Your cart is currently empty!
Month: March 2022
-

The Beginner’s Guide to Kitesurfing.
The Beginner’s Guide to Kitesurfing.
The Beginner’s Guide to Kitesurfing: within each category. Kites are classified into three basic categories, which are as follows:
Kites with only one line
Kites with two lines are a type of kite.
Kites for stunts with four lines
Kite for beginners with a single line
A kite flying with a little child is the most basic activity, and this is what most people imagine when they think of a child and a kite. Tying the kite to a single line in a central location is necessary. Toss it into the wind, and the kite will soar!
For single line kites, there are four basic frame shapes to choose from:
Diamond kites
Delta Kites
Parafoil Kites
Diamond Kites
When most people hear the word “kite,” they immediately think of a diamond shape. In reality, compared to most single-line kites, the classic diamond is the most difficult to launch into the air successfully. Diamond kites are easy to make and are appropriate for flying by younger children due to their small size.
We recommend flying this kite with a tail in winds ranging from 5-15 mph. Remember to turn the dome, so the kite sail is leaning away from you when constructing the structure.
Delta Kites
When asked which kite is the best, we nearly always say a Delta since it is so versatile. These are frequently the kites that we use to train newcomers. Delta kites get their name from the triangle form that they have.
They can fly at a wide range of wind speeds, from 5 to 20 mph, allowing smooth and stable flying. The small and regular sizes of delta kites are appropriate for beginning flyers. Using more enormous deltas (6 feet and up) makes it possible to incorporate numerous tails, and line washes into one design.
Parafoil Kites
Parafoil kites are one of our favourite kites because of their versatility. Kites made of parafoils are among the easiest to fly, and because they are soft kites (that are “blown up” by the wind), no assembly is required, and no parts are likely to be lost during the flight.
Most parafoil kites are equipped with a line and tail for added stability. These kites typically fly best at speeds ranging from 6 to 20 miles per hour. They are available in various sizes suitable for both novice and veteran tournament kite flyers alike.
Box Kites
As a result of their distinctive shape, box and cellular kites are the most eye-catching options. Because of their design, most of these kites require more wind than standard kite frames, often requiring 8-20 mph to fly successfully.
The majority of these kites, despite their appearance, are simple to assemble and fly. Some even spin and roll in the sky, which adds to their overall visual appeal.

Kites with two lines for those who are just starting.
Flying this type of kite is a pleasurable experience. The kite’s flight is controlled by two wires attached to it. Flying a kite allows the pilot to manoeuvre it up, down, and over the horizon, among other things. It can be used to create loops, roller coasters, and anything else your imagination can conjure up. Even though they are a little more challenging to fly than a conventional single line kite, you can buy a vast assortment of dual line kites that are great for beginning flyers.
When it comes to kite flying, it can take some time to learn how to fly a dual-line kite with a high degree of expertise. It will take around one hour to become familiar with the controls of a stunt kite and its capabilities. This has been a productive use of time.
Delta-shaped stunt kites account for the vast majority of dual line stunt kites. They have the appearance of miniature kites and are constructed using the same technology as kites, known as the Rogallo wing. There are also two-line parabolics, which provide a significant lift and power.
Delta kites are used for stunts.
Like these, single and double line frames let pilots steer and move their guiding kites while also doing acrobatics.
Kites with two lines are a type of kite.
Due to the absence of a structural frame, two-line stunt kites generate excessive pull and strain. They can also often be packed into smaller luggage, making them ideal for travel purposes. When a kite buggy is added to the mix, you’re in for an exciting ride!
We hope that this has assisted in making the vast majority of kites available on the market more understandable.
The post The Beginner’s Guide to Kitesurfing. appeared first on https://gqcentral.co.uk
-
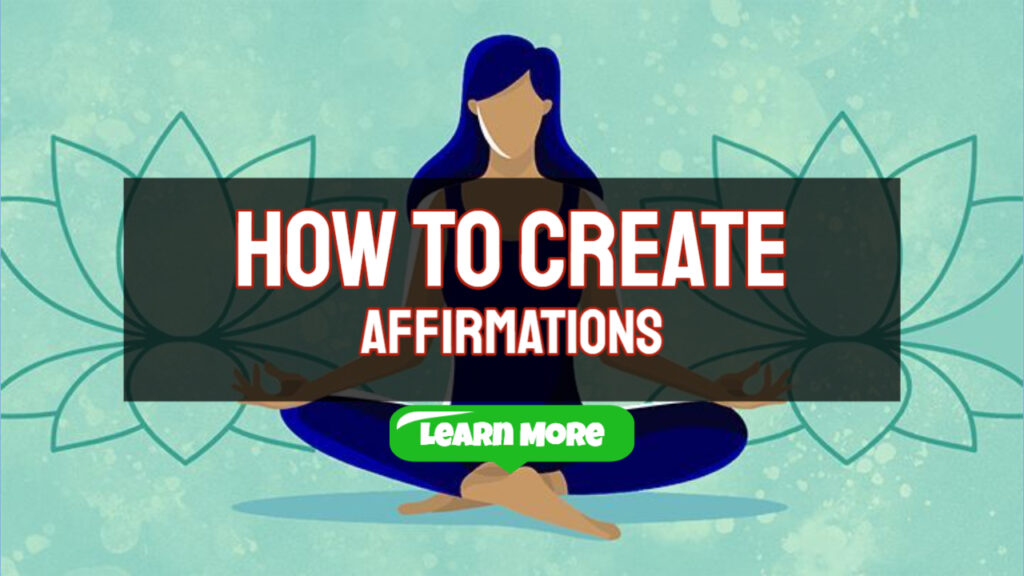
How to Create Your Own Affirmations
Your thinking patterns and mentality have a huge impact on how your life unfolds. If you continuously halt and check-in with yourself, you may notice some negative self-talk. These ideas manifest in various ways, ranging from belief systems that tell us we’re unworthy to incessant blaming. If you pay attention, you’ll discover that way you say to yourself has an impact on your whole attitude in life.
Our beliefs influence many aspects of our lives, including our emotions and desire to act. For example, if you convince yourself that you can’t do anything, you’ll most likely be stuck. The reason for this is that the thought pattern prevents you from acting in order to reach your goal. Good ideas, on the other hand, will assist you to develop a positive inner environment that will influence your behaviors. Affirmations are a fantastic place to start if you want to transition from negative to positive thinking.
Affirmations: What They Are
Affirmations are phrases and statements that assist us to alter our negative ideas and beliefs into positive ones. They are crucial to the law of attraction, helping us to move from a scarcity attitude to an abundance mindset. Although you may get affirmations in a variety of places, making your own list is a powerful method to transform your thinking. Are you ready to begin? Here’s a step-by-step approach to making your own affirmations:
Convert a Negative Thought to Something Positive
Examining what you’ve been saying to yourself is the easiest method to build an affirmation. Being aware of your thinking patterns and belief system is required for this activity. Take a piece of paper and a pen and jot down all of the negative things you tell yourself on a regular basis. After you’ve written them down, change the negative terms to positive ones.
Write in Present Tense
Writing in the future tense is a typical error individuals make while generating affirmations. This method reduces the impact of your remarks by making your aspirations appear remote. Instead of saying “I shall” or “I desire,” speak your affirmations as though the events are now taking place. One of the most prevalent and powerful ways to begin your affirmations is with “I am.”
Stick to the Positives
When writing affirmations, avoid using negative terms like “don’t” and “can’t.” Instead, concentrate on positive phrases that will help you develop a good mentality. “I don’t want to work at this job anymore,” many individuals remark. The problem with this assertion is that you’ll be directing your energy toward something you don’t desire. Focusing on what you desire is a tremendous adjustment. Stick to positive affirmations rather than negative ones.
Use Powerful Words that Motivate You
What good is an affirmation if you don’t believe it? Affirmations have power because of how they make you feel. Not only should you utter the words, but you should also feel the pleasant vibrations of each phrase. When making your list of affirmations, pay attention to powerful phrases like “effortlessly,” “easy,” “enthusiastic,” and “delighted.” “I effortlessly attract prosperity into my life,” for example. The addition of the term “effortlessly” strengthens the good resonance in your sentences. It increases your excitement about what you’re confirming and producing via repetition.
Visualize What You Want
As previously said, saying affirmations are not enough; you must also believe them. Create a mental image of what you want before writing or uttering your affirmations. Feel it, believe it, and make it a reality. Visualization exercises increase your enthusiasm for obtaining or accomplishing everything you desire.
Conclusion
Affirmations are an easy and efficient approach to changing your mentality from negative to positive. The change also makes place for more abundance in your life. By following these steps to construct your affirmations, you’ll be well on your way to living the life you want. Remember that you must also put forth the effort to see these things happen. Your path becomes clearer as a result of a mentality shift, allowing you to take beneficial activities..
The post How to Create Your Own Affirmations appeared first on https://gqcentral.co.uk
-

What Is So Special About Golden Hour Photography?
What is the Golden Hour For Photographers?
What is so special about golden hour photography? When it comes to capturing images, nearly all photographers believe that the golden hour is the finest time of day to do it. Learn more about these lovely times of day to create a glow in your images. The golden hour is described as the hour preceding sunset and the hour after dawn, which are the first and final hours of daylight in the day.
The phrase “golden hour” refers to a moment when a photographer has the most opportunity. To be more exact, it is the time of day immediately following sunrise or just preceding sunset. The color of sunshine is redder and softer during this time of day than when the sun is higher in the sky. Photographers refer to this period as a “magical hour” because of the wonderful lighting conditions it affords for creating spectacular photos. The brightness of the sky correlates to the brightness of the surrounding streetlights, signage, automobile headlights, and lit windows at this moment in time. It only lasts around twenty to thirty minutes.
When does the Golden Hour begin and end?
Professional photographers consider the hour before sunset and the hour after sunrise to be the optimum periods to photograph their subjects. These intervals of time, known as “the golden hour” or “the magic hour,” give the optimum lighting conditions for creating breathtaking images. Understanding how to use the golden hour to your advantage is a skill that any photographer can benefit from understanding.
Aside from being a lovely time of day for composition, this important block of time is well recognized for providing artists with some of the most flattering natural light to work with when making amazing sunset photos. The following are some of the most successful techniques for taking advantage of Mother Nature’s golden hour chance.
Suggestions for maximizing the golden hour photography
Photographers employ not just professional techniques and weather circumstances while shooting images, but also a precise time of day to completely convey their artistic goals in the shot. Lighting is one of the most important factors in determining whether or not an image will turn out nicely. You might be capturing the most gorgeous scenery or stunning figure, but your photographs will be flat, boring, and lacking of expression unless you use high-quality lighting. This is especially true when filming outside in low light circumstances where using artificial light is difficult or impossible. You will be fully reliant on natural light to finish your work in this circumstance. To mention a few, such time periods are appropriately named: a blue hour, a golden hour, or an emerald instant.
Here are some tips to help you get the most out of photographing during the golden hour: Make a strategy ahead of time. Set your camera’s white balance. Use a big aperture while photographing individuals. Utilize spot metering. In the front, lighting. Backlighting. Lighting around the rim and around the borders. Flare.
These golden-hour photography tips will help you achieve the best results and create magical images
The possibilities for golden hour photography are nearly unlimited. Isn’t it interesting how the identical camera settings and subject location can result in two very different photographs, even though they were shot at the same time with only a 2-3 minute exposure time difference?
Aside from following tips and strategies, experimenting with golden hour photography is the most efficient way to learn the art of golden hour photography. Remove your camera from your bag and begin shooting. Because of the compromising nature of this warm golden light, you will create some incredibly beautiful outcomes! However, it goes without saying that putting the above-mentioned ideas and tactics into practice might be useful to your job.
Various lighting options are available during the Golden hour.
There are several different lighting options to select from. What’s fantastic about photography during the golden hour is that you can explore and play with various sorts of lighting all in one place. Use golden hour to snap images with natural light coming from the front. Because the light is soft enough, the models may face the sun directly, which acts as the major light source for the shoot.
Have you ever wondered how photographers acquire such lovely golden tones in their photographs? It is critical to get these sorts of photographs during the golden hour. Lighting and photographic composition are two of the most significant aspects of the profession. We’re all aware that adequate lighting is vital for creating beautiful photos. By employing artificial light, your camera’s flash, and even reflectors, flash photography allows you to adjust the lighting conditions in your interior photography assignments. Outdoor lighting, on the other hand, is uncontrollable, so you’ll have to make do with what Mother Nature supplies.
Type of Lighting

When filming during the golden hour, you have four lighting options: backlighting, front-lighting, rim lighting, and flare lighting. Backlighting: Backlighting is performed by putting your subject with their back to the sun or light source, which usually results in a hazy effect. Is your subject look too dark? To fill up the spaces surrounding your subject, increase your exposure duration or use a reflector. Front-lighting is the polar opposite of backlighting and happens when your subject is immediately in front of the light source. This style of lighting creates the beautiful, warm, and flattering tone seen in portraiture. All you have to do is ensure that the sun is right on you!
The greatest approach to making the most of any photography opportunity is to have fun while shooting. The golden hour offers photographers an excellent atmosphere in which to experiment with various forms of lighting and produce outcomes that would be impossible to attain under any other circumstances. Some of the inventive photographic concepts you might consider implementing into your next magic hour session are listed below:
Why Do Photos Look So Good When Taken In The Golden Hour
The golden hour is easy to capture because the light is soft, warm, and directed, lighting the northern and eastern horizons. Everyone appreciates shooting photos when the sun is shining brilliantly since it is less challenging and scary. Because the sun is lower in the sky at this time of day, the golden hour seems more pensive.
When shooting pictures, the “golden hour” refers to the period of time immediately following dawn and shortly before sunset. Because the sun isn’t directly above during these hours, the light is redder and softer than it is in the middle of the day. Because of the reddish, mellow light that permeates the space, golden hour is a very flattering time of day to snap pictures. In this photograph, the shadows are longer and the colors are more contrasted. For photographers, the golden hour is a common time to organize client sessions in order to take advantage of the attractive light available.
This form of illumination occurs just once or twice a day when the sun is low in the sky and closest to the earth. Evenings are the most popular times to capture portraits throughout the summer months, especially in the city.
In photography, the term “golden hour” refers to the time between dawn and sunset. Because the light is so gorgeous at this time of day, we photographers like capturing images.
What exactly is “golden hour” photography?
Many photography publications geared at new photographers claim that the only good periods to shoot are during the golden hour (also known as the blue hour), which is the period between sunrise and sunset, as well as before and after dawn or sunset. Some authors have gone so far as to state that they put their cameras away in the afternoon when the light is the worst. After that, as your photographic talents improve, you’ll realize you don’t have to hide your camera away like a hermit simply because the sun has risen. Any time of day is a terrific time to shoot, but my favorite is around the golden hour (harsh light is also a favorite because of the shadows it creates).
Despite the fact that it is referred to as the “hour,” the golden hour does not last exactly one hour. In general, it’s a good idea to arrive at your destination before the event starts and to leave after it’s finished. But, when will it happen?
It’s all about the light in this case.
The golden hours are usually acknowledged to be the first hour after dawn and the last hour before dusk. The length of the golden hours, however, varies based on your geographical location and the time of year. What is it about this lighting situation that makes it so conducive to photography?
The sun’s location in the sky. Because the sun is at such a low angle, it goes through more of the earth’s atmosphere before impacting the subject. As a result, the light is soft, diffused, and appealing.
In this sense, what is the “golden hour”? Photographers aspire to capture these incredible, mystical photographs at an ideal dawn or sunset session. Perfected radiant skin, soft shadows, and attractive highlights — it’s like something out of a fairy tale. When it comes to generating a magnificent gallery of photographs for my clients, a number of elements must be taken into account. Light is the single most critical aspect of a photographer’s success.
Here’s how to make the most of the warm color temperatures and gentle natural light. Make the most of this light.
Is there an optimal time of day for taking photos? That’s a difficult topic to answer, but the golden hour, when the sun’s light is gentle and warm while simultaneously producing lengthy shadows, is a strong contender.
Tips for taking photographs during the golden hour.
Shooting during the golden hour has various advantages. Long shadows provide you the freedom to experiment with texture and express yourself artistically. For some creative fun, experiment with backlight photos or silhouettes. Aside from that, you’ll see some beautiful warm hues. Simply bring your camera with you to capture the golden glory of the dawn and sunset.
Do you want to know how to frame your photographs to take advantage of golden hour? Take a look at some basic strategies for using the golden ratio in your photographs that don’t involve any intricate math.
The golden hour has a particular position in the world of photography. Landscape, portrait, and wedding photographers realize how lovely a golden touch of light can be when capturing these subjects. However, it is uncommon to hear street photographers discuss the significance of street photography during the golden hour.
Take a reflector, which is one of the most popular golden hour photography tips. You will almost certainly benefit from one while capturing portraits in this directed light. Because natural light is already warm, it is recommended to utilize the light bulb’s white or silverside. You may experiment with the location by elevating the reflector above your head and producing downward shadows, for example. If you use an orange gel, the flash’s light will mix in with the natural light and be undetectable.
Original post on ThoughtfulTravelWriter.com
Another great resource is WritersLife.
The post What Is So Special About Golden Hour Photography? appeared first on https://riskinabox.org
The post What Is So Special About Golden Hour Photography? appeared first on https://gqcentral.co.uk
-

Are Self-made Covers a Good or a Bad Idea?
Are Self-made Covers a Good or a Bad Idea?
Are Self-made Covers a Good or a Bad Idea?: A purchased cover is costly. However, an amateurishly created cover will not result in sales. What should a self-publishing author do?
Many self-publishing courses and guides advise authors to purchase their covers. They claim that they must present a professional image. They claim you can’t do it on your own.And if you’ve ever attempted to design a cover for a song, you’ll know what I mean, and noticed that it doesn’t look anything like the covers you see in bookstores, they might be right.
At first, at any rate.
The issue for a new independent publisher is that a cover can quickly add up to be a considerable expense. You’re probably only making “coffee money” if you’ve only published one or two novels. The prospect of writing and publishing another book causes you to sigh—another problem.
You begin to think incorrectly, viewing new books as expenses rather than potential money streams.
And you’re correct in that regard.
Coverage on Fiverr
When you try to save money by getting book covers from Fiverr, they frequently lack the professional appearance of best-selling books.
Fiverr vendors only make a few bucks for every cover unless they have raised their prices. That means they only have a few minutes for each cover if they want to earn a profit.
The greatest of these Fiverr cover designers employ professionally designed templates. This assures a professional appearance, but it also means that your cover will seem similar to thousands of others, with a few exceptions.
You can check it out by searching “Kindle cover” on Fiverr. Check out the examples. Then go on an Amazon tour and see if you can see some of them in different guises.
A Fiverr cover could be a temporary solution to see if your book sells.
Store-bought pre-made coverings
There are shops where you can purchase pre-made covers. GoOnWrite.com is one of the oldest and most well-known. You can choose from the artist’s existing covers, purchase them, and he will add your author name and book title. Then he’ll take the cover off his store. These covers are more expensive than the conventional Fiverr covers, but they are also somewhat better because they are one-of-a-kind.
Design should be delegated to more than one individual.
It is sometimes recommended in a course to employ two Fiverr artists to acquire a better result. You are capable of doing so. Alternatively, you can hire numerous graphic designers to create your cover and pay for the one you choose.
A website like 99Designs.com is designed for this purpose.
Write what you want, and the artists will create covers that they believe should look like yours. You examine the outcomes and select the one that appeals to you the most.
Prices start at $299, but you can get your money back if you don’t discover a design you like.
Invest in a cover artist.
Hiring a cover artist might provide good, awful, great, or mediocre results. Examine previous work samples and, if possible, acquire a second view from other writers before hiring an artist. Expect to pay $100 or more for a cover artist. That’s a lot higher.
You’ve now learned about the outside options that will provide you with a more or less professional-looking cover.
What’s the other option?
Make your cover.
Don’t give up if your cover attempts look like a five-year-old had fun painting mum and dad. Numerous approaches can be used to solve this obstacle.
You can use Amazon’s cover templates if you publish on their KDP platform. They’re better than nothing, but you’ll also notice a lot of books that look exactly like yours but have a different title and author name.
A better option is to learn how to make your covers. Covers that seem professional. But how do you do that if you don’t spend years studying graphic design?
You’re emulating other popular covers.
You never, ever copy. It’s unethical as well as illegal. However, you might discover a cover that you like and use it as inspiration for your own.
To begin, go to Amazon and look for your subcategory. Examine the best-sellers in that subcategory and pay attention to the overall appearance of the covers. Is there someone on the covers? Do we perceive their faces, bodies, or a combination of the two? Are they staring at you or walking away? Are the covers depicting buildings or landscapes? Or is it simply words and names?
How do the colours look? Dark? Light? Many colours mixed, or just one or two?

Feed your subconscious with all of this information.
Then select a cover that appeals to you.
Make your mockup with Photoshop/Illustrator, Affinity Photo/Designer, or an internet software like Canva.
Use various photos, colours, and, of course, your title and author name. Use fonts that appear similar.
(Ensure that you have permission to use the photos and fonts on your cover.)
These three elements alone will significantly alter the appearance of your cover compared to the original. However, it will appear professional, providing you choose a professional-looking cover in the first place.
Will it take some time?
Yes, it will take some time to learn, but it will become easier with each new cover you produce. It will also make it easier for you to determine whether or not to write and publish a new book when you are not faced with hefty fees.
Improve your covers
It is not always possible to replicate previous covers. Perhaps your title is significantly longer or shorter than the original. Alternatively, you may wish to add your style at the conclusion, which better defines your book series.
There are other classes available.
There are numerous free YouTube tutorials available to teach you how to utilise your favourite design programme.
However, the difference between an unprofessional and professional cover is how the title and author’s name appear.
If there is one ability you can employ to improve your cover design, it is “typography.”
Even inexperienced readers can discern a terrible cover from a good one by examining the font, the size of the letters, the spacing between them, and the layout.
If you’re ready to take the plunge, LinkedIn has many such courses. You can even try them out for a month for free.
So, what are you going to do?
If the prospect of paying for a cover is holding you from creating your book, use Amazon’s templates or buy a cheap cover on Fiverr.
You’ll be better off learning how to make your covers over time. Take the time to learn, starting with imitation. Learn more about the craft later.
Perhaps you’ll have generated enough money from your books to afford a professional cover artist by then.
The post Are Self-made Covers a Good or a Bad Idea? appeared first on https://gqcentral.co.uk
-

Benefits of Video Marketing for Local Businesses
Video Marketing for Local Businesses
Video is an excellent medium for connecting with your audience. This format has the ability to engage the majority of the human senses. It can assist you to achieve additional marketing goals in addition to raising awareness about your company. In the United States, 85 percent of internet users consume online video material on any device [1].
This demonstrates how quickly and widely video is consumed. As a local business, it is critical to incorporate video into your marketing efforts. Even if your company is doing well right now, you’ll need to keep ahead of your competition. Video, a modern kind of marketing, will assist you in doing this.
Every day, Internet users watch video material on a variety of platforms. Video is blooming everywhere, from social media platforms like Instagram and YouTube to websites and emails. Videos are also the most common way for buyers to learn about a brand or product before purchasing it [2]. People now spend more time online, exploring places and activities, as a result of the Pandemic’s impact. As a result, if you want to expand your audience or consumer base, video marketing is the way to go.
Benefits of Video Marketing for Local Businesses
Whether you’re a local business owner or marketer, it’s important to know the benefits of video marketing.
Attracts new customers
Video is a terrific approach to enhance awareness of your brand and consequently attract clients. Whether these clients are locals or visitors, releasing entertaining videos may help your business win new customers. Creating and sharing outstanding films isn’t restricted to only the major corporations anymore. As a small or local business, you may leverage social media channels to publish material online.
Builds trust and loyalty
People generally patronize firms that they trust. As a marketer or business owner, good video marketing initiatives may substantially benefit you. Through videos, individuals may easily interact with a business, which affects their decisions whether to buy or utilize the items or services.
Reveals personality
Unlike media like blog posts and articles, video aggressively engages the senses. It’s simpler for a potential consumer to connect and interact with your video than a write-up. Through video sharing, you may actively portray your personality as well as your brand. People prefer to see the face behind a business, therefore video enables you to accomplish precisely that.
Explains your offerings to your customers effectively
 Video lets you show and tell. This structure also keeps people more engaged. With this, you may suppose that individuals are more inclined to pay attention to your message. Through video, you can demonstrate to your new and existing consumers your product or service, the features, uses and how these might benefit them.
Increases conversion and sales
It’s common for conversion and sales to be at the center of company procedures. With the ever-growing internet use, individuals are increasingly using the internet to seek offers within their neighborhoods. 64 percent of customers make a purchase after seeing a sponsored social video [3] so you can understand the impact this creates on sales.
How Local Businesses Can Utilize Video Marketing
Create engaging social media content
Social media platforms offer a direct approach to interacting and communicating with customers. Through video sharing, you may actively and efficiently contact your target audience. Beyond establishing a following base, it’s also crucial that you build relationships with them. Platforms like Facebook, Instagram, Twitter, and YouTube are vital in your video marketing tactics. Depending on the platform, the films might range from 10-second bursts to 15 minutes and above.
Share customer testimonial videos
Testimonials are an excellent approach to gaining people’s faith in your company. Customers are powerful brand advocates, and their feedback can make or destroy a company. When consumers go into your business, you may kindly ask them to discuss their experiences. This contributes to making a long-lasting impact on other clients.
Show behind-the-scenes footage
Behind-the-scenes videos provide viewers with an insight into the inner workings of a company. People enjoy seeing the people behind the scenes of a company, and this form of video caters to that need. For local fast-food restaurants, for example, a behind-the-scenes video can help to develop confidence in the food-making process. Because of the Pandemic, people have grown more attentive to hygiene and other similar activities. People begin to trust and patronize you when you use films to guide them through your procedures.
Create teaser videos
Teaser videos aid in the creation of buzz around your products or services. They pique people’s curiosity in what you’re offering. Focus on sharing compelling buzz videos about new products or services, events, and promotions as a local business or marketer.
Checklist for Videos that Connect and Convert
- Provide value
- Show the team behind the business
- Highlight how your products or services benefit the customer
- Prioritize quality over quantity
- Use keywords in captions and video transcripts
- Mobile optimization is a must
- Use an attention grabber to begin your videos
- Include a call to action
Videos are powerful content formats. They assist you in successfully telling the tale of your company. Whether your company sells online or not, a successful video marketing plan may make or break your sales. From reaching out to locals to enthralled tourists, the appropriate plan can keep you at the top of their minds.
References
[1] Statista. Online video penetration in selected countries 2018
[2] Animoto. 2018 state of social video: Consumer trends
[3] Tubular Insights. 64 percent of consumers purchase after watching branded social video content.
The post Benefits of Video Marketing for Local Businesses appeared first on https://gqcentral.co.uk
-

Explanation of Secure Sockets Layer Certificates
Explanation of Secure Sockets Layer Certificates
Explanation of Secure Sockets Layer Certificates: Every website now includes an SSL certificate to protect consumer information and secure online transactions.
This means that when you visit a website with an SSL Certificate, the information exchanged between your computer and the server is encrypted, making it impossible for anybody else on the network to access it. Encryption safeguards sensitive information such as credit card details, passwords, emails, and so on.
A website with an SSL certificate is distinguished by the presence of a padlock icon next to the URL in the address bar of a browser. It is reasonable to presume that a website with this padlock emblem is secured by an SSL certificate.
What Is the Process of Using SSL Certificates?
An SSL certificate is the internet’s technique of assuring that thieves cannot intercept, read, or manipulate data sent between your browser and servers.
Without an SSL Certificate, data between your site visitors and your server could be intercepted by anyone on the local network. Encryption safeguards sensitive information such as credit card details, passwords, emails, and so on.
Here’s a step-by-step explanation of how SSL certificates function.
1. A server or browser tries to connect to a website protected by SSL certificates.
2. The server or browser asks the web server for “identity.”
3. The web server delivers the browser or server a copy of its SSL certificate.
4. The server or browser verifies the SSL certificate to determine its trustworthiness. If the certificate is valid, it sends a signal to the webserver.
5. The web server then sends a digitally signed acknowledgement, and an SSL encrypted session begins.
6. Encrypted data can now be exchanged among browsers, servers, and web servers.
While the connection between your website, server, and browser appears to be lengthy, it only takes a few milliseconds to complete.
The first half of the URL appears as HTTP before a website is secured with an SSL certificate (which stands for HyperText Transfer Protocol.) Following the installation of an SSL certificate, the first portion of the URL appears as HTTPS, which stands for HyperText Transfer Protocol Secure.
To view information about SSL certificates on a website, click the padlock symbol next to the URL in the browser bar.
The following are typical details to look for in SSL certificates:
The name of the domain to which the certificate was issued
The person, device, or organisation to which the certificate was issued
The particular Certificate Authority that issued it
The certificate’s expiration date
What Is the Purpose of an SSL Certificate?
SSL certificates’ principal function is to protect a user’s data, prevent attackers from building a fake duplicate of the website, and authenticate website ownership.
It is critical that a website protects its users’ data when they enter personal information such as credit card numbers or access confidential material.
SSL certificates reassure consumers that their connection is secure and private and that the website they are visiting is real and safe for them to share sensitive information.
SSL certificates protect the following types of confidential information:
Medical documentation
Discretionary information
Legal documents and contracts
Names, residences, dates of birth, and cellphone numbers are examples of personally identifiable information.
Login information
Financial Data such as transaction and bank account information

SSL Certificate Types
There are six different types of SSL certificates, each with a different level of validation. These are some examples:
Domain Validated Certificates (DVCs) (DV SSL)
Certificates Validated by Organizations (OV SSL)
SSL Certificates with Extended Validation (EV SSL)
SSL Certificates using wildcard characters (WC SSL)
Certificates for Unified Communications (UCC)
SSL certificates with multiple domains (MDC)
Certificates with Domain Validation
Domain validated certificates are a form of SSL certificate that just confirms the domain name (for example, example.com) and does not validate the entity behind it.
Because the entity requesting the certificate has not been vetted, this form of certificate is the cheapest and quickest to put up, but it provides poor levels of encryption and validation.
Certificates Validated by Organizations
Organization verified certificates are used when the requesting organisation has undergone a substantive verification process.
This sort of SSL certificate provides additional validation than domain validated certificates and includes the owner’s information in the SSL certificate (e.g., example.com, Inc.)
SSL Certificates with Extended Validation
The extended verified SSL certificate provides the highest degrees of validation, but it needs extensive processing and is costly to obtain.
This sort of certificate is typically designated for businesses that must demonstrate high levels of trust and security, such as banks.
SSL Certificates using wildcard characters
A wildcard certificate is used when a corporation wants to secure a domain as well as an unlimited number of subdomains using a single certificate.
This certificate is useful if you need to secure a large number of subdomains.
Certificates for Unified Communications
Initially, a unified communications certificate was created to secure Live Communications and Microsoft Exchange servers.
UCCs, also known as Multi-Domain SSL Certificates, allow a single certificate to secure several domains.
These certificates have been organizationally approved and can function as EV SSLs to provide the highest level of assurance via the green address bar.
How to Get an SSL Certificate
SSL certificates can be purchased from a Certificate Authority or from a third party.
The cost of an SSL certificate varies according to the level of protection required and can range from free to hundreds of dollars.
Certificate Authorities may frequently provide certificates for a one-time cost, which is great if your certificate is about to expire.
Third-party providers frequently charge a fee in addition to one-time and monthly expenses.
When determining where to get your certificate, it is critical to understand the distinctions.
The following are the steps to acquiring an SSL certificate
Set up your server and confirm that your WHOIS records are up to date and reflect the information you are sending to the Certificate Authority.
On your server, create a Certificate Signing Request. Most web hosting firms will be able to assist you with this.
Submit your CSR to the Certificate Authority to authenticate the details of your company and website.
Install the certificate that was issued once the approval process was completed.
The post Explanation of Secure Sockets Layer Certificates appeared first on https://gqcentral.co.uk
-

Learn How to Be Upbeat and Positive
Learn How to Be Upbeat and Positive
Even the most challenging difficulties may be overcome if you maintain your positive outlook throughout the situation. Life is full of ups and downs that are continual.
Optimism isn’t about seeing rainbows and butterflies around every corner; it’s about learning from experiences, discovering minor positives, and recognizing fresh opportunities – even when things are difficult.
It is commonly considered that optimistic people are born or raised that way. On the other hand, optimism is a skill that can be learnt and cultivated at any age.
With that in mind, we’ve compiled a list of strategies to help you tackle any circumstance positively and proactively.
It’s a good idea to keep a positive attitude even while going through a difficult period.
What Exactly Is Optimism?
In a nutshell, optimism refers to a person’s ability to maintain hope and belief in the outcome of a situation in the face of hardship.
Optimists can generally find something positive in every situation and believe that a good ending is more likely than a negative.
If you’re an optimist, you understand that you can’t control everything, but you can influence how you think about and react to it. When a problem develops, you usually concentrate on resolving it rather than becoming engrossed in destructive emotions.
Furthermore, you see every difficulty as the result of a specific set of circumstances, rather than believing that problems occur because the world is conspiring against you.
What Is the Significance of Optimism?
Optimists can usually perceive the possibility of change in any situation, which can help them move on. There are numerous links between optimism and good health. According to research, positive conduct can lead to the following outcomes.
Increased participation in healthy habits such as exercise and eating a well-balanced diet.
A reduction in unhealthy behaviours such as smoking and binge drinking.
They have improved sleep quality.
A more robust ability to deal with life’s stresses and setbacks.
A broader social network – because people prefer to spend time with optimists rather than pessimists.
Tips for developing the gift of optimism are provided in the following paragraphs.
Every day, list a few things you are grateful for and write them down in a journal.
It’s relatively uncommon for one lousy thought to trigger another, and before we realize it, we’re trapped in a downward spiral of pessimistic ideas with no way out.
One method to interrupt the cycle and inject positivity into your life is to Write one item you are grateful for every day.
This can range from the roof over your head and the morning sun coming through the blinds to a pleasant conversation with a buddy.
Even in the darkest of times, we can generally find something to be grateful for. It’s vital to remember what we have instead of focusing on what we don’t have or can’t alter.
Those who have endured life-altering injuries or illnesses are advised to focus on what they can still do rather than what they cannot.
The more time we devote to practise thankfulness, the less time we will have to devote to negative thinking.
Consider your viewpoint as a decision.
It’s easy to become so accustomed to negative thinking that we lose sight of the fact that there is another way to think. We have numerous options in life. One of them is to be optimistic.
We can choose to spend our evenings talking on the phone with a friend or drinking wine in front of the TV, just as we can choose to have pleasant or negative thoughts.
It can be challenging to realize that we can change our thought patterns even if we cannot influence what happens to us. But once we recognize this, it becomes much easy to practise optimism like we would any other skill.

Example
If your automobile breaks down on the way to the grocery, you have two options.
One possible unfavourable reaction is:
“Now I can’t get my groceries, and I’m waiting for someone to come to tow me. My day has been wrecked.”
When things like these go wrong, you may feel justified in being irritated and unhappy – and you are. However, keep in mind that this thinking will not improve your problem. Instead, it raises the level of stress hormones in your body while doing little to help you manage your current concerns.
On the other hand, an optimistic answer may be first to acknowledge the facts of the issue, such as the fact that your car has broken down and you won’t be able to continue your drive to pick up your groceries. This may irritate you at first, which is natural. But you don’t let it bother you.
As a person who sees the bright side, you will try to think of what you can do next, such as calling roadside assistance or asking a friend or family member for aid.
An optimistic person will be able to see the big picture. Yes, it’s frustrating, but there are many things to be thankful for, including:
the knowledge that you have someone you may call for assistance
You can buy a car and go shopping because you can afford it.
You might also consider different options for getting your groceries.
You might be able to walk to the store and pick up your groceries while you wait for help (provided you parked your car in a safe location), or you might be able to have your food delivered.
“You may not be able to control all the circumstances that happen to you,” Maya Angelou famously stated, “but you can choose not to let them limit you.”
Recognize Negative Ideas
If you wish to break away from existing negative thinking patterns, it can assist in acknowledging them when they arise, so they don’t loop again.
The goal here is not to eliminate negative ideas but to keep them from interfering with your overall well-being and preventing you from moving forward.
If you have to do a video interview and have never done one before, it’s normal to think, “I’m sure I’ll suck at this and never get the job.”
This approach can impact how effectively you prepare for the interview and how you present yourself. You may believe that preparing too much is pointless since you will not come across well in the video. However, this thought process might harm your chances of succeeding in the interview, but it can also harm your confidence and self-esteem.
Instead of expecting the worst, it is critical to reason negative beliefs and adopts a healthier, more realistic perspective of the issue.
Even though I’ve never done a video interview before, “I’m looking forward to giving it a go,” for example. Whatever happens, I’ll be able to learn from it and better understand how video interviews function, which will be important in the future.”
It is clear that optimism does not always imply the best possible conclusion; it can also refer to turning around excessively pessimistic beliefs.
Consider a Bright Future
It’s risky to be overly hopeful about the future because you are frightened of being disappointed, let down, or that things will not go as planned. We frequently believe that setbacks will be less painful if we psychologically prepare for the worst-case situation.
In reality, nothing in life is definite. If we constantly catastrophize circumstances and plan for the worst-case scenario, we may unknowingly contribute to some of the things we fear occurring.
For example, if you hear your firm is cutting costs and tell yourself you’re about to be laid off (even though you haven’t been told you’ll be directly affected by the cuts), you may be less productive.Though your firm has never considered putting you off but notices that your work level has decreased, they may reconsider laying you off – even if it has never been discussed before.
The mind is mighty, and in many circumstances, how we imagine our future can genuinely influence the outcome. Many Olympians utilize visualization to perform at their best in their sport, and research has shown that people who imagine themselves successfully doing a task can boost their performance.
For example, maybe you want to go to the gym but are too ashamed or believe you’ll be horrible. These concerns can often be enough to deter you from going to the gym at all. Instead, rethink those beliefs and envision yourself working out at the gym and receiving the advantages, and you’ll be far more likely to sign up, go, and enjoy it.
Make an inspirational vision board to help you discover, visualize, and realize your goals.
Spread Happiness
Making people happy might affect your mood. That doesn’t mean you should try to please everyone all of the time, but going out of your way to thank someone or tell a loved one how much you appreciate them can significantly impact how they feel.
And, while it’s essential to make people happy, don’t forget to compliment yourself as well. Take a few minutes at the end of each day to reflect on how the day went and offer yourself appreciation – even for the minor things.
Praise yourself for preparing a wonderful meal or making an effort to go for a stroll. “I did a nice job today,” you might tell yourself, can go a long way.
Spend time with folks who are upbeat.
Whether we realize it or not, the company we keep can significantly impact how we perceive life. Spending time with pessimistic people who constantly express negative views makes it easier to acquire some of those thoughts – or to perceive the world in general in an even more negative way.
Negativity spreads quickly. Consider spending less time with negative people and more time with those who are pragmatic, proactive, and upbeat. Your energy levels are going to skyrocket after this!
Last but Not Least
Optimism is a valuable talent to develop and apply in various settings. However, avoid taking it to conceal your emotions and give the idea that you are doing well when you are not. We are all human beings with sentiments. You can express yourself by smiling and laughing; if you want to cry, express yourself.
Even though life appears unfair or complicated, the essential thing is to take a deep breath and continue moving forward. Remember that few sentiments or situations survive forever and that there will always be a better day.
The post Learn How to Be Upbeat and Positive appeared first on https://gqcentral.co.uk
-

Herbs to Always Have on Hand
Herbs to Always Have on Hand
Herbs to Always Have on Hand: Herbs can be used in a variety of ways to improve health and fitness. Some, on the other hand, are significantly more effective and should be kept in the house at all times. This is a list of herbs that are good for your general health and may be cultivated in your own yard and cooked with.
Chamomile
Chamomile is a very versatile and useful herb to have on hand. It’s an excellent addition to your first-aid kit as well as your kitchen cabinet. The best part is that it is easy to start from seed. It is well-known for its ability to alleviate anxiety and concern, but it also helps with stuffiness, constipation, upset stomachs, and migraines.
It can be used to treat pain, digestive problems, and sleep disorders. Steep dried chamomile flowers in boiling water for 5 minutes to make tea. To get a good night’s sleep, try it before going to bed. Chamomile can also be used as a supplement in pill form.
Chamomile is a soothing herb that can be used to treat arthritis, haemorrhoids, stomach problems, and cuts and wounds.
Painful menstrual periods are a particular problem for women. Chamomile has been shown to aid with this, which is fantastic news for many ladies who suffer from it on a monthly basis. Osteoporosis is another issue that women encounter, particularly after their periods have ceased. This is the point at which the bones become brittle and easily fractured. Chamomile has been shown to help prevent this due to its influence on the hormone oestrogen. Chamomile is unquestionably a woman’s best friend.
Lavender
Lavender is another herb that may help you sleep better, especially if you have insomnia. It aids in the relaxation of both the mind and the body, resulting in a better mood. Simply feeling less anxious and more peaceful can help you sleep better. Lavender can be used to relieve pain and muscle tension, especially after strenuous activity or exercise, and inhaling lavender blooms is said to have a soothing effect on people. So, before you go to bed tonight, plant a few stems beneath your pillow or beside your bed and take several deep breaths to savour the lovely aroma.
This is yet another plant that is simple to grow. It makes a wonderful border with flowers that attract bees and butterflies. You will then have a ready supply of organic food at all times.
St. John’s Wort is a herb.
This plant is used to treat a variety of mental health issues, such as depression, anxiety, and stress. It is also used to alleviate insomnia and nerve pain. Although it is extremely effective in improving mental health, it should not be used in conjunction with prescribed medications. This is because it can interact with it and have undesirable effects.
Turmeric
This herb has strong anti-inflammatory properties. As a result, it may help to alleviate arthritic pain. It has the ability to relax the stomach and aid in the treatment of digestive ailments such as indigestion and ulcers. It can also help with depression treatment because it increases brain function. Curcumin, a molecule contained in turmeric, has also been demonstrated to aid in the death of cancer cells (6), which is yet another reason to keep turmeric on hand in the kitchen.
It’s crucial to note that not all herbs are useful in cancer treatment. Avoid using St John’s Wort or Ginkgo Biloba if you are already being treated. Because they cause cancer drugs to leave the body too quickly, they become useless.

Ginger
Ginger is a fantastic addition to any dish. It not only tastes good and improves the flavour of foods, but it also has healing properties. Both ginger and turmeric have anti-cancer properties. If you have a family history of cancer, use ginger and turmeric in many of your meals to help protect yourself from this terrible disease. Ginger, like turmeric, can be used to a range of foods, such as curries, soups, stews, and smoothies.
Ginger has been shown to help with nausea, vomiting, motion sickness, morning sickness (9) and even arthritis. It can also help lower blood pressure and cholesterol levels (10). If you have indigestion, ginger can help you feel better. If this doesn’t persuade you to use ginger on a regular basis, I’m not sure what will.
Ginkgo Biloba (Ginkgo Biloba) (Ginkgo Biloba)
This plant contains a lot of antioxidants and anti-inflammatory chemicals, so it can help you avoid heart disease, arthritis, and even cancer. Because it is accessible as a supplement, it makes sense to take it on a daily basis. It has been shown to be effective in the prevention of Alzheimer’s disease. Alzheimer’s disease, as well as melancholy, anxiety, and attention deficit hyperactivity disorder (ADD/ADHD), are all linked to brain health. Ginkgo biloba boosts circulation, especially in the brain and heart. As a result, it goes without saying that this powerful herb can assist you in staying mentally sharp.
Rosemary
Rosemary is yet another herb that grows easily in the garden and tastes great in meals. It is useful in the treatment of memory loss and has even been shown to postpone the onset of dementia. Rosemary can aid with headaches, especially migraines, as well as asthma and bronchitis. It can also help women with menstruation cramps. It is also useful for treating depression. If you have diabetes or are on blood thinners, avoid using rosemary oil as it may make them less effective.
Liquorice Root
As a child, I used to enjoy chewing on a piece of liquorice root, not realising how helpful it was to my health. Liquorice has anti-inflammatory properties and can aid in the treatment of intestinal infections, indigestion, and heartburn. It can also help you breathe if you have a cough or a cold. All of these characteristics derive from its anti-inflammatory and bacteria-killing qualities. Furthermore, it is effective at reducing skin inflammation, which aids in the alleviation of acne, psoriasis, and eczema symptoms.
Chewing liquorice root as a youngster obviously helped my oral health, as I have very few fillings and studies show it prevents cavities. I’m on my way to the health food store right now!
Lemon Balm
This herb is well-known for its calming qualities and can help alleviate anxiety, stress, insomnia, migraines, and other tension-related ailments. It also has antiviral effects. It grows easily in the garden and may be used in cooking as well as to make delicious tea.
Peppermint
This plant can help with gastrointestinal problems such as nausea, vomiting, diarrhoea, and constipation (23). It also aids in the relief of achy muscles and tension headaches. This herb can simply be replanted in your garden. It can be prepared into a tea by steeping it in hot water, or it can be purchased as a supplement or essential oil. When you’re feeling congested, mix the oil with hot water and inhale it to help you breathe. Peppermint is also a fantastic addition to your first-aid kit for treating hay fever symptoms. It reduces the allergic reaction, which causes sneezing and itching eyes.
These eleven herbs will keep you healthy if you use them on a daily basis. The bulk of them can be consumed, while some can be purchased as a supplement or used to make tea. Why not give one of them a try and see if it helps you feel better?
The post Herbs to Always Have on Hand appeared first on https://gqcentral.co.uk
-

Growing Catnip In The House, From Seed To Plant
Growing Catnip in the House, from Seed to Plant
Growing Catnip in the House, from Seed to Plant: A fun and educational project for the whole family.
Catnip (Nepeta cataria), a member of the mint family, is not just for cats. It is a calming herb that may be used to brew tea and give flavour to salads and savoury foods. Catnip is a moderate sedative that acts similarly to chamomile in humans.
Catnip, often known as catmint, is a perennial plant with an unbranched leaf.
It grows well in USDA winter hardiness zones 3-9 and makes a beautiful container plant.
Catmint grows throughout the spring and summer and then goes dormant in the winter.
The herb has tiny, inconspicuous white blooms. Catnip’s growth, like mint’s, is only restricted by the pot it is planted. Plants grow into and out of their containers.
Although the plant is perennial, many people prefer to start a new plant each year to keep the growth under control. Growing catnip inside is an easy project that all cat owners should think about.
It will save you money and make your cat’s life better, at least for a while.
Cats rarely attack or disturb growing plants unless the leaves are crushed or stroked, producing a chemical that attracts them and triggers the all-too-common catnip fever.
Most cats aren’t interested in the plant while it’s just starting to grow. Of course, some cats are so taken with the plant that they will lie down on it for hours.
Catnip is frequently marketed at garden centres, and seeds are easily obtained online.
Catnip is famous among our feline companions due to the presence of a substance known as nepetalactone. The essential oil is released when catnip leaves are rubbed or crushed, and the aroma functions as a signal to all around cats – a slight catnip fever!
When the cats smell the perfume, they go insane and run about the neighbourhood like crazy. However, when catnip is consumed, the effect is precisely the reverse.
Cats often roll around, become calmer, and frequently shut down after consuming catnip. On the other hand, some cats have the opposite reaction and become wild or violent.
Catnip does not affect all cats in the same way. A cat’s sensitivity to catnip is inherited, with just 50-60% of cats responding.
Kittens do not react to catnip since the sensitivity does not manifest itself until later in life. Cats do not get the catnip feature until they are 3 to 6 months old.
When you first give your cats catnip, observe them discover where they lie on the catnip sensitivity spectrum.

Catnip’s effects usually last 1 to 2 hours, with the first 10 to 15 minutes is the most strong.
Some cats have been known to overindulge, but this is uncommon. Keep an eye on them to ensure they don’t overeat.
On a bright, sunny windowsill, catnip grows wonderfully. Growing catnip indoors requires little attention, making it an ideal houseplant for novices with a green thumb.
Don’t forget to include catnip in your window herb garden. It’s a simple addition to any herb garden, indoors and out. In this article, you’ll learn how to produce catnip to make all the cats in your house your best pals.
Catnip has the same growing season indoors as outdoors. Growth slows during the winter months as the plant goes dormant.
When catnip seeds are layered before planting, they grow the best. This may appear to be difficult, but it is not.
It’s not difficult. Fill a bag or tray with the seeds, then store them in the freezer overnight to germinate. Place them in a dish of water in the morning and leave them for 12-24 hours.
This technique disrupts the seed’s natural protective coating, allowing faster and more consistent germination. Plants develop faster and more successfully with this method of nurturing.
To allow for catnip growth, use a pot at least 8 inches deep and 8 inches wide. Make sure the pot’s bottom has drainage holes.
If your feline companions become overexcited and attempt to knock the container over, we strongly advise against using delicate containers in this situation (such as clay or ceramic).
Combine the potting soil and water in a large mixing bowl until the soil is moist but not saturated.
Fill the container halfway with the potting soil mixture and lightly press down on the soil mixture with your fingers.
Sprinkle the stacked catnip seeds on top of the dirt and gently press them in until they are lightly coated with dirt.
Wherever possible, place your container in an area that is both warm and well-lit. The development of luxuriant catnip necessitates the presence of light.
Spray the soil with water every day to keep it moist, but don’t get it too wet.
Within 8 to 15 days, the seeds will sprout.
Reduce watering to every 4-7 days after the seedlings have germinated. Continue doing so until the seedlings are 1 to 2 inches tall and well-established in their pot.
Once the plant is established, water it every 7-12 days or when the top inch of soil is somewhat dry.
When the catnip has grown to a height of 6-8 inches, you can start harvesting by pinching off the leaves for your cat.
It is recommended to snip off the plant’s flower buds because this encourages leaf growth and saves the plant from having to expend energy creating blossoms. I
Make sure to let the flowers blossom before you cut them back so that they don’t become invasive weeds.
Reduce winter watering to a minimum and allow the plant to fall dormant throughout the winter.
During the growing season, harvest from pots as needed. As long as it is correctly cared for, this perennial herb will continue to flourish.
The post Growing Catnip In The House, From Seed To Plant appeared first on https://gqcentral.co.uk
-

How to Create a Waitlist and Why It’s Useful
Steps to Creating a Waitlist
Email marketing is one of the most efficient strategies to remain in touch with your consumers and drive repeat business. One of the best methods to grow a list of subscribers is through a waiting list.
A waiting list is a list of people who exhibit interest in your product or service before introducing it.
Many firms and marketers have utilized waiting lists to develop email marketing campaigns with a high conversion rate. This article takes a look at how to establish a waiting list and everything you need to create a waiting list.
Create a Landing Page
Your first step is to design a landing page where your audience will opt-in and join your waiting list.
Your landing page serves the function of an elevator pitch to people contemplating joining your waiting list. It’s created utilizing language that pitches your concept and the benefits folks on your waiting list will gain for joining you early.
Your landing page should have;
- A compelling headline that focuses on the advantages
- High-quality writing that is benefits-based
- A clean design that is not distracting
- An excellent button with a clear call-to-action
The landing page should have an enticing call-to-action that will entice your readers to join the waiting list.
A landing page builder makes it simple to create a landing page. Using landing page builders like Instapage, ClickFunnels, and LeadPages, you should be able to create your landing page in minutes.
Integrate Your Landing Page With Your Email Marketing Software
After you’ve developed your landing page, the following step is to connect it to your email marketing platform.
This allows you to automatically capture the email addresses of folks who sign up for your waiting list and add them to your emailing list.
You may combine your landing page with email marketing tools such as ActiveCampaign, MailChimp, or Aweber.
Create a ThankYou Page
When someone joins your waiting list, they should be taken to a thank you page.
A thank you page should include a basic message thanking your subscriber for joining your email list.
You may further incentivize individuals to join your waiting list in exchange for priority access to the product/service you are developing.
You may also include a link on your thank you page that takes them to your website/another page that describes what they can expect from being on your list.
Create an Optin Form
The following step is to design an opt-in form that will collect your target audience’s email addresses. Optin forms are simple to design and integrate into your website, blog, or landing page.
There are a few things to keep in mind when creating an opt-in form:
- The form should be easy to fill out
- The form should ask for the minimum amount of information
- The form should be mobile-friendly
- The form should have a clear call to action
Most landing page builders include a form builder that makes it simple to design an opt-in form. You may also use your email marketing software to construct an opt-in form that you can incorporate on your landing page.
Create an Event Countdown and Add it To The Landing Page
A countdown to an event should provide a definite timetable for when you will debut your product/service for everyone on the waiting list.
Countdown timers express urgency, and studies have shown that they may raise click-through rates by up to 30%.
The majority of landing page builders include an event timer that you can apply immediately to your landing page. Setting up an event timer is simple and does not require any coding knowledge.
Set Automated Email Sequences Leading Up To The Event
Set up automatic email sequences that will be delivered to individuals who sign up for your waiting list to drive engagement even further.
Automated email sequences are an excellent method to stay in touch with your subscribers and provide them with useful information about the product/service you are offering.
Email marketing software allows you to create automated email sequences that will deliver messages to your subscribers at certain periods.
Benefits of Creating a Wait List
There are various advantages to forming a waitlist, which includes the following:
Increased Exposure and Buzz; When you announce that you will be developing a waiting list for your product/service, it creates a feeling of urgency and generates excitement about your future offering.
More individuals will join up for your waiting list as a consequence, enhancing the visibility and buzz surrounding your product.
Increased Engagement and Conversion Rates; Having a waiting list tells your audience that your product is in great demand and will likely sell out quickly.
This will enhance engagement and conversion rates since people will be more likely to buy your product/service when it is released.
Preference Access to Your Product/Service; When you introduce your product or service, people on your waiting list will receive first priority over those who are not.
This is an excellent method to thank your most devoted followers and keep them engaged with your company.
Wait Lists Aid in Decision Making; Waitlists aid in decision-making for both you and your clients. The waitlist assists customers in deciding whether or not to acquire your stuff.
As a company owner, establishing a waitlist may assist you in determining the level of interest in your product and the number of individuals who are likely to acquire it.
If the demand is big enough, you can potentially utilize this information to further tailor your items.
Conclusion
Waitlists are an excellent email marketing method for growing your email list and effectively launching your products/services. Knowing how to construct a waitlist is critical for any business and may help you improve your lead generation and conversion rates.
References
[1] https://unbounce.com/landing-page-articles/what-is-a-landing-page/
[2] https://influencermarketinghub.com/email-marketing-software-platforms/
[3] https://www.bigcommerce.com/ecommerce-answers/what-is-an-opt-in/
[4] https://www.salecycle.com/blog/strategies/countdown-timers-can-used-drive-ecommerce-sales/
The post How to Create a Waitlist and Why It’s Useful appeared first on https://gqcentral.co.uk