Your cart is currently empty!
Category: Fashion & Beauty
-

Layering Foils for Lift: Tips and Expert Techniques Revealed
Unlock the Secrets of Layering Foils for Superior Hair Lift and Vibrancy
Discover the Innovative Technique of Layering Foils in Hair Colouring
Layering foils denote a sophisticated hair colouring technique that utilizes multiple foils placed strategically to achieve desired lift and tone in hair. This method empowers stylists to exercise enhanced precision and creativity in their colour applications, resulting in exceptional vibrancy and depth. It has emerged as a preferred choice among professional hair colourists aiming for flawless finishes. Successfully implementing layering foils requires essential materials, such as:
- Hair foils (available in either aluminium or paper)
- Hair colour or lightener
- Applicator brush
- Comb for sectioning
- Clips for efficient sectioning
- Gloves to safeguard hands
- Mixing bowl for preparing colour
- Developing cream or activator
These materials are vital for establishing a solid foundation for expert application, ensuring that the process unfolds smoothly and effectively. With the right tools at the ready, the transformative power of layering foils can be unleashed, leading to breathtaking hair colour transformations that will mesmerize clients.
Explore the Numerous Advantages of Layering Foils in Hair Colouring
Incorporating layering foils into the hair colouring process presents a multitude of advantages that go beyond mere aesthetics. This technique elevates both the application experience and the final visual impact. The key benefits of employing layering foils include:
- Enhanced colour vibrancy for striking results
- Creation of multidimensional looks that stand out
- Greater control over lift and precise application
- Reduced processing time for efficiency
- Minimized product waste for cost-effectiveness
- Customisable colour placements that cater to client preferences
- Improved client satisfaction through tailored results
These advantages position layering foils as an essential technique in any stylist’s arsenal. By amplifying colour vibrancy, stylists can achieve visually stunning results that are customized to meet each client’s unique desires. The ability to control lift and colour placement results in bespoke creations that reflect individual styles, significantly enhancing the overall salon experience.
Essential Preparations for Successfully Applying Layering Foils
Preparation is a crucial aspect of the successful application of layering foils. Before initiating the colouring process, specific preparatory steps must be undertaken to ensure everything is organized and ready to proceed. The first step involves sectioning the hair, which entails dividing it into manageable parts to facilitate precise application. Optimizing this process can be accomplished by creating quadrants on the head and securing them with clips, keeping the hair orderly and out of the way during the application.
Selecting the right foils is equally critical. Different foil types can yield varying outcomes; for instance, heavier aluminium foils retain heat more effectively, promoting greater lift, while lighter paper foils may be preferable for a gentler application. Additionally, organizing your workspace is essential. Ensure that all materials are easily accessible and that the area is well-lit, allowing for accurate application and thorough inspection of the work. A clean, organized workspace significantly enhances efficiency and focus throughout the process.
Effective Techniques for Mastering Layering Foils Application

Choosing the Ideal Foils Based on Your Hair Type
Selecting the appropriate foils for layering is a pivotal step that directly impacts the final hair colouring outcome. Your choice should take into account several factors, including hair type, desired lift, and colour intensity. For example, fine hair may require thinner, lighter foils to avoid overwhelming the strands, while those with thicker hair might benefit from sturdier foils that effectively retain heat.
When deciding on foils, it is also crucial to evaluate the specific colouring agents being utilized. Certain formulations yield better results with specific types of foils, thereby affecting the overall effectiveness of the lift achieved. Furthermore, assessing the condition of the client’s hair can inform your choices regarding which foil type to use. Healthy hair can often endure more aggressive techniques, while compromised hair may necessitate a gentler approach. Ultimately, understanding these variables enables a customized application that not only meets but exceeds client expectations.
Perfecting the Art of Sectioning for Layering Foils
Mastering effective sectioning is essential for achieving even lift and consistent colour distribution throughout the layering foil process. Enhancing your sectioning technique can significantly streamline the application process and improve the final result. Begin by ensuring that the hair is dry and free from tangles; this preparation allows for better control as you navigate each section.
To optimize sectioning for layering foils, partition the hair into quadrants or smaller subsections based on the client’s hair density and length. Using clips to secure the sections while you work prevents hair from falling into unintended areas, thereby reducing the risk of uneven application. Pay attention to the thickness of each subsection; thinner sections facilitate a more controlled application and better colour penetration. By emphasizing organization and control during this critical phase, you establish a solid foundation for outstanding results in your layering foils application.
Implementing Techniques for Effective Foil Application

The application of foils necessitates precise techniques to ensure maximum lift and saturation of colour. To achieve effective results, adhere to these step-by-step application methods:
- Begin with clean, dry hair, ensuring it is thoroughly detangled.
- Section the hair into manageable parts, securing them with clips for organization.
- Apply the chosen colour or lightener evenly along the hair length for consistent coverage.
- Position the foil beneath the section, folding it slightly to create a base for the colour.
- Apply the colour onto the hair, ensuring the product is fully absorbed for optimal results.
- Fold the foil securely over the hair to trap heat and moisture, aiding in processing.
- Repeat this process for each section, maintaining consistency across the entire head.
- Carefully monitor processing time according to product recommendations to achieve the desired lift.
By adhering to these techniques, stylists can ensure that the application process is both efficient and effective. Consistency in application is critical for achieving a uniform result, and the use of foils not only isolates the hair being coloured but also helps control the lift accomplished.
Expert Insights on Mastering Layering Foils
Understanding Lift Levels for Optimal Results
Grasping the concept of different lift levels is crucial for effectively utilizing layering foils. The lift level is influenced by the type of foils used, the colour formulation, and the application technique employed. For instance, utilizing a high-lift colour in conjunction with well-placed foils can yield up to 4-5 levels of lift in a single application, especially for lighter hair types.
Moreover, real-world experiences reveal the variability of lift levels achieved with layering foils. A stylist working with a client who has naturally light blonde hair may find that they can achieve significantly higher lift compared to a client with dark brown hair. Additionally, the choice of developer strength is critical; using a 40-volume developer can facilitate higher lift levels, while a 20-volume developer may be more suitable for achieving subtle highlights.
Understanding the science behind lift levels empowers stylists to make informed decisions during the colouring process, ensuring that the desired results align with client expectations. By taking all these factors into consideration, one can optimize the foiling technique for maximum effectiveness.
Strategies for Achieving Dimensional Colour with Layering Foils
Achieving dimensional colour entails creating depth and movement within the hair, significantly enhancing its overall appearance. Attaining this effect with layering foils requires specific strategies for seamlessly blending shades. One effective method involves using multiple tones that contrast while also complementing each other. For instance, combining warm tones with cooler shades can yield a rich, multidimensional finish.
To achieve dimensional colour using layering foils, start by selecting at least two to three shades to blend. While applying the foils, alternate the placement of each colour within the sections. For example, if using a light blonde and a medium caramel, place the light blonde foil in some sections while interspersing the caramel within adjacent sections. This technique promotes a natural blend of colours, enhancing visual interest and depth.
Moreover, consider the thickness of the foils and the spacing between them. Varying the width of the sections and the placement of foils can dramatically influence the resulting dimension. By embracing creativity and experimentation, stylists can craft stunning dimensional looks that breathe life into their clients’ hair.
Troubleshooting Common Issues During Layering Foils Application
Despite meticulous planning and execution, common issues may arise during the layering foils process, such as uneven lift and colour bleeding. To effectively troubleshoot these problems, it is crucial to understand their underlying causes and implement suitable corrective measures. Uneven lift often results from inconsistent application or sectioning. To remedy this, ensure that you apply equal amounts of colour and that your sections are uniform in thickness.
In cases of colour bleeding, which can occur if products are not adequately isolated, consider using a clean foil for each application and ensuring that the edges are securely sealed. Additionally, closely monitoring processing times can help mitigate potential issues; removing foils prematurely can lead to uneven colour distribution.
Ultimately, resolving these common challenges requires a combination of observation, experience, and adaptability. By being proactive and employing these strategies, stylists can enhance their skills and ensure that clients leave with stunning results.
Assessing the Impact of Layering Foils on Hair Health
Understanding the Effects on Hair Texture
Layering foils can significantly influence hair texture, impacted by various factors such as the frequency of application and the chemicals used. Frequent use of strong lighteners can compromise hair health, leading to undesirable changes in texture. To minimize damage, it is essential to evaluate the condition of the hair before commencing the foiling process.
Preventive measures may include utilizing lower-volume developers, incorporating conditioning treatments, and allowing sufficient time between applications. Additionally, applying bonding agents during the colouring process can help safeguard the hair’s integrity, ensuring that the cuticle remains intact while the colour penetrates effectively. These protective measures are vital for maintaining the desired texture throughout the layering foils process.
By prioritizing hair health during the process, stylists can achieve remarkable results without compromising hair quality. This careful consideration benefits not only the immediate outcome but also fosters long-term health and vitality for the client’s hair.
Best Practices for Maintaining Hair Health After Layering Foils
Maintaining hair health post-layering foils is essential for preserving both colour and texture. Following the application of foils, it is advisable to implement a comprehensive hair care routine that includes regular conditioning treatments. Deep conditioning masks can provide essential moisture and nutrients, helping to restore any vitality lost during the colouring process.
Minimizing heat styling is another crucial practice for maintaining hair health. Excessive use of heat tools can exacerbate damage, particularly on hair that has undergone chemical treatment. When heat styling is necessary, utilizing a heat protectant spray can create a barrier that mitigates the risk of thermal damage.
Furthermore, encouraging clients to engage in regular trims can prevent split ends and maintain overall hair health. By adopting these best practices, clients will not only enjoy vibrant colour but also healthier, more resilient hair in the long run.
Long-Term Effects of Layering Foils on Hair Quality
The long-term effects of layering foils may include challenges such as colour fading and potential hair damage. Over time, exposure to environmental factors, including sun and pollution, can lead to diminished vibrancy. To mitigate these effects, it is advisable to recommend colour-protecting shampoos and conditioners specifically formulated to lock in colour.
Regular salon visits for professional touch-ups can also play a significant role in maintaining the vibrancy of layered foils. Stylists can assess the condition of the hair and suggest appropriate treatments to preserve both colour and texture. Moreover, educating clients about the importance of protecting their hair from UV rays and chlorine can further extend the longevity of their colour.
By proactively addressing potential long-term effects, stylists can ensure that their clients maintain beautiful, healthy hair that continues to shine long after the initial application of layering foils.
Creative Uses of Layering Foils in Hair Colouring
How to Design Unique Colour Patterns with Layering Foils
Creating unique colour patterns can be accomplished through the strategic placement and thickness of foils. By varying foil placement, stylists can craft eye-catching designs. For instance, a spiral pattern can be achieved by applying foils in a circular motion around the head, resulting in a striking dimensional effect.
Another approach involves using contrasting colours within the same foil. For instance, placing a dark colour adjacent to a light one can create a stunning juxtaposition that enhances the overall look. The thickness of the foils can also be manipulated; employing thinner foils for highlights next to thicker ones for lowlights can amplify texture and depth.
Experimentation with placement and patterns is essential; the more a stylist explores different techniques, the more innovative their applications become. By embracing bold ideas and stepping outside traditional methods, stylists can realize stunning innovations in colour patterns.
Effective Techniques for Mixing and Matching Colours
Mixing and matching colours allows stylists to create unique, personalized looks that resonate with clients. Effective blending of multiple colours requires a keen eye for harmony and balance. Begin by selecting colours that complement each other on the colour wheel; for instance, pairing warm tones like golden blonde with cool tones like ash can create a visually appealing contrast.
When applying mixed colours, careful consideration of placement is vital. For example, placing darker shades underneath lighter shades creates depth, while intermingling brighter colours can add dimension. This method not only enhances the overall look but also offers versatility in styling options.
Utilizing foils effectively allows the colours to blend seamlessly. Ensure that the edges are feathered during application to prevent harsh lines, facilitating a smooth transition between hues. By mastering the art of mixing and matching, stylists can provide clients with bespoke looks that reflect their unique personalities.
Implementing Artistic Techniques for Layering Foils
Employing artistic techniques in layering foils involves applying creativity to craft intricate designs and effects. These methods can elevate a standard foiling application into a true work of art. One popular artistic technique is the ‘balayage foil,’ which merges traditional foiling with freehand application to create a soft, natural-looking gradient.
Additionally, techniques such as ‘ombre’ and ‘sombre’ can be achieved through layering foils. By applying lighter shades at the ends and gradually transitioning to darker hues at the roots, stylists can produce a beautiful, seamless appearance.
Incorporating other artistic elements, such as colour melting, can also enhance the dimensional effect. This technique involves blending colours directly on the hair while using foils to separate sections, resulting in a fluid look. Success with artistic techniques relies on meticulous execution; practicing precision and maintaining consistency will ensure stunning results.
Key Advantages of Layering Foils for Mastering Lift
Enhancing Colour Lift with Layering Foils
Enhanced colour lift is a primary advantage of employing layering foils, as this technique allows for targeted application and meticulous control over the lifting process. The ability to isolate specific sections of hair with foils means that stylists can apply colour or lightener precisely where needed, resulting in improved lift without affecting surrounding areas.
By effectively layering foils, colourists can achieve multiple levels of lift simultaneously, particularly beneficial when working with clients seeking dramatic transformations. This method reduces the risk of over-processing hair, a common concern with traditional all-over colour applications. Instead, colourists can focus on specific areas, enhancing the overall impact while preserving the hair’s integrity.
The enhanced control afforded by layering foils not only leads to superior outcomes but also enables stylists to address individual client needs. This level of precision is critical for achieving the desired look and ensuring clients leave the salon with beautifully lifted hair.
Time Efficiency of Layering Foils in Colouring Services
Layering foils can significantly streamline the colouring process, making it a time-efficient method for achieving vibrant results. The ability to work on multiple sections simultaneously allows stylists to maximize their time effectively. By systematically applying foils, colourists can achieve optimal lift without compromising quality.
Utilizing layering foils also minimizes extensive processing time. Because the foils isolate the hair and trap heat, the colour develops more rapidly, leading to quicker results. This efficiency is particularly beneficial in busy salon environments, where time is of the essence and client satisfaction is paramount.
Overall, the time-saving advantages of layering foils enhance the salon experience for both stylists and clients. Customers appreciate the swift turnaround without sacrificing the quality of results, contributing to a positive salon atmosphere.
Increasing Versatility in Hair Styling with Layering Foils
Layering foils enhance versatility in styling by providing a wide range of colour and lift options. This technique empowers stylists to experiment with various shades and placements, catering to diverse client preferences and styles. As clients become more adventurous with their hair choices, the versatility offered by layering foils becomes invaluable.
This method can easily adapt to different looks, ranging from subtle highlights to bold, dramatic transformations. By encouraging clients to explore distinct colour combinations, stylists can customize their services to meet each individual’s unique desires.
Moreover, layering foils facilitate creative expression. Stylists can mix, match, and create custom blends that resonate with clients’ personal styles, resulting in a more fulfilling salon experience. This versatility not only boosts client satisfaction but also fosters enduring relationships between stylists and their clientele.
The Benefits of Improved Heat Distribution with Layering Foils
Layering foils improve heat distribution throughout the hair, contributing to more consistent and effective lift during the colouring process. The foils act as a reflective surface, trapping heat close to the hair and promoting even colour or lightener development. This is especially advantageous when working with thicker or coarser hair types that require additional heat for optimal lift.
Enhanced heat distribution helps avoid patchiness and uneven colour results, ensuring that the desired lift is uniformly achieved across the sections. By employing layering foils, stylists create a more controlled and efficient environment for colour processing.
Ultimately, the consistent application of heat translates into superior results, enabling clients to achieve their desired looks without the risk of over-processing. When stylists guarantee even lift, it enhances the quality of service and solidifies their reputation as experts in colour mastery.
Reducing Product Waste with Layering Foils
By implementing layering techniques, stylists can significantly reduce product waste, yielding both economic advantages and environmental sustainability. The targeted placement of colour or lightener within foils means that less product is required overall, as colour is applied directly to the sections needing lift rather than liberally across the entire head.
This reduction in product usage translates into lower costs for salon owners, contributing to improved profitability. Furthermore, minimizing waste supports sustainable practices within the industry, as salons aim to reduce their environmental footprint.
Incorporating layering foils into standard procedures not only benefits the salon financially but also appeals to eco-conscious clients who value responsible practices. By embracing this technique, stylists can contribute to a more sustainable future for the beauty industry while delivering exceptional results to their clients.
Research-Backed Advantages of Layering Foils for Lift Mastery
Insights on Colour Retention from Research
Research indicates that layering foils can improve colour retention over time, leading to longer-lasting results for clients. The precise application of colour through foils facilitates better penetration of the colour into the hair shaft, resulting in enhanced longevity.
Real-world examples demonstrate that clients who regularly receive foil applications often report maintaining their colour vibrancy for extended periods, requiring fewer touch-ups. This not only benefits the client but also strengthens the stylist’s reputation for delivering high-quality services.
Utilizing layering foils, therefore, not only meets client expectations but also maximizes the effectiveness of the products used, resulting in satisfied clients and fostering repeat visits.
Supporting Consistency in Lift Analysis with Layering Foils
Analyzing lift consistency shows that layering foils can yield more uniform results compared to traditional applications. The use of foils isolates specific sections, allowing for targeted application that results in even lift across different areas of the hair.
To achieve consistent lift with layering foils, stylists should consistently monitor section size and ensure even product application. Maintaining a steady hand and adhering to established techniques enhances the predictability of outcomes.
This predictability builds trust with clients, as they can rely on stylists to produce consistent results every time. In an industry where reputation is crucial, delivering uniform lift is a key component of success.
Expert Perspectives on Hair Health Related to Layering Foils
Experts in the field assert that when applied correctly, layering foils can minimize damage to the hair. By focusing on targeted application and monitoring the hair’s health throughout the process, colourists can achieve stunning results without compromising hair integrity.
Offering insights into the benefits of layering foils, professionals emphasize the necessity of regular assessments of hair condition before and after applications. This proactive approach allows colourists to make informed decisions regarding the products and techniques used, ultimately benefiting the hair.
By maintaining a strong focus on hair health, stylists can not only achieve beautiful colour results but also educate clients about the importance of caring for their hair, fostering ongoing relationships built on trust and expertise.
Evaluating Processing Time Efficiency with Layering Foils
Research indicates that layering foils can significantly reduce processing time, benefiting both stylists and clients. The ability of the foils to trap heat enables faster colour development, allowing stylists to achieve desired results in a shorter timeframe. This efficiency is particularly advantageous in busy salon environments, where time is often a critical factor.
Discussing the benefits of this efficiency, many stylists highlight the positive impact on overall client satisfaction. Quick yet effective results lead to a better salon experience, allowing clients to leave feeling satisfied and looking their absolute best.
This efficiency not only enhances the stylist’s productivity but also contributes to a positive reputation for the salon, as clients appreciate the balance of quality and speed in service.
Reflecting Client Satisfaction and Feedback in Layering Foils Success
Surveys indicate an increase in client satisfaction with results from layering foils, underscoring the technique’s effectiveness. Clients frequently report a marked improvement in the vibrancy and longevity of their colour, leading to numerous positive testimonials and word-of-mouth referrals for salons that utilize this method.
Feedback highlights that clients appreciate the tailored approach achieved through layering foils, as it allows for personalized colour outcomes that align with their individual styles and preferences. The ability to create stunning, multidimensional looks results in clients leaving the salon feeling confident and satisfied.
By prioritizing client satisfaction and actively seeking feedback, stylists can continuously refine their techniques and ensure they remain attuned to the needs of their clientele, fostering long-term relationships that benefit both parties.
Effective Training and Education on Layering Foils for Mastery
Comprehensive Training Programmes for Stylists: Key Components
Comprehensive training programmes for stylists should encompass both the fundamentals and advanced techniques of layering foils. Teaching new stylists the basics, such as sectioning, product application, and foil placement, is essential. However, it is equally important to delve into advanced concepts, including the art of colour blending and troubleshooting common issues that may arise.
Hands-on practice is crucial within training programmes, allowing stylists to develop their skills in real-world settings. Incorporating interactive elements such as demonstrations, peer reviews, and group workshops can foster a collaborative learning environment. This comprehensive approach ensures that stylists are well-equipped to handle a diverse range of client requests and preferences.
By establishing robust training programmes that encompass both foundational and advanced techniques, salons can cultivate a team of highly skilled professionals who are confident in their ability to execute layering foils effectively.
Benefits of Workshops and Seminars for Stylist Development
Workshops and seminars provide invaluable opportunities for stylists to enhance their skills through hands-on experience and networking. These events can focus specifically on layering foils, offering participants the chance to learn from industry experts and collaborate with their peers.
During workshops, stylists can practice new techniques, receive immediate feedback, and refine their skills in a supportive environment. Additionally, networking opportunities enable stylists to connect with others in the industry, fostering relationships that can lead to future collaborations or mentorships.
By participating in workshops, stylists can remain updated on the latest trends and techniques in layering foils, ensuring that their skills remain relevant and competitive in a constantly evolving industry.
Exploring Online Resources and Tutorials for Stylist Education
Online resources and tutorials provide flexible learning options for stylists mastering layering foils. Numerous platforms offer video tutorials, step-by-step guides, and forums where stylists can discuss techniques and share experiences. These resources allow stylists to learn at their own pace while still accessing valuable information from industry professionals.
When selecting online resources, it is crucial to choose reputable sources that align with current industry standards. Engaging with platforms that offer certification or accreditation can enhance credibility and ensure that stylists receive high-quality education.
The accessibility of online learning enables stylists to continuously improve their skills and stay informed about the latest innovations in layering foils, ultimately benefiting their clients as well.
The Role of Mentorship and Peer Learning in Stylist Skill Development
Mentorship and peer learning serve as powerful avenues for skill development and confidence-building in layering foils. By establishing mentorship programmes, experienced stylists can guide newcomers through the intricacies of the technique, offering insights and sharing best practices.
Peer learning, on the other hand, facilitates collaboration and the exchange of ideas among stylists. This collaborative approach fosters a sense of community and encourages the sharing of unique techniques that may not be covered in formal training programmes.
Both mentorship and peer learning enrich the stylist’s experience, allowing them to grow their skills in a supportive atmosphere. By embracing these collaborative learning approaches, stylists can enhance their mastery of layering foils, ultimately benefiting their clientele and elevating their craft.
Advanced Techniques for Layering Foils to Master Lift
Customizing Foiling Techniques for Different Hair Types
Customizing techniques for layering foils based on hair type and texture is essential for achieving optimal results. Different hair types respond uniquely to colour applications, necessitating adjustments in the application technique. For instance, fine hair may benefit from lighter formulations and smaller sections to avoid overwhelming the strands, while thicker hair might require more product and larger sections to ensure even lift.
When working with curly or coily textures, it is important to consider the natural shrinkage of the hair. Adjusting the section sizes and product application can help maintain the desired lift while respecting the hair’s natural curl pattern. Additionally, understanding how different hair types absorb colour can inform decisions about processing times and product choices.
By tailoring the application of layering foils to suit individual hair characteristics, stylists can achieve remarkable results that respect the integrity of the hair while delivering stunning colour outcomes.
Benefits of Integrating Layering Foils with Other Colouring Techniques
Integrating layering foils with other colouring techniques can enhance overall results, allowing for a multifaceted approach to hair colour. Techniques such as balayage, ombre, or even colour melting can be effectively combined with foiling to create unique and dynamic looks.
For instance, a stylist might use foils to achieve a high lift at the roots while applying a balayage technique on the mid-lengths and ends for a more natural transition. This combination not only adds dimension but also allows for creative expression that resonates with clients seeking a bespoke look.
By continuously experimenting with the integration of various techniques, stylists can expand their repertoire and offer clients innovative solutions that push the boundaries of traditional hair colouring.
Staying Informed on the Latest Trends in Hair Colouring
Staying informed about the latest trends in hair colouring is crucial for stylists aiming to remain competitive in the industry. Following industry leaders on social media, subscribing to professional magazines, and attending trade shows are effective methods for keeping abreast of emerging techniques and styles.
In the realm of layering foils, current trends might include the rise of pastel colours, creative patterns, or the resurgence of natural-looking highlights. Understanding these trends enables stylists to adapt their techniques accordingly and meet the evolving demands of their clients.
Continuously learning about new advancements and trends can significantly enhance a stylist’s skill set and ultimately lead to increased client satisfaction and retention.
Best Practices for Optimizing Foil Placement for Maximum Lift
Optimizing foil placement is crucial for achieving maximum lift during the layering foils process. The strategic positioning of foils can significantly influence the resulting lift and colour vibrancy. Effective placement should consider the natural direction of hair growth and the desired outcome.
For maximum lift, foils should be positioned to follow the natural contours of the head, ensuring that each section receives equal attention. Additionally, staggered placement can create a more natural flow, preventing harsh lines and promoting even colour distribution.
By mastering the nuances of foil placement, stylists can enhance their results and create stunning, dimensional looks that meet their clients’ expectations. Attention to detail in foil placement distinguishes an average application from a masterful one.
Frequently Asked Questions About Layering Foils
What Specific Applications are Layering Foils Used For?
Layering foils are utilized in hair colouring to achieve precise lift and colour application, enabling stylists to create dimensional looks and vibrant shades tailored to client preferences.
How Can I Select the Most Suitable Foils for My Hair Type?
Choose foils based on your hair type and desired lift; lighter foils are recommended for finer hair, while thicker foils are more suitable for coarser textures to enhance results.
Is There a Risk of Hair Damage with Layering Foils?
When applied correctly and with appropriate products, layering foils can minimize damage and maintain hair health while achieving the desired colour results.
How Long Does the Foiling Process Generally Take?
The foiling process typically takes between 1 to 3 hours, depending on the desired look and the thickness of the hair being treated.
What Distinguishes Foils from Balayage Techniques?
Foils involve wrapping sections of hair in foil for colour processing, while balayage is a freehand technique that creates a more natural gradient effect without the use of foils.
How Frequently Should I Schedule My Hair Foiling Appointments?
It is generally recommended to schedule foiling appointments every 6 to 8 weeks to maintain colour vibrancy and manage regrowth effectively.
What Maintenance Should I Follow After Foiling My Hair?
Use colour-safe shampoos and conditioners, avoid excessive heat styling, and consider regular conditioning treatments to maintain your colour and hair health.
Is it Feasible to Perform Layering Foils at Home?
While it is possible to do layering foils at home, it is advisable to consult with a professional stylist for the best results, especially for complex techniques that require expertise.
What Are the Current Trends in Foiling Techniques?
Current trends include pastel shades, creative placement patterns, and the combination of foils with other techniques like balayage, providing added dimension and interest.
How Can I Address Issues with Uneven Lift When Using Foils?
To troubleshoot uneven lift, ensure consistent section size, apply equal amounts of product, and closely monitor processing times throughout the application.
Connect with us on Facebook!
The Article: Layering Foils for Lift Mastery: Techniques and Tips appeared first on Amitys Hair Salon.
The Article Layering Foils for Lift: Expert Techniques and Tips Was Found On https://limitsofstrategy.com
-

Xero Shoes: Your Ultimate Buying Guide for Top Choices
Reveal the Benefits of Xero Shoes for Superior Foot Health
What Makes Xero Shoes Stand Out from Conventional Footwear?
Xero Shoes represent a transformative innovation in the footwear realm, meticulously crafted to emulate the sensation of being barefoot while ensuring essential protection and support for the feet. These groundbreaking shoes are perfect for those who prioritize natural foot movement, allowing the feet to operate as nature intended. Their minimalist design enhances the authenticity of walking or running experiences, leading to notable gains in foot strength and agility. Consequently, Xero Shoes have gained traction among athletes, outdoor adventurers, and anyone striving to improve their foot health through minimalist alternatives.
This distinctive design philosophy underscores the crucial aspects of flexibility and lightweight construction, rendering Xero Shoes particularly enticing for an array of activities, ranging from leisurely walks to vigorous trail running. By closely mirroring the natural shape of the foot, these shoes enhance wearers’ proprioception, or the awareness of body positioning and movement, which significantly bolsters balance and stability during diverse physical endeavors.
Trace the Journey of Xero Shoes
The inception of Xero Shoes can be attributed to Steven Sashen and Lena Phoenix, who embarked on their journey driven by a fundamental need to address their own foot health challenges. Initially, they crafted a simple do-it-yourself sandal inspired by ancient methods, laying the foundation for what would evolve into a prestigious brand dedicated to natural movement and foot wellness. Their personal struggles ignited a wave of creativity that not only revolutionized their lives but also provided a unique solution for countless others in search of similar advantages.
The narrative of Xero Shoes is characterized by a fervent dedication to promoting healthier lifestyles through exceptional footwear. Since its founding, the brand has persistently broadened its product portfolio, unveiling pioneering designs that resonate with various activities and personal preferences. Today, Xero Shoes is celebrated as a trusted frontrunner in the minimalist footwear industry, renowned for its unwavering commitment to quality, performance, and the principles of natural movement.
Why Opt for Xero Shoes for Your Footwear Needs?
Selecting Xero Shoes offers a multitude of advantages that can profoundly enhance your foot health and overall comfort. The minimalist construction fosters improved foot strength, optimal balance, and a more authentic walking and running style, making them particularly popular among athletes keen to amplify their performance, hikers tackling challenging landscapes, and individuals in search of healthier footwear alternatives.
A key benefit of Xero Shoes is their focus on flexibility and lightweight design. Wearing these shoes promotes the strengthening of foot and leg muscles, directly contributing to enhanced biomechanics and a lower risk of injuries. Furthermore, these shoes permit a broader range of motion, which is vital for individuals engaged in dynamic activities. The combination of comfort, support, and the sensation of being barefoot positions Xero Shoes as an outstanding choice for varied activities and lifestyles.
Expert Guidance for Choosing Your Ideal Xero Shoes
What Essential Features Should You Seek in Xero Shoes?
When seeking the perfect pair of Xero Shoes, several crucial features can significantly influence your overall experience. Understanding these attributes will empower you to make an informed choice that aligns with your personal preferences and requirements.
- Sole Thickness: A thinner sole provides a more authentic barefoot experience, while a thicker sole offers added cushioning for enhanced protection.
- Lacing System: Opt for adjustable lacing options that allow for a customized fit, maximizing both comfort and security.
- Intended Use: Different models are specifically engineered for activities like running, hiking, or casual wear, so choose accordingly.
- Flexibility: Ensure the shoe permits natural foot movement without restrictions.
- Traction: Assess the outsole material and tread pattern for adequate grip on your preferred terrain.
- Weight: Lighter models are preferable for speed-focused activities, while more robust versions offer additional support.
- Arch Support: Depending on your foot structure, some models may provide varying degrees of arch support.
- Durability: Look for high-quality materials that guarantee long-lasting performance, especially for rugged use.
By carefully evaluating these features, you can align your selection of Xero Shoes with your distinct lifestyle, ensuring optimal performance and comfort tailored to your specific needs.
How Do Experts Evaluate the Performance of Xero Shoes?
Experts frequently praise Xero Shoes for their innovative minimalist design and emphasis on promoting natural movement. Numerous reviews highlight the comfort and adaptability these shoes offer across a wide array of activities. Both athletes and casual wearers appreciate how these shoes support a natural gait while still delivering sufficient protection.
Testimonials from runners, hikers, and fitness enthusiasts often emphasize the extraordinary comfort experienced even during prolonged wear. Many experts note that the shoes tend to adapt to the wearer’s foot over time, thereby enhancing fit and comfort. The lightweight materials utilized in various models also receive accolades for contributing to the sense of freedom that many users seek in their footwear.
Moreover, Xero Shoes are often acknowledged for their versatility. Reviewers frequently mention their successful use in diverse contexts—from challenging trails to relaxed urban outings—making them a preferred choice for those who value multifunctional footwear. This widespread positive feedback has solidified Xero Shoes’ reputation as a dependable option within the minimalist footwear landscape.
Which Xero Shoe Models Are Best Suited for Different Activities?
Xero Shoes offers a varied selection of models, each explicitly designed to meet specific activity needs, ensuring that every individual can discover the ideal fit for their lifestyle. For instance, the Xero Prio is a fantastic option for runners due to its lightweight construction and responsive feel. It strikes the perfect balance between cushioning and ground contact, making it suitable for both road running and trail explorations.
For hiking enthusiasts, the Xero TerraFlex stands out for its rugged outsole and supportive build, making it perfect for traversing challenging terrains. It delivers exceptional traction and durability, enabling hikers to navigate rocky paths with confidence.
For casual wear, the Xero Hana and Xero Z-Trek sandals offer a harmonious blend of comfort and style. These models provide the breathability essential for leisurely outings while retaining the core minimalist attributes that Xero Shoes are known for.
Each model is thoughtfully engineered with unique features that enhance performance for its intended purpose, allowing wearers to enjoy the advantages of minimalist footwear, regardless of their passion. By assessing the intended application and specific characteristics of each model, you can choose the Xero Shoes that best fit your lifestyle needs.
How to Effectively Compare Different Xero Shoe Models?
When deciding which Xero Shoes to purchase, it is vital to compare key models side-by-side to make an informed choice. Factors such as weight, flexibility, and price can significantly influence your buying experience.
For instance, the Xero Prio is celebrated as one of the lightest options, weighing approximately 7.8 ounces, which makes it ideal for speed-focused activities like running. In contrast, the Xero TerraFlex, while slightly heavier at around 10 ounces, provides enhanced durability and traction for hiking.
Flexibility is another critical aspect to consider. The Xero Prio features a flexible sole that encourages natural foot movement, whereas the TerraFlex offers a more structured design for support on rugged terrains. Pricing may also vary, with models like the Z-Trek sandals presenting a more budget-friendly choice, while high-performance options like the Prio may come with a higher price tag.
By comparing these essential attributes, consumers can ensure they select the ideal Xero Shoes that correspond with their activity level, preferences, and budget, leading to a more satisfying footwear experience.
What Are the Primary Advantages of Wearing Xero Shoes?
Boosting Foot Strength and Overall Wellness
Wearing Xero Shoes can significantly enhance your foot strength and overall physical health. The minimalist design encourages the foot to function naturally, facilitating necessary muscle engagement that often diminishes with conventional footwear. This engagement is vital for developing stronger foot muscles, which can lead to improved balance, posture, and overall foot health.
The minimalist nature of Xero Shoes ensures they interfere less with the foot’s natural biomechanics. This promotes muscle tone and strength development, which helps prevent various common foot issues such as plantar fasciitis and bunions. Regular usage can lead to increased arch support and better foot alignment, ultimately benefiting your legs and back as well.
By allowing the foot to move freely and comfortably, Xero Shoes can help maintain and enhance foot health over time. The following health benefits are associated with wearing Xero Shoes:
- Strengthens Foot Muscles: Promotes the engagement of foot muscles for enhanced strength.
- Improves Balance: Enhances balance through natural movement.
- Enhances Posture: Supports proper foot alignment, contributing to better posture.
- Reduces Foot Problems: Helps prevent common foot issues through natural biomechanics.
- Increases Flexibility: Promotes greater flexibility in the feet and toes.
- Boosts Proprioception: Enhances awareness of foot placement and movement.
- Encourages Natural Gait: Supports authentic walking and running patterns.
- Promotes Overall Mobility: Aids in maintaining mobility as you age.
Incorporating Xero Shoes into your daily regimen can serve as a catalyst for meaningful improvements in your foot strength and overall well-being.
Encouraging a Natural Gait and Movement
Xero Shoes are expertly designed to promote a more natural gait, allowing the feet to move in a manner that closely resembles being barefoot. This design enhances the biomechanics of running and walking, yielding benefits that extend beyond mere comfort.
Wearing Xero Shoes enables individuals to experience increased flexibility and a wider range of motion, which is critical for maintaining a healthy gait. The shoes allow the foot to flex and bend naturally, promoting a more efficient stride and minimizing the risk of injuries typically associated with restricted movement. This enhancement in gait efficiency can lead to improved running and walking performance, making physical activities feel less strenuous.
The shoes also facilitate a more authentic connection to the ground, enhancing proprioception and overall body awareness. For runners, this can translate into a lighter step and more efficient energy expenditure, potentially increasing speed and endurance over time. Additionally, being able to feel the terrain beneath your feet aids in better navigation and adaptability during various activities, from trail running to urban walking.
Overall, adopting Xero Shoes can lead to a substantial transformation in your natural movement patterns, cultivating a healthier and more engaged relationship with your body and its capabilities.
How Do Xero Shoes Impact Running Performance?
For runners, the choice of footwear can dramatically influence performance, and Xero Shoes excel in this domain. The minimalist design fosters a more natural running form, enabling runners to achieve a lighter and more efficient stride. This can enhance performance metrics, such as speed and endurance, while also minimizing the chances of injuries typically linked to conventional running shoes.
The absence of excessive cushioning and support in Xero Shoes encourages runners to effectively engage their natural biomechanics. This engagement often leads to a midfoot or forefoot strike, which is considered more efficient than a heel strike. By promoting a natural running style, Xero Shoes help runners maintain better form over longer distances, ultimately improving overall performance.
Moreover, the lightweight nature of Xero Shoes minimizes the energy expenditure typically associated with heavier running footwear. Many runners report feeling less fatigued and more agile when wearing Xero Shoes, enabling them to push their limits and explore longer distances without discomfort.
In essence, Xero Shoes not only enhance running performance but also promote healthier running practices, making them an ideal choice for both novice and seasoned runners alike.
Research-Backed Benefits of Choosing the Right Xero Shoes
What Does Current Research Indicate About Foot Health and Xero Shoes?
Research surrounding minimalist footwear, including Xero Shoes, consistently highlights the numerous advantages these shoes offer for foot health. Studies indicate that wearing minimalist shoes leads to improved foot strength, flexibility, and overall biomechanical efficiency. This focus on natural movement has been shown to decrease common foot problems and enhance overall foot health.
For instance, one significant finding reveals that individuals transitioning to minimalist footwear often report a decrease in conditions such as plantar fasciitis and other overuse injuries. By allowing the foot to function as intended, Xero Shoes help realign the body’s mechanics, supporting better posture and movement patterns.
Additionally, studies have demonstrated that minimalist footwear can improve proprioception, resulting in enhanced balance and coordination. The natural sensation of the ground allows wearers to adjust their movements more effectively, reducing the risk of falls and injuries—an essential benefit for individuals of all ages, particularly seniors.
By embracing the principles of natural movement, Xero Shoes align with contemporary research advocating for a return to more traditional, less restrictive footwear to achieve optimal foot health.
How Do Xero Shoes Influence Biomechanics?
Xero Shoes significantly affect biomechanics by promoting a natural range of motion in the foot. This minimalist footwear design encourages a more fluid movement pattern that aligns with the body’s inherent mechanics. By allowing the foot to flex, bend, and splay as it was naturally intended, Xero Shoes can enhance shock absorption and force distribution during movement.
One notable biomechanical effect of wearing Xero Shoes is the promotion of a midfoot or forefoot strike versus the heel strike commonly associated with traditional running shoes. This adjustment can lead to reduced impact forces on the joints, thereby lowering the risk of injury. Additionally, the shoes encourage natural arch engagement, which is essential for effective shock absorption and overall foot stability.
As a result, individuals often experience greater comfort and efficiency during physical activities, leading to more enjoyable and less taxing movement. This transition towards a more natural biomechanical approach can enhance athletic performance while minimizing wear and tear on the body over time.
What Long-Term Benefits Can Minimalist Footwear Provide?
The long-term benefits of adopting minimalist footwear like Xero Shoes are extensive and significant. By consistently wearing these shoes, individuals can experience sustained improvements in foot health, gait mechanics, and overall movement efficiency.
Over time, regular use of minimalist footwear promotes the strengthening of foot and leg muscles, contributing to enhanced stability and a reduced risk of injury. Many users report that their feet become more adaptable and resilient, facilitating easier transitions between various activities and terrains.
Moreover, long-term wear can lead to improved posture and alignment, as the natural biomechanics promoted by Xero Shoes foster a more balanced and efficient movement pattern. This alignment is crucial for preventing chronic pain and discomfort associated with poor foot health.
Additionally, adopting a minimalist approach may inspire a more active lifestyle, as users often feel more at ease engaging in a variety of physical activities. The cumulative effect of these advantages can lead to a healthier, more active life, enabling individuals to remain mobile and engaged as they age.
Techniques for Selecting the Perfect Xero Shoes for Your Needs
How Active Are You?
Choosing the right Xero Shoes primarily depends on your activity level. Various models are specifically designed for distinct activities, catering to different intensities and frequencies. To ensure you make the most suitable choice in footwear, consider the following actionable steps:
1. Evaluate Your Activities: Identify the primary activities you participate in, such as casual walking, running, or hiking.
2. Match Models to Activities: Explore Xero models designed for specific activities. For instance, the Prio is ideal for running, while the TerraFlex excels in hiking.
3. Consider Frequency: If you plan to wear the shoes daily, prioritize models that emphasize durability and comfort for extended use.
4. Assess Intensity: For high-intensity activities, seek shoes that offer additional support and traction to enhance performance and minimize injury risk.By considering your activity level, you can ensure that you select Xero Shoes that not only meet your needs but also enrich your experience, regardless of how dynamic your lifestyle may be.
What Are Your Specific Foot Health Requirements?
When selecting Xero Shoes, it is crucial to assess your unique foot health needs. Understanding any existing conditions and specific requirements will guide you in choosing the appropriate model that offers the necessary support, flexibility, and comfort. Consider these factors when evaluating your foot health:
1. Arch Support: Determine whether you have high, low, or neutral arches, as this will influence which model best suits your foot structure.
2. Foot Width: Some individuals may require wider options, while others might prefer a snug fit. Check the availability of different widths within specific models.
3. Past Injuries: If you have a history of foot injuries, consider models with added cushioning or support in the necessary areas.
4. Flexibility Needs: Depending on your foot’s flexibility, some models may cater better to individuals who require more or less movement.By evaluating these aspects of your foot health, you can make a well-informed decision regarding which Xero Shoes will fulfill your specific requirements, ultimately leading to improved comfort and performance.
How to Ensure Your Xero Shoes Fit Perfectly?
Achieving the ideal fit is essential for both comfort and performance when wearing Xero Shoes. Here are some effective strategies to help you find the right size and fit:
1. Measure Your Feet: Use a ruler or measuring tape to measure both the length and width of your feet to determine your exact size.
2. Try Different Models: Xero Shoes come in various styles, so try on multiple models to discover which one feels the most comfortable and supportive.
3. Walk Around: Spend some time walking in the shoes you are considering. Pay attention to how they feel during movement, ensuring there is no pinching or excessive tightness.
4. Check for Toe Space: Ensure there’s enough room for your toes to wiggle without feeling cramped, as this is crucial for comfort during prolonged wear.
5. Adjust Laces: Make sure the lacing system provides a secure yet comfortable fit across the top of the foot.By following these steps, you can ensure a proper fit for your Xero Shoes, enhancing both comfort and performance across all your activities.
What Terrain Will You Be Exploring?
Selecting the right Xero Shoes also significantly depends on the terrain you will be navigating. Different models offer varying levels of traction, support, and protection tailored to specific environments. When making your selection, consider the following factors:
1. Terrain Type: Determine whether you will be walking on roads, trails, or uneven surfaces. Each condition requires distinct design features for optimal performance.
2. Traction Requirements: Look for models with appropriate outsole patterns that provide grip on specific surfaces, such as rocky trails or wet pavement.
3. Protection Level: If traversing rough terrains, opt for shoes with added toe protection and rugged construction to endure impacts.
4. Flexibility vs. Stability: Certain terrains may require a balance between flexibility and stability. For example, trail running may demand flexibility, while hiking may require stability.By understanding your preferred terrain, you can select Xero Shoes that will optimize your performance, ensuring you feel confident and secure, regardless of where your adventures take you.
Key Maintenance Tips to Prolong the Life of Your Xero Shoes
How to Clean Your Xero Shoes Effectively
Proper care for your Xero Shoes is vital for maintaining their condition and extending their lifespan. Regular cleaning keeps their performance at its peak. Here are some straightforward steps for effectively cleaning your Xero Shoes:
- Remove Debris: Begin by eliminating any loose dirt or debris from the uppers and soles using a soft brush or cloth.
- Hand Wash: Utilize a mild soap mixed with water to gently cleanse the shoes. Avoid harsh chemicals that could damage the materials.
- Scrub Gently: Employ a soft brush or cloth to scrub away stubborn stains, focusing on areas that tend to accumulate dirt and grime.
- Rinse Thoroughly: Rinse the shoes with clean water to remove any soap residue, ensuring no cleaning agents remain that could negatively affect the materials.
- Air Dry: Allow the shoes to air dry in a shaded area, steering clear of direct sunlight or heat sources that might warp or damage them.
- Regular Maintenance: Clean your shoes consistently, especially after outdoor activities, to sustain their performance and appearance.
By adhering to these cleaning steps, you can extend the lifespan of your Xero Shoes, ensuring they remain functional and stylish for all your adventures.
Repairing and Maintaining the Quality of Your Xero Shoes
Xero Shoes are constructed for durability, but occasional repairs may be necessary to prolong their lifespan. Learning how to maintain and repair them can keep them functional for years. Consider the following maintenance tips:
1. Inspect Regularly: Check for signs of wear and tear, such as frayed laces or worn-out soles, and address these issues promptly.
2. Replace Laces: If laces become damaged or frayed, replace them to ensure a secure fit and proper support.
3. Patch Holes: For small punctures or holes in the material, use a fabric patch or adhesive to seal them and prevent further damage.
4. Store Properly: When not in use, keep your Xero Shoes in a cool, dry place to avoid mold or material degradation.
5. Consult the Manufacturer: If you encounter significant damage, don’t hesitate to reach out to Xero Shoes for repair options or warranty information.By incorporating these maintenance practices, you can keep your Xero Shoes in prime condition, ensuring they support you on countless adventures.
What Is the Expected Lifespan of Xero Shoes?
The lifespan of Xero Shoes can vary based on usage and care. With proper maintenance, these shoes can endure many miles while delivering long-lasting comfort and performance. Typically, Xero Shoes are known to withstand extensive wear, often lasting between 500 to 1000 miles depending on the model and the conditions in which they are utilized.
Factors such as terrain, frequency of use, and care practices play a significant role in determining their longevity. For instance, shoes primarily used on rugged trails may wear down more quickly than those used on softer surfaces. Additionally, regular cleaning and appropriate storage can enhance their lifespan.
Users can also extend the life of their Xero Shoes by monitoring signs of wear and addressing any issues early on. By following recommended maintenance practices, you can enjoy the benefits of your Xero Shoes for an extended period.
Your Most Common Questions about Xero Shoes Answered
What Sets Xero Shoes Apart from Traditional Sneakers?
Xero Shoes are designed with a minimalist philosophy, promoting natural foot movement and a barefoot sensation, unlike traditional sneakers, which often contain excessive cushioning and support that restrict natural biomechanics.
Can Xero Shoes Alleviate Foot Pain?
Many users report relief from various foot pains after transitioning to Xero Shoes, as they encourage better foot alignment and natural movement, potentially reducing strain on muscles and joints.
Are Xero Shoes Suitable for All Foot Types?
Yes, Xero Shoes come in a variety of models to accommodate different foot types and health needs, including options for various arch heights and widths to ensure an optimal fit.
How Should I Gradually Transition to Wearing Xero Shoes?
Begin by wearing Xero Shoes for short periods, gradually increasing the duration as your feet adjust to the minimalist design. This method helps strengthen foot muscles and prevent discomfort.
What Activities Do Xero Shoes Best Support?
Xero Shoes are versatile and suitable for a broad range of activities, including running, hiking, walking, and casual wear. Each model is designed with specific features to optimize performance for different activities.
How Do I Determine the Right Size for Xero Shoes?
Measure both the length and width of your feet and refer to Xero’s sizing guide. Trying on multiple models can also help you find the best fit for your comfort and support needs.
Can I Use Xero Shoes for Trail Running?
Absolutely, many Xero Shoe models, such as the TerraFlex, are specifically engineered for trail running, providing additional traction and protection for rugged terrains.
Are Xero Shoes Waterproof?
Most Xero Shoes are not waterproof, but certain models may include water-resistant features. It’s advisable to consult the specific product details for waterproof capabilities.
How Do I Clean My Xero Shoes Properly?
To clean Xero Shoes, start by removing debris, then wash with mild soap, scrub gently, rinse thoroughly, and allow them to air dry away from direct sunlight or heat sources.
What Warranty Coverage Is Available for Xero Shoes?
Xero Shoes typically come with a warranty that covers manufacturing defects. For specific warranty details, it is best to consult the manufacturer’s website or contact customer service.
The Article Discover Top Xero Shoes: Your Ultimate Buying Guide appeared first on My Shoes Finder
Explore Related Topics:
Xero Shoes for Children: 2025 Developmental Podiatry Guide Xero Shoes for Bunions: 2025 Guide to Hallux Valgus Improvement
 Xero Shoes for Wide Feet: 2025 Fitting Guide and Model Recommendations
 Best Xero Shoes for Pickleball: Top Recommendations
 Sizing Xero Shoes: The Ultimate Universal Guide
 Xero Shoes with the Most Cushion: Your Ultimate Guide
The Article Xero Shoes Buying Guide: Discover the Best Options Was Found On https://limitsofstrategy.com
-
Face Shape Cuts: Your Essential Guide to Perfect Hairstyles
Comprehensive Guide to Understanding Face Shapes for Ideal Haircuts
Essential Face Shapes to Identify for Optimal Haircut Choices
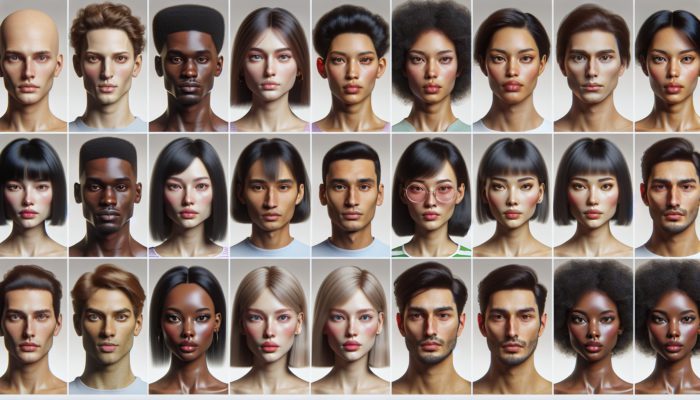
Recognizing the different face shapes is essential for selecting the most suitable haircuts. Familiarizing yourself with prevalent shapes such as oval, round, square, and heart can greatly influence your haircut decision-making process. By pinpointing your specific face shape, you can choose a haircut that highlights your unique features, enhancing your overall appearance. Below, you will find detailed characteristics that define each face shape:
- Oval: This shape exhibits well-proportioned features with cheekbones slightly wider than the jawline, tapering to a narrower chin.
- Round: Equal measurements in width and length characterize this shape, showcasing full cheeks and a gently rounded jawline.
- Square: This shape is marked by a strong jawline, with uniform widths at both the forehead and jawline, culminating in a prominent square chin.
- Heart: Recognizable by a broader forehead, prominent cheekbones, and a chin that tapers to a point.
By identifying these unique traits, individuals can make more informed choices about their hairstyles. Selecting a haircut that aligns with one’s natural features can dramatically boost attractiveness, leading to a more polished and confident appearance.
Steps to Accurately Determine Your Face Shape
Accurately identifying your face shape requires careful measurement of your facial dimensions. Employ a flexible tape measure to capture the width of your forehead, cheekbones, and jawline, as well as the length of your face from your hairline to your chin. This systematic measurement approach will yield the precise data necessary for a comprehensive assessment of your facial structure.
For example, if your forehead is the widest point while your jawline is narrower, you may have a heart shape. Conversely, if your measurements are fairly uniform, you might be dealing with either a round or square shape. This measuring technique not only aids in understanding your face shape but also helps in selecting the most flattering haircut that complements your unique features.
The Importance of Knowing Your Face Shape for Haircut Selection
Choosing the right haircut plays a vital role in enhancing your natural features while achieving balance and symmetry in your face shape, which greatly influences your overall appearance. An expertly chosen haircut can highlight your best attributes, creating a harmonious and appealing look. Understanding your face shape is crucial as it guides you toward styles that not only flatter your features but also reflect your personal style and identity.
For instance, a long, layered haircut may beautifully frame an oval face, while a blunt cut can accentuate the strong lines of a square jawline. Each face shape has specific cuts that can elevate its appearance, making awareness of your face shape a fundamental element in hair styling. By considering this aspect, individuals can transform their looks, significantly enhancing their confidence through a hairstyle that suits them perfectly.
Understanding How Face Shape Influences Hairstyle Choices

Every face shape is suited to particular hairstyles, making it essential to understand your unique face shape when selecting cuts that enhance your features and complement the natural contours of your face. For example, individuals with oval faces often find they can wear a wide range of styles effectively, while individuals with round faces may prefer haircuts that elongate their appearance for a more flattering look.
Additionally, the angle of your jawline is a critical factor in determining your ideal hairstyle. For instance, softening a square jaw with layered cuts can create a more approachable and feminine appearance. Similarly, hairstyles that introduce width to a narrow forehead can help balance features across all face shapes. By aligning your hairstyle choices with your face shape, you can achieve a more flattering and harmonious overall appearance.
Effective Techniques for Styling Hair Based on Face Shapes
Tailoring your hair styling to correspond with your face shape is essential for achieving the most flattering look possible. Techniques such as layering, incorporating bangs, or choosing specific partings can significantly influence how your facial features are perceived. For instance, if you have a round face, opting for long, side-swept bangs can elongate your appearance while softening the width of your face.
Here are some crucial styling tips customized for your specific face shape:
- Oval: Almost any hairstyle works well; consider long layers or stylish bobs for versatility and chicness.
- Round: Long hairstyles, asymmetrical cuts, and side parts can create an elongated effect that flatters.
- Square: Soft layers and waves can help to round out sharp angles, offering a gentler and softer look.
- Heart: Chin-length bobs and side-swept bangs can soften a wider forehead while drawing attention to the eyes.
By employing these techniques, you can accentuate your facial features while ensuring that your hairstyle reflects your personal style, all while maintaining a balanced appearance that complements your face shape.
Expert Insights on Customizing Haircuts for Distinct Face Shapes
Techniques Employed by Professional Stylists to Tailor Haircuts to Face Shapes
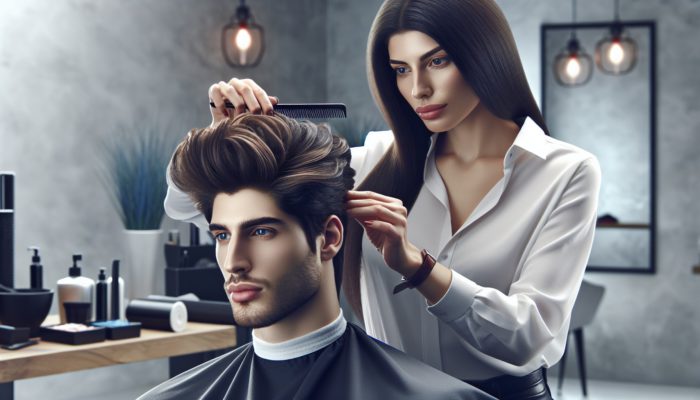
Professional hairstylists utilize an array of techniques to adapt haircuts for various face shapes, ensuring that each style enhances the individual’s unique features. Methods such as layering, texturizing, and shaping are among the most effective strategies for achieving a balanced and flattering appearance. Layering introduces volume and movement to the hair, while texturizing softens harsh lines, making a haircut more forgiving of the natural contours of the face.
For those interested in replicating professional techniques at home, consider the following actionable steps:
1. Layering: Employ sharp scissors to create soft layers, gradually reducing length around the face for a tailored effect.
2. Texturizing: Utilize thinning shears to soften thick hair and reduce bulk, resulting in a more manageable and stylish appearance.
3. Shaping: Regularly trim split ends and shape your hair to eliminate excess weight, leading to a more defined and appealing silhouette.Incorporating these techniques into your haircare regimen allows you to achieve a professional finish at home, effectively customizing your haircut to suit your face shape.
Tailoring Bangs to Complement Your Face Shape
Bangs can dramatically alter your appearance and should be selected thoughtfully based on your face shape. For example, soft, side-swept bangs can provide balance for a square face, softening angular features, while blunt bangs can effectively add width to a longer face, creating a more balanced appearance.
When choosing bangs, consider the following styles that best suit different face shapes:
- Oval: Blunt bangs or curtain bangs can beautifully highlight your features.
- Round: Side-swept bangs are ideal for elongating the face, creating a more oval appearance.
- Square: Soft, textured bangs can diminish the harshness of a strong jawline, adding a touch of femininity.
- Heart: Wispy bangs can soften a wider forehead while drawing attention to the eyes.
These adaptations ensure that bangs enhance rather than detract from your overall look. By aligning your bangs with your face shape, you can achieve a flattering and well-balanced style that complements your facial features perfectly.
Assessing the Impact of Hair Texture on Haircut Choices
Hair texture significantly influences how a haircut appears on your face shape. Fine hair often requires added volume, which can be achieved through layering or using suitable styling products, whereas thick hair may need thinning to prevent an overwhelming appearance. Understanding your hair texture is crucial for a successful haircut, as it dictates the best methods for styling and upkeep.
For example, if you have fine hair, opting for a layered cut can provide the necessary body, allowing it to frame your face beautifully. Conversely, thick hair may benefit from a blunt cut that eliminates excess weight while maintaining a sleek and polished look. Recognizing the interplay between hair texture and face shape can guide you in making informed decisions that enhance your overall style and appearance.
How to Accurately Assess Your Face Shape
Determining your face shape is vital for selecting the optimal haircut, as it informs your styling choices. To accurately assess the dimensions of your face, stand before a mirror and use a flexible tape measure. Measure the width of your forehead, cheekbones, and jawline, as well as the length of your face from the hairline to your chin.
Once you have these measurements, compare them against the characteristics of common face shapes. For instance, if your forehead is the widest part of your face and your jaw is narrower, you may have a heart-shaped face. If the measurements are relatively equal across the forehead, cheekbones, and jawline, you might have either a round or square face. This method provides clear insights into your face shape, assisting in selecting the most flattering hairstyles tailored to your features.
Optimal Haircuts for Each Face Shape
Different face shapes are suited to various hairstyles; therefore, identifying which cuts work best can greatly enhance your overall appearance. For instance, round faces may benefit from long layers that add length and definition, while oval faces can typically wear almost any style due to their balanced proportions.
Here is a curated list of recommended cuts tailored for each face shape:
- Oval: Bobs, long layers, and pixie cuts enhance the natural balance of this face shape.
- Round: Long layers, asymmetrical cuts, and side parts elongate the face, creating a more sophisticated look.
- Square: Layered cuts, soft waves, and side-swept bangs soften the jawline and add femininity.
- Heart: Chin-length bobs and soft layers balance the forehead and beautifully highlight the eyes.
- Diamond: Layered bobs and shoulder-length cuts enhance cheekbones while softening angular features.
Choosing a haircut that complements your face shape can lead to a remarkable difference in how you feel and how you present yourself to the world.
Making Informed Haircut Decisions Based on Face Shape
Flattering Haircuts for Oval Faces
Individuals with oval faces enjoy exceptional versatility, allowing for a broad range of hairstyles. With their balanced proportions, those with this face shape can wear a variety of cuts, from chic bobs to long layers and trendy pixie cuts, all of which flatter and enhance their natural features. A significant advantage of an oval face is the ability to successfully carry off nearly any hairstyle.
Consider opting for styles that add texture and volume, such as soft waves or tousled layers, to give your hair movement and life. Alternatively, a sleek bob or a classic pixie cut can highlight the natural symmetry of your face. The primary goal is to enhance your inherent balance while showcasing your unique style, making the oval face shape one of the most adaptable and alluring of all.
Styling Tips for Square Face Shapes
Square faces benefit from haircuts that soften the jawline and create a more rounded appearance. To achieve this effect, layered cuts, side-swept bangs, and soft waves serve as excellent choices. These styles help balance the strong angles of a square face, providing a more feminine and harmonious look.
For success with your hairstyle, consider incorporating layers that begin at the chin to frame the face and add movement. Additionally, soft waves can create the illusion of a more oval shape, which is often considered more desirable. Overall, the aim is to soften the strong jawline while allowing the hair to flow gracefully around the face, thereby enhancing the overall appearance and presenting a more inviting look.
Best Hairstyles for Round Faces
Individuals with round faces look best with hairstyles that add length and definition. Cuts such as long layers, asymmetrical styles, and side parts can elongate the face, creating a more oval appearance. The key is to avoid styles that add width, as this may accentuate the roundness of the face.
Long layers prove particularly effective, as they draw the eye downward and create a vertical line that elongates the face. Asymmetrical cuts can also work wonders, offering an edgy flair while providing the necessary elongation. Furthermore, side parts help create the illusion of length, steering clear of middle parts that may emphasize roundness. By focusing on these styles, individuals with round faces can achieve a flattering and sophisticated appearance that enhances their natural beauty.
Flattering Hairstyles for Heart-Shaped Faces
Heart-shaped faces are best complemented by styles that soften the forehead while accentuating the eyes. Haircuts featuring soft layers, side-swept bangs, and chin-length bobs are particularly effective, as they create balance and harmony in the proportions of the face.
Soft layers draw attention away from a wider forehead while emphasizing the cheekbones. Side-swept bangs serve as an excellent choice for heart-shaped faces, framing the eyes beautifully and reducing emphasis on the forehead. Additionally, chin-length bobs elegantly balance the proportions, providing a polished and sophisticated appearance. Overall, focusing on these styles helps create a softer, more inviting look for those with heart-shaped faces.
Choosing Cuts for a Diamond Face Shape
Diamond faces are characterized by high cheekbones, a narrow forehead, and a pointed chin. To complement this face shape, cuts that enhance the cheekbones while softening the angles are ideal. Layered bobs, shoulder-length cuts, and wispy bangs stand out as excellent choices, as they add width to the forehead and jawline while accentuating the cheekbones.
A layered bob can provide a fuller appearance, while shoulder-length styles contribute to balance and elongate the face. Wispy bangs are another fantastic option, softening the forehead while drawing attention to the eyes. By selecting styles that enhance the natural beauty of a diamond face shape, individuals can achieve a striking and harmonious look that accentuates their features.
Research-Driven Advantages of Customizing Haircuts to Face Shapes
How Does the Right Haircut Boost Your Confidence?
A haircut that complements your face shape can profoundly impact your confidence levels. When you feel good about your appearance, it often leads to improved self-esteem and a greater sense of overall well-being. The psychological benefits of a flattering haircut are significant, as they contribute to a positive self-image and an increased sense of self-worth.
When individuals select hairstyles that enhance their features, they typically receive compliments, which further boosts their confidence. For example, a well-suited haircut can draw positive attention and help others perceive the individual favorably. This transformation can empower individuals to approach social situations with enhanced self-assurance, ultimately leading to a more fulfilled and confident life.
Aesthetic Benefits of Choosing the Right Haircut
The right haircut has the potential to enhance your natural beauty while creating a more harmonious overall appearance. A suitable hairstyle highlights your best features while establishing a balanced look, making you feel more attractive and well put together. When individuals look their best, they are more inclined to express themselves authentically and confidently.
By aligning a haircut with your face shape, it is possible to accentuate certain qualities that make you unique. For example, a soft, layered cut can beautifully highlight your cheekbones, while a bob may frame your face gracefully. These aesthetic advantages contribute to a feeling of self-assurance and well-being, an invaluable asset in both personal and professional environments.
How Haircuts Influence Age Perception
Certain haircuts can significantly impact how others perceive your age. Soft, layered cuts often have the effect of making you appear younger, creating a fresh and vibrant look. In contrast, harsh lines or overly straight styles might inadvertently add years to your appearance. Understanding this dynamic is crucial when selecting a cut that aligns with your desired image.
For instance, layers can add movement and softness, contributing to a more youthful look. Conversely, a blunt cut or overly structured style may create a more mature appearance. By choosing a hairstyle that complements your face shape and embodies a youthful spirit, you can effectively manage how you are perceived, helping you feel vibrant and rejuvenated as you navigate through life.
Essential Tips for Maintaining Your Haircut
Recommended Schedule for Hair Trims
Regular trims are vital for maintaining the shape and health of your haircut. Depending on your hair growth rate, scheduling trims every 6-8 weeks can keep your cut looking fresh and well-maintained. This routine not only preserves your hairstyle but also enhances the overall health and vitality of your hair.
For individuals with shorter styles, frequent trims are crucial to maintaining the desired length and shape. Longer hair, while requiring less frequent cuts, still benefits from regular touch-ups to remove split ends and promote healthy growth. Establishing a maintenance schedule ensures that your haircut remains sharp and stylish, reducing the likelihood of needing a complete overhaul down the line.
Products That Enhance Your Haircut’s Appearance
Utilizing the right hair products can dramatically elevate the look and feel of your haircut. Mousses, gels, and serums are specifically formulated to add volume, texture, and hold, ensuring that your hairstyle maintains its intended shape and style throughout the day. Selecting products tailored to your hair type and desired style is essential for achieving optimal results.
For example, volumizing mousse can provide lift for finer hair, while smoothing serums can tame frizz and enhance shine. Texturizing sprays can add definition to layered cuts, allowing for a more tousled and effortless look. By incorporating the right products into your haircare routine, you can maximize the impact of your cut, ensuring it looks its best at all times.
Mastering Home Hair Styling
Learning to style your hair at home can save both time and money while providing the freedom to experiment with different looks. By using the appropriate tools and techniques, you can achieve salon-quality results without leaving the comfort of your home.
Here’s a list of essential styling tools and their uses:
- Hairdryer: Ideal for blow-drying and creating volume or smoothing hair.
- Flat Iron: Perfect for straightening hair or crafting sleek looks.
- Curling Iron: Excellent for adding waves or curls for a more textured style.
- Round Brush: Great for creating volume and shape during blow-drying.
- Hair Clips: Useful for sectioning hair while styling, ensuring precision.
By mastering the use of these tools, you can effectively style your hair at home, tailoring your look to suit your face shape and personal flair, ultimately enhancing your overall appearance.
Protecting Your Hair from Damage
Utilizing heat protectants and avoiding excessive heat styling are crucial steps in preventing hair damage. Regular conditioning treatments keep your hair healthy and your haircut looking sharp. Ensuring that your hair is well-nourished contributes to its overall vitality and enhances the longevity of your haircut.
Incorporating a weekly deep conditioning mask can work wonders in restoring moisture and shine, particularly for those with color-treated or heat-styled hair. Furthermore, limiting heat exposure and occasionally allowing your hair to air dry can significantly reduce damage. Emphasizing care and protection in your hair routine helps maintain the integrity of your cut, allowing it to remain as captivating as the day you first got it.
Avoiding Common Haircut Mistakes
Steering clear of common mistakes can help preserve your haircut and maintain its intended style. Over-washing, using unsuitable products, and neglecting trims are among the pitfalls to be cautious of. These missteps can lead to a lackluster appearance and hinder the full potential of your haircut.
For instance, washing hair too frequently can strip it of natural oils, leading to dryness and damage. Additionally, selecting products that do not align with your hair type may cause build-up or complicate styling. Sticking to a consistent trimming schedule also helps prevent split ends and maintains the shape of your haircut. By being mindful of these common pitfalls, you can extend the life of your cut and keep it looking its best at all times.
Emerging Trends in Haircuts for Different Face Shapes
Contemporary Hair Trends for Oval Faces
Individuals with oval faces can embrace a variety of trends, including the popular shag cut and curtain bangs. These modern styles add texture and volume, enhancing the versatility of an oval face shape. The shag cut, characterized by its choppy layers, offers movement and a relaxed feel, making it perfect for those who desire a stylish yet laid-back look.
Curtain bangs represent another hot trend that works beautifully with oval faces, framing the features without overwhelming them. This soft fringe can be styled in numerous ways, allowing for personalization and an effortlessly chic vibe. As trends evolve, individuals with oval faces can confidently experiment with new styles, showcasing their ability to adapt and reinvent their looks in fashionable ways.
How Square Faces Influence Current Hair Trends
Square faces are inspiring trends such as soft, layered bobs and long, tousled looks that soften the strong jawline and create a more fashionable appearance. These cuts are particularly appealing, as they address the unique characteristics of square faces while remaining trendy and stylish.
Soft, layered bobs can break up the angularity of a square face, providing a more rounded, feminine silhouette. Similarly, long, tousled cuts can add movement and softness, making them incredibly on-trend for those looking to enhance their features. By recognizing the influence of square faces on current trends, individuals can select hairstyles that resonate with their face shape while keeping up with the latest styles.
Popular Trends for Round Faces
Round faces are currently embracing trends like long, layered cuts and side-swept bangs, both of which add length and definition to the overall look. These styles are not only fashionable but also help create the illusion of an elongated face, making them particularly advantageous for individuals with round features.
Long, layered hairstyles draw the eye downward, providing a sophisticated appearance. Side-swept bangs are equally effective, helping to break up the roundness while adding an elegant touch. By capitalizing on these trends, individuals with round faces can achieve a stylish and contemporary look that enhances their natural beauty and complements their features.
Frequently Asked Questions about Face Shapes and Haircuts
What is the best way to determine my face shape?
You can accurately identify your face shape by measuring the width of your forehead, cheekbones, and jawline, along with the length of your face. After taking these measurements, compare them to common face shape characteristics to identify your shape.
Which hairstyles are ideal for an oval face?
Oval faces are versatile and can suit nearly any hairstyle; however, bobs, long layers, and pixie cuts are particularly flattering as they enhance the natural balance of this face shape.
What types of bangs are most suitable for a square face?
Soft, textured bangs and side-swept styles are ideal for square faces, as they soften the jawline and add femininity to the overall look, creating a more harmonious appearance.
How can I effectively maintain my haircut?
Regular trims every 6-8 weeks are essential for maintaining the shape and health of your haircut. Adjust this schedule based on your hair growth rate and personal style preferences to ensure optimal results.
Which products should I use to enhance my haircut?
Utilizing the right products, such as mousses, gels, and serums, can significantly enhance your cut by adding volume, texture, and hold, keeping your hairstyle looking fresh and vibrant throughout the day.
What steps can I take to protect my hair from damage?
To protect your hair from damage, it is essential to use heat protectants when styling, limit heat exposure, and incorporate regular conditioning treatments into your haircare routine for optimal health.
What common mistakes should I avoid when caring for my haircut?
Common mistakes include over-washing, using unsuitable products, neglecting trims, and failing to tailor your styling routine to your specific hair type, all of which can hinder the potential of your haircut.
What hairstyles are trending for round faces?
Trending hairstyles for round faces include long, layered cuts and side-swept bangs, which add length and create a more oval appearance, enhancing the overall aesthetic.
How does the right haircut influence my confidence?
A well-chosen haircut can significantly boost your confidence by enhancing your natural beauty and contributing to a positive self-image, leading to increased self-esteem and overall well-being.
Which styles are most flattering for a heart-shaped face?
Heart-shaped faces are complemented by soft layers, chin-length bobs, and side-swept bangs, which effectively balance the forehead while beautifully highlighting the eyes.
Connect with us on Facebook!
The Article: Adapting Cuts to Face Shapes: Universal Guide appeared first on Amitys Hair Salon.
The Article Face Shape Cuts: The Ultimate Universal Guide Was Found On https://limitsofstrategy.com
-
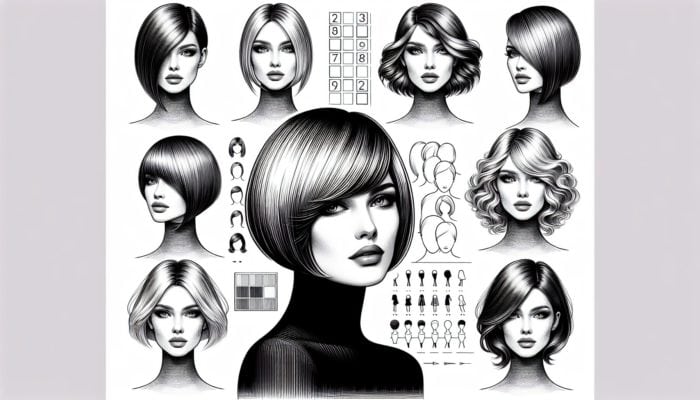
Graduated Bobs: Modern Style with Timeless Layered Chic
Discover the Allure of Graduated Bobs for a Stylish Transformation
What Makes Graduated Bobs a Fashion Must-Have?
The increasing popularity of graduated bobs is largely due to their remarkable versatility and undeniable fashion appeal. These trendy hairstyles can be customized to flatter various face shapes and hair types, making them a go-to choice for fashion-conscious individuals worldwide. Their adaptability allows for effortless transitions from casual outings to formal occasions, ensuring you always look your best. Key elements contributing to the captivating charm of graduated bobs include:
- Flattering for Different Face Shapes: Graduated bobs can be tailored to highlight individual facial features, appealing to a diverse range of people.
- Textured Look: The layered cut adds depth and movement, keeping the hairstyle vibrant and dynamic.
- Low Maintenance: Compared to longer hairstyles, graduated bobs are generally easier to style and manage, saving precious time.
- Trend Versatility: They can be effortlessly updated with new colors, textures, or accessories, ensuring a fresh appearance.
- Professional Vibe: Graduated bobs convey confidence and professionalism, making them ideal for workplace environments.
- Ageless Appeal: This hairstyle transcends age, appealing to both younger and older audiences alike.
- Adjustable Lengths: The length can be customized to fit personal preferences, ranging from chin-length to shoulder-grazing styles.
- Stylish and Sophisticated: The refined lines and structured silhouette of a graduated bob exude elegance and class.
These features come together to create a hairstyle that is not only fashionable but also functional, catering to a variety of aesthetics and lifestyles. Graduated bobs are an excellent option for those looking to make a bold statement while maintaining practicality in their everyday routines.
Layering Techniques to Elevate Your Graduated Bob Style
Utilizing effective layering techniques is crucial for enhancing the beauty of graduated bobs. By carefully placing layers, hairstylists can infuse volume, texture, and movement, transforming a basic bob into a stunning masterpiece. Here are some valuable layering methods tailored for different hair types:
- Point Cutting: This method softens the ends, making it ideal for fine hair that requires added volume without excess bulk.
- Thinning Shears: Using thinning shears effectively reduces weight from thick hair while maintaining length, resulting in a light and airy feel.
- Face-Framing Layers: These layers enhance facial features and add dimension, making them suitable for all hair types.
- Long Layers: For medium to thick hair, long layers create movement and body, allowing for easy styling.
- Choppy Layers: This contemporary technique excels at generating a textured appearance, particularly in straight hair.
- Subtle Graduations: Gradual layering from back to front enhances the bob’s shape without being overly dramatic.
- Invisible Layers: These layers provide depth without visible lines, ideal for those preferring a sleek look.
- Feathering: This technique softens the overall appearance and adds a whimsical touch, especially flattering for soft, wavy textures.
Incorporating these techniques can elevate a graduated bob from ordinary to extraordinary. A skilled stylist will assess individual hair textures and preferences to select the most effective layering strategy, ensuring a chic and customized finish.
Proven Strategies for Achieving Effortless Everyday Elegance
Achieving everyday sophistication with a graduated bob hinges on using the right styling products and techniques. This not only enhances your overall appearance but also ensures that your hairstyle remains polished throughout the day. Here are some expert tips to maintain your fabulous look:
First and foremost, investing in high-quality styling products can significantly improve your results. Applying a lightweight mousse or volumizing spray to damp hair before blow-drying adds body and lift. For those with curly or wavy hair, a curl-enhancing cream defines texture while managing frizz. Additionally, using a heat protectant spray is essential when styling tools are involved, as it shields hair from damage while maintaining its sleekness and gloss.
Next, consider utilizing the right tools. A round brush is invaluable during blow-drying, helping to achieve a smooth finish and adding root volume. For a relaxed vibe, a flat iron can craft gentle waves or bends throughout the hair, enhancing the chicness of the graduated bob. Regularly changing your part can also refresh the style and promote even volume distribution.
To maintain the style throughout the day, a few finishing touches are necessary. A light-hold hairspray can provide structure without weighing the hair down, ensuring that the bob retains its shape. For a quick refresh, dry shampoo can be a lifesaver, absorbing excess oil and adding texture. Lastly, keep a few bobby pins handy to secure any loose strands or keep hair away from the face for a polished look.
Expert Insights for Selecting Your Ideal Graduated Bob

How Professional Stylists Can Assist in Your Bob Selection Journey
When it comes to finding the perfect graduated bob, the expertise of a professional stylist proves invaluable. An experienced hairstylist comprehends the nuances of various hair textures and face shapes, offering personalized advice to ensure that the chosen style is both flattering and practical. For example, a stylist might recommend a gently rounded bob for someone with a round face to create the illusion of length or an angular bob for a square face to soften sharp features.
Real-life examples showcase how professional guidance can dramatically alter a client’s hairstyle. For instance, a stylist may suggest incorporating long layers into the bob for a client with thick, wavy hair, reducing bulk while enhancing movement. Conversely, an individual with fine hair could benefit from a blunt cut that creates the appearance of density. Stylists consider not only hair type but also lifestyle factors, including the time a client is willing to dedicate to daily styling.
Moreover, an expert can suggest color treatments that elevate the graduated bob. Subtle balayage can add depth and dimension, while highlights may enhance texture and movement. This personalized approach ensures that clients leave the salon with a hairstyle that is chic and seamlessly integrates into their overall aesthetic.
Additionally, professionals keep abreast of current trends and can offer insights on seasonal style variations. For example, during colder months, a thicker graduated bob may be recommended to frame the face warmly, while summer might inspire lighter, softer layers for a breezier appearance. Consulting with an expert allows individuals to confidently embrace the graduated bob, ensuring a style that resonates with their personality while highlighting their natural beauty.
What Are the Latest Trends in the World of Graduated Bobs?
Staying informed about the latest trends in graduated bobs is crucial for those wanting to maintain a fresh and fashionable appearance. Contemporary interpretations of this classic style have emerged, featuring subtle adjustments that elevate the traditional bob into something distinctive and trendsetting. Currently, one prominent trend involves the incorporation of asymmetry, where one side is cut longer than the other, introducing a modern flair to the bob.
Another exciting trend includes the use of texture. Stylists are increasingly employing techniques such as slicing and choppy layers to create a more dynamic look. This approach not only adds visual interest but also simplifies the at-home styling process. Length variations are also gaining popularity; some individuals prefer a longer bob that grazes the collarbone, allowing for additional styling options.
Bold colors are making significant waves in the realm of graduated bobs. From vibrant hues to pastel shades, color can dramatically enhance the overall style. Techniques like ombré and balayage are currently trending, allowing for a seamless blend of colors that adds depth to the hairstyle.
To incorporate these trends into your look, individuals can consult with their stylists about personalized color options or texturing techniques that suit their hair type. They may also experiment with styling tools to achieve the desired effect – for instance, using a texturizing spray to enhance waves or curls can make a significant difference.
Moreover, staying connected through social media and beauty blogs can provide inspiration and guidance for adopting the latest trends. Engaging with these resources allows individuals to discover new styles and uncover creative ways to express themselves through their graduated bob.
Essential Guidelines for Maintaining Your Chic Graduated Bob

To keep a graduated bob looking stylish and healthy, maintenance is key. Regular trims are one of the most critical aspects of upkeep, as they prevent split ends and maintain the hairstyle’s shape. Most professionals recommend scheduling a trim every six to eight weeks, depending on hair growth and styling habits. This practice not only keeps the bob fresh but also promotes long-term hair health.
In addition to routine trims, establishing a proper hair care regimen is fundamental. Using a gentle shampoo and conditioner suited to one’s hair type can yield significant improvements. For fine hair, lightweight formulas prevent the hair from being weighed down, while thicker hair may benefit from hydrating products that reduce frizz and enhance shine.
Furthermore, heat styling can impact the longevity of a graduated bob. Professionals advise minimizing the use of heated tools and always applying a heat protectant before styling. This practice protects the hair cuticle from damage, maintaining its integrity and shine. Regular deep conditioning treatments can replenish moisture and vitality, ensuring the hair remains healthy and vibrant.
Properly storing hair products is another often-overlooked aspect of maintenance. Keeping products in a cool, dry area preserves their efficacy, while checking expiration dates ensures that only the best formulations are used. Additionally, being mindful of environmental stressors can help; wearing a hat in harsh weather or using UV protection can shield the hair from damage.
By following these expert tips, individuals can ensure their graduated bobs remain stunning and healthy, allowing them to showcase their stylish look with confidence.
Choosing the Perfect Graduated Bob to Match Your Unique Style
Evaluating Your Hair Type and Texture for the Ideal Bob
Selecting the perfect graduated bob begins with a thorough evaluation of your hair type and texture. Different hair types respond uniquely to various cutting techniques and styles, making this assessment essential for achieving the desired look. Fine hair usually benefits from shorter, blunt cuts that create the illusion of volume. A graduated bob with a slightly longer back can lift the hair without adding unnecessary weight.
For medium hair types, versatility is key. Layering techniques can introduce movement and texture, enhancing the hair’s natural body. This results in a stylish and effortless look, perfect for those who desire a chic yet manageable style. Thick hair, on the other hand, requires a more careful approach. Graduated bobs with strategically placed layers can eliminate excess bulk while creating a flattering shape. Avoiding overly dramatic angles helps maintain the natural flow of the hair and ensures the style remains cohesive.
It’s crucial to consult with a stylist who can evaluate your hair type and texture. They can provide tailored recommendations based on your unique attributes, ensuring that the selected bob is both flattering and practical. Emphasizing the importance of communication, clients should feel empowered to discuss their desired outcomes and any concerns they may have regarding maintenance or styling.
Additionally, understanding how your hair behaves in various environments is vital. For instance, those living in humid climates may need to consider how their hair reacts to moisture and select a bob that can withstand changing conditions. Customizing your choice based on these factors guarantees a successful and sustainable hairstyle.
Selecting the Right Bob Style to Enhance Your Face Shape
Different face shapes lend themselves to specific bob styles, making it essential to choose a graduated bob that enhances your unique features. Understanding your face shape can guide you in selecting a style that elevates your natural beauty. For example, a round face can benefit from a graduated bob that is longer in the front and slightly shorter in the back, creating the illusion of length and balance.
Conversely, individuals with a square face may find that softer, rounded bobs with layers can soften angular features, while an A-line bob can add elegance and sophistication. For those with an oval face, nearly any bob style works well, but incorporating layers or texture can enhance the overall look. Heart-shaped faces can benefit from a chin-length bob with side-swept bangs, balancing the width of the forehead and drawing attention to the cheekbones.
To determine which bob style will enhance your face shape, examining proportions is vital. Consider the width of your forehead, the length of your face, and the prominence of your cheekbones. An experienced stylist can provide valuable insights, performing a face shape analysis during a consultation. They can recommend suitable variations of the graduated bob that will flatter your features and align with your personal style.
Moreover, don’t hesitate to explore different styles and variations. Trying out virtual hair applications can assist in visualizing how various bob styles may appear on you, allowing for a more informed decision. Ultimately, selecting a graduated bob that complements your face shape will not only enhance your appearance but also boost your confidence in carrying the look.
Customizing Your Bob to Reflect Your Personal Style
Your personal style plays a significant role in how you customize your graduated bob, enabling you to express your individuality through your hairstyle. Understanding your aesthetic preferences is the first step in this journey. Whether you lean towards classic elegance, edgy trends, or bohemian vibes, your choice of bob can encapsulate your style philosophy.
Customization can begin with the length and layering of the bob. If you prefer a sleek and sophisticated look, a longer bob with minimal layers may suit you best. Conversely, those who enjoy a more playful aesthetic might opt for choppy layers or a shorter cut that injects edge and excitement into their appearance. Incorporating bangs can also be a delightful way to personalize your bob, framing the face and enhancing your features.
Another aspect of customization is color. Experimenting with highlights, balayage, or even bold hues can introduce dimension and character to your graduated bob. Choosing shades that complement your skin tone can elevate your overall appearance, creating a more cohesive and visually appealing look. For instance, warm tones may suit those with golden undertones, while cooler shades may flatter individuals with porcelain complexions.
Accessorizing your bob can further enhance your expression of personal style. Hair clips, headbands, or scarves can transform the look, providing versatility in styling. Additionally, experimenting with various textures, such as straightening or curling, can offer additional opportunities to showcase your unique flair. Ultimately, customizing your graduated bob empowers you to articulate your individuality while enjoying the chicness of this timeless style.
Essential Tools and Products for Styling Your Graduated Bob
Crucial Tools for Achieving Your Perfect Graduated Bob Look
To effectively style a graduated bob, investing in the right tools is essential. The tools you select can significantly impact achieving the desired finish and help maintain the look over time. A high-quality hairdryer is fundamental; opting for one with multiple heat settings and a concentrator nozzle can direct airflow for precision styling. This feature is especially useful for creating volume and a sleek finish.
Additionally, a round brush is crucial for blow-drying techniques. It allows for the creation of body and curls at the ends, enhancing the overall shape of the bob. For those with thicker hair, a vent brush can be effective in reducing drying time and preventing frizz. The right brush can help achieve a polished look without damaging the hair.
For finishing touches, a flat iron or curling wand is indispensable. A flat iron helps achieve a sleek, straight finish, while a curling wand can create soft waves or curls for a more relaxed appearance. Choosing the appropriate barrel size allows for versatility, enabling you to switch from straight to wavy styles effortlessly.
Investing in hair clips and pins can also enhance styling. These tools are valuable for sectioning the hair during styling or securing loose strands. Moreover, a diffuser attachment for curly hair can amplify natural curls while minimizing frizz, ensuring your graduated bob remains stylish and chic.
Finally, a wide-tooth comb is essential for detangling. It reduces breakage and maintains the integrity of your bob, ensuring your hair stays healthy while looking fabulous. By equipping yourself with these essential tools, you lay the groundwork for achieving a stunning graduated bob that reflects your personal style.
Which Products Best Enhance Graduated Bob Styles?
Utilizing the right products can dramatically enhance the appearance of a graduated bob, ensuring it looks chic and healthy. A tailored styling routine starts with a high-quality shampoo and conditioner suitable for your hair type. For fine hair, volumizing products can provide lift and fullness, while those with thick hair might benefit from hydrating formulas that combat frizz and enhance shine.
Mousse or volumizing spray is essential for creating body and texture. Applying these products to damp hair before blow-drying maximizes volume and ensures a bouncy finish. For individuals looking to define waves or curls, a curl-enhancing cream can provide hold and reduce frizz, allowing for a more polished appearance.
Hairspray is another critical product for maintaining a graduated bob. A light-hold formula can help set the style while allowing for movement, ensuring that it doesn’t become stiff or heavy. For those prone to oiliness, dry shampoo is invaluable as it refreshes the hair and adds texture between washes, facilitating easy styling.To achieve a sleek finish, consider using a shine serum or lightweight oil. These products can smooth down flyaways and impart an enviable gloss to the bob, enhancing its overall allure. However, it’s essential to apply them sparingly to avoid weighing the hair down.
Lastly, a heat protectant spray should be a staple in your styling regimen. This product safeguards the hair from heat damage caused by styling tools, ensuring your graduated bob remains vibrant and healthy. By carefully selecting the right products, you can elevate your graduated bob into a chic and polished statement.
Effective DIY Styling Techniques for Your Graduated Bob
Mastering DIY styling techniques for graduated bobs empowers individuals to maintain their chic look at home without frequent salon visits. Below are effective step-by-step methods for achieving a stylish bob:
- Blow-Dry for Volume: After washing your hair, apply a volumizing mousse. Use a round brush to lift the roots while blow-drying, directing the airflow from the roots to the ends to create bounce.
- Soft Waves with a Flat Iron: Section your hair and run a flat iron through each strand, twisting it slightly as you move down to create soft waves. Finish with a light-hold hairspray for staying power.
- Textured Finish with Sea Salt Spray: Apply sea salt spray to damp hair and scrunch it to create natural waves. Allow it to air dry for a relaxed, beachy vibe.
- Sleek and Straight Look: Use a heat protectant spray before flat-ironing your hair in sections. Finish with a shine serum to smooth down any flyaways and add gloss.
These techniques can be personalized based on individual preference and hair type. Experimenting with different methods allows individuals to discover what works best for them.
To create a polished finish, consider using a finishing spray to hold the style in place without stiffness. Additionally, regularly practicing these techniques will enhance styling skills, resulting in a beautifully maintained graduated bob that exudes chicness.
The Advantages of Embracing Layered Chic Bobs
Unleashing Versatility and Styling Potential
Layered chic bobs offer incredible versatility and a multitude of styling options, making them a coveted choice for many. This haircut allows individuals to effortlessly transition from casual day looks to sophisticated evening styles. One of the most significant benefits is the ability to change the appearance and mood of the hairstyle with minimal effort. For instance, a simple shift in parting or the addition of waves can create a drastically different look.
A graduated bob can be styled in numerous ways, such as sleek and straight for professional settings or tousled and messy for relaxed weekends. This adaptability means that one haircut can serve various purposes, making it both economical and practical. The layers within the bob can also be styled to enhance or soften the overall shape, providing endless opportunities for personalization.
Furthermore, the versatility of a layered bob extends to color and highlights. Adding dimension with subtle highlights can enliven the layers, making them more noticeable and visually appealing. This allows individuals to express their creativity while enjoying a chic and polished look.
Another advantage is the ease of styling. With the right products and tools, achieving different looks becomes simpler. A few minutes of styling each morning can yield a variety of chic appearances throughout the day, making layered bobs an ideal choice for busy individuals who do not want to compromise on style for convenience.
Simple Maintenance and Care Tips for Your Graduated Bob
Maintaining and caring for a layered chic bob is relatively straightforward, which adds to its appeal. The bob’s length often allows for easier management compared to longer hairstyles, requiring less time for styling and upkeep. Regular trims every six to eight weeks are advisable to maintain the shape and eliminate split ends, ensuring the hairstyle remains fresh and healthy.
An effective daily care routine can significantly enhance the longevity of the style. Utilizing a mild shampoo and conditioner tailored to your hair type helps maintain moisture and shine. Additionally, incorporating deep conditioning treatments once a week can replenish hydration, especially for layered bobs that may require extra care due to their varied lengths.
Daily styling can be simplified by using versatile products. A lightweight styling cream or mousse can provide hold and texture without weighing the hair down. For those with finer hair, volumizing products can contribute body, while thicker hair may benefit from smoothing serums to tame frizz.
Crucially, the ease of maintenance also extends to styling options. Layered bobs can often be worn in various ways—whether sleek, wavy, or messy, they adapt effortlessly to different occasions. This flexibility allows individuals to enjoy a chic look without dedicating excessive time to styling.
In essence, layered chic bobs offer the perfect combination of style and practicality, making them an excellent choice for those seeking a low-maintenance yet fashionable hairstyle.
Boosting Confidence with a Chic Graduated Bob
A chic bob can significantly impact one’s confidence and self-esteem. The transformative nature of a stylish haircut often leads to a renewed sense of self, empowering individuals to embrace their appearance with pride. A well-executed graduated bob not only beautifully frames the face but also conveys an air of sophistication and modernity.
When individuals feel confident about their hairstyle, this often translates into increased assurance in their daily lives. A chic bob can enhance facial features, draw attention to the eyes, and provide a polished look that fosters self-assurance. This psychological boost can positively affect interactions, whether in professional settings or social environments.
Moreover, the versatility of a layered bob enables individuals to express their unique personalities through their styling choices. Experimenting with different colors, textures, or accessories can further elevate the overall look, providing opportunities for self-expression that resonate with personal style. Engaging with one’s hairstyle in this manner fosters a deeper connection to personal identity, contributing to overall well-being.
In a world where first impressions hold significance, a stylish haircut like a graduated bob can significantly influence how one is perceived by others. When individuals feel confident about their appearance, they exude positivity and approachability, enhancing both personal and professional relationships. Ultimately, the effect of a chic bob extends beyond aesthetics; it nurtures an empowered mindset, encouraging individuals to step into their best selves.
Highlighting Facial Features with Expertly Placed Layers
Layered chic bobs are crafted to accentuate facial features, making them an excellent choice for those looking to enhance their natural beauty. The strategic placement of layers can soften angular features and highlight an individual’s best attributes. For instance, layers framing the cheekbones can draw attention to them, creating a more sculpted appearance.
For round faces, longer layers can elongate the face while softening the overall look. A bob with layers starting below the chin helps create length, whereas shorter layers may add width, which can be less flattering for round faces. For square-shaped faces, softer, rounded layers can disrupt symmetry, creating a more balanced and flattering appearance.
In the case of heart-shaped faces, layering around the chin and jawline can enhance these features, drawing attention away from the forehead. The added dimension of a layered bob can soften sharp features, providing a more harmonious balance to the overall appearance. Similarly, oval faces benefit from a variety of layering styles, as this shape is easily complemented by different lengths and textures.
The key to effectively utilizing layers lies in understanding the relationship between the bob’s cut and one’s facial features. Consulting with a professional stylist can provide insight into the most flattering layering techniques, ensuring that the graduated bob enhances your distinctive characteristics.
Furthermore, layering can also create movement and depth within the hairstyle, adding vibrancy to the overall look. This dynamic quality not only highlights facial features but also contributes to a youthful and energetic appearance, making the layered chic bob a versatile choice for individuals seeking to make a style statement.
Research-Backed Benefits of Choosing Graduated Bobs for Layered Chic
Exploring Hair Health and the Appeal of Bob Styles
Research indicates that specific bob styles, including graduated bobs, can promote hair health while providing aesthetic appeal. The layered nature of the cut allows for improved circulation at the scalp, potentially encouraging healthy hair growth. Additionally, the absence of excessive weight at the ends reduces stress on hair follicles, decreasing the likelihood of breakage and split ends.
Studies have shown that regular haircuts, such as the graduated bob, can have a substantial impact on hair health. Maintaining a consistent trim schedule helps remove split ends and fosters stronger hair overall. The layering techniques used in graduated bobs also enhance texture and manageability, resulting in a healthier appearance.
Moreover, experts frequently recommend avoiding blunt cuts for certain hair types. Layered cuts like graduated bobs can help distribute weight evenly, leading to a more balanced look, thus reducing the need for excessive styling tools that may cause damage. This tailored approach to haircuts can extend the style’s longevity while promoting overall hair vitality.
Additionally, adopting a graduated bob can inspire better hair care practices. Individuals with bobs often invest in quality hair products to maintain their style and promote hair health. This awareness of hair care translates into healthier habits, leading to improved overall hair condition.
In summary, research supports the notion that graduated bobs not only provide a fashionable option but also contribute positively to hair health through their layered structure and regular maintenance.
The Psychological Impact of a Chic Hairstyle
The psychological effect of a chic hairstyle, such as a layered bob, can be significant, influencing self-perception and mental well-being. A stylish haircut often leads to increased confidence and self-esteem, as individuals feel empowered by their appearance. This boost in confidence can translate into various aspects of life, enhancing social interactions and professional engagements.
Studies have suggested that individuals who perceive themselves as looking good often experience higher levels of self-worth and positivity. The act of changing one’s hairstyle, particularly to something as transformative as a graduated bob, can signify a fresh start or a new chapter, further contributing to an individual’s sense of empowerment.
Moreover, a chic bob can serve as a form of self-expression, allowing individuals to communicate their personality and style preferences. This expression plays a critical role in personal identity, fostering a sense of belonging and connection to one’s self. Engaging with one’s appearance in this manner can be revitalizing, encouraging individuals to embrace their unique beauty while boosting overall mental well-being.
The versatility of a graduated bob can also lead to experimentation with colors, textures, and styling techniques, fostering creativity. This creative engagement can further enhance mood and inspire a positive outlook, as individuals feel more in control of their appearance and can adapt their look to suit different occasions.
In essence, the psychological benefits of adopting a chic hairstyle like a graduated bob extend far beyond aesthetics; they contribute to a deeper sense of identity and self-confidence, positively influencing overall mental health.
Consumer Preferences and Trends in Bob Styles
Consumer preferences significantly influence the popularity of bob styles, including graduated bobs. The trend toward low-maintenance, versatile hairstyles reflects a broader shift in societal values, where convenience and adaptability are highly prized. As individuals seek styles that fit their busy lifestyles, the graduated bob emerges as a frontrunner due to its chic appearance and relative ease of upkeep.
Recent surveys indicate a significant proportion of individuals prefer hairstyles that require minimal styling time while still looking polished. This preference aligns seamlessly with the characteristics of graduated bobs, which can be worn in various ways without extensive effort. The ability to transition from day to night looks with simple styling tools appeals to a wide audience.
Moreover, social media platforms heavily influence trends in bob styles. Influencers and celebrities showcasing their graduated bobs often set the tone for current preferences, encouraging others to adopt similar looks. This visibility fosters a sense of community, where individuals feel inspired to experiment with their hairstyles, driving demand for graduated bobs.
Additionally, the growing acceptance of diverse hair types and textures in mainstream beauty also impacts consumer preferences. Graduated bobs can be easily customized to suit different hair types, making them an inclusive choice for a broader demographic. This adaptability encourages individuals to seek stylists who can create a bob that aligns with their specific hair characteristics and personal style.
Expert analysis of these trends suggests that the future of bob styles will continue to evolve, reflecting cultural shifts and societal influences. As the beauty industry embraces inclusivity and versatility, the graduated bob is poised to remain a staple hairstyle for individuals seeking a chic, modern look.
Confidently Transitioning to Your New Graduated Bob
Preparing for Your Big Hair Transformation
Mentally and physically preparing for a new haircut, particularly a graduated bob, is essential for a smooth transition. Before making the significant chop, individuals should take the time to envision their desired style and understand the implications of a shorter cut. Researching various variations of graduated bobs can help clarify preferences and set realistic expectations.
It’s also beneficial to consult with a trusted stylist who can provide professional insights on what to expect from the new haircut. Engaging in a thorough discussion about hair types, face shapes, and maintenance requirements can alleviate anxieties and instill confidence in the decision-making process.
Additionally, taking care of your hair leading up to the appointment can prepare it for the transition. Regular trims and deep conditioning treatments can enhance the hair’s health, ensuring it looks its best post-chop. Considering factors such as lifestyle, daily routines, and styling preferences will also inform the choice of bob style, ultimately leading to a more satisfying outcome.
Moreover, considering a gradual transition by opting for a longer bob initially may be advantageous for those apprehensive about drastically changing their look. This approach allows individuals to adapt to shorter lengths while still enjoying the versatility of a bob. Embracing the journey towards a graduated bob can lead to a confident and exciting new look.
Finding the Right Stylist for Your Perfect Bob
Selecting a skilled stylist is crucial for achieving the perfect graduated bob that aligns with your expectations. When searching for a stylist, consider their experience and specialization in cutting bobs. Reading reviews and asking for recommendations can provide valuable insight into a stylist’s expertise in this specific area.
During the consultation, it’s essential to communicate openly about your desired look. Bring reference photos that showcase various graduated bobs to convey your vision effectively. A good stylist will appreciate this input and be able to provide insights on how to adapt the style to suit your hair type and face shape.
Moreover, trust your instincts when selecting a stylist. A professional who listens to your concerns and offers tailored advice is likely to deliver a satisfactory outcome. Observing their previous work can also provide assurance of their capabilities, so take the time to review their portfolio or social media presence.
Furthermore, discussing maintenance expectations is crucial. A reputable stylist will inform you about the upkeep involved with a graduated bob and recommend products that will enhance the style. By finding the right stylist, you can ensure a successful journey towards a stylish and flattering graduated bob.
Aftercare and Embracing Your New Look
Adjusting to a new graduated bob involves understanding the aftercare needed to maintain the style while embracing the change. Immediately post-cut, it’s essential to follow your stylist’s instructions regarding washing and styling. Using the right products will guarantee the health and longevity of your bob.
In the initial weeks, individuals may need to experiment with styling techniques to discover what works best for their hair type. This might include mastering blow-drying techniques, using the right tools, and incorporating suitable products. Over time, familiarity with these methods will lead to a more effortless styling routine.
Moreover, embracing the freedom that comes with a shorter haircut can take some time. Many individuals find that a graduated bob provides a sense of liberation, allowing for a fresh perspective on personal style. Engaging in styling experimentation, such as trying different textures or accessories, can further enhance the experience of adjusting to the new look.
Maintaining regular appointments with your stylist for trims will also aid in adjusting to the bob, ensuring that it stays fresh and well-shaped. This ongoing care not only keeps the hairstyle looking its best but also allows for minor adjustments as needed. Ultimately, embracing the transitional period with patience and a sense of adventure will lead to complete satisfaction with the graduated bob.
Determining Your Ideal Length and Layers
Establishing the perfect length and layers for your graduated bob is vital to achieving a look that suits your face shape and hair type. When considering length, think about how short the back should be and how long the front will fall. A graduated bob typically features shorter layers at the back that gradually lengthen towards the front, creating a flattering silhouette.
For those with round faces, opting for a longer front can create the illusion of length and balance out the roundness. Conversely, individuals with square faces may prefer a bob that is slightly shorter with softer, rounded layers to soften sharp angles. Consulting with a stylist who can provide expert insights based on your facial features helps you understand which length works best.
Layer placement is equally critical in shaping the overall look of the graduated bob. For fine hair, shorter layers can add volume and texture, while longer layers are ideal for thicker hair to help reduce bulk. The angle of the layers can also create different effects; a subtle angle may add movement without being too dramatic, while a steeper angle offers a more edgy appearance.
Ultimately, experimenting with different lengths and layer styles during the consultation process can lead to a personalized bob that enhances your unique characteristics. Communicating clearly with your stylist about your preferences and any concerns will ensure you achieve a beautiful graduated bob tailored to your individual needs.
Effective Styling Techniques for Your Graduated Bob
Mastering styling techniques for a graduated bob is essential for maintaining its chic appearance. Consider several key tips when styling your new look. Firstly, using the right products is paramount. A lightweight mousse or volumizing spray applied to damp hair can help create a bouncy texture when blow-dried. For added definition, consider integrating a curl-enhancing cream, especially if your hair features natural waves or curls.
Next, selecting the appropriate tools can significantly affect the final appearance. A round brush is ideal for blow-drying, allowing for volume and smoothness at the roots. For those aiming to achieve soft waves, a flat iron can work wonders—just twist the wrist as you glide the iron through the hair for a relaxed, tousled finish.
Regularly changing your part can also refresh your look. A side part can create volume and movement, while a middle part can offer a sleek, polished appearance. This simple technique can dramatically alter the overall style of your graduated bob.
Additionally, incorporating styling accessories can elevate the look. Hair clips or decorative pins can add a touch of personality, making the hairstyle feel unique. Experimenting with different accessories allows for versatility, enabling you to adapt your bob to suit various occasions.
Finally, maintenance is key. Regular trims and appropriate hair care products will keep your bob looking healthy and fresh. Scheduling routine appointments with your stylist for trims will help maintain the integrity of the cut while allowing for necessary adjustments to keep it stylish.
Exploring Creative Variations of Graduated Bobs
Experimenting with Colors and Highlights for a Unique Look
Introducing a creative twist to your graduated bob through color and highlights can significantly enhance its chicness. Modern graduated bobs beautifully accommodate a variety of colors, from subtle tones to bold statements. One approach is to incorporate balayage, which allows for a natural, sun-kissed effect. This technique blends color seamlessly, adding depth and dimension to the layers without harsh lines.
For those seeking a more dramatic look, bold colors such as pastel pink or deep purple can make an unforgettable impact. These vivid hues often turn heads and provide an opportunity for self-expression. Alternatively, incorporating ombre techniques can create a stunning gradient effect, transitioning from a darker root to lighter ends, enhancing the graduated cut’s shape.
Highlights are another effective method to introduce dimension to a graduated bob. By strategically placing lighter shades around the face or throughout the layers, one can create an illusion of depth and movement. This technique is particularly flattering for layered hairstyles, as it accentuates the texture and adds vibrancy.
When experimenting with color, it’s crucial to consult with a professional stylist who can provide expert advice on color choices that complement your skin tone and enhance your overall look. Additionally, selecting high-quality color products ensures that the hair remains healthy and vibrant.
Ultimately, the versatility of graduated bobs allows for endless experimentation with color and highlights. Whether opting for subtle changes or bold transformations, the right color can elevate your graduated bob into a chic style that reflects your unique personality and aesthetic.
Incorporating Bangs and Fringe into Your Graduated Bob for Added Flair
Bangs and fringe can add a unique touch to a graduated bob, creating a more dynamic and personalized look. The incorporation of bangs provides a fresh perspective on the traditional bob, offering versatility and enhancing facial features. For instance, soft, wispy bangs can frame the face beautifully, drawing attention to the eyes and cheekbones, while blunt bangs deliver a bold statement that adds an edgy flair.
When considering bangs, think about your face shape. For round faces, side-swept bangs can elongate the appearance and soften the overall look. In contrast, straight-across bangs may suit oval faces, complementing their proportions. On square faces, softer, feathered bangs can help to break up angular features, while heart-shaped faces benefit from bangs that gently graze the brow, providing balance.
Styling bangs within a graduated bob involves integrating them into the overall cut seamlessly. A skilled stylist can create bangs that blend harmoniously with the layers of the bob, ensuring a cohesive look. Moreover, bangs allow for various styling options; they can be worn straight, curled, or even pinned back for a different appearance.
To maintain bangs, regular trims are essential, as they can lose their shape quickly. Using light styling products can help keep them in place without weighing them down. Additionally, experimenting with different styling tools can yield different effects, whether sleek and polished or tousled and carefree.
Ultimately, incorporating bangs into a graduated bob adds a playful and contemporary dimension to the hairstyle. They offer another avenue for personal expression and can transform an ordinary bob into a chic and fashionable statement.
Accessorizing Your Bob for Versatility Across Occasions
Accessorizing a graduated bob allows for versatility, enabling individuals to tailor their style to suit different occasions, from casual outings to formal events. The right accessories can elevate the look, adding a touch of personality and flair. Here are some accessories that beautifully complement graduated bobs:
- Hair Clips: Decorative hair clips can add a stylish accent, perfect for keeping hair away from the face while introducing a trendy touch.
- Headbands: A chic headband can elevate a casual bob, providing a polished appearance ideal for both day and night events.
- Scarves: Wrapping a colorful scarf around the bob can introduce a playful element, allowing for creativity in styling.
- Statement Pins: Unique hairpins or brooches can be used to secure sections of hair, serving as eye-catching accessories that enhance the overall look.
- Bobby Pins: Colorful or embellished bobby pins can hold styles in place while adding a touch of fun, ideal for casual looks.
- Hats: A stylish hat can transform a graduated bob, providing protection from the elements while contributing to a chic ensemble.
- Hair Ties: Opt for decorative hair ties that can double as accessories, adding a pop of color to a ponytail or bun.
- Hairbands: Soft, stretchy hairbands can be practical while still looking fashionable, perfect for workouts or relaxed days.
Accessorizing allows for personal expression and creativity, enabling individuals to adapt their graduated bob to fit different settings. Experimenting with various accessories not only enhances the overall look but also adds an element of fun, making the bob feel fresh and exciting for every occasion.
Frequently Asked Questions About Graduated Bobs
What defines a graduated bob hairstyle?
A graduated bob is a hairstyle characterized by shorter layers at the back that gradually lengthen towards the front, creating a flattering silhouette.
How can I determine if a graduated bob is right for me?
Consulting with a professional stylist can assist in determining if a graduated bob complements your face shape and hair type.
How frequently should I schedule trims for my graduated bob?
It is generally recommended to book a trim every six to eight weeks to maintain the shape and health of your graduated bob.
What products are best suited for styling a graduated bob?
Using lightweight mousse, volumizing spray, and heat protectant can enhance the appearance of your graduated bob while shielding it from heat damage.
Can I add bangs to my graduated bob hairstyle?
Yes, incorporating bangs can introduce a unique touch to a graduated bob, allowing for personalization and enhancing facial features.
How can I maintain my hair’s health with a graduated bob?
Regular trims, a proper hair care routine, and the use of suitable products will help preserve the health of your graduated bob.
What creative methods can I use to color a graduated bob?
Consider balayage, highlights, or bold colors to introduce dimension and character to your graduated bob.
Is a graduated bob suitable for all hair types?
Yes, graduated bobs can be customized to accommodate various hair types, from fine to thick, making them versatile and accessible for many.
What styling techniques can I apply to my graduated bob?
Blow-drying with a round brush, using a flat iron for waves, and experimenting with parting can effectively style your graduated bob.
How can I modify the appearance of my graduated bob for different occasions?
Accessorizing with clips, headbands, or scarves can transform your graduated bob, enabling it to suit various events and personal styles.
Connect with us on Facebook!
The Article: Adopting Graduated Bobs for Layered Chic: Timeless Style appeared first on Amitys Hair Salon.
The Article Graduated Bobs: Timeless Layered Chic for Modern Style Was Found On https://limitsofstrategy.com
-

Micro Braids: Explore Half-Up Styles for Every Occasion
Unlock the Stunning Versatility of Micro Braids for Half-Up Hairstyles
Understanding Micro Braids: The Trendy Choice for Modern Styles
Micro braids consist of meticulously woven strands of hair, divided into tiny, intricate sections that create a stylish and adaptable appearance. This unique braiding technique opens the door to a wide range of hairstyles, suitable for everything from casual outings to elegant formal events. The charm of micro braids lies in their tidy and sophisticated look, inviting creativity and personal flair in hairstyling. They can be styled into complex designs that express individuality, making them a popular choice for anyone wanting to showcase their personal style through their hair.
Micro braids are celebrated across various cultures, making appearances at vibrant music festivals in Brazil and traditional weddings in India. Beyond their aesthetic appeal, these braids protect hair from environmental damage, encouraging healthy growth. As the trend for fashionable yet functional hairstyles continues to rise, micro braids have established themselves as a dominant force in the hairstyling landscape, attracting a diverse global audience eager for chic options.
Enhance Your Look with the Allure of Half-Up Hairstyles
Half-up hairstyles create a perfect blend of sophistication and freedom, balancing the elegance of an updo with the relaxed feel of loose hair. Whether you’re strolling through the streets of Paris or attending a high-end gala in New York, this hairstyle offers the versatility to adapt to any setting. The appeal of half-up hairstyles is further amplified when paired with various braiding techniques, including micro braids, adding a trendy yet practical touch to your overall appearance.
A key advantage of half-up styles is their ability to frame the face beautifully, enhancing flattering silhouettes for different face shapes. This style effectively keeps hair away from the face, making it ideal for activities like dancing, dining, or enjoying outdoor adventures. Moreover, half-up hairstyles can be personalized with a variety of accessories, allowing for unique expression and creativity in hairstyling.
Identifying the Perfect Hair Type for Micro Braids: A Comprehensive Guide
Choosing the appropriate hair type is vital for achieving exquisite micro braids within half-up styles. Different hair textures and lengths significantly impact the braiding process and the overall aesthetic, making it crucial to understand your hair’s specific traits. Here’s an in-depth look at hair types and their compatibility with micro braids:
- Straight Hair: This texture allows for easier braiding, as the strands lay flat and align seamlessly, resulting in a polished finish.
- Wavy Hair: Wavy textures hold micro braids exceptionally well, adding volume and a relaxed vibe that enhances the overall look.
- Curl Patterns: Curly hair can achieve stunning results with micro braids, although maintaining uniformity may require additional care and patience during the braiding process.
- Coily Hair: Coily textures excel at holding braids, making them an excellent option for micro braids, amplifying definition and style.
- Length Requirements: Ideally, hair should be at least shoulder-length to ensure optimal micro braiding, providing adequate length for diverse styles.
Grasping these factors not only helps achieve the most visually appealing results but also ensures the health of your hair throughout the styling journey, allowing your micro braids to remain vibrant and well-maintained.
Master the Art of Crafting Beautiful Micro Braids
Kickstart the Micro Braiding Process with Precision and Care
Embarking on the journey to create stunning micro braids necessitates a systematic approach that emphasizes precision and patience. Begin by sectioning your hair into small, uniform parts to achieve a neat and professional appearance. A fine-toothed comb is indispensable for this task, as it ensures consistently sized sections, which is critical for the overall aesthetic of the braids.
Here are essential tools for micro braiding:
- Fine-toothed comb: Essential for accurately parting the hair.
- Hair clips: Useful for securely holding sections out of the way while you focus on the braiding.
- Moisturizing product: Important for keeping the hair hydrated and manageable throughout the braiding process.
- Edge control gel: Perfect for achieving sleek finishes, especially along the hairline.
- Scissors: Necessary for trimming any split ends before starting the braiding.
Once the hair is sectioned, start at the nape of the neck and work your way up, applying consistent tension while braiding. This technique ensures that the braids maintain their structure and don’t come loose over time. Although this process may require a considerable investment of time, the rewarding outcome is beautifully styled braids that showcase your artistic flair and creativity.
Explore Effective Techniques for Creating Eye-Catching Micro Styles
There are several methods to create stunning micro braids, each offering unique aesthetics and textures to your hairstyle. The classic three-strand braid is the most traditional technique, yielding a clean and timeless look that suits any occasion. This method involves dividing the hair into three sections and interweaving them, providing a straightforward approach to producing micro braids.
Another popular technique is the box braid, which creates larger sections that are then divided into smaller micro braids. This method results in a more structured appearance, ideal for those seeking a defined style. Additionally, the fishtail braid presents a distinctive texture, achieved by taking small pieces from each side and crossing them over the center, resulting in an eye-catching design.
Each braiding technique produces varying looks and feels, allowing individuals to express their unique style preferences. Experimenting with these methods can lead to discovering new favorites, enhancing the versatility of half-up styles adorned with micro braids.
Maintain Consistent Tension and Neatness for Perfect Braids
Achieving consistent tension and neatness during braiding is crucial for crafting beautiful micro braids. The secret to uniformity lies in applying steady pressure without pulling too tightly, which can cause discomfort and potential breakage. Utilizing clips and bands strategically can help effectively manage sections, ensuring they remain organized and separate throughout the braiding process.
Using hair clips to secure sections while you work facilitates a smoother braiding experience. Focus on one small part at a time to ensure neatness and precision. The overall appearance heavily relies on the quality of each braid’s construction, so meticulous attention to detail is vital for achieving a polished style.
After completing the braiding, inspect your work for any inconsistencies. Adjusting any loose or uneven sections can dramatically enhance the final result, ensuring that the micro braids are not only visually appealing but also durable and long-lasting. By employing the right techniques alongside a patient approach, you can achieve remarkable results that reflect your talent and creativity in hairstyling.
Understanding the Longevity of Micro Braids: What to Expect
The longevity of micro braids can vary significantly based on several key factors, typically lasting between 4 to 8 weeks. Major determinants include hair growth rate, maintenance practices, and the technique used during the initial braiding process. Regular upkeep is essential for maintaining the style’s integrity and ensuring it remains fresh throughout its duration.
To extend the life of your micro braids, establishing a solid maintenance routine is critical. Regularly moisturizing the hair prevents dryness and frizz, keeping the braids looking neat and well-maintained. Additionally, handling the braids carefully, especially during sleep, can avoid unnecessary wear and tear. Using a silk or satin scarf or pillowcase can protect the braids from friction, contributing to their longevity.
Ultimately, adhering to a consistent routine can significantly influence the lifespan of your micro braids, allowing you to enjoy your stylish half-up look for as long as possible while preserving its charm and elegance.
Expert Tips for Creating Micro Braids in Half-Up Styles
Find Inspiration for Half-Up Styles with Micro Braids
Real-world examples of half-up styles featuring micro braids vividly showcase the versatility and aesthetic appeal of this braiding technique. From vibrant music festivals in the UK to elegant gatherings in Japan, these styles can be tailored to fit various events, highlighting the creativity and adaptability inherent in micro braids.
Popular half-up styles incorporating micro braids include:
- Half-Up Top Knot: A stylish look that combines a chic top knot with flowing micro braids.
- Twisted Half-Up Ponytail: This look features twisted sections of micro braids gathered into a ponytail for a polished appearance.
- Braided Half-Up Crown: A stunning crown effect achieved by braiding front sections of hair into a beautiful half-up style.
- Half-Up with Accessories: Adding decorative elements, such as beads or flowers, into the braids creates a whimsical feel, perfect for festivals.
Exploring these styles can inspire you to experiment with your micro braids, adapting them to fit your personal aesthetic and the specific occasion at hand. By embracing these examples, you can unleash your creativity while enjoying the practical benefits of micro braids in half-up hairstyles.
Step-by-Step Guide to Achieving Your Desired Half-Up Look
Creating the perfect half-up style with micro braids involves a series of actionable steps to ensure a look that is both fashionable and functional. Start by preparing your hair; ensure it is clean, dry, and free of tangles. Section the hair into manageable parts, focusing on the upper half that will create the half-up style.
Next, braid the selected sections into micro braids, paying close attention to uniformity and neatness throughout the process. Once the braids are complete, gather the top section of hair and secure it neatly with a hair tie or clip, achieving the half-up look while allowing the remaining hair to flow freely. To personalize your style further, consider adding accessories such as beads or decorative clips to the braids, enhancing the overall visual appeal.
Finally, evaluate your entire look in the mirror to ensure it meets your expectations. Make any necessary adjustments, such as tightening or loosening specific sections, to achieve the desired finish. These steps not only guide you through the process but also encourage creativity and self-expression in styling your micro braids in half-up arrangements.
Insights on Various Braiding Techniques from Experts
Diving into expert analysis of various braiding techniques can elevate your understanding and execution of micro braids. Each method has its nuances that can profoundly affect the final appearance and functionality of the braids. For instance, the traditional three-strand braid allows for straightforward manipulation, making it a staple in braiding methods.
Conversely, exploring advanced techniques like the fishtail braid can add an intriguing twist to your micro braids, resulting in a visually stunning effect. Understanding the mechanics behind each technique empowers you to adapt your approach according to your hair type and desired style. For instance, coily hair may benefit from tighter braids, while straight hair thrives with looser, more fluid styles.
Incorporating these insights can refine your braiding skills, allowing for greater versatility and creativity in styling. As you build confidence in these techniques, you will uncover endless creative possibilities that micro braids in half-up styles offer.
Elevate Your Look with Half-Up Styles Featuring Micro Braids
Strategic Approaches to Styling Half-Up Looks
Styling half-up looks with micro braids opens up a world of creative opportunities, allowing for effortless transitions between casual and formal aesthetics. One effective strategy is to incorporate various accessories, such as beads, ribbons, or hairpins, which can infuse a personal touch into your style. This adaptability makes half-up styles suitable for diverse settings, from elegant dinners to relaxed outings.
For a more laid-back appearance, consider leaving some strands loose to frame your face, adding a hint of softness to the overall look. On the other hand, a tightly secured half-up style can convey sophistication, particularly when paired with sleek accessories. The key lies in harmonizing the intricate nature of micro braids with the overall mood of the occasion.
Experimenting with different styling techniques can further amplify your look. For instance, creating a braided crown by wrapping micro braids around the base of the half-up section introduces depth and visual interest. The versatility of half-up styles ensures that you can tailor your look for any event while showcasing your beautiful micro braids.
Integrate Accessories Seamlessly into Your Half-Up Style
Accessories can dramatically enhance a simple half-up style, transforming it into a striking statement look. Incorporating decorative elements such as beads, ribbons, or hair jewelry can elevate the overall aesthetic, providing a unique touch that reflects your personality. Strategically placing these accessories throughout the micro braids can create visual interest while highlighting the intricate design of your hairstyle.
When selecting accessories, consider the color scheme and style of your outfit. Metallic or brightly colored beads can introduce excitement, while natural elements like flowers or wooden accessories can lend a more bohemian vibe. Experimenting with placement is crucial; consider clustering beads at the ends of braids or interspersing them throughout for a cohesive look.
Moreover, using hair ties that match your outfit or accessories can unify the style, ensuring that your half-up look is polished and cohesive. The right accessories not only enhance the micro braids but also provide a platform for personal expression, allowing you to showcase your individuality with every hairstyle.
Achieving a Polished Finish with Micro Braids
Creating a polished finish with micro braids in half-up styles requires meticulous attention to detail, ensuring that every aspect of the hairstyle is refined. Start by ensuring that all micro braids are uniform in size and tension; this greatly contributes to the overall neatness and visual appeal of the style. Any inconsistencies can detract from the intended look, so addressing them promptly is essential.
Once the braids are complete, focus on securing the half-up section neatly. Use a hair tie that complements your hair color and consider wrapping a small piece of hair around the base to conceal the tie, resulting in a more polished appearance. Additionally, applying an edge control product can smooth away any flyaways, creating a sleek finish that enhances the elegance of the style.
Finally, assess your overall appearance in the mirror and make any necessary minor adjustments to achieve balance and symmetry. These finishing touches can make a significant difference, transforming a simple half-up style into a breathtaking masterpiece that showcases your skill and creativity in forming micro braids.
Choosing the Right Products for Micro Braids
Selecting the appropriate hair products is crucial for maintaining the health and longevity of micro braids in half-up styles, ensuring they remain hydrated, healthy, and visually attractive. A high-quality moisturizing spray is beneficial for keeping the hair nourished, preventing dryness and frizz. Look for products specifically formulated for braided hair, as they often contain ingredients tailored to meet the unique needs of braided styles.
Edge control gels are also essential, as they provide a sleek finish to the hairline, enhancing the overall polished look. Additionally, consider using a lightweight oil or serum to add shine and hydration without weighing down the braids. These products can significantly enhance the longevity of micro braids, ensuring they maintain their freshness and vibrancy throughout their lifespan.
When choosing products, consider your hair type and any specific needs it may have. For coily or textured hair, heavier creams may be advantageous, whereas straight or wavy hair may benefit from lighter formulations. By carefully selecting the right products, you can maintain the beauty and integrity of your micro braids in half-up styles for weeks to come.
Creating Volume and Texture in Half-Up Styles
Infusing volume and texture into half-up styles with micro braids can significantly elevate their visual appeal, creating a dynamic and captivating look. One effective technique is teasing the hair at the crown before securing the half-up section, which adds lift and dimension, transforming a flat style into one that appears fuller and more luxurious.
Utilizing texturizing products can further enhance the overall aesthetic, providing definition while keeping the micro braids neat. Applying these products prior to braiding can also help lock in volume without compromising the integrity of the braids.
Experimentation is key; playing with different amounts of teasing and texturizing can lead to discovering the perfect balance for your style. The right combination of volume and texture can elevate your half-up look, allowing your creativity to shine while ensuring the micro braids remain the focal point of your hairstyle.
Understanding the Longevity of Micro Braids in Half-Up Styles
Factors Influencing the Lifespan of Micro Braids
Numerous factors can impact the lifespan of micro braids in half-up styles, each playing a pivotal role in determining how long they will remain intact. Hair type is a significant factor; finer hair may experience quicker wear, while coarser textures often retain braids longer. Additionally, the technique used during the initial application affects how long the braids last; tighter braiding may result in longer-lasting styles but could lead to discomfort if done excessively.
Maintenance routines are equally vital for prolonging the life of your braids. Regular moisturizing and gentle handling can extend the lifespan of your micro braids, helping to prevent frizz and wear. Furthermore, exposure to harsh weather conditions, such as humidity or extreme dryness, can affect the durability of micro braids. Implementing protective measures, like wearing a scarf at night or using a silk pillowcase, can safeguard the style from damage and preserve its appearance.
Ultimately, understanding these factors allows you to tailor your approach to maintaining micro braids in half-up styles, ensuring they remain looking fresh and vibrant for as long as possible while allowing you to enjoy your stylish look without concern.
Best Practices for Maintaining Micro Braids
Maintaining micro braids in half-up styles requires a dedicated routine to ensure they remain neat and healthy. Begin by incorporating regular washing into your maintenance schedule, utilizing a gentle, sulfate-free shampoo that won’t strip the hair of its natural oils. This practice helps maintain scalp health, which is vital for the longevity of the style.
After washing, thoroughly moisturize the braids. A lightweight leave-in conditioner or a specialized moisturizing spray can keep the braids hydrated while preventing dryness and frizz. Additionally, using an oil or serum on the ends of the braids will help seal in moisture and add a radiant shine.
Nighttime care is also a critical component of maintenance. Securing the hair in a loose bun or braid, or using a silk or satin scarf, can help protect the style while reducing friction that leads to wear and tear. By incorporating these best practices, you can ensure that your micro braids remain stunning and intact throughout their lifespan, allowing you to enjoy your half-up styles to the fullest.
Tips for Extending the Life of Your Micro Braids
Extending the life of micro braids in half-up styles involves a combination of careful daily practices and thoughtful maintenance strategies. One of the most effective tips is to limit daily manipulation of the braids. While it may be tempting to adjust the style frequently, excessive handling can lead to frizz and looseness, ultimately shortening the lifespan of the braids.
Incorporating protective hairstyles at night is crucial. Using a satin or silk scarf or pillowcase can reduce friction while you sleep, preventing frizzy and damaged braids. Additionally, consider applying a light oil or serum to keep the braids shiny and healthy without weighing them down.
Regularly assessing the condition of your braids is also beneficial. If you notice any signs of frizz or wear, promptly address them by rebraiding loose sections to maintain the overall appearance. By implementing these practical tips, you can significantly extend the life of your micro braids and enjoy your half-up styles for weeks on end.
Guidelines for Safely Removing Micro Braids from Half-Up Styles
Removing micro braids requires patience and care to ensure the health of your hair remains intact. Start by gathering the necessary tools, including a detangling spray, a wide-tooth comb, and, if needed, scissors for any stubborn knots. Generously apply a detangling spray to soften the braids, making them easier to unravel without causing breakage.
Begin the removal process by gently unravelling the braids from the ends, working your way towards the roots. This method minimizes tension on the hair and reduces the risk of damage. If you encounter tangles, use your fingers to carefully separate the hair, taking your time to avoid pulling or tugging.
Post-removal care is equally important. Once all the braids are out, wash and condition the hair thoroughly to remove any product buildup and restore moisture. Deep conditioning treatments can also be beneficial to rejuvenate the hair after the stress of braiding. By following these steps, you can safely remove micro braids while promoting healthy hair recovery, ensuring that your hair is in great shape for your next styling adventure.
Research-Backed Benefits of Micro Braids in Half-Up Styles
Health Benefits Associated with Micro Braids
Micro braids can offer a variety of health benefits when properly maintained. A significant advantage is their potential to reduce hair breakage. By securing the hair in a braided style, the ends are protected from environmental factors like wind and pollution, minimizing damage and breakage over time. Additionally, the braiding technique can create a protective barrier that preserves the hair’s natural moisture, thereby decreasing the likelihood of dryness.
When maintained correctly, micro braids can also promote healthier hair growth. Less manipulation and increased protection allow the hair to thrive, resulting in longer, healthier strands. This protective aspect is especially vital for individuals with naturally curly or coily hair types, as these textures often require extra care to avoid damage.
Moreover, wearing micro braids can provide a much-needed break from daily styling routines, reducing the frequency of heat styling and chemical treatments. This period of minimal manipulation can lead to noticeable improvements in the hair’s overall health and appearance, making micro braids a beneficial addition to any hair care regimen.
Impact of Micro Braids on Hair Growth
Micro braids can have a positive influence on hair growth by minimizing manipulation and protecting the ends of the hair, which are often the most susceptible to damage. When styled protectively, the chances of breakage and split ends decrease, allowing the hair to maintain its length and integrity.
Research indicates that protective hairstyles, such as micro braids, can help sustain hair health. By limiting the need for frequent styling, the hair endures less stress, enabling it to flourish. For those aiming to grow their hair, incorporating micro braids into their routine can be a strategic choice that aligns with their hair care goals.
Furthermore, the braiding process typically involves distributing natural oils from the scalp throughout the strands, promoting overall health and shine. This natural oil distribution further helps maintain moisture levels, which are essential for optimal hair growth and vitality.
Psychological Benefits of Micro Braids
The psychological benefits of micro braids in half-up styles are noteworthy, contributing to greater confidence and a heightened sense of personal style. Many individuals find that well-styled hair positively impacts their self-esteem and overall mood. The ability to express oneself through creative hairstyles, such as micro braids, can amplify feelings of empowerment and individuality.
When individuals feel good about their appearance, it often translates into more positive social interactions and increased self-confidence. This boost in confidence can be especially beneficial in professional settings or social gatherings, where first impressions hold immense value. The versatility of micro braids allows them to adapt to various occasions, further enhancing their appeal and psychological benefits.
Additionally, the time saved in daily hair care routines can alleviate stress and improve overall well-being, allowing individuals to focus on other aspects of their lives. Embracing unique hairstyles, like micro braids, can serve as a form of self-care, contributing to a positive self-image and mental wellness.
Versatility of Micro Braids in Half-Up Styles
Micro braids in half-up styles offer remarkable versatility, providing endless styling options and easy maintenance. The adaptability of micro braids allows them to be dressed up for formal events with elegant accessories or worn casually for everyday outings, making them a valuable addition to anyone’s hairstyle repertoire.
This versatility extends to the various techniques that can be employed to integrate micro braids into half-up styles. For example, combining braids with loose curls can create a stunning contrast, while incorporating twists or additional braiding techniques can enhance the overall design. The ability to transition effortlessly between styles enables individuals to express their creativity and personality through their hair.
Research suggests that this adaptability can enrich personal expression, offering opportunities for experimentation with different aesthetics and trends. By embracing the versatility of micro braids, individuals can continually refresh their look while maintaining the style’s practicality and beauty.
Time-Saving Benefits of Micro Braids
Micro braids in half-up styles can significantly reduce the time spent on daily hair care routines, making them a practical choice for individuals with busy lifestyles. Once braided, the style typically requires minimal maintenance, allowing individuals to enjoy their look without extensive daily styling. This time-saving aspect is particularly beneficial for professionals, students, or anyone constantly on the go.
Research indicates that the longevity of micro braids means less frequent re-styling is needed, further streamlining hair management. The capacity to maintain a polished appearance without daily effort enables individuals to focus on other priorities throughout their day.
Furthermore, the protective nature of micro braids can lead to healthier hair, reducing the need for additional styling products or heat treatments that often consume significant time. By incorporating micro braids into their hairstyling routine, individuals can enjoy both the aesthetic appeal and convenience of this hairstyle, ultimately enhancing their overall hair care experience.
Troubleshooting Common Issues with Micro Braids
What to Do If Braids Begin to Unravel
If you notice that micro braids start to unravel, it’s crucial to address the issue promptly to maintain the overall appearance of your hairstyle. First, assess the extent of the unravelling; if only minimal sections are affected, rebraiding those areas may suffice. Gently detangle the loose strands, applying a bit of moisturizing product to help, and then carefully rebraid the section while ensuring consistent tension for a neat finish.
In instances where the unravelling is more widespread, consider redoing the entire braid. This may be necessary if the braids have become significantly loose or messy. Keeping a consistent routine for checking the condition of your micro braids can help catch these issues early, enabling you to rectify them before they become more pronounced.
To prevent future unravelling, ensure that the braids are securely fastened at the roots, and consider using hair products designed to maintain braids in place. Regular maintenance and vigilance regarding the condition of your hairstyle will significantly help in preventing unravelling and preserving the beauty of your micro braids.
Addressing Frizz and Flyaways in Micro Braids
Frizz and flyaways can detract from the polished look of micro braids in half-up styles, so addressing these issues is vital for maintaining a neat appearance. One effective strategy is to use anti-frizz products specifically designed for braided hair. These products often contain smoothing agents that can tame unruly strands, providing a sleek finish.
Applying a lightweight serum or oil to the braids can also effectively combat frizz. Use a small amount, focusing on the ends of the braids, as using too much product can weigh them down. Additionally, ensuring that the braids are well-moisturized can help prevent dryness, which is a common cause of frizz.
Incorporating a silk or satin scarf at night can further reduce frizz by minimizing friction while you sleep. These simple yet effective strategies can greatly enhance the overall appearance of your micro braids, allowing you to maintain a flawless half-up style.
Effectively Managing Scalp Irritation
Scalp irritation can be a common issue when wearing micro braids, particularly if they have been installed too tightly. Addressing this discomfort is essential for maintaining the health of your scalp and overall hair. Start by assessing how tight the braids feel; if they are excessively tight, consider loosening them slightly to relieve tension.
Utilizing a soothing scalp treatment can provide immediate relief from irritation. Look for products containing natural ingredients like aloe vera or tea tree oil, known for their calming properties. Additionally, applying a light oil to the scalp can help hydrate and soothe the skin, alleviating discomfort.
Ensuring that your braids are not too tight during installation is vital for preventing future irritation. Communicate with your stylist about your comfort levels, and consider scheduling regular breaks between installations to give your scalp time to recover. By promptly addressing scalp irritation, you can continue to enjoy the beauty of your micro braids without discomfort.
Creative Ideas for Micro Braids in Half-Up Styles
Infusing Color into Your Micro Braids
Adding color to micro braids can create a stunning and eye-catching half-up style that truly stands out. One popular method for achieving this look is by using colored hair extensions, which can be seamlessly integrated into the braiding process. This approach allows for a bold burst of color without permanently altering your hair, making it ideal for those who wish to experiment with vibrant hues.
Alternatively, consider dyeing sections of your hair before braiding. Techniques such as ombre or balayage can add depth and dimension to your micro braids, enhancing their visual impact. When selecting colors, take your skin tone and personal style into account; brighter shades work well for bold statements, while softer tones can provide a more subtle, elegant look.
Experimenting with various color combinations can yield unique results that reflect your personality. The addition of color not only enhances the hairstyle but also allows for greater creativity and expression, making each half-up style a true representation of your individual taste.
Innovative Half-Up Designs to Experiment With
Innovative half-up designs with micro braids can showcase your creativity and styling prowess, transforming traditional looks into extraordinary, yet elegant hairstyles. One technique involves creating intricate patterns with your braids, such as weaving them into a unique design at the crown, which can serve as a focal point for the style.
Consider experimenting with asymmetrical designs, where one side features more braids than the other, creating a visual balance that feels fresh and modern. Additionally, incorporating twists or knots into your half-up design can add texture and dimension, elevating the overall look.
As you explore these innovative designs, don’t hesitate to mix and match techniques, combining micro braids with other hair elements, such as curls or straight sections. This fusion can yield dynamic and versatile styles that suit various occasions, from casual outings to formal events.
Blending Micro Braids with Other Hairstyles for Unique Looks
Combining micro braids with other hairstyles can create a dynamic and visually appealing look, adding depth and interest to your half-up style. For instance, pairing micro braids with loose waves can provide a beautiful contrast, where the structured braids frame the soft, flowing curls. This combination offers a playful yet sophisticated aesthetic, perfect for a variety of occasions.
Consider integrating twists into your style as well. Twisting sections of hair before braiding can create unique textures and visual appeal that distinguish your half-up look. Additionally, experimenting with buns or ponytails can allow for even greater versatility, enabling you to transition smoothly from day to night.
The key to mastering this mix-and-match approach is to maintain a balance between the elements, ensuring that the micro braids remain the focal point while complementing the other styles. By creatively blending micro braids with various hairstyle elements, you can develop a signature look that showcases your individuality and flair.
Safe Removal and Care for Your Hair Post-Braids
Safe Techniques for Removing Micro Braids
Safely removing micro braids requires patience and careful technique to prevent hair damage. Begin by gathering your tools: a detangling spray, a wide-tooth comb, and, if necessary, scissors for any stubborn knots. Start the removal process by applying a generous amount of detangling spray, which will help soften the braids and facilitate the unravelling process.
Gently unravel the braids from the ends, using your fingers to separate any tangles as you work towards the roots. If you encounter knots, avoid pulling; instead, gently tease the strands apart with your fingers. If necessary, a wide-tooth comb can help ease stubborn tangles, but be cautious to avoid excessive pulling or tugging.
Once all the braids have been removed, wash and condition your hair thoroughly to eliminate any product buildup and restore moisture. Post-removal care is essential for maintaining the health and vitality of your hair. By following these steps, you can effectively and safely remove micro braids while promoting the overall health of your hair.
Best Practices for Post-Braid Hair Care
Post-braid care is vital for maintaining the health and integrity of your hair after wearing micro braids. Start by washing your hair with a gentle, hydrating shampoo to remove any product buildup accumulated during the braiding period. Following this, use a deep conditioner to restore moisture, focusing on the ends, which may have been particularly stressed during the braiding process.
Incorporating regular deep conditioning treatments into your routine can further enhance hair health, helping to replenish lost moisture and strengthen strands. Additionally, consider trimming any split ends, which can help improve the overall appearance and health of your hair.
Hydration is key; drink plenty of water and continue using nourishing hair products to maintain softness and shine post-braids. By adopting these best practices, you can ensure your hair remains healthy and vibrant after wearing micro braids, setting the stage for your next styling adventure.
Facilitating a Smooth Transition to a New Hairstyle
Transitioning to a new hairstyle after wearing micro braids in a half-up style requires careful consideration and preparation. Start by assessing your hair’s condition post-braids; ensure it is clean, moisturized, and free of tangles before moving on to a new style. Gradually adjusting your hair care routine is essential to ease the transition without causing additional stress to your strands.
Introduce lighter styling products that won’t weigh down your hair, allowing it to breathe and recover from the effects of braiding. Consider experimenting with styles that require minimal manipulation, such as loose waves or a simple bob, which can help your hair regain its natural state without compromising its health.
Additionally, consider scheduling regular trims to maintain the health of your hair as you transition. This practice not only helps eliminate split ends but also allows for a fresh start with any new hairstyle you choose. By taking these steps, you can ensure a smooth and successful transition from micro braids to your next exciting look.
Frequently Asked Questions About Micro Braids
How long do micro braids typically last?
Micro braids can last between 2 and 8 weeks, depending on hair type, growth rate, and maintenance practices.
Can I wash my hair while it’s in micro braids?
Yes, but it’s recommended to use a gentle, sulfate-free shampoo and to focus on cleansing the scalp while avoiding excessive manipulation of the braids.
What products are best for maintaining micro braids?
Using a lightweight moisturizing spray, edge control gel, and a nourishing oil can help keep micro braids healthy and well-maintained.
Are micro braids suitable for all hair types?
Micro braids can be adapted for various hair types, though finer hair may require extra care during installation and maintenance.
How do I prevent frizz in my micro braids?
Using anti-frizz products and ensuring the braids are well-moisturized can help prevent frizz and keep your micro braids looking sleek.
Can I style my micro braids in different ways?
Absolutely! Micro braids are versatile and can be styled in numerous ways, including half-up styles, buns, or left loose.
What are the signs that I need to remove my micro braids?
Signs include excessive frizz, unravelling, or discomfort from tightness, indicating it’s time to remove them.
How can I safely remove micro braids without damaging my hair?
Apply a detangling spray, gently unravel the braids from the ends, and avoid tugging to protect your hair during removal.
What should I do after removing my micro braids?
Wash and condition your hair thoroughly, followed by deep conditioning to restore moisture and prevent damage.
Can I rebraid my hair immediately after removing micro braids?
It’s advisable to give your hair some time to recover before rebraiding, allowing for healthy and strong hair growth.
Connect with us on Facebook!
The Article: Forming Micro Braids in Half-Up Styles: A Universal Guide appeared first on Amitys Hair Salon.
The Article Micro Braids: Your Ultimate Guide to Half-Up Styles Was Found On https://limitsofstrategy.com
-

Cushioned Xero Shoes: The Ultimate Comprehensive Guide
Explore the Advanced Cushioning Features of Xero Shoes for Optimal Comfort
Understanding the Unique Characteristics and Benefits of Xero Shoes
Xero Shoes represent a groundbreaking collection of minimalist footwear meticulously crafted to emulate the true feeling of being barefoot while offering necessary protection. These shoes are designed to facilitate natural foot movement and strengthen foot muscles, making them increasingly popular among runners, hikers, and fitness aficionados. Unlike conventional footwear, Xero Shoes feature an ultra-lightweight design that aligns with the foot’s natural biomechanics, fostering a more instinctive connection to the ground. This unique structure not only boosts athletic performance but also contributes to improved foot health over time. Whether navigating bustling urban landscapes or traversing challenging hiking trails, Xero Shoes are ideal for anyone seeking an exceptional combination of comfort and minimalist design in their footwear.
Discover the Wide Range of Cushioning Options Available in Xero Shoes
Xero Shoes provide a diverse array of cushioning options to suit individual preferences, ranging from minimal cushioning to more substantial alternatives. Recognizing the various types of cushioning is vital for selecting the perfect shoe tailored to your specific needs. For example, some models come equipped with thicker soles that offer enhanced shock absorption and comfort, making them ideal for extended activities. Conversely, other designs prioritize a lower profile to enhance ground feedback, catering to individuals who prefer a more authentic sensation underfoot. With such an extensive selection, every user can find a pair of shoes that matches their lifestyle, whether it involves leisurely strolls, rigorous workouts, or spirited trail running.
Understanding the Key Advantages of Minimalist Cushioning in Footwear
Minimalist cushioning found in Xero Shoes encourages natural foot movement, which is crucial for developing the intrinsic muscles of the feet and improving overall foot health. This style of cushioning is particularly beneficial for individuals transitioning to barefoot-style running or walking. By promoting a more natural gait, users typically experience reduced impact on their joints and a lower likelihood of sustaining injuries. The minimalist design encourages the engagement of foot muscles, leading to better posture and alignment. As a result, many users report significant improvements in their performance across various activities, such as running and hiking, owing to the supportive features integrated into Xero Shoes.
Insights from Experts on Selecting the Ideal Xero Shoes with Optimal Cushioning
Factors That Influence the Cushioning Levels in Xero Shoes
The level of cushioning in Xero Shoes is primarily influenced by the thickness and material composition of the sole. Thicker soles often provide enhanced comfort and shock absorption while maintaining the minimalist essence that Xero Shoes are renowned for. Several key aspects that affect cushioning include:
- Sole Thickness: Thicker soles typically deliver superior shock absorption, enhancing overall comfort.
- Material Composition: The choice of materials plays a significant role in determining both comfort and durability.
- Design Features: Aspects such as heel-to-toe drop and arch support greatly contribute to the overall cushioning experience.
- Intended Use: Different activities may necessitate varying levels of cushioning for optimal performance.
Understanding these components can assist you in finding the most suitable pair for your requirements, whether you are a committed runner or someone who enjoys casual walks.
How Experts Evaluate the Cushioning Quality of Xero Shoes
Experts thoroughly assess the cushioning of Xero Shoes through detailed evaluations of comfort, durability, and performance. They conduct extensive testing and collect user feedback to provide accurate ratings. For instance, many reviewers have praised the “Prio” model for its remarkable balance between cushioning and minimalism. Similarly, the “HFS” is frequently acknowledged for its ability to maintain comfort during extended wear while still offering essential ground feedback. These expert insights offer invaluable guidance for consumers looking to invest in high-quality footwear that meets their individual needs.
Which Xero Shoe Models Are Highly Recommended by Experts for Optimal Cushioning?
Experts consistently endorse specific Xero Shoe models that provide enhanced levels of cushioning, especially beneficial for beginners or those transitioning from traditional footwear. Models such as the Xero Shoes “Prio” and “HFS” regularly receive acclaim for their thoughtful and user-friendly design. The “Prio” features a versatile sole that accommodates a wide range of activities, making it a favored option among both runners and casual wearers. Meanwhile, the “HFS” is recognized for its superior cushioning, meticulously crafted to support longer distances without compromising the minimalist experience. These endorsements are grounded in expert evaluations, ensuring that users can confidently select footwear that fulfills their unique requirements.
What Benefits Can You Anticipate from Choosing Xero Shoes with Enhanced Cushioning?
How Does Increased Cushioning Elevate Comfort Levels?
Enhanced cushioning in Xero Shoes can dramatically improve comfort levels by providing additional padding and superior shock absorption. This is particularly advantageous for individuals engaged in long-duration walking or running sessions. The extra cushioning helps minimize fatigue in your feet during extended activities, making it easier to sustain performance levels. Furthermore, individuals with sensitive feet or those transitioning from traditional shoes will find that the additional padding aids in a smoother adjustment process. With increased comfort, users often report a more pleasant experience during various activities, ranging from daily errands to adventurous excursions on challenging trails.
Can Enhanced Cushioning Contribute to Improved Performance?
Absolutely, increased cushioning can significantly enhance performance by reducing fatigue and allowing users to engage in activities for longer periods. The additional support and shock absorption provided by cushioned Xero Shoes can lessen the impact on your feet and joints, ultimately decreasing the risk of injuries during high-impact activities. Consequently, runners and athletes may find that they can push their limits further, experiencing enhanced endurance and speed. Achieving the ideal balance between comfort and performance is essential, and well-cushioned shoes can help in reaching this equilibrium, making them an excellent option for individuals seeking to elevate their physical capabilities.
Which Activities Benefit Most from Wearing Cushioned Xero Shoes?
Cushioned Xero Shoes are especially suitable for activities that require prolonged wear and exceptional impact absorption. Long-distance running, hiking, and everyday use are all ideal applications for these shoes. They provide the necessary support and comfort required for such demanding pursuits while still retaining the inherent advantages of minimalist footwear. Whether navigating rugged terrains or leisurely strolling through urban settings, cushioned Xero Shoes offer an experience that harmonizes support with natural foot functionality, allowing you to engage in various activities without discomfort.
How Does Enhanced Cushioning Influence Foot Health?
Incorporating additional cushioning into your footwear can positively affect foot health by alleviating stress on joints and muscles. This cushioning is particularly important for individuals recovering from injuries or aiming to prevent chronic issues like plantar fasciitis. With increased support, the likelihood of overuse injuries is reduced, promoting a healthier and more resilient foot structure. Additionally, cushioned Xero Shoes can help facilitate proper alignment during various movements, enhancing overall foot biomechanics. As a result, users commonly report improved comfort and reduced pain, contributing to better long-term foot health.
Are There Any Potential Drawbacks to Wearing Highly Cushioned Xero Shoes?
While increased cushioning provides several benefits, it may also present certain disadvantages. A higher level of cushioning can diminish ground feel and proprioception, both critical elements of minimalist shoes. This reduction may lead to a reliance on the added support, potentially undermining the natural strength and agility that minimalist footwear aims to foster. Therefore, it is essential to find a balance when selecting cushioned models to ensure that you continue to experience the natural foot movement that Xero Shoes encourage. Users should remain aware of these factors when choosing their footwear to uphold the essence of minimalist running and walking.
Research-Based Insights on the Most Cushioned Xero Shoes
What Does Research Reveal About Cushioning and Foot Health?
Research supports the idea that the appropriate level of cushioning can significantly enhance foot health. Studies indicate that adequate cushioning can minimize impact forces while promoting natural foot movement. These studies frequently compare various cushioning levels to assess their effects on foot biomechanics, revealing that moderate cushioning can effectively balance comfort with the natural functioning of the foot. This balance is crucial for preventing injuries and facilitating a smooth transition to minimalist footwear. As the minimalist footwear movement continues to gain momentum, ongoing research is likely to yield further insights into the connection between cushioning and foot health.
How Does Cushioning Affect Running Efficiency?
Cushioning in Xero Shoes plays a pivotal role in optimizing running efficiency. Shoes equipped with thoughtfully designed cushioning can enhance running performance by providing comfort without compromising the natural foot motion crucial for effective strides. Research has shown that runners wearing shoes with strategically placed cushioning experience less fatigue and maintain their pace over longer distances. This balance can lead to improved overall performance, enabling athletes to concentrate on their technique rather than the discomfort often associated with lengthy runs. Understanding the impact of cushioning on running efficiency can assist users in selecting the right shoes tailored to their unique needs.
What Long-Term Advantages Can You Gain from Wearing Cushioned Xero Shoes?
Long-term use of cushioned Xero Shoes can lead to numerous benefits, including enhanced foot strength, improved posture, and a reduced risk of common foot ailments. As users incorporate these shoes into their daily routines, they often report stronger feet due to the supportive yet minimalist design that encourages natural movement. Furthermore, consistent wear can promote better posture by facilitating proper alignment and alleviating muscle strain. These advantages highlight the importance of selecting the right footwear for both immediate comfort and long-term health, making cushioned Xero Shoes a smart investment for those prioritizing foot wellness.
How to Select the Ideal Cushioned Xero Shoes for Your Needs?
Essential Factors to Consider When Making Your Purchase
When choosing cushioned Xero Shoes, several crucial factors must be considered to ensure a proper fit and alignment with your unique requirements. Evaluate the type of activities you will be engaging in, your foot shape, and your personal comfort preferences. For instance, individuals focused on long-distance running may prioritize shoes with enhanced cushioning, while casual walkers might prefer models that achieve a balance between comfort and ground feel. It’s equally important to assess any existing foot conditions; those with specific issues may need more specialized support. Striking the right balance between cushioning and the minimalist feel inherent to Xero Shoes is vital for an optimal wearing experience.
How to Determine the Right Level of Cushioning for Your Needs?
Determining the appropriate level of cushioning requires careful consideration of your foot sensitivity, the activities you intend to engage in, and your experience with minimalist footwear. Start by evaluating how your feet react to different levels of cushioning—this will guide you toward the most fitting choice. If you are new to minimalist shoes, beginning with models that offer moderate cushioning can facilitate a smoother transition. Additionally, take into account the intensity and duration of your planned activities; longer, more intense sessions may necessitate increased cushioning for optimal support. Trying on various styles can help you identify the perfect fit, ensuring an enjoyable experience with your Xero Shoes.
Best Practices for Trying on Xero Shoes for the Right Fit
Effectively trying on Xero Shoes involves following several best practices to ensure a proper fit and maximum comfort. Start by wearing them indoors to assess their initial feel. Gradually increase the time you wear them to allow your feet to acclimate to the new sensations. Pay close attention to how your feet respond; if you experience discomfort, reconsider the model or size. It may also be beneficial to walk or run on various surfaces to evaluate their performance. Here’s a quick checklist for a successful Xero Shoes fitting:
- Wear them indoors for brief periods to evaluate initial comfort.
- Gradually extend wear time as your feet adapt to the shoes.
- Test them on different surfaces to assess overall performance.
- Monitor your body’s reactions; adjust sizes or models as necessary.
By adhering to these practices, you can enhance your transition to Xero Shoes while ensuring that you select a model that seamlessly fits your lifestyle.
Proven Strategies for Selecting Xero Shoes with Optimal Cushioning
How to Maximize the Benefits of Your Cushioned Xero Shoes?
To fully harness the advantages of cushioned Xero Shoes, it is essential to prioritize regular use, ensure a proper fit, and engage in activities that promote foot health. Make sure to select the correct size to prevent discomfort that could detract from your experience. Additionally, incorporating foot-strengthening exercises into your routine will complement the support provided by your shoes. Listening to your body is equally vital; if you experience any discomfort, reassess your footwear choice or consult with a specialist. Here are some actionable steps for maximizing the benefits of your cushioned Xero Shoes:
- Wear your Xero Shoes regularly to facilitate foot adaptation.
- Incorporate exercises that strengthen your feet into your routine.
- Consult with footwear experts for accurate fitting.
- Be attentive to any discomfort and make necessary adjustments.
By implementing these strategies, you can enhance your overall experience and fully benefit from the unique features of your cushioned Xero Shoes.
What Common Mistakes Should You Avoid with Cushioned Xero Shoes?
Common errors made by users of cushioned Xero Shoes can significantly impact their experience. One prevalent issue is an over-reliance on cushioning, which can create a disconnect from the natural ground feel that minimalist shoes are designed to provide. Neglecting foot-strengthening exercises may also hinder overall foot health and performance. Furthermore, incorrect sizing can lead to discomfort and reduce the effectiveness of the cushioning. Avoiding these pitfalls will improve your experience and help you maximize the benefits of your footwear. Being mindful of these factors ensures that you fully enjoy the advantages offered by Xero Shoes.
What Maintenance Practices Should You Implement to Care for Your Cushioned Xero Shoes?
Proper maintenance of cushioned Xero Shoes is crucial to ensuring their longevity and continued comfort. Regular cleaning is vital to prevent dirt buildup, which can compromise the materials. Store your shoes in a cool, dry environment to maintain their structural integrity and avoid exposure to extreme elements. Additionally, routinely inspect the soles for wear and replace them when significant deterioration is observed. This proactive approach will help preserve the comfort and performance of your Xero Shoes. Here are some expert maintenance tips:
- Clean shoes regularly using mild soap and water.
- Store them in a cool, dry location to prevent damage.
- Regularly check the soles for wear and replace as necessary.
- Avoid exposing shoes to extreme temperatures.
By following these maintenance practices, you can ensure that your cushioned Xero Shoes continue to perform at their best.
Which Xero Shoe Models Are Renowned for Their Exceptional Cushioning?
When examining Xero Shoe models recognized for their cushioning, the “Z-Trail” and “Prio” emerge as top contenders due to their thoughtful design and positive user feedback. The “Z-Trail” features an enhanced cushioned sole that remains lightweight, making it ideal for hiking and all-day wear. In contrast, the “Prio” is celebrated for its versatility, offering an excellent balance of cushioning and minimalism, appealing to both casual wearers and dedicated athletes. Understanding the unique attributes of these models empowers users to make informed choices that align with their specific needs while still benefiting from minimalist footwear.
How Does Cushioning in Xero Shoes Affect Your Foot Health?
Cushioning in Xero Shoes significantly enhances foot health by providing essential support while promoting natural foot movement. Adequate cushioning helps absorb shock during physical activities, effectively reducing the risk of injury and discomfort. This supportive feature enables the foot to function optimally, encouraging improved biomechanics. Over time, users may observe increased strength and resilience in their feet, contributing to enhanced overall foot health. As more individuals embrace the advantages of minimalist footwear, recognizing the importance of cushioning becomes increasingly vital. Choosing the appropriate level of cushioning can positively impact your performance and safeguard your long-term foot health.
Frequently Asked Questions About Xero Shoes: Key Insights
What Unique Features Differentiate Xero Shoes?
Xero Shoes are widely recognized for their minimalist design that mimics the sensation of being barefoot, fostering natural foot movement and strength.
Which Xero Shoe Models Offer the Most Cushioning?
Models like the Xero Shoes “Prio” and “HFS” frequently receive accolades for their superior cushioning, ensuring comfort while maintaining the minimalist feel.
Are Xero Shoes Suitable for Everyday Activities?
Indeed, Xero Shoes are designed for versatility and can be effectively used for a variety of daily activities, including walking, running, and casual outings.
How Can I Assess If I Need More Cushioning?
If you experience discomfort or fatigue during physical activities, or if transitioning from traditional footwear, opting for more cushioning may be advantageous.
Can Xero Shoes Be Utilized for Hiking?
Yes, certain models of Xero Shoes, such as the “Z-Trail,” are specifically designed for hiking, providing both cushioning and support for rugged terrains.
How Often Should I Replace My Xero Shoes?
It is advisable to replace your Xero Shoes when you notice significant wear on the soles or if you begin to feel discomfort during use.
Can Cushioned Xero Shoes Help Alleviate Foot Pain?
Cushioned Xero Shoes can assist in reducing foot pain by providing support and shock absorption, particularly for those recovering from injuries or dealing with chronic conditions.
Do I Need to Break in My Xero Shoes?
While Xero Shoes are designed for immediate comfort, gradually increasing wear time can assist your feet in adjusting to the minimalist design.
What Key Features Should I Seek in Cushioned Xero Shoes?
When selecting cushioned Xero Shoes, consider factors such as sole thickness, material composition, and design elements that cater to your planned activities.
How Can I Properly Care for My Xero Shoes?
To maintain your Xero Shoes, clean them regularly, store them appropriately, and monitor for signs of wear to ensure longevity.
The Article Xero Shoes with the Most Cushion: Your Ultimate Guide appeared first on My Shoes Finder
Discover Related Articles:
Xero Shoes for Children: 2025 Developmental Podiatry Guide Xero Shoes for Bunions: 2025 Guide to Hallux Valgus Improvement
 Xero Shoes for Wide Feet: 2025 Fitting Guide and Model Recommendations
 Best Xero Shoes for Pickleball: Top Recommendations
 Xero Shoes for Nurses: 12-Hour Shift Survival Guide (2025)
 Sizing Xero Shoes: The Ultimate Universal Guide
The Article Most Cushioned Xero Shoes: Your Complete Guide Was Found On https://limitsofstrategy.com
-

Scissor Cuts for Detail: Perfecting Precision Techniques
Become a Scissor Cutting Expert: Effective Techniques for Precision and Control
Improve Your Scissor Grip for Enhanced Cutting Control and Accuracy
To achieve exceptional precision in your scissor cuts, it is vital to adopt an effective grip that enhances your control while minimizing errors during the cutting process. Start by placing your thumb in the upper handle and your middle finger in the lower handle, allowing your index finger to rest lightly on the top for added stability. This grip promotes fluid motion, making it easier to adjust the cutting angle as needed. A well-executed grip not only boosts your control but also builds your confidence during various cutting projects, making your work more enjoyable and efficient.
Experimenting with different grips can yield significant benefits. Some individuals may find that using their index finger for additional leverage enhances their cutting efficiency, while others might prefer the comfort of relying solely on their thumb and middle finger. Regular practice with these different grips will help you discover the most effective and comfortable method tailored to your unique cutting style. Striking a balance is essential; a firm grip ensures control, while a relaxed hand promotes smoother cutting movements, ultimately enhancing your overall proficiency.
To maximize your cutting control, ensure that your hand is comfortably positioned relative to the material being cut. Tension in your hand can lead to unsteady cuts, so practice relaxing your grip slightly while maintaining comprehensive control. This more relaxed approach enables smoother, more precise cutting motions. By recognizing your comfort and control preferences, you will significantly enhance your scissor cutting skills and elevate the overall quality of your work.
Optimize Your Cutting Angles and Body Positioning for Better Results
Mastering the angle of your cuts is essential for achieving detailed and intricate work. The angle of your scissors should align with the material being cut to ensure a clean and effective cut. It is crucial to experiment with various angles to determine which yields the best outcomes for different cutting projects. For example, a slight tilt may prove more effective when cutting curves, while a perpendicular angle is typically necessary for straight lines to guarantee accuracy and precision.
Furthermore, your body’s positioning in relation to the work surface can significantly influence the quality of your cuts. Whether you are standing or sitting, ensure that you are at an optimal height to maintain a steady hand. This positioning is vital for achieving precision in all your cutting tasks. If your cutting surface is too high or low, it can lead to fatigue, resulting in uneven cuts. Try different body positions to discover what works best for you, ensuring that you maintain a relaxed and controlled posture throughout your cutting endeavors.
Additionally, consider the specific project you are undertaking. For delicate and intricate designs, employing a gradual approach with smaller, controlled movements may be necessary. Practicing these techniques on a variety of materials will not only enhance your ability to adapt your cutting style but will also significantly improve your overall precision across different cutting contexts.
Customize Your Cutting Techniques Based on Material Types
The type of material you are cutting greatly influences the techniques required to achieve detailed and precise cuts. Each material presents unique challenges and necessitates specific approaches for optimal results. For example, when cutting paper, ensuring your scissors are sharp is essential to prevent tearing; smooth blade movement is critical for achieving clean edges. Furthermore, working on a stable surface will greatly enhance your control during the cutting process.
Transitioning to cutting fabric demands a completely different approach. Fabric can shift or fray, requiring a steady hand and the proper type of scissors. It is often advisable to use fabric scissors designed specifically for this purpose, as they are tailored to handle the unique properties of cloth. When working with fabric, consider using pins to secure the material in place, preventing unwanted movement and ensuring accuracy in your cuts.
When dealing with other materials, such as cardstock or plastic, you may need to adjust your technique accordingly. For instance, thicker materials might require the use of heavy-duty scissors or even a craft knife for more intricate cuts. Understanding how to adapt your approach based on the material type will significantly enhance the quality of your detail work, enabling you to produce professional and polished results across various projects.
Elevate Your Detail Work: Expert Guidance on Scissor Cutting Practices

Key Factors That Enhance Cutting Precision
Achieving precision in cutting is influenced by several critical factors that can be optimized for superior results. The sharpness of your scissors plays a pivotal role; dull blades can cause dragging and tearing, ultimately leading to imprecise cuts. Additionally, the steadiness of your hand is equally vital; a shaky hand can result in uneven lines and poor angles. Furthermore, understanding the material you are cutting can inform your technique, ensuring you apply the right amount of pressure and the appropriate cutting method for each specific material.
To attain the highest level of precision in your cuts, consider these key factors:
- Sharpness: Regularly sharpen your scissors using a sharpening stone or professional service to maintain their cutting edge.
- Steadiness: Practice maintaining a steady hand, potentially using support like a table or stabilizing your arm.
- Material Knowledge: Familiarize yourself with the specific properties of each material you cut, which will inform your technique.
- Grip Technique: Experiment with different grips to identify what provides you with the best control over your cuts.
- Cutting Angle: Adjust your cutting angle based on the material and desired outcome for greater accuracy.
- Practice: Consistent practice enhances muscle memory, leading to improved precision over time.
- Focus: Minimize distractions during cutting to maintain concentration and ensure optimal results.
Optimizing these factors can dramatically elevate the precision of your cuts, resulting in polished and professional outcomes in any project you undertake.
Effective Strategies for Improving Your Scissor Skills
Enhancing your scissor skills requires regular practice and the refinement of your technique. Engaging in integrated exercises can be particularly beneficial for boosting your control and dexterity. Begin by practicing on simple projects, such as cutting out shapes or following lines, to gradually build your confidence. As you develop your skills, progressively introduce more complex tasks to challenge yourself.
To effectively improve your scissor skills, consider implementing these exercises:
- Cutting Straight Lines: Draw various straight lines on paper and practice cutting along them to build your confidence.
- Curved Cuts: Draw curves and practice cutting along these shapes to enhance your control and precision.
- Shapes Practice: Cut out basic shapes like circles, triangles, and squares to improve your accuracy in detail work.
- Layered Cutting: Stack materials (like paper or fabric) and practice cutting through them to build strength and confidence.
- Speed Control: Set a timer for short sessions to practice cutting quickly while maintaining accuracy.
- Feedback Sessions: Have someone observe your technique and provide constructive feedback to facilitate improvement.
- Daily Practice: Dedicate a few minutes each day to practice various cutting techniques to enhance muscle memory.
Regularly practicing these exercises will significantly improve your scissor handling, ultimately leading to enhanced performance in detailed cutting tasks.
Essential Maintenance Tips for Your Scissors to Ensure Optimal Performance

Proper maintenance of your scissors is crucial for achieving the best results in detail work. Keeping your scissors sharp and in good condition ensures that they perform optimally, allowing for clean and precise cuts. Dull scissors can lead to frustration and imprecise work, so implementing a regular maintenance routine is key to preserving their effectiveness.
Here are some best practices for scissor care:
- Regular Sharpening: Sharpen your scissors regularly using a sharpening stone or professional service to maintain their cutting edge.
- Cleaning: Wipe the blades clean after each use to prevent residue build-up that can affect performance and longevity.
- Proper Storage: Store scissors in a protective case or sheath to avoid damaging the blades and maintain their sharpness.
- Check Alignment: Regularly check that the blades are aligned properly; misalignment can lead to uneven cuts and poor performance.
- Handle with Care: Avoid using scissors for tasks they aren’t designed for, as this can damage the blades and reduce their effectiveness.
- Lubrication: Occasionally apply a drop of oil to the pivot point to keep the scissors functioning smoothly and prevent rust.
- Temperature Awareness: Store scissors in moderate temperature conditions to prevent warping or damage over time.
Adhering to these maintenance tips will prolong the life of your scissors and greatly enhance their effectiveness in detailed cutting tasks, ensuring optimal performance each time you use them.
Choosing the Perfect Scissors for Superior Detail Work
Selecting the appropriate scissors is crucial for achieving precision in detail work. The right pair can significantly impact the outcomes of your projects. When selecting scissors, consider several key features that can affect your cutting experience and overall satisfaction.
Pay attention to the following features:
- Blade Sharpness: Look for scissors with high-quality, sharp blades that enable cleaner cuts and minimize tearing.
- Handle Comfort: Choose scissors with ergonomic handles that offer comfort during extended use, reducing hand fatigue.
- Size: Select a size that fits comfortably in your hand, allowing for better control and precision during cutting.
- Blade Length: Longer blades may be suitable for larger cuts, while shorter blades can provide more precision for intricate detail work.
- Material: Consider the material of both the blades and handles; stainless steel is often preferred for its durability and resistance to rust.
- Type: Investigate specific types of scissors, such as fabric scissors or detail scissors designed for intricate cutting tasks.
- Weight: Lighter scissors can be easier to handle for prolonged periods, allowing for greater control and precision.
Choosing scissors that meet these criteria will ensure that you have the right tools at your disposal for detailed cutting, ultimately improving the quality of your results and enhancing your overall cutting experience.
Avoiding Common Pitfalls in Scissor Cutting Techniques
Avoiding common errors in scissor cutting can significantly enhance the quality of your work. Recognizing these mistakes is the first step toward improvement. Being aware of issues such as overcutting, undercutting, and misalignment can help you refine your technique and achieve better results in your cutting projects.
Here are typical mistakes to avoid:
- Overcutting: Avoid removing too much material, which can ruin the intended design and compromise your project’s integrity.
- Undercutting: Ensure that you cut all the way through the material to avoid leaving jagged edges that detract from the quality.
- Inconsistent Pressure: Maintain a consistent pressure during cutting to prevent uneven lines and ensure clean edges.
- Misalignment: Regularly check the alignment of your scissors to ensure straight cuts and avoid skewed results.
- Neglecting Material Properties: Different materials may require different techniques; be mindful of these variations to achieve the best outcomes.
- Rushing: Lack of patience can lead to careless mistakes; take your time with each cut for the best results.
- Ignoring Grip: Not paying attention to how you hold your scissors can negatively affect your control and precision during cutting.
By understanding and avoiding these common mistakes, you can significantly enhance your scissor cutting skills, resulting in cleaner, more professional-looking cuts in your projects.
Identifying and Correcting Common Errors in Scissor Cutting
Understanding and Addressing Overcutting and Undercutting Issues
Overcutting and undercutting are two prevalent issues that can compromise the quality of your cutting work. Overcutting refers to the removal of excess material beyond the intended cut line, which can lead to an incomplete or damaged final product. Conversely, undercutting occurs when the cut does not go all the way through the material, resulting in unfinished edges that detract from the overall appearance.
To avoid overcutting, it is essential to be mindful of the amount of material you are removing. Develop a clear understanding of your project and ensure you have a precise outline to follow. Practicing controlled cuts can help you develop a sense of how much pressure and movement are necessary to achieve your desired results. Cutting a little at a time can prevent the temptation to remove excess material in one go, leading to cleaner outcomes.
Similarly, recognizing the signs of undercutting is vital for maintaining quality in your work. Jagged edges or incomplete cuts often indicate that you need to adjust your technique. To avoid this issue, take a moment to assess your cutting angle and the pressure you are applying. Ensuring that your scissors are sharp will also help you achieve clean cuts without leaving material behind. Practicing with different materials will enhance your ability to recognize the appropriate cut depth required for various projects.
Strategies for Achieving Consistent Cutting Lines
Achieving a smooth and consistent cutting line can be challenging, particularly for intricate designs. Factors such as hand fatigue, improper technique, and lack of focus can lead to jagged or uneven lines. Recognizing these causes will help you address them effectively, improving your overall performance in your cutting tasks.
To combat hand fatigue, take regular breaks during your cutting sessions. This not only helps maintain focus but also allows your hand to recover, which can enhance precision in your cuts. Proper technique is paramount; ensure that you are gripping the scissors correctly and maintaining a steady hand throughout the cutting process. Practicing slow, deliberate movements can lead to more consistent lines, as rushed cuts often result in uneven outcomes.
Another effective technique for achieving consistency is to use guides or templates. These tools can help you maintain a straight line or precise curve, providing a reference point to follow during your cutting. Over time, as your skills develop, you will find it easier to achieve consistent cutting lines without the aid of guides. Continuous practice and mindful observation of your technique will undoubtedly lead to improved cutting outcomes and greater confidence in your abilities.
Ensuring Proper Alignment of Scissors for Optimal Cutting Outcomes
Misalignment of scissors can have a detrimental effect on your cuts, resulting in skewed or uneven outcomes that detract from the quality of your work. Regular checks and adjustments to your scissors are necessary to ensure they function optimally and produce the desired results. Recognizing when your scissors are misaligned is essential, as this can lead to frustration and poor-quality work.
To ensure proper alignment, begin by visually inspecting the blades before each cutting session. If you notice any gaps or unevenness, take the time to adjust them accordingly. A simple tightening of the screw that connects the blades can often remedy minor misalignments. Additionally, investing in a quality pair of scissors that maintain their alignment over time is essential; cheaper scissors may be more prone to misalignment issues, compromising your cutting performance.
Practicing cutting techniques with an emphasis on maintaining alignment can also contribute to improved results. Focus on how you hold the scissors during each cut and make adjustments as necessary to ensure optimal alignment. With consistent attention to your scissors’ alignment, you will be able to produce cleaner, more accurate cuts in all your projects.
Essential Tools and Accessories to Enhance Detail Cutting
Choosing the Right Scissors for Your Specific Cutting Needs
Selecting the right pair of scissors for detail work is vital for achieving precision in your cuts. Different tasks require different types of scissors; therefore, understanding what features to consider can significantly enhance your overall cutting experience. The right scissors not only improve your technique but also contribute to the quality of your finished projects.
When selecting scissors for detail work, consider the following features:
- Blade Sharpness: Ensure the blades are sharp enough to cut through materials effortlessly and cleanly.
- Handle Comfort: Opt for ergonomic designs that fit comfortably in your hand, especially for extended use to reduce fatigue.
- Size: Select scissors that are appropriately sized for your hand and the detail work you intend to perform, ensuring ease of control.
- Blade Length: A shorter blade can provide greater control and precision for intricate designs, while longer blades may be suitable for larger cuts.
- Material: Stainless steel blades are often preferred for their durability and resistance to rust, ensuring longevity.
- Specialty Scissors: Consider scissors designed specifically for certain tasks, such as fabric scissors or detail scissors tailored for intricate cutting.
- Weight: Lighter scissors may be easier to handle for prolonged periods, providing greater comfort during use.
Taking the time to evaluate these features will ensure that you choose scissors that cater to your cutting needs, ultimately improving both your technique and the quality of your work.
Enhancing Your Cutting Experience with Cutting Mats
Cutting mats are invaluable tools that protect surfaces while providing a stable base for your cutting projects. Their non-slip surfaces help keep materials in place, allowing for clean and precise cuts. Utilizing a cutting mat can significantly enhance your cutting experience, especially when working with delicate materials that require careful handling.
One of the advantages of cutting mats is that they often come with grid lines, which can assist in measuring and aligning your cuts accurately. This feature is particularly useful for tasks that require straight lines or specific dimensions, as the grid serves as a guide, helping you maintain consistency and precision throughout your cutting process.
Additionally, cutting mats can absorb the impact of your scissors, preventing wear and tear on both your tools and work surfaces. This protection helps maintain the sharpness of your scissors for a longer duration and keeps your work area tidy. When selecting a cutting mat, consider its thickness and material; a thicker mat will provide better protection and stability during cutting tasks. Overall, incorporating a cutting mat into your toolkit will enhance your cutting efficiency and improve your results.
Utilizing Rulers and Guides for Enhanced Cutting Precision
Rulers and guides are essential accessories for maintaining straight lines and achieving precision in your cutting tasks. These tools can significantly improve the quality of your cuts, helping you create clean edges and accurate shapes. The right guide can make all the difference in executing intricate designs and projects effectively.
For detailed scissor cuts, consider using metal rulers for their sturdiness and straight edges. They serve as a reliable guide for cutting straight lines, ensuring that you maintain a consistent angle throughout your cuts. Clear plastic guides are also beneficial, as they allow you to see the material beneath while providing a straight edge to follow. Curved templates can assist when cutting shapes that require rounded edges, enabling you to achieve consistent results with ease.
Incorporating these tools into your cutting routine will not only enhance your accuracy but also build your confidence in tackling more complex projects. Practicing with these guides will help you internalize the techniques needed for precise cutting, ultimately leading to improved overall performance in your cutting tasks.
How to Effectively Practice Scissor Cuts at Home
Creating a Dedicated Practice Space for Cutting Mastery
Establishing a dedicated space for practicing scissor cuts can significantly enhance your focus and productivity. A well-organized practice area allows you to concentrate on honing your skills without distractions. When setting up your practice area, consider the following elements to improve your cutting experience and skill development.
Begin by selecting a well-lit area, as good lighting is essential for seeing the details of your work clearly. Natural light is ideal, but if that’s not possible, invest in a high-quality lamp that provides adequate illumination. The seating arrangement should be comfortable, with a chair that supports good posture to help you maintain focus during longer practice sessions.
A stable table is equally important; ensure that your cutting surface is robust and won’t shift during use. Placing a cutting mat on your table will protect the surface and provide a non-slip area for your materials, enhancing your cutting accuracy. Organizing your tools and materials within reach will also save time and maintain your flow during practice. By thoughtfully arranging your practice area, you will create an environment conducive to skill development and improvement in your cutting abilities.
Practicing with a Variety of Materials to Enhance Your Skills
Variety in practice materials can greatly enhance your versatility as a scissor user. By familiarizing yourself with different materials, you will develop the skills necessary to tackle a wide range of projects successfully. As a beginner, it’s essential to start with manageable materials and gradually progress to more challenging options.
Start with paper as your primary practice material. It is easy to cut and perfect for building confidence with basic cutting techniques. Once you feel comfortable, transition to fabric, which requires a different approach due to its unique properties. Begin with lightweight fabrics and practice cutting shapes, ensuring you maintain control throughout the process.
As you progress, introduce more complex materials such as cardstock or thicker fabrics. These materials will challenge your skills and help you adapt your cutting techniques accordingly. Practicing on various materials not only improves your scissor handling but also prepares you for diverse projects in the future. Embrace the learning process and challenge yourself to explore multiple materials to enhance your cutting proficiency.
Monitoring Your Progress and Improvement in Scissor Skills
Tracking your progress is an essential aspect of developing your scissor cutting skills. By monitoring your improvements, you can identify areas that require further attention while celebrating your successes. This practice will help motivate you to continue refining your technique and provide tangible evidence of your advancement.
One effective method for tracking progress is to maintain a practice journal. Document your cutting sessions, noting the materials used, techniques practiced, and any challenges encountered. Reflecting on your experiences will help you recognize patterns and areas for improvement, enabling you to set specific goals for future practice sessions.
Additionally, consider using before-and-after photos to visually illustrate your progress. Capturing images of your work at various stages will allow you to see how much you’ve improved over time. This method not only provides motivation but also highlights the techniques that have worked well for you. By actively tracking your progress and celebrating your achievements, you will cultivate a positive and rewarding learning experience in your scissor cutting journey.
Research-Backed Benefits of Practicing Scissor Cuts for Detail Work
Enhancing Fine Motor Skills Through Consistent Scissor Practice
Regular practice with scissors can significantly improve your fine motor skills, which are essential for precision tasks across various fields. Engaging in activities that require intricate movements, such as scissor cutting, enhances hand-eye coordination and dexterity. Research indicates that these tasks are particularly beneficial for both children and adults, leading to improved motor skills over time as a result of consistent practice.
As individuals practice cutting with scissors, they develop better control over their hand movements, which translates into enhanced performance in other activities requiring fine motor skills. This includes tasks like writing, drawing, and performing intricate manual tasks in various professions. The act of cutting necessitates precise movements, ultimately refining one’s ability to manipulate tools and materials effectively with greater accuracy.
Additionally, incorporating practice sessions into daily routines can foster a habit of skill enhancement. Regular engagement in such activities ensures continuous improvement, which is crucial for mastering fine motor skills. As you refine your scissor skills, you will notice broader applications of enhanced dexterity in your everyday tasks, making practice well worth the effort.
Boosting Cognitive Development Through Engaging Cutting Activities
Engaging in detailed cutting tasks with scissors has been shown to stimulate cognitive functions, providing a range of cognitive benefits. Activities that require concentration, planning, and problem-solving skills can enhance cognitive development, making scissor cutting an excellent exercise for both children and adults alike.
The process of planning a cut—such as determining the correct angle and depth—requires cognitive engagement and critical thinking. These tasks encourage focus, as individuals must concentrate on maintaining their cutting lines and executing precise movements. Moreover, practice with scissors can promote spatial awareness, as users learn to visualize the outcome of their cuts based on their hand movements.
Research supports the notion that activities requiring precision, such as scissor cutting, contribute to improved cognitive skills. Whether in educational settings or for personal development, practicing scissor cuts can help strengthen cognitive abilities, resulting in better problem-solving skills and enhanced focus across various tasks.
Improving Craft and Art Project Outcomes Through Scissor Skills
Mastering scissor skills can significantly elevate the quality of your craft and art projects. Detail work is often where the success of a project lies, and well-practiced scissor techniques can lead to higher quality and more intricate designs. Artists and crafters frequently report that their projects benefit from improved cutting skills, allowing for cleaner lines and more precise shapes.
As you develop your scissor skills, you will find that you can tackle more complex designs with ease. Intricate patterns and shapes become more achievable as you gain control and confidence in your cutting technique. This, in turn, opens the door to more ambitious projects, enhancing both your creativity and your ability to execute your vision effectively.
Furthermore, engaging in arts and crafts using these refined scissor skills can be a rewarding experience. Not only do you create tangible products, but you also boost your self-esteem and satisfaction with your work. As you continue to improve your precision and detail work, the quality of your projects will rise, leading to a fulfilling and enjoyable crafting journey.
Therapeutic Benefits of Engaging in Precision Scissor Cutting
Practicing scissor cutting can also offer therapeutic benefits, particularly in improving mental health. Engaging in activities that require focus and precision, such as scissor cutting, can help reduce stress and promote mindfulness. This process can be particularly beneficial for individuals looking to cultivate a sense of calm and well-being through creative expression.
Studies indicate that engaging in hands-on activities, including scissor cutting, can lead to reduced anxiety levels and improved mood. The repetitive nature of cutting can be meditative, allowing individuals to enter a state of flow that promotes relaxation and mindfulness. Additionally, the satisfaction derived from creating something tangible can elevate one’s sense of accomplishment and joy in their work.
Incorporating scissor cutting into therapeutic practices can also enhance fine motor skills in children, making it a useful tool for occupational therapy. As children practice cutting with scissors, they improve not only their dexterity but also their ability to manage frustration and develop patience. Overall, the therapeutic benefits of scissor cutting extend beyond just skill development, positively impacting mental health and emotional well-being.
Best Practices for Teaching Scissor Skills Effectively
Starting with Fundamental Techniques for Beginner Learners
For beginners, starting with simple cuts is vital to building confidence and developing foundational skills in scissor use. Teaching basic techniques lays the groundwork for more complex cutting tasks in the future. The initial focus should be on mastering straight lines, curves, and simple shapes, which are the building blocks of effective scissor cutting.
Begin by introducing straight-line cutting. Draw lines on paper for learners to follow, providing guidance on how to hold the scissors and maintain a steady hand. Once they feel comfortable with straight lines, progress to curves and simple shapes, such as circles and triangles. This gradual approach allows learners to develop their skills incrementally, reinforcing their confidence as they master each technique.
Creating a supportive learning environment is essential during this process. Encourage learners to take their time and be patient with themselves as they practice. Celebrate their successes and provide positive reinforcement to motivate continued effort. Establishing a solid foundation of basic techniques will prepare learners for more advanced cuts in the future and instill a sense of accomplishment in their learning journey.
Emphasizing Safe Scissor Use for Beginners
Safety is paramount when teaching scissor skills, especially to beginners. Emphasizing safe practices from the start helps prevent accidents and instills good habits that will last a lifetime. When introducing scissor use, it’s essential to highlight key safety measures to ensure a secure and supportive learning environment.
Begin by instructing learners to always cut away from their bodies, as this reduces the risk of injury. For young children, using child-safe scissors can provide an added layer of protection while they develop their skills. Supervision is also crucial; ensure that a responsible adult is present during practice sessions to monitor and support learners as they cut.
Additionally, teach proper handling techniques, such as how to pass scissors to others safely. Encourage learners to keep their fingers away from the blade when cutting and to maintain a focused mindset during practice. By prioritizing safety and proper technique, you will create a secure environment that fosters learning and growth in scissor skills.
Providing Constructive Feedback for Skill Improvement
Effective feedback is essential for helping learners improve their scissor skills. Constructive feedback focuses on positive reinforcement while also highlighting specific areas for improvement. This approach not only encourages learners to continue practicing but also helps them grow in their abilities over time.
When providing feedback, start by acknowledging what the learner did well. For instance, if they maintained a steady hand or followed a line accurately, express appreciation for their efforts. Next, gently suggest areas for improvement, such as adjusting their grip or slowing their speed during cuts. Specific, actionable advice will help them understand how to enhance their technique effectively.
Encouragement is key. Foster a supportive atmosphere where learners feel comfortable asking questions and seeking guidance. By creating a positive feedback loop, learners will feel motivated to keep practicing and honing their skills. Celebrating their progress and providing constructive insights will reinforce their dedication to mastering scissor cuts and improving their overall performance.
Progressing to Advanced Cutting Techniques for Skill Development
Once basic scissor skills are mastered, introducing more complex cuts will challenge learners and further develop their abilities. Advanced cuts, such as zigzags and spirals, provide opportunities for learners to apply their foundational techniques in new and exciting ways. These challenges can enhance both their skills and their confidence in using scissors effectively.
Start by demonstrating the new techniques clearly and breaking them down into manageable steps. For zigzag cuts, guide learners to create a series of sharp angles, emphasizing the importance of maintaining a consistent rhythm. For spirals, encourage them to practice a smooth, continuous motion while cutting, reinforcing control and precision in their movements.
Encourage learners to experiment with these advanced cuts using various materials to develop adaptability and versatility in their cutting techniques. Providing opportunities for creative application, such as incorporating these techniques into art and craft projects, will further engage learners and solidify their skills. As they progress to advanced cuts, they will build a sense of accomplishment and confidence in their abilities.
Integrating Scissor Skills into Meaningful Creative Projects
Incorporating scissor cuts into art and craft projects allows learners to apply their skills in practical and engaging ways. By integrating scissor skills into creative tasks, learners can see the real-world applications of their training, making the learning process more meaningful and enjoyable.
Encourage learners to select projects that require various cutting techniques, such as creating collages, greeting cards, or decorations. This hands-on approach allows them to utilize their scissor skills while exploring their creativity in a supportive environment. Provide guidance on how to plan their projects and the cutting techniques they will need to employ to achieve their desired outcomes.
As they work on these projects, monitor their progress and provide support as needed, reinforcing the importance of precision and control in their cutting tasks. Celebrating the completion of their projects fosters a sense of achievement, motivating learners to continue developing their skills over time. By integrating scissor skills into creative endeavors, learners will not only enhance their cutting abilities but also cultivate a passion for art and crafts, making the learning experience truly rewarding.
Advanced Techniques for Mastering Scissor Cutting Skills
Creating Stunning Intricate Patterns with Scissors
Advanced techniques can elevate your scissor cutting, allowing for the creation of intricate patterns that showcase both skill and creativity. Mastering these methods requires practice and patience, but the results can be striking and rewarding. Techniques such as using templates, layering cuts, and varying pressure are essential for achieving detailed and complex designs in your cutting projects.
One effective approach is to use templates as guides for intricate patterns. Templates provide a clear outline, enabling you to follow precise shapes and designs with ease. This is particularly useful for complex projects, where freehand cutting might lead to inaccuracies. Once you have created the template, you can practice cutting along its edges, refining your technique as you master the intricacies of the design.
Layering cuts is another advanced technique that can add depth and complexity to your work. By cutting through multiple layers of material, you can create unique effects and designs that stand out. Additionally, varying the amount of pressure applied during cutting can help you achieve different outcomes; lighter pressure may create delicate cuts, while firmer pressure can result in sharper, bolder lines. These techniques can be applied in various projects, allowing you to express your creativity and skill effectively.
Mastering Curves and Circles with Precision
Cutting curves and circles requires a different approach than straight lines, demanding greater control and technique. Mastering these shapes is essential for achieving precision in intricate designs. As you practice, you’ll develop the skills necessary to navigate curves smoothly and produce clean, accurate circles that enhance the quality of your work.
Begin by using templates or stencils for practice. This allows you to familiarize yourself with the cutting motion required for curves and circles without the pressure of freehand cutting. As you gain confidence, gradually reduce your reliance on templates, focusing on the feel of your scissors as they navigate the curves and shapes.
Practicing slow, deliberate movements is key when tackling curves and circles. Unlike straight cuts, where you can maintain a steady line, curves require gentle adjustments of your hand and wrist. Emphasize the importance of maintaining a steady angle and consistent pressure to achieve clean edges. With regular practice, cutting curves and circles will become more instinctive, enhancing your overall cutting proficiency and precision.
Combining Scissor Cuts with Additional Tools for Enhanced Results
Integrating other tools alongside scissors can significantly enhance your cutting work, particularly for detailed projects. Using a combination of tools allows you to achieve results that scissors alone might not provide, enabling you to explore a wider range of cutting techniques and styles.
Craft knives, rotary cutters, and punches are excellent supplementary tools that can be used in conjunction with scissors. A craft knife is particularly useful for intricate cuts that require precision; it allows for greater control in tight spaces and complex shapes. Rotary cutters are ideal for larger projects where straight cuts are needed, while punches can create specific shapes or designs that complement your scissor work effectively.
When combining these tools, it’s important to understand how each one interacts with the materials you are using. For instance, employing a craft knife on thicker materials may require added caution to ensure safety and maintain control. By leveraging the strengths of various tools, you can expand your creative possibilities and produce more complex and polished projects that showcase your cutting skills.
Frequently Asked Questions About Scissor Cutting Skills
What is the best way to hold scissors for precise cuts?
To achieve precise cuts, hold the scissors with your thumb in the top handle and your middle finger in the bottom handle, allowing your index finger to rest lightly on top for stability and control.
How do I improve my scissor cutting skills quickly?
Regular practice is key. Engage in focused exercises that emphasize straight lines, curves, and simple shapes while gradually introducing more complex tasks as your skills improve and develop.
What materials are ideal for beginners practicing scissor cuts?
Beginners should start with paper for basic practice, then progress to lightweight fabrics and cardstock as their skills develop and improve over time.
How often should I sharpen my scissors?
Scissors should be sharpened regularly, ideally after significant use or when you notice a decrease in cutting efficiency to ensure optimal performance.
What are some common mistakes to avoid when cutting with scissors?
Common mistakes include overcutting, undercutting, inconsistent cutting lines, and neglecting the proper alignment of scissors during use, all of which can affect the quality of your work.
Can scissor cutting enhance fine motor skills in children?
Yes, engaging in scissor cutting helps improve fine motor skills in children by enhancing hand-eye coordination and dexterity through consistent practice and engagement in cutting activities.
What types of scissors are best for detail work?
For detail work, look for scissors with sharp blades, comfortable handles, and a size that fits your hand well, allowing for better control and precision during cutting tasks.
How can I create intricate designs with scissors?
Using templates, layering cuts, and varying pressure can help you achieve intricate designs while cutting with scissors, allowing for greater creativity and detail in your work.
Is it safe for children to use scissors?
Yes, children can safely use scissors with proper supervision and by beginning with child-safe scissors designed to minimize injury while they develop their skills.
How can I track my progress while practicing scissor skills?
Maintaining a practice journal or taking before-and-after photos of your cuts can help you track progress and identify areas for improvement over time, facilitating growth in your skills.
Connect with us on Facebook!
The Article: Practicing Scissor Cuts for Detail: Mastering the Art appeared first on Amitys Hair Salon.
The Article Scissor Cuts for Detail: Master the Art of Precision Was Found On https://limitsofstrategy.com
-

Waterfall Braids: Your Essential Guide to Elegant Styling
Master the Art of Waterfall Braids: Unlock Expert Techniques for Stunning Styles
Discover the Allure and Popularity of Waterfall Braids
The creation of exquisite waterfall braids involves a sophisticated technique that presents hair in a flowing, artistic manner, reminiscent of a breathtaking waterfall. This elegant hairstyle not only accentuates the natural texture of the hair but also adds a sophisticated touch to various looks, making it a favorite among fashion enthusiasts. The appeal of waterfall braids lies in their unique combination of simplicity and intricate detailing. Notable features of waterfall braids include:
- Gorgeous Cascading Effect: Strands are skillfully interwoven to produce a captivating visual that mimics the graceful flow of water.
- Diverse Styling Possibilities: Perfect for both casual outings and formal events, these braids can be easily dressed up or down to match any occasion.
- Complex Yet Easy to Master: Despite their intricate appearance, waterfall braids can be straightforward to achieve with consistent practice and patience.
- Enhancing Facial Features: They can be styled to beautifully frame the face, highlighting and accentuating one’s features.
- Compatible with Various Hair Textures: This braiding method suits a wide range of hair textures, from straight to curly.
- Limitless Creative Variations: Waterfall braids can be combined with other styles, offering endless possibilities for creativity and personalization.
These remarkable attributes make waterfall braids a top choice for those seeking to enhance their hairstyling skills and elevate their overall appearance.
Essential Steps to Perfect Your Waterfall Braid Technique
Mastering the delicate craft of creating waterfall braids requires a series of precise techniques aimed at achieving a flawless and visually stunning hairstyle. Success hinges on patience and a commitment to regular practice, as each step demands focus and meticulous attention. Important techniques for mastering your waterfall braid include:
- Effective Hair Sectioning: Properly sectioning your hair allows for better control and accuracy throughout the braiding process.
- Consistent Tension Maintenance: Maintaining even tension across the braid prevents it from becoming loose or uneven in shape.
- Skillful Incorporation of Loose Strands: Adding loose strands into the braid creates a natural, flowing appearance that enhances the overall style.
- Effective Braid Securing: Tying off the braid securely ensures it remains intact without compromising its aesthetic.
- Practicing with Different Hair Textures: Experimenting with various hair types enhances your adaptability and skill in braiding.
By implementing these vital techniques, anyone can develop expertise in creating breathtaking waterfall braids, transforming their hairstyling skills into something remarkable.
Essential Tools and Accessories for Crafting Stunning Waterfall Braids
Using the right tools and accessories is critical for creating the perfect waterfall braid. Each item plays a significant role in both the styling process and the final look. Recommended tools and accessories include:
- Fine-toothed Comb: This tool is essential for cleanly sectioning hair and ensuring smooth, even parts.
- Hair Elastics: Choose clear or color-matching elastics to discreetly secure your braid without drawing attention.
- Hairpins: These are excellent for securing any loose strands without detracting from the braid’s beauty.
- Frizz Control Products: Utilizing products to manage frizz helps maintain a polished appearance throughout the day.
- Styling Gel: A light-hold gel provides additional control for any pesky flyaways, ensuring a neat finish.
- Decorative Accessories: Incorporating ribbons, flowers, or beads can add a unique and personal touch to your hairstyle.
These tools not only assist in crafting a stunning waterfall braid but also ensure it remains refined and durable throughout the day.
Gain Expert Insights into Precision Waterfall Braiding Techniques
Understanding What Distinguishes Waterfall Braids from Other Braiding Styles
The true uniqueness of waterfall braids lies in their enchanting cascading effect, which adds movement and depth to any hairstyle. This distinctive quality elevates a simple braid into a captivating focal point. To fully appreciate the uniqueness of waterfall braids, consider embracing the following actionable steps:
- Prioritize Mastery of Techniques: Gaining proficiency in the basic waterfall braid technique is crucial before exploring more advanced variations.
- Experiment with Different Hair Textures: Discover how various textures can impact the aesthetic and overall allure of the braid.
- Varying Section Sizes: Adjusting the size of the hair sections can significantly change the overall look and feel of the braid.
- Incorporate Color: Use temporary hair color sprays to enhance visual interest and depth.
By following these steps, you can truly appreciate the artistry involved in waterfall braids and become adept at this mesmerizing technique.
How Expert Guidance Can Elevate Your Braiding Skills
Learning from experienced hairstylists can significantly enhance your braiding skills. Their expertise often encompasses a wealth of tips and tricks that can transform your approach to waterfall braids, providing practical insights. Real-world examples of expert guidance in braiding include:
- Participating in Hands-on Workshops: Engaging in professional workshops offers tailored, personalized instruction to meet your learning needs.
- Accessing Online Tutorials: Expert-led video tutorials typically provide step-by-step guidance that can be paused and replayed for enhanced understanding.
- Seeking Inspiration from Social Media: Following professional hairstylists on platforms like Instagram can offer ongoing inspiration and creative ideas.
- Receiving Feedback and Critique: Engaging with experts for constructive feedback can highlight areas that need improvement and growth.
By leveraging expert insights, aspiring hairstylists can refine their techniques and explore new possibilities in the art of waterfall braiding.
The Crucial Role of Precision in Creating Exquisite Waterfall Braids

Precision plays a vital role in the delicate process of creating waterfall braids. Each movement must be executed with care to ensure the braid flows naturally and gracefully. Expert analysis on the significance of precision in braiding highlights several key aspects:
- Control Over Tension: Keeping consistent tension throughout the braid guarantees a cohesive, polished appearance that stands out.
- Accurate Sectioning: Neat and precise sectioning is crucial to avoid tangles and maintain the structural integrity of the braid.
- Attention to Symmetry: Focusing on symmetry enhances the overall aesthetic balance and visual appeal of the braid.
- Effective Finishing Techniques: The method of securing the braid can significantly affect its longevity and appearance.
By emphasizing precision, one can elevate the quality of their waterfall braids, transforming a simple hairstyle into a true work of art.
Your Comprehensive Guide to Creating the Perfect Waterfall Braid
Essential Preparations for Crafting a Stunning Waterfall Braid
Proper preparation is crucial for ensuring a successful waterfall braid. This groundwork includes washing, conditioning, and detangling the hair to create an optimal base for styling. Key steps to prepare your hair for braiding include:
- Washing: Start with freshly washed hair to eliminate any product buildup that could compromise the braid’s overall appearance.
- Conditioning: Apply a high-quality conditioner to nourish your hair, ensuring it is well-hydrated and manageable.
- Detangling: Gently detangle your hair with a wide-toothed comb to remove knots and ensure a smooth styling experience.
- Drying: Allow your hair to air dry or gently blow-dry to prevent frizz and maintain a sleek texture.
By diligently following these preparation steps, you set the foundation for a beautiful waterfall braid that retains its shape and style throughout the day.
Key Steps to Execute the Waterfall Braid Technique Effectively
Executing the waterfall braid requires meticulous attention to detail, as each step builds upon the last to achieve the desired effect. Key steps in executing a waterfall braid include:
- Sectioning the Hair: Begin by dividing your hair into a top section and two side sections to initiate the braiding process effectively.
- Creating the Initial Braid: Start with a basic braid using the top section, crossing the strands over one another to create a foundation.
- Adding Loose Strands: As you braid, allow a section of hair from the top to drop and incorporate a new strand from the side for a seamless look.
- Repeating the Process: Continue this pattern until you reach your desired braid length, ensuring it remains tight and even throughout.
By diligently following these steps, you can achieve a breathtaking waterfall braid that showcases both skill and beauty in your hairstyling.
Finishing Touches and Styling Options to Enhance Your Waterfall Braid
Once the braid is complete, it is the finishing touches that can truly elevate the overall look. Personalizing your waterfall braid can be accomplished through various styling options, including:
- Loosening the Braid: Gently tug on sections of the braid to create a fuller and more voluminous appearance.
- Incorporating Accessories: Adding ribbons, flowers, or decorative pins can significantly enhance the style and make it more unique.
- Applying Hairspray: A light mist of hairspray can help maintain the braid’s integrity throughout the day, ensuring it looks fresh.
- Combining with Other Styles: Pairing the braid with a bun or ponytail can create a distinctive and stylish look.
These thoughtful finishing touches not only add flair but also allow for personal expression, transforming each waterfall braid into a unique masterpiece that reflects your individual style.
Identifying Common Challenges and Solutions in Waterfall Braiding
Adapting Braiding Techniques for Different Hair Types
Each hair type presents unique challenges when braiding, but understanding these differences can help you adapt your techniques effectively. Best practices for braiding various hair types include:
- Straight Hair: This type works best with precise sectioning; utilize styling products to prevent flyaways and maintain a polished look.
- Curly Hair: Proper detangling is essential; consider using a leave-in conditioner for added definition and manageability.
- Thick Hair: Sectioning into smaller parts can improve manageability during the braiding process, ensuring an even and tidy result.
- Fine Hair: Applying volumizing mousse can enhance the overall appearance of the braid, adding texture and body.
By tailoring your approach to suit each specific hair type, you can overcome challenges and achieve stunning waterfall braids, regardless of the hair’s texture.
Strategies to Correct Common Braiding Mistakes
Mistakes are an inevitable part of the learning process in braiding, but identifying and correcting them is crucial for improvement. Key strategies to recognize and rectify common braiding mistakes include:
- Ensuring Proper Tension: Maintain consistent tension throughout the braid to prevent it from loosening and losing its shape.
- Maintaining Even Sections: Reassess the sizes of your sections to ensure uniformity and balance within the braid.
- Incorporating Loose Strands: Make sure to include all loose strands into the braid for a polished and cohesive finish.
- Securing the Base: Ensure the braid’s base is tied off securely to prevent it from unraveling or slipping.
By remaining vigilant and adjusting your technique, you can effectively overcome these common pitfalls and refine your braiding skills.
Maintaining the Longevity of Your Waterfall Braid
Ensuring your waterfall braid remains beautiful over time requires specific care techniques to keep the style looking fresh and neat. Best practices to maintain the integrity of a waterfall braid include:
- Regular Touch-ups: Refreshing the braid periodically helps maintain its aesthetic and keeps it looking pristine.
- Avoiding Excessive Heat: Limit the use of heat styling tools to prevent damage and ensure hair health.
- Sleeping with Care: Consider using a silk scarf to protect the braid while sleeping, which can help reduce friction.
- Utilizing Protective Products: Applying nourishing serums or oils can keep hair hydrated and prevent breakage.
With diligent maintenance, your waterfall braid can remain a stunning feature for days, showcasing the beauty and artistry of this beloved hairstyle.
Exploring Creative Variations of Waterfall Braids
Innovative Ways to Integrate Accessories into Your Waterfall Braid
Adding accessories to a waterfall braid can elevate a simple hairstyle into a captivating statement piece. Creativity is essential when selecting and positioning these decorative elements. Here’s how you can creatively incorporate accessories into your waterfall braid:
- Ribbons: Weave vibrant ribbons through the braid for a striking pop of color and added texture.
- Flowers: Fresh or artificial flowers can lend a natural and romantic touch to the braid, enhancing its beauty.
- Beads: Incorporating beads can enhance the braid’s elegance and add unique character to your style.
- Decorative Hairpins: Use these to secure sections while simultaneously adding visual interest to the look.
By thoughtfully integrating accessories into your waterfall braid, you can elevate the style, allowing it to reflect your personal flair and suit various occasions perfectly.
Hairstyles That Pair Beautifully with Waterfall Braids
Waterfall braids can be seamlessly integrated with other hairstyles to create unique and striking looks. Experimenting with different combinations can yield stunning results. Consider the following styles that work exceptionally well with waterfall braids:
- Buns: A waterfall braid can create a beautiful accent for both low and high buns, adding elegance to the overall style.
- Ponytails: Incorporating a waterfall braid into a ponytail adds sophistication and flair to the classic style.
- Half-up Styles: A half-up, half-down style complements the waterfall braid perfectly, showcasing its beauty.
- Twists: Combining twists with waterfall braids can introduce intricate detail and texture to your hairstyle.
Experimenting with these combinations allows for boundless creativity, enabling you to showcase a wide range of versatility in waterfall braids across various hairstyles.
Adapting Waterfall Braids for Different Seasons and Occasions
Waterfall braids can effortlessly be modified to suit different seasons and occasions, making them incredibly versatile. From summery styles to formal events, the possibilities are virtually limitless. Here’s how you can adjust waterfall braids for various settings:
- Summer Festivals: Embrace bright accessories and loose curls for a playful and carefree vibe that fits the season.
- Weddings: Opt for elegant hairpins and floral arrangements to create a romantic and sophisticated touch.
- Casual Outings: Keep it simple and relaxed with minimal accessories and a messy braid for an effortless look.
- Formal Events: Pair the braid with sleek hair and polished accessories for a refined and elegant appearance.
By tailoring your waterfall braid to the occasion and season, you can ensure that your hairstyle is always appropriate and stylish, no matter the event.
The Art of Teaching Waterfall Braids with Clarity and Effectiveness
Effective Techniques to Foster Connections When Teaching Waterfall Braids
Teaching others to create delicate waterfall braids necessitates clear and effective techniques. Demonstrating the process step-by-step can facilitate easier understanding for learners. The most effective teaching techniques for waterfall braids include:
- Utilizing Visual Aids: Employ mirrors or video recordings to visually demonstrate each step, enhancing comprehension.
- Encouraging Hands-on Practice: Invite learners to practice alongside you for immediate feedback and guidance, solidifying their understanding.
- Breaking Down Steps: Simplify the process by dividing it into manageable and digestible segments for better learning.
- Encouraging Questions: Foster an open environment where learners feel comfortable asking questions and seeking clarification.
By employing these effective teaching techniques, you can successfully impart the art of waterfall braids, empowering others to develop their skills and confidence.
Inspiring Creativity in Braiding Among Students
Fostering creativity among learners can lead to innovative and personalized styles in braiding. Providing a supportive environment is crucial for nurturing this creativity. Here’s how you can encourage creativity in braiding among your learners:
- Inspiration Boards: Create boards featuring various braid styles to spark ideas and inspire new creations among students.
- Encouraging Experimentation: Allow learners the freedom to try different styles and techniques without fear of making mistakes, promoting innovation.
- Hosting Feedback Sessions: Organize sessions for participants to share and discuss each other’s creations, fostering growth and collaboration.
- Collaborative Braiding Projects: Pair learners for projects that inspire new ideas and techniques through teamwork and creativity.
Nurturing creativity in braiding not only enhances skill development but also makes the learning process enjoyable and fulfilling for everyone involved.
Strategies to Build Confidence in New Braiders
Building confidence in new braiders requires patience and positive reinforcement. Helping learners navigate initial challenges can lead to mastery of the technique. Strategies to build confidence in new braiders include:
- Setting Realistic Goals: Encourage establishing small, attainable goals to foster a sense of achievement and progress.
- Providing Positive Reinforcement: Celebrate successes, no matter how minor, to motivate continued progress and enthusiasm.
- Facilitating Peer Support: Create opportunities for peer-to-peer support, enabling learners to share experiences and challenges, enhancing learning.
- Encouraging Regular Practice: Promote consistent practice to solidify skills and boost confidence in their abilities.
By focusing on these strategies, new braiders can cultivate the self-assurance necessary to master the art of waterfall braiding.
Research-Backed Benefits of Mastering Waterfall Braids
Psychological Benefits of Hairstyles like Waterfall Braids
Stylish hairstyles such as waterfall braids can offer significant psychological benefits, often boosting confidence and self-esteem. Research supports the positive impact of grooming on mental health, demonstrating that feeling good about one’s appearance can elevate mood and overall well-being. Real-world examples of the psychological benefits of stylish hairstyles include:
- Increased Confidence: A well-styled braid can empower individuals, leading to improved self-image and self-worth.
- Enhanced Mood: Engaging in grooming can serve as a form of self-care, positively influencing overall emotional well-being.
- Social Acceptance: Stylish hairstyles may increase feelings of acceptance and belonging in social situations, fostering connection.
- Creative Expression: The process of styling hair can serve as a creative outlet, allowing for personal expression and individuality.
These benefits illustrate how waterfall braids not only enhance physical appearance but also contribute to improved mental health and emotional well-being.
Physical Health Benefits Associated with Proper Hair Care
Proper hair care, including braiding, can contribute to physical health by reducing damage and emphasizing the importance of healthy hair growth. It’s essential to note that well-cared-for hair can prevent breakage and deterioration. Actionable steps to enhance physical hair health through braiding include:
- Regular Conditioning: Conditioning treatments can nourish the hair, promoting strength and resilience.
- Avoiding Excessive Tension: Ensuring braids are not overly tight can prevent hair loss and maintain scalp health.
- Using Gentle Hair Products: Opt for sulfate-free shampoos and conditioners to maintain overall hair health and prevent irritation.
- Ensuring Adequate Hydration: Keeping hair hydrated with oils can enhance its appearance and prevent dryness.
By integrating these practices into your hair care routine, you can enjoy the physical benefits while maintaining gorgeous waterfall styles.
Social and Cultural Significance of Braids
Braids possess significant social and cultural value across various societies. Understanding this can deepen appreciation for the art of braiding. Expert analysis on the social and cultural significance of braids reveals several key aspects:
- Cultural Identity: Braids often reflect cultural heritage and traditions, serving as a connection to one’s ancestry and community.
- Community Bonds: Braiding can act as a communal activity, fostering connections and relationships within communities through shared experiences.
- Historical Context: In various cultures, specific braid styles can signify social status, milestones, or rites of passage, carrying historical significance.
- Empowerment: Many individuals engage in self-expression and personal empowerment through their choice of braid styles, showcasing individuality.
Recognizing these elements enriches one’s understanding of braids, allowing for a deeper appreciation of their beauty and significance in society.
The Aesthetic Appeal and Versatility of Waterfall Braids
Waterfall braids offer a unique aesthetic appeal and versatility, making them suitable for a multitude of occasions. They can be styled in various ways to complement different outfits and personalities, enhancing the wearer’s overall look. This versatility is further enhanced by:
- Customizable Styles: Waterfall braids can be tailored to match personal preferences and settings, allowing for creativity in styling.
- Adaptable Lengths: Suitable for both long and short hair, providing options for everyone to enjoy.
- Event-Specific Designs: From casual outings to formal gatherings, waterfall braids can be styled appropriately for each occasion.
- Layering Techniques: Incorporating layers can add depth and dimension to the braid, enhancing its overall visual impact.
This adaptability makes waterfall braids a cherished choice among hairstyling enthusiasts, providing endless opportunities for creativity and personal expression.
Choosing the Ideal Waterfall Braid for Your Look
Factors to Consider Regarding Hair Length and Texture
Choosing the right waterfall braid begins with assessing your hair’s length and texture, as different braids suit various hair types. Factors to consider when evaluating your hair for a waterfall braid include:
- Hair Length: Longer hair typically allows for more intricate braids, while shorter hair may require simpler styles for effective results.
- Hair Texture: Different textures, such as straight, wavy, or curly, can significantly influence the braid’s appearance and structure, necessitating adjustments in technique.
- Volume: Thick hair may require more sectioning to maintain an even braid, while fine hair could benefit from volumizing products to enhance thickness.
- Health of Hair: Ensure your hair is in good condition, as damaged hair may not hold a braid effectively, impacting the final look.
By carefully considering these factors, you can select a waterfall braid that beautifully complements your hair’s unique characteristics and enhances your overall look.
Aligning Your Braid with Your Personal Style
Your personal style should significantly influence your choice of waterfall braid. Whether you favor a classic or contemporary look, there’s a braid to align with your aesthetic. Here’s how to ensure your waterfall braid harmonizes with your personal style:
- Consider Your Wardrobe: Reflect on how the braid will complement your usual outfits and overall fashion sense to create a cohesive look.
- Reflect on Your Personality: Choose a braid style that embodies your individuality, whether it’s bold and vibrant or subtle and understated.
- Experiment with Variations: Try out different braid styles to discover which resonates most with your personal aesthetic and preferences for maximum impact.
- Incorporate Accessories: Use accessories that align with your personal style to add flair and character to your braid, making it uniquely yours.
By aligning your waterfall braid with your personal style, you can create a polished look that authentically expresses who you are.
Key Considerations for Choosing a Braid Based on Occasion and Environment
The occasion and environment can dictate the type of waterfall braid you select. Formal events may require a more intricate style, while casual settings allow for simpler, more relaxed braids. Key considerations for selecting a waterfall braid based on occasion include:
- Event Type: Weddings and formal gatherings may warrant elegant, embellished styles that complement the occasion, enhancing your overall look.
- Casual Outings: Opt for straightforward, relaxed braids for everyday activities and informal engagements to keep your style effortless.
- Seasonal Considerations: When choosing a style, account for weather conditions to ensure it withstands environmental factors, such as avoiding heavy products in humid climates.
- Personal Comfort: Select a braid that you feel comfortable wearing, ensuring you can fully enjoy the event without feeling distracted by your hairstyle.
By thoughtfully considering the occasion and environment, you can select a waterfall braid that enhances your overall experience and style, making you feel confident and beautiful.
Maintaining and Refreshing Your Waterfall Braid
Daily Care Practices to Keep Your Waterfall Braid Looking Flawless
Daily care is essential to keep your waterfall braid looking its absolute best. Establishing simple routines can help maintain the braid’s appearance and integrity over time. The best daily care routines for a waterfall braid include:
- Gentle Brushing: Use a soft-bristle brush to avoid disturbing the braid while gently detangling any loose strands, preserving the style.
- Moisturizing Products: Applying light oils or serums can keep hair hydrated and help prevent frizz and dryness, enhancing the overall look.
- Avoiding Over-Manipulation: Limit the amount of touching and adjusting to maintain the braid’s structure and neatness throughout the day.
- Regular Re-styling: Refresh loose strands or sections as needed to maintain a polished and well-groomed appearance that lasts.
By committing to these daily care practices, you can ensure that your waterfall braid remains stunning and well-maintained, ready for any occasion.
Refreshing Your Braid for a Renewed Look
Refreshing your braid is crucial for maintaining its appearance and preventing it from looking worn or messy. Taking the time to touch up the braid regularly can yield impressive results. Here are some methods for refreshing your braid:
- Re-braiding Loose Sections: For sections that become loose or messy, re-braid them for a neat and polished finish that revitalizes the style.
- Adding Moisturizer: A light spritz of hair mist or a nourishing spray can restore freshness and shine to your braid, making it look vibrant.
- Adjusting Accessories: Swap out or reposition accessories to refresh the overall look, keeping it dynamic and interesting.
- Loosening the Braid: Slightly loosening the braid can create a fuller and more voluminous appearance, enhancing the style’s impact.
Incorporating these techniques can breathe new life into your braid, ensuring you maintain a stylish and eye-catching look throughout the day.
Best Methods for Protecting Your Waterfall Braid Overnight
Learning techniques to safeguard your braid while you sleep is essential for ensuring it remains intact and stylish through the night. Here are the best methods to protect a waterfall braid overnight:
- Creating a Loose Bun: Secure your braid in a loose bun to maintain its shape while avoiding tangling and flattening during sleep.
- Using a Silk Scarf: Wrap your braid in a silk scarf to reduce friction and help prevent frizz and breakage while you rest.
- Applying the Pineapple Method: For curly hair, gather the braid loosely at the top of your head to maintain its shape and volume while you sleep.
- Sleeping on a Silk Pillowcase: This helps maintain your braid’s integrity throughout the night, minimizing friction and potential damage.
By following these protective measures, you can ensure that your waterfall braid stays beautiful and ready for the day ahead, allowing you to showcase your stunning hairstyle effortlessly.
Frequently Asked Questions About Waterfall Braids
Understanding Waterfall Braids: What Are They and How Do They Work?
Waterfall braids are a unique hair styling method where strands of hair are woven together, allowing sections to cascade down, creating a flowing and elegant appearance that is both captivating and stylish.
How Should I Prepare My Hair for a Waterfall Braid?
To prepare your hair, wash, condition, and detangle it thoroughly. Ensure your hair is dry and manageable to facilitate easier braiding and achieve optimal results.
What Tools Are Essential for Creating Waterfall Braids?
Essential tools for creating waterfall braids include a fine-toothed comb for sectioning, hair elastics for securing the braid, hairpins for holding loose strands, and optional decorative accessories to add personal flair and style.
Can Waterfall Braids Work on All Hair Types?
Yes, waterfall braids can be adapted to suit various hair types, including straight, wavy, and curly textures. However, the specific techniques may vary slightly depending on the hair type.
How Can I Maintain My Waterfall Braid’s Appearance Daily?
Regular re-styling, gentle brushing, and using moisturizing products can help maintain your braid’s appearance and integrity over time, ensuring it looks fabulous.
Are There Specific Hair Care Tips for Waterfall Braids?
Using gentle hair care products, avoiding excessive heat, and ensuring regular conditioning can help keep your hair healthy while enjoying beautiful waterfall braids.
How Can I Refresh My Waterfall Braid for a Renewed Look?
Refreshing your braid can involve re-braiding loose sections, adding moisture, or adjusting accessories to keep the look vibrant and fresh throughout the day.
What Occasions Are Suitable for Waterfall Braids?
Waterfall braids are versatile and beautifully suited for casual outings, formal events, and seasonal celebrations, easily adapting to suit each setting and occasion.
How Do I Choose the Right Waterfall Braid for My Look?
Consider your hair length and texture, personal style, and the occasion when selecting a waterfall braid to ensure it complements your overall aesthetic and enhances your look.
Can I Combine Waterfall Braids with Other Hairstyles?
Absolutely! Waterfall braids can be seamlessly combined with buns, ponytails, and twists, allowing you to create unique and eye-catching looks that showcase your creativity and style.
Connect with us on Facebook!
The Article: Channelling Waterfall Braids Delicately: A Universal Guide appeared first on Amitys Hair Salon.
The Article Waterfall Braids: A Universal Guide to Delicate Styling Was Found On https://limitsofstrategy.com
-

Razor Shaves: Tips for Safe and Effective Refinement
Unlock Expert Techniques for Achieving the Smoothest Shave Possible
Choose the Perfect Razor: Tailor Your Selection to Meet Your Shaving Needs
Selecting the ideal razor is a crucial step in elevating your shaving experience. This choice directly influences not only the quality of your shave but also the health of your skin. By opting for a razor that caters to your unique requirements, you can significantly minimize irritation while enjoying a closer, more accurate shave. When making this essential selection, pay attention to crucial factors such as blade type, handle grip, and skin sensitivity. These components can greatly affect your comfort and effectiveness during shaving. Gaining a thorough understanding of these characteristics will empower you to achieve optimal results customized to your grooming preferences.
When assessing a razor, concentrate on key features that can enhance your shaving routine. Important considerations include:
- Blade Type: Your choices include safety razors, straight razors, and cartridge razors, each presenting its distinct advantages and disadvantages.
- Handle Grip: A comfortable grip is essential for maintaining control and precision during your shave, ensuring a smooth and enjoyable experience.
- Skin Sensitivity Compatibility: If you frequently experience irritation, select a razor specifically designed for sensitive skin.
- Weight and Balance: Heavier razors may provide enhanced control, while lighter models can be more maneuverable around facial contours.
- Blade Replacement Ease: Opt for a razor that facilitates effortless blade changes to ensure optimal performance and hygiene.
Investing time to explore various brands and models can yield valuable insights into what best aligns with your individual shaving style. Be sure to read customer reviews and seek recommendations from fellow users or seasoned barbers, enabling you to make a knowledgeable decision that significantly enhances your shaving experience.
Elevate Your Shaving Results with Effective Pre-Shave Preparation
Effective pre-shave preparation is vital for minimizing irritation and improving the overall quality of your shave. One of the first and most crucial steps involves thoroughly cleansing your skin to remove dirt, oil, and impurities that could impede the shaving process. Ideally, this cleansing should be performed with a gentle cleanser suitable for your specific skin type, a few minutes before you begin shaving. Ensuring your skin is primed for success can make a significant difference in your shaving experience.
Incorporating pre-shave oils or gels can further enhance your shaving experience. These products are specifically designed to hydrate the skin and soften the hair, allowing the razor to glide effortlessly over the surface. The advantages of utilizing pre-shave products are numerous and include:
- Reduced Friction: This significantly decreases the likelihood of nicks and cuts, promoting a safer shaving experience.
- Hydrated Skin: Well-moisturized skin is less prone to irritation, contributing to a more comfortable shave.
- Soften Hair: Softer hair allows for a closer shave, requiring less pressure for effective cutting, which enhances comfort.
- Enhanced Lubrication: Provides an additional layer of protection against cuts, razor burn, and irritation.
Investing time and effort in pre-shave preparation is essential for achieving the most optimal results and maintaining healthy skin throughout your shaving routine. The right products and techniques can transform your experience, leading to better outcomes and satisfaction.
Achieve the Perfect Shave: Master the Art of Shaving Angle and Pressure
Mastering the correct angle and pressure while shaving is critical for obtaining a close shave with minimal irritation. The ideal shaving angle typically ranges from 30 to 45 degrees, enabling the blade to effectively cut the hair without damaging the skin. Slightly adjusting this angle based on your hair growth direction can yield even more favorable results, significantly enhancing your shaving experience.
Equally important is the pressure applied during shaving. Excessive pressure can lead to skin irritation and cuts, making it essential to maintain a light touch as you shave. Experimenting with various techniques to discover what works best for your individual skin and hair type can greatly improve your overall shaving experience. Consider the following practical tips:
- Test Angles: Experiment with different angles to determine which provides the best results without causing irritation.
- Light Pressure: Use just enough pressure to allow the blade to perform its function effectively without compromising skin integrity.
- Follow Hair Growth: Start by shaving in the direction of hair growth to minimize irritation and discomfort.
- Adjust as Needed: Be prepared to modify your technique based on your skin’s response and feedback during the shave.
Finding the right combination of angle and pressure may require some practice, but the rewards of a smoother, more comfortable shave are undoubtedly worth the effort invested. A mindful approach to these elements can transform your shaving routine into a more enjoyable process.
Gain Valuable Insights for Perfecting Your Razor Shaves Safely
Determine Your Skin Type for Customized Shaving Techniques
Understanding your skin type is crucial, as different skin types require tailored shaving approaches and techniques. This knowledge is essential for identifying the right products and methods that will yield the best results for your skin. For example, individuals with oily skin may benefit from lightweight creams that prevent clogging, while those with dry skin need rich, hydrating formulations to maintain moisture and comfort.
Real-world examples illustrate how to adapt shaving routines according to various skin types. For oily skin, utilizing a gel that absorbs excess oil can effectively prevent breakouts and irritation. Conversely, individuals with sensitive skin should opt for fragrance-free and hypoallergenic products to minimize the risk of adverse reactions. Here are some common skin types and their recommended shaving approaches:
- Sensitive Skin: Choose hypoallergenic products and avoid harsh exfoliants that could exacerbate irritation and discomfort.
- Oily Skin: Use light, non-comedogenic creams to prevent clogged pores and breakouts, ensuring a smoother shave.
- Dry Skin: Incorporate rich moisturizing creams to hydrate the skin while shaving, ensuring a smoother experience.
- Normal Skin: Most products will work well, but always prioritize quality over price when selecting your shaving essentials.
Customizing your shaving routine based on your skin type can lead to improved comfort and effectiveness, ultimately ensuring a smoother shave with minimal irritation. This tailored approach will enhance your overall grooming experience and skin health.
Discover the Essential Role of Shaving Creams in Your Routine
Shaving creams serve a purpose far beyond mere lubrication; they are critical in achieving a quality shave. These products help soften hair, protect the skin, and provide a smooth surface for the razor to glide over effortlessly. Selecting the right shaving cream can make a substantial difference in your overall shaving experience and the results you achieve.
When choosing a shaving cream, look for key ingredients that enhance performance and comfort, such as:
- Glycerin: Offers exceptional lubrication and moisture retention, ensuring a smooth glide over the skin.
- Aloe Vera: Renowned for its soothing properties, it helps calm irritation and redness that may occur during shaving.
- Essential Oils: Provide pleasant fragrance, and some can offer astringent properties that benefit the skin by promoting healing.
- Fatty Acids: Contribute to a creamy texture that enhances glide and protection during shaving, reducing the risk of irritation.
Expert analysis suggests that the effectiveness of various formulations can vary greatly, and personal preference should guide your choice. Testing different creams can lead to the discovery of one that complements your skin type and suits your shaving style, ensuring an optimal shaving experience every time.
Establish Post-Shave Care Essentials for Optimal Skin Recovery
Post-shave care is just as crucial as the shaving process itself. Proper care following shaving can soothe the skin and prevent irritation, making it an essential component of your grooming routine. Aftershave products, such as balms and lotions, play an important role in this phase by providing hydration and relieving any discomfort resulting from shaving. These products can be the key to maintaining healthy skin.
To create a comprehensive post-shave routine, consider these actionable steps that can greatly benefit your skin:
- Cool Water Rinse: Rinse your face with cool water to help close pores and reduce redness, promoting skin health.
- Apply Aftershave Balm: Select a product rich in moisturizers to soothe and hydrate the skin post-shave, ensuring comfort.
- Use a Hydrating Lotion: This helps replenish moisture lost during shaving, promoting skin health and recovery.
- Avoid Irritants: Steer clear of products containing alcohol, as they can dry out the skin and exacerbate irritation, negatively impacting your recovery.
By taking these thoughtful steps, you can dramatically improve your skin’s recovery and overall comfort, resulting in a smoother, irritation-free shaving experience. This post-shave routine is essential for maintaining healthy skin and enhancing your grooming regimen.
Understand the Impact of Choosing the Right Razor Type on Your Shaving Experience
Choosing the appropriate razor—be it a safety razor, straight razor, or cartridge razor—greatly influences the quality of your shave and the health of your skin. Each type has its pros and cons, and understanding these can greatly assist in making a well-informed decision tailored to your shaving needs.
Safety razors typically offer an excellent balance of control and closeness while being more user-friendly than straight razors, which require a steeper learning curve but can provide the closest shave. Cartridge razors, on the other hand, are convenient and often equipped with multiple blades for a smoother finish; however, they may lead to increased irritation for some users. Here’s a comparison to consider:
- Safety Razors: Generally affordable blades with minimal irritation, but require proper technique for optimal results.
- Straight Razors: Provide the closest shave possible but necessitate skill and regular maintenance to achieve the best outcomes.
- Cartridge Razors: Easy to use and convenient, though they may cause irritation due to their multiple blades.
- Disposable Razors: Cost-effective for travel; however, they often lack quality compared to more permanent options.
Expert recommendations suggest experimenting with different types of razors to find the best fit for your unique shaving needs and preferences. Take the time to assess the impact of each on your skin’s health and comfort, ensuring your grooming routine is effective and enjoyable.
Implement Effective Techniques for Minimizing Irritation During Shaving
Adopting proper shaving techniques can significantly reduce skin irritation, a common issue for many individuals. Experts recommend methods such as shaving in the direction of hair growth (with the grain) and employing minimal pressure to alleviate discomfort and achieve better results. These techniques are vital for a successful shaving experience.
Shaving with the grain is a primary technique to follow, as it reduces the risk of ingrown hairs and irritation. Additionally, using short strokes rather than long ones can help maintain better control over the razor, reducing the likelihood of cuts and nicks. Here are some practical tips to consider:
- Start Slow: Take your time, particularly when learning new techniques to avoid mistakes and irritation.
- Use Quality Blades: Ensure your blades are sharp to minimize tugging on hair and irritation, promoting a smoother shave.
- Hydrate: Keep your skin adequately hydrated both before and after shaving to maintain its health and comfort.
- Rest Skin: Allow your skin time to recover between shaves, especially after experiencing irritation or discomfort.
Incorporating these techniques into your shaving routine can lead to a much more comfortable and satisfying experience, allowing you to enjoy the process of shaving rather than dreading it. Mindful shaving techniques can transform your grooming regimen into a delightful ritual.
What Effective Strategies Can You Use to Prevent Razor Burn?
Identify the Common Causes of Razor Burn and How to Avoid Them
Razor burn typically occurs due to improper shaving techniques or the use of dull blades, making it essential to understand these causes to prevent it effectively. Common signs of razor burn include redness, irritation, and a burning sensation on the skin, which can be quite uncomfortable and distressing for many individuals.
Several factors contribute to the occurrence of razor burn, including:
- Improper Technique: Shaving too quickly or using incorrect angles can lead to irritation and discomfort during and after the shave.
- Dull Blades: Using old or dull blades increases friction and the risk of nicks and cuts, both of which can exacerbate irritation.
- Inadequate Lubrication: Insufficient shaving cream or gel can result in poor glide and increased irritation, leading to a less enjoyable experience.
- Shaving Against the Grain: While this may provide a closer shave, it often comes at the cost of irritation and discomfort for many individuals.
Understanding these contributing factors helps in making necessary adjustments to your shaving routine, ultimately minimizing the risk of experiencing razor burn effectively. Awareness of these issues can lead to better shaving practices.
Explore Effective Treatments for Alleviating Razor Burn Symptoms
There are several effective treatments available to help alleviate the symptoms of razor burn. Post-shave care is critical, and utilizing soothing gels, aloe vera, and avoiding further irritation can make a significant difference in your recovery process. These remedies can soothe your skin and promote healing.
Consider these home remedies for quick relief from razor burn:
- Aloe Vera Gel: Known for its soothing properties, it can effectively calm irritated skin and provide hydration.
- Cold Compress: Applying a cold compress can reduce inflammation and cool the skin to ease discomfort effectively.
- Moisturising Creams: These hydrate and soothe irritated areas, promoting recovery and enhancing skin comfort.
- Anti-Inflammatory Creams: Look for hydrocortisone creams to help reduce redness and inflammation, facilitating healing.
Implementing these treatments can provide immediate relief and promote healing, ensuring that your skin recovers swiftly and effectively after shaving. A focused approach to post-shave care can enhance your overall experience.
Adjusting Your Shaving Frequency for Optimal Skin Health
Reducing the frequency of your shaves can significantly help in preventing razor burn and allowing your skin to recover. Understanding your skin’s recovery time and hair growth rate is essential in planning your shaving schedule. For instance, if your hair grows quickly, you may need to shave more often, while those with slower hair growth may find extending the intervals between shaves more beneficial for skin health.
Listening to your skin and adjusting your routine accordingly can lead to better outcomes over time. Keep track of any signs of irritation after shaving and adjust your frequency as needed to give your skin ample time to recover and heal. Consider the following tips:
- Observe Your Skin: If irritation appears, consider increasing the time between shaves to allow your skin to recover effectively.
- Track Hair Growth: Understanding your hair growth cycle can inform your timing and frequency, promoting better results.
- Experiment: Try different shaving frequencies to discover what works best for your skin type and needs, enhancing comfort.
- Rest Days: Allow your skin to rest after a particularly close shave or any signs of irritation, promoting overall skin health.
Finding the right balance will lead to healthier skin and a more comfortable shaving experience overall. Adapting your routine to your skin’s needs is essential for long-term success.
Selecting the Right Shaving Products for Your Skin Type
Choosing appropriate shaving creams, gels, and aftershaves is vital in significantly reducing the risk of razor burn. Look for products specifically formulated to moisturize and soothe the skin, ensuring your shaving process is as comfortable as possible. The right products can enhance your shaving experience and minimize discomfort effectively, contributing to better skin health.
When selecting shaving products, consider the following essential features:
- Moisturising Ingredients: Look for products that contain glycerin, aloe vera, or shea butter for enhanced hydration and skin care.
- Scent-Free Options: Fragrance can irritate sensitive skin, so opt for fragrance-free formulations whenever possible to minimize discomfort.
- Non-Comedogenic: Ensure that the products do not clog pores, as this can lead to breakouts and irritation, negatively impacting skin health.
- Alcohol-Free Aftershaves: These formulations can help prevent further irritation and dryness after shaving, promoting skin recovery.
Selecting high-quality products suited for your skin type can significantly improve your overall shaving experience and reduce the likelihood of experiencing razor burn or irritation. A thoughtful approach to product selection will enhance your grooming routine.
What Are the Best Practices for Maintaining Your Razor?
Ensure Your Razor Stays Clean and Sanitized for Optimal Performance
Regular cleaning of your razor is essential for extending its lifespan and preventing infections. Thoroughly rinsing your razor after each use helps remove hair, cream, and bacteria that can accumulate and compromise performance. Moreover, consider implementing deep cleaning methods periodically to ensure optimal functionality and hygiene.
Effective cleaning involves the following steps:
- Rinsing Under Warm Water: This helps to effectively remove hair and shaving cream residue from the blades, promoting cleanliness.
- Checking for Clogs: Ensure that the blade and mechanism are free of obstructions to maintain performance and effectiveness.
- Soaking in Vinegar: This can help eliminate any bacteria and keep your razor sanitized for safer use.
- Drying Properly: Allow your razor to air dry completely to prevent rust and corrosion from forming, ensuring longevity.
By maintaining a clean razor, you ensure a safer shave and prolong its usability, making cleanliness a vital part of your shaving routine. A well-maintained razor contributes to better shaving results.
Implement Proper Storage Techniques to Preserve Your Razors
Proper storage of your razors is essential for preventing rust and maintaining their sharpness. Keeping razors in a dry, clean environment, away from moisture and other bathroom products, is crucial to their longevity and performance. This mindful approach to storage can significantly extend the life of your shaving tools.
Consider these effective storage strategies:
- Dry Location: Store your razor in a location where it can remain dry and free from humidity, preventing rust.
- Razor Stand: Using a stand allows the blade to air out and prevents contact with other surfaces that could cause damage.
- Avoid Humidity: Never store razors in the shower or damp areas, as this can promote rust and deterioration, negatively impacting performance.
- Separate Storage: Keep razors away from other bathroom items that may cause damage or dulling of the blades, ensuring optimal conditions.
Taking these steps will help ensure that your razors remain in optimal condition, providing you with quality shaves for a longer period. Proper storage contributes to effective and enjoyable shaving experiences.
Recognize the Signs Indicating It’s Time to Replace Your Razor Blades
Knowing when to replace your razor blades is crucial for ensuring a safe and effective shave. Signs that it’s time for a new blade include dullness, visible nicks, and increased skin irritation. Regularly assessing the condition of your blades will help you maintain optimal shaving quality and skin health.
Consider these indicators for determining when to replace your razor blades:
- Dull Blades: If your razor is tugging at hair instead of cutting cleanly, it’s time for a change to ensure a comfortable experience.
- Visible Damage: Any signs of rust or chipping indicate that a replacement is necessary for safety and effectiveness.
- Increased Skin Irritation: If you notice more irritation than usual after shaving, it may be due to a dull or damaged blade.
- Frequency of Use: It’s advisable to replace blades every 5-7 shaves for optimal performance and comfort, promoting skin health.
Paying attention to these factors will help you maintain the quality of your shave and protect your skin from potential irritations and discomfort. A proactive approach to blade maintenance enhances your overall shaving experience.
Understand the Importance of Shaving Direction for Optimal Results
Master the Technique of Shaving With the Grain for Comfort
Shaving with the grain significantly reduces the risk of irritation and ingrown hairs, making it a crucial technique to master. This method follows the natural direction of hair growth, making it gentler on the skin and often leading to a more comfortable shave. The benefits of this approach include minimized trauma to the skin and a reduced likelihood of razor burn, enhancing overall comfort.
The technique involves:
- Identifying Hair Growth Direction: Take a moment to feel the direction in which your hair grows for accurate shaving and to achieve better results.
- Short Strokes: Use short, controlled strokes to ensure you’re moving with the grain effectively while maintaining control.
- No Pressure: Allow the weight of the razor to do the work without applying excessive pressure, reducing the risk of irritation.
- Regular Rinsing: Rinse the razor frequently to maintain blade cleanliness and effectiveness, ensuring optimal performance.
Mastering this technique can lead to a more pleasant shaving experience and promote healthier skin, making it a valuable practice in your routine. Incorporating this method will yield better results and greater satisfaction with your grooming efforts.
Approach Shaving Against the Grain with Caution
Shaving against the grain can provide a closer shave, but it also increases the risk of irritation and discomfort. Use this technique cautiously, ensuring proper skin preparation and utilizing quality products to mitigate potential issues that may arise during the process. A careful approach is essential for achieving the desired results without compromising skin health.
Before attempting to shave against the grain, consider the following essential precautions:
- Ensure Proper Hydration: The skin must be well-moisturized to minimize friction and irritation, promoting a comfortable shave.
- Sharp Blades: Only shave against the grain with a fresh, sharp blade to avoid pulling hair and causing discomfort or irritation.
- Test Areas: Start with small areas to assess how your skin tolerates this technique, ensuring you can manage any reactions.
- Be Gentle: Apply light pressure to avoid nicks and irritation while shaving, promoting a safer experience.
For those seeking a closer shave, shaving against the grain may be desirable, but it requires careful consideration of your skin type and sensitivity to ensure a comfortable experience. Mindfulness in your approach can make all the difference.
Utilize Cross-Grain Shaving Techniques for a Balanced Approach
Cross-grain shaving strikes an effective balance between closeness and skin safety. This technique involves shaving at a 90-degree angle to the direction of hair growth, which can help achieve a smooth finish without the irritation often associated with shaving against the grain. This method can enhance your overall shaving experience while prioritizing skin health.
To effectively implement this technique, follow these steps:
- Identify Hair Growth: Understand the direction of your hair growth for accurate shaving and optimal results.
- Use Short Strokes: Take your time with short, controlled strokes to achieve better results and maintain comfort.
- Maintain Lubrication: Ensure that your skin remains adequately lubricated throughout the shaving process to reduce irritation.
- Adjust Pressure: Apply light pressure to minimize the risk of irritation and discomfort, ensuring a safe shave.
By incorporating cross-grain shaving into your routine, you can enhance your shaving experience while protecting your skin’s health and comfort. A balanced approach will yield greater satisfaction with your grooming efforts.
Adapt Your Shaving Direction Based on Your Hair Type for Optimal Results
Different hair types may necessitate varying shaving directions for optimal results. Considering the texture and curliness of your hair when selecting the best shaving method is essential for effective shaving and achieving the best outcomes. Personalization based on hair type can make a significant difference in your grooming routine.
For instance, individuals with fine hair may find that shaving with the grain suffices for a clean shave, while those with coarser or curlier hair may benefit from cross-grain or against-the-grain techniques to achieve a closer result. Here are some adaptations to consider:
- Coarse Hair: May require more aggressive shaving techniques; exercise caution to avoid irritation and discomfort.
- Curly Hair: Cross-grain shaving may help prevent ingrown hairs due to the hair’s tendency to curl back into the skin, promoting smoother results.
- Sensitive Skin: Stick to with-the-grain shaving techniques to minimize irritation and discomfort during and after shaving.
- Fine Hair: More flexibility in techniques; feel free to experiment to discover what works best for your shaving needs and preferences.
Adapting your shaving method to suit your hair type can lead to improved results, greater comfort, and enhanced skin health overall. A customized approach fosters a more enjoyable grooming experience.
What Are the Key Benefits of Using a Shaving Brush?
Enhance Your Shaving Cream Application with a Brush for Superior Results
Utilizing a shaving brush significantly enhances the application of shaving cream, leading to improved shave quality and overall results. The brush aids in the even distribution of cream across the skin, ensuring thorough coverage, proper hydration, and an overall luxurious experience during your grooming routine. The benefits of using a brush can elevate your shaving game.
The advantages of using a shaving brush include:
- Even Distribution: A brush allows for a more uniform layer of cream on the skin, ensuring effective application and coverage.
- Hair Lifting: The brush helps lift hair for a closer shave, allowing the razor to cut more effectively and efficiently.
- Better Lathering: Produces a richer lather that provides enhanced protection during shaving, contributing to a more enjoyable experience.
- Exfoliation: Can gently exfoliate the skin, preparing it for a smoother shave and reducing the risk of irritation.
Incorporating a shaving brush into your routine not only improves the application of cream but also elevates the entire shaving experience to one of luxury and comfort. This simple tool can make a world of difference in your grooming practices.
Gently Exfoliate Your Skin for a Better Shaving Experience
Using a shaving brush can provide gentle exfoliation for your skin, effectively removing dead skin cells and preparing it for a smoother shave. Exfoliation benefits the shaving process by creating a better surface for the razor, reducing the likelihood of irritation and ingrown hairs. This practice can significantly enhance your overall grooming routine.
Consider the following benefits of exfoliation:
- Fewer Ingrown Hairs: Exfoliating removes dead skin that can trap hairs below the surface, helping to prevent ingrown hairs and discomfort.
- Improved Smoothness: Exfoliation leaves the skin feeling softer and more refined, enhancing the overall shaving experience and comfort.
- Better Product Absorption: Exfoliated skin can better absorb shaving products, ensuring maximum effectiveness and results.
- Enhanced Blood Circulation: Gentle exfoliation stimulates blood circulation, promoting healthier skin overall and improving its appearance.
Regularly incorporating exfoliation into your shaving routine can lead to significant improvements in both your shaving process and your overall skin health. A mindful approach to skincare will yield lasting benefits.
Explore Different Types of Shaving Brushes to Meet Your Unique Needs
Various types of shaving brushes, including boar, badger, and synthetic options, provide different levels of performance, comfort, and user experience. Each type offers unique benefits and may cater to different preferences and budgets, allowing you to find the perfect fit for your grooming routine.
Here’s a brief overview of common shaving brush types to consider:
- Boar Brushes: Generally more affordable; offer good exfoliation but may require breaking in for optimal softness and effectiveness.
- Badger Brushes: Renowned for their softness and excellent water retention, making them ideal for a luxurious lather and experience.
- Synthetic Brushes: Animal-friendly options that perform well and are easy to clean, making them a popular choice among eco-conscious consumers.
- Custom Brushes: Handmade options that can provide unique aesthetics and performance tailored to your preferences, enhancing your grooming experience.
When selecting a brush, consider factors such as cost, material, and personal preferences to choose one that best aligns with your shaving routine and needs. The right brush can elevate your entire shaving experience.
Research-Backed Benefits of Refining Your Razor Shaves Safely
Implement Strategies to Reduce Skin Irritation Effectively
Studies indicate that adopting proper shaving techniques can significantly reduce skin irritation. This encompasses using sharp blades, maintaining appropriate angles, and selecting suitable products for your skin type. Implementing these best practices can lead to a more comfortable and effective shaving experience, enhancing your overall grooming routine.
Consider these actionable steps to minimize irritation during your shaves:
- Always Use Sharp Blades: Dull blades cause tugging and irritation, so ensure your blades are fresh for optimal performance.
- Shave with the Grain: This reduces the chance of ingrown hairs and irritation, leading to a more comfortable shave overall.
- Moisturise: Apply hydrating products both pre- and post-shave to maintain skin health and comfort, preventing dryness.
- Take Your Time: Rushing through your shave can lead to mistakes that may result in irritation and discomfort; a careful approach is essential.
By adhering to these guidelines, you can enhance your shaving routine and improve your skin’s health over time, resulting in a more enjoyable experience. A thoughtful approach to shaving will promote better outcomes and satisfaction.
Implement Best Practices to Prevent Ingrown Hairs Effectively
Ingrown hairs can be painful and unsightly, but research shows that certain shaving practices can effectively prevent them. Employing effective shaving techniques, such as shaving in the direction of hair growth and using exfoliating products, can help minimize the occurrence of ingrown hairs and enhance your grooming results.
Expert analysis suggests the following best methods to avoid ingrown hairs:
- Regular Exfoliation: Keeping the skin clear of dead cells is essential to prevent blockage at the hair follicle, promoting healthier hair growth.
- Sharp Blades: Always use sharp blades to ensure hair is cut cleanly without being pushed back into the follicle, reducing the risk of irritation.
- Moisturising Products: Hydrate the skin to keep hair follicles soft and pliable, reducing the risk of ingrown hairs and discomfort.
- Shaving Techniques: Follow the grain and avoid overly aggressive methods that can irritate the skin, ensuring a smooth experience.
By implementing these practices, you can significantly reduce the risk of ingrown hairs while maintaining healthy skin. A proactive approach to shaving will yield better results and greater satisfaction.
Enhance Overall Skin Health with a Thoughtful Shaving Routine
Regularly refining your shaving technique contributes to better overall skin health. This includes reducing the risk of infections, maintaining skin moisture levels, and preventing irritation, all of which are vital for healthy skin. A well-thought-out shaving routine should include:
- Consistent Technique: A stable routine can help your skin adapt over time, leading to better results and comfort during shaving.
- Quality Products: Choose high-quality shaving products that are gentle on the skin and free from harsh ingredients, promoting skin health.
- Regular Hydration: Ensure your skin is adequately moisturized post-shave to maintain its health and comfort, reducing the risk of irritation.
- Listening to Your Skin: Pay attention to how your skin responds to different products and techniques, adjusting as needed to optimize your routine.
Investing time in refining your shaving technique not only enhances your shaving experience but also promotes healthier, more resilient skin over time. A dedicated approach to grooming will yield long-term benefits.
Establish Trusted Strategies for Refining Razor Shaves Safely
Develop a Consistent Shaving Routine for Optimal Results
Establishing a consistent shaving routine can lead to better results over time. This includes regular timing, product usage, and technique refinement. A predictable routine allows your skin to adapt, ultimately enhancing your overall shaving experience and comfort. Consistency is key to effective grooming.
Consider real-world examples of successful shaving routines:
- Regular Timing: Shaving at consistent intervals helps your skin adjust and respond better, promoting optimal results.
- Consistent Products: Using the same products allows you to monitor how they work for your skin, leading to better outcomes.
- Technique Adaptation: Continuously refine your technique as you learn what works best for you, ensuring comfort and effectiveness.
- Skin Monitoring: Track how your skin reacts to various products and adjust your routine accordingly to optimize your results.
By developing a routine that fits your specific needs, you can reap the long-term benefits of a more efficient and enjoyable shaving experience. Personalization will enhance your grooming practices.
Incorporate New Shaving Technologies for Enhanced Experiences
New technologies, such as multi-blade razors and advanced shaving creams, can significantly enhance your shaving experience. Staying updated on the latest shaving innovations allows you to make informed decisions about your grooming routine, enhancing overall satisfaction.
To remain informed, consider the following strategies:
- Follow Industry Trends: Keep an eye on popular grooming blogs and forums for the latest products and tips to enhance your routine.
- Attend Grooming Events: Participate in trade shows or exhibitions showcasing new grooming products and technologies, expanding your knowledge.
- Seek Recommendations: Engage with professionals at barbershops for their insights on current trends and effective products, gaining valuable advice.
- Trial Periods: Experiment with new products to identify what works best for your needs and preferences, improving your grooming results.
By staying informed, you can continuously refine your shaving experience with the latest technologies available, enhancing your routine and overall satisfaction. A commitment to innovation will elevate your grooming practices.
Seek Professional Advice for Personalized Shaving Tips
At times, professional advice can be invaluable in refining your shaving technique. Consulting dermatologists and barbers can provide tailored tips that cater specifically to your unique needs and skin type, ensuring effective results.
When seeking professional shaving advice, consider asking the following questions:
- What products do you recommend for my specific skin type?
- How can I effectively reduce irritation during shaving?
- What techniques should I adopt for my hair type and skin sensitivity?
- How often should I be changing my razor blades for optimal performance?
Utilizing professional insights can lead to a more effective and enjoyable shaving experience while ensuring that you are taking the best possible care of your skin. A professional touch can enhance your grooming routine significantly.
Frequently Asked Questions About Shaving
What type of razor is best for sensitive skin?
For sensitive skin, a safety razor featuring sharp blades or a single-blade razor is often recommended to minimize irritation and provide a comfortable shave. Selecting the right type is vital for skin health.
How often should I replace my razor blades?
It’s generally advised to change your razor blades every 5-7 shaves or sooner if you notice any dullness or an increase in irritation. Regular replacement is essential for skin safety.
Can I shave every day?
Whether you can shave daily depends on your skin’s sensitivity and hair growth rate. It’s important to monitor how your skin reacts to regular shaving and adjust accordingly for comfort.
What are the benefits of using a shaving brush?
Using a shaving brush improves the application of cream, hydrates the skin effectively, and lifts hair for a closer shave while providing gentle exfoliation. This results in a more luxurious experience during your grooming routine.
How can I prevent razor burn?
To prevent razor burn, always use a sharp blade, shave with the grain, and ensure adequate lubrication using quality shaving products tailored to your skin type. A mindful approach is key.
What ingredients should I look for in shaving cream?
Look for moisturizing ingredients such as glycerin and aloe vera, as well as alcohol-free formulas to reduce irritation and promote skin health during shaving. Quality ingredients are essential for comfort.
Is it better to shave in the shower?
Shaving in the shower can help soften hair and provide a smoother shave; however, ensure you have proper lighting and a good mirror for accuracy, as this can enhance your experience.
How can I treat razor bumps effectively?
To treat razor bumps, apply soothing gels or creams, such as aloe vera or hydrocortisone, and avoid shaving the affected area until it has healed completely. Gentle care is essential.
Can I shave my face without cream?
While it’s technically possible to shave without cream, using a lubricant like shaving cream significantly reduces the risk of irritation and provides a smoother finish, making it highly advisable for comfort.
Should I use aftershave products?
Utilizing aftershave products is recommended, as they help soothe the skin, prevent irritation, and provide much-needed hydration following shaving. This step is vital for skin recovery and comfort.
Connect with us on Facebook!
The Article: Refining Razor Shaves Safely: Universal Tips appeared first on Amitys Hair Salon.
The Article Razor Shaves: Safe and Effective Refining Tips Was Found On https://limitsofstrategy.com
-
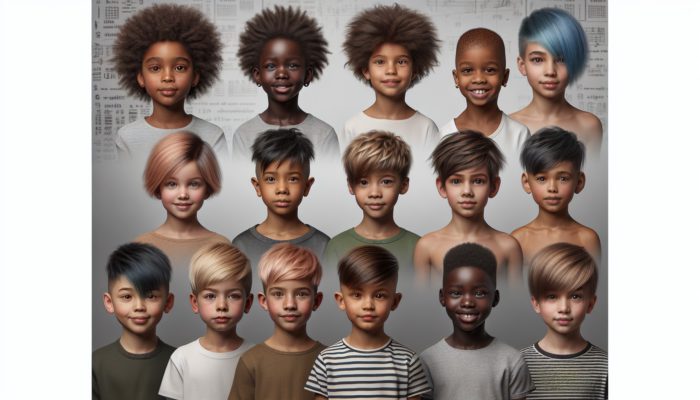
Bold Kids’ Pixie Styles: An Essential Guide
Unleashing the Creative Potential of Pixie Hairstyles for Kids
Understanding Pixie Hairstyles and Their Distinctive Charm
Pixie hairstyles are a fashionable choice among short haircuts that merge contemporary style with adaptability, making them perfect for adventurous young individuals. These haircuts offer a canvas for customization, enabling children to express their unique personalities in creative ways. From fun and edgy looks to sleek and polished styles, the possibilities for styling pixie hairstyles are endless. Here are some popular variations:
- Classic Pixie: A timeless cut with short hair evenly styled around the head.
- Textured Pixie: A layered style that introduces movement and depth.
- Asymmetrical Pixie: A bold look featuring one side longer than the other.
- Pixie Bob: A blend of bob characteristics with a pixie for added length.
- Shaggy Pixie: A carefree style with choppy layers for a relaxed vibe.
- Undercut Pixie: A daring style with shorter sides and longer hair on top for striking contrast.
- Curly Pixie: Embraces natural curls, delivering a lively and playful appearance.
- Faux Hawk Pixie: A punk-inspired style focusing volume at the hair’s center.
The allure of pixie hairstyles goes beyond their visual appeal; they reflect a child’s individuality and creativity while remaining easy to manage, making them a practical choice for busy families.
Benefits of Pixie Hairstyles for Children
Choosing a pixie hairstyle offers numerous advantages for children, significantly enhancing their style and confidence. One of the most remarkable benefits is that pixie cuts can elevate a child’s self-esteem, allowing them to shine with their bold character. Additionally, maintaining a pixie cut is relatively straightforward, a crucial factor for families on the move. Key advantages of pixie hairstyles for kids include:
- Boosted confidence through distinctive self-expression.
- Minimal maintenance, simplifying morning routines.
- Encouragement of creativity through a variety of styling options.
- Versatility suitable for every occasion, from casual playdates to formal events.
- Enhanced comfort, especially during warmer months.
- Empowerment to celebrate their uniqueness.
- Easy adaptation to changing tastes as they mature.
- Durability of the hairstyle during various activities, ensuring longevity.
Opting for a pixie cut goes beyond aesthetics; it serves as a pathway for children to embrace and showcase their individual styles.
Selecting the Ideal Pixie Hairstyle for Your Child
Choosing the perfect pixie hairstyle for a child involves thoughtful consideration of several factors, including hair texture, face shape, and the child’s personal preferences. It is essential to align a pixie cut with a child’s features for optimal results. For example, children with round faces may find that an asymmetrical pixie elongates their look, while those with square faces often benefit from softer, rounded cuts that balance their features. Consulting a stylist can provide valuable insights, as they can offer tailored suggestions based on individual characteristics and preferences.
During the consultation process, it’s important to communicate openly about your child’s lifestyle and interests. A stylist can share recommendations about which pixie hairstyles will be most suitable given the child’s hair type and maintenance preferences. Additionally, they can propose styling techniques that resonate with your child’s personality, ensuring the final appearance is as flattering and distinctive as they are.
Essential Steps to Prepare for a Pixie Cut

Key Factors to Consider Before the Cut
Before committing to a pixie hairstyle, it is important to evaluate several factors that could affect both the child’s experience and the long-term success of the haircut. Assessing your child’s lifestyle is crucial; for instance, an active child may need a style that is easy to manage and can withstand daily activities. Additionally, gauge their readiness to embrace a bold look. While some children may feel empowered by a pixie hairstyle, others might find the transition challenging, making it crucial to assess their comfort level.
Important factors to consider include:
- Your child’s daily activities and overall lifestyle.
- Their comfort level with having short hair.
- Their ability to maintain a short hairstyle effectively.
- Possible reactions from peers and family members.
- Personal style preferences and expressions.
- Seasonal considerations, particularly regarding summer heat.
- Future growth phases and styling options.
- Engaging family members in the decision-making process.
Involving children in the decision can empower them and generate excitement about their new look, fostering a positive attitude toward the change.
Necessary Tools and Products for a Pixie Cut
Achieving the perfect pixie hairstyle requires specific tools and products to ensure a professional finish. Quality equipment is essential for precision and ease of use, making the haircutting experience smooth and effective. Essential tools for a pixie cut include:
- Sharp scissors for clean, precise cuts.
- Hair clippers for an even finish.
- A comb for effective hair sectioning.
- Hair clips to secure sections in place during cutting.
- A razor for softening edges and adding texture.
- Styling products such as gel, wax, or mousse for finishing touches.
- A brush or blow dryer for styling purposes.
- A mirror for checking the final style from different angles.
Equipping yourself with the appropriate tools is crucial when embarking on the journey of a pixie hairstyle. The right equipment allows for greater creativity, ensuring both the stylist and the child can explore different possibilities and outcomes during the haircut.
The Value of Professional Consultation

Consulting a hairstylist who specializes in pixie hairstyles for children is highly beneficial to achieve the desired outcome. A professional brings expertise and artistry, significantly enhancing the haircutting experience. They understand the subtleties of different hair types and can provide invaluable advice on which styles will best complement your child.
Hairstylists can assist in various ways, including:
- Offering customized advice based on hair type and texture.
- Demonstrating at-home styling techniques for ongoing upkeep.
- Identifying potential challenges related to hair growth or shape.
- Ensuring the cut aligns with the child’s personality and lifestyle.
- Creating a welcoming environment to alleviate any worries.
- Encouraging creativity in styling approaches.
- Recommending suitable products for ongoing hair care.
- Providing tips for transitioning to and growing out a pixie cut.
A professional stylist not only helps achieve the desired cut but also contributes to a positive experience that empowers the child, fostering a love for their new hairstyle.
Expert Advice for Styling Pixie Cuts for Adventurous Kids
Essential Cutting Techniques for Pixie Hairstyles
Mastering the art of cutting pixie hairstyles involves understanding various techniques that add versatility and dimension. Techniques such as point cutting, layering, and texturizing can elevate a standard pixie into a unique masterpiece. For example, point cutting softens the edges, reducing bluntness and lending a more organic appearance to the hairstyle.
Real-world examples of successful pixie cuts on children highlight the creativity and individuality that can be achieved. Take Ella, a bold 10-year-old who transformed her look with a layered pixie cut. By incorporating texture and movement, her stylist crafted an adaptable style suitable for both casual and formal occasions. The layering added volume, making it effortless for Ella to style her cut.
Another technique is the undercut, which involves shortening the hair on the sides while leaving the top longer. This style offers a striking contrast and can be easily styled for various occasions, allowing children to express their unique personalities boldly. Each technique can be fine-tuned based on the child’s hair texture and personal style, ensuring a perfect fit.
Expert Styling Tips for Pixie Cuts
To effectively style pixie cuts, experts recommend utilizing a combination of the right products and techniques. A key aspect of maintaining a fashionable pixie is to harness the natural texture of the hair. For instance, using volumizing mousse can create lift and body at the roots, while smoothing serum can tame flyaways, adding polish to the overall look.
Actionable steps for styling various pixie cuts include:
- Start with clean, damp hair for optimal product application.
- Apply volumizing mousse at the roots for extra height.
- Use a lightweight wax for texture and definition.
- Style using your fingers for a more relaxed appearance.
- Blow-dry using a round brush for shaping.
- Finish with a light-hold hairspray for lasting hold.
- Add accessories for a touch of flair.
- Experiment with different styles and products until the desired look is achieved.
With practice and the right products, styling a pixie cut can become a fun and creative endeavor, allowing children to express their uniqueness every day.
Avoiding Common Mistakes When Cutting Pixie Styles
When achieving a successful pixie cut, awareness of common mistakes can make a significant difference. Over-cutting is perhaps the most frequent error, where the hair is cut too short, leaving little room for adjustments. This can lead to disappointment, especially if a child is not fully prepared for such a dramatic change.
Another pitfall is creating uneven layers, resulting in a mismatched appearance that requires additional effort to correct. Furthermore, neglecting to consider hair texture can lead to a style that does not hold well or suit the child’s natural hair characteristics. It’s crucial to contemplate how the hair will lay and behave post-cut, as this can influence styling options.
Expert advice on avoiding these mistakes includes:
- Communicate clearly with the stylist about desired length and style.
- Consider the child’s hair texture and growth patterns.
- Request a consultation before cutting to evaluate the best options.
- Start with a longer cut if unsure; adjustments can always be made later.
- Ensure layers are cut evenly for balance.
- Consider light texturizing instead of heavy layering.
- Be open to experimenting with different styles.
- Encourage regular communication with the stylist regarding adjustments needed.
By avoiding these common mistakes, parents and children can ensure a positive experience that promotes confidence and creativity as they embrace their new pixie hairstyle.
Choosing the Right Pixie Style for Your Child
Selecting a pixie hairstyle that complements your child’s face shape, hair type, and personality is essential for a successful haircut. Evaluating face shapes can help narrow down suitable styles; for example, oval faces tend to suit various pixie cuts, while round faces may benefit from styles that add height and elongate their appearance.
When considering hair types, it’s important to recognize that different textures can significantly impact how a pixie cut looks. For instance, curly hair may require a different approach than straight hair, with specific cuts tailored to enhance the natural curl pattern. Consulting with experts can provide guidance on which styles will best suit your child’s hair.
Furthermore, it’s vital to consider age-appropriate and bold options. Younger children may gravitate towards fun, playful styles, while older kids might prefer sleeker, more sophisticated looks. Fostering an open dialogue with your child regarding their preferences can ensure they feel excited and confident about their new hairstyle.
Effective Maintenance Strategies for Pixie Hairstyles
Daily Care Routine Essentials
Maintaining a pixie cut involves a straightforward daily routine that keeps the hairstyle looking fresh and vibrant. The first step is to wash and condition the hair regularly; using a gentle shampoo and lightweight conditioner can help maintain the hair’s health and manageability.
Daily maintenance should also incorporate proper styling techniques tailored to the pixie cut. Applying styling products such as gel or wax can provide the necessary hold for a polished look. Key steps for a daily care routine include:
- Wash hair 2-3 times per week to prevent dryness.
- Condition after every wash to retain moisture.
- Apply leave-in conditioner for added hydration.
- Utilize styling products to enhance texture and hold.
- Style hair while damp for optimal results.
- Use a comb or fingers for soft styling.
- Check for split ends and touch up as needed.
- Incorporate accessories to quickly elevate the look.
Establishing a daily routine not only keeps the pixie cut looking sharp but also instills good hair care habits in children from an early age.
Importance of Regular Trims and Touch-Ups
Regular trims are essential for maintaining the shape and style of pixie cuts. Keeping the haircut sharp and well-defined not only enhances its appearance but also contributes to overall hair health. Typically, it is advisable to trim a pixie cut every 4-6 weeks to sustain its shape and prevent the style from becoming unruly.
During these touch-ups, a professional stylist can also address any uneven lengths or layers, ensuring the pixie cut continues to look its best. Discussing desired changes or styling preferences during these appointments can help the stylist tailor the cut to evolving personal styles.
Considerations for timing include:
- Monitor how quickly the hair grows; some children may require more frequent trims.
- Time trims around school schedules or special events.
- Maintain a calendar for regular appointments.
- Discuss any desired changes in style with the stylist during visits.
- Incorporate touch-ups into fun outings to make the experience enjoyable.
- Observe how the cut holds up between trims for feedback.
- Keep a flexible approach for adjustments based on hair growth.
- Encourage children to express their styling preferences during visits.
By prioritizing regular trims, parents can ensure that their child’s pixie cut remains a fashionable and manageable option.
Managing Hair Growth During Transition
As hair grows, Pixie styles can undergo significant changes, which may require careful management during the transition period. The key to navigating this phase is implementing styling techniques that adapt to the evolving look. For example, as hair length increases, experimenting with different styles can be a fun way to maintain a fresh appearance.
To manage the transition effectively, consider the following:
- Schedule regular trims to eliminate excess length and maintain shape.
- Incorporate styling products to control awkward stages during growth.
- Explore alternative styles like braids or accessories during the growth phase.
- Encourage children to embrace the change and express their creativity.
- Maintain open communication with a stylist for ongoing advice.
- Discover layering techniques to blend varying lengths seamlessly.
- Document the hair’s growth journey for fun memories.
- Utilize styling tools to create temporary styles as hair grows.
Managing hair growth can be a rewarding experience that supports creativity and encourages children to take an active role in their hair care journey.
Exploring Styling Options for Pixie Cuts
Timeless Classic Pixie Hairstyles That Last
Classic pixie cuts remain perpetually stylish and can be adapted for various occasions, making them a favorite choice for many kids. The beauty of classic pixie styles lies in their simplicity and versatility, allowing for effortless transitions from casual outings to formal events.
Some enduring pixie styles that consistently maintain their fashion appeal include:
- The Audrey Hepburn-inspired pixie, known for its sleek and elegant look.
- The traditional rounded pixie, featuring short hair all around for a polished finish.
- The feathered pixie, where soft layers create gentle framing around the face.
- The sleek pixie, providing a refined finish ideal for special occasions.
- The tousled pixie, celebrating a relaxed, textured look.
- The side-swept pixie, offering styling flexibility.
- The layered pixie, adding movement and volume for a contemporary twist.
- The bob-inspired pixie, merging the elegance of a bob with the cropped freshness of a pixie.
These classic styles evoke nostalgia while remaining modern in their appeal. Children can easily personalize them with accessories or styling products, showcasing their individuality at every opportunity.
Modern and Edgy Pixie Variations for Daring Kids
For those desiring a bold look, modern and edgy pixie variations push the boundaries of traditional styles, enabling children to express their unique identities. Asymmetrical cuts, shaved sections, and vibrant color choices are just a few ways to add an exciting edge to a classic pixie cut.
Adding an edgy twist can be achieved through various methods:
- Choose an asymmetric pixie to create a bold silhouette.
- Incorporate shaved sections for unexpected contrasts.
- Select vibrant colors or highlights to make a statement.
- Layer with texture for a messy, undone aesthetic.
- Add a fringe or bangs for a contemporary touch.
- Experiment with unique styling products for hold and definition.
- Use temporary hair chalks for playful color changes.
- Utilize accessories like hair tattoos or clips for extra flair.
These contemporary approaches not only foster creative expression but also empower children to embrace their individuality through their hairstyles, helping them stand out in their unique way.
Accessorizing Pixie Styles for Extra Flair
Accessorizing can significantly enhance pixie hairstyles and add a personal touch that reflects a child’s unique personality. Accessories provide opportunities to transform a basic pixie cut into something truly distinctive, elevating the overall look with minimal effort.
Some accessories that work exceptionally well with pixie cuts include:
- Headbands in various colors and textures for a pop of fun.
- Creative clips and barrettes that showcase individual style.
- Scarves for a playful, chic vibe.
- Hairbands with embellishments for a touch of glamour.
- Colorful scrunchies for added flair.
- Temporary hair color sprays for festive occasions.
- Decorative pins that can be clipped into the hair for stylish detail.
- Hats or beanies for a trendy, casual look.
Utilizing accessories allows children to be creative in their styling, making it an enjoyable and expressive experience. It’s a fantastic way for them to experiment with looks that effectively reflect their mood and personality at any moment.
Benefits of Pixie Hairstyles for Bold Kids
Boosting Confidence Through Hair Choices
Pixie hairstyles can significantly enhance a child’s confidence by enabling them to express their bold personalities. A daring haircut can serve as a powerful form of self-expression, showcasing their individuality and uniqueness. When children see themselves with a stylish cut, they often feel more empowered and self-assured.
A pixie cut can help children feel more confident in various social settings, as it distinguishes them from their peers. The transformation often brings a sense of liberation, allowing children to embrace their new look and identity.
The impact of a pixie cut on confidence can be profound:
- Encourages children to showcase their personality.
- Provides a sense of pride in their appearance.
- Fosters resilience in the face of potential criticism.
- Enhances their ability to navigate social interactions.
- Allows for creative expression through styling.
- Promotes self-acceptance and appreciation for individuality.
- Enables children to feel unique and special.
- Builds a positive self-image through personal choice.
Such a transformative experience can help children develop a strong sense of self-worth, instilling confidence that transcends their appearance.
Low Maintenance Nature of Pixie Cuts
One of the main advantages of pixie cuts is their ease of maintenance. Busy parents and active kids benefit from the low-maintenance nature of shorter styles, which require minimal daily upkeep. Pixie cuts generally have a quick drying time, significantly simplifying morning routines.
The practical factors contributing to the low-maintenance nature of pixie styles include:
- Fewer products needed for styling and upkeep.
- Quicker drying time compared to longer hairstyles.
- Simple styling options that don’t require extensive tools.
- Less time spent on daily routines, allowing for more playtime.
- Reduced tangling and knots, making brushing easier.
- Less frequent need for shampooing and conditioning.
- Lower exposure to heat styling, resulting in healthier hair.
- Streamlined approach to hair care promotes independence in kids.
This simplicity makes pixie cuts an attractive choice for families seeking a stylish yet manageable hairstyle for their children.
Versatility of Pixie Styles in Styling
Pixie cuts offer a plethora of styling options, making them adaptable for different occasions. Whether it’s a casual day out, a formal event, or a playdate, pixie styles can be customized to match any setting. The flexibility of pixie cuts enables children to transition seamlessly from one scenario to another.
Versatile styling options can include:
- Sleek and polished for formal gatherings.
- Messy and textured for casual outings.
- Accessorizing for festive occasions.
- Experimenting with styling products for different finishes.
- Incorporating braids or twists for added flair.
- Creating volume and lift for an energetic look.
- Utilizing headbands or clips for quick transformations.
- Mixing styles for a unique aesthetic.
The ability to adapt a pixie cut for various events provides children with creative freedom and encourages them to experiment with their looks, which can be both enjoyable and empowering.
Encouraging Individuality with Pixie Styles
Pixie styles inherently allow children to stand out and embrace their uniqueness, fostering a sense of individuality and self-expression. The choice to opt for a pixie cut often serves as a bold statement, showcasing a child’s courage in their hairstyle choice.
This encouragement of individuality can manifest in several ways:
- Promotes self-acceptance and appreciation for unique traits.
- Encourages children to express their identity freely.
- Enables them to take ownership of their appearance.
- Facilitates discussions about personal style and preferences.
- Inspires confidence in making choices about their looks.
- Encourages creativity in styling and accessorizing.
- Enhances their ability to navigate peer pressures related to appearance.
- Provides a platform for showcasing personal interests through hair.
By allowing children to embrace their unique sense of self, pixie cuts can contribute to their emotional and social development, empowering them to flourish as individuals.
Keeping Kids Cool with Pixie Cuts During Summer
The short length of pixie cuts helps keep children cool during hot summer months, making it a practical choice for active kids. The lightweight nature of a pixie cut allows for airflow, reducing discomfort often associated with longer hairstyles in the heat.
The benefits of choosing a pixie cut for summer include:
- Reduced heat on the scalp, promoting comfort.
- Less time spent on hair care during busy summer days.
- Minimizes tangling when swimming or playing outside.
- Allows for easy transitions from activities to playdates.
- Facilitates faster drying after swimming or bathing.
- Helps prevent sun damage by keeping hair off the neck.
- Offers more freedom for outdoor activities without hair distractions.
- Presents opportunities for fun summer styling with accessories.
This practicality makes pixie cuts an appealing choice for families looking to keep their children comfortable and stylish throughout the warmer months.
Research-Backed Benefits of Embracing Pixie Hairstyles for Bold Kids
The Psychological Impact of Short Hair
Studies indicate that short hair can positively influence a child’s self-esteem and sense of identity. Children often feel liberated when they embrace a pixie cut, shedding societal expectations surrounding longer hairstyles. The psychological impact of short hair can be profound, contributing to improved self-image and enhanced confidence.
Examples of children experiencing positive changes after adopting a pixie cut illustrate this impact. For instance, Liam, a 9-year-old, reported feeling more confident and independent after switching from long hair to a stylish pixie. The transformation allowed him to express his personality freely without being confined to traditional norms.
Children often feel more empowered and confident with shorter styles, enabling them to embrace their individuality. The benefits of short hair can include:
- Increased self-confidence through personal choice.
- Encouragement to break free from societal norms.
- Enhanced self-identity through unique hairstyles.
- Development of a personal style that reflects their personality.
- Fostering resilience in facing peer opinions.
- Encouragement of creativity and experimentation with hair.
- Empowerment to make decisions regarding their appearance.
- Improved overall emotional well-being.
The positive psychological effects of short hair make pixie cuts a valuable choice for children seeking to express themselves authentically.
Health Benefits Associated with Short Hair
Choosing a pixie cut can also lead to healthier hair and scalp, simplifying cleanliness and hygiene. Short hair often allows for more manageable upkeep, which can be particularly beneficial for active kids. Regular washing and proper conditioning become crucial for maintaining scalp health with short hair.
Actionable steps for maintaining scalp health with short hair include:
- Using a gentle, sulfate-free shampoo to avoid irritation.
- Conditioning regularly to keep the scalp hydrated.
- Massaging the scalp while washing to stimulate circulation.
- Limiting heat styling to reduce damage.
- Incorporating a weekly deep conditioning treatment.
- Monitoring any skin sensitivities or reactions.
- Encouraging a balanced diet for healthy hair.
- Using natural products when possible for gentler care.
The health benefits associated with short hair make pixie cuts an appealing option for parents prioritizing their child’s hair and scalp health.
Long-Term Advantages of Pixie Hairstyles
Maintaining a pixie cut over time can lead to healthier hair growth, as shorter styles typically experience less breakage and damage than longer hair. The regular trims associated with pixie cuts promote better hair health, allowing for consistent maintenance and fresh growth.
Expert insight on the long-term effects of pixie cuts highlights the following benefits:
- Reduced breakage due to shorter lengths.
- Increased exposure to nutrients from the scalp.
- Encouragement of healthier hair growth patterns.
- Less styling damage from heat applications.
- Improved overall hair texture and appearance.
- Facilitated ease of care and management.
- Opportunity to explore various styles as hair grows.
- Greater flexibility in experimenting with color.
The long-term health benefits of embracing a pixie cut provide parents with compelling reasons to consider this hairstyle for their children.
Social Perceptions of Pixie Styles
Pixie cuts can influence how peers and adults perceive and interact with bold kids, often fostering inclusivity and acceptance. The boldness associated with short haircuts enables children to stand out in social situations, leading to increased visibility and opportunities for connection.
Discussions surrounding societal attitudes towards children with short hair reveal the following insights:
- Pixie styles are often regarded as modern and trendy.
- Short hair can break gender norms, promoting equality.
- Children with pixie cuts may receive compliments, boosting self-esteem.
- Bold hairstyles can encourage meaningful conversations.
- Short hair may attract attention, fostering social interactions.
- Embracing diversity in haircuts promotes acceptance of differences.
- Encouragement of unique expressions within peer groups.
- Facilitates a supportive environment for those who choose shorter styles.
By embracing pixie cuts, children can enhance their social experiences, setting a positive precedent for self-expression and acceptance among their peers.
Choosing the Right Pixie Style for Your Child
Evaluating Face Shape for the Ideal Pixie Cut
Selecting a pixie hairstyle that complements your child’s face shape is essential for achieving a flattering look. Different face shapes benefit from various pixie cuts, enhancing features while adding visual interest. To determine the best pixie cut based on face shape, understanding which styles suit specific shapes is crucial.
For instance:
- Round faces may benefit from pixies with added height and volume to elongate their appearance.
- Oval faces can wear virtually any pixie style, allowing for creative freedom.
- Square faces often look best with softer, rounded cuts that soften angular features.
- Heart-shaped faces may prefer pixies with side-swept bangs to balance their features.
- Long faces can suit fuller styles, adding width.
- Diamond-shaped faces work well with textured layers to add softness.
- Triangular faces may suit asymmetrical cuts for contrast.
- Considering facial features is crucial when selecting a flattering style.
By assessing face shape, parents can choose a pixie hairstyle that enhances their child’s natural beauty, ensuring they feel confident and stylish.
Considering Hair Texture in Pixie Style Selection
Hair texture plays a significant role in selecting the right pixie hairstyle. Different textures require tailored approaches to ensure the cut is both flattering and manageable. Understanding the best pixie cuts for various hair textures can assist in making informed decisions.
For example:
- Curlier hair types can benefit from layered pixies that enhance curl patterns.
- Straight hair often looks sleek with blunt cuts or soft layers.
- Wavy textures thrive with styles that incorporate waves for added movement.
- Fine hair may require pixies with volume and texture for fullness.
- Coarse hair can handle edgier styles with more defined shapes.
- Thick hair typically works well with layered cuts to reduce bulk.
- Considering suitable styling products is essential for managing different textures.
- Consulting with a stylist can provide clarity on suitable cuts.
Taking hair texture into account ensures that the chosen pixie hairstyle is not only visually appealing but also practical for daily maintenance.
Personal Style and Preferences in Pixie Cuts
A child’s personal style and preferences should guide the choice of pixie cut to ensure they feel excited and confident about their new hairstyle. Involving children in the decision-making process allows them to express their individuality, making the haircut feel more like a personal choice.
To incorporate a child’s personality into their haircut, consider the following:
- Encourage them to express their preferences regarding length and style.
- Incorporate bold colors or highlights that resonate with their personality.
- Explore unique shapes or asymmetrical cuts that appeal to their creativity.
- Allow for accessories that reflect their interests and tastes.
- Discuss the possibility of temporary styles for special occasions.
- Explore celebrity pixie styles for inspiration.
- Consider their hobbies and interests as a basis for their style.
- Promote a sense of ownership over their new look.
By integrating personal style into the decision, children are more likely to embrace their new pixie cut, empowering their self-expression and confidence.
Encouraging Boldness Through Pixie Hairstyles
Fostering Self-Expression with Hair Choices
Pixie hairstyles can serve as a powerful tool for fostering self-expression in children. The decision to adopt a pixie cut signifies a willingness to embrace individuality, allowing kids to showcase who they are through their appearance. The boldness associated with such a choice can lead to newfound confidence and creativity.
Encouraging children to choose their style can help them express their individuality in several ways:
- Empowering them to make personal choices regarding their appearance.
- Encouraging experimentation with colors and accessories.
- Fostering discussions about their preferences and interests.
- Validating their choices and supporting their self-expression.
- Promoting a sense of pride in their unique hairstyle.
- Encouraging resilience in the face of criticism.
- Creating opportunities for them to embrace their identity.
- Allowing them to explore various styling options and trends.
Through fostering self-expression, parents can instill confidence in their children, encouraging them to embrace their uniqueness and stand tall in their individuality.
Building Resilience Through Pixie Cuts
A bold haircut, such as a pixie cut, can help build resilience and courage in children. Choosing a distinctive hairstyle allows them to face potential criticism or attention, ultimately strengthening their confidence. Embracing a pixie cut can serve as a transformative experience, equipping children with the tools to navigate social dynamics.
The role of a pixie cut in building a child’s resilience can be illustrated through the following:
- Encouraging them to face potential judgment with confidence.
- Promoting acceptance of individuality in a diverse society.
- Helping them learn to stand out and embrace their uniqueness.
- Developing problem-solving skills when navigating social interactions.
- Instilling a sense of courage in making bold choices.
- Encouraging them to advocate for their preferences and style.
- Fostering strong self-esteem through positive reinforcement.
- Creating a supportive environment for personal growth.
By allowing children to embrace bold choices like pixie cuts, parents can help cultivate resilience that extends beyond mere hairstyle choices.
Celebrating Uniqueness with Pixie Hairstyles
Pixie hairstyles celebrate the uniqueness of each child, allowing them to stand out and embrace their distinctive traits. Opting for a pixie cut can be a bold declaration of individuality, encouraging children to take pride in their appearance and qualities.
How a pixie cut helps celebrate a child’s unique traits can be encapsulated in several ways:
- Encouraging them to appreciate their individuality.
- Promoting self-acceptance through unique hairstyles.
- Empowering them to showcase their personality boldly.
- Fostering creativity in styling and accessorizing.
- Encouraging discussions about personal identity and expression.
- Helping them navigate societal expectations with confidence.
- Celebrating differences within peer groups.
- Inspiring others to embrace their uniqueness.
By adopting pixie styles, children can learn to appreciate their individuality and the diverse characteristics that make them special.
Boosting Confidence Through Pixie Cuts
A pixie cut promotes confidence by encouraging children to embrace their appearance and stand out. The boldness of a pixie style empowers kids, allowing them to feel proud of their look and enhancing their sense of self-worth.
The confidence fostered by a pixie cut can be seen in:
- The bold choice signaling self-acceptance and self-love.
- Increased pride in their appearance and personal choices.
- Encouragement to express themselves freely.
- Opportunities for positive reinforcement from peers and family.
- Development of a strong sense of identity through styling.
- Encouragement to take risks in appearance and expression.
- Fostering resilience in facing criticism or judgment.
- Promoting a healthy self-image through creative choices.
By choosing a pixie cut, children are not only making a fashion statement but also embarking on a journey of self-discovery and confidence building.
Encouraging Experimentation with Pixie Styles
Pixie hairstyles inspire children to experiment with their looks, promoting a sense of adventure and openness to new experiences and self-discovery. The nature of a pixie cut allows for various styling possibilities, making it a fun platform for creative exploration.
Ways to encourage experimentation with pixie styles include:
- Promoting playfulness with different styling techniques.
- Encouraging the use of color and temporary dyes.
- Allowing for accessories that reflect interests and personality.
- Exploring various styling products to achieve different looks.
- Engaging in discussions about styling trends and inspirations.
- Encouraging collaboration with friends on styling ideas.
- Documenting their styling journey to celebrate creativity.
- Promoting a safe space for them to express themselves.
By supporting experimentation through pixie styles, parents can nurture creativity and encourage children to embrace their individuality, paving the way for adventures in self-discovery.
Frequently Asked Questions About Pixie Hairstyles
What age is appropriate for a pixie cut?
There’s no specific age limit for a pixie cut; it often depends on the child’s comfort and willingness to try a shorter style. Many children as young as 5 or 6 can successfully rock a pixie cut.
How often should a child’s pixie cut be trimmed?
It is recommended to trim a child’s pixie cut every 4-6 weeks to maintain its shape and ensure it looks fresh and well-kept.
Can a pixie cut work for all hair types?
Yes, pixie cuts can work for various hair types, including curly, straight, or wavy hair. Each hair type may require different styling techniques and products for optimal results.
What styling products are best for pixie cuts?
Products such as volumizing mousse, texturizing wax, and smoothing serum are excellent for styling pixie cuts, providing hold and enhancing the overall appearance.
How can I help my child feel confident about their pixie cut?
Encourage your child to express their preferences, involve them in the decision-making process, and affirm their choice. Celebrating their uniqueness can greatly enhance their confidence in their new look.
Are pixie cuts low maintenance?
Yes, pixie cuts are generally low maintenance, requiring less styling time and fewer products compared to longer hairstyles, making them practical for busy families.
What accessories can I use with a pixie cut?
Accessories such as headbands, clips, and scarves can beautifully complement pixie cuts, adding a personal touch and elevating the overall look.
How can I style my child’s pixie cut for special occasions?
For special occasions, consider sleek styling with a smoothing serum or adding fun accessories. Experimenting with temporary color can also make the style more festive and unique.
Can pixie cuts help with summer heat?
Absolutely! The short length of pixie cuts helps keep children cool during hot summer months, making it a comfortable and practical choice for active lifestyles.
How can I transition a pixie cut as hair grows out?
Regular trims can help manage the transition, along with experimenting with different styles or adding accessories to maintain a fresh look as the hair grows longer.
Connect with us on Facebook!
The Article: Forming Pixie Styles for Bold Kids: A Universal Guide appeared first on Amitys Hair Salon.
The Article Pixie Styles for Bold Kids: A Comprehensive Guide Was Found On https://limitsofstrategy.com