Your cart is currently empty!
Category: Fashion & Beauty
-

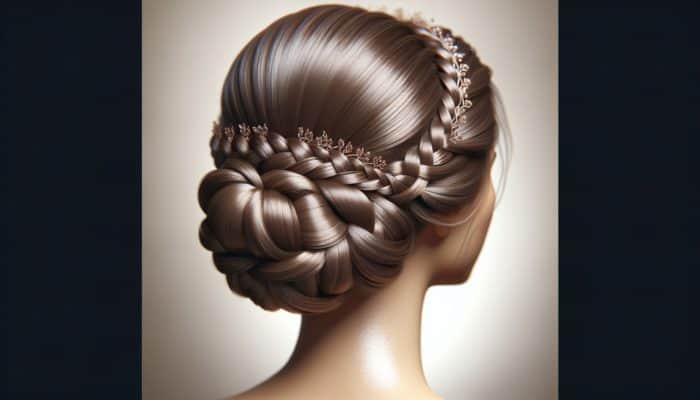
Little Braids: Your Essential Guide to Delicate Styles
Become an Expert in Crafting Little Braids for Captivating Hairstyles
Understanding the Role and Importance of Little Braids in Hairstyling
Little braids are exquisite, meticulously crafted strands that significantly enhance the beauty and sophistication of diverse hairstyles. These delicate features are remarkably versatile, seamlessly integrating into various hair types and styles, catering to everyone. Whether you desire a casual yet elegant appearance or are preparing for a formal occasion, little braids can elevate your hairstyle dramatically. Their subtle complexity transforms a simple ponytail adorned with fine braids or an elaborate updo featuring multiple intertwined strands, capturing attention and adding charm to your overall look.
Essentially, little braids introduce a distinctive dimension to your hair, allowing it to stand out without overwhelming your overall style. They can either serve as standalone features or be effortlessly woven into more intricate designs, providing ample opportunities for personal expression and creativity. This adaptability positions little braids as a vital technique in any hairstylist’s toolkit, catering to a wide array of preferences and occasions. As we delve into the artistry behind weaving little braids, we will explore various techniques, tools, and styling tips that empower anyone to master this elegant form of hairstyling.
Essential Techniques for Perfecting the Art of Little Braids
To excel in creating little braids, a strong understanding of both fundamental and advanced techniques is crucial. The basic three-strand braid serves as the cornerstone that every aspiring stylist should master. Start by dividing a section of hair into three equal strands. Cross the right strand over the middle strand, then the left strand over the newly formed middle strand, and continue this process until you reach your desired length. This technique is straightforward yet effective, resulting in a clean and classic appearance that remains timeless.
Once you gain confidence with basic braiding, you can explore advanced techniques such as fishtail, Dutch, and waterfall braids. For instance, the fishtail braid offers a more intricate look and is created by taking small sections from each outer edge and crossing them over to the opposite side. The Dutch braid, often referred to as an inverted braid, provides a three-dimensional effect as the strands are woven underneath, making a bold statement in any hairstyle.
To truly excel in creating little braids, continual practice is vital. Dedicate time to refine your skills while experimenting with various hair types and textures. Furthermore, watching tutorials from expert hairstylists can offer invaluable insights into techniques and tricks that can elevate your braiding abilities. With sufficient practice, what once felt complex will become second nature, enabling you to craft stunning hairstyles with ease.
Must-Have Tools and Accessories for Creating Beautiful Little Braids
Utilizing the appropriate tools and accessories is paramount for achieving flawless little braids. The foundation of successful braiding begins with a fine-tooth comb, which aids in sectioning hair neatly and ensuring that the strands are tangle-free. A high-quality hair elastic is also essential for securing the end of each braid without causing damage. Opt for soft, snag-free bands that won’t pull or break the hair, ensuring a comfortable fit.
Decorative clips and hairpins can add an extra touch to your braided styles, transforming an everyday look into something special, whether you’re infusing a hint of sparkle or color. Furthermore, using hairspray or styling cream can be beneficial for maintaining the integrity of your braid throughout the day, particularly in humid conditions. For those who enjoy a bit of creativity, consider weaving ribbons or beads into your braids for a personalized touch that reflects your unique style.
Remember, investing in high-quality tools not only enhances the outcome of your braiding but also makes the process more enjoyable. This meticulous attention to detail can significantly improve your hairstyling experience, allowing for greater creativity and innovation in your braid designs.
Top Styling Tips for Crafting Eye-Catching Little Braids
Styling little braids opens up a realm of endless possibilities, enabling you to elevate your hairstyle effortlessly. One popular method involves integrating little braids into updos, where they can serve as an elegant frame around the face or add texture to a bun or chignon. For example, a few strategically positioned braids woven into a sleek ponytail can create a polished yet playful look, ideal for casual outings and formal occasions alike.
If you’re aiming to incorporate little braids into loose hairstyles, consider using them as accents. A half-up hairstyle adorned with small braids introduces an element of interest while maintaining an effortlessly chic vibe. Another effective technique is to create a crown braid that encircles the head, adding a regal touch to your overall appearance. This style works beautifully for weddings and special events, where making a memorable impression is paramount.
Experimentation is crucial when it comes to styling little braids. Don’t hesitate to combine different sizes, textures, and colors to discover what best suits you. The goal is to enhance your existing style while showcasing your personality. The beauty of little braids lies in their adaptability; with the right styling tips, you can uncover exciting new ways to incorporate them into your everyday look.
Proper Maintenance and Care for Long-Lasting Little Braids
Proper maintenance and care are essential for ensuring little braids remain looking fresh and neat for an extended time. Washing your hair prior to braiding is crucial; clean hair provides better grip and prevents tangling. However, be mindful of how often you wash your braided hair. Over-washing can lead to dryness, so consider using a gentle, moisturizing shampoo and conditioner that keeps your hair hydrated without stripping it of its natural oils.
Once the braids are in place, maintaining their appearance is vital. Using a light leave-in conditioner or hair oil can effectively moisturize the braids without weighing them down. This practice helps to prevent frizz and keeps the strands looking sleek and polished. Additionally, refreshing your braids can be as simple as gently re-braiding sections that have loosened or fallen out of place, ensuring they maintain their intended shape and structure.
Lastly, recognizing when to remove your little braids is crucial for maintaining hair health. Signs that it’s time to take them out include discomfort, excessive frizz, or noticeable tangling. Safely removing braids involves gently unwrapping them, starting from the ends and working your way up to avoid damaging your hair. By following these maintenance tips, you can enjoy the beauty of little braids while keeping your hair healthy and vibrant.
Professional Insights on Crafting Perfect Little Braids for Delicate Accents
How Expert Stylists Can Enhance Your Braiding Skills

Expert hairstylists possess invaluable insights regarding the refinement of little braids. Their extensive industry experience provides them with a wealth of tips and tricks that can significantly enhance anyone’s braiding technique. Here are some top recommendations from the experts:
- Always start with clean, dry hair for optimal grip.
- Use a fine-tooth comb to section hair precisely, resulting in cleaner braids.
- Maintain even tension while braiding to avoid loose strands and unevenness.
- Experiment with various hair products to determine what works best for your unique hair type.
- Practice braiding techniques on a mannequin or friend to enhance your skills.
- Incorporate different textures, such as waves or curls, to add depth and dimension.
- Watch tutorials from professional hairstylists for visual guidance and inspiration.
- Don’t hesitate to mix styles—combine little braids with other techniques for unique and striking looks.
These expert insights can serve as a valuable guide for anyone seeking to improve their braiding skills. The key is to practice regularly and remain open to new methods and styles that can broaden your hairstyling repertoire. With dedicated effort, you can quickly evolve from a novice to a confident braider, crafting stunning hairstyles that showcase your individuality.
Current Trends Shaping the World of Little Braids
The hairstyling world is constantly evolving, and little braids are no exception. Keeping up with the latest trends can inspire fresh styles and help you personalize your look. Currently, bohemian styles are on the rise, characterized by loose, effortless braids that evoke a laid-back, free-spirited vibe. Paired with floral accessories or beachy waves, these braids are perfect for summer festivals or casual outings.
Conversely, sleek, modern looks are also trending, featuring tight, polished little braids styled into chic updos or sleek ponytails. These styles often emphasize clean lines and minimalism, resulting in a sophisticated appearance suitable for professional settings or formal events. To achieve this look, a good quality hair serum is essential for smoothing frizz and ensuring a lustrous shine.
Adapting these trends to suit your personal style is crucial. You can incorporate elements of the latest braiding fashions while retaining your unique flair. Consider using colorful elastics, experimenting with braid placements, or adding decorative elements like ribbons or beads to make each style your own. Keeping an eye on trending styles can invigorate your hairstyling journey, allowing for continuous creativity and experimentation.
Real-World Examples of Little Braids in Action
Examining real-world examples of little braids provides valuable insight into their application across various hairstyles. For instance, renowned hairstylist Jen Atkin frequently incorporates little braids into celebrity looks, enhancing textures and adding visual interest. A perfect example is the intricate braided crown worn by a famous actress at a recent award show, showcasing how little braids can elevate even the most glamorous styles.
Similarly, during bridal season, many hairstylists embrace little braids to create stunning bridal hairstyles. A notable case study from a prominent wedding stylist reveals that integrating small braids into a loose, romantic updo allowed for a whimsical touch that did not detract from the overall elegance of the look. This technique accentuated the bride’s features and added a personal touch, making the hairstyle distinctly unique.
In another instance, a hairstylist created an everyday look for a client by incorporating little braids into a half-updo, demonstrating how these braids can transform a simple style into something truly special. By examining these real-world applications, it becomes evident that little braids are not merely a trend but a versatile technique adaptable to various occasions, enhancing the beauty and style of any hairstyle.
The Art of Seamlessly Integrating Little Braids into Hairstyles
Techniques for Incorporating Little Braids into Elegant Updos
Integrating little braids into updos is an art form that can elevate any hairstyle to new heights of elegance. The key lies in planning your design before you begin, ensuring the braids complement the overall look harmoniously. Start by deciding where to feature the braids—whether as accents around the face, woven into the bun, or as an integral part of the updo itself.
One effective technique involves creating several small braids along the sides of the head and then pulling them back into a bun. This method not only adds texture but also beautifully frames the face. Alternatively, you can incorporate a single, thicker braid that wraps around the bun, adding depth and interest. When crafting your updo, ensure each braid is secured with a small, clear elastic for a polished appearance.
Another option is to use little braids in a chignon, where they can be woven into the structure of the hairstyle. This approach provides seamless integration, creating a sophisticated look ideal for formal occasions. To achieve a chic aesthetic, consider finishing with decorative pins or flowers, which can enhance the overall elegance. Each of these techniques demonstrates how little braids can be creatively utilized to add refinement to any updo.
Incorporating Little Braids into Everyday Hairstyles
Incorporating little braids into everyday hairstyles adds a subtle yet stylish accent, making your look more dynamic without requiring significant time investment. One popular option is to add a few small braids to a simple ponytail. This can be achieved by braiding sections of hair from the front and securing them at the back with the ponytail, instantly transforming a basic style into something chic and playful.
Another idea is to create a half-up hairstyle where little braids are woven into the top section, allowing them to cascade down alongside loose strands. This approach adds an element of interest while keeping the hair manageable for daily activities. Integrating little braids into a messy bun can also provide a relaxed, effortless vibe, perfect for casual outings or days spent running errands.
For those who prefer not to spend too much time styling in the morning, consider using little braids as a way to refresh your look. If you have previously styled your hair into a braid or bun, simply unraveling and fluffing it out can create beautiful texture, with little braids adding a touch of detail. These simple yet effective techniques enable you to enhance your everyday hairstyles, allowing your creativity to shine through with minimal effort.
Using Little Braids for Special Occasions
When it comes to special occasions, little braids can serve as stunning focal points that elevate your overall look. For weddings, galas, or formal events, opting for intricate braided hairstyles can help you stand out. A popular choice is the braided crown, where little braids encircle the head, providing a regal appearance that is both romantic and sophisticated.
Another elegant option is to create a waterfall braid, where strands of hair are continually added to the braid, allowing it to cascade gracefully down the back. This style works beautifully for formal events and can be paired with floral accessories or sparkling pins for added glamour. For those looking to make a bold statement, consider incorporating a series of small braids into an elaborate updo, allowing them to weave through the hairstyle for a multi-dimensional effect.
It’s essential to plan your braided hairstyle in advance, especially for special events. Consider factors such as the dress code and theme of the occasion, ensuring that your braids complement your overall outfit perfectly. Don’t hesitate to experiment with different styles and placements to find what feels right for you. The key to a successful braided hairstyle lies in its execution and attention to detail, which can truly make or break your look for a memorable occasion.
Exploring the Benefits of Weaving Little Braids for Delicate Accents
Enhancing Hair Texture and Volume with Little Braids
Little braids serve as an excellent method for enhancing hair texture and adding dimension to your overall look. By incorporating braiding techniques, you can create visual interest that transforms flat, lifeless hair into something dynamic and exciting. The act of braiding helps to define and separate strands, providing a more structured appearance without compromising the hair’s natural flow.
Additionally, little braids work wonders for individuals with fine or straight hair, as they can create the illusion of thickness and volume. The added texture from braids can make hair appear fuller and more lively, perfect for those seeking to enhance their natural beauty. This technique is particularly effective when combined with styling products that add definition and hold, such as mousse or texturizing spray.
Furthermore, little braids can protect the hair from damage, especially in harsher weather conditions. By keeping strands tightly secured, braids minimize exposure to environmental stressors like wind, sun, and humidity. This added layer of protection contributes to healthier hair in the long run, making little braids both a stylish and practical choice for haircare.
The Elegant Touch of Little Braids in Hairstyles
The subtle intricacy of little braids significantly enhances the elegance of any hairstyle. Their delicate nature lends a touch of refinement, making them suitable for both casual and formal settings. Whether woven into an updo or used as accents in loose hair, little braids can elevate a look from ordinary to extraordinary.
Moreover, the visual appeal of little braids lies in their versatility. They can soften sharp styles or add complexity to simple looks, creating a balance that is both aesthetically pleasing and sophisticated. For example, a sleek bun adorned with a few small braids can soften the overall appearance while maintaining a modern edge that is always in vogue.
In addition to their aesthetic benefits, little braids evoke a sense of tradition and artistry. Numerous cultures worldwide have long embraced braiding as a form of self-expression, adding depth to their beauty. This cultural significance can make little braids not just a style choice but a way to connect with heritage and personal identity, enriching your hairstyling experience.
Unleashing the Versatility of Little Braids in Hairstyling
The versatility of little braids in hairstyling cannot be overstated. They can adapt to suit any hair length or texture, making them accessible for a diverse range of individuals. From simple accents to complex, multi-layered looks, little braids can easily be tailored to fit specific occasions, personal styles, and preferences.
For instance, short hair can benefit from adding small braids to create movement and texture, while long hair can showcase intricate braid patterns that draw attention. Little braids can also be combined with other styling techniques, such as twists or buns, allowing for endless creativity. They can be utilized as standalone pieces or integrated into larger designs, ensuring they serve as a focal point or subtle detail, depending on the desired look.
Furthermore, the adaptability of little braids extends to various hair types, including straight, wavy, or curly. This inclusivity allows everyone to experiment with this styling technique, regardless of their hair type. Here’s a list of styling options to explore with little braids:
- Accented ponytails for a playful touch.
- Braided crowns for a regal appearance.
- Integrated into chignons for added texture.
- Mixed with loose waves for a bohemian feel.
- Braided headbands to frame the face.
- Layered braids for a dramatic effect.
- Combined with accessories for a unique flair.
- Woven into half-up styles for effortless elegance.
Embracing the versatility of little braids opens doors to fresh styling opportunities, allowing you to discover new ways to express yourself through your hair and style.
Step-by-Step Guides for Crafting Little Braids
A Simple Tutorial for Creating Basic Little Braids
Creating basic little braids is a fundamental skill that everyone can master with practice. This step-by-step guide will assist you in weaving your first little braid, ensuring you achieve clean and neat results that impress.
1. Begin by sectioning a small amount of hair, approximately one inch wide, from the area you wish to braid. Ensure that the section is free of tangles by using a fine-tooth comb.
2. Divide the section of hair into three equal strands. Hold the right strand in your right hand, the middle strand in the center, and the left strand in your left hand.
3. Cross the right strand over the middle strand, bringing it to the center. Now, the right strand becomes the middle strand.
4. Next, take the left strand and cross it over the new middle strand. The left strand is now the middle strand.
5. Continue this process, alternating between the right and left strands until you reach your desired braid length.
6. Secure the end of the braid with a small, clear elastic, ensuring it’s tight enough to hold but not so tight that it causes discomfort.With these straightforward instructions, you can create basic little braids that can be used as accents or incorporated into larger hairstyles. Remember, practice makes perfect, so don’t hesitate to try different sections and sizes to find what works best for your unique hair type and styling preferences.
Diving into Advanced Techniques for Little Braids
Once you’ve mastered the basic little braid, it’s time to delve into advanced techniques that can add complexity and flair to your hairstyles. Two popular methods include the fishtail braid and the Dutch braid, each offering unique textures and styles that can enhance your overall look.
To create a fishtail braid, begin by dividing a section of hair into two equal parts. Take a small strand from the right section and cross it over to the left section. Then, take a small strand from the left section and cross it over to the right. Repeat this process, alternating sides until you reach the end of the hair. Secure with an elastic once you achieve the desired length.
For a Dutch braid, start similarly to a basic braid but focus on weaving the strands under instead of over. Begin by dividing a section of hair into three equal strands. Cross the right strand under the middle strand, bringing it to the center. Then, cross the left strand under the new middle strand. Continue this pattern while adding hair from the sides until you reach the desired length. Finish by securing the braid with an elastic.
Advanced braiding techniques allow for intricate hairstyles that can dramatically transform your look. With practice, you can create stunning designs that showcase your skills and creativity, providing endless styling options for any occasion.
Troubleshooting Common Braiding Challenges
Even skilled braiders can encounter common issues when weaving little braids. Understanding how to troubleshoot these problems helps ensure your braids look perfect every time. One frequent challenge is dealing with loose strands. If you notice sections of hair slipping out of the braid, it’s important to maintain even tension as you weave. Keep the hair taut but not overly tight, as this can lead to discomfort later on.
Another issue is uneven sections. When braiding, strive to keep the strands equal in size for a balanced appearance. If you find that one section is significantly thicker or thinner, pause and adjust before continuing. Taking the time to correct this will enhance the overall look of your braid, ensuring it is visually appealing and well-structured.
Frizz can also be a common concern, especially in humid conditions. To combat this, consider using a light styling cream or hairspray to smooth down any flyaways. Additionally, try using a silk or satin scarf to cover your braids when sleeping to prevent frizz from developing overnight. By addressing these common issues, you can refine your braiding technique and create flawless little braids that consistently look polished and professional.
The Research-Backed Advantages of Weaving Little Braids for Delicate Accents
What Research Reveals About the Impact of Little Braids on Hair Health
Research indicates that braiding offers numerous benefits for hair health, particularly in protecting the strands from damage. Little braids can help prevent breakage by keeping hair secured and reducing exposure to environmental factors such as wind and sun. The tension from braiding, when done properly, can also promote the appearance of thicker, fuller hair, contributing to a healthier overall look.
Additionally, braiding aids in moisture retention. When hair is braided, it helps lock in natural oils, keeping the strands hydrated. This is particularly beneficial for individuals with curly or coily hair textures, which often require extra moisture to maintain their health and vibrancy. Thus, incorporating little braids into your hairstyling routine may foster healthier hair in the long term.
Importantly, it’s essential to take breaks between braiding sessions to prevent tension-induced damage. Proper maintenance and care, including regular washing and conditioning, will help keep your hair in optimal condition while enjoying the benefits of braiding. By understanding the research-backed advantages of little braids, you can make informed decisions about your hairstyling choices.
Studies Highlighting the Aesthetic Appeal of Little Braids
Various studies have highlighted the aesthetic appeal of little braids, noting how they can significantly enhance overall hairstyle. The intricate nature of little braids draws attention and adds a layer of complexity that elevates a simple style into something truly stunning. This aesthetic enhancement is particularly pronounced in formal settings, where attention to detail is crucial for a polished appearance.
To maximize the aesthetic benefits of little braids, consider incorporating various styling techniques. For example, pairing braids with loose waves can create a romantic, bohemian vibe, while sleek, polished styles can convey elegance and sophistication. Exploring different combinations and placements of little braids can help you discover what works best for your style and occasion, ensuring your look is always on point.
To leverage the findings of these studies in your hairstyling efforts, focus on balance and proportion. The placement of little braids should complement your facial features and overall hairstyle, ensuring they enhance rather than overwhelm your look. By paying attention to these details, you can create hairstyles that not only look beautiful but also reflect your individuality.
The Psychological Impact of Wearing Little Braids
The psychological impact of wearing little braids can be profound, as these delicate accents often boost confidence and self-esteem. Many individuals report feeling more polished and put-together when sporting braids, attributing this sense of empowerment to the intricate artistry involved in the style. Little braids can serve as a form of self-expression, allowing wearers to showcase their creativity and personal style effortlessly.
Moreover, the act of braiding can be meditative and calming. Engaging in the process of creating little braids can provide a sense of accomplishment and relaxation, making it an enjoyable experience. This connection between hairstyling and mental well-being is increasingly recognized in beauty and wellness spheres, suggesting that the process of braiding can be as beneficial as the final result.
Additionally, little braids can evoke cultural connections for some, allowing individuals to express their heritage and identity through their hairstyles. This cultural significance can further enhance the positive psychological effects associated with wearing braids, fostering a sense of belonging and pride in one’s personal history.
Time Efficiency in Creating Little Braids
One significant advantage of weaving little braids is the time efficiency it offers. While more complex hairstyles can require considerable effort and time, little braids can be quickly incorporated into various styles, allowing you to achieve polished looks in less time. This time-saving aspect makes little braids an appealing option for individuals with busy schedules who still want to look stylish and put-together.
For example, a simple ponytail embellished with a few little braids can be completed in mere minutes, transforming an everyday style into something chic and effortlessly fashionable. Similarly, adding braids to a bun or updo can be done swiftly, providing a sophisticated appearance without extensive styling.
To maximize efficiency when creating little braids, consider planning your hairstyles in advance. Having a clear vision of the styles you want to achieve can streamline the process, allowing you to execute your braids quickly and effectively. Additionally, practicing your braiding techniques can enhance your speed and proficiency, enabling you to create stunning looks in record time without compromising on quality.
Exploring the Versatility and Styling Options of Little Braids
The versatility of little braids is a hallmark of their appeal, making them suitable for a wide array of styling options. They can adapt to various occasions, hair types, and personal preferences, ensuring that everyone can find a way to incorporate them into their hairstyles. From casual outings to formal events, little braids can elevate any look with their intricate charm and elegance.
For instance, little braids can be used to create casual, everyday styles, such as accenting a loose bun or adding flair to a ponytail. Conversely, they can also be integrated into more formal hairstyles, such as elegant updos or intricate braided crowns. The range of styles that little braids can complement is virtually limitless, providing a canvas for creativity and personal expression in hairstyling.
Here’s a list of versatile styling options for incorporating little braids into your hairstyles:
- Accentuating a casual ponytail for everyday wear.
- Creating intricate updos for weddings and special occasions.
- Integrating braids into half-up styles for a romantic look.
- Pairing little braids with loose waves for a bohemian vibe.
- Using braids as a decorative element in formal hairstyles.
- Combining different braid techniques for unique effects.
- Incorporating color or accessories into braids for added flair.
- Transforming a simple hairstyle into a statement look with minimal effort.
Embracing the versatility of little braids allows for endless experimentation and ensures that you can always find styles that resonate with your personal aesthetic and creativity.
Maintaining Little Braids for Long-Lasting Results
Daily Care Essentials for Your Little Braids
Maintaining little braids requires a dedicated daily care routine to ensure they remain fresh and intact. It’s important to keep your braids clean, but washing them too frequently can lead to dryness and frizz. Instead, consider using a gentle spritz of water mixed with a lightweight leave-in conditioner to keep them hydrated without the need for full washing. This method helps retain moisture and prevents the braids from becoming brittle or frizzy.
Additionally, be mindful of how you handle your braids throughout the day. Avoid tugging or pulling at them, as this can cause loosening and discomfort. Instead, gently run your fingers through the braids to keep them neat and organized. If you notice any frizz or loose strands, consider using a small amount of hair cream or oil to smooth them down and maintain a polished look. This little extra care can go a long way in preserving the beauty of your braids.
Protecting your little braids at night is also essential for their longevity. Consider wrapping your hair in a silk or satin scarf or using a silk pillowcase to reduce friction while you sleep. This small step can make a significant difference in preventing frizz and maintaining the overall look of your braids, allowing you to wake up with beautiful, intact hairstyles.
Refreshing Your Little Braids for a Lively Look
To keep little braids looking fresh and well-maintained, occasional refreshing is necessary. This process can involve re-braiding sections that have become loose or frizzy, ensuring they retain their intended shape and structure. If you find that the ends of your braids have become unruly, consider lightly re-braiding just the ends to maintain a tidy appearance without having to redo the entire braid.
Another effective way to refresh little braids is to use a light hair mist or serum. Spritzing the braids with a hydrating mist can restore moisture and definition, making them look lively again. If you find that your braids have lost their hold, a small amount of styling gel can help keep them in place without creating a stiff look. Regularly refreshing your braids keeps them looking their best and extends their longevity.
If your little braids are particularly old or worn, consider removing and redoing them entirely. This ensures they look fresh and vibrant, allowing you to maintain your desired style. Be cautious when removing braids; always work gently to avoid causing damage to your hair. Taking the time to refresh or redo your braids will keep your hairstyle looking polished and elegant.
Identifying the Right Time to Remove Little Braids
Knowing when to take out your little braids is crucial for maintaining hair health and preventing damage. It’s generally advisable to remove braids after a week or two, depending on your hair type and how well they hold up. Signs that it may be time to take out your braids include noticeable frizz, discomfort, or excessive tangling that cannot be easily managed.
If you notice that the braids have loosened significantly or are causing tension at the roots, it’s essential to remove them to prevent breakage. Additionally, if the hair around the braids appears dry or brittle, this is a clear indication that your hair needs a break from the tension caused by braiding. Taking timely action ensures your hair remains healthy and free from damage.
When it’s time to remove your braids, always do so gently. Start from the ends and carefully unravel the braids, working your way up to avoid pulling on your hair. Once removed, treat your hair with a deep conditioner to restore moisture and nourishment, ensuring that it stays healthy and vibrant. This post-braiding care is essential for maintaining the overall health of your hair.
Choosing the Right Products for Your Little Braids
Selecting the right products for little braids is essential for maintaining their condition and appearance. A high-quality leave-in conditioner can help keep your hair hydrated and manageable while preventing frizz. Look for products that are lightweight yet effective to avoid weighing down your braids and compromising their structure.
To maintain shine and smoothness, consider using a lightweight hair oil or serum. These products can tame flyaways and add gloss to your braids without making them greasy. Additionally, using a styling cream can provide hold and definition, ensuring your braids look polished throughout the day.
If you experience dryness or frizziness, a moisturizing spray can be beneficial for keeping your braids looking fresh and well-maintained. Opt for sprays that contain natural ingredients, such as aloe vera or coconut oil, which can hydrate without leaving residue. By choosing the right products, you can ensure that your little braids remain healthy, vibrant, and stunning.
Protecting Your Little Braids While You Sleep
Protecting little braids while sleeping is vital for maintaining their appearance and longevity. One effective method is to wrap your hair in a silk or satin scarf, which helps reduce friction and prevent frizz. These materials are gentler on the hair compared to cotton, allowing your braids to retain their shape overnight and remain smooth.
Alternatively, using a silk pillowcase can also be beneficial. This option allows you to sleep without additional wrapping while still minimizing friction between your braids and the pillow. If you prefer not to use a scarf or pillowcase, consider loosely braiding your hair and securing it at the nape of your neck, which can help keep your braids protected from tangling and damage.
In addition to these methods, maintaining moisture in your braids while you sleep is crucial. A light spritz of leave-in conditioner before bed can help keep them hydrated and prevent dryness, ensuring that you wake up to beautiful, intact braids. By following these protective measures, you can ensure that your little braids remain intact and looking fabulous for days to come.
Proven Strategies for Weaving Little Braids for Delicate Accents
Best Practices for Weaving Beautiful Little Braids
To achieve professional-looking little braids, adhering to best practices is essential. Start by sectioning your hair into manageable parts, ensuring that each section is even and free of tangles. This creates a clean canvas for braiding and allows for better control throughout the process.
Maintaining consistent tension is another key aspect of successful braiding. As you weave, be mindful of how tightly you pull each strand; uneven tension can lead to loose or messy braids. It’s best to practice your technique slowly at first, gradually increasing speed as you become more comfortable. This approach will help you develop a sense of control over your braiding style, leading to better results.
Another best practice is to utilize the right tools. A fine-tooth comb is indispensable for sectioning, while soft hair elastics will secure your braids without causing damage. Experimenting with different accessories can also enhance your braiding experience, allowing for creativity and personalization in your styles. By following these best practices, you can ensure that your little braids are consistently beautiful and well-executed, making your hairstyling efforts rewarding and enjoyable.
Time-Saving Techniques for Crafting Little Braids
For those with busy schedules, employing time-saving techniques for creating little braids can be invaluable. Prepping your hair the night before can significantly reduce your styling time in the morning. Consider braiding sections of your hair while it’s still damp and allowing them to dry overnight, resulting in effortless waves once you unravel them.
Another effective time-saving strategy is mastering the art of creating multiple braids simultaneously. Instead of braiding one section at a time, try sectioning your hair into multiple parts and braiding them all at once. This can dramatically cut down your overall styling time, allowing you to achieve a polished look in a fraction of the time.
Utilizing braiding aids or tools can also speed up the process. Devices designed to assist with braiding can help you create uniform braids quickly and efficiently. By incorporating these time-saving techniques into your routine, you can enjoy the beauty of little braids without dedicating excessive time to the styling process, making it easier to achieve your desired looks effortlessly.
Customizing Little Braids to Reflect Your Unique Style
Customizing little braids to match your personal style is an enjoyable aspect of the braiding process. One way to personalize your braids is by experimenting with different sizes and placements. Consider mixing thick and thin braids for an eclectic look or positioning them asymmetrically for added interest.
Incorporating color is another effective method for customization. Temporary hair dyes or hair chalks can allow you to add vibrant hues to individual braids, making them stand out. Additionally, decorative elements such as beads, ribbons, or faux flowers can be woven into your braids, adding a unique flair that reflects your personality and creativity.
When customizing little braids, consider the overall vibe you want to achieve. For a bohemian feel, opt for loose, carefree braids adorned with natural elements. Conversely, if you prefer a sleek and modern aesthetic, focus on tight, polished braids with minimal embellishment. Ultimately, personalization allows you to express your individuality through your hairstyle, making each braid uniquely yours and enhancing your overall look.
Essential Tools for Weaving Beautiful Little Braids
Having the right tools for weaving little braids is essential for achieving polished results. Start with a fine-tooth comb, crucial for sectioning hair neatly and ensuring your strands are tangle-free. This tool lays the foundation for successful braiding by allowing for precise divisions and control.
A good quality hair elastic is also important for securing the ends of your braids. Opt for soft, snag-free bands that won’t pull or break the hair, ensuring a comfortable fit. Additionally, hairpins and decorative clips can be used to enhance your braided styles, adding a touch of flair and sophistication that elevates your overall look.
For those looking to create more intricate styles, consider investing in specialized braiding tools. These can aid in achieving uniform braids while saving time during the styling process. By gathering these essential tools, you’ll be well-equipped to create stunning little braids that showcase your skills and creativity, allowing you to experiment freely with your hairstyles.
Maintaining and Caring for Your Little Braids
Caring for little braids is crucial to ensure they last longer and maintain their appearance. Regular maintenance includes keeping your braids clean and moisturized. Consider using a gentle leave-in conditioner or a light hair oil to keep them hydrated without weighing them down. This practice will help prevent frizz and maintain a polished look that lasts throughout the day.
Protecting your braids while you sleep is also essential. Use a silk or satin scarf to reduce friction and prevent frizz overnight. This small step can make a huge difference in the longevity and appearance of your braids, ensuring they stay intact and stylish for days. Investing this extra care pays off in your overall hairstyling experience.
Additionally, monitor the condition of your braids regularly. If you notice any signs of damage or excessive frizz, it may be time to refresh or even remove them. By following these care tips, you can ensure your little braids remain beautiful, healthy, and ready to impress, allowing you to enjoy their elegance for as long as possible.
Inspiration and Ideas for Crafting Little Braids
Celebrity Hairstyles Showcasing the Beauty of Little Braids
Looking to the stars can provide ample inspiration for incorporating little braids into your hairstyles. Many celebrities have embraced little braids, showcasing how these delicate accents can enhance their looks. For instance, a well-known actress sported a stunning braided crown at a recent award ceremony, demonstrating the regal beauty of this style. The combination of little braids framing the face and cascading down the back created an eye-catching and elegant appearance that left a lasting impression.
Another celebrity trend involves adding little braids to loose waves. A popular singer was recently seen with her hair styled in soft waves, interspersed with delicate braids. This effortless combination exuded a laid-back yet glamorous vibe, perfect for summer festivals or casual outings. By studying these celebrity hairstyles, you can gain insight into how little braids can be adapted to fit different occasions and styles, inspiring your own creative hairstyling efforts.
When looking for inspiration, consider how you can personalize these celebrity looks to suit your tastes. Pay attention to the size, placement, and accessories used in their styles to inform your choices. Emulating celebrity hairstyles can help you explore your creativity and discover signature looks that resonate with your personality, making each style uniquely yours.
Innovative Designs for Little Braids
Creative designs for little braids can transform your hairstyle, making it uniquely yours. One popular design involves creating a series of small braids woven together into a larger braid, resulting in a visually stunning effect that captures attention. This technique adds depth and complexity to your hairstyle, allowing for a standout look that is sure to impress.
Another innovative idea is to create a halo braid, where multiple little braids encircle the head. This design can be adorned with flowers or decorative pins for a romantic touch, making it perfect for special occasions like weddings or parties. Consider mixing different braid styles, such as combining a fishtail braid with a Dutch braid for a unique texture that showcases your creativity and flair.
Experimenting with asymmetrical placements can also yield striking results. Positioning braids on one side of the head can create an edgier look, while a central placement can evoke a more classic feel. The key is to explore various designs and placements until you find combinations that resonate with your personal style, allowing you to express yourself through your hair.
Expressing Your Personality Through Little Braids
Little braids offer a fantastic way to express your personality and creativity through your hairstyle. By incorporating different styles, colors, and embellishments, you can create looks that truly reflect who you are. For instance, bright, bold colors can infuse your braids with energy, showcasing a vibrant and playful side of your personality that stands out.
You can also express your individuality through the choice of braid styles. If you have a free-spirited nature, opt for loose, bohemian braids adorned with natural elements such as flowers or feathers. Alternatively, a sleek and polished look may be more representative of a sophisticated or professional persona. The beauty of little braids lies in their adaptability; they can be styled to suit any mood or occasion, allowing you to showcase your unique identity.
Furthermore, incorporating personal touches, such as meaningful accessories or unique patterns, can further enhance the expression of your identity through your braids. This could include using charms that hold sentimental value or incorporating designs that are culturally significant to you. By embracing little braids, you not only enhance your hairstyle but also create a canvas for self-expression that can evolve with you over time.
Your Questions Answered: Frequently Asked Questions About Little Braids
What exactly are little braids?
Little braids are small, intricate braids that add elegance to various hairstyles, serving as beautiful accents that can be integrated into different styles for a refined look.
How do I create a basic little braid?
Divide hair into three equal strands, cross the right strand over the middle, then the left strand over the new middle. Repeat until the desired length is achieved and secure with an elastic.
What tools do I need for creating little braids?
Essential tools include a fine-tooth comb, soft hair elastics, and decorative clips, which help achieve polished and professional results in your braiding efforts.
How can I maintain my little braids?
Keep braids clean and moisturized, avoid excessive tugging, and protect them at night using a silk scarf or pillowcase to maintain their beauty and longevity.
What styles can I create with little braids?
You can accent ponytails, create updos, incorporate them into loose hairstyles, or use them as headbands to enhance your look, providing versatility in your styling options.
How often should I refresh my little braids?
Refresh little braids as needed, typically every few days or when they start to frizz or look loose, ensuring they maintain their intended appearance.
Can little braids damage my hair?
If not done carefully, little braids can cause tension and damage. Ensure they are not too tight and take breaks between wears to protect your hair’s health.
How do I safely remove little braids?
Gently unravel from the ends upwards to avoid pulling on the hair. Treat your hair with conditioner afterward to restore moisture and nourishment.
What are the benefits of wearing little braids?
Little braids protect hair from damage, enhance texture, and can boost confidence and self-expression, making them a stylish choice for various occasions.
Are there any current trends in little braids?
Yes, popular trends include bohemian styles with loose braids and sleek, polished looks for formal occasions. Experiment with both to find your unique style.
Connect with us on Facebook!
The Article: Weaving Little Braids for Delicate Accents: A Universal Guide appeared first on Amitys Hair Salon.
The Article Little Braids: A Universal Guide to Delicate Accents Was Found On https://limitsofstrategy.com
-

Bold Uniform Designs with Eye-Catching Block Colour
Maximize the Impact of Block Colour in Modern Design Strategies
Understanding Block Colour: Key Concepts and Definitions
The term block colour in design refers to the intentional application of a single, solid hue across various elements to create a significant visual impact. This design technique is particularly effective in grabbing and holding the viewer’s attention, making it a popular choice in areas like graphic design, interior decoration, and fashion. The straightforward nature of block colour brings numerous advantages, such as improved clarity and instant recognizability. It is often utilized in logos, advertisements, and product packaging, where vibrant, uniform hues can effectively communicate vital information. Common uses of block colour encompass:
- Logos and branding elements
- Advertising materials
- Product packaging designs
- Web design backgrounds
- Interior wall colours and furniture
- Fashion collections and clothing items
- Editorial layouts and printed publications
- Infographics for data visualisation
Designers harness the power of block colour to craft distinct brand identities and convey emotions effectively. By stripping away unnecessary visual clutter, this technique enables audiences to concentrate on the core message or aesthetic being presented. The implementation of block colour allows designers to create experiences that resonate on both visual and emotional levels, ultimately enhancing engagement with their work.
The Role of Colour Psychology in Influencing Design Choices
Understanding the psychological effects of colours is vital for designers who aim to elicit specific reactions or feelings from their audience. Each hue can provoke different emotional responses; for instance, red often signifies urgency and passion, whereas blue tends to evoke feelings of calmness and trust. By effectively applying block colour, designers can leverage these psychological insights to significantly boost the impact of their designs.
Designers can skillfully utilize colour psychology by choosing hues that resonate with the intended message or align with the brand identity. A well-selected block colour can amplify emotional responses in the audience, encouraging desired actions, such as making a purchase, engaging with content, or developing specific feelings towards a brand. For example, a green block colour in a wellness context can symbolize vitality and health, succinctly conveying the brand’s promise.
Understanding cultural associations linked to colours is equally crucial. While white may symbolize purity in many Western cultures, it can represent mourning in others. Therefore, when addressing a global audience, designers must take these cultural variations into account to ensure their colour choices resonate positively across diverse contexts.
The Historical Importance of Block Colour in Art and Design
The concept of block colour has a rich history, intricately connected with various artistic movements and design philosophies. From the bold use of primary colours championed by the Bauhaus movement to the striking monochrome palettes prevalent in contemporary art, the employment of solid hues has been a defining characteristic throughout the ages. A prominent figure, Piet Mondrian, utilized geometric shapes and block colour to express harmony and balance, demonstrating how minimalism can evoke profound emotional responses.
The Pop Art movement also stands as a significant historical reference, where artists like Andy Warhol and Roy Lichtenstein innovatively employed block colour to create iconic pieces that challenged traditional artistic boundaries. These artists strategically applied bold, uniform hues to capture attention and provoke thought, showcasing the compelling power of colour in engaging and captivating audiences.
In design, the origins of block colour can be traced back to ancient civilizations, where vibrant colours adorned textiles and pottery as symbols of status and cultural identity. The enduring appeal of block colour underscores its essential role in shaping visual communication throughout history, affirming its relevance in contemporary design practices.
Effective Techniques for Utilizing Block Colour to Create Impactful Visuals

Essential Techniques for Successfully Implementing Block Colour
To effectively implement block colour, designers should employ several key strategies that enhance the overall design. A fundamental technique involves ensuring colour consistency throughout the design, which helps maintain a unified appearance. This can be achieved by choosing a limited colour palette and adhering to it across various design elements.
Additionally, utilizing the right tools and software is crucial. Many designers prefer applications like Adobe Illustrator or Photoshop, which provide features that facilitate precise colour application and manipulation. For instance, employing the eyedropper tool can help ensure consistent colour matching across different design components, resulting in a seamless visual experience.
Real-world examples of successful block colour applications can be observed in recognizable brands like IKEA, which consistently utilizes bold blue and yellow tones in its marketing and product designs. This cohesive colour strategy not only reinforces brand identity but also cultivates a distinctive visual presence that consumers can instantly associate with the brand.
Furthermore, a successful strategy is to combine block colour with varying opacities or textures. This layering approach can introduce depth, resulting in a more dynamic visual experience. For instance, Nike frequently integrates block colour into its promotional materials, layering different shades to create striking, eye-catching advertisements that draw attention.
Connecting Colour Theory to Block Colour Application
A solid understanding of colour theory provides essential knowledge that can augment the application of block colour in design. Familiarity with the colour wheel, encompassing primary, secondary, and tertiary colours, empowers designers to create harmonious colour combinations. When employing block colour, it’s vital to consider complementary colours—those positioned opposite each other on the colour wheel—to achieve striking contrasts.
Designers may also incorporate analogous colours, which are located next to each other on the wheel, for a more subdued palette that still garners attention. For example, pairing shades of blue and green can create a tranquil environment while maintaining visual intrigue through block colour.
Actionable steps for integrating colour theory with block colour involve starting with a defined colour palette, experimenting with combinations across various design components, and refining selections based on feedback. It’s advisable to create mock-ups and gather insights from colleagues or target audiences to ensure that the chosen block colours resonate well with the intended message and audience perception.
Avoiding Common Mistakes When Implementing Block Colour

When employing block colour, several common pitfalls can diminish a design’s overall effectiveness. A major mistake is selecting colours without considering their context or intended use. Designers must ensure that colours not only align with the desired aesthetic but also resonate with the psychological effects they wish to elicit.
Another frequent error is overusing block colour without achieving balance. While bold colours can effectively grab attention, excessive use may overwhelm viewers. Striking a balance between block colour and negative space is essential to allow the design to breathe and maintain clarity. A well-planned layout should incorporate areas of contrast and openness alongside vibrant hues, creating a harmonious composition.
Moreover, designers sometimes neglect to test colour combinations across different environments and media. Colours can appear significantly different in print compared to digital formats. Therefore, conducting tests in varied settings ensures that the block colour retains its intended effect across all platforms, enhancing overall effectiveness.
Finally, failing to research the cultural implications of colour can lead to significant misunderstandings. Designers must be aware of how certain colours may be perceived differently across diverse cultures and adjust their choices accordingly to avoid unintended consequences, ensuring their designs resonate positively with their target audience.
The Impact of Block Colour on Branding and Identity
Block colour plays a pivotal role in shaping brand perception and identity. The strategic application of colour can evoke specific emotions and associations, making it a powerful instrument in branding. A quintessential example is the Coca-Cola brand, which employs a distinctive red hue that conveys energy and excitement. This colour choice has become synonymous with the brand, firmly establishing its identity in consumers’ minds worldwide.
In addition to fostering emotional resonance, block colour enhances brand recognition. Consistent application of a specific block colour across all marketing materials boosts visibility and memorability. Brands like McDonald’s, recognized for its iconic yellow and red colour scheme, exemplify how block colour can become a core component of a company’s identity, making it instantly identifiable to consumers, even without the logo present.
Case studies demonstrate that brands effectively utilizing block colour often experience increased loyalty and trust from their audience. The key lies in creating a cohesive visual language that continually reflects the brand’s values and mission through thoughtfully selected block colours. This strategy cultivates stronger connections with consumers and differentiates brands within a competitive landscape.
The Psychological Effects of Block Colour on Users
The use of block colour can profoundly influence mood and behaviour, emphasizing the necessity for designers to understand the potential psychological impacts of their colour choices. Different hues evoke distinct emotional responses; for instance, yellow is often associated with optimism and creativity, while blue promotes calmness and stability. By harnessing these associations, designers can create experiences that resonate deeply with their audience.
Consider how block colour is applied in healthcare design; shades of green and blue are commonly used to cultivate environments that feel soothing and safe, thereby positively influencing patient experiences. Conversely, vibrant orange or red tones may generate feelings of energy and urgency, which can be advantageous in marketing materials aimed at promoting quick action.
Moreover, research indicates that colour can impact consumers’ perceptions of time, taste, and even product effectiveness. Understanding these psychological effects enables designers to create more effective designs that not only appeal visually but also fulfill their intended objectives. By strategically applying block colour, designers can enhance user experience and engagement across various contexts.
Enhancing Visual Impact with Block Colour Techniques
Creating Dramatic Contrast Through Block Colour Choices
Block colour serves as an excellent method for generating strong contrasts in design, thereby amplifying visual impact and directing attention to key areas. By juxtaposing bold colours against lighter or darker backgrounds, designers can create focal points that guide the viewer’s eye throughout the composition. This type of contrast is particularly effective in advertising and branding, where capturing attention is crucial.
A practical technique for creating contrast involves utilizing complementary colours. When paired appropriately, colours opposite each other on the colour wheel—such as blue and orange or red and green—can produce a stunning visual effect that captivates the audience. Additionally, varying the intensity and saturation of block colours can introduce depth and dimension, making the overall design more engaging.
Here are some actionable strategies to leverage block colour for contrast:
- Pair complementary colours to achieve a striking visual effect
- Utilize light and dark shades for depth
- Incorporate contrasting textures alongside block colour
- Strategically apply negative space to enhance colour contrast
- Use block colour to highlight key elements
- Integrate gradients subtly for added dimension
- Mix warm and cool colours for dynamic tension
- Maintain a limited palette for maximum contrast effectiveness
By mastering the manipulation of colour contrast, designers can elevate their work, ensuring that vital messages stand out in a visually crowded landscape.
Utilizing Block Colour to Emphasize Key Design Elements
Block colour is an effective technique for drawing attention to specific elements within a design. By employing bold, uniform hues, designers can underscore critical information, calls to action, or other essential components of the composition. This approach improves legibility and enhances user experience by directing the viewer’s focus.
One successful strategy for emphasizing elements with block colour is to establish a visual hierarchy. For example, applying a vibrant block colour to headings while using more subdued tones for body text can help create clear distinctions between different text elements. This method not only boosts readability but also ensures that the most important information stands out prominently.
Moreover, the careful placement of block colour can lead to increased engagement. In web design, for instance, employing a brightly coloured block for buttons can encourage users to take action, such as clicking to purchase or to subscribe. The colour choice should align with the intended action, creating visual cues that prompt immediate interaction from the audience.
When applying block colour for emphasis, it is crucial to consider the surrounding elements. A well-balanced composition will ensure that the emphasis generated by block colour does not overwhelm the viewer, but rather enhances their understanding and experience of the design.
Achieving Visual Harmony with Block Colour in Your Designs
Finding balance when using block colour is crucial for creating harmonious compositions. While bold hues can be visually striking, integrating them thoughtfully with other design elements is essential to avoid clutter and confusion. A well-balanced design allows viewers to navigate content effortlessly while enjoying its aesthetic appeal.
An effective approach to achieving balance is through the use of negative space. By incorporating areas of whitespace around bold colours, designers can create a sense of openness and clarity, enabling the viewer to concentrate on the important elements without distraction. This technique is particularly effective in minimalist designs, where simplicity is paramount.
Another strategy involves varying the scale of block colours within the design. Large areas of vibrant colour can be balanced with smaller sections of muted tones or textures, preventing any single element from overwhelming the composition. This approach adds visual interest and maintains a cohesive look throughout the design.
Lastly, designers should be mindful of the emotional weight of colours when balancing their usage. For instance, combining a bold red block with softer pastels can yield a dynamic yet harmonious design, allowing the stronger colour to stand out without overwhelming the overall composition. Achieving this equilibrium is essential for conveying intended messages while ensuring an engaging experience for the viewer.
Exploring the Advantages of Embracing Block Colour
Enhancing Simplicity and Clarity in Visual Design
Block colour plays a pivotal role in simplifying designs and enhancing clarity, making it easier for audiences to understand messages. By utilizing a single, strong colour in a design, unnecessary distractions are stripped away, allowing viewers to focus on key elements. This results in a more straightforward and cohesive visual narrative that effectively communicates the intended message.
Moreover, the use of block colour can significantly improve communication effectiveness. In advertisements, for example, a bold block colour surrounding critical information can make it more prominent, ensuring that essential messages are conveyed clearly. This clarity is particularly crucial in contexts where rapid understanding is vital, such as signage or infographics.
Reducing visual complexity also aids audience retention. Simple designs featuring block colour are often more memorable, enabling viewers to recall information more easily. Brands adopting this approach frequently find their messaging resonates with consumers, leading to enhanced brand recognition and loyalty.
Ultimately, the application of block colour cultivates an environment conducive to clarity and simplicity, empowering designers to communicate their messages with precision and impact.
Understanding the Versatility of Block Colour Across Design Mediums
The versatility of block colour is one of its most significant advantages, allowing designers to apply it across a wide array of contexts and mediums. Block colour can be tailored to meet diverse design needs, making it an invaluable tool in a designer’s arsenal. From web design to fashion, the applications of block colour vary widely across industries.
In graphic design, block colour is often utilized to create striking visuals that capture attention. In advertising campaigns, bold block colours can effectively evoke emotions and enhance brand messages. Similarly, in fashion, designers frequently deploy block colours to create eye-catching pieces that command attention on the runway and in retail settings.
Some notable applications of block colour include:
- Landing pages in digital marketing
- Consumer product packaging
- Fashion collections and textiles
- Interior design schemes
- Branding and logo design
- Social media graphics and content
- Event signage and promotional materials
- Art installations and exhibitions
The adaptability of block colour empowers designers to harness its power across various applications, ensuring it remains relevant and effective in delivering the desired visual impact. This flexibility significantly enhances the overall potential of design, rendering block colour a timeless choice in the ever-evolving aesthetic landscape.
Strengthening Branding and Identity Through Block Colour
Block colour can significantly enhance a brand’s visual identity, enabling a coherent and recognizable presence in the marketplace. By consistently applying specific block colours across all brand touchpoints, companies can reinforce their core values and messages. This strategic use of colour fosters brand loyalty while distinguishing a brand from its competitors.
A prime example is Tiffany & Co., whose iconic robin’s-egg blue has become synonymous with luxury and elegance. This distinctive colour is meticulously maintained across all branding materials, from packaging to marketing collateral, solidifying the brand’s identity and evoking aspirational feelings among consumers.
Effectively utilizing block colour enhances memorability. Studies indicate that consumers are more likely to recall brands that employ distinctive colour palettes. By strategically incorporating block colour, brands can create lasting impressions on their target audience, ultimately resulting in increased recognition and preference.
Brands must also consider the psychological implications of their chosen colours. Colour choices should align with the brand’s overarching narrative and values to ensure they resonate positively with the audience. By embracing the impact of block colour on branding, companies can strengthen their identity and cultivate deeper connections with consumers.
Implementing Block Colour Across Diverse Design Contexts
Block Colour Applications in Graphic Design
Graphic designers frequently leverage the power of block colour to create bold, eye-catching designs that captivate audiences. The effective application of block colour can transform ordinary graphics into engaging visual experiences. Several critical considerations can enhance the use of block colour in graphic design, ensuring it achieves the desired impact.
One fundamental aspect is ensuring that block colours align with the overall design objectives. Designers should consider the target audience and the emotional response they aim to elicit. For instance, a technology company may opt for sleek, cool tones to convey innovation, while a brand aimed at children might select vibrant, playful colours to engage youthful audiences.
Moreover, paying attention to the harmony and contrast of block colours is vital. By carefully selecting complementary or analogous colours, designers can create dynamic compositions that are visually appealing and well-balanced. Utilizing the rule of thirds can also guide the arrangement of colours, ensuring the design remains engaging without becoming overwhelming.
Additionally, testing designs with target audiences can provide valuable insights into the effectiveness of block colour choices. Feedback can reveal how viewers perceive the colours and whether they align with the intended message. This iterative process is crucial for refining designs and ensuring that block colour effectively enhances overall visual impact.
Block Colour in Fashion and Textile Design
Block colour occupies a prominent position in the fashion and textiles industry, celebrated for its bold and striking impact. Designers harness the power of solid hues to create attention-grabbing garments and accessories that resonate with consumers. To effectively implement block colour in fashion and textile design, several considerations must be addressed.
First and foremost, understanding the seasonality of colour trends is essential. Fashion is inherently linked to trends, and certain block colours may resonate more during specific seasons. For instance, bright and vibrant colours are typically more prevalent in spring and summer collections, while autumn and winter may lean towards deeper, muted tones. Staying attuned to these changes can enhance a designer’s relevance in the market.
Furthermore, block colour can be utilized to create statement pieces that demand attention. A dress in a bold shade of red can serve as the focal point of an outfit, allowing accessories and other elements to complement rather than compete. Designers must also consider how block colour interacts with patterns and textures; combining solid hues with intricate patterns can lead to visually stunning designs that engage viewers.
Lastly, sustainability is an increasingly important factor in fashion. Designers can utilize eco-friendly dyes and materials while preserving the vibrancy of block colour, appealing to environmentally-conscious consumers. By integrating sustainable practices into their designs, fashion brands can enhance their appeal while capitalizing on the impactful nature of block colour.
Block Colour in Interior Design
Interior designers frequently employ block colour to create bold statements within spaces, significantly influencing the overall atmosphere and aesthetic. The use of solid colours can transform a room, establishing the tone for how it feels and functions. To effectively incorporate block colour in interior design, several innovative strategies can be employed.
One effective method is to use block colour as a focal point. For example, painting a single wall in a vibrant hue can create a striking visual effect without overwhelming the entire space. This technique draws the eye and can define areas within open-concept designs, guiding the flow of movement and interaction.
Additionally, pairing block colours with complementary or contrasting elements can enhance visual interest. For instance, a room adorned with a bold charcoal grey block colour may be beautifully offset by bright yellow furniture or decor accents. This interplay of colours adds depth and dimension while maintaining a cohesive overall design.
Understanding the psychology of colour is also crucial in interior design. Different hues can evoke various emotions; for example, blues and greens can create a calming environment, while warm tones like reds and oranges may energize a space. By thoughtfully selecting block colours based on their psychological effects, designers can create atmospheres that resonate with the intended purpose of each space.
Ultimately, block colour is a powerful tool for interior designers, enabling them to craft spaces that are not only aesthetically pleasing but also functional and reflective of their clients’ desires.
Research-Backed Benefits of Using Block Colour for Impactful Visual Communication
Insights from Studies on Colour Perception
Research suggests that block colour can significantly influence how individuals perceive and interact with designs. Studies have shown that people often associate specific colours with various emotions and concepts, shaping their responses to visual stimuli. For instance, research indicates that blue can evoke feelings of trust and calmness, while red can generate a sense of urgency or excitement.
These findings carry practical implications for design. By strategically applying block colour based on research-backed insights, designers can enhance the effectiveness of their work. For example, a financial institution might utilize dominant blue hues to instill confidence in potential clients, while a promotional sale may incorporate bold reds to evoke urgency.
Real-world applications of these findings can be observed in successful branding strategies. Brands that understand and apply colour psychology consistently experience improved engagement and loyalty. Companies like Facebook and Twitter incorporate blue in their branding, effectively communicating trust and reliability to their users.
Additionally, studies suggest that using block colour can enhance recall and recognition. When brands utilize distinctive block colours, consumers are more likely to remember them, leading to increased brand loyalty and recognition.
The Influence of Block Colour on User Engagement
Block colour can significantly impact user engagement with design, influencing how users interact with a given medium. Research indicates that designs incorporating bold block colours tend to capture attention more effectively than those featuring muted palettes. This heightened engagement can lead to increased interaction rates, whether in digital environments or print media.
For instance, in web design, strategically using vibrant block colours for buttons or calls to action can create a clear pathway for users, guiding them towards desired actions such as signing up or making a purchase. Studies reveal that designs utilizing contrasting block colours for actionable elements experience higher click-through rates compared to more subdued designs.
To leverage these insights, designers can implement actionable steps, such as emphasizing critical elements with strong block colours and ensuring their strategic placement within the layout. Conducting A/B testing on different colour schemes can provide valuable insights into user preferences, allowing designers to refine their choices based on real data.
Furthermore, understanding the target audience’s colour preferences can enhance engagement further. Conducting surveys or gathering feedback on colour perceptions can guide designers in selecting block colours that resonate with their users, ultimately leading to improved engagement rates.
The Long-Term Effects of Block Colour in Design
The long-term effects of employing block colour in design have been the focus of extensive study, revealing several benefits that contribute to the sustainability of this technique. One significant advantage is the enduring nature of effective colour choices. Unlike trends that may fade, well-chosen block colours can remain relevant and impactful over time, reinforcing brand identity and recognition.
Research indicates that brands consistently using specific block colours often experience cumulative benefits in recognition and recall over time. The strategic application of block colour can create a visual anchor in consumers’ minds, solidifying brand associations and fostering long-term loyalty.
Additionally, the principles of colour psychology can yield long-term benefits in user perception. By employing block colours that correspond with desired emotional responses, designers can cultivate positive associations that endure over time. For instance, a brand that consistently utilizes calming blue hues may foster a sense of trust and reliability among consumers.
Moreover, integrating block colour into a comprehensive brand strategy can enhance cohesion across all touchpoints, creating a seamless experience for consumers. This consistency not only strengthens brand identity but also enhances consumer perception, leading to long-term success.
The Psychological Impact of Block Colour on Users
The influence of block colour on mood and behaviour is profound, impacting design across various settings. Research indicates that colour choices can significantly affect how individuals feel and respond to their environments. For example, studies suggest that warm hues like yellow and orange can evoke feelings of happiness, while cooler tones like blue and green may promote calmness.
Understanding these psychological impacts enables designers to create environments that resonate positively with users. For instance, in educational settings, incorporating block colours associated with focus and clarity can enhance learning experiences. Similarly, in healthcare environments, utilizing soothing block colours can promote feelings of safety and comfort for patients.
The implications of these findings extend to marketing and branding as well. Brands that strategically select block colours based on their psychological effects can forge stronger connections with consumers. For example, employing vibrant colours in promotional materials can evoke excitement and encourage engagement, whereas softer tones might foster trust and loyalty.
Designers must, therefore, remain attuned to the psychological dimensions of their colour choices, ensuring alignment with the intended outcomes of the design. By leveraging the psychological impact of block colour, designers can create experiences that not only look appealing but also foster positive emotional responses among users.
Strengthening Brand Identity Through Block Colour
Block colour plays a vital role in enhancing brand recognition and loyalty. By strategically employing distinct block colours, brands can establish a strong visual identity that resonates with consumers. The effective use of block colour fosters familiarity, making it easier for consumers to identify and engage with the brand.
One approach to enhancing brand identity is through consistency. Brands that maintain a cohesive colour palette across their marketing and product lines can reinforce their identity, ensuring that consumers easily recognize them. For instance, Starbucks effectively employs its characteristic green hue across its branding, creating a strong association with the brand and its values of sustainability and community.
Moreover, the emotional resonance of block colour can further strengthen brand loyalty. Brands that select colours aligned with their mission and values can forge deeper connections with consumers. For example, Coca-Cola’s iconic red colour not only evokes excitement but also embodies the brand’s commitment to joy and celebration.
Strategies for effective use of block colour in branding include developing a distinctive colour palette, conducting market research to understand consumer preferences, and consistently applying these colours across all touchpoints. This cohesive approach ensures that block colour enhances brand identity while fostering recognition and loyalty among consumers.
Implementing Block Colour in Digital Design Contexts
Utilizing Block Colour in Web Design
Block colour can be effectively employed in web design to create strong visual impacts that enhance user experience. By strategically using solid colours, designers can direct users’ attention to critical elements, thereby improving navigation and interaction on the website. This intentional use of block colour can significantly influence user engagement and retention.
An effective application of block colour in web design involves using vibrant block colours for calls-to-action (CTAs). By choosing contrasting colours for buttons or links, designers can draw attention to these elements, encouraging users to take action. For instance, employing a contrasting colour for a “Sign Up” button against a muted background can effectively increase click-through rates.
Furthermore, block colour can help establish visual hierarchy. By varying shades and tones, designers can differentiate between headings, subheadings, and body text, ensuring users can easily navigate the content. This clarity fosters a more pleasant browsing experience while enhancing comprehension.
Ensuring that block colours are accessible is also crucial. Designers should consider colour contrast ratios to guarantee that text remains legible against block colours. Tools like the WebAIM contrast checker can assist in assessing the accessibility of colour combinations, ensuring that the website is inclusive for all users.
Block Colour in Mobile Applications
Mobile app designers frequently leverage block colour to create cohesive and engaging user interfaces. The strategic use of bold, solid colours can enhance usability and ensure that key functionalities stand out within the app. To apply block colour effectively in mobile app design, several best practices can be followed.
First and foremost, utilizing a limited colour palette can create visual coherence throughout the app. By selecting a few key block colours and applying them consistently across different screens and elements, designers can create a seamless experience that users find intuitive. This consistency fosters familiarity, enabling users to navigate the app with ease.
Another best practice is to use block colour to highlight essential features or actions. For example, using a bold block colour for primary buttons can make them easily identifiable, encouraging users to interact. This approach can be particularly effective in onboarding processes, where clear direction is essential for user engagement.
Moreover, it’s important to ensure that block colours align with the brand identity. Users should be able to associate specific colours with the brand, creating a memorable experience. Integrating brand colours into the app’s design not only solidifies brand recognition but also fosters trust and loyalty among users.
Finally, designers must consider the context in which users will interact with the app. Block colours should enhance usability and ensure that users can navigate easily, especially in varying lighting conditions. By thoughtfully applying block colour, mobile app designers can create engaging, user-friendly experiences.
Block Colour in Digital Art Practices
Digital artists often utilize block colour to create bold and striking compositions that capture the viewer’s attention. The application of solid hues allows artists to convey emotion and mood powerfully while also establishing a unique visual style. To effectively use block colour in digital art, several techniques can be employed.
One approach is to experiment with colour blocking, where distinct areas of the artwork are filled with different blocks of colour. This technique can create vibrant, dynamic compositions that evoke strong emotional responses from viewers. Artists can mix and match block colours to create visual tension or harmony based on their artistic intentions.
Additionally, incorporating gradients or blending techniques can enhance the visual depth of block colour. While preserving the integrity of solid hues, artists can layer colours to create subtle transitions and complexities within their work. This layered approach can lead to more compelling and intricate designs.
Moreover, understanding the principles of colour theory is essential for digital artists. By selecting colours that complement or contrast effectively, artists can create a sense of movement, emphasis, or balance within their compositions. This awareness allows for effective communication of themes and emotions through colour.
Digital platforms also provide artists with tools to manipulate block colour easily, enabling experimentation without the constraints of traditional mediums. This flexibility encourages creativity and innovation, allowing artists to push the boundaries of their work and explore new dimensions of colour application.
Creative Techniques for Mastering Block Colour Usage
How Layering Block Colour Can Enrich Your Designs
Layering different block colours can introduce depth and interest in a design, allowing for a more complex visual narrative. This technique not only enhances the overall aesthetic but also evokes emotion and intrigue, making the design more captivating for the viewer. By employing layering effectively, designers can elevate their work beyond mere colour application.
One effective method of layering is to use varying opacities. By applying transparent layers of block colour, designers can create unique effects that add depth without overwhelming the composition. This technique is particularly useful in graphic design, where subtle layering can enhance legibility while contributing to a visually rich experience.
Another approach is to combine block colours with patterns or textures. For example, layering a vibrant block colour with a subtle pattern can create visually stimulating contrast, adding interest to the design. Designers might utilize software tools to manipulate opacity and blending modes, allowing for experimentation and creativity in combining elements.
Additionally, using layers to establish a sense of hierarchy can guide the viewer’s eye through the design. For instance, a strong block colour in the foreground can be complemented by softer shades in the background, establishing a clear focal point while maintaining a cohesive appearance.
Ultimately, layering block colour thoughtfully can transform a simple design into a captivating visual statement, allowing designers to explore new dimensions of creativity and expression.
The Advantages of Integrating Block Colour with Patterns
Combining block colour with patterns can yield visually captivating designs that engage viewers. This technique enhances the overall aesthetic while providing a unique visual language that resonates with audiences. By thoughtfully integrating block colour with patterns, designers can create dynamic compositions that stand out.
One effective strategy is to use contrasting block colours against intricate patterns. For instance, a bold block colour can serve as a backdrop for a detailed pattern, allowing both elements to coexist harmoniously. This interplay can create depth and texture, adding layers of interest to the design.
Another approach is to apply block colours selectively within patterns. By strategically using solid colours within a patterned design, designers can draw attention to specific areas or elements, guiding the viewer’s eye. This selective application creates a focal point while maintaining a cohesive look.
Additionally, experimenting with different pattern styles can enhance the visual impact of block colour. Designers might explore geometric, organic, or abstract patterns, pairing them with bold colours to create unique and engaging designs. The key is to ensure that the combination serves the overall message and aesthetic of the design.
By effectively blending block colour with patterns, designers can harness the power of both techniques, resulting in captivating designs that intrigue and engage viewers.
Block Colour’s Contribution to Minimalist Design Aesthetics
Block colour is frequently employed in minimalist design to create a clean and bold aesthetic. The simplicity inherent in this approach allows for clarity and focus, enabling designers to communicate messages effectively without unnecessary distractions. To achieve a successful minimalist design using block colour, several key strategies can be implemented.
First, adopting a limited colour palette is essential. By selecting a few carefully chosen block colours, designers can create a cohesive and harmonious look that embodies the principles of minimalism. The key is to select colours that resonate with the intended message while maintaining visual interest.
Another strategy is to use negative space effectively. Allowing areas of whitespace around block colours creates a sense of openness and clarity, reinforcing the minimalist aesthetic. This intentional use of space enhances the overall composition while drawing attention to the essential elements of the design.
Moreover, simplicity in form is vital. Minimalist designs should focus on straightforward shapes and lines, allowing block colour to take centre stage. By stripping away unnecessary details and maintaining a clean, uncluttered layout, designers can create powerful visual statements that leave a lasting impression.
Lastly, designers should remain attuned to the emotional resonance of block colour. The chosen colours should align with the overall message and evoke the desired emotional response in viewers. By harnessing the power of block colour within a minimalist framework, designers can create striking, memorable designs that communicate effectively.
Proven Strategies for Mastering Block Colour for Impactful Visual Statements
Choosing the Right Block Colours for Your Designs
Selecting the appropriate block colours is crucial for creating a successful design that resonates with the target audience. Several strategies can assist designers in choosing the most effective colours, ensuring that their selections align with the overall objectives of the project.
One effective strategy is to conduct thorough research on colour psychology. Understanding how different colours evoke specific emotions can inform the selection process, allowing designers to choose hues that align with their intended message. For instance, employing warm colours may evoke feelings of energy, while cool colours can instil calmness.
Additionally, considering the preferences of the target audience is essential. Conducting surveys, focus groups, or gathering feedback can provide valuable insights into which colours resonate most with the intended demographic. By aligning colour choices with audience preferences, designers can enhance engagement and connection.
Another approach is to create mood boards that visually represent potential colour combinations. This exercise allows designers to experiment with various block colours and observe how they interact cohesively. Mood boards can serve as reference points throughout the design process, ensuring consistency and clarity in colour selection.
Finally, testing colours in real-world applications can provide valuable feedback. Designers should evaluate how the chosen block colours appear across different media, such as print and digital, to ensure they maintain their intended impact. This iterative process enables designers to refine their choices based on practical insights, ensuring optimal effectiveness.
Integrating Block Colour with Other Design Elements Effectively
Thoughtfully integrating block colour with other design elements is essential for achieving a harmonious composition. Ensuring that block colours work cohesively with typography, imagery, and layouts can enhance overall visual impact and effectiveness. Several actionable steps can facilitate this integration.
One approach is to establish a consistent visual language. By selecting typography and imagery that complement the chosen block colours, designers can create a cohesive look that reinforces the overall message. For instance, pairing bold block colours with clean, modern fonts can create a striking visual identity that resonates with audiences.
Additionally, designers should consider the hierarchy of elements within the design. By strategically positioning block colours in relation to other components, designers can guide the viewer’s attention and establish a clear pathway for navigation. This deliberate arrangement enhances usability while maintaining visual appeal.
Moreover, using textures or patterns alongside block colours can add depth and interest to the design. Layering elements thoughtfully allows for a dynamic composition that encourages exploration. Designers should balance simplicity and complexity, ensuring that the design remains clear and effective.
Lastly, gathering feedback from peers or target audiences can provide insights into how well the integration is perceived. Conducting usability tests can help identify areas where block colours may need adjustment or further refinement to ensure they complement the overall design effectively.
Methods for Assessing the Effectiveness of Block Colour Choices
Evaluating the impact of block colour on a design is crucial for continuous improvement and refinement. Several methods can be employed to assess the effectiveness of block colour choices, ensuring that designers can optimize their work based on feedback and data.
One effective method is to conduct user testing and gather qualitative feedback. Engaging with target audiences can provide insights into how well the block colours resonate with viewers and whether they enhance the overall message. Conducting focus groups or surveys can reveal valuable perspectives on colour perception.
Additionally, analysing engagement metrics can provide quantifiable data on the effectiveness of block colour. For instance, tracking click-through rates, time spent on pages, or conversion rates can illustrate how well block colours drive user interaction. This data can inform future design decisions and help identify areas for improvement.
Another approach is to compare designs with varying block colour applications. By conducting A/B testing on different colour combinations, designers can assess which options yield better results in terms of user engagement and overall effectiveness. This iterative process enables ongoing refinement and enhancement of colour choices.
Lastly, monitoring industry trends and emerging research on colour perception can inform future design strategies. Designers should remain aware of shifts in colour preferences and psychological associations, ensuring that their block colour choices remain relevant and impactful over time.
Frequently Asked Questions About Block Colour
What is block colour in design?
Block colour refers to the use of a solid, single colour across a design element, creating bold and uniform hues that enhance visual impact and clarity.
How does colour psychology influence design?
Colour psychology explores how different colours evoke specific emotions and behaviours, enabling designers to select hues that align with their intended message and audience.
What are some common applications of block colour?
Block colour is commonly used in logos, product packaging, advertising, fashion, web design, and interior design to create striking visual statements.
How can I effectively use block colour in graphic design?
To effectively use block colour in graphic design, consider colour consistency, balance with negative space, and strategic placement of focal points to guide viewer attention.
What is the impact of block colour on branding?
Block colour enhances brand recognition and loyalty by creating a cohesive visual identity that resonates with consumers and reinforces brand values.
How do different colours affect mood in design?
Different colours can evoke a range of emotions; for example, blue can promote calmness, while red may create a sense of urgency, influencing viewer responses.
What are some techniques for layering block colour?
Techniques for layering block colour include varying opacities, combining textures, and using contrasting colours to create depth and visual interest.
How can I assess the effectiveness of my block colour choices?
Assess the effectiveness of block colour choices through user testing, engagement metrics, A/B testing, and gathering qualitative feedback from target audiences.
What are the advantages of using block colour in minimalism?
Block colour enhances clarity and focus in minimalist design, allowing for straightforward communication while maintaining visual appeal through simplicity.
Can block colour be used in digital art?
Yes, block colour is a popular technique in digital art, enabling artists to create bold compositions and convey emotions through the strategic use of solid hues.
Connect with us on Facebook!
The Article: Using Block Colour for Bold Uniform Hues: Create Striking Designs appeared first on Amitys Hair Salon.
The Article Block Colour for Striking Bold Uniform Designs Was Found On https://limitsofstrategy.com
-

Wig Bonding Techniques for Perfecting Your Look
Comprehensive Strategies for Perfecting Wig Bonding Techniques for Stunning Results
Understanding the Wig Bonding Process for Optimal Outcomes
Wig bonding is an intricate and meticulous procedure that entails securely attaching a wig to the scalp through various adhesives or techniques. This approach is vital for achieving a realistic appearance and ensuring a comfortable fit, which can significantly elevate the overall aesthetic. When executed properly, wig bonding results in a flawless transition between the wig and the wearer’s natural hairline, providing a more authentic look. Several popular methods for wig bonding include:
- Glue-based bonding
- Tape-based bonding
- Medical-grade adhesives
- Heat fusion methods
- Skin-adhesive creams
- Weaving techniques
- Clip-in methods
- Micro-link connections
Grasping these methods is essential for anyone aiming to achieve the best results with their wigs. The ideal bonding technique may vary depending on several factors, including hair type, lifestyle, and individual preferences.
The Advantages of Incorporating Irons in Wig Bonding Techniques
The integration of irons into the wig bonding process can substantially improve both the durability and aesthetic quality of the bond. Irons offer a level of precision and control that is often necessary to achieve outstanding results. Applying heat can activate specific adhesives, forging a stronger bond that is less likely to lift or detach over time. Notable benefits of utilizing irons during wig bonding encompass:
- Enhanced bond strength
- Increased adhesion through heat activation
- Greater precision during application
- Ability to style the wig while bonding
- Shortened adhesive setting times
- Reduced risk of lifting edges
- Versatility for various wig materials
- Potential for a seamless finish
These advantages position irons as indispensable tools in the wig bonding arsenal, yielding both functional and aesthetic enhancements.
Essential Safety Precautions When Using Irons for Wig Bonding
Prioritizing safety is crucial when employing irons for wig bonding, as improper techniques can result in burns or damage to both the wig and scalp. Adhering to proper practices and precautions is necessary to guarantee a safe and effective bonding experience. Key safety recommendations for the use of irons in wig bonding include:
- Always conduct a patch test with the adhesive on a small area of skin prior to full application.
- Utilize a heat-resistant mat to safeguard surfaces from burns.
- Set the iron to the appropriate temperature tailored to the adhesive used.
- Keep the iron in motion to prevent creating hotspots that could cause damage.
- Wear protective gloves when using heated tools.
- Maintain a clutter-free workspace and ensure it is devoid of flammable materials.
- Allow the iron to cool completely before storing it away.
- Apply suitable heat protectant products on wigs to avoid damage during bonding.
By following these guidelines, the likelihood of accidents can be significantly minimized, leading to a more enjoyable bonding experience.
Choosing the Right Adhesive for Effective Wig Bonding

Selecting the right adhesive is a pivotal aspect of the wig bonding process. Considerations such as skin type, desired hold, and ease of removal must be factored in to achieve optimal results. Various adhesives exhibit differing strengths and longevity, making it essential to choose one that aligns with the wearer’s lifestyle and preferences. Common adhesives used for wig bonding include:
- Medical-grade adhesives suitable for sensitive skin
- Waterproof glues designed for extended wear
- Temporary adhesives intended for short-term use
- Bio-based adhesives for environmentally friendly options
- Silicone-based adhesives for flexibility
- Heat-activated adhesives for seamless bonding
- Clear adhesives for a discreet finish
- Adhesive tapes for simple application
Being knowledgeable about the characteristics of these adhesives can empower users to make informed choices, ultimately leading to superior bonding experiences.
Essential Maintenance Practices for Bonded Wigs
Proper maintenance is vital for assuring the longevity and visual appeal of bonded wigs. Routine cleaning and suitable storage methods are necessary to preserve the integrity of both the wig and the bond. Maintenance tips for bonded wigs include:
- Gently cleanse the wig with appropriate products to keep it in superb condition.
- Avoid excessive heat exposure during styling to prevent damage.
- Store wigs on a mannequin or in a breathable bag to maintain their shape.
- Regularly inspect the bond for signs of wear and address any issues immediately.
- Utilize a wide-toothed comb to detangle and minimize breakage.
- Reapply adhesive as necessary to ensure bond longevity.
- Keep wigs away from direct sunlight when not in use.
- Use protective sprays to maintain shine and vibrancy.
Following these maintenance practices can dramatically extend the lifespan of bonded wigs, providing the wearer with continued satisfaction and use.
Advanced Techniques for Maximizing Wig Bonding with Irons
Expert Tips for Enhancing Bonding Techniques

Experts in the realm of wig bonding provide invaluable insights into refining bonding techniques, particularly concerning the use of irons. Their extensive experience enables them to pinpoint the most effective methods and tools available. To enhance wig bonding techniques utilizing irons, consider the following actionable strategies:
1. Conduct Thorough Research: Stay informed about the latest trends and techniques in wig bonding. Online tutorials and professional workshops can offer new insights and methods.
2. Experiment with Various Irons: Not all irons are created equal. Testing different models can help identify which one provides the best heat distribution and control for bonding.
3. Refine Application Techniques: Practising the correct motion and timing during iron application can significantly improve adhesion. Experts recommend maintaining a steady pace for even heat application.
4. Utilize Heat Protectants: Always apply a heat protectant product to the wig prior to using an iron. This can shield against damage while enhancing the bond’s effectiveness.
5. Engage with Community Feedback: Join forums or social media groups dedicated to wig bonding. Sharing experiences can yield practical tips from fellow enthusiasts and professionals.
6. Invest in Quality Tools: Purchasing high-quality irons and adhesives can greatly impact results. Quality tools typically yield more reliable outcomes.
7. Understand Individual Needs: Customising techniques to match individual hair types and preferences can lead to more effective and tailored bonding solutions.By implementing these strategies, wig wearers can refine their bonding practices, resulting in improved durability and aesthetic appeal.
Innovative Developments in Iron Technology for Enhanced Wig Bonding
Advancements in iron technology have introduced numerous innovations that significantly improve the wig bonding process. These enhancements not only increase efficiency but also prioritize safety and user experience. Some of the latest innovations in iron technology include:
1. Smart Temperature Control: Modern irons come equipped with digital displays that allow for precise temperature settings, ensuring optimal bonding without overheating risks.
2. Rapid Heating Features: Newer models heat up quickly, reducing wait times and enhancing the overall efficiency of the bonding process.
3. Ceramic and Tourmaline Plates: These materials provide even heat distribution, minimizing hotspots and ensuring a consistent bond across the entire surface.
4. Ergonomic Designs: Improved grips and lightweight designs make irons easier to handle, reducing user fatigue during extended use.
5. Automatic Shut-off Features: Safety mechanisms that deactivate the iron after a designated period of inactivity help prevent accidents and burns.
6. Multi-functionality: Some irons now offer versatility beyond wig bonding, including options for styling and curling, catering to various hair needs.
7. Wireless Models: Cordless irons provide added convenience and mobility, allowing users to bond wigs anywhere without being tethered to a power source.These innovations signify substantial progress in the tools available for wig bonding, ensuring a more effective and user-friendly experience.
Successful Case Studies Showcasing Effective Wig Bonding with Irons
Real-world instances of successful wig bonding using irons demonstrate the effectiveness of various techniques and tools in practice. Consider the following case studies that illustrate the practical application and results of refined bonding methods:
1. Professional Stylist Case Study: A renowned stylist held a workshop showcasing the use of heat-activated adhesives with a ceramic iron. Participants noted a 30% increase in bond durability compared to traditional methods, with many reporting enhanced comfort and wearability.
2. Celebrity Influence: A celebrity stylist combined silicone-based adhesive with a digital temperature-controlled iron on a high-profile client’s wig. The result was a seamless blend with the client’s natural hairline, exemplifying the potential of contemporary techniques in high-stakes environments.
3. Everyday User Experience: A regular wig wearer documented her journey on social media, highlighting the use of a lightweight iron and heat protectant. The successful bond lasted over three weeks, requiring minimal maintenance, proving effective for those with busy lifestyles.
4. Community Feedback Loop: A local beauty salon adopted a new bonding process using advanced irons and shared their results in a community forum. Clients reported reduced discomfort and longer-lasting wear, leading to increased client satisfaction and retention.These case studies provide compelling evidence of the effectiveness of refined wig bonding techniques using irons. Each example highlights the significance of selecting the right tools and methods to achieve outstanding results.
Selecting the Ideal Iron for Wig Bonding
Choosing the right iron for wig bonding is crucial for achieving effective results. Several factors should guide this decision, ensuring that the selected tool aligns with specific bonding needs. Key features to consider when selecting the best iron for wig bonding include:
1. Temperature Control: Opt for an iron with adjustable temperature settings to facilitate customized heat application based on the adhesive and wig material in use.
2. Plate Material: Select irons with ceramic or tourmaline plates, as these materials provide even heat distribution and minimize the risk of damaging the wig.
3. Weight and Design: A lightweight, ergonomic design can reduce hand fatigue during longer bonding sessions, making the process more comfortable and efficient.
4. Safety Features: Look for models that include automatic shut-off functions and other safety mechanisms to prevent accidents while in use.
5. Corded vs. Cordless: Consider how mobility affects your bonding process. Cordless models offer flexibility, while corded ones may provide consistent power without needing recharging.
6. Multi-functionality: Some irons can serve dual purposes for styling and bonding, providing versatility for personal use or professional environments.
7. User Reviews and Recommendations: Research user feedback on specific models to assess their performance in real-world applications.By carefully evaluating these factors, users can select an iron that best meets their needs, ensuring a successful wig bonding experience.
Critical Safety Measures When Using Irons for Wig Bonding
Maintaining safety while using irons for wig bonding is essential to prevent accidents and damage to both the wig and the scalp. Practicing the following precautions can help ensure a safe bonding experience:
- Always perform a patch test with new adhesives on a small area of the scalp.
- Utilize a heat-resistant mat or surface to protect work areas from burns.
- Adjust the temperature of the iron based on the specific adhesive and wig type.
- Keep the iron in motion during application to prevent overheating.
- Wear protective gloves when handling heated tools and products.
- Ensure a clutter-free workspace to minimize the risk of accidents.
- Allow the iron to cool down completely before storing it away.
- Use a heat protectant on wigs before applying heat to minimize damage.
Implementing these safety measures can effectively reduce the risk of injuries and ensure a more successful and enjoyable wig bonding process.
Essential Tools and Equipment for Successful Wig Bonding
Necessary Tools for Effective Wig Bonding
Achieving effective wig bonding requires a selection of essential tools that facilitate the entire process. Each tool serves a specific purpose to ensure optimal adhesion and finish. The fundamental tools required for successful wig bonding include:
1. Heat Iron: A high-quality heat iron is vital for activating adhesives and ensuring robust bonds. Look for one with adjustable temperature settings.
2. Adhesives: Choose the right adhesive based on skin sensitivity and desired bond duration. Options include medical-grade adhesives and tape.
3. Applicators: Applicators, such as brushes or spatulas, enable precise adhesive application, ensuring even coverage.
4. Comb: A wide-toothed comb is crucial for detangling and preparing both the wig and natural hair prior to bonding.
5. Heat Protectant Spray: This product safeguards the wig from heat damage during the bonding process, ensuring the integrity of the fibers.
6. Microfiber Cloth: Useful for cleaning excess adhesive and maintaining a tidy work area during the bonding process.
7. Mannequin Head or Stand: For those applying wigs on themselves, a mannequin head can provide a stable surface for practice and application.
8. Storage Containers: Keeping wigs and bonding materials in designated containers can prolong their usability and maintain organization.Utilizing these essential tools can significantly enhance the bonding process, resulting in a more professional and polished finish.
Choosing the Optimal Iron for Wig Bonding
Selecting the right iron is pivotal for successful wig bonding, as several factors influence performance and outcomes. Here are critical features to consider when selecting an iron for wig bonding:
1. Heat Settings: Look for an iron with adjustable heat settings to accommodate various adhesive types and wig materials, allowing for customization based on needs.
2. Plate Material: Irons with ceramic or titanium plates offer even heat distribution, reducing the risk of damaging the wig while ensuring effective bonding.
3. Weight and Balance: Opt for a lightweight design that provides good balance, thus minimizing user fatigue during extended bonding sessions.
4. Cord or Cordless Functionality: Consider your working environment; cordless models offer flexibility, while corded ones provide uninterrupted power.
5. Quick Heating Feature: An iron that heats quickly can save time and streamline the bonding process, making it more efficient for both professionals and home users.
6. Safety Features: Automatic shut-off functions are essential for preventing accidents, especially during long bonding sessions where the iron may be left unattended.
7. User Reviews: Research customer feedback and professional recommendations to assess the performance and reliability of specific models.By evaluating these factors, users can confidently select an iron that meets their specific bonding needs, ultimately enhancing their wig bonding results.
Maintenance Requirements for Bonding Equipment
Proper maintenance of bonding equipment is vital for ensuring longevity and effectiveness in the wig bonding process. Regular care can prevent damage and enhance performance over time. Here are some crucial points regarding the maintenance and care of bonding equipment:
1. Regular Cleaning: Clean irons and applicators after each use to prevent adhesive build-up. Use gentle cleaners compatible with the materials.
2. Storage Considerations: Store bonding equipment in a cool, dry place to avoid damage from humidity or heat. Utilize protective covers for iron plates when not in use.
3. Inspect Equipment: Regularly check tools for signs of wear or damage. Replace any worn-out parts, such as frayed cords on irons, to ensure safety and efficiency.
4. Frequency of Maintenance: Conduct a thorough cleaning and inspection of your tools at least once a month, or more frequently if used regularly.
5. Follow Manufacturer Instructions: Adhere to the manufacturer’s care guidelines for each tool to maximize longevity and maintain optimal performance.
6. Use Appropriate Products: Ensure that cleaning products are suitable for the specific materials of your equipment, as harsh chemicals can cause damage.Implementing these maintenance practices can significantly extend the lifespan and effectiveness of bonding equipment, ensuring consistent results in wig bonding procedures.
Step-by-Step Protocol for Optimizing Wig Bonding with Irons
Preparation Steps for the Wig and Scalp Prior to Bonding
Preparation is essential for achieving a successful wig bonding process. Properly preparing both the wig and the scalp ensures a solid foundation for adhesion. To effectively prepare the wig and scalp, follow these steps:
1. Clean the Scalp: Begin by washing the scalp with a gentle cleanser to eliminate oils, dirt, and product residue. This step is crucial for optimal adhesive performance.
2. Dry Thoroughly: Ensure that the scalp is completely dry before applying any adhesive. Moisture can undermine the bond and lead to premature lifting.
3. Prepare the Wig: Gently cleanse the wig with a suitable wig shampoo and allow it to dry fully. This helps eliminate any styling products that might interfere with bonding.
4. Style the Wig: If desired, style the wig prior to bonding. This allows for easier adjustments and reduces manipulation once it is adhered to the scalp.
5. Check Fit: Before applying adhesive, position the wig on the head to assess fit and make any necessary adjustments to ensure it sits correctly.
6. Apply Heat Protectant: Spray a heat protectant on the wig to shield it from potential damage during the bonding process, particularly if heat is involved.
7. Gather Tools: Ensure all necessary tools, including the iron, adhesive, applicators, and combs, are within reach to facilitate an efficient bonding process.Taking these preparatory steps can lead to a more successful and visually appealing wig bonding outcome, ensuring that everything is in place for optimal adhesion.
Applying the Iron for Optimal Bonding Outcomes
Correctly applying the iron is crucial for ensuring a strong and durable bond. The technique and timing involved in this process can significantly affect the effectiveness of bonding. Here are best practices for applying the iron during bonding:
1. Set the Right Temperature: Ensure the iron is set to the appropriate temperature based on the adhesive being used and the wig material. Start with a lower temperature if unsure.
2. Section the Wig: Divide the wig into manageable sections for even application. This allows for precise heat distribution and enhances the bonding process.
3. Consistent Motion: Apply the iron in smooth, consistent motions across the adhesive area. Avoid holding it in one spot for too long to prevent overheating.
4. Timing is Key: Follow the adhesive manufacturer’s recommendations for how long to apply heat. Typically, 10-30 seconds is sufficient to activate most adhesives.
5. Monitor Bonding Progress: After applying heat, gently check the bond by lifting a small section. If it lifts easily, reapply the heat and adhesive as necessary.
6. Seal the Edges: Once the bond is set, use the iron to seal the edges of the wig for a more polished and natural appearance, smoothing any lifted sections.
7. Cool Down Period: Allow the bond to cool completely before manipulating or styling the wig further. This helps solidify the bond and ensures longevity.Implementing these techniques can significantly enhance the success of wig bonding, leading to a more durable and aesthetically pleasing finish.
Finalizing and Securing the Bond Effectively
The finishing touches during the wig bonding process can greatly improve both the bond’s appearance and durability. Properly securing the bond ensures it remains intact and looks natural over time. To effectively finish and secure the bond, consider the following steps:
1. Inspect the Bond: Thoroughly check the bond for any areas needing additional adhesive or heat. This step guarantees a uniform hold across the entire wig.
2. Seal Edges with Iron: Utilize the iron to gently press down the edges of the wig, ensuring they adhere well to the scalp. This technique helps prevent lifting and creates a seamless look.
3. Apply Finishing Products: Once the bond is secure, apply a light finishing spray or serum to enhance shine and protect the wig from environmental factors.
4. Secure with Clips: If necessary, use wig clips or bands to temporarily secure the wig while the adhesive fully sets. This added support can prevent any movement until the bond is completely cured.
5. Check for Comfort: After securing the bond, ensure the wig feels comfortable and doesn’t irritate the scalp. Adjust as needed to achieve a perfect fit.
6. Allow Time to Set: Give the bond ample time to cure fully before styling or engaging in strenuous activities. This ensures the adhesive reaches its maximum holding capacity.
7. Regular Maintenance Checks: After the bonding process, schedule regular maintenance checks to assess the integrity of the bond and promptly address any issues.By completing these finishing steps, the bond can achieve a polished, natural look, ensuring that the wig remains securely in place and comfortable for the wearer.
Overcoming Common Challenges in Wig Bonding
Solutions for Addressing Uneven Bonding Issues
Uneven bonding can lead to an unnatural appearance and discomfort for the wearer. Recognizing and addressing the causes of uneven bonding is essential for improving the outcome. Common causes of uneven bonding and potential solutions include:
1. Inconsistent Adhesive Application: Ensure that adhesive is applied evenly across the bonding area. Utilizing a suitable applicator can help achieve uniform coverage.
2. Improper Heat Distribution: If the iron is too hot in certain areas, it can cause irregular bonding. Regularly check and adjust the temperature settings to ensure even heat application.
3. Insufficient Heating Time: If the adhesive doesn’t receive adequate heat, it may not bond properly. Follow manufacturer guidelines for heating times to ensure a secure hold.
4. Inadequate Preparation: Preparing the scalp and wig correctly is crucial. Clean thoroughly and dry completely before bonding to prevent uneven adhesion.
5. Lifting Edges: If edges lift, it can create an uneven look. Use the iron to seal edges securely, ensuring a smooth transition between the wig and natural hairline.
6. Poor Wig Fit: A poorly fitted wig can lead to visible gaps. Always assess fit before bonding and make any necessary adjustments for a snug fit.
7. Regular Maintenance Checks: Schedule periodic checks to address any bonding issues as they arise. Early intervention can prevent further complications.By recognizing these potential challenges and implementing appropriate solutions, wearers can achieve a more uniform and natural-looking bond.
Preventing Heat Damage During the Bonding Process
Heat damage during the bonding process can adversely affect both the wig and the scalp. Proper techniques and tools can significantly mitigate this risk. Here are strategies to prevent heat damage during bonding:
1. Use Heat Protectants: Always apply a heat protectant spray to the wig before using the iron. This product creates a barrier against heat, minimizing potential damage.
2. Monitor Temperature Settings: Set the iron to the lowest effective temperature for the adhesive being used. This precaution helps reduce the risk of overheating.
3. Limit Direct Heat Exposure: Keep the iron moving to avoid concentrating heat on a single spot. This technique prevents hotspots that can damage hair fibers.
4. Incorporate Cooling Breaks: Allow the wig to cool down briefly between bonding sessions. This practice can prevent cumulative heat damage from extended use.
5. Invest in High-Quality Tools: Use professional-grade irons specifically designed for wig bonding. Quality tools typically offer better temperature control and heat distribution.
6. Regularly Inspect the Wig: After bonding, regularly check the wig for any signs of heat damage, such as frizz or texture change. Address issues promptly to maintain the wig’s integrity.
7. Educate on Proper Techniques: Take time to learn the correct application methods for both the adhesive and iron. Understanding the process can greatly reduce the risk of damage.Implementing these strategies can protect both the wig and the wearer’s scalp, ensuring a successful bonding experience without compromising the quality of the materials used.
Steps to Take If the Bond Fails
Experiencing bond failure can be frustrating, but understanding the reasons behind it can help prevent future occurrences. Here are steps to take if the bond fails:
1. Assess the Cause of Failure: Determine whether the failure was due to improper application, insufficient preparation, or unsuitable adhesive choice. Identifying the reason can guide corrective actions.
2. Remove the Failed Bond Safely: Use a gentle adhesive remover to carefully detach the wig from the scalp. Avoid pulling or tugging to prevent damage to the natural hair.
3. Clean the Scalp: Once the bond is removed, cleanse the scalp thoroughly to eliminate any residual adhesive, dirt, or oil that may affect future bonding.
4. Reevaluate Your Method: Consider adjusting your bonding technique. Experiment with different adhesives or tools if the initial method was not effective.
5. Test Adhesives: If using a new adhesive, conduct a patch test on a small area of the scalp to evaluate sensitivity and bonding capability before full application.
6. Allow Adequate Drying Time: Ensure all products applied are given sufficient time to set before attempting to bond the wig again. This can help prevent future failures.
7. Seek Professional Advice: If bond failures persist, consult a professional stylist who specializes in wig bonding. Their expertise can provide tailored solutions and techniques.By addressing bond failure proactively, individuals can improve their bonding experience and achieve more reliable results in subsequent applications.
Considerations for Proper Bonding on Different Hair Types
Different hair types require specific bonding techniques to ensure effective and aesthetic results. Understanding these differences can lead to better bonding experiences. Here are strategies for adapting bonding methods for various hair types:
1. Fine Hair: Fine hair often requires gentler adhesives and lower heat settings to prevent damage. Use lightweight adhesives to avoid weighing down the hair.
2. Curly Hair: For curly hair, consider using flexible adhesives that allow for movement without compromising hold. This prevents breakage and maintains the integrity of the curls.
3. Thick Hair: Individuals with thick hair may benefit from stronger adhesives and higher heat settings. Ensure thorough bonding to accommodate the density of the hair.
4. Textured Hair: Textured hair types might require additional moisture and care. Use bonding methods that consider hair health, applying products that promote shine and hydration.
5. Short Hair: Short hair can present challenges with bonding. Consider using clips or tapes in conjunction with adhesives to ensure a secure fit without affecting the natural look.
6. Natural Hair vs. Relaxed Hair: Adjust bonding techniques based on whether the hair is in its natural state or relaxed. Natural hair may require more careful handling to prevent damage.
7. Consulting a Professional: For those unsure about the best bonding methods for their hair type, consulting a professional stylist can provide tailored advice and techniques.By recognizing and adapting to the unique needs of different hair types, individuals can achieve optimal bonding results that enhance both appearance and comfort.
Research-Backed Advantages of Optimizing Wig Bonding with Irons
What Studies Reveal About the Durability of Bonds Formed with Irons
Research has shown that bonds established with irons can be more durable than those created through other methods. This durability is essential for individuals seeking longevity in their wig applications. Expert analysis indicates that the heat activated by irons tends to forge a stronger chemical bond between the adhesive and both the wig material and the scalp. This enhanced bond can lead to longer-lasting results, significantly reducing the frequency with which a bond must be reapplied.
Moreover, studies suggest that consistent heat application promotes a more uniform bond. Irons that maintain a steady temperature help minimize thermal damage while improving adhesion. This means that not only are bonds created with irons often more resilient, but they also maintain the integrity of the wig and natural hair, leading to a more comfortable wear.
The potential for longer-lasting results is crucial for consumers who invest in high-quality wigs, ensuring that their appearance remains polished and professional over extended periods without frequent maintenance.
Impact of Refining Wig Bonding with Irons on Appearance
Refining wig bonding techniques with irons can significantly enhance the visual appeal of wigs, allowing for a natural and seamless look. When executed accurately, the heat application can effectively activate adhesives, creating a smooth transition from the scalp to the wig.
To achieve a natural appearance, individuals should focus on the precision of their application. The use of irons can help shape the wig along the contours of the wearer’s head, ensuring that it hugs the natural hairline closely. This attention to detail can eliminate noticeable gaps or unevenness, which are often the tell-tale signs of poorly bonded wigs.
Additionally, the application of heat can also enhance the overall texture and shine of the wig. By carefully applying heat during the bonding process, the fibers of the wig can maintain their natural luster, further contributing to an authentic look. For the best results, individuals should integrate techniques that promote this seamless appearance, such as using heat protectants and ensuring that they work with high-quality materials.
Ultimately, refining the bonding process with irons can elevate the overall experience for the wearer, instilling confidence and comfort while enhancing aesthetic appeal.
Long-Term Benefits of Using Irons in Wig Bonding
The long-term advantages of utilizing irons in the wig bonding process are multifaceted, enhancing both the durability and ease of maintenance for wigs. By concentrating on refining bonding techniques, wearers can enjoy several benefits, including:
1. Increased Durability: Bonds created with irons generally last longer, reducing the need for frequent reapplications. This can save time and resources for the wearer, making wig maintenance more manageable.
2. Improved Aesthetics: A well-executed bond appears natural and seamless, significantly boosting the wearer’s confidence and overall satisfaction with their appearance.
3. Reduced Damage: When used correctly, irons can minimize damage to both the wig and natural hair, as they provide consistent heat application and control, preventing overheating.
4. Enhanced Comfort: A securely bonded wig is less likely to shift or cause discomfort, allowing wearers to engage in daily activities without worry.
5. Flexibility in Styling: Stronger bonds facilitate styling versatility, enabling wearers to experiment with different looks without jeopardizing the integrity of the bond.
6. Cost-Effectiveness: Investing in quality tools and refining bonding techniques can lead to a longer lifespan for both the wig and the bond itself, offering better value for money in the long run.
7. Environmental Considerations: The ability to reuse wigs due to durable bonding reduces waste and promotes sustainability within the wig-wearing community.These long-term benefits highlight the significance of utilizing irons in the wig bonding process, establishing them as essential tools for both everyday users and professionals alike.
Advanced Techniques for Optimizing Wig Bonding with Irons
Layering Techniques for Superior Wig Bonding
Layering techniques can significantly enhance the strength and appearance of wig bonding. By applying multiple layers of adhesive and utilizing heat correctly, wearers can create a more robust bond that withstands the test of time. Here are effective layering techniques for improved wig bonding:
1. Apply Multiple Adhesive Layers: Start with a thin layer of adhesive and allow it to become tacky before applying a second layer. This approach can yield a stronger bond as each layer adds additional support.
2. Use a Heat Iron Between Layers: After applying each layer, employ the iron to activate the adhesive. This step ensures that each layer adheres properly and maximizes the overall strength of the bond.
3. Incorporate Different Adhesives: Experimenting with various types of adhesives can improve bonding. For example, using a medical-grade adhesive as a base layer and a stronger bond on top can yield excellent results.
4. Focus on Edge Sealing: Pay special attention to the edges of the wig during layering. Ensuring that the edges are well-sealed can provide a more polished and natural-looking finish.
5. Monitor Consistency: While layering, it’s crucial to maintain consistency in application. Uneven layers can lead to weak points in the bond, causing lifting or detachment.
6. Allow Time for Each Layer: Patience is key. Allowing each layer to set and bind properly before applying the next can enhance the overall effectiveness of the bonding process.
7. Regularly Check for Lift: After bonding, periodically check for any signs of lifting or weakness. Addressing these issues early can prevent larger complications in the future.By utilizing these layering techniques, individuals can achieve enhanced bonding results, creating a secure and aesthetically pleasing wig application.
Customizing Bonding Techniques for Different Wig Types
Customizing bonding techniques for different wig types is essential for achieving optimal results. Each wig type may possess unique characteristics that require tailored approaches to bonding. Here are best practices for effectively bonding various wig types:
1. Lace Front Wigs: For lace front wigs, incorporate a gentle adhesive that is safe for the delicate lace material. Ensure that the adhesive is applied only to the lace for a seamless blend with the scalp.
2. Full Lace Wigs: Full lace wigs benefit from a more extensive bonding area. Apply adhesive evenly across the entire lace, using a gentle touch to avoid damaging the material.
3. Synthetic Wigs: Synthetic wigs often require lower temperature settings due to their heat sensitivity. Use heat-activated adhesives sparingly to avoid melting the fibers.
4. Human Hair Wigs: Human hair wigs can tolerate higher temperatures; thus, stronger adhesives can be used. Ensure that the bonding process incorporates the natural hair characteristics.
5. Clip-In Wigs: For clip-in and temporary wigs, consider using adhesive tapes instead of permanent glue. This allows for easy removal and reattachment while maintaining the integrity of the wig.
6. Wigs with Bangs: Wigs with bangs may require special attention at the front hairline. Ensure that the adhesive is applied precisely to prevent any visibility of the bond.
7. Specialty Wigs: Custom or specialty wigs may have specific bonding requirements based on their construction. Consult with the manufacturer or a professional stylist for tailored advice.By customizing bonding methods according to the specific wig type, wearers can ensure a secure and natural-looking application, maximizing the benefits of their chosen wigs.
Integrating Other Bonding Methods with Irons
Combining irons with other bonding methods can enhance the overall process, resulting in a more versatile and effective bonding experience. Here are strategies for integrating other bonding methods with irons:
1. Attach with Tapes: Use adhesive tapes for initial attachment to secure the wig before applying heat with the iron. This dual method can provide immediate hold while enhancing the bond.
2. Combine Clips and Adhesives: Utilize clips to hold the wig in place while the adhesive cures. This technique prevents movement and ensures a secure application.
3. Utilize Fusion Methods: Integrate fusion techniques, where heat is applied to create a bond, alongside traditional adhesive methods. This approach can enhance the overall strength of the bond.
4. Incorporate Weaving Techniques: For those seeking a more permanent solution, integrating weaving methods can provide additional support to the wig. This hybrid approach ensures a fuller look while securing the wig.
5. Layering Products: Combine different types of adhesives in a layering approach, applying heat with the iron to activate each layer. This can enhance durability and flexibility in the bond.
6. Use of Finishing Sprays: After bonding, apply finishing sprays that are compatible with both adhesive and heat methods. This can help seal the bond and add shine.
7. Experimentation and Adjustment: Remain open to experimentation. Each integration method may yield different results based on individual needs and preferences.By creatively integrating different bonding methods with the use of irons, wearers can achieve a more robust and aesthetically pleasing bond, significantly enhancing their wig-wearing experience.
Maintaining and Removing Wig Bonds Created with Irons
Daily Care Requirements for Wig Bonds
Daily care is essential for maintaining wig bonds created with irons, as proper routines can extend the life of the bond and keep the wig looking fresh. Here are recommended daily care practices for wig bonds:
1. Gently Clean the Bond Area: Use a mild cleanser around the bond area to prevent buildup from products or oils, ensuring the bond remains intact.
2. Monitor Wig Positioning: Regularly check the wig’s positioning and bond integrity throughout the day. Adjust as necessary to maintain comfort and appearance.
3. Avoid Excessive Heat Styling: Limit the use of heat styling tools on bonded wigs to prevent damage. If styling is necessary, apply a heat protectant.
4. Use a Wide-Tooth Comb: Gently detangle the wig with a wide-toothed comb to avoid breakage and maintain the overall health of the fibers.
5. Apply a Light Conditioning Spray: Use a light conditioning spray to maintain moisture without weighing down the wig. This helps to keep both the wig and bond in optimal condition.
6. Store Properly at Night: Before bed, secure the wig gently or remove it if possible. Store it in a breathable bag or on a mannequin to maintain its shape.
7. Regular Refreshing: Refresh the bond with additional adhesive as needed, especially if signs of lifting or discomfort arise.Implementing these daily care routines can significantly enhance the longevity and appearance of wig bonds, ensuring a consistent and comfortable wear.
Safest Methods for Removing Wig Bonds Created with Irons
Safely removing wig bonds created with irons is crucial for preventing damage to both the wig and the scalp. Specific techniques and products can facilitate this process effectively. Here are the safest methods for removing wig bonds:
1. Use an Adhesive Remover: Invest in a quality adhesive remover specifically designed for wig bonds. These products are formulated to dissolve adhesives without damaging the wig or scalp.
2. Apply Remover Generously: Saturate the bond area with the adhesive remover, allowing it to penetrate the adhesive for a few minutes to soften the bond.
3. Gently Peel the Wig: After the adhesive has softened, carefully peel the wig away from the scalp. Avoid pulling or tugging at the wig to prevent injury to the natural hair.
4. Clean the Scalp: Once the wig is removed, cleanse the scalp thoroughly with a gentle shampoo to eliminate any residual adhesive or product.
5. Wash the Wig: Clean the wig with suitable products to remove any adhesive traces. This step is vital for maintaining the wig’s integrity and appearance.
6. Inspect for Damage: After removal, check both the scalp and wig for any signs of damage. Address any issues promptly to ensure a safe reapplication in the future.
7. Allow Time to Heal: If the scalp appears sensitive or irritated after bond removal, allow it to heal before attempting to re-bond. Proper care during this period is essential.By following these methods, individuals can safely remove wig bonds without compromising the quality of the wig or health of the scalp.
Effective Techniques for Re-bonding and Reusing Wigs
Re-bonding and reusing wigs can be a cost-effective and environmentally friendly approach to wig maintenance. Proper techniques can ensure successful re-bonding, allowing for extended use of the wig. Here’s how to effectively re-bond and reuse wigs that were initially bonded with irons:
1. Assess the Wig’s Condition: Before re-bonding, inspect the wig for any signs of wear or damage. Address any issues before proceeding with the bond.
2. Clean the Bond Area: Thoroughly cleanse both the scalp and bond area of the wig to remove any residual adhesive, oils, or products. This ensures a clean surface for the new bond.
3. Choose the Right Adhesive: Select an adhesive suitable for the specific wig type and the bonding method previously used. Consider factors such as skin sensitivity and bond duration.
4. Follow Original Bonding Techniques: Reapply the adhesive using the same methods as the initial bonding. This consistency can help achieve similar results in terms of durability and appearance.
5. Utilize the Iron Again: Use the iron to activate the adhesive as per the original bonding process, ensuring that the bond is secure and long-lasting.
6. Allow the Bond to Cure: After re-bonding, allow sufficient time for the adhesive to set before engaging in activities that may stress the bond.
7. Store with Care: After removal and re-bonding, store the wig properly to maintain its shape and quality, ensuring it’s ready for future use.By employing these techniques, individuals can successfully re-bond and reuse their wigs, promoting sustainability and maximizing their investment in quality wig products.
Frequently Asked Questions Regarding Wig Bonding
What is wig bonding?
Wig bonding refers to the process of securely attaching a wig to the scalp using adhesives, ensuring a natural appearance and fit.
What benefits does using irons in wig bonding provide?
Using irons enhances bond durability, provides precision in the application, and allows for styling during the bonding process.
Are there safety precautions to consider when using irons for wig bonding?
Yes, safety precautions include adjusting the iron to the correct temperature, using heat protectants, and monitoring the bonding area to prevent burns.
How do I select the right adhesive for wig bonding?
Choose an adhesive based on skin type, desired hold, and ease of removal. Popular options include medical-grade adhesives and silicone-based products.
What maintenance is necessary for bonded wigs?
Regular cleaning and proper storage are essential for maintaining bonded wigs. Use a gentle cleanser and store in a breathable container.
How can I improve bonding techniques with irons?
Improving techniques involves staying updated with trends, experimenting with different irons, and refining the application methods used.
What innovations are available in iron technology for wig bonding?
Recent innovations include smart temperature control, rapid heating features, and ceramic plates for better heat distribution.
What should I do if the bond fails?
Assess the cause of failure, safely remove the wig, clean the area, and reevaluate your bonding methods for future applications.
How can I ensure proper bonding on different hair types?
Adapt bonding techniques based on hair type by using suitable adhesives and adjusting heat settings to prevent damage.
What are the long-term advantages of using irons in wig bonding?
Long-term advantages include increased durability, improved aesthetics, and cost-effectiveness, leading to a better overall wig-wearing experience.
Connect with us on Facebook!
The Article: Refining Wig Bonding With Irons: Universal Techniques appeared first on Amitys Hair Salon.
The Article Wig Bonding Techniques: Universal Tips for Refinement Was Found On https://limitsofstrategy.com
-

Weaving Highlights for Natural Sun-Kissed Effects
Unlock the Secrets of Hair Highlighting Techniques for Radiant Results
Explore the Transformative Effects of Highlights on Your Hairstyling
The primary objective of highlights is to infuse your hair with depth, dimension, and brightness, effectively simulating the radiant effects of sunlight. This artistic technique not only enhances the overall visual appeal of your hair but also accentuates facial features, resulting in a luminous glow. By skillfully placing lighter shades throughout your locks, you can achieve a stunning sun-kissed effect that appears both authentic and flattering, giving you a vibrant and youthful appearance that many seek.
When executed with precision, highlights can revolutionize any hairstyle, injecting movement and texture that flat, uniform hair typically lacks. The charming interplay of light and shadow can reveal the unique qualities of your hair, showcasing its natural beauty in an elegant and eye-catching way. Whether you prefer a subtle enhancement or a striking contrast, highlights cater to a variety of styles, making them a versatile option for anyone wishing to rejuvenate their look.
Furthermore, highlights can be customized to suit different hair textures and lengths, making them an ideal choice for a wide range of hair types. From fine, straight strands that benefit from gentle, delicate highlights to thick, curly hair that can handle bolder colour contrasts, the possibilities are virtually limitless. Highlights serve as a form of artistic expression within the world of hair colour, allowing individuals to showcase their unique style and personality with flair.
Discover Effective Techniques to Create Beautiful Sun-Kissed Effects
To achieve a truly captivating sun-kissed effect, a variety of highlighting techniques can be utilized, each offering its own aesthetic and maintenance level. The most sought-after methods include foiling, balayage, and ombre. Each technique presents unique benefits, catering to diverse preferences and hair needs.
Foiling involves carefully sectioning the hair and applying colour to strands that are then wrapped in foil. This precise method can yield sharp highlights and is particularly effective for creating pronounced contrasts. It allows for meticulous control over the lightness or darkness of the highlights, making it a favored choice for those desiring defined and striking looks. Conversely, balayage employs a freehand painting technique that results in softer, more blended highlights. This method mimics the way sunlight naturally lightens hair, resulting in a more organic look, perfect for those seeking a low-maintenance style since regrowth is less noticeable.
Ombre is another highly popular technique, featuring a gradual transition from darker roots to lighter ends. This style creates a visually stunning effect and is often selected by those seeking a dramatic transformation. The beauty of ombre lies in its adaptability, as it can be customized from subtle to bold, allowing for personal expression.Ultimately, selecting the right technique is influenced by individual preferences and desired outcomes. For a more natural appearance, balayage is generally recommended, while foiling may be preferred for a more polished finish. Each method encourages creativity and personal expression, fundamental elements of the artistry involved in hair colouring.
Understanding the Lifespan of Your Highlights
The longevity of highlights can greatly vary and is affected by numerous factors, including hair type, the technique used, and aftercare routines. Typically, highlights can last anywhere from 6 to 8 weeks before requiring a touch-up. However, this timeframe can fluctuate based on personal circumstances and hair care practices.
For instance, individuals with finer hair may notice their highlights fade more rapidly, particularly if they frequently wash their hair or use high-heat styling tools. On the other hand, thicker hair might retain its colour longer due to its inherent resilience. Additionally, the method employed plays a crucial role; balayage highlights generally grow out more naturally compared to foiled highlights, which might create a more noticeable contrast as the roots become visible.
Proper aftercare is essential in determining how long your colour lasts. Utilizing colour-safe products, avoiding excessive heat styling, and taking protective measures against environmental factors can all significantly prolong the life of your highlights. Consequently, diligent care can lead to a longer-lasting vibrancy and fewer trips to the salon, preserving the beauty of your highlights.
Expert Insights for Creating Natural Sun-Kissed Highlights
Key Characteristics of Professional Highlighting Techniques
Professional highlighting techniques are generally those that yield natural-looking results while minimizing hair damage. Techniques like balayage are preferred for their seamless blending and ability to create soft, sun-kissed effects. Professionals consider several vital factors when recommending highlighting methods, including:
- Hair Health: Techniques that require less processing and harsh chemicals are prioritized.
- Maintenance Level: Options like balayage are selected for their low upkeep requirements.
- Natural Appearance: Methods that imitate natural light variations are highly sought after.
- Customization Ability: Techniques that allow personalization to fit individual styles are recommended.
- Longevity: Approaches that maintain their vibrancy over time reduce the frequency of salon visits.
- Minimization of Damage: Techniques focusing on preserving hair integrity are prioritized.
- Client Lifestyle: Understanding a client’s daily routine aids in selecting the best method.
Each of these considerations plays a crucial role in delivering results that not only meet aesthetic desires but also cater to the client’s lifestyle and hair health. By prioritizing these elements, professionals can ensure that the highlighting process yields beautiful, lasting colour without compromising hair quality.
How to Achieve Salon-Quality Highlights at Home
Achieving salon-quality results at home is entirely possible with the right tools and products. First and foremost, invest in professional-grade hair dyes, as they usually contain superior formulations compared to over-the-counter alternatives. Pair these high-quality dyes with premium brushes and foils designed specifically for highlighting to ensure even application that closely resembles salon results.
To begin, prepare your hair by ensuring it is healthy and clean. Applying a deep conditioning treatment a few days prior can set the stage for optimal results. When it comes to the application process, follow these actionable steps:
1. Section Your Hair: Divide your hair into manageable sections to ensure even coverage. Use clips to secure each section as you work.
2. Choose Your Technique: Decide whether you want to use foiling or adopt a balayage approach. For foiling, apply dye to selected strands, while for balayage, utilize a painting technique to apply colour freehand.
3. Timing Is Key: Adhere to the recommended timing on the dye package, checking periodically to avoid over-processing.
4. Rinse and Condition: Once the desired colour is achieved, rinse thoroughly and apply a deep conditioner to restore moisture.
5. Style Your Hair Appropriately: Use styling products that are colour-safe to maintain the vibrancy of your highlights.By following these steps and focusing on high-quality products, it is indeed feasible to replicate the salon experience within the comfort of your own home while achieving stunning results that reflect your personal style.
Avoiding Common Mistakes in Highlighting
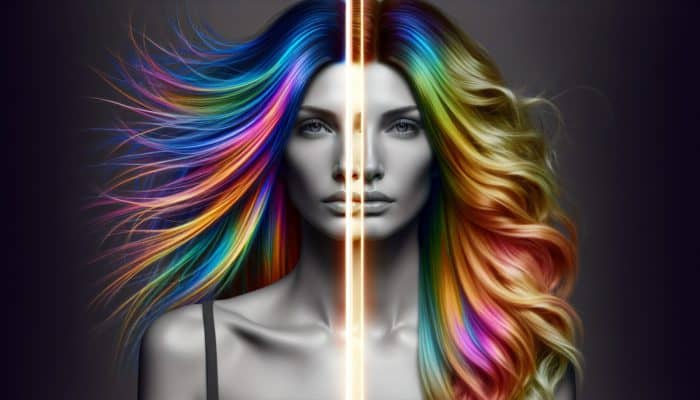
Avoiding common pitfalls during the highlighting process is crucial for achieving the desired results. Some prevalent mistakes include over-processing, choosing the incorrect shade, and improper application. Understanding these common errors can save you from disappointment and potential hair damage.
Over-processing often occurs when individuals leave the dye on for too long, leading to dryness and breakage. To prevent this, always follow the recommended timing specified in the instructions and conduct strand tests prior to full application. Additionally, selecting a shade that doesn’t harmonize with your skin tone can result in an unflattering appearance. To avoid this, assess your skin’s undertones and choose colours that enhance rather than clash with your natural complexion.
Improper application can also lead to uneven results. Ensure you apply colour section by section, paying close attention to the roots and the ends to avoid patchy results. By taking the time to educate yourself about these common mistakes, you can enhance your highlighting experience and achieve the radiant, sun-kissed results you desire.
Selecting the Ideal Shade for Your Skin Tone
Determining Your Skin’s Undertone for Highlight Selection
Identifying your skin’s undertone is essential for choosing the most flattering highlight shade. Undertones are typically categorized into three primary types: cool, warm, and neutral. To identify your undertone, observe the veins on your wrist; if they appear blue, you likely have cool undertones, while greenish veins indicate warm undertones.
Another method involves considering how your skin reacts to sun exposure. If you tan easily, you may possess warm undertones, while those who burn quickly often have cool undertones. Additionally, consider the colours that suit you best – do gold or silver accessories enhance your appearance? Gold typically complements warm undertones, while silver is flattering for cool undertones.
Understanding your skin’s undertone not only aids in selecting highlight shades but also helps in choosing clothing and makeup that accentuate your natural beauty. By considering these factors, you can ensure your highlights harmonize beautifully with your overall look, enhancing your features and providing a radiant glow that captivates attention.
Best Highlight Shades for Warm Undertones
Individuals with warm undertones often shine with golden and honey shades when it comes to highlights. These hues blend seamlessly with the natural warmth of the skin and can create a cohesive look that elevates the overall appearance. Additionally, warm balayage highlights can add depth without overpowering the natural colour of the hair.
Caramel and buttery blonde tones also make excellent choices, as they accentuate the golden hues in warm undertones. The key is to select shades that mimic the warmth of the sun for that coveted sun-kissed effect. Incorporating highlights with a mix of light and dark shades can create depth, ensuring the highlights appear multi-dimensional and lively.
Moreover, the strategic placement of highlights is crucial. Positioning lighter shades around the face can brighten the overall look and enhance features, providing a fresh and youthful appearance. Ultimately, selecting the right shades for warm undertones focuses on balancing warmth and brightness to achieve a stunning, natural effect that radiates confidence.
Highlight Options for Cool Undertones
For those with cool undertones, shades such as ash and platinum work wonders, enhancing the natural coolness of the skin. These cooler tones, when applied as highlights, can create a sophisticated look that feels fresh and modern. Ashy blondes and silver hues are particularly flattering, offering a striking contrast against deeper hair colours, enhancing overall vibrancy.
Incorporating highlights that transition from darker roots to lighter ends in an ombre style can also be very effective for cool undertones, as it allows for a gradual blend that appears effortless and chic. The aim should be to select shades that complement the coolness without overwhelming the natural hair colour.
Furthermore, when applying highlights, consider the overall contrast. If your base colour is dark, opting for lighter ash or silvery shades can create a dramatic yet polished effect. By focusing on cooler tones, you can achieve a balanced and stylish look that beautifully enhances your features. Ultimately, the right choice of highlights can elevate your hairstyle and enhance your natural beauty, creating a striking visual impact.
Preparing Your Hair for the Highlighting Process
Essential Steps Before Highlighting Your Hair
Before embarking on the highlighting journey, preparing your hair is paramount to achieving the best possible results. It is essential to ensure that your hair is in optimal condition to withstand the chemical processes involved in highlighting. This begins with a thorough assessment of your hair’s health, which is vital for minimizing damage.
A few days prior to highlighting, consider indulging in a deep conditioning treatment. This will help nourish and hydrate your hair, making it more resilient to the chemical changes it will undergo. Look for treatments rich in proteins and moisture, as these can reinforce the hair’s structure and prevent damage during the highlighting process.
On the day of highlighting, ensure your hair is clean but not freshly washed; this provides a barrier of natural oils that can protect the scalp during the process. Additionally, avoid using heavy styling products, as they can interfere with the dye’s ability to penetrate the hair cuticle, leading to uneven results.
Finally, consulting with a professional or conducting thorough research on the techniques you plan to employ can greatly enhance your understanding and preparation. By ensuring your hair is adequately prepped, you set the stage for a successful highlighting experience that yields beautiful and long-lasting results.
Protecting Your Hair Throughout the Highlighting Process
Safeguarding your hair during the highlighting process is essential for minimizing damage and preserving hair health. One effective method is to apply a barrier cream around your hairline and ears to shield your skin from dye stains. This simple yet effective step can save you from unwanted discolouration and irritation, ensuring a smoother highlighting experience.
Moreover, consider using a conditioning treatment before applying dye. This creates a protective layer on the hair, allowing the colour to be absorbed while minimizing potential damage. Professional-grade products designed for this purpose can be particularly beneficial, as they are formulated to work harmoniously with the dye, enhancing the overall outcome.
When applying highlights, take care to follow the correct application techniques. Avoid overlapping colour on previously dyed areas, as this can lead to excessive processing and damage. Instead, focus on applying dye to the mid-lengths and ends, leaving the roots for last to prevent them from becoming overly lightened, which can result in an unnatural appearance.
Lastly, be mindful of timing. Over-processing can be detrimental to healthy hair; always adhere to the recommended time specified in the instructions and conduct periodic checks to assess the colour development. By implementing these protective measures, you can significantly reduce the chances of damage and ensure that your hair remains vibrant and healthy throughout the highlighting process.
Post-Highlighting Products for Optimal Hair Care
Post-highlighting care plays a critical role in maintaining the health and vibrancy of your hair. It is vital to select appropriate products that are specifically designed for coloured hair to ensure longevity and shine. Sulfate-free shampoos are essential, as they are gentler on the hair and help prevent fading, preserving the brilliance of your highlights.
After shampooing, using a colour-safe conditioner formulated for highlighted hair can provide essential hydration and nourishment. Look for conditioners with ingredients like argan oil or keratin, which can help restore moisture and strength, ensuring your hair remains healthy and vibrant.
In addition to shampoos and conditioners, incorporating a deep conditioning treatment into your routine at least once a week can further enhance the health of your hair. This will help replenish lost moisture and keep your highlights looking fresh and luminous.
For those who wish to maintain vibrancy, consider using a toning treatment periodically to counteract any brassiness that may develop, especially in blonde highlights. Products containing purple or blue pigments can neutralize unwanted warm tones and keep your highlights looking crisp and vibrant.
Finally, regular use of UV protectants is crucial if you spend time outdoors, as sun exposure can lead to fading. By selecting the right post-highlighting products, you can ensure that your hair remains vibrant and healthy for a longer duration, allowing your highlights to truly shine.
- Sulfate-free shampoos
- Colour-safe conditioners
- Deep conditioning treatments
- Toning treatments
- UV protectants
Optimal Waiting Period Between Highlighting Sessions
To maintain optimal hair health, it is advisable to wait at least 6 to 8 weeks between highlighting sessions. This period allows your hair to recover from the chemical processes associated with dyeing, ensuring it retains its strength and vitality. Waiting too short a time can lead to cumulative damage, resulting in dryness and breakage.
During the waiting period, pay close attention to your hair’s condition. If you notice signs of excessive dryness or brittleness, extending the time between highlights may be necessary. Hair requires time to restore its natural oils and moisture levels, which can be depleted during highlighting, so prioritizing hair health is essential.
In the interim, focus on strengthening your hair through conditioning treatments and regular trims to eliminate any split ends. Healthy hair is more resilient and can better withstand future highlighting sessions. By being mindful of the timing between highlights, you can ensure that your hair remains in top condition while still enjoying beautiful sun-kissed colour that radiates confidence.
Signs Indicating Your Hair Needs a Break from Highlighting
Recognizing when your hair requires a break from highlighting is crucial for its long-term health and vitality. One of the most evident signs is excessive dryness. If your hair feels rough, lacks moisture, or exhibits a straw-like texture, it may be time to pause and allow your hair to recover.
Another sign is breakage. If you notice more hair than usual falling out during washing or styling, it indicates that your hair may be weakened from the chemical processes associated with highlighting. Additionally, dullness can signify that your hair is over-processed; if highlights no longer appear vibrant or reflect light effectively, it’s a clear indication that your hair is in need of a break.
Look out for frizz as well; over-processed hair can become more porous, leading to an inability to retain moisture and resulting in frizzy, unruly locks. If you encounter these signs, consider taking a break from highlighting. Focus on deep conditioning, nourishing treatments, and regular trims to restore your hair’s vitality before resuming highlighting sessions, ensuring that your hair remains healthy and beautiful.
Care and Maintenance Strategies for Sun-Kissed Highlights
Determining the Frequency of Highlight Touch-Ups
The frequency of touch-ups largely depends on the individual’s hair growth rate and the highlighting technique used. Typically, a touch-up is necessary every 6 to 8 weeks. However, this can vary; for example, those with a faster growth rate might require more frequent sessions to maintain their desired look, especially with techniques like foiling that may show regrowth more prominently.
For balayage highlights, touch-ups can often be less frequent. Because this technique is designed to grow out more naturally, it can allow for a longer interval between appointments without an obvious demarcation line. This makes balayage an excellent choice for those who prefer lower maintenance and a more organic look.
When planning touch-ups, consider your lifestyle and how much time you’re willing to dedicate to hair maintenance. If you prefer a more laid-back approach, choosing a method that requires less frequent visits, such as balayage or ombre, might be beneficial. Additionally, maintaining regular salon visits can help ensure that your highlights remain fresh, vibrant, and beautifully blended, allowing you to enjoy your sun-kissed look for longer.
Best Practices for Maintaining Colour Intensity
Maintaining the colour of your highlights involves a combination of care techniques and products. One of the most crucial practices is to avoid excessive heat styling. High temperatures can lead to fading and damage, so consider air-drying your hair or using heat protectants when styling to safeguard your colour.
Utilizing colour-protecting products is also essential. Shampoos and conditioners specifically formulated for coloured hair are designed to preserve vibrancy and prevent fade. Regular use of such products ensures that your highlights remain lively and true to tone, enhancing your overall look.
Incorporating regular conditioning treatments into your routine can further aid in maintaining colour. Deep conditioners help to retain moisture, eliminating dryness that can lead to dullness and loss of vibrancy. Aim for a weekly deep conditioning session to keep your hair healthy and your highlights looking fresh and radiant.
Lastly, be mindful of environmental factors such as sun exposure. UV rays can cause highlights to fade faster, so using hair products with UV protection can safeguard your colour. By following these best practices, you can extend the life of your highlights while keeping your hair looking vibrant, healthy, and beautiful.
Strategies for Maximizing the Longevity of Your Highlights
Extending the life of your highlights requires intentional care and attention to your hair’s needs. One effective method is to use UV-protective hair products. These products shield your hair from sun damage, preventing colour fading and maintaining the integrity of your highlights, ensuring they remain vibrant for longer.
Minimizing sun exposure can also be beneficial. Whenever possible, wear a hat or scarf to protect your hair from direct sunlight, especially during peak hours when the sun’s rays are strongest. Additionally, consider avoiding chlorinated water, which can strip colour and lead to unexpected changes in your highlights. If swimming, rinse your hair before entering the pool and use a leave-in conditioner for added protection against chemical damage.
Regular salon visits for toning treatments can also help keep your highlights looking fresh. These treatments can neutralize unwanted tones that may develop over time, ensuring that your highlights remain vibrant and true to colour. Additionally, incorporating regular trims into your routine will help eliminate split ends and maintain overall hair health, further prolonging the life of your highlights and ensuring they continue to shine beautifully.
By employing these strategies, not only can you enhance the longevity of your highlights, but you can also ensure that your hair remains healthy and vibrant, embodying the sun-kissed glow you desire.
Scientific Benefits of Highlighting for Natural Sun-Kissed Effects
Psychological Advantages of Adding Highlights
Changing your hair colour, particularly through highlights, can yield significant psychological benefits. Research indicates that individuals often experience a boost in confidence and self-esteem when they alter their appearance. The addition of sun-kissed highlights can elevate one’s mood, providing a sense of renewal and refreshment that resonates deeply within.
The psychological impact of looking good is profound; it can influence how you feel about yourself and how others perceive you. Highlights can accentuate features, making faces appear more radiant and youthful. This enhancement can lead to increased satisfaction with one’s appearance, contributing positively to mental well-being and overall happiness.
Moreover, experimenting with highlights can serve as a form of creative expression and personal style. This acts as a medium for self-expression, allowing individuals to showcase their personality and adapt their look to reflect changing moods or seasons. The renewed sense of self that often accompanies a hair transformation can lead to increased positivity and self-acceptance, enriching one’s overall quality of life.
In essence, the psychological benefits of highlights extend beyond mere aesthetics; they can serve as a catalyst for improved self-image and confidence, enhancing one’s overall well-being and satisfaction in life.
Effects of Highlights on Hair Health
While highlighting can indeed cause some damage due to the chemical processing involved, understanding how to minimize these effects is crucial for maintaining healthy hair. Proper techniques and aftercare are paramount in ensuring that hair health is not compromised. When executed correctly, highlights can be a safe and stylish choice that enhances your natural beauty.
Using professional-grade products and techniques that prioritize hair health can significantly reduce potential damage. For instance, opting for balayage can be gentler than traditional foil techniques, as it allows for less direct contact with the scalp and roots, resulting in less potential for damage and breakage.
Post-highlighting care is equally vital. Regular deep conditioning treatments, along with colour-safe shampoos and conditioners, can help restore moisture and strength to the hair. It’s also essential to manage heat styling carefully, as excessive heat can exacerbate damage. By focusing on these strategies, individuals can enjoy the beauty of highlights while maintaining the integrity of their hair, ensuring it remains healthy and vibrant.
Ultimately, with the right approach, the adverse effects of highlighting can be minimized, allowing for vibrant, beautiful results without sacrificing hair health and quality.
Understanding the Long-Term Effects of Highlighting
Long-term effects of highlighting can vary based on individual hair health and the techniques used. If highlighting is not properly maintained, it can lead to weakened hair over time. However, with adequate care, highlights can be both a safe and stylish choice that enhances your overall appearance.
For example, individuals who regularly maintain their highlighted hair with deep conditioning and protective products often report positive results, enjoying vibrant colour that lasts longer without significant damage. Conversely, those who neglect post-highlighting care may experience issues such as increased dryness, breakage, and overall dullness, detracting from the beauty of their highlights.
Real-world examples highlight the importance of personalized aftercare. For instance, clients who choose balayage often enjoy longer-lasting results due to the technique’s natural regrowth pattern. They typically experience fewer issues with stark contrast between their roots and highlights, allowing for a more seamless look over time that enhances their overall style.
Ultimately, the long-term effects of highlighting hinge on the commitment to hair health and maintenance. By prioritizing care, individuals can experience beautiful results while enjoying the flexibility of highlights in their hair journey, achieving stunning looks without compromising hair integrity.
Fashion-Forward Recommendations for Highlighted Hair
Hairstyles That Enhance Sun-Kissed Highlights
Sun-kissed highlights are best complemented by hairstyles that amplify their natural beauty and dimension. Loose, beachy waves are a top choice, as they allow highlights to catch the light beautifully, creating a soft, sunlit effect that embodies a relaxed aesthetic. This effortless style is perfect for showcasing the organic look of highlights, making them appear vibrant and lively.
Another fantastic option is to incorporate loose curls into your hairstyle. These curls can add volume and bounce, making highlights appear more dynamic and vibrant. The three-dimensional aspect created by loose curls emphasizes the interplay of light and dark shades in the hair, enhancing the overall look.
Braids also present a stylish way to elevate highlighted hair. Incorporating highlights into a braid can add depth and visual interest, particularly with fishtail or Dutch braids. These styles offer creative variations, ensuring that the highlights remain the focal point while providing a chic, sophisticated look.
For those seeking a more polished appearance, consider sophisticated updos that allow highlights to peek through. A low bun or a twisted chignon can effectively showcase the colour while maintaining elegance, making them perfect for formal occasions or professional settings.
In essence, choosing hairstyles that allow your highlights to shine is key. Whether opting for relaxed waves, defined curls, or intricate braids, the goal is to create looks that enhance the sun-kissed quality of your highlights, allowing them to be the standout feature of your hairstyle.
Styling Your Hair to Showcase Your Highlights
To effectively show off your highlights, consider experimenting with different partings and styles that allow the colour to take centre stage. A deep side part can create dramatic contrast, accentuating the highlights while beautifully framing your face. Additionally, a tousled look can enhance the soft, sun-kissed effect, making the highlights appear even more vibrant and eye-catching.
Incorporating styles like half-up, half-down can also be beneficial. This versatile style allows for highlights to be showcased while maintaining sophistication. By pulling the top section back, the lower section, rich with highlights, can shine freely, creating a stunning visual contrast.
Utilizing hair accessories can further elevate the look. Hair clips and headbands that complement the highlight colour can add an additional layer of sophistication and flair. For a more casual vibe, consider incorporating scarves that play off the warmth of your highlights, adding a playful touch to your overall appearance.
Lastly, using styling products that enhance shine can magnify the visual impact of highlights. Serums or sprays designed to boost shine can add a glossy finish, making your highlights pop even more and creating a radiant, polished look.
By creatively styling your hair and utilizing accessories, you can effectively showcase your highlights, allowing them to be the standout feature of your look while exuding confidence and style.
Choosing Accessories That Flatter Highlighted Hair
Selecting the right accessories can significantly enhance the appeal of highlighted hair. Accessories that complement the colour of your highlights can create a cohesive and stylish appearance. Headbands in soft, pastel hues can beautifully frame the face and highlight the natural tones in your hair, adding a playful yet chic touch.
Hair scarves are another excellent choice, particularly those with floral patterns or vibrant colours. These can bring out the warmth in sun-kissed highlights, adding an element of fun to your hairstyle. Tying a scarf around a ponytail or incorporating it into a braid can create an effortlessly chic vibe that showcases your highlights.
Hair clips are also practical and stylish. Opt for clips adorned with jewels or in metallic finishes that catch the light, enhancing the overall look. They can be used to pull back sections of hair, allowing highlights to shine through while keeping your hair tidy and fashionable.Finally, consider incorporating statement earrings that can draw attention to your face and complement your highlighted hair. Bright or sparkly jewellery can create a striking contrast, further enhancing the sun-kissed effect and adding an extra touch of glamour to your appearance.
By carefully selecting accessories that harmonize with your highlights, you can elevate your overall appearance while allowing your hair to be the focal point of your look, showcasing your style and personality.
Essential Products for Maintaining Highlighted Hair
To maintain highlighted hair, it is essential to use products specifically designed for coloured hair. Start with colour-safe shampoos that are sulfate-free; these gentle formulas help preserve vibrancy while preventing colour fade, ensuring that your highlights remain beautiful and fresh. Pairing this with a conditioner formulated for colour-treated hair will ensure moisture and nourishment are retained, keeping your hair healthy.
Incorporating a UV protectant into your hair care routine is crucial, especially if you spend considerable time outdoors. Products containing UV filters can protect your colour from sun damage, helping to maintain the brilliance of your highlights and preventing fading.
Regular use of a deep conditioning treatment can also benefit highlighted hair. Aim for a weekly treatment that infuses moisture and repairs damage, ensuring that hair remains silky and healthy. Look for treatments that contain nourishing oils, proteins, or botanical extracts for optimal results.
Finally, consider using toning treatments periodically to counteract any brassiness that may develop over time. These treatments can help balance the colour and keep your highlights looking fresh and radiant, enhancing your overall style.
By incorporating these products into your routine, you will optimize your hair care regime, ensuring that your highlights remain vibrant and healthy for as long as possible, allowing you to enjoy your stunning sun-kissed look.
DIY Highlighting versus Professional Techniques: Making Your Choice
Evaluating the Pros and Cons of DIY Highlighting
DIY highlighting has gained popularity due to its cost-effectiveness and convenience. However, it comes with both advantages and disadvantages. Some of the pros include:
- Cost Savings: DIY techniques can save considerable money compared to professional salon visits, making it an appealing choice for budget-conscious individuals.
- Convenience: You can colour your hair at home according to your own schedule without needing an appointment, providing flexibility in your routine.
- Control: You have complete control over the process, allowing for personal artistic expression and creativity in your highlighting style.
- Accessibility: Many products are available in stores, making it easy to obtain what you need for a DIY highlighting project.
On the flip side, there are some cons to consider:
- Risk of Damage: Incorrect application or over-processing can lead to significant hair damage, resulting in dryness and breakage.
- Uneven Results: Achieving professional-looking results can be challenging, especially for beginners who may lack experience.
- Time-Consuming: DIY highlighting can take longer than a professional session, particularly if you are inexperienced and learning the process.
- Lack of Expertise: Without professional guidance, it’s easy to make mistakes that can impact the final result, potentially leading to dissatisfaction.
Ultimately, while DIY highlighting can be a fulfilling experience, it requires careful consideration and preparation to avoid pitfalls. Ensuring you have the right knowledge and tools can make the process successful, allowing you to enjoy beautiful highlights at home.
Identifying When Professional Highlighting is the Best Choice
Choosing professional highlighting is often advisable for individuals seeking complex techniques or those who desire a more natural, blended look. Techniques such as balayage or intricate foiling require a level of expertise that can be difficult to achieve at home, making professional application a wise choice.
If you are new to highlighting or uncertain about your colour choices, consulting a professional can provide valuable guidance. Experts can assess your hair type, skin tone, and desired outcome, recommending the best approach for your individual needs. Their experience can help avoid common mistakes and ensure a successful, satisfying result.
Additionally, professional highlighting is ideal for those who wish to maintain the health of their hair while achieving beautiful results. Stylists often have access to higher-quality products and techniques that can minimize damage, preserving the integrity of the hair while delivering stunning highlights.
Ultimately, if you’re looking for a polished, salon-quality finish or if you’re planning on making significant changes to your hair colour, opting for professional highlighting is the best route to take, ensuring you enjoy beautiful results that reflect your personal style.
Making the Choice Between DIY and Professional Highlighting
Deciding between DIY and professional highlighting hinges on several factors, including your hair type, desired result, and comfort level with at-home colouring. Begin by assessing your hair’s health; if it is already damaged or fragile, seeking a professional is likely the best choice to avoid further compromise.
Consider the complexity of the technique as well. If you’re aiming for advanced methods like balayage or ombre, a professional’s expertise will help achieve a seamless result that looks polished and natural. On the other hand, if you’re looking for simple highlights and feel confident in your skills, DIY might be a viable option, allowing for creative expression at home.
Additionally, evaluate your budget. If cost is a concern, DIY highlighting may be more feasible. However, weigh this against the potential risks of damaging your hair and needing to fix mistakes later on, which could incur further costs.
Lastly, consider your own experience and comfort level with colouring hair. If you’re unsure, consulting a professional can provide clarity and help you make the best decision for your hair goals, ensuring you achieve the desired look while maintaining hair health.
Emerging Trends and Innovations in Highlighting Techniques
Current Trends Shaping Highlighting Practices
Current trends in highlighting lean towards natural-looking results that mimic the sun’s lightening effects. Techniques such as balayage and subtle babylights have surged in popularity, offering a more lived-in, sun-kissed effect that requires less upkeep than traditional highlighting methods.
Balayage, in particular, allows for a soft transition of colour that looks effortlessly chic and modern. This technique is perfect for those who desire dimension without the harsh lines often associated with foiling, providing a more organic look. Babylights, which replicate the delicate highlights seen in children’s hair, are also trending, providing a soft, natural look that adds brightness without overwhelming the base colour.
Additionally, pastel and vibrant colours are making waves, allowing individuals to express their creativity and personality through their hair. These bold shades can be incorporated as highlights, adding an exciting twist to traditional colour and enabling a unique personal style.
Ultimately, the latest trends focus on individuality and natural beauty, encouraging styles that enhance rather than overpower one’s features, allowing for personalized expression through hair colour.
Evolution of Highlighting Techniques Over Time
Highlighting techniques have significantly evolved over the years, reflecting changing beauty standards and advances in hair care. The shift from traditional foiling to more freehand methods like balayage and ombre speaks to a growing desire for more natural, dimensional looks that resonate with contemporary aesthetics. These innovative methods allow for greater creativity and personalization, straying away from the uniformity of classic foil highlights.
The introduction of techniques like color melting and shadow rooting has further expanded options for individuals seeking soft transitions and seamless blends. These advanced techniques focus on creating depth and dimension by blending multiple shades, allowing for a more sophisticated and natural appearance that enhances overall hair texture and colour.
Moreover, advancements in hair colour technology have introduced gentler formulations that reduce damage and promote hair health during the highlighting process. Professional products now often include nourishing elements that support hair integrity, allowing for beautiful results without compromising hair quality.
Overall, the evolution of highlighting techniques reflects a broader trend towards individual expression and hair health, making the highlighting process more accessible and enjoyable for all, celebrating the beauty of personalized hair colour.
Anticipated Innovations in the Future of Highlighting
The future of highlighting techniques promises exciting innovations that focus on sustainability and hair health. As consumers become more environmentally conscious, there is an increasing demand for eco-friendly hair dyes and products that prioritize natural ingredients without compromising on quality or performance.
Additionally, advances in application techniques that minimize damage while enhancing colour payoff are likely to emerge. Innovations such as non-damaging glosses and colour sprays that can temporarily add highlights without long-term commitment are expected to gain popularity, offering individuals flexibility in their hair styling choices.
Furthermore, as technology continues to evolve, we may see the introduction of more personalized hair colour consultations using digital tools that allow for precise colour matching and tailored recommendations based on individual features, preferences, and hair health.
In essence, the future of highlighting is set to integrate sustainability, health, and personalization, making it an exciting time for those seeking to enhance their hair with stunning colour that reflects their unique style and personality.
Frequently Asked Questions Regarding Highlights
What are highlights in hair?
Highlights are lighter strands of hair that are strategically placed to add depth and brightness, effectively mimicking the effects of natural sunlight and enhancing overall hair colour.
How long do highlights generally last?
Typically, highlights last between 6 to 8 weeks, depending on hair type, technique, and aftercare practices.
Can I do highlights at home?
Yes, it is entirely feasible to do highlights at home, but it requires careful application and the right products to achieve optimal results without damaging your hair.
What is the best technique for achieving natural-looking highlights?
Balayage is often recommended for a natural look, as it allows for seamless blending and soft transitions between colours, resulting in a more organic appearance.
How can I maintain the vibrancy of my highlights?
Utilize colour-safe products, avoid excessive heat styling, and incorporate regular conditioning treatments to prolong the life and appearance of your highlights.
Are there any risks associated with highlighting?
Yes, highlighting can cause some damage to hair, especially if not done correctly or if hair is already in poor condition due to prior treatments.
How do I choose the right shade for my highlights?
Determine your skin’s undertone and select shades that complement it—warm undertones suit golden hues, while cool undertones benefit from ash tones for optimal results.
How often should I plan for touch-ups of my highlights?
Touch-ups are generally recommended every 6 to 8 weeks, depending on your hair growth rate and the specific highlighting technique used.
What products should I use after highlighting my hair?
Use sulfate-free shampoos, colour-safe conditioners, deep conditioning treatments, and UV protectants to maintain the health and vibrancy of your highlights.
What are the signs that my hair needs a break from highlighting?
Signs include excessive dryness, breakage, dullness, and increased frizz, indicating that your hair may need time to recover and restore its health.
Connect with us on Facebook!
The Article: Weaving Highlights for Natural Sun-Kissed Effects: Techniques and Tips appeared first on Amitys Hair Salon.
The Article Natural Sun-Kissed Effects: Techniques for Weaving Highlights Was Found On https://limitsofstrategy.com
-

Latex Gauntlet Gloves: Best Shops and Buying Tips in Cambridge
Explore the Best Local Retailers for Premium Latex Gauntlet Gloves in Cambridge
Discover Quality Gloves at Your Neighborhood Hardware Stores
In the bustling city of Cambridge, acquiring latex gauntlet gloves is a seamless experience, thanks to a wide array of local hardware stores that showcase an extensive selection of gloves. Notable retailers such as B&Q and Homebase provide gloves in various sizes and styles, catering to both avid DIY enthusiasts and seasoned professionals. For example, B&Q offers a variety of gloves tailored for gardening, cleaning, and light industrial applications, while Homebase specializes in durable gloves that can withstand extensive wear, perfect for those requiring reliable hand protection in more strenuous environments.
Beyond the larger retail chains, smaller, independent hardware stores present unique selections that may not be found in their larger counterparts. Supporting these local businesses not only contributes to community development but also allows customers to receive tailored recommendations that align with their specific needs. The experienced staff members often possess considerable expertise and can provide valuable insights into which gloves are most suitable for particular tasks, ensuring customers make informed and confident purchasing decisions.

Shop for Professional-Quality Gloves at Specialized Safety Equipment Retailers
For those seeking top-notch latex gauntlet gloves specifically crafted for professional applications, specialized safety equipment retailers in Cambridge stand out as the premier destinations. Shops like Safety First and Cambridge Safety Supplies concentrate on personal protective equipment, offering a comprehensive range of gloves that comply with stringent industry standards. These retailers guarantee that their gloves are not only resilient but also meet essential safety regulations, making them ideal for various sectors, including healthcare, construction, and laboratory environments.
What differentiates these specialized retailers is their unwavering dedication to quality and safety. They frequently stock gloves designed with enhanced grip, exceptional chemical resistance, and ergonomic shapes that ensure comfort during prolonged wear. Moreover, the knowledgeable staff at these establishments can assist customers in navigating their choices, ensuring they select gloves that effectively meet their specific safety requirements. Opting for gloves from these retailers signifies a commitment to safety and performance in any work context.
Enjoy the Convenience of Online Shopping for Latex Gloves in Cambridge
The rise of online shopping has revolutionized how consumers acquire latex gauntlet gloves from retailers in Cambridge. Numerous local online stores cater to the needs of consumers who desire prompt delivery and a vast selection of options. Shopping online not only permits customers to explore products from the comfort of their homes but also simplifies the process of comparing prices and evaluating features.
- Glove Club Ltd. – Provides local delivery options for your convenience.
- Safety First – Features a comprehensive range of safety equipment.
- eBay Cambridge – Hosts unique and often discounted items for savvy shoppers.
- Amazon UK – Offers same-day delivery for selected items, enhancing convenience.
- Toolstation Cambridge – Ensures rapid shipping on tools and safety gear, making it an efficient option.
These online retailers typically offer detailed product descriptions, customer reviews, and easy access to sizing charts, simplifying the selection process for customers. Furthermore, many of them provide competitive pricing, making it a prudent choice for those looking to buy in bulk or seeking budget-friendly alternatives. The combination of online shopping convenience and the reliability of local retailers makes this approach a favored method for obtaining latex gauntlet gloves in Cambridge.
Understand the Advantages of Choosing Latex Gauntlet Gloves

What Contributes to the Exceptional Durability of Latex Gauntlet Gloves?
Latex gauntlet gloves are renowned for their outstanding durability, primarily attributed to the high-quality latex material used in their construction. This robust material is meticulously designed to endure significant wear and tear, rendering these gloves ideal for heavy-duty tasks. The intrinsic properties of latex enable the gloves to maintain their shape and strength after extensive use, which is crucial for professionals who depend on reliable gear every day.
- Exceptional tensile strength, preventing rips and tears even during strenuous activities.
- Resistance to a wide array of chemicals ensures extended longevity.
- Flexible design adapts seamlessly to hand movements for enhanced usability.
- Thicker material provides superior protection against abrasions and punctures.
Additionally, many latex gauntlet gloves are treated with specialized coatings that boost their chemical resistance, making them suitable for a variety of industrial and cleaning applications. Their capacity to withstand harsh conditions while retaining comfort is a significant benefit, ensuring that users can rely on them for extended periods without compromising safety or performance.
Are Latex Gauntlet Gloves Designed with User Comfort in Mind?
Comfort is a crucial factor to consider when selecting the right latex gauntlet gloves, particularly for tasks that necessitate prolonged use. These gloves are engineered to fit snugly around the hand, offering a second-skin feel that enhances dexterity and control during operation. The elasticity of latex allows users to perform intricate tasks without feeling constrained, making them ideal for jobs that require both protection and precision.
Many manufacturers prioritize comfort and have developed latex gloves featuring ergonomic designs, cushioned palms, and contoured fingers. This meticulous attention to detail ensures that the gloves conform to the natural shape of the hand, reducing fatigue during long periods of wear. Furthermore, the breathable qualities of latex help minimize sweating, thereby enhancing comfort, especially in warmer working environments.
What Are the Ideal Applications for Latex Gauntlet Gloves?

Latex gauntlet gloves are incredibly versatile, making them suitable for a multitude of environments, which is why they remain a favored choice among both professionals and DIY enthusiasts. They are particularly effective for cleaning tasks, providing outstanding protection against chemicals and dirt, making them indispensable in homes, laboratories, and industrial settings. Their flexibility also facilitates easy handling of tools and equipment, which is essential across various trades.
Gardening is another domain where latex gauntlet gloves shine. They offer ample protection against thorns and sharp objects while allowing for the careful handling of plants. Furthermore, in the culinary sector, these gloves ensure hygiene and safety during food preparation and handling, making them essential items in professional kitchens and catering operations.
Overall, the adaptability of latex gauntlet gloves makes them suitable for an expansive range of applications, from household chores to professional tasks, guaranteeing that users remain safe and comfortable, regardless of the job at hand.
How Do Latex Gauntlet Gloves Enhance Workplace Safety?
Safety is paramount when utilizing latex gauntlet gloves, especially in environments where users may encounter hazardous materials. These gloves are strategically designed to provide a high level of protection against chemicals, sharp tools, and other potential dangers. The durable latex material acts as a barrier, preventing harmful substances from contacting the skin, which is critical across various industries, including healthcare and construction.
Moreover, latex gauntlet gloves undergo rigorous testing for puncture and tear resistance, ensuring they can withstand the demands of challenging tasks. This level of protection is essential for professionals operating in high-risk environments, as it significantly diminishes the likelihood of injury or contamination. Many gloves are also fashioned with longer cuffs, which offer additional protection for the forearms, further bolstering safety during use.
What Environmental Considerations Should Be Taken into Account When Using Latex Gauntlet Gloves?
The environmental implications of latex gauntlet gloves are becoming increasingly significant as consumers develop heightened eco-awareness. One of the primary benefits of latex gloves is their biodegradable nature, which means they naturally decompose over time, helping to mitigate their long-term effects on landfills. However, it is essential to evaluate the entire lifecycle of these gloves, as their production can have ecological consequences due to resource consumption and chemical treatments.
While latex is sourced from the sap of rubber trees—a renewable resource—the cultivation of these trees can lead to deforestation if not managed sustainably. Additionally, the manufacturing process of latex gloves often entails a variety of chemicals, some of which may pose environmental hazards if not handled responsibly. Therefore, consumers should seek manufacturers that prioritize sustainability and responsible material sourcing, ensuring their purchasing decisions positively impact the environment.
Glean Expert Insights on Purchasing Latex Gauntlet Gloves in Cambridge
What Do Experts Recommend Regarding the Quality of Latex Gloves?
Professionals in the field of personal protective equipment underscore the importance of prioritizing quality when selecting latex gauntlet gloves. They highlight that gloves with a high latex content typically deliver superior performance, flexibility, and durability. Real-world examples demonstrate that industry professionals consistently favor gloves from reputable brands known for their strict quality control practices. Numerous cleaning companies, for instance, trust gloves from brands like Marigold and Ansell, citing their reliability and comfort during extended use.
Furthermore, experts recommend verifying certifications, such as those from the British Standards Institution (BSI), which signify that the gloves have undergone comprehensive testing to satisfy safety and quality benchmarks. This is particularly crucial for individuals operating in environments where exposure to hazardous materials poses a risk. Investing in high-quality gloves not only enhances user safety but also minimizes the need for frequent replacements, ultimately leading to cost savings over time.
How Can You Identify the Correct Size of Gloves?
Choosing the appropriate size of latex gauntlet gloves is vital for ensuring optimal comfort and functionality. Experts advise trying on gloves before purchasing to ensure a perfect fit. A glove that is too tight may restrict movement and cause discomfort, while one that is too loose may compromise safety, as it could slip off during use.
To ascertain the correct size, measure the circumference of your hand at its widest point, typically around the knuckles, and compare this measurement with the manufacturer’s sizing chart. Most brands offer gloves in a range of sizes from small to extra-large, with some even providing half sizes for a more precise fit. Additionally, consider the glove’s length; longer gauntlets provide added forearm protection, which may be necessary for certain tasks.
Which Brands Are Preferred by Professionals?
Industry professionals consistently gravitate towards established brands when selecting latex gauntlet gloves to ensure dependability and performance. Brands such as Marigold and Ansell frequently arise in industry discussions regarding their commitment to quality and safety. These brands have earned a reputation for producing gloves that not only protect the hands but also provide comfort and dexterity, essential for various tasks.
Additionally, Showa and Stanley have gained popularity among professionals due to their innovative designs and high-performance materials. Many users report that gloves from these brands excel in challenging conditions, allowing for prolonged wear without compromising safety. Ultimately, investing in reputable brands can significantly enhance the overall effectiveness and satisfaction experienced when utilizing latex gauntlet gloves.
Essential Maintenance Tips for Your Latex Gauntlet Gloves
What Is the Most Effective Method for Cleaning Latex Gloves?
To uphold the integrity of latex gauntlet gloves and prolong their lifespan, proper cleaning is crucial. The most efficient method involves washing the gloves with mild soap and lukewarm water immediately after use. Upon cleaning, it is essential to rinse thoroughly to eliminate any soap residue, as leftover soap can deteriorate the latex material over time.
During the cleaning process, avoid using harsh chemicals or bleach, as these substances can hasten the breakdown of the gloves. Instead, opt for a gentle detergent that effectively removes dirt and contaminants without causing harm to the material. After washing, allow the gloves to air dry completely before storing them, as moisture can lead to mold growth or material degradation. By adhering to proper care practices, users can extend the longevity of the gloves while maintaining their protective qualities, ensuring user safety during subsequent uses.
Is It Possible to Repair Damaged Latex Gloves?
While latex gauntlet gloves are designed for resilience, minor damage can occur, especially with frequent use. Many users wonder if they can repair such gloves instead of discarding them. The answer is affirmative; minor tears can often be mended using specialized latex repair kits available at safety equipment outlets in Cambridge. These kits typically include a latex adhesive designed to bond the material, allowing for continued use.
Before attempting any repairs, it is vital to assess the damage thoroughly. If a glove displays significant tears or punctures, it may be prudent to replace it entirely to ensure safety. However, for smaller rips, adhering to the instructions provided with the repair kit can effectively restore functionality. Being able to repair gloves not only saves money but also reduces waste, fostering more sustainable practices.
What Are the Recommended Storage Practices for Latex Gauntlet Gloves?
Proper storage of latex gauntlet gloves is essential to prevent material degradation and extend their lifespan. Gloves should be kept in a cool, dry location, away from direct sunlight and extreme temperatures, as both can damage the latex and compromise its protective qualities. Avoid placing gloves in damp areas, as excess moisture can encourage mold growth and material deterioration.
When not in use, it is advisable to hang the gloves or store them in a breathable container to facilitate air circulation. Refrain from folding or creasing the gloves, as this can lead to cracks and weaken the material over time. By following these storage recommendations, users can ensure that their latex gauntlet gloves remain in optimal condition, ready for use whenever needed.
Investigate the Benefits of Choosing Latex Gauntlet Gloves
Do Latex Gauntlet Gloves Offer Superior Chemical Resistance?
Among the standout features of latex gauntlet gloves is their exceptional chemical resistance, rendering them particularly well-suited for laboratory work, cleaning tasks, and other environments with a risk of exposure to harmful substances. The natural characteristics of latex enable these gloves to serve as a barrier against a wide spectrum of chemicals, preventing skin contact and potential harm.
Numerous professionals in the cleaning and healthcare sectors rely on latex gloves specifically for their chemical resistance. They effectively shield against common cleaning agents, disinfectants, and biological contaminants, providing peace of mind during tasks that may involve hazardous materials. This level of protection is crucial for upholding safety standards across a multitude of industries, ensuring users can perform their responsibilities without the risk of exposure to harmful substances.
Are Latex Gauntlet Gloves a Cost-Effective Choice?
When evaluating personal protective equipment, latex gauntlet gloves are frequently regarded as a cost-effective option due to their durability and reusability. Unlike single-use gloves, high-quality latex gauntlet gloves can withstand multiple uses when properly cared for, significantly reducing overall costs over time. This is particularly advantageous for professionals who require gloves regularly, such as those in healthcare or cleaning roles.
By investing in durable gloves, users can minimize the need for frequent replacements, making this a financially sound decision. Furthermore, many retailers offer bulk purchase options, providing additional savings while ensuring that users always have a dependable supply of gloves on hand. The combination of longevity and affordability makes latex gauntlet gloves a wise investment for anyone in need of effective hand protection.
How Do Latex Gauntlet Gloves Enhance Safety Standards?
Enhancing safety remains one of the primary motivations for utilizing latex gauntlet gloves. These gloves serve to protect hands from harmful substances, sharp objects, and potential infections, making them indispensable in numerous settings. The durable latex material provides a reliable barrier against chemicals and pathogens, significantly reducing the risk of exposure and injury.
In addition to offering a physical barrier, latex gauntlet gloves can also improve grip and dexterity, enabling users to handle tools and materials with greater effectiveness. This blend of protection and functionality is critical in many professional environments, contributing to a safer and more efficient workplace. Ultimately, utilizing latex gloves serves as a proactive measure in maintaining health and safety standards across various industries.
Can Latex Gauntlet Gloves Enhance Grip and Dexterity?
A notable advantage of latex gauntlet gloves is their ability to improve grip and dexterity, making them especially valuable for tasks that necessitate precision and fine motor control. The textured surface of many latex gloves provides a secure hold on a variety of objects, from tools to delicate materials. This enhanced grip is vital for professionals operating in fields such as construction, healthcare, and cleaning, where control and accuracy are paramount.
Moreover, latex gloves are designed to fit snugly around the fingers, ensuring that users can perform intricate tasks without feeling restrained. This combination of comfort and functionality allows for effective handling of items, whether in a laboratory environment or during routine maintenance tasks. Consequently, latex gauntlet gloves not only provide protection but also empower users to execute their responsibilities with confidence and precision.
Are Latex Gauntlet Gloves Comfortable for Prolonged Use?
Comfort plays a crucial role when evaluating latex gauntlet gloves, particularly for tasks that require extended wear. These gloves are crafted with user comfort in mind, featuring designs that contour to the natural shape of the hand. This ergonomic fit ensures minimal fatigue, allowing users to wear them for extended periods without discomfort.
The flexible composition of latex further enhances comfort, enabling smooth hand movements without restriction. Many gloves are constructed from breathable materials that help reduce sweating, thereby improving comfort during prolonged use. Ultimately, the combination of ergonomic design and breathable material makes latex gauntlet gloves an excellent option for individuals requiring reliable protection without sacrificing comfort.
Research-Backed Insights on Choosing Latex Gauntlet Gloves in Cambridge
What Do Studies Reveal About the Efficacy of Latex Gloves?
Research consistently indicates that latex gauntlet gloves are highly effective in preventing skin contact with hazardous materials, a crucial factor for anyone operating in environments where safety is paramount. Studies demonstrate that these gloves significantly lower the risk of contamination and exposure, particularly in healthcare settings where infection control is critical.
Experts analyzing these findings suggest that the protective qualities of latex gloves are further enhanced when users receive comprehensive training in their application. For example, proper donning and doffing techniques can minimize the risk of cross-contamination, underscoring the importance of organizations providing thorough training. In conclusion, the effectiveness of latex gauntlet gloves in preventing exposure to hazardous materials is well-supported by research, emphasizing their significance across various professional fields.
How Do Latex Gloves Compare to Alternative Materials?
When comparing latex gauntlet gloves to alternative materials such as nitrile or vinyl, studies reveal that latex gloves offer superior flexibility and tactile sensitivity. This characteristic makes them an ideal choice for tasks requiring dexterity, as they allow users to feel and manipulate objects with greater precision. In contrast, while nitrile gloves provide excellent puncture resistance, they often lack the same level of tactile feedback as latex gloves.
Additionally, latex gloves are generally more elastic, allowing them to stretch and fit closely to the hand. This feature not only enhances comfort but also improves grip, making latex a preferred option for many professionals. While each glove material has its pros and cons, latex remains a top choice for those prioritizing both protection and sensitivity in their work.
Do Latex Gloves Offer Health Benefits?
Utilizing latex gauntlet gloves can confer several health benefits, particularly in reducing the risk of skin conditions like dermatitis caused by exposure to harsh chemicals. Healthcare professionals, for instance, frequently rely on latex gloves to mitigate the risk of cross-contamination and infections, thus protecting both their health and their patients.
Moreover, the protective barrier provided by latex gloves can help prevent minor injuries resulting from cuts or abrasions while handling sharp objects or tools. This additional layer of protection is essential for individuals working in environments where the risk of injury is heightened. Overall, the use of latex gauntlet gloves not only enhances safety but also contributes to improved overall health for individuals employed across various industries.
Essential Considerations for Purchasing Latex Gauntlet Gloves in Cambridge
Where Can You Discover the Best Deals on Gloves?
Locating the best deals on latex gauntlet gloves in Cambridge can yield considerable savings, especially for regular users. Local retailers frequently run promotional sales and discounts that can provide substantial savings. Inquiring with stores like B&Q or Homebase may reveal seasonal promotions, particularly during spring cleaning or back-to-school periods.
Online platforms also present competitive pricing, with websites like Amazon and eBay frequently featuring deals on bulk purchases. Subscribing to newsletters from these retailers can grant early access to sales, ensuring customers do not miss out on great bargains. By combining local shopping with online opportunities, consumers can efficiently find the best prices on latex gauntlet gloves.
Is Bulk Buying a Wise Strategy?
For individuals who consistently require latex gauntlet gloves, purchasing in bulk often proves to be a shrewd choice. Acquiring larger quantities can result in significant savings per unit, making this approach both economical and practical. Many safety equipment suppliers in Cambridge offer bulk pricing options, further encouraging this purchasing strategy.
By investing in a bulk supply of gloves, users can ensure they always have access to the necessary protective gear, minimizing the risk of running out during critical tasks. This strategy is particularly beneficial for businesses that depend on gloves as part of their daily operations, as it streamlines procurement processes and can ultimately lead to lower overall costs.
What Key Features Should You Consider in Product Descriptions?
When searching for latex gauntlet gloves, paying close attention to product descriptions is crucial for ensuring you select the right gloves that meet your needs. Important features to evaluate include thickness, length, and any certifications that indicate compliance with safety standards. Thicker gloves generally provide better protection against cuts and chemicals, while longer gloves offer additional coverage for the forearms.
- Thickness of the glove for enhanced durability and protection.
- Length for extra forearm coverage to safeguard against exposure.
- Texture to enhance grip and handling capabilities.
- Compliance certifications (e.g., CE marking) to ensure safety standards.
- Available size options to suit different hand dimensions.
Additionally, reviewing customer feedback can offer insights into the gloves’ performance, comfort, and durability. By thoroughly analyzing product descriptions and customer reviews, buyers can make informed decisions that ensure they select the most suitable gloves for their specific applications.
Are Local Shops or Online Retailers Better for Shopping?
When it comes to acquiring latex gauntlet gloves, both local shops and online retailers present unique advantages. Local stores in Cambridge offer the benefit of immediate product access, allowing users to try on gloves for size and comfort before purchasing. This tactile shopping experience can be particularly beneficial for those who prefer a hands-on approach.
Conversely, online retailers often boast a more extensive selection and competitive pricing, along with the convenience of doorstep delivery. Many local retailers also maintain online platforms, providing the best of both worlds. Ultimately, the decision between local shops and online purchasing will depend on individual preferences regarding convenience, selection, and immediacy.
How Can You Ensure an Accurate Fit for Gloves?
Ensuring a proper fit for latex gauntlet gloves is essential for both comfort and effectiveness. To achieve this, measure the circumference of your hand at its widest point, typically around the knuckles. This measurement will help you determine the appropriate size using the manufacturer’s sizing chart.
Moreover, consider the glove’s length; longer models provide enhanced forearm protection, which may be necessary for specific tasks. It is advisable to try on different sizes and styles to find the best fit, as sizing standards can vary between brands. By taking the time to ensure a proper fit, users can significantly enhance their safety and comfort while using latex gauntlet gloves.
Frequently Asked Questions
What are the primary applications of latex gauntlet gloves?
Latex gauntlet gloves are utilized for various applications, including cleaning, gardening, and industrial tasks, providing essential protection against chemicals and sharp objects.
Can latex gauntlet gloves be reused multiple times?
Yes, high-quality latex gauntlet gloves can be reused several times when cleaned and maintained properly.
What steps can I take to extend the life of my latex gloves?
To enhance the longevity of latex gloves, clean them using mild soap and water, allow them to air dry, and store them in a cool, dry place away from sunlight.
Is it possible for individuals to be allergic to latex gloves?
Yes, some individuals may develop a latex allergy, leading to skin irritation or more severe reactions. In such instances, it is advisable to consider alternative materials, such as nitrile.
Where can I find latex gauntlet gloves in Cambridge?
Latex gauntlet gloves can be found at local hardware stores, specialized safety equipment retailers, and various online platforms in Cambridge.
What thickness of latex glove should I select based on usage?
The thickness of the glove should depend on the intended application; thicker gloves provide better protection against cuts and chemicals, while thinner gloves offer greater dexterity.
Are biodegradable latex gloves available in the market?
Yes, many latex gloves are biodegradable, making them a more environmentally friendly option compared to synthetic alternatives.
How can I determine the appropriate size of latex gloves to purchase?
To determine your glove size, measure the circumference of your hand at its widest point and compare it to the manufacturer’s size chart.
What should I examine when purchasing latex gloves online?
When buying latex gloves online, scrutinize product descriptions for details regarding thickness, length, and certifications, and read customer reviews for insights on performance.
Do latex gloves provide sufficient protection in medical settings?
Yes, latex gauntlet gloves are widely used in medical environments for their excellent barrier protection against infections and contaminants, provided there are no latex allergies among patients or staff.
Connect with us on Facebook!
The Article: Buy Latex Gauntlet Gloves in Cambridge: Best Shops and Tips first published on https://www.gloveclub.co.uk
The Article Latex Gauntlet Gloves in Cambridge: Top Shops & Buying Tips Was Found On https://limitsofstrategy.com
-

Tobacco Bronde Essentials: A Quick Guide for You
Comprehensive Guide to Understanding Tobacco Bronde Essentials
Defining Tobacco Bronde: What Distinguishes Its Unique Composition?
Tobacco bronde is an intricate and captivating mixture of tobacco that has garnered significant interest in various consumer markets, particularly within smoking and vaping communities. Understanding its multifaceted composition is essential for both manufacturers and consumers, as it directly influences product quality and overall enjoyment. Tobacco bronde is more than just individual tobacco leaves; it combines a diverse range of elements that work together to create its unique characteristics. The following outlines the critical components that define tobacco bronde:
- Tobacco Leaves: These serve as the foundational elements, delivering essential flavor and nicotine levels required for the product.
- Natural Flavourings: These enhancements introduce distinctive tastes and aromas that elevate the overall appeal of the final product.
- Preservatives: Vital components that ensure product longevity and maintain integrity throughout its shelf life.
- Humectants: These substances help retain moisture, ensuring the tobacco remains fresh and enjoyable for users.
- Binders: Ingredients that maintain the blend’s consistency and texture, providing a seamless experience for the user.
This sophisticated mixture results in a product that appeals to a wide audience, showcasing a rich array of flavors and aromas that cater to diverse preferences.
Understanding the Importance of Quality in Tobacco Bronde Products
The quality of tobacco bronde profoundly affects both its flavor profile and the safety of the product. Upholding high-quality standards during production not only augments the consumer experience but also ensures adherence to regulatory requirements, which is increasingly significant in today’s health-conscious market. Informed consumers actively seek high-quality products that guarantee both satisfaction and safety, prompting manufacturers to invest in sourcing premium tobacco leaves while refining their production methods to meet these elevated expectations.
Moreover, emphasizing quality transcends mere taste; it encompasses strict adherence to safety standards that are vital in the tobacco industry. Implementing rigorous quality control measures helps prevent contamination and keeps harmful substances at bay, thereby protecting both producers and consumers. As global regulations tighten, the demand for high-quality tobacco bronde is soaring, motivating producers to innovate and strive for excellence in their product offerings.
Tracing the Historical Evolution of Tobacco Bronde
The historical trajectory of tobacco bronde is extensive and intricate, tracing back centuries to indigenous cultures that revered tobacco for its spiritual and medicinal properties. Over time, the methods for cultivating, curing, and blending tobacco have evolved significantly, resulting in the refined products available today. The evolution of tobacco bronde mirrors broader societal shifts, including changes in consumer preferences and advancements in agricultural practices.
Initially, tobacco was typically enjoyed in its natural form, with minimal emphasis on flavor enhancements. However, as global trade expanded, producers began experimenting with various curing techniques and flavoring agents, leading to early blends that bear resemblance to modern tobacco bronde. The industrial revolution further expedited advancements in production processes, facilitating mass production and distribution, which opened up new markets and consumer demographics.
As awareness of health implications surged, particularly in the late 20th century, the industry confronted challenges related to safety and regulation. This prompted the emergence of quality-focused practices and innovations in product offerings, as consumers increasingly sought safer alternatives without compromising flavor. The legacy of tobacco bronde continues to evolve today, reflecting a dynamic interplay between tradition and contemporary consumer demands.
Essential Ingredients That Define Tobacco Bronde

Identifying the Core Components of Tobacco Bronde
The fundamental components of tobacco bronde comprise tobacco leaves, flavorings, and preservatives. Each ingredient plays a crucial role in shaping the final product’s characteristics. Tobacco leaves act as the base, providing not only essential nicotine but also the primary flavor profile that consumers associate with various tobacco products. The quality and variety of these leaves can dramatically influence the overall taste and aroma of tobacco bronde.
Flavorings constitute another essential component. They can range from natural extracts sourced from fruits and spices to synthetic compounds engineered to replicate specific tastes. These enhancements are vital for appealing to a broader customer base, especially among those seeking alternatives to traditional tobacco flavors. By incorporating unique flavor profiles, producers can craft distinctive products that stand out in a competitive market.
Preservatives, often overlooked, hold equal significance. They prolong the shelf life of tobacco bronde, ensuring that it remains fresh and of high quality over time. Additionally, preservatives help inhibit the growth of harmful microorganisms, thus enhancing consumer safety. Carefully selecting and balancing these ingredients is crucial for achieving a consistent and desirable product.
The Role of Additives in Enhancing Tobacco Bronde Products
Additives in tobacco bronde are pivotal for improving the overall appeal and functionality of the product. They can influence multiple attributes, including flavor, shelf life, and burning properties, which are all essential for market success. With a diverse consumer landscape, producers increasingly rely on additives to cater to varying tastes and preferences, making their products more attractive to potential buyers.
Flavor enhancers, for instance, can significantly transform the sensory experience of using tobacco bronde. By introducing new taste elements, manufacturers can attract consumers who may be searching for a distinctive flavor experience or those looking to transition from traditional tobacco varieties. This diversity not only broadens the appeal of tobacco bronde but also allows brands to differentiate themselves in a crowded marketplace.
Moreover, certain additives can enhance the burning qualities of tobacco products, resulting in a smoother and more enjoyable experience. High-quality burning properties ensure even consumption of the product, which is crucial for many users. Additionally, additives that function as humectants help retain moisture within the blend, preventing tobacco bronde from drying out, which can negatively impact both flavor and usability.
The meticulous selection and application of additives can create a product that not only meets but exceeds consumer expectations, ultimately enhancing marketability and fostering brand loyalty.
The Critical Importance of Curing in Tobacco Bronde Production

Curing is an essential process in the production of tobacco bronde, significantly affecting the flavor and aroma of the final product. This intricate procedure is not merely a step; it embodies an art form that requires expertise and a profound understanding of the tobacco leaf aging process. Curing involves drying and fermenting the tobacco leaves to unlock their full potential, transforming them from raw plant material into a product ready for blending and consumption.
Different curing methods yield varied results, each contributing unique flavor profiles and characteristics to tobacco bronde. For example, air curing allows the leaves to dry gradually, resulting in a sweeter and milder flavor. In contrast, fire curing exposes the leaves to smoke from burning wood, imparting a robust and smoky taste, appealing to a specific segment of consumers. Manufacturers must skillfully choose the appropriate curing technique based on the desired outcome, balancing flavor, aroma, and market trends.
Additionally, the duration of the curing process can also significantly influence the quality of the final product. A longer curing time typically enhances flavor depth, while a shorter period may preserve a more vibrant character. This nuanced understanding of curing techniques is essential for producers aiming to create well-rounded and appealing tobacco bronde.
The significance of curing extends beyond flavor; it also affects the overall quality and safety of the product. Properly cured tobacco is less likely to harbor harmful substances, making it a vital step in ensuring consumer safety and satisfaction.
How Ingredient Blends Impact the Quality of Tobacco Bronde
The combination of ingredients utilized in tobacco bronde production profoundly influences its quality, taste, and aroma. A well-crafted blend not only elevates the overall experience for consumers but also determines how the product is perceived in the marketplace. The balance between various components—tobacco leaves, flavorings, and preservatives—must be meticulously managed to achieve the desired outcome.
First and foremost, the selection of tobacco leaves is crucial. Different varieties possess unique flavor notes and nicotine content that can significantly impact the final product. For instance, Virginia tobacco offers a natural sweetness, while Burley tobacco provides a richer and nuttier profile. By thoughtfully blending these leaves, producers can create a harmonious flavor experience that resonates with a broad audience.
In addition to the tobacco itself, flavorings are vital in shaping the sensory aspects of tobacco bronde. The right combination can enhance or complement the natural flavors of the tobacco leaves, adding layers of complexity that entice consumers. However, overly dominant flavors can overshadow the tobacco’s characteristics, highlighting the importance of balance in the blending process.
Moreover, incorporating preservatives and humectants plays a pivotal role in maintaining product integrity and quality over time. A well-balanced blend ensures that tobacco bronde retains its moisture and flavor, delivering a consistent experience for the consumer. When producers master the art of blending, they create a product that resonates deeply with users, fostering loyalty and setting the stage for long-term success.
Thorough Analysis of Tobacco Bronde Manufacturing Processes
Critical Steps in the Production of Tobacco Bronde
The manufacturing of tobacco bronde encompasses several essential steps, each contributing to the quality and appeal of the final product. Understanding these processes is crucial for producers aiming to create superior offerings while navigating the complex landscape of tobacco manufacturing.
The initial phase involves harvesting, where mature tobacco leaves are carefully selected to ensure that only the highest quality leaves are utilized. Timing is essential; leaves must be harvested at the optimal moment to attain the best flavor and nicotine content. After harvesting, the leaves undergo the curing process, which significantly influences their flavor and aroma, as previously discussed.
Following curing, the leaves are sorted based on size, quality, and other characteristics. This step is crucial as it allows manufacturers to blend different types of tobacco leaves to achieve the desired flavor profile. The sorting process ensures that only the finest leaves are incorporated into the final product, upholding high standards.
Next, the blending of tobacco leaves with flavorings and preservatives takes place. This stage showcases the creativity of producers as they balance various elements to create a distinctive and appealing tobacco bronde. The blending process is often accompanied by additional quality control checks to ensure consistency and safety.
The final step involves packaging, where the tobacco bronde is carefully packed to preserve its freshness and flavor while considering consumer appeal. Proper packaging is vital for protecting the product during distribution and storage, further emphasizing the importance of quality throughout the manufacturing process.
Impact of Automation on Tobacco Bronde Manufacturing
Automation has transformed the manufacturing processes within the tobacco bronde industry, resulting in enhanced efficiency and consistency. Modern technology plays a significant role in streamlining production, enabling manufacturers to meet rising consumer demand while maintaining high-quality standards.
One of the primary benefits of automation is the ability to standardize processes. Automated systems can monitor and adjust various parameters throughout production, such as temperature and humidity during curing, ensuring that each batch meets specific quality criteria. This consistency is vital, as fluctuations in these conditions can lead to variations in flavor and aroma, potentially affecting consumer satisfaction.
Additionally, automation decreases the risk of human error, which can occur during manual processes. By integrating technology, manufacturers can minimize inconsistencies and enhance overall product quality. This is particularly important in an industry where consumer expectations are high and competition is fierce.
Beyond production efficiency, automation facilitates effective scaling of operations. As demand for tobacco bronde products grows, automated systems can accommodate larger production volumes without compromising quality. This scalability ensures that companies can respond swiftly to market trends and consumer preferences, positioning them for success in a rapidly evolving landscape.
Furthermore, incorporating automation into tobacco bronde manufacturing often leads to long-term cost savings. By optimizing production processes and reducing waste, companies can boost their profitability while continuing to deliver high-quality products to consumers.
Quality Control Measures in Tobacco Bronde Production
Quality control is a fundamental aspect of tobacco bronde production, ensuring safety and consistency in the final product. Rigorous testing and monitoring throughout the manufacturing process are standard practices that help producers maintain high standards and build trust with consumers.
A critical stage in quality control occurs during the sourcing of raw materials. Producers must meticulously select tobacco leaves based on specific criteria, such as moisture content, size, and aroma. Regular inspections of these materials ensure that only the best leaves are used, directly impacting the quality of the final blend.
In addition to raw material inspection, various quality control tests are conducted throughout the production process. These may include sensory evaluations, where trained panels assess the flavor, aroma, and overall quality of the tobacco bronde. Chemical testing is also crucial, as it helps identify harmful substances and ensures compliance with industry regulations.
Furthermore, regular audits and checks throughout the manufacturing process help uncover potential issues before they escalate. By implementing stringent quality control measures, producers can ensure that their tobacco bronde meets both safety standards and consumer expectations, fostering loyalty in an increasingly discerning market.
Investing in quality control not only protects consumers but also enhances the producer’s reputation. In an industry facing ongoing scrutiny over health and safety concerns, prioritizing quality can differentiate a brand and establish it as a trusted source of tobacco products.
Expert Insights on Tobacco Bronde Essentials
Evaluating the Quality of Tobacco Bronde: Expert Methodologies
Experts assess the quality of tobacco bronde through a blend of sensory analysis, chemical testing, and compliance with industry standards. This multifaceted approach enables a comprehensive evaluation of the product, ensuring it fulfills both consumer expectations and safety regulations.
Sensory analysis is arguably the most vital component of quality evaluation. Trained panels assess flavor, aroma, and the overall experience of smoking or vaping the product. This subjective analysis is crucial in determining whether a tobacco bronde meets the desired characteristics that consumers seek. Factors such as aftertaste, smoothness, and richness of flavor are all critical components evaluated during this process.
Moreover, chemical testing is essential for identifying and quantifying various compounds present in tobacco bronde. This includes checking nicotine levels and ensuring that harmful substances, such as tar and heavy metals, are within acceptable limits. Compliance with industry regulations is vital, as it not only safeguards consumer health but also bolsters the brand’s credibility.
Additionally, adherence to industry standards—such as those set by health organizations and regulatory bodies—forms the backbone of expert evaluation. Brands that consistently comply with these standards are often viewed as more trustworthy and reputable by consumers. By integrating these evaluation methods, producers can confidently assure their customers of the quality and safety of their tobacco bronde products.
Real-world examples of quality evaluation techniques include implementing ISO-certified testing labs for chemical analysis and collaborating with sensory experts for flavor profiling. These practices enable producers to maintain high standards and continuously improve their offerings in a competitive marketplace.
Current Trends Influencing Tobacco Bronde Development
The latest trends in tobacco bronde reflect a shifting landscape shaped by consumer preferences and heightened awareness of health issues. One of the most significant movements is the rising demand for natural flavorings and sustainable production methods. Consumers are becoming more health-conscious, leading to a preference for products that prioritize natural ingredients over synthetic ones.
Natural flavorings are gaining traction as consumers seek to avoid artificial additives. This trend aligns with a broader movement toward cleaner, healthier products across various sectors. Producers are responding by exploring unique flavor profiles derived from fruits, herbs, and spices, which not only enhance the sensory experience but also appeal to a more discerning audience.
Sustainability is another critical trend in the tobacco bronde industry. As environmental awareness grows, consumers increasingly favor brands that adopt eco-friendly practices. This includes sourcing tobacco from sustainable farms, reducing carbon footprints, and implementing waste reduction initiatives. Companies that successfully integrate sustainability into their production processes often find themselves at a competitive advantage, resonating with consumers who prioritize ethical consumption.
Additionally, there is a noticeable shift towards innovative packaging solutions. Brands are investing in packaging that not only protects the product but also enhances its appeal through eco-friendly materials and eye-catching designs. This focus on aesthetics and sustainability is becoming a significant aspect of brand identity in the tobacco bronde market.
Expert analysis indicates that these trends will continue to shape the industry in the coming years. Producers who adapt to these changes and align their products with consumer values are likely to thrive in an increasingly competitive market.
Expert Recommendations for Enhancing Tobacco Bronde Quality
Experts recommend that producers focus on natural ingredients and innovative curing techniques to improve the quality of tobacco bronde. By prioritizing these aspects, manufacturers can create products that resonate more deeply with health-conscious consumers while preserving the rich flavors that traditional tobacco users appreciate.
To enhance the use of natural ingredients, producers should strive to source high-quality, organic tobacco leaves and flavorings that align with consumer preferences for cleaner products. This shift not only appeals to a growing demographic but also helps cultivate a reputation for quality and sustainability—two essential attributes in today’s market.
In addition to sourcing, embracing innovative curing techniques can significantly impact the final product’s quality. For example, exploring alternative curing methods, such as controlled fermentation or different wood types for drying, can yield unique flavor profiles that stand out in a crowded marketplace. Experimenting with these techniques allows producers to differentiate their products and cater to niche markets, enhancing their overall appeal.
Moreover, investing in research and development is crucial for staying ahead of trends. Producers should continuously evaluate consumer feedback and market data to identify emerging preferences and adapt their offerings accordingly. This proactive approach can help manufacturers not only meet but exceed consumer expectations, establishing themselves as leaders in the tobacco bronde sector.
By following these expert recommendations, producers can enhance their products, build consumer loyalty, and thrive in an evolving industry while promoting a sustainable and health-conscious brand image.
Health and Safety Considerations of Tobacco Bronde
Identifying Health Risks Associated with Tobacco Bronde Usage
Tobacco bronde, like all tobacco products, contains nicotine and other harmful substances, presenting several health risks to consumers. The most pressing concern is addiction, as nicotine is a highly addictive compound that can lead to long-term dependence. This addiction not only affects individual users but also contributes to broader public health challenges associated with tobacco consumption.
In addition to addiction, tobacco bronde can lead to various respiratory issues. The inhalation of smoke, regardless of the product type, exposes users to harmful chemicals, potentially resulting in lung damage, chronic bronchitis, and an increased risk of lung cancer. As awareness of these risks continues to grow, many consumers are seeking alternatives that provide a fulfilling experience without the associated health hazards.
Moreover, the presence of other harmful substances in tobacco bronde, such as tar and carbon monoxide, complicates the health implications further. These compounds can contribute to cardiovascular diseases and exacerbate existing health conditions. Therefore, it is vital for consumers to be informed about these risks and make educated choices regarding their tobacco use.
Understanding these health risks is essential for promoting responsible consumption. By raising awareness about the potential dangers of tobacco bronde, consumers can make informed decisions and seek out safer alternatives when available.
Understanding Safety Regulations Governing Tobacco Bronde Products
Safety regulations play a crucial role in ensuring that tobacco bronde products meet established health standards. Regulatory bodies worldwide impose strict guidelines that producers must follow to safeguard consumer health. These regulations encompass various aspects of production, including the sourcing of raw materials, manufacturing processes, labeling, and marketing practices.
Manufacturers are required to conduct regular testing to verify that their products comply with safety standards. This includes assessing the levels of harmful substances, such as nicotine, tar, and other chemicals. By adhering to these regulations, producers can ensure that their tobacco bronde products are safe for consumption and minimize the risk of health-related issues linked to tobacco use.
Additionally, regulations often mandate clear labeling, providing consumers with critical information regarding the ingredients and potential health risks associated with tobacco bronde. Transparent labeling empowers consumers to make informed choices and encourages manufacturers to maintain high standards of quality and safety.
The importance of compliance with safety regulations cannot be overstated; it not only protects consumers but also enhances the credibility and reputation of tobacco brands. Producers who prioritize safety and adhere to regulatory guidelines are more likely to build trust and loyalty among their customer base.
In an industry facing increasing scrutiny, aligning with safety regulations is not merely a legal obligation; it is a fundamental principle of ethical business practice that promotes public health and consumer well-being.
Strategies for Consumers to Mitigate Health Risks Associated with Tobacco Bronde
Consumers can minimize health risks related to tobacco bronde by adopting responsible usage practices and remaining aware of their nicotine intake. While the most effective way to reduce health risks is to quit using tobacco altogether, for those who choose to partake, several strategies can help mitigate potential dangers.
- Set Limits: Establish a personal limit on consumption to reduce overall exposure to harmful substances.
- Stay Informed: Educate yourself about the ingredients in tobacco bronde products to make informed choices.
- Choose Quality Brands: Opt for reputable brands that prioritize safety and adhere to regulations.
- Monitor Symptoms: Be vigilant about any adverse health effects and consult a medical professional if concerns arise.
- Consider Alternatives: Explore nicotine-free or less harmful options as substitutes for traditional tobacco bronde.
Implementing these strategies can help consumers enjoy tobacco bronde products while being mindful of their health. By taking a proactive approach to usage and remaining informed about the potential risks, individuals can make choices that better align with their health goals.
Ultimately, understanding the health implications of tobacco bronde is essential for fostering a responsible consumption culture and promoting awareness about safer alternatives.
Marketing and Branding Strategies for Tobacco Bronde
Effective Marketing Techniques for Tobacco Bronde Products
Marketing tobacco bronde effectively requires a profound understanding of consumer preferences and innovative branding techniques. As the market becomes increasingly saturated, producers must develop creative campaigns that resonate with their target audience while adhering to regulatory constraints on tobacco advertising.
One effective strategy is to emphasize the unique qualities and craftsmanship of the tobacco bronde product. By highlighting the blend of ingredients, the curing process, and the brand’s heritage, manufacturers can establish an emotional connection with consumers who value authenticity and quality. Storytelling plays a crucial role here; brands that convey their narratives compellingly often build stronger relationships with their customers.
Another important strategy is to leverage digital marketing platforms to reach a broader audience. Social media, in particular, provides a valuable avenue for engaging consumers through interactive content, educational resources, and brand storytelling. By creating visually appealing campaigns that showcase the product’s attributes, brands can capture the attention of potential customers and encourage them to explore their offerings further.
Additionally, collaborations with influencers in the tobacco and lifestyle sectors can amplify brand presence. Partnering with individuals who resonate with target demographics can enhance credibility and attract new consumers to the brand. These partnerships must be carefully considered to ensure alignment with the brand’s values and image.
Finally, utilizing consumer feedback is fundamental for refining marketing strategies. By actively engaging with consumers and responding to their preferences, brands can adapt their offerings and marketing messages to better align with market demands.
Ultimately, a combination of authenticity, digital engagement, and adaptability will be key to successful marketing in the competitive landscape of tobacco bronde products.
The Influence of Branding on Tobacco Bronde Sales Performance
Branding is a critical factor in the sales of tobacco bronde products, as it fosters consumer loyalty and differentiates products in a crowded market. A strong brand identity not only attracts new customers but also nurtures a sense of trust and reliability among existing users, thereby enhancing market share.
Effective branding communicates the unique attributes of the tobacco bronde product, including its quality, flavor profile, and production methods. By establishing a clear brand narrative, producers can set themselves apart from competitors and appeal to specific consumer segments. This differentiation is vital in an industry where numerous brands vie for consumer attention.
Furthermore, branding contributes to the overall perception of value. Consumers often associate premium branding with higher quality, leading them to justify a higher price point. By investing in strong branding strategies that emphasize quality and craftsmanship, manufacturers can position their products as desirable and worth the investment.
Additionally, the emotional connection that branding creates cannot be underestimated. Consumers are more likely to remain loyal to brands that resonate with their values and lifestyles. By creating a brand image that aligns with consumer aspirations, producers can cultivate a loyal customer base that continues to choose their products over others.
In summary, a strategic approach to branding not only enhances visibility and market presence but also drives sales growth in the competitive tobacco bronde market.
Innovative Packaging Solutions for Tobacco Bronde
Innovative packaging for tobacco bronde can significantly enhance product appeal and functionality. As consumer expectations evolve, brands are increasingly investing in packaging solutions that not only protect the product but also captivate consumers through aesthetics and practicality.
One key trend in packaging innovation is the use of eco-friendly materials. With a growing emphasis on sustainability, many brands are opting for biodegradable or recyclable packaging options that resonate with environmentally-conscious consumers. This shift not only reduces the environmental impact of tobacco bronde products but also aligns the brand with consumer values, fostering greater brand loyalty.
In addition to sustainability, creative designs play a crucial role in capturing consumer attention. Eye-catching graphics and unique shapes can differentiate products on store shelves, making them stand out in a crowded marketplace. Packaging that reflects the brand’s identity and story can create a more immersive consumer experience, encouraging exploration and purchase.
Moreover, functional packaging innovations, such as resealable pouches or moisture-retaining technologies, address practical consumer needs. These features enhance convenience, allowing users to preserve freshness and flavor over time. By prioritizing user experience, brands can foster positive associations with their products, leading to repeat purchases.
Collaborations with designers and artists to create limited-edition packaging can also generate buzz and excitement around specific products. Such initiatives not only attract attention but also create a sense of exclusivity, appealing to collectors and enthusiasts.
Overall, investing in innovative packaging solutions is essential for tobacco bronde brands seeking to enhance consumer engagement and satisfaction while aligning with contemporary market trends.
Navigating Regulatory Challenges in Tobacco Bronde Marketing
Navigating regulatory challenges is crucial for tobacco bronde marketing, as compliance with laws and regulations can significantly impact marketing strategies and brand positioning. The tobacco industry is one of the most heavily regulated sectors globally, with stringent guidelines governing advertising, promotional activities, and product labeling.
One of the primary challenges lies in the advertising restrictions imposed in many regions. These limitations often prevent tobacco brands from using traditional media channels to promote their products, compelling them to seek alternative methods for reaching consumers. Consequently, digital marketing and social media platforms have become increasingly important for engaging consumers and conveying brand messages.
However, even in digital spaces, brands must carefully navigate regulations concerning age restrictions and content guidelines. Failing to comply with these rules can lead to penalties and damage to the brand’s reputation. To mitigate these risks, brands must develop marketing strategies that not only comply with local regulations but also resonate with their target audience.
Furthermore, the dynamic nature of regulatory environments poses a continuous challenge for tobacco bronde marketers. As new laws and regulations are introduced, brands must remain agile and adapt their marketing strategies accordingly. Staying informed about changes in legislation and actively participating in industry discussions can help brands anticipate shifts and respond proactively.
Moreover, transparency in marketing claims is vital. As consumers become more discerning, brands must ensure that their messaging accurately reflects the product’s attributes while avoiding misleading statements. Building trust through honesty and integrity is essential for long-term success in a regulated industry.
In summary, navigating regulatory challenges requires a strategic and informed approach to marketing tobacco bronde products. By prioritizing compliance and ethical practices, brands can position themselves as trustworthy sources in a competitive market.
Research-Driven Insights into Tobacco Bronde Fundamentals
The Role of Research in Developing Tobacco Bronde
Research plays a crucial role in informing the development of tobacco bronde, helping producers understand consumer preferences and improve product quality. By leveraging data and insights, manufacturers can adapt their offerings to align with changing market demands and enhance customer satisfaction.
Consumer research is foundational in identifying the preferences and behaviors of tobacco bronde users. Surveys, focus groups, and market analysis provide invaluable insights into what consumers seek regarding flavor, packaging, and product characteristics. This understanding enables manufacturers to tailor their products to meet specific consumer needs, leading to improved market performance.
Additionally, research into emerging trends—such as health concerns and flavor preferences—helps producers stay ahead of the curve. By monitoring shifts in consumer attitudes and behaviors, manufacturers can develop innovative products that resonate with their target audience. For instance, as demand for natural ingredients rises, research can guide producers in sourcing high-quality, organic tobacco and flavorings that meet this growing expectation.
Furthermore, research-driven innovations contribute to refining production techniques. By exploring new curing methods and blending techniques, manufacturers can enhance the flavor profiles and overall quality of their tobacco bronde products. This continuous improvement process ensures that brands remain competitive and relevant in a rapidly changing market.
Real-world examples of research-driven innovations include the development of new flavor combinations based on consumer feedback and the implementation of sustainable practices informed by environmental studies. By prioritizing research in product development, tobacco bronde producers can create offerings that resonate with consumers and stand out in the marketplace.
Economic Contributions of the Tobacco Bronde Industry
The economic benefits of tobacco bronde are substantial, contributing to job creation and revenue generation, which bolster local economies worldwide. As one of the oldest agricultural industries, the tobacco sector provides livelihoods for millions, from farmers to manufacturers and retailers.
Job creation is a critical aspect of the tobacco bronde industry. The cultivation of tobacco requires a substantial workforce, especially in regions where tobacco farming is a traditional practice. Additionally, manufacturing processes demand skilled labor, encompassing various roles in production, quality control, and logistics. By supporting local economies, the tobacco bronde industry plays a vital role in maintaining employment levels in many communities.
Moreover, the revenue generated from the sale of tobacco bronde products contributes to government coffers through taxation. These funds can then be allocated to public services, infrastructure development, and health initiatives. In many countries, tobacco taxes represent a significant portion of government income, highlighting the industry’s impact on national economies.
Furthermore, the tobacco bronde sector supports ancillary businesses, including packaging, transportation, and marketing services. This interconnectedness within the supply chain fosters economic growth and creates opportunities for collaboration among different industry players, enhancing overall market viability.
However, it is essential to balance these economic benefits with public health considerations. As the industry evolves, there is a growing emphasis on developing sustainable and responsible practices that benefit both the economy and consumer health. By fostering innovation and adaptation, the tobacco bronde sector can navigate challenges while continuing to contribute positively to global economic landscapes.
Scientific Advances Transforming Tobacco Bronde Production
Scientific advances in tobacco bronde production have led to significant improvements in curing techniques and flavor enhancement methods. These innovations are reshaping the industry, enabling manufacturers to create higher-quality products that resonate with today’s consumers.
One noteworthy advancement is the development of controlled fermentation processes, allowing for precise modulation of flavor profiles in tobacco bronde. By meticulously controlling temperature and humidity during fermentation, producers can enhance specific flavor notes and diminish undesirable characteristics. This method not only improves the overall quality of the product but also expands the range of flavors available to consumers.
Additionally, advancements in agricultural science have contributed to more efficient and sustainable tobacco cultivation practices. Research into pest-resistant tobacco varieties, crop rotation, and organic farming methods is helping producers minimize environmental impact while maximizing yield. This focus on sustainability is increasingly important as consumers demand eco-friendly practices in their product sourcing.
Moreover, improvements in analytical testing techniques enable manufacturers to monitor and evaluate the chemical composition of their products more effectively. By understanding the presence of various compounds in tobacco bronde, producers can make informed decisions regarding flavoring, curing methods, and quality control measures. These insights contribute to developing safer and more appealing products for consumers.
As scientific research continues to evolve, the tobacco bronde industry stands to benefit from ongoing innovations that enhance product quality and address consumer demands for healthier and more sustainable options. By embracing these advances, producers can position themselves as leaders in a competitive market, setting new standards for quality and innovation.
Consumer Preferences and Their Impact on Tobacco Bronde
How Consumer Preferences Drive Tobacco Bronde Development
Consumer preferences play a pivotal role in shaping the development of new tobacco bronde products. As preferences evolve, producers must adapt their offerings to align with changing demands, ensuring they remain relevant in a competitive marketplace. Understanding these preferences is crucial for market success and brand loyalty.
One of the most significant influences on consumer preferences is the growing awareness of health issues associated with tobacco use. As consumers become more health-conscious, there is an increasing demand for products that feature natural ingredients and fewer harmful additives. Manufacturers who respond to this trend by prioritizing quality and transparency in their product offerings can attract discerning consumers looking for healthier alternatives.
Additionally, flavor preferences are a crucial consideration in product development. Today’s consumers seek a diverse range of flavors that cater to their unique tastes. This shift has led to innovations in flavor combinations, with brands experimenting with various natural flavorings to create distinctive tobacco bronde products. By staying attuned to consumer preferences, manufacturers can develop products that resonate with their target audience, driving sales and customer loyalty.
Moreover, packaging and branding also significantly influence consumer choices. A product’s visual appeal, branding story, and perceived quality can impact purchasing decisions. As consumers increasingly prioritize aesthetics and sustainability, brands must ensure their packaging reflects their values and resonates with their target market.
Ultimately, understanding and responding to consumer preferences is essential for producers aiming to succeed in the tobacco bronde market. By prioritizing quality, flavor diversity, and appealing branding, manufacturers can create products that not only meet but exceed consumer expectations.
Emerging Trends in Consumer Demand for Tobacco Bronde
Current trends in consumer demand for tobacco bronde reveal a clear preference for natural and flavored options. As public awareness of health concerns continues to rise, consumers are gravitating toward products that align with their values and expectations for quality.
One significant trend is the increasing demand for natural tobacco bronde products. Consumers are becoming more discerning, seeking products made from organic tobacco and free from synthetic additives. This shift toward natural ingredients is driven by a desire for cleaner, healthier options that enhance the overall experience without compromising safety or quality.
Additionally, flavored tobacco bronde products are gaining popularity among consumers looking for variety and novelty. Brands that offer a diverse range of flavors—from fruity to spicy—are attracting a younger demographic that seeks unique taste experiences. This trend highlights the importance of innovation in flavor development, as manufacturers experiment with new and exciting combinations to satisfy evolving consumer preferences.
Moreover, the demand for eco-friendly and sustainable tobacco bronde products is on the rise. Consumers are increasingly considering the environmental impact of their purchases, leading to a preference for brands that prioritize sustainability in their sourcing and production practices. This trend is prompting manufacturers to explore sustainable farming techniques and eco-friendly packaging solutions that resonate with environmentally-conscious consumers.
In summary, the current trends in consumer demand for tobacco bronde reflect a growing emphasis on natural ingredients, flavor diversity, and sustainability. Producers who adapt to these trends and prioritize consumer preferences will be well-positioned to thrive in a competitive market.
Strategies for Producers to Adapt to Shifting Consumer Tastes
Producers can adapt to changing consumer tastes by innovating their product lines and marketing strategies to align with evolving preferences. Being responsive to market trends is essential for maintaining relevance and capturing consumer interest in the ever-evolving tobacco bronde landscape.
One effective strategy is to invest in research and development to identify emerging flavor trends and preferences. By conducting consumer surveys and analyzing market data, producers can gain insights into what flavors and characteristics resonate with their target audience. This information can guide product development, allowing manufacturers to create offerings that cater to current tastes.
Additionally, producers should consider diversifying their product ranges to include natural and flavored tobacco bronde options. By expanding their offerings, manufacturers can attract a broader consumer base and meet the demands of both traditional users and those seeking modern alternatives. This diversification can also help mitigate the risks associated with changing regulations and health trends.
Engaging with consumers through social media and other digital platforms is another vital strategy. By actively communicating with their audience, producers can gather feedback and insights that inform product development. This dialogue fosters a sense of community and encourages brand loyalty, as consumers feel valued and heard.
Moreover, promoting sustainability in production and packaging can resonate with environmentally-conscious consumers. By adopting eco-friendly practices and transparently communicating these efforts, producers can enhance their brand image and attract consumers who prioritize sustainability in their purchasing decisions.
In conclusion, adapting to changing consumer tastes requires a proactive and responsive approach. By investing in research, diversifying product lines, engaging with consumers, and prioritizing sustainability, producers can navigate the dynamic landscape of tobacco bronde and thrive in a competitive market.
Regulatory Changes and Their Influence on Consumer Preferences for Tobacco Bronde
Regulatory changes can significantly affect consumer preferences and the availability of tobacco bronde products. As governments implement stricter regulations to address public health concerns, manufacturers must adapt their strategies, which ultimately influences consumer choices and market dynamics.
One of the most evident impacts of regulatory changes is the introduction of advertising restrictions. These limitations can hinder brands from promoting their products through traditional media channels, forcing them to find alternative ways to engage consumers. As a result, manufacturers may need to develop more innovative marketing strategies that comply with regulations while still resonating with their target audience.
Additionally, regulations surrounding product labeling and health warnings can shape consumer perceptions. Clear and transparent information about the ingredients and potential health risks associated with tobacco bronde can lead to more informed purchasing decisions. Consumers may gravitate toward brands that prioritize transparency and adhere to safety standards, influencing their preferences in favor of those products.
Furthermore, changes in taxation policies can impact consumer behavior. Increased taxes on tobacco products often lead to higher retail prices, prompting some consumers to seek lower-cost alternatives or reduce their overall consumption. This shift can create opportunities for brands to develop value-oriented offerings that cater to budget-conscious consumers without compromising on quality.
As regulations continue to evolve, manufacturers must remain agile, adapting their product offerings and marketing strategies in response to these changes. By staying informed about regulatory developments and actively engaging with consumers, producers can navigate the complexities of the market while meeting the demands of an increasingly health-conscious audience.
The Future of Tobacco Bronde: Trends and Predictions
Emerging Technologies Shaping the Future of Tobacco Bronde
Emerging technologies in tobacco bronde are poised to revolutionize the industry, leading to improved production processes and enhanced product quality. As advancements continue to reshape the market, manufacturers who embrace these technologies stand to gain a competitive edge.
One key area of innovation is the development of advanced curing methods. Technologies such as controlled environment curing enable producers to precisely manage temperature and humidity levels during the curing process. This level of control allows manufacturers to enhance flavor profiles and achieve consistent quality across batches, catering to consumer demands for premium products.
Another emerging technology is the integration of data analytics and machine learning into production processes. By analyzing data from various stages of manufacture, producers can identify trends and optimize their operations for efficiency and quality. These insights can inform decisions regarding sourcing, blending, and quality control, leading to improved product outcomes.
Additionally, advancements in digital marketing tools are transforming the way tobacco bronde brands engage with consumers. Social media platforms and targeted advertising technologies enable brands to reach specific demographics more effectively, tailoring their messaging to resonate with diverse audiences. This level of engagement fosters a deeper connection with consumers and enhances brand loyalty.
Moreover, innovations in packaging technology are also on the rise. Smart packaging solutions equipped with QR codes or NFC technology can provide consumers with real-time information about product freshness and origin. This transparency aligns with growing consumer preferences for information and sustainability.
As these technologies advance, they will shape the future of tobacco bronde, offering opportunities for producers to enhance product quality, streamline operations, and engage with consumers in more meaningful ways.
The Impact of Sustainability on Tobacco Bronde Production
Sustainability in tobacco bronde production is becoming increasingly important as consumers demand eco-friendly practices and products. The industry is witnessing a shift toward more responsible sourcing, production, and packaging methods that minimize environmental impact.
One primary focus is on sustainable farming practices. Producers are exploring organic cultivation methods, which reduce the use of synthetic pesticides and fertilizers. This approach not only benefits the environment but also appeals to health-conscious consumers who prioritize natural ingredients. Additionally, crop rotation and integrated pest management strategies can enhance soil health and biodiversity, contributing to a more sustainable agricultural system.
Moreover, manufacturers are implementing waste reduction initiatives in their production processes. By optimizing resource use and minimizing waste, producers can lower their environmental footprint while also improving efficiency. This includes recycling by-products, utilizing renewable energy sources, and reducing water consumption during production.
Sustainable packaging is another critical aspect of the movement toward eco-friendliness. Brands are increasingly adopting biodegradable or recyclable materials that resonate with environmentally-conscious consumers. This shift not only reduces plastic waste but also enhances brand image, as companies align their practices with consumer values.
Transparency in sustainability efforts is essential for building trust with consumers. Brands that openly communicate their sustainable practices and engage in responsible sourcing are more likely to cultivate loyalty among environmentally-conscious consumers.
In conclusion, sustainability is no longer just a trend; it is becoming a fundamental principle for tobacco bronde production. By prioritizing sustainable practices, producers can meet consumer expectations and contribute positively to the environment while ensuring long-term viability in the industry.
Predictions for the Future Landscape of Tobacco Bronde
Predictions for the future of tobacco bronde indicate a landscape shaped by increased regulation and a shift toward healthier alternatives. As public health concerns continue to drive consumer preferences, manufacturers must adapt to remain relevant and competitive in the evolving market.
One significant prediction is the tightening of regulations surrounding tobacco products. Governments worldwide are likely to continue implementing stricter advertising and labeling requirements, compelling brands to rethink their marketing strategies. Transparency and compliance will become paramount as consumers demand more information about the products they use.
Additionally, there is expected to be a growing shift toward healthier alternatives and reduced-risk products. As more consumers seek options that minimize health risks, the demand for nicotine-free or low-nicotine tobacco bronde products is likely to rise. Manufacturers who innovate in this space and develop products that cater to health-conscious consumers will gain a competitive advantage.
Moreover, the integration of technology in tobacco bronde production and marketing will continue to evolve. Advancements in data analytics, automation, and digital marketing will enable brands to optimize their operations and engage with consumers more effectively. This technological evolution will drive efficiency, quality, and consumer satisfaction.
Ultimately, the future of tobacco bronde will be characterized by a dynamic interplay between regulation, consumer preferences, and technological advancements. Brands that remain agile and responsive to these changes will thrive in an increasingly competitive and health-conscious market.
The Global Regulatory Framework and Its Impact on Tobacco Bronde
Global regulations are tightening, significantly impacting the production and marketing of tobacco bronde products. As governments implement stricter guidelines to address public health concerns, manufacturers must navigate a complex landscape that influences their strategies and operations.
One of the key impacts of global regulations is the standardization of safety requirements across markets. Manufacturers must comply with various health standards and regulations, ensuring that their products meet established criteria for safety and quality. This compliance not only protects consumers but also enhances brand reputation and trust.
Additionally, regulations surrounding advertising and marketing are becoming increasingly stringent. Many countries now impose restrictions on tobacco advertising, limiting brands’ ability to promote their products through traditional media channels. As a result, manufacturers must shift their focus to digital marketing and social media strategies that comply with local laws while effectively reaching their target audience.
Furthermore, taxation policies on tobacco products are also evolving. Increased taxes can lead to higher retail prices, which may prompt consumers to seek lower-cost alternatives or reduce their overall consumption. This shift can create opportunities for brands to develop value-oriented products that cater to budget-conscious consumers.
As global regulations continue to evolve, manufacturers must remain vigilant and proactive in adapting their strategies. Staying informed about regulatory changes and proactively engaging with policymakers can help brands navigate the complexities of compliance while maintaining a competitive edge.
In summary, the impact of global regulations on tobacco bronde is significant and multifaceted. By prioritizing compliance and transparency, brands can build trust with consumers while remaining competitive in an increasingly regulated market.
Consumer Trends and Their Influence on Tobacco Bronde Preferences
Consumer trends in tobacco bronde are continually shifting, reflecting changing preferences and values among users. Understanding these trends is essential for producers aiming to develop products that resonate with their target audience and drive market success.
One prominent trend is the growing demand for natural and organic tobacco bronde products. As consumers become more health-conscious, there is an increased preference for products made from organic tobacco and free from artificial additives. This shift towards natural ingredients aligns with broader consumer movements emphasizing clean and sustainable consumption.
Additionally, flavor diversity is a significant factor influencing consumer preferences. Many users seek unique and adventurous flavor profiles that enhance their smoking or vaping experience. This trend has led to an explosion of innovative flavor combinations in the market, catering to a diverse array of tastes and preferences.
Moreover, sustainability is becoming an essential consideration for consumers when selecting tobacco bronde products. Brands that prioritize eco-friendly practices in sourcing, production, and packaging are more likely to resonate with environmentally-conscious consumers. By transparently communicating their sustainability efforts, manufacturers can enhance their brand image and attract a loyal customer base.
In response to these trends, producers must remain agile and responsive. By continuously monitoring consumer preferences and adapting their product offerings to align with market demands, manufacturers can thrive in an ever-evolving landscape.
Ultimately, the future of tobacco bronde will be shaped by a dynamic interplay of natural ingredients, flavor innovation, and sustainability, creating opportunities for brands that successfully navigate these trends.
Frequently Asked Questions About Tobacco Bronde
What is tobacco bronde?
Tobacco bronde refers to a specific blend of tobacco used in various smoking and vaping products, characterized by unique flavor profiles and ingredients that enhance the overall experience.
What health risks are associated with tobacco bronde?
Tobacco bronde contains nicotine and harmful substances that can lead to addiction, respiratory issues, and other health problems. Being aware of these risks is crucial for consumers.
How can consumers minimize health risks from tobacco bronde?
Consumers can minimize health risks by setting limits on consumption, staying informed about product ingredients, choosing quality brands, and considering alternatives to traditional tobacco products.
What are the latest trends in tobacco bronde?
Current trends include a growing preference for natural flavorings, sustainable production methods, and innovative packaging solutions that resonate with environmentally-conscious consumers.
How does branding impact tobacco bronde sales?
Branding plays a crucial role in creating consumer loyalty, differentiating products, and enhancing perceived value, ultimately driving sales and market share.
What role does research play in tobacco bronde development?
Research informs product development by identifying consumer preferences and trends, guiding manufacturers in creating offerings that resonate with their target audience.
What are some effective marketing strategies for tobacco bronde?
Effective marketing strategies include storytelling to highlight product quality, leveraging digital platforms for engagement, and collaborating with influencers to expand brand reach.
How do additives enhance tobacco bronde?
Additives enhance tobacco bronde by improving flavor, extending shelf life, and optimizing burning properties, making the product more appealing to consumers.
What is the impact of global regulations on tobacco bronde?
Global regulations affect production and marketing by imposing safety standards, advertising restrictions, and taxation policies, compelling manufacturers to adapt their strategies accordingly.
What are the economic benefits of tobacco bronde?
The tobacco bronde industry contributes to job creation, revenue generation through taxes, and supports ancillary businesses, playing a significant role in local and national economies.
Connect with us on Facebook!
The Article: Forming Tobacco Bronde Basics: Essential Guide appeared first on Amitys Hair Salon.
The Article Tobacco Bronde Basics: Your Essential Guide Was Found On https://limitsofstrategy.com
-

Bridal Updos: Elegant Styles for Timeless Weddings
Discover Timeless Bridal Updos That Exude Classic Elegance
Explore Timeless Styles Customised for Every Bride’s Vision
Classic bridal updos embody sophistication and elegance, making them the perfect choice for brides who aspire to radiate beauty that withstands the passage of time. Iconic styles such as the French twist, chignon, and bun have captivated brides for generations, showcasing their enduring charm. The French twist, often seen in vintage weddings, exudes a subtle grace, while the chignon provides versatility to accommodate different hair lengths and textures. These classic styles frame the face beautifully, ensuring that the bride appears radiant from every angle, effortlessly enhancing her natural beauty on her special day.
When choosing the perfect classic updo, it is crucial to consider the bride’s overall aesthetic and personality. A sleek, polished bun may resonate with a minimalist bride, while a romantic chignon adorned with soft curls might appeal to those desiring a whimsical touch. The true beauty of these timeless updos lies in their adaptability; with the right accessories, they can transition seamlessly from understated to elaborate. Brides can achieve a harmonious blend of classic elegance and personal style, ensuring that their updo authentically reflects their individuality.
Enhance Your Bridal Updo with Expert Accessorising Techniques
Accessories play a significant role in elevating bridal updos, serving as the perfect finishing touches that personalise the hairstyle. From delicate veils cascading gracefully down the back to vibrant floral arrangements that add a pop of colour, the right accessories can dramatically enhance the overall appearance. Popular accessories that brides often incorporate include:
- Veils
- Fresh flowers
- Hairpins
- Crystals or pearls
- Headbands
- Ribbons
- Combs
- Beaded clips
Each of these elements can transform a simple updo into a stunning statement piece. For example, embellishing a classic bun with a vintage comb adorned with crystals instantly adds glamour and sparkle. Additionally, strategically placing flowers within an updo can soften the overall look, creating a romantic and enchanting vibe. The key is to choose accessories that resonate deeply with the bride’s style while enhancing the wedding theme, ensuring a cohesive and harmonious appearance throughout the celebration.
The Importance of Texture in Elevating Your Updo Design
Texture is a crucial aspect in bridal updos, infusing depth and visual interest that enhances the hairstyle’s overall elegance. Incorporating elements such as Curls, waves, or braids can transform a flat updo into a breathtaking, multi-dimensional masterpiece. Curls evoke a romantic and soft aesthetic, while waves introduce movement and fluidity. On the other hand, braiding adds an artistic flair and can be seamlessly integrated into various styles, lending a bohemian touch perfect for outdoor weddings or a more traditional feel suited for church ceremonies.
When designing an updo, exploring the various textural elements that can be achieved is essential. For instance, using a curling iron to create soft waves can enhance the chignon, yielding a fuller and more dynamic appearance. Alternatively, braiding sections of hair before pinning them into the updo can create a stunning contrast between sleek and textured components. The interplay of smooth and tousled locks enhances visual interest, contributing to an overall polished look and ensuring the bride radiates elegance throughout her special day.
Selecting the Perfect Updo According to Your Wedding Theme

Choosing an updo that aligns with the wedding’s theme is crucial for achieving a cohesive and breathtaking bridal look. For example, a rustic wedding may call for a loose, romantic updo embellished with wildflowers, while a formal black-tie affair might benefit from a sleek, polished chignon. Understanding the nuances of different themes enables brides to select an updo that embodies the style and atmosphere of their celebration, enhancing the overall experience.
For beach weddings, consider light, breezy styles that incorporate braids and soft curls, capturing the essence of a carefree seaside vibe. Conversely, vintage-themed weddings may favour classic updos with intricate detailing that evoke the elegance of yesteryear. The chosen hairstyle should also complement the event’s colour palette and decor, ensuring harmony with the dress, flowers, and venue. By thoughtfully considering how her updo interacts with every aspect of her wedding, a bride can create a truly stunning and cohesive look.
Expert Insights on Designing Elegant Bridal Updos
Proven Techniques for Adding Volume and Height to Your Updo
Creating volume and height in bridal updos is vital for achieving a regal appearance that captures attention. Techniques such as backcombing, using volumising products, and strategically positioning hair extensions can significantly enhance the overall look. Backcombing, or teasing, the hair at the crown provides immediate lift and fullness, transforming an ordinary updo into a striking symbol of elegance that leaves a lasting impression.
For instance, to elevate a classic bun, start by creating volume at the base, resulting in an updo that appears both sophisticated and substantial. Besides backcombing, incorporating volumising sprays or powders can add texture and fullness without excessive teasing. Additionally, hair extensions serve as a transformative addition, providing extra length and volume, making even the finest hair types appear more luxurious and full-bodied.
Another effective method for enhancing updo volume involves using padding or doughnut forms. By placing these under sections of hair, hairstylists can create beautifully shaped buns that look both full and elegant. Whether opting for a simple, elegant bun or a more intricate style, the right techniques for generating volume and height are essential for achieving an exquisite bridal updo that stands out on the big day.
Ensuring Your Updo Lasts All Day Long

To ensure that a bridal updo remains intact and beautiful throughout the wedding day, meticulous preparation and the right products are essential. The foundation for longevity lies in the initial styling process and the products chosen to secure the hairstyle. To begin, thoroughly washing and conditioning the hair creates a clean slate, allowing for better product adhesion. Using a clarifying shampoo before styling can eliminate any residue that may hinder the updo’s durability.
Several best practices for enhancing updo longevity include:
- Utilise heat protectant sprays before styling
- Incorporate volumising mousse during preparation
- Secure hair with strong-hold hairspray
- Pin each section securely, using bobby pins strategically
- Consider waterproofing products for humidity resistance
- Opt for a professional-grade styling gel for added hold
- Regularly check and secure loose strands throughout the day
By implementing these techniques, hairstylists can ensure that the bride’s updo maintains its form and beauty, allowing her to celebrate without worry. Moreover, communicating with the bride about the need for minimal adjustments throughout the day can help her feel more at ease, ensuring she looks flawless from the ceremony through to the reception.
Stay Updated on the Latest Trends in Bridal Updos
Keeping abreast of the latest trends in bridal updos is essential for brides seeking modern elegance. One prominent trend is the resurgence of relaxed, effortless styles. Loose updos that blend soft braids and natural texture are incredibly popular, reflecting brides’ desires for a more organic and approachable aesthetic. This trend allows brides to express their individuality while still maintaining an air of elegance.
Another emerging trend is the incorporation of bold accessories, such as statement hairpieces or embellished combs that serve as focal points within updo designs. These accessories can transform a classic style into something unique and personal, allowing brides to showcase their style. Additionally, the inclusion of floral accents, whether real or faux, continues to gain popularity, seamlessly blending with rustic and garden-themed weddings.
Brides are also gravitating towards asymmetrical designs, featuring an offset bun or side-swept curls that add an element of surprise and modernity. This trend reflects the creative freedom brides enjoy today, enabling them to select styles that resonate with their personal brand rather than strictly adhering to traditional norms. By embracing these trends, hairstylists can assist brides in achieving a contemporary yet timeless look for their special day.
Selecting the Ideal Updo for Your Face Shape
Choosing the most flattering updo for various face shapes is essential for enhancing the bride’s facial features and overall elegance. Understanding the characteristics of each face shape guides brides toward styles that flatter their unique contours. For round faces, styles that add height, such as a high bun or an elongated chignon, can create the illusion of length, drawing attention upward and away from the width of the face.
For those with oval faces, the options are virtually limitless. Soft curls framing the face or a sleek ponytail can highlight delicate features, providing balance and harmony. Square faces benefit from softer styles that incorporate waves or curls, helping to soften angular features. A low bun or side-swept updo can also work wonders, enhancing femininity and grace.
Heart-shaped faces, characterised by a wider forehead and narrower chin, are beautifully complemented by styles that add volume at the chin, such as loose curls or a messy bun. This creates harmony and balance in the overall appearance. Ultimately, understanding face shapes empowers brides to make informed decisions about their updos, ensuring they look their absolute best on their wedding day.
Maximising the Impact of Accessories in Your Bridal Updo
Accessories can elevate a bridal updo, adding sophistication and personalisation that enhances the overall look. Hairstyles adorned with accessories reflect a bride’s individual style while complementing the wedding theme. Various types of accessories work beautifully with updos, including delicate veils that create an ethereal quality, fresh flowers that introduce a touch of nature, and sparkling hairpins or combs that add a hint of glamour.
Brides should consider the overall aesthetic of their wedding when selecting accessories. For a romantic, garden-themed wedding, incorporating soft, pastel flowers or leafy vines can harmonise beautifully with a loose chignon. In contrast, a modern, minimalist wedding may call for geometric hairpins or sleek headbands that add a contemporary touch to a classic style.
The impact of accessories on an updo cannot be overstated. They serve as focal points, drawing attention to the hairstyle while enhancing the bride’s overall look. Moreover, the careful selection and placement of accessories can transform even the simplest of updos into a stunning masterpiece, ensuring the bride feels unique and beautiful on her special day.
Mastering the Art of Customising Bridal Updos for Ultimate Elegance
Tailoring Updos to Reflect Your Unique Wedding Theme
Customising an updo to align with the wedding’s theme is an art that can greatly enhance the overall aesthetic. To achieve this, brides should first consider the theme’s colours, motifs, and vibe. For instance, a vintage-themed wedding might feature intricate braids or soft curls accented with antique hairpieces, while a bohemian theme could embrace loose, tousled styles adorned with wildflowers or feathers.
Brides can further personalise their updos by including family heirlooms or sentimental accessories. These touches create a meaningful connection to the wedding day, adding emotional depth to the hairstyle. Engaging in a collaborative discussion with the hairstylist helps brides articulate their vision, ensuring that the updo reflects their personality and style while aligning with the wedding theme.
In addition to aesthetic considerations, brides should also contemplate how their updo interacts with the overall atmosphere of the wedding. For an intimate outdoor ceremony, a relaxed, flowing style may resonate better than a tightly polished updo. Ultimately, the goal is to curate an updo that feels authentically ‘them’ while seamlessly blending with the chosen theme, allowing the bride to shine on her special day.
Achieving a Harmonious Balance Between Simplicity and Intricacy in Updo Design
Finding the right balance between simplicity and intricacy in bridal updos can lead to stunning elegance. An updo that is overly complex risks overshadowing the bride’s features, while a simple design might lack the statement quality many brides desire. The key lies in understanding which elements to emphasise and where to simplify.
For instance, a classic bun can be enhanced with delicate braids woven throughout, creating an intricate look without overwhelming the overall style. Conversely, a sleek updo could be softened with loose tendrils framing the face, providing a touch of romantic softness that elevates the entire look. When designing an updo, hairstylists should consider the bride’s dress style and accessories to achieve a harmonious balance that highlights her natural beauty.
Another factor to consider is the texture of the hair. Fine hair may require more intricate detailing to create visual interest, while thicker hair can often achieve elegance through simpler designs. This balance ensures that the updo enhances the bride’s natural beauty while maintaining a polished and sophisticated appearance that will be remembered.
Effectively Adapting Updos for Different Hair Types
Different hair types necessitate varied approaches to achieve the perfect updo, as each texture presents unique challenges and opportunities. For fine hair, utilising volumising products and techniques such as backcombing can create the illusion of fullness. Texturising sprays can be invaluable, providing grip and hold to ensure styles remain intact throughout the wedding day.
Medium hair types typically offer versatile styling options, allowing for both intricate braids and smooth updos. A half-up, half-down style can work particularly well for medium-length hair, blending the elegance of an updo with the softness of loose locks. This approach can incorporate various textures, allowing for curls or waves that add depth and dimension to the overall look.
For thick, coarse hair, the challenge often lies in managing volume and ensuring the updo remains balanced. Using appropriate products to tame frizz and enhance shine is essential. Styles such as braided buns or twisted updos can harness the hair’s natural texture while maintaining an elegant appearance. Ultimately, the goal is to select techniques that celebrate the unique qualities of each hair type, ensuring the bride’s updo reflects her individual beauty and style throughout her special day.
How to Achieve a Polished Finish in Bridal Updos
The Importance of Hair Preparation and Product Selection
Achieving a polished finish for bridal updos relies on meticulous hair preparation and the selection of quality products. Proper hair preparation begins with a clean slate; washing the hair with a clarifying shampoo removes any buildup that could hinder styling. Following this, conditioning treatments should be applied to nourish the hair without weighing it down, allowing for optimal styling.
Once the hair is prepared, the choice of products can significantly impact the final look. Styling creams and mousses can enhance the hair’s texture while providing hold. For added volume, volumising sprays can elevate roots, creating a fuller appearance that translates beautifully into an updo. It’s also essential to consider heat protectant sprays before applying heat styling tools, safeguarding the hair from damage and maintaining its integrity.
Moreover, the right finishing products can elevate an updo from good to exceptional. A strong-hold hairspray ensures the style remains intact throughout the day, while shine sprays can add that coveted glossy finish. The combination of careful preparation and high-quality products is crucial for achieving a polished bridal updo that endures the long hours of celebration, allowing the bride to shine brilliantly.
Techniques for Smoothing and Securing Hair for Lasting Hold
To achieve a neat and polished updo, effective techniques for smoothing and securing hair are paramount. Start by using a fine-tooth comb or brush to eliminate tangles, ensuring a smooth base for styling. For added slickness, a lightweight styling gel can be applied to control flyaways and create a refined, sophisticated appearance.
When securing the updo, hairstylists should use bobby pins strategically, placing them in a way that enhances the hairstyle while remaining discreet. For a truly polished finish, consider crisscrossing bobby pins to create added stability and prevent slipping. It’s also advisable to use hair ties that match the bride’s hair colour to ensure they remain hidden within the updo, contributing to a seamless look.
Incorporating the use of hair accessories, such as decorative pins or combs, can also aid in securing the style while adding elegance. Employing these techniques not only ensures a neat finish but also enhances the overall sophistication of the bridal updo, allowing the bride to feel confident and beautiful throughout her wedding day.
Final Touches for Achieving a Flawless Look
The final touches applied to a bridal updo can make all the difference in achieving a flawless look. After the hairstyle has been meticulously crafted, it’s essential to apply a strong-hold hairspray to secure the style in place. This not only helps maintain the updo’s form but also protects against humidity and movement during the festivities, ensuring the bride looks impeccable throughout the day.
Additionally, incorporating shine serums can create a polished and luxurious finish, enhancing the hair’s natural beauty. Applying a small amount to the ends of the hair before the final spray helps seal in moisture and adds a lustrous sheen that reflects beautifully in photographs, capturing the essence of the day.
Regularly checking the updo throughout the day is advisable, ensuring that any stray hairs are tamed and the style remains exactly as intended. For brides who anticipate a long day of celebrations, a quick touch-up kit with essential products can be beneficial, ensuring that their updo remains flawless. With these final touches, brides can confidently embrace their special day, knowing they look stunning.
Choosing the Right Updo Style to Enhance Your Hair Type
Selecting an updo style that complements your hair type is crucial for achieving a polished and refined finish. For fine hair, styles that create the illusion of volume, such as braided buns or textured chignons, can provide fullness and visual interest. Incorporating braids into the design can offer a dynamic element that enhances the overall look while adding depth and charm.
Medium hair types often benefit from versatility, allowing for a range of styles from classic buns to romantic half-up, half-down looks. Loose waves intertwined into an updo can add softness while maintaining structural integrity, making it a popular choice for many brides seeking that perfect balance.
For thick or coarse hair, styles such as sculpted buns or intricate braids can effectively harness the texture, ensuring the updo remains secure and polished throughout the day. Using the right products to tame frizz and enhance shine is essential for thick hair types, ensuring the final look is elegant and refined. Ultimately, understanding the nuances of each hair type empowers brides to make informed choices, resulting in a stunning and polished bridal updo that reflects their unique beauty.
Essential Tools and Accessories for Achieving a Professional Finish
Utilising the right tools and accessories is vital for achieving a professional finish in bridal updos. Essential items include high-quality hairpins and bobby pins, which provide stability and security to even the most intricate designs. A good set of combs and brushes is also crucial, allowing for precise styling and smoothing throughout the process, ensuring every detail is attended to.
Heat styling tools such as curling irons or straighteners help create the desired shape and texture, while a reliable hairdryer and diffuser assist in preparing the hair for styling. Additionally, the use of professional-grade products, such as volumising sprays, strong-hold hairsprays, and shine serums, can significantly elevate the overall look, ensuring longevity and polish that withstands the test of time.
For a truly professional touch, consider incorporating hair accessories that align with the bride’s style, such as embellished combs, decorative pins, or elegant headbands. These accessories can serve as focal points in the updo, enhancing the overall aesthetic and elevating the hairstyle to a new level of sophistication. Equipped with the right tools and accessories, hairstylists can create breathtaking bridal updos that leave a lasting impression on everyone present.
Proven Benefits of Crafting Elegant Bridal Updos
Boosting the Bride’s Confidence Through Thoughtful Design
A well-crafted updo can significantly enhance a bride’s confidence, making her feel beautiful and self-assured on her wedding day. Understanding the psychological impact of a stunning hairstyle is essential for hairstylists seeking to elevate their clients’ experiences. To achieve this, hairstylists should engage in open conversations with brides about their style preferences and concerns, fostering a collaborative atmosphere that empowers the bride to express her vision.
Actions such as showcasing different styles through sketches or photos can help brides visualise their potential looks. Providing trials ahead of the wedding day allows for adjustments and refinements based on the bride’s feedback, ensuring she feels truly represented. Incorporating personal touches, such as heirloom accessories or meaningful elements, can further increase a bride’s emotional connection to her style, enhancing her confidence and self-esteem.
Ultimately, creating an updo that resonates with the bride’s identity and vision serves to boost her confidence, allowing her to shine effortlessly on one of the most important days of her life, encapsulating the beauty of the moment.
Enhancing the Wedding Dress with the Perfect Updo
The right updo can beautifully complement a wedding dress, elevating the bride’s overall appearance and creating a cohesive look. To achieve this, hairstylists must consider the dress’s style, neckline, and embellishments when selecting an updo. For instance, a strapless gown may benefit from an elegant updo that showcases the collarbone and neckline, while a dress adorned with intricate detailing might be best paired with a simpler hairstyle to avoid overwhelming the overall appearance.
When choosing an updo, it’s crucial to take into account the fabric of the dress as well. Lighter fabrics such as chiffon may lend themselves to more romantic, flowing updos, while structured materials like satin can support sleek, polished styles. The interplay between the updo and the dress can create a harmonious balance, ensuring that both elements shine in their own right while enhancing one another’s beauty.
Additionally, considering the colour palette of the wedding can influence accessory choices and hairstyles, allowing for a cohesive visual narrative throughout the celebration. By thoughtfully integrating the updo with the wedding dress, hairstylists can elevate the bride’s overall look, ensuring she feels stunning and radiant on her special day.
Creating Lasting Memories Through Elegant Updos
Elegant updos play a crucial role in creating lasting memories, immortalised in wedding photographs and cherished for years to come. Hairstyles that resonate with the event’s aesthetic evoke emotions and recall the beauty of the day every time the couple revisits their wedding album. To create memorable updos, hairstylists should pay close attention to the intricacies of each style and how they translate through the lens of a camera.
Incorporating unique elements, such as personalised accessories or innovative designs, can greatly enhance the memorability of the updo. For example, a bride’s family heirloom, such as a vintage hairpin or comb, can add sentimental value, making the hairstyle even more meaningful and cherished.
Ultimately, the combination of elegance and personalisation results in bridal updos that not only look beautiful on the day but also resonate long into the couple’s future, serving as a reminder of the love and joy shared on that special occasion. By crafting updos that reflect the bride’s personality and the wedding’s theme, hairstylists can create timeless memories that last a lifetime.
Elevating the Wedding Theme with Elegant Updos
An elegant bridal updo can profoundly enhance the wedding’s theme, adding sophistication and cohesion to the overall celebration. A well-designed hairstyle that reflects the chosen theme contributes to a unified visual narrative throughout the event. When hairstylists create updos that align with the wedding theme, they help elevate the entire atmosphere, ensuring that every detail contributes to the overall aesthetic and harmony of the day.
For instance, a beach-themed wedding may feature loose, effortless waves adorned with seashells or beach flowers, embodying the relaxed yet elegant vibe of the setting. Conversely, a vintage-inspired wedding might showcase a classic chignon with retro accessories, evoking the glamour of past eras and enhancing the overall ambiance.
Furthermore, collaborating with the bride to understand her vision for the theme allows the hairstylist to tailor the updo accordingly, ensuring alignment with colour schemes and decor. This attention to detail transforms the updo from a simple hairstyle into a key component of the wedding’s overall design, ensuring a cohesive and elegant celebration that leaves a lasting impression on everyone involved.
Proven Strategies for Crafting Elegant Bridal Updos
Collaborating with the Bride for the Ideal Look
Collaboration between the bride and hairstylist is essential in achieving the desired updo. Effective communication strategies can help bridge any gaps in expectations, ensuring that the final look aligns perfectly with the bride’s vision. Beginning with a comprehensive consultation allows the hairstylist to gauge the bride’s preferences, style inspirations, and any specific concerns she may have regarding her hairstyle.
During this initial meeting, hairstylists should encourage brides to share images or examples of styles they admire, facilitating a clearer understanding of their desired outcome. Providing a range of options and suggesting styles that complement the bride’s features and wedding theme can also enhance the collaborative process, ensuring that the bride feels heard and valued.
Moreover, offering trials can significantly enhance the collaboration, allowing brides to experience different looks and make adjustments based on their feedback. This hands-on approach fosters trust and confidence, ensuring that the final updo is not only beautiful but also a true reflection of the bride’s identity and style, tailored specifically for her moment.
Integrating Modern Techniques with Traditional Styles for Unique Elegance
Combining modern techniques with traditional styles can result in unique and elegant updos that celebrate both heritage and contemporary trends. For instance, traditional braids can be reimagined using modern texturising techniques, infusing a sense of modernity into classic looks. This approach allows hairstylists to preserve the timeless elegance of time-honoured styles while adding a fresh twist that appeals to today’s brides.
Utilising innovative tools and products, such as texturising sprays and heat stylers, can elevate traditional techniques. For example, creating soft, romantic waves as a base for a classic chignon adds depth and volume while still maintaining the integrity of the traditional style, allowing brides to enjoy the best of both worlds.
Furthermore, embracing trends such as asymmetrical designs or mixed textures can breathe new life into classic updos, making them feel relevant and stylish for modern celebrations. The art of blending modern techniques with traditional styles enables hairstylists to create stunning updos that resonate with brides seeking both elegance and individuality, ensuring they feel special on their big day.
Ensuring Comfort and Wearability on the Wedding Day
An updo must be comfortable and wearable for the bride throughout the wedding day, ensuring she can fully enjoy her celebration without concern for her hairstyle. Key considerations for ensuring comfort in bridal updos include the choice of products, the way hair is secured, and the overall weight of the hairstyle itself. For instance, using lightweight hair accessories instead of heavy embellishments can prevent discomfort and strain on the scalp.
Additionally, securing the hair with a snug but not overly tight grip is essential in preventing headaches or discomfort. A professional hairstylist should assess how the updo feels once styled, encouraging the bride to voice any concerns about tightness or pulling, allowing for adjustments as necessary. This proactive communication aids in addressing any issues before they become problematic on the wedding day.
Finally, providing tips for the bride on how to adapt her updo during the day, such as loosening sections or adjusting accessories, can enhance her comfort while still allowing her to look chic and polished. By prioritising wearability, hairstylists can ensure that brides feel at ease and confident, allowing them to focus on enjoying their special day without distractions.
FAQs: Your Most Common Bridal Updo Questions Answered
What defines a bridal updo?
A bridal updo is a hairstyle typically worn by brides on their wedding day, characterised by hair styled up and away from the face, creating a polished and elegant look that enhances the bride’s beauty.
How do I choose the right updo for my wedding?
Consider your wedding theme, dress style, and face shape when selecting an updo. A consultation with a professional hairstylist can provide personalised advice tailored to your unique features, ensuring the perfect look.
What accessories best complement bridal updos?
Popular accessories include veils, hairpins, fresh flowers, and decorative combs. Each can add a personal touch and complement the overall style of the updo, enhancing the bridal look.
How can I ensure my updo lasts throughout the day?
Prior to styling, ensure your hair is clean and free from residue. Use strong-hold hairspray and secure sections with bobby pins for added durability throughout the day, allowing you to celebrate with confidence.
Are there specific updos tailored for different hair types?
Yes, fine hair may require volume-boosting techniques, while thick hair can incorporate more intricate styles. A hairstylist can recommend the best approaches based on your hair type, ensuring a flawless look.
What trends are currently popular in bridal updos?
Loose, textured styles, bold accessories, and asymmetrical designs are currently trending. These modern touches allow brides to reflect their unique style while maintaining elegance and sophistication.
How do I prepare my hair for an updo?
Start with a clean, conditioned base. Use products suited for your hair type, such as volumising mousse or smoothing serums, to prepare your hair for styling and ensure optimal results.
Can I wear my hair down with an updo style?
Absolutely! Many brides opt for half-up, half-down styles that blend the elegance of an updo with the softness of loose hair, offering versatility in styling for a beautiful look.
What should I discuss with my hairstylist before the wedding?
Share your vision, preferred styles, and any concerns you have. Discuss your wedding theme and dress to ensure your updo complements the entire look, creating a seamless ensemble.
How much time should I allocate for my bridal hairstyle on the wedding day?
Typically, allocate 1.5 to 2 hours for your bridal hairstyle, depending on the complexity of the updo and any additional styling required for your bridal party, ensuring everything is perfect.
Connect with us on Facebook for more tips and inspiration!
The Article: Designing Bridal Updos for Elegance: Timeless Styles appeared first on Amitys Hair Salon.
The Article Bridal Updos: Timeless Styles for Elegant Weddings Was Found On https://limitsofstrategy.com
-
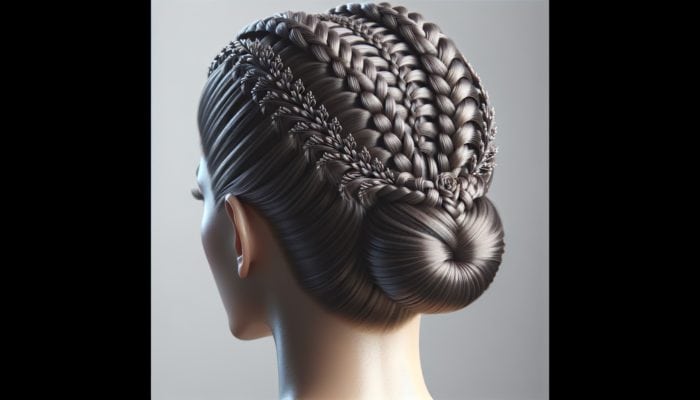
Micro Braids: The Essential Guide to Integrated Cuts
Discover the Art of Micro Braids: Your Comprehensive Guide to Styling and Care
Understanding Micro Braids: The Trendy Protective Hairstyle Everyone Loves
Micro braids are remarkably small, individual braids that create a stunningly intricate and adaptable hairstyle. Their detailed design offers a multitude of styling options, making them suitable for various hair textures, including straight, wavy, and curly types. These delicate braids can be fashioned into elegant updos or relaxed flowing styles, making them perfect for any occasion. Beyond their aesthetic allure, micro braids serve as a protective hairstyle, promoting the overall health and vitality of your hair. Here’s an enticing selection of micro braid styles to consider:
- Classic Micro Braids
- Cornrow Micro Braids
- Twisted Micro Braids
- Braided Ponytail with Micro Braids
- Micro Braids with Ombre Colouring
- Beaded Micro Braids
- Half-Up Micro Braid Styles
- Micro Braids with Decorative Hair Accessories
These diverse styles emphasize the versatility of micro braids, catering to different preferences and specific events. Their charm lies in their ability to enhance any outfit or occasion, lending an air of sophistication. The delicate size of micro braids creates a captivating visual texture that draws attention while allowing for personal expression and creativity.
Essential Tools and Products for Crafting Perfect Micro Braids
Creating beautiful micro braids necessitates specific tools and materials to ensure a smooth process and a polished final look. Essential items include a rat-tail comb for accurate sectioning, hair clips to securely hold sections, and styling products to keep the braids looking fresh. Below is a curated list of must-have products to facilitate the creation of stunning micro braids:
- Rat-Tail Comb
- Hair Clips
- Sulfate-Free Shampoo
- Moisturizing Conditioner
- Lightweight Styling Gel or Mousse
- Anti-Frizz Serum
- Silk Scarf or Bonnet
- Hair Extensions (for added length or volume)
Having the appropriate tools and products is crucial for achieving the desired outcome in your braiding journey. Each item serves a unique purpose, from detangling and sectioning to securing and styling. Investing in high-quality products not only enhances your braiding experience but also benefits your hair’s health throughout the process, ensuring it remains strong and vibrant.
Steps to Effectively Prepare Your Hair for Braiding
Properly preparing your hair is essential for achieving flawless micro braids. This preparation involves thorough washing, conditioning, and detangling to ensure your hair is in optimal condition for styling. Begin with a gentle, sulfate-free shampoo to cleanse the scalp and eliminate any product buildup. Follow this with a deep conditioner to hydrate and soften your hair strands. This step is vital as it minimizes the risk of breakage and tangling during the braiding process.
Once washed, gently detangle your hair using a wide-tooth comb or your fingers to avoid pulling or damaging the strands. After detangling, allow your hair to air dry partially or use a blow dryer on a low heat setting. For additional nourishment, apply a lightweight leave-in conditioner or moisture-rich cream to enhance your hair’s health and readiness for braiding. Ensuring your hair is clean, well-conditioned, and thoroughly detangled will significantly improve the results of your micro braids, leading to a smoother, more polished finish.
Mastering Micro Braids: Expert Techniques and Integrated Cuts

Pro Stylist Techniques for Flawless Micro Braids
Professionals in the hairstyling industry utilize various techniques to create micro braids with integrated cuts that appear seamless and stylish. A commonly employed method is “feed-in braiding,” where additional hair is gradually incorporated into the braid as it progresses. This technique allows for greater control over the thickness of the braids, ensuring a natural appearance, particularly when integrating cuts.
Maintaining consistent tension during the braiding process is another effective strategy. This is achieved by holding the hair steadily while braiding, preventing any unevenness or bumps. Experts recommend using a mirror to check for symmetry as you work, making it easier to spot areas that may require adjustments. Many professional stylists showcase their skills on social media platforms, inspiring others with their ability to blend cuts seamlessly into micro braids.
Additionally, many experts advocate for sectioning the hair into small, manageable parts before beginning the braiding process. This practice helps to maintain control and precision, ensuring each braid is uniform in size and appearance. By implementing these professional techniques, you can achieve a polished look that highlights the beauty of both the micro braids and the integrated cuts.
Maintaining the Integrity of Cuts in Your Micro Braids
To preserve the integrity of cuts within micro braids, regular attention and proper care are essential to prevent frizz and breakage. Begin by keeping the scalp moisturized and the braids looking fresh. Applying a lightweight oil or moisturizing spray directly to the scalp can alleviate dryness and irritation, fostering a healthy environment for hair growth.
Regularly inspect the condition of your braids. If you notice any fraying or unevenness, take the time to carefully adjust or re-braid those sections to ensure uniformity. Utilizing an anti-frizz serum can help create a sleek appearance and reduce the likelihood of stray hairs around the braids.
Moreover, it’s vital to avoid excessive manipulation of the braids. This means refraining from constantly touching or adjusting them, as this can lead to unnecessary wear and tear. Establish a simple routine that includes gentle cleansing with a sulfate-free shampoo and reapplying your favorite styling product every few days. By following these actionable steps, you’ll ensure that your micro braids with integrated cuts remain looking fresh and vibrant for weeks.
Challenges Professionals Face with Micro Braids

Even seasoned braiders encounter challenges when integrating cuts into micro braids. One common issue is achieving even sections, which can lead to inconsistencies in the overall appearance of the braids. To overcome this, experts recommend taking the time to section the hair meticulously before starting the braiding process. Using a rat-tail comb to create neat and straight lines can significantly enhance the final outcome.
Another challenge is maintaining proper tension during the braiding process. If the tension is too loose, the braids may unravel or appear messy, while excessive tension can lead to breakage and discomfort on the scalp. Practicing on a mannequin head or a friend’s hair can help refine your skills in maintaining the right balance. Additionally, be mindful of the cutting technique used when integrating cuts; making small, precise snips will yield better results than larger, haphazard cuts.
Finally, ensuring that the braids sit close to the scalp while remaining comfortable can be tricky. Striking the right balance requires practice and patience, but focusing on the techniques mentioned can streamline the process. By effectively addressing these common challenges, you can elevate your braiding skills and create stunning micro braids that reflect your artistic vision.
A Step-by-Step Approach to Crafting Micro Braids
How to Accurately Section Your Hair for Micro Braiding?
Proper sectioning is critical for achieving uniform micro braids. Begin by ensuring your hair is completely dry and free of tangles. Utilize your rat-tail comb to divide your hair into small, manageable sections. This may involve parting your hair down the center or creating smaller horizontal or vertical sections based on your preference.
Each section should be no wider than a finger’s width to ensure the braids are genuinely micro in size. After creating the sections, use hair clips to secure them in place, preventing stray hairs from interfering with the braiding process. This meticulous organization allows you to concentrate on each individual braid, resulting in a neater and more professional appearance.
After sectioning, consider applying a small amount of styling product or moisturizer to each section. This not only helps maintain the braid’s hold but also adds shine and reduces frizz. Preparing each section well before you start braiding will ultimately lead to a more polished final look.
How to Begin the Braiding Process with Confidence?
Initiating the braiding process involves several straightforward steps. First, take a small section of hair from one of your prepared sections and divide it into three equal parts. To start the braid, cross the right section over the middle section, followed by the left section over the new middle section. This foundational technique, known as the three-strand braid, serves as the basis for creating micro braids.
As you continue braiding, maintain even tension throughout. This is crucial for ensuring the braids sit flat against the scalp while retaining their structure. If you notice any areas of uneven tension, gently adjust them as you progress.
For integrated cuts, once you’ve braided down to the desired length, carefully snip small sections of the braid at your preferred lengths. Ensure that the cuts are symmetrical and consistent to achieve a balanced appearance. Mastering this technique takes practice, but with dedication, you’ll be able to create beautiful micro braids that incorporate seamless cuts.
Integrating Cuts into Your Braids: A Detailed Process
Integrating cuts into your micro braids requires a combination of precision and creativity. To start, braid your hair as you normally would, maintaining a consistent pattern throughout. When you reach the desired length of the braid, it’s time to integrate the cuts.
Using sharp hair scissors, carefully snip small sections at a time, ensuring that each cut is made with intention. This technique will create a layered effect within the braids, adding depth and dimension. It’s essential to keep the cuts symmetrical to maintain a professional appearance.
You may choose to integrate cuts at varying lengths to create a more dynamic look. Experimenting with different lengths will help you understand how they affect the overall visual appeal of your hairstyle. Regularly check your progress in a mirror; this will help you ensure that the integrated cuts complement each other and enhance the overall braid design. By thoughtfully integrating cuts, you can transform standard micro braids into an artistic expression that showcases your unique style.
Innovative Styling and Customization for Your Micro Braids
Current Trendy Styling Options for Micro Braids
Micro braids offer a wealth of styling possibilities, providing ample opportunities for creativity and personal expression. One popular choice is the classic updo, where the micro braids are twisted and pinned into a chic hairstyle, making it ideal for formal events. This style not only exudes elegance but also keeps the hair neatly secured away from the face.
Another trendy option is to leave the micro braids down, allowing them to cascade over the shoulders for a relaxed yet sophisticated look. You can enhance this style by adding waves or curls to the ends for added texture and movement. For a more playful appearance, consider styling the micro braids into high pigtails or space buns, which create a fun and youthful vibe.
Furthermore, accessorizing your micro braids can significantly elevate your style. Adding beads, charms, or colorful ribbons can personalize your look and highlight the intricate detailing of the braids. These accents can be easily changed, allowing for versatility without the need for re-braiding.
Utilizing hair ties that complement your hairstyle or incorporating metallic clips can enhance the overall aesthetic. The styling possibilities are virtually endless with micro braids, enabling you to tailor your look to suit any occasion or mood, showcasing your creativity and personal flair.
Elevate Your Braids with Accessories
Incorporating accessories into your micro braids is an excellent way to enhance their visual appeal and showcase your personal style. One popular method is to use beads, which come in an array of shapes, sizes, and colors. By threading beads onto the ends of your micro braids, you create a stunning focal point that captures attention and adds flair.
You might also consider adding charms or decorative clips along the braids to introduce additional elements of interest. For instance, metallic clips can provide a touch of elegance, while colorful ribbons can contribute a fun, playful vibe. When adding accessories, it’s crucial to maintain the overall balance of the hairstyle; excessive accessories can overwhelm the look, so choose wisely.
Another option is to experiment with hair cuffs, which can be placed at different points along the braid to create an edgy, bohemian style. These decorative elements not only enhance the aesthetic but also allow for easy changes without the need to redo the braids. The right accessories can transform your micro braids from simple to extraordinary, making them a standout feature of your look.
Ways to Customize Your Micro Braids for a Unique Look
Customizing micro braids allows you to express your individuality and create a hairstyle that reflects your personal style. One of the simplest ways to customize your braids is by experimenting with different lengths. You can create a layered effect by varying the lengths of individual braids or integrating cuts throughout the style.
In addition to length, playing with different patterns can also make your micro braids unique. Consider incorporating twists or spiral braids into the mix for added texture and interest. You can also choose to mix various braiding techniques, such as combining traditional braids with micro braids or adding cornrows for a striking contrast that showcases your creativity.
Color can significantly impact the overall appearance of your micro braids. Whether you opt for bold hues or subtle highlights, adding color can introduce depth and dimension to your hairstyle. Temporary hair dyes or colored hair extensions can be used to achieve this effect without long-term commitment.
Lastly, don’t hesitate to let your personality shine through by using unique hair accessories or patterns. Every choice you make in customizing your micro braids contributes to the overall look, allowing you to create a style that is distinctly yours and a true reflection of your style.
Best Practices for Crafting Micro Braids with Integrated Cuts
Key Techniques for Beginners in Braiding
For newcomers looking to explore the world of micro braids, starting with smaller sections is crucial. This approach allows for greater control over the braiding process and leads to more uniform results. Patience is key; take your time to ensure each braid is completed thoroughly without rushing through the process.
Moreover, it’s advisable to practice on a friend or a mannequin head before attempting to braid your own hair. This provides an opportunity to refine your technique and gain confidence in your braiding skills. Additionally, consider watching tutorials or seeking guidance from experienced braiders to understand the nuances of integrating cuts successfully into your braids.
Utilizing the right tools is another best practice for beginners. High-quality rat-tail combs, clips, and styling products will streamline the process and enhance your experience. Always remember to maintain proper tension while braiding, as this is essential for achieving a neat and polished look. By following these foundational steps, beginners can build a solid foundation for mastering micro braids with integrated cuts.
Achieving Professional-Looking Micro Braids: Essential Tips
Achieving professional results with micro braids and integrated cuts requires meticulous attention to detail and a steady hand. Begin by setting up a well-lit workspace; good lighting helps you see what you’re doing and ensures that you can catch any inconsistencies early on.
Practicing proper sectioning techniques is vital; this ensures that each braid is uniform and sits well against the scalp. Additionally, maintaining consistent tension throughout the braiding process will prevent any unevenness or looseness in the braids, leading to a more professional finish that you can be proud of.
Having a keen eye for symmetry is essential. Regularly checking your progress in a mirror will help you identify any imbalances as you work. Furthermore, using high-quality hair products is crucial for preserving the integrity of both the micro braids and the integrated cuts. This approach will not only enhance the appearance of your braids but also promote the overall health of your hair.
Lastly, don’t hesitate to take breaks when needed. A steady hand and a relaxed mindset will significantly contribute to achieving the professional results you desire. By adhering to these expert strategies, you can elevate your braiding skills to create stunning micro braids with integrated cuts that truly shine.
Key Elements of Successful Braiding Techniques
Successful braiding relies on several key components that contribute to a polished and professional appearance. Here’s a list of essential elements to ensure your micro braids turn out beautifully:
- Consistent Tension: Maintain even tension throughout to prevent uneven braids and ensure longevity.
- Quality Tools: Use a rat-tail comb, clips, and sharp scissors for precision and ease.
- Understanding Hair Texture: Tailor your techniques to suit your hair type for optimal results.
- Proper Sectioning: Divide hair into small, manageable sections for uniform braids that look professional.
- Attention to Detail: Regularly check for symmetry and make adjustments as necessary to enhance the overall appearance.
- Patience: Take your time to ensure each braid is executed thoughtfully and thoroughly.
- Moisturizing Products: Use products that promote hydration and prevent frizz for a polished look.
- Regular Practice: Hone your skills over time to achieve better results and greater confidence.
Incorporating these elements into your braiding routine will significantly enhance the quality of your micro braids, leading to a more satisfying and visually appealing hairstyle. Emphasizing these key aspects will empower you to tackle more complex styles and techniques with confidence and creativity.
Maintaining Micro Braids with Integrated Cuts: Essential Care Tips
To effectively maintain micro braids with integrated cuts, regular moisturizing is vital. Keeping the scalp and braids hydrated will help prevent dryness and breakage. Light oils or leave-in conditioners can be applied to maintain moisture levels and enhance the overall shine of the braids, ensuring they look vibrant and healthy.
Careful handling is equally important in preserving the integrity of your style. Avoid excessive manipulation and refrain from pulling or tugging on the braids, as this can lead to damage over time. Instead, incorporate a gentle daily care routine that involves lightly massaging the scalp and applying a moisturizer as needed to keep everything looking fresh.
Consider using a silk scarf or bonnet while sleeping to protect your braids from friction and damage. This can help reduce frizz and maintain the style’s longevity. Finally, be mindful of how long you keep your micro braids in; generally, it’s advisable to remove them after 6-8 weeks to prevent hair damage and allow your scalp to breathe.
Implementing these tips will not only help maintain the appearance of your micro braids but also promote the health of your hair throughout the styling process, ensuring you enjoy beautiful results for as long as possible.
Comprehensive Care and Maintenance for Micro Braids
Daily Care for Micro Braids: Best Practices
Maintaining micro braids necessitates a consistent daily care routine to ensure they remain fresh and healthy. Begin each day by gently massaging your scalp with your fingertips to stimulate blood circulation. This simple act can promote hair growth and alleviate any tension around the roots of the braids, contributing to overall scalp health.
Moisturizing the scalp is also crucial. Using a lightweight oil or a hydrating scalp treatment is recommended to combat dryness and itchiness while ensuring that the braids maintain their overall appearance. Applying a small amount directly to the scalp can significantly improve comfort and hydration.
At night, protecting your micro braids is essential. Wearing a silk scarf or bonnet while sleeping can help reduce friction against your pillow, which can cause frizz and looseness in your braids. Additionally, this protective measure allows your braids to maintain their shape and shine, enhancing their longevity and appearance over time.
Establishing a daily care routine will not only improve the aesthetics of your micro braids but also promote scalp health and hair growth over time, making it a vital aspect of your overall hair care regimen.
Refreshing Your Braids: Effective Techniques
Refreshing micro braids is a crucial part of maintaining their appearance and ensuring they look vibrant throughout their wear. Start by gently washing the braids with a sulfate-free shampoo. This type of shampoo is less harsh and won’t strip the hair of its natural oils, helping to maintain moisture.
After washing, it’s crucial to apply a moisturizing product to restore hydration. A lightweight leave-in conditioner can be particularly effective. Simply spray or apply the product evenly throughout the braids to help maintain their shape and reduce frizz, ensuring they look their best.
If you notice any flat or lifeless braids, consider redoing the edges or the first few inches of the braid to give it a fresh look. This technique can revive your hairstyle without the need to redo the entire set of braids, saving you time and effort.
Lastly, ensure you continue to moisturize the scalp during this refresh process. Keeping the scalp hydrated is key to maintaining both the health of your hair and the aesthetics of your micro braids, ensuring they stay beautiful and vibrant.
Determining the Right Time to Remove Micro Braids
Recognizing when to remove your micro braids is essential for preventing damage to your hair and maintaining scalp health. Generally, it’s advisable to consider removing your braids after 6-8 weeks of wear. However, individual hair growth rates and the condition of your braids can influence this timeframe.
Here are some signs that it may be time to remove your micro braids:
- Visible frizz or fuzz around the braids.
- Scalp irritation or discomfort.
- Loose braids that are no longer secure.
- Signs of breakage or damage in the natural hair.
- Unruly tangles that are difficult to detangle.
- Excessive itching or irritation on the scalp.
- Changes in hair texture that indicate the need for a reset.
- Desire for a new style or change in appearance.
Taking these signs seriously will help you maintain the health of your hair while giving you the freedom to explore new styles. Removing your micro braids in a timely manner is an essential part of hair care that should not be overlooked, ensuring your hair remains healthy and vibrant.
Strategies for Minimizing Frizz and Flyaways in Micro Braids
To keep micro braids smooth and free from frizz, there are several effective strategies to implement. First, using an anti-frizz serum or lightweight oil can significantly help in taming flyaways. Apply the product sparingly to avoid weighing the braids down and making them look greasy, ensuring they maintain their natural beauty.
Another tip is to avoid excessive manipulation of the braids. Instead of continually adjusting or running your fingers through them, establish a hands-off approach to maintaining the style. This not only reduces the risk of frizz but also helps your braids maintain their neat appearance over time, keeping them looking fresh.
Regularly tucking in any loose hairs can also keep the style looking tidy. If you notice any strands peeking out, use a small amount of styling gel to secure them back into place. This simple step can make a substantial difference in the overall look of your micro braids, ensuring they stay polished and well-maintained.
Finally, when heading to bed, ensure you wear a silk scarf or bonnet to protect your braids from friction while sleeping. This will help preserve your style overnight and keep your micro braids looking sleek and polished, ready for the next day.
Troubleshooting Common Issues with Micro Braids
Managing Frizz and Flyaways Effectively
Frizz and flyaways can be common issues that arise with micro braids. To manage these, start by using a small amount of oil or anti-frizz serum to smooth down any unruly strands. Apply the product gently to the affected areas, ensuring you do not overwhelm the braids, which can lead to a greasy appearance.
Additionally, maintaining a regular moisturizing routine is key. By keeping your scalp and braids hydrated, you can reduce the likelihood of frizz developing. Consider using a light leave-in conditioner or a hydrating spray to keep the braids looking fresh and well-maintained, enhancing their overall appearance.
If you find that frizz persists, try to avoid products that contain alcohol, as they can dry out the hair and contribute to frizz. Instead, opt for hydrating and nourishing products that promote shine and softness, helping you maintain the sleek look of your micro braids. By following these tips, you’ll effectively manage frizz and keep your braids looking polished and fresh.
Fixing Uneven Braids: Effective Solutions
Fixing uneven braids is essential for achieving a polished and professional appearance. If you notice that some braids appear thicker or thinner than others, take a deep breath and focus on the affected sections. Start by carefully undoing the uneven braid; this will allow you to re-braid it with a more consistent size.
When re-braiding, pay close attention to the sectioning. Divide the hair into equal parts, ensuring that each is of similar width to maintain uniformity throughout the braid. As you braid, maintain an even tension to avoid creating bumps or inconsistencies that can detract from the overall look.
If you’re working with an established set of braids, you can also opt to adjust sections instead of undoing them entirely. For instance, pulling tighter on the thinner sections while loosening the thicker sections can create a more balanced appearance without completely redoing the work. This approach saves time and allows you to achieve a more uniform look across your micro braids.
Addressing Scalp Irritation: Effective Tips
Scalp irritation can be uncomfortable and detract from the beauty of your micro braids. To alleviate discomfort, start by regularly cleansing your scalp. Use a gentle, sulfate-free shampoo to remove any buildup and prevent irritation, helping you maintain a healthy scalp.
Incorporating a soothing oil, such as tea tree or jojoba oil, into your scalp care routine can also help reduce inflammation and promote healing. Apply the oil directly to the irritated area and gently massage it in to encourage relaxation and comfort, which can alleviate discomfort.
Moreover, consider reducing the tightness of your braids during installation. If you frequently experience irritation, it may be worth re-evaluating your braiding technique to ensure you are not pulling too tightly on your scalp. Furthermore, wearing your braids for shorter durations can also help mitigate irritation and give your scalp a chance to recuperate.
By addressing scalp irritation promptly and implementing these strategies, you can maintain the health and comfort of your scalp while enjoying your micro braids to the fullest.
Preventing and Fixing Loose Braids: Essential Practices
Loose braids can be frustrating, but there are ways to prevent and fix this issue. To prevent loose braids, ensure that you maintain consistent tension while braiding. A tight grip at the roots will help prevent the braids from loosening over time, ensuring they stay secure and stylish.
If you’re dealing with already loose braids, the first step is to identify the affected sections. Gently pull on the loose braid to ascertain where it is coming undone. Once identified, you can carefully re-braid the loose sections, ensuring to maintain steady tension as you work to restore their integrity.
Another strategy is to use small, clear hair elastics to secure the ends of the braids. This can help reinforce the braid’s hold and prevent it from unraveling further. Ensure that when using elastics, they are not too tight, as this can lead to breakage and discomfort.
Finally, regularly checking your braids for looseness and addressing any issues promptly will help maintain their integrity and overall appearance, ensuring your micro braids remain stunning throughout their wear.
Managing Itchiness Comfortably While Wearing Braids
Braid itchiness can be an uncomfortable side effect of wearing micro braids, but there are effective ways to manage it. Start by ensuring your scalp is clean and free from buildup, which can exacerbate itching. A gentle shampoo specifically designed for braided hair can help keep your scalp fresh and irritation-free, promoting comfort.
In addition, incorporating an anti-itch scalp treatment can provide immediate relief. Look for products containing soothing ingredients like aloe vera or tea tree oil, which are known for their calming properties. Apply these treatments directly to the itchy areas for quick relief and comfort.
Avoid scratching your scalp, as this can lead to irritation and potential damage. Instead, implement gentle massaging techniques using your fingertips to alleviate discomfort without causing harm to your braids.
Lastly, consider wearing your braids in a looser style if itchiness persists. This will allow your scalp to breathe and reduce irritation, making your overall experience more enjoyable. By following these steps, you can effectively manage braid itchiness and enjoy your micro braids comfortably.
Advanced Techniques for Stunning Micro Braids with Integrated Cuts
Creating Intricate Patterns with Micro Braids
Creating intricate patterns with micro braids is an advanced technique that can elevate your hairstyle to new heights. To achieve this, begin by planning your design before you start braiding. Drawing out or visualizing the desired pattern will help you maintain focus as you work, ensuring a cohesive and artistic result.
One effective method is to vary the size and direction of your braids. For example, incorporating larger braids alongside smaller ones can create an eye-catching contrast that adds depth to your style. Additionally, alternating the direction in which you braid—going clockwise in some areas and counterclockwise in others—adds a unique twist to your overall look.
Consider also integrating twists or cornrows into your micro braid patterns. This not only adds texture but can also create a visually striking effect that sets your style apart. When working with intricate patterns, take your time, as precision is key to achieving a polished look that impresses.
Lastly, don’t hesitate to experiment with color and accessories within your patterns. Adding beads or contrasting hair extensions can further enhance the intricacy of your design, making your micro braids truly one-of-a-kind and a reflection of your unique style.
Incorporating Multiple Textures into Your Braids
Incorporating multiple textures into your micro braids can create a stunning and dynamic hairstyle. To achieve this, start by selecting hair extensions that feature varying textures. For instance, you might choose straight, wavy, and curly extensions to blend together for a visually striking effect that adds dimension.
Begin the braiding process with the texture that is closest to your natural hair. This creates a seamless transition into the extensions. As you progress, mix in the different textured extensions at various intervals, ensuring that you distribute them evenly throughout the braiding process for a cohesive look.
It’s also important to pay attention to how you blend the textures. The key is to align the braids carefully so that they flow together naturally. This may involve adjusting the tension and spacing of your braids to ensure a smooth combination of textures that enhances the overall aesthetic.
Finally, when integrating multiple textures, be sure to style the braids appropriately to enhance the overall look. Using curling rods or a flat iron on specific sections can help create cohesive waves or curls that flow beautifully, adding depth and dimension to your hairstyle that captivates.
Experimenting with Color and Highlights in Micro Braids
Experimenting with color and highlights in micro braids can dramatically transform your look. When selecting colors, consider your skin tone and personal style. Bold, vibrant colors can make a statement, while subtle highlights can introduce dimension and depth to your hairstyle, enhancing its overall appeal.
One effective method is to use temporary hair dye or washable hair chalk for a fun, non-permanent change. This allows you to experiment with different colors without the commitment of permanent dye. When applying color, focus on the ends of the braids for a gradient effect, or integrate highlights throughout for a more blended appearance that elevates your style.
Another option is to use colored hair extensions. Blend these extensions in with your natural hair, ensuring a smooth transition that enhances your overall look. This method provides the freedom to play with multiple colors and styles without altering your natural hair, allowing for creativity without long-term commitment.
Lastly, maintain the vibrancy of your color by using color-safe shampoos and conditioners. This will help to prevent fading while keeping your micro braids looking fresh and beautiful. By incorporating color thoughtfully, you can create micro braids that are as unique as you are, showcasing your personal flair.
Mastering Seamless Cuts within Your Braids
Mastering the art of seamless cuts within micro braids requires both skill and practice. To create smooth transitions, start by carefully planning where you want to integrate the cuts. Snipping small sections at a time ensures that you maintain control and precision throughout the entire process, resulting in a polished finish.
When you begin to cut, use sharp scissors to achieve clean lines. Avoid making large, blunt cuts, as these can create noticeable edges that detract from the overall look. Instead, focus on layering the cuts to create a gradual effect that flows harmoniously with the braids, enhancing their beauty.
As you work, regularly check your progress in a mirror. This allows you to assess how well the cuts are blending with the overall braid design. If you find any inconsistencies, take the time to make adjustments as needed, ensuring that the cuts appear seamless and intentional.
Lastly, consider experimenting with different cutting techniques, such as point cutting or feathering, to create soft edges within the braids. With practice, you’ll gain the confidence to create beautifully integrated cuts that enhance the overall aesthetic of your micro braids, setting your style apart.
Enhancing Styles with Decorative Elements
Enhancing your micro braids with decorative elements can add a personalized flair that elevates your hairstyle. Beads are a popular choice; they come in various shapes, sizes, and colors, allowing you to express your individuality. Threading beads onto the ends of the braids can create eye-catching accents that draw attention and highlight your creative styling choices.
You might also consider using hair cuffs or clips that match your style. These metallic or decorative pieces can be placed at various points along the braids to create a unique look that stands out. Make sure to space them evenly for a balanced appearance, ensuring they complement rather than overwhelm your style.
Incorporating ribbons or fabric strips within your braids can also add texture and color. This technique allows for playful and creative expression of your personal style. Simply tie or weave the ribbons into the braids for a beautiful contrast that enhances your overall style.
Finally, don’t hesitate to mix and match different elements. Combining beads, clips, and ribbons can lead to a striking and cohesive style that sets your micro braids apart from the rest. By thoughtfully enhancing your hairstyle with decorative elements, you’ll create a look that is truly your own and showcases your creativity.
FAQs: All You Need to Know About Micro Braids
What are micro braids?
Micro braids are tiny individual braids created by sectioning the hair into small portions. They offer a versatile and stylish look, suitable for various hair types, allowing for creativity and personal expression.
How long do micro braids last?
Micro braids typically last between 6 to 8 weeks, depending on hair care and maintenance. Regular upkeep is essential for longevity, ensuring they remain beautiful throughout their wear.
Can I do micro braids on my own?
Yes, you can create micro braids on your own, though it may require practice. Starting with small sections and using proper techniques will help you achieve the desired look and build your skills over time.
How do I maintain my micro braids?
Maintaining micro braids involves regular moisturizing, gentle scalp massages, and wearing a silk scarf or bonnet at night to protect them while sleeping, ensuring they remain looking fresh and healthy.
Can I wash my micro braids?
Yes, you can wash your micro braids with a sulfate-free shampoo. It’s important to keep the scalp clean and free of build-up to maintain hair health and ensure the longevity of your braids.
What should I do if my braids are frizzy?
To manage frizz, apply a lightweight anti-frizz serum and avoid excessive manipulation of the braids, allowing them to maintain their shape and sleek appearance over time.
How can I refresh my micro braids?
Refreshing micro braids can be done by gently washing them, applying a leave-in conditioner, and redoing the edges or first few inches if needed, ensuring they remain vibrant and well-maintained.
What are the common issues with micro braids?
Common issues include frizz, loose braids, uneven sections, and scalp irritation. Addressing these promptly will help maintain the braids’ integrity and overall appearance, ensuring they remain stunning.
Can I color my micro braids?
Yes, you can color your micro braids using temporary hair dye or colored extensions, adding dimension and vibrancy to your hairstyle while allowing for creative expression.
When should I remove my micro braids?
It’s best to remove micro braids after 6-8 weeks to prevent hair damage and maintain scalp health, paying attention to any signs of irritation or discomfort during wear.
Connect with us on Facebook!
The Article: Creating Micro Braids with Integrated Cuts: A Comprehensive Guide appeared first on Amitys Hair Salon.
The Article Micro Braids with Integrated Cuts: Your Essential Guide Was Found On https://limitsofstrategy.com
-

Master Deep Colours: Your Ultimate Guide for Every Season
Unlocking the Power of Deep Colours in Design
Understanding Deep Colours and Their Impact on Design
Deep colours are defined as a range of rich and intense hues that provoke strong emotional responses and add significant complexity to any seasonal colour palette. These hues are notable for their higher saturation levels, which set them apart from lighter shades, rendering them powerful tools in various design applications. When utilized thoughtfully, deep colours can transform a space, generating either a bold, dramatic effect or a peaceful, calming atmosphere based on the intended design goal. In design contexts, deep colours serve as essential components that enrich visual compositions, creating a sense of depth and stability. Mastering the art of using deep colours can significantly enhance both interior aesthetics and fashion selections throughout the changing seasons.
The impact of deep colours on seasonal themes is particularly noteworthy. For example, during spring, vibrant hues like Emerald Green and Rich Purple encapsulate the notions of renewal and vitality. Conversely, in winter, deep reds and cool blues project warmth and serenity. The adaptability of deep colours permits them to harmonize seamlessly with other shades, facilitating intricate layering and textural contrasts that resonate with seasonal sentiments, ultimately enriching the overall aesthetic experience.
To effectively identify deep colours, several strategies can be employed. These include assessing saturation levels, applying principles of colour theory, and recognizing the psychological effects that different shades can evoke. Effective methods for discerning deep colours encompass:
- Evaluating colour saturation: Deep colours are typically defined by their elevated saturation levels.
- Utilizing colour wheels: Familiarity with colour relationships can enhance recognition.
- Observing emotional reactions: Noticing the feelings that specific colours elicit can guide your choices.
- Testing under various lighting: Natural light can reveal the true richness and depth of colours.
The Psychological Effects of Deep Colours on Mood and Atmosphere
Deep colours possess an extraordinary capacity to shape mood by crafting environments that range from tranquil to invigorating. For instance, a room adorned with deep blues can foster a sense of calm and relaxation, making them ideal for spaces like bedrooms or meditation areas. In contrast, deep reds can ignite energy and passion, making them perfect for social settings. Comprehending the psychological influences of colours is crucial for their effective application in seasonal decor and fashion decisions.
The emotional responses triggered by deep colours arise from cultural associations, personal experiences, and biological reactions. For example, deep green is commonly associated with nature and growth, while deep purple often signifies luxury and creativity. By understanding these connections, individuals can curate environments that resonate emotionally with inhabitants or visitors. This awareness is particularly significant in seasonal contexts, where desired atmospheres may shift dramatically from one season to another.
Thoughtfully incorporating deep colours into design can cultivate a connection to the changing seasons. For instance, during autumn, rich browns and deep oranges can evoke warm, inviting spaces reminiscent of falling leaves and harvest celebrations. By considering the psychological implications of deep colours, one can create environments that not only enhance visual allure but also promote well-being and satisfaction among their occupants.
Practical Approaches to Identifying Deep Colours
Recognizing deep colours necessitates a discerning eye and a robust understanding of colour theory. The initial step involves assessing the saturation of a hue, acknowledging that deep colours are generally more vibrant and intense compared to their lighter counterparts. This can be accomplished through straightforward comparisons of colour swatches, identifying which shades elicit a stronger emotional response.
Another helpful technique is to employ colour wheels, which visually represent colour relationships. These tools aid in comprehending complementary colours and how deep hues interact with one another. Furthermore, focusing on emotional responses to colours can guide the selection process. Taking the time to observe how specific shades influence your feelings can inform your choices, leading to more meaningful applications.
Lastly, testing colours in diverse lighting conditions is essential. Natural light can enhance the richness of deep colours, while artificial lighting may alter their appearance. Conducting tests in various settings allows for a comprehensive understanding of how these hues will perform across different environments, especially as seasons transition.
Expert Strategies for Mastering Deep Colours in Seasonal Applications

What Do Experts Recommend Regarding Seasonal Deep Colours?
Professionals in colour theory and design consistently underscore the transformative capacity of deep colours in enhancing seasonal themes. These experts assert that the strategic application of deep hues can significantly influence the atmosphere of a space or event. For example, interior designers often advocate for deep jewel tones during winter months to convey warmth and comfort, crafting inviting environments amidst the chill. Seasonal design strategies frequently incorporate deep colours to resonate with the emotions and experiences tied to specific times of the year.
Real-world applications of expert insights can be observed in various design projects. In a recent luxury hotel renovation, designers employed deep navy and emerald tones in guest rooms to evoke tranquility and sophistication. This approach resulted in a notable increase in guest satisfaction, highlighting the importance of colour selection in seasonal themes. Similarly, event planners often utilize deep colours for holiday celebrations, employing rich reds and greens to create festive atmospheres that reflect traditional themes.
Experts also recognize the crucial role deep colours play in branding and marketing, particularly during seasonal campaigns. Brands aiming to evoke nostalgia and warmth in autumn frequently incorporate rich earthy tones into their visual communications. This strategic use of colour cultivates a cohesive identity that resonates with target audiences, ultimately enhancing brand loyalty and engagement.
How Can Professionals Assist You in Colour Selection?
Experts serve as invaluable resources for guiding individuals and businesses in selecting appropriate deep colours for each season. Their expertise in colour psychology, emerging trends, and practical applications can lead to informed decisions that align with the desired emotional response. For instance, interior designers typically evaluate a client’s lifestyle and preferences before recommending deep colours that enhance their living spaces while reflecting personal styles.
Moreover, experts can provide insights into current trends. Recently, there has been a resurgence of interest in deep colours, with designers championing their use in both residential and commercial settings. This awareness of trends enables individuals to make choices that are not only visually appealing but also modern and relevant.
Additionally, experts can assist in conducting colour assessments, helping clients comprehend how various hues interact with existing elements in their spaces. This collaborative process ensures that the selected deep colours harmonize with other design aspects, such as furniture, fixtures, and lighting. Ultimately, expert guidance can yield a more cohesive and visually pleasing outcome that embodies seasonal themes and personal preferences.
What Are the Best Practices for Implementing Expert Recommendations?
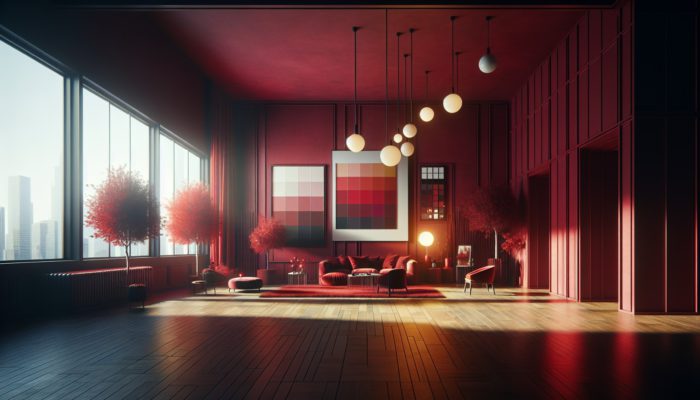
Implementing expert advice on deep colour selection necessitates a strategic approach. First, it is essential to comprehend the context of each season. Seasonal changes evoke specific colour associations and emotional responses, so aligning deep colour selections with these factors can significantly enhance the overall design.
A valuable best practice is to test colours in various lighting conditions before finalizing decisions. This process allows individuals to observe how deep colours interact with both natural and artificial light, ensuring that the selected hues achieve the desired impact. For instance, a deep red may appear vibrant in daylight but subdued under warm artificial lighting.
Additionally, considering the broader design scheme is crucial. Deep colours should complement other elements in the space, including furniture, textiles, and decor. Achieving a harmonious balance between deep and lighter shades can create an engaging visual experience that reflects the intended seasonal aesthetic.
Finally, embracing experimentation is vital. A trial-and-error approach can yield unexpected and delightful outcomes. Whether utilizing paint samples, fabric swatches, or accent pieces, testing various combinations can uncover innovative methods to effectively incorporate deep colours.
Selecting the Ideal Deep Colours for Every Season
Which Deep Colours Best Represent Spring?
Spring typically calls for vibrant deep colours that embody the themes of growth, renewal, and exuberance. Deep shades such as emerald green, rich purple, and vibrant coral encapsulate the essence of spring, infusing vitality and energy into any design or fashion choice. These colours resonate with the blossoming of flowers and the rejuvenation of nature, making them perfect for this lively season.
Incorporating deep colours into spring designs can be accomplished through various applications, including home decor, fashion, and event planning. For instance, using emerald green in textiles or wall colours can evoke a sense of freshness and vitality, while rich purple can infuse sophistication into any space.
Recommended deep colours for spring include:
- Emerald Green
- Rich Purple
- Coral
- Deep Turquoise
- Vibrant Fuchsia
- Royal Blue
- Golden Yellow
By integrating these deep hues into seasonal themes, one can create a unified aesthetic that celebrates the vibrancy of spring.
Summer Deep Colour Selections for an Energetic Atmosphere
During summer, the preferred deep colours transition to warm, energizing tones that embody the vibrant spirit of the season. Deep blues reminiscent of the ocean and fiery oranges that evoke stunning sunsets are particularly favored for summer designs. These colours not only reflect the lively energy of the season but also cultivate an inviting atmosphere that encourages outdoor gatherings and social interactions.
In fashion, deep summer colours can be paired with lighter shades to create striking contrasts. For example, a deep navy dress can be beautifully complemented by light pastel accessories, resulting in a balanced and harmonious ensemble. Similarly, in home decor, deep blue accents can add depth to a predominantly light colour palette, enhancing the overall summer aesthetic.
Recommended deep colours for summer include:
- Deep Ocean Blue
- Fiery Orange
- Vibrant Red
- Royal Purple
- Deep Coral
- Sunny Yellow
- Fresh Mint Green
These selections can significantly elevate the joyful and lively atmosphere that summer embodies, creating an inviting and dynamic environment.
Autumn and Winter Deep Colour Choices for Coziness
As the seasons transition into autumn and winter, deep colours evolve to reflect the more subdued and comforting aesthetics characteristic of these times. Rich reds, browns, and cool blues are quintessential choices that foster cozy atmospheres, ideal for the colder months. These colours elicit feelings of warmth and comfort while resonating with the natural world during fall and winter.
In autumn, deep reds and burnt oranges echo the changing foliage, creating an inviting environment perfect for gatherings. In winter, cool blues paired with deep greys can cultivate a serene and tranquil atmosphere that promotes relaxation and reflection. The strategic application of these hues in decor, fashion, and seasonal events can greatly enhance the overall experience during the colder months.
Recommended deep colours for autumn and winter include:
- Deep Red
- Chocolate Brown
- Cool Navy Blue
- Forest Green
- Burnt Orange
- Pine Green
- Charcoal Grey
By incorporating these deep colours into designs and fashion choices, one can create a warm, inviting, and festive atmosphere as the seasons shift.
Enhancing Seasonal Decor and Atmosphere with Deep Colours
How Do Deep Colours Transform Home Decor?
Deep colours can dramatically alter home decor by introducing depth, richness, and warmth to living spaces. These hues create a sense of luxury and comfort, making any environment feel more inviting and sophisticated. The effects of deep colours are particularly pronounced during seasonal transitions, where they can evoke the emotions and themes associated with each time of year.
Incorporating deep colours into home decor can serve multiple purposes, from establishing focal points to creating a harmonious flow throughout a space. For example, painting an accent wall in a deep hue can attract attention and add dimension to a room. Similarly, deep-coloured textiles, such as cushions or throws, can enhance the overall aesthetic while providing additional comfort and warmth.
Furthermore, deep colours can influence how individuals perceive space. Rich, dark hues can make a room feel cozier and more intimate while anchoring lighter elements within the design. This balance creates an engaging visual experience that resonates with the changing seasons and the emotions they evoke.
Utilizing Deep Colours in Seasonal Themes for Cohesion
Incorporating deep colours into seasonal themes not only enhances overall aesthetics but also creates a cohesive design narrative. By strategically employing deep hues in textiles, wall colours, and decorative accents, one can elevate the visual experience and embody the essence of each season. For instance, during autumn, deep reds and oranges can be woven into table settings and decor to reflect the richness of the harvest.
Using deep colours in seasonal themes also enriches the sensory experience of a space. The application of warm, inviting hues in winter decor can foster a comforting atmosphere during colder months, making areas feel more welcoming and conducive to relaxation. Additionally, summer events can benefit from the vibrancy of deep colours, infusing celebrations with energy and excitement.
To effectively incorporate deep colours into seasonal themes, individuals can:
- Use deep colours in accent pieces, such as cushions or throws.
- Paint accent walls in deep hues to establish focal points.
- Choose deep-coloured tableware for seasonal gatherings.
- Integrate deep colours into seasonal floral arrangements.
These strategies can produce a cohesive and immersive design that captures the spirit of each season, enhancing the overall experience for both inhabitants and guests.
What Are the Most Effective Strategies for Integrating Deep Colours?
Incorporating deep colours into design can be achieved through various strategies, ensuring a harmonious balance between deep and lighter hues. One effective approach is to use deep colours as accent pieces within a predominantly light colour palette. This method allows deep hues to stand out without overwhelming the space, creating focal points that draw attention and enhance visual interest.
Another best practice is to layer deep colours with complementary shades. For instance, pairing a deep green sofa with lighter neutral cushions can create a balanced look that feels both sophisticated and inviting. This layering technique adds depth while allowing for versatility in design, enabling seasonal adjustments with ease.
Additionally, considering the proportions of deep colours used in a space is essential. Introducing deep hues in moderation can prevent a room from feeling too dark or heavy. Instead, they should be carefully balanced with lighter elements to maintain a harmonious and inviting atmosphere.
Finally, experimenting with different textures can enhance the impact of deep colours. Incorporating various materials, such as velvet, wood, or metal, can create a dynamic visual experience that resonates with the richness of the deep hues. By embracing these strategies, individuals can effectively incorporate deep colours into their designs, creating a visually engaging and seasonally appropriate aesthetic.
The Vital Impact of Lighting on Perceiving Deep Colours
How Does Lighting Influence the Perception of Deep Colours?
Lighting plays a critical role in how deep colours are perceived, significantly altering the experience of these hues within any given space. Natural light can amplify the richness of deep colours, allowing their full vibrancy to shine through. Conversely, artificial lighting can enhance or diminish the intensity of these hues, impacting the overall mood and atmosphere of a room.
For example, deep colours illuminated by bright daylight may appear more vivid and lively, while the same colours under warm artificial light can create a softer, more subdued effect. Understanding how various lighting conditions influence deep colours is essential for achieving the desired ambiance in seasonal designs.
Additionally, the direction of light can affect how deep colours are perceived. Light coming from various angles can create shadows and highlights that alter the visual depth of colours, adding complexity and richness to the overall design. This interplay between light and colour is crucial in crafting environments that resonate with the seasonal themes and emotions one aims to evoke.
Adjusting Deep Colours for Optimal Lighting Conditions
Adjusting deep colours for different lighting conditions requires an understanding of the type of light present in a space and how it interacts with various hues. In environments with predominantly warm lighting, deep colours can be enhanced to evoke a sense of warmth and comfort. For example, using deep yellows and reds under warm lighting can create a cozy atmosphere suitable for winter evenings.
Conversely, in settings with cooler lighting, deep colours may require careful selection to avoid appearing overly muted. In such cases, vibrant deep blues and greens can maintain their impact, capturing the freshness of summer or the calmness of spring.
To effectively adjust deep colours based on lighting conditions, consider the following strategies:
- Test colours in both natural and artificial light to observe how they shift.
- Utilize warm lighting to enhance the richness of deep hues.
- Incorporate dimmable lighting options to adjust intensity based on the time of day.
- Consider layering light sources to create a dynamic interplay of light and shadow.
These strategies ensure that the impact of deep colours is maximized, aligning with the mood and ambiance one wishes to create throughout the seasons.
What Are the Most Effective Lighting Techniques for Deep Colours?
Employing effective lighting techniques can significantly enhance the perception of deep colours, allowing them to shine in their full glory. A fundamental approach is to utilize dimmable lights, enabling individuals to adjust the intensity of illumination based on the time of day or desired atmosphere. This flexibility allows deep colours to be showcased in their most flattering light, whether it be a cozy evening setting or a bright daytime ambience.
Incorporating different light temperatures represents another effective lighting technique. Warmer lights can amplify the richness of deep colours, fostering a welcoming and intimate environment. Conversely, cooler lighting can emphasize the vibrancy of deep hues, particularly during warmer months. Understanding how to manipulate light temperatures can profoundly influence how deep colours are experienced within a space.
Key lighting techniques for deep colours include:
- Utilizing dimmable and adjustable light sources for flexibility.
- Incorporating warm lighting to enhance the richness of deep hues.
- Using layered lighting to create depth and dimension.
- Positioning lights strategically to highlight focal points in a room.
By mastering these lighting techniques, one can substantially enhance the depth and richness of deep colours, creating immersive and engaging environments that resonate with seasonal themes.
How Can Lighting Amplify the Depth of Deep Colours?
Strategic lighting placement and angles are critical in enhancing the depth and richness of deep colours. By directing light towards these hues, one can create a dynamic visual experience that showcases their full potential. For example, highlighting deep-coloured artwork or furniture with focused lighting can generate dramatic shadows and highlights, emphasizing their texture and depth.
Furthermore, the use of layered lighting can add complexity to the environment. Combining ambient, task, and accent lighting can create a multi-dimensional effect, allowing deep colours to interact with light in diverse ways. This interplay can evoke a changing atmosphere as natural light shifts throughout the day, further enriching the seasonal experience.
Moreover, understanding the spatial arrangement of deep colours in relation to light sources can optimize their impact. For instance, placing deep-coloured elements near windows can maximize natural light exposure, while strategically positioned artificial lights can enhance mood and ambience. By thoughtfully considering lighting placement, one can create a harmonious and engaging environment that resonates with intended seasonal themes.
Research-Backed Benefits of Mastering Deep Colours for Seasonal Use
What Does Research Reveal About Deep Colours and Well-being?
Research indicates that deep colours can have a positive influence on well-being, creating environments that foster calmness or energize individuals. Studies suggest that deep hues can affect mood and emotional responses, contributing to feelings of comfort and stability. For instance, deep blues are often linked with tranquility, making them ideal for spaces designed for relaxation, such as bedrooms or meditation areas.
Moreover, the psychological effects of deep colours extend to their ability to reduce stress. Research has shown that environments filled with deep hues can lead to lower cortisol levels, the stress hormone, promoting a sense of calm and overall well-being. This finding is particularly relevant in design contexts, where the careful selection of deep colours can create spaces that nurture mental health and emotional balance.
By understanding the research surrounding deep colours and their impact on well-being, individuals can make informed choices in their design and decor, ensuring the spaces they inhabit contribute positively to their overall mental health.
How Can Deep Colours Boost Productivity?
Deep colours can enhance productivity by creating focused and inspiring environments that encourage creativity and concentration. For example, deep greens and blues are often associated with calmness and focus, making them ideal for workspaces and study areas. These colours can help minimize distractions and promote clarity, allowing individuals to engage more deeply with their tasks.
Additionally, the use of deep colours in collaborative settings can foster a sense of connection and teamwork. When paired with appropriate lighting, deep hues can create a stimulating environment that inspires collaboration and innovation. This is especially relevant in dynamic work environments, where the energy of a space can significantly influence team interactions and overall productivity.
Incorporating deep colours into various aspects of design, from office interiors to creative studios, can lead to enhanced focus and increased output. By creating environments that inspire and motivate, individuals can tap into the potential benefits of deep colour psychology to improve productivity and satisfaction.
What Are the Long-term Advantages of Utilizing Deep Colours?
The long-term benefits of using deep colours extend beyond aesthetics, positively influencing mental health and the overall quality of living spaces. Regular exposure to thoughtfully chosen deep colours can lead to improved emotional well-being, fostering positive associations with specific environments over time. This is especially significant in residential and commercial settings where individuals spend substantial amounts of time.
Furthermore, deep colours can elevate the perceived value of a space. Properties featuring well-selected deep hues often command higher market values, as these colours can enhance the overall aesthetic appeal and atmosphere. For homeowners and investors, understanding the long-term benefits of deep colours can lead to more strategic design choices that elevate the value of their spaces.
In summary, the use of deep colours not only enriches immediate visual experiences but also contributes to sustained positive mental health, emotional well-being, and increased property value over time.
Strategies for Applying Deep Colours in Seasonal Fashion
Which Deep Colours Are Best for Seasonal Outfits?
Deep colours such as burgundy, navy, and forest green are ideal for seasonal fashion, adding sophistication and elegance to any wardrobe. These hues can be seamlessly paired with lighter tones, allowing for versatile styling that captures the essence of each season. For instance, a deep burgundy dress can be beautifully complemented with soft pink accessories, creating a balanced and visually appealing ensemble.
In addition to clothing, deep colours can also be integrated into accessories, footwear, and outerwear. A deep navy coat can serve as a timeless staple during winter, while forest green scarves can add a vibrant touch to spring outfits. These colours not only stand out but also evoke the emotions associated with each season, making them essential for seasonal fashion.
Recommended deep colours for seasonal outfits include:
- Burgundy
- Navy Blue
- Forest Green
- Rich Purple
- Charcoal Grey
- Burnt Orange
- Deep Teal
By incorporating these deep hues into seasonal wardrobes, individuals can create a stylish and cohesive look that resonates with the changing seasons.
How to Accessorize with Deep Colours for Maximum Effect
Accessorizing with deep colours involves strategically selecting items that enhance the main outfit while elevating the overall look. Deep-coloured accessories, such as scarves, hats, or jewelry, can add depth and interest to any ensemble. For instance, pairing a deep teal dress with gold accessories can create a striking contrast that enhances the outfit’s elegance.
In addition to contrasting hues, considering the texture of accessories can amplify the impact of deep colours. Selecting materials such as velvet, silk, or leather can create a luxurious feel, drawing attention to the deep hues while adding dimension to the overall look. Combining deep colours with diverse textures can result in a visually engaging ensemble that captures the essence of seasonal style.
When accessorizing with deep colours, consider the following strategies:
- Choose accessories that complement or contrast with the main outfit.
- Incorporate various textures to enhance visual interest.
- Utilize statement pieces to draw attention to specific colours.
- Balance deep hues with lighter tones to maintain harmony.
By thoughtfully accessorizing with deep colours, individuals can elevate their outfits and create a cohesive seasonal aesthetic that reflects their personal style.
What Are the Latest Trends in Deep Colour Fashion?
The latest trends in deep colour fashion showcase a resurgence of monochromatic deep colour outfits alongside the creative blending of deep tones with pastels. Monochromatic looks, featuring varying shades of a single deep hue, create a sophisticated and elegant aesthetic suitable for both casual and formal occasions. This trend allows individuals to experiment with layering and texture while maintaining a cohesive appearance.
Mixing deep colours with pastels has emerged as another popular trend, adding a fresh and modern twist to seasonal wardrobes. For example, pairing a deep purple top with soft lilac trousers can create a dynamic yet harmonious ensemble that embodies the essence of spring or summer. This approach not only enhances visual interest but also offers greater versatility in styling.
Other notable trends in deep colour fashion include incorporating prints and patterns featuring deep hues, such as florals or geometric designs. These prints can infuse an artistic touch into outfits, making them suitable for various occasions. By embracing these trends, individuals can curate fashionable and seasonal looks that celebrate the beauty of deep colours.
How Deep Colours Shape Seasonal Events and Gatherings
What Role Do Deep Colours Play in Event Planning?
Deep colours can establish the mood for seasonal events by creating a specific atmosphere that resonates with the occasion. Whether it’s a winter wedding or an autumn festival, the intentional use of deep hues can enhance the overall experience for guests. These colours can be employed in decorations, lighting, and even food presentation, allowing for a cohesive and immersive event theme.
For example, deep reds and golds can create an elegant and festive atmosphere for holiday gatherings, while deep greens and browns evoke the warmth of autumn celebrations. By selecting deep colours that align with the season and event theme, planners can craft memorable experiences that resonate with attendees.
Moreover, deep colours can also influence guests’ emotions and interactions. Research suggests that specific colours can evoke feelings of warmth, comfort, or excitement, contributing to a positive atmosphere. Understanding the psychological effects of deep colours can guide event planners in creating environments that foster connection and enjoyment among attendees.
Utilizing Deep Colours in Seasonal Festivities for a Memorable Experience
Incorporating deep colours into seasonal festivities can make celebrations more memorable and visually engaging. From table settings to decorations, the strategic use of deep hues can enhance the overall aesthetic and reflect the spirit of the season. For instance, a holiday table adorned with deep red and green accents can evoke a festive atmosphere, while a spring gathering can be enlivened with deep purples and yellows.
Utilizing deep colours in seasonal festivities also allows for creative expression. Event planners can experiment with various combinations of deep hues, textures, and materials to craft a unique and immersive experience. For example, deep-coloured linens can add elegance to a dining setting, while floral arrangements featuring deep shades can enhance the visual appeal of the space.
To effectively integrate deep colours into seasonal festivities, consider the following strategies:
- Select a cohesive colour palette that reflects the seasonal theme.
- Utilize deep colours in table settings, decorations, and attire.
- Experiment with different textures to create visual interest.
- Incorporate deep hues into food presentation for added impact.
By embracing these strategies, event planners can create stunning and unforgettable festive experiences that resonate with guests.
What Are the Best Practices for Deep Colour Event Design?
Best practices for deep colour event design involve creating a cohesive colour palette while considering the event’s purpose. A well-thought-out colour scheme can enhance the overall aesthetic and atmosphere, making the event more engaging for attendees. By selecting deep colours that align with the season and theme, planners can craft visually appealing and immersive experiences.
Incorporating lighting techniques is another critical aspect of deep colour event design. Strategic lighting can enhance the richness of deep colours, creating a dynamic visual experience that resonates with the event’s theme. For instance, using warm lighting can amplify the warmth of deep reds and oranges during autumn celebrations, while cool lighting can enhance the elegance of deep blues for winter events.
Additionally, balancing deep colours with lighter hues is essential for maintaining harmony. Overusing deep colours can create a heavy atmosphere; therefore, it is important to introduce lighter elements that complement the overall design. This balance ensures that deep colours retain their impact while fostering an inviting environment.
Key best practices for deep colour event design include:
- Developing a cohesive colour palette aligned with the event’s theme.
- Using strategic lighting to enhance deep colours.
- Balancing deep hues with lighter shades for visual harmony.
- Incorporating various textures and materials to add depth.
By following these best practices, event planners can create engaging and memorable experiences that resonate with the intended seasonal themes.
How Do Deep Colours Influence the Mood of Seasonal Events?
Deep colours have the power to evoke distinct emotions and moods, significantly enhancing the atmosphere of seasonal events. For instance, deep reds and golds can generate a sense of warmth and festivity, making them ideal for winter celebrations. In contrast, deep blues and greens can inspire tranquility and calmness, which is suitable for spring or summer gatherings.
The emotional responses elicited by deep colours influence guests’ experiences, encouraging connection and engagement. Research indicates that colours can affect heart rate, mood, and stress levels, making the intentional use of deep hues particularly important in event planning. Understanding the psychological impact of colours allows planners to create environments that foster desired emotional responses among attendees.
Moreover, deep colours can contribute to a shared sense of identity and connection among guests. When the colour scheme aligns with cultural or seasonal themes, attendees may feel a greater sense of belonging and connection to the experience. This is especially relevant during holiday celebrations, where deep colours can evoke nostalgia and familiarity.
To optimize the emotional impact of deep colours in seasonal events, consider the following approaches:
- Select colours that resonate with the event’s theme and desired atmosphere.
- Utilize deep hues to enhance emotional connections among guests.
- Incorporate elements that evoke nostalgia or shared experiences.
- Experiment with colour combinations to create dynamic moods.
By thoughtfully integrating deep colours into event design, planners can create immersive experiences that resonate with attendees and enhance the overall atmosphere.
Integrating Deep Colours with Seasonal Themes for Seamless Cohesion
Utilizing deep colours that align with seasonal themes can create a unified and immersive event experience. From invitations to venue decor, the strategic incorporation of deep hues can reinforce the overarching theme, enhancing the overall impact of the event. For example, a winter wedding featuring deep blues and whites can evoke a serene and magical atmosphere, while an autumn gathering can utilize rich reds and oranges to celebrate the harvest.
Incorporating deep colours into various elements of event design allows for greater cohesion and visual appeal. This includes everything from table settings and floral arrangements to signage and lighting. Each element contributes to the overall narrative, creating a seamless experience for guests that resonates with the chosen season.
To effectively integrate deep colours with seasonal themes, consider the following strategies:
- Develop a cohesive design narrative that reflects the season.
- Incorporate deep colours into all aspects of the event, from decor to attire.
- Utilize seasonal elements, such as flowers or foliage, that complement deep hues.
- Experiment with lighting to enhance the overall atmosphere.
By embracing these strategies, event planners can create immersive experiences that capture the essence of each season, resulting in memorable celebrations that resonate with attendees.
Proven Strategies for Mastering Deep Colours Throughout the Seasons
What Are Effective Strategies for Using Deep Colours?
Effective strategies for using deep colours involve understanding principles of colour theory and experimenting with various combinations. Recognizing the relationships between colours can assist individuals in making informed choices, ensuring that deep hues harmonize with other elements within a space or outfit. This understanding can lead to more impactful and visually engaging designs.
Another beneficial approach is to test different combinations of deep colours in various settings. This process enables individuals to observe how colours interact with one another, opening up new possibilities for design and styling. Starting small, such as with accessories or paint samples, can help gauge the potential impact of deep colours before committing to larger applications.
Moreover, being mindful of the psychological implications of colour selection is essential. Understanding how specific deep colours can evoke particular emotions can guide individuals in making choices that align with the desired atmosphere. For example, employing deep blues in a study can foster focus and productivity, while deep reds in a dining area can stimulate conversation and connection.
Key strategies for mastering the use of deep colours include:
- Understanding colour theory to inform selection.
- Experimenting with different combinations to discover new palettes.
- Being mindful of the psychological effects of colours.
- Starting small and gradually expanding the use of deep hues.
By embracing these strategies, individuals can effectively incorporate deep colours into their designs and styles, mastering the seasonal nuances they bring.
How Can You Experiment with Deep Colours in Design?
Experimenting with deep colours involves trying out various shades, combinations, and applications to find what resonates best within a given context. One practical approach is to begin with small elements, such as accessories, textiles, or accent pieces. This allows for a low-risk exploration of how deep colours can enhance a space or outfit without overwhelming it.
Another effective method is to create mood boards or digital samples showcasing various deep colour combinations. This visual approach can help individuals understand how different hues interact and complement one another. By utilizing online tools or physical swatches, one can experiment with layering deep colours alongside lighter tones, creating a balanced and harmonious aesthetic.
Moreover, seeking feedback from peers or design professionals can provide valuable insights and alternative perspectives. Engaging in discussions about colour preferences and experiences can deepen understanding and inspire new ideas for incorporating deep colours.
To successfully experiment with deep colours, consider the following strategies:
- Start with small elements to gauge impact.
- Create mood boards or digital samples for visual exploration.
- Layer deep colours with lighter hues for balance.
- Seek feedback from others to expand your perspective.
By adopting these strategies, individuals can effectively experiment with deep colours, discovering innovative ways to incorporate them into their seasonal designs and styles.
What Are the Key Elements of Successful Deep Colour Use?
The key elements of successful deep colour use involve understanding the psychological impact, balancing with other colours, and considering the overall design context. Recognizing how deep colours influence emotions can guide individuals in making informed choices that resonate with the desired atmosphere. For instance, using deep greens in a living area can evoke feelings of tranquility and connection to nature.
Balancing deep colours with lighter shades is crucial for maintaining harmony within a space or outfit. Deep hues can easily dominate a design; therefore, introducing lighter elements that complement and enhance their presence is essential. This balance creates visual interest and ensures that deep colours retain their impact without overwhelming the viewer.
Finally, considering the overall design context is vital for successful deep colour use. This includes assessing how deep colours interact with existing elements, such as furniture, decor, and lighting. A cohesive approach to colour selection and application can lead to more harmonious and engaging designs.
Key elements for successful deep colour use include:
- Understanding the psychological effects of colour.
- Balancing deep hues with lighter shades for harmony.
- Considering the overall design context for cohesion.
- Being open to experimentation and adaptation.
By embracing these key elements, individuals can master the use of deep colours in their designs, creating captivating and seasonally appropriate atmospheres.
How Do Deep Colours Influence Seasonal Design?
Deep colours significantly shape the mood and style of seasonal designs, influencing the overall atmosphere of spaces and experiences. Each season presents unique themes and emotional associations, and the strategic use of deep hues can enhance these elements, creating immersive environments that resonate with the time of year.
For instance, during autumn, deep reds and oranges can evoke warmth and comfort, aligning with the season’s themes of harvest and nostalgia. Similarly, in winter, cool blues and deep greens can foster a serene and peaceful atmosphere, reflecting the tranquility of the colder months. By thoughtfully incorporating deep colours, designers can create spaces that embody the essence of each season, fostering emotional connections among inhabitants and guests.
Moreover, deep colours can serve as a foundation for layering other design elements. Textiles, artwork, and furnishings can all complement deep hues, creating a rich and engaging visual experience. This layering process allows for greater versatility in seasonal designs, enabling individuals to adapt their spaces as the seasons change.
To effectively influence seasonal design with deep colours, consider the following strategies:
- Align deep colours with each season’s emotional themes.
- Layer deep hues with complementary elements to create depth.
- Use deep colours to create focal points and draw attention.
- Incorporate seasonal elements that resonate with deep hues.
By mastering the influence of deep colours on seasonal design, individuals can create captivating environments that reflect the beauty and essence of each time of year.
What Are Common Mistakes to Avoid When Using Deep Colours?
Common mistakes involving deep colours often stem from overuse, inadequate lighting considerations, and neglecting balance with other elements. Overusing deep hues can create a heavy or oppressive atmosphere, detracting from the intended aesthetic. It is crucial to introduce lighter shades that complement deep colours, maintaining a harmonious visual experience.
Another frequent mistake is failing to consider how lighting affects deep colours. Poor lighting can alter the perception of these hues, diminishing their impact or causing them to appear muted. Testing colours in various lighting conditions is vital to ensure that deep hues achieve the desired effect within a space.
Lastly, neglecting the balance between deep colours and other elements can result in disjointed designs. A cohesive approach to colour selection should consider furniture, decor, and lighting, ensuring that deep hues harmonize with the overall design context.
To avoid common errors with deep colours, consider the following tips:
- Avoid overusing deep colours; balance with lighter shades.
- Test colours in various lighting conditions for accurate perception.
- Consider the overall design context for cohesion.
- Be open to adjusting and modifying colour choices based on feedback.
By recognizing these common pitfalls and adopting these tips, individuals can effectively utilize deep colours in their designs, creating beautiful and seasonally appropriate spaces.
Frequently Asked Questions About Deep Colours and Their Applications
What are the benefits of using deep colours in home decor?
Deep colours enrich home decor, providing a sense of richness and depth that creates inviting and luxurious spaces. They elicit emotional responses and can enhance the overall atmosphere, making a home feel more welcoming and sophisticated.
How can I select deep colours for my seasonal wardrobe?
When choosing deep colours for your wardrobe, consider the emotional themes of the season and pair deep hues with lighter tones for balance. Popular choices include burgundy, navy, and forest green, which add elegance to any ensemble.
What lighting is most effective for showcasing deep colours?
Dimmable and adjustable lighting is most effective for deep colours, providing flexibility in atmosphere. Additionally, incorporating warm lighting can enhance the richness of deep hues, while cool lighting can help maintain their vibrancy.
How can deep colours influence mood and well-being?
Deep colours can evoke specific emotions and contribute to mental well-being. For instance, deep blues promote calmness, while deep reds stimulate energy, influencing how individuals feel in a space.
What are the best methods for incorporating deep colours into seasonal events?
Integrate deep colours into seasonal events by selecting a cohesive colour palette, using them in decor and attire, and experimenting with textures. This approach creates an immersive experience that reflects the spirit of the season.
Can deep colours impact productivity in workspaces?
Yes, deep colours can enhance productivity by fostering focused environments. Shades like deep green and blue encourage concentration and creativity, making them ideal for offices and study areas.
How do deep colours affect fashion trends?
Deep colours are increasingly popular in fashion, with trends such as monochromatic deep outfits and mixing deep tones with pastels. These styles allow for creative expression while remaining seasonally relevant.
What are common mistakes to avoid when using deep colours?
Common mistakes include overusing deep colours, overlooking lighting considerations, and failing to balance them with lighter shades. Being mindful of these factors can enhance the effectiveness of deep colour utilization.
How can I experiment with deep colours in my designs?
Experiment with deep colours by starting with small elements, creating mood boards, and layering hues. Seeking feedback from others can also provide valuable insights into your choices.
What are the long-term benefits of mastering deep colours?
Long-term benefits include improved mental health, enhanced aesthetic appeal, and increased property value. Regular exposure to thoughtfully chosen deep colours can create more enjoyable and valuable living spaces.
Connect with us on Facebook!
The Article: Mastering Deep Colours for Seasons: A Universal Guide appeared first on Amitys Hair Salon.
The Article Deep Colours for Seasons: Your Ultimate Mastery Guide Was Found On https://limitsofstrategy.com
-
Sparkle in Prom Hairstyles: Dazzling Looks to Shine Bright
Essential Tools for Crafting Gorgeous Prom Hairstyles That Dazzle
Key Brushes and Combs for Perfect Hair Styling Results
Selecting the perfect hair tools is essential for achieving the stunning hairstyle you’ve envisioned, especially when it comes to creating those magical prom looks that will leave everyone in awe. Investing in top-notch brushes and combs can vastly improve the final appearance of your hairstyle. Round brushes are particularly beneficial for adding volume and creating soft, flowing waves that exude elegance. Meanwhile, wide-tooth combs are indispensable for gently detangling wet hair, minimizing breakage during this crucial step. A fine-tooth comb is crucial for achieving precise parts and smoothing down those pesky flyaways, making it a must-have for both sophisticated updos and relaxed styles.
When choosing brushes, prioritize those made with natural bristles, as they effectively distribute the oils from your scalp, significantly enhancing your hair’s natural shine. Additionally, don’t underestimate the value of having a vent brush on hand for blow-drying. This tool promotes optimal airflow, reducing the risk of heat damage while keeping your hair in excellent condition. Remember that selecting the right tools not only guarantees exceptional styling results but also preserves the health and integrity of your hair throughout the styling journey.
Transformative Hair Accessories to Amplify Your Prom Look
No prom hairstyle can truly radiate without the right accessories that elevate your entire look into a breathtaking masterpiece. Hair accessories range from glittery clips to sparkling headbands, each adding a unique flair that can significantly enhance your hairstyle. It’s essential to experiment with various styles and accessories to discover the combination that resonates most with your individual aesthetic. For example, a bejeweled hairpin can add a touch of elegance to a simple updo, while a shimmering headband beautifully complements flowing, loose waves.
Integrating accessories requires a keen eye for harmony, especially when considering your overall prom attire. When selecting accessories, ensure they align with the color palette and design of your gown to create a cohesive and polished look. For instance, a floral embellishment might perfectly complement a soft, romantic dress, while metallic accents could align beautifully with a contemporary, structured outfit. Feel free to mix and match various accessories to create a look that is distinctly your own, reflecting your unique style while infusing that captivating sparkle.
Must-Have Styling Products for Long-Lasting Prom Hair Success
Choosing the right styling products is critical for achieving a radiant, long-lasting effect when creating your prom hairstyle. Products such as gels, sprays, and serums can add that extra shine needed to ensure your look stands out on the dance floor. It is vital to select products tailored to your specific hair type, whether your locks are straight, wavy, or curly, to ensure they enhance your hair’s natural beauty without causing any damage. For example, a lightweight glitter spray can effortlessly provide a shimmering finish without weighing your hair down.
Utilizing a strong-hold hair gel is perfect for securing intricate styles like braids or updos, ensuring your hairstyle stays intact throughout the evening, even as you dance and move. Additionally, a nourishing serum can help tame frizz and boost shine, resulting in a polished and sophisticated finish. Always apply styling products in moderation to avoid a heavy or greasy appearance, striking the perfect balance between sparkle and style.
Essential Heat Styling Tools for Stunning Hair Looks

Heat styling tools are indispensable for creating breathtaking prom hairstyles, offering the versatility necessary to achieve your desired look. Curling irons, straighteners, and hot rollers each bring unique capabilities to the styling process. When selecting your tools, prioritize those equipped with adjustable temperature settings to protect your hair from heat damage while still achieving the desired results. For instance, a 1-inch curling iron is perfect for crafting soft, romantic curls, while a flat iron helps you achieve sleek, polished strands with ease.
Using a hot roller can add volume and bounce, making it an excellent choice for enhancing your hairstyle without excessive heat application. Always remember to apply a heat protectant spray before styling to safeguard your locks from damage. Moreover, take the time to practice your styling techniques in advance; mastering your preferred tools will ensure you can recreate the look effortlessly on prom night, allowing you to fully enjoy the festivities.
How Can You Infuse Sparkle into Different Hairstyles for Prom?
Enhancing Updos with Dazzling Glitter Effects
Updos are a classic choice for prom, and incorporating glitter can truly elevate their appeal. Adding sparkle to an updo not only enhances its elegance but also introduces a unique flair that sets your look apart. There are several effective techniques to add glitter to your updo. For example, you might consider applying a glitter gel directly onto your hair or using a glitter spray after styling for a soft, subtle finish. Additionally, experimenting with glittery hair accessories can elevate your hairstyle further, such as embellished clips or decorative pins.
Here are some key techniques for adding glitter to your updos that you can explore:
- Apply glitter gel at the base before styling for an all-over shimmer that captivates.
- Lightly sprinkle loose glitter on the hair, ensuring even distribution for a delicate touch.
- Strategically position sparkling hairpins for an extra hint of glamour.
- Finish off your look with glitter hairspray for an eye-catching, dazzling effect.
To achieve the best results, consider your hair color and the shade of the glitter to ensure they complement each other beautifully. It’s vital to maintain a balance; an overabundance of glitter might overwhelm your style, so strive for a refined shimmer that enhances rather than detracts from your overall appearance.
Adding Sparkle to Loose Styles for a Chic Yet Glamorous Look

For a more relaxed prom aesthetic, adding sparkle to loose waves or curls can create a stunning yet effortlessly chic appearance. Loose styles offer incredible versatility and open the door to creative embellishments. Start by styling your hair into soft waves using a curling iron, then consider applying a glitter spray to lightly coat your curls for a subtle effect. This technique ensures that the sparkle catches the light beautifully while allowing the natural movement of your hair to shine through.
Sparkling hairpins can also be used to accentuate specific sections of your hairstyle; simply slide them into your waves for a touch of interest and glamour. Another creative idea is to weave in a strand of sparkly ribbon or thread during the styling process, creating a delicate shimmer that enhances the softness of your look. Remember that loose styles should maintain a sense of flow, so be judicious with your use of sparkle, focusing on enhancing rather than overpowering the hairstyle.
Incorporating Shimmer into Braids for an Eye-Catching Effect
Braids provide a fantastic canvas for infusing shimmer and can be beautifully elevated with a few simple additions. Whether you opt for a classic braid or a more intricate fishtail, integrating glitter can introduce a touch of glamour to your overall style. One effective technique is to weave in glittery threads as you braid, creating a striking contrast against your natural hair. Additionally, using sparkling elastics to secure the ends of your braid can add a stunning finishing touch.
To achieve the best results, it’s advisable to start with clean, dry hair, as this allows the glitter to adhere more effectively. If you prefer a more subdued approach, consider adding a light dusting of glitter along the braid itself. This method enhances the texture and visual interest without overwhelming the overall style. Explore various braiding techniques to discover the one that best suits your personal style and complements your prom outfit, ensuring your sparkling braid will be the highlight of the evening.
Infusing Glamour into Ponytails for an Elegant Twist
Elevating a simple ponytail with sparkle can add an exciting and glamorous twist to this timeless hairstyle. To achieve this stunning look, begin with a sleek ponytail secured at your desired height. One way to incorporate sparkle is to apply a glitter gel or use a sparkly hair tie that enhances the base of your ponytail. This minor adjustment introduces an element of glamour without requiring an overly elaborate style.
In addition to decorative hair ties, consider adding a playful twist by incorporating a few strands of glittery hair extensions into your ponytail, creating a fun yet sophisticated appearance. Another option is to tease the hair at the crown before smoothing it back into the ponytail, adding volume and texture. The key is to ensure that your ponytail maintains a polished look while the sparkle introduces a touch of excitement, transforming a simple style into a magnificent statement.
Expert Tips for Crafting Dazzling Prom Hairstyles That Shine
Explore Real-World Examples of Successful Sparkling Hairstyles
Observing real-life examples of sparkling hairstyles can significantly inspire your creative journey. Numerous celebrities and influencers have showcased dazzling looks at various high-profile events. For instance, a notable example is Blake Lively, who frequently displays elegant updos adorned with glittering accessories at film premieres. Similarly, Kendall Jenner has been spotted with flowing waves embellished with shimmering clips that catch attention on the red carpet.
To inspire your hairstyle choices, here’s a list of notable examples and where you can find them:
- Blake Lively – Search for her red carpet appearances via Google Images.
- Kendall Jenner – Explore her best looks on Instagram.
- Zendaya – Renowned for her unique styles; find photos on Pinterest.
- Harry Styles – Frequently experiments with fun, sparkly looks; check out his latest appearances.
These references provide you with a wealth of ideas to adapt and modify based on your individual preferences. They illustrate how sparkle can enhance a style, inspiring you to incorporate similar elements into your prom hairstyle while adding your unique twist to make it truly your own.
Actionable Steps for Achieving a Sparkling Look on Prom Night
Creating a sparkling hairstyle requires meticulous planning and execution to ensure a stunning appearance. Start with clean, dry hair, as this ensures that styling products adhere effectively. Next, select a hairstyle that complements your personal style and the prom dress you’ve chosen. For example, if you’re wearing a dramatic gown, consider an elegant updo that showcases your neckline and highlights your features.
Once you’ve settled on a style, follow these essential steps to guarantee your look lasts throughout the night:
- Prepare your hair with a heat protectant before using any styling tools.
- Style your hair according to your chosen design, ensuring even application of all products.
- Add sparkle using glitter gels, sprays, or accessories as desired.
- Finish with a strong-hold hairspray to effectively secure your style in place.
Investing time to practice these steps in advance will build your confidence, ensuring you can recreate the look seamlessly on the night of the event. Always remember to enjoy the process of styling your hair; it’s a celebration of your individuality and an opportunity to shine on your special night.
Expert Insights on the Transformative Impact of Sparkle on Hairstyles
Experts unanimously agree that incorporating sparkle can dramatically transform a simple hairstyle into something truly extraordinary. The addition of glitter or shimmering elements introduces a playful, youthful vibe that perfectly complements the excitement surrounding prom night. A touch of sparkle not only enhances the visual appeal of your hairstyle but also leaves a lasting impression on friends and family.
From a psychological standpoint, feeling beautiful and confident is paramount on such a significant night. Sparkle can significantly boost self-esteem, making you feel like the star you are. Furthermore, the right sparkle can create an enchanting atmosphere, setting the stage for a magical evening filled with cherished memories. As you prepare your hairstyle, remember that your ultimate goal is to create a look that resonates with your personality while embracing the enchanting essence of this momentous occasion.
What Are the Benefits of Adding Sparkle to Prom Hairstyles?
Enhancing Your Overall Look with a Touch of Sparkle
Incorporating sparkle into your prom hairstyle can elevate your overall appearance, ensuring you stand out in any crowd. A touch of shimmer adds a level of glamour and sophistication that enhances any style. For instance, a simple braid adorned with glittery threads or a polished updo embellished with sparkling accessories can transform your look from ordinary to extraordinary, capturing attention as you walk into the venue.
Sparkle goes beyond being merely an aesthetic choice; it serves to highlight your features and draw attention to your hairstyle, making it a focal point of your overall ensemble. The interplay of light against glitter creates visual interest, which is particularly vital on prom night, where every detail contributes to the overall experience. By choosing to embrace sparkle, you are making a bold statement that showcases your personality and style while ensuring you remain the center of attention throughout the evening.
Boosting Confidence through Your Sparkling Hairstyle
Feeling beautiful on prom night is essential for boosting your confidence and self-assurance. A sparkling hairstyle can make you feel like a star, ready to fully embrace and enjoy your special evening. The right look can inspire poise and self-confidence as you enter the venue, setting the tone for a memorable night filled with joy, laughter, and celebration.
Confidence often stems from how you perceive your appearance. When you know you look your best, it radiates from within, positively impacting your interactions and experiences throughout the evening. A sparkling hairstyle serves as an expression of your individuality, allowing you to embrace your uniqueness. By choosing to enhance your look with sparkle, you are making not just a fashion statement, but also fostering confidence that will resonate in every moment of your prom night.
Creating Lasting Memories with a Unique Hairstyle
Prom is an unforgettable night filled with laughter, dancing, and cherished moments that become treasured memories. A unique, sparkling hairstyle can help create lasting impressions that you’ll hold dear for years to come. The glamour associated with prom often becomes a significant part of your high school experience, and a standout hairstyle can enhance that sense of nostalgia and joy.
On this special night, every detail matters; from your attire to your hairstyle, each element contributes to the overall experience. A sparkling look can serve as a vivid reminder of the joy and excitement of the evening, captured in photographs that you will look back on fondly. By investing time and effort into crafting a stunning hairstyle, you are not only making a statement but also ensuring that your prom night is a cherished memory that you will treasure for years to come.
Adding Versatility to Your Prom Styles with Sparkle
One of the most exciting aspects of incorporating sparkle into your prom hairstyle is the versatility it offers. Sparkle can be seamlessly integrated into various hairstyles, from chic updos to relaxed loose waves, providing endless possibilities to match your prom dress and personal style. This flexibility allows you to experiment with different looks, ensuring you find the perfect hairstyle that complements your attire and enhances your overall appearance.
For example, a classic bun can be beautifully adorned with glittering pins for a sophisticated look, while loose curls can be enhanced with shimmering sprays for a more playful vibe. The ability to customize your hairstyle with sparkle ensures that you can fully express your personality. Embrace the opportunity to mix styles and elements, creating a unique look that embodies your essence while celebrating the glamour of prom night.
Proven Strategies for Crafting Dazzling Prom Hairstyles with Sparkle
Strategic Planning for Your Hairstyle
Deciding on your hairstyle well in advance of prom night is crucial to ensure you have ample time to practice and perfect your look. Planning allows you to explore various options, considering your dress, accessories, and overall aesthetic. Start by gathering inspiration from social media platforms or celebrity looks that resonate with your style, noting specific elements that you wish to incorporate into your own hairstyle.
Once you have a clear vision, practice the selected hairstyle several times to build confidence and familiarity with the look. This preparation also allows you to troubleshoot any challenges you may encounter, ensuring a smoother experience on the night itself. Consider creating a checklist of the tools and products you’ll need, ensuring you have everything ready when it’s time to style your hair.
Additionally, seek feedback from friends or family during your practice sessions. Their insights can provide valuable perspectives and help you refine your look to perfection. This strategic approach to planning your hairstyle ensures that you are not only ready for prom night but also confident in showcasing your sparkling creation.
What Are the Best Products for Sparkling Hairstyles?
Not all products are created equal when it comes to adding sparkle to your hairstyle. Selecting high-quality glitter gels, sprays, and accessories is crucial for achieving a stunning look while ensuring your hair remains healthy and manageable. Begin by researching brands known for their glitter products; those that offer lightweight formulas are ideal, as they won’t weigh down your hair or cause damage.
For the best results, look for glitter sprays that provide an even, fine mist for a soft application. When it comes to gels, opt for those that dry clear and provide a firm hold without stiffness. Additionally, consider investing in quality hair accessories that feature secure clasps and are designed specifically for hair use, preventing any slipping throughout the night.
Always read reviews and seek recommendations from fellow prom-goers or hairstylists to gauge the effectiveness of various products. This ensures you select the best options available, providing the perfect balance of sparkle and durability while allowing you to shine all night long.
Seeking Professional Styling Assistance for the Perfect Look
If you’re feeling uncertain about creating a sparkling hairstyle on your own, enlisting the help of a professional stylist can be a wise decision. Professional hairstylists possess the expertise and experience to help you achieve the perfect look for your special night. They can offer tailored advice based on your hair type, face shape, and dress style, ensuring a cohesive appearance that enhances your overall look.
Booking a consultation ahead of prom night allows you to discuss your vision and explore different styles together. Many salons offer trial sessions, enabling you to test out various hairstyles and make adjustments before the big night. This not only alleviates stress but also ensures that you will feel comfortable and confident in your final look.
Moreover, professionals have access to a wide range of high-quality products that may not be available to the average consumer. Their expertise in applying these products guarantees a flawless finish that will withstand the excitement of prom night. If you desire a unique, expertly crafted hairstyle, enlisting the help of a professional stylist can be a game-changing advantage on your special evening.
How to Maintain Your Sparkling Hairstyle Throughout the Evening
Essential Tips for Protecting Your Hairstyle
To keep your sparkling hairstyle intact throughout the night, it’s essential to implement a few protective measures. Avoid touching your hair excessively, as this can lead to frizz and disrupt your carefully crafted look. Instead, focus on admiring your hairstyle from a distance and encourage friends to appreciate your work without getting too hands-on.
Using a light-hold hairspray can provide a protective barrier that locks your style in place without leaving it stiff or crunchy. Opt for a product designed specifically for holding styles while still allowing for movement. This way, your hair will remain elegant and free-flowing as you dance the night away, maintaining that dazzling appearance.
Another invaluable tip is to avoid areas with excessive humidity, as this can wreak havoc on your hairstyle. If you anticipate high humidity, consider opting for an updo or a style that is inherently less prone to frizz. Taking a few precautionary steps can ensure your hairstyle remains flawless, allowing you to enjoy the night without constantly worrying about your look.
Managing Humidity for a Perfect Appearance
Humidity can pose a challenge for any hairstyle, and it’s essential to consider this element when crafting your prom look. The key to managing humidity is to use anti-humidity products that create a protective barrier around your hair. Look for serums or sprays specifically formulated to resist moisture, preventing frizz and maintaining your hairstyle’s integrity even in challenging conditions.
Another effective strategy is to opt for a hairstyle that is less susceptible to humidity, such as an updo or a tight braid. These styles are inherently more durable against the elements and can be embellished with sparkle to maintain their glamour. If you choose to wear loose waves or curls, ensure they are set with a strong-hold hairspray to help them endure through the humidity.
If you find yourself facing unexpected humidity on prom night, consider carrying a small touch-up kit filled with anti-frizz products and a comb. This way, you can quickly address any issues that arise, restoring your hairstyle to its former glory and enabling you to enjoy the evening without stress.
Effective Touch-Up Strategies Throughout the Night
Having a small bag with touch-up products is essential for maintaining your sparkling hairstyle throughout the night. Items such as glitter spray, extra hairpins, and lightweight hairspray can help you swiftly fix any issues that may arise during the evening. Plan ahead by assembling your touch-up kit before prom night, ensuring you have everything you need right at your fingertips.
A quick spritz of glitter spray can rejuvenate your sparkle if it begins to fade, while extra hairpins can secure any loose strands that might have escaped their hold. Keeping a small comb handy also allows you to smooth any flyaways, ensuring your hairstyle remains polished and elegant throughout the festivities.
Consider enlisting a trusted friend to assist with touch-ups throughout the evening. Having someone else help you can make the process smoother, allowing you to fully enjoy the night without constantly worrying about your look. With a little preparation and the right tools, you can maintain your sparkling hairstyle, ensuring you look fresh and flawless at every moment of your prom night.
Frequently Asked Questions About Prom Hairstyles
What are the best hairstyles for prom night?
The best hairstyles for prom night include elegant updos, loose waves, intricate braids, and sleek ponytails. Selecting a style that complements your dress and personal style is key to looking and feeling your best.
How can I add sparkle to my prom hairstyle?
You can incorporate sparkle into your prom hairstyle through glitter sprays, sparkling hairpins, or glitter gels. These elements enhance your look and elevate your overall style, making you the center of attention.
What products should I use for a sparkling hairstyle?
Look for lightweight glitter gels, high-quality sprays, and secure hair accessories designed for hair use. These products will help you achieve the perfect sparkling look without weighing your hair down or causing damage.
Can I create a DIY sparkling hairstyle?
Absolutely! Many stunning sparkling hairstyles can be created at home with the right tools and techniques. Practice ahead of time and gather all necessary materials to ensure your look is flawless on prom night.
How do I maintain my hairstyle throughout the prom night?
To maintain your hairstyle, avoid touching your hair too much and use light hairspray to keep everything in place. Carry touch-up products in a small bag for quick fixes as needed throughout the evening.
What are some popular trends for prom hairstyles?
Current trends for prom hairstyles include bohemian braids, sleek ponytails with accessories, and elegant updos adorned with sparkling elements. Keeping an eye on celebrity looks can provide ample inspiration for your own hairstyle.
Should I consult a professional stylist for my prom hairstyle?
Consulting a professional stylist can be beneficial, especially if you’re unsure about creating your look. They can provide expert advice and help you achieve the perfect hairstyle for your prom night, ensuring everything comes together seamlessly.
How do I choose the right hair accessories for my prom hairstyle?
Select hair accessories that complement your dress and overall look. Consider the color palette and style of your gown to ensure a cohesive and elegant appearance that enhances your entire outfit.
What if my hairstyle doesn’t hold up to humidity?
If facing humidity, consider using anti-humidity products and opting for styles that are more resistant, like updos. Carrying touch-up products can help you address any frizz that arises, keeping your look fresh and polished.
Can I mix different hairstyles with sparkle?
Yes! Mixing different hairstyles with sparkle allows for creativity and personal expression. Feel free to combine elements from various styles to create a unique look that suits you perfectly, showcasing your individuality and flair.
Connect with us on Facebook!
The Article: Crafting Prom Hairstyles With Sparkle: Shine Bright appeared first on Amitys Hair Salon.
The Article Prom Hairstyles With Sparkle: Shine Bright and Dazzle Was Found On https://limitsofstrategy.com