Your cart is currently empty!
Category: Cooking Guide
-

Thai Green Curry: The Ultimate Guide to Authentic Cooking
Unveil the Essential Ingredients for Authentic Thai Green Curry Mastery
Discover the Key Components That Make Thai Green Curry Irresistibly Flavorful
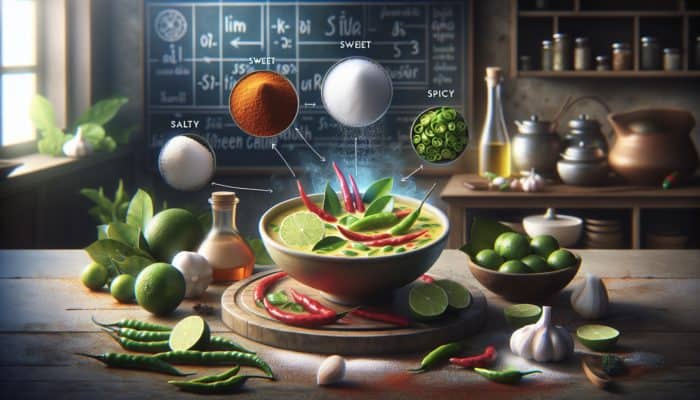
The magic of Thai green curry stems from its vibrant and aromatic ingredients, crafting a culinary journey that is both memorable and satisfying. At the core of this delightful dish is a perfect blend of lemongrass, galangal, Kaffir lime leaves, and Thai green chilies. These fundamental ingredients contribute not only to a rich and complex flavor profile but also impart the distinctive aroma that Thai cuisine is celebrated for around the globe. Choosing fresh, high-quality ingredients is essential; sourcing these will dramatically enhance the flavor and authenticity of your curry. The perfect balance of these crucial elements yields a profile that is a delightful medley of salty, sweet, sour, and spicy, showcasing the artistry inherent in traditional Thai cooking.
Investing time to familiarize yourself with these ingredients can significantly enhance your culinary experience at home. Lemongrass contributes a refreshing citrusy essence, while galangal adds a unique peppery brightness. The fragrant, floral notes of Kaffir lime leaves beautifully complement the heat from green chilies. Together, these elements create a flavor foundation that is intricate and utterly irresistible, ensuring that every bite transports you to the vibrant culinary landscape of Thailand.
Explore a Variety of Protein Selections to Elevate Your Thai Green Curry
Selecting the right protein for your Thai green curry is a journey filled with options, each contributing unique textures and flavors that can elevate your dish to new culinary heights. Common protein choices include:
- Chicken: Opt for boneless thigh or breast for tenderness; marinating briefly in soy sauce can deepen the flavor profile.
- Shrimp: Choose large, fresh shrimp; adding them towards the end of cooking prevents overcooking and maintains their natural sweetness.
- Beef: Choose tender cuts such as sirloin; slicing thinly against the grain ensures optimal tenderness.
- Tofu: Firm tofu is ideal; pressing it to remove excess moisture allows you to achieve a beautiful golden sear.
Each protein selection effectively absorbs the robust and spicy flavors of the curry, making proper preparation essential. For example, marinating chicken enhances its juiciness, while briefly precooking shrimp ensures they maintain their delightful sweetness. Your choice of protein not only influences the taste but also contributes to the overall texture of your dish, creating a personalized culinary experience that caters to a variety of palates and preferences.
Enhance Your Thai Green Curry with Colorful Vegetables and Fresh Aromatic Herbs
Elevating your Thai green curry with a thoughtful selection of vegetables and herbs not only enhances its nutritional profile but also adds vibrant color and excitement to the dish. Traditional ingredients often include Thai eggplant, bamboo shoots, and an array of fresh herbs such as basil and coriander. These components not only enrich the flavor but also provide a satisfying crunch and refreshing quality that beautifully balances the creaminess of coconut milk, making each bite an enjoyable culinary experience.
Incorporating bright vegetables like bell peppers, snow peas, or even zucchini can further enhance both the visual appeal and nutritional benefits of your curry. Fresh herbs such as Thai basil and coriander impart an aromatic finish that elevates the overall dining experience. An exemplary Thai green curry showcases a variety of textures and flavors, ensuring that every mouthful is an exhilarating adventure filled with lively tastes and enticing aromas.
Master Essential Preparation Techniques for Authentic Thai Green Curry

How to Create Authentic Curry Paste in Your Own Kitchen?
Crafting the perfect Thai green curry paste is a pivotal step that lays the foundation for your dish. To make it at home, blend fresh ingredients until they reach a smooth consistency by following these simple steps:
- Gather fresh lemongrass, galangal, and green chilies.
- Chop them into smaller pieces to facilitate easier blending.
- Add garlic and shallots to enhance the depth of flavor.
- Incorporate a pinch of salt to aid in the grinding process.
- Blend until you achieve a smooth paste; adjust with water if necessary for consistency.
The experience of creating curry paste from scratch offers a rewarding and aromatic adventure that pre-packaged alternatives cannot replicate. Utilizing a mortar and pestle traditionally amplifies the flavors by releasing essential oils, resulting in a more complex flavor profile. The outcome is a fresh and fragrant paste that promises a truly authentic Thai green curry experience, captivating your senses and enhancing your culinary repertoire.
Cooking the Curry Base to Achieve a Luxuriously Creamy Consistency
Once your curry paste is ready, the next step involves creating a rich and creamy base for your Thai green curry. Begin by heating oil in a pan over medium heat, then sauté the curry paste until it becomes aromatic. This crucial step releases the essential oils and flavors locked within the paste, infusing the oil with a delightful fragrance. After approximately one minute, pour in coconut milk to create a luxurious, creamy sauce that serves as the heart of your dish.
The coconut milk not only provides a rich, velvety consistency but also balances the heat from the green chilies. Allow the mixture to simmer gently, letting the flavors meld together beautifully. This slow cooking process is essential for permitting the coconut milk to absorb the aromatic notes of the curry paste, resulting in a dish that feels hearty and comforting while retaining its lightness and freshness.
Master the Art of Flavor Balancing in Your Thai Green Curry

Achieving a harmonious balance of flavors in your Thai green curry is essential for crafting an authentic culinary experience. Traditional Thai cuisine emphasizes the thoughtful interplay of salty, sweet, sour, and spicy elements. The secret lies in tasting and adjusting as you cook. Start with a base of fish sauce for saltiness, then add a hint of sugar to introduce sweetness. A squeeze of lime juice provides the necessary acidity that elevates the dish, creating a delightful burst of flavor.
Understanding your palate is key; some diners may prefer a spicier kick, while others might lean towards a sweeter profile. Experimenting with additional ingredients, such as tamarind paste, can introduce an unexpected twist that enhances the complexity of flavors. Remember, the goal is to craft a dish where no single flavor overpowers the others, resulting in a well-rounded, delicious curry that showcases the beauty of Thai cuisine and entices diners to savor every bite.
Gain Expert Insights for Crafting Authentic Thai Green Curry
What Distinguishes Authentic Thai Green Curry?
Authenticity in Thai green curry hinges on the utilization of fresh, high-quality ingredients and adherence to traditional cooking techniques. Genuine recipes prioritize flavor balance, layering tastes through the careful selection of spices and aromatics. Real-life examples of authentic dishes, such as those served at local street markets in Bangkok or family-run eateries in Chiang Mai, underscore the importance of these culinary principles.
In these environments, chefs often employ locally sourced ingredients—such as freshly harvested coconut milk and homegrown herbs—which contribute to a flavor depth that is difficult to replicate with store-bought substitutes. The focus on fresh produce not only enhances taste but also reflects the cultural significance of quality food in Thai society. Understanding these subtleties is vital for anyone aspiring to recreate a genuine taste of Thailand in their own kitchen, allowing for a full appreciation of the artistry found in Thai cooking.
What Techniques Do Renowned Thai Chefs Recommend for an Authentic Experience?
Accomplished Thai chefs possess a wealth of knowledge that can substantially enhance your cooking skills when preparing Thai green curry. One prevalent technique is mastering the texture of the curry. This can be achieved by paying careful attention to how you sauté the curry paste, ensuring it is neither burnt nor undercooked, as this can drastically influence the final flavor and aroma.
Moreover, the timing of ingredient additions is critical. For instance, proteins like chicken or tofu should be introduced after the paste has been sautéed and the coconut milk has been added, allowing them to absorb the flavors fully without overcooking. Many chefs also suggest adding vegetables in stages to maintain their unique textures, especially when using a variety of produce. Adhering to these expert techniques can elevate your culinary skills and result in an authentic, satisfying dish that reflects the true essence of Thai cuisine.
Avoiding Common Mistakes When Preparing Authentic Curry
Steering clear of common pitfalls is essential for creating an authentic Thai green curry that truly shines. One of the most significant missteps is overcooking the curry, which can lead to a loss of vital flavors and nutrients. To prevent this, carefully monitor cooking times and adjust heat levels as needed to maintain a perfect simmer.
Using pre-made curry pastes can also undermine your dish’s authenticity; homemade paste captures the essence of fresh ingredients and offers unmatched flavor. Lastly, avoid skimping on herbs and aromatics, as they are the heart of the curry. Instead, prioritize sourcing fresh ingredients and focus on flavor balance throughout the cooking process. By being mindful of these common errors, you can ensure a more authentic and delightful dining experience that celebrates the deliciousness of Thai green curry.
What Ingredients Should You Prioritize for Genuine Thai Green Curry?
Choosing the right ingredients is crucial when preparing an authentic Thai green curry. Fresh herbs like Thai basil and coriander are essential; their vibrant flavors are integral in achieving the desired taste and aromatic quality. When selecting coconut milk, look for brands that contain no additives or preservatives—opting for pure coconut milk will yield superior results in terms of texture and flavor.
The type of green chilies you use can significantly influence the heat level of your curry. Traditional Thai bird chilies are the preferred choice, but if they are unavailable, consider using other fresh green chilies, adjusting the quantity to accommodate your heat tolerance. Whenever possible, source your ingredients from local markets or specialty Asian grocers to ensure freshness and quality. This dedication to high-quality ingredients will greatly enhance the authenticity and overall flavor profile of your curry, making it a standout dish in your culinary repertoire.
Serve and Present Your Thai Green Curry with Elegance
Traditional Accompaniments That Enhance Your Thai Green Curry Experience
Thai green curry is typically served alongside jasmine rice, which pairs perfectly with the rich, creamy flavors of the dish. The rice acts as a neutral base, allowing the bold flavors of the curry to shine without overwhelming the palate. To serve, spoon the curry over a generous bed of fluffy jasmine rice, ensuring that each plate features a substantial portion of both, creating a delightful balance that enriches the dining experience.
In some regions, sticky rice is also a favored alternative, offering a unique texture that complements creamy dishes beautifully. Consider adding a side of Thai cucumber salad or spring rolls for a refreshing contrast that perfectly balances the meal. These accompaniments not only enhance the overall dining experience but also add a cultural touch, showcasing the delightful diversity of Thai cuisine and its culinary traditions.
Innovative Garnishing Techniques for Stunning Presentation
Garnishing your Thai green curry is essential for elevating both its visual appeal and flavor profile. Fresh herbs such as Thai basil and coriander not only impart a burst of color but also enhance the aroma and taste of the dish. Finely chop the herbs and sprinkle them generously over the curry just before serving, ensuring that their vibrant flavors are preserved and contribute to the culinary experience.
Incorporating edible flowers can also create an eye-catching presentation. For instance, nasturtiums or Thai basil flowers can add an unexpected yet delightful touch. Consider using slices of lime or lemon as a garnish to highlight the citrus notes in the curry. By being creative with your garnishing techniques, you can transform a simple dish into a beautifully presented culinary centerpiece that impresses guests and enhances the overall dining experience.
How Can You Enhance the Dining Experience with Thai Green Curry?
Elevating your Thai green curry meal involves more than just focusing on the food itself. Serving the dish in traditional Thai bowls adds an authentic touch that enhances the overall dining experience. Consider incorporating decorative elements like edible flowers or leafy greens to elevate the presentation and appeal of the dish.
Creating a thematic dining atmosphere can further enhance the meal. Utilize traditional Thai textiles for table settings and consider lighting scented candles or playing soft Thai music to accentuate the cultural experience. These thoughtful touches can transform a simple dinner into an immersive culinary journey, allowing diners to fully appreciate the flavors and heritage of Thai cuisine, making every meal an unforgettable occasion.
- Utilize traditional Thai bowls for serving.
- Incorporate fresh herbs for garnish to enhance presentation.
- Consider edible flowers for additional visual appeal.
- Light scented candles to enhance the dining atmosphere and create a warm ambiance.
Creative Plating Styles to Impress Your Guests
The visual allure of your Thai green curry can significantly enhance the dining experience for your guests. Exploring different plating styles can create an inviting presentation that captures attention. One effective technique is to arrange the curry in concentric circles on the plate, allowing the vibrant colors of the ingredients to stand out and create an artistic display.
Another option is to create artistic drizzles of the curry sauce around the plate, using a spoon or squeeze bottle for precision. This not only showcases your culinary skills but also adds an element of artistry to the dish. Incorporating a variety of textures—such as crispy fried shallots or toasted coconut flakes—can further enhance the visual and sensory experience, making the dish not only delicious but also stunning to behold, ensuring it is as pleasing to the eye as it is to the palate.
Discover the Nutritional Benefits of Thai Green Curry
Explore the Health Advantages of Key Ingredients in Thai Green Curry
The ingredients in Thai green curry serve purposes beyond flavor; many provide significant health benefits. For example, lemongrass is renowned for its anti-inflammatory properties and aids in digestion, while galangal is loaded with antioxidants that promote overall health. The coconut milk utilized in the curry supplies healthy fats, beneficial for heart health when consumed in moderation, making the dish not only delicious but also a nourishing choice.
Incorporating a variety of vegetables into your curry—such as Thai eggplant, bamboo shoots, and fresh herbs—enhances its nutritional profile by providing essential vitamins and minerals. This makes Thai green curry not only a delightful meal but also a wholesome option that supports a balanced diet, allowing you to savor a flavorful dish while effectively nourishing your body.
What Nutritional Values Can You Expect from Thai Green Curry?
Thai green curry can be a nutritious meal option, offering a variety of nutrients from its core ingredients. A typical serving provides a good balance of protein, carbohydrates, and healthy fats, making it a well-rounded dish that satisfies hunger and supports energy levels. The addition of various vegetables contributes dietary fiber, vitamins, and minerals, while the protein from chicken, shrimp, or tofu enhances the nutritional density of the meal.
Expert analysis indicates that a serving of Thai green curry can fulfill a substantial portion of daily nutritional needs, particularly when paired with jasmine rice. Monitoring portion sizes and ingredient choices can help create a healthy meal that supports overall wellness while delighting the palate, allowing you to enjoy a comforting dish that nourishes both body and soul.
Dietary Considerations for Enjoying Thai Green Curry
Thai green curry is a versatile dish that can be adapted to meet various dietary needs. For those following a vegetarian or vegan lifestyle, substituting meat with tofu or tempeh provides a protein-rich alternative without losing flavor. Additionally, using vegetable broth instead of chicken stock can maintain depth of flavor while keeping the dish plant-based and accessible to a wider audience.
For individuals with gluten sensitivities, ensuring that the soy sauce is gluten-free can make this dish a safe option. The adaptability of Thai green curry makes it an inclusive choice for gatherings, allowing everyone to enjoy the delightful flavors without compromising dietary restrictions. This versatility ensures that Thai green curry can be a crowd-pleasing dish that caters to diverse dietary preferences while remaining true to its authentic roots.
How to Maximize Nutritional Intake from Thai Green Curry?
Maximizing the nutritional benefits from your Thai green curry involves careful ingredient selection and cooking techniques. Opt for organic vegetables when possible, as they are often richer in nutrients and free from harmful pesticides that can impact health. Cooking vegetables just until tender, rather than overcooking them, can preserve their vitamins and minerals, making the dish both flavorful and healthful.
Incorporating a variety of colors in your vegetables can help ensure a broad range of nutrients. For instance, adding vibrant bell peppers or leafy greens can enhance both the flavor and the nutritional profile of the curry. By prioritizing these aspects, you can create a dish that not only tastes amazing but also supports your health goals, allowing you to enjoy the benefits of a well-balanced meal.
Impact of Thai Green Curry on Overall Health
Regular enjoyment of Thai green curry can contribute to long-term health benefits, thanks to its nutrient-rich ingredients. The anti-inflammatory properties of key components like lemongrass and galangal can bolster immune function and overall wellness, while healthy fats from coconut milk can promote heart health when included as part of a balanced diet.
Moreover, the inclusion of fiber-rich vegetables aids in digestion and can lead to improved gut health. As part of a balanced diet, savoring Thai green curry can provide not only a satisfying and delicious meal option but also a healthful choice that supports overall well-being. Embracing the flavors and advantages of this dish contributes to a holistic approach to nutrition, making it a worthy addition to your culinary repertoire and a celebration of the vibrant flavors of Thai cuisine.
Explore Variations and Customizations of Thai Green Curry
How Can You Personalize Thai Green Curry to Fit Your Tastes?
Customizing Thai green curry allows you to tailor the dish to your personal preferences and dietary requirements. Adjusting the spice level is a common modification; if you prefer a milder curry, reduce the number of green chilies in your paste. Conversely, for those who enjoy heat, adding extra chilies or a splash of chili oil can amplify the spice factor and create a bold flavor profile that excites the palate.
You can also swap out the protein to match seasonal availability or personal taste, using fish, pork, or even a variety of legumes for a vegetarian option. Including different vegetables, such as carrots, zucchini, or spinach, not only adds flavor but also enhances the nutritional content of the dish. This flexibility allows everyone to enjoy an authentic Thai green curry experience that caters to their tastes while ensuring that the dish remains both satisfying and delicious.
Diverse Regional Variations of Thai Green Curry to Explore
While the core ingredients of Thai green curry remain consistent, regional variations can introduce unique flavor profiles that reflect local culinary traditions. For example, in Southern Thailand, the curry might be spicier, utilizing a higher ratio of green chilies compared to the milder versions found in northern regions. Additionally, some areas may incorporate local vegetables or seafood, adding distinct regional flair that enhances the overall dish.
In certain coastal regions, fresh seafood such as squid or mussels may play a prominent role in the curry, offering a delightful twist on the classic dish. Understanding these regional nuances can deepen your appreciation for Thai cuisine, allowing you to explore diverse interpretations of Thai green curry that highlight the rich culinary heritage of Thailand and its vibrant culinary landscape.
Exciting Fusion Ideas for Thai Green Curry to Try
Incorporating non-traditional ingredients into your Thai green curry can lead to exciting fusion dishes that blend Thai flavors with other culinary traditions. For example, using quinoa instead of rice as a base provides a nutty flavor and a protein boost, making it a great option for health-conscious diners seeking a nutritious alternative.
You might also consider adding elements such as curry powder or tamarind sauce from Indian cuisine for an interesting twist that adds depth and complexity to the dish. Experimenting with Mexican ingredients, like incorporating black beans or corn, can create a unique flavor combination that brings a delightful fusion of cultures to your table. These creative adaptations can broaden the appeal of Thai green curry while maintaining its essence, allowing for innovative interpretations that delight the senses.
Research-Backed Advantages of Cooking Authentic Thai Green Curry
Enhancing Your Culinary Skills Through Time-Honored Thai Cooking Techniques
Learning to cook authentic Thai green curry not only enriches your cooking repertoire but also significantly enhances your culinary skills. Mastering this dish involves understanding the balance of spices, techniques for crafting a smooth curry paste, and the timing of ingredient additions to achieve the perfect flavor profile. These skills are highly transferable to other dishes, fostering greater confidence and expertise in the kitchen.
Engaging with the intricacies of Thai cuisine, from ingredient selection to flavor balancing, can deepen your understanding of culinary arts. The process encourages experimentation and creativity, allowing home cooks to cultivate a more sophisticated palate and cooking technique over time. Ultimately, this journey leads to a more fulfilling cooking experience that not only satisfies the appetite but also nourishes the soul.
Appreciating Thai Culture Through the Art of Cooking
Cooking Thai green curry provides a unique opportunity to engage with and appreciate Thai culture and culinary traditions. By exploring the history and significance of the ingredients and preparation techniques, you can gain insight into the cultural practices that shape Thai cuisine. This appreciation extends beyond the kitchen, fostering a connection to the rich heritage of Thailand and its diverse culinary landscape.
Participating in the culinary process allows you to embrace the values of freshness, quality, and balance that are central to Thai cooking. Sharing this dish with family and friends can further enhance your understanding of cultural diversity and foster a sense of community through shared meals. This experience promotes an appreciation for the flavors and traditions of Thailand, enriching your culinary journey and creating lasting memories.
What Psychological Benefits Can Cooking Provide for You?
Cooking can be a therapeutic activity, offering numerous psychological benefits, particularly when preparing dishes like Thai green curry. The act of cooking engages the senses, providing a creative outlet that can alleviate stress and anxiety. The rhythmic motions of chopping, stirring, and sautéing can be meditative, promoting relaxation and mindfulness as you immerse yourself in the cooking process.
Moreover, creating a delicious meal provides a sense of accomplishment and satisfaction. Enjoying the fruits of your labor—whether alone or with others—can enhance mood and foster a sense of connection. By embracing the joy of cooking, especially with a dish as vibrant and flavorful as Thai green curry, individuals can experience both emotional and mental well-being, making it a rewarding and enriching activity.
Frequently Asked Questions About Thai Green Curry
What is the primary ingredient in Thai green curry?
The primary ingredient in Thai green curry is the green curry paste, which is crafted from a blend of fresh herbs and spices, including lemongrass, galangal, and Thai green chilies.
Can I create a vegetarian version of Thai green curry?
Absolutely! You can easily prepare Thai green curry as a vegetarian dish by substituting meat with tofu or an array of vegetables and using vegetable broth instead of chicken stock for added depth of flavor.
How spicy can Thai green curry be?
The spiciness of Thai green curry can vary significantly depending on the amount of green chilies used in the paste. Adjusting the quantity allows you to tailor the heat level to your specific preference, ensuring that every bite is just right.
What type of coconut milk is recommended for cooking Thai green curry?
For optimal results, use full-fat coconut milk without additives. This provides a creamy texture and rich flavor that is essential for authentic Thai green curry, enhancing the overall experience of the dish.
What vegetables can I incorporate into Thai green curry?
Traditional vegetables include Thai eggplant and bamboo shoots, but you can also add bell peppers, zucchini, or spinach for a colorful and nutritious boost that enhances both flavor and texture.
How should I store leftover Thai green curry?
Leftover Thai green curry can be stored in an airtight container in the fridge for up to three days. Reheat gently on the stove or in the microwave before serving to enjoy the flavors once more.
Is Thai green curry a healthy meal option?
Yes, Thai green curry can be a healthy meal choice, packed with vegetables, protein, and healthy fats from coconut milk. Just be mindful of portion sizes and ingredient choices for optimal health benefits, making it a nutritious and satisfying option.
Can I freeze Thai green curry?
Yes, you can freeze Thai green curry for up to three months. Ensure it’s cooled completely before transferring to an airtight container or freezer bag for effective storage while preserving its delightful flavors.
What should I serve alongside Thai green curry?
Thai green curry is traditionally served with jasmine rice, but you can also pair it with sticky rice or a simple salad for a refreshing contrast that balances the rich flavors of the curry.
How long does it take to prepare Thai green curry?
Preparing Thai green curry typically takes about 30-45 minutes, including time for making the curry paste and cooking the ingredients to perfection, ensuring a delicious meal without excessive time commitment.
Connect with us on Facebook for more culinary inspiration!
The post How to Cook Authentic Thai Green Curry: A Universal Guide appeared first on https://cookinggods.com
The Article Authentic Thai Green Curry: Your Ultimate Cooking Guide Was Found On https://limitsofstrategy.com
-

Ukrainian Varenyky: A Step-by-Step Cooking Guide
Key Ingredients You Need to Make Authentic Varenyky
Essential Components for Crafting the Ideal Dough

Creating the ultimate varenyky starts with a robust foundation: the dough. This vital component relies on three fundamental ingredients: flour, water, and salt. Your choice of flour is crucial as it greatly influences the texture of your dough. For optimal results, select all-purpose flour, which provides a perfect balance between elasticity and tenderness, making it easier to handle during preparation. A practical flour-to-water ratio is consistently around 2:1, although you may need to adjust this based on the humidity in your environment and the specific type of flour being used.
After measuring your ingredients accurately, combine them in a generously sized mixing bowl. Gradually incorporate the water while mixing with a fork or your hands until the mixture resembles a shaggy dough. Following this, knead the dough on a lightly floured surface for about 10 minutes, aiming for a smooth and elastic consistency. Should the dough be too sticky, sprinkle in additional flour; if it feels overly dry, add a touch more water. Once you achieve the desired texture, let the dough rest under a damp cloth for a minimum of 30 minutes to allow the gluten to relax and develop.
Choosing the Perfect Filling for Your Varenyky
The filling for your varenyky is a canvas for your culinary creativity. Traditional options include potato, cheese, and various fruits. Each filling introduces distinct flavors and textures, making the selection process a delightful journey. For a classic potato filling, opt for creamy russet potatoes. Boil and mash them, mixing in sautéed onions along with a sprinkle of salt. Alternatively, create a cheese filling by blending farmer’s cheese with garlic or fresh herbs to enhance its depth and flavor profile.
If you’re feeling adventurous in the kitchen, consider experimenting with fruit fillings. Sweet varenyky filled with fresh berries, cherries, or diced apples can provide a delightful contrast to the savory dough. Always prioritize fresh, ripe ingredients to maximize flavor and ensure a vibrant taste experience. Embrace the chance to innovate in your kitchen; after all, the filling is what truly defines the character and appeal of your varenyky.
Exciting Ideas to Enhance Your Varenyky with Additional Ingredients
To amplify the flavor profile of your varenyky, consider incorporating a variety of herbs, spices, and seasonings. Fresh dill and parsley are classic flavor enhancers that beautifully complement savory fillings. A touch of black pepper or a hint of smoked paprika can deepen the flavor of your potato filling, while a sprinkle of cinnamon can elevate sweet fruit fillings. Think about how these flavors will harmonize with your primary filling to create a balanced and enjoyable taste experience.
Additionally, incorporating sautéed onions or garlic into your fillings can create an aromatic base that enriches the overall flavor. Ensure that these ingredients are finely chopped for even distribution throughout the filling. It’s crucial to taste as you go; this practice allows you to create a filling that excites the palate and perfectly complements the dough.
Effective Strategies for Storing and Utilizing Leftover Dough

Leftover dough is a treasure trove of culinary potential! If you have extra dough after preparing your varenyky, there’s no need to worry. Proper storage can significantly extend its usability. You can refrigerate the dough for up to two days by wrapping it tightly in plastic wrap or placing it in an airtight container to prevent it from drying out. When you are ready to use it again, allow the dough to reach room temperature before rolling it out for your next batch.
For longer storage, freezing is a fantastic option. Portion the remaining dough into manageable sizes, wrap them securely, and store them in a freezer-safe bag. When you’re ready to create another batch of varenyky, thaw the dough in the fridge overnight. This method preserves the dough’s quality, ensuring you can whip up delicious varenyky whenever the craving strikes.
Expert Tips for Cooking Traditional Ukrainian Varenyky
Understanding the Ideal Dough Consistency for Varenyky Preparation
The consistency of your dough is vital for achieving perfectly cooked varenyky. An expertly crafted dough should be soft yet elastic, allowing for easy rolling without tearing. If your dough is too sticky, remedy this by gradually incorporating more flour until the desired texture is achieved. Conversely, if the dough feels dry and crumbly, add a few drops of water while continuing to knead until the consistency improves.
Reflect on practical examples from your kitchen experiences. For instance, if you live in a humid climate, your dough might absorb more moisture, necessitating less water than usual. In contrast, in drier conditions, you may need to slightly increase the water content. Always trust your instincts and make adjustments based on how the dough feels in your hands. The ultimate goal is to achieve a dough that rolls out effortlessly and maintains its shape when filled and sealed.
Techniques for Effectively Sealing Varenyky

Properly sealing your varenyky is essential to prevent your delicious fillings from leaking during the cooking process. Start by placing a spoonful of filling in the center of each dough circle. Next, fold the dough over the filling to create a half-moon shape. At this point, it’s crucial to ensure that no filling escapes. Pinch the edges together gently, working from one end to the other, making sure there are no air pockets present.
For a more secure seal, consider employing the following techniques:
- Moisten the edges of the dough with a small amount of water prior to sealing; this helps the dough adhere better.
- Utilize a fork to press down along the edges, creating both an attractive and functional seal.
- Experiment with twisting the edges for a more traditional, decorative appearance.
- Ensure that the filling is evenly distributed; an overloaded filling can easily lead to ruptures during cooking.
Taking the time to seal your varenyky properly will not only enhance their appearance but also guarantee that the delicious filling remains intact while cooking.
Exploring the Best Cooking Methods for Varenyky
When it comes to cooking varenyky, you have several methods available: boiling, frying, or baking. Each technique produces distinct textures and flavors, catering to a variety of preferences. Boiling is the most traditional method and is favored for its simplicity, resulting in tender, fluffy varenyky that retain the moisture of the filling. To boil, bring a pot of salted water to a rolling boil and cook the varenyky until they float, typically taking around 3-5 minutes.
Frying, on the other hand, imparts a delightful crispness to your varenyky. After boiling, you can pan-fry them in a touch of oil or butter until golden brown on both sides. This method is particularly effective for savory fillings, as the crispy exterior offers a wonderful contrast to the soft, warm interior.
Baking provides a healthier alternative, yielding a distinct texture altogether. If you choose to bake your varenyky, be sure to brush them with melted butter before placing them in a preheated oven, which enhances the flavor and prevents drying. Consider the filling when selecting a cooking method; fruit-filled varenyky may shine when boiled, while cheese or potato fillings might benefit from the crispy finish achieved through frying or baking.
Discovering the Most Flavorful Filling Options for Varenyky
The world of varenyky fillings is as diverse as it is delightful. Traditional fillings such as potato and cheese remain popular for good reasons, but the potential for innovation is endless. You could explore exciting combinations like sweet potato and feta or ricotta and spinach, pushing the boundaries of what varenyky can be. Always consider the balance of flavors and textures within your filling. A well-balanced filling should combine creaminess, saltiness, and possibly a hint of sweetness, especially when incorporating fruit.
Don’t hesitate to mix and match fillings! For instance, consider creating a blend of mashed potatoes with crumbled bacon and chives or a sweet filling of cherries mixed with a touch of vanilla. The more creative you become, the more delightful surprises await your taste buds. Always remember to taste your filling mixture before sealing; this practice allows for necessary adjustments, ensuring your varenyky will be bursting with flavor and character.
Creative Serving and Presentation Ideas for Your Varenyky
Effective presentation significantly enhances the dining experience when serving varenyky. After boiling or frying, arrange the varenyky on a large platter, ensuring they are not overcrowded. You can garnish them with a dollop of Sour cream, a sprinkle of fresh herbs like dill or parsley, and perhaps some crispy fried onions for added texture. Drizzling melted butter over the top not only adds flavor but also provides an appealing sheen.
Consider serving varenyky alongside a vibrant salad or a comforting bowl of borscht for a complete meal. The color contrast between the varenyky and fresh ingredients creates an appealing visual presentation. During festive occasions, you might want to serve them with an assortment of dips and sauces, allowing guests to personalize their flavors. This interactive element can elevate the dining experience, encouraging conversation and joy as you share in this cherished dish.
Thorough Step-by-Step Guide to Preparing Varenyky
Mixing and Kneading the Dough for Perfect Varenyky
Mixing and kneading the dough is the essential first step in crafting your varenyky. Begin by sifting your flour into a large mixing bowl to aerate it, ensuring a light and fluffy dough. Next, add the salt, mixing it thoroughly with the flour to evenly distribute the flavor. Gradually pour in water, using your hands or a wooden spoon to blend everything into a cohesive mixture. The key here is to add water slowly, allowing the flour to absorb it without becoming overly wet.
Once the mixture begins to come together, transfer it to a lightly floured surface to start kneading. This step is vital, as it develops the gluten in the flour, giving your dough the elasticity necessary for rolling. Knead the dough vigorously for about 10 minutes, using the heels of your hands to push the dough away, folding it back over itself, and repeating this process. The dough should become smooth and elastic, feeling soft yet not sticky. If it clings to your hands, sprinkle in a little more flour as needed.
Rolling and Cutting the Dough for Varenyky
Once your dough has rested, it’s time to roll it out and cut it into uniform circles. Begin by dividing the dough into manageable portions, keeping the remaining pieces covered to prevent drying out. Using a rolling pin, roll out a portion of dough on a lightly floured surface to approximately 1/8 inch thickness. Aim for an even thickness to ensure consistent cooking results. If the dough is too thick, your varenyky will be chewy; too thin, and they may tear easily.
For cutting, use a round cutter, a glass, or even a knife to create uniform pieces. A standard diameter is about 3-4 inches; however, you can adjust this based on your preference. As you cut, ensure that you re-flour the surface and your cutter to prevent sticking. Gather any scraps of dough, knead them together, and repeat the rolling and cutting process until all the dough has been used. This methodical approach not only enhances presentation but also facilitates even cooking.
Step-by-Step Assembly Process for Your Varenyky
Assembling your varenyky is where the magic truly unfolds! Take one of your dough circles and place it in the palm of your hand. Using a spoon, add a generous scoop of your selected filling in the center. Be cautious not to overfill, as this can lead to leaks during cooking. The ideal amount is about a tablespoon, providing just enough to showcase the filling without overwhelming the dough.
To seal the varenyky, fold the dough circle in half over the filling, creating a half-moon shape. With your fingers, gently press the edges together, ensuring there are no air pockets trapped inside. For added security, you may crimp the edges using a fork, which adds a decorative touch as well. As you assemble each varenyky, place them on a floured surface or a baking sheet lined with parchment paper to prevent sticking. Keep the assembled varenyky covered with a damp cloth to maintain moisture as you work through the remaining dough.
The Classic Method for Perfectly Boiling Varenyky
Boiling is the most traditional technique for cooking varenyky, resulting in soft, pillowy bites that are simply delightful. Begin by filling a large pot with water and adding a generous amount of salt—this will flavor the varenyky as they cook. Bring the water to a rolling boil before adding the varenyky in batches. Be cautious not to overcrowd the pot; this can lower the water temperature and lead to uneven cooking.
Once the varenyky are in the pot, stir gently to prevent them from sticking to the bottom. As they cook, keep an eye on them to see when they float to the surface, which indicates they are fully cooked. This typically takes about 3-5 minutes. Once they have floated, allow them to cook for an additional minute to ensure they are cooked through. Use a slotted spoon to remove the varenyky, allowing excess water to drain off before transferring them to a serving dish. For an added layer of flavor, toss them in melted butter immediately after boiling.
Relishing Your Varenyky: How to Serve and Enjoy
Now comes the most enjoyable part—serving and relishing your freshly made varenyky! These delightful dumplings can be served hot and savored on their own, or you can enhance the experience with delectable toppings. A classic choice is a dollop of sour cream, which provides a creamy tang that beautifully complements the soft dough and savory filling. Alternatively, consider melted butter, a sprinkle of crispy fried onions, or fresh herbs to add depth and richness.
Varenyky are incredibly versatile and can be enjoyed as a main dish or served as a side. For a more substantial meal, pair them with a refreshing salad or a comforting bowl of soup, allowing the varenyky to shine as the star of your meal. It’s essential to provide a selection of sauces or toppings, inviting everyone at the table to personalize their dumplings. Regardless of how you serve them, the warmth and flavor of homemade varenyky are sure to create a memorable dining experience.
Enhancing the Flavor of Your Varenyky
Incorporating Fresh Herbs and Spices to Boost Flavor
Incorporating fresh herbs and spices into your varenyky can elevate basic fillings into flavorful masterpieces. Fresh herbs such as dill, parsley, and chives can infuse bursts of freshness that enhance both savory and sweet fillings. For instance, adding finely chopped dill to the potato filling creates a delightful combination that balances the creaminess of the potato. Similarly, a sprinkle of fresh chives can introduce a subtle onion flavor to cheese-filled varenyky.
Furthermore, consider the impact of spices. A pinch of nutmeg can enhance sweet fillings, particularly those featuring fruits like plums or cherries. Conversely, spices like black pepper or paprika can add warmth and depth to savory fillings. Experimenting with these additions allows you to uncover unique flavor combinations that not only please the palate but also enliven your dishes.
Innovative Filling Ideas for Varenyky
The beauty of varenyky lies in their versatility; experimenting with different fillings can keep your culinary adventures fresh and exciting. While traditional fillings provide a solid foundation, branching out can lead to delightful surprises. Think creatively: why not try a blend of roasted garlic and ricotta for a creamy, flavor-packed filling? Or, for a sweet twist, consider combining mashed banana with cinnamon and a touch of sugar?
To keep things interesting, consider seasonal ingredients. During summer, fresh zucchini mixed with feta can create a refreshing filling, while autumn calls for spiced pumpkin or butternut squash. The key is to balance flavors and textures, ensuring that each bite remains harmonious. Embracing new fillings can result in exciting variations of this classic dish, making every meal a unique experience.
Delicious Sauces That Perfectly Complement Varenyky
The choice of sauce can elevate your varenyky from ordinary to extraordinary. Traditional pairings include sour cream and melted butter, both of which beautifully complement the dumplings. Sour cream adds a tangy richness that balances savory fillings, while melted butter provides a luxurious coating that enhances the overall experience. You might also caramelize onions, which introduce a depth of flavor through their sweet, rich character.
If serving sweet varenyky, consider drizzling them with a fruit compote or a spoonful of jam. A dollop of whipped cream can also work wonders, enhancing sweetness while adding a light, airy texture. Exploring different sauces allows you to customize your meal and cater to various taste preferences, transforming each serving into a unique experience full of flavor.
Research-Backed Benefits of Cooking Classic Ukrainian Varenyky
Nutritional Value of Varenyky: A Healthy Meal Choice
Varenyky, when made with wholesome ingredients, can serve as a nutritious meal option. The type of fillings you select significantly influences their health benefits. For instance, potato-filled varenyky offer a good source of carbohydrates, while cheese fillings can contribute protein and calcium. Incorporating vegetables like spinach or mushrooms not only adds vibrant flavors but also enhances the overall nutritional profile.
The dough itself, crafted from simple ingredients like flour and water, can contribute to a balanced diet when paired with nutrient-dense fillings. Using whole grain flour boosts fiber content, making varenyky a more health-conscious choice. It’s important to consider portion sizes and pairings; serving them alongside a fresh salad or soup can create a well-rounded meal that satisfies hunger while nourishing the body.
Cultural Significance of Varenyky in Eastern European Traditions
The cultural importance of varenyky extends far beyond their delightful taste. These dumplings are often associated with family gatherings, celebrations, and traditional feasts. In many Eastern European cultures, preparing varenyky is a communal activity that brings families together to share in the cooking process. This practice fosters a sense of connection and tradition across generations.
In Ukraine, for example, varenyky are frequently served during holidays and festive occasions, symbolizing abundance and prosperity. The act of making them collectively creates lasting memories and strengthens familial bonds. Understanding the cultural significance of varenyky enriches your cooking experience, reminding you that each dumpling you prepare carries a legacy of tradition and love.
How Cooking Varenyky Promotes Family Bonding
The process of preparing and enjoying varenyky serves as a wonderful opportunity for fostering family bonding. Involving family members in the cooking process creates chances for shared experiences and storytelling. From mixing the dough to filling and sealing the varenyky, each step presents an opportunity for interaction and collaboration. Whether you have children helping at the table or older generations sharing their tips, these moments strengthen connections.
To make the experience even more engaging, consider hosting a varenyky party where each family member can create their unique filling combination. This allows everyone to express their creativity and preferences while enjoying the company of others. Ultimately, cooking varenyky together not only results in delicious food but also creates lasting memories that family members will cherish for years to come.
Effective Ways to Serve and Enjoy Varenyky
Plating Techniques for an Impressive Varenyky Presentation
When it comes to plating varenyky, presentation is crucial. A well-presented dish not only enhances the dining experience but also reflects the care and effort invested in preparation. Begin by arranging the varenyky in a circular pattern on a large serving platter, allowing guests to appreciate their appearance. For a personal touch, consider serving them in individual bowls, each topped with a different sauce or garnish.
To enhance visual appeal, consider adding contrasting colors—bright green herbs like dill or parsley make for beautiful garnishes. Drizzling melted butter over the varenyky for a glossy finish, or sprinkling some toasted seeds or nuts for added texture, can also elevate the presentation. The goal is to create a plate that not only looks enticing but also invites everyone to dig in and savor the delicious flavors you’ve crafted.
Best Side Dishes to Pair with Varenyky
Complementing varenyky with the right side dishes can elevate your meal, creating a harmonious dining experience. Consider serving them alongside a classic borscht, which offers a vibrant and hearty contrast. A light salad made with fresh greens, tomatoes, and cucumbers can also refresh the palate between bites of rich varenyky.
For a heartier option, pair your varenyky with roasted vegetables or a warm grain salad, providing a delightful balance of flavors and textures. Alternatively, a creamy soup can warm the soul and enhance the overall experience. The key is to choose sides that complement and enhance the flavors of the varenyky, creating a well-rounded meal that satisfies a variety of tastes.
Best Practices for Storing and Reheating Varenyky
Proper storage and reheating techniques are vital for maintaining the deliciousness of leftover varenyky. To store, place them in an airtight container, separating layers with parchment paper to prevent sticking. If properly stored, varenyky can last in the fridge for up to three days. For longer storage, freezing is an excellent option—ensure they are well-wrapped to prevent freezer burn.
When it’s time to enjoy your leftovers, reheating is key to preserving their texture. For boiled varenyky, gently reheat them in a pot of boiling water for a few minutes until heated through. Alternatively, you can pan-fry them in a little oil for a crispy finish. If you have baked varenyky, pop them in a preheated oven at 180°C (350°F) for about 10-15 minutes to warm through. These methods ensure your varenyky remain delicious and ready to be enjoyed again.
Pairing Varenyky with Sauces and Toppings for Maximum Flavor
The right sauces and toppings can elevate your varenyky to the next level. Traditional accompaniments like sour cream and melted butter are always popular, but don’t hesitate to explore other options. For a twist, consider caramelized or crispy bacon bits on top, which contribute a delightful crunch and flavor contrast.
If you’re serving sweet varenyky, a drizzle of fruit sauce or compote can beautifully enhance their sweetness. A sprinkle of powdered sugar is also a simple yet effective touch. Experimenting with different sauces and toppings allows you to create a unique dining experience each time you serve varenyky, making every meal an adventure full of flavor.
Enjoying Varenyky at Different Meals Throughout the Day
Varenyky are incredibly versatile, making them suitable for any meal of the day. For breakfast, you can serve them alongside scrambled eggs and sautéed vegetables, creating a fulfilling start to the day. At lunch, they pair wonderfully with a light soup or salad, allowing for a nourishing midday meal.
For dinner, varenyky can truly shine as a main dish, especially when accompanied by hearty sides or complemented with meats like roast chicken or pork. Their adaptability makes them a fantastic option for meal prepping, ensuring a delicious, satisfying dish is ready for any occasion. Regardless of the time of day, varenyky remain a beloved choice that consistently delights.
Frequently Asked Questions About Varenyky: Your Comprehensive Guide
What is the origin of varenyky and their cultural significance?
Varenyky are traditional Ukrainian dumplings with origins that trace back centuries. They are often associated with family gatherings and festive occasions in Eastern European cultures, symbolizing abundance and togetherness.
Can I freeze varenyky before cooking them, and how?
Yes, you can freeze varenyky before cooking. Arrange them on a baking sheet in a single layer until frozen, then transfer them to an airtight container or freezer bag for later use.
What is the best way to cook frozen varenyky for optimal taste?
For frozen varenyky, boil them directly from the freezer. Increase the cooking time slightly, usually around 5-7 minutes, until they float to the surface, indicating they are done.
How long can I store leftover varenyky without losing quality?
You can store leftover varenyky in the refrigerator for up to three days. Ensure they are in an airtight container to maintain freshness.
Can I use whole wheat flour for the dough, and what changes will it bring?
Yes, whole wheat flour can be used to make varenyky dough. It will impart a nuttier flavor and denser texture, but you may need to adjust the water content accordingly.
What are some popular fillings for varenyky that everyone loves?
Popular fillings for varenyky include potato, cheese, sauerkraut, meat, and various fruits. You can also create unique combinations to suit your taste.
How do I prevent varenyky from sticking together while cooking them?
To prevent sticking, ensure the varenyky are well-floured before cooking. You can also stir gently while they boil to keep them from clumping together.
What are some traditional toppings for varenyky that enhance their flavor?
Traditional toppings for varenyky include sour cream, melted butter, fried onions, or fresh herbs. Each adds a unique flavor that beautifully complements the dumplings.
Can I make varenyky ahead of time for convenience?
Absolutely! You can prepare varenyky ahead of time, either by boiling or freezing them, making them a perfect option for meal prep or gatherings.
Are varenyky gluten-free, and how can I modify them?
Traditional varenyky are not gluten-free due to the flour used in the dough. However, you can substitute gluten-free flour blends to create a gluten-free version.
Connect with us on Facebook!
The post How to Cook a Classic Ukrainian Varenyky: A Step-by-Step Guide appeared first on https://cookinggods.com
The Article Classic Ukrainian Varenyky: Your Step-by-Step Cooking Guide Was Found On https://limitsofstrategy.com
-

Moroccan Tagine Dishes: A Complete Cooking Guide
Key Ingredients for Crafting Authentic Moroccan Tagine Dishes
Utilizing Essential Spices and Aromatic Herbs to Enhance Flavors

Creating authentic Moroccan tagine dishes involves a meticulous selection of spices and herbs, essential for developing a complex flavor profile that sets these culinary masterpieces apart. The foundational spices, including cumin, coriander, and saffron, play a crucial role in infusing tagines with irresistible aromas. To achieve the true Moroccan essence, experiment with a diverse array of spices, as each brings its distinctive charm to the dish. Below is an extensive compilation of the most frequently used spices and herbs that can significantly elevate your tagine culinary adventures:
- Cumin
- Coriander
- Saffron
- Cinnamon
- Ginger
- Turmeric
- Paprika
- Chili Powder
These spices not only enhance the flavor but also offer numerous health benefits, including anti-inflammatory properties and digestive support. When combined, they create a rich tapestry of tastes that transforms an ordinary meal into an extraordinary culinary experience, delighting your senses and tantalizing your taste buds.
Choosing Diverse Meats and Fresh Seasonal Vegetables for Flavor Balance
Moroccan tagines shine through the variety and richness of the meats and vegetables used in their preparation. While lamb and chicken are traditional favorites, tagines can also feature beef, duck, or even seafood, allowing individual preferences and ingredient availability to take center stage. The selection of vegetables is just as crucial, as they harmoniously complement chosen proteins and enhance the dish’s overall balance, making each bite a delightful experience.
Commonly used vegetables in tagines include carrots, potatoes, zucchini, and eggplant. Emphasizing seasonal produce is highly encouraged to ensure the best flavors and maximum nutritional value. The slow cooking method allows these ingredients to meld beautifully, resulting in tender meats and flavorful vegetables infused with a Mediterranean zest that captivates the palate and nourishes the body.
Harnessing the Unique Flavors of Preserved Lemons and Olives
Preserved lemons and olives are indispensable in Moroccan tagine dishes, delivering a unique tanginess that elevates the overall flavor experience. The zesty profile of preserved lemons enhances the heartiness of meats and spices, while olives contribute a briny depth that enriches the dish’s complexity and richness, making each bite a delight.
Utilizing preserved lemons infuses a remarkable aroma that is unmistakably Moroccan. Typically, these lemons are prepared by packing them in salt and allowing them to ferment, enhancing their zestiness and making them a versatile ingredient. Including olives, often in green or black varieties, further elevates the dish, providing a dynamic balance of flavors that enraptures and comforts the palate, creating a rich sensory experience.
Integrating Sweet Dried Fruits and Crunchy Nuts to Enhance Texture

Incorporating dried fruits and nuts into Moroccan tagine dishes not only introduces sweetness but also provides a delightful texture that contrasts beautifully with the savory elements of the dish. Popular choices such as dried apricots, prunes, and raisins infuse the dish with natural sugars, creating a harmonious balance between sweet and savory that captivates the taste buds.
Nuts like almonds and pistachios add a crunchy component, enriching the tagine while also providing nutritional benefits, including healthy fats and proteins. The combination of these elements results in a multi-layered culinary experience that delights the senses. Experimenting with different ratios of fruits to meats can lead to a range of variations, ensuring that no two tagine dishes ever taste the same, keeping your culinary exploration vibrant and exciting.
Perfecting Techniques for Cooking an Exceptional Tagine
Strategically Layering Ingredients for Maximum Flavor Development
Mastering the layering of ingredients is crucial for achieving optimal cooking results in a tagine. Proper layering not only ensures even cooking but also facilitates the blending of flavors throughout the dish. Begin by placing denser vegetables at the bottom, such as potatoes and carrots, since they require longer cooking times to become tender.
Then, introduce your selected protein, whether it be chicken, lamb, or a plant-based alternative, followed by lighter vegetables and aromatic herbs on top. This technique creates a natural barrier that helps moisture circulate throughout the dish, allowing the ingredients to steam effectively. Careful placement of spices and liquids is essential to avoid overpowering flavors and to maintain the dish’s integrity, resulting in a well-balanced and satisfying meal that is sure to impress.
The Art of Simmering and Steaming for Delicious Tagine Results

The secret to a succulent tagine lies in the simmering and steaming process, which should be conducted over low heat for an extended duration. A good rule of thumb is to simmer your tagine on low heat for a minimum of 1.5 to 2 hours. This slow cooking method tenderizes the meat while allowing the vegetables to soften and absorb the intensity of the spices, creating a dish that is rich in flavor and texture.
Monitoring the temperature is crucial; excessive heat can cause ingredients to dry out, while too low a temperature may result in inadequate cooking. The ideal simmering temperature should be just below boiling, creating a gentle bubbling effect that fosters an environment for flavors to deepen and develop. Utilizing a traditional tagine pot is highly recommended, as its conical lid traps steam, ensuring moisture retention throughout the cooking process and enhancing the quality of your dish.
Selecting the Appropriate Cookware for Authentic Tagine Preparation
While a traditional tagine pot is the preferred choice for preparing Moroccan tagines, alternative cookware such as a Dutch oven can also yield excellent results. The primary distinction lies in the design; a tagine pot is typically made from earthenware and features a conical lid that promotes even cooking and moisture retention, which are essential for achieving that authentic tagine experience.
On the other hand, a Dutch oven, often constructed from cast iron, offers superior heat retention and versatility, as it can be used on the stovetop or in the oven. Each cookware option has its benefits; however, if authenticity is your goal, investing in a traditional tagine pot is highly recommended. Regardless of the cookware you choose, ensure that it is well-seasoned or compatible with acidic ingredients, as many tagine recipes incorporate tomatoes and citrus to enhance the dish’s flavor.
Insights and Tips for Creating Exceptional Moroccan Tagine Dishes
Inspiring Tagine Recipes to Foster Culinary Creativity
To ignite creativity in home cooks, showcasing successful tagine recipes can be immensely beneficial. Key elements contributing to a successful tagine recipe include:
- High-quality ingredients that emphasize authenticity
- Thoughtful layering of flavors
- Careful attention to cooking time and temperature
- Balanced application of spices and herbs
For example, a classic chicken tagine with preserved lemons and olives exemplifies these principles beautifully. The acidity from the lemons combined with the briny notes of olives harmonizes with succulent chicken, resulting in a delightful dining experience that is both comforting and satisfying.
Similarly, a lamb tagine with apricots effectively illustrates the coexistence of sweet and savory elements. The inclusion of spices like cinnamon and cumin enhances the dish, while the addition of nuts contributes a satisfying crunch that elevates the overall experience, making each bite a memorable one.
Actionable Steps for Mastering Tagine Cooking Techniques
To empower beginners in achieving remarkable results, providing actionable steps is essential. One common pitfall to avoid when preparing tagines is underestimating the significance of the marinating process. Marinating meats for several hours or ideally overnight allows spices and aromatics to seep deeply into the protein, significantly enhancing the flavor profile.
Moreover, ensure that all ingredients are prepped and ready before you begin cooking. This method streamlines the cooking process and fosters a more organized kitchen experience. Lastly, make it a habit to taste and adjust the seasoning throughout the preparation; this practice will help develop an acute sense of balance and enhance the overall flavor of your tagine, resulting in a dish that is both delicious and memorable.
Expert Analysis on Harmonizing Flavor Combinations in Tagine Dishes
Understanding how flavors work together is vital for elevating Moroccan tagine dishes. Balancing sweet and savory flavors can lead to a delightful dish that tantalizes the palate. When pairing fruits with meats, consider combinations like apricots with chicken or prunes with lamb, which create a beautiful harmony of tastes that enhances the overall experience.
For herbs and spices, fresh parsley or coriander can add a bright note to the dish. Adding a touch of honey or sugar can enhance sweet notes, while a dash of vinegar introduces acidity, rounding out the flavors and providing depth. Experimenting with these combinations will deepen your appreciation for Moroccan cuisine and enable you to express yourself personally in your culinary creations, leading to unique and tasty results that excite the senses.
Diving into Unique Flavor Profiles and Innovative Variations
Crafting Delightful Sweet and Savory Combinations for Tagines
A hallmark of Moroccan tagines is the remarkable ability to create sweet and savory combinations that are both satisfying and surprising. Fruits such as apricots, dates, and prunes can beautifully complement a variety of meats, providing a contrasting flavor profile that excites the palate and enhances the dish’s overall appeal.
For instance, pairing chicken with apricots yields a dish that is both light and richly flavored, while lamb with dates offers a deeper, more robust taste experience that is truly unforgettable. These combinations are not only about flavor; they also contribute delightful visual appeal, showcasing a colorful array of ingredients. To achieve a well-balanced dish, consider using fruits with varying levels of sweetness and acidity to elevate the overall taste, ensuring a culinary masterpiece that captivates the senses with every bite.
Adjusting Spice Levels for Milder or Spicier Tagine Options
Modifying the level of heat in your tagine can cater to a variety of palates, accommodating both those who enjoy spice and those who prefer milder dishes. For those who appreciate a kick, incorporating ingredients like harissa or chili flakes is an excellent way to infuse warmth into the dish. Conversely, for a milder approach, you can reduce or exclude these ingredients while focusing on aromatic spices like cinnamon and ginger to maintain the dish’s complexity without overwhelming the palate.
A simple technique for adjusting spiciness is to start with small amounts and gradually increase them until the desired heat level is reached. This method ensures that the dish retains its balance and doesn’t become overwhelmingly spicy, allowing the more subtle flavors to shine through and be fully appreciated.
Adapting Tagine Recipes for Vegetarian and Vegan Diets
Moroccan tagines can be easily modified to cater to plant-based diets, making them an excellent option for vegetarians and vegans alike. Instead of traditional meats, consider using a variety of vegetables such as cauliflower, sweet potatoes, and chickpeas, which are hearty enough to serve as the dish’s primary components, ensuring a satisfying meal that doesn’t compromise on flavor.
Incorporating proteins like tofu or tempeh can also enhance the nutritional value of the dish while keeping it flavorful and satisfying. A mix of spices and herbs ensures that these vegetarian tagines remain delicious and enjoyable. Moreover, using dried fruits can still provide that sweet contrast characteristic of traditional recipes. The flexibility of tagine cooking encourages creativity, allowing every cook to discover a unique variant that suits their dietary preferences without sacrificing taste or satisfaction.
Creative Serving and Presentation Ideas for Your Tagine
Traditional Accompaniments to Elevate Your Meal Experience
When serving Moroccan tagines, traditional accompaniments can significantly enhance the meal by adding texture and flavor contrast. Couscous is perhaps the most well-known side, providing a light, fluffy base that beautifully absorbs the rich sauce of the tagine, elevating the overall dining experience. Traditional flatbreads, such as khobz, are also excellent choices, perfect for scooping up the delicious morsels from the tagine.
Beyond these staples, consider offering sides like hummus or a refreshing tzatziki to introduce a creamy element to the meal. Salads made from fresh vegetables and herbs can provide a crisp counterpoint to the hearty tagine, ensuring a well-rounded dining experience. Each addition enhances the overall meal, creating a vibrant and enjoyable feast for all, making it a visually appealing and delicious occasion.
Enhancing Visual Appeal through Thoughtful Garnishing and Decoration
Garnishing and decorating your tagine can significantly enhance its visual appeal and overall presentation. Simple yet elegant touches can make your dish inviting and appetizing. Fresh herbs like coriander and parsley can be finely chopped and sprinkled over the top just before serving, providing a burst of color and freshness that draws the eye and invites anticipation.
To add texture, consider toasting sliced almonds or pine nuts and scattering them over the dish. Pomegranate seeds are also a popular choice, adding a pop of color and a sweet flavor contrast that enhances the dish’s overall appeal. These decorative elements not only beautify the tagine but also hint at the delicious layers of flavor contained within, enhancing the anticipation of the meal and making it a feast for the eyes and the palate.
Effective Plating Techniques for Stunning Presentation of Tagine Dishes
Utilizing effective plating techniques can make your tagine more appetizing and visually captivating. Start by selecting a wide, shallow bowl or a traditional tagine dish to showcase your culinary creation effectively. Place a generous portion of couscous or your chosen side at the bottom of the plate, creating a base for the tagine that enhances its visual appeal.
When adding the tagine, ensure you present it in a manner that highlights its vibrant colors and textures. Consider offsetting the meat and vegetables to allow the sauce to cascade down, creating a visually enticing effect that whets the appetite. Finally, a drizzle of high-quality olive oil or a sprinkle of fresh herbs just before serving can harmoniously tie the dish together, ensuring it looks as good as it tastes, providing an experience that is both delightful and memorable.
Research-Backed Benefits of Crafting Moroccan Tagine Dishes
Exploring the Nutritional Advantages of Tagine Ingredients
Moroccan tagines offer significant nutritional advantages due to their emphasis on fresh, wholesome ingredients. The use of lean meats, nutrient-rich vegetables, and legumes contributes to a well-balanced meal. For instance, chickpeas provide plant-based protein and dietary fiber, promoting digestive health and overall wellness.
By incorporating a variety of vegetables, you ensure a rich supply of vitamins and minerals, while spices like turmeric and ginger can improve inflammation and enhance overall well-being. Additionally, the slow cooking method preserves nutrients, making tagines a wholesome choice for families seeking nutritious meal options that are both delicious and beneficial, contributing positively to overall health.
Understanding the Cultural Significance of Moroccan Tagine Dishes
The cultural significance of tagines extends beyond mere sustenance; they embody the traditions and hospitality of Morocco. Cooking and sharing a tagine often form part of family gatherings and celebrations, reinforcing community bonds and cultural identity. The preparation of these dishes typically involves intricate rituals that reflect the importance of food in Moroccan culture and family life.
Gaining insight into the cultural context enhances the cooking experience, allowing cooks to appreciate the flavors and techniques passed down through generations. The tagine is not merely a cooking vessel; it represents a rich heritage that connects people to their culinary roots and traditions, making each meal an opportunity to celebrate and honor that legacy.
Health Benefits Derived from a Variety of Spices Used in Tagines
Many spices incorporated into tagines carry health benefits that can enhance overall well-being. For instance, cinnamon is renowned for its anti-inflammatory properties, while cumin aids in digestion and can help regulate blood sugar levels. Turmeric is celebrated for its high curcumin content, which is linked to numerous health benefits, including reduced inflammation and improved overall health outcomes.
Incorporating a diverse range of spices into your tagine not only enhances flavor but also contributes to a healthier lifestyle. The variety of spices used means that each plate of tagine is packed with potential health benefits, adding further value to this remarkable and beloved dish, making it a nutritious choice for your meals.
Expert Tips for Elevating Your Tagine Dishes
Understanding the Importance of Marinating Meats for Enhanced Flavor
Marinating meats is a fundamental step to enhance flavor in tagine dishes. This marination process serves to tenderize the meat while allowing the spices to penetrate deeply for maximum flavor. Ideally, meats should be marinated for at least 4 to 12 hours, depending on the cut and thickness of the meat, to achieve the best results.
Common marinade ingredients include olive oil, garlic, spices, and citrus juice. This method not only amplifies the taste but also yields a more succulent and flavorful outcome. This technique is crucial for achieving the depth of flavor associated with authentic Moroccan tagines, which are highly sought after in traditional cuisine and appreciated for their rich taste.
Achieving a Balanced Flavor Profile in Your Tagine Dishes
Finding the right balance of flavors is key to creating an unforgettable tagine. A common technique involves tasting throughout the cooking process to ensure a harmonious blend of ingredients. Begin with the base ingredients and gradually adjust the seasonings, adding more spice, sweetness, or acidity until the dish reaches a harmonious balance that delights the palate and satisfies the senses.
To enhance the interplay between sweet and savory, consider incorporating honey or a splash of vinegar towards the end of cooking. This dynamic adjustment allows for the emergence of complex flavors that excite the taste buds. Balancing ingredients ensures that no single component overwhelms the others, creating a cohesive dish that is both visually appealing and delicious, making each bite truly enjoyable.
Embracing Ingredient Experimentation for Unique Tagine Creations
The beauty of tagines lies in their versatility, which encourages cooks to experiment with a wide range of ingredients. Trying unconventional ingredients can lead to exciting new culinary creations that surprise the palate. Consider incorporating seasonal vegetables or unique proteins, such as duck or rabbit, for an adventurous twist on traditional recipes, expanding your culinary repertoire.
Additionally, swapping out standard spices for alternatives can create distinctive flavor profiles. For instance, using smoked paprika instead of regular can add depth, while experimenting with different types of olives can introduce new dimensions of taste. The freedom to innovate ensures that each tagine reflects the cook’s creativity and personal palate, making for a truly unique culinary experience that keeps meals fresh and exciting.
Choosing the Right Cookware for Authentic Flavors in Tagine Cooking
Selecting the right cookware is crucial for achieving authentic flavors in tagine cooking. Traditional tagine pots, made from clay, are designed to conduct heat evenly and retain moisture effectively. When choosing a tagine pot, look for one that is well-crafted and free of chemicals, as these can impact both the cooking process and the dish’s flavor, ensuring a delightful culinary experience.
If you opt for alternatives, such as a Dutch oven, ensure it has a heavy bottom and a tight-fitting lid to mimic the steaming effect of a traditional tagine. Each pot has its nuances, so understanding the properties of your cookware can significantly influence the outcome of your dishes, leading to the best possible results and enhancing the overall quality of your meals.
Storing and Reheating Your Tagines for Optimal Enjoyment
Implementing Proper Storage Methods to Preserve Freshness
Properly storing your tagine is crucial to preserving its flavor and quality over time. Once your tagine has cooled down, transfer any leftovers to an airtight container to prevent moisture loss and flavor deterioration. Ideally, store the tagine in the refrigerator, where it can last for 3 to 4 days without losing its quality or taste.
If you wish to store tagines for an extended period, consider freezing them. However, ensure they are well-contained to avoid freezer burn. Using glass or BPA-free plastic containers is ideal, as these materials won’t react with the dish’s acidity, maintaining the integrity of your flavors and ensuring your meals remain enjoyable.
Reheating Techniques to Maintain Quality and Flavor
Reheating tagines requires careful consideration to retain moisture and flavor effectively. The best methods include using a stovetop or oven. For stovetop reheating, place the tagine on low heat and add a splash of broth or water to create steam. This technique ensures that the dish remains moist and delectable, preserving its rich flavors and enhancing the overall dining experience.
Alternatively, if using an oven, cover the tagine with foil to trap steam and prevent it from drying out or overheating at a low temperature. Avoid using a microwave, as this can lead to uneven heating and negatively affect the texture and overall quality of the dish, compromising the delightful flavors you worked hard to create.
Freezing and Thawing Tagines Safely for Long-Term Storage
Freezing tagines is an excellent way to prepare meals in advance without compromising quality. To freeze safely, allow the tagine to cool completely, then portion it into airtight containers and label them with the date. When stored properly, a tagine can last up to 3 months in the freezer without losing its flavor or texture, making it a convenient meal option for busy days.
When thawing, it’s advisable to transfer the container to the refrigerator overnight to allow for gradual defrosting. This method preserves the flavors and textures of the ingredients, ensuring your meal remains enjoyable. After thawing, reheat gently, ensuring it is thoroughly heated before serving to enjoy the best taste and quality, making your tagine as delightful as when it was first prepared.
Creative Ways to Transform Leftover Tagines into New Dishes
Transforming leftover tagines into new dishes can minimize waste while creating exciting meals that surprise your taste buds. Consider using leftover tagine as a filling for wraps or sandwiches, adding fresh vegetables for a satisfying crunch that enhances the overall experience. Alternatively, you can blend the leftovers into a hearty soup by adding broth and additional vegetables to create a nutritious, delicious meal.
Another innovative approach is to turn the tagine into a casserole by layering it with grains or pasta and baking until bubbly. Each of these methods not only repurposes your dish but also allows for creativity in the kitchen, ensuring that leftover tagines never go to waste while offering delightful new culinary experiences that expand your cooking repertoire.
Proven Strategies for Crafting Exquisite Moroccan Tagine Dishes
Mastering the Techniques of Tagine Cooking for Culinary Excellence
To master the art of tagine cooking, it takes practice and a deep understanding of the techniques involved in creating these beautiful dishes. Key skills include balancing flavors, comprehending cooking times, and effectively layering ingredients. Begin by familiarizing yourself with various recipes, then gradually adapt them to suit your unique palate and preferences, making each dish your own.
Experimenting with different ingredients and techniques will enhance your skill set. Observing the cooking process closely and making necessary adjustments will boost your confidence in the kitchen, enabling you to create exceptional tagines over time that are reflective of your style and culinary journey, resulting in meals that are both enjoyable and memorable.
Personalizing Recipes to Align with Your Unique Taste Preferences
When preparing tagines, personalizing recipes can greatly enhance enjoyment and satisfaction. Start by understanding the core components of traditional recipes, then modify them according to your individual preferences and tastes, making the dish truly your own.
For instance, if you favor a specific protein or vegetable, don’t hesitate to substitute. Adjusting the spice levels to cater to your palate can also make a significant difference in the final dish, transforming it into something uniquely yours. This flexibility empowers cooks, allowing them to create dishes that resonate with their unique culinary inclinations and preferences, leading to a more fulfilling cooking experience.
Incorporating Modern Techniques for Enhanced Results in Tagine Cooking
Incorporating modern cooking techniques can greatly enhance the outcome of traditional tagines. Techniques such as sous-vide cooking ensure precise temperature control and enhanced tenderness, while using pressure cookers can dramatically reduce cooking times without sacrificing rich flavors, allowing for quicker meal preparation without compromising quality.
Experimenting with these modern methods can yield exciting results while maintaining the authentic essence of Moroccan cuisine. Embracing technology in the kitchen can help cooks achieve the perfect tagine in less time, ensuring quality and flavor are not compromised, making your cooking experience both efficient and satisfying.
Choosing the Right Ingredients for Authentic Flavor in Your Tagine
For truly authentic Moroccan tagine dishes, selecting the right ingredients is paramount. High-quality spices, such as saffron, should be genuine and aromatic, as they impart a unique flavor and vibrant color to the dish. Opting for fresh, seasonal produce ensures that your tagine showcases the best flavors that nature has to offer, enhancing the overall taste and experience.
When sourcing preserved lemons, look for those prepared traditionally, free from artificial additives. Authentic ingredients not only enhance the final product but also pay homage to the rich history and culture behind Moroccan cuisine, bringing a sense of authenticity to your cooking that resonates with each bite.
Understanding the Essential Role of Spices in Crafting Tagine Dishes
Spices play a critical role in shaping the flavor profile of Moroccan tagines. Each spice contributes its unique characteristics, creating a complex blend that defines the dish. For example, cinnamon adds warmth and sweetness, while cumin provides earthiness and depth.
Understanding the delicate interplay of these spices enables cooks to tailor dishes to their preferences. Experimenting with different combinations can lead to discovering new flavor profiles, ensuring that every tagine becomes a unique culinary experience that reflects your journey with Moroccan cuisine and showcases your creativity.
Frequently Asked Questions About Moroccan Tagine Cooking
What is a tagine, and how is it used in cooking?
A tagine refers to both a traditional North African cooking vessel and the type of dish prepared within it, typically characterized by slow-cooked stews made with a combination of meat and vegetables, resulting in a rich and flavorful meal.
Can I create a tagine without using a traditional tagine pot?
Yes, you can use a Dutch oven or a heavy pot with a tight-fitting lid as an effective alternative to a traditional tagine pot, allowing you to achieve similar cooking results.
Which meats are best suited for preparing a tagine dish?
Common meats used in tagines include lamb, chicken, beef, and duck. You can also opt for seafood or plant-based proteins, ensuring a diverse range of delicious options for your tagine.
How long should I typically cook a tagine for optimal results?
Most tagines require a slow cooking time of 1.5 to 2 hours to ensure that the ingredients become tender and the flavors fully develop, creating a mouthwatering dish that is worth the wait.
What spices are essential for crafting a traditional Moroccan tagine?
Key spices that are essential include cumin, coriander, saffron, cinnamon, and ginger. These spices collectively create the unique and aromatic flavor profile characteristic of Moroccan tagines, making them indispensable in the cooking process.
Is it possible to prepare a vegetarian tagine dish?
Absolutely! You can create delicious vegetarian tagines using an array of vegetables, legumes like chickpeas, and a rich blend of spices to ensure a satisfying and flavorful experience.
How should I store leftover tagine for later use?
Store any leftover tagine in an airtight container in the refrigerator for up to 4 days, or freeze it for longer-term storage options, ensuring it remains fresh and delicious.
What are some traditional sides that pair well with tagine dishes?
Traditional sides often include couscous, flatbreads, and salads made from fresh vegetables, all of which complement the robust flavors of the tagine beautifully, creating a well-rounded meal.
How can I enhance the flavor of my tagine dishes further?
Enhance the flavor by marinating meats, fine-tuning spice levels, and experimenting with an array of fresh herbs and dried fruits for added depth and complexity, ensuring a delightful culinary experience.
What health benefits do tagines offer as part of a balanced diet?
Tagines can be quite healthy due to their emphasis on fresh ingredients, lean proteins, and the inclusion of beneficial spices known for their anti-inflammatory properties and overall health benefits, making them a nutritious choice.
Connect with us on Facebook!
The post How to Make Moroccan Tagine Dishes: A Universal Guide appeared first on https://cookinggods.com
The Article Moroccan Tagine Dishes: Your Ultimate Cooking Guide Was Found On https://limitsofstrategy.com
-

Vietnamese Pho Recipes: A Beginner’s Simple Guide
Explore the Delicious and Aromatic Experience of Pho: A Vietnamese Culinary Gem
Pho is more than just a meal; it embodies a culinary journey that reflects the rich and vibrant culture of Vietnam. This aromatic and soothing soup has developed a worldwide fan base, becoming a cherished delicacy among culinary enthusiasts. At its essence, pho is a nourishing soup that expertly blends broth, rice noodles, fragrant herbs, and your preferred choice of meat, making it an ideal entry point into Vietnamese gastronomy. For those eager to discover the intricate flavors and textures of this lively culture, pho serves as an inviting introduction. Its charm lies in its simplicity, yet it delivers a remarkable depth of flavors when prepared with high-quality ingredients and meticulous techniques.
The heart of pho resides in its fundamental ingredients, which constitute the foundation of this beloved dish. The key components include rice noodles (bánh phở), your selection of protein (beef or chicken), and an array of spices such as star anise and cinnamon, complemented by fresh herbs like basil and cilantro. Each ingredient is vital in crafting a well-balanced and satisfying bowl of pho. For instance, the broth should exude a deep, rich flavor, while the noodles must maintain a tender yet firm consistency, ensuring that each bite is a delightful experience.
When it comes to creating the broth, novices can conquer the art of preparing a clear and flavorful base by adhering to several essential tips and techniques. Begin by selecting premium bones, preferably beef or chicken, and allow them to simmer gently over low heat for an extended duration. This gradual cooking method extracts profound, robust flavors while keeping the broth clear and visually appealing. Incorporating spices and herbs at the appropriate stage can significantly enhance the aroma and overall flavor of the broth. As you embark on your pho-making adventure, keep in mind that patience and meticulous attention to detail will ultimately yield exceptional results.
Discover the Cultural Significance of Pho: A Culinary Delight

Pho transcends the limits of a mere meal; it is a cultural icon that symbolizes the essence of Vietnamese cuisine. Originating from Northern Vietnam, this fragrant soup has traveled across borders, becoming a cherished dish savored by many around the globe. Traditionally, pho includes a savory broth, rice noodles known as bánh phở, fresh herbs, and a choice of protein, usually beef or chicken. Every bowl presents a delightful blend of flavors and textures, inviting diners to relish each spoonful.
The enjoyment of pho is intricately tied to the warmth of Vietnamese hospitality. It is common to see street vendors passionately serving pho to eager customers, creating a lively environment filled with the enticing aroma of simmering spices. The versatility of this dish allows it to cater to a diverse range of palates, making it an excellent starting point for newcomers to Vietnamese cuisine.
For those unfamiliar with pho, grasping its significance is crucial. It goes beyond mere ingredients; it embodies the love and dedication invested in crafting the broth and achieving the perfect balance of flavors. Each bowl of pho narrates a story, reflecting the rich cultural heritage and traditions of Vietnam.
Key Ingredients for Creating the Ultimate Pho
Crafting the perfect bowl of pho heavily relies on the quality of its ingredients. The essential components include rice noodles, broth, and a variety of garnishes. The rice noodles, known as bánh phở, are flat and silky, providing a smooth texture that effectively absorbs the broth’s flavors. When choosing your noodles, prioritize those made from high-quality rice to ensure the best possible taste and texture.
Selecting the right meat is equally vital. Beef is the traditional choice, with cuts such as brisket or sirloin commonly used, while chicken pho offers a lighter alternative that remains delicious. Each type of meat adds its unique flavor profile to the dish, allowing for customization based on dietary preferences or restrictions, making pho a versatile option for everyone.
Herbs and spices are crucial for enhancing the overall taste of pho. Key spices like star anise, cloves, and cinnamon contribute to a fragrant broth that warms the soul. Fresh herbs such as basil, cilantro, and mint provide a refreshing contrast to the rich flavors, elevating the entire dining experience. For beginners, sourcing the best ingredients is essential to achieving an authentic pho experience that delights the senses.
Expert Techniques for Crafting an Extraordinary Broth
The broth is the heart and soul of pho, and mastering its preparation is vital for novices. To create a clear and flavorful broth, start with high-quality bones. Beef bones are ideal for producing a rich, hearty broth, while chicken bones offer a lighter option. Roasting the bones prior to simmering can significantly enhance the depth of flavor, imparting a caramelized note to the final product.
After preparing your bones, the next step is to infuse the broth with spices. A traditional pho broth showcases a harmonious blend of spices, typically including star anise, cinnamon, and cloves. It’s essential to add these spices judiciously, as excessive amounts can overpower the broth. Striking the right balance between the spices and the natural flavors of the bones is crucial for crafting a harmonious broth that delights the palate.
Slowly simmering the broth over low heat is essential for extracting maximum flavor from the bones and spices. This process can take several hours, but the end result is a rich, savory liquid that forms the foundation of your pho. Regularly skimming off impurities during the simmering process ensures a clear broth, which is a hallmark of excellent pho. Once adequately simmered, strain the broth to eliminate solids, leaving behind a clean, flavorful liquid ready to be combined with noodles and garnishes.
Explore the Various Styles of Pho

The beauty of pho lies in its adaptability, allowing enthusiasts to explore a variety of styles that cater to different tastes and preferences. Beginners can experiment with a range of pho recipes, from the classic beef pho to lighter chicken options, vegetarian delights, and even seafood varieties. Each style introduces unique flavors and textures, transforming the cooking experience into an exciting culinary adventure.
Delight in the Richness of Authentic Beef Pho
Beef pho represents the quintessential version of this dish, celebrated for its rich and robust flavor profile. The foundation of this recipe lies within the broth, typically crafted from beef bones, aromatic spices, and flavorful aromatics. The process begins with roasting the bones to enhance their inherent flavor before simmering them with water and spices such as star anise and cinnamon. The result is a deep, nourishing broth that forms the essence of your pho.
Once the broth reaches perfection, the next step is preparing the beef. Thinly sliced cuts of beef, commonly sirloin or brisket, are added directly to the steaming hot broth, allowing them to cook just enough to retain their tenderness. To create an authentic experience, serve the pho with traditional garnishes like Bean sprouts, lime wedges, and fresh herbs such as Thai basil and cilantro. Each addition enhances the flavors and textures, making every spoonful a delightful experience.
To further elevate your beef pho, consider adding extra toppings like sliced jalapeños for a spicy kick or hoisin sauce for a hint of sweetness. This customization allows each diner to create a bowl that aligns with their flavor preferences, making beef pho a cherished choice for many.
Experience the Lightness of Chicken Pho
For those seeking a lighter alternative, chicken pho offers a delicate yet flavorful option that is sure to please. The broth is prepared similarly to beef pho, but with chicken bones, resulting in a clearer and lighter liquid. Begin by simmering the chicken bones with spices and a touch of ginger for an aromatic enhancement.
Once the broth is ready, poach the chicken until it reaches tenderness. Shredded or sliced poached chicken is then combined with the noodles and broth. The simplicity of chicken pho makes it an excellent choice for beginners, as the preparation is straightforward yet yields delicious results.
A unique aspect of chicken pho is the opportunity to customize it with seasonal vegetables and fresh herbs. Adding fresh bean sprouts, herbs, and even mushrooms can enhance flavor and nutrition. This adaptability ensures that chicken pho can be tailored to various tastes and preferences, making it an enjoyable meal for everyone at the table.
Explore the Vibrant Flavors of Vegetarian Pho

Vegetarian pho presents a delightful alternative for those wishing to savor the flavors of this classic dish without meat. Instead of a traditional meat-based broth, a robust vegetable broth is created using mushrooms, carrots, and a medley of spices. The key lies in slowly simmering the vegetables to allow their flavors to meld into a rich, satisfying broth.
Mushrooms, particularly shiitake, add depth and umami, forming a gratifying base for the soup. Incorporating tofu adds protein and texture, enhancing the dish’s overall appeal. Once the broth is perfected, serve it with rice noodles and a generous amount of fresh herbs and vegetables, such as bok choy and bean sprouts.
The beauty of vegetarian pho lies in its ability to cater to various dietary needs while still delivering exceptional flavor. This version can be easily customized with different vegetables or spices, allowing for a personal touch. For those new to cooking, vegetarian pho offers an excellent opportunity to explore the versatility of Vietnamese cuisine without compromising on taste.
Delight in the Freshness of Seafood Pho
Seafood pho presents a unique twist on the traditional recipe, infusing fresh seafood for an exciting variation. The base of seafood pho remains consistent, starting with a flavorful broth, but the addition of fish, prawns, or squid elevates the dish to new culinary heights.
Begin by preparing the broth with a mixture of seafood shells, such as shrimp or crab, alongside traditional spices. This creates a light yet flavorful liquid that beautifully complements the seafood. Once the broth is ready, gently add your choice of seafood, ensuring it cooks through without becoming rubbery.
Seafood pho can be garnished with fresh herbs and a squeeze of lime, enhancing the natural flavors of the seafood. This version is perfect for those who appreciate the ocean’s bounty and desire to experience pho in a refreshing and light manner.
Perfecting the Craft of Broth Preparation
Crafting the ideal broth is an art form that serves as the foundation of exceptional pho. Mastering broth preparation will elevate your pho-making skills, transforming a simple dish into a remarkable culinary experience.
Choosing the Best Bones for Optimal Flavor
The type of bones you select plays a critical role in the flavor and richness of your broth. For beef pho, opt for a combination of marrow bones, oxtails, and brisket bones. This blend provides an ideal balance of gelatin and flavor, resulting in a rich broth. Conversely, for chicken pho, use a whole chicken or chicken carcass to achieve a lighter yet satisfying broth.
When sourcing bones, prioritize quality. Look for bones from grass-fed or free-range animals to ensure the best flavor profile. Freshness is paramount, so purchase your bones from a reputable butcher or farmer’s market. This focus on quality sourcing will significantly impact the final result of your broth.
Consider roasting the bones before simmering. This technique caramelizes the bones, adding depth of flavor to your broth. A few hours of roasting at a moderate temperature will enhance the final taste, making the broth richer and more complex.
Enhancing Your Broth with Essential Spices
The spices utilized in pho broth are essential for achieving that distinctive aromatic profile. A classic blend typically incorporates star anise, cinnamon sticks, cloves, and coriander seeds. Each spice contributes unique flavors that enhance the overall taste of the broth.
For beginners, the key lies in balancing the spices. Start with small amounts and adjust according to your taste preferences. Using a spice bag can simplify the process, allowing you to easily remove them later and focus on developing the broth’s flavors without the hassle of straining.
Incorporating aromatics like ginger and onion will further enhance your broth, adding layers of complexity. Charred onion and ginger contribute a smoky, caramelized note that pairs beautifully with the spices.
Perfecting Your Simmering Technique for Flavorful Broth
Simmering is where the magic truly unfolds. A long, slow simmer is essential for extracting maximum flavor from the bones and spices. Ideally, aim for a simmering time of at least 6-8 hours for beef broth and 3-4 hours for chicken broth. This extended process allows the flavors to meld and develop, resulting in a rich, flavorful liquid that serves as the base for your pho.
Keep the heat low to ensure a gentle simmer. High temperatures can lead to a cloudy broth, which is not desirable for pho. Throughout the simmering phase, regularly skim off any impurities that rise to the top. This practice is crucial for achieving a clear broth, which is a hallmark of outstanding pho.
Once the broth is fully prepared, allow it to cool slightly before straining. Straining removes the solids, leaving behind a pristine, flavorful liquid that serves as the foundation for your pho.
Skimming and Straining for a Crystal-Clear Broth
Skimming and straining your broth is vital for creating a clean and flavorful pho. As the broth simmers, impurities and fat will rise to the surface. Regularly skimming these off prevents them from clouding the broth, ensuring a clear, visually appealing soup.
After simmering, let the broth rest for a few minutes to allow the sediment to settle at the bottom. Then, carefully strain the broth through a fine mesh sieve or cheesecloth to eliminate any remaining solids. This final step will yield a perfectly clear broth that highlights the essence of your ingredients.
A clean broth not only appears more appetizing but also allows the flavors to shine through without any unpleasant bitterness. This attention to detail is what distinguishes a good pho from a great one, making your culinary efforts truly worthwhile.
Mastering the Preparation of Noodles for Pho
The noodles are the essential heart of pho, providing a chewy texture that complements the rich broth. Preparing them correctly is imperative for creating a well-balanced dish that satisfies the palate.
Understanding the Different Varieties of Rice Noodles Used in Pho
Comprehending the different types of rice noodles is crucial for crafting the perfect pho. The most common noodles used in pho are bánh phở, which are flat, wide rice noodles that soak up the broth beautifully. These noodles come in various widths, ranging from thin to wide, allowing for personalization based on individual preference.
When shopping for rice noodles, seek those made from high-quality rice flour to ensure the best possible texture. Fresh noodles can often be found in Asian grocery stores, while dried noodles are also widely available and can be conveniently stored for future culinary explorations.
Experimenting with different noodle thicknesses can enhance the texture of your pho. Wider noodles provide a chewier bite, while thinner noodles offer a more delicate experience. As you gain confidence in your pho-making skills, consider trying various noodle types to discover your personal favorite.
Cooking Noodles to Achieve the Ideal Texture
Cooking the noodles to perfection is key for a satisfying bowl of pho. To begin, soak dried rice noodles in warm water for about 30 minutes or until they soften. This step ensures that the noodles hydrate evenly, resulting in a tender texture that pairs wonderfully with the broth.
Once soaked, it’s crucial to cook the noodles quickly in boiling water. They typically require just a few minutes to achieve an al dente texture. Monitor them closely, as overcooked noodles can become mushy and lose their desirable consistency.
After cooking, drain the noodles and rinse them briefly under cold water to halt the cooking process. This step helps maintain their texture and prevents them from clumping together. Properly cooked noodles will deliver a satisfying bite that complements the rich flavors of the broth beautifully.
Serving Noodles for Maximum Enjoyment in Pho
Serving the noodles correctly is essential for preserving their texture and enhancing the overall dish. When assembling your pho, place a generous portion of cooked noodles at the bottom of each bowl before ladling the hot broth on top. This method ensures that the noodles soak up the broth’s flavor while retaining their firmness.
To prevent the noodles from clumping together, consider tossing them with a small amount of oil before serving. This practice can also impart a subtle flavor to the dish. When serving, ensure that each bowl has an even distribution of noodles, allowing every diner to enjoy the ideal balance of broth and noodles.
As a finishing touch, contemplate adding a variety of fresh herbs and garnishes atop the noodles. This not only enhances the dish’s visual appeal but also provides an explosion of flavors that elevate your pho experience to a new level.
Artfully Assembling Your Pho for a Memorable Presentation
Assembling your pho is a delightful process that encourages creativity and personalization. Each component plays a vital role in creating a harmonious and visually appealing dish that tantalizes the senses.
The Technique of Layering Ingredients for Optimal Pho
The technique of layering ingredients in your pho bowl is crucial for achieving the perfect bite. Start by placing a generous serving of noodles at the base of the bowl. This foundation absorbs the broth’s flavors and serves as a base for the other ingredients.
Next, incorporate your choice of protein—be it tender slices of beef, poached chicken, or tofu. This layering ensures that each ingredient is adequately distributed, allowing diners to savor a balance of flavors in every spoonful.
Complete the assembly by ladling the hot broth over the noodles and protein, ensuring that everything is submerged. This step is essential for allowing the flavors to meld together, creating a delightful taste experience.
Elevating Your Pho with Beautiful Garnishes
Garnishing your pho is an opportunity to enhance its presentation and add layers of flavor. Traditional garnishes include fresh herbs such as Thai basil, cilantro, and mint, which provide brightness and freshness to the dish. Bean sprouts introduce a crunchy texture, while lime wedges offer a zesty contrast.
To enhance the garnishing experience, consider providing a selection of toppings on the side. Sliced jalapeños, hoisin sauce, and sriracha can be offered for those who enjoy a touch of heat or sweetness. This approach allows diners to customize their bowls according to their preferences, making each dining experience unique and personal.
Presentation matters, so take the time to arrange your garnishes aesthetically. A well-garnished bowl of pho not only looks appetizing but also invites diners to indulge in the exciting flavors waiting to be discovered.
Achieving a Harmonious Flavor Balance in Your Pho
Striking a balance of flavors is key to crafting a harmonious bowl of pho. The broth should complement the noodles and protein without overpowering them. A well-seasoned broth provides a rich backdrop for the other ingredients, allowing their natural flavors to shine through.
As you assemble your pho, consider the sweet, salty, and savory elements of the dish. Adding a touch of sugar can enhance the broth’s depth, while fish sauce or soy sauce can introduce umami and saltiness. Taste as you go, adjusting the flavors to ensure a well-rounded and harmonious experience.
The right balance of spices and garnishes can elevate your pho to new culinary heights. Experiment with different combinations until you discover the perfect blend that excites your palate and tantalizes your taste buds.
Presenting Your Pho with Style and Flair
Serving pho is a moment to showcase your culinary efforts. Presentation is vital, as a visually appealing bowl of pho will entice diners and enhance their overall experience. Serve the pho in deep bowls to accommodate the generous portions of broth, noodles, and garnishes.
Before serving, take a moment to garnish your pho with fresh herbs and lime wedges. The vibrant colors will make the dish pop and set the stage for an appetizing meal that diners will remember. Consider offering chopsticks and a soup spoon alongside the bowls, allowing diners to enjoy their pho in the traditional manner.
As you serve, encourage diners to mix the garnishes into their soup, allowing the flavors to meld together. This interactive experience creates a connection between the dish and the diner, making the meal even more memorable and enjoyable.
Personalize Your Pho Experience to Suit Your Taste
One of the joys of pho is its adaptability. Each bowl can be customized to suit individual preferences and dietary requirements, making it a versatile option for any meal or occasion.
Enhancing Your Pho with Spicy Elements
For those who enjoy a bit of heat, adding spices to pho can elevate the overall dining experience. Consider incorporating sliced fresh chilies, sriracha, or hoisin sauce into your bowl. Each of these options empowers diners to control the level of heat according to their liking, allowing for a personalized touch.
Chilies can be added directly to the broth or served on the side for personal customization. Sriracha offers a tangy kick, while hoisin sauce introduces a hint of sweetness that can balance the spiciness. Encourage diners to experiment with different combinations to discover their ideal level of heat.
The ability to customize pho with spice not only enhances the flavors but also adds an element of fun to the dining experience. It invites diners to engage with their food, making each bowl uniquely theirs and enhancing their overall enjoyment.
Adapting Pho for Vegetarian and Vegan Diets
Pho can seamlessly be tailored to accommodate vegetarian and vegan diets. By utilizing a robust vegetable broth, beginners can craft a delicious meat-free version of this beloved dish. Start with a base of mushrooms, carrots, and onions to create a rich broth that mimics the depth found in traditional pho.
Tofu is an excellent addition, providing protein and texture, while a mix of fresh vegetables like bok choy and bean sprouts can enhance the dish’s overall appeal. Garnishing with fresh herbs like cilantro will add brightness and freshness, making the vegetarian pho a satisfying option for all diners.
By experimenting with different vegetable combinations and broths, you can easily create a unique, flavorful pho that caters to various dietary preferences without compromising on taste or enjoyment.
Making Dietary Adjustments in Your Pho
Customizing pho to meet different dietary needs is straightforward and accessible. For those with gluten sensitivities, opt for gluten-free rice noodles, which are widely available. Always check labels to confirm that the noodles meet dietary requirements, ensuring an enjoyable meal for all.
To enhance the healthiness of your pho, consider using organic or locally sourced ingredients. This practice not only supports sustainable farming but also ensures that your pho is made with the freshest produce available, contributing to a more wholesome meal.
For those following a keto diet, substituting traditional noodles with alternatives like zucchini noodles or shirataki noodles can provide a low-carb base while still allowing you to savor the rich flavors of pho without straying from your dietary goals.
Elevating Flavor Profiles in Your Pho
To enhance the flavor profile of your pho, experimenting with various herbs and spices can make a significant difference. Fresh basil and mint provide vivid aromas that elevate the overall experience. A splash of lime juice can also brighten the broth, balancing the richness with refreshing acidity.
Herbs can be added directly to the broth or served as a garnish, allowing diners to personalize their dishes. Consider offering a selection of herbs on the side for an interactive dining experience that encourages creativity and exploration.
Encourage diners to experiment with different flavor profiles by incorporating unique spices or ingredients that cater to individual tastes. This creativity will transform each bowl of pho into a unique culinary adventure, inviting diners to explore the endless possibilities of this cherished dish.
Your Most Frequently Asked Pho Questions Addressed
What are the fundamental components of pho?
Pho primarily consists of rice noodles, broth, fresh herbs, and a protein source, typically beef or chicken. Other essential ingredients include spices like star anise and fresh garnishes such as bean sprouts and lime.
How much time should I allocate for preparing pho?
Preparing pho can take several hours, especially for the broth, which requires a long simmering time to develop rich and complex flavors. However, assembling the dish itself is a quick process that can be accomplished in under 30 minutes once the broth is ready.
Can pho be made suitable for vegetarians?
Yes, pho can easily be made vegetarian by using a vegetable broth as the base. Incorporating mushrooms, tofu, and a variety of fresh vegetables can create a delicious meat-free version that is satisfying and flavorful.
What type of noodles are ideal for pho?
The best type of noodles for pho are bánh phở, which are flat, wide rice noodles. These noodles absorb the broth’s flavor beautifully and provide a satisfying texture that enhances the overall dish.
How should I store any leftover pho?
Leftover pho should be stored in an airtight container in the refrigerator. To maintain the best texture, it’s advisable to store the broth and noodles separately. Reheat carefully before serving to preserve the dish’s quality.
What spices are considered essential for pho broth?
Key spices for pho broth include star anise, cinnamon, cloves, and coriander seeds. These spices contribute to the aromatic profile that makes pho so distinctive and enjoyable.
Can I incorporate different proteins into my pho?
Absolutely! Pho can be customized with a variety of proteins, including chicken, tofu, seafood, or even a mix of meats. Experimenting with different options allows for personalization and enhances the dining experience.
Is pho gluten-free?
Traditional pho made with rice noodles is gluten-free. However, it’s important to always check labels for any additional sauces or ingredients that may contain gluten to ensure a safe dining experience.
How spicy can I make my pho?
The level of spiciness in pho can be adjusted by incorporating sliced chilies, sriracha, or hoisin sauce. Diners can easily customize their bowls to suit their individual spice preferences, adding a fun and interactive element to the meal.
What characteristics define a good pho broth?
A good pho broth is clear, aromatic, and rich in flavor. It is achieved through a long simmering process with high-quality bones, spices, and aromatics, allowing the flavors to meld beautifully into a comforting and satisfying liquid.
Join Our Community on Facebook!
The post Vietnamese Pho Recipes: A Beginner’s Simple Guide appeared first on https://cookinggods.com
The Article Vietnamese Pho Recipes: A Simple Guide for Beginners Was Found On https://limitsofstrategy.com
-

Tunisian Couscous: Your Essential Guide to Flavorful Dishes
Discover the Essential Ingredients for Crafting Authentic and Flavorful Tunisian Couscous
Embarking on your culinary adventure requires starting with the right ingredients to create a truly delicious Tunisian couscous. The freshness and quality of each ingredient are crucial as they directly influence the overall taste of your dish. In this section, we will delve into the essential components that are vital for achieving the authentic and mouthwatering flavor profile of your couscous, ensuring a delightful and memorable culinary experience that will impress any guest.
Selecting the Ideal Type of Couscous for Unmatched Taste and Texture

Choosing the right type of couscous is a fundamental step in creating an irresistibly delicious Tunisian couscous. Traditionally, couscous is made from semolina derived from durum wheat, which imparts a light, fluffy texture essential for authentic preparation. You can opt for fine, medium, or coarse couscous, each variety providing a distinct culinary experience. Fine couscous is ideal for side dishes, while the medium type is preferred for main courses, offering versatility in your meal planning and enhancing the overall dining experience.
To prepare the couscous correctly, begin by rinsing it under cool water to remove excess starch, which is crucial for preventing clumping and ensuring a light, airy consistency. After rinsing, transfer the couscous to a large bowl and add enough hot water to thoroughly moisten it. Allow the mixture to rest for approximately 30 minutes, then fluff the grains using a fork to achieve that perfect, airy texture that characterizes traditional couscous.
Enhance Your Dish with Key Spices: Cumin, Coriander, and Paprika
Spices are the essence of a truly delicious Tunisian couscous. The harmonious combination of cumin, coriander, and paprika infuses your dish with remarkable depth and complexity. Cumin introduces an earthy aroma that is both comforting and grounding, while coriander imparts bright, citrusy notes that beautifully enhance the overall flavor profile. Meanwhile, paprika not only adds a touch of sweetness but also brings a vibrant red hue to your dish, making it visually appealing and more enticing.
To maximize the impact of these spices, consider lightly toasting them in a dry skillet before adding them to your couscous. This process enhances their aromatic qualities and releases essential oils, resulting in a more robust and engaging flavor. Once toasted, mix them directly into your couscous for an explosion of flavor that elevates the dish to new culinary heights, ensuring every bite is packed with deliciousness.
Boost Flavor and Nutrition with Fresh Vegetables: Carrots, Zucchini, and Chickpeas
Incorporating vegetables is crucial for enhancing the overall composition of a delicious Tunisian couscous. Fresh carrots, zucchini, and chickpeas not only contribute diverse textures but also significantly boost the nutritional profile of the dish. Diced or sliced carrots introduce a natural sweetness, while zucchini provides a refreshing lightness and a hint of moisture to the blend, enhancing the overall flavor and enjoyment.
Rich in protein, chickpeas are a staple ingredient in couscous preparation. They should be cooked until tender and then combined with the other vegetables to create a harmonious and cohesive dish. For optimal results, sauté your vegetables in high-quality olive oil before adding them to the couscous, as this enhances their flavors and contributes to a well-rounded dish. When these ingredients are combined thoughtfully, you’ll create a balanced and flavorful dish that is sure to impress the taste buds of all your guests.
Perfect Your Skills: Techniques for Cooking the Ideal Delicious Tunisian Couscous

The cooking process is integral to creating a delicious Tunisian couscous. Whether you choose the traditional method using a couscoussier or a more modern approach, each technique offers unique advantages that can significantly enhance your culinary experience. In this section, we will explore various cooking methods for couscous and provide expert tips to achieve the perfect texture and flavor that will delight your palate.
Mastering the Traditional Cooking Method with a Couscoussier
The traditional preparation of couscous involves the use of a couscoussier, a specialized two-tiered pot designed specifically for steaming. This authentic technique preserves the integrity of the dish while ensuring that the couscous absorbs all the rich flavors from the broth. To begin, fill the bottom portion of the couscoussier with water and bring it to a rolling boil. Then, place the semolina in the upper section, allowing it to steam gently and thoroughly.
Maintaining proper aeration for the couscous is essential for achieving that perfect texture. To do this, gently stir the grains every 10 minutes and mist them with a small amount of water to keep them moist. While this method may require time and patience, the results are undeniably rewarding. A traditionally prepared couscous will be light, fluffy, and bursting with flavor, making the effort well worth it and providing a delightful dining experience.
Adopting the Modern Cooking Method: Steaming for Quick and Delicious Results
Steaming offers a fantastic alternative for those who prefer a quicker approach to cooking couscous. This method employs a steam pot or steamer, allowing the couscous to cook while retaining its essential nutrients and flavors. Simply add water to the base of the pot and place the couscous in the steaming basket, cooking it for about 15 to 20 minutes for optimal results that will satisfy your taste buds.
While this technique is more time-efficient, it requires careful monitoring to prevent the couscous from becoming sticky. To help separate the grains and enhance the dish’s texture, consider adding a drizzle of olive oil to the couscous before cooking. This method can lead to delightfully fluffy couscous without sacrificing flavor or texture, ensuring a rewarding culinary experience.
Expert Advice for Achieving Flawless Couscous Texture Every Time

Achieving the perfect texture for your delicious Tunisian couscous requires meticulous attention to detail and a few essential tips. One of the most critical aspects is to avoid over-saturating the couscous during preparation. Excess moisture can lead to a gummy texture that is unappealing. Instead, gradually sprinkle water over the grains and allow them to rest, enabling them to swell appropriately and attain that desired lightness that is a hallmark of traditional couscous.
Another key to enhancing the flavor is to use a rich broth instead of plain water for hydrating the couscous. This substitution greatly enriches the dish with added flavor and depth. Finally, remember to fluff the couscous after cooking to ensure the grains remain separate and airy, fully prepared to absorb all the delightful flavors you plan to incorporate into the dish.
Uncover the Flavorful Secrets to a Truly Delicious Tunisian Couscous
The flavors of a delicious Tunisian couscous extend far beyond just the basic ingredients. The secrets to creating an exceptional dish lie in the intricate details, particularly the broth, spice blend, and the use of fresh herbs. In this section, we will explore these key elements to help elevate your couscous to extraordinary culinary heights, ensuring each serving is a delightful experience.
The Critical Importance of Broth: Selecting Between Meat and Vegetable Options
The broth serves as the vital component that binds all the ingredients of a delicious Tunisian couscous together. Whether you choose a meat-based or vegetable broth, it should be rich, aromatic, and full of flavor. For a traditional couscous, a meat broth—typically made from Lamb or chicken—is preferred. The meat should be simmered alongside onions, garlic, and a medley of spices to extract maximum flavor and ensure the broth is deeply satisfying.
If you prefer a vegetarian alternative, a well-seasoned vegetable broth can work wonders. Utilize a combination of vegetables such as carrots, leeks, and celery to create a flavorful base that complements your couscous. The key is to allow the broth to simmer long enough for all the ingredients’ flavors to meld and intensify, resulting in a deeply satisfying and flavorful experience.
The Art of Creating a Spice Blend for Unmatched Flavor and Aroma
The spice blend is what truly sets a delicious Tunisian couscous apart from other culinary offerings. The art of mixing spices lies in achieving a balanced flavor profile that excites the palate. You can experiment with various spices, including ras el hanout, a traditional Moroccan spice blend that adds incredible depth and complexity. Gradually incorporate your spices and taste as you go to find the perfect balance that suits your preferences.
Feel free to customize the spice blend according to your own taste. For example, adding a hint of cinnamon for sweetness or a touch of cardamom for an exotic flair can elevate the dish further. The goal is to create a harmonious flavor profile that enhances every bite of your couscous, making it a truly memorable dish for your guests.
Brighten Your Dish with Fresh Herbs: The Vital Role of Parsley and Coriander
Fresh herbs such as parsley and coriander are essential for finishing a delicious Tunisian couscous. They infuse the dish with a burst of freshness and brightness that balances the rich flavors of the other ingredients. Incorporating the herbs just before serving preserves their aroma and vibrant color, ensuring the best possible taste and presentation.
Consider using these herbs as a garnish for your couscous. A simple handful of chopped coriander or parsley can dramatically enhance the visual appeal of your dish, making it more appetizing and inviting. Beyond their aesthetic contributions, these herbs also provide significant nutritional benefits, adding essential vitamins, minerals, and antioxidants to your meal.
Explore the Rich Regional Variations of Delicious Tunisian Couscous
The delicious Tunisian couscous is not a one-size-fits-all dish; it boasts numerous regional variations that reflect the rich cultural diversity of Tunisia. Each region presents its interpretations and ingredients, making every version unique and worth exploring. In this section, we will highlight some of these delightful variations, showcasing the versatility of couscous across the country.
Indulge in Sfax-Style Couscous: A Seafood Lover’s Delight
Sfax-style couscous is a coastal specialty that stands out due to its incorporation of seafood. This variation is often prepared with fresh shrimp, mussels, and fish, providing an unparalleled culinary experience that highlights the flavors of the Mediterranean. The seafood is cooked in a savory broth that enhances the flavors of the couscous, creating a delightful dish that is both satisfying and rich.
To prepare this delightful couscous, cook the seafood separately with a mix of spices and garlic to enhance its natural flavors. Incorporate the seafood into the couscous just before serving to ensure that it remains tender and juicy, creating a beautifully crafted dish that marries land and sea, perfect for seafood enthusiasts and those seeking a unique flavor experience.
Experience Djerba-Style Couscous: Infused with the Fiery Kick of Harissa
The Djerba variant of couscous is characterized by the generous use of harissa, a spicy chili paste that adds both heat and depth to the dish. Harissa can be mixed directly into the couscous or served on the side, allowing each diner to adjust the heat level according to their liking and spice tolerance.
To create a Djerba-style couscous, prepare the couscous using traditional methods and mix harissa into the broth. This technique imparts a vibrant red hue to the dish while enhancing its flavors, creating a bold and exciting dining experience. Spice lovers will surely appreciate this fiery variation, making it a memorable addition to any meal.
Delve into Southern-Style Couscous: A Taste of Berber Heritage
Southern-style couscous, heavily influenced by Berber culture, often incorporates local ingredients such as Dates, almonds, and a variety of spices. This version is distinguished by its unique sweet-salty flavor profile, providing a delightful culinary experience that showcases the region’s rich traditions and ingredients. Dates, in particular, contribute a natural sweetness that harmonizes beautifully with the savory elements of the dish, creating an intriguing balance.
To prepare a Southern-style couscous, incorporate dried fruits and nuts into the vegetable mix. This combination creates a delightful contrast of textures and flavors, ensuring that every bite is both intriguing and satisfying. This variation is often served during festive gatherings, making it a perfect centerpiece for celebratory meals and family feasts.
Enhance Your Delicious Tunisian Couscous with Perfect Accompaniments and Garnishes
Accompaniments and garnishes play a crucial role in enhancing both the presentation and flavor of your delicious Tunisian couscous. While the dish can stand alone as a satisfying main course, it is often paired with a variety of sides that enrich the overall culinary experience. Let’s explore the best options to accompany your couscous delightfully, ensuring a well-rounded meal.
Meat Pairings: Enjoying the Spices of Merguez and Succulent Lamb
Meat is a central element in many recipes for delicious Tunisian couscous. Merguez, a spicy sausage made from Lamb, is a popular choice that adds intense flavor and a slight kick to the dish. This savory addition complements the couscous beautifully, enhancing its overall appeal and creating a satisfying meal.
To prepare merguez, grill or pan-fry them until they are golden brown and slightly crispy. Add them to the couscous just before serving to maintain their juicy texture and robust flavor. On the other hand, Lamb is often slow-cooked with a medley of spices and vegetables, yielding tender meat that melts in your mouth. Serving these meats alongside your couscous transforms the meal into a hearty and flavorful feast that is sure to impress.
Delicious Roasted Vegetables: The Sweetness of Eggplants and Bell Peppers
Incorporating roasted vegetables into your delicious Tunisian couscous adds a touch of sweetness and depth to the dish. Eggplants and bell peppers are particularly excellent choices for this purpose. They can be roasted in the oven with high-quality olive oil and a blend of spices until they are beautifully caramelized and tender, elevating the dish’s overall flavor.
To prepare this vibrant garnish, chop the vegetables into uniform chunks, seasoning them with salt, pepper, and various herbs. Roast them at a high temperature to bring out their rich and natural flavors, ensuring they retain their shape and texture. Serving these colorful roasted vegetables atop your couscous not only adds visual appeal but also introduces varied textures that enhance the overall dish and provide a delightful contrast.
Flavorful Sauces: The Perfect Touch of Harissa and Creamy Labneh
Sauces play an essential role in elevating the taste of your delicious Tunisian couscous. Harissa is a must-have condiment for those who enjoy a little heat. This spicy chili paste can be served on the side, allowing guests to customize their level of spiciness. Its rich flavor and heat add an extra dimension to every bite of couscous, making it an indispensable accompaniment.
Labneh, a creamy strained yogurt, serves as another excellent addition. Its smooth texture and slightly tangy flavor beautifully balance the spices in the couscous, creating an appealing contrast. Serving a generous dollop of labneh atop your dish offers a refreshing and cooling touch that complements the intense flavors of the couscous, enhancing the overall dining experience.
Essential Guidance for Beginners: Crafting Your Own Delicious Tunisian Couscous
If you are new to the world of delicious Tunisian couscous, there’s no reason to worry. With a few practical tips, you can create a delightful and impressive dish that will wow your guests and leave a lasting impression. In this section, we will share valuable advice to help you navigate the process of preparing your couscous with ease and confidence, ensuring a successful cooking experience.
Strategic Ingredient Preparation for Culinary Triumph
Effective planning is vital to successfully preparing your delicious Tunisian couscous. Before you start cooking, ensure that you have all the necessary ingredients readily available. This includes couscous, fresh vegetables, spices, and your choice of meat or vegetarian alternatives to create a well-rounded dish.
Creating a detailed shopping list can streamline your process and help you choose fresh, high-quality ingredients. Additionally, consider preparing your vegetables in advance by chopping and storing them in the refrigerator. This strategy will save you valuable time during your cooking session, allowing you to focus on the preparation of your couscous and ensuring everything comes together seamlessly for a delightful meal.
Mastering Cooking Timing for Optimal Culinary Results
Timing is crucial when it comes to preparing a delicious Tunisian couscous. Be diligent in following the recommended cooking times for each component of the dish. For instance, cooking meat or broth typically takes longer, while you can prepare the couscous and vegetables simultaneously for efficiency.
Generally, couscous cooks faster than the other elements, so it’s wise to prepare it last to ensure it is served hot and fluffy. Proper time management will allow you to present your guests with a delicious and flavorful dish that they will love, enhancing their dining experience and making your meal memorable.
Impressive Presentation and Serving Tips for Your Guests
Presentation is key for a dish as visually appealing as delicious Tunisian couscous. Use a large serving platter to showcase your beautifully prepared couscous. Arrange the vegetables and meats artfully on top, creating an inviting visual display that will entice your guests. Don’t hesitate to add a sprinkle of coriander or parsley to provide a pop of vibrant color and freshness.
Additionally, ensure that sauces such as harissa and labneh are served on the side, allowing each guest to customize their dish according to their preferences. A stunning presentation not only pleases the eye but also enhances the overall dining experience, making your couscous a memorable centerpiece for any meal and a topic of conversation among your guests.
Common Questions About Creating Delicious Tunisian Couscous
Can You Prepare Couscous in Advance for Meal Prep?
Yes, you can prepare couscous in advance, as it stores well in an airtight container in the refrigerator. Simply reheat it gently before serving to restore its fluffy texture and enjoy it as part of your meals.
How Should You Store Leftover Couscous for Future Use?
Leftover couscous can be kept in the refrigerator inside an airtight container for optimal freshness. It is best consumed within 3 to 4 days. To prevent the couscous from drying out, add a splash of water when reheating it to maintain its desired consistency.
Is It Possible to Create a Vegan Version of Couscous?
Absolutely! You can prepare a completely vegan couscous by utilizing vegetable broth and a variety of colorful vegetables. Incorporating chickpeas will not only boost the protein content but also add heartiness, making it a nutritious and satisfying option for everyone.
What Types of Meat Can Be Incorporated into Couscous Dishes?
Traditionally, Lamb and chicken are commonly used in couscous preparations, but you can also opt for beef or merguez sausages to enhance the flavor profile of your dish and create a more diverse culinary experience.
Which Type of Couscous Is Ideal for Cooking?
For main dishes, medium couscous is often recommended due to its ideal texture, while fine couscous is best suited for side dishes. Selecting the right type enhances your meal’s overall experience, ensuring it is both enjoyable and satisfying.
Can You Use Pre-Made Spice Mixes for Convenience?
Yes, pre-made spice blends can provide convenience in the kitchen. Just ensure that you select high-quality blends to achieve an authentic taste in your couscous and enhance the flavors of your dish.
Can Couscous Be Served Cold in Salads?
Yes, couscous can be served cold, particularly in salads. Incorporating fresh vegetables, herbs, and a dressing makes for a refreshing summer dish that is delightful and satisfying.
How Can You Prevent Couscous from Sticking Together?
To prevent couscous from sticking, add a drizzle of olive oil during preparation and fluff it gently after cooking to keep the grains separated and ensure a light, fluffy texture.
Is It Possible to Cook Couscous in a Pressure Cooker?
Yes, a pressure cooker can be an effective method for quickly cooking couscous. Be sure to follow your appliance’s specific instructions for optimal results and to achieve the desired texture.
Is Couscous Considered a Healthy Dish?
Yes, couscous is a healthy option, especially when paired with fresh vegetables and lean proteins. It offers a dish rich in nutrients and flavors, making it a satisfying choice that everyone will enjoy.
Stay updated with our latest news on Facebook!
The post Tasty Tunisian Couscous: Your Complete Guide appeared first on https://cookinggods.com
The Article Tunisian Couscous: The Ultimate Guide to Deliciousness Was Found On https://limitsofstrategy.com