Your cart is currently empty!
Category: Cooking Tips
-
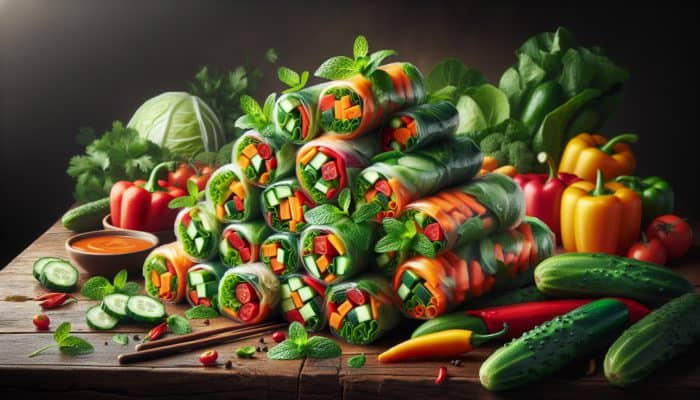
Fresh Spring Rolls: Your Complete Guide to Making Them at Home
Key Ingredients for Crafting Delectable and Nutritious Fresh Spring Rolls
Fresh, Colorful Vegetables and Aromatic Herbs for Maximum Flavor
When embarking on the journey to create mouthwatering and nutritious fresh spring rolls in your kitchen, the choice of fresh, crunchy vegetables is paramount. Ingredients such as lettuce, carrots, cucumbers, and bell peppers play essential roles, each imparting their distinct texture and flavor profile. Additionally, integrating vibrant herbs like mint and coriander infuses a refreshing quality that elevates your rolls to new culinary heights. Prioritizing locally grown and seasonal produce can amplify both flavor and nutritional benefits, making your meal not just tasty but also wholesome.
To enhance the excitement of your spring roll experience, consider adding a vibrant assortment of vegetables that provide an array of textures and colors. For instance, shredded carrots offer an appealing crunch, while cucumber brings a juicy and refreshing element. Feel free to innovate with unique ingredients, such as purple cabbage for striking visual appeal or avocado for a creamy texture. This combination of fresh ingredients not only beautifies the dish but also ensures a deliciously satisfying eating experience.
Incorporating Protein for a Heartier Spring Roll Experience
Integrating a source of protein into your fresh spring rolls can significantly enhance their substance and nutritional profile. Popular protein choices include shrimp, tofu, and chicken, each providing unique flavors and textures. Shrimp offers a succulent, slightly sweet taste, while fried or marinated tofu serves as an excellent vegetarian alternative. Grilled chicken can be seasoned to perfection, adding depth and richness to your rolls.
Furthermore, you can diversify your protein options by incorporating ingredients like tempeh for a nutty flavor or even crab meat for an indulgent touch. The versatility of these protein sources allows for catering to various dietary preferences, ensuring that everyone can relish your homemade fresh spring rolls.
Selecting High-Quality Rice Paper Wraps for Perfect Rolls
Choosing high-quality rice paper wraps is essential for achieving the perfect texture in your spring rolls. The wraps should be pliable yet sturdy, providing a delicate yet reliable casing for your chosen fillings. Brands that utilize premium rice flour tend to deliver better results, ensuring that the wraps won’t tear easily during the filling process.
When shopping for rice paper, look for options that are transparent and available in various sizes. Larger wraps allow for more fillings, while smaller ones are ideal for bite-sized portions. Mastering the handling of these wraps is crucial for perfecting your rolling technique, as understanding their behavior when soaked in water is key. A well-executed rice paper wrap can turn your spring rolls into culinary masterpieces.
Exciting Dipping Sauces to Elevate Your Spring Rolls

No fresh spring roll experience is complete without the perfect dipping sauce to amplify its flavors. Prepare a selection of sauces, including classic peanut sauce, hoisin sauce, and sweet chili sauce, each offering distinct taste profiles. For instance, peanut sauce blends creamy peanut butter with soy sauce and lime juice, creating a rich, nutty accompaniment that pairs beautifully with the freshness of the rolls.
Diving into various dipping sauces can significantly enhance your spring roll experience. A spicy hoisin sauce mixed with sriracha delivers an exhilarating burst of flavor, while a light sauce made from lime, fish sauce, and sugar provides a refreshing contrast. These dipping sauces not only deepen the dish’s flavor but also allow for customization based on individual taste preferences, transforming every meal into a unique culinary adventure.
Adding Noodles for Extra Texture and Filling Quality
Incorporating thin rice or vermicelli noodles into your fresh spring rolls adds an additional layer of texture, making them more satisfying and filling. These noodles are generally soft and slippery, seamlessly blending with the other ingredients. Furthermore, they absorb the flavors of the sauces and seasonings, enhancing the overall taste of the rolls.
To prepare the noodles, cook them according to the package instructions and rinse them under cold water to halt the cooking process. This step is crucial for preserving their integrity and preventing them from becoming mushy. Adding noodles to your spring rolls not only creates a more satisfying dish but also transforms it into a perfect light meal or enticing appetizer for any gathering.
Effective Preparation Techniques for Optimal Ingredient Quality
Mastering the Art of Slicing Vegetables Thinly for Ideal Texture
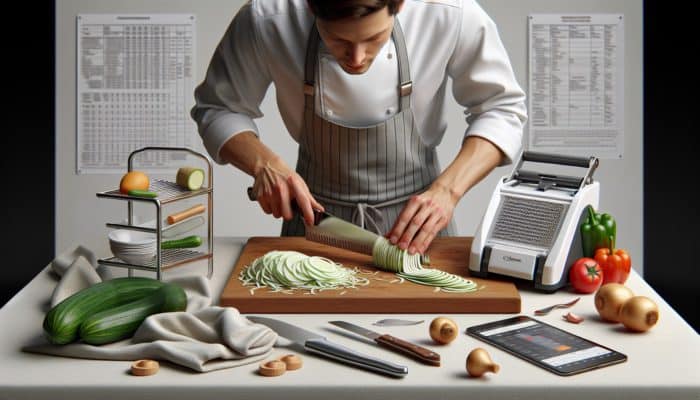
Mastering the technique of slicing vegetables thinly is vital for crafting visually appealing and well-balanced fresh spring rolls. By utilizing a sharp knife or a mandoline slicer, you can achieve uniform slices that not only look great but also offer a harmonious texture when combined. Aim for slices that resemble the thickness of a coin, ensuring they’re thin enough to be pliable without falling apart.
For precise slicing, it’s beneficial to have essential tools at your disposal, including a sharp chef’s knife for clean cuts, a mandoline slicer for achieving perfect thickness, a cutting board for stability, a vegetable peeler for creating ribbons, and a kitchen towel to dry the vegetables. Efficiently using these tools streamlines your slicing process, enhancing your overall productivity in the kitchen.
Cooking Your Protein to Perfection for Tasty Spring Rolls
Properly cooking your chosen protein is crucial for maintaining its texture and flavor when included in spring rolls. Whether you select shrimp, tofu, or chicken, each protein requires specific cooking techniques to achieve optimal results. For shrimp, a quick sauté in a hot pan with minimal seasoning helps to preserve their juiciness. In contrast, tofu should be pan-fried until golden brown to enhance its flavor.
When preparing chicken, ensure it is grilled or poached just until cooked through to avoid dryness. Allow your proteins to cool before adding them to the rolls, as this prevents the rice paper from becoming soggy. Properly cooked proteins enhance the integrity of the spring roll, guaranteeing that each bite is both satisfying and packed with flavor.
Correctly Soaking Rice Paper Wraps for Best Results
Correctly soaking rice paper wraps is a critical step in the spring roll-making process. Dip the rice paper in warm water for about 5-10 seconds to soften it without rendering it overly sticky or fragile. Begin by filling a shallow dish with warm water and fully submerge the wrap.
As the rice paper starts to soften, remove it from the water and lay it flat on a clean surface, such as a cutting board or countertop. It’s crucial to work quickly because the rice paper continues to soften once removed from the water. A well-soaked wrap should be pliable and easy to manipulate, allowing you to create tight and secure rolls.
Enhancing Flavor Through Ingredient Marination
Marinating your vegetables and proteins before assembling your spring rolls can significantly enhance their flavor profile. A simple marinade could consist of soy sauce, lime juice, and a hint of honey. Allow your ingredients to soak in the marinade for at least 30 minutes, or even overnight, to infuse them with rich, vibrant flavors. This step is particularly beneficial for tofu, as it absorbs flavors exceptionally well.
When marinating vegetables, consider using components that complement the overall taste of the spring rolls. For example, a splash of rice vinegar can brighten the flavor of cucumbers, while a dash of sesame oil can add depth to carrots. The aim is to create a balance that enhances the fresh taste of the spring rolls, ensuring that every bite is a delightful experience.
Expert Techniques for Crafting Fresh Spring Rolls at Home
Effective Rolling Techniques for Perfectly Formed Spring Rolls
Mastering the art of rolling spring rolls is vital for achieving a tight, well-formed roll that doesn’t tear the rice paper. Begin by placing your soaked rice paper on a clean surface. Position your ingredients towards the lower third of the wrap, ensuring you don’t overfill. Start by folding the bottom of the wrap over the filling, then tuck in the sides as you roll it up tightly. This method secures the contents within the wrap while maintaining its structural integrity.
Practice makes perfect—experiment with various rolling techniques to find what works best for you. Some individuals prefer the ‘burrito’ style, while others may adopt a more delicate approach. The key is to ensure that the roll is snug without applying excessive pressure, which could lead to tearing. With time and experience, you will develop an intuitive sense of how tightly to roll your spring rolls for optimal results.
Achieving a Harmonious Balance of Flavors in Your Rolls
Establishing an ideal balance of flavors in your fresh spring rolls requires careful ingredient selection and thoughtful combinations. Aim to incorporate elements that offer contrasting tastes, such as sweet, salty, and fresh. For example, pairing sweet mango with savory shrimp creates a delightful contrast, while fresh herbs like mint and coriander contribute brightness and vibrancy.
To further enhance the flavor profile, consider using complementary sauces as dips. A rich peanut sauce can counterbalance the freshness of the vegetables, while a zesty lime dipping sauce can elevate the overall tasting experience. The objective is to curate a multi-dimensional flavor journey that keeps your palate engaged from the first bite to the last.
Presentation Techniques for Stunning Spring Rolls
The presentation of your fresh spring rolls significantly influences the overall enjoyment of the dish. Arrange them attractively on a platter, perhaps in a circular pattern or elegant stacks, to create visual appeal. Consider using vibrant garnishes like a sprig of mint or a sprinkle of sesame seeds to enhance the dish further. Serving your spring rolls alongside a variety of dipping sauces not only elevates the flavors but also adds an interactive element to the dining experience.
When serving fresh spring rolls at a gathering, consider sharing dipping sauce recipes or flavor combination tips with your guests. This interaction not only engages your diners but also invites them to create their own unique flavor experiences. Ultimately, the goal is to transform your fresh spring rolls into not just a delicious treat but also a feast for the eyes, encouraging everyone to indulge.
Tips for Selecting the Freshest Ingredients for Your Spring Rolls
Choosing the freshest ingredients is crucial for ensuring your spring rolls are bursting with flavor. When selecting vegetables, look for items that are vibrant in color and crisp to the touch. Fresh herbs should exude a fragrant aroma and have bright leaves, free from wilting or browning. For proteins, choose high-quality options, whether it’s sustainably sourced shrimp or organic tofu, as these choices significantly impact both flavor and health.
Building a good relationship with local farmers’ markets or trusted grocery stores can enhance your ingredient selection process. These sources often boast a better turnover of produce, ensuring fresher options. By focusing on freshness and quality, you guarantee that your homemade spring rolls will not only taste better but also be more nutritious, making each bite an immensely satisfying experience.
Tempting Dipping Sauces to Enhance Your Spring Rolls
Creating a Classic Peanut Sauce for Your Rolls
The classic peanut sauce is an essential accompaniment for any fresh spring roll enthusiast. To create this rich, nutty dipping sauce, start by blending smooth peanut butter with soy sauce, lime juice, and a hint of sweetness, such as honey or maple syrup. The balance of these ingredients yields a sauce that is both creamy and flavorful, perfectly complementing the fresh ingredients in your spring rolls. Adjust the ratios to discover your ideal balance of salty and sweet.
For an added kick, consider incorporating finely chopped garlic or ginger, both of which introduce depth and complexity to the sauce. Adjusting the thickness of your peanut sauce is also crucial; if you prefer a thicker dip, simply reduce the amount of liquid, or for a thinner consistency, add warm water until you reach the desired texture. This versatile sauce can be customized to suit your taste, making it a vital component of your spring roll experience.
Making a Spicy Hoisin Sauce for Extra Flavor
If you enjoy a bit of heat, creating a spicy hoisin sauce is an excellent option to accompany fresh spring rolls. Blend hoisin sauce with sriracha and a splash of water to achieve your desired consistency. The combination of sweet, spicy, and tangy notes delivers a complex flavor that pairs beautifully with the freshness of the rolls.
Feel free to personalize your spicy hoisin sauce by adjusting the spice levels to suit your preferences. Adding a squeeze of lime juice can brighten the flavors, while a sprinkle of sesame seeds adds delightful crunch. This sauce not only elevates the taste of your spring rolls but also adds an element of fun and customization for your guests.
Crafting a Refreshing Dipping Sauce for Your Rolls
A refreshing dipping sauce can enhance the lightness of spring rolls, making it an ideal complement. Start with a base of lime juice, which provides acidity and brightness. Incorporate fish sauce for umami depth, and a touch of sugar to balance the acidity. These three ingredients combine to create a light and zesty sauce that beautifully complements the freshness of your rolls.
Consider adding fresh herbs such as cilantro or basil to infuse an aromatic quality into your sauce. Additionally, finely chopped chili can introduce a hint of heat, further elevating the flavor profile. By utilizing simple, fresh ingredients, you can create a dipping sauce that enhances your spring rolls without overwhelming their delicate flavors.
Proper Storage and Reheating Techniques for Fresh Spring Rolls
Best Practices for Storing Fresh Spring Rolls
Properly storing fresh spring rolls is critical for maintaining their texture and flavor for later enjoyment. To keep them fresh, place your spring rolls in an airtight container lined with a damp cloth. This method helps retain moisture and prevents the rice paper from drying out. Ideally, consume them within a day for optimal freshness.
If you’re preparing spring rolls in advance for a gathering, consider storing them separately from the dipping sauces. This prevents the rolls from becoming soggy and ensures a satisfying crunch upon serving. Additionally, if you lack a suitable container, wrapping the rolls individually in damp paper towels can be a good alternative, ensuring they stay moist until you’re ready to serve.
Reheating Techniques to Preserve Texture
When reheating fresh spring rolls, it’s essential to do so gently to preserve their delicate texture. One effective method is to steam the rolls for a few minutes until heated through. This technique retains moisture and ensures that the rice paper remains pliable and enjoyable.
Avoid using a microwave to reheat spring rolls, as this can cause them to become chewy and rubbery. If steaming isn’t an option, consider pan-frying them briefly in a non-stick skillet over low heat, flipping occasionally for even heating. By employing gentle reheating methods, you can enjoy your spring rolls as fresh and delicious as they were when first made.
Freezing Fresh Spring Rolls for Future Enjoyment
Freezing fresh spring rolls is certainly feasible, but it’s essential to consider the potential texture changes that may occur upon thawing and reheating. To freeze, arrange the spring rolls in a single layer on a baking sheet and place them in the freezer until firm. Once frozen, transfer them to an airtight container or a freezer bag for long-term storage.
When you’re ready to indulge in your frozen spring rolls, remove them from the freezer and allow them to thaw in the refrigerator overnight. To reheat, steam them or pan-fry gently as mentioned earlier. Keep in mind that the texture of the rice paper may not be as crisp as when freshly made, but the flavors will remain delightful, allowing you to enjoy your creations even after freezing.
Creative Variations and Customizations for Your Spring Rolls
Adding Fruits for a Sweet Twist in Your Rolls
Incorporating fruits into your fresh spring rolls can introduce a delightful sweet twist and an unexpected burst of flavor. Fruits such as mango, papaya, or even strawberries pair beautifully with traditional savory ingredients. The natural sweetness of these fruits enhances the overall taste and creates a balanced contrast with other fillings.
When including fruit in your spring rolls, opt for ripe selections to ensure they positively contribute to the overall flavor. For instance, mango slices can add creaminess, while cucumber provides a satisfying crunch, creating a dynamic texture. Feel free to explore unique combinations—try pairing mango with shrimp or avocado with papaya for a refreshing and vibrant roll. The addition of fruits not only enhances flavor but also adds visual appeal to your dish.
Exploring Creative Protein Alternatives for Your Rolls
Exploring creative protein alternatives in your fresh spring rolls can diversify your fillings and cater to various dietary preferences. Some excellent options to consider include:
- Tempeh for a nutty flavor
- Crab meat for an indulgent option
- Seitan for a meaty texture
- Grilled eggplant for a hearty vegetarian choice
- Chickpeas for a protein-packed option
These alternatives allow you to personalize your spring rolls based on what you have on hand and your flavor preferences. Experiment with different cooking methods, such as roasting or marinating, to amplify the flavors of your chosen proteins.
Incorporating Unique Herbs and Spices for Enhanced Flavors
Enhancing the flavor profile of your fresh spring rolls can be achieved by incorporating unique herbs and spices. While mint and coriander are traditional favorites, consider experimenting with basil, dill, or lemongrass to introduce new layers of flavor. Each herb brings its distinct character, transforming your spring rolls into a culinary adventure.
In addition to herbs, spices such as sesame seeds, crushed peanuts, or even a pinch of curry powder can add depth and complexity. Consider the overarching theme of your spring rolls when selecting these ingredients. For example, Thai basil and lemongrass can create an aromatic experience, while dill and lemon can evoke Mediterranean vibes. The beauty of spring rolls lies in their versatility, allowing you to explore diverse flavor combinations.
Experimenting with Different Wrappers for Unique Textures
While rice paper is the traditional choice for spring rolls, experimenting with various wrappers can significantly alter the texture and taste of your rolls. Consider using wheat flour wrappers for a thicker, more indulgent bite, or lettuce leaves for a gluten-free, crunchy alternative. Each wrapper offers unique characteristics, allowing for a personalized spring roll experience.
If you opt for a different wrapper, be mindful of the cooking methods required. For example, wheat flour wrappers may need to be cooked before rolling, while lettuce leaves can simply be filled and rolled. Experimenting with various wrappers can lead to delightful surprises and encourage creativity in your spring roll preparations.
Research-Backed Benefits of Making Fresh Spring Rolls at Home
Nutritional Advantages of Homemade Spring Rolls
Homemade spring rolls offer numerous nutritional advantages compared to store-bought options, mainly due to the control you exert over the ingredients used. By opting for fresh vegetables, lean proteins, and wholesome wraps, you can create a nutrient-dense meal packed with vitamins, minerals, and antioxidants. Aim to incorporate a variety of colors and types of vegetables to maximize nutritional benefits.
To optimize the nutritional value of your spring rolls, consider these actionable steps:
- Utilize whole grains instead of refined rice paper.
- Include a diverse range of vegetables to enhance nutrient intake.
- Opt for lean proteins or plant-based alternatives.
- Choose dipping sauces made from wholesome ingredients.
By prioritizing nutrition in your homemade spring rolls, you can enjoy a delicious meal that supports your health and well-being.
How Making Spring Rolls at Home Can Save You Money
Preparing spring rolls at home can be a cost-effective alternative to purchasing them from restaurants or takeout. Not only do you save money by sourcing ingredients in larger quantities, but you also gain the flexibility to control portion sizes and ingredient quality. Buying items like rice paper, vegetables, and proteins in bulk can lead to significant savings over time.
Moreover, cooking at home allows you to customize recipes based on what you already have in your pantry or fridge, minimizing food waste and maximizing your budget. Overall, making spring rolls at home gives you the freedom to enjoy a gourmet experience without breaking the bank.
The Environmental Benefits of Homemade Meals
Cooking meals at home, including fresh spring rolls, can have a positive environmental impact. By preparing your dishes, you significantly reduce packaging waste compared to purchasing pre-packaged or takeaway food. Choosing locally sourced ingredients also supports sustainable farming practices and minimizes the carbon footprint associated with food transportation.
Additionally, home cooking promotes mindful eating and reduces reliance on processed foods, which can contribute to environmental degradation. By prioritizing homemade meals, you not only create delicious dishes but also make choices that align with sustainable eating practices, benefiting both your health and the planet.
Troubleshooting Common Issues with Spring Rolls
How to Handle Torn Rice Paper Effectively
Encountering torn rice paper can be frustrating when making fresh spring rolls, but it is manageable with the right techniques. If your rice paper tears during soaking or rolling, remain calm. You can often salvage the situation by using a second piece of rice paper to reinforce the torn area. Overlaying the torn piece with a fresh wrap can provide the necessary support.
To prevent tearing in the future, ensure that you soak the rice paper for the correct duration; over-soaking can weaken the wraps. Additionally, handle the rice paper gently during assembly and consider laying it flat on a clean, damp surface to minimize friction. With practice, you will learn to manage the rice paper more adeptly, resulting in beautifully rolled spring rolls.
What to Do If Your Rolls Are Too Loose
If you find your spring rolls are too loose and fall apart easily, it may be due to overfilling or inadequate rolling technique. To remedy this, tighten your rolling technique by applying gentle, even pressure as you roll. Be sure to fold in the sides securely before completing the roll to create a firm package.
In the future, be mindful of portion sizes. A well-balanced filling should provide substance without overwhelming the rice paper. Practicing your rolling technique will also help you develop a better sense of how tightly to roll. With time, you’ll perfect the art of rolling snug, well-formed spring rolls.
Preventing Soggy Spring Rolls: Tips and Tricks
Soggy spring rolls can be disappointing, but preventing this issue is achievable with a few simple strategies. Firstly, ensure that all ingredients are dry before assembling your rolls. Excess moisture from vegetables can seep into the rice paper, leading to sogginess. Consider using a salad spinner to dry leafy greens and wiping down other vegetables before use.
Additionally, pay attention to your rolling technique. Be sure to roll tightly without applying excessive pressure, which can cause the rice paper to tear or break. Here are some tips to help prevent soggy spring rolls:
- Utilize a clean, dry surface for rolling.
- Keep ingredients at room temperature before assembly.
- Limit moisture-heavy fillings.
- Store rolls in a damp cloth to retain moisture without becoming soggy.
By following these tips, you can enjoy fresh, crisp spring rolls every time you make them.
Frequently Asked Questions About Fresh Spring Rolls
Can I use different types of rice paper wraps in my rolls?
Absolutely! Feel free to experiment with various types of rice paper wraps or alternatives like wheat flour wrappers or lettuce leaves for unique textures and flavors in your spring rolls.
What is the shelf life of fresh spring rolls in the refrigerator?
Fresh spring rolls can be stored in the fridge for up to 1 day, wrapped in a damp cloth and placed in an airtight container to maintain moisture.
What sauces pair best with spring rolls?
Classic pairings include peanut sauce, hoisin sauce, and sweet chili sauce, but feel free to explore other sauces that suit your taste preferences.
Can I prepare spring rolls ahead of time for a party?
Yes, you can prepare spring rolls in advance and store them in the fridge for a few hours or overnight, but they are best enjoyed fresh.
Are spring rolls considered a healthy option?
Absolutely! Fresh spring rolls can be packed with vegetables, lean proteins, and healthy fats, making them a nutritious meal choice.
Can I freeze fresh spring rolls for later use?
Yes, you can freeze fresh spring rolls, but their texture may change upon thawing. It’s best to steam or pan-fry them for reheating.
How can I enhance the flavor of my spring rolls?
Enhance flavor by marinating your ingredients, using fresh herbs, and pairing them with a variety of dipping sauces.
What fillings should I avoid in spring rolls?
Avoid overly moist ingredients, such as watery fruits or excessive sauces, as they can make the rice paper soggy.
How do I know when the rice paper is ready to use?
Rice paper is ready when it becomes pliable and slightly tacky but not overly sticky. Soak it for just a few seconds in warm water to achieve this desired consistency.
Can I incorporate cooked vegetables into my spring rolls?
Yes, cooked vegetables can be used in spring rolls, but ensure they are cooled and dry before assembly to prevent sogginess.
Connect with us on Facebook!
The post How to Make Fresh Spring Rolls at Home: A Universal Guide appeared first on https://cookinggods.com
The Article Fresh Spring Rolls at Home: Your Ultimate Guide Was Found On https://limitsofstrategy.com
-

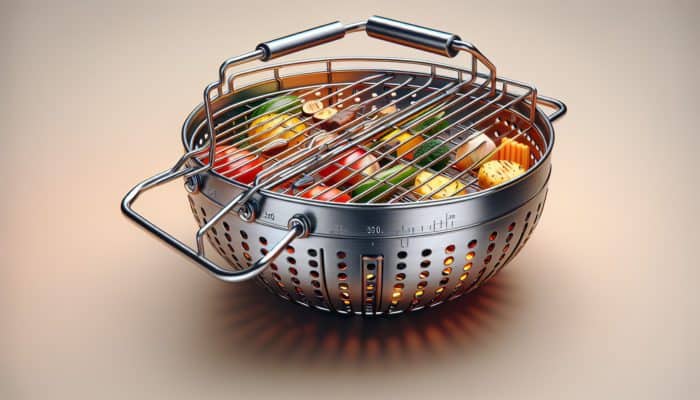
Grilling Baskets for Vegetables: Essential Guide to Use
Discover the Incredible Benefits of Using Grilling Baskets for Perfectly Cooked Vegetables
Understanding Grilling Baskets: Essential Tools for Every Grill Master
Grilling baskets are innovative cooking tools meticulously designed to securely hold food on the grill, effectively preventing smaller items from falling through the grates. They are especially advantageous for grilling vegetables, ensuring that these ingredients cook evenly and thoroughly, while also preventing any pieces from getting lost to the flames. Some essential features of grilling baskets include:
- Diverse Materials: Available in a range of materials, including stainless steel, non-stick options, and woven wire designs.
- Ergonomic Handle Design: Many models come with long handles for safe and easy handling during grilling.
- Varied Mesh Sizes: Different mesh sizes accommodate various food types, from tiny diced vegetables to larger chunks.
- Flexibility in Design: Some baskets feature a closing mechanism, creating a secure environment that retains marinades and seasonings effectively.
- Portability: Lightweight and easily transportable, perfect for outdoor grilling excursions.
These baskets not only simplify the grilling process but also enhance the flavor and texture of grilled vegetables, making them an indispensable tool for any grilling enthusiast.
Uncover the Different Types of Grilling Baskets to Elevate Your Cooking
A wide variety of grilling baskets are available on the market, each specifically designed to meet distinct cooking needs and personal preferences. The categorization of grilling baskets is primarily based on their shape, size, and materials used. Common types include:
- Flat Baskets: Perfect for grilling sliced or diced vegetables, they provide a spacious cooking surface.
- Woven Baskets: Ideal for smaller items like cherry tomatoes or diced peppers, preventing them from slipping through the grates.
- Grill Wok: A deep, bowl-shaped basket crafted to securely hold vegetables, making it ideal for stir-frying on the grill.
- Skewers and Baskets Combination: Some models integrate skewers into the basket, allowing for easy flipping and turning of food.
- Multi-Level Baskets: These enable grilling multiple vegetable varieties simultaneously, maximizing grill space efficiency.
Understanding these various types can help grillers select the right basket tailored to their preferred grilling methods and the specific vegetables they wish to cook.
Discover the Key Benefits of Using Grilling Baskets for Your Cooking Needs
Using grilling baskets can significantly improve your grilling experience by offering convenience and superior cooking results. The main benefits include:
- Loss Prevention: Smaller vegetable pieces are less likely to fall into the flames, ensuring that no ingredients are wasted during grilling.
- Uniform Cooking: Grilling baskets facilitate even heat distribution, resulting in perfectly charred vegetables every time.
- Flavor Enhancement: The basket retains seasonings and marinades close to the food, intensifying flavor absorption throughout the grilling process.
- Convenience: They simplify the process of turning and flipping vegetables, making it easier to manage them on the grill.
- Healthier Cooking Option: Grilling vegetables in a basket often requires less oil, making it a healthier choice compared to frying methods.
These benefits clearly demonstrate why grilling baskets are a preferred choice for both novice and skilled grillers alike, transforming the art of grilling into a more enjoyable and efficient experience.
Essential Tips for Selecting the Ideal Grilling Basket for Your Cooking Style

Choosing the Best Materials for High-Quality Grilling Baskets
The material of a grilling basket is a vital factor determining its durability and overall effectiveness. Common materials used include stainless steel and non-stick coatings, each offering distinct advantages. Selecting the right material can significantly enhance your grilling experience and ensure the longevity of your basket. Here’s an in-depth breakdown of the pros and cons of various materials:
- Stainless Steel: Known for its durability and rust resistance, this material provides excellent heat retention but may require oiling to prevent sticking.
- Non-stick Coatings: Easy to clean and allows food to release easily, though these coatings can wear off over time with extensive use.
- Woven Wire: Promotes good airflow and heat distribution but may be less durable and more prone to bending than other materials.
- Cast Iron: Exceptional at heat retention and distribution, making it ideal for searing; however, it can be heavy and requires careful maintenance to prevent rust.
Choosing the right material depends on your grilling style and how frequently you plan to use the basket. Investing in a high-quality, durable material will ensure your grilling basket withstands many seasons of outdoor cooking.
Determining the Right Size of Grilling Basket for Your Food
Selecting the appropriate size of grilling basket is crucial for accommodating your food effectively. While larger baskets may seem appealing, they can lead to overcrowding, resulting in uneven cooking. Conversely, smaller baskets might limit the variety of vegetables you can grill simultaneously. Here are some considerations for size selection:
– Consider the volume of food you typically grill at one time. If you often cook for larger groups, a larger size will be beneficial.
– Think about the types of vegetables you plan to grill. Dense, chunky vegetables may require more space compared to smaller, diced items.
– Ensure that your basket fits comfortably on your grill without blocking heat sources or airflow.
– Reflect on your personal cooking habits. If you enjoy experimenting with various vegetable mixes, a medium to large basket can offer the necessary flexibility.Ultimately, selecting the right size of grilling basket enhances cooking efficiency, ensuring every vegetable receives the attention it deserves for perfectly grilled results.
Essential Features to Look for When Choosing a Grilling Basket
Grilling baskets come with a variety of features that can greatly enhance their functionality and usability. When purchasing a basket, consider the following essential features:
- Locking Mechanism: Some baskets feature a locking mechanism that securely holds food during grilling, preventing spills.
- Removable Handle: A detachable handle can facilitate easier storage and provide better access to the grill while cooking.
- Ventilation Holes: These ensure even cooking and help prevent steaming, allowing for that perfect char.
- Heat Resistance: Handles and materials should withstand high temperatures without warping or melting during grilling.
- Dishwasher Safe: Opt for baskets that are dishwasher-friendly to simplify cleanup after cooking.
Evaluating these features will not only streamline your grilling process but also enhance the quality of the meals you prepare outdoors, ensuring a delightful culinary experience.
Maintaining Your Grilling Basket for Longevity and Optimal Performance
Proper maintenance is essential for extending the lifespan of your grilling basket significantly. Here are key steps to keep your basket in excellent condition:
– Cleaning After Use: Always clean the basket immediately after grilling to prevent food residue from hardening. Use a soft sponge and mild dish soap to wipe it down thoroughly.
– Avoid Abrasive Materials: Stay away from steel wool or harsh chemicals that can scratch and damage the non-stick coating or the surface of stainless steel.
– Seasoning: For cast iron baskets, season them with oil after use to avoid rust and maintain their non-stick qualities.
– Proper Storage: Store the basket in a dry area to prevent moisture damage, and avoid stacking heavy items on top to maintain its shape.
– Regular Inspections: Periodically check your grilling basket for signs of wear or damage, such as rust, bent wires, or peeling non-stick coating, and replace it if necessary.By following these maintenance tips, you can ensure that your grilling basket remains a reliable tool in your outdoor cooking arsenal for many years to come.
Expert Insights on the Best Grilling Baskets for Vegetables
Recommendations from Culinary Experts on Top Grilling Baskets
Culinary professionals frequently share specific recommendations regarding grilling baskets. According to seasoned chefs and grilling enthusiasts, some of the finest options available include baskets known for their durability and performance. Real-world examples of expert recommendations comprise:
– Weber Gourmet BBQ System: Renowned for its versatility and quality, this basket allows for secure grilling of vegetables and even accommodates a wok insert for stir-frying.
– Cuisinart Non-Stick Grilling Basket: Praised for its large capacity and non-stick surface, making it easy to cook a variety of vegetables without the mess.
– BBQ-Aid Stainless Steel Grill Basket: This option is appreciated for its heat retention and easy cleanup, making it a staple for many professional grillers.
– Outset Cast Iron Grill Basket: Experts commend its ability to retain heat and impart a lovely char to vegetables, perfect for those desiring robust flavors.
These selections not only reflect quality but also the preferences of professional grillers, making them reliable choices for home cooks eager to achieve that perfect grilled taste.Optimal Care Practices for Your Grilling Basket
Proper maintenance is vital for prolonging the lifespan of your grilling basket. Essential steps for cleaning and caring for your basket include:
– Immediate Cleaning: Clean the basket right after use while it’s still warm, as this facilitates the removal of food particles.
– Gentle Scrubbing: Use a soft sponge or cloth with warm soapy water to scrub the basket gently, avoiding scrapers that might damage its surface.
– Thorough Drying: After cleaning, ensure to dry the basket completely to prevent rust and maintain its integrity.
– Effective Storage: Store your grilling basket in a cool, dry place. If possible, hang it to prevent any warping.
– Regular Checks: Periodically inspect for wear and tear, especially after extensive use. Address any signs of damage immediately to prolong the basket’s life.
These practices will ensure your grilling basket remains in excellent condition, ready for many enjoyable grilling sessions ahead.Explore the Latest Innovations in Grilling Baskets
The market for grilling baskets is continually evolving, with innovative designs and materials emerging that cater to modern grilling needs. Recent trends include:
– Eco-Friendly Materials: Many brands are transitioning towards sustainable materials that are not only durable but also non-toxic, appealing to health-conscious consumers.
– Smart Grilling Technology: Some new models feature temperature sensors and smart capabilities, enabling precise cooking control directly from your smartphone.
– Modular Designs: Baskets that can be adjusted or configured for various uses are gaining traction, allowing grillers to adapt their tools to specific cooking needs quickly.
– Increased Versatility: Many baskets now showcase hybrid designs that can accommodate various food types, from vegetables to meats, simplifying outdoor cooking setups.
– Enhanced Safety Features: New designs focus on user safety, with improved handle designs to prevent burns and locking mechanisms to secure food during cooking.
Staying informed about these trends ensures that you are utilizing the best tools for your grilling needs, making each outdoor cooking experience enjoyable and efficient.Choosing the Right Grilling Basket to Match Your Unique Cooking Style
Selecting the perfect grilling basket depends on a variety of factors that align with your cooking style and preferences. When making your choice, consider:
– Type of Food: Think about the vegetables you grill most often. If you favor small, delicate items, opt for a basket with a finer mesh for better support.
– Frequency of Grilling: If you grill frequently, investing in a higher-quality, durable basket can be advantageous for consistent results.
– Preferred Cooking Method: Decide whether you want to grill vegetables directly over flames or prefer indirect cooking techniques, as certain baskets are better suited for specific methods.
– Ease of Use and Storage: Choose a basket that fits comfortably on your grill, is easy to handle, and can be stored conveniently when not in use.
– Budget Considerations: Determine your budget range to find a basket that meets your needs while ensuring quality.
By thoughtfully considering these factors, you can confidently select a grilling basket that not only meets your grilling expectations but also enhances your culinary creations.Key Features to Prioritize When Selecting Grilling Baskets
Assessing Durability and Material Quality for Long-Lasting Use
The durability of a grilling basket is vital for long-term use and effective grilling. High-quality materials ensure that the basket can withstand high temperatures and the rigors of outdoor cooking. Factors to consider include:
– Material Strength: Stainless steel is often preferred for its rust and corrosion resistance, while cast iron offers exceptional heat retention and flavor enhancement.
– Construction Quality: Look for well-welded joints and sturdy handles that can support the weight of heavy vegetables without bending or breaking.
– Heat Resistance: Ensure that all components of the basket can endure high temperatures without warping or melting, particularly handles and coatings.
– Weight Consideration: A heavier basket may be more durable, but ensure it is manageable for your grilling sessions, especially when loaded with food.
Investing in a durable grilling basket is essential for ensuring it remains a reliable tool in your grilling arsenal, allowing you to cook confidently for years to come.Focusing on Usability and Ease of Cleaning for Grilling Baskets
A grilling basket should be user-friendly and easy to clean, minimizing the effort required after an enjoyable grilling session. Key features that enhance usability include:
– Non-Stick Surfaces: Baskets with non-stick coatings facilitate food release without residue sticking, simplifying the post-grilling cleanup process.
– Ergonomic Handles: Comfortable, heat-resistant handles make the basket easier to maneuver and prevent burns during grilling.
– Washable Materials: Opt for baskets that are dishwasher safe or can be cleaned easily with minimal scrubbing.
– Lightweight Construction: A lighter basket can make it easier to handle, especially when filled with food, enhancing the overall grilling experience.
Selecting a grilling basket with these features ensures that your cooking remains stress-free and that cleanup is quick and simple, allowing you to focus on enjoying your meal.Exploring Versatility and Multi-Purpose Functionality of Grilling Baskets
Certain grilling baskets are designed for versatility and can be used for a variety of foods, making them a valuable addition to your grilling setup. Baskets that offer multi-purpose functionality include:
– Adjustable Compartments: Baskets with sections allow you to grill different types of vegetables or meats simultaneously, maximizing your grill space.
– Hybrid Designs: Some baskets are crafted for both grilling and oven use, providing flexibility in cooking methods and environments.
– Stir-Fry Capability: Baskets that can double as woks or frying pans enable users to experiment with stir-frying vegetables right on the grill.
– Multi-Level Grilling: Baskets that offer two or more levels for grilling allow for cooking various ingredients at different temperatures.
Choosing a versatile basket enhances your cooking options, making it simpler to experiment and enjoy a diverse range of grilled dishes from the same tool.Understanding Size and Capacity Considerations for Grilling Baskets
Selecting the right size and capacity of a grilling basket is crucial for effectively accommodating different quantities of food. Considerations for selecting the most suitable fit for your grilling needs include:
– Cooking for Groups: If you frequently host gatherings, a larger-capacity basket can save time by grilling multiple servings at once.
– Food Variety: A basket that can accommodate a mix of vegetables allows for creative grilling without the need for multiple tools, simplifying meal preparation.
– Storage Space: Ensure that the size of the basket fits your available storage area, as larger baskets may require more room both in storage and on the grill.
– Personal Preference: Consider your typical grilling habits; if you often prepare smaller portions, a medium-sized basket could be sufficient, while larger families may require a more substantial option.
By evaluating your size and capacity needs, you can choose a grilling basket that aligns with your cooking style and enhances your outdoor culinary experiences.Best Practices for Using Grilling Baskets Effectively
Preparing Your Vegetables for the Ultimate Grilling Experience
Properly preparing your vegetables can greatly enhance the grilling experience. The steps for optimal preparation include:
– Thorough Washing: Always wash vegetables under cold water to remove dirt and pesticides. This ensures a clean cooking surface, enhancing the overall flavor.
– Uniform Cutting: Slice your vegetables into uniform sizes to promote even cooking. For instance, thicker pieces may require longer grilling times, while smaller pieces cook quickly.
– Marinating: Marinate your vegetables for at least 30 minutes before grilling to amplify their flavor. Use a mixture of olive oil, herbs, and spices for a delightful coating.
– Generous Seasoning: Don’t hesitate to season with salt, pepper, or other spices to elevate the taste during cooking. A light sprinkle of seasoning can make a substantial difference.
By following these preparation tips, you can ensure that your vegetables turn out perfectly grilled, bursting with flavor and texture.Grilling Vegetables Effectively for Maximum Flavor and Texture
Effectively grilling vegetables requires the right technique and timing. Here are some essential tips:
– Preheat Your Grill: Always preheat your grill to ensure even cooking and to create those desirable grill marks.
– Avoid Overcrowding: Place vegetables in a single layer within the basket, allowing for proper airflow and even heat distribution. This prevents steaming and ensures a nice char.
– Monitor Cooking Times: Different vegetables have varying cooking times. For example, peppers may take 10-15 minutes, while zucchini cooks in about 5-10 minutes. Keep a close watch to avoid overcooking.
– Utilize Direct and Indirect Heat: Start grilling over direct heat for a quick char, then move to indirect heat to finish cooking without burning.
By mastering these techniques, you can achieve perfectly grilled vegetables that are both tender and flavorful, impressing guests and family alike.Best Practices for Cleaning Your Grilling Basket Post-Use
Cleaning your grilling basket after use is essential for maintaining its condition and longevity. Here’s a step-by-step guide on how to clean your basket effectively:
– Cool Down: Allow the basket to cool down after grilling to prevent burns or injuries during cleaning.
– Scrape Away Residue: Use a spatula or grill brush to carefully scrape off any leftover food particles.
– Soak for Ease: For stubborn residue, soak the basket in warm, soapy water for about 15-30 minutes before scrubbing.
– Thorough Rinse: Ensure all soap residue is rinsed away to prevent lingering flavors or harmful chemicals.
– Complete Drying: Dry the basket with a clean towel or let it air dry to prevent rusting, particularly for metal baskets.
By following these cleaning steps, you can ensure that your grilling basket remains in excellent condition, ready for your next outdoor cooking adventure.Comparing the Top Grilling Baskets for Vegetables on the Market
Reviewing the Highest Rated Grilling Baskets Available
This section will review and compare the highest-rated grilling baskets available, focusing on their features and user reviews. Some noteworthy options include:
– Weber Stainless Steel Grill Basket: Renowned for its durable construction and ability to securely hold a variety of vegetables, it often receives high marks for ease of use and cleaning.
– Cuisinart Gridler Grill Basket: This versatile option is loved for its non-stick properties, making it easy to cook and clean, and it’s praised for its large capacity.
– BBQ-Aid Grill Basket with Handle: Users appreciate its sturdy design and excellent heat distribution, allowing for perfectly charred vegetables with minimal effort.
– Outset Cast Iron Grill Basket: Known for its heat retention and ability to impart delicious flavor, this option is favored by those seeking a more traditional grilling experience.
These comparisons highlight the benefits of each basket, assisting grillers in selecting the best option tailored to their specific needs and preferences.Comparing Different Brands of Grilling Baskets
Various brands offer distinct grilling baskets with unique features that cater to diverse grilling needs. A comparison of leading brands reveals:
– Weber: Renowned for high-quality materials and innovative designs, Weber grilling baskets often come equipped with features that enhance usability, such as ergonomically designed handles and durable construction.
– Cuisinart: Known for their user-friendly designs and non-stick surfaces, Cuisinart baskets are favored for ease of cleaning and versatility in cooking.
– Outset: This brand typically emphasizes traditional materials like cast iron, focusing on heat retention and flavor enhancement, appealing to those who value a classic grilling experience.
– BBQ-Aid: Known for its affordability without sacrificing quality, BBQ-Aid offers durable, functional baskets that cater to both novice and experienced grillers.
By understanding how different brands compare, you can make a more informed decision based on your cooking style and preferences.Understanding the Typical Price Ranges for Grilling Baskets
Grilling baskets are available in a variety of price ranges, and understanding what to expect at different levels can guide your purchase. Price ranges typically include:
– Budget Options ($10-$30): These baskets, often made of lighter materials, may lack some durability but are perfect for casual grillers or those just starting out.
– Mid-Range ($30-$60): Mid-range baskets often feature better materials, such as stainless steel and non-stick coatings, offering a good balance of quality and affordability.
– Premium Options ($60-$100+): High-end baskets tend to be made from durable materials, often with advanced features like multi-functionality, allowing for a more sophisticated grilling experience.
By evaluating your budget and expectations, you can choose a grilling basket that fits your needs without overspending.Effective Strategies for Choosing the Best Grilling Baskets for Vegetables
Selecting the Ideal Grilling Basket Tailored to Your Individual Needs
Choosing the best grilling basket involves carefully considering your specific needs and preferences. Follow these actionable steps to make an informed decision:
– Assess Your Grilling Style: Think about how often you grill and the types of food you typically prepare, as this will influence the size and type of basket you need.
– Evaluate Material Preferences: Reflect on whether you prefer non-stick for easy cleanup or stainless steel for durability and heat retention.
– Review Necessary Features: Determine which features are essential for you, such as a locking mechanism, removable handle, or dishwasher safety, and prioritize these when shopping.
– Read User Reviews: Look into user reviews to gain insights into the performance and durability of baskets you are considering.
– Set a Realistic Budget: Establish a budget that reflects your expectations for quality and functionality, allowing you to narrow down your choices effectively.
By following these strategies, you can confidently select a grilling basket that meets your unique grilling needs and enhances your outdoor cooking experiences.Avoiding Common Mistakes When Using Grilling Baskets
Several common mistakes can occur when using grilling baskets. Avoiding these errors can significantly improve your grilling experience:
– Avoid Overcrowding: Filling the basket too full can lead to uneven cooking and steaming instead of grilling, diminishing the flavor and texture of your vegetables.
– Neglecting Preheating: Skipping the preheating step can result in poorly cooked food, as they won’t sear properly or develop that desired grill flavor.
– Skipping Cleanup: Failing to clean your basket promptly can lead to stubborn residue that becomes difficult to remove and can affect the taste of future meals.
– Ignoring Food Preparation: Not adequately washing or properly cutting vegetables can result in uneven cooking and potential contamination.
– Not Monitoring Cooking Times: Each vegetable has distinct cooking times, and failing to keep track can lead to overcooked or burnt food.
By being mindful of these common mistakes, you can elevate your grilling game and ensure that your vegetables come out perfectly cooked and delicious every time.Maximizing the Use of Your Grilling Basket for Optimal Results
Maximizing the use of your grilling basket can greatly enhance your grilling experience. Here are some expert strategies:
– Experiment with Different Foods: Don’t restrict your basket to just vegetables; try grilling fruits, seafood, or even meats for a varied cooking experience.
– Utilize Marinades and Seasonings: Enhance the flavor of your food by marinating or seasoning before grilling, allowing the flavors to infuse during cooking.
– Combine Complementary Foods: Use the basket to grill multiple ingredients together that complement each other, such as bell peppers and onions, to create a cohesive flavor profile.
– Try Different Cooking Techniques: Experiment with both direct and indirect grilling methods to discover which produces the best results for various food types.
– Host Grilling Gatherings: Engage friends and family by hosting grilling parties where everyone can participate in preparing their own vegetable skewers or baskets, turning the experience into a fun social event.
By implementing these strategies, you can get the most out of your grilling basket, transforming every grilling session into a delicious adventure.Key Insights and Recommendations for Grilling Baskets
Summarizing Key Takeaways from This Comprehensive Guide
This guide has explored essential aspects of grilling baskets, focusing on their types, features, and benefits. Key takeaways include:
– Grilling baskets are invaluable tools for cooking vegetables, offering secure cooking methods that prevent loss and promote even grilling.
– Material quality, size, and essential features are crucial factors when selecting the right grilling basket for your needs.
– Expert insights reveal top recommendations and the latest trends, guiding you to make informed purchasing decisions.
– Best practices for preparing, grilling, and cleaning vegetables enhance your overall grilling experience.
By understanding these foundational elements, you can maximize your enjoyment and success in grilling.Top Recommendations for the Best Grilling Baskets
Based on the information provided, our top recommendations for grilling baskets are:
– Weber Stainless Steel Grill Basket: Best for durability and versatility in cooking.
– Cuisinart Non-Stick Grill Basket: Ideal for easy cleaning and large capacity to accommodate various vegetables.
– BBQ-Aid Stainless Steel Grill Basket: Excellent value and reliable performance for everyday grilling needs.
– Outset Cast Iron Grill Basket: Perfect for enhancing flavors with superior heat retention and even cooking.
These options cater to various grilling styles and preferences, ensuring that you find the perfect basket to elevate your outdoor cooking experience.Finding More In-Depth Information About Grilling Baskets
For those interested in learning more, consider exploring the following resources:
– Grilling Blogs and Forums: Join communities that discuss expert tips, grilling techniques, and product reviews relevant to grilling baskets.
– YouTube Channels: Follow grilling enthusiasts who provide visual tutorials on best practices and recipes for vegetables on the grill.
– Social Media Groups: Engage with groups dedicated to grilling and barbecue techniques, sharing experiences and gaining insights from fellow enthusiasts.
– Cookbooks: Look for grilling cookbooks that offer in-depth information and recipes specifically focused on grilling vegetables.
These resources can provide further insights into the world of grilling baskets, enhancing your skills and enjoyment of outdoor cooking.Frequently Asked Questions (FAQs) About Grilling Baskets
1. What types of vegetables are optimal for grilling?
Popular vegetables for grilling include bell peppers, zucchini, asparagus, eggplant, and mushrooms, all of which hold up well on the grill and develop fantastic flavors.
2. Can I use a grilling basket for meat as well?
Yes, many grilling baskets are versatile and can be used for meats, seafood, and even fruits alongside vegetables, offering a range of cooking possibilities.
3. How do I prevent my vegetables from burning on the grill?
Ensure to cut vegetables evenly, use a moderate heat setting, and avoid overcrowding in the basket to promote even cooking without burning or charring.
4. What is the best way to clean a non-stick grilling basket?
Clean it with warm soapy water using a soft sponge; avoid abrasive materials to maintain the integrity of the non-stick surface and ensure longevity.
5. Should I oil my vegetables before grilling them?
Yes, lightly oiling vegetables before grilling helps prevent sticking and enhances flavor while promoting a nice char on the surface.
6. How do I know when my grilled vegetables are done?
Vegetables are typically done when they are tender and have visible grill marks. A fork should easily pierce them without resistance, indicating they are perfectly cooked.
7. Can I put a grilling basket directly over a flame?
Yes, ensure that the material can handle direct heat; most stainless steel baskets are suitable for direct grilling without any issues.
8. How can I store my grilling basket effectively?
Store your basket in a cool, dry place, and consider hanging it to prevent warping or damage to its shape, ensuring it remains ready for use.
9. Are there eco-friendly grilling baskets available on the market?
Yes, many brands offer grilling baskets made from sustainable materials, providing a safer option for both you and the environment, aligning with eco-conscious cooking practices.
10. How long should I preheat my grill before using a grilling basket?
Preheat your grill for at least 10-15 minutes to ensure it reaches the optimal cooking temperature for the best grilling results.
Connect with us on Facebook!
The post Top Grilling Baskets For Vegetables: Essential Guide appeared first on https://cookinggods.com
The Article Grilling Baskets for Vegetables: Must-Have Guide Was Found On https://limitsofstrategy.com
-

Herbs for Pasta Dishes: Best UK Selections
Discover the Amazing Advantages of Using Basil in Your Pasta Dishes
Why Basil is the Go-To Herb for Amplifying Pasta Flavors?
The distinctive flavor profile of basil is truly exceptional, securing its place as a beloved and essential herb in pasta recipes throughout the UK. Renowned for its sweet and aromatic qualities, basil elevates the essence of any pasta dish, creating a delightful balance of flavors that resonates on the palate. Its incredible adaptability allows it to blend seamlessly with a variety of ingredients, transforming traditional recipes into culinary masterpieces. Here are several compelling reasons to incorporate basil into your pasta recipes:
- Enhances flavor with its sweet and aromatic nuances, making each dish more enticing and delectable.
- Versatile ingredient that complements an array of sauces, inspiring culinary creativity and innovation.
- Pairs wonderfully with tomatoes, cheeses, and meats, enriching the overall flavor complexity of your dishes.
- Adds a vibrant pop of color and freshness to your meals, significantly boosting their visual appeal.
- Rich in antioxidants and possesses anti-inflammatory properties, providing numerous health benefits.
- Can be used fresh or dried, offering flexibility in its integration into various dishes.
Incorporating basil into your pasta repertoire not only elevates the dish’s taste but also guarantees a wholesome culinary experience. Its ability to flourish in UK gardens or pots makes it an accessible herb for home cooks eager to add a personal touch to their pasta creations, allowing for an authentic cooking experience filled with fresh flavors.
Mastering the Art of Growing Basil in the UK Climate
Growing basil at home is a rewarding and fulfilling endeavor, enabling you to savor the freshest flavors in your pasta dishes. Here is a comprehensive step-by-step guide for successfully cultivating basil in UK conditions:
1. Choose the Right Variety: Select sweet basil, the most popular variety used in Italian cuisine, famous for its aromatic qualities and versatility.
2. Find an Ideal Location: Basil flourishes in sunny spots, ideally requiring 6-8 hours of sunlight daily for optimal growth.
3. Prepare the Soil: Use well-drained, nutrient-rich soil; a combination of potting soil and compost yields excellent results for basil growth.
4. Plant Seeds or Seedlings: For seeds, plant them about 1cm deep. When using seedlings, ensure they are planted at the same depth as in their original pots.
5. Watering: Keep the soil consistently moist without overwatering. Morning watering helps avoid conditions that lead to mildew and promotes healthy growth.
6. Harvesting: Begin harvesting leaves when the plant reaches approximately 15cm tall; regular harvesting encourages bushier growth and ensures a continuous supply of fresh leaves.By following these guidelines, you will ensure that your basil thrives abundantly, providing you with fresh herbs to incorporate into your pasta dishes, enriching flavors and enhancing your culinary creations with delightful aromas.
Creating Perfect Pairings: Basil and British Cheeses in Pasta Dishes
The sweet flavor of basil not only enhances a variety of pasta sauces but also harmonizes beautifully with a selection of British cheeses. When developing your pasta dishes, consider these recommended pairings that highlight the best qualities of both basil and cheese:
- Mozzarella: The creamy texture pairs exquisitely with basil in a refreshing Caprese pasta salad, adding a delightful contrast.
- Ricotta: This light and fluffy cheese provides a perfect counterbalance to basil’s robust flavor, enriching the overall dish.
- Cheddar: A mature cheddar introduces a sharpness that contrasts wonderfully with fresh basil, creating a rich flavor experience.
- Goat Cheese: The tangy profile complements the sweetness of basil, making it an ideal choice for creamy pasta sauces.
- Blue Cheese: For those seeking adventure, combining blue cheese with basil creates a bold and flavorful explosion in your dishes.
- Lancashire Cheese: This crumbly cheese, rich in taste, marries beautifully with basil in baked pasta dishes, elevating the meal’s profile.
These pairings not only enhance the flavor profiles of your pasta dishes but also showcase the versatility of both basil and British cheeses, creating a delicious harmony with every bite, ensuring that your culinary creations are both enjoyable and memorable.
Enhancing Your Dishes with Parsley: The Essential Herb

Effective Ways to Incorporate Parsley into Your Pasta Recipes
Parsley stands as a cornerstone herb that infuses refreshing vibrancy into a multitude of pasta dishes, cherished for its adaptability within UK cuisine. One of the remarkable advantages of parsley is its capacity to complement a broad range of flavors, from light to robust. Here are several creative techniques to integrate parsley into your pasta dishes:
- As a Garnish: Finely chop fresh parsley and sprinkle it atop your finished pasta for an invigorating burst of flavor and color, enhancing both taste and presentation.
- In Pestos: Blend parsley with nuts, garlic, olive oil, and cheese for a unique take on traditional pesto, adding a fresh twist to your dishes.
- In Sauces: Introduce chopped parsley to tomato or cream-based sauces for a refreshing finish that elevates the overall flavor profile.
- In Stuffed Pasta: Incorporate parsley into the filling of ravioli or tortellini to enhance flavor and texture, enriching each bite.
- In Salads: Combine parsley with pasta, vegetables, and a zesty lemon dressing for a refreshing pasta salad that is both light and satisfying.
- As an Ingredient in Marinades: Utilize parsley in marinades for chicken or fish served alongside pasta, infusing dishes with fresh flavor that enhances the overall experience.
Using parsley in these diverse ways can elevate the flavor and aesthetics of your pasta dishes, appealing to both taste and presentation, thereby creating a delightful dining experience for everyone who partakes.
Best Parsley Varieties for Thriving in UK Gardens
In the UK, several varieties of parsley can be effectively utilized in pasta dishes, each offering its unique flavor and texture. The most common types include:
– Curly Parsley: This variety boasts a mild flavor and is frequently used as a garnish, adding visual appeal to pasta dishes when finely chopped.
– Flat-leaf Parsley: Also known as Italian parsley, it possesses a stronger flavor than curly parsley and is favored by chefs for its culinary applications, particularly in sauces and pestos.
– Root Parsley: While not typically used in pasta dishes, the roots can be harvested for stocks or soups, with the leaves serving a decorative purpose.
– Petroselinum crispum var. neapolitanum: This hardy variety is cold-resistant and well-suited for UK gardens, providing a robust flavor ideal for various recipes.Experimenting with these parsley varieties allows for a nuanced approach to flavoring pasta, ensuring your dishes remain vibrant and appealing to the palate while showcasing the herb’s versatility.
Best Practices for Storing Parsley to Maintain Freshness
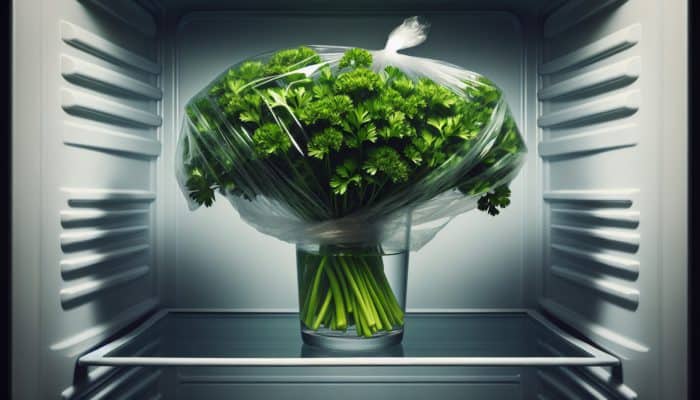
Keeping parsley fresh is crucial for enhancing the flavor of your pasta dishes. Here are some effective storage tips to ensure parsley retains its freshness:
– In Water: Trim the stems and place parsley in a glass of water, loosely covering the leaves with a plastic bag. Store it in the fridge for up to a week to maintain optimal freshness.
– In a Damp Towel: Wrap parsley in a damp paper towel and store it in a plastic bag in the fridge. This method retains moisture without causing decay, ensuring it stays vibrant.
– Freezing: Chop parsley and combine it with olive oil in an ice cube tray. Once frozen, transfer the cubes to a freezer bag for convenient access to flavorful additions later.
– Dried Parsley: For long-term storage, consider drying parsley. Hang it upside down in a dark, ventilated area, then crumble the leaves and store them in an airtight container away from light.By implementing these storage techniques, you can ensure that your parsley remains fresh and flavorful, readily available to enhance your pasta dishes whenever culinary inspiration strikes.
Health Benefits of Adding Parsley to Your Pasta Dishes
Incorporating parsley into your pasta dishes not only enhances flavor but also provides substantial health benefits. Rich in vitamins A, C, and K, parsley significantly boosts the nutritional profile of your meals.
The high vitamin K content is particularly beneficial for bone health and blood clotting, while vitamin C strengthens the immune system and aids in collagen production, promoting overall wellness. Furthermore, parsley serves as a rich source of antioxidants, combating oxidative stress within the body, thereby supporting health.
Additionally, the herb contains essential oils that may assist in reducing inflammation and promoting digestive health. By adding parsley to your pasta, you’re not merely enhancing taste; you’re also contributing to a healthier diet and lifestyle, making every meal more nourishing.Insights from Experts on the Best Herbs for Pasta Dishes
What Do UK Chefs Recommend Regarding Herb Usage in Pasta?
Renowned UK chefs have long acknowledged the transformative power of herbs in pasta dishes, frequently emphasizing their significance in elevating simple ingredients to extraordinary levels. Chefs like Giorgio Locatelli and Angela Hartnett advocate for the inclusion of fresh herbs to cultivate authentic flavors in their pasta recipes, enriching the overall dining experience.
Locatelli often incorporates basil into his signature dishes, emphasizing how it harmonizes beautifully with fresh tomatoes, while Hartnett champions parsley, particularly in seafood pasta dishes, where it introduces a refreshing touch that brightens the meal. Real-world examples illustrate this trend: a simple linguine with clams becomes extraordinary with just a handful of freshly chopped parsley, demonstrating that the right herbs not only enhance flavor but also forge an emotional connection with the dish, making each bite truly memorable.
Encouraging Home Cooks to Experiment with Herbs in Pasta Dishes
For home cooks eager to explore herbs in their pasta dishes, the process can be both gratifying and creatively fulfilling. Start by identifying the dominant flavors in your dish. For example, if you are preparing a creamy sauce, consider adding thyme or sage, as both herbs complement creamy textures beautifully and elevate the overall taste.
Begin with small amounts of herbs, gradually increasing as you taste and adjust. This approach not only helps develop your palate but also fosters intuitive cooking skills. Additionally, experimenting with combinations of herbs, such as mixing basil with a hint of oregano, can yield delightful and unexpected results, enhancing the complexity of flavors in your dishes.
Consider creating herb-infused oils or butters to elevate dishes effortlessly by drizzling them over the finished product. Finally, don’t hesitate to utilize herbs in unconventional ways, such as in a sweet pasta dish where mint or even dill might surprise and delight your guests, showcasing the versatility of herbs in culinary settings.
Trending Herbs in UK Pasta Dishes
Current trends in UK pasta cuisine are witnessing a resurgence of traditional herbs alongside innovative new pairings. While basil and parsley remain staples, culinary enthusiasts are increasingly experimenting with herbs such as tarragon and chervil, known for their unique flavor profiles that add sophistication to contemporary pasta dishes.
Additionally, a focus on sustainability has led to a rise in interest in foraged herbs, such as wild garlic and sorrel. These ingredients not only provide unique flavors but also connect diners with seasonal produce available in the UK, enriching the culinary landscape. Chefs are also embracing herbaceous sauces, transcending the classic pesto to include varieties like kale pesto or even herb sauces crafted from an array of bold greens. These trends reflect a broader movement towards fresh, local, and flavor-forward cooking that resonates deeply with UK diners and enhances their dining experiences.
Rosemary: The Bold and Aromatic Herb Perfect for Pasta Dishes
Utilizing Rosemary to Elevate Your Pasta Sauces
The inclusion of rosemary in pasta sauces introduces a robust, piney flavor that resonates well with UK palates. This herb is particularly effective in elevating rich, meaty sauces, making it a favorite for dishes featuring lamb or beef. When incorporating rosemary into your pasta sauces, it’s best to use it judiciously, as its strong flavor can easily overpower a dish if not balanced correctly.
A common technique is to infuse olive oil with fresh rosemary, allowing the herb’s essential oils to permeate the oil before adding it to sauces, creating a fragrant base. For a delightful pasta dish, consider a lamb ragù where finely chopped rosemary is added alongside garlic and onions, allowing the flavors to meld beautifully, resulting in a dish that is both hearty and satisfying. The aromatic nature of rosemary also pairs exceptionally well with creamy sauces, providing a fragrance that complements the dish while enhancing its overall taste profile.
Health Benefits of Incorporating Rosemary into Your Dishes
Integrating rosemary into your pasta dishes not only enhances flavor but also offers several notable health advantages. This aromatic herb is rich in antioxidants, which combat oxidative stress in the body, contributing to overall health and wellness. Moreover, rosemary is recognized for its anti-inflammatory properties, which may help alleviate various ailments, making it a valuable addition to your diet.
Research suggests that rosemary can improve memory and concentration, adding cognitive benefits to its culinary uses. Furthermore, rosemary contains compounds that may aid digestion, making it an excellent addition to rich pasta sauces. These health benefits, combined with its distinctive flavor, render rosemary a highly valuable herb in both culinary and nutritional contexts, ensuring your meals are not only delicious but also beneficial for your health.
Flavorful Pairings of Rosemary with British Lamb in Pasta Creations
Combining rosemary with British lamb creates an elevated pasta experience, showcasing the rich flavors of both ingredients. The unique taste of British lamb, renowned for its quality, works beautifully with the aromatic notes of rosemary, resulting in a hearty and satisfying dish. A classic recipe involves slow-cooking lamb shanks with garlic, onions, and fresh rosemary, allowing the flavors to develop before tossing the mixture with pasta.
The rosemary infuses the lamb and sauce, imparting a depth that transforms the dish into a comforting meal suitable for any occasion. For those seeking a lighter version, consider utilizing minced lamb sautéed with rosemary and incorporated into a fresh tomato sauce. This approach retains the essence of the pairing while offering a more summery, light pasta option, ensuring that your meal is both wholesome and delicious.
Creating Rosemary-Infused Olive Oil for Your Pasta Dishes
Crafting rosemary-infused olive oil is a simple yet effective method to enhance your pasta dishes. This fragrant oil not only adds flavor but also serves as a beautiful finishing touch to your meals, elevating the overall dining experience. To prepare rosemary-infused olive oil, gently heat a cup of high-quality olive oil in a saucepan with a few sprigs of fresh rosemary. Be cautious not to boil the oil; instead, maintain a low temperature to allow the flavors to meld without burning the herb.
After about 15-20 minutes, remove from heat and let it cool. Strain the oil into a bottle, discarding the rosemary. Drizzle this aromatic oil over your favorite pasta dishes, whether it’s a simple spaghetti aglio e olio or a rich creamy sauce. The rosemary oil not only elevates flavors but also adds a fragrant aroma, enhancing the overall dining experience and delighting your guests with every bite.
Thyme: The Subtle Yet Powerful Herb for Pasta
Enhancing Pasta Dishes with Thyme
Thyme is a subtle yet impactful herb that contributes earthy notes to pasta dishes, making it a beloved choice in UK cooking. Its versatility allows thyme to be utilized in various contexts, from enhancing tomato sauces to beautifully complementing creamy dishes. One of thyme’s most appreciated qualities is its ability to meld seamlessly with other flavors, enhancing the dish without overwhelming it.
For example, when added to a classic carbonara, thyme provides a depth that balances the richness of the egg and cheese sauce, creating a harmonious blend of flavors. Additionally, thyme is often featured in roasted vegetable pasta dishes, where its earthy notes beautifully complement the sweetness of roasted tomatoes or squash. Incorporating thyme into your pasta repertoire can elevate simple recipes into gourmet experiences, establishing it as an essential herb in any kitchen.
Most Suitable Thyme Varieties for Pasta in the UK
In the UK, several thyme varieties can enhance your pasta dishes, each offering unique flavor nuances. The most common varieties include:
– Common Thyme (Thymus vulgaris): This popular variety is widely used in cooking and possesses a robust flavor, making it versatile for various pasta applications.
– Lemon Thyme: Known for its citrusy notes, lemon thyme adds a refreshing twist to lighter pasta dishes, particularly those featuring seafood or poultry.
– Creeping Thyme: This low-growing variety is often used as ground cover, but its flavor is equally enjoyable in pasta, especially in rustic dishes that benefit from its depth.
– English Thyme: A hardier variety, English thyme thrives in UK gardens and provides a strong flavor ideal for hearty sauces and dishes.Experimenting with these thyme varieties can introduce new dimensions to your pasta dishes, allowing you to tailor flavors according to your personal taste preferences while enhancing your culinary creations.
Best Methods for Storing Thyme for Longevity
Keeping thyme fresh and flavorful is essential for enhancing your pasta creations. Here are some effective storage tips to ensure your thyme remains usable for future recipes:
– Refrigeration: Wrap fresh thyme in a damp paper towel and place it in a plastic bag. This method retains moisture, extending its shelf life for up to two weeks.
– Freezing: For longer-term storage, consider freezing thyme. Wash and dry the leaves, then chop them and place them in an ice cube tray with water or olive oil. After freezing, transfer the cubes to a freezer bag for easy access to fresh herbs later.
– Drying: If you prefer dried thyme, hang fresh sprigs upside down in a cool, dark, and ventilated area. Once dried, crumble the leaves and store them in an airtight container away from light.
– Herb Oil: Create thyme-infused oil by gently heating olive oil with fresh thyme. This not only preserves the herb but also results in a fragrant addition to your pasta dishes, enhancing their overall flavor.These storage methods ensure that your thyme remains on hand, ready to enhance your dishes with its earthy, aromatic flavor whenever needed, ensuring you can always enjoy its delightful taste.
Oregano: The Bold and Pungent Herb Essential for Pasta
Understanding Oregano’s Role in UK Pasta Creations
The bold and pungent flavor of oregano has established it as a staple ingredient in numerous UK pasta dishes, particularly those inspired by Italian cuisine. Oregano’s robust character beautifully complements rich sauces and hearty ingredients, making it an essential herb in the kitchen. When used fresh, oregano imparts a vibrant flavor that is particularly pronounced in tomato-based sauces, transforming a simple marinara into a vibrant culinary experience.
Conversely, dried oregano is more concentrated and lends its deep flavor to baked pasta dishes and casseroles, where it can infuse the entire dish with its essence. Moreover, oregano pairs excellently with other herbs, facilitating creative combinations that elevate your pasta recipes. For instance, blending oregano with basil in a fresh tomato sauce can yield a complex and rewarding flavor profile that delights the palate.
Noteworthy Oregano Varieties in the UK
When selecting oregano for your pasta dishes in the UK, several varieties stand out for their unique characteristics. The most popular include:
– Greek Oregano (Origanum vulgare subsp. hirtum): Renowned for its robust flavor, Greek oregano is ideal for Italian dishes, providing intense aromas and a slightly spicy taste that enriches each bite.
– Italian Oregano: Similar to Greek oregano, it has a milder flavor and is frequently used in pizza and pasta sauces, making it a versatile choice for many recipes.
– Mexican Oregano: This variety boasts a more citrusy and slightly floral note, perfect for fusion dishes that incorporate Latin flavors, offering a unique twist on classic pasta recipes.
– Marjoram: While technically distinct, marjoram is often confused with oregano and has a milder, sweeter profile, making it suitable for delicate pasta dishes that require a softer touch.Experimenting with these varieties can provide exciting flavor nuances, allowing you to tailor your dishes to suit your preferences while ensuring a delightful culinary experience.
Perfect Pairing of Oregano with British Tomatoes in Pasta Recipes
Combining oregano with British tomatoes creates a classic pairing that shines in numerous pasta dishes. The natural sweetness of ripe tomatoes beautifully complements oregano’s bold, peppery flavor, establishing a harmonious balance that enhances the overall dish. To create a classic tomato sauce, sauté onions and garlic in olive oil, then add chopped tomatoes and a generous sprinkle of dried oregano. This simple yet effective method results in a rich, flavorful sauce that pairs perfectly with pasta, ensuring every bite is packed with taste.
Furthermore, consider a fresh tomato salad using sliced heirloom varieties, drizzled with olive oil and topped with fresh oregano. This dish accentuates the freshness of the tomatoes while showcasing oregano’s aromatic qualities, making it a delightful addition to any pasta meal, celebrating the beauty of fresh, local ingredients.
Sage: The Rich and Savory Herb for Pasta Delights
Utilizing Sage in Creamy Pasta Sauces
The rich and savory flavor of sage adds a delightful depth to creamy pasta sauces, providing an earthy quality that elevates dishes to new heights. Sage’s distinctive profile works particularly well with rich ingredients such as cream, butter, and cheese, making it an ideal choice for indulgent pasta recipes. One popular method involves browning butter with fresh sage leaves, allowing the herb to infuse the fat with its aromatic essence before combining it with pasta, resulting in a luscious sauce that clings beautifully to the pasta, enhancing each bite.
Another exquisite option is to incorporate sage into a creamy sauce with mushrooms and garlic, creating a luxurious dish that is both comforting and sophisticated. Using sage in these contexts demonstrates its ability to enhance flavor while adding a distinctive character to your pasta creations, ensuring that every meal is memorable and satisfying.
Culinary Applications of Sage in UK Cooking
In UK cuisine, sage is often celebrated for its versatility and depth of flavor. Beyond its use in creamy pasta sauces, sage can be integrated into a variety of dishes, enriching the overall culinary experience. For example, sage pairs wonderfully with roasted meats, especially poultry, often finding its way into stuffing and gravies, adding warmth and savoriness to meals.
It can also be used in soups and stews, where its rich flavor complements hearty ingredients. In pasta dishes, sage can be featured in herbaceous pesto blends or finely chopped and tossed with roasted vegetables to create a vibrant pasta salad. Its ability to meld with other flavors makes sage a powerful ingredient in any cook’s repertoire, enhancing the overall quality of your culinary creations.
Successfully Growing Sage in Your UK Garden
Cultivating sage in your UK garden is a rewarding experience, as this hardy herb thrives in the local climate. Here’s how to effectively grow sage to ensure a bountiful harvest:
1. Select the Right Location: Sage prefers full sun, so choose a spot in your garden that receives at least six hours of sunlight each day for optimal growth.
2. Prepare the Soil: Well-drained soil is crucial for sage. Amend heavy clay with sand or compost to improve drainage and support healthy roots.
3. Planting: Sow seeds directly into the ground or transplant seedlings in early spring. Space them approximately 30cm apart to allow for proper growth.
4. Watering: Water sage plants regularly but be cautious not to overwater. Once established, they require less frequent watering, making them relatively low-maintenance.
5. Harvesting: Begin harvesting leaves once the plant is well established, usually after a few months. Regular pruning encourages bushier growth and ensures a continuous supply of fresh leaves for your culinary creations.By adhering to these guidelines, you can enjoy a steady supply of fresh sage for your pasta dishes, ensuring that your meals are bursting with flavor and freshness, making every dish a culinary delight.
Cheese Pairings that Harmonize with Sage in UK Recipes
Integrating sage with various cheeses in UK recipes creates unique and flavorful combinations that enhance pasta dishes. Some cheeses that pair beautifully with sage include:
- Ricotta: The creamy texture of ricotta complements the earthy notes of sage, making it ideal for stuffed pasta or creamy sauces that are rich and satisfying.
- Goat Cheese: The tangy flavor of goat cheese balances sage’s richness, perfect for salads or pasta dishes that require a touch of brightness and contrast.
- Cheddar: The sharpness of mature cheddar works well with sage, particularly in baked pasta casseroles, adding depth and flavor.
- Blue Cheese: For a bold option, blue cheese combined with sage creates a rich, hearty sauce for pasta, offering a luxurious dining experience.
- Mozzarella: Fresh mozzarella pairs wonderfully with sage in baked pasta dishes, resulting in a delightful melty texture that enhances every bite.
These pairings not only elevate the flavor of your dishes but also celebrate the versatility of both sage and cheese, creating a delightful harmony that enhances your pasta creations and makes your meals truly special.
Frequently Asked Questions About Herbs for Pasta Dishes
Which Herbs Are Best to Include in Pasta Dishes?
The finest herbs for pasta dishes include basil, parsley, oregano, thyme, rosemary, and sage. Each herb contributes unique flavors that can significantly enhance your pasta recipes, making them more enjoyable and memorable.
How Can I Successfully Grow Basil at Home?
To cultivate basil at home, select a sunny location, utilize well-drained soil, and maintain consistent moisture. Regularly harvesting leaves promotes healthy growth and a bountiful supply for your culinary needs.
What Health Benefits Does Parsley Provide When Added to Dishes?
Parsley is rich in vitamins A, C, and K, and contains antioxidants that contribute to overall health. It also aids digestion and possesses anti-inflammatory properties, making it a valuable addition to your meals.
Can I Use Dried Herbs Instead of Fresh Ones?
Yes, dried herbs can be used in place of fresh ones; however, typically, you should use one-third of the amount. Dried herbs are more concentrated and can offer robust flavor, enhancing your dishes significantly.
What Is the Best Way to Store Fresh Thyme?
Store fresh thyme by wrapping it in a damp paper towel within a plastic bag inside the fridge. This method helps maintain moisture and prolongs freshness, ensuring you always have thyme on hand for your recipes.
How Can I Incorporate Rosemary into My Pasta Sauces?
Rosemary can be added to pasta sauces by finely chopping it and incorporating it during cooking, or by infusing olive oil with rosemary for an added flavor boost that elevates your dishes significantly.
Is It Possible to Freeze Fresh Basil for Future Use?
Yes, you can freeze fresh basil by chopping it and mixing it with olive oil in an ice cube tray. Once frozen, transfer the cubes to a freezer bag for later use, ensuring you have fresh basil available whenever needed.
Which Dishes Pair Well with Oregano?
Oregano pairs excellently with tomato-based sauces, pizza, baked pasta, and roasted vegetables, enhancing their flavor with its robust profile and making each dish more enjoyable.
How Do I Incorporate Sage into My Pasta Recipes?
Incorporate sage into pasta recipes by adding it to creamy sauces, using it in pesto, or pairing it with roasted meats in pasta dishes for added depth and flavor that transforms your meals.
What Unique Herb Combinations Can Enhance Pasta Dishes?
Unique herb combinations for pasta dishes include basil with mint, parsley with dill, and thyme with rosemary, all of which add depth and complexity to the flavors, making each dish a culinary delight.
Join Us on Facebook for More Culinary Inspiration and Tips!
The Article: Best Herbs for Pasta Dishes: UK’s Top Picks appeared first on https://mcrtherapies.co.uk
The Article Herbs for Pasta Dishes: Top Picks in the UK Was Found On https://limitsofstrategy.com
-

Summer BBQ Cooking Guide: Your Ultimate Feast Awaits
Maximize Your BBQ Grill Performance with Expert Preparation Techniques
Comprehensive Cleaning and Maintenance Strategies for Your Grill
To achieve exceptional cooking results and enhance your BBQ experience, it is imperative to begin with a thoroughly clean and well-maintained grill. Regular cleaning goes beyond being a simple chore; it is essential for ensuring optimal performance and improving the flavour of your food. Start by employing a wire brush to diligently scrub the grates, ensuring the complete removal of residue and remnants from previous grilling sessions. Following this thorough scrubbing, it is advisable to wipe down the grates with a paper towel that has been soaked in cooking oil. This step not only helps in preventing food from sticking but also adds a hint of flavour to your next BBQ. Additionally, do not overlook the importance of inspecting the burners for any blockages. Clearing these obstructions is vital for ensuring even heat distribution, which is essential for cooking your food to perfection.
Furthermore, prioritizing an inspection of hoses and connections for signs of leaks or wear is crucial. A simple mixture of soap and water can help in detecting any leaks. Look for bubbles forming at the connection sites, as this indicates a potential issue. Regularly replace any parts that exhibit signs of wear and make sure to keep your grill covered when not in use, protecting it from adverse environmental factors. This basic maintenance routine not only extends the lifespan of your grill but also enhances safety, allowing you to concentrate on crafting mouth-watering dishes without the worry of mechanical complications.
Choosing the Ideal Fuel Source to Elevate Your BBQ Experience
When selecting a fuel source for your BBQ, it is crucial to carefully consider your flavour preferences as well as the convenience that each option offers. Charcoal, gas, and electric grills each come with distinct advantages that cater to various grilling styles. Charcoal grills are particularly esteemed for their capability to impart a smoky flavor to food, delivering that iconic BBQ taste that many enthusiasts hold dear. However, charcoal does require additional time to heat up and may present challenges in managing temperatures effectively.
In contrast, gas grills offer easy temperature management and rapid start-up times, making them the ideal choice for those who appreciate convenience and efficiency in their cooking endeavors. With just a simple turn of a knob, you can achieve consistent temperatures, rendering gas grills perfect for busy gatherings where timing is critical. For individuals living in areas with restrictions on open flames, electric grills provide a practical alternative. While they are generally easier to maintain and clean, they may lack the depth of flavour that is typically associated with charcoal grilling.
Configuring Your Grill for Optimal Direct and Indirect Heat Cooking Techniques
Understanding how to properly set up your grill for various cooking methods is essential for mastering BBQ techniques. Direct heat refers to cooking food directly over the heat source, making it ideal for quick-cooking items such as steaks, burgers, and hot dogs. When utilizing direct heat, ensure that your grill is preheated to a high temperature to achieve a delectable sear on the outside while retaining juicy goodness within.
Conversely, indirect heat involves positioning food away from the flame, allowing it to cook slowly and evenly. This method is particularly suited for larger cuts of meat, such as ribs or whole chickens, where the goal is to achieve tenderness without charring the exterior. To configure for indirect heat, ignite one side of the grill while leaving the other side unlit, creating a controlled cooking environment. Mastering both direct and indirect heat techniques will undoubtedly elevate your summer BBQ feast to extraordinary culinary heights.
Expert Techniques for Creating an Unforgettable Summer BBQ Feast

Selecting the Finest Cuts of Meat for BBQ Triumph
Choosing the right cuts of meat is a fundamental aspect of achieving BBQ success. The quality and type of meat you select can profoundly influence the overall flavour and texture of your dishes. Here’s a curated list of some prime cuts that are perfect for BBQ:
- Ribeye
- Brisket
- Pork shoulder
- Chicken thighs
- Tri-tip
- Baby back ribs
- Lamb chops
- Whole fish
When selecting meat, pay close attention to the marbling, which refers to the distribution of fat within the cut. Cuts with good marbling, such as ribeye, tend to be more tender and flavourful when grilled. Although brisket may be tougher, it is excellent for low and slow cooking methods that allow the connective tissues to break down and infuse the meat with incredible flavours. Pork shoulder is another outstanding choice, particularly for BBQ pulled pork that can be savoured in sandwiches or enjoyed on its own. Finally, consider the cooking technique you intend to use, as certain cuts are better suited for specific methods than others.
Enhancing Flavours with Marinades and Rubs
To elevate the taste of your BBQ meats, consider incorporating marinades and rubs. The essential components for effective marinades typically consist of a blend of acids, such as vinegar or citrus juice, mixed with herbs, spices, and a touch of oil. These ingredients work together to tenderize the meat while infusing it with robust flavours. For instance, a simple marinade made from olive oil, lemon juice, garlic, and rosemary can work wonders on chicken or lamb.
Dry rubs also provide a fantastic method for enhancing the depth of flavour in your meats without adding extra moisture. A mixture of brown sugar, paprika, garlic powder, and cumin can create a delightful crust on ribs or steak. Feel free to experiment with various combinations to discover your preferred flavours. Remember to marinate or rub your meats well in advance of cooking to allow the flavours to penetrate deeply. This preparation not only enhances taste but also guarantees a more satisfying BBQ experience.
Mastering Timing and Temperature Control for Perfectly Cooked Meats

Monitoring and adjusting grill temperatures is vital for achieving perfectly cooked meats. Using a reliable digital thermometer is the best way to ensure your food reaches the correct internal temperature for both safety and taste. For example, chicken should be cooked to an internal temperature of 75°C (165°F) to eliminate any risk of foodborne illnesses, while pork should reach a minimum of 63°C (145°F).
While grilling, always keep in mind that the cooking process continues even after you remove the meat from the grill. Carryover cooking can raise the internal temperature by up to 5°C (10°F), so it’s essential to plan accordingly. Allowing meat to rest after cooking not only enhances its juiciness but also permits the flavours to settle properly. Incorporate this timing into your BBQ strategy, and you will consistently produce exceptional dishes that impress your guests.
Essential BBQ Side Dishes to Complete Your Meal
Classic Salads That Enhance Your BBQ Feast
No BBQ is truly complete without an assortment of classic salads that complement the main event. Essential salads include potato salad, coleslaw, and seasonal green salads, each providing a refreshing contrast to the rich, smoky flavours of grilled meats. A creamy potato salad, with its tangy dressing and hearty potatoes, serves as a satisfying side that pairs beautifully with BBQ items.
Coleslaw contributes a crunchy, cool texture that balances the meal perfectly. A simple mixture of shredded cabbage, carrots, and a tangy vinaigrette is all it takes to create this dish. For those seeking lighter options, consider a seasonal green salad. Incorporating fresh ingredients such as cherry tomatoes, cucumbers, and herbs can create a vibrant dish that adds both colour and nutrition to your feast. Additionally, think about garnishing your salads with nuts or seeds for an added crunch and flavour, enhancing their overall appeal.
The Benefits of Grilled Vegetables as a Nutritious Addition
Grilled vegetables are not only a healthy addition; they also present a visually appealing component to your meal. Certain vegetables grill exceptionally well, including peppers, zucchini, and corn. When grilling, ensure that you cut them into even pieces to guarantee consistent cooking. A light seasoning of salt, pepper, and a drizzle of olive oil can amplify their natural flavours, making them truly irresistible.
Grilling vegetables not only enhances their sweetness but also contributes a charred flavour that beautifully complements your meats. Incorporate a variety of colours and textures to create a stunning platter that encourages guests to indulge in healthy options. For an added twist, consider marinating your vegetables in similar marinades used for meats, allowing the flavours to meld together, creating a cohesive meal experience that delights the palate.
Choosing the Right Breads and Buns to Enhance Your BBQ Experience
Selecting the right breads and buns can significantly elevate your BBQ experience. Options such as brioche buns, ciabatta, and homemade cornbread serve as excellent companions for your grilled meats. Brioche buns provide a soft, slightly sweet base for burgers, enhancing both flavour and texture. Ciabatta, with its crisp crust and airy interior, is ideal for sandwiches filled with pulled meats and fresh toppings.
If you’re feeling adventurous, consider making cornbread. This Southern classic is not only easy to prepare but also offers a delightful sweetness that pairs beautifully with barbecue dishes. Providing a selection of breads caters to varying preferences, ensuring everyone finds something they enjoy. Don’t forget to offer butter and accompaniments like garlic aioli or fresh herbs to further enhance the flavours of your grilled feast.
Crafting the Ultimate BBQ Sauce: Essential Steps
Homemade vs. Store-Bought BBQ Sauce: Making the Right Choice
When it comes to BBQ sauce, both homemade and store-bought options offer their own set of advantages and disadvantages. Homemade BBQ sauce allows for a high degree of customization, enabling you to adjust flavours and ingredients based on your personal taste preferences. You can experiment with various bases like tomato, mustard, or vinegar while controlling the sweetness and spice levels to suit your palate.
Conversely, store-bought BBQ sauces provide convenience and consistency, saving precious time for those who prefer to focus on grilling rather than sauce preparation. Many brands offer a variety of flavours and styles, making it easy to find something that appeals to your taste. For those just embarking on their BBQ journey, store-bought options can be a fantastic way to ensure delicious results without the hassle of crafting homemade sauces. Ultimately, the choice depends on your personal preferences and the amount of time you have available for preparation.
Achieving the Perfect Balance of Sweet, Spicy, and Tangy Flavours in BBQ Sauce
The perfect BBQ sauce achieves a delicate balance between sweet, spicy, and tangy flavours. Key ingredients that contribute to this balance include sugar, vinegar, and spices. Brown sugar or honey can provide the necessary sweetness, while apple cider vinegar or lemon juice adds a tangy kick. To achieve the desired level of heat, consider incorporating cayenne pepper, hot sauce, or even smoked paprika for a unique twist that excites the palate.
When crafting your own BBQ sauce, it’s essential to taste as you go. This practice will help you find the right balance that complements your grilled meats without overpowering them. Remember that different meats may pair better with specific flavours; for instance, a sweet sauce may work beautifully with pork, while a tangy sauce typically complements chicken. Experimentation is key, so don’t hesitate to adjust the ingredients until you achieve your ideal flavour profile.
Techniques for Applying BBQ Sauce for Maximum Flavor
Applying BBQ sauce at the right moment during cooking is crucial for maximizing flavour. Brush the sauce onto your meats towards the end of the grilling process to prevent it from burning. The sugars present in most sauces can caramelize quickly, resulting in a burnt exterior if applied too early in the cooking timeline.
Consider using a basting brush to apply the sauce evenly, ensuring that every bite is packed with flavour. If you’re grilling different types of meat, think about designating a specific area on the grill for saucing; this will help avoid cross-contamination. Additionally, serve extra sauce on the side for guests who enjoy a little more kick with their meal. This approach allows everyone to savour the flavours they love without compromising the integrity of your BBQ dishes.
Incorporating Unique Ingredients into Your BBQ Sauce for a Twist
Incorporating unconventional elements into your BBQ sauce can surprise and delight your guests. Ingredients like coffee, chocolate, or fruit can introduce unexpected depth and complexity to your sauce. For instance, a splash of coffee can enhance the richness of a tomato-based sauce, while a dash of cocoa powder can add a subtle bitterness that beautifully balances sweetness.
Fruits such as peaches or pineapples can infuse delightful sweetness and acidity, creating a refreshing twist on traditional BBQ sauces. Consider crafting a mango BBQ sauce that combines ripe mangoes, ginger, and lime for a tropical flair. The key is to start with a base recipe and gradually incorporate these unique elements, tasting as you go to create an enticing fusion of flavours. Your guests will appreciate the creativity and may even request the recipe to try at home!
Best Practices for Storing and Preserving Your BBQ Sauce
Proper storage of your homemade BBQ sauce is essential for maintaining its freshness and flavour. To ensure longevity, consider refrigerating your sauce in an airtight container, which can typically extend its shelf life to several weeks. Ensure the container is clean and dry before pouring in the sauce to avoid contamination.
If you wish to store BBQ sauce for an extended period, canning is an excellent option. This process involves sterilizing jars and sealing them to create a vacuum, which can preserve the sauce for months. Always label your jars with the date and contents, so you can easily keep track of what you have on hand. Whether refrigerating or canning, taking these steps will ensure you have delicious BBQ sauce ready for your future cooking adventures.
Essential BBQ Safety and Hygiene Practices to Implement
Ensuring Food Safety for a Healthy BBQ Experience
Ensuring food safety during your BBQ is crucial for keeping your guests healthy and safe. Adhere to proper food handling and storage techniques to prevent foodborne illnesses. Always keep raw meats separate from other foods, utilizing dedicated cutting boards and utensils to avoid cross-contamination. It is essential to wash your hands thoroughly after handling raw meat to avoid spreading harmful bacteria.
Be sure to cook meats to the correct internal temperatures using a reliable meat thermometer. For example, ground meats should reach at least 70°C (160°F), while poultry needs to hit 75°C (165°F). Additionally, serve food promptly and avoid leaving cooked items out at room temperature for extended periods. Serve side dishes chilled and keep hot foods at the right temperature to maintain food safety throughout your BBQ event. By adhering to these guidelines, you can enjoy a worry-free BBQ experience.
Grill Safety: Preventing Accidents and Injuries During Your BBQ
Grill safety is paramount for preventing accidents and injuries during your BBQ. First and foremost, keep a fire extinguisher nearby and ensure that everyone knows how to use it. When grilling, wear appropriate clothing—avoid loose-fitting garments that could catch fire or get caught in the grill. Always position the grill in a well-ventilated area, away from overhanging branches or structures that could pose a fire hazard.
Never leave the grill unattended, especially when it’s lit. If you must step away, ask someone to supervise it. If your grill is gas-powered, regularly check connections for leaks and always light it according to the manufacturer’s instructions. Implementing these safety measures ensures a fun and relaxed atmosphere for all your BBQ guests.
Practical Clean-Up Procedures and Waste Management Strategies
Efficient clean-up and waste management are vital for maintaining a safe and enjoyable BBQ environment. After cooking, allow the grill to cool down before cleaning it. Once it’s at a safe temperature, use a wire brush to remove any food residue and grease from the grates. Properly dispose of any leftover food and packaging, separating recyclables from regular trash to support eco-friendly practices.
Consider using biodegradable cleaning products to minimize environmental impact while keeping your grill in top condition. Set up designated waste and recycling bins at your BBQ to encourage guests to dispose of items properly. A clean and organized BBQ area not only promotes safety but also enhances the overall enjoyment of the event, allowing everyone to focus on good food and great company.
Research-Backed Benefits of Cooking a Summer BBQ Feast
Exploring the Nutritional Advantages of Grilled Foods
Grilling is not only a delicious cooking method, but it also presents numerous nutritional advantages. One of the primary benefits is that grilling reduces the need for added fats and oils, making it a healthier option compared to frying or sautéing. Lean meats cooked on a grill maintain their natural flavours, and the high temperatures help seal in moisture, resulting in tender and juicy dishes that are both satisfying and nutritious.
Grilling vegetables preserves their nutrients, ensuring you get the maximum health benefits from your meal. The quick cooking process allows vegetables to retain their vitamins and minerals, making grilled vegetables a nutritious addition to any BBQ feast. By incorporating a variety of grilled foods into your diet, you can enjoy meals that are not only tasty but also promote a healthy, balanced lifestyle.
The Social and Psychological Benefits of BBQ Gatherings
Hosting a BBQ is not merely about the food; it also nurtures community and strengthens social bonds. Gatherings centred around food encourage connections among friends and family, creating lasting memories and enhancing relationships. The relaxed atmosphere of a BBQ allows people to unwind and enjoy each other’s company, contributing positively to mental health and well-being.
Moreover, the act of cooking together can be a bonding experience. Involving guests in food preparation or inviting them to share their favourite BBQ recipes can spark conversations and laughter, making the event more enjoyable. Ultimately, BBQs serve as a celebration of togetherness, relaxation, and joy, proving that great food is best enjoyed in good company.
Understanding the Environmental Impact of Grilling Techniques
As awareness of environmental issues continues to grow, many BBQ enthusiasts are exploring eco-friendly grilling practices. Utilizing sustainable fuels, such as hardwood charcoal or propane, can significantly reduce the environmental footprint of your BBQ. These options produce less smoke and emissions compared to traditional grilling methods, making them a better choice for the planet.
Minimizing waste is another effective strategy to lessen your BBQ’s impact on the environment. Opt for reusable plates and utensils, and encourage guests to bring their own containers for leftovers. Composting food scraps and using eco-friendly cleaning products further contribute to sustainable practices. By adopting these strategies, you can enjoy a delicious BBQ while also being mindful of the planet and its resources.
Effective BBQ Cooking Techniques to Master for Culinary Success
Mastering Direct Grilling: Quick Cooking with High Heat
Mastering the art of direct grilling is essential for quickly cooking foods like burgers and hot dogs. This technique involves cooking food directly over the heat source, allowing for a rapid sear that enhances flavours through caramelisation. Keep the grill lid open to closely monitor the cooking process, ensuring that your food doesn’t overcook and remains juicy.
For optimal results, preheat the grill to a high temperature, typically around 200-230°C (400-450°F). This level of heat will provide that satisfying char on the outside while keeping the inside moist. Remember to turn your food midway through cooking to achieve even browning and prevent sticking. Direct grilling is ideal for smaller cuts of meat and vegetables, enabling you to whip up a meal in no time.
Perfecting Indirect Grilling: The Slow and Low Cooking Method
Indirect grilling is a fantastic method for cooking larger cuts of meat that require more time to become tender and flavourful. This technique involves positioning the food away from the flame, allowing it to cook slowly and evenly. Perfect for items like ribs and roasts, indirect grilling creates juicy results without the risk of burning.
To set up your grill for indirect grilling, light one side while keeping the other side unlit. This arrangement creates a controlled cooking environment where heat circulates around the food. Maintain a temperature of about 120-150°C (250-300°F) for slow cooking. This method not only enhances flavours but also allows for the perfect caramelisation of sauces and rubs, resulting in a mouth-watering BBQ experience.
Infusing Deep Flavours with Smoking Techniques
Smoking on a BBQ grill is an art form that adds incredible depth of flavour to your meats. This method requires the use of wood chips or chunks, which can be soaked in water before grilling to create a steady release of smoke. Choose wood types based on your flavour preference—hickory and mesquite offer strong, bold flavours, while apple and cherry woods provide a milder, fruity aroma that enhances the overall taste experience.
Maintain a low temperature, ideally between 90-120°C (200-250°F), for optimal smoking results. This low and slow approach allows the smoke to penetrate the meat, infusing it with rich flavours that will impress your guests. Keep the grill covered as much as possible to maintain smoke and heat, and use a thermometer to monitor the internal temperature of your meat. Smoking can transform a standard BBQ into a gourmet experience that truly elevates your culinary skills.
Reverse Searing: The Secret to Cooking Perfect Steaks
Reverse searing is a technique that simplifies achieving perfectly cooked steaks. This method involves cooking steaks at a low temperature first, ensuring they cook evenly throughout. Start by preheating your grill to a low setting, around 120-130°C (250-275°F), and place your steaks on the grill away from direct heat.
Once they have reached an internal temperature of about 50-55°C (120-130°F), remove them from the grill and allow them to rest for a few minutes. Then, increase the grill’s temperature to high and sear the steaks on both sides for 1-2 minutes to create a delicious crust. This technique guarantees that your steaks are tender and juicy, providing a flavourful exterior that will impress any guest. It’s a reliable way to achieve restaurant-quality results in your own backyard.
Satisfying BBQ Desserts: Sweet Endings to Your Feast
Preparing Grilled Fruit: Easy and Delicious Dessert Ideas
Grilled fruit is a delightful and unexpected addition to your BBQ dessert offerings. Certain fruits, like pineapples, peaches, and bananas, caramelize beautifully when grilled. To prepare, cut them into thick slices or halves and lightly brush them with oil to prevent sticking. Place them on the grill over medium heat, allowing them to cook for a few minutes on each side until they develop those signature grill marks.
The grilling process enhances the natural sugars in the fruit, creating a warm, sweet treat that pairs wonderfully with ice cream or yogurt. Consider sprinkling a touch of cinnamon or drizzling honey over the grilled fruit for an added flavour boost. Grilled fruit not only provides a refreshing end to your meal but also adds a touch of elegance to your BBQ dessert spread, making it a memorable experience.
Crafting S’mores and Other Campfire Treats
For a fun and nostalgic BBQ dessert, consider making s’mores. This classic treat involves roasting marshmallows over an open flame before sandwiching them between graham crackers and chocolate. The combination of warm, gooey marshmallows and melted chocolate is truly irresistible. Alternatively, you can experiment with variations such as using chocolate-covered cookies or adding peanut butter for an exciting twist.
In addition to s’mores, grilled doughnuts also make for a delightful dessert option. Slice doughnuts in half and grill them for a couple of minutes until warm and slightly crispy. Serve them with fresh fruit or ice cream for a scrumptious end to your BBQ meal. These easy, interactive desserts will surely entertain and satisfy your guests’ sweet cravings, ensuring a memorable conclusion to your feast.
Pairing Desserts with Ice Cream and Other Frozen Treats
Pairing your grilled desserts with cool treats is an excellent way to create a refreshing conclusion to your BBQ feast. Ice cream or sorbet can effectively balance the warmth of grilled fruits, providing a delightful contrast in temperature and taste. Consider setting up an ice cream station where guests can customize their own sundaes with a variety of toppings.
Frozen treats, such as popsicles made from pureed fruit or yogurt, also make a great option. These can be prepared ahead of time and offer a light, refreshing end to the meal. For an added twist, try pairing grilled fruit with a scoop of vanilla ice cream and a drizzle of caramel sauce for a decadent dessert that will leave your guests wanting more. This combination will surely elevate your BBQ experience.
Strategizing and Hosting Your BBQ Event for Maximum Enjoyment
Creating a BBQ Menu with Variety and Balance
Planning a BBQ menu that caters to different tastes and dietary needs is crucial for ensuring everyone enjoys the feast. Aim for a variety of meats, vegetarian options, sides, and desserts to create a well-rounded meal. Consider incorporating classic BBQ staples like burgers and sausages, along with grilled fish or plant-based alternatives like veggie burgers or skewers for those who prefer non-meat options.
Incorporate a selection of side dishes such as salads, grilled vegetables, and baked beans to complement your main courses. Additionally, don’t forget about dietary restrictions; offering gluten-free buns or vegan sides can make your BBQ inclusive for all guests. A well-planned menu not only enhances the overall experience but also showcases your skills as a host.
Creating the Ideal Atmosphere: Decor and Music Choices
Creating the right atmosphere is key to an enjoyable BBQ gathering. Use outdoor lighting, such as string lights or lanterns, to add warmth and charm to your space. Comfortable seating arrangements are essential, encouraging guests to linger and enjoy each other’s company. Consider incorporating colourful tableware and centrepieces that reflect the summer theme, enhancing the visual appeal of your event.
Music also plays a vital role in setting the mood. Curate a playlist filled with summer tunes that encourage relaxation and dancing. Upbeat tracks create a lively environment, making the gathering even more enjoyable. By focusing on these aesthetic details, you can transform a simple BBQ into a memorable occasion that your guests will talk about long after the event.
Inviting Guests and Planning Entertainment Activities
Planning engaging activities and games can keep your guests entertained throughout the BBQ. Lawn games like cornhole, giant Jenga, or frisbee create an inviting atmosphere for guests to mingle and interact. Consider hosting a BBQ cook-off where guests can showcase their cooking skills and compete for fun prizes. This adds an element of friendly competition and encourages participation from everyone.
Invitations can also set the tone for your event. Use creative designs that reflect the BBQ theme and consider incorporating RSVP options to gauge the number of guests beforehand. This helps with planning food quantities and seating arrangements. By creating a dynamic environment filled with activities and thoughtful touches, you can ensure your BBQ is a resounding success with all attendees.
Frequently Asked Questions About BBQ Practices
What is the best method for cleaning my BBQ grill effectively?
The most effective way to clean your BBQ grill is to use a wire brush to scrub the grates while they are still warm. This technique helps remove any residue and ensures a clean cooking surface for your next use.
How long should I marinate meat before BBQ cooking for optimal results?
Marinating meat for at least 30 minutes is recommended, but for optimal flavour, aim for 2 to 12 hours, depending on the type of meat and marinade ingredients used.
What temperature should I aim for when cooking chicken on the BBQ?
Chicken should be cooked to an internal temperature of at least 75°C (165°F) to ensure it is safe to eat and remains juicy throughout.
Can I BBQ vegetables without using any oil?
Yes, you can BBQ vegetables without oil; however, using a light brush of oil enhances flavour and helps prevent sticking to the grill.
How can I prevent my BBQ sauce from burning during cooking?
To prevent BBQ sauce from burning, apply it towards the end of the cooking process. This allows for flavour enhancement without the risk of caramelisation and burning.
What are some great vegetarian BBQ options to consider for a diverse menu?
Good vegetarian BBQ options include veggie burgers, grilled portobello mushrooms, vegetable skewers, and grilled corn on the cob, all of which are hearty and satisfying alternatives.
How can I tell when my steak is done cooking to perfection?
The best way to know if a steak is done is to use a meat thermometer. For medium-rare, target an internal temperature of 55°C (130°F) and for medium, 60°C (140°F).
Is it safe to use the same utensils for raw and cooked meat?
No, it is not safe to use the same utensils for raw and cooked meat, as this can lead to cross-contamination and foodborne illnesses. Always use separate utensils for each.
What should I serve with BBQ ribs for the best overall experience?
BBQ ribs pair beautifully with classic sides like coleslaw, baked beans, cornbread, and grilled corn. These sides complement the rich flavours of the ribs perfectly.
Can I grill desserts on the BBQ for a sweet treat?
Yes, you can grill desserts on the BBQ! Grilled fruits, s’mores, and even grilled doughnuts make for delightful sweet endings to your BBQ feast.
Connect with us on Facebook for the latest updates!
The post How to Cook a Summer BBQ Feast: A Universal Guide appeared first on https://cookinggods.com
The Article Summer BBQ Feast: Your Ultimate Cooking Guide Was Found On https://limitsofstrategy.com
-

Easy Recipes for First-Time Cooks: Quick and Delicious Options
Transform Your Mornings with Delightful and Simple Breakfast Recipes
Unleash Your Culinary Skills with Nutritious Egg-Based Breakfast Dishes
Egg-based meals present an array of delicious and versatile options for those eager to enhance their breakfast routine. By mastering essential egg cooking techniques such as scrambled, fried, and boiled eggs, you can broaden your culinary skills while increasing your confidence in the kitchen. Each method has its distinct preparation methods, all designed to prioritize simplicity and deliciousness. For fluffy scrambled eggs, simply crack the eggs into a bowl, whisk them with a dash of salt, and cook them in a warm pan until they reach the perfect fluffy texture. Fried eggs require precise temperature control in a non-stick skillet, while boiling eggs requires careful timing to achieve your preferred yolk texture.
Here’s a quick reference list of quick and easy egg recipes that can be whipped up in under 15 minutes:
- Scrambled Eggs with Spinach and Feta
- Classic Fried Eggs with Toast
- Boiled Eggs with Avocado Toast
- Oven-Baked Shakshuka
- Egg Muffins Loaded with Veggies and Cheese
- Fluffy Cloud Eggs with a Touch of Salt
- Spanish Tortilla with Potatoes
- Deviled Eggs Topped with a Sprinkle of Paprika
Each of these delightful dishes promotes healthier eating habits while igniting creativity in your cooking endeavors. Don’t hesitate to experiment with various toppings or ingredients to craft a breakfast experience that feels personal and enjoyable, something you’ll eagerly anticipate every day.
Elevate Your Morning Routine with Wholesome and Delicious Smoothie Recipes
Smoothies are an incredible way to effortlessly pack a variety of nutrients into a quick and tasty breakfast. By blending your favorite fruits and vegetables, you can craft a creamy, satisfying drink that caters to your individual preferences. Opt for fruits like bananas, berries, and mangoes, which add natural sweetness and delightful texture to your smoothie. Additionally, leafy greens such as spinach or kale offer an extra nutritional punch without overpowering the taste.
Here’s a curated list of essential smoothie ingredients to enhance your morning rituals:
- Bananas
- Spinach or Kale
- Greek Yogurt
- Frozen Berries
- Almond Milk
- Chia Seeds
- Peanut Butter
- Honey or Maple Syrup
To create a simple smoothie, blend one banana, a handful of spinach, a cup of almond milk, and a tablespoon of peanut butter until smooth. Adjust the thickness by adding ice or more almond milk as needed. The beauty of smoothies lies in their adaptability; you can easily swap ingredients based on what’s available, making them an ideal choice for busy mornings.
Make Meal Prep Simple with Overnight Oats for a Nutritious Breakfast
Overnight oats have gained immense popularity as a convenient and nourishing breakfast option for those on the go. The allure of this dish is its effortless preparation; you can prepare it the night before, allowing the oats to soak and absorb flavors while you rest. For optimal texture, soak the oats for a minimum of 6-8 hours. This soaking time softens the oats and activates beneficial enzymes, significantly enhancing digestibility.
Customization is key with overnight oats, allowing you to play with a variety of toppings and mix-ins based on your taste. Here are some fantastic additions you might consider:
- Yogurt for added creaminess
- Fresh Fruits such as berries or bananas
- Nuts and Seeds for a satisfying crunch
- Honey or Maple Syrup for a hint of sweetness
- Cinnamon or Vanilla Extract for flavor enhancement
- Nut Butters for an extra protein boost
- Cacao Nibs for a delightful chocolate twist
- Chia Seeds for additional fiber and omega-3 fatty acids
Begin by combining rolled oats, your liquid of choice (like milk or plant-based alternatives), and a sweetener of your preference. Mix these ingredients in a jar for a wholesome and satisfying breakfast that’s both delicious and filling.
Learn from the Pros: Simple and Delicious Recipes for Beginner Cooks

Motivating Real-Life Success Stories from New Home Cooks
Inspirational experiences from novice cooks can serve as powerful motivation for those who may feel hesitant about stepping into the kitchen. Take Sarah, for example—she had never cooked before but decided to try her hand at making a simple pasta dish. Initially overwhelmed by the process, she followed an easy recipe that required spaghetti, olive oil, garlic, and cherry tomatoes. Not only did she create a delightful meal, but she also uncovered the joy and fulfillment that cooking can bring.
Many beginners encounter challenges such as timing and accurately measuring ingredients, but conquering these obstacles builds confidence. Sharing stories like Sarah’s can motivate others to take that first leap. Perhaps you have also faced moments of uncertainty in the kitchen, only to end up with a meal you not only enjoyed but felt proud to have prepared. Sharing these personal cooking experiences can demystify the culinary process for newcomers, encouraging them to explore simple recipes with excitement.
Essential Steps to Master Fundamental Cooking Techniques
Acquiring essential cooking skills is crucial for anyone aspiring to be a chef. Start with foundational skills like chopping vegetables. To enhance your chopping technique, follow these steps: select a sturdy cutting board, employ a sharp knife, and practice the claw grip to protect your fingers. Take your time; it is far more beneficial to be careful and precise rather than hurrying through the process.
Additionally, become familiar with fundamental cooking methods such as sautéing, boiling, and roasting. For instance, sautéing vegetables involves quickly cooking them in a small amount of oil over high heat, which results in vibrant, flavorful dishes. Experimenting with various vegetables will help you understand how cooking times influence texture and taste. Each technique adds depth and character to your dishes, bolstering your confidence in the kitchen.
Expert Guidance on Ingredient Substitutions for Flexible Cooking

Gaining a solid understanding of ingredient substitutions is an essential skill for any beginner cook. For example, if you find yourself without eggs, one egg can be substituted with ¼ cup of unsweetened applesauce or a mashed banana in many baking recipes. This not only accommodates dietary restrictions but also promotes creativity in the kitchen.
Common allergens like gluten can be replaced with alternatives such as almond flour or oats, providing a broader range of meal options without sacrificing flavor. Understanding the purpose of ingredients in recipes—whether for binding, thickening, or adding moisture—empowers you to make informed substitutions. This knowledge enhances your overall cooking skills and expands your culinary repertoire while accommodating dietary needs.
Essential Tools and Equipment for New Cooks
Equipping your kitchen with the right tools can greatly improve your experience as a novice cook. Begin with the essentials: a sharp chef’s knife, a cutting board, measuring cups and spoons, and some mixing bowls. These fundamental items will serve you well across most cooking tasks.
Investing in a non-stick skillet simplifies the process of preparing eggs and pancakes, while a durable saucepan is ideal for boiling pasta or making soups. Additionally, consider adding a blender for smoothies and soups, as well as a slow cooker for easy, set-and-forget meals. These appliances streamline your cooking process and foster enjoyment in meal preparation, transforming cooking from a chore into a gratifying experience.
Effortless One-Pot Meals for Quick and Easy Cleanup
Simple and Tasty Pasta Recipes for Quick Dinners
Pasta is a universally cherished dish that combines simplicity and versatility, making it a fantastic choice for novice chefs. One-pot pasta meals are particularly appealing because they require minimal cleanup and allow flavors to blend beautifully. Consider preparing a classic Aglio e Olio, where spaghetti is tossed with garlic, olive oil, and a sprinkle of chili flakes—all cooked in a single pot.
Quick pasta sauces to explore include marinara, pesto, or even a creamy Alfredo made with just a few ingredients. Begin by sautéing garlic and onions in the pot, then add canned tomatoes and spices to create a rich sauce. Incorporate the pasta along with water, cooking until the pasta absorbs all the flavors. This method minimizes cleanup while maximizing taste and satisfaction.
Comforting Soups and Stews Perfect for Novices
Soups and stews are comforting, nutritious, and can be crafted using a wide variety of ingredients, making them ideal for learning how to balance flavors. Whether you’re making a classic chicken soup or a hearty vegetable stew, these dishes can be prepared in one pot, allowing you to experiment with various combinations of proteins, grains, and vegetables.
To thicken a soup, consider adding puréed beans or potatoes. Alternatively, you can create a roux with flour and butter to deepen the flavors of your stew. For beginners, a simple vegetable soup is a fantastic starting point; just chop your favorite vegetables, sauté them, add broth, and let them simmer. The key is to taste as you go, adjusting seasoning and ingredients to suit your palate.
Build Your Own Rice and Grain Bowls for Every Palate
Rice and grain bowls provide the perfect foundation for customization, allowing you to mix and match vegetables, proteins, and sauces to create a well-rounded meal. For novice cooks, using pre-cooked or microwaveable rice or quinoa simplifies the preparation process. Start by cooking your chosen grain according to package instructions.
Once your base is ready, consider adding roasted or sautéed vegetables such as bell peppers, zucchini, or broccoli. Complete your bowl with a protein source like grilled chicken, chickpeas, or tofu, and drizzle your favorite sauce or dressing for enhanced flavor. This approach leads to a nutritious meal while encouraging creativity as you explore different flavor combinations, ensuring that each bowl is a unique and delightful creation.
Quick Skillet Dinner Recipes for Easy Meal Solutions
Skillet dinners offer a quick and flavorful way to combine meat, vegetables, and starches into a single-pan meal. These dishes are particularly appealing for busy weeknights when time is of the essence. A simple chicken and vegetable stir-fry, for instance, can be prepared in under 30 minutes by sautéing bite-sized pieces of chicken along with a colorful assortment of veggies.
Consider versatile skillet recipes like fajitas, where you can effortlessly incorporate whatever vegetables and proteins you have on hand, or a fried rice dish using leftover rice and vegetables. Cooking everything in one skillet not only simplifies the process but also allows the ingredients to meld together, resulting in a satisfying meal that is both convenient and delicious.
Making Baking Simple and Enjoyable for New Chefs
Beginner-Friendly Muffin and Cupcake Recipes to Explore
Baking muffins and cupcakes serves as a forgiving introduction to the world of baking, making it an excellent choice for those new to this culinary art. These recipes typically require minimal ingredients and can be tailored with a variety of flavors. Common challenges include overmixing the batter or mismeasuring ingredients, both of which can impact texture and rise.
Start with a basic muffin recipe that incorporates flour, sugar, baking powder, milk, and eggs. From this foundation, enhance the batter with mix-ins like blueberries, chocolate chips, or nuts to create your favorite flavor combinations. Understanding how ingredients interact—such as the role of baking powder as a leavening agent—will boost your confidence and ability to master this skill.
Simple Cookie Dough Preparation Steps for Beginners
Cookies are a delightful baking project for novices, featuring an uncomplicated dough that can be made in just a few simple steps. To determine when cookies are done, look for a lightly golden edge while the center may still appear slightly soft—this ensures a chewy texture once they cool.
A basic chocolate chip cookie recipe consists of creaming together butter and sugar, adding eggs and vanilla, followed by mixing in flour and chocolate chips. The beauty of cookies lies in their adaptability; feel free to experiment with different types of chocolate or include nuts to create your favorite variations. Follow these steps, and soon you’ll be enjoying fresh cookies right out of the oven.
Effortless No-Knead Bread Recipes for Aspiring Bakers
No-knead bread is an excellent way to dive into bread baking without the need for extensive effort or experience. This method requires minimal ingredients and time, making it perfect for beginner bakers. The basic components for bread consist of flour, water, yeast, and salt—simple yet effective.
To prepare no-knead bread, combine the ingredients into a wet dough and allow it to rise for several hours. The magic occurs during the prolonged fermentation process, which develops flavor and structure within the dough. Once risen, shape it into a loaf, let it rest again, and bake it in a preheated oven. The result is a crusty, artisan-style loaf that will impress friends and family while enhancing your baking skills.
Essential Cooking Tools for New Culinary Enthusiasts
Must-Have Kitchen Gadgets for Streamlined Cooking
Equipping your kitchen with the right gadgets can significantly streamline the cooking process and enhance your enjoyment. For novice cooks, a reliable set of measuring tools, such as cups and spoons, is crucial for accuracy when following recipes. A quality peeler and grater can also be extremely helpful, enabling quick preparation of fruits and vegetables.
Consider investing in a food processor, which can save time on chopping, mixing, and puréeing, making it an indispensable tool for a variety of recipes. A slow cooker is another essential gadget, perfect for creating hands-off meals that cook while you go about your day. Having these tools at your disposal can improve efficiency and inspire creativity in your culinary adventures.
Essential Pots and Pans for Successful Cooking Experiences
Quality cookware is fundamental for achieving success in your cooking endeavors. For beginners, a non-stick skillet is essential for frying eggs and pancakes, while a sturdy saucepan is perfect for boiling pasta or preparing soups. Look for pots with thick bottoms to ensure even heat distribution, which is critical for achieving optimal results.
A versatile Dutch oven is another valuable investment; it can be utilized for everything from braising meat to baking bread. Additionally, having a baking tray for cookies and a variety of skillets will expand your cooking possibilities, making meal preparation simpler and more enjoyable.
Helpful Utensils for Efficient Cooking
The right utensils can dramatically improve your cooking experience. Essential utensils include a high-quality spatula for flipping and serving, a wooden spoon for stirring, and a whisk for mixing ingredients. These tools facilitate smooth operation in the kitchen, allowing you to manage tasks with ease.
Investing in a set of measuring spoons and cups also enhances accuracy when following recipes. A pair of tongs is invaluable for handling hot foods and flipping meat, while a ladle is perfect for serving soups and stews. These utensils form the backbone of a functional kitchen, empowering beginners to tackle a variety of cooking tasks with confidence.
Beginner-Friendly Cutting Tools for Safe and Effective Food Prep
Sharp and safe cutting tools are essential for any novice cook. A high-quality chef’s knife should be your primary cutting instrument, as it’s versatile enough to handle everything from chopping vegetables to slicing proteins. It’s important to learn how to use it properly and safely, including practicing the claw grip to protect your fingers.
In addition to a good knife, consider investing in a sturdy cutting board that can withstand heavy use. Opt for boards made from wood or plastic; both have their benefits in terms of care and durability. Lastly, a paring knife is useful for smaller tasks, such as peeling or deveining, while a serrated knife excels at slicing bread without crushing it. Having the right cutting tools will not only streamline food prep but also enhance your overall cooking experience.
Proven Strategies for Easy Recipes for First-Time Cooks
Essential Tips for Selecting the Right Recipes
Choosing the right recipes is crucial for beginner cooks. Recipes that feature a short ingredient list and clear instructions are ideal, as they reduce overwhelm and allow you to focus on honing your technique rather than feeling confused. Look for recipes labeled as ‘beginner-friendly’ in cookbooks or online resources; these have often been tested and simplified for new cooks.
When selecting a recipe, pay attention to the cooking time and complexity. Simple dishes like stir-fries or sheet pan meals typically require less prep and cooking time, often yielding delicious outcomes. As you build confidence, gradually progress to more intricate recipes, enhancing your skills along the way.
Effective Meal Planning Steps for Success
Effective meal planning can simplify the cooking process, making it easier for beginners to navigate the kitchen. Start by designating a day each week to sit down and plan your meals. Consider what ingredients you already have and create your meal plan around them to minimize waste.
Develop a shopping list based on your meal plan to ensure you have everything you need on hand. Batch-cooking grains or proteins at the beginning of the week can save time and allow for quicker meal assembly. Furthermore, maintaining a well-stocked pantry with staples like canned beans, rice, and pasta makes it simpler to whip up meals without extensive planning.
Practical Examples of Time-Saving Cooking Techniques
Time-saving techniques can significantly enhance your cooking experience, especially for those new to the kitchen. One effective strategy is to prep ingredients in bulk, such as chopping vegetables or marinating proteins ahead of time. This preparation can be accomplished on a quieter day, making weeknight meals much less daunting.
Utilizing a slow cooker is another excellent time-saving method; simply add your ingredients, set the timer, and let it cook while you continue your day. Additionally, embrace simple, quick-cooking methods; for example, one-pan meals or sheet pan dinners allow you to cook everything simultaneously, conserving both time and effort. These practical examples illustrate that cooking can be efficient, enjoyable, and entirely achievable.
Healthy and Simple Snack Ideas for Everyday Enjoyment
Nourishing Fresh Fruit and Vegetable Snacks to Fuel Your Day
Fresh fruits and vegetables are not only nutritious but also incredibly easy to prepare, making them ideal snack options for beginners. Enjoying a diverse array of colorful produce can help meet your daily nutrient requirements while keeping hunger at bay. Creative presentation can make these snacks even more enticing; for example, pairing sliced apples with almond butter or arranging carrot sticks alongside hummus for dipping.
For quick preparation, wash and slice items like cucumbers, cherry tomatoes, or bell pepper strips ahead of time and store them in the fridge. This allows for grab-and-go snacks that require no additional effort. Not only are fresh fruit and vegetable snacks nutritious, but they also foster a positive relationship with food by showcasing the beauty of natural ingredients.
Flavorful Healthy Dips to Elevate Your Snacking Experience
Dips can transform simple snacks into exciting, flavorful experiences. Healthy dips not only enhance taste but also offer nutritional benefits, making your snacking habits more wholesome. Consider recipes like hummus, which blends chickpeas, tahini, garlic, and lemon juice into a creamy delight that pairs perfectly with vegetables.
Explore other nutritious dip options, such as guacamole made from ripe avocados and tomatoes, or a yogurt-based ranch dip that’s low in calories but packed with flavor. These dips can be prepared in advance and stored in the fridge for quick access when you need a satisfying snack. Engaging with nutritious dips encourages creativity in the kitchen and elevates your overall snacking experience.
Homemade Energy Bars for a Convenient On-the-Go Snack
Energy bars are a convenient snack option that can easily be made at home, offering a healthier alternative to store-bought varieties often loaded with sugar. The essential ingredients for energy bars typically include oats, nut butter, and a natural sweetener like honey or maple syrup.
Creating your own bars allows you to customize the flavors and ingredients to suit your preferences. Combine oats, nut butter, dried fruits, and nuts in a bowl, then press the mixture into a baking dish and refrigerate until firm. Once set, cut them into bars or squares for easy snacking throughout the week. These energy bars not only save money but also ensure you know exactly what goes into your snacks.
Tips for Cooking on a Budget Without Compromising Quality
Smart Ingredient Substitutions for Cost-Effective Cooking
Cooking on a budget doesn’t necessitate sacrificing flavor or nutrition. Learning to substitute expensive ingredients with budget-friendly alternatives can be a game-changer. For instance, instead of fresh herbs, consider dried versions, which are often more affordable and have a longer shelf life.
Beans can serve as an excellent protein source in place of pricier meats; they are versatile and can be incorporated into soups, salads, or rice dishes. Frozen vegetables are another economical choice, as they tend to be less expensive than fresh produce and retain essential nutrients while boasting a longer shelf life. By exploring these affordable ingredient swaps, you can create delicious meals without overspending.
Effective Meal Planning Techniques for Budget-Friendly Cooking
Strategic meal planning is essential for cooking on a budget and minimizing food waste. Start by mapping out your week’s meals, ensuring to include versatile ingredients that can be utilized across multiple dishes. This approach helps you avoid unnecessary purchases and maximizes the use of what you already have.
Consider batch-cooking meals that can be reheated throughout the week, such as soups, stews, or casseroles. Not only does this save time, but it also ensures you have healthy, homemade meals readily available. Keeping an organized pantry and fridge will assist you in tracking your available ingredients, facilitating better meal planning and cost management.
Batch Cooking and Freezing for Convenience and Savings
Batch cooking is an efficient method to save time and money while ensuring you have nutritious meals ready to go. By preparing large quantities of food at once, you can portion out servings and freeze them for later use. This is particularly useful for soups, stews, and casseroles, which freeze exceptionally well.
Labeling your containers with dates and contents will help you keep track of what you have and ensure nothing goes to waste. When it’s time for a meal, simply pull a portion from the freezer and heat it up. Batch cooking not only simplifies weeknight meals but also encourages a more sustainable approach to cooking, effectively minimizing food waste.
Delicious and Effortless Dessert Recipes for Any Occasion
Simple Ice Cream and Sorbet Recipes Everyone Will Enjoy
Creating ice cream and sorbet at home is a fun project that requires minimal ingredients and equipment. For beginners, a straightforward no-churn ice cream can be made by whipping cream and folding in condensed milk before adding your favorite flavors. This method allows you to prepare a refreshing treat without the need for an ice cream maker.
Sorbet is even simpler; just blend frozen fruits like bananas or berries with a touch of sugar and lemon juice for a revitalizing dessert. Experiment with flavor combinations such as mango-lime or strawberry-basil to tantalize your taste buds. These easy recipes not only satisfy sweet cravings but also inspire creativity in the kitchen.
Effortless Pudding and Custard Creations for Sweet Indulgence
Puddings and custards are comforting desserts that are surprisingly easy to prepare. A basic vanilla pudding can be made by simmering milk, sugar, and cornstarch until thickened, resulting in a creamy treat that can be enjoyed warm or chilled.
Consider adding different flavors by incorporating cocoa powder for chocolate pudding or vanilla beans for a fragrant custard. The key is to closely monitor the cooking process to achieve the desired consistency. These desserts can also be topped with fresh fruit or a dollop of whipped cream, making them both appealing and satisfying for any occasion.
Quick and Easy No-Bake Dessert Options for Instant Gratification
No-bake desserts are the ultimate convenience for beginners, requiring minimal effort and no baking time. A simple recipe for a no-bake cheesecake involves mixing cream cheese, sugar, and whipped cream before pouring the filling into a prepared crust and allowing it to set in the refrigerator.
Other popular no-bake options include chocolate energy bites made with oats and nut butter or layered parfaits featuring yogurt and fruit. The beauty of no-bake desserts lies in their versatility; you can easily swap ingredients and flavors to create something unique while simplifying the preparation process. These sweet treats provide immediate satisfaction without the fuss, making them perfect for novice bakers.
Frequently Asked Questions About Cooking and Baking
What are some easy recipes for beginners to start with?
Some easy recipes for beginners include scrambled eggs, stir-fried vegetables, pasta with simple sauces, and smoothies. These dishes require minimal ingredients and basic cooking techniques, making them perfect for new cooks.
How can I improve my cooking skills as a beginner?
To enhance your cooking skills, practice regularly, experiment with new recipes, and focus on mastering basic techniques like chopping, sautéing, and baking. Watching cooking tutorials and reading cookbooks can also provide valuable insights.
What is the best way to meal prep for the week?
The best way to meal prep is to plan your meals for the week, cook in bulk, and store portions in the fridge or freezer. Choose versatile ingredients that can be used in different dishes to reduce waste and save time.
Are there budget-friendly recipes suitable for beginners?
Yes, budget-friendly recipes often include ingredients like beans, rice, pasta, and seasonal vegetables. Meal planning and using affordable staples can help create delicious meals without overspending.
How do I make healthy snacks at home?
Healthy snacks can be made by combining fresh fruits and vegetables with dips, creating energy bars with oats and nut butter, or preparing snack packs with nuts and dried fruits. Focus on whole, unprocessed ingredients for the best results.
What kitchen tools do I need as a beginner cook?
As a beginner, essential kitchen tools include a sharp chef’s knife, cutting board, measuring cups and spoons, a non-stick skillet, and mixing bowls. These tools will help you tackle a variety of recipes with ease.
How can I make cooking fun and enjoyable?
To make cooking enjoyable, try experimenting with new recipes, involve friends or family, create themed cooking nights, and listen to music while you cook. Embrace creativity and enjoy the process of making delicious meals.
What are some quick breakfast ideas for busy mornings?
Quick breakfast ideas include overnight oats, smoothies, yogurt with fruit and granola, and toast with avocado or nut butter. These options are nutritious and can be prepared in advance or quickly in the morning.
How do I store leftovers properly to maintain freshness?
Store leftovers in airtight containers to maintain freshness. Label containers with the date and contents, and refrigerate or freeze them promptly to prevent spoilage. Most leftovers can be safely stored for 3-4 days in the fridge.
Can I make desserts without baking?
Yes, many delicious desserts can be made without baking, such as no-bake cheesecakes, chocolate mousse, and energy bites. These recipes often require minimal ingredients and are easy to prepare, making them perfect for beginners.
Stay updated with our fantastic content on Facebook!
The post Best Easy Recipes for First-Time Cooks: Simple and Delicious appeared first on https://cookinggods.com
The Article Easy Recipes for First-Time Cooks: Simple and Tasty Ideas Was Found On https://limitsofstrategy.com
-

Reheat Leftovers: Expert Tips for Perfect Results
Unlock the Secrets of Microwave Cooking for Perfect Leftover Reheating
Explore Key Techniques to Maximize Your Microwave Effectiveness When Reheating Leftovers
The optimal methods for reheating your delicious leftovers like a seasoned culinary professional depend on understanding the unique science behind microwave cooking. This approach allows heat to penetrate your food from the inside out, which is crucial for retaining the original flavors and textures. To successfully microwave your leftovers, consider implementing the following professional tips to enhance your reheating experience:
- Utilize a microwave-safe cover: Always use a microwave-safe lid or a damp paper towel over your dishes to lock in moisture and prevent them from drying out.
- Stir or rotate your food: Doing this halfway through the reheating process promotes uniform heating and significantly improves the quality of your meals.
- Heat in short intervals: Choose brief heating intervals at medium power to avoid overheating, ensuring your meals retain their moisture.
- Allow resting time: After microwaving, let your dish sit for a minute to ensure proper heat distribution throughout the food.
Implementing these strategies is essential for achieving top-notch results when reheating in the microwave. By adopting these techniques, you can savor your leftovers with flavors and textures that closely mirror their original state, making each meal an enjoyable experience.
Essential Factors to Consider When Selecting Microwave-Safe Containers
Choosing the right containers for microwaving is vital for ensuring both safety and the quality of your food. Some materials can leach harmful chemicals into your meals when exposed to heat, which can pose health risks. To ensure a safe reheating experience, always opt for containers made from the following materials:
- Glass: Sturdy, heat-resistant glass containers are microwave-safe and do not react adversely with food.
- BPA-free plastic: Certain plastics are specifically crafted to endure microwaving without releasing dangerous toxins.
- Ceramic: Microwave-safe ceramic dishes effectively retain heat and excel at warming a variety of meals.
- Silicone: Flexible and heat-resistant, silicone containers serve as a safe and versatile choice for microwave cooking.
By choosing these safe materials, you can greatly enhance your reheating experience while ensuring your meals are devoid of harmful substances. This approach allows you to enjoy your leftovers with complete peace of mind, knowing you are making safe, health-conscious choices.
Master the Art of Preventing Soggy Food While Reheating
Soggy meals are a common problem when reheating leftovers in the microwave. To maintain the desired texture of your food, it’s crucial to utilize specific techniques during the reheating process. An effective strategy is to cover your food loosely, which allows steam to escape and prevents excess moisture from accumulating, thus avoiding a soggy meal. Additionally, stirring your food occasionally during reheating helps distribute heat evenly, further minimizing the risk of sogginess.
For foods prone to becoming soggy, such as rice or pasta, consider adding a few drops of water to create steam while still controlling moisture levels. Another smart tactic is to leverage the microwave’s built-in functions, such as defrost or reheat settings, designed to manage heat levels more efficiently. By employing these strategies, you can enjoy perfectly reheated meals without the unwelcome texture of sogginess.
Expert Strategies for Reheating Leftovers Like a Culinary Professional

Real-Life Insights into Effective Reheating Techniques
Learning from real-world examples can significantly enhance your reheating prowess. For instance, a seasoned chef might recommend reheating risotto slowly on the stovetop with a splash of broth, ensuring it remains creamy rather than drying out or clumping together. Another home cook suggests reheating pizza in a frying pan with a lid, allowing for a crispy crust while keeping the cheese perfectly melted.
These practical insights highlight how your selected reheating method can greatly influence the final product. Observing how others approach reheating challenges can provide innovative solutions and inspire confidence in your reheating strategies. By experimenting with these techniques and adapting them to your preferences, you’ll be better equipped to enjoy your leftovers just as much as when they were initially prepared.
Best Practices for Reheating Leftovers for Optimal Flavor and Safety
Adopting best practices for reheating leftovers guarantees that your meals taste as fresh as when they were first prepared. Start by checking the internal temperature of your food, ensuring it reaches at least 75°C (165°F) for safety. Moreover, use covered dishes to maintain moisture and prevent drying out.
It’s important to recognize that different foods require tailored reheating methods. For example, utilize the microwave for quick reheating, the stovetop for soups and sauces, and the oven for baked goods or casseroles. Additionally, reheating in small, manageable portions can prevent uneven heating and simplify monitoring doneness. By adhering to these best practices, you can savor delicious, safe, and satisfying leftovers every time.
Avoid Common Mistakes When Reheating Leftovers for Best Results

Understanding frequent reheating mistakes can sharpen your skills and help you avoid disappointing outcomes. One common mistake is reheating food straight from the fridge without allowing it to reach room temperature first. This can result in uneven heating, leaving some areas cold while others become overcooked. Another error is using high-power settings in the microwave, which often leads to dry, tough food instead of the desired tender texture.
Furthermore, neglecting to cover your food can cause moisture loss, resulting in dry leftovers. Always use lids or damp paper towels to trap steam and heat. By recognizing these pitfalls, you can adjust your reheating approach effectively, ensuring that leftovers are not only safe to eat but also enjoyable.
Enhance Your Reheating Results Using Stovetop Techniques
Why Stovetop Reheating Achieves Superior Results for Leftovers
Stovetop reheating is an excellent method for warming food evenly, particularly for dishes that require stirring or contain a sauce. Direct heat allows for precise control, making it easier to achieve the desired texture and temperature. Using a heavy-bottomed pan or skillet aids in uniformly distributing heat, reducing the chances of hot spots and burning.
Begin by placing your leftovers in a skillet over medium heat. Stir continuously to ensure even heating, preventing any areas from becoming overcooked while others remain cold. This technique is especially effective for risotto, soups, and stews, where maintaining a creamy consistency is essential. The stovetop method enables a more hands-on approach, allowing you to adjust heat levels and closely monitor the reheating process.
Choosing the Right Cookware for Effective Stovetop Reheating
Selecting appropriate cookware is crucial for achieving optimal results when reheating on the stovetop. Heavy-duty options like cast iron or stainless steel skillets are ideal, providing even heat distribution and effectively retaining warmth. Avoid thin pans, which can create hot spots and lead to uneven cooking.
For reheating sauces or liquids, opt for a saucepan, as it helps contain splatter while warming the food efficiently. Steer clear of non-stick coatings when using high heat settings, as they can release harmful chemicals. By carefully considering the cookware you use, you can enhance your reheating process and enjoy your leftovers at their best.
Strategies to Add Moisture and Prevent Food from Drying Out When Reheating
Incorporating moisture during stovetop reheating is essential for keeping your food juicy and flavorful. Adding a small amount of liquid—such as water, broth, or wine—can rejuvenate your leftovers, preventing them from becoming dry or unappetizing. This is particularly important for older or drier meals like roasted vegetables or proteins.
When reheating, pour a splash of your chosen liquid into the pan before adding your food, as this generates steam that helps maintain moisture levels. Covering your pan with a lid can further trap steam, leading to more effective heating. This technique not only preserves the texture of your leftover meals but also enhances their overall flavor profile, ensuring a satisfying dining experience.
Effective Oven Reheating Techniques for Large Portions and Optimal Results
Discover the Advantages of Oven Reheating for Leftovers
Oven reheating is the preferred method for warming larger portions or dishes that require even heat distribution. It’s particularly beneficial for casseroles, baked goods, and any meal that needs a crispy exterior. The dry heat of the oven allows foods to regain their texture, making it an ideal choice for restoring the original appeal of your meals.
Utilizing the oven can also impart a roasted flavor to your leftovers. For instance, reheating pizza in the oven not only warms it up but also revitalizes the crust, giving it a satisfying crunch. By embracing oven reheating, you can create meals that taste freshly prepared, making it a valuable technique in your culinary repertoire.
Setting the Correct Temperature for Reheating Leftovers in the Oven
Choosing the appropriate temperature is crucial for successful oven reheating. Generally, a moderate temperature of around 180°C (350°F) works best for most meals, ensuring that your leftovers are heated throughout without burning or drying out. For thicker dishes like casseroles, starting at a lower temperature may allow heat to penetrate evenly.
Preheating your oven is equally essential; placing food in a cold oven can lead to uneven heating. If you’re reheating multiple items, remember that they may require different times based on their size and density. Keeping a close watch on your food while it reheats can help you avoid overcooking, ensuring a delightful dining experience.
Understanding the Importance of Covering Food for Even Heating
Covering your dish while reheating in the oven helps retain moisture and guarantees even heating throughout the process. Using aluminum foil can prevent the top from browning too quickly while allowing the rest of the dish to heat thoroughly. For items prone to drying out, such as meats or casseroles, consider covering them completely.
If you aim to achieve a crispy top, you can remove the cover during the last few minutes of reheating. This method preserves moisture while still providing that desirable crunch. By strategically utilizing covers, you can enhance the quality of your reheated meals, ensuring they are not only safe to eat but also thoroughly enjoyable.
How to Monitor Reheating Times Effectively for Perfect Results
Monitoring reheating time is vital to prevent overcooking and ensure even warmth throughout your dish. Timing can vary depending on the type of food and the size of the portions. As a general guideline, most leftovers require 20 to 30 minutes in the oven. It’s wise to check on your food periodically, especially if it has been portioned into smaller servings.
Utilizing a food thermometer can help confirm that the internal temperature has reached the recommended level of 75°C (165°F), ensuring both safety and palatability. Setting a timer will assist you in managing the reheating process effectively, allowing for a stress-free cooking experience. By closely monitoring your food, you can enjoy perfectly reheated meals that retain their original flavor and texture.
Discover the Benefits of Toaster Ovens for Reheating Leftovers
Explore the Versatility of Toaster Ovens for Efficient Reheating
Toaster ovens are an exceptional tool for reheating smaller portions, offering the speed of microwaving with the added benefit of achieving crispiness similar to oven reheating. Their compact size makes them perfect for quick meals, whether you’re warming a slice of pizza or reheating pastries. This versatility allows home cooks to achieve impressive results without relying on a conventional oven.
The ability to toast, bake, broil, and reheat within one appliance makes toaster ovens a preferred choice for many. With settings to adjust temperature and time, you can tailor your reheating process for various food types, resulting in optimal texture and taste. Whether you’re short on time or space, a toaster oven is a valuable addition to your kitchen arsenal.
Adjusting Settings for Different Foods in a Toaster Oven
When reheating various types of food, adjusting settings on your toaster oven can yield the best results. For example, when reheating pizza, use a setting that promotes a crisp crust, typically around 180°C (350°F) for 5 to 10 minutes. Conversely, softer items like bread may require a shorter time at a slightly lower temperature to prevent drying.
Experimenting with different settings can help you determine the optimal approach for each type of food. Always keep a watchful eye on your food to avoid overcooking, and consult your appliance’s manual for specific guidelines. Mastering these adjustments can transform your toaster oven into an effective reheating tool, significantly enhancing the quality of your leftovers.
Accessories to Enhance Your Toaster Oven Reheating Experience
Incorporating accessories like baking sheets or racks into your toaster oven can elevate the reheating experience by allowing air to circulate around the food. For instance, placing a slice of bread on a rack ensures that hot air flows evenly, resulting in a crisp finish. Baking sheets are beneficial for items like cookies or pastries, providing a stable surface for reheating.
Consider using a silicone mat to prevent sticking while ensuring even heat distribution. This allows foods to reheat effectively without losing moisture or becoming soggy. By integrating these accessories into your reheating routine, you’ll achieve consistently excellent results, transforming even the simplest meals into delightful dining experiences.
Recommended Time and Temperature Guidelines for Toaster Oven Reheating
Following specific time and temperature guidelines for various foods is crucial to ensure they are reheated evenly and safely in a toaster oven. As a general rule, most leftovers can be reheated at approximately 180°C (350°F). Here are some helpful guidelines to follow:
- Pizza: 5-10 minutes
- Baked goods: 10-15 minutes
- Casseroles: 15-20 minutes
- Meats: 10-15 minutes
These timings will ensure that your leftovers are warm and safe to eat while maintaining their textures and flavors. Adjusting these guidelines based on your specific toaster oven model will help you achieve optimal reheating results, ensuring delicious meals every time.
Research-Backed Techniques for Effective Reheating of Leftovers
Practical Steps to Ensure Safe Reheating of Food
Implementing safe reheating practices is essential for preventing foodborne illnesses. To ensure your leftovers are safe to consume, follow these actionable steps:
- Prompt Refrigeration: Cool leftovers quickly and store them in the fridge within two hours to prevent bacterial growth.
- Even Reheating: Use methods that guarantee food reaches an internal temperature of at least 75°C (165°F) for safety.
- Use Appropriate Containers: Opt for microwave-safe or oven-safe containers to avoid chemical leaching into your food.
- Limit Reheating: Reheat food only once to maintain quality and safety.
By adhering to these essential steps, you can take charge of your reheating process, ensuring your meals remain both enjoyable and safe to eat. Mindful reheating not only preserves the quality of your food but also contributes to better health outcomes.
Health Benefits of Using Proper Reheating Techniques
Proper reheating plays a vital role in retaining the nutritional value of your food. When you reheat leftovers correctly, you preserve the integrity of essential vitamins and minerals, ensuring you continue to benefit from the nutrients present in your meals. Foods rich in water-soluble vitamins, such as vegetables, should be reheated gently to prevent nutrient loss.
Moreover, quality reheating helps eliminate harmful bacteria that may develop if food is stored improperly. This dual approach maximizes the health benefits of your leftovers while ensuring that you enjoy them safely. By prioritizing proper reheating practices, you can savor meals that are both nutritious and delicious.
Analyzing Reheating and Food Safety: Key Considerations
Understanding the relationship between reheating and food safety is crucial for making informed decisions in the kitchen. The primary concern revolves around the growth of bacteria in improperly stored leftovers. Bacteria can thrive if food is left at room temperature too long or if it is reheated inadequately.
To mitigate these risks, always store food in airtight containers and refrigerate promptly after cooking. When reheating, ensure that your food reaches the recommended internal temperature of 75°C (165°F) to eliminate any harmful bacteria. This expert insight highlights the significance of both safe food storage and effective reheating techniques in safeguarding your health while enjoying delicious leftovers.
Maximizing Flavor When Reheating Leftovers: Tips and Tricks
Reheating does not have to compromise flavor. There are several techniques you can employ to enhance the taste of your reheated meals. For example, adding fresh herbs or a splash of vinegar can invigorate previously cooked dishes. Alternatively, consider incorporating new ingredients, such as cheese or spices, to refresh the flavor profile.
Another effective technique involves using appropriate reheating methods that help retain moisture and texture. For instance, utilizing a stovetop for soups or a toaster oven for baked goods can significantly enhance the overall taste and quality of your leftovers. By embracing these methods, you can ensure that your reheated meals are just as flavorful as when they were first prepared.
Time-Saving Techniques for Efficient Reheating of Different Foods
Discovering quick and efficient methods for reheating various types of leftovers can save you valuable time in the kitchen. One useful tip is to use a microwave-safe lid while microwaving, which helps heat food faster and prevents splatter. For robust items like casseroles, consider reheating in smaller portions, as they will warm up more rapidly.
If you’re reheating multiple items simultaneously, stagger their reheating times based on their density and moisture content. This method allows you to manage time effectively without compromising the quality of any food. By implementing these time-saving techniques, you can enjoy your leftovers swiftly and conveniently.
The Benefits of Steaming: The Optimal Method for Delicate Dishes
Why Steaming is Ideal for Reheating Sensitive Foods
Steaming is an exceptional method for reheating delicate dishes, as it preserves both texture and flavor without drying them out. This gentle process is especially suited for foods like fish, vegetables, and rice, which can easily become mushy or tough when subjected to direct heat. Steaming ensures even heating while retaining the moisture and nutrients of the food.
Using a steamer basket or a collapsible steamer insert guarantees that your leftovers heat evenly, preventing overcooking. The steam envelops the food, gently warming it while maintaining its original qualities. For a foolproof reheating technique, consider incorporating steaming into your culinary repertoire, particularly for delicate items that deserve special care.
Proper Preparation of Your Steamer for Optimal Reheating Results
To achieve the best results when reheating delicate dishes in a steamer, proper preparation is essential. Start by ensuring that your steamer has enough water to produce ample steam, but avoid overfilling, as this can lead to waterlogged food. Bring the water to a boil before adding your leftovers to ensure they heat up immediately.
Place your food in the steamer basket without overcrowding to allow steam to circulate freely. Cover the steamer with a lid to trap the steam, ensuring that your dish reheats evenly. By following these preparation steps, you can create a reliable and effective reheating method that delivers perfect results every time.
Timing Guidelines for Steaming Leftovers Effectively
Timing is critical when steaming leftovers; it’s easy to overdo it. Generally, most delicate foods require only a few minutes to reheat thoroughly. As a rule of thumb, start with 3-5 minutes for vegetables and fish, checking frequently to ensure they don’t overcook.
For denser items like rice or dumplings, you may need to extend the time slightly, around 5-10 minutes, depending on the quantity. By keeping an eye on the clock and checking for doneness, you can avoid overcooking while ensuring your leftovers are warmed through and ready to enjoy.
Proven Strategies for Successful Reheating of Leftovers
Real-World Examples of Effective Reheating Strategies You Can Implement
Real-world examples of effective reheating strategies can inspire your approach and provide valuable insights. For instance, a home cook might share their experience of reheating lasagna in the oven, initially covering it with foil to retain moisture and then uncovering it for the last 10 minutes to achieve a crispy top. This method ensures that the lasagna remains creamy while still offering a satisfying texture.
Another example involves reheating stir-fried dishes in a skillet over medium heat with a splash of soy sauce to add moisture and flavor. By learning from these strategies, you can adapt your reheating techniques to suit your preferences and enjoy consistently delightful leftovers.
The Most Efficient Reheating Methods Available for Your Kitchen
Efficiency in reheating not only saves time but also ensures that your meals retain their quality. The microwave is often the quickest method, but it may not always deliver the best results in terms of texture. The stovetop is an excellent option for dishes that require stirring, while the oven is ideal for larger portions or items needing a crispy finish.
In terms of energy efficiency, toaster ovens and steamers also provide excellent reheating capabilities without consuming as much power as a conventional oven. By identifying the most efficient reheating method for different types of food, you can streamline your kitchen process and enjoy delicious meals without excessive effort.
Insights from Experts on Reheating Techniques
Expert analysis of reheating techniques reveals the science behind why certain methods yield better results than others. For instance, microwaves function by agitating water molecules in food, creating heat that cooks evenly. However, this can lead to uneven heating if not managed properly. Conversely, oven reheating utilizes dry heat, allowing for a more gradual warming process that preserves texture and flavor.
Stovetop methods provide direct control over heat levels, making them ideal for foods that require careful attention. Understanding these underlying principles can help you choose the best reheating techniques for your meals, enhancing both the safety and enjoyment of your leftovers.
Customized Reheating Tips Tailored for Specific Food Types
Effective Methods for Reheating Soups and Stews
Soups and stews can be reheated easily using either the stovetop or microwave, but each method has its advantages. On the stovetop, pour your soup or stew into a pot and heat over medium-low heat, stirring occasionally. This method allows for even heating and enables you to add a splash of water or broth to maintain moisture throughout.
In the microwave, use a microwave-safe bowl, cover it with a lid or a damp paper towel to prevent splattering, and heat in short intervals, stirring in between. This ensures everything heats through evenly without burning. Both methods can yield delicious results, but the stovetop offers a bit more control over texture and consistency.
Best Practices for Reheating Bread and Pastries
Reheating bread and pastries effectively is crucial for restoring their freshness and crispness. The oven or toaster oven is your best option for this task. Preheat your oven to about 180°C (350°F), then wrap your bread or pastries loosely in foil to prevent drying out. Heat for approximately 10 minutes until warmed through.
For quicker results, a toaster oven can swiftly reheat small items like croissants or bagels. Set it to a lower temperature and monitor closely, as it typically requires just 3-5 minutes. These methods will help you enjoy baked goods that taste freshly made rather than stale or chewy.
How to Reheat Fried Foods While Preserving Their Crispiness?
Reheating fried foods can be challenging, as they can easily lose their desirable crispiness if not done correctly. The oven or toaster oven is ideal for this purpose. Preheat your oven to 200°C (400°F), then spread your fried items in a single layer on a baking sheet. Reheat for about 10-15 minutes, turning halfway through to ensure even heating.
Please avoid using the microwave, as it tends to make fried food soggy. If you’re dealing with smaller portions, a stovetop frying pan can also work by adding a small amount of oil and reheating over medium heat. This method allows the exterior to regain its crunch while effectively warming the inside. By employing these methods, you can enjoy your fried leftovers just as crispy as when they were first cooked.
Frequently Asked Questions (FAQs) About Reheating Leftovers
Can you reheat food multiple times without compromising quality?
It’s advisable to limit reheating food to once to maintain quality and safety. Each time food is reheated, the risk of bacterial growth increases.
What is the safest way to reheat food?
The safest way to reheat food is to ensure it reaches an internal temperature of 75°C (165°F). Use a food thermometer to check for doneness.
Is it safe to reheat food in plastic containers?
Only use microwave-safe plastic containers to reheat food, as other plastics may leach harmful chemicals. Always check for a microwave-safe label.
Can you reheat takeaway food safely?
Yes, as long as the food has been stored properly in the fridge, it is safe to eat. Reheat it thoroughly to the recommended temperature before consuming.
Do reheated leftovers lose nutritional value?
Reheated leftovers can lose some nutritional value, particularly water-soluble vitamins. However, proper reheating methods can minimize this loss.
Can you reheat frozen leftovers directly without thawing?
While it’s possible, it’s best to thaw frozen leftovers in the refrigerator before reheating, ensuring more even and thorough warming.
What’s the best way to reheat pizza?
The best way to reheat pizza is in a frying pan with a lid on or in the oven, as these methods help retain the crispiness of the crust.
How long can you keep leftovers in the fridge?
Leftovers can typically be stored in the fridge for 3-4 days. Ensure they are stored in airtight containers to maintain freshness.
Is it safe to reheat food in the microwave?
Yes, reheating food in the microwave is safe as long as you follow proper guidelines, including ensuring even heating and using microwave-safe containers.
Can you use a steamer to reheat all types of food?
Steaming is ideal for delicate foods like vegetables and fish, but it is not suitable for foods that need a crisp texture, such as baked goods.
Stay updated with our latest tips on Facebook!
The post Best Ways to Reheat Leftovers Like a Pro: Universal Tips appeared first on https://cookinggods.com
The Article Reheat Leftovers Like a Pro: Top Universal Tips Was Found On https://limitsofstrategy.com
-

Mastering U.S. Competitions with Brisket Techniques
How to Choose the Ideal Brisket for Competitive Cooking Success
Essential Guide to Brisket Grades for Optimal Selection
Selecting the right brisket begins with a thorough understanding of meat grades, as these classifications play a pivotal role in determining the tenderness and flavor of your finished dish. The USDA categorizes brisket into various grades, with USDA Prime and Choice being the top contenders for competitive cooking. The Prime brisket is celebrated for its abundant marbling, which significantly enhances tenderness and flavor, making it a favorite among pitmasters. On the other hand, Choice brisket provides commendable quality with slightly less fat content. In your evaluation of brisket, prioritize a uniform shape, which promotes even cooking. Here are some key attributes to consider when assessing each grade:
- USDA Prime: Exceptional marbling, unparalleled tenderness, and rich flavor; the ultimate choice for high-stakes competitions.
- USDA Choice: Good marbling and overall quality; a reliable option for most competitors seeking solid performance.
- USDA Select: Leaner with reduced marbling; may require additional care to maintain moisture during cooking.
- Grass-fed Brisket: Often leaner with a distinct flavor profile; appeals to niche markets and health-conscious consumers.
- Wagyu Brisket: Noted for its extraordinary marbling; highly sought after but can be quite pricey.
By focusing on these important characteristics, you can confidently navigate the brisket selection process, ensuring that you choose a cut that will yield outstanding results on competition day, impressing both judges and spectators alike.
Finding Trustworthy Sources for Premium Quality Brisket
Acquiring high-quality brisket is crucial for achieving success in competitive barbecue settings. In the United States, there are numerous well-regarded suppliers and local farms that offer exceptional cuts. When sourcing brisket, it is advisable to visit butchers who specialize in competition-grade meat. These skilled professionals often possess valuable insights into the best cuts available and can assist you in selecting the ideal brisket tailored to your specific requirements. Look for suppliers who prioritize animal welfare and provide grass-fed or organic options, as these factors can greatly impact taste and quality. Additionally, building relationships with local farmers or butchers can lead to information about upcoming sales or unique cuts that may not be widely available.
While in pursuit of the perfect brisket, keep an eye out for local competitions that offer networking opportunities with fellow meat enthusiasts. These connections can lead you to hidden gems in your area that emphasize quality and flavor, giving you a competitive edge on the barbecue circuit.
Key Factors to Consider When Selecting the Best Brisket
Choosing the right brisket involves a comprehensive understanding of several crucial factors that influence its cooking characteristics and flavor profile. Here are five essential considerations to keep in mind:
- Fat Content: Aim for a fat cap thickness of around 1/4 inch to ensure moisture retention without overpowering the meat’s natural flavors.
- Muscle Structure: Look for briskets that offer a balanced combination of muscle and fat, which contributes significantly to the overall tenderness.
- Age of the Animal: Younger animals generally yield more tender meat, so prefer briskets sourced from younger cattle for superior results.
- Marbling: The presence of intramuscular fat is vital for delivering flavor and moisture, making it a critical component of competition-grade brisket.
- Shape: Favor briskets that are evenly shaped to ensure consistent cooking throughout the cut.
These factors are intricately connected and work in harmony to produce a brisket that is not only flavorful but also tender and juicy—key components for impressing judges and securing high scores in any competition.
Time-Tested Techniques for Perfecting Brisket Preparation in Competitions

Trimming Techniques to Enhance Flavor and Quality
Skillful trimming is an essential technique that can significantly elevate the flavor and overall quality of your brisket. Proper trimming ensures even cooking and minimizes excess fat that could lead to flare-ups during the cooking process. Begin by removing the thick layer of fat on the top while retaining a portion to preserve moisture throughout the lengthy cooking journey. Additionally, trim the edges and any hard pieces of fat that are unlikely to render down during cooking.
An effective technique employed by many award-winning pitmasters is to achieve a uniform thickness across the entire brisket. This method not only promotes even cooking but also enhances presentation when the brisket is sliced. For instance, during the trimming process, aim for about a 1/4-inch fat cap over the flat, with a slightly thicker layer over the point. This balance not only preserves moisture but also allows for a beautifully developed bark that is visually appealing.
By implementing these trimming techniques, you enhance not only the texture but also the depth of flavor, which can be critical in competitive environments. The final cut should exhibit a clean and attractive appearance, establishing a solid foundation for the cooking process ahead.
Optimal Cooking Temperatures for Achieving Superior Brisket Results
Maintaining the correct cooking temperature is vital for producing a tender and juicy brisket. For competition purposes, a consistent low temperature range of 225 to 250°F is ideal. This temperature range allows for the gradual breakdown of tough connective tissues, transforming them into melt-in-your-mouth tenderness.
Cooking at a lower temperature ensures that the brisket remains in the smoke longer, absorbing flavor without the risk of drying out. Utilizing a high-quality smoker capable of sustaining this temperature range is critical. Many competitors favor offset smokers or pellet grills, as they excel in temperature control and provide the ideal environment for low and slow cooking.
Furthermore, monitoring the internal temperature is of paramount importance. Aim for an internal temperature between 195 and 205°F for optimal tenderness. This temperature range indicates that the collagen has fully broken down, resulting in a brisket that is both succulent and easy to slice. Regularly check your smoker’s temperature and make necessary adjustments to maintain the desired cooking range.
Amplifying Flavor with Injection and Marination Techniques

Injecting and marinating are powerful techniques for enhancing the flavor and moisture retention of your brisket. Injection involves introducing a carefully crafted blend of spices, liquids, and tenderizers directly into the meat, amplifying its taste and ensuring moisture during cooking. A common injection mixture may consist of beef broth, Worcestershire sauce, and your choice of spices, creating a flavor explosion from within.
Marinating, on the other hand, entails soaking the brisket in a seasoned liquid for a designated period before cooking. Including an acidic component, such as vinegar or citrus juice, helps to break down tough fibers, resulting in a more tender final product. Typical marinade ingredients might include soy sauce, garlic, onion, and paprika, which add layers of flavor that enhance the overall profile of the meat.
For both methods, timing is essential; injecting can be performed just before cooking for immediate impact, while marinating should ideally occur several hours in advance—overnight is best. Experiment with various combinations to develop a flavor profile that sets your brisket apart from the competition.
Mastering the Art of Smoking Brisket
Choosing the Right Wood for Flavor Infusion
The selection of wood is fundamental in imparting distinctive flavor to your brisket. Different wood varieties produce unique flavor profiles, and making the right choice can elevate your brisket to extraordinary levels. In the U.S., popular wood choices include oak, hickory, and pecan. Oak is versatile, offering a mild flavor that complements the meat without overshadowing it. Hickory provides a stronger, more robust flavor often associated with traditional barbecue, making it a favorite among many pitmasters.
Pecan wood contributes a subtly sweeter flavor profile, delivering a unique touch to the brisket. Additionally, fruitwoods such as apple or cherry are excellent options for those seeking a more delicate sweetness and attractive color on the bark. Experimentation is essential; consider blending different woods to discover the perfect combination that aligns with your cooking style and enhances the flavor of your brisket.
It’s also important to contemplate your smoking technique. Using chunks or logs instead of chips can help maintain a more consistent smoke level, promoting better flavor development. Keeping your smoker well-maintained and ensuring a clean burn will also enhance the overall flavor profile of the brisket.
Understanding Smoke Penetration and Its Impact on Brisket Flavor
Smoke penetration is a critical factor when cooking brisket, as it significantly contributes to the meat’s flavor and complexity. However, it is essential to achieve a balance; excessive smoke can lead to bitterness, while insufficient smoke results in a bland brisket. Attaining the right level of smoke requires careful management throughout the cooking process.
The initial stages of cooking are vital for smoke absorption. During this phase, the surface of the meat is hot, allowing smoke particles to penetrate effectively. Maintaining a low and consistent smoker temperature facilitates optimal smoke flavor absorption, leading to a well-rounded flavor profile.
As a general guideline, strive for clean, blue smoke rather than thick, white smoke. Clean smoke indicates that the wood is burning efficiently, while thick smoke often results from incomplete combustion, potentially leading to undesirable flavors in the meat. Regularly check and adjust your wood supply and airflow to ensure your brisket develops a balanced smokiness that complements, rather than overwhelms, the meat’s natural flavors.
Maintaining Consistent Smoke Levels for Enhanced Flavor Development
To achieve even flavor distribution, maintaining consistent smoke levels during cooking is vital. This consistency can be accomplished through careful management of your smoker and the quality of fuel you use. Opt for smokers that offer precise temperature control, as fluctuations can affect smoke levels and overall cooking duration.
Monitoring your smoke output throughout the cooking process is equally important. If your smoker produces too much smoke, it may lead to harsh flavors in the meat. Conversely, if the smoke is too light, your brisket may lack the depth of flavor you desire. Adjust your wood supply as necessary and consider the type of wood you use, as different woods combust at various rates.
Utilizing a water pan in your smoker can help stabilize temperature and humidity, both of which can influence smoke levels. This technique maintains a consistent cooking environment, allowing the brisket to absorb smoke evenly, resulting in a rich, flavorful bark that is both visually appealing and delicious.
Achieving the Ideal Brisket Through Balanced Smoke and Heat
Creating the perfect brisket relies on the delicate balance between smoke flavor and heat. While smoke adds depth and character, it must be complemented by the appropriate amount of heat for optimal cooking. Ideally, the smoking temperature should be maintained between 225 and 250°F, allowing for even cooking while enabling the brisket to absorb smoke flavor fully.
One effective technique is the two-zone cooking method, where one side of the smoker is hotter than the other. This setup allows you to sear the brisket briefly on the hotter side before transferring it to the cooler side for low and slow cooking. This method not only enhances flavor but also ensures that the smoke has adequate time to penetrate without overpowering the meat.
Moreover, closely monitoring your smoker’s temperature is crucial. Invest in a reliable digital thermometer to track both the internal temperature of the brisket and the ambient temperature of the smoker. Making slight adjustments to airflow or wood supply will help you maintain a harmonious balance that results in a perfectly cooked brisket, ready for competition.
Mastering Cooking Techniques and Optimal Temperatures for Brisket
Perfecting Low and Slow Cooking Techniques
The foundation of an exceptional brisket lies in the low and slow cooking technique. Maintaining a temperature between 225 and 250°F is critical for breaking down tough connective tissues without drying out the meat. Patience is key, as the cooking process can take anywhere from 12 to 18 hours, depending on the size of the brisket.
By adopting a gradual cooking approach, the collagen within the meat dissolves, resulting in a tender and juicy final product. A common practice among competition pitmasters is to begin cooking the brisket fat-side up. This positioning allows the melting fat to baste the meat as it cooks, enhancing moisture and flavor.
It’s essential to monitor the brisket throughout this lengthy process. Regularly check the internal temperature, aiming for the crucial range of 195 to 205°F for optimal tenderness. Many competitors utilize a meat thermometer or BBQ probe to closely monitor the temperature without frequently opening the smoker, which can lead to heat loss and inconsistent results.
The low and slow technique not only promotes flavor development but also ensures your brisket is competition-ready, featuring a beautifully developed bark and juicy interior that captivates judges’ palates.
How Wrapping Brisket During Cooking Benefits the Final Product
Wrapping brisket during the cooking process can yield several significant advantages, particularly in a competitive setting. The most common materials for wrapping are aluminum foil and butcher paper, each offering unique benefits. Wrapping helps to accelerate cooking time, retain moisture, and create a tender texture while achieving that coveted bark.
When brisket reaches the stall—an internal temperature plateau around 150 to 160°F—wrapping can assist in pushing through this phase. Foil effectively traps heat and moisture, creating a mini-oven effect that speeds up cooking. Conversely, butcher paper allows for some moisture escape, preventing the bark from becoming overly soggy while still keeping the meat juicy and flavorful.
Timing is critical when it comes to wrapping. Many pitmasters opt to wrap their brisket once it hits the stall, which typically occurs several hours into the cooking process. This strategic move ensures a more consistent cooking temperature while preserving the rich flavors developed during the smoking phase.
Ultimately, wrapping enhances the overall quality of the brisket, increasing the likelihood of impressing judges with its tenderness and flavor, setting you up for success in competitions.
Utilizing a Water Pan for Optimal Moisture Control During Cooking
Incorporating a water pan into your smoker setup is an effective strategy for moisture control, preventing your brisket from drying out during the extended cooking process. The water pan helps create a humid environment inside the smoker, which maintains moisture levels in the meat while stabilizing the cooking temperature.
Position the water pan directly in the smoker, either beneath the brisket or beside it, to maximize benefits. As the water heats, it evaporates, producing steam that circulates around the meat, aiding in flavor and tenderness development. This technique is particularly advantageous when cooking larger cuts of meat, which are more prone to drying out in a dry environment.
Moreover, using a water pan can help manage temperature fluctuations. If your smoker tends to experience temperature spikes, the water pan absorbs excess heat, acting as a buffer that helps maintain a more consistent cooking temperature. This stable environment allows your brisket to cook evenly, further enhancing its quality and flavor.
Overall, employing a water pan is a straightforward yet effective method for ensuring your brisket remains juicy and flavorful, making it a crucial step in the competition cooking process.
Monitoring Internal Temperature for Perfect Brisket Doneness
Monitoring the internal temperature of your brisket is one of the most critical aspects of achieving perfect doneness. Utilizing a reliable meat thermometer will help you track the brisket’s progress without frequently opening the smoker, which can lead to heat loss. Aim for an internal temperature of 195 to 205°F. This range guarantees that the collagen has fully rendered, resulting in a tender and flavorful bite.
When checking the temperature, insert the thermometer probe into the thickest part of the brisket, steering clear of any fat or bone, which can yield inaccurate readings. Precision is vital in competition; even a few degrees can significantly impact texture and tenderness, which judges will closely evaluate.
Additionally, using a digital thermometer with a remote monitor can streamline the process. Many pitmasters prefer models that allow you to check the temperature from a distance, enabling you to focus on other crucial aspects of the competition without losing sight of your brisket’s progress.
Consistent monitoring is essential, as brisket can sometimes plateau in temperature, a phenomenon known as “the stall.” Keeping track of these fluctuations allows you to make informed decisions regarding wrapping or adjusting smoker conditions, ensuring your brisket reaches the optimal doneness that judges will appreciate.
Effective Monitoring and Resting Techniques for Achieving Brisket Perfection
Utilizing Probes for Accurate Temperature Monitoring
Employing probes for precise temperature readings is vital for achieving perfectly cooked brisket. Utilize high-quality digital meat thermometers with long probes designed for larger cuts of meat. Inserting the probe into the thickest part of the brisket enables effective monitoring of the internal temperature without the need to frequently open the smoker.
Aim for a target temperature range of 195-205°F, which indicates the ideal doneness for tenderness and flavor. Regular checks throughout the cooking process keep you aware of any fluctuations, allowing you to take corrective measures if necessary.
Recommended probe types include:
- Instant-read thermometers: Provide quick readings but require you to open the smoker.
- Digital probes with alarms: Notify you when the desired temperature is reached, minimizing heat loss.
- Wi-Fi or Bluetooth-enabled probes: Allow for remote monitoring, enabling you to check temperatures without being tethered to the smoker.
- Multiple probes: Use these for simultaneous monitoring of meat and smoker temperature for a comprehensive overview.
By effectively utilizing temperature probes, you can ensure that your brisket is cooked to perfection, showcasing your skills and enhancing your chances of success in competitive settings.
Understanding the Importance of Resting Brisket After Cooking
Resting the brisket post-cooking is a critical step that should never be overlooked. Allowing the brisket to rest enables the juices, which have been driven to the center of the meat during cooking, to redistribute throughout the entire cut. This process significantly enhances both the flavor and tenderness of the brisket, providing a superior eating experience.
Generally, a resting period of at least one hour is recommended, although longer rests can yield even better results. During this time, loosely tent the brisket with foil to retain warmth without trapping excess moisture, which could lead to sogginess and compromise the bark’s texture.
Many competition pitmasters utilize this resting period to prepare their presentation and side dishes, optimizing their time effectively. The resting phase provides an opportunity to refine your plating, ensuring the brisket is ready for the judges’ discerning eyes and palates.
Ultimately, the resting period is essential for achieving a juicy, flavorful brisket that will leave a lasting impression on judges and elevate your competitive cooking to new heights.
Mastering Techniques for Slicing and Presenting Brisket
Slicing and presenting brisket is an art form, and employing the right techniques can significantly impact the final presentation. To maximize tenderness, always slice against the grain of the meat. This method shortens the muscle fibers, making each bite easier to chew and enhancing the overall eating experience.
Presentation is equally important when serving your brisket. Aim for even, uniform slices, as this creates an appealing visual that will capture the judges’ attention. Consider garnishing with fresh herbs or edible flowers to add a vibrant pop of color, enhancing the overall aesthetic appeal.
In the U.S., traditional sides like coleslaw, baked beans, and cornbread pair beautifully with brisket, offering a well-rounded meal that judges will appreciate. Being mindful of portion sizes is also important; ensure that each serving is generous enough to allow judges to fully experience the flavor and tenderness of your brisket.
Finally, practice your slicing technique ahead of time to ensure you can execute it smoothly on competition day. With the right slicing and serving techniques, your brisket will not only taste delicious but also look exquisite, further increasing its chances of impressing the judges and securing high scores.
How to Properly Use a Meat Thermometer for Optimal Results
Utilizing a meat thermometer effectively is crucial for ensuring your brisket reaches the desired level of doneness. Position the thermometer in the center of the brisket, avoiding any fat or bone, which can result in inaccurate readings. Monitoring the temperature throughout the cooking process allows you to make informed decisions without frequently opening the smoker.
A high-quality digital meat thermometer is essential for precision. Many pitmasters prefer models that provide instant readouts and can withstand high temperatures without malfunctioning. For optimal results, regularly check the internal temperature, particularly during the final cooking stages, as brisket can experience stalls.
Moreover, consider the importance of timing; adjust your smoker’s temperature settings as needed to maintain a consistent cooking environment. This proactive approach ensures your brisket reaches the desired internal temperature without unnecessary delays, ultimately leading to a tender and flavorful final product.
Ultimately, effectively using a meat thermometer not only enhances the quality of your brisket but also instills confidence in your cooking abilities, leading to impressive results on competition day.
Best Practices for Wrapping Brisket During Cooking
Wrapping brisket during cooking is a technique that can greatly enhance moisture retention and expedite the cooking process. Most competitors choose to wrap their brisket in aluminum foil or butcher paper once it begins to approach the stall, typically around 150 to 160°F.
When wrapping, ensure to create a tight seal to effectively trap moisture and heat. Foil is excellent for creating a more braising effect, while butcher paper allows for some moisture escape, helping to maintain a desirable texture on the bark. Many pitmasters prefer butcher paper, as it strikes a balance between moisture retention and bark development, which is crucial for competition success.
After wrapping, diligently monitor the brisket’s temperature, as it will cook more quickly. Once it reaches the target internal temperature of 195-205°F, it’s time to remove it from the smoker. Unwrapping the brisket during the final hour of cooking can help develop a crispy bark, an essential attribute for scoring high in competitions.
Employing these wrapping techniques ensures that you achieve a perfectly cooked, moist, and flavorful brisket, positioning you for a strong performance in competitive settings.
Proven Strategies for Mastering Brisket Techniques in Competitions
Crafting a Unique and Memorable Flavor Profile
Developing a distinctive flavor profile is essential for standing out in the competitive brisket landscape. Begin by experimenting with various rubs, injections, and marinades to discover combinations that resonate with your personal style. Successful competitors often keep their flavor profiles simple yet impactful, allowing the natural taste of the brisket to shine through.
Consider starting with a base rub that includes a blend of salt, pepper, and sugar. From there, integrate your signature spices, whether they are traditional barbecue staples or unique regional ingredients. For example, adding coffee or cacao can introduce unexpected depth and complexity, setting your brisket apart from the competition.
In addition to rubs, injections can dramatically enhance flavor and moisture. Experiment with various liquid bases—beef broth, apple juice, or even beer—to find a balance that elevates the taste while complementing the brisket’s inherent flavors.
Don’t underestimate the importance of consistency; meticulously track your measurements and methods to replicate successful results while allowing for adjustments based on feedback or personal taste preferences. Ultimately, a well-crafted flavor profile can be the key to winning over judges and enhancing your reputation in the competitive barbecue community.
Perfecting the Bark on Your Brisket for Competition Success
Achieving the perfect bark on your brisket necessitates a combination of the right ingredients, temperature control, and smoke exposure. The bark, a delectable crust formed during the cooking process, should be flavorful, crispy, and visually appealing to impress judges.
To start, use a well-balanced rub that incorporates sugar, salt, and an array of spices. Sugar caramelizes during cooking, contributing to the bark’s desirable texture and flavor. Be cautious with the salt content; excessive amounts can lead to a hard bark rather than a desirable crust.
Temperature is crucial in bark development. Cooking at a consistent low temperature, typically between 225 and 250°F, allows the sugar in the rub to caramelize effectively without burning. Additionally, maintaining a steady smoke output contributes to a thick layer of flavor as the brisket cooks.
Another technique for enhancing bark is to spritz the brisket during the cooking process with a mixture of apple cider vinegar and water. This not only keeps the surface moist but also aids in developing that sought-after bark texture. Lastly, be patient; achieving the perfect bark requires time and practice, but the results are undoubtedly rewarding and can make a significant difference in competitions.
Effective Presentation Techniques for Success in Barbecue Competitions
In barbecue competitions, presentation is just as crucial as taste. Judges evaluate not only flavor but also the visual appeal of the dish. To impress, start with clean, even slices of brisket, artfully arranged on a serving platter. Crafting an attractive display can elevate your brisket from merely good to competition-worthy, capturing the judges’ attention.
Garnishing with fresh herbs, such as parsley or cilantro, adds vibrant color contrast and enhances the overall presentation. Additionally, consider using appealing serving dishes; wooden boards or slate platters can create a rustic yet sophisticated display that captivates the judges’ attention and enhances the tasting experience.
Pay attention to portion sizes; ensure that each slice is generous without overwhelming the plate. Remember, less is often more—focus on quality over quantity, showcasing the best pieces of brisket to highlight your culinary skills.
Finally, practice your presentation skills ahead of competition day to make a significant difference. Rehearse your plating techniques and consider gathering feedback from friends or fellow competitors to refine your approach. With these actionable steps, you can elevate your presentation skills, increasing your chances of impressing judges and securing a winning position in competitions.
Avoiding Common Pitfalls in Brisket Preparation
Preventing Overcooking and Drying Out Your Brisket
One of the most significant challenges in cooking brisket is preventing overcooking, which can lead to a dry and unappealing final product. To avoid this, closely monitor the internal temperature with a dependable meat thermometer. Aim for the range of 195 to 205°F, where the meat becomes tender without drying out.
Utilizing a water pan in your smoker can also help maintain moisture levels, as the steam produced during cooking keeps the environment humid. Additionally, when brisket reaches the stall, consider wrapping it in foil or butcher paper to retain moisture and expedite cooking, ensuring a tender result.
Another effective strategy is to practice patience; resist the urge to rush the cooking process. The low and slow technique is your best ally in achieving a tender, juicy brisket. If your brisket approaches the target temperature too quickly, consider lowering the smoker’s temperature slightly to allow for a more gradual cooking experience.
By implementing these strategies, you can significantly reduce the risk of overcooking and drying out your brisket, ensuring a succulent final product that leaves a lasting impression on judges and enhances your competitive performance.
Recognizing the Signs of Undercooked Brisket
Identifying undercooked brisket is crucial for ensuring a delectable final product. Signs of undercooked brisket typically include a tough and chewy texture. If you slice into the brisket and find that it resists cutting or fails to pull apart easily, it is likely undercooked and in need of further cooking.
Another indicator is the internal temperature; undercooked brisket usually falls below the 195°F threshold. If you suspect the brisket is undercooked, insert a meat thermometer into the thickest part to check its temperature, ensuring it reads at least 195°F for optimal tenderness and flavor.
If your brisket is indeed undercooked, you can remedy the situation by returning it to the smoker until it reaches the desired temperature. Remember, patience is key; allow ample time for the tough connective tissues to break down, contributing to a tender bite that judges will appreciate.
Ultimately, recognizing the signs of undercooked brisket enables you to adjust your cooking techniques and achieve the perfect texture, enhancing your chances of success in competitions and leaving a lasting impression.
Managing the Stall and Temperature Variations Effectively
Encountering the stall—when the brisket’s internal temperature plateaus—is a common challenge faced by many pitmasters. During this phase, the brisket may hold its temperature for an extended period, often frustrating those aiming for timely cooking.
To effectively manage the stall, patience is crucial. Resist the temptation to increase the smoker’s temperature; instead, maintain a consistent low temperature to allow the meat to break through the plateau naturally. Wrapping the brisket in foil or butcher paper once it reaches the stall can expedite this phase, creating a mini-oven effect that retains heat and steam, facilitating a faster cooking process.
Temperature fluctuations can also occur due to factors such as external weather conditions or the quality of your smoker. To mitigate these fluctuations, regularly calibrate your smoker and monitor both the internal temperature of the brisket and the ambient temperature within the cooker to maintain optimal cooking conditions.
By employing these techniques and remaining patient during the stall, you can successfully navigate through this common hurdle, resulting in a well-cooked brisket that satisfies judges and enhances your competitive performance.
Avoiding a Hard Bark on Your Brisket for Maximum Appeal
Achieving the ideal bark texture is a delicate balance for brisket competitors. While a crunchy bark can enhance flavor, overcooking or excessive seasoning can lead to a hard, undesirable crust. To prevent this, closely monitor the smoker’s temperature; cooking at a consistent low temperature allows the sugars in the rub to caramelize without becoming overly hard or burnt.
Additionally, regularly spritzing the brisket with a mixture of apple cider vinegar and water can help maintain moisture and prevent the bark from becoming too dry. This practice also adds an extra layer of flavor that judges will appreciate, enhancing the overall tasting experience.
Be cautious with your rub; while seasoning is crucial for flavor, too much salt or sugar can create a hard bark. Strive for a well-balanced rub that includes moisture-enhancing ingredients along with flavor to achieve that perfect crust.
Ultimately, achieving the perfect bark requires careful attention to temperature, moisture, and seasoning. By implementing these strategies, you can create a beautifully textured bark that elevates the overall quality of your brisket, making it more appealing to judges during competitions.
Managing Fat Cap Thickness for Optimal Brisket Results
The fat cap on your brisket plays a significant role in flavor and moisture retention during the cooking process. Trimming the fat cap to approximately 1/4 inch is ideal for ensuring it renders properly without overwhelming the meat. A fat cap that is too thick can lead to excessive grease, while too little can result in a dry brisket that lacks flavor.
When trimming, carefully assess the thickness to ensure an even layer across the brisket. The fat cap not only contributes flavor but also creates a barrier that helps keep the meat moist as it cooks. Many competitors choose to leave a slightly thicker layer over the point—where the meat is more marbled—to enhance richness and flavor.
Another consideration is the positioning of the fat cap during cooking. Many pitmasters prefer cooking the brisket fat-side up, allowing the melting fat to baste the meat, ensuring an overall juicy outcome and enhancing flavor.
By effectively managing the fat cap thickness, you can elevate your brisket’s flavor and tenderness, thereby enhancing its chances of impressing judges and securing success in competitions.
Learning from the Experts in Brisket Cooking
Analyzing Award-Winning Brisket Recipes for Valuable Insights
Exploring award-winning brisket recipes is a valuable strategy for honing your skills and understanding the elements that contribute to their success. Analyzing these recipes allows you to identify common ingredients, techniques, and methods that top competitors employ to create mouthwatering brisket that captivates judges.
Take note of the rubs and injections used; many successful recipes emphasize well-balanced seasoning that enhances the natural flavors of the meat. Common components include a mix of sweet, savory, and spicy elements that create a harmonious flavor profile that resonates with judges.
Moreover, closely examine the cooking methods and temperatures utilized in these recipes. Many champions adhere to the low and slow technique, emphasizing patience and consistent temperature monitoring throughout the cooking process.
By learning from the best, you can adapt and apply these techniques to your own cooking, continually refining your approach to brisket and increasing your chances of success in competitions.
Engaging in U.S. Barbecue Competitions for Enhanced Learning Opportunities
Participating in barbecue competitions across the United States is an excellent opportunity to learn from seasoned pitmasters and expand your knowledge of brisket cooking techniques. By observing their methods in real-time, you can gain invaluable insights into the nuances of competition cooking, helping you refine your skills.
Seize this opportunity to engage with competitors; ask questions about their techniques, seasoning blends, and cooking methods. Many pitmasters are eager to share their experiences, providing you with firsthand knowledge that can elevate your own skills and performance.
Participating in workshops or demonstrations held at competitions can further enrich your learning experience. These sessions often cover a wide range of topics, from selecting the right brisket to mastering the smoking process, providing you with comprehensive knowledge to enhance your cooking abilities.
Ultimately, immersing yourself in the competitive barbecue scene allows you to learn from the best, refine your technique, and network with fellow enthusiasts who share your passion for brisket and barbecue.
Strategies for Continuously Improving Your Brisket Skills
Continuous improvement in your brisket skills involves a blend of experimentation, feedback, and staying informed about the latest trends in barbecue competitions. Regularly testing new techniques, rubs, and cooking methods can lead to valuable discoveries that enhance your overall approach and results.
Seeking feedback from friends, family, or fellow competitors is equally crucial. Constructive criticism provides insights into areas for improvement, helping you refine your technique and flavor profiles. Consider hosting informal tastings where you can gather input and suggestions from a trusted group to further enhance your skills.
Staying informed about the latest developments in the barbecue community is also important. Follow industry leaders on social media, read blogs, and participate in online forums to learn about emerging trends, techniques, and upcoming competitions that can provide inspiration and fresh ideas.
By embracing a mindset of continuous improvement, you can evolve your brisket skills over time, ultimately leading to greater success in competitions and a deeper appreciation for the art of barbecue.
Frequently Asked Questions About Brisket Cooking Techniques
Which brisket grade is best for competitions?
The top brisket grades for competitions are USDA Prime and Choice, as they offer the ideal balance of marbling and tenderness for high-quality results that impress judges.
How long should a competition brisket be cooked?
A brisket generally requires 12 to 18 hours of cooking time, depending on its size and the cooking method used. Low and slow cooking at 225-250°F is recommended for optimal tenderness and flavor development.
What type of wood is ideal for smoking brisket?
Popular woods for smoking brisket include oak, hickory, and pecan. Each imparts unique flavors, so experimenting with combinations can yield the best results in terms of depth and complexity.
Is injecting brisket necessary for competitions?
Injecting brisket can enhance flavor and moisture, making it a beneficial technique for competitions. Use a balanced injection mix to avoid overwhelming the meat’s natural taste, ensuring a well-rounded flavor profile.
What internal temperature should brisket reach for optimal tenderness?
The ideal internal temperature for brisket is between 195-205°F. This range ensures that the collagen has broken down, resulting in tender meat that judges will appreciate.
How important is it to rest brisket after cooking?
Resting brisket is essential, as it allows juices to redistribute, enhancing both flavor and tenderness. A resting period of at least one hour is recommended to achieve the best results.
What are the indicators of properly cooked brisket?
Properly cooked brisket should exhibit a tender texture, an internal temperature of 195-205°F, and an appealing, well-developed bark that enhances its visual and flavor profile.
Can a water pan be used in a smoker for brisket?
Yes, utilizing a water pan in your smoker helps maintain humidity and moisture levels, preventing the brisket from drying out during the lengthy cooking process while promoting even cooking.
How can I achieve a good bark on my brisket?
To achieve a good bark, use a well-balanced rub, maintain a consistent low temperature, and consider spritzing the brisket during cooking to enhance both flavor and texture, creating an appealing crust.
What are common mistakes to avoid when cooking brisket?
Common pitfalls include overcooking, undercooking, and failing to manage fat cap thickness. Monitoring temperature closely and employing proper techniques can help avoid these issues, ensuring a successful cooking process.
Connect with us on Facebook for more tips and updates!
The Article Best Brisket Techniques for Competitions: U.S. Mastery appeared first on https://pitmastersarsenal.com
The Article Brisket Techniques for Mastering U.S. Competitions Was Found On https://limitsofstrategy.com
-

Deep-Fry Without a Mess: Simple Tips for Success
Maximize Your Kitchen Efficiency with the Right Deep Frying Equipment
Select the Ideal Deep Fryer for Cleaner and More Delicious Results
Choosing the right deep fryer is essential for minimizing mess and maximizing flavor in your dishes. An exceptional deep fryer incorporates various features designed to enhance both cleanliness and cooking efficiency. When selecting a model, prioritize those with oil filtration systems, which help maintain oil quality for multiple uses, and splatter shields that contain any mess during the frying process. Furthermore, fryers with non-stick surfaces make cleanup significantly easier, while accurate temperature controls ensure your food is cooked precisely. Important features to consider include:
- Capacity: Choose a fryer size that meets your cooking needs, accommodating the amount of food you plan to fry.
- Ease of Cleaning: Opt for models with removable components to facilitate quick and thorough cleanups.
- Safety Features: Look for features like cool-touch handles and automatic shut-off mechanisms to enhance safety and prevent accidents.
- Versatility: Some fryers offer additional functions such as steaming or sautéing, which increases their overall utility.
Investing in a fryer equipped with these advantageous features will significantly enhance your deep-frying experience, making it cleaner and more enjoyable for you and your loved ones.
Effectively Using Pots and Pans as Alternatives for Deep Frying
If a specialized deep fryer isn’t an option for your kitchen setup, various types of pots and pans can serve as excellent alternatives for deep frying. Opt for pots crafted from materials such as cast iron, which are celebrated for their exceptional heat retention, or stainless steel, known for its durability and ability to withstand high temperatures. It’s vital to select a pot that is deep enough to hold an ample amount of oil, thus preventing any potential overflow during the cooking process.
The size of your pot plays a crucial role in your cooking efficiency; a larger surface area enables you to fry more food simultaneously, which reduces cooking time and minimizes splatter. Dutch ovens are particularly advantageous due to their sturdy construction that maintains consistent temperatures while frying. Before using any pot or pan, ensure it is entirely dry and clean; any residual moisture can lead to dangerous splattering during frying.
Essential Accessories for a Hassle-Free Deep Frying Experience
Utilizing the right accessories is key to reducing mess during the deep-frying process. A reliable thermometer is an indispensable tool for monitoring oil temperature, ensuring it remains stable and preventing splattering caused by incorrect heating. Fry baskets allow for the safe lowering and lifting of food, while splatter screens effectively shield your kitchen from oil sprays and spills.
These accessories not only help maintain a clean cooking environment but also enhance the overall frying process. For instance, using a thermometer can prevent overheating of the oil, while a splatter screen captures any errant droplets. Equipping your kitchen with these essential tools can transform your cooking experience, making it significantly simpler and more enjoyable.
Efficient Oil Management for Safe and Effective Deep Frying

Effective management of frying oil is critical for ensuring both the safety and efficiency of your deep-frying endeavors. Selecting the appropriate type of oil can enhance the flavor of your dishes while minimizing the mess. Oils with high smoke points, such as peanut oil or canola oil, are ideal choices as they can withstand high temperatures without breaking down, leading to a cleaner frying experience.
Moreover, it is crucial to maintain your oil by filtering it after each use to eliminate food particles that can result in off flavors and odors. For disposal, avoid pouring oil down the drain; instead, store it in a sealed container and take it to a recycling center whenever feasible. Responsible oil management not only improves your cooking experience but also contributes to a more sustainable kitchen by minimizing waste.
Optimize Your Cooking Space for Maximum Deep Frying Efficiency
Crafting a Tidy and Efficient Cooking Area for Successful Deep Frying
Creating a clean and organized workspace is essential for minimizing mess during the deep-frying process. Start by decluttering your area of unnecessary items, ensuring that you have a designated space for all cooking activities. Keep paper towels and cleaning supplies easily accessible so you can promptly address any spills that may occur while frying.
Before commencing, arrange all necessary tools and ingredients to minimize the risk of knocking over items or creating unnecessary messes. By clearing surfaces and strategically placing tools, you can maintain focus and enjoy the frying process without feeling overwhelmed by potential chaos. An organized workspace not only enhances efficiency but also improves your overall cooking experience.
Implementing Protective Measures to Safeguard Your Kitchen During Deep Frying

Utilizing protective coverings is a smart strategy to capture oil splatters and maintain a tidy workspace during frying. Consider materials such as newspaper, which can be easily discarded, or silicone mats that are easily wiped clean and reusable. These materials serve as effective barriers against splashes, protecting your countertops and stovetops from oil stains.
Additionally, you can employ old towels or baking sheets to catch any drips or spills, significantly simplifying the cleanup process. Having these protective layers in place not only keeps your area tidy but also saves time when cleaning up after cooking, allowing you to savor your meal without the stress of a messy kitchen.
Streamlining Access to Cooking Tools for Enhanced Efficiency
Keeping all necessary cooking tools within easy reach can significantly reduce mess while you prepare food. Designate specific spots for each item, ensuring you know exactly where to locate them when required. This approach minimizes unnecessary movements around your workspace, which can lead to accidental knocks and spills.
Consider using a caddy for utensils or small containers for spices and seasonings. This organizational system streamlines your workflow, reducing the likelihood of mishaps occurring. A well-organized kitchen not only promotes efficiency but also enhances your deep-frying experience, making it more enjoyable and less chaotic.
Professional Techniques for Deep-Frying with Minimal Mess
Expert Insights on Clean Deep-Frying Practices
Professional chefs offer invaluable insights into maintaining a clean kitchen while deep-frying. A common recommendation is to ensure the oil reaches the correct temperature before adding any food, as this significantly reduces splattering. Chefs highly advise using a thermometer to accurately monitor the oil temperature.
Many chefs also utilize deep-fry baskets for the easy placement and retrieval of food, which helps prevent oil from splashing out. They frequently stress the importance of preparation; by having all components prepped and ready, they maintain a clean workspace. For instance, a renowned chef shared a story about how a splatter screen saved time while frying fish, as it greatly reduced the cleanup required afterward.
Diving Into the Science of Oil to Minimize Mess
Understanding the science behind oil behavior is vital for effectively reducing mess during deep-frying. For example, the temperature of the oil directly impacts its volatility and tendency to splatter. Heating oil beyond its optimal level can cause it to bubble vigorously, leading to splatters. Conversely, oil that is too cool will absorb food rather than producing a crispy texture.
Maintaining the correct oil temperature, typically between 350°F and 375°F (175°C to 190°C), is essential for achieving optimal frying results. Regularly check the temperature with a thermometer to ensure the best conditions for frying. When the oil temperature remains steady, it behaves in a way that significantly reduces the likelihood of splattering, resulting in a cleaner cooking experience.
Safety Precautions for a Secure Deep Frying Process
Safety is paramount when deep-frying, and taking specific precautions can help prevent accidents and messes. First and foremost, ensure that all equipment is dry and clean before use; moisture can lead to dangerous splatters. Always utilize long-handled utensils to maintain a safe distance from hot oil and avoid severe burns.
Moreover, it is crucial to keep children and pets away from the frying area, as hot oil can cause serious injuries. An additional safety measure is to have a fire extinguisher readily accessible, specifically rated for grease fires. Being prepared not only keeps your kitchen clean but also fosters a safe cooking environment.
Essential Tools for a Mess-Free Deep Frying Experience
Experts recommend specific tools and equipment designed to minimize mess during deep-frying. A high-quality splatter screen can effectively shield surrounding surfaces, while an integrated oil filtration system in a deep fryer can help maintain oil clarity and reduce residue buildup.
Additionally, consider investing in a digital fryer with programmable settings. These fryers often come equipped with built-in timers and temperature controls, allowing for precision cooking and significantly reducing the chances of oil overflow. When equipped with the right tools, deep-frying can be a neat and enjoyable culinary process.
Cleaning Techniques for Post-Frying Hygiene
Cleaning up after deep-frying is vital for managing and minimizing mess in the kitchen. Begin by responsibly disposing of any used oil; do not allow it to sit in the fryer, as it can harden and become difficult to clean. Use a metal strainer to filter out food particles from the oil before storing or disposing of it.
For surface cleaning, a mixture of warm soapy water and a scrubbing brush is highly effective. Additionally, a degreaser can be useful for tackling stubborn oil stains on countertops or stovetops. Regular maintenance and effective cleaning techniques will ensure that your kitchen remains hygienic and tidy after deep-frying, fostering a pleasant cooking environment.
Strategies to Minimize Oil Splatter During Deep Frying
Maintaining Ideal Oil Temperature to Reduce Splatter
Maintaining the correct oil temperature is crucial for minimizing splatter while deep-frying. Begin by gradually heating the oil; sudden temperature spikes can result in dangerous splattering. Follow these steps to achieve and maintain the right oil temperature:
- Select the Right Pot: Use a deep, heavy pot to ensure even heating.
- Use a Thermometer: Always monitor the oil temperature for accuracy.
- Heat Gradually: Slowly increase the heat to prevent overheating.
- Test with a Small Piece of Food: Drop in a small piece to check if the oil is ready.
By following these steps, you can ensure that the oil remains stable, significantly reducing the likelihood of splatter and mess during the frying process.
Careful Food Placement to Minimize Oil Splashing
The way you place food into the oil can greatly affect splattering. Instead of dropping food haphazardly, gently lower it into the oil using a slotted spoon or basket. This technique allows for controlled immersion, thereby minimizing disturbance in the oil.
Aim for a slow, steady motion, ensuring that the food is fully submerged before releasing it. This practice prevents the oil from erupting upon contact with the cold food, which mitigates splatter and potential hazards. Practicing gentle food placement can greatly enhance your deep-frying experience and keep your cooking area cleaner.
Importance of Drying Food Before Frying
Excess moisture on food can cause oil to splatter dramatically during frying. To ensure a clean frying experience, it is vital to thoroughly dry food before immersing it in the oil. Techniques such as patting with paper towels or using a salad spinner for vegetables can effectively eliminate moisture.
For items like chicken, consider air-drying them for a short period after seasoning. This practice not only reduces splatter but also aids in achieving a crispier texture. Ensuring your food is adequately dry is a key step in successful deep-frying, contributing to both safety and quality in your cooking.
Exploring the Advantages of Using Less Oil in Cooking
Health Benefits of Reducing Oil Usage in Your Recipes
Utilizing less oil during deep-frying can lead to healthier meals with significantly lower calorie content. Foods fried in excessive oil tend to absorb more fat, resulting in higher calorie counts and poorer nutritional profiles. By choosing to use less oil, you can create dishes that are lighter and more heart-healthy, aligning with contemporary dietary preferences.
In addition, using less oil can help prevent the formation of harmful compounds that may develop when oil is reused multiple times. By prioritizing healthier cooking methods, you not only enhance the nutritional quality of your meals but also prepare dishes that are more appealing to health-conscious diners.
Financial Savings Linked to Reducing Oil Consumption
Utilizing less oil can lead to significant cost savings over time. High-quality cooking oils can be quite expensive, so using them judiciously means you won’t need to replenish your supply as often. When you reduce oil usage, you also create less waste, which can contribute to financial savings in the long run.
Additionally, effective oil management—such as filtering and reusing oil—can extend your oil supply even further, enhancing economic benefits. Embracing these practices can have a notable positive impact on your grocery budget, allowing you to allocate funds to other culinary essentials.
Environmental Advantages of Minimizing Oil Consumption
Reducing oil usage can positively impact the environment as well. Excess oil contributes to waste, and improper disposal can lead to environmental hazards. By using less oil, you not only minimize your carbon footprint but also engage in more sustainable cooking practices that benefit our planet.
Moreover, adopting proper disposal methods for oil—such as recycling—further enhances your environmental responsibility. Being mindful of your oil usage and disposal contributes to a cleaner environment and promotes a more sustainable lifestyle for everyone.
Effective Clean-Up Strategies After Deep-Frying
Swift Clean-Up Techniques Immediately Following Frying
Cleaning up promptly after frying can prevent oil from hardening and becoming difficult to remove. Start by taking a few moments to wipe down surfaces with paper towels to catch any splatters that may have occurred during the frying process.
Use a warm, soapy sponge to clean pots and pans immediately after use, as this simplifies the process before the oil cools and solidifies. Keep a bowl handy to collect any scraps, preventing clutter in your workspace. Taking quick action can save you time and effort later, ensuring your kitchen remains tidy and hygienic.
Addressing Oil Residue with Effective Cleaning Methods
Oil residue can be challenging to clean from cooking equipment. To effectively tackle this issue, begin with a mixture of warm soapy water and a non-abrasive scrubber for surfaces. Allow the oil residue to soak for a few minutes, which aids in loosening it for easier removal.
If residue persists, consider using a vinegar and baking soda paste, which can effectively cut through tougher stains. For pots and pans, avoid using metal scouring pads that can scratch surfaces; instead, opt for softer cleaning tools to preserve the integrity of your equipment and prolong its lifespan.
Proper Disposal Techniques for Used Oil
Responsible disposal of used oil is essential for maintaining a clean kitchen while also protecting the environment. Avoid pouring oil down the drain, as it can lead to plumbing issues and environmental damage. Instead, collect the used oil in a sealed container and take it to a local recycling center that accepts cooking oil.
Many communities offer recycling programs specifically for used cooking oil, converting it into biodiesel or other environmentally-friendly products. Following these disposal practices not only keeps your kitchen clean but also contributes to sustainability efforts in your community.
Thorough Cleaning of Deep Fryer Components for Optimal Performance
Regular cleaning of your deep fryer components is crucial for preventing build-up and ensuring safe operation. Start by unplugging the fryer and allowing it to cool completely. Once cooled, disassemble parts such as the fry basket, heating element, and lid for thorough cleaning.
Utilize warm soapy water and a soft brush to clean these components. Avoid abrasive cleaners that can damage the finish of your fryer. Rinse thoroughly and allow parts to dry completely before reassembling, as this is essential to maintaining hygiene and ensuring operational efficiency. Regular cleaning ensures your fryer remains in optimal condition for future use.
Maintaining a Pristine Kitchen Environment After Deep Frying
After deep-frying, it’s crucial to wipe down countertops, the stove, and surrounding areas to eliminate any oil splatters. Use a degreaser for stubborn spots that soap alone cannot clean effectively.
Additionally, ensure that any utensils and tools used are cleaned immediately to prevent oil from hardening and becoming difficult to remove. A well-maintained kitchen not only looks appealing but also promotes a safe cooking environment, making future cooking sessions more enjoyable and efficient.
Best Practices for Safely Reusing Cooking Oil
How to Effectively Filter Used Oil for Future Cooking
Filtering oil after use can significantly extend its lifespan and reduce waste. Start by allowing the oil to cool completely. Once cooled, pour the oil through a fine mesh strainer or a coffee filter into a clean container to remove food particles. This process ensures that the oil remains clean and safe for future use.
Store the filtered oil in a dark, cool place to minimize oxidation and degradation. By following these simple steps, you can safely reuse oil without compromising the quality of your food, enhancing both sustainability and cost-effectiveness in your cooking practices.
Proper Storage Techniques for Used Cooking Oil
Proper storage is essential for reusing oil without compromising its safety or taste. Store used oil in a dark glass or opaque plastic container to protect it from light, which can cause it to break down. Ensure the container is tightly sealed to prevent air exposure, which can lead to rancidity.
Label the container with the type of oil and the date it was used for frying. This practice will help you keep track of the oil’s freshness, ensuring you only use oil that remains safe and effective for cooking, thus promoting better culinary outcomes.
Identifying Signs of Oil Degradation for Safety
Knowing when oil is no longer safe to use is crucial for maintaining food quality and safety. Look for signs of off smells, which indicate that the oil has gone rancid. Additionally, check for changes in color, or the presence of foam or excessive cloudiness when heated.
If the oil has a sticky or tacky texture, it is best to dispose of it. Following these guidelines will help ensure that your reused oil remains safe and suitable for your culinary needs, preventing unpleasant flavors and health risks.
Safe Practices for Reusing Oil in Cooking
Incorporating reused oil into your cooking requires careful consideration to maintain food quality and safety. When reusing oil, filter it first to eliminate any food particles that could compromise flavor. Additionally, keep track of how many times the oil has been used; generally, oil can be reused about three times for frying similar foods before it degrades.
Avoid mixing different types of oils, as their smoking points and flavors may vary. When reheating reused oil, monitor it closely to prevent overheating. By adhering to these practices, you can safely incorporate reused oil into your cooking routine, promoting sustainability without sacrificing taste or quality.
Responsible Disposal of Unusable Oil
Proper disposal methods for oil that can no longer be reused are essential for protecting the environment. Avoid pouring oil down the drain, as it can lead to plumbing issues and environmental damage. Instead, collect the used oil in a sealed container and take it to a local recycling center that accepts cooking oil.
Many locations offer recycling services specifically for used cooking oil, converting it into biodiesel or other products. By following these disposal methods, you contribute to a cleaner, more sustainable environment while ensuring that your kitchen remains tidy and organized.
Maintaining Your Deep-Frying Equipment for Longevity
Establishing Regular Cleaning Routines to Enhance Equipment Lifespan
Setting up a regular cleaning schedule for your deep-frying equipment is crucial for preventing build-up and maintaining optimal performance. Aim to clean your deep fryer after each use, focusing on components like the fry basket and heating elements to ensure they remain clean and functional.
Incorporate a more thorough cleaning into your schedule each month, inspecting and cleaning all parts of the fryer meticulously. This routine not only prolongs the lifespan of your equipment but also guarantees it operates safely and efficiently, minimizing mess and enhancing your deep-frying experience.
Inspecting for Wear and Tear to Ensure Safe Operation
Regularly examining your deep-frying equipment for signs of wear and tear is vital for ensuring it remains in good working order. Inspect components such as the fry basket and heating elements for any signs of damage, including cracks or frayed cords that could pose safety hazards.
Make it a habit to conduct these inspections before each use. If you notice any issues, address them immediately to prevent potential hazards during operation. Regular maintenance not only guarantees safer frying but also contributes to the longevity of your kitchen equipment, saving you from costly replacements.
Timely Upkeep and Repairs for Optimal Performance
Proper maintenance and timely repairs can significantly extend the life of your deep-frying equipment. Keep an inventory of common maintenance tasks, such as cleaning, replacing filters, and checking cords and plugs for damage.
When repairs are necessary, consult your user manual for guidance, or seek professional help to ensure safety. Investing time in upkeep will enhance the performance of your equipment, allowing you to achieve better results while reducing the risk of mess during cooking.
Frequently Asked Questions About Deep-Frying
What is the best type of oil for deep-frying?
The most suitable oils for deep-frying are those with high smoke points, such as peanut, canola, or vegetable oil, as they can withstand high temperatures without breaking down, ensuring superior frying results.
What measures can I take to reduce splatter while deep-frying?
To effectively decrease splatter, maintain the correct oil temperature, use a splatter screen, and gently lower food into the oil instead of dropping it quickly, which can cause excessive splashing.
Is it safe to reuse oil from deep-frying?
Yes, you can safely reuse oil, provided it is filtered to remove food particles and stored correctly after each use. However, it is essential to monitor its usage to ensure quality and safety standards are maintained.
What should I do with leftover oil after frying?
Dispose of leftover oil responsibly by sealing it in a container and taking it to a recycling center that accepts cooking oil. Avoid pouring oil down the drain, as this can lead to plumbing issues.
How can I quickly clean up oil spills in my kitchen?
For a quick clean-up of oil spills, use paper towels to blot up excess oil, then follow up with warm soapy water and a degreaser to tackle any remaining residue effectively.
How often should I clean my deep fryer for optimal performance?
It is advisable to clean your deep fryer after each use and perform a thorough cleaning monthly to prevent build-up and maintain optimal performance, ensuring a safe cooking environment.
What are the signs that oil has gone bad and is no longer safe to use?
Signs that oil has gone bad include off smells, changes in color, excessive cloudiness, or a sticky texture. If you observe any of these signs, it is best to dispose of the oil immediately.
Can I fry frozen food directly in hot oil?
Frying frozen food directly can cause excessive splattering and lower the oil temperature. It is best to thaw food slightly or dry off excess moisture before frying to achieve optimal results.
Is it safe to deep-fry outdoors?
Deep-frying outdoors can be safer due to improved ventilation, but ensure you are on a flat, stable surface away from flammable materials to prevent accidents from occurring.
What is the best way to store used cooking oil for future use?
Store used cooking oil in a sealed, opaque container in a cool, dark place. Label it with the date and type of food it was used for to monitor its freshness and ensure safe usage in future cooking.
Connect with us on Facebook!
The post How to Deep-Fry Without a Mess: Simple Tips appeared first on https://cookinggods.com
The Article Deep-Fry Without a Mess: Easy Tips for Success Was Found On https://limitsofstrategy.com
-

Fried Chicken Secrets: Universal Techniques for Crispy Perfection
Master the Art of Perfectly Fried Chicken Every Single Time
Identify the Top Chicken Cuts for Frying to Ensure Delicious Results
Selecting the perfect chicken cuts is essential for crafting delectably crispy fried chicken that satisfies every palate. Among the most popular selections, drumsticks and wings shine due to their ideal balance of juicy meat and crunchy skin, both of which are vital for achieving that irresistible crispy texture. Always choose fresh, high-quality chicken, as its freshness greatly influences the overall flavour and texture of your dish. To ensure you source top-quality chicken, visit your local butchers or reputable suppliers. This thoughtful selection process guarantees that each piece remains juicy and tender during cooking, delivering the succulent bite that every fried chicken enthusiast desires.
The skin of the chicken plays a pivotal role in the frying process, serving as a protective barrier that locks in moisture while allowing the exterior to achieve that perfect golden-brown, crispy finish. When frying chicken breasts, exercise caution, as they can dry out rapidly; therefore, marinating or brining these cuts is advisable to preserve their juiciness. The objective is to select chicken pieces that are compatible with your frying method and desired results, ensuring that each bite offers a delightful crunch paired with a tender, juicy interior.
Understanding the Importance of Brining for Outstanding Fried Chicken
Incorporating the technique of brining into your cooking routine can elevate your fried chicken from mundane to exceptional. Soaking the chicken in a mixture of water, salt, and sugar significantly enhances its moisture content while amplifying its flavour. This simple yet transformative brine permeates the chicken, infusing it with delightful taste while ensuring it remains succulent during frying. While a basic brine can be made with just water, salt, and sugar, consider enhancing it with a selection of herbs, spices, or a dash of hot sauce to enrich the flavour complexity.
For best results, allow the chicken to soak in the brine for at least one hour, although a soaking period of 4 to 12 hours is recommended for deeper flavour infusion and moisture retention. Once the brining process is complete, rinse the chicken lightly to eliminate excess salt and pat it dry with paper towels. This step is crucial, as excess moisture can impede the frying process and lead to a less crispy finish.
How to Perfectly Control Oil Temperature for Frying Chicken
Maintaining the precise temperature during frying is one of the most critical factors in achieving perfectly fried chicken. Aim to keep the oil temperature between 350°F and 375°F (approximately 175°C to 190°C) to attain that coveted golden, crispy exterior. If the oil becomes excessively hot, the chicken may burn on the outside while remaining undercooked on the inside; conversely, if the oil is too cool, the chicken will absorb too much oil, resulting in an unappetizing greasy texture.
A reliable thermometer is an indispensable tool for accurately monitoring the oil’s heat. Investing in a deep-fry thermometer or an infrared thermometer for quick and precise checks is advisable. When placing the chicken into the hot oil, avoid overcrowding the pan, as this can drastically lower the oil temperature. Fry in batches if necessary to ensure each piece cooks evenly. After frying, allow the chicken to rest on a wire rack rather than paper towels; this method preserves its crispiness by preventing steam accumulation.
Expert Strategies for Achieving Unmatched Crispy Fried Chicken

Proven Techniques from Culinary Professionals for Crunchy Fried Chicken
Many seasoned chefs and culinary experts have perfected their methods for creating the ultimate crispy fried chicken. These acclaimed chefs often combine premium ingredients with specific cooking techniques to enhance both flavour and texture. Notable culinary figures such as David Chang and Marcus Samuelsson advocate for the use of buttermilk brines to effectively tenderize the meat while infusing it with rich, robust flavours.
Here are some essential techniques employed by professionals that can help you replicate similar success in your kitchen:
- Utilizing buttermilk or yogurt marinades for optimal tenderness and flavour infusion.
- Employing a seasoned flour mixture to amplify flavour depth.
- Implementing a double frying technique for enhanced crispiness.
- Allowing the batter to rest before application for improved adherence to the chicken.
- Using a blend of various oils for frying to achieve unique flavour profiles.
- Incorporating an array of spices into the coating for richer flavour nuances.
- Meticulously monitoring frying time to avoid overcooking and ensure perfect doneness.
- Adjusting the thickness of the coating to cater to personal preferences.
These methods have been rigorously tested in kitchens around the globe and have proven effective in delivering fried chicken that excels in both flavour and texture, ensuring your culinary creations will leave a lasting impression on all who indulge.
Your Comprehensive Guide to Crafting Perfect Fried Chicken at Home
To replicate restaurant-quality fried chicken in the comfort of your own kitchen, follow these clear, actionable steps:
1. Select Quality Chicken Cuts: Begin your culinary journey by choosing high-quality chicken cuts, preferably skin-on, to enhance that sought-after crunch and flavour.
2. Prepare Your Brine: Create a brine solution using water, salt, sugar, and any additional flavourings you desire. Allow the chicken to soak for a minimum of one hour, or longer for deeper flavour infusion and moisture retention.
3. Mix Your Batter: In a mixing bowl, combine flour, Cornstarch, and spices. The batter should achieve a consistency thick enough to adhere to the chicken without being overly heavy or clumpy.
4. Heat Your Oil: In a deep fryer or large pot, heat your preferred oil to between 350°F and 375°F. Use a thermometer to ensure accuracy and consistency during frying.
5. Coat Your Chicken Thoroughly: After removing the chicken from the brine, pat it dry, then dip it into the batter mixture, ensuring even coverage throughout each piece for maximum flavour and texture.
6. Fry in Batches: Carefully place the chicken into the hot oil, taking care not to overcrowd the pan. Fry until golden brown and fully cooked, which typically takes around 12 to 15 minutes depending on the size of the cuts.
7. Rest and Serve: Once fried, let the chicken rest on a wire rack to maintain its crispiness before serving to your eager guests.
By adhering to these steps, home cooks can efficiently avoid common pitfalls such as greasy or undercooked chicken, ensuring delicious and satisfying results every time.
Perfecting Batter Consistency for Optimal Fried Chicken Texture

The consistency of your batter is a critical factor that directly influences the texture of your fried chicken. A thinner batter typically results in a lighter, airier crunch, while a thicker batter provides a heartier coating that contributes to increased crunchiness. Ultimately, your choice of batter thickness should align with your personal preference and desired outcome, allowing you to tailor your dish to your tastes.
When creating your batter, aim for a consistency akin to pancake batter—thick enough to cling to the chicken but not so thick that it overwhelms the meat. Many experts recommend experimenting with different ratios to discover the perfect balance that suits your palate. For example, adding cornstarch to your flour mix can enhance the crispiness due to its lower moisture content, making each bite more enjoyable.
Allowing the batter to rest for 15 to 30 minutes prior to use can also improve its adhesion to the chicken. This resting phase helps the gluten in the flour relax, resulting in a smoother coating that adheres better during frying. Testing the batter’s thickness by dipping a piece of chicken can help you assess whether adjustments are needed for the desired texture, ensuring optimal results.
Crafting the Ideal Batter for Exceptional Fried Chicken
Essential Ingredients for Creating a Superb Batter
The selection of ingredients is pivotal when striving to create the perfect batter for frying chicken. A blend of flour, cornstarch, and various seasonings typically forms the foundational mix. While flour provides the necessary structure, cornstarch contributes a lighter texture, enhancing the overall crunch of the coating. The seasonings are where you can significantly elevate the flavour profile of your batter.
Consider experimenting with the following essential batter ingredients to discover your ideal combination:
- All-purpose flour as the primary base for structure.
- Cornstarch for added crispiness in the coating.
- Baking powder for a lighter, airier texture.
- Salt to enhance the overall flavour of the batter.
- Black pepper for a subtle touch of heat.
- Garlic powder for added depth and aroma.
- Paprika for vibrant colour and a hint of smokiness.
- Herbs such as thyme or oregano for aromatic notes and complexity.
These ingredients can be adjusted based on your personal taste or regional culinary influences. For a unique twist, consider incorporating spices that reflect local traditions, enhancing the overall flavour profile of your fried chicken dish and making it truly your own.
How the Thickness of the Batter Influences Frying Outcomes
Absolutely, the thickness of the batter significantly influences the final texture of your fried chicken. A thicker batter tends to create a more substantial, crunchier exterior, while a thinner batter may yield a lighter and more delicate coating that is equally appealing.
Home cooks should conduct a few experiments to determine their preferred batter thickness. For a crunchier finish, aim for a batter that retains its shape slightly when dipped. In contrast, if you’re aiming for a lighter result, opt for a thinner consistency that flows smoothly off the chicken. This exploration will help you pinpoint the texture that best appeals to your palate, allowing for a more satisfying fried chicken experience.
Moreover, when working with a thicker batter, be sure to fry at a slightly higher temperature to ensure it crisps up quickly without absorbing too much oil, which can lead to a greasy finish. Maintaining the right balance of batter thickness and frying temperature is crucial for achieving that perfect crunch.
Optimal Resting Time for Batter to Enhance Performance
Allowing your batter to rest for 15 to 30 minutes can significantly boost its frying performance. This resting period allows the ingredients to meld together, which can improve adhesion to the chicken. A rested batter is less likely to separate during frying, ensuring an even and consistent coating that enhances the overall quality of your fried chicken.
During this time, the gluten within the flour relaxes, resulting in a smoother and more uniform application. It’s essential to keep the batter covered during this period to prevent oxidation and retain moisture, ensuring it performs at its best when it comes time to fry.
If you’re short on time and cannot let your batter rest, a quick whisk can reintroduce air into the mixture. However, for the best results, always aim to allow for a proper resting period whenever possible to achieve optimal adhesion and texture in your final dish.
Impact of Temperature on Batter During Frying
The temperature of both the batter and the oil can significantly affect the outcome of your frying. Applying cold batter to hot oil can produce a crispier finish, as the sudden temperature shock causes moisture in the batter to evaporate rapidly, resulting in a crunchy exterior that is hard to resist.
Conversely, if the batter is at room temperature, it may not set as quickly, leading to a softer texture that may not be as appealing. Therefore, it is advisable to let your batter warm slightly after being refrigerated before frying, though it should not reach full room temperature to maintain its ideal consistency.
Additionally, keeping the oil temperature within the ideal range of 350°F to 375°F is crucial for optimal frying results. If the temperature is too low, the chicken will absorb excess oil; if it’s too high, the batter may burn before the chicken is fully cooked. Always use a thermometer to accurately monitor the oil temperature during frying, ensuring the perfect balance of heat and cooking time.
Choosing the Right Oil for Frying Chicken: A Key Element
The Best Oils for Frying Chicken: What to Choose
The selection of oil can dramatically influence the outcome of your fried chicken. Oils with high smoke points and neutral flavours are typically recommended for frying. Popular choices include peanut oil, canola oil, and vegetable oil. These oils can withstand high temperatures without breaking down, which is essential for achieving that perfect crispy finish that everyone loves.
When selecting your oil, also consider your dietary preferences. For instance, while olive oil has a lower smoke point, it can impart a unique flavour that some may enjoy. If you have nut allergies, canola oil serves as an excellent alternative. Each type of oil possesses distinct characteristics that can affect both the frying process and the final flavour of the chicken, allowing for personalized adjustments based on your cooking style.
Always ensure your oil is fresh and not excessively reused, as old oil can carry off-flavours and negatively impact the quality of your fried chicken. Maintaining high-quality frying oil is essential for achieving the best results in your cooking, ensuring that every meal is as delicious as possible.
Understanding the Role of Oil Temperature in Frying Results
The temperature of the oil is a crucial aspect of cooking chicken to perfection. Keeping the oil at the appropriate temperature ensures even cooking and prevents the chicken from absorbing too much oil, which can lead to an undesirable greasy finish that detracts from the overall enjoyment of the dish.
If the oil temperature is too low, the chicken will cook slowly, allowing it to soak up excess oil and become overly greasy. Conversely, if the oil is too hot, the exterior may burn before the chicken is fully cooked on the inside. This highlights the importance of using a thermometer to monitor the oil temperature closely throughout the frying process.
Consistency is key once the chicken is placed in the oil. Avoid overcrowding the frying vessel, as this can drastically lower the temperature and lead to uneven cooking. Fry in batches if necessary to ensure consistent results across all pieces, allowing for a uniform cooking experience that yields perfectly fried chicken every time.
Reusing Oil for Frying Chicken: Best Practices
Yes, reusing frying oil is feasible, but it’s essential to strain it properly to remove any debris and particles that could affect the flavour of subsequent batches. Allow the oil to cool completely before straining it through a fine mesh sieve or cheesecloth into a clean container for storage.
Store the strained oil in a cool, dark place to extend its shelf life and prevent degradation. It is advisable to reuse frying oil just a couple of times, closely monitoring its quality. Be vigilant for any off-smells or colour changes, which can indicate that the oil has deteriorated and should no longer be used for frying.
With proper storage and careful monitoring, reused oil can be a practical option, helping to reduce waste while still delivering delicious fried chicken that meets your high standards.
How Oil Selection Influences the Flavour of Fried Chicken
The type of oil you choose for frying can significantly influence the overall flavour profile of your fried chicken. Neutral oils such as canola or vegetable oil allow the chicken’s natural flavours to shine through, while oils with stronger profiles, like sesame or olive oil, can impart unique nuances to the dish that enhance its complexity.
When experimenting with flavoured oils, it’s vital to consider how they complement the spices or marinades used. For instance, frying chicken in peanut oil can introduce a subtle nutty flavour that pairs beautifully with Asian-inspired dishes, enriching the overall dining experience.
Understanding the flavour profiles of different oils allows for creative experimentation, enabling you to develop a distinctive twist on classic fried chicken recipes that reflect your personal culinary style and preferences, making your dish stand out.
Health Considerations When Choosing Frying Oils
The health implications associated with various frying oils are primarily determined by their fatty acid profiles. Oils high in monounsaturated and polyunsaturated fats, such as olive or avocado oil, are typically regarded as healthier choices due to their beneficial effects on heart health and overall well-being.
Conversely, oils rich in saturated fats, like palm oil, should be utilized sparingly in your cooking routine. The frying process can also affect the nutritional content; for example, oil that degrades during frying may produce harmful compounds that could impact health negatively.
Opting for oils with health-conscious properties can enhance your fried chicken without sacrificing flavour. Always consider the nutritional aspects when selecting oils for cooking, making informed choices that align with your health goals and dietary needs while still enjoying delicious fried chicken.
Techniques for Crafting an Irresistibly Crunchy Coating
The Benefits of Double Frying for Superior Texture
Double frying is a technique that can elevate your fried chicken to new levels of crunchiness and flavour. This method involves an initial frying at a lower temperature, allowing the chicken to cook through completely, followed by a second fry at a higher temperature to achieve that desired crispy exterior. This approach is a favourite among professional kitchens for its exceptional results and texture.
During the double frying process, the first fry should occur at around 325°F (approximately 160°C) until the chicken is cooked internally. After allowing it to rest, increase the oil temperature to around 375°F (190°C) before returning the chicken to the oil for the second fry. This step locks in moisture while creating an irresistible crunch that is hard to resist, delivering a fried chicken experience that is simply unforgettable.
After the second fry, place the chicken on a wire rack to ensure its crispiness is preserved. This method not only enhances texture but also allows the flavours to fully develop, resulting in a satisfying eating experience that will impress anyone who has the pleasure of trying your homemade fried chicken.
Enhancing Crunch with Spices: The Secret to Exceptional Fried Chicken
Spices are integral to enhancing the crunch of fried chicken, contributing both flavour and texture to the coating. Specific spices, such as paprika and garlic powder, can help create a robust crust while adding depth to the flavour profile that elevates the overall dish.
When incorporating spices into your batter, consider using a blend of dry spices that complement one another. For example, combining smoked paprika, cayenne pepper, and garlic powder creates a flavourful base that enhances both the crunch and overall taste of the chicken, making every bite a delightful experience.
Experimenting with different spice blends can yield unique variations that surprise and delight. The key is to maintain a balanced flavour; using too many spices can overpower the chicken, while too few may lead to a bland coating. Finding the right mix not only enhances the crunch but also personalizes your fried chicken experience, allowing you to create a dish that reflects your culinary creativity.
Influence of Coating Type on Overall Quality of Fried Chicken
Indeed, the type of coating applied to fried chicken has a significant impact on its final texture and flavour. Traditional flour-based coatings provide a classic crunch, but numerous alternatives can yield diverse outcomes that can be just as satisfying.
For instance, using breadcrumbs, particularly panko breadcrumbs, can impart a unique texture, as they are larger and coarser than regular breadcrumbs, resulting in a lighter and crispier finish that is especially appealing. Additionally, incorporating crushed cornflakes or potato chips can add an intriguing twist in both texture and flavour, making your fried chicken stand out.
Exploring different coating options opens up a realm of possibilities for your fried chicken. Consider combining various textures for a multi-dimensional crunch or utilizing unique ingredients that reflect your culinary style. The coating not only serves as a vessel for flavour but also contributes significantly to the overall eating experience, ensuring that your fried chicken is memorable and enjoyable.
Proven Techniques for Crafting Irresistibly Crispy Fried Chicken
Successful Methods from Renowned Cooks to Perfect Fried Chicken
Numerous chefs and home cooks have shared their successful fried chicken recipes, highlighting various strategies for achieving that ideal crunch and flavour. For instance, the famous Roscoe’s House of Chicken and Waffles is celebrated for its marinated chicken, which is soaked in a spice blend for hours before frying to achieve maximum flavour infusion.
Here are some effective strategies utilized by expert cooks that can help you master the art of fried chicken:
- Marinating chicken overnight for intensified flavour and tenderness.
- Combining flour and cornstarch for a superior coating that enhances crispiness.
- Employing a vinegar-based brine for effective tenderisation of the meat.
- Frying in small batches to maintain optimal oil temperature and achieve even cooking.
- Allowing chicken to rest after frying for maximum crispiness and flavour retention.
- Using a deep fryer for consistent temperature control throughout the cooking process, ensuring perfect results.
- Experimenting with gluten-free flours for alternative coatings that cater to dietary needs.
- Pairing fried chicken with flavourful dipping sauces to enhance the meal experience.
These strategies have been rigorously tested and proven to yield outstanding results, making them invaluable for anyone aspiring to master the art of fried chicken preparation with confidence and flair.
Steps to Ensure Consistent Results in Fried Chicken Preparation
Achieving consistent outcomes in fried chicken preparation requires meticulous attention to detail and adherence to specific techniques. Follow these guidelines for reliable results:
1. Consistency in Ingredients: Always measure your ingredients accurately. Even minor variations can alter the batter’s consistency and flavour, leading to inconsistent results.
2. Stable Oil Temperature: Use a thermometer and fry in small batches to ensure the oil temperature remains stable throughout the cooking process. Adjust the heat as necessary to maintain the ideal frying conditions for your chicken.
3. Timing is Everything: Stick to recommended frying times for each cut of chicken, checking for doneness using a meat thermometer (aim for 165°F/74°C internal temperature) to ensure safety and quality.
4. Incorporate Resting Periods: After frying, allow the chicken to rest. This step is critical for maintaining crispiness by preventing steam build-up, ensuring every bite is as delicious as the first.
5. Document Your Process: Keep detailed notes on your frying method, including ingredient ratios and timings. This documentation will help you replicate your successes in the future, making your fried chicken preparation more efficient and effective.
By implementing these steps and focusing on the finer details, home cooks can consistently achieve delicious fried chicken time after time, impressing family and friends alike with their culinary skills.
Expert Recommendations for Effective Marinating Techniques
Marinating is a fundamental technique that enhances both the flavour and texture of fried chicken. The right marinade can effectively tenderize the meat, resulting in a juicier final product that is bursting with flavour. Experts often recommend using acidic components, such as buttermilk or yogurt, which not only impart flavour but also help break down proteins, making the chicken more tender and enjoyable.
Different marinating techniques can yield various results. For example, marinating in a blend of buttermilk, hot sauce, and spices overnight creates chicken that is deeply flavoured and moist, making each bite an indulgence. Alternatively, a dry rub marinade can provide a punch of flavour while allowing the chicken to maintain its crispiness during frying, ensuring that the coating adheres beautifully.
The key lies in balancing the marinade’s flavours with the coating. A well-marinated chicken can withstand bold spices in the coating, resulting in an impressive taste experience that will delight your guests. Always remember to pat the chicken dry before applying the coating to ensure the batter adheres effectively, leading to a satisfying crunch with every bite.
Best Practices for Serving and Storing Your Fried Chicken
Ideal Serving Methods for Delicious Fried Chicken
Fried chicken is best enjoyed hot and fresh to fully appreciate its crispy texture and rich flavour. Presentation can greatly enhance the dining experience; consider serving the chicken on a rustic wooden board or an elegant platter that showcases its golden-brown beauty. Pair it with sides that complement its richness, such as creamy coleslaw, buttery mashed potatoes, or tangy pickles that add contrast and balance to the meal.
Don’t hesitate to think outside the box regarding serving styles. Fried chicken can shine in sliders, mini sandwiches, or even atop a crisp salad for a lighter meal option. Accompany it with a variety of dipping sauces—think spicy mayo, honey mustard, or classic hot sauce—to elevate the flavour experience even further, allowing each guest to customize their meal to their liking.
Aim for a presentation that showcases your culinary skills while preserving the comfort and familiarity that fried chicken embodies. Whether for a casual family dinner or an elegant gathering, fried chicken can be a star dish that delights everyone at the table.
How to Store Fried Chicken to Maintain Optimal Quality
Yes, you can store fried chicken effectively, but there are methods to ensure it retains its texture and flavour. Allow the chicken to cool completely before transferring it to an airtight container, which helps prevent moisture accumulation that could lead to sogginess and loss of that delightful crunch.
Store the fried chicken in the refrigerator for up to 3-4 days. When it’s time to reheat, avoid using the microwave, as this can lead to a rubbery texture that detracts from the enjoyment. Instead, place the chicken on a baking sheet in a preheated oven (around 375°F/190°C) and heat until warmed through, approximately 15-20 minutes. This method helps restore some of its crispiness, making it almost as good as when it was freshly fried.
If you plan to freeze the chicken, make sure it’s completely cooled, tightly wrapped in foil or freezer bags, and consumed within a month for the best quality, ensuring that you can enjoy delicious fried chicken whenever the craving strikes.
Innovative Ways to Serve Fried Chicken
There are countless innovative ways to present fried chicken that go beyond traditional servings. For instance, consider crafting fried chicken sliders using mini brioche buns, topped with spicy slaw and a drizzle of sriracha mayo for a delightful kick. Another idea is to serve the chicken on a fresh garden salad, accompanied by crispy bacon and a zesty vinaigrette that complements the flavours beautifully.
You might also incorporate fried chicken into breakfast by serving it atop waffles, drizzled with maple syrup for a delightful sweet and savoury experience that is sure to please. Another unique option is to create fried chicken tacos, using corn tortillas, fresh salsa, and avocado to complement the crunch and provide a refreshing contrast.
Experimenting with various accompaniments and presentations can elevate your fried chicken dish, transforming it into a versatile option appropriate for any meal or occasion, making it a fun and exciting dish to serve.
Frequently Asked Questions About Fried Chicken
What Is the Best Method to Maintain Fried Chicken’s Crispiness After Cooking?
To keep your fried chicken crispy after cooking, place it on a wire rack instead of paper towels. This technique promotes air circulation and prevents steam from softening the coating, ensuring a satisfying crunch that everyone loves.
How Long Can I Safely Store Leftover Fried Chicken?
Leftover fried chicken can be stored in the refrigerator for up to 3-4 days. Ensure it is placed in an airtight container to help preserve its freshness and texture, allowing you to enjoy it later without sacrificing quality.
Is It Better to Fry Chicken in Cast Iron or a Deep Fryer?
Both methods are excellent; however, a deep fryer provides more consistent temperature control, while cast iron skillets offer a classic frying experience with great heat retention and flavour development. Ultimately, the choice depends on personal preference and available equipment.
Can I Use Gluten-Free Flour for Frying Chicken?
Yes, gluten-free flour blends can be successfully used to create a batter for fried chicken. Look for blends that incorporate a mixture of flours to achieve the best texture and taste, making it accessible for those with dietary restrictions.
What Is the Purpose of Brining Chicken Before Frying?
Brining chicken infuses moisture and flavour into the meat, enhancing its juiciness and tenderness during frying, which results in a more enjoyable eating experience that everyone can appreciate.
How Can I Make Fried Chicken Healthier?
To create a healthier version of fried chicken, consider baking instead of frying, using air fryers, or selecting lean cuts of chicken. Alternatively, opt for healthier oils when frying to reduce fat content while still enjoying this classic dish.
What Temperature Should Oil Reach for Frying Chicken?
The ideal oil temperature for frying chicken is between 350°F and 375°F (approximately 175°C to 190°C) to achieve a crispy exterior while ensuring the chicken cooks thoroughly inside, providing that perfect bite.
Is Overnight Marinating Beneficial for Chicken?
Yes, marinating chicken overnight is highly beneficial for developing deeper flavours and tenderness. Just ensure your marinade is balanced to avoid overwhelming the chicken with excessive seasoning, resulting in a harmonious dish.
What Are Some Complementary Sides to Serve with Fried Chicken?
Excellent sides to accompany fried chicken include coleslaw, mashed potatoes, cornbread, biscuits, and pickles. These sides beautifully complement the richness of the chicken, creating a well-rounded meal that satisfies all appetites.
How Do I Determine When My Fried Chicken Is Fully Cooked?
Fried chicken is considered done when its internal temperature reaches 165°F (approximately 74°C). Using a meat thermometer is the most reliable method to ensure it is thoroughly cooked and safe to eat, providing peace of mind with every bite.
Join Us on Facebook for More Culinary Inspiration!
The post Uncovering the Secrets to Crispy Fried Chicken: Universal Techniques appeared first on https://cookinggods.com
The Article Crispy Fried Chicken Secrets: Universal Cooking Techniques Was Found On https://limitsofstrategy.com
-

Perfect Techniques for Boiling Eggs Without Cracking
Your Comprehensive Guide to Selecting and Boiling Eggs Perfectly
Essential Steps to Determine Egg Freshness for Boiling
When embarking on the delightful journey of boiling eggs, your first critical step is to choose the right eggs. Freshness is vital, as fresh eggs are less likely to crack due to their stronger shells. To start, check the date on the carton, but enhance your assessment by performing the water test for a more accurate determination of freshness. Simply place the egg in a bowl of water—fresh eggs will sink to the bottom and lay flat, while older eggs will stand upright or float. This floating effect occurs as air cells develop within the egg, leading to increased buoyancy. Selecting fresh eggs not only boosts your boiling success but also significantly enhances the flavour and nutritional value of your culinary creations.
Furthermore, consider that the size of the eggs is an influential factor in your boiling experience. While larger eggs may require additional cooking time, oddly shaped eggs can be more prone to cracking during the boiling process. Therefore, it is wise to select medium to large eggs, which typically provide a more consistent shell structure, thereby minimizing the likelihood of mishaps. This selection not only supports even cooking but also guarantees a uniform texture, making it simpler to achieve that desired perfect boiled egg.
Additionally, the temperature of your eggs plays a significant role. Bringing your eggs to room temperature before boiling reduces the risk of cracking caused by thermal shock. Remove eggs from the fridge at least 30 minutes prior to cooking, allowing them to acclimate to room temperature. This straightforward preparation step can drastically improve your results, creating a smoother transition from cold to hot and ultimately preserving the integrity of your valuable eggs.
Maximizing Boiling Success by Understanding Egg Size and Shape
In the world of egg boiling, both the size and shape of your eggs are critical factors that should never be overlooked. Larger eggs, while often preferred for their superior yolk-to-white ratio, can require a few extra minutes in the pot. It is essential to calibrate your boiling times based on the size of the eggs you select. For example, medium eggs typically reach perfect hard-boiled status in about 12-15 minutes, while larger eggs may take an additional minute. This slight timing variation can be the difference between achieving a beautifully boiled egg and ending up with an overcooked, rubbery disappointment.
As for shape, it’s interesting to note that eggs with irregular shapes can be more susceptible to cracking during boiling. This variability can result from factors such as the hen’s diet and health, so while it may be tempting to choose uniquely shaped eggs for their aesthetic appeal, opting for standard shapes can significantly improve your success rate. The best practice is to aim for a uniform selection—this not only simplifies the cooking process but also contributes to an attractive presentation when serving your dishes.
Finally, as you navigate the intricacies of egg boiling, remember that maintaining uniformity in size and shape is essential for achieving consistent results. A diverse egg selection may lead to uneven cooking outcomes, with some eggs potentially becoming overcooked while others remain underdone. By choosing medium to large, evenly shaped eggs, you will enhance your culinary experience and make it easier to deliver perfect results every time.
The Benefits of Using Room Temperature Eggs for Boiling
The debate between using room temperature and cold eggs is a pivotal one for enthusiasts of boiling. When it comes to cracking, room temperature eggs possess a significant advantage. The explanation is straightforward: cold eggs placed in hot water face thermal shock, leading to cracks that can ruin your efforts. To prevent this, take your eggs out of the fridge at least 30 minutes before cooking. This minor adjustment not only prepares them for the heat but also results in a more evenly cooked egg.
During this acclimation period, you can ready your pot of boiling water, ensuring that all is set for a seamless transition. Allowing the eggs to warm up enables the contents inside to expand gradually, reducing the pressure on the shell throughout the heating process. The outcome? A beautifully boiled egg devoid of the unsightly cracks that can spoil your culinary masterpiece.
Moreover, if you’re pressed for time and cannot wait half an hour, consider running your eggs under warm water for a few minutes as a quick solution. This method helps bring them closer to room temperature without consuming too much time. Remember, the goal is to create a gentle transition from cold to hot, reinforcing the integrity of the shell and ensuring that your eggs remain perfectly intact for boiling.
Mastering the Art of Preparing Boiling Water for Eggs

Determining the Ideal Water Temperature and Volume for Boiling Eggs
As you embark on your egg boiling adventure, the temperature and volume of water you select play a pivotal role in the final outcome. Starting with cold water is essential, as this practice helps prevent thermal shock. By immersing your eggs in cold water and then gradually heating it, you create the perfect environment for a smoother cooking experience. This method allows the eggs to warm up evenly, diminishing the chance of cracking and enhancing your overall boiling success.
Moreover, the volume of water you utilize is equally significant. Always ensure that your pot contains enough water to cover the eggs by at least an inch. This depth not only maintains a consistent temperature throughout the cooking process but also provides a buffer against sudden temperature fluctuations. Opt for a pot that is large enough to accommodate the eggs comfortably, as overcrowding can lead to uneven cooking and potential cracking.
In practical terms, a good rule of thumb is to use at least 1 litre of water for every four eggs. This guideline promotes a steady temperature and encourages even cooking, regardless of the number of eggs in the pot. As the water heats, you can observe the temperature closely, aiming for a gentle simmer rather than a vigorous boil, which can lead to cracking disasters.
Enhancing Boiling Water with Salt or Vinegar for Better Results
When it comes to fortifying your boiling water, consider adding a pinch of salt or a splash of vinegar. This simple yet effective technique can help reinforce the eggshells and significantly reduce the chances of cracking during the boiling process. The addition of salt not only strengthens the eggshell but can also enhance the flavour of the eggs themselves. Using about a teaspoon of salt or vinegar per litre of water serves as a practical guideline. This minor adjustment can yield significant improvements in your cooking results.
Vinegar works wonders in this scenario, as it can help coagulate any egg white that might leak out in the event of a crack. The acid in vinegar strengthens the proteins in the egg white, causing them to firm up promptly. In essence, you are not just flavouring the water; you are creating a safety net for your cooking process.
Moreover, consider the type of salt you use. While kosher salt is a favourite among chefs for its ease of handling and dissolving properties, table salt works perfectly fine as well. Whichever you choose, the aim is to create a protective environment for your eggs, allowing them to cook beautifully without the distress of cracks. So, go ahead and sprinkle that salt or splash some vinegar into your boiling water—your eggs will thank you for it.
Implementing Gentle Boiling Techniques for Flawless Results

As you prepare to boil your eggs, the technique you employ can significantly impact the outcome, ensuring they remain crack-free. Avoid the temptation to bring the water to a rapid boil; instead, aim for a gentle simmer. A rolling boil can create turbulence in the pot, increasing the likelihood of eggs jostling against each other or the sides of the pot, which can lead to cracks. Instead, utilize a medium heat setting and keep a watchful eye on the water as it heats.
By maintaining a steady, gentle simmer, the eggs will cook evenly, minimizing the risk of cracking and ensuring a more consistent texture throughout. This technique is not solely about avoiding cracks; it is also about achieving that perfect doneness without overcooking the eggs. As the eggs simmer, you will find that they develop a creamy texture that is a delight to the palate.
To ensure you are on the right track, invest in a reliable kitchen thermometer to monitor the water temperature. For perfect boiled eggs, aim for a water temperature around 90-95°C (194-203°F). This temperature range allows the eggs to cook evenly while minimizing the risk of cracking. With this gentle approach, your eggs will emerge from the pot perfectly intact, ready to be enjoyed in salads, sandwiches, or simply on their own.
Using a Timer for Precision in Cooking
Precision is key when boiling eggs, and utilizing a timer can make the difference between success and disappointment. Once your water has reached that ideal simmer, gently drop the eggs in and set your timer based on your desired level of doneness. For soft-boiled eggs, aim for 4-6 minutes, medium-boiled eggs should be cooked for around 8-10 minutes, and hard-boiled eggs will require 12-15 minutes.
The timer becomes your trusty companion in the kitchen, ensuring you do not lose track of time while your eggs transform into delectable bites. It is easy to become distracted, whether flipping through social media or preparing other components of your meal. That is where the beauty of a timer comes in—it keeps you accountable and focused on achieving that perfect result.
As you gain experience, you may find that adjusting the timing based on the size and quantity of eggs becomes second nature. For example, if you’re boiling a dozen eggs, consider adding an extra minute to ensure they all cook evenly. Conversely, if you’re using smaller eggs, you may find that reducing the time slightly yields better outcomes. With careful timing and attention, you will master the art of boiling eggs without compromising their structural integrity.
Cooling Boiled Eggs Properly for Best Results
Once the cooking process is complete, it is essential to cool the water gradually to halt the cooking process. This step is crucial, as it prevents overcooking and ensures that your eggs retain their ideal texture. After timing your eggs perfectly, remove them from the heat and let them sit in the hot water for a minute to allow the residual heat to work its magic. Then, it is time to cool them down.
The best method for cooling boiled eggs is to use cold tap water or an ice bath. If opting for an ice bath, prepare a bowl filled with ice and cold water before your eggs finish cooking. Once the cooking time is up, transfer the eggs directly to the ice bath. This rapid cooling not only halts the cooking process but also aids in making peeling easier later on.
The importance of this cooling method cannot be overstated. By swiftly cooling the eggs, you minimize the risk of a greenish ring forming around the yolk, a common issue caused by overcooking. Additionally, the shock of cold water helps separate the membrane from the shell, making peeling a breeze. With this simple yet effective technique, you will have perfectly boiled eggs ready for enjoyment, whether as a snack, in a salad, or as part of a larger dish.
Safe Techniques for Lowering Eggs into Boiling Water
Utilizing a Spoon or Ladle for Safe Egg Transfer
Lowering eggs into boiling water may seem straightforward, but executing it safely can significantly reduce the risk of cracking. One effective technique is to use a spoon or ladle to gently lower the eggs into the water. This method minimizes the impact of the eggs hitting the bottom of the pot, which is a common cause of cracking. Simply place the spoon under the egg, support it gently, and then lower it into the simmering water with care.
This gentle approach not only prevents cracks but also allows for better control over the cooking process. By lowering the eggs slowly, you give them a chance to acclimate to the water temperature, further reducing the risk of thermal shock. This technique is particularly beneficial when cooking multiple eggs since it enables you to lower them one at a time, maintaining a calm environment in the pot.
Moreover, using a spoon or ladle can help you avoid overcrowding the pot. If you’re boiling several eggs, applying this method allows you to space them out evenly. This technique promotes even cooking and ensures that each egg receives the attention it deserves, ultimately resulting in perfectly boiled eggs free from cracks. So, the next time you prepare to boil eggs, remember to utilize that trusty spoon—it’s a simple yet impactful trick.
The Egg Carton Method for Safe Submersion
For those seeking a creative approach to safely submerging eggs into boiling water, the egg carton method is an excellent option. Begin by placing your eggs in a slotted spoon or, if you have a specific egg carton that fits the bill, use it to cradle the eggs. This method allows you to gently submerge the eggs into the water without the risk of dropping them or causing unnecessary impact against the pot. It’s a technique that provides both safety and stability during the cooking process.
By using an egg carton or slotted spoon, you can distribute the impact evenly across the surface of the eggs. This gentle descent into the water minimizes the risk of cracking, ensuring that every egg remains intact throughout the boiling process. It’s especially valuable when cooking a larger batch, allowing you to lower multiple eggs in one go without overcrowding.
Additionally, this technique can help streamline your cooking process. While using a ladle or spoon requires careful maneuvering, the egg carton method allows you to maintain a steady grip on multiple eggs, freeing up your other hand for other tasks. Ultimately, using this method not only safeguards your eggs but also enhances the overall efficiency of your cooking experience, ensuring perfectly boiled eggs without the stress of potential cracks.
The Advantages of Using a Wire Basket for Boiling Eggs
Incorporating a wire basket for boiling eggs is a clever and practical approach that offers numerous benefits. This tool simplifies the lowering and lifting of eggs, significantly reducing the chances of cracking against the pot. The wire basket provides a structured and secure method to handle multiple eggs simultaneously, making it a favourite among both home cooks and professional chefs.
One of the key advantages of using a wire basket is that it facilitates gentle immersion into boiling water. Rather than dropping the eggs directly into the pot, the basket allows you to lower them gradually, maintaining a controlled environment. This method enhances structural integrity by preventing sudden temperature changes and impact, ensuring your eggs remain crack-free during the cooking process.
In addition to safety, a wire basket also eases the removal of cooked eggs from the pot. Once your eggs have achieved the desired doneness, you can easily lift the basket out of the water, allowing excess water to drain away before transferring them to an ice bath for cooling. This method not only enhances efficiency but also helps maintain the quality of the eggs, ensuring they are ready for enjoyment or further culinary exploration.
Overall, the wire basket is a valuable tool that elevates your boiling technique. By incorporating this handy device into your cooking routine, you are setting yourself up for success in achieving perfectly boiled eggs without the worry of cracks ruining your efforts.
Expert Insights on Boiling Eggs Without Cracking
Chef-Recommended Techniques for Flawless Boiled Eggs
Professional chefs have refined their techniques over years of experience, and their insights on boiling eggs without cracking them are priceless. Many chefs advocate for starting with room temperature eggs and utilizing a steamer basket instead of traditional boiling methods. The steamer basket technique provides a gentle cooking environment that promotes even heating, significantly reducing the risk of cracks.
For example, chefs often recommend bringing water to a simmer and placing eggs in the steamer basket for 10-12 minutes, depending on your desired doneness. This method not only results in perfectly cooked eggs but also facilitates easier peeling, as the steam helps separate the membrane from the shell. Chefs also emphasize the importance of proper timing, employing timers to ensure consistency and precision throughout the cooking process.
Another common recommendation from culinary experts is to avoid overcrowding the pot. Chefs note that when eggs are packed too closely together, they are more likely to bump against one another, increasing the chances of cracking. Instead, they suggest cooking fewer eggs at a time, allowing for ample space between each. This simple adjustment can lead to a successful outcome, transforming your egg boiling endeavors into a culinary triumph.
How to Effectively Monitor Cooking Progress for Boiling Eggs
Monitoring the cooking progress of boiling eggs is crucial for achieving your desired level of doneness, and there are several effective methods to do so. The most straightforward approach is to utilize a timer, setting it based on the size of the eggs and your preferred level of doneness. For a standard batch of medium eggs, aim for 10 minutes for hard-boiled and adjust accordingly for soft or medium-boiled eggs.
However, timing isn’t the only method to gauge progress; you can also gently lift the eggs out of the water using a slotted spoon. By doing this, you can assess their firmness; if they feel too soft for your liking, simply lower them back into the water for a few more minutes. This tactile technique allows you to achieve that perfect balance, giving you confidence in your boiling prowess.
Furthermore, consider using a thermometer to monitor water temperature, aiming for a range of 90-95°C (194-203°F). This ensures that the eggs cook evenly, resulting in a more consistent texture. Together, these methods of monitoring cooking progress will empower you to create perfectly boiled eggs tailored to your taste preferences, eliminating any guesswork from the equation.
Common Mistakes to Avoid When Boiling Eggs
Even seasoned cooks can stumble when boiling eggs, but being aware of common pitfalls can pave the way to success. One major mistake is boiling water too vigorously. While a rapid boil may seem efficient, it can cause the eggs to jostle against each other and the pot’s walls, resulting in cracks. Instead, opt for a gentle simmer, which provides a more stable cooking environment.
Another frequent error is overcrowding the pot. When eggs are packed too tightly, they have less room to move, which increases the likelihood of cracking. It’s wise to cook in smaller batches to allow for sufficient space and consistent cooking. Additionally, avoid using eggs straight from the fridge—this sudden temperature change can lead to thermal shock and cracking. Always let your eggs reach room temperature before boiling to mitigate this risk.
By steering clear of these common mistakes, you will elevate your egg boiling game, ensuring a delightful experience with perfectly cooked eggs every time. Remember that success in the kitchen often hinges on attention to detail, and avoiding these pitfalls will lead to delicious results.
Choosing the Best Pots and Tools for Boiling Eggs
The selection of pots and tools can greatly influence your success when boiling eggs. Choosing a pot that allows for adequate water depth is crucial; aim for one that can comfortably hold enough water to cover the eggs by at least an inch. A wider pot facilitates more even cooking and prevents eggs from colliding with one another, which can lead to cracking.
Additionally, a slotted spoon is an indispensable tool for gentle handling during the cooking process. It allows for easy lowering and lifting of eggs, ensuring you can manage them without the risk of dropping or causing impact. Investing in a wire basket for boiling eggs is another excellent option. This tool simplifies the lowering and lifting of multiple eggs at once, providing stability and reducing the risk of cracks.
Finally, consider using a kitchen thermometer to monitor water temperature. Maintaining a consistent temperature is key to achieving perfect results, and a thermometer ensures you remain on track. By equipping yourself with the right pots and tools, you significantly enhance your chances of boiling eggs to perfection.
Understanding How Egg Age Affects Boiling Success
Recognizing how egg age impacts boiling success is vital for any home cook aiming to create the perfect boiled egg. Fresh eggs possess tighter shells, which can lead to a lower risk of cracks during boiling. However, while fresh eggs are ideal for cooking, they can be more challenging to peel once boiled. Conversely, older eggs are easier to peel but are more likely to crack during boiling due to weakened shells.
Thus, the ideal scenario is to strike a balance. Aim to use eggs that are approximately 1-2 weeks old, as they offer the best of both worlds—ample freshness for cooking while still being easy to peel. Proper storage is essential in maintaining egg quality. Keep your eggs in their original carton in the refrigerator to prevent them from absorbing strong odours and flavours from other foods.
Additionally, consider labelling your eggs with purchase dates to keep track of their age. By being mindful of egg age and storage practices, you will be better equipped to boil eggs successfully while ensuring they are easy to handle and enjoy.
Cooking Times and Methods for Achieving Perfectly Boiled Eggs
Crafting the Ideal Soft, Medium, and Hard Boiled Eggs
Creating perfectly boiled eggs relies heavily on timing—knowing how long to cook them is essential for achieving your desired yolk consistency. For soft-boiled eggs, which boast a runny yolk and tender white, aim for 4-6 minutes in simmering water. This brief cooking time yields a delightful contrast between the firm white and the velvety yolk, making them perfect for dipping toast or enhancing ramen dishes.
Medium-boiled eggs, which feature a slightly firmer yolk with a creamy texture, require around 8-10 minutes in the simmering water. This cooking method creates a yolk that’s not fully set, offering a rich and satisfying experience. For those who prefer hard-boiled eggs, which are completely cooked through, aim for 12-15 minutes. The key is to adjust these times based on the size of the eggs you’re using; larger eggs may need an extra minute or two.
As you develop your skills in boiling eggs, start with these timings as a guideline, fine-tuning them based on your preferences. Keep in mind that altitude can also influence cooking times; eggs may require additional time to cook at higher elevations. Experimenting with different timings will lead you to discover your perfect boiled egg, catering to your taste and culinary aspirations.
The Cold Water Start Method for Boiling Eggs
For those seeking a foolproof method to boil eggs without cracking, the cold water start method is an excellent choice. Begin by placing your eggs in a pot and covering them with cold water. This gradual heating approach mitigates the risk of thermal shock, allowing the eggs to warm up evenly as the water heats. As the water comes to a boil, the temperature increase is gentle, creating a buffer against potential cracks.
Once the water reaches a rolling boil, reduce the heat to maintain a gentle simmer. Depending on your desired level of doneness, you can adjust cooking times accordingly. For soft-boiled eggs, aim for 4-6 minutes; for medium, 8-10 minutes; and for hard-boiled, 12-15 minutes. This method not only improves the odds of crack-free eggs but also enhances the overall texture and flavour of the final product.
As you perfect this technique, consider the convenience it offers. By starting with cold water, you can multitask in the kitchen, allowing your eggs to cook while you prepare other components of your meal. This method is a time-saver and a game-changer for those who love to incorporate boiled eggs into various dishes.
The Best Cooling Techniques for Eggs After Boiling
Properly cooling boiled eggs is a critical step to achieving success and ease when it comes to peeling. The most effective method is to transfer the eggs immediately to an ice bath after cooking. This involves filling a bowl with ice and cold water, ready to receive the hot eggs. The rapid cooling effect halts the cooking process, ensuring that your eggs do not overcook and develop unsightly greenish rings around the yolks.
By placing the eggs directly into the ice bath, you also assist in making peeling easier. The sudden temperature shift helps separate the membrane from the shell, leading to a smoother peeling experience. Whether you plan to use your eggs in salads, deviled eggs, or simply as a snack, this cooling method enhances both the aesthetic and practical aspects of your boiled eggs.
Additionally, if you don’t have ice on hand, running cold water over the eggs can suffice. However, the ice bath technique is the most effective in halting the cooking process swiftly and ensuring a delightful outcome. By cooling your eggs properly after boiling, you will set the stage for a beautiful presentation and enjoyable eating experience.
How to Avoid Cracking Eggs During Cooking
Using a Pin to Create a Small Hole in the Egg
A clever trick to prevent eggs from cracking during boiling is to pierce the larger end of the egg with a pin or needle. This method releases pressure that builds up inside the egg as it heats, mitigating the chances of cracking. Gently tap the egg and insert the pin just enough to break the membrane without puncturing the egg too deeply. This simple action can lead to significant gains, ensuring your eggs remain intact throughout the boiling process.
Many home cooks have successfully employed this method, finding that it truly minimizes the risk of cracks. The small hole created allows steam to escape, reducing internal pressure during cooking. It’s a technique that’s both easy and effective, requiring minimal effort for maximum results. As you incorporate this method into your egg boiling routine, you’ll find greater success in achieving perfectly boiled eggs.
Moreover, this technique complements other practices aimed at preventing cracks, such as using fresh eggs and ensuring they are at room temperature before boiling. By combining multiple strategies, you will set yourself up for consistent success in the kitchen, transforming the art of boiling eggs into a delightful and stress-free experience.
Understanding the Role of Egg Age in Cracking
Egg age plays a significant role in the risk of cracking during boiling. Fresh eggs, while often praised for their flavour and texture, tend to have tighter shells, which makes them less prone to cracking. However, they can be challenging to peel once boiled. On the other hand, older eggs have weaker shells and are more susceptible to cracking during the cooking process. As the egg ages, the moisture inside evaporates, leading to a weakened structure.
The ideal scenario is to use eggs that are about 1-2 weeks old, as they strike a balance between being easy to peel and possessing adequate structural integrity. Proper storage is key in maintaining egg quality—keeping eggs in their original carton in the refrigerator helps preserve freshness and moisture levels.
By being mindful of egg age and selecting the right eggs for boiling, you can mitigate the risk of cracks while still enjoying the benefits of easy peeling. This balance will enhance your overall egg boiling experience, allowing you to create delectable dishes with confidence.
The Importance of Gentle Handling of Eggs
Gentle handling is paramount when it comes to boiling eggs without cracking them. The way you interact with the eggs throughout the cooking process can significantly influence the outcome. From the moment you choose your eggs to the final transfer into boiling water, being cautious and considerate is key. Treating your eggs with care as you handle them helps prevent unnecessary bumps and knocks that could lead to cracks.
When lowering eggs into boiling water, employ gentle methods such as using a spoon, ladle, or wire basket, which allows for a controlled descent. Avoid dropping them directly into the pot, as this can cause a sudden impact that could crack the shells. Similarly, when lifting eggs out of the water, use a slotted spoon or wire basket to avoid jostling them against one another or the pot’s edges.
As you adopt this gentle approach, you will find that your success rate in boiling eggs without cracks will soar. Remember that patience and care are your best allies in this culinary endeavor, leading to delightful results and perfectly cooked eggs ready to be enjoyed.
Peeling Boiled Eggs Without Damaging Them
Utilizing the Rolling Technique for Effortless Peeling
Peeling boiled eggs can be a daunting task, especially when it comes to preserving the integrity of the egg white. One effective method to ensure a smooth peeling experience is the rolling technique. To start, gently roll the egg on a hard surface to crack the shell all over, creating a network of fractures. This process loosens the shell, making it easier to peel without damaging the white underneath.
Once the shell is sufficiently cracked, begin peeling from the larger end of the egg, where there’s usually an air pocket. This pocket allows for easier access to the membrane, which can aid in the peeling process. As you peel, the cracked shell should come away in larger pieces, leaving the egg white intact and beautifully presented.
The rolling technique is not just about aesthetics; it also enhances the overall enjoyment of boiled eggs. By ensuring that your eggs are peeled without damage, you’ll be able to enjoy them in salads, sandwiches, or as a standalone snack, showcasing their delightful appearance and texture.
Effective Spoon Technique for Peeling Eggs
Another handy method for peeling boiled eggs without causing damage is to use a spoon. This technique is particularly effective for those who may struggle with traditional peeling methods. To begin, tap the larger end of the egg to create a small crack. Then, gently insert a spoon beneath the shell, using it to lift the shell off in a smooth motion. This method separates the shell efficiently while preserving the egg white.
Using a spoon allows for greater control and precision, especially when peeling eggs that have been boiled to perfection. The curved shape of the spoon follows the contour of the egg, making it easier to navigate the shell and membrane. This technique is particularly beneficial for those who prefer their eggs visually appealing, as it minimizes the risk of unsightly dents or breaks in the egg white.
Incorporating this spoon-peeling method into your routine will not only help you achieve great results but also enhance your overall enjoyment of boiled eggs, allowing you to present them beautifully on any dish.
The Benefits of Peeling Under Water for Cleaner Results
Peeling boiled eggs under running water or in a bowl of water offers several benefits that can enhance your overall experience. The primary advantage of this method is that it helps to remove shell fragments that often cling to the egg white, making it easier to achieve a clean peel. As you peel under water, any tiny bits of shell are washed away, leaving you with a pristine egg ready for consumption.
Additionally, peeling under water helps cool the eggs further, making them easier to handle. The cold water creates a gentle environment, reducing the temperature of the egg’s surface, which can be particularly helpful if you’re working with eggs that are still warm. This method not only makes the peeling process smoother but also enhances your overall efficiency in the kitchen.
Moreover, peeling eggs in water can help maintain their structural integrity, allowing you to enjoy perfectly preserved whites and yolks. This method is particularly valuable if you’re preparing eggs for salads, deviled eggs, or any dish where presentation matters. Embrace the benefits of peeling under water, and you’ll find that your experience with boiled eggs becomes even more enjoyable.
Storing and Reusing Boiled Eggs for Maximum Freshness
Effective Storage Techniques to Preserve Boiled Eggs
Storing boiled eggs correctly is essential to maintain their freshness and quality. Once your eggs have been cooked and cooled, place them in a covered container in the refrigerator. Boiled eggs can last up to a week when stored properly, ensuring they remain safe for consumption. It’s best to keep the shells on until you’re ready to eat them, as the shells provide a natural barrier against bacteria and help preserve moisture.
For optimal storage, consider using an airtight container to protect the eggs from other odours in the fridge. If you’ve already peeled the eggs, remember to store them in water or with damp paper towels to prevent them from drying out. Keeping boiled eggs well-sealed not only preserves their freshness but also ensures they remain enjoyable when it’s time to eat.
By adhering to these storage techniques, you will find that your boiled eggs remain a convenient and nutritious option throughout the week. Whether you enjoy them as a quick snack, in salads, or as part of a meal, proper storage practices will elevate your experience and maintain the eggs’ integrity.
Identifying Spoiled Boiled Eggs: Key Indicators
Knowing how to identify if a boiled egg has gone bad is invaluable for food safety. The first sign to check for is an unusual smell. Fresh eggs typically have a neutral aroma, so any off-odour is a red flag. Additionally, inspect the texture of the egg; if it feels slimy or excessively sticky, it’s best to discard it. Another indicator is the presence of a greenish ring around the yolk, which can occur if the egg has been overcooked; while this doesn’t signify spoilage, it may suggest the egg isn’t fresh.
If you’re uncertain about the freshness of your boiled eggs, it’s always safer to err on the side of caution. When in doubt, it’s better to dispose of the egg than risk consuming a spoiled product. By staying vigilant and checking for these signs, you can ensure a safe and pleasant experience when enjoying your boiled eggs.
Proper storage and regular checks will keep your boiled eggs fresh and ready for consumption, allowing you to enjoy their deliciousness without worry.
Innovative Ways to Utilize Leftover Boiled Eggs
Boiled eggs are incredibly versatile, and finding creative ways to use leftovers can elevate your meals. One popular option is to incorporate them into salads, where they add protein and texture. Consider tossing chopped boiled eggs into a classic Caesar salad or mixing them into a fresh garden salad for added richness. Their creamy yolks beautifully complement various greens.
Another delicious way to repurpose boiled eggs is by making deviled eggs. This classic dish is perfect for gatherings and allows for a variety of flavour combinations. Whether you prefer traditional mustard and mayo or more adventurous flavours like avocado or sriracha, deviled eggs are always a crowd-pleaser.
For a quick snack, you can slice boiled eggs and enjoy them on whole-grain toast or crackers. They make for a satisfying and nutritious bite, perfect for busy days. Additionally, consider using boiled eggs in egg salad sandwiches or as toppings for grain bowls; their versatility knows no bounds.
By creatively incorporating leftover boiled eggs into your meals, you’ll not only reduce food waste but also enjoy the delightful flavours and textures they bring to your dishes.
Frequently Asked Questions about Boiling Eggs
What are effective strategies to prevent my eggs from cracking while boiling?
To prevent eggs from cracking, use fresh eggs at room temperature, lower them gently into simmering water with a spoon or ladle, and avoid overcrowding the pot.
Is there a specific type of pot that is best for boiling eggs?
A wide pot with sufficient depth is ideal for boiling eggs. It allows for even cooking and prevents overcrowding, reducing the risk of cracking.
Can I boil eggs directly from the fridge?
While you can boil eggs directly from the fridge, it’s best to bring them to room temperature first to lower the risk of thermal shock and cracking.
What is the most effective way to cool boiled eggs quickly?
The best way to cool boiled eggs quickly is to transfer them to an ice bath immediately after cooking. This halts the cooking process and simplifies peeling.
How long can boiled eggs be safely stored in the fridge?
Boiled eggs can be stored in the refrigerator for up to one week when kept in a covered container with shells intact.
What’s the best method for peeling boiled eggs?
The rolling technique is effective for peeling boiled eggs. Gently roll the egg on a hard surface to crack the shell, then peel from the larger end.
Can I add salt or vinegar to the boiling water?
Yes, adding a pinch of salt or a splash of vinegar to the boiling water can help strengthen the eggshell and reduce the chances of cracking.
How do I know if a boiled egg has spoiled?
Check for an unusual smell, slimy texture, or a greenish ring around the yolk. These are signs that the egg may have spoiled and should be discarded.
What are some creative ways to use leftover boiled eggs?
Leftover boiled eggs can be used in salads, made into deviled eggs, or sliced and enjoyed on whole-grain toast or in egg salad sandwiches.
What is the cold water start method for boiling eggs?
The cold water start method involves placing eggs in a pot, covering them with cold water, and then gradually bringing the water to a boil, which helps prevent cracking.
Connect with us on Facebook for the latest updates!
The post How to Boil Eggs Without Cracking Them: Perfect Techniques appeared first on https://cookinggods.com
The Article Boiling Eggs Without Cracking: Perfect Techniques Revealed Was Found On https://limitsofstrategy.com