Your cart is currently empty!
Category: Cooking Tips
-

BBQ Competition Feedback Analysis: A US Guide
Maximizing the Effectiveness of Feedback Collection in BBQ Competitions
Essential Feedback Types for Successful BBQ Competitions
Understanding how to effectively analyze BBQ competition feedback is vital for BBQ competition organizers to ensure success. This involves gathering a comprehensive array of key types of feedback from a variety of sources, including judges, participants, and spectators. Each group offers unique insights that can significantly influence the overall evaluation and success of the competition.
Judges deliver crucial assessments based on predetermined criteria, focusing on elements such as taste, tenderness, and presentation. Their expert observations are invaluable for competitors aiming to refine their culinary skills and comprehend how their performances measure up to industry benchmarks. For instance, if a judge notes the issue of overcooked ribs, it highlights the necessity for precise temperature regulation during cooking.
The input from participants is equally essential, reflecting their firsthand experiences during the competition. Their feedback regarding registration processes, competition flow, and overall satisfaction can aid organizers in pinpointing logistical challenges that may detract from the participant experience. Furthermore, this feedback can spark improvements in the organization and execution of future events, promising a smoother experience for all involved.
Spectators play a pivotal role in the event’s success, as their insights shed light on the entertainment value, atmosphere, and accessibility of the competition. For example, if attendees express difficulty navigating the venue, adjustments can be made regarding signage or layout in future competitions. Ultimately, collecting diverse feedback enables a well-rounded evaluation, fostering a more successful and enjoyable BBQ competition experience for all.
Effective Techniques for Streamlined Feedback Collection
To efficiently gather feedback, it’s essential to select methods that cater to the event’s scale and audience. Common techniques encompass surveys, interviews, and leveraging digital platforms, each offering distinct advantages to enhance the feedback collection process.
Surveys, whether paper-based or online, serve as a powerful tool for efficiently gathering quantitative data. These can be customized with specific questions designed to elicit focused feedback on various aspects of the competition. For example, a survey might prompt participants to rate their satisfaction with different event elements on a scale from 1 to 10, yielding a clear numerical representation of opinions.
Engaging in qualitative feedback collection facilitates deeper discussions and uncovers nuanced perspectives. By hosting face-to-face or virtual dialogues with a select group of judges or participants, valuable insights can surface that surveys alone might not capture. This approach encourages open communication, allowing respondents to express their thoughts comprehensively.
Digital platforms, especially social media, can also be harnessed to gather feedback. These platforms enable real-time responses and can reach a broader audience. Utilizing these tools enhances the overall experiences of both participants and spectators.
Ultimately, the chosen feedback collection method should align with the event’s goals and the audience’s preferences, ensuring that every voice is heard and appreciated during the entire process.
Are You Prepared to Embrace Feedback?
Enhancing the Credibility of Collected Feedback
To ensure that the feedback collected during BBQ competitions is both credible and actionable, several critical steps must be taken. First, developing structured and pointed questions that direct respondents toward providing meaningful insights is essential. Open-ended questions can sometimes result in vague responses; thus, employing a combination of quantitative and qualitative inquiries can yield the best outcomes.
Bias can distort feedback, making it crucial to implement strategies to reduce bias. This includes phrasing questions neutrally and steering clear of leading inquiries that might guide respondents toward predetermined answers. Moreover, offering anonymity can encourage more honest feedback, especially from participants who may fear negative consequences.
To further bolster feedback quality, organizers should aim to gather responses from a wide spectrum of participants, judges, and spectators. Collecting feedback from diverse groups offers a more holistic view of the event’s successes and shortcomings. Engaging multiple voices helps counterbalance any potential biases that could arise from relying solely on one group, ensuring a comprehensive understanding of the event.
Ultimately, the objective is to create a feedback collection process that is as transparent and inclusive as possible, empowering all stakeholders to share their insights openly and constructively.
Transforming Collected Feedback into Actionable Insights for Improvement

Once feedback has been gathered, it is vital to analyze and effectively use it to improve future BBQ competitions. One productive method involves categorizing feedback into actionable insights based on common themes or issues. This can be accomplished through data analysis techniques, such as thematic analysis, to pinpoint recurring comments and sentiments across various feedback sources.
After organizing feedback, the next step is to formulate actionable plans based on the insights obtained. For instance, if several judges comment on the blandness of BBQ sauces, an action plan might include hosting workshops for competitors to refine their sauce-making skills or inviting expert chefs to offer their expertise. Implementing such changes signals a responsiveness to feedback and elevates the overall quality of the competition.
Additionally, monitoring feedback over time can assist in measuring improvements and identifying persistent issues. Conducting follow-up surveys or interviews after changes have been implemented will reveal whether the modifications have positively influenced the quality of the competition. By continually iterating on feedback and making necessary adjustments, organizers foster a culture of improvement that enhances the competitive experience for all involved.
Lastly, communicating the modifications made based on feedback to all stakeholders is crucial. By demonstrating that participant and spectator insights are valued and acted upon, organizers can build trust and encourage ongoing engagement in future events, nurturing a community focused on BBQ excellence.
In-Depth Analysis of Judges’ Feedback for Ongoing Improvement
Grasping Judging Standards in BBQ Competitions
To effectively analyze feedback from BBQ competitions, it is essential to have a solid understanding of the judging criteria applied in American BBQ competitions. Typically, judges assess entries based on critical factors such as taste, tenderness, and presentation, with each criterion playing a crucial role in the overall evaluation process.
Taste ranks as the most significant criterion, as it ultimately determines whether a BBQ dish is enjoyable. Judges seek well-balanced flavors, appropriate seasoning levels, and the harmonious integration of accompanying ingredients. Recognizing what constitutes “good taste” can help competitors adjust their recipes based on judges’ feedback, especially if recurring comments suggest that a dish lacks complexity or depth.
Tenderness refers to how easily the meat pulls apart while retaining moisture. Judges frequently emphasize this aspect in their feedback, as it can greatly affect a competitor’s overall score. If multiple judges note the toughness of a specific meat entry, it may indicate the necessity for improved cooking techniques or better meat selection to enhance the eating experience.
Presentation involves the visual appeal of the dish, including how the food is arranged on the plate, the use of garnishes, and the overall aesthetic impact. Feedback in this domain can offer specific recommendations, such as incorporating more vibrant colors or utilizing creative plating techniques that could elevate a dish’s visual allure.
By familiarizing themselves with these judging criteria, competitors can better interpret feedback and make targeted enhancements to their BBQ offerings, ultimately boosting their chances of success in competitions.
Recognizing Common Patterns in Judges’ Feedback

Analyzing judges’ feedback for common patterns can yield invaluable insights into areas of strength and weakness. Competitors should look for recurring comments that highlight specific aspects of their BBQ entries, including flavor profiles, cooking techniques, or presentation styles.
One effective approach for identifying trends is to create a judges’ feedback spreadsheet or database. This organization facilitates quick categorization and pattern recognition, enabling rapid responses. For instance, if multiple judges highlight the smokiness of a pulled pork entry as a standout characteristic, it indicates a strength to emphasize in future competitions.
Conversely, if feedback consistently points to problems like overcooked brisket or dry ribs, these weaknesses should be prioritized for improvement. Competitors can also compare their feedback against their peers to gain a broader perspective on industry standards and expectations, further guiding their development.
Furthermore, tracking judges’ scores across various categories can reveal essential performance metrics. By monitoring scores over time, competitors can evaluate their progress and determine whether adjustments made in response to feedback lead to better results.
By systematically analyzing judges’ feedback for trends, BBQ competitors can make informed decisions regarding where to concentrate their efforts, ultimately enriching their chances of success in upcoming competitions.
Transforming Judges’ Feedback into Measurable Data for Analysis
Converting qualitative judges’ feedback into quantifiable data can significantly enhance analysis and tracking efforts. One effective approach is to establish a scoring system that translates comments into numerical values. For instance, assigning scores from 1 to 10 for taste, tenderness, and presentation can provide a clear snapshot of performance across these critical areas.
By aggregating and averaging scores from multiple judges, competitors can establish an overall performance benchmark. This quantification highlights specific strengths and weaknesses, allowing for targeted improvements. For example, if the average score for taste significantly surpasses that for tenderness, this indicates a focus area for enhancing cooking techniques to improve the latter aspect.
Data analysis tools like Excel or specialized BBQ scoring software can aid in visualizing this data, simplifying trend identification over time. Competitors can create charts or graphs to illustrate their performance across competitions, showcasing improvements or ongoing issues in a clear format.
Additionally, conducting sentiment analysis on written feedback can provide a deeper understanding of how judges perceive specific elements of a competitor’s entries. By categorizing comments as positive, negative, or neutral and analyzing the proportions of each, competitors can gain insights into the overall perception of their BBQ.
Quantifying judges’ feedback not only simplifies the analysis process but also enables competitors to track their progress and effectively communicate improvements to their teams and stakeholders, ultimately driving better outcomes in future competitions.
Expert Approaches for Analyzing BBQ Competition Feedback
Incorporating Insights from BBQ Experts
To enhance the understanding of how to analyze BBQ competition feedback, integrating expert opinions from seasoned competitors can be incredibly beneficial. Successful BBQ champions often have practical insights gained from their experiences that can guide newcomers in refining their approaches.
For example, a winner of a prominent BBQ competition may share that they meticulously document all feedback received after each event. They might analyze comments to identify trends across multiple competitions, helping them pinpoint consistent strengths and weaknesses. This practice of systematic feedback evaluation serves as a model for less experienced competitors seeking to enhance their performance.
Experts may also emphasize the importance of networking and seeking mentorship within the BBQ community. Engaging with experienced peers often leads to the sharing of strategies and techniques for effectively analyzing feedback. For instance, they might recommend establishing peer review sessions where competitors can present their entries and receive constructive criticism from fellow BBQ enthusiasts.
Incorporating these expert strategies not only aids in analyzing feedback but also fosters a collaborative environment that encourages learning and growth within the BBQ community. Drawing on insights from seasoned competitors can significantly elevate an individual’s ability to interpret feedback and implement effective, actionable changes.
Leveraging Professional Analysis Tools for Enhanced Insights
For BBQ competitors serious about analyzing competition feedback, utilizing professional analysis tools can streamline the process and provide comprehensive insights. Numerous software options cater to the unique needs of BBQ enthusiasts, allowing for more efficient data management and analysis.
One highly recommended tool is the BBQ Scorecard, specifically designed for BBQ competitions. This platform allows competitors to input scores and comments from judges, creating a centralized database for easy access and review. This tool can assist competitors in tracking their performance over time, helping them identify patterns and make informed decisions regarding future entries.
General data analysis software, such as Tableau or Google Data Studio, can also be employed to visualize feedback data. These platforms can transform raw feedback into interactive dashboards that highlight crucial metrics, simplifying the digestion of information and uncovering actionable insights.
Competitors should also consider project management tools like Trello or Asana to help organize and prioritize feedback. By structuring feedback into actionable tasks, competitors can create a clear roadmap for improving their BBQ entries based on insights gained from analysis.
Incorporating these professional analysis tools can significantly enhance the efficiency and effectiveness of feedback analysis, enabling BBQ competitors to maximize their potential for success in future competitions.
Gaining Expertise Through Workshops and Seminars
Attending workshops and seminars led by BBQ experts offers numerous advantages for those seeking to enhance their skills in feedback analysis. These events provide a platform for learning from seasoned professionals who share their experiences and techniques in interpreting competition feedback.
Key benefits of attending such workshops include:
- Access to expert knowledge: Gain insights from industry leaders who have successfully navigated the competition landscape.
- Networking opportunities: Connect with fellow BBQ enthusiasts and competitors, fostering collaborative learning and mutual support.
- Hands-on practice: Engage in interactive sessions where you can apply feedback analysis techniques in real-time.
- Exposure to new tools: Discover the latest analysis software and methods used by professionals to enhance their feedback interpretation.
- Inspiration and motivation: Learn firsthand about the strategies of successful competitors, which will invigorate your passion and drive.
- Q&A sessions: Get direct answers to specific questions regarding analyzing feedback or improving your BBQ.
- Takeaways: Leave with valuable resources, including guides and templates, to apply in your feedback analysis process.
Overall, participating in expert-led workshops can equip BBQ competitors with the knowledge, tools, and connections needed to elevate their approach to feedback analysis, ultimately enhancing their performance in competitions.
Comprehensive Analysis of Feedback from Participants and Spectators
Strategically Categorizing Feedback Sources
To gain a thorough understanding of BBQ competition feedback, it is essential to categorize the sources into distinct groups. By differentiating insights from participants and spectators, organizers can analyze varying perspectives regarding the event’s organization and overall experience.
Feedback from participants typically centers around elements such as registration processes, competition flow, and overall satisfaction throughout the event. Analyzing this feedback can unveil critical areas for improvement, enabling organizers to streamline logistics and create a more enjoyable experience for competitors. For example, if participants report difficulties with the registration process, this feedback can prompt organizers to reassess their systems and make enhancements for better efficiency.
Conversely, spectator feedback provides valuable insights into the entertainment value, atmosphere, and accessibility of the event. Spectators may comment on aspects like the variety of food offerings, entertainment options, and the overall ambiance of the venue. Understanding this perspective can help organizers refine future events to attract more attendees and create memorable experiences for everyone involved.
By categorizing feedback sources, organizers can concentrate on specific areas of concern and develop targeted strategies that address the unique needs of both participants and spectators. This dual approach will enhance the overall success of future BBQ competitions and ensure a more satisfying experience for all stakeholders.
Conducting a Thorough Analysis of Participant Experiences
Feedback from participants is crucial for improving future BBQ competitions, as it directly relates to the competitors’ experiences. Organizers should analyze this feedback with a keen focus on comments regarding registration, event flow, and overall satisfaction.
For example, if participants frequently mention confusion during the registration process, it signals a need for clearer instructions or a more user-friendly registration system. Streamlining this process not only enhances the competitor experience but also sets a positive tone for the entire event, fostering enthusiasm and engagement among participants.
Event flow is another critical aspect; feedback regarding delays or disorganization needs to be addressed, along with logistical issues that require attention. By investigating comments about the schedule, time management, and communication during the event, organizers can identify areas for improvement and create a smoother experience for participants in future competitions.
Understanding overall satisfaction is the culmination of various factors, and comprehending what drives it can help organizers make informed decisions. Conducting follow-up surveys after the event can provide deeper insights into competitors’ feelings about their experiences. By effectively analyzing participant feedback, organizers can create an environment that fosters satisfaction and encourages competitors to return for future events.
Leveraging Spectator Insights to Enhance Future Events
Spectator feedback can provide valuable insights into the overall atmosphere of BBQ competitions, assisting organizers in refining the event’s appeal to a broader audience. By examining this feedback, organizers can identify aspects that resonate with spectators and those that may require enhancement.
For example, comments regarding the entertainment value can reveal whether spectators found the event engaging and enjoyable. If feedback indicates a lack of engaging activities or entertainment options, organizers can explore adding live music, cooking demonstrations, or interactive booths to elevate the overall experience. Such additions can significantly enhance enjoyment for all attendees.
The venue’s atmosphere is another critical component; feedback regarding layout, cleanliness, and accessibility can guide organizers in creating a better environment. If spectators encounter difficulties navigating the venue, adjustments can be made to enhance accessibility, ensuring a welcoming atmosphere for all.
Furthermore, understanding the demographics of the spectators can help tailor future competitions to meet their interests and preferences. By leveraging spectator insights, organizers can create a more enjoyable and memorable experience for attendees, ultimately boosting attendance and participation in future BBQ competitions.
Identifying Common Themes in Participant and Spectator Feedback
Analyzing feedback from both participants and spectators can help organizers identify common themes that guide improvements in event planning and execution. By systematically reviewing comments and categorizing them into key areas, organizers can pinpoint recurring issues or suggestions that warrant attention.
Common themes may include logistical concerns, such as parking, registration, or event flow issues. If multiple participants express frustration over similar issues, it clearly indicates that changes are necessary to enhance the event experience. Similarly, spectator feedback regarding seating arrangements or visibility can guide organizers in creating a more spectator-friendly environment.
Positive themes should also be highlighted. If feedback consistently praises exceptional food offerings or engaging activities, those features should be emphasized in future promotions and events. Recognizing strengths allows organizers to build upon what is already working well, ensuring that future competitions resonate with both participants and spectators.
Tracking these common themes over multiple events can provide valuable insights into trends and opportunities for improvement. By continuously refining the event based on feedback, organizers can create a more successful BBQ competition that meets the needs and expectations of all stakeholders.
Assessing the Impact of Feedback on Event Changes
To evaluate the effectiveness of changes implemented based on feedback, it is essential to measure the impact on participant and spectator satisfaction in subsequent events. This can be accomplished using various techniques, including follow-up surveys, performance metrics, and direct observations.
Conducting follow-up surveys after future competitions can provide insights into how participants and spectators perceive the changes made. Asking specific questions related to areas where improvements were implemented can help gauge the effectiveness of those adjustments. For example, if organizers revamped the registration process, feedback regarding its ease and efficiency can indicate whether the changes were successful.
Additionally, tracking insights and performance metrics can provide valuable data on attendance rates, participant engagement, and overall satisfaction. Comparing these metrics before and after changes were made will help organizers determine whether their efforts have resulted in tangible improvements. This data-driven approach can inform future decisions and adjustments.
Direct observations during the event can also reveal how participants and spectators respond to changes. Organizers should pay attention to body language, interactions, and the overall atmosphere to gauge satisfaction levels. By combining these methods, organizers can comprehensively measure the impact of feedback-based changes and continue refining future BBQ competitions.
Leveraging Feedback to Enhance BBQ Techniques
Adapting Recipes Based on Constructive Feedback
Utilizing feedback from BBQ competitions to modify recipes is a practical and effective means of enhancing flavor and texture. By meticulously analyzing judges’ comments and identifying recurring themes, competitors can target specific areas for improvement in their dishes.
For instance, if judges often suggest adding more seasoning to BBQ sauces, competitors can experiment with their recipes to incorporate bolder flavors. This may involve adjusting seasoning ratios, introducing new ingredients, or even researching regional flavor profiles to create a competitive edge in their offerings.
Feedback can also illuminate issues with cooking techniques. If multiple judges point out that a particular cut of meat is consistently overcooked, competitors should reconsider their cooking methods. This might involve recalibrating cooking times, temperatures, or exploring alternative techniques to achieve optimal tenderness and flavor.
Moreover, being attentive to feedback regarding meat selection can lead to significant improvements. If judges express preferences for specific types of meat or cuts, competitors may want to adapt their sourcing strategies to align with these preferences. By making these adjustments based on constructive feedback, BBQ competitors can elevate their dishes and increase their chances of success in future competitions.
Enhancing Presentation Skills Through Feedback
Feedback can reveal specific areas where presentation techniques could be improved, significantly influencing the overall impact of BBQ dishes. Judges frequently provide valuable insights regarding appearance, garnishing, and serving style, all of which contribute to a dish’s visual appeal.
For example, if feedback indicates that a dish lacks color or vibrancy, competitors might consider incorporating fresh herbs or colorful garnishes to enhance visual appeal. Utilizing contrasting colors and textures can elevate a dish’s presentation, making it more enticing to judges and spectators alike.
Furthermore, attention to plating techniques can greatly affect how a BBQ dish is perceived. If judges mention that the presentation feels cluttered or unorganized, competitors should reevaluate their plating style. Adopting a minimalist approach and ensuring that each component of the dish is thoughtfully arranged can improve overall presentation quality and visual impact.
Feedback related to serving style is also crucial; if judges comment on portion sizes or the way food is presented, considering these insights can lead to a more appealing dining experience. By adapting presentation techniques based on feedback, BBQ competitors can create dishes that are not only delicious but also visually captivating, ultimately influencing judges’ scores and spectator enjoyment.
Exploring Innovative Cooking Methods through Feedback
Feedback from BBQ competitions can serve as a valuable resource for learning new cooking methods that enhance overall skills. Judges often share insights based on their experiences, highlighting areas where alternative techniques could yield better results.
For instance, if feedback suggests that a competitor’s smoked brisket lacked depth of flavor, exploring different smoking techniques might prove beneficial. Competitors could experiment with various wood types, smoking durations, or even incorporate marinades and rubs that complement the meat’s natural flavors to achieve a rich, satisfying taste.
Additionally, judges might comment on the necessity for improved cooking methods to achieve optimal tenderness. If feedback indicates that certain cuts are consistently tough, competitors can investigate alternative cooking methods, such as sous vide braising or reverse searing, which may yield better results in terms of texture and flavor.
Moreover, attending workshops or classes focused on specific cooking techniques can provide competitors with hands-on experience and expert guidance. These learning opportunities enable competitors to broaden their skill sets and better meet the expectations of judges in future competitions.
By leveraging feedback to explore and learn new cooking methods, BBQ competitors can continuously develop their skills and elevate their BBQ game, leading to greater success in competitions.
Research-Driven Advantages of Analyzing BBQ Competition Feedback
Elevating Performance in Future Competitions
Analyzing feedback can significantly boost performance in upcoming BBQ competitions. By systematically reviewing feedback, competitors can uncover key areas for enhancement, ultimately leading to superior outcomes.
To effectively leverage feedback, competitors should focus on several actionable steps, including:
- Reviewing scores and comments from judges to identify strengths and weaknesses.
- Implementing suggested changes in recipes, cooking techniques, and presentation styles.
- Tracking performance over time to measure improvement in specific areas.
- Soliciting feedback from peers and mentors to gain diverse perspectives on entries.
By following these steps, competitors can create a roadmap for continuous improvement. Regularly analyzing feedback ensures that they remain adaptable and responsive, positioning themselves for success in future BBQ competitions.
Enhancing Customer Satisfaction at BBQ Events
Analyzing feedback contributes to higher customer satisfaction at BBQ events by aligning with the expectations of both participants and spectators. By actively seeking and implementing feedback, organizers can create an environment that resonates with attendees.
For example, if participant feedback highlights challenges with registration or event flow, addressing these issues can improve the overall experience and reduce participant frustration. Similarly, understanding spectator preferences regarding entertainment options can help organizers curate a more enjoyable atmosphere for all attendees.
Moreover, positive feedback should be celebrated and amplified. If spectators express delight over exceptional BBQ offerings, organizers can promote these features in marketing materials, attracting more attendees in the future and building a positive reputation.
Ultimately, by viewing feedback as a valuable tool for improvement, organizers can create BBQ events that prioritize customer satisfaction, fostering loyalty and encouraging repeat participation from both competitors and spectators.
Fostering a Strong BBQ Community Through Feedback Analysis
Expert analysis of how feedback fosters a sense of community among BBQ enthusiasts reveals its crucial role in collaboration and shared learning. Feedback loops encourage participants to engage with one another, exchanging insights and experiences that strengthen the BBQ community.
For instance, when competitors come together to share their feedback experiences, they create opportunities for mentorship and collaboration. Seasoned competitors might offer guidance to newcomers, sharing strategies for interpreting feedback and improving BBQ techniques.
Additionally, fostering a culture of open communication around feedback encourages competitors to support one another and celebrate successes. This sense of camaraderie can lead to lasting friendships and collaborations, further enriching the BBQ scene and creating a welcoming environment for all.
By cultivating an environment where feedback is valued and shared, BBQ enthusiasts can build a vibrant community that thrives on collaboration, knowledge-sharing, and mutual support, ultimately elevating the BBQ experience for everyone involved.
Strategically Utilizing Feedback for Event Planning
Informed Decision-Making for Future Competitions
Utilizing feedback to inform decisions regarding future BBQ competitions is vital for enhancing the overall event experience. Organizers should carefully analyze feedback from previous competitions to identify trends, preferences, and areas for improvement.
For example, if participants indicate a preference for a specific event format, such as longer cook times or more relaxed judging criteria, organizers can adapt future competitions to align with these preferences. Similarly, feedback regarding timing and venue can inform decisions about scheduling and location selection, considering the needs of both participants and spectators.
Moreover, addressing logistical feedback can lead to more efficient event planning. If participants express concerns about parking or registration procedures, addressing these issues in future events can significantly improve satisfaction and minimize potential frustrations among attendees.
By actively incorporating feedback into event planning, organizers can create competitions that resonate with both participants and spectators, ultimately driving greater engagement and satisfaction in BBQ competitions.
Budget Allocation Driven by Feedback Insights
Feedback can significantly influence budget allocation for BBQ competitions, assisting organizers in pinpointing areas where additional investment could enhance the event experience. By analyzing feedback related to perceived value, organizers can prioritize spending on elements that matter most to participants and spectators.
For instance, if feedback suggests that participants desire more diverse food options, allocating budget towards catering can elevate the event experience. Similarly, if spectators express a need for improved entertainment, investing in live music or interactive activities can enhance overall engagement during the competition.
Furthermore, feedback regarding prior expenditures can guide future budgeting decisions. Organizers can evaluate the effectiveness of previous investments to allocate resources more efficiently in upcoming competitions, aligning their approaches with the desires of participants and spectators.
By strategically budgeting based on feedback, organizers can ensure that their investments enhance the overall success and enjoyment of BBQ competitions, leading to a more satisfying experience for all attendees.
Refining Marketing and Promotion Based on Feedback Analysis
Tailoring marketing efforts based on feedback regarding event awareness and appeal can significantly boost attendance and participation in BBQ competitions. By understanding what resonates with the target audience, organizers can refine promotional materials and outreach strategies.
For instance, if feedback indicates that potential participants are unaware of registration dates or entry requirements, improving communication through targeted marketing campaigns can increase awareness and participation. Utilizing social media platforms and local advertising can help spread the word and effectively engage potential competitors.
Moreover, highlighting positive feedback from previous competitions can serve as a powerful marketing tool. Showcasing testimonials from satisfied participants or exciting moments from past events can pique the interest of potential attendees and drive registrations for future competitions.
Ultimately, by leveraging feedback to refine marketing strategies, organizers can create compelling campaigns that resonate with their audience, driving greater participation and success for future BBQ competitions.
Challenges in Effectively Analyzing Feedback
Overcoming Vague or Contradictory Feedback
Analyzing feedback that is vague or contradictory can present significant challenges for BBQ competition organizers. When feedback lacks clarity or provides opposing viewpoints, it becomes difficult to draw meaningful conclusions or implement effective changes.
One strategy to tackle this challenge is to develop follow-up questions that encourage respondents to elaborate on their comments. For example, if a judge provides vague feedback regarding flavor without specifying which aspects need improvement, organizers can reach out for clarification to gain a deeper understanding of the feedback.
Additionally, creating a structured feedback form with specific criteria can help minimize vagueness. By guiding respondents towards providing detailed comments, organizers can collect more actionable insights that lead to meaningful improvements.
When confronted with contradictory feedback, it is essential to weigh the perspectives of multiple stakeholders. Organizers should consider the context of each comment and assess how consistent themes emerge across different feedback sources. This multifaceted approach can help reconcile opposing views and guide informed decision-making.
By developing strategies to clarify vague feedback and manage contradictory responses, organizers can effectively navigate challenges and glean valuable insights that lead to meaningful improvements in BBQ competitions.
Efficiently Managing Large Volumes of Feedback
Handling extensive volumes of feedback can be overwhelming for BBQ competition organizers; however, effective management strategies can streamline the process. Utilizing data management software allows organizers to categorize and analyze feedback efficiently, ensuring that no valuable insights are overlooked.
One effective method is to create a centralized feedback database, where all responses are organized by theme, source, and relevance. This organization enables organizers to quickly access specific comments and track trends over time. Additionally, employing tagging systems can help categorize feedback, making it easier to identify common themes and areas for improvement.
Organizers can also consider assigning dedicated team members to manage the collection and analysis of feedback. By distributing the workload, teams can ensure a thorough review of all responses while preventing burnout and maintaining focus on critical insights.
Furthermore, implementing automated feedback collection methods, such as online surveys or digital platforms, can significantly reduce the administrative burden of managing feedback. These tools often come with built-in analytics features that streamline data analysis, enabling organizers to focus on implementing changes rather than manually sifting through responses.
By employing effective feedback management strategies, organizers can navigate large volumes of feedback and extract the insights needed to drive continuous improvement in BBQ competitions.
Addressing Bias in Feedback Collection and Analysis
Identifying and mitigating bias in feedback collection and analysis is crucial for ensuring the reliability of insights derived from BBQ competitions. Bias can skew perceptions and result in an inaccurate understanding of participants’ and spectators’ experiences.
To address bias, organizers should develop a clear understanding of common biases to watch for, including:
- Confirmation bias: Focusing solely on feedback that aligns with preconceived notions.
- Sampling bias: Collecting feedback from a non-representative group of participants or spectators.
- Response bias: Encouraging responses that align with the expectations of judges or organizers.
- Social desirability bias: Respondents providing answers they believe are more socially acceptable rather than their true opinions.
Mitigating these biases requires implementing transparent and neutral feedback collection methods. Organizers should ensure questions are worded objectively and that respondents understand they can provide honest opinions without fear of repercussions.
Additionally, employing diverse feedback collection strategies can help balance perspectives and minimize bias. Engaging with a broad range of participants and spectators will yield a more representative dataset for analysis.
By actively addressing bias in feedback collection and analysis, BBQ competition organizers can ensure that insights are accurate and reflect the experiences of both participants and spectators.
Successfully Implementing Changes Based on Feedback
Prioritizing Feedback for Meaningful Action
Determining which feedback points are most critical and should be addressed first is crucial for the effective implementation of changes in BBQ competitions. Organizers can adopt a structured approach to prioritize feedback based on urgency and potential impact.
One effective method is to utilize a scoring system to rank feedback. Organizers can assign numerical values to feedback points based on factors such as the frequency of comments, the severity of issues raised, and the potential benefits of implementing changes. This quantitative approach allows for clear differentiation between high-priority feedback and less critical suggestions, ensuring that the most pressing issues receive attention first.
Additionally, engaging with key stakeholders, including participants, judges, and team members, can provide valuable insights into which feedback points should take precedence. Gathering input from multiple perspectives can help ensure that decisions align with the needs and expectations of all parties involved, fostering a collaborative environment.
Once feedback points are prioritized, developing an action plan outlining specific steps for addressing each point is crucial. This plan should include timelines, responsibilities, and measurable outcomes to track progress effectively, ensuring accountability and focus.
By prioritizing feedback and implementing a structured action plan, BBQ competition organizers can ensure that changes are meaningful, impactful, and reflective of stakeholder input, ultimately enhancing the overall quality of future events.
Effectively Communicating Changes to Stakeholders
Effectively communicating changes made based on feedback to participants and spectators is crucial for fostering transparency and building trust within the BBQ community. Organizers should develop clear and concise communication plans to inform stakeholders of the improvements made.
One effective approach is to utilize email newsletters or social media announcements to share updates with participants and spectators. This enables organizers to reach a broad audience and ensure that everyone is informed of the changes implemented based on their feedback, reinforcing the importance of community input.
In addition to general announcements, organizing follow-up communication or Q&A sessions can provide stakeholders with an opportunity to ask questions and discuss changes in more detail. This interactive approach fosters engagement and demonstrates that organizers value the input and opinions of participants and spectators.
Providing a summary of the feedback received, along with the changes made, can also enhance transparency and accountability. By showcasing how feedback directly influenced the decision-making process, organizers can reinforce the importance of community input and encourage ongoing engagement in future events.
Ultimately, effective communication of changes ensures that stakeholders feel heard and valued, fostering a sense of collaboration and commitment to continuous improvement in BBQ competitions.
Monitoring the Impact of Changes on Future Events
Monitoring the effects of changes made based on feedback is critical for making necessary adjustments and further refinements as needed. Organizers should establish a systematic approach to track the outcomes of changes implemented in response to feedback.
One effective strategy is to utilize follow-up surveys after future competitions, asking participants and spectators to evaluate their experiences based on the changes made. This feedback can provide valuable insights into whether changes positively impacted satisfaction and engagement, informing future decisions.
Additionally, performance metrics, such as attendance rates, participant engagement, and overall satisfaction scores, can serve as indicators of success. Comparing these metrics before and after changes were implemented can help organizers determine whether their efforts have led to measurable improvements, guiding future planning.
Direct observations during events can also provide qualitative insights into how participants and spectators respond to changes. Observing interactions, body language, and the overall atmosphere can offer valuable insights into the effectiveness of implemented strategies, helping organizers understand the real-time impact of their changes.
By establishing a comprehensive monitoring system, BBQ competition organizers can evaluate the impact of changes and make informed adjustments as needed. This continuous feedback loop fosters a culture of improvement, ensuring that BBQ competitions evolve to meet the needs of both participants and spectators.
Frequently Asked Questions
What types of feedback should I collect at BBQ competitions?
Collect feedback from judges, participants, and spectators. Each group provides unique insights into the competition’s strengths and areas for improvement, ensuring a comprehensive evaluation.
How can I ensure the feedback I collect is reliable?
Implement structured questions, ensure anonymity where needed, and check for bias in responses to enhance the reliability of the feedback collected, leading to actionable insights.
What are some effective methods for collecting feedback?
Common methods include surveys, interviews, and utilizing digital platforms to gather responses efficiently and reach a broader audience, enhancing engagement. How can I effectively analyze judges’ feedback?
Understand judging criteria, identify common trends, and quantify feedback to convert qualitative insights into actionable data for improvement, guiding future competitions.
What should I do with participant feedback?
Analyze participant feedback to improve aspects such as registration flow and overall satisfaction, with a focus on enhancing the competitive experience and addressing concerns.
How can spectator feedback be leveraged?
Utilize spectator insights to refine the event’s appeal by evaluating entertainment value, venue atmosphere, and accessibility for future competitions, ensuring a positive experience for all attendees.
What are some common challenges in analyzing feedback?
Challenges include handling vague or contradictory feedback, managing large volumes of responses, and addressing bias in the collection process to maintain data integrity.
How can I prioritize feedback for action?
Implement a scoring system to rank feedback based on urgency and potential impact, then develop an action plan to address critical points effectively and efficiently.
How should I communicate changes based on feedback?
Effectively communicate changes through newsletters, social media, and follow-up sessions to keep stakeholders informed and engaged in the ongoing improvement process.
How can I monitor the effectiveness of changes made?
Use follow-up surveys, performance metrics, and direct observations to track the impact of changes and determine further adjustments needed for continuous improvement.
Connect with us on Facebook!
The Article How to Analyze BBQ Competition Feedback: A US Guide appeared first on https://pitmastersarsenal.com
The Article Analyze BBQ Competition Feedback: A Guide for the US Was Found On https://limitsofstrategy.com
-

Herbal Butter Guide: Essential Tips for the UK
Comprehensive Guide to Selecting Ideal Herbs for Your Artisan Butter Creations
Explore the Best UK Herbs to Enhance Your Butter Flavors
Crafting outstanding herbal butter necessitates a thoughtful selection of the most appropriate herbs, which play a pivotal role in enhancing your culinary creations. Within the UK, various herbs are revered for their aromatic properties and adaptability, making them perfect for infusing into butter. Fresh herbs not only impart unique flavors but also add vibrant colors and enticing fragrances to your butter masterpieces. The top five herbs frequently utilized in the UK are:
- Parsley – A quintessential herb celebrated for its fresh, grassy taste.
- Chives – Recognized for their subtle onion-like flavor, chives enhance dishes without overpowering them.
- Thyme – This herb provides earthy notes, making it ideal for enriching savory recipes.
- Rosemary – Renowned for its robust flavor, rosemary pairs beautifully with various meats.
- <a href="https://mcrtherapies.co.uk/basil-boosts-immunity-discover-natures-hidden-benefits/">Basil</a> – A fragrant herb that contributes a sweet and slightly peppery taste, perfect for diverse culinary uses.
These herbs thrive in the temperate climate of the UK, making them readily available to both novice and seasoned gardeners, as well as shoppers at local markets. When selecting herbs for your butter, it’s essential to assess their distinct flavor profiles and how well they harmonize with the dishes you plan to create.
Where to Find Fresh Herbs in the UK?
Sourcing fresh herbs in the UK can be a delightful journey, whether you prefer visiting local farmers’ markets, browsing supermarket shelves, or cultivating a personal herb garden. The freshness of the herbs you choose is crucial when making herbal butter, as it greatly influences both the flavor and aroma. Local markets often feature freshly harvested herbs, enabling you to connect with growers and learn about their cultivation practices. While supermarkets typically provide a wide variety of herbs, opting for organic options is recommended whenever possible, as they usually deliver enhanced freshness and flavor.
If you’re interested in growing your own herbs, start with pots on a sunny windowsill or create a small herb garden patch. Many herbs require minimal upkeep and thrive with basic care. To ensure a plentiful harvest, it’s vital to supply them with adequate sunlight and water. By sourcing fresh herbs locally or growing them yourself, you can significantly improve the quality of your herbal butter, all while enjoying the satisfaction of using homegrown ingredients in your culinary endeavors.
How to Effectively Prepare Herbs for Butter Infusion?
Careful preparation of herbs is essential to ensure they release their full flavor into the butter during the infusion process. This meticulous handling transforms the herbs into aromatic components that enrich the taste of your butter considerably. Begin by rinsing the herbs thoroughly under cool, running water to remove any dirt or residue. After washing, gently pat them dry with a clean towel or allow them to air dry naturally.
The subsequent step involves finely chopping the herbs, which increases their surface area and encourages the release of essential oils during infusion. Using a sharp knife or herb scissors is recommended for this task. Here’s a simple checklist of preparation steps to guarantee your herbs are ready for infusion:
- Rinse the herbs in cool water to eliminate any soil.
- Pat dry or let the herbs air dry completely.
- Trim away any thick stems and discard them.
- Finely chop the herbs to maximize flavor release during infusion.
By adhering to these steps, you will effectively prepare your herbs, ensuring they impart their delightful flavors beautifully to your herbal butter.
Best Practices for Storing and Preserving Your Herb-Infused Butter
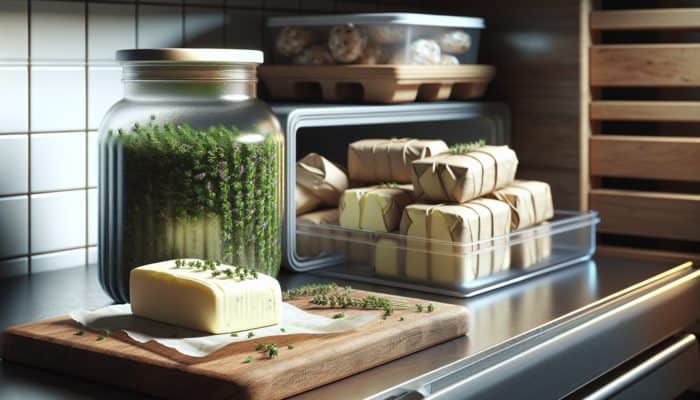
Properly storing herb-infused butter is essential for preserving its freshness and flavor over time. When prepared correctly, it can remain viable for several weeks in the refrigerator and even months in the freezer. For optimal storage, transfer your butter into an airtight container, which prevents exposure to air and light that can lead to quality degradation over time.
If you prefer to store your butter in logs or other shapes, consider wrapping it in parchment paper or foil. When freezing, it’s advantageous to portion the butter into smaller servings, which allows you to thaw only what you need at any given time. Here are some effective storage tips to prolong the life of your herbal butter:
- Utilize airtight containers to prevent oxidation and flavor loss.
- Label containers with the date of preparation and types of herbs used.
- Refrigerate for up to two weeks for short-term use.
- Store in the freezer for extended storage, thawing as needed.
These practices not only help maintain flavor integrity but also enable you to enjoy your homemade herbal butter long after its initial creation.
Professional Techniques for Crafting Exceptional Herbal Butter
Preferred Methods of Culinary Experts in the UK for Creating Herbal Butter
In the UK, culinary experts employ various techniques to produce herbal butter that accentuates the rich flavors of fresh herbs. A favored method is slow infusion, where softened butter is combined with finely chopped herbs and left to steep for several hours or overnight. This approach allows the flavors to meld, developing a deeper aromatic profile that enhances the overall taste of the butter. Many chefs endorse this technique, as it captures the natural essence of the herbs, transforming the butter into a flavor powerhouse.
Another commonly used technique by chefs is blending, which ensures a consistent mixture of butter and herbs. Utilizing a food processor enables chefs to seamlessly integrate the herbs into the butter, resulting in a smooth texture that is easy to spread. For example, renowned chef Yotam Ottolenghi often combines both slow infusion and blending methods to create vibrant herb-infused butters that significantly elevate his dishes.
By adopting these expert techniques, you can enhance the flavor of your herbal butter, ensuring it stands out as a gourmet addition to your dining experience.
How to Enhance the Flavor Profiles of Your Herbal Butter?

Enhancing the flavor profiles of your herbal butter requires creativity and a willingness to experiment. Combining various herbs can yield exciting results, allowing you to craft a unique butter that perfectly complements specific dishes. For instance, blending thyme with rosemary can create a robust butter ideal for meat dishes, while a mix of basil and chives can exquisitely elevate the flavors of delicate fish.
In addition to herb combinations, consider incorporating spices or citrus zest into your herbal butter. A sprinkle of smoked paprika can add a gentle warmth, while lemon or orange zest can infuse brightness into the overall flavor profile. Here are some actionable steps to experiment with flavor enhancement:
- Combine complementary herbs for a balanced flavor experience.
- Add spices like paprika or cayenne for an extra kick.
- Incorporate zest from citrus fruits to enliven flavors.
- Utilize garlic or shallots for added depth and complexity.
By following these strategies, you can create herbal butter that not only complements but also elevates your culinary creations, ensuring that every dish you serve is a memorable experience.
What are the Most Effective Methods for Storing Herbal Butter?
Properly storing your herbal butter is vital for preserving its flavor and freshness. In the UK, the most common and effective storage methods include refrigeration and freezing. For short-term storage, refrigerating the butter in an airtight container is ideal, allowing you to enjoy it within up to two weeks while retaining its aromatic qualities.
For longer storage, freezing is the preferred method, as it can extend the butter’s lifespan for several months. It’s advisable to portion the butter into small servings before freezing, allowing you to thaw only what you need at any given time. Consider using a silicone mould for shaping and freezing, as this facilitates easy removal once the butter is frozen.
Furthermore, ensure that you label your containers clearly with the date and types of herbs used, as this will help you track freshness. Adhering to these best practices will ensure that your herbal butter remains a delightful addition to your kitchen for weeks or even months ahead.
Detailed Process for Crafting Herbal Butter
How to Achieve the Perfect Consistency for Your Butter?
Softening butter is the initial and crucial step in creating herbal butter, as it simplifies the mixing process with herbs significantly. Achieving the right consistency is essential; the butter should be pliable yet not entirely melted. There are several effective methods to soften butter:
- Allow the butter to sit at room temperature for approximately 30–60 minutes.
- Cut the butter into small cubes to expedite the softening process.
- Microwave on a low power setting (10-15 seconds) for quick softening.
- Grate the butter using a box grater for immediate softening.
Selecting the method that suits your time constraints is critical. For example, letting butter sit at room temperature provides the best texture for mixing, while grating is effective for immediate use. Softened butter can be easily combined with herbs, ensuring a consistent flavor throughout the mixture.
What is the Best Technique for Mixing Herbs with Butter?
Mixing the herbs with the softened butter is a pivotal step in the process of making herbal butter. Achieving a uniform distribution of flavors is crucial for the final product. Begin by placing the softened butter in a mixing bowl and gradually incorporate the finely chopped herbs. Use a spatula or fork to thoroughly blend the ingredients, ensuring that every portion of butter is infused with the delightful herbaceous notes.
For an even smoother consistency, consider utilizing a food processor. This equipment can efficiently combine the butter and herbs, resulting in a creamy texture that is easy to apply. Remember to taste the mixture as you progress, adjusting the quantity of herbs to suit your individual palate.
The significance of this step cannot be overstated; thorough mixing is essential to ensure that your herbal butter provides a consistent flavor profile in every spoonful or swipe.
What are the Different Techniques for Shaping Butter?
Shaping your herbal butter not only enhances its visual appeal but also aids in portion control. There are several creative techniques to shape butter, each offering unique presentation advantages. One of the most traditional methods is rolling the butter into logs using parchment paper. This technique allows for easy slicing when serving.
Another popular approach is to use molds, which can create decorative shapes ideal for entertaining. Silicone molds are especially useful, as they provide flexibility for easy removal after the material has frozen. Alternatively, you can use ice cube trays to create small, individual servings that are ready to use. Here are a few shaping techniques to consider:
- Roll into logs using parchment paper for effortless slicing.
- Utilize silicone molds for aesthetically pleasing shapes.
- Employ ice cube trays for convenient single servings.
- Pipe into decorative shapes using a piping bag for an elegant presentation.
These techniques not only make your herbal butter visually appealing but also practical for various culinary applications.
What are the Best Practices for Storing and Preserving Herbal Butter?
Storing and preserving your herbal butter effectively is crucial for maintaining its flavor and freshness. After shaping your butter, selecting the appropriate storage method is important. If you plan to use the butter within a few weeks, storing it in a refrigerator in an airtight container is ideal. This will keep the butter fresh and flavorful while ensuring easy access.
For longer storage, freezing is the best option. Ensure that you wrap the butter tightly in plastic wrap or place it in an airtight container to prevent freezer burn. It’s beneficial to portion the butter before freezing for convenience, allowing you to thaw only what you need at any given time. Here’s a summary of effective storage practices:
- Refrigerate in an airtight container for up to two weeks.
- Store in the freezer for longer-term storage, wrapping tightly to prevent freezer burn.
- Portion the butter before freezing for convenience.
- Label containers with the date and types of herbs used.
By implementing these storage practices, you will ensure that your herbal butter remains a delightful addition to your culinary repertoire for an extended period.
How Does Herbal Butter Enrich UK Culinary Traditions?
Which Dishes Are Enhanced by the Addition of Herbal Butter?
The inclusion of herbal butter can significantly elevate a wide range of dishes within UK cuisine, providing depth and richness that enhance the overall dining experience. Classic meals, such as roast beef, gain immense flavor from rosemary- or thyme-infused butter, imparting aromas and tastes that beautifully complement the roasted meat.
Grilled fish, a favorite in coastal regions, becomes even more delectable when paired with lemon and chive butter, introducing a zesty freshness that harmonizes perfectly with delicate flavors. Additionally, traditional scones can be transformed from simple to sublime when served with herb-infused butter, offering a unique twist on this cherished British treat.
The versatility of herbal butter means it can be seamlessly incorporated into numerous dishes, making it an invaluable addition to your culinary toolkit. Whether enhancing a Sunday roast or elevating afternoon tea, herbal butter has the potential to transform everyday meals into extraordinary experiences.
How to Pair Herbal Butter with Local UK Ingredients?
Combining herbal butter with local ingredients is a fantastic way to celebrate the rich flavors of UK produce. For instance, pairing parsley-infused butter with freshly harvested Cornish crab enhances the seafood’s natural sweetness. In contrast, garlic and herb butter can elevate seasonal vegetables like asparagus or new potatoes, significantly enriching their flavor profiles.
Cheddar cheese, a staple in British cuisine, pairs wonderfully with thyme or chive-infused butter, creating a complementary spread that enhances the cheese’s rich, nutty flavors. Seasonal ingredients, such as spring greens and autumn root vegetables, especially shine when sautéed in herbal butter, showcasing the versatility of this culinary creation.
By thoughtfully pairing herbal butter with local ingredients, you create dishes that not only highlight the best of British produce but also offer a unique dining experience that reflects the region’s culinary heritage.
In What Ways Can Herbal Butter Elevate Traditional UK Recipes?
Herbal butter acts as a transformative ingredient that can elevate traditional UK recipes, adding layers of flavor and sophistication. For example, a classic shepherd’s pie can be enhanced with garlic and rosemary-infused butter, enriching the filling with aromatic notes that elevate this comforting dish to new heights.
Similarly, adding basil-infused butter to a simple pasta dish can elevate it into a gourmet meal. The infusion of fresh herbs enhances the pasta, allowing the flavors to meld beautifully. Even the iconic fish and chips can benefit from a drizzle of parsley and lemon butter, providing a refreshing twist to this beloved dish.
These enhancements not only improve the taste but also introduce an element of creativity, encouraging cooks to experiment with flavors and techniques. With herbal butter, even the simplest recipes can be transformed into extraordinary culinary experiences that delight the senses.
How Does Herbal Butter Complement British Tea Time Offerings?
Herbal butter can play a delightful role in enhancing the British tea time experience, particularly when served alongside scones and sandwiches. A spread of herb-infused butter on freshly baked scones adds a new dimension of flavor, beautifully complementing the sweetness of jam and clotted cream.
For sandwiches, a chive or dill-infused butter can elevate plain cucumber sandwiches from ordinary to extraordinary, delivering a refreshing burst of flavor with every bite. Furthermore, serving herbal butter on warm bread or toast during tea time can enhance the overall experience, transforming it into an indulgent afternoon treat.
Incorporating herbal butter into British tea time not only enriches these traditional offerings but also promotes creativity and exploration in this cherished ritual, making it more enjoyable for both guests and hosts alike.
Examining the Health Benefits of Herbal Butter in the UK
What is the Nutritional Value of Common UK Herbs?
The addition of herbs into herbal butter not only enhances flavor but also brings valuable nutritional benefits. Common UK herbs, such as parsley and thyme, are rich in vitamins, antioxidants, and essential oils that can support overall health. For instance, parsley is abundant in vitamin K, crucial for maintaining bone health, while thyme contains powerful antioxidants that may help protect against cellular damage.
Moreover, herbs like basil and rosemary offer anti-inflammatory properties, which can be beneficial for gut health and digestion. By incorporating these herbs into your butter, you not only amplify the taste but also enhance the nutritional profile of your culinary creations, making them a healthier choice for daily consumption.
The fusion of flavors and health benefits makes herbal butter a valuable addition to your diet, allowing you to enjoy delicious food while also supporting your well-being.
How Does Herbal Butter Contribute to a Balanced Diet?
Herbal butter can significantly support a balanced diet by providing essential nutrients in a delightful format. This type of butter enriches dishes that may otherwise lack flavor, encouraging individuals to include more vegetables, lean proteins, and whole grains in their meals.
When cooking with herbal butter, you can enhance the overall flavor of healthy ingredients, making them more appealing. For example, sautéing vegetables in garlic and rosemary-infused butter not only boosts their natural flavors but also promotes vegetable consumption, a key aspect of a balanced diet.
Furthermore, using herbal butter as a substitute for less healthy fats in cooking and baking provides a more nutritious alternative while still delivering richness and depth of flavor. By integrating herbal butter into your meals, you nurture a varied and balanced diet that is both enjoyable and health-conscious.
What Are the Health Benefits Associated with Fresh Herbs?
Incorporating fresh herbs into your cooking repertoire offers numerous health benefits, enhancing both the flavor of your dishes and supporting overall wellness. Fresh herbs are packed with essential vitamins and minerals; for instance, basil is noted for its antimicrobial properties, while oregano is rich in antioxidants that may help combat oxidative stress.
Utilizing fresh herbs in your butter can also improve digestion, as many herbs, such as fennel and mint, are recognized for their digestive benefits. Additionally, the anti-inflammatory properties found in herbs like turmeric and garlic can help reduce inflammation in the body, promoting overall better health.
By prioritizing fresh herbs in your cooking, you not only create delicious flavors but also enhance the nutritional value of your meals, contributing to a holistic approach to health and wellness.
How Can Herbal Butter Support Heart Health?
Herbal butter, particularly when infused with herbs known for their heart-healthy properties, can be a beneficial addition to a cardiovascular-conscious diet. Ingredients such as garlic and oregano have been linked to lower cholesterol levels and improved blood pressure, both crucial for maintaining heart health.
Infusing butter with these herbs can impart their advantageous properties into the fat, allowing you to enjoy their benefits with each use. By incorporating herbal butter into your cooking, you can elevate the flavor of your dishes while simultaneously promoting heart health.
Additionally, substituting herbal butter for less heart-unhealthy fats can help to reduce overall saturated fat intake. This combination of flavor and functionality makes herbal butter an excellent choice for those aiming to maintain heart health while enjoying delicious food.
Proven Strategies for Crafting Exquisite Herbal Butter
What Are the Best Practices for Infusing Butter with Herbs?
Infusing butter with herbs requires meticulous attention to detail to ensure a high-quality product. One of the best practices involves maintaining the correct herb-to-butter ratio. A general guideline is one tablespoon of finely chopped herbs per 100 grams of butter, but this can be adjusted based on personal taste and the intensity of the herbs used.
Allow the mixture to sit for an adequate length of time, which can range from several hours to overnight, depending on your desired flavor intensity. This slow infusion process enables the herbs to fully release their essential oils, resulting in a robust and aromatic butter.
Another effective practice is to apply gentle heat during the infusion, especially with more robust herbs like rosemary or sage. This can be achieved by gently warming the butter on the stove before adding the herbs, facilitating better flavor extraction. By adhering to these best practices, you’ll ensure a successful infusion that maximizes the flavor of your herbal butter.
How Can You Achieve Consistent Results in Herbal Butter Preparation?
Achieving consistent results when crafting herbal butter relies heavily on precision and meticulous attention to detail. Following a specific recipe is crucial for maintaining both flavor and texture. This includes accurately measuring ingredients and ensuring the herbs are fresh and of high quality.
Maintaining quality control is also essential for consistent results. Always opt for fresh herbs, as dried herbs may not provide the same vibrant flavors. Furthermore, keeping a consistent infusion time will ensure that your butter achieves the desired flavor profile without becoming overpowering.
Conducting taste tests throughout the process allows you to adjust the herb quantities to suit your palate, guaranteeing that each batch meets your expectations. By implementing these strategies, you can create herbal butter that consistently delivers on flavor and quality.
What Are the Key Factors for Success in Making Herbal Butter?
Several key factors contribute to the successful creation of herbal butter, starting with the quality of your ingredients. Using fresh, high-quality herbs and butter is paramount, as these elements form the foundation of your final product.
Technique also plays a crucial role; from proper herb preparation to ensuring thorough mixing, each step contributes to the outcome. Patience during the infusion process is equally important, as rushing this stage can lead to a lack of flavor development.
Lastly, maintaining an organized workspace can streamline the process, allowing you to focus on creating a high-quality product. By paying attention to these key factors, you can craft delicious herbal butter that delights the senses and enhances your culinary creations.
Innovative Applications of Herbal Butter in UK Cooking
How to Incorporate Herbal Butter into Baking Recipes?
Integrating herbal butter into baking introduces an exciting twist to traditional UK baked goods. By replacing standard butter with herb-infused butter, you can elevate the flavor profile of scones and shortbread, turning a simple treat into a gourmet delight.
For example, using rosemary-infused butter in shortbread adds a fragrant, savory note that beautifully contrasts with the sweetness of the biscuits. Similarly, incorporating basil butter into a scone recipe can create a refreshing herbal twist, making it perfect for pairing with cheese or savory spreads.
When baking with herbal butter, consider how the flavors will interact with other ingredients and the overall dish. Experimenting with different herb pairings can yield delightful surprises, allowing you to create unique baked goods that stand out at any gathering.
What are the Best Ways to Use Herbal Butter in Savory Dishes?
The versatility of herbal butter extends well beyond baking; it can be an excellent addition to a variety of savory dishes. For instance, using garlic and parsley-infused butter on grilled meats or fish can significantly enhance their natural flavors, providing a delicious finishing touch.
Herbal butter can also be employed to sauté vegetables, adding a burst of flavor that transforms simple sides into standout dishes. For example, sautéing seasonal greens like kale or spinach in herb-infused butter can enhance their flavor while making them more appealing to those who might otherwise be hesitant about vegetables.
Additionally, incorporating herbal butter into sauces adds complexity and depth, making it a valuable culinary tool. Whether drizzling over steaks or mixing into pasta, herbal butter provides endless opportunities for enhancing savory dishes.
What are Some Innovative Serving Suggestions for Herbal Butter?
Innovative serving methods for herbal butter can greatly enhance your dining experience and impress your guests. One creative approach is to serve it as a spread alongside artisanal bread, allowing diners to enjoy a burst of flavors with every bite. A butter dish featuring several varieties, such as basil, garlic, and chives, can create a visually appealing presentation.
Another method involves using herbal butter as a topping for soups; a dollop of infused butter can enrich the flavors of a simple vegetable soup or elevate a creamy bisque. Additionally, consider utilizing herbal butter as a base for homemade sauces, adding a rich foundation for dishes like pasta or grilled fish.
These innovative serving ideas not only showcase the versatility of herbal butter but also encourage exploration and creativity in the kitchen, making meals more enjoyable and memorable.
Frequently Asked Questions (FAQs)
What is herbal butter?
Herbal butter is a delightful mixture of softened butter infused with a variety of fresh herbs, creating a flavorful spread or cooking ingredient that enhances a wide range of dishes.
How long can herbal butter be stored?
When kept in an airtight container, herbal butter can last up to two weeks in the refrigerator and up to six months when frozen.
Can I use dried herbs instead of fresh?
While dried herbs can be utilized, fresh herbs are highly recommended for a superior flavor and aroma in herbal butter.
What are common uses for herbal butter?
Herbal butter can serve as a spread for bread and scones, a cooking fat for sautéing, or a finishing touch for meats and vegetables, enhancing their overall taste.
Can I customize my herbal butter recipes?
Absolutely! You can experiment with various herb combinations, spices, and flavorings to create a personalized herbal butter that suits your individual taste preferences.
How can I tell if my herbal butter has spoiled?
Signs that your herbal butter has gone bad include an off smell, mold growth, or an unusual texture. Always check for freshness before use.
Is herbal butter a suitable gift?
Herbal butter makes for a delightful homemade gift! Package it in decorative jars with a label for a personal touch that your recipients will appreciate.
What is the quickest method to soften butter?
Cutting butter into small cubes or grating it can help it soften quickly. Alternatively, you can microwave it on low power for short intervals for faster results.
Is herbal butter appropriate for high-temperature cooking?
It’s best to use herbal butter for low- to medium-heat cooking, as high temperatures may cause the butter to burn and lose its delicate flavor.
Can I combine herbal butter with other ingredients?
Yes, herbal butter can be combined with other ingredients, such as garlic, lemon zest, or spices, to create more complex and interesting flavors for your dishes.
Connect with us on Facebook!
The Article: How to Make Herbal Butter: A UK Guide appeared first on https://mcrtherapies.co.uk
The Article Herbal Butter: Your Essential Guide for the UK Was Found On https://limitsofstrategy.com
-

Cooking Without Power: Essential Tips and Techniques
Discover the Art of Cooking Without Electricity: An In-Depth Guide
Understanding the Concept of Cooking Without Electrical Appliances
Cooking without electricity is an intriguing culinary practice that emphasizes meal preparation using techniques that do not rely on electric or gas-powered appliances. This approach draws inspiration from age-old methods that have been cherished across diverse cultures for generations, encouraging innovation and resourcefulness in the kitchen. By delving into this style of cooking, individuals can discover practical, environmentally friendly, and sustainable methods that not only satisfy hunger but also foster creativity. Common techniques for cooking without electricity include:
- solar cooking
- <a href="https://survivalbite.com/open-fire-cooking-a-timeless-culinary-art/">open fire cooking</a>
- Haybox cooking
- Pit cooking
- Thermal mass cooking
- Utilizing a rocket stove
- Food preservation through fermentation and drying
Exploring these diverse cooking techniques not only enhances culinary skills but also cultivates a deeper understanding and appreciation for the rich cultural heritage embedded in these traditional practices, creating a meaningful connection to food and its origins.
Uncover the Numerous Advantages of Cooking Without Electricity
Embarking on the journey of cooking without electricity reveals a wealth of advantages that extend far beyond mere meal preparation. This approach significantly promotes sustainability by reducing reliance on fossil fuels and electricity, leading to a noticeable decrease in one’s carbon footprint. Additionally, cooking without electricity often proves to be more economical, as it leverages accessible resources instead of relying on costly energy sources. Furthermore, this culinary style fosters a stronger relationship with food, as individuals dedicate time and effort to craft their meals thoughtfully. Notable benefits of cooking without electricity include:
- Cost savings on utility bills
- Increased food security through enhanced self-sufficiency
- Environmental sustainability via reduced carbon emissions
- Improved health through the emphasis on fresh ingredients
- Strengthened community connections through shared culinary experiences
- Encouragement of culinary creativity and experimentation
By adopting these practices, individuals can transform their cooking experiences into enriching and fulfilling endeavors that resonate with their personal values and commitment to sustainability.
Key Tools You Need for Cooking Without Electricity Effectively
Equipping oneself with the right tools is essential for mastering the art of cooking without electricity. A variety of indispensable tools can simplify the meal preparation process, making the transition from traditional cooking methods seamless. Solar cookers effectively harness the sun’s energy, while fire pits provide a nostalgic outdoor cooking experience reminiscent of simpler times. Manual food processors and blenders enable ingredient preparation without electrical dependency. Here’s a comprehensive list of essential tools necessary for cooking without electricity:
- Solar cookers
- Fire pits or grills
- Rocket stoves
- Hayboxes or insulated cookers
- Portable charcoal grills
- Manual food processors
- Cast iron cookware
- Fermentation vessels
These essential tools empower cooks to explore a wide range of culinary possibilities while adhering to sustainable cooking practices that respect both the environment and cultural traditions.
Creative Techniques for Achieving Culinary Success Without Electricity

A multitude of techniques exists for cooking without electricity, each offering unique benefits and applications across various culinary traditions and environments. Solar cooking utilizes the sun’s energy—a plentiful renewable resource—for meal preparation. This method requires specialized equipment designed to efficiently capture and retain solar heat. Best practices for solar cooking include positioning the solar cooker directly towards the sun and utilizing dark-colored pots, which significantly enhance heat absorption for optimal cooking results.
Open fire cooking methods, such as grilling and roasting, provide an authentic culinary experience that often accompanies social gatherings and celebrations. Safety is paramount when cooking over an open flame; thus, ensuring proper ventilation, managing firewood effectively, and having a nearby water source for emergencies are critical precautions to take during these cooking sessions.
Thermal mass cooking employs retained heat for slow and even cooking, utilizing materials like bricks or stones to maintain warmth. To achieve maximum efficiency with this method, preheating the thermal mass before placing food inside is essential, ensuring optimal cooking conditions are achieved and maintained throughout the process.
Safety First: Key Considerations While Cooking Without Electricity
Safety is a top priority when cooking without electricity, as traditional cooking methods can present unique risks. Adequate ventilation is crucial, especially when cooking over open flames, to prevent the buildup of harmful gases. Proper fire handling requires using appropriate tools and maintaining a safe distance from flammable materials. Adhering to food safety guidelines is vital to prevent spoilage and foodborne illnesses. Important safety considerations include:
- Maintaining proper food storage temperatures
- Using clean utensils and cookware
- Ensuring sufficient ventilation when utilizing open flames
- Practicing good hygiene during food preparation
By following these safety measures, cooks can fully enjoy the myriad benefits of cooking without electricity while minimizing potential risks associated with traditional cooking methods.
Insights from Experts on Cooking Without Electricity
What Knowledge Can Culinary Professionals Share About Cooking Without Electricity?

Experts in sustainable living and culinary arts advocate for the practice of cooking without electricity, highlighting its numerous benefits for both individuals and the environment. Many culinary professionals stress the significance of selecting seasonal and locally sourced ingredients, which not only enhances flavor but also supports local economies. Real-world examples include chefs conducting workshops aimed at imparting traditional cooking methods that do not depend on modern conveniences. They promote techniques like open-fire cooking, demonstrating how to prepare delicious dishes while reducing reliance on electricity.
Furthermore, sustainability advocates argue that cooking without electricity can encourage healthier eating habits. By steering clear of processed foods, individuals are more inclined to consume fresh, whole ingredients. Chefs often inspire participation in community cooking events where participants can exchange knowledge and skills, nurturing a deeper appreciation for food and its origins while fostering community bonds.
How Can Cooking Without Electricity Enhance Your Health?
Cooking without electricity can significantly bolster health by promoting the use of fresh, unprocessed ingredients. This transition often results in meals that are nutrient-dense and free from artificial additives. Practical steps for adopting healthier cooking methods without electricity involve prioritizing local and seasonal produce, which not only supports local farmers but also guarantees the freshest ingredients are utilized. Embracing techniques like fermentation, which preserves nutrients, and employing methods such as solar cooking can further elevate meal quality and nutritional value.
Additionally, cooking without electricity encourages mindfulness in food preparation. Engaging with food—chopping vegetables or stirring pots over an open flame—can transform cooking into a meditative practice that enhances mental well-being. By focusing on the cooking process and being fully present, individuals can cultivate a healthier relationship with their food, leading to more conscious eating habits and improved overall health.
What Are the Environmental Advantages of Cooking Without Electricity?
The environmental impact of cooking without electricity is profound, as this approach can drastically lower carbon footprints and promote sustainable living practices. By avoiding traditional energy sources, individuals actively contribute to the reduction of greenhouse gas emissions. Expert evaluations suggest that methods such as solar cooking and open-fire cooking leverage renewable energy sources, thereby minimizing waste and environmental harm.
Moreover, cooking without electricity encourages the use of local ingredients, which reduces the environmental costs associated with transporting food over long distances. By adopting sustainable cooking practices, individuals can enhance their health while actively contributing to the preservation of the planet for future generations.
Advanced Strategies for Cooking Without Electricity
How to Optimize Solar Cooking for Maximum Efficiency?
Solar cooking utilizes the sun’s energy to prepare meals, positioning itself as an eco-friendly and sustainable alternative to traditional cooking methods. To maximize solar cooking, one must employ specific equipment—such as solar cookers or solar ovens—designed to concentrate sunlight effectively. Key practices for solar cooking include orienting the cooker to face the sun directly and adjusting its angle throughout the day, along with using dark, heat-absorbent pots to improve cooking efficiency.
Cooking times may vary based on sunlight intensity, so a degree of patience is essential. Foods particularly well-suited for solar cookers include rice, beans, and vegetables, which can be cooked in a single pot to minimize energy loss. Additionally, experimenting with various recipes tailored for solar cooking can yield delightful results while promoting energy conservation and environmental stewardship.
Exploring Techniques for Open Fire Cooking
Techniques for open fire cooking, including grilling or roasting over a campfire, are timeless practices that connect us to our culinary roots. While incredibly rewarding, cooking over an open flame demands careful attention to safety. Essential safety precautions include selecting a designated fire pit area away from flammable materials and always having a nearby water source to extinguish the fire if needed.
When preparing food, ensure that meats are cooked thoroughly to prevent foodborne illnesses, and use separate utensils for raw and cooked foods to avert cross-contamination. Exploring various cooking techniques—such as skewering vegetables or meats on sticks or using cast iron pots over coals—can lead to unforgettable culinary experiences under the open sky, fostering connections with nature and tradition.
Utilizing Thermal Mass for Efficient Cooking Methods
Thermal mass cooking is an innovative approach that leverages retained heat for slow cooking, presenting an efficient alternative to conventional cooking methods. This technique involves using materials such as bricks, stones, or specially designed thermal cookers that retain heat for extended periods. To maximize the efficiency of thermal mass cooking, preheating the thermal mass before placing food inside is crucial, ensuring that the cooking process remains uniform and effective throughout.
Foods particularly suited for this method include stews, soups, and grains, all of which benefit from the slow, even heat. Furthermore, this technique champions resourcefulness, often requiring minimal fuel and can be employed in various environments, from backyards to remote camping sites, thus promoting a sustainable cooking lifestyle.
Addressing Challenges Associated with Cooking Without Electricity
How to Manage Time Constraints When Cooking Without Electricity?
Cooking without electricity can sometimes present time constraints, especially with methods like solar cooking that require extended cooking durations. However, effective planning and preparation can alleviate these challenges. One strategy involves utilizing quicker cooking methods for fast meals, such as open-fire cooking or preparing dishes that can be left to cook slowly while engaging in other activities.
Batch cooking represents another effective tactic, allowing for the preparation of multiple meals simultaneously. By cooking larger quantities, individuals can save time during busy weeks by simply reheating or enjoying leftovers. Additionally, employing techniques like haybox cooking—where food is placed in an insulated container after initial boiling—can substantially decrease cooking time while still yielding delicious, fully cooked meals, making it easier to maintain a sustainable lifestyle.
Adapting Cooking Techniques to Weather Variability
Weather conditions can significantly influence cooking methods without electricity, particularly solar cooking, which heavily relies on sunlight. However, adapting cooking techniques to varying weather conditions is entirely achievable. For instance, on cloudy days, one can switch to open fire cooking or thermal mass cooking, both of which are less dependent on ideal weather conditions for successful meal preparation.
In inclement weather, consider indoor cooking options that utilize thermal mass materials or insulated pots. Additionally, planning meals according to local weather forecasts can optimize cooking times and methods, ensuring that meals are prepared efficiently, regardless of external conditions, and minimize disruptions to your cooking routine.
Effectively Managing Limited Resources in Cooking Without Electricity
Cooking without electricity often necessitates managing limited resources, such as fuel for open fire cooking or water for solar cooking. Developing effective resource management strategies is essential. Prioritizing efficiency by utilizing minimal fuel sources, like small branches or twigs for an open fire, can extend cooking capabilities while minimizing environmental impact.
Moreover, embracing cooking methods that require fewer resources, such as haybox cooking, can prove beneficial. This method employs insulation to retain heat without necessitating continuous fuel. Finally, preserving food through techniques like fermentation or drying can diminish the need for fresh ingredients, enabling cooks to optimize resources while minimizing waste and promoting sustainability.
Ensuring Food Safety Without Conventional Power Sources
Maintaining food safety while cooking without electricity is critical, particularly as traditional refrigeration methods may not be available. Proper storage and cooking techniques are essential to prevent spoilage and foodborne illnesses. First and foremost, ensure that all ingredients are fresh before use, especially perishables like meats and dairy products.
Utilizing cool storage methods, such as burying food in cool ground or employing insulated containers, can help maintain safe temperatures. Cooking food thoroughly, especially meats, is vital for eliminating harmful bacteria. Lastly, practicing rigorous hygiene during food preparation, such as washing hands and utensils, can significantly minimize the risk of contamination, ensuring safe and healthy meals.
Research-Backed Benefits of Cooking Without Electricity
What Do Studies Reveal About Nutritional Benefits?
Research indicates that cooking without electricity can preserve more nutrients in food compared to traditional cooking methods reliant on electricity or gas. Studies reveal that techniques like solar cooking and steaming help retain vitamins and minerals that may be lost through conventional high-temperature cooking methods, such as boiling.
Moreover, cooking without electricity often emphasizes the use of whole, unprocessed ingredients, contributing to higher nutritional quality in meals. Focusing on fresh produce fosters a diet rich in essential nutrients, leading to improved overall health. As a result, individuals adopting these cooking methods are likely to experience significant enhancements in their dietary habits and health outcomes, reflecting the powerful impact of food choices on well-being.
How Does Cooking Without Electricity Affect Mental Health?
Cooking without electricity has the potential to positively influence mental health by promoting mindfulness and reducing reliance on technology. Engaging in the tactile experience of preparing meals—chopping, mixing, and cooking—can serve as a form of meditation, allowing individuals to disconnect from the digital realm and reconnect with their surroundings.
Actionable steps for enhancing mental well-being through cooking without electricity include establishing a routine that integrates cooking as a form of self-care. This could involve setting aside time each week to experiment with new recipes or inviting friends or family to share in the cooking experience. Such activities foster a sense of community and connection, further enhancing mental health and promoting a balanced lifestyle.
How Does Cooking Without Electricity Encourage Environmental Sustainability?
Cooking without electricity significantly contributes to environmental sustainability by reducing greenhouse gas emissions associated with traditional cooking methods. By harnessing renewable energy sources, such as solar or biomass, individuals can lessen their reliance on fossil fuels. Expert evaluations indicate that implementing these practices not only diminishes carbon footprints but also supports a sustainable lifestyle that respects the planet and its resources.
Additionally, cooking without electricity frequently encourages a lifestyle centered around local and seasonal ingredients, minimizing the environmental costs associated with transporting food over long distances. This holistic approach enhances appreciation for the environment, as individuals become more mindful of their food sources and the impact of their choices on the planet, ultimately contributing to a healthier ecosystem.
How Can Cooking Without Electricity Strengthen Social Connections?
Cooking without electricity can significantly foster social connections by promoting communal cooking and shared meals. Traditional cooking methods often unite families and communities, encouraging collaboration and bonding over shared culinary experiences that transcend generations.
One effective way to reinforce community ties is by organizing potlucks or community cooking events, where individuals can exchange recipes and cooking techniques while enjoying each other’s company. Moreover, teaching friends or family members how to cook without electricity creates opportunities for shared experiences and learning, further deepening relationships through the joy of food preparation and the stories that accompany it.
Incorporating Cooking Without Electricity Into Everyday Life
How to Integrate Cooking Without Power into Your Daily Routine?
Integrating cooking without electricity into daily life requires thoughtful planning and adaptability. Start by making small adjustments to your routine, such as dedicating one day a week to exploring solar cooking or open-fire techniques. Gradually expanding this practice fosters a smoother transition, making it a more enjoyable and rewarding experience.
Additionally, consider meal prepping for the week using cooking methods that don’t require power. For example, utilize haybox cooking for slow-cooked meals or prepare larger batches of food that can be easily reheated. Over time, these practices will become second nature, allowing cooking without electricity to seamlessly become an integral part of your culinary lifestyle and routine.
How to Introduce Children to the Joy of Cooking Without Electricity?
Teaching children to cook without electricity can instill invaluable life skills while promoting sustainability. This educational experience can be engaging and enjoyable by making learning fun through hands-on activities and interactive cooking sessions that ignite curiosity and creativity.
Consider organizing family cooking nights where children can assist in meal preparation using traditional methods like open-fire cooking or solar cooking. Encourage creativity by allowing them to select ingredients and experiment with recipes, fostering a sense of ownership over their culinary creations. This approach not only builds essential skills but also deepens their appreciation for food and its origins, laying the foundation for a lifelong love of cooking and sustainability.
Finding Harmony Between Modern and Traditional Cooking Techniques
Finding balance between modern and traditional cooking methods allows for flexibility and variety in meal preparation. Combining these approaches can optimize efficiency while still honoring culinary traditions. For example, a modern slow cooker can be used alongside traditional methods like solar cooking, resulting in a diverse array of meal options that cater to various preferences and occasions.
The benefits of this balance include the opportunity to experiment with new techniques while still enjoying the comfort and familiarity of modern conveniences. This fusion can lead to innovative recipes that reflect both contemporary and traditional influences, celebrating the best aspects of both culinary worlds and enriching the overall cooking experience.
How to Tackle Challenges and Limitations of Cooking Without Power?
Addressing common challenges, such as time constraints and weather conditions, is essential to make cooking without electricity more feasible and enjoyable. Effective planning and preparation can mitigate these obstacles. For instance, utilizing quicker cooking methods, like open-fire cooking, can save time when preparing meals, allowing for a more efficient workflow in the kitchen.
Moreover, having backup plans for adverse weather conditions—such as maintaining alternative cooking methods—can ensure that meals are consistently prepared without electricity. Additionally, embracing resourcefulness and creativity in the kitchen can transform limitations into opportunities for culinary innovation, enriching the overall cooking experience and fostering a sense of accomplishment.
Emerging Innovations in Cooking Without Electricity
What Are the Latest Innovations in Cooking Without Power Technologies?
Innovations in cooking without electricity technology are continually evolving, introducing new and efficient methods for meal preparation. Recent advancements include solar cookers designed for enhanced efficiency, such as parabolic solar cookers that effectively concentrate sunlight, enabling faster cooking times while maintaining energy conservation.
Other innovations involve the development of portable biomass stoves that utilize waste materials, thus reducing environmental impact while providing cooking solutions in off-grid settings. As technology continues to advance, these new tools will further enhance the practicality of cooking without electricity, making it more accessible to a wider audience and promoting sustainable practices throughout the culinary landscape.
The Importance of Cooking Without Power in Sustainable Living
Cooking without electricity plays a vital role in sustainable living, promoting eco-friendly practices that diminish reliance on non-renewable energy sources. By embracing these methods, individuals contribute to a more sustainable lifestyle that minimizes waste and prioritizes local food sources, fostering a sense of responsibility towards the environment.
Moreover, cooking without electricity cultivates mindfulness in consumption, encouraging awareness of resource usage and food origins. This lifestyle choice benefits individuals and has a broader impact on the community and environment, creating a ripple effect that contributes to a more sustainable future for everyone involved.
Cultural and Community Aspects of Cooking Without Electricity
Cooking without electricity nurtures cultural and community connections, often rooted in traditional methods and shared experiences. Celebrating these culinary practices helps preserve cultural heritage while advocating for sustainable living, enriching the culinary landscape for generations to come.
Community events focused on cooking without electricity can unite individuals, allowing them to share stories, recipes, and techniques. This collective experience not only strengthens community bonds but also keeps cultural traditions alive, ensuring that valuable knowledge and skills are passed down through time, enriching the lives of those who participate.
Frequently Asked Questions About Cooking Without Electricity
What Are the Most Effective Cooking Methods Without Electricity?
The most effective methods for cooking without electricity include solar cooking, open fire cooking, haybox cooking, and thermal mass techniques. Each of these methods offers unique benefits, such as sustainability and efficiency, making them ideal for those looking to reduce their reliance on electrical appliances.
How Can I Start Cooking Without Electricity?
Begin by incorporating small changes into your cooking routine, such as utilizing a solar cooker on sunny days or experimenting with open fire cooking during camping trips. Gradually build your skills and confidence over time to enhance your culinary repertoire and embrace the joys of traditional cooking.
What Tools Are Essential for Cooking Without Electricity?
Essential tools for cooking without electricity encompass solar cookers, fire pits, rocket stoves, insulated hayboxes, and manual food processors. These tools facilitate various cooking techniques efficiently and effectively, empowering individuals to explore diverse culinary experiences without relying on electricity.
Is Cooking Without Electricity Safe for Food Preparation?
Yes, cooking without electricity can be safe if proper food safety practices are followed, including thorough cooking, maintaining hygiene, and ensuring appropriate food storage to prevent spoilage and contamination. By adhering to these guidelines, cooks can enjoy the benefits of traditional cooking methods safely.
Can Cooking Without Electricity Result in Financial Savings?
Absolutely! Cooking without electricity can lead to significant savings on energy bills, as it decreases reliance on electricity and gas. Additionally, sourcing local ingredients can further reduce grocery expenses, contributing to a more budget-friendly culinary lifestyle.
How Does Cooking Without Electricity Benefit the Environment?
Cooking without electricity aids in lowering carbon footprints by utilizing renewable energy sources and minimizing waste. It promotes sustainable practices that significantly benefit the planet and its ecosystems, aligning with the growing need for environmentally conscious living.
What Health Advantages Are Associated with Cooking Without Electricity?
Cooking without electricity often results in healthier meals, as it emphasizes fresh ingredients and avoids processed foods. This dietary focus can lead to enhanced nutrition and improved overall health, encouraging individuals to adopt a more balanced and wholesome lifestyle.
Can Children Learn Cooking Skills Without Electricity?
Yes! Teaching children to cook without electricity can impart valuable skills and foster a sense of sustainability. It can be an engaging and educational experience that nurtures creativity in the kitchen while instilling important life lessons about food and cooking.
How Can I Maximize Efficiency When Cooking Without Electricity?
To maximize efficiency, plan your meals, utilize batch cooking techniques, and experiment with time-saving methods like haybox cooking or thermal mass cooking to minimize fuel consumption. These strategies can enhance your culinary experience while promoting sustainability.
What Common Challenges Are Associated with Cooking Without Electricity?
Challenges include time constraints, weather dependencies, limited resources, and ensuring food safety. Nevertheless, effective planning and adaptability can help overcome these hurdles successfully, making cooking without electricity a rewarding and fulfilling endeavor.
Discover more on our journey at X!
The post Cooking Without Power: Essential Techniques and Tips appeared first on Survival Bite.
The Article Essential Techniques and Tips for Cooking Without Power Was Found On https://limitsofstrategy.com
-

Smoker Temperature Gauge Installation: Your Essential US Guide
Unlock the Secrets to Selecting the Perfect Smoker Temperature Gauge for Your Barbecue Mastery
Explore the Different Types of Smoker Temperature Gauges for Optimal Cooking
Selecting the perfect smoker temperature gauge is essential for passionate barbecue aficionados who want to elevate their grilling skills to the next level. In the diverse U.S. market, you’ll primarily find two main types: analog and digital gauges. Analog gauges function through a dial mechanism with a needle that indicates the temperature levels. Many barbecue enthusiasts favor these analog gauges for their straightforward design and reliable performance, especially when used in traditional setups. They typically operate without batteries, can endure high heat, and are cherished by purists who appreciate classic barbecue methodologies.
Conversely, digital gauges have gained immense popularity due to their remarkable accuracy and often feature backlit displays for easy visibility, regardless of lighting conditions. A wide array of digital models includes extra functionalities such as timers and alarms, which are incredibly useful for managing cooking times effectively. Some top-tier digital options even offer mobile connectivity, enabling you to monitor temperatures remotely—a substantial advantage during extensive smoking sessions.
Your decision between an analog and a digital gauge ultimately hinges on your personal preferences and smoking styles. If you prioritize simplicity and reliability, an analog gauge may be your best fit; on the other hand, if you desire sophisticated features and exceptional accuracy, investing in a digital gauge can greatly enhance your smoking experience.
Are You Ready to Engage Your Senses?
Key Features to Consider When Selecting Your Smoker Temperature Gauge
When you’re in the market for a smoker temperature gauge, several essential features can significantly enhance your cooking experience. The foremost aspect is accuracy; your gauge should deliver real-time readings that accurately reflect the internal conditions of your smoker. A top-notch gauge will maintain a tolerance of less than five degrees Fahrenheit, ensuring that your meats consistently reach the perfect doneness.
Durability is another vital consideration, particularly for smokers that habitually endure high temperatures and outdoor elements. Opt for gauges made from stainless steel or other heat-resistant materials to prevent wear and tear over time. Ease of reading is also crucial; choose gauges with large, clear dials or displays that can be easily viewed from a distance. If you often cook in low-light situations, consider models equipped with illuminated screens or well-marked indicators to enhance visibility.
Lastly, seek out additional features such as wireless connectivity, temperature threshold alerts, and programmable settings, which can greatly enhance convenience, especially during lengthy smoking sessions. By prioritizing these key attributes, you can choose a smoker temperature gauge that perfectly aligns with your specific needs and amplifies your overall barbecue experience.
Where to Find the Best Smoker Temperature Gauges for Your Needs
In the United States, you can discover smoker temperature gauges at various retailers, catering to a broad spectrum of preferences and budget constraints. Local hardware stores often serve as an excellent starting point, showcasing a selection of gauges you can assess firsthand. This hands-on experience is particularly advantageous for those who value the opportunity to ask questions and gain insights from knowledgeable staff members.
For a more extensive variety, online retailers like Amazon and Walmart feature vast inventories of gauges that range from budget-friendly options to high-end models. Shopping online not only allows you to peruse customer reviews and compare prices but often leads to better deals and exclusive promotions.
Additionally, specialty barbecue shops offer an outstanding alternative, stocking gauges specifically designed for smoking and grilling. These establishments frequently carry high-quality, professional-grade instruments and can provide expert advice on the best gauge for your specific smoker.
Whether you choose to shop online or visit a physical store, be sure to evaluate aspects like warranty and return policies, as these can offer invaluable peace of mind regarding your purchase.
Comprehensive Guide for Installing and Calibrating Your Smoker Temperature Gauge

Proper installation and calibration of your smoker temperature gauge are crucial for obtaining accurate readings and enhancing your overall smoking experience. Begin by selecting the ideal location on your smoker, preferably at the level of the cooking chamber, as this will ensure that the gauge accurately reflects the actual temperature where the meat is being cooked. This strategic positioning is key for achieving precise temperature readings, which are essential for optimal cooking results.
After identifying the best spot, meticulously follow the installation instructions provided with your gauge. Equally important is regular calibration. Without proper calibration, the temperature readings may be misleading, which could result in overcooked or undercooked meats that do not meet your culinary standards.
To calibrate your gauge, utilize a secondary thermometer to compare readings. Adjust the gauge according to the manufacturer’s instructions until both thermometers display the same temperature. It is advisable to perform this calibration at least once per season or after significant temperature fluctuations in your cooking environment.
By ensuring both proper installation and calibration, you will enjoy a more precise smoking process and elevate your cooking results, transforming each barbecue session into a triumphant success.
Preparing Your Smoker for the Installation of the Temperature Gauge: Essential Steps to Follow
Implementing Essential Safety Measures Prior to Installation
Before beginning the installation of your smoker temperature gauge, prioritizing safety is critical to avoid potential accidents. Always confirm that your smoker is completely cool and, if applicable, unplugged. Working with a hot smoker poses significant burn risks and other injuries, underscoring the importance of patience throughout this process.
If your smoker has recently been used, allow it to cool down for at least 30 minutes to an hour. This waiting period is not only vital for your safety but also helps prevent accidents during installation. Additionally, ensure that the area surrounding the smoker is free from any flammable materials, including paper towels, grilling tools, and wood piles, as these could pose hazards.
Lastly, wear appropriate protective gear, such as gloves and safety glasses, particularly when using power tools during installation. Implementing these straightforward yet effective safety measures will ensure a smooth installation process without any unpleasant surprises.
Essential Tools Needed for a Successful Installation

Installing a smoker temperature gauge requires just a few common tools, most of which can be easily acquired from your local hardware store. The primary tool you’ll need is a drill, which you’ll use to create a hole in your smoker for the gauge. Ensure you have the correct drill bit size that corresponds with the gauge’s stem diameter for a proper fit.
You will also need screws and a screwdriver to secure the gauge to your smoker. If your gauge comes with a mounting bracket, check whether additional hardware is necessary for installation. A small wrench or pliers may also be beneficial, especially if your gauge has nuts that require tightening.
Finally, having a measuring tape or ruler handy can assist you in pinpointing the precise location for the installation, ensuring accurate placement. By gathering these tools in advance, you will streamline the installation process and enhance your chances of success.
Cleaning and Preparing the Smoker Surface for Accurate Gauge Installation
Before proceeding with the installation of your smoker temperature gauge, it’s crucial to thoroughly clean and prepare the installation surface. This step is vital for ensuring a secure fit and accurate temperature readings. Start by using a soft cloth or sponge to wipe down the area where you plan to install the gauge. Remove any grease, soot, or debris that may have accumulated from past grilling sessions, as these can interfere with the gauge’s performance.
If your smoker has a painted or coated surface, be cautious not to scrub too vigorously, as this could damage the finish. Instead, use a mild detergent mixed with warm water to gently clean the surface. Rinse thoroughly and allow it to dry completely before proceeding with the installation.
Additionally, inspect the designated area for any rust or corrosion that could hinder the gauge’s installation. If you discover any issues, take the necessary steps to address them using appropriate rust treatment products. Ensuring a clean and well-prepared surface will facilitate an easy installation and help maintain the longevity of your smoker temperature gauge.
A Comprehensive Step-by-Step Guide to Installing Your Smoker Temperature Gauge
Identifying and Marking the Optimal Installation Location
Choosing the ideal location for your smoker temperature gauge is crucial for achieving accurate readings. Start by selecting a spot on your smoker that offers a clear view of the thermometer while keeping a safe distance from direct heat sources. Typically, the best location is near the cooking chamber, where the gauge can effectively monitor the temperature.
Once you’ve identified the location, use a pencil or marker to clearly mark the spot. Ensure the mark is at an appropriate height for easy viewing without requiring you to bend down or strain. For optimal results, utilize a measuring tape to ensure symmetry and alignment with any other gauges on your smoker.
It’s advisable to step back and visually assess the marking before proceeding to drill. This final check guarantees that the gauge’s placement will not obstruct any cooking processes or lids on your smoker. Taking the time to mark accurately will lay the groundwork for a smooth and successful installation.
Drilling the Hole for Your Gauge Installation
With your installation spot marked, it’s time to drill the hole for your smoker temperature gauge. Selecting the correct drill bit size is vital; it should match the diameter of the gauge’s stem for a snug fit. Using the wrong size can complicate securing the gauge, ultimately leading to inaccurate readings.
Position your drill perpendicular to the smoker’s surface to create a straight hole. Begin at a slow speed to avoid damaging the smoker’s material, then gradually increase the speed as you drill through. Clear any metal shavings or debris as you go to maintain a tidy work area.
After drilling through the surface, double-check the size and cleanliness of the hole. It should allow the gauge to fit securely without being overly tight, ensuring ease of installation. A well-drilled hole will significantly enhance the gauge’s accuracy and overall longevity.
Securing the Gauge After Installation for Optimal Accuracy
Once you have drilled the hole, the next step is to secure the gauge in place. Begin by gently inserting the gauge’s stem into the drilled hole. Ensure it fits snugly without requiring excessive force, as this could damage both the gauge and the smoker.
After inserting the gauge, use the screws or nuts provided with it to secure it appropriately. You may need a small wrench or screwdriver to tighten these components adequately. Exercise caution not to over-tighten, as this can lead to damage or misalignment of the gauge.
After securing the gauge, take a step back and visually inspect it to confirm it is level and correctly positioned for optimal reading. The gauge should be easily visible from a comfortable distance, allowing you to monitor your smoker’s temperature without hassle. Proper installation is critical for maintaining accurate readings, making this final step essential for a successful smoker setup.
Expert Tips for Successfully Installing a Smoker Temperature Gauge
Real-Life Success Stories of Gauge Installations
Across the United States, barbecue enthusiasts have significantly enhanced their smoking experiences by successfully installing temperature gauges. For instance, in Texas, a backyard pitmaster opted for a digital gauge on his offset smoker, enabling him to maintain the perfect temperature for brisket throughout the lengthy smoking process. This installation not only contributed to his award-winning recipes but also allowed him to monitor temperatures from the comfort of his home through a smartphone app.
In Colorado, a competitive barbecue team selected an analog gauge for their vertical smoker. They appreciated the simplicity of the gauge, which required no batteries and provided reliable readings even at high altitudes, where temperature fluctuations can be more pronounced. Their choice paid off during competitions, as they consistently produced perfectly smoked ribs that impressed judges.
In Florida, a family successfully installed multiple gauges on their smoker, allowing them to monitor various cooking zones. This approach enabled them to experiment with different smoking techniques, yielding delicious results and igniting a newfound passion for barbecue. These examples illustrate how diverse installation strategies can lead to successful outcomes across varied smoking environments and preferences.
Effective Strategies for Troubleshooting Common Gauge Issues
Even with optimal installations, there may be occasions when smoker temperature gauges fail to provide accurate readings. If you find your gauge is not delivering correct readings, start by checking for loose connections. Ensure that the gauge is securely fastened and that there are no gaps between the gauge and the smoker.
If connections are intact, recalibrating the gauge may be necessary. Use a secondary thermometer to compare readings, and adjust the gauge according to the manufacturer’s instructions to ensure accuracy.
If issues persist, consider implementing the following troubleshooting steps:
- Inspect for damage: Look for cracks or breaks in the gauge that could affect its functionality.
- Check the gauge’s placement: Ensure it’s not positioned too close to direct heat sources.
- Verify the smoker’s temperature: Use a secondary thermometer to confirm that the smoker is reaching the expected temperature.
- Consult the warranty: If the gauge is new and not functioning correctly, check if it’s covered under warranty for replacement.
By following these steps, you can quickly identify and resolve common problems with your smoker temperature gauge, ensuring reliable cooking results every single time.
Expert Placement Insights for Maximum Gauge Accuracy
The placement of your smoker temperature gauge is critical for ensuring accurate readings. Experts recommend positioning the gauge at the cooking chamber level to capture the most precise internal temperature while the smoker is in operation. This allows the gauge to accurately reflect the cooking environment, which is essential for maintaining control over the smoking process.
Avoid placing the gauge too close to direct heat sources, as this can lead to consistently higher readings, potentially resulting in overcooked meats. Instead, consider positioning it slightly off-center or even on the opposite side of the heat source to minimize temperature fluctuations and improve accuracy.
Here are some expert tips for optimal gauge placement:
- Position the gauge at the desired level within the cooking chamber for accurate readings.
- Keep the gauge away from direct flames or heat sources.
- Consider multiple gauges for different cooking zones if your smoker design permits.
- Ensure the gauge is visible from your cooking station for easy temperature monitoring.
By strategically placing your smoker temperature gauge, you can enhance your cooking precision and achieve consistently excellent results.
The Importance of Regular Maintenance for Your Smoker Temperature Gauge
Regular maintenance of your smoker temperature gauge is essential for ensuring its longevity and accuracy. Just as you would not neglect the upkeep of your smoker, your gauge also requires attention to function optimally. Cleaning the gauge frequently keeps it free from grease and soot buildup, which can obstruct readings and diminish performance.
It’s advisable to inspect the gauge regularly for any signs of wear or damage. Look for cracks in the glass face, corrosion on the body, or any discrepancies in the readings. If you observe any issues, address them promptly to prevent further complications and ensure reliable performance.
Here are some maintenance tips to keep your smoker temperature gauge in top condition:
- Clean with a soft cloth and mild detergent on a regular basis.
- Inspect for signs of rust or damage and replace if necessary.
- Ensure connections remain tight and secure after each use.
- Store the smoker covered to protect the gauge from environmental factors.
By incorporating these maintenance practices into your routine, you will not only extend the life of your smoker temperature gauge but also ensure that your cooking remains consistently excellent, enhancing your overall grilling experience.
A Breakdown of Different Types of Smoker Temperature Gauges for Informed Decision-Making
Understanding the various types of smoker temperature gauges available can help you make an informed decision that best suits your needs. Generally, analog and digital gauges are the most prevalent. Analog gauges are renowned for their durability and simplicity, as they require no batteries and provide consistent readings even in extreme temperatures. They typically feature large dials that are easy to read at a glance, making them ideal for traditional setups.
In contrast, digital gauges offer advanced features, such as wireless connectivity and backlit displays, making them user-friendly, especially during nighttime cooking or low-light conditions. Some models can log temperature data over time, providing you with deeper insights into your smoking sessions and allowing for more precise control.
Here’s a quick overview of the different types:
- Analog Gauges: Durable, battery-free, straightforward to use, perfect for traditional setups.
- Digital Gauges: High accuracy, often equipped with additional features such as alarms, making them ideal for tech-savvy users.
- Wireless Gauges: Facilitate remote monitoring, perfect for extended cooking sessions.
- Infrared Gauges: Deliver quick surface temperature readings, useful for checking grill hot spots.
By understanding the advantages and drawbacks of each type, you can make a well-informed decision that enhances your smoking experience and achieves the best possible cooking results.
The Indispensable Necessity of Calibrating Your Smoker Temperature Gauge
Understanding the Critical Role of Calibration
Calibration of your smoker temperature gauge is vital for ensuring its accuracy. Accurate readings are crucial in smoking, where maintaining the appropriate temperature can significantly influence the flavor and texture of your meats. A poorly calibrated gauge can lead to overcooked or undercooked food, resulting in disappointing outcomes even for the most experienced pitmasters.
Calibration helps expose any discrepancies between the gauge’s readings and the actual temperatures, enabling you to make adjustments as needed. Regular calibration also prolongs the life of your gauge by preventing unnecessary strain from incorrect readings, ensuring that it continues to operate optimally for years to come.
To ensure your gauge maintains its accuracy, plan to calibrate it at least once per season or whenever you notice inconsistencies in its readings. Adopting this proactive approach will help guarantee consistent, high-quality smoking results every time you fire up your grill.
A Practical Guide to Calibrating Your Smoker Temperature Gauge
Calibrating your smoker temperature gauge is a straightforward process that can be accomplished using a separate, reliable thermometer. Start by placing the secondary thermometer next to the smoker’s gauge, ensuring both instruments are exposed to the same air temperature for accurate comparison.
Next, preheat your smoker to a set temperature, ideally one that you frequently use during smoking sessions. Allow both gauges to stabilize for about 15 to 20 minutes, then compare the readings. If there is a discrepancy, adjust your smoker’s gauge according to the manufacturer’s guidelines, which may involve a simple twist or adjustment of its calibration screw.
If your gauge does not feature a calibration option, take note of the difference and compensate for it during your next smoking session. By following these steps, you can ensure your gauge remains reliable and accurate, resulting in perfectly smoked meats every time you grill.
Determining the Frequency of Calibration for Your Gauge
To maintain the accuracy of your smoker temperature gauge, frequent calibration is advisable. Calibration should ideally occur at least once per season and more often if there are significant temperature fluctuations or after extensive use.
If you’ve recently purchased a new gauge, it’s wise to calibrate it before its initial use. The manufacturer may not perfectly calibrate new gauges, and checking them ensures you start your smoking endeavors on the right foot.
Additionally, if you notice discrepancies in your readings, such as a gauge indicating a much higher or lower temperature than expected based on your smoking experience, it’s time for recalibration. By adhering to these recommendations, you’ll ensure your smoker temperature gauge remains accurate, providing you with dependable readings throughout your barbecue sessions.
Essential Tools Required for Effective Calibration
Calibrating your smoker temperature gauge does not require an extensive toolkit. However, a few essential tools can ensure a smooth calibration process. First and foremost, you will need a reliable thermometer—this can be either an instant-read thermometer or another type that you trust for accuracy.
Additionally, a small wrench or pliers may be necessary if your gauge has calibration screws that require adjustment. Having a calibration key, if provided by the manufacturer, can also be beneficial and streamline the process.
Finally, a notepad or a digital device for note-taking during calibration can help you keep track of any adjustments made and discrepancies noted. By gathering these tools in advance, you’ll facilitate the calibration process and ensure your gauge delivers precise readings when you’re ready to smoke.
Grasping the Functionality of a Smoker Temperature Gauge
Understanding the Mechanics Behind Temperature Measurement
A smoker temperature gauge measures the internal temperature of your smoker, playing a vital role in maintaining the desired cooking temperature. The mechanism typically involves a probe that senses heat and a dial or digital display that conveys this temperature to the user.
In analog gauges, a bi-metallic strip or thermocouple reacts to heat, causing a needle to move along a calibrated scale. Digital gauges, in contrast, utilize a sensor to detect temperature changes and convert those readings into a digital format for easier interpretation.
Key components of thermometer mechanisms include:
- Sensing Element: Detects temperature changes within the smoker.
- Display: Presents the temperature readings (dial for analog, screen for digital).
- Calibration Mechanism: Allows for adjustments to ensure accuracy.
- Housing: Protects internal components from the environment of the smoker.
Understanding how these components work together enhances your appreciation of the gauge and aids in troubleshooting any issues that may arise.
The Critical Importance of Temperature in the Smoking Process
Temperature control is fundamental in the smoking process, as it directly impacts the flavor, texture, and safety of your meats. Each type of meat necessitates specific temperature ranges to achieve optimal cooking results, making it essential to maintain consistency throughout the smoking journey.
For instance, brisket typically benefits from a low and slow approach, with temperatures ranging between 225°F and 250°F, which allows the connective tissues to break down and results in tender meat. On the other hand, poultry needs to reach an internal temperature of 165°F for safety; however, many pitmasters prefer smoking it at slightly higher temperatures for enhanced flavor and texture.
Understanding the importance of temperature also extends to food safety, as cooking meats at safe temperatures helps prevent the risk of foodborne illnesses. By closely monitoring temperatures with your smoker gauge, you can ensure that your smoked dishes turn out delicious and safe for consumption.
Factors That Influence Gauge Accuracy and Performance
Several factors can impact the accuracy of your smoker temperature gauge, potentially compromising the quality of your smoking results. One of the primary factors is the gauge’s placement. If the gauge is positioned too close to direct heat or flames, it will register higher temperatures, leading to uneven cooking.
Calibration is another critical aspect. A gauge that hasn’t been calibrated regularly can produce readings that deviate from actual temperatures, resulting in frustration during cooking.
Moreover, the quality of the gauge itself also plays a role. Lower-quality gauges may not provide reliable readings, while high-quality models often feature more accurate sensors and superior construction, ensuring longevity and precision.
By understanding these factors, you can take proactive measures to ensure your gauge operates effectively and provides accurate readings throughout your smoking sessions.
The Advantages of Using a Smoker Temperature Gauge
Achieving Consistent Cooking Results with Every Use
One of the most significant benefits of using a smoker temperature gauge is the marked improvement in cooking consistency. With precise temperature readings readily available, you can maintain optimal cooking conditions throughout the entire smoking process. This consistency is vital for achieving the ideal flavor profile and texture in your meats.
For example, when smoking ribs, keeping a steady temperature between 225°F and 250°F allows the meat to cook uniformly, rendering fat and collagen into tender, juicy bites. Without a reliable gauge, it becomes easy to fluctuate between temperatures, leading to dry or undercooked meat that fails to impress.
Moreover, the ability to monitor temperatures throughout the cooking process provides greater control, helping you make necessary adjustments as needed. This translates to less guesswork and more dependable outcomes, whether you are a novice or an experienced pitmaster seeking to refine your skills.
Enhancing Food Safety Standards Through Accurate Measurements
Utilizing a smoker temperature gauge also plays a crucial role in bolstering food safety. Monitoring the internal temperature of meat ensures it reaches safe levels, thereby reducing the risk of foodborne illnesses. For example, poultry should be cooked to an internal temperature of at least 165°F, while pork and beef have their specific safe limits as well.
By employing a temperature gauge, you can verify that your meats reach these temperatures without needing to cut into them, which can lead to moisture loss and a less appealing final product. This is particularly vital for larger cuts of meat, where assessing internal temperatures can be challenging without reliable tools.
Regularly checking the temperature also allows you to avoid the “danger zone” of 40°F to 140°F, where bacteria can proliferate, ensuring that your culinary creations are not only delicious but also safe for consumption.
Convenient Monitoring Solutions for Effortless Cooking Experiences
A smoker temperature gauge provides unparalleled ease of monitoring during your cooking sessions. Rather than having to lift the smoker lid continually to check on the meat, which can lead to heat loss and extended cooking times, you can simply glance at your gauge to assess the temperature.
Digital gauges, in particular, often come equipped with features like remote monitoring and alarms that notify you when your smoker reaches a predetermined temperature. This convenience allows you to focus on other tasks, socialize with guests, or relax while your food cooks, all while maintaining confidence that you’re effectively managing your smoking game.
By utilizing a temperature gauge, you streamline your cooking process, resulting in a more enjoyable and less stressful smoking experience, regardless of your skill level.
Maintaining Your Smoker Temperature Gauge for Optimal Longevity
Essential Cleaning Practices for Peak Performance
To keep your smoker temperature gauge functioning at its best, regular cleaning is essential. Over time, grease, soot, and other residues can accumulate, obstructing readings and negatively impacting performance. Start by using a soft cloth dampened with mild detergent to wipe down the gauge, ensuring you avoid abrasive cleaners that could scratch the surface.
For deeper cleaning, especially if the gauge has been exposed to heavy smoke, a mixture of vinegar and water works wonders. Soak a cloth in this solution and gently wipe the gauge, allowing it to penetrate any tough buildup. Rinse thoroughly with water to eliminate any cleaning agents.
After cleaning, ensure the gauge is completely dry before reattaching it to your smoker. Regular cleaning not only maintains the accuracy of your readings but also prolongs the gauge’s life, ensuring it remains a reliable tool for all your smoking endeavors.
Protecting Your Gauge from Environmental Factors for Enhanced Longevity
Safeguarding your smoker’s temperature gauge from the elements is crucial for its longevity and optimal performance. Exposure to rain, snow, or extreme temperatures can damage the internal components of the gauge, leading to inaccurate readings or complete failure.
When your smoker is not in use, consider covering it with a protective tarp or investing in a smoker cover that shields it from moisture and UV rays. This simple precaution can prevent rust and corrosion, significantly extending the life of your gauge.
Additionally, if you’re using a digital gauge, removing it when the smoker is not in operation—especially if it’s portable—can protect it from potential damage. Store it in a cool, dry place to safeguard it against environmental factors. By implementing these preventive measures, you can ensure your gauge remains in excellent condition and ready for your next barbecue adventure.
Identifying When to Replace Your Smoker Temperature Gauge for Reliable Performance
Understanding when to replace your smoker temperature gauge is crucial for maintaining cooking quality. If you notice that your gauge consistently provides inaccurate readings, even after calibration, it may be time for a replacement.
Additionally, if the glass face becomes cracked or damaged, it compromises the gauge’s integrity and readability, necessitating a new purchase. Regular inspections are essential—if you find rust or corrosion on the gauge body that cannot be cleaned, it’s likely time for a replacement to ensure reliable performance.
Another sign that you need a new gauge is if it fails to respond quickly to temperature changes. A sluggish response time can lead to mismanagement of your smoking environment, resulting in unsatisfactory cooking results. By being proactive and replacing your gauge when necessary, you guarantee the best possible outcomes for all your grilling endeavors.
Your Most Frequently Asked Questions Answered for Clarity and Confidence
How often should I calibrate my smoker temperature gauge?
It’s recommended to calibrate your smoker temperature gauge at least once per season or whenever you notice discrepancies in readings that could affect performance.
How do I know if my temperature gauge is accurate?
To test accuracy, compare your gauge’s readings with those of a reliable secondary thermometer, adjusting as necessary for any discrepancies identified during the comparison.
Can I use a digital thermometer for my smoker?
Yes, digital thermometers are excellent for smokers, providing precise readings and various features, such as alarms and remote monitoring capabilities, that enhance your cooking experience.
What should I do if my gauge is reading too high?
Check the gauge’s placement to ensure it’s positioned away from direct heat, recalibrate it if necessary, and consider the possibility of damage if issues persist.
How can I clean my smoker temperature gauge effectively?
Use a soft cloth dampened with mild detergent, or a vinegar-water solution for tougher residue, ensuring the gauge is dry before reinstalling it.
What type of temperature gauge is best for beginners?
Analog gauges are often recommended for beginners due to their simplicity and reliability; however, digital gauges are also user-friendly and provide accurate readings that facilitate the learning process.
Is it necessary to disconnect the gauge when not in use?
While not always necessary, removing a digital gauge can protect it from moisture and damage when the smoker is not in operation, prolonging its lifespan.
Can I install the gauge myself?
Absolutely! Installing a smoker temperature gauge is a straightforward process that can be completed with basic tools by following the manufacturer’s instructions closely.
What temperature should my smoker be set at for ribs?
For optimal results, set your smoker to maintain a temperature of about 225°F to 250°F when cooking ribs for the best flavor and tenderness.
How long does a smoker temperature gauge typically last?
With proper care and maintenance, a quality smoker temperature gauge can last several years. However, it’s essential to replace it if you notice inaccuracies or physical damage that could impact its performance.
Connect with us on Facebook for More Tips!
The Article How to Install a Smoker Temperature Gauge: A US Guide appeared first on https://pitmastersarsenal.com
The Article Install a Smoker Temperature Gauge: Your Essential US Guide Was Found On https://limitsofstrategy.com
-

Grill Fish Without Sticking: Essential Tips from the US
Expert Tips for Selecting the Perfect Fish for Grilling Success
Discover the Best Fish Varieties for Exceptional Grilling Experience
Choosing the appropriate type of fish is crucial for achieving perfectly grilled fish without it sticking. Focus on selecting fatty fish varieties like salmon, tuna, and mackerel, which are ideal for grilling due to their higher oil content. This natural fat not only helps to prevent sticking on the grill but also enriches the flavor, making these fish robust enough to withstand high cooking temperatures. Conversely, lean fish such as cod or sole can also be grilled effectively, provided you utilize proper preparation techniques. Implementing a marinade or applying thoughtful seasoning can help keep these lean fishes moist and flavorful, thereby significantly reducing the chance of sticking during the grilling process.
Each type of fish presents a distinct texture and flavor profile, making it essential to consider the specific dish you intend to create. For instance, a simply seasoned grilled salmon can shine as a main attraction, while tilapia can be enhanced with a spicy rub for a more adventurous flavor experience. It’s vital to recognize that the grilling technique you employ will greatly influence your success, impacting both the flavor and texture of the finished dish.
The Importance of Freshness and Quality in Fish Selection
The freshness and quality of the fish you select are paramount to achieving an enjoyable grilling experience. Always prioritize purchasing the freshest fish available, as this significantly impacts both the flavor and texture of your dish. When assessing fish quality, look for certain indicators: clear, bulging eyes indicate freshness, while dull eyes suggest that the fish may be past its prime. The flesh should be firm and should spring back when pressed. Additionally, a mild oceanic aroma signals freshness; a strong, fishy smell typically indicates that the fish is no longer fresh.
Purchasing from reputable sources, such as local fish markets or trusted grocery stores, is essential to ensure you acquire high-quality fish. Be mindful of how long the fish has been displayed, and don’t hesitate to seek recommendations from knowledgeable staff. Opting for quality fish not only enhances the overall flavor of your dish but also reduces the likelihood of it falling apart on the grill, which is a common issue linked to older or less fresh fish.
Essential Preparation Techniques for Grilling Fish Successfully
Proper preparation of fish is vital to achieving successful grilling results. Begin by thoroughly cleaning the fish and ensuring all scales are removed. Patting the fish dry with paper towels is crucial to eliminate excess moisture, which can contribute to sticking when grilling. The skin of the fish is particularly important; if you’re grilling fish with skin, keeping it intact can shield the flesh from direct contact with the grill grates, promoting more favorable cooking outcomes.
Marinating the fish is a fantastic method to amplify its flavor and moisture content, thereby minimizing the risk of sticking during cooking. An effective marinade should include oil, which serves to create a barrier between the fish and the grill. Consider using a combination of herbs, spices, and acidic ingredients like lemon juice or vinegar to complement the fish’s natural taste without overpowering it. Allowing the fish to marinate for at least 30 minutes to several hours will yield superior results, making it juicier and more flavorful when grilled.
How to Prepare Your Grill for Perfectly Cooked Fish

Thoroughly Cleaning Grill Grates for Optimal Cooking
A clean grill is essential for preventing fish from sticking during the grilling process. Residue from previous grilling sessions can lead to unwanted sticking, ruining your carefully prepared fish. Start your grilling session by utilizing a wire brush to scrub the grates thoroughly. This simple yet effective step helps eliminate any leftover food particles, grease, or carbon buildup that can create a sticky surface for your fish.
After scrubbing, it’s advisable to wipe down the grates with a damp cloth or paper towel to ensure they are completely clean. Additionally, preheating the grill for about 10-15 minutes before placing the fish on it is beneficial. This practice assists in burning off any remaining residue, further ensuring a clean cooking surface. A spotless grill not only enhances the flavor of your fish but also contributes to a more manageable cleanup process afterward.
Effective Techniques for Oiling Grill Grates
Once you have confirmed that the grill grates are clean, the next critical step is to oil them properly. Applying oil to the grates establishes a non-stick surface that minimizes the risk of your fish clinging to the grill. Use a high smoke point oil such as canola or grapeseed oil for optimal results. These oils can withstand high temperatures without burning, providing a reliable non-stick surface for grilling.
To apply the oil, pour a small amount onto a paper towel or cloth and, using tongs, wipe the oil evenly over the grates. Avoid over-oiling; a light coating is sufficient and helps prevent flare-ups during grilling. This step is particularly crucial when grilling delicate fish that require all the support they can get to remain intact while cooking.
The Importance of Preheating Your Grill for Fish Cooking

Preheating the grill is not merely a suggestion; it’s a fundamental step in successfully grilling fish. Aim for a medium-high heat, ideally between 400-450°F. A hot grill facilitates a rapid sear on the fish, forming a crust that reduces sticking while sealing in moisture. This method is particularly effective for preventing fish from falling apart during the grilling process.
While preheating, keep the lid closed to maintain the temperature and allow the grill grates to heat evenly. If you’re using a gas grill, turn on all burners to achieve the desired temperature. For charcoal grills, allow the coals to become white-hot before placing the fish on the grates. Once the grill has reached the proper temperature, you’ll be fully prepared to grill your fish to perfection, transforming it into a delightful culinary experience.
Expert Strategies: Mastering the Art of Grilling Fish Without Sticking
Insights from Top Chefs on Perfect Grilling Techniques
Grilling experts and renowned chefs have developed various techniques to ensure fish doesn’t stick to the grill. One widely accepted method is to let the fish rest at room temperature before grilling, which helps it cook more evenly. Additionally, many chefs emphasize the significance of using high-quality non-stick sprays or effective oiling methods to enhance the cooking surface of the fish. Here are some key techniques commonly practiced by professional chefs:
- Ensure a hot grill: Preheat the grill adequately to create an effective sear on the fish.
- Keep the skin on: Grill fish with the skin on whenever possible; it acts as a protective barrier.
- Minimize flipping: Flip the fish only once to avoid tearing its flesh.
- Employ indirect heat: For thicker cuts, consider using indirect heat to prevent burning.
- Utilize a fish basket: A grilling basket can provide stability for fragile fillets.
- Season appropriately: Salt the fish before grilling to help create a crust that minimizes sticking.
- Monitor doneness: Wait until the fish naturally releases from the grill before attempting to flip it.
These techniques not only enhance the grilling experience but also help achieve restaurant-quality results right from your backyard grill.
Common Mistakes to Avoid for Successful Fish Grilling
Grilling fish can be an incredibly rewarding experience, but several common mistakes can lead to sticking and disappointment. One significant pitfall is overcrowding the grill. Placing too much fish on the grill at once can lower the temperature and create steam, causing the fish to stick. Instead, grill fish in manageable batches, allowing sufficient space for even cooking.
Another frequent mistake involves flipping the fish too soon. It’s essential to allow the fish enough time to form a crust on the grill. A good rule of thumb is to wait until the fish easily releases itself from the grill, which typically takes about 3-5 minutes. Additionally, neglecting to preheat the grill can lead to sticking; always ensure your grill is hot before placing the fish on it.
Lastly, using poor-quality fish or fish that isn’t fresh can ruin your grilling experience. Always opt for high-quality, fresh fish to guarantee the best results. By steering clear of these common mistakes, you can savor perfectly grilled fish without the frustration of it sticking to the grill.
Best Practices for Grilling Fish on Different Grill Types
Grilling fish may vary based on the type of grill you use. Each grill type offers unique features that can influence how effectively you grill fish. For gas grills, the precise temperature control allows for even cooking, making them suitable for both delicate and thicker cuts of fish. Always ensure that the grates are well-oiled and preheated to the correct temperature before placing your fish.
Charcoal grills impart a delightful smoky flavor but require more attention to temperature management. Create heat zones by arranging the coals on one side, allowing for both direct and indirect grilling. This method can help prevent sticking, especially for thicker fish that may benefit from slower cooking using indirect heat.
Electric grills are user-friendly and often maintain a consistent temperature, significantly reducing the chances of sticking. They are particularly beneficial for indoor grilling, as they handle delicate fish well. Look for electric grills that come equipped with adjustable temperature settings to find the optimal heat level for your specific fish type.
Essential Tools for Achieving Grilling Success with Fish
Having the right tools at your disposal can dramatically enhance your grilling experience. Essential tools for grilling fish include a fish grilling basket, which securely holds the fish and prevents it from falling apart. Look for baskets with heat-resistant handles and a design that accommodates various fish sizes for maximum versatility.
A wide, slotted spatula is another crucial tool, allowing you to flip fish easily without breaking it apart. When selecting tongs, opt for sturdy, heat-resistant options to ensure you can maneuver the fish without any issues. Additionally, grill mats or aluminum foil can serve as practical alternatives, especially for ultra-delicate fish.
Utilizing a reliable meat thermometer is essential to ensure that your fish is cooked to perfection. Look for models that provide quick readings and can withstand high heat. Lastly, a good brush for applying marinades or oils is indispensable. Select brushes with heat-resistant bristles for safe and effective application. Having these tools not only enhances your grilling experience but also helps achieve the best results possible.
What Are the Most Effective Tools for Grilling Fish?
The Advantages of Using Fish Grilling Baskets
Fish grilling baskets are among the best tools specifically designed for holding fish while it cooks, preventing it from sticking to the grill grates. These baskets are especially useful for delicate fish fillets that might otherwise fall apart when flipped. The best features to look for in a fish grilling basket include sturdy construction that withstands high heat, a non-stick surface to prevent adherence, and a design that facilitates easy flipping.
Additionally, choose baskets that can accommodate various sizes of fish. Some baskets come with adjustable handles for added convenience, allowing you to position them over the grill with ease. A well-designed fish basket not only simplifies grilling but also enhances the overall cooking experience by ensuring even heat distribution around the fish.
Choosing the Right Spatulas and Tongs for Grilling
When it comes to flipping fish on the grill, using the correct spatula and tongs is crucial. A wide, slotted spatula is highly recommended, as its design allows for easy flipping of the fish while minimizing the risk of breaking it apart. Look for spatulas that are heat-resistant and sturdy, as they need to withstand high temperatures without bending or breaking.
Tongs are equally important for maneuvering fish without causing damage. Opt for tongs that have a good grip and are constructed from heat-resistant materials. Some tongs feature silicone tips, providing an added layer of protection against high temperatures while also being gentle on delicate fish. By selecting the right spatula and tongs, you enhance your control over the grilling process, leading to better results overall.
Using Grill Mats and Foil for Stress-Free Grilling
Grill mats and aluminum foil can be excellent alternatives for grilling fish, particularly for beginners or for especially delicate fish varieties. Grill mats provide a non-stick surface that helps retain the fish’s moisture while cooking. To use them effectively, ensure that they are designed for high temperatures and can withstand direct flames; this will help you avoid any burning or melting issues.
When using aluminum foil, create a pouch for the fish by folding it over and sealing the edges. This method helps lock in flavors and moisture. Remember to puncture a few holes in the foil to allow steam to escape during cooking. Both grill mats and foil provide a protective barrier between the fish and the grates, making them excellent tools for keeping your fish intact while grilling.
How to Utilize Thermometers for Perfectly Grilled Fish
Employing a meat thermometer is one of the most effective ways to guarantee that your fish is cooked to the desired temperature, thereby avoiding the risk of overcooking. When selecting a thermometer for grilling fish, look for digital probes that can endure high grill heat and provide quick readings. Ideally, the internal temperature of fish should reach 145°F for safe consumption, ensuring that it is both tender and flaky.
Some thermometers also feature alarms that notify you when the fish has reached its desired temperature, allowing you to focus on other aspects of your grilling. Having a reliable thermometer not only contributes to the quality of the grilled fish but also enhances your confidence in achieving the best results every time.
The Importance of Marinades and Brushes in Infusing Flavor into Fish
Marinades are vital for both flavoring and maintaining moisture in fish while on the grill. When selecting marinades, opt for those that include oil as a primary ingredient, as oil assists in creating a barrier against sticking. A great marinade can consist of a variety of ingredients such as citrus juice, herbs, and spices, all contributing to the fish’s flavor profile.
To apply marinades effectively, use a brush designed for grilling. Select brushes with heat-resistant bristles to ensure safety while working with high temperatures. A brush allows for an even application of the marinade, ensuring that every inch of the fish is infused with flavor. Keep in mind that allowing the fish to marinate for at least 30 minutes enhances its taste and moisture, making it less prone to sticking when grilled.
How to Season and Marinate Fish Effectively for Grilling
Selecting the Ideal Marinade for Your Fish
Choosing the right marinade is crucial, not only for flavor but also for ensuring that your fish remains moist during grilling. An effective marinade should primarily consist of oil, which creates a protective layer around the fish, reducing the risk of sticking. Common oil choices include olive oil, avocado oil, or other high smoke point oils that can withstand grilling temperatures without burning.
In addition to oil, a good marinade should incorporate flavor-enhancing ingredients. Ingredients like lemon juice, soy sauce, or vinegar introduce acidity that can tenderize the fish. Enhance the marinade with herbs and spices according to your taste preferences. Allowing the fish to soak in the marinade for at least 30 minutes will maximize flavor absorption and moisture retention, ultimately leading to a more enjoyable grilling experience.
Enhancing Flavor with Dry Rubs and Seasonings
Utilizing a dry rub is an excellent way to boost the flavor of grilled fish without adding extra moisture that could lead to sticking. A good dry rub typically consists of a blend of herbs, spices, and salt. The salt serves a dual purpose: it flavors the fish while also assisting in creating a crust that minimizes sticking during the grilling process.
When preparing to apply a dry rub, consider using a mix of common spices like paprika, garlic powder, black pepper, and dried herbs such as thyme or rosemary. It’s advisable to apply the dry rub 15-30 minutes before grilling; this allows the flavors to penetrate the fish while ensuring that it retains its structural integrity during cooking. This method not only enhances the flavor but also creates a delightful crust that complements the fish’s natural taste.
Timing and Application Techniques for Seasoning and Marinating
Timing is essential when it comes to marinating and seasoning fish for grilling. Ideally, you should marinate fish for a minimum of 30 minutes but can extend it to several hours depending on the type of fish and the marinade used. A shorter marination period is often sufficient for delicate fish, while thicker cuts can benefit from longer marination to absorb more flavors.
In terms of applying seasonings, it’s best to do so just before grilling. This approach allows you to maintain the freshness of the seasonings and prevents moisture loss. Use a light hand when seasoning; the goal is to enhance the fish’s natural flavor without overpowering it. By mastering the timing and method of seasoning, you can elevate your grilled fish to the next level.
Achieving Balance in Flavors and Acidity within Marinades
The secret to a deliciously grilled fish lies in balancing flavors and acidity. Incorporating citrus or vinegar into your marinade not only adds brightness but also enhances the overall flavor profile. The acidity in these ingredients interacts beautifully with the fish, making it taste fresh and vibrant.
To create a well-balanced marinade, combine your acid with sweetness and salt; this creates a harmonious blend that complements the fish without overwhelming it. For example, a citrus-based marinade can be enriched with honey for sweetness and seasoned with sea salt. This balance elevates the fish’s natural flavor while ensuring it remains moist and delectable. By experimenting with different ingredients, you can create unique profiles that enhance your grilling experience.
Proven Methods for Grilling Fish Without Sticking
Utilizing Effective Grilling Techniques
Employing the right grilling technique is crucial for preventing fish from sticking. The indirect grilling method is particularly effective for thicker fish cuts, as it promotes even cooking while minimizing direct contact with intense heat. This approach allows the fish to cook through without burning, thereby retaining its moisture and flavor.
For thinner fish fillets or delicate varieties, direct grilling can yield great results, provided that the grill is adequately preheated and oiled. Using a fish basket can also assist with flipping and cooking fish evenly without risking breakage. Additionally, allowing the fish to rest at room temperature for about 15 minutes before grilling helps it cook evenly and prevents sticking. Each technique serves to enhance the flavor and texture of your grilled fish, ensuring a delicious meal.
Mastering Temperature Control for Ideal Grilling Results
Maintaining consistent temperature is a critical factor in grilling fish successfully. Fluctuations in temperature can lead to uneven cooking, which may cause the fish to stick. Using a reliable thermometer to monitor both the grill’s heat and the fish’s internal temperature is essential. Aim for an internal temperature of 145°F for perfectly cooked fish, ensuring that it’s both safe to eat and tender.
To manage temperature fluctuations, avoid frequently lifting the grill lid, as this can let heat escape. Instead, check the temperature periodically using your thermometer. If you find the grill is too hot, you can move the fish to a cooler section of the grill or adjust the heat. Mastering temperature control will ultimately lead to better grilling outcomes and a reduced chance of sticking.
Timing and Flipping Techniques for Successful Grilling
Flipping the fish at the right moment is crucial in preventing it from sticking to the grill. It’s essential to flip the fish only once during cooking; flipping too frequently can result in breakage. Allow the fish to cook undisturbed for 3-5 minutes before attempting to flip it. The fish will naturally release from the grill when it’s ready to be turned.
Another indication that it’s time to flip is when the fish becomes opaque and starts to flake slightly at the edges. A gentle motion during flipping can help preserve the fish’s structure. By adhering to these timing and flipping strategies, you can significantly reduce the chances of your fish sticking to the grill, resulting in perfectly cooked fillets every time.
The Impact of Grill Type on Fish Sticking
The Advantages of Using Gas Grills for Fish Preparation
Gas grills are often preferred for their precise temperature control, making them an excellent choice for grilling fish. The even heat distribution helps cook delicate fish evenly, thereby reducing the likelihood of sticking. The ability to adjust the heat instantly allows for quick responses to any temperature fluctuations, ensuring that your fish remains perfectly cooked.
Another advantage of gas grills is the convenience of preheating. With just a turn of a knob, you can achieve the desired temperature quickly. This feature is particularly beneficial when grilling delicate fish like trout or flounder, which require careful attention to cooking time. Ultimately, the benefits of using a gas grill can lead to a more enjoyable and successful grilling experience.
Understanding the Challenges of Charcoal Grilling
Charcoal grills provide a distinctive smoky flavor that many people cherish, but they require more attention to heat management during the grilling process. The uneven heat distribution can pose challenges, particularly when grilling fish. To minimize sticking, it’s important to create heat zones by arranging the coals on one side of the grill, allowing for both direct and indirect cooking.
For thicker cuts of fish, utilizing the indirect heat method is advisable, as it promotes even cooking without burning. Regularly monitoring the temperature is key; this can prevent flare-ups and sticking. If you plan to use a charcoal grill, mastering heat management will significantly enhance your results while grilling fish.
Benefits of Electric Grills for Cooking Fish
Electric grills offer a range of benefits, particularly for indoor grilling enthusiasts. One of their most significant advantages is their ability to maintain a consistent temperature, which greatly reduces the chances of fish sticking. They are also incredibly user-friendly and allow for precise heat control. This reliability makes them an excellent choice for delicate fish varieties that require gentle cooking.
When selecting an electric grill for fish, look for features such as adjustable temperature settings and a non-stick surface. These features will facilitate a seamless grilling experience and help you achieve the perfect grill marks without worrying about fish sticking. Overall, electric grills can provide stress-free grilling, particularly for those new to cooking fish.
Achieving Consistent Results When Grilling Fish
How to Effectively Monitor Fish Doneness
Knowing when your fish is perfectly grilled is essential for achieving the best flavor and texture. Using a meat thermometer is the most reliable method; the fish should reach an internal temperature of 145°F for safe consumption. In addition to using a thermometer, visual cues can also be helpful. Look for the fish to be opaque and flaky when it’s done.
Another sign that indicates the fish is ready is its appearance; it should transition from translucent to opaque and begin to flake at the edges. Allowing the fish to rest for a few minutes after grilling also helps redistribute the juices, leading to a more flavorful and succulent result. Mastering the art of monitoring doneness will ensure you achieve perfectly grilled fish every time.
The Importance of Resting and Serving Techniques
After grilling, allowing your fish to rest is an often-overlooked but crucial step. Resting for a few minutes gives the juices time to redistribute within the fish, resulting in a moister and more flavorful dish. While the fish rests, consider preparing complementary sides to elevate your meal further. Grilled vegetables, rice pilaf, or a refreshing citrus salad can provide a delightful contrast to the rich flavors of the fish.
Drizzling the grilled fish with a citrus-based sauce or fresh herbs can enhance its presentation and flavor. When serving, be sure to present the fish on a warm plate, as this will help maintain an ideal temperature. These steps contribute not only to delivering a beautiful meal but also to a more enjoyable dining experience.
Best Practices for Cleaning Your Grill After Fish Cooking
Cleaning the grill immediately after use is an important practice for maintaining a pristine grilling experience in the future. After you’ve finished grilling, allow the grates to cool slightly, but not completely. Using a wire brush, scrub the grates to remove any food residue or leftover fish remains. For stubborn residue, soaking the grates in warm, soapy water can make cleaning easier.
Proper cleanup prevents buildup that could affect future grilling sessions, ensuring that your grill remains in optimal condition. Moreover, a clean grill contributes to better flavor profiles for your next meal, as lingering residues may impart unwanted flavors to your fish. By adopting a thorough cleaning routine, you can ensure consistent results and enhance the longevity of your grill.
Why Preheating the Grill is Essential for Grilling Success
Preheating the grill is a foundational step in achieving perfect grill marks and even cooking. Before you begin grilling, always take the time to preheat the grill to the desired temperature, typically around medium-high heat (400-450°F). This step ensures that the grill grates are hot enough to sear the fish quickly, which helps create a crust that reduces sticking.
Preheating not only facilitates even cooking but also helps in achieving that coveted grilled flavor and texture. A hot grill prevents the fish from clinging to the grates, allowing for easier flipping and serving. Make preheating a non-negotiable step in your grilling routine, as it sets the stage for the best possible outcomes.
Crucial Tips for Seasoning and Marinating Fish
When it comes to seasoning or marinating fish for grilling, the right approach can elevate your dish significantly. Begin by choosing a marinade that includes oil, acids, and herbs or spices; this combination enhances flavor while creating a barrier that minimizes sticking. Allow the fish to marinate for an appropriate amount of time to absorb these flavors, typically ranging from 30 minutes to a few hours.
When seasoning, apply a light hand just before grilling to maintain the freshness of the flavors. Consider using a mixture of dry spices for a flavorful crust that locks in moisture. By focusing on your seasoning and marinating techniques, you can ensure that your fish is not only flavorful but also perfectly grilled without the risk of sticking.
Frequently Asked Questions About Grilling Fish
What types of fish are ideal for grilling?
Fatty fish such as salmon and tuna are perfect for grilling due to their high oil content. Lean fish can also be successfully grilled with proper preparation and care.
How can you prevent fish from sticking to the grill?
To avoid sticking, clean the grill grates thoroughly, oil them, preheat the grill, and handle the fish gently during cooking.
What is the optimal temperature for grilling fish?
The best grilling temperature for fish is between 400-450°F, ensuring even cooking and a nice crust development.
How long should I allow fish to marinate before grilling?
Marinate fish for at least 30 minutes or up to several hours, depending on the type and recipe, to enhance flavor and moisture retention.
What common mistakes should I avoid when grilling fish?
Avoid overcrowding the grill, flipping too soon, and using fish that isn’t fresh. Proper preparation and timing can help mitigate these issues.
What tools are essential for grilling fish?
Crucial tools include a fish grilling basket, a wide spatula, tongs, grill mats, and a meat thermometer for checking doneness.
How can I determine when my fish is fully cooked?
Fish is done when it reaches an internal temperature of 145°F, appears opaque, and flakes easily with a fork.
Is marinating fish really necessary?
While not required, marinades enhance flavor and moisture, helping to prevent sticking during grilling.
What side dishes pair well with grilled fish?
Complementary sides for grilled fish include grilled vegetables, rice, salad, or a citrus sauce to enhance flavor.
How should I clean my grill after cooking fish?
Clean the grill immediately after use while it’s still warm, using a wire brush and soapy water if necessary to remove residue.
Connect with us on Facebook!
The Article How to Grill Fish Without It Sticking: US Tips appeared first on https://pitmastersarsenal.com
The Article Grill Fish Without Sticking: Top Tips from the US Was Found On https://limitsofstrategy.com
-

Grilling Burgers Without a Grill: Your Ultimate Guide
Key Tools for Perfecting Your Indoor Burger Grilling Experience
Choosing the Ideal Pan for Masterful Indoor Burger Grilling
To successfully replicate the genuine grilling experience within your home, selecting the proper pan is crucial. Opting for a cast-iron or heavy-bottomed skillet is advisable, as it effectively mimics a grill’s capability to retain heat and achieve a flawless sear. Cast-iron pans excel in forming a mouthwatering crust on your burgers while evenly distributing heat, an essential aspect for thoroughly cooking the meat. When choosing your pan, consider its dimensions in relation to your cooking space; a 12-inch skillet is often the perfect choice for preparing multiple burgers simultaneously, making it easier to serve larger groups of family or friends efficiently.
Additionally, the thickness of the pan is an important consideration. Thicker pans provide excellent heat retention, which is advantageous for creating that desirable sear. A well-seasoned cast-iron skillet not only offers an outstanding cooking surface but also contributes a layer of flavor to your burgers, enhancing the overall taste experience significantly. The weight of the pan also plays a critical role; heavier pans maintain heat for extended periods, which is vital for the searing process. This leads to the delightful Maillard reaction, the browning of the meat that produces the rich, complex flavors we all seek in a perfect burger.
Must-Have Accessories to Enhance Your Indoor Burger Grilling
To elevate your indoor grilling experience, investing in a selection of specialized accessories is highly advantageous. Grill pans featuring raised ridges allow excess fat to drain away while creating those signature grill marks that mimic outdoor grilling. A robust griddle serves a similar purpose and proves especially useful for cooking several items at once, ensuring that everyone enjoys a freshly grilled meal.
For those focused on preserving the juiciness of their burgers, press weights can be invaluable. These tools apply even pressure, guaranteeing uniform cooking throughout your burger patties. When selecting these accessories, aim for surfaces that are either non-stick or pre-seasoned to promote easy food release without sticking. Silicone spatulas are perfect for flipping and transferring burgers without damaging your cookware’s surface, making them indispensable in your grilling toolkit.
In essence, equipping yourself with the right tools not only enhances the quality of your burgers but also improves the overall cooking experience, transforming indoor grilling from a mundane task into an enjoyable culinary adventure.
Essential Safety Gear for Indoor Grilling Success
Prioritizing safety is critical when diving into the realm of indoor grilling. Essential safety equipment includes oven mitts, splatter guards, and a fire extinguisher. Oven mitts shield your hands from burns when handling hot pans or trays, while splatter guards prevent oil and juices from creating a mess on your stovetop and surrounding areas, maintaining a cleaner and safer kitchen environment.
A fire extinguisher is indispensable, especially when utilizing high heat, to be prepared for any unforeseen flare-ups that may occur. It’s also wise to keep a first-aid kit nearby for any minor accidents that may arise during cooking. Additionally, ensure that your smoke detectors are functioning correctly; this offers peace of mind as you concentrate on achieving that ideal burger without distractions.
Beyond immediate safety equipment, it’s prudent to establish a designated area for indoor grilling. This includes ensuring your cooking space is free from flammable materials and that you are using appliances specifically designed for high heat. By preparing your environment and arming yourself with the necessary safety tools, you can enjoy indoor grilling with confidence and peace of mind.
Implementing Effective Ventilation for Indoor Burger Grilling

Effective ventilation is vital when grilling indoors to manage smoke and odors proficiently. Utilizing a range hood can significantly reduce smoke accumulation and keep your kitchen comfortable while you cook. If a hood isn’t available, opening windows or using exhaust fans can facilitate airflow, allowing fresh air to circulate and smoke to disperse, creating a more enjoyable cooking experience.
In some instances, cooking on a balcony or in an outdoor space with adequate ventilation can also be a viable option. If neither scenario is feasible, consider investing in an air purifier designed to eliminate cooking odors and particles from the air. This is particularly advantageous when employing cooking techniques that produce increased smoke, such as searing at high temperatures, as it helps to ensure your indoor area remains fresh and inviting.
Utilizing effective ventilation not only improves the cooking environment but also enriches the overall dining experience, allowing you to concentrate on flavors without being overwhelmed by lingering odors.
Crafting Irresistible Burger Patties
Choosing Premium Quality Meat for Delicious Burger Patties
The cornerstone of any exceptional burger lies in the quality of the meat you choose. Selecting high-caliber cuts with the right fat content is essential for achieving juicy and flavorful patties. Ground chuck, typically containing around 80/20 fat content, is a favored choice among burger enthusiasts. This ratio ensures that your burgers remain moist and tender during cooking, whereas leaner meats often result in drier burgers lacking richness.
Exploring various cuts of beef can unveil exciting flavor profiles; incorporating cuts such as brisket or short rib can significantly elevate your burger experience. For those in search of alternative protein sources, minced turkey or plant-based meats can also be utilized to create delicious burgers. However, these may necessitate adjustments in cooking time and temperature to achieve the desired texture.
When selecting your meat, freshness is paramount; sourcing from local butchers or farmers’ markets frequently results in higher-quality options. Moreover, understanding the animal’s diet and treatment can greatly influence the flavor and quality of the meat, giving your burgers an edge in taste that is simply unparalleled.
Effective Seasoning Techniques for Maximum Burger Flavor

The method you employ to season your burger is just as crucial as the quality of the meat itself. A straightforward yet effective approach begins with the essentials: ample pinches of salt and pepper can significantly enhance the meat’s natural flavors. However, experimenting with various herbs and spices can elevate your burgers to new culinary heights, introducing layers of complexity that enhance their overall appeal.
Dried herbs such as oregano, thyme, and garlic powder can contribute depth, while smoked paprika introduces a hint of smokiness reminiscent of outdoor grilling, delighting the senses. For those seeking a bit of excitement, consider using blends like Cajun seasoning, which can provide a delightful kick that enlivens your burgers.
Do not hesitate to marinate your patties prior to cooking; a simple marinade consisting of olive oil, balsamic vinegar, and herbs can infuse the meat with additional flavor. Ultimately, the key to a well-seasoned burger lies in achieving balance—over-seasoning can overpower the meat, while under-seasoning may leave it bland. Finding that sweet spot is essential for crafting a mouthwatering burger that satisfies every palate.
Shaping and Sizing Your Burger Patties for Optimal Cooking
Ensuring uniformity in the size of your patties is critical for even cooking. When shaping your patties, aim for a consistent thickness—typically around 1 to 1.5 inches—to ensure they cook evenly throughout. Utilizing a burger press can help you achieve this consistency quickly and easily, but hand-shaping can also be just as effective if you prefer a more personal touch.
While forming the patties, it’s essential to create a slight indentation in the center. This technique, known as the dimple method, aids in maintaining the burgers’ shape during cooking and prevents them from puffing up. Additionally, it is crucial to handle the meat gently; overworking it can lead to tough burgers that lack the tenderness you desire.
After shaping, it’s highly advisable to chill the patties in the refrigerator for at least 30 minutes before cooking. This step not only helps preserve their shape but also enhances the texture, resulting in a juicier burger overall. Properly shaped and chilled patties lay the groundwork for a delightful grilling experience that everyone will enjoy.
Understanding the Importance of Chilling Patties Before Cooking
Chilling your burger patties before cooking is an essential step that can significantly influence the final result. By allowing the patties to cool in the refrigerator for at least 30 minutes, you help them maintain their shape during the cooking process. This is particularly vital for ensuring even cooking and achieving the ideal texture that makes a burger truly enjoyable.
When the patties are chilled, they are less likely to shrink dramatically when exposed to high heat. This results in burgers that not only look enticing but also retain their juiciness and flavor throughout cooking. Furthermore, chilling aids in solidifying the fat within the meat, which can create a more succulent bite once cooked to perfection.
To chill your patties effectively, place them on a tray lined with parchment paper or a plate, ensuring they are not stacked on top of one another. Loosely covering them with plastic wrap can help prevent contamination from other foods during the chilling period. This simple yet effective technique is often overlooked, but it can greatly enhance the overall quality of your burgers, ensuring they are nothing short of delectable.
Expert Insights on Indoor Burger Grilling Techniques
Techniques Employed by Professional Chefs for Indoor Burger Grilling
Professional chefs possess a wealth of techniques that can elevate indoor grilling, ensuring home cooks can achieve restaurant-quality burgers. One prevalent method involves utilizing high heat to achieve a proper sear, which locks in moisture and flavor. Chefs recommend preheating your pan to a high temperature, allowing for that perfect crust while keeping the inside juicy and tender.
Another technique entails employing a two-zone cooking method, where you cook the burgers on high heat to sear them and then move them to a cooler part of the pan to finish cooking through. This methodology mimics the indirect grilling often utilized in outdoor setups, promoting even cooking without the risk of burning the exterior of the patties.
Additionally, many chefs advocate enhancing burgers with a butter baste. Adding a tablespoon of butter to the pan during the final minutes of cooking and spooning it over the patties introduces richness and depth of flavor that elevates the overall taste experience. Here’s a concise list of key techniques that professionals recommend for perfect indoor burgers:
- Preheat your pan thoroughly before adding burgers.
- Utilize a two-zone cooking method for even doneness.
- Implement a butter baste for added richness and flavor.
- Experiment with various types of meat for unique flavor profiles.
- Incorporate fresh herbs and spices to enhance taste.
- Add cheese during the last moments of cooking for perfect melting.
- Rest the patties after cooking to allow juices to redistribute effectively.
- Emphasize the importance of using a meat thermometer for cooking precision.
These techniques, when adapted for home cooking, can significantly improve the quality of your indoor grilled burgers, ensuring they are delicious and satisfying for everyone involved.
Avoiding Common Mistakes for Perfect Indoor Grilling
Steering clear of common pitfalls in indoor burger grilling is essential for achieving stellar results. One prevalent mistake is overcooking the patties, which can lead to dry and flavorless burgers that lack the juiciness you desire. To mitigate this, closely monitor the cooking process and utilize a meat thermometer to check for doneness. Medium-rare burgers should reach an internal temperature of 63°C, while well-done patties should be cooked to 74°C to ensure safety.
Another frequent mistake is failing to allow the pan to heat sufficiently before adding the food. Without adequate preheating, patties can stick to the surface and fail to develop a proper sear, resulting in less-than-optimal flavor. Always test the pan’s readiness with a drop of water—if it sizzles, you’re ready to cook.
Additionally, flipping your burgers too frequently can disrupt the searing process, which is vital for developing that delicious crust. Ideally, aim for a single flip after 3-4 minutes, depending on the thickness of the patty. Pressing down on the patties while they cook can also release essential juices, resulting in a drier end product that may not satisfy your taste buds.
By being mindful of these common mistakes, you can ensure that your indoor grilling experience results in delicious, perfectly cooked burgers every time, impressing your family and friends alike.
Maximizing Flavor When Grilling Indoors
Infusing smoky flavors into your indoor grilled burgers can elevate them to new culinary heights, even without a traditional grill. One popular method is to use liquid smoke, a concentrated flavoring derived from the condensation of smoke. A few drops mixed into your burger meat can replicate that beloved taste of outdoor grilling, providing an authentic experience.
Alternatively, consider using wood chips placed in a smoker box or wrapped in foil with holes poked in it. When heated, these chips release aromatic smoke that can impart a delightful flavor to your burgers. Though this method requires a bit more setup, it can yield impressive results that transport your taste buds outdoors, making the effort well worth it.
Another effective technique for enhancing flavor is using smoking salts. Sprinkling these salts on your formed patties before cooking can add depth of savoriness that mimics the essence of grilled meat. Experimenting with different types of wood chips, such as hickory or mesquite, can further enrich the flavor profile of your burgers. With these techniques in your arsenal, you can easily create burgers bursting with flavor without needing to step outside.
Cooking Techniques for Crafting the Ultimate Burger
The Importance of Proper Pan Preheating for Perfect Burger Grilling
Preheating your pan is a pivotal step in achieving that perfect sear on your burger. By heating your pan on high heat for at least five minutes before adding your patties, you create a hot surface that facilitates the Maillard reaction—the process responsible for browning and flavor development. A hot pan not only sears the surface of the meat but also helps lock in juices, resulting in a more flavorful burger that is sure to impress.
To determine whether your pan is adequately preheated, drop a small amount of water onto the surface. If the water droplets sizzle and evaporate immediately, your pan is ready for cooking. Proper preheating can make a significant difference in the final result, ensuring that each burger is cooked to perfection and possesses that sought-after crust.
Moreover, consider the type of cooking fat you use. Choosing oils with a high smoke point, such as canola or avocado oil, is advisable, as they can withstand the elevated temperatures required for searing without burning. This step also adds a layer of flavor, enhancing the overall taste of your burgers. By mastering the preheating process, you set the stage for consistently successful grilled burgers, ensuring satisfaction with every bite.
Best Practices for Flipping and Pressing Burgers
When flipping burgers, less is often more. Flipping too frequently can disrupt the formation of a good sear, preventing that desirable crust from developing. The ideal approach is to flip your burgers only once, approximately three to four minutes after placing them on the pan, based on their thickness and your desired doneness.
Pressing down on the patties while they cook is another common mistake. While it may be tempting to squeeze out any excess juices, doing so can lead to a dry burger that lacks the moisture and flavor that makes it enjoyable. Instead, allow the natural juices to remain within the patty, contributing to a tastier and more succulent outcome that will impress your guests.
If you’re eager to achieve a perfectly cooked burger, consider using a meat thermometer to check for doneness. This handy tool eliminates the guesswork of cooking, ensuring you achieve your desired level of doneness without the risk of overcooking. With these flipping and pressing techniques, you’ll be well on your way to mastering the art of indoor burger grilling, delighting everyone at your table.
Accurate Methods for Checking Burger Doneness
Determining when a burger is perfectly cooked is essential for both safety and taste. The most reliable method to achieve this is by using a meat thermometer; the internal temperature of your burger should read 63°C for medium-rare and 74°C for well-done. This ensures that any harmful bacteria are eliminated while maintaining the desired juiciness that makes a burger truly delicious.
In addition to using a thermometer, visual cues can also indicate when food is done. A well-cooked burger should have a firm texture and a slightly pink center, indicating that it remains moist inside. The exterior should be a deep golden brown, a sign that a good sear has been achieved, contributing to the overall flavor.
Seasoning plays a vital role as well; if you’ve seasoned your burgers well, the crust will reflect that, making it easier to gauge doneness. If the patties are nicely browned and feel firm yet springy, you’re likely in the right zone for serving. By honing in on these methods, you’ll consistently produce burgers that are cooked to perfection, ensuring an enjoyable dining experience for everyone involved.
Enhancing Your Burger Experience for Ultimate Satisfaction
Selecting the Best Buns to Complement Your Burgers
The bun you select can greatly enhance your burger experience, serving as the ideal vessel for all those delicious fillings. Opt for fresh, sturdy options that can withstand juicy toppings and fillings. Brioche buns are a popular choice for their slightly sweet flavor and soft texture, providing a delightful contrast to the savory meat while adding an indulgent touch.
Alternatively, sesame seed buns offer a classic touch that pairs beautifully with traditional burger toppings, evoking a sense of nostalgia. For those seeking a denser option, consider pretzel buns; their unique flavor and chewy texture can add an exciting layer to your burger, making each bite a delightful experience.
Regardless of the type, ensure your buns are fresh. Stale buns can detract from the overall experience, leading to a less enjoyable bite. Lightly toasting the insides of your buns on the grill or in the pan can also enhance their texture and prevent them from becoming soggy from the burger juices. By focusing on the quality and type of bun, you can significantly enhance the overall enjoyment of your burgers, transforming a simple meal into a truly memorable culinary experience.
Elevating Your Burger with Unique Toppings and Condiments
Toppings and condiments play a crucial role in defining the flavor profile of your burger, allowing for creativity and personalization. While classics like lettuce, tomato, onion, and pickles are always crowd-pleasers, don’t hesitate to explore more adventurous options that can elevate your creation. Cheese, for instance, can enhance a burger’s appeal; try varieties like cheddar, blue, or pepper jack for an exciting burst of flavor that complements the meat.
Adding a crispy bacon layer can introduce savory richness, while avocado slices offer creaminess that pairs beautifully with well-seasoned meat, elevating the entire burger experience. Specialty sauces, such as homemade mayonnaise, tangy barbecue sauce, or spicy aioli, can also add an exciting twist that surprises the palate.
Experimentation is key; consider combining toppings to create unique flavor profiles. For example, a burger topped with jalapeños, pepper jack cheese, and chipotle mayo can deliver a satisfying kick that adds depth to your meal. Remember, the right balance of toppings can elevate your burger from ordinary to extraordinary, making every bite a memorable moment that diners will savor.
Complementary Side Dishes and Pairings for Your Burgers
Enhancing your burgers with the right side dishes can create a well-rounded meal that tantalizes the senses. Classic options like crispy fries, coleslaw, or a refreshing garden salad can elevate the overall dining experience, providing contrasting textures and flavors that complement your juicy burgers. When it comes to fries, consider variations like sweet potato fries or loaded fries topped with cheese and bacon for an indulgent treat that tantalizes the taste buds.
Pairing your burgers with beverages can also enhance the meal; craft beers often pair beautifully with rich, meaty flavors, while a crisp soda can cleanse the palate after each bite. For a more indulgent combination, consider serving milkshakes or smoothies alongside your burgers, offering a delightful contrast to the savory components of your meal that makes the entire experience more enjoyable.
Overall, thoughtfully chosen side dishes and pairings can transform a simple burger into a full-fledged culinary experience, allowing for a satisfying and enjoyable meal that leaves guests raving long after the meal is over.
Cooking Techniques for Improving Your Burger’s Texture and Flavor
Mastering various cooking techniques can significantly enhance the texture and flavor of your burger, creating a more satisfying eating experience. Consider techniques like smashing, where the patty is pressed onto the hot cooking surface, resulting in a caramelized crust that maximizes flavor and texture. This method is particularly popular in diner-style burgers and can yield delicious results that are hard to resist.
For a more traditional approach, searing is crucial for achieving that coveted golden-brown crust that adds depth to the flavor. By using high heat and allowing the patty to cook undisturbed for a few minutes, you enhance the depth of flavor through the Maillard reaction, making each bite more enjoyable.
If you prefer a more controlled cooking process, slow-cooking can be an effective method, especially for thicker patties. This technique allows the burger to cook evenly without burning the exterior, resulting in a juicy and tender product that is sure to impress. Mastering these cooking techniques gives you the versatility to create a variety of burgers, each with its unique profile and taste that reflects your culinary style.
Research-Backed Benefits of Indoor Burger Grilling
Healthier Cooking Options Offered by Indoor Grilling
Choosing to grill burgers indoors can provide healthier cooking methods compared to traditional outdoor grilling techniques. Research indicates that indoor grilling may reduce exposure to harmful compounds commonly associated with outdoor grilling, such as polycyclic aromatic hydrocarbons (PAHs) and heterocyclic amines (HCAs) that form when meat is cooked at high temperatures over an open flame.
Indoor grilling not only limits the creation of these harmful substances but also allows for more controlled cooking temperatures, ensuring better health outcomes and safety for your meals. By being mindful of your cooking methods, you can minimize risks while enjoying the deliciousness of grilled food.
Additionally, indoor grilling can be customized to incorporate healthier ingredients and cooking methods, such as opting for leaner meats and including fresh vegetables. By consciously selecting ingredients and cooking techniques, you can create a balanced meal that prioritizes both flavor and health, satisfying your cravings without compromising your dietary goals.
Year-Round Enjoyment with Indoor Grilling
Indoor grilling offers the convenience of enjoying burgers throughout the year, regardless of weather conditions. Whether it’s snowing in winter or raining in spring, you can whip up delicious burgers without worrying about outdoor elements affecting your cooking plans. This consistent access to grilling allows for greater creativity in meal preparation, enabling you to explore new flavors and techniques regardless of the season.
Furthermore, indoor grilling is often more convenient. You can set up and cook in your kitchen without the need for extensive outdoor setups, making it easier to experiment with different flavors, toppings, and techniques, all while turning it into a fun culinary experience for you and your guests.
The consistency of indoor grilling allows you to hone your techniques over time, achieving better results with each attempt. This reliability is ideal for anyone looking to elevate their burger game, making it a preferred method for many home cooks who appreciate the ease and accessibility of indoor grilling.
Environmental Considerations of Indoor Grilling
Indoor grilling can be more energy-efficient than outdoor grilling, particularly in urban areas where heating outdoor grills typically requires more fuel. Studies indicate that indoor grilling can lead to lower emissions and resource use, positively contributing to sustainability efforts while allowing you to enjoy delicious meals.
Additionally, cooking indoors often requires less preparation than traditional grilling, which can involve setting up the grill, preparing charcoal or gas, and managing the cleanup afterward. By using a stovetop or electric grill, energy consumption is minimized, benefiting the environment while providing a convenient cooking option that fits seamlessly into your lifestyle.
With the increasing focus on sustainable cooking practices, embracing indoor grilling can be a responsible choice that aligns with environmentally conscious living, allowing you to enjoy your favorite meals while being mindful of your impact on the planet.
Cleaning and Maintaining Your Indoor Grilling Equipment
Optimal Cleaning Practices for Your Indoor Grilling Tools
Post-cooking maintenance is vital for prolonging the life of your grilling equipment and ensuring optimal cooking results for future meals. After using your pan, allow it to cool down slightly before attempting to clean it. This prevents thermal shock, which can warp or damage your cookware, ensuring it remains in peak condition for years to come.
For general cleaning, use warm, soapy water and a soft sponge to gently scrub away any food residue that may have accumulated during cooking. It’s essential to avoid abrasive cleaners or scrubbers, as these can scratch the surface of your pans and compromise their non-stick properties. For stubborn residues, consider soaking the pan in warm, soapy water or applying a paste of baking soda and water to help lift the grime.
If you’ve used a cast iron pan, remember to follow proper care guidelines, such as thoroughly drying it after washing and applying a light coat of oil to prevent rust. By maintaining your grilling equipment properly, you can ensure it remains in excellent condition for years to come, allowing you to enjoy countless delicious burger feasts.
Maintaining Non-Stick Surfaces for Longevity
When it comes to non-stick surfaces, proper maintenance is crucial to ensure their longevity and effectiveness. To maintain these surfaces, avoid using metal utensils or harsh cleaners that can scratch or damage the coating. Instead, opt for silicone or wooden utensils that are gentle on the surface, preserving their integrity and ensuring a seamless cooking experience.
Regularly seasoning your non-stick pans can further enhance their performance and lifespan. A light application of cooking oil creates a protective layer that prevents sticking and prolongs the life of the coating. It’s also vital to follow the manufacturer’s guidelines for cleaning and care; adhering to these recommendations will help maintain the non-stick properties of your cookware and ensure consistent cooking results.
By prioritizing care for your non-stick surfaces, you can enjoy a seamless cooking experience that not only makes grilling easier but also improves the quality of your burgers, allowing you to create delightful meals without frustration.
Best Practices for Storing Your Grilling Tools
Proper storage of your grilling tools can significantly extend their lifespan and maintain their performance. After cleaning, ensure your pans and accessories are completely dry before storing them. Moisture can lead to rust or corrosion, particularly in metal utensils and cast iron pans, affecting their functionality over time.
Store your pans in a cool, dry place, ideally hanging or stacked, to prevent scratches and damage. If you have non-stick pans, consider placing a soft cloth or paper towel between stacked pans to prevent damage to the coating. For accessories like spatulas and press weights, designate a specific drawer or container to keep them organized and easily accessible whenever you’re ready to grill.
Using protective covers for your grilling tools can also help prevent dust accumulation and physical damage. By taking the time to store your tools properly, you can ensure they remain ready for use and maintain their integrity for all your indoor grilling adventures, allowing you to cook with confidence and ease.
Troubleshooting Common Indoor Grilling Challenges
Resolving Sticking Burgers for a Smooth Cooking Experience
If your burgers are sticking to the pan, it’s often a sign that the pan is not hot enough or that the meat is too lean. To prevent sticking, ensure your pan is adequately preheated before adding the patties. A hot pan creates a natural sear that helps to release the meat, making it easier to flip without damaging the patty.
Using a small amount of oil can also be beneficial; opt for oils with high smoke points, like canola or grapeseed, to create a non-stick environment that promotes easy cooking. Additionally, consider the fat content of your meat; burgers made from lean cuts may benefit from added fat, such as bacon or oil, to enhance moisture and prevent sticking during grilling.
If you find that burgers do stick despite these efforts, gently using a spatula to loosen the edges before flipping can help. By following these tips, you can enjoy perfectly seared burgers without the frustration of sticking, allowing you to savor your meal fully.
Managing Smoke and Odours for a Pleasant Cooking Environment
Effectively managing smoke and odors is crucial for a pleasant indoor grilling experience. If you notice smoke beginning to accumulate, consider opening windows and using exhaust fans to enhance ventilation. This will allow fresh air to circulate and help dissipate any lingering odors, ensuring your cooking space remains comfortable.
Cooking at a moderate temperature can also help reduce smoke production. While high heat is essential for achieving a good sear, excessive heat can lead to excessive smoke, especially from fats. Adjusting your cooking temperature as needed can help balance flavor development with effective smoke management, making the process more enjoyable.
Additionally, consider using an air purifier or placing bowls of vinegar or baking soda around the kitchen to neutralize odors. These simple strategies can greatly improve indoor air quality while you enjoy your grilling session, creating a more pleasant environment for everyone involved.
Achieving Consistent Results for Indoor Grilling Success
Consistency in burger grilling can be challenging, but with practice and a few helpful tips, it’s entirely achievable. Start by using a timer to monitor cooking times; this helps eliminate the guesswork from the process and ensures a more reliable cooking experience that you can replicate consistently over time.
Maintaining even heat throughout your cooking surface is crucial. If using a stovetop, consider rotating your pans if your burner has hot spots to ensure uniform cooking. Additionally, practicing your flipping technique can contribute to consistent results. The more comfortable you become with flipping and monitoring your burgers, the better your outcomes will be, leading to perfectly cooked burgers every time.
Finally, adjusting your cooking times based on patty thickness and personal preference can help promote consistency, allowing you to cater to a variety of tastes and preferences. With these strategies in place, you’ll develop a reliable approach to indoor grilling that consistently delivers delicious burgers, impressing your family and friends alike.
Advanced Techniques and Tips for Indoor Burger Grilling
Creating Authentic Grill Marks Indoors for Visual Appeal
Achieving those coveted grill marks indoors is not only visually appealing but also adds an extra dimension of flavor to your burgers. To create grill marks, invest in a ridged grill pan. These pans feature raised surfaces that mimic the lines of an outdoor grill, giving your burgers an authentic appearance.
When cooking, gently press down on the patties for a few seconds to create the desired marks. To achieve a crisscross pattern, rotate the patties 90 degrees halfway through cooking. This straightforward technique not only enhances your burgers’ appearance but also increases the surface area that caramelizes, enhancing flavor.
Timing is crucial—press down only once per side to prevent juices from escaping. With the right techniques, you can master the art of creating impressive grill marks indoors, elevating your burger presentation and impressing your guests with both flavor and aesthetics.
Infusing Smoky Flavors into Your Burgers for Enhanced Taste
Adding smoky flavors to your burgers can significantly elevate their appeal, even without a traditional grill. One effective method is to incorporate liquid smoke into your meat mixture. Just a few drops can impart rich, smoky undertones reminiscent of outdoor grilling that will tantalize your taste buds.
If you want to go a step further, consider using smoked salts. Sprinkling these on your patties before cooking can introduce a depth of flavor that enhances the overall taste of your burgers. Another option is to use wood chips; if you have a stovetop smoker, you can infuse your burgers with authentic smoky flavors by adding chips to the smoker box and letting them smolder while you cook.
Each of these methods can significantly transform your indoor grilling experience, allowing you to enjoy the essence of outdoor cooking from the comfort of your kitchen, resulting in burgers that are nothing short of spectacular.
Exploring Different Meats for Unique Burger Creations
While beef is the classic choice for burgers, experimenting with different meats can yield exciting culinary results that surprise and delight. Ground turkey or chicken can provide a lighter alternative, but be sure to adjust cooking times and temperatures, as these meats can dry out more easily than beef, requiring careful attention during grilling.
For a richer flavor, consider using lamb, which can bring a unique twist to your burgers that many will find appealing. Alternatively, plant-based options like black bean or chickpea patties can cater to vegetarian and vegan preferences while still delivering on taste and texture, making them a great addition to your grilling repertoire.
When working with different meats, monitor the cooking temperature closely to ensure even cooking. For instance, turkey and chicken should be cooked to at least 74°C to ensure safety, while lamb can be enjoyed at varying degrees of doneness based on personal preference. By exploring various meats, you’ll discover new flavor profiles and textures that can keep your burger game fresh and exciting, ensuring every meal is a delightful adventure.
Mastering the Art of Seasoning for Flavorful Burgers
The art of seasoning is a critical skill for any burger enthusiast looking to elevate their creations. To enhance flavor effectively, start with a base of salt and pepper, but don’t hesitate to experiment with different spice blends that cater to your palate and preferences.
Consider marinating your patties to infuse deeper flavors into the meat. A mixture of olive oil, balsamic vinegar, and herbs can create a delicious marinade that profoundly enhances the taste of the meat. For dry seasoning, try blends like garlic powder, smoked paprika, or even Cajun seasoning to add layers of complexity that your diners will appreciate.
Mastering seasoning is about finding balance; taste your mixture before shaping the patties to ensure it aligns with your flavor preferences and enhances the overall burger experience. By honing your seasoning skills, you’ll elevate your burgers and create a memorable culinary experience that keeps everyone coming back for more.
Frequently Asked Questions about Indoor Burger Grilling
Can I grill burgers without an actual grill?
Yes, you can grill burgers without a traditional grill by using a cast-iron pan, grill pan, or stovetop griddle to achieve results similar to those of outdoor grilling.
What is the best type of meat for indoor grilling?
Ground chuck, with a fat content of around 80/20, is ideal for juicy burgers, but you can also experiment with other meats, such as turkey or lamb, for different flavors.
How do I prevent my burgers from sticking to the pan?
Ensure your pan is adequately preheated and use a small amount of high-smoke-point oil to create a non-stick environment, promoting easier cooking.
What’s the ideal cooking temperature for burgers indoors?
Cook burgers at high heat for searing, and check the internal temperature with a meat thermometer—medium-rare is approximately 63°C, while well-done is around 74°C.
How can I add smoky flavor to my burgers indoors?
You can use liquid smoke, smoked salts, or wood chips in a stovetop smoker to infuse smoky flavors into your indoor burgers, enhancing their overall taste.
Is it necessary to chill burger patties before cooking?
Yes, chilling burger patties for at least 30 minutes helps them maintain shape during cooking and enhances their texture, resulting in a more enjoyable burger.
What are some common mistakes to avoid when grilling burgers indoors?
Avoid overcooking, not preheating the pan, flipping too frequently, and pressing down on the patties while they cook, as these can all lead to less-than-ideal results.
What toppings are best for burgers?
Classic toppings include lettuce, tomato, onion, and pickles, but try adding cheese, bacon, or avocado for extra flavor and variety that enhances your burger experience.
How do I clean my grilling equipment after cooking?
Let pans cool, then use warm, soapy water and a soft sponge. For stubborn residues, soak the pans and use a paste of baking soda to help remove any stuck-on bits.
Can I use plant-based meat for burgers?
Absolutely! Plant-based meats can offer delicious alternatives to traditional beef burgers, and they often require different cooking times and methods for optimal results.
Connect with us on Facebook for more grilling tips and recipes!
The post How to Grill Burgers Without a Grill: A Universal Guide appeared first on https://cookinggods.com
The Article Grilling Burgers Without a Grill: A Complete Guide Was Found On https://limitsofstrategy.com
-

Toast Without a Toaster: Simple Methods to Try
Must-Have Kitchen Tools for Achieving Perfectly Toasted Bread
Which Kitchen Tools Are Most Effective for Toasting Bread?
Exploring how to create toast without a toaster opens up a myriad of culinary possibilities. By leveraging various kitchen tools, you can utilize different methods that yield unique flavor profiles and textures. The most commonly utilized tools for this purpose include:
- Frying Pan: Ideal for stovetop toasting, providing direct heat control and rapid results.
- Oven: Perfect for batch toasting, as it allows you to achieve an evenly browned finish on multiple slices simultaneously.
- Grill: Imparts a delightful charred flavor, especially suited for thicker slices of bread.
Utilizing a frying pan is recognized as the most accessible and straightforward method for toasting. It allows the cook to closely monitor the bread, ensuring it reaches the ideal level of crispness. While the oven may take a bit longer, it excels at toasting larger quantities consistently. On the other hand, grilling adds a unique flavor that enhances the toast experience, particularly for those who appreciate a touch of smokiness in their meals. Each method can be tailored to accommodate different types of bread and the desired final result.
How to Prepare Your Bread Properly for Optimal Toasting
Preparing your bread correctly is crucial before embarking on the toasting process to achieve the best possible results. Start by letting your bread warm up to room temperature, as this step ensures even toasting throughout. Here are some effective tips for preparing your bread:
- Slice Evenly: Cut your bread into uniform slices to promote even toasting.
- Consider the Type of Bread: Different breads have unique toasting characteristics, and knowing these can lead to superior results.
- Storage Conditions: Utilize bread that has been stored properly to prevent sogginess or excessive dryness.
Slicing your bread evenly guarantees consistent heat exposure for each piece, minimizing the risk of some slices burning while others remain undercooked. When selecting your bread, it’s essential to consider how different types—such as wholemeal, sourdough, or brioche—react to heat. For instance, denser breads like sourdough may need a slightly longer toasting time compared to lighter varieties. Additionally, proper bread storage enhances its toasting quality; stale or overly moist bread can lead to disappointing results.
What Essential Safety Measures Should You Follow When Toasting Without a Toaster?
Toasting bread without a toaster introduces a unique set of safety concerns. By following a few straightforward safety tips, you can ensure the process is both effective and safe. Here are the key precautions to keep in mind:
- Use Oven Mitts: Protect your hands from burns when handling hot pans or trays.
- Keep an Eye on Your Bread: Remain vigilant while toasting to prevent burning.
- Ensure Proper Ventilation: Open windows or utilize exhaust fans to avoid smoke buildup.
Wearing oven mitts is essential, especially when working with hot surfaces or flipping slices in a pan. Bread can swiftly transition from perfectly toasted to burnt, making constant monitoring vital. Moreover, ensuring proper ventilation in your kitchen is crucial for managing smoke, particularly with high-heat methods such as grilling or broiling. Prioritizing safety will contribute to a risk-free and enjoyable toasting experience.
Masterful Techniques for Toasting Bread Using a Frying Pan

How to Optimize Your Frying Pan Setup for Toasting
Setting up your frying pan for toasting is a straightforward yet effective process. Start by heating your pan over medium heat, which is the best setting for achieving even toasting without burning the bread too quickly. If you desire, adding a small amount of butter or oil can enhance the flavor and help prevent sticking. Once the pan is adequately heated, carefully place your bread inside, ensuring enough space between slices for proper heat distribution.
Regularly flipping the bread is critical for achieving the perfect toast. Each side requires close monitoring; adjusting the heat may be necessary if the bread begins to darken too quickly. It’s practical to check the bread every 30 seconds to evaluate its toastiness. This method provides flexibility, allowing you to adjust according to the thickness of the bread and your preferences for crispiness. Ultimately, using a frying pan offers complete control over the entire toasting process, leading to optimal results.
What Is the Ideal Temperature for Toasting in a Frying Pan?
A medium heat setting is ideal for toasting bread in a frying pan. This temperature achieves the perfect balance, allowing the bread to toast evenly without the risk of burning. Excessively high heat can lead to a charred exterior while leaving the interior soft and undercooked. Conversely, too low a heat may result in limp and unappealing toast.
Maintaining this medium heat may require periodic adjustments based on the type of bread you are using. For example, denser breads, such as wholegrain or sourdough, may benefit from a slightly longer toasting time at medium heat. If your initial attempts yield variations in toastiness, take note of the heat levels and adjust as necessary. A consistent temperature will ensure a reliable toasting experience, guaranteeing that each slice meets your expectations.
How Long Should You Toast Bread in a Frying Pan for Best Results?
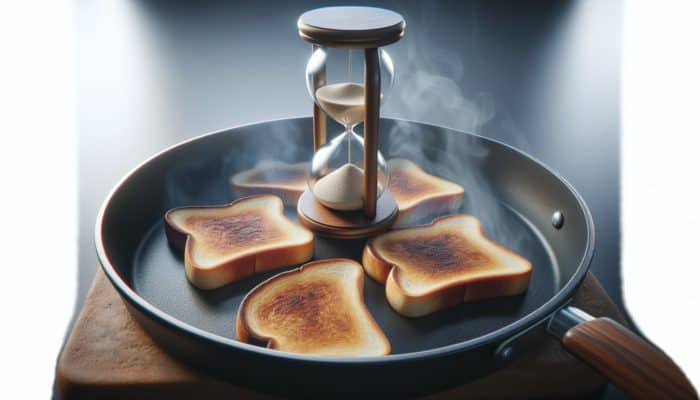
Toasting bread in a frying pan generally takes around 2-3 minutes per side, depending on your heat settings and the type of bread. It is crucial to keep a close watch on your bread during this process to prevent overcooking or burning. The timing may vary based on the thickness of the slices; thicker pieces may need more time.
For optimal results, flip the bread halfway through the toasting process. This practice not only promotes even browning but also allows you to keep a close eye on the progress. If you’re aiming for a specific level of crispness, feel free to adjust the time according to your preferences. Some individuals may prefer a light toast, while others enjoy a darker, crunchier finish. By mastering the timing, you can perfect the art of frying pan toasting.
Can You Toast Different Types of Bread in a Frying Pan?
Absolutely, you can toast a variety of breads in a frying pan. Whether it’s white, wholemeal, or artisan sourdough, each type offers a distinct flavor and texture when toasted. However, the toasting time may need adjustments based on the density and moisture content of the bread.
Lighter breads, such as white sandwich bread, will toast quickly, often requiring less time than denser varieties like rye or sourdough. It’s crucial to consider the thickness of the slices as well; thicker slices will generally require a longer toasting period. Experimenting with different kinds of bread can lead to delightful discoveries, as each type offers unique flavors that can enhance your meal. This versatility is what makes using a frying pan an excellent method for toasting.
Proven Strategies for Toasting Bread Without a Toaster
What Techniques Do Culinary Experts Suggest for Toasting Bread?
Culinary professionals often recommend specific techniques for toasting bread without relying on a traditional toaster, focusing on methods that enhance both flavor and texture. Using a grill is a favored choice among chefs, as it imparts a charred flavor that many find appealing. The high heat of grilling caramelizes the sugars in the bread, yielding an attractive crust. Alternatively, the oven is praised for its even toasting capabilities, particularly for larger quantities of bread.
Chefs may also advise pairing certain types of bread with specific methods. For instance, sourdough is frequently grilled to achieve a smoky flavor, whereas lighter breads are better suited for the oven to ensure even toasting. This expert insight underscores the importance of selecting the appropriate method based on the type of bread being used, ensuring that every slice is toasted to perfection.
How Can You Consistently Achieve Perfectly Toasted Bread?
Achieving perfectly toasted bread requires meticulous attention and strategic adjustments based on your kitchen setup. One key step is closely monitoring the bread throughout the toasting process. This vigilance helps you catch any potential issues before they escalate, ensuring your toast maintains the desired color and texture.
Adjusting heat settings is another critical factor. Many chefs recommend starting at medium heat and modifying as necessary. If you notice that the bread is toasting too quickly, reducing the heat can help. Conversely, if you prefer a darker toast, a slight increase in temperature may be warranted. Additionally, flipping the bread regularly ensures even browning. By implementing these actionable steps, you can refine your toasting technique and consistently produce outstanding results.
What Common Mistakes Should You Avoid When Toasting Bread?
When toasting bread without a toaster, several common mistakes can undermine your efforts. A major issue stems from using excessively high heat, which can scorch the bread before it has a chance to toast properly. Another frequent error involves neglecting to flip the bread; failing to do so can result in uneven toast, with one side burnt while the other remains pale.
Overcrowding the pan is another common pitfall. When multiple slices are crammed together, they may not receive adequate heat, leading to uneven toasting. Real-world examples illustrate this point: many home cooks find their toast lacks a golden finish due to insufficient space in the pan. To correct these mistakes, ensure proper heat settings, flip the bread regularly, and provide ample room for each slice in your pan. These adjustments can significantly enhance your toasting outcomes.
Expert Insights on Toasting Bread in the Oven
What Temperature Should You Set Your Oven For Toasting Bread?
When using an oven for toasting bread, preheating to a temperature range of approximately 180-200°C is ideal. This temperature ensures that the bread toasts evenly without the risk of burning. A hotter oven can lead to rapid browning on the exterior while leaving the inside soft and chewy. Conversely, too low a temperature may result in a longer wait without achieving the desired crispiness.
The advantage of using an oven lies in its ability to distribute heat evenly, making it an excellent choice for toasting multiple slices at once. Preheating the oven is a crucial step; placing bread in a cold oven can lead to uneven cooking and disappointing results. By adhering to the recommended temperature range, your toasting experience will be much more reliable and enjoyable.
How Should You Arrange Bread in the Oven for Optimal Toasting?
Proper arrangement of your bread in the oven is vital for achieving even toasting. Place the bread slices on a baking sheet in a single layer, ensuring they do not overlap. Overlapping can lead to uneven browning, as the bread pieces may shield one another from the heat, preventing optimal toasting.
Using a baking sheet lined with parchment paper can also facilitate the process, making it easier to remove the bread once toasted. For best results, consider rotating the baking sheet halfway through the cooking time to ensure even exposure to heat. This simple yet effective method guarantees that every slice comes out with a consistent color and crispness, creating a satisfying toasting experience.
How Long Should You Toast Bread in the Oven for Optimal Results?
Toasting bread in the oven typically takes about 5-10 minutes, depending on your desired level of toastiness. Keeping a watchful eye on the bread is vital to prevent burning, especially as different ovens may have slight variations in heating. Flipping the bread halfway through the toasting process helps achieve an even finish, allowing both sides to develop a beautiful, golden brown hue.
If you’re aiming for a lighter toast, checking the bread around the 5-minute mark is advisable. If you prefer a darker, crunchier result, continue to toast while monitoring closely. This method offers flexibility, enabling you to adjust according to your taste preferences. By mastering oven toasting, you can easily produce batches of perfectly toasted bread for any occasion.
How Can You Determine When Your Bread is Perfectly Toasted?
Determining when your bread is perfectly toasted involves visual cues and intuition. Begin checking the bread after approximately 5 minutes. The ideal toast should exhibit a golden brown color and a crisp texture. If the bread appears pale or soft, it likely requires more time in the oven.
The aroma can also serve as a helpful indicator; the smell of toasted bread is distinctive and signals that it’s nearing completion. If you’re ever in doubt, you can slice a piece to check its texture. This approach allows you to refine your toasting technique, ensuring that your bread meets your standards of perfection every time.
Grilled Bread for a Charred and Smoky Flavor Experience
What Type of Grill is Most Effective for Toasting Bread?
Both gas and charcoal grills can effectively toast bread. While gas grills are often preferred for their ease of use and precise temperature control, making them ideal for achieving the desired level of toastiness without burning, charcoal grills add an extra layer of flavor, imparting a smoky taste that many enthusiasts appreciate.
When selecting your grill, consider the flavor profile you wish to achieve for your toast. If you’re after a simple, evenly toasted slice, a gas grill may be your best option. However, if you aim to elevate your culinary experience with a charred, smoky finish, a charcoal grill is the ideal choice. Ultimately, each grill type has its advantages, and the choice should be based on personal preferences and the equipment you have available.
How Do You Prepare Your Grill for Toasting Bread?
Proper preparation of your grill is crucial for successful toasting. Begin by preheating the grill to medium heat, ensuring it is adequately heated for effective cooking. Clean the grates to remove any residual food or grease, as these can impact the flavor and appearance of your toast. Once clean, lightly oil the grates to prevent the bread from sticking and ensure a smooth cooking process.
Achieving even heat distribution is essential, so check that all areas of the grill are heated before placing your bread. You can also use a grilling stone or a cast-iron skillet for greater control over the toasting process. These accessories help maintain even heat and create a more consistent toast. With the grill prepared, you’re ready to enjoy the unique flavors that come from grilling bread.
How Long Should You Grill Bread for Optimal Toasting?
Grilling bread typically takes about 1-2 minutes per side, making it a quick method to achieve that desired charred flavor. Staying close to the grill during this process is essential, as bread can go from perfectly toasted to burnt in just a few seconds. Adjusting the grill’s heat may be necessary, depending on the type of bread and its thickness; thinner bread will toast faster than thicker varieties.
For best results, flip the bread once before the first side develops too much color. This prevents burning and allows for an even char across both sides. If you’re experimenting with various types of bread, take note of how each reacts to the heat, refining your technique as you go. This attention to detail can significantly enhance your grilled toast experience.
What Types of Bread Are Best for Grilling?
When it comes to grilling bread, dense varieties such as sourdough or ciabatta work exceptionally well. Their sturdy structure withstands intense heat, helping to develop an appealing, charred crust. Lighter breads may become too soft or fragile when exposed to direct heat and can easily fall apart during the grilling process.
Additionally, slicing the bread thicker for grilling allows for a more substantial surface area that can handle the heat. Experimenting with different types of bread can lead to delightful discoveries; for instance, a rustic whole grain can offer a unique flavor when grilled. Ultimately, selecting the right bread will enhance your grilling experience and ensure delicious results.
How Can You Elevate the Flavor of Grilled Bread?
Enhancing the flavor of grilled bread can transform a simple slice into a gourmet experience. One popular method is to brush the bread with olive oil or garlic butter before grilling; this adds richness and depth to the flavor. Consider infusing herbs or spices into your oil to create a more complex taste profile.
Another effective approach is to pair grilled bread with toppings that complement its smoky flavor. Spreads like pesto, tapenade, or even a simple mixture of olive oil and balsamic vinegar can elevate your dish. Experimenting with different flavor combinations will allow you to discover your personal favorites. By taking the time to enhance your grilled bread, you can create a memorable culinary experience that excites the palate.
Exploring Alternative Methods for Toasting Bread
Can You Use a Microwave to Toast Bread Effectively?
While unconventional, you can indeed use a microwave to toast bread. However, it’s essential to note that the results differ significantly from those of other methods, as microwaves tend to steam rather than crisp. To microwave toast, place your bread on a microwave-safe plate and heat it in short intervals while checking frequently to avoid sogginess.
To improve the texture, consider placing a cup of water in the microwave alongside the bread. This method can help prevent the bread from becoming overly rubbery. While it won’t achieve the crispiness of fried, grilled, or oven-toasted bread, this method can serve as a quick alternative in a pinch. It’s important to manage expectations; microwave-toasted bread will not deliver the satisfying crunch of other methods but can be a functional option.
What Are the Advantages of Using a Sandwich Press for Toasting?
A sandwich press is an excellent tool for toasting bread quickly and evenly. This appliance is particularly useful for creating paninis or grilled sandwiches that require a crispy exterior and warm, melty interior. The design of a sandwich press allows heat to circulate evenly around the bread, enhancing the toasting process.
Utilizing a sandwich press can save time compared to traditional methods, as it requires less attention once the bread is placed inside. Additionally, many models come with adjustable settings, enabling you to control the level of browning and crispiness to your preference. This versatility makes the sandwich press a popular choice for those who frequently enjoy toasted bread, offering a reliable and efficient solution.
How Does a Broiler Work for Toasting Bread?
A broiler is an effective tool for quickly toasting bread by utilizing high heat from above. To use a broiler, place the bread on a baking sheet and position it close to the heating element. This method allows for rapid browning, but it requires careful monitoring to prevent burning.
Toasting bread under the broiler typically takes 1-3 minutes, depending on the thickness of the slices. It’s beneficial to check the toast regularly, as the intense heat can lead to quick changes in the bread’s color. Using a broiler is particularly advantageous for those who enjoy a crisp top while maintaining a softer interior. By understanding how to use your broiler effectively, you can achieve perfectly toasted bread with minimal effort.
Can You Use an Air Fryer to Toast Bread Efficiently?
Yes, an air fryer can efficiently toast bread, offering a unique cooking method that mimics traditional frying without excess oil. To toast bread in an air fryer, place it in the basket and set the temperature to a moderate level. Cooking times typically range from 3 to 5 minutes, depending on your desired level of toastiness.
One of the benefits of an air fryer is its ability to circulate hot air around the food, ensuring even cooking and browning. This method can also produce a crispy texture that rivals other toasting techniques. If you enjoy experimenting with flavors, consider adding seasonings or lightly brushing the bread with oil before air frying. The versatility of an air fryer makes it an excellent choice for those looking to toast bread without traditional methods.
Is a Toaster Oven Suitable for Toasting Bread?
A toaster oven is an excellent appliance for toasting bread, offering the convenience of a traditional toaster while providing added versatility. Toaster ovens can cook a variety of foods and typically have adjustable settings that allow you to control the level of browning and crispiness.
When toasting bread in a toaster oven, you can achieve an even, golden finish similar to that of a conventional oven. Preheating the toaster oven may enhance results, and it is important to keep a watchful eye on the bread to prevent over-toasting. If you enjoy preparing multiple slices at once, a toaster oven can efficiently handle larger batches, making it a practical option for busy kitchens. Overall, a toaster oven is a reliable and adaptable tool for anyone looking to perfect their toast.
Elevating Your Toast with Delicious Toppings and Spreads
What Are Some Popular Toppings That Can Enhance Your Toast?
Toppings can elevate your toast, transforming a simple snack into a culinary delight. Some popular toppings include:
- Butter: A classic choice that melts beautifully into warm bread, enhancing its richness.
- Jam or Marmalade: Adds sweetness and fruitiness, perfect for breakfast or a light snack.
- Avocado: Creamy and nutritious, often seasoned with salt and pepper for added flavor.
- Cheese: Melts wonderfully when placed on hot toast, offering a savory experience that many love.
- Nut Butters: Peanut or almond butter provides protein and a rich texture, perfect for energy.
- Hummus: A healthy, savory option that pairs well with wholegrain bread, adding a creamy element.
Each topping brings its unique flavor and texture, allowing for endless combinations. For instance, buttery toast topped with jam can be a sweet treat, while avocado spread serves as a nutritious meal option. Experimenting with various toppings allows you to discover new favorites, creating a toast that suits every mood or occasion.
How to Choose the Right Spread for Your Toast?
Selecting the right spread for your toast is crucial in achieving the desired flavor profile. Consider the taste you wish to create; if you’re leaning towards something sweet, spreads like honey or fruit preserves can beautifully complement your toast. Alternatively, savory options such as hummus or ricotta cheese offer a completely different experience.
The balance of textures is also worth considering; creamy spreads can pair well with crunchy toasts, while chunky toppings may require a sturdier bread base. Factor in any dietary preferences or restrictions; many delicious vegan and gluten-free spreads cater to various needs. By thoughtfully selecting your spreads, you can create a toast experience that is both satisfying and enjoyable.
Can You Create Gourmet Toast at Home?
Gourmet toast can be crafted at home with quality ingredients and a bit of creativity. Using artisanal breads as your base sets the stage for a gourmet experience. Consider experimenting with different toppings, such as flavored butters, gourmet cheeses, or fresh herbs, to elevate your dish.
Combining unique flavor profiles can enhance the gourmet aspect of your toast. For example, a slice of sourdough topped with ricotta cheese, honey, and fresh figs creates a sophisticated dish. Don’t hesitate to experiment with seasonal ingredients and local produce, integrating unique flavors that reflect your culinary style. Making gourmet toast at home not only allows for creativity but also offers a chance to impress guests or indulge in a special treat.
Proven Strategies for Making Toast Without a Toaster
What Are the Best Practices for Even Toasting?
To achieve even toasting, it’s essential to ensure proper heat distribution and flip the bread regularly. This approach allows both sides to receive equal exposure to heat, promoting uniform browning. Whether you’re using a frying pan, oven, or grill, keeping a close eye on the bread is crucial to prevent one side from browning too quickly.
Another best practice is to avoid overcrowding the cooking surface. Providing adequate space for each slice ensures that hot air can circulate effectively, resulting in consistent toasting. If you’re toasting multiple pieces, consider working in batches to maintain control over the cooking process. By adhering to these best practices, you can develop a successful toasting technique, resulting in perfectly toasted bread every time.
How Can You Save Time When Toasting Bread?
Saving time while toasting bread comes down to preparation and efficiency. Preheating your cooking surface, whether it’s a pan, oven, or grill, allows you to start toasting immediately. Additionally, preparing multiple slices at once can significantly reduce overall cooking time.
Utilizing appliances like a toaster oven or sandwich press can yield faster results compared to traditional methods. These devices often have settings specifically designed for quick toasting. If you’re using a frying pan, consider opting for a larger one to accommodate more slices, maximizing your cooking time. These actionable steps will streamline your toasting process, leaving you with more time to enjoy your meal.
What Are the Most Reliable Methods for Toasting Bread?
When it comes to reliable methods for toasting bread, using an oven or frying pan stands out due to their control over heat and ability to achieve even results. These methods not only allow for consistent browning but also provide flexibility in accommodating various bread types and thicknesses.
Real-world examples demonstrate the effectiveness of these methods; many home cooks favor frying pans for their speed and direct heat control, while others appreciate the convenience of an oven for larger batches. Ultimately, both methods offer reliable results when approached with care. By understanding the nuances of each technique, you can confidently toast bread to perfection, no matter the occasion.
Resolving Common Toasting Issues
Why Is My Bread Burning Instead of Toasting Properly?
If your bread is burning instead of toasting, it’s likely due to excessively high heat settings or inadequate monitoring. When the heat is too high, the exterior can char quickly while the interior remains undercooked. To rectify this issue, adjust your heat settings to a medium level and keep a close watch on the bread during toasting.
Another factor to consider is the thickness of your bread; thicker slices may require lower heat and longer cooking times to ensure proper toasting. If burning occurs frequently, experimenting with different types of bread can also lead to improved results. By making these adjustments, you can effectively prevent burning and enjoy perfectly toasted bread.
How Can You Fix Unevenly Toasted Bread?
Unevenly toasted bread can result from improper heat distribution or inadequate flipping. To rectify this issue, start by flipping the bread more frequently during the toasting process. This ensures that all sides receive equal exposure to heat, resulting in a more uniform outcome.
Additionally, check that your bread slices are cut evenly; inconsistent thickness can lead to uneven toasting, as thinner slices will cook faster than thicker ones. If you’re using a cooking surface that doesn’t distribute heat evenly, consider rotating or repositioning the bread throughout the process for more consistent results. By implementing these strategies, you can achieve a perfectly toasted slice every time.
What Should You Do If Your Toast Is Too Soft?
If your toast is too soft, it may require adjustments in toasting time or temperature. Increasing the toasting time slightly can help achieve a crispier texture. If this approach doesn’t yield the desired results, consider increasing the temperature marginally to promote browning.
Ensure that the bread is not overly thick, as thicker slices may take longer to toast adequately. If you’re using methods like the microwave, remember that the texture may differ from traditional toasting; in such cases, reconsidering the cooking method altogether can yield better outcomes. By making these adjustments, you can enjoy a perfectly toasted slice that meets your texture preferences.
Frequently Asked Questions About Toasting Bread
Can I toast frozen bread?
Yes, you can toast frozen bread using a frying pan or oven. Just add a minute or two to the toasting time to ensure it thaws and toasts properly.
Is it safe to toast bread on an open flame?
Toasting bread over an open flame is possible, but it requires careful monitoring. Ensure the bread is kept at a safe distance from the flame to prevent burning.
What types of bread work best for grilling?
Dense breads, such as sourdough or ciabatta, are ideal for grilling, as they hold up well to high heat and develop a nice char.
Can I toast bread in an air fryer from a frozen state?
Yes, you can toast frozen bread in an air fryer. Just set it to a moderate temperature and check periodically to achieve your desired toastiness.
Why is my toast coming out uneven?
Uneven toast can result from inconsistent bread thickness or improper heat distribution. Regularly flipping the bread can help achieve more uniform results.
How do I keep my toast from sticking?
To prevent sticking, lightly oil the cooking surface or use a non-stick pan. This simple step can significantly enhance the toasting process.
How can I make my toast more flavorful?
Brushing toast with olive oil or butter before toasting can enhance its flavor. Experimenting with herbs and spices can also add unique tastes.
Is it possible to toast bread in the microwave?
Yes, you can toast bread in the microwave, but the texture will differ from traditional methods. Use short intervals and monitor closely.
What’s the best way to store bread for toasting?
Store bread in a cool, dry place to maintain its freshness and optimal quality. For longer storage, consider freezing it and toasting directly from the frozen state.
Can I use a sandwich press for grilling cheese sandwiches?
A sandwich press is excellent for grilling cheese sandwiches, allowing for even melting and a crispy exterior.
Connect with us on Facebook!
The post How to Make Toast Without a Toaster: Simple Techniques appeared first on https://cookinggods.com
The Article Make Toast Without a Toaster: Easy Methods to Try Was Found On https://limitsofstrategy.com
-

Best Cuts of Pork for Beginner Pitmasters
Elevate Your Barbecue Skills by Mastering Essential Pork Cuts
Discover the Most Popular Pork Cuts for Your Culinary Adventures
Pork is an incredibly versatile meat that offers a wide array of cuts, each designed to cater to both novice cooks and seasoned chefs. The most sought-after pork cuts provide unique flavors and textures, making them suitable for various cooking methods, from grilling to slow-roasting. For any aspiring pitmaster eager to refine their barbecue skills, understanding these cuts is crucial. Here’s a detailed overview of the top 5 most popular pork cuts that can elevate your culinary repertoire:
- Pork Shoulder
- Pork Loin
- Pork Ribs
- Pork Belly
- Pork Tenderloin
Each of these cuts has the potential to significantly enhance your barbecue experience when prepared with care and expertise. For example, pork shoulder is renowned for its rich flavor and is ideal for slow cooking, while pork loin serves as a leaner option that is perfect for quick roasting. With the right techniques, both cuts can be transformed into mouthwatering dishes that showcase the deep, savory essence inherent to quality pork.
Assessing Pork Quality: Key Factors to Consider
When evaluating the quality of pork, several critical aspects come into play, including marbling, the lean-to-fat ratio, and color. In the United States, the grading system categorizes pork into three main classifications: USDA Prime, Choice, and Select, with Prime being the highest standard. Typically, higher grades correlate with enhanced flavor and tenderness, making them particularly desirable for barbecue enthusiasts. Keep these important quality indicators in mind when selecting your pork:
- Marbling: This refers to the intramuscular fat that enhances the overall flavor and juiciness of the meat.
- Color: A fresh pinkish-red hue is indicative of quality meat.
- Texture: A firm texture is preferred, as excessively soft meat can indicate lower quality.
- Fat Coverage: A substantial fat layer on cuts like shoulder is beneficial for moisture retention during cooking.
- Freshness: Always check the sell-by date to ensure optimal freshness when purchasing.
Opting for higher quality cuts can dramatically enhance your barbecue results, leading to tender and flavorful dishes that will undoubtedly impress your guests and elevate your culinary standing.
Essential Considerations for Selecting Pork Cuts for Barbecue
Choosing the right cut of pork is vital for achieving the desired flavor and texture in your barbecue creations. One effective guideline is to select cuts that have sufficient fat, as this fat will render during cooking, aiding in moisture retention and flavor enhancement. Look for cuts that strike a balance between muscle and fat, ensuring they can absorb smoke flavors beautifully. Here are some essential factors to consider when selecting your pork cuts:
- Cooking Method: Choose cuts based on your preferred method—whether that be smoking, grilling, or slow cooking.
- Fat Content: Opt for cuts with good marbling, particularly in options like pork shoulder and belly.
- Bone-in vs. Boneless: Generally, bone-in cuts provide more flavor and moisture.
- Size: Consider portion sizes concerning your cooking method and the number of servings required.
- Visual Inspection: Assess the color and ensure that a good fat cap is present.
By thoughtfully weighing these factors, you can select cuts that will yield delicious results, significantly enhancing your overall barbecue experience and ensuring that your dishes are memorable.
Best Practices for Storing Various Cuts of Pork

Proper storage of pork is essential for maintaining its freshness and flavor. To prolong the shelf life of pork and prevent spoilage, it’s crucial to store different cuts appropriately. Fresh pork should be refrigerated within a temperature range of 32-38°F, while freezing is recommended for longer storage durations. Here’s how to effectively manage the storage of various pork cuts:
- Refrigeration: Store fresh cuts in the coldest section of your refrigerator to maintain optimal freshness.
- Freezing: Wrap cuts tightly in plastic wrap or freezer bags to guard against freezer burn.
- Thawing: Always thaw pork in the refrigerator or in cold water; never at room temperature to ensure safety.
- Shelf Life: Fresh pork can be refrigerated for 3-5 days, while frozen cuts may last for 4-6 months.
- Special Requirements: Certain cuts, like pork belly, may require specific handling to preserve texture and quality.
Understanding these storage techniques not only helps maintain the quality of your meat but also ensures that your culinary efforts are both safe and successful in delivering delicious results.
Nutritional Benefits of Different Pork Cuts for Health-Conscious Consumers
Pork is a nutrient-rich source of protein that provides essential vitamins and minerals crucial for maintaining overall health. Different cuts of pork offer varying nutritional profiles, making this meat a versatile ingredient for diverse dietary preferences. Here are some of the nutritional advantages associated with popular pork cuts:
- Protein: Pork is an excellent source of high-quality protein, essential for muscle growth and repair.
- B Vitamins: Pork is abundant in vital B vitamins, including B6 and B12, which are important for energy metabolism.
- Iron: Rich in heme iron, pork can assist in preventing iron deficiency.
- Zinc: A good source of zinc, pork is essential for robust immune function.
- Phosphorus: This mineral plays a significant role in maintaining bone health and energy production.
Incorporating a variety of pork cuts into your meals allows you to enjoy not only delicious dishes but also significant nutritional benefits that contribute to your overall well-being and vitality.
Pork Shoulder: The Premier Cut for Budding Barbecue Enthusiasts
Uncovering the Popularity of Pork Shoulder for Barbecue

Pork shoulder, often referred to as pork butt, is a highly recommended cut for those embarking on their barbecue journey. Its forgiving nature makes it particularly well-suited for slow cooking methods, allowing the meat to become incredibly tender and flavorful. The ample fat content in pork shoulder ensures it remains juicy throughout the cooking process, making it an ideal choice for novice cooks looking to impress. Additionally, this cut is larger, making it perfect for gatherings and barbecues, as it easily serves a crowd.
Many beginners may feel intimidated by the idea of smoking meat, but pork shoulder acts as an excellent entry point due to its resilience and adaptability. It can withstand varying cooking temperatures and times without drying out, resulting in a tender and satisfying final product. Whether you’re preparing pulled pork or carnitas, the rich, savory essence of pork shoulder is sure to delight your guests, making it a go-to choice for any barbecue.
Steps for Properly Preparing Pork Shoulder for Smoking
Preparing pork shoulder for smoking involves several crucial steps to ensure optimal results. The first step is to trim any excess fat to facilitate even cooking while still leaving a fat cap for flavor and moisture retention. Applying a dry rub can also significantly enhance flavor; consider using a blend of salt, pepper, paprika, garlic powder, and brown sugar for a well-rounded seasoning profile.
Once your pork shoulder is prepped, setting up the smoker is vital. Aim to maintain a consistent temperature range between 225-250°F for the best smoking results. Remember, the smoking process requires patience, often taking around 1.5 hours per pound, so be prepared for a long cook. Here are some pivotal tips for effectively preparing pork shoulder for smoking:
- Trim excess fat but retain a fat cap for moisture retention during cooking.
- Apply a dry rub at least an hour before cooking, or overnight for enhanced flavor absorption.
- Preheat your smoker to a stable temperature before adding the meat.
- Consider using wood chips like hickory or applewood to impart additional smoky flavor.
- Wrap the shoulder in foil during the final hours of cooking to help retain moisture.
By adhering to this preparation method, you will achieve a tender and flavorful pork shoulder that serves as the foundation for an array of delicious barbecue dishes, impressing even the most discerning palates.
Cooking Techniques for Achieving Perfectly Tender Pork Shoulder
The most effective cooking techniques for pork shoulder revolve around low and slow methods that allow the fat to render while the meat becomes tender. Two primary methods that stand out are slow smoking and braising. Slow smoking not only infuses the meat with aromatic flavors but also ensures that the collagen breaks down, resulting in mouthwatering tenderness.
Braising is another effective technique, particularly for those who may lack access to a smoker. This method involves cooking the pork shoulder in a flavorful liquid, such as broth or beer, at a low temperature. Both techniques enable the meat to absorb rich flavors while maintaining moisture. Consider these cooking methods for optimal results:
- Slow smoking at temperatures of 225-250°F for a duration of 12-16 hours.
- Braising in a Dutch oven at 300°F for 4-6 hours.
- Using a meat thermometer to ensure an internal temperature of 195-205°F for optimal tenderness.
- Allow the meat to rest post-cooking to let juices redistribute for maximum flavor.
- Shred the meat for pulled pork or serve in large, succulent slices.
By mastering these cooking techniques, you can elevate your pork shoulder to new heights, ensuring that your barbecue experience is both enjoyable and memorable for all who partake.
Delicious Recipes Highlighting Pork Shoulder for Culinary Exploration
Pork shoulder is remarkably versatile, and numerous popular recipes showcase its rich flavor and tender texture. One of the most iconic dishes featuring pork shoulder is pulled pork, where the meat is slow-cooked until it becomes effortlessly shreddable. This dish is perfect for sandwiches or served alongside classic sides like coleslaw and baked beans, creating a satisfying meal.
Another beloved recipe is carnitas, a traditional Mexican dish in which the pork is cooked in its own fat until crispy and served in tacos or burritos, offering a delightful culinary experience. You can also prepare a savory pork shoulder roast, seasoned with a medley of herbs and spices, and cooked until it reaches ideal tenderness. Here are some popular recipes to inspire your culinary adventures:
- Pulled pork sandwiches topped with tangy coleslaw and barbecue sauce.
- Carnitas cooked with spices and served in soft tortillas for an authentic experience.
- Pork shoulder roast seasoned with garlic, rosemary, and thyme for savory satisfaction.
- Smoked pork shoulder served with a vinegar-based sauce for a flavorful kick.
- Pork shoulder chili made with beans and spices for a hearty meal option.
These recipes not only highlight the versatility of the cut but also provide an opportunity for beginners to experiment with flavors and various cooking techniques, making pork shoulder an excellent choice for budding pitmasters eager to expand their culinary horizons.
Pork Loin: The Health-Conscious Choice for Flavorful Meals
Exploring the Benefits of Choosing Pork Loin
Pork loin is an exceptional choice for those seeking a leaner cut of meat that still delivers on flavor. Unlike pork shoulder, which is richer and fattier, pork loin provides a healthier alternative without sacrificing taste. Its lower fat content allows it to cook more quickly, making it ideal for weeknight meals or when time is of the essence.
Despite being leaner, pork loin can still remain incredibly juicy and tender when cooked correctly. The key to success lies in avoiding overcooking, as this can lead to dryness. For beginners, pork loin offers a fantastic opportunity to practice precision in cooking while still resulting in delicious meals that will impress family and friends alike.
Mastering the Art of Cooking Pork Loin to Perfection
Achieving the perfect cook on pork loin demands careful attention to detail, especially when monitoring internal temperatures. The ideal internal temperature for pork loin is 145°F, which ensures it remains juicy while being safe to consume. To achieve this, utilizing a meat thermometer for accurate readings is highly recommended.
Begin by seasoning the pork loin with your choice of herbs and spices, or marinating it to enhance flavor. Searing the meat in a hot skillet or on a grill will develop a delicious crust before finishing it in the oven. Here are some essential tips for cooking pork loin perfectly:
- Utilize a meat thermometer to ensure the internal temperature reaches 145°F for optimal juiciness.
- Allow the meat to rest for 10 minutes after cooking to allow juices to redistribute, enhancing flavor.
- Marinate or apply a dry rub for an extra layer of flavor.
- Consider using indirect heat on the grill for a more even cooking process.
- Avoid overcooking by closely monitoring the temperature throughout the cooking process.
By adhering to these guidelines, you can transform pork loin into a tender and flavorful centerpiece for any meal, impressing guests and family alike.
Culinary Creations to Try with Pork Loin
Pork loin is remarkably versatile, making it suitable for an extensive range of dishes. It can be roasted whole, cut into chops, or even sliced for stir-fries, making it a favorite among home cooks for its adaptability. One popular dish is a roasted pork loin, often accompanied by seasonal vegetables and a savory sauce that complements the meat beautifully.
Additionally, pork loin can be cut into chops, which are perfect for quick grilling or pan-frying while retaining their juiciness. You can also utilize pork loin in stir-fries, where its lean profile allows it to absorb flavors from marinades and sauces beautifully, creating a delightful meal. Here are some delicious dishes you can create with pork loin:
- Herb-crusted roasted pork loin enhanced with garlic and rosemary for aromatic flavor.
- Pork chops glazed with honey mustard and grilled to perfection.
- Stir-fried pork loin with fresh vegetables and a savory soy sauce marinade.
- Pork loin sliders topped with a spicy slaw for a fun twist.
- Stuffed pork loin filled with spinach, cheese, and sun-dried tomatoes for an elegant touch.
The possibilities are extensive, showcasing the adaptability of pork loin in both simple and elaborate dishes that cater to a variety of tastes and preferences.
Pork Ribs: The Essential Barbecue Indulgence
Understanding the Different Types of Pork Ribs and Their Culinary Uses
Pork ribs are a beloved barbecue staple, offering unparalleled flavor and tenderness when cooked correctly. The two primary types of pork ribs are baby back ribs and spare ribs. Baby back ribs are shorter and leaner, making them ideal for quicker cooking methods, while spare ribs are larger with more fat, providing a richer flavor that many barbecue enthusiasts crave.
Baby back ribs are perfect for grilling, as they cook faster and remain tender, while spare ribs excel in slow smoking, allowing the fat to render beautifully and enhance the flavor profile. Understanding the differences between these cuts can help you select the right ribs for your next barbecue. Here’s a breakdown of the various pork rib types:
- Baby Back Ribs: Lean, tender, and quick-cooking, ideal for grilling.
- Spare Ribs: Meatier and richer in flavor, perfect for slow cooking methods.
- St. Louis-Style Ribs: A trimmed version of spare ribs, offering a uniform shape for even cooking.
- Country-Style Ribs: Cut from the shoulder, these are meatier and often cooked like pork chops.
- Rib Tips: Small, flavorful pieces cut from spare ribs, ideal for snacking or as appetizers.
Selecting the appropriate type of pork rib can elevate your barbecue game and ensure that your dishes are bursting with flavor, leaving your guests wanting more.
Key Steps for Achieving Fall-Off-The-Bone Tender Ribs
Achieving perfectly tender ribs relies on a combination of proper seasoning, slow cooking, and meticulous temperature control. The secret to tender ribs lies in low and slow cooking methods, which allow the collagen in the meat to break down, resulting in that coveted fall-off-the-bone tenderness. Whether you choose to smoke or bake, maintaining a consistent temperature is crucial for success.
A common practice is to apply a dry rub to the ribs well in advance, allowing the flavors to permeate the meat. Cooking at a low temperature, around 225°F, guarantees a long, slow cook that yields tender results. Consider these methods to achieve perfectly tender ribs:
- Utilize a dry rub to enhance flavor; applying it the night before yields the best results.
- Cook at a low temperature (225°F) for several hours for optimal tenderness.
- Wrap the ribs in foil during cooking to retain moisture and enhance tenderness.
- Finish with a glaze or barbecue sauce during the last 30 minutes of cooking for added flavor.
- Allow the ribs to rest before slicing to retain juices and enhance flavor.
By following these methods, you can prepare ribs that are not only tender but also bursting with flavor, making your barbecue gatherings unforgettable.
Exciting Recipes to Explore Featuring Pork Ribs
When it comes to ribs, the flavor possibilities are virtually limitless. Popular recipes often highlight the smoky, savory qualities of pork ribs. One classic dish is dry-rubbed ribs, where a blend of spices creates a savory crust that enhances the meat’s natural flavors and elevates the barbecue experience.
Another favorite is glazed ribs, where a sticky barbecue sauce caramelizes on the surface, adding sweet and tangy notes that beautifully complement the meat. For those who enjoy experimentation, you can try Asian-inspired ribs marinated in soy sauce and ginger, offering a unique flavor profile that will surprise and delight. Here are some popular rib recipes to try:
- Dry-rubbed ribs with a blend of spices, smoked to perfection for a savory delight.
- Glazed ribs coated with homemade barbecue sauce for a sticky, sweet finish.
- Asian-style ribs marinated in soy sauce, garlic, and ginger for a unique twist on flavor.
- Sweet and spicy ribs featuring a honey-chipotle glaze for a flavor explosion.
- Rib tips cooked low and slow, perfect for snacking or serving as appetizers.
These recipes showcase the versatility of pork ribs, making them a must-try for any beginner pitmaster looking to impress friends and family with their barbecuing skills.
Selecting the Finest Pork Ribs for Optimal Flavor
Choosing high-quality pork ribs is essential for achieving flavorful and tender results. When selecting ribs, inspect the meat for color, marbling, and freshness. Ideal ribs should exhibit a vibrant pink color with good marbling, indicating a desirable balance of fat and meat that enhances flavor.
Additionally, freshness is key; always verify the sell-by date and avoid ribs that appear discolored or emit an off-putting smell. For baby back ribs, look for meat that is well-attached to the bone, while spare ribs should possess a generous top layer of meat. Here’s how to select the best pork ribs:
- Check for a bright pink color and fresh appearance, indicating quality.
- Look for good marbling to ensure flavor and tenderness in the meat.
- Choose ribs with a firm texture; avoid overly soft or mushy meat.
- Inspect the bone area; the meat should be well-attached and not overly trimmed.
- Consider purchasing from reputable butchers or trusted sources for higher quality.
By following these tips, you can ensure that your pork ribs are of the highest quality, making your barbecue a delicious success that everyone will enjoy.
Expert Insights for Selecting the Best Pork Cuts for New Pitmasters
Recommendations from Experienced Barbecue Enthusiasts for Beginners
When embarking on your barbecue journey, experts frequently recommend pork shoulder as the ideal cut for novice pitmasters. Its forgiving nature and robust flavor make it an excellent choice for those new to smoking and grilling. Many successful cooks have begun their culinary adventures with pork shoulder, finding it manageable while producing delicious results.
A real-world example includes a novice cook who crafted mouthwatering pulled pork by following straightforward preparation and cooking methods. The cut’s ability to absorb smoke and render fat allows even those with minimal experience to create tender, flavorful meat that impresses. Here’s what experts suggest for aspiring barbecue cooks:
- Start with pork shoulder for its forgiving cooking attributes that allow for easy preparation.
- Don’t hesitate to experiment with different rubs and sauces to find your favorite flavors.
- Practice patience; low and slow cooking yields the most satisfying results.
- Utilize a meat thermometer for precise cooking temperatures to avoid undercooking or overcooking.
- Learn from failures; every cooking experience is a chance to improve your skills.
By embracing these expert recommendations, you can build confidence and skill as you navigate your barbecue journey, creating delicious meals that everyone will love.
Ways Beginners Can Enhance Their Barbecue Skills
Improving your barbecue skills as a beginner requires a blend of practice, experimentation, and learning from others. One effective way to enhance your skills is to try out different cuts of pork, experimenting with various cooking methods and flavor profiles. Engaging with the barbecue community—whether through social media, forums, or local competitions—can provide invaluable insights, tips, and inspiration for your culinary endeavors.
Understanding the science behind slow cooking and how different temperatures affect the meat can significantly elevate your barbecue abilities and results. Here are some actionable steps for skill improvement:
- Experiment with different pork cuts to discover personal preferences and cooking styles.
- Join local barbecue clubs or online communities for shared knowledge and experience.
- Maintain a record of your cooking methods and results to refine your techniques over time.
- Try various wood types for smoking to explore diverse flavor variations.
- Attend workshops or classes taught by experienced pitmasters for hands-on learning.
By adopting a mindset of continuous learning and experimentation, you can substantially enhance your barbecue skills, leading to exceptional dishes that reflect your growing expertise and passion for cooking.
Avoiding Common Mistakes in Barbecue Cooking
As you embark on your barbecue journey, it’s crucial to be aware of common mistakes that could hinder your success. Overcooking remains one of the most prevalent pitfalls, especially with lean cuts like pork loin, which can dry out quickly if not monitored closely. Additionally, neglecting to apply sufficient seasoning can lead to bland results, while improper temperature management can compromise both flavor and food safety.
By recognizing these common errors, you can actively work to avoid them in your cooking endeavors. Here are some frequent pitfalls to watch for:
- Overcooking meat; always use a meat thermometer to check internal temperatures.
- Neglecting to apply seasoning, which can lead to bland and unappealing flavors.
- Failing to rest meat after cooking, causing valuable juices to escape and dryness.
- Not monitoring cooking temperatures; maintaining steady heat is essential for successful barbecue.
- Rushing the cooking process; patience is crucial for achieving tender, flavorful results.
By steering clear of these common missteps, you can enhance your skills and ensure that your barbecue creations are both delicious and memorable, delighting your guests and satisfying your culinary ambitions.
Pork Belly: A Flavorful Exploration for Culinary Adventurers
The Allure of Pork Belly in Barbecue Cooking
Pork belly is a decadent cut that offers a rich, fatty flavor, making it a favorite among adventurous cooks and food enthusiasts alike. This cut can be transformed into a variety of delicious dishes, such as crispy pork belly or tender burnt ends, when cooked correctly. Its unique composition of fat and meat allows for multiple cooking methods, including roasting, smoking, and braising, each yielding a delightful outcome.
Choosing pork belly for your barbecue not only enhances your dishes but also provides an opportunity to experiment with flavors and cooking techniques. Cooks can play around with various seasonings and sauces, making it a versatile option for those looking to broaden their culinary skills. Here are several reasons to consider incorporating pork belly into your barbecue repertoire:
- Rich flavor profile that elevates any dish to new heights.
- Adaptable to various cooking methods, from smoking to grilling, enhancing its versatility.
- Offers a chance to experiment with different seasonings and marinades for unique flavors.
- Creates impressive dishes that are sure to wow your guests and elevate your culinary reputation.
- Often more affordable compared to other premium cuts of meat, providing excellent value.
Incorporating pork belly into your barbecue repertoire can elevate your cooking and impress friends and family with its delicious results, making it a must-try for any aspiring pitmaster.
Best Cooking Methods for Perfect Pork Belly
Cooking pork belly effectively requires a method that allows the fat to render while achieving a crispy exterior. Two popular methods include slow roasting and smoking. Slow roasting at a low temperature allows the fat to melt, resulting in tender, juicy meat that is bursting with flavor. For those who enjoy the flavors of smoke, utilizing a smoker can impart a unique taste that beautifully complements the richness of the pork.
Regardless of the method you choose, attaining that sought-after crispy skin is often the final touch that elevates the dish. Scoring the skin enables better fat rendering, while finishing at a high temperature can achieve that desired crunch. Here are the best methods for cooking pork belly to perfection:
- Slow roast at 275°F for several hours until the meat is tender and flavorful.
- Smoke at a consistent temperature for several hours to impart additional flavor.
- Score the skin prior to cooking to enhance crispiness and texture.
- Finish under a broiler or at a high temperature to achieve a crunchy texture that contrasts beautifully with the tender meat.
- Allow the meat to rest before slicing to retain juices and maximize flavor.
By following these methods, you can create pork belly dishes that are both tender and bursting with flavor, truly highlighting the allure of this exquisite cut of meat.
Strategies for Achieving Perfectly Crispy Pork Belly
Achieving that perfectly crispy pork belly requires a blend of technique and timing. The process typically begins with scoring the skin, which allows fat to escape during cooking, ultimately leading to a crispy exterior that complements the tender meat. Cooking at a low temperature will render much of the fat, ensuring the meat remains juicy and flavorful.
As the pork belly nears completion, a final blast of high heat will crisp up the skin, creating a delightful textural contrast that everyone will enjoy. Timing is crucial, as you want to ensure the meat is fully cooked while still achieving that coveted crunch. Here are some strategies for achieving perfectly crispy pork belly:
- Score the skin to enable effective fat rendering and enhance crispiness.
- Cook at a low temperature (around 275°F) for several hours to ensure tenderness.
- Raise the heat or finish under the broiler for several minutes to achieve that perfect crunch.
- Thoroughly dry the skin before cooking to promote crispiness and texture.
- Let the pork belly rest before slicing to maintain moisture and flavor integrity.
By employing these techniques, you can serve crispy pork belly that’s destined to become a favorite among your barbecue offerings, impressing guests with both flavor and presentation.
Pork Tenderloin: Quick Cooking for Busy Weeknights
The Advantages of Choosing Pork Tenderloin
Pork tenderloin stands out as an excellent choice for those seeking a quick and convenient protein option that doesn’t compromise on flavor. This cut is not only lean but also cooks relatively quickly, making it ideal for busy weeknights or spontaneous meals when time is of the essence. The tenderloin is the most tender cut of pork, providing a delicate texture that is sure to impress even the most discerning palates.
Thanks to its mild flavor, pork tenderloin can easily absorb marinades and seasonings, allowing for a versatile range of dishes that cater to different tastes. Beginners can enjoy a satisfying cooking experience without the risk of overcomplicating the process. Here are some reasons why pork tenderloin is a fantastic option for weeknight dinners:
- Lean and healthy protein option, perfect for lighter meals that satisfy.
- Cooks quickly, making it ideal for busy schedules without sacrificing quality.
- High versatility; suitable for grilling, roasting, or stir-frying with various ingredients.
- Tender texture that appeals to a wide range of palates, making it a family favorite.
- Absorbs marinades exceptionally well, enhancing overall flavor and appeal.
The convenience and flavor of pork tenderloin make it a superb addition to any beginner’s barbecue repertoire, allowing for quick yet delicious meal options.
Grilling Pork Tenderloin Successfully: Key Techniques
Grilling pork tenderloin successfully involves a few key steps to ensure it remains juicy and flavorful. Utilizing a marinade or dry rub adds depth to the cut, while preheating the grill to a medium-high temperature allows for a good sear that locks in essential juices. Searing the tenderloin creates a caramelized crust while keeping the meat moist.
Once seared, the tenderloin should be moved to a cooler part of the grill to finish cooking indirectly, ensuring it doesn’t dry out. The target internal temperature should reach around 145°F, followed by a resting period that permits juices to redistribute for maximum flavor. Consider these tips for grilling pork tenderloin to perfection:
- Marinate for at least 30 minutes to enhance flavor and tenderness.
- Preheat the grill to medium-high for optimal searing and cooking.
- Sear on all sides to lock in juices before moving to indirect heat for even cooking.
- Utilize a meat thermometer to check for doneness and ensure safe consumption.
- Allow the meat to rest for a few minutes before slicing for maximum juiciness.
By following these guidelines, you’ll create a grilled pork tenderloin that’s juicy, flavorful, and sure to impress family and friends alike.
Simple Yet Flavorful Recipes Featuring Pork Tenderloin
Pork tenderloin is well-suited for a variety of straightforward yet delicious recipes that are perfect for beginners looking to build their cooking confidence. One simple recipe involves marinating the tenderloin in a blend of olive oil, garlic, and herbs before grilling or roasting it. This technique allows the meat to absorb a range of flavors while remaining tender and juicy.
Another easy dish is herb-crusted pork tenderloin, where a mixture of fresh herbs and spices is rubbed onto the surface prior to cooking, creating a fragrant crust that enhances the natural flavor of the pork. Here are some simple recipes to consider that highlight the versatility of pork tenderloin:
- Marinated pork tenderloin grilled to perfection with a zesty glaze that tantalizes the taste buds.
- Herb-crusted tenderloin roasted alongside potatoes and seasonal vegetables for a wholesome meal.
- Stir-fried pork tenderloin with colorful vegetables and a savory soy sauce marinade for a quick and healthy dish.
- Pork tenderloin medallions sautéed in garlic and served with a pan sauce for an elegant touch.
- Stuffed pork tenderloin filled with spinach and cheese for a delightful twist on traditional preparations.
These simple recipes not only highlight the versatility of pork tenderloin but also provide an excellent opportunity for beginners to build their confidence in the kitchen and impress loved ones with delicious meals.
Pork Chops: A Versatile and Accessible Choice for Home Cooks
Selecting the Best Pork Chops for Cooking Success
Choosing the best pork chops involves understanding the various types available and recognizing what to look for in terms of quality. Pork chops can be found as bone-in or boneless, with bone-in cuts generally offering more flavor and moisture due to the fat surrounding the bone. Thickness is another important factor; thicker chops can be grilled or cooked at higher temperatures, while thinner cuts are better suited for quick cooking methods.
Look for chops that exhibit a pinkish color and possess a good amount of marbling for the best results. Ideally, the fat should be evenly distributed throughout the meat, contributing to its overall flavor and tenderness. Here’s how to choose the best pork chops for your cooking endeavors:
- Opt for bone-in chops for enhanced flavor and moisture retention during cooking.
- Consider thickness; thicker chops generally retain moisture better and provide a more satisfying bite.
- Look for marbling, which adds flavor and juiciness to the meat.
- Avoid overly pale or discolored cuts, which may indicate lower quality.
- Buy from a trusted source to ensure freshness and high quality.
Making informed choices when selecting pork chops can lead to a satisfying and flavorful meal that everyone will enjoy and appreciate.
Best Cooking Methods for Pork Chops: Tips and Techniques
Pork chops can be cooked using various methods, each yielding different textures and flavors that can enhance your meal. Grilling is a popular choice, especially for outdoor cooking, as it imparts a smoky flavor and creates a delightful char that many people love. Pan-searing is another excellent method, allowing for a crispy crust to develop while keeping the inside tender and juicy.
Baking is also an option, particularly when cooking thicker cuts, while brining beforehand can enhance moisture retention and flavor. The cooking method you select can significantly impact the final dish, so consider these methods for the best results:
- Grill over medium heat for a smoky flavor and caramelized crust that enhances the overall taste.
- Pan-sear in a hot skillet for a crisp exterior and juicy interior, creating a delightful contrast.
- Bake in the oven at 350°F for thicker chops to ensure even cooking and tenderness.
- Brine chops beforehand for enhanced juiciness and flavor that will impress your guests.
- Finish with a sauce or glaze for added flavor and presentation.
By experimenting with these methods, you can discover the perfect approach for cooking pork chops to suit your taste and preferences, ensuring a satisfying meal every time.
Strategies to Prevent Pork Chops from Drying Out During Cooking
Preventing pork chops from drying out requires a few essential techniques aimed at maintaining moisture throughout the cooking process. One effective method is to brine the chops before cooking, which can help infuse flavor and moisture into the meat. Another important step is to avoid overcooking; utilizing a meat thermometer ensures you reach the ideal internal temperature without exceeding it, resulting in juicy and flavorful chops.
Allowing the pork chops to rest for a few minutes after cooking is also crucial, as this permits the juices to redistribute, ensuring that each bite remains succulent. Here are some strategies to prevent dryness and ensure perfectly cooked pork chops:
- Brine chops to enhance moisture and flavor for a delightful dining experience.
- Utilize a meat thermometer to monitor cooking temperatures accurately and avoid overcooking.
- Avoid cooking on high heat for extended periods; aim for medium heat to retain moisture.
- Allow the chops to rest after cooking to retain juices and improve flavor.
- Consider topping with a sauce or glaze for added moisture and flavor enhancement.
By incorporating these techniques, you can ensure that your pork chops are succulent, flavorful, and satisfying, making each meal a delightful experience for you and your guests.
Flavorful Marinades to Elevate Your Pork Chops
Marinades serve as an excellent means to elevate the flavor of pork chops, offering a range of tastes to suit different palates. Popular marinades often include ingredients like soy sauce, garlic, and herbs, creating a savory profile that beautifully complements the meat. A simple marinade can consist of olive oil, balsamic vinegar, and rosemary for a fresh, herbaceous flavor that enhances the overall taste.
Another flavorful option involves using citrus juices, such as lemon or lime, combined with spices for a zesty kick that enlivens the pork. Here are some flavorful marinades to consider for your pork chops:
- Soy sauce, garlic, and ginger for an Asian-inspired flavor that adds depth.
- Honey, mustard, and vinegar for a sweet and tangy profile that balances beautifully.
- Cilantro, lime, and garlic for a fresh, zesty marinade that brightens the dish.
- Balsamic vinegar, olive oil, and rosemary for a rich, savory blend that enhances flavor.
- Chipotle peppers in adobo sauce for a spicy kick that adds excitement.
These marinades not only enhance the flavor of pork chops but also provide an opportunity to experiment with various tastes, making each cooking experience unique and enjoyable.
Serving Pork Chops for Various Occasions: Ideas and Inspirations
Pork chops can be dressed up or down, making them suitable for a variety of occasions and dining experiences. For casual meals, serving pork chops with classic sides like mashed potatoes or coleslaw creates a comforting atmosphere that everyone will enjoy. Conversely, for more formal settings, consider plating chops with a reduction sauce, accompanied by seasonal vegetables for an elegant touch that impresses guests.
The flavor profiles can also dictate how you present your pork chops. For a barbecue gathering, a smoky flavor with tangy barbecue sauce creates a festive atmosphere, while a herb-crusted version might be perfect for a dinner party. Here are some ideas for serving pork chops based on occasion:
- With classic sides like mashed potatoes and green beans for a cozy, casual dining experience.
- With a wine reduction sauce and roasted vegetables for an elegant and refined presentation.
- In a sandwich format with slaw for a fun, interactive meal that guests will love.
- With a side of fruit salsa for a fresh, summery dish that brightens the table.
- As part of a charcuterie board for a stylish appetizer option that excites the palate.
By considering the occasion and matching flavors and presentation, pork chops can be transformed into a dish that fits any dining experience, ensuring satisfaction and delight for all who partake.
Next Steps for Advancing Your Barbecue Skills
Strategies for Continuous Improvement in Barbecue Techniques
Continuing to enhance your barbecue skills requires a mix of experimentation, education, and community engagement. To refine your techniques, consistently try out different cuts of pork and explore new recipes that challenge your abilities. Engaging with local barbecue competitions or online forums can provide valuable feedback and inspiration from seasoned pitmasters, helping you grow as a cook.
Moreover, investing time in understanding the science behind cooking can significantly enhance your skills. Whether it’s mastering temperature control or learning about flavor combinations, each step contributes to your growth as a cook and barbecue enthusiast. Here’s how to keep progressing on your barbecue journey:
- Experiment with new cuts and cooking methods regularly to expand your culinary repertoire.
- Join local barbecue clubs or online communities for tips, support, and shared experiences.
- Study the science of cooking meat to understand flavor development and cooking techniques.
- Attend workshops or cooking classes to learn from experts and gain hands-on experience.
- Document your cooking experiences to track progress and learn from mistakes to improve.
By adopting a mindset of continuous improvement, you can elevate your barbecue game and savor the delicious rewards of your culinary efforts, delighting yourself and those you cook for.
Essential Equipment for Barbecue Success: What You Need
Having the right equipment is vital for successful barbecue sessions, ensuring you can cook both efficiently and effectively. Essential tools include a quality smoker or grill, which enables various cooking methods, from smoking to direct grilling. A meat thermometer is also critical for ensuring meats are cooked to the proper internal temperature, thus preventing both undercooking and overcooking, which can lead to unsatisfactory results.
Basic tools such as tongs, spatulas, and brushes are necessary for handling meat and applying sauces effectively. Investing in high-quality equipment can make a significant difference in both the cooking process and the final results. Here are some must-have barbecue tools to consider:
- A reliable smoker or grill for versatile cooking methods that cater to different styles.
- A meat thermometer for accurate temperature readings to ensure food safety.
- Tongs and spatulas for safe and easy meat handling while grilling.
- Brushes for evenly applying marinades or sauces, enhancing flavor profiles.
- Disposable gloves for maintaining hygiene while handling food and preparing meals.
Equipping yourself with the right tools will set you up for success in your barbecue endeavors, allowing you to enjoy the cooking process and the delicious results.
Where to Find More Recipes and Inspiration for Barbecue
Finding additional recipes and inspiration for your barbecue journey can be both enjoyable and rewarding. Cookbooks focused on barbecue provide structured guidance and innovative recipes tailored to various skill levels, while online platforms such as food blogs and YouTube channels offer a wealth of visual content and tips to enhance your cooking techniques. Engaging with social media groups dedicated to barbecue can also provide fresh ideas and connect you with other cooking enthusiasts who share your passion.
Local barbecue competitions can serve as excellent sources of inspiration, showcasing different styles and techniques you may wish to try in your cooking adventures. Consider these resources for further learning and exploration:
- Barbecue cookbooks featuring expert recipes, tips, and techniques for successful grilling.
- Food blogs and websites dedicated to barbecue enthusiasts, providing insights and inspiration.
- YouTube channels with instructional cooking videos to visually guide your culinary efforts.
- Social media groups where members share tips, recipes, and experiences in barbecue cooking.
- Local barbecue competitions for firsthand experience and inspiration from seasoned competitors.
By exploring these resources, you can continually discover new ideas and techniques that will enhance your barbecue skills and overall satisfaction with your cooking journey.
Frequently Asked Questions About Pork Cuts and Barbecue Techniques
Which Cuts of Pork Are Best for Smoking?
The prime cuts of pork for smoking include pork shoulder, ribs, and pork belly. These cuts possess ample fat content, which helps keep the meat moist and flavorful throughout the lengthy cooking process.
How Long Should You Cook Pork Shoulder for the Best Results?
Pork shoulder should be cooked low and slow, typically around 1.5 hours per pound at a temperature of 225-250°F. The aim is to reach an internal temperature of 195-205°F for tender, pull-apart meat that is bursting with flavor.
What Is the Best Way to Store Different Cuts of Pork?
To store pork cuts, refrigerate fresh meat at a temperature between 32-38°F. For longer storage, wrap it tightly in plastic wrap or freezer bags and freeze. Always check the sell-by date to ensure freshness and quality.
Can Pork Loin Be Used for Barbecue?
Yes, pork loin is a great option for barbecue, especially when cooked carefully to prevent drying out. It’s best suited for quicker cooking methods like grilling or roasting, allowing for a delightful meal experience.
How Do You Know When Pork Is Fully Cooked?
Use a meat thermometer to check for doneness. Pork should reach an internal temperature of 145°F, followed by a resting period to allow the juices to redistribute and enhance flavor.
What Types of Seasoning Work Well with Pork?
Pork pairs well with a variety of seasonings, including garlic, rosemary, thyme, paprika, and brown sugar. Marinades that include soy sauce, citrus, or vinegar can also enhance the overall flavor profile of your dishes.
How Can I Make Pork Ribs Tender?
To achieve tender pork ribs, cook them low and slow, either by smoking or braising. Wrapping them in foil during the cooking process can help retain moisture and ensure tenderness in the final product.
Is It Necessary to Marinate Pork Tenderloin?
While not mandatory, marinating pork tenderloin enhances flavor and can help keep the meat moist during cooking. A simple marinade can add depth to the dish and elevate the overall dining experience.
Can I Reuse Marinades?
It’s not safe to reuse marinades that have been in contact with raw meat. If you wish to use a marinade as a sauce, set some aside before adding it to the meat to ensure food safety.
What Are Some Common Mistakes When Cooking Pork?
Common mistakes when cooking pork include overcooking, not using enough seasoning, and failing to rest the meat after cooking. Avoiding these pitfalls can significantly improve the quality of your dishes and enhance your barbecue experience.
Connect with us on Facebook!
The Article Best Cuts of Pork for Beginner Pitmasters: Top Choices appeared first on https://pitmastersarsenal.com
The Article Top Choices for Beginner Pitmasters: Best Cuts of Pork Was Found On https://limitsofstrategy.com
-
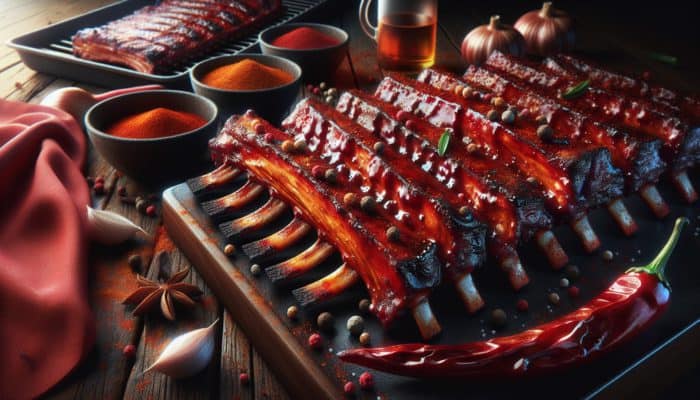
BBQ Pork Ribs Spices: The Ultimate Guide for US BBQ Lovers
Unlock the Secrets of the Best Spices to Elevate Your BBQ Pork Ribs Across America
Why You Should Always Include Paprika for Mouthwatering BBQ Ribs
The vibrant hue and subtle sweetness of paprika are essential for crafting incredible BBQ pork ribs that stand out across the United States. Not only does paprika enhance the visual appeal of the ribs with its rich red color, but it also imparts a mild, sweet flavor that beautifully complements the savory notes of the meat. Its remarkable versatility allows for seamless incorporation into a variety of rubs and marinades, reinforcing its status as a go-to spice for BBQ aficionados eager to elevate their culinary creations.
In America, a plethora of paprika varieties are utilized, each delivering a unique flavor profile that can dramatically enhance your BBQ experience. The most notable types include:
- Sweet Paprika: This variety is mild and sweet, perfect for adding depth without overwhelming heat.
- Smoked Paprika: Infused with the essence of smoked peppers, this spice contributes a rich, smoky flavor that enhances the charred taste of BBQ.
- Hot Paprika: Ideal for those who crave spice, hot paprika introduces a zesty kick while preserving sweet undertones.
- Spanish Paprika: Known for its complex flavor, Spanish paprika can range from sweet to spicy, adding a distinctive twist to traditional BBQ recipes.
Integrating these paprika varieties into your seasoning mix can create a more dynamic flavor profile, allowing you to customize your BBQ pork ribs perfectly to match your taste preferences and impress your guests.
How Black Pepper Intensifies the Flavor of BBQ Ribs
Black pepper is an indispensable flavor enhancer in BBQ pork ribs, delivering depth and a sharp, spicy kick that significantly elevates the overall taste experience. Its versatility allows it to blend seamlessly with other spices, forming a well-rounded flavor profile. In the US, black pepper is typically ground to a medium texture, enabling it to coat the ribs effectively without clumping.
When preparing BBQ pork ribs, selecting the right type of black pepper can significantly influence the final dish. Freshly cracked black pepper is often favored by BBQ enthusiasts, as it delivers a more vibrant flavor compared to pre-ground alternatives. Grinding the pepper just before use releases essential oils, enhancing both the aroma and potency of the spice. When combined with other common spices, such as garlic powder and paprika, black pepper amplifies their flavors, creating a balanced seasoning that enhances the rib’s natural taste.
Experimenting with different grind sizes can yield varied textures and intensities of spice. A coarser grind can produce a more robust flavor, while a fine grind offers a subtler, more even taste. Ultimately, black pepper is an essential component of BBQ pork rib recipes, enhancing flavor and delivering a zesty zing that keeps diners returning for more.
Are You Ready to Dive Into Flavorful BBQ?
The Essential Role of Garlic Powder as a Flavor Amplifier
Garlic powder is a highly regarded ingredient in BBQ pork ribs, recognized for its ability to infuse savory depth into the dish. Its concentrated flavor ensures easy incorporation into rubs and marinades, making it a preferred choice for countless cooks across the United States. While fresh garlic is often praised for its pungency, garlic powder offers an unparalleled convenience that is hard to ignore.
The key difference between fresh garlic and garlic powder lies in their flavor intensity and application. Fresh garlic can impart a sharp, vibrant flavor that evolves during the cooking process, often caramelizing and sweetening when exposed to heat. In contrast, garlic powder delivers a milder, more consistent flavor that integrates effortlessly into spice blends without the need for chopping or mincing, which can be time-consuming.
This consistency allows cooks to easily control the desired garlic flavor. For those who prefer a more pronounced garlic presence, combining both fresh garlic and garlic powder can create a rich, layered taste profile. It’s also essential to consider the cooking method; for example, ribs cooked slowly in a smoker allow the garlic flavors to deepen, while those grilled quickly may highlight the sharper notes of fresh garlic. Garlic powder remains an essential flavor enhancer in BBQ pork ribs, ensuring that every bite is filled with savory goodness.
Insights from Experts on the Finest Spices for BBQ Pork Ribs
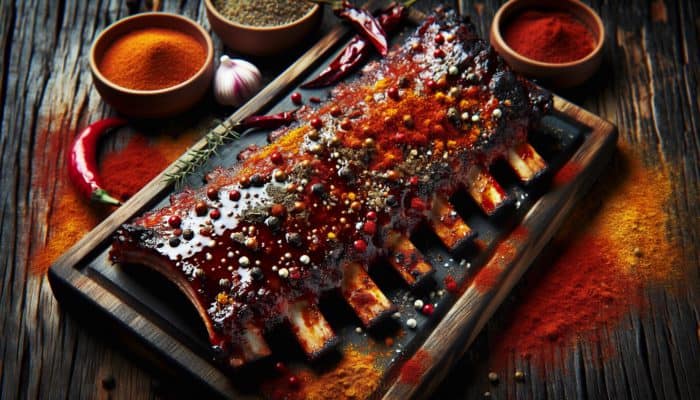
Expert Recommendations for Flavorful and Balanced Spice Blends
When it comes to creating the ideal BBQ pork ribs, expert chefs emphasize the significance of well-balanced spice blends. Many accomplished BBQ chefs across the United States recommend specific combinations that have proven to be crowd-pleasers. These blends often draw from traditional Southern recipes while incorporating modern twists that cater to contemporary palates.
A popular blend recommended by various BBQ experts includes equal parts brown sugar, paprika, and garlic powder, with a pinch of cayenne pepper for a delightful kick. This combination strikes a balance between sweet and spicy, enhancing the natural flavors of the pork. Another well-known blend features smoked paprika, black pepper, and onion powder, catering to those who appreciate smoky depth in their BBQ.
For example, renowned pitmasters like Aaron Franklin have gained acclaim by developing signature blends that accentuate the quality of the meat while avoiding overshadowing its inherent flavors. Although each expert approaches seasoning differently, a common thread is the meticulous attention to flavor balance, ensuring that every bite of rib is an enjoyable and memorable experience. As you explore spice blends, consider the elemental qualities of each ingredient to allow the flavors to resonate harmoniously.
Determining the Ideal Spice Ratios for BBQ Ribs
Understanding the correct ratios of spices is vital for achieving perfectly seasoned BBQ pork ribs. This knowledge empowers you to develop a well-rounded flavor profile that highlights the meat while preventing any single spice from overpowering the others. In the US, effective spice ratios generally involve a base of sugar, salt, and pepper, complemented by a variety of additional spices to create a unique blend.
A common starting point for a spice mix may include two parts brown sugar to one part salt, with one part black pepper and paprika, plus a teaspoon of cayenne for heat. This balance enhances the natural sweetness of the pork and contributes to the formation of a beautiful crust during cooking. It is crucial to taste and adjust these ratios based on personal preference and the specific cut of meat being used.
Furthermore, when mixing spices, it’s advisable to start with smaller quantities, particularly when incorporating potent spices like cayenne or garlic powder. Gradually increasing the amounts allows for fine-tuning the flavor to suit your taste. Creating a spice blend that resonates with you may require experimentation, but understanding how each component interacts will yield consistently delicious results every time you prepare BBQ pork ribs.
Elevate Your Ribs with Unique and Creative Spice Combinations

In the competitive BBQ arena, some US chefs set themselves apart by incorporating unique spices that amplify the flavors of traditional pork ribs. These innovative additions can transform a classic recipe into something extraordinary, captivating diners with unexpected tastes. Chefs are increasingly exploring global spice influences, integrating herbs and spices from various culinary traditions into their BBQ repertoire.
For instance, spices like coriander and cumin, commonly found in Middle Eastern cuisine, can add an earthy depth to BBQ pork ribs, creating a fusion of flavors that excites the palate. Similarly, the use of five-spice powder—a staple in Chinese cooking—can introduce a sweet and aromatic flavor profile that contrasts beautifully with the savory meat. Other unique spices, such as sumac or za’atar, can lend tangy and herbaceous notes that refresh the traditional BBQ experience.
Successfully enhancing ribs with unique spices hinges on achieving balance. These unconventional ingredients should complement the existing flavors without overwhelming them. A well-crafted spice blend that incorporates creativity can set your BBQ pork ribs apart, offering diners a memorable culinary experience that showcases the versatility of spices.
Understanding Regional Variations in BBQ Pork Rib Spices
Regional variations significantly influence the diverse landscape of BBQ pork ribs across the United States, especially regarding the spices used. Each area has cultivated its unique flavor profiles, reflecting the local culture and traditions that shape BBQ practices. Understanding these regional differences provides insight into the diverse approaches to seasoning ribs.
In the South, BBQ often features a combination of cayenne, mustard powder, and vinegar-based sauces, creating a punchy flavor profile that is distinctly Southern. Conversely, the Midwest tends to favor sweeter rubs, focusing on ingredients like brown sugar, cinnamon, and allspice, yielding a milder, more comforting flavor experience. The West Coast embraces innovation and experimentation, with chefs incorporating a range of spices from various culinary backgrounds, such as chipotle and adobo, to create bold and unique flavors.
This regional diversity influences not only the choice of spices but also the methods of preparation and cooking. For instance, Southern BBQ may involve slow-smoking ribs over hickory wood, while West Coast BBQ could entail grilling over open flames, showcasing the impact of geography on flavor profiles. By exploring these regional variations, BBQ enthusiasts can gain a deeper appreciation for the craft and artistry behind each plate of ribs, making every bite a reflection of its cultural roots.
How Spices Influence the Flavor Profile of BBQ Pork Ribs
The Crucial Function of Spices in Flavor Development
Spices play an essential role in developing the rich and complex flavors of BBQ pork ribs. The interplay between various spices creates a harmonious blend that enhances the natural richness of the meat. The key lies in understanding how different spices interact; this knowledge empowers you to create a well-balanced flavor profile that enhances the dining experience.
When applied effectively, spices can transform the flavor profile of pork ribs, imparting depth and character. For example, the warmth of black pepper complements the sweetness of brown sugar, while smoked paprika adds a rich, savory note that mirrors the flavor imparted by the cooking process itself. This multi-dimensional approach to seasoning means that each component must be carefully considered, ensuring that no single element overwhelms the palate.
Moreover, spices can enhance the Maillard reaction during cooking, which is crucial for developing that coveted bark on the ribs. When spices interact with heat, they not only contribute flavor but also aroma, creating an enticing sensory experience. Understanding these dynamics allows BBQ enthusiasts to craft ribs that not only taste incredible but also deliver a layered flavor experience that keeps diners engaged.
Achieving the Ideal Balance of Heat and Sweetness in BBQ
Balancing the heat from spices like cayenne with the sweetness of brown sugar is fundamental to creating BBQ pork ribs that are both exciting and approachable. In the US, many BBQ sauces incorporate both sweet and spicy elements, allowing for a well-rounded taste experience that satisfies a broad range of palates.
Common ingredients found in US BBQ sauces, such as honey, molasses, and even fruit purees, work harmoniously with spices to achieve that perfect balance. For example, a sauce that combines the fiery kick of cayenne with the honeyed sweetness of brown sugar can result in a glaze that caramelizes beautifully when cooked, enhancing the overall flavor of the ribs.
Moreover, experimenting with different sweet and spicy combinations can lead to unique flavor profiles tailored to individual preferences. For those who enjoy more heat, increasing the quantity of cayenne or adding hot sauce can create a bold dish, while reducing the sweetness can provide a more savory experience. Ultimately, achieving the right balance between heat and sweetness is crucial for delivering mouthwatering BBQ pork ribs that leave a lasting impression.
The Importance of Marination Time for Flavor Infusion
The duration that pork ribs spend marinating with spices significantly affects the absorption of flavor. Marination allows the spices to penetrate the meat, enhancing its natural flavors and ensuring that each bite is infused with rich, seasoned goodness. In the US, the optimal marination time can vary depending on the specific spices used and the cut of the meat; however, a duration of at least four to six hours is generally recommended.
For maximum flavor infusion, marinating overnight is ideal, especially when using potent spices like garlic and cayenne. This extended time allows for the development of complex flavors, as the spices interact with the meat fibers and create a deeper flavor profile. Conversely, marinating for too long, particularly with acidic components like vinegar, can lead to textural changes that may result in a mushy consistency.
It’s essential to monitor the marination process and adjust the time based on the specific ingredients in your spice blend. By recognizing the role of marination in the flavor development of BBQ pork ribs, cooks can ensure that their dishes are flavorful while maintaining the desired texture and integrity of the meat.
Exploring Regional Differences in BBQ Pork Rib Spices
Regional variations in BBQ pork rib spices greatly influence overall flavor, with each area of the US showcasing its unique take on seasoning. These differences reflect local preferences, available ingredients, and cultural influences that shape the BBQ landscape. Understanding these variations provides insight into the diverse palette of flavors found across the nation.
In the Southeast, particularly in states like North Carolina, BBQ often features a vinegar-based sauce that is tangy and sharp, frequently seasoned with spices like black pepper and crushed red pepper flakes. This contrasts sharply with the sweeter, tomato-based sauces favored in Kansas City, which often include spices such as allspice and cinnamon, providing a rich, complex flavor.
On the West Coast, a growing trend toward fusion cuisine is emerging, where chefs incorporate spices from Asian and Latin American traditions. Ribs may be seasoned with spices like sesame seeds and cilantro, introducing refreshing flavors that challenge traditional BBQ norms. Understanding these regional spice variations allows BBQ enthusiasts to appreciate the art of seasoning and the unique influence of geography on the flavor of pork ribs.
What Distinct Regional Variations Exist in BBQ Pork Rib Spices?
Exploring the Unique Spice Profiles of Southern US BBQ
Southern US BBQ is celebrated for its distinctive spice profile, often incorporating bold and vibrant flavors that reflect the region’s culinary heritage. The use of cayenne and mustard powder plays a critical role in defining the taste of Southern BBQ pork ribs. These spices not only enhance the flavor but also contribute to the dish’s overall character.
One hallmark of Southern BBQ is the emphasis on balance—spicy elements, such as cayenne, are often paired with sweet ingredients, creating a harmonious blend that excites the palate. Mustard powder, in particular, brings a tangy note that cuts through the richness of the pork while also helping to tenderize the meat during cooking.
Another key aspect of Southern BBQ spice rubs is the use of local ingredients, such as brown sugar and smoked paprika, which reflect the regional flavors. The combination of these spices creates a complex flavor profile that is both comforting and invigorating. As a result, Southern BBQ ribs are celebrated for their rich flavor and perfectly balanced seasoning, making them a favorite among barbecue lovers.
Midwest BBQ Spice Characteristics and Preferences
Midwestern BBQ adopts a characteristically milder approach, often favoring sweeter spice profiles that reflect the region’s agricultural roots. Ingredients like brown sugar, honey, and even apple juice are commonly used to create rubs and sauces that lend a sweet, caramelized flavor to BBQ pork ribs. This preference for sweetness sets Midwestern BBQ apart from the spicier styles found in other regions.
This focus on sweet profiles does not imply a lack of flavor; rather, Midwestern spice rubs often incorporate subtle hints of smoke and warmth through spices like paprika and black pepper. This combination ensures that while the sweetness is prominent, it does not overshadow the natural flavors of the pork. The result is a deliciously succulent rib that appeals to a broad audience, making it a staple in backyard cookouts and BBQ festivals across the region.
Moreover, Midwestern BBQ chefs often prioritize a glaze or sauce that complements the ribs’ seasoning. Many Northern BBQ enthusiasts enjoy a sweeter, tomato-based sauce that enhances the flavor without overshadowing the carefully balanced rub. This approach to seasoning reflects the region’s unique preferences, resulting in a delightful dining experience.
Innovative Spice Applications in West Coast BBQ
West Coast BBQ is characterized by its innovative approach to seasoning and cooking techniques, often influenced by diverse culinary traditions. Chefs in this region frequently experiment with new spices, incorporating global influences into their BBQ pork rib recipes. The use of spices such as chipotle, adobo, and even citrus zest introduces exciting flavors that challenge traditional BBQ norms.
The emphasis on freshness is also a hallmark of West Coast BBQ, with many chefs using fresh herbs and spices to create vibrant marinades and rubs. Ingredients like cilantro, lime, and ginger are often integrated into spice blends, providing a refreshing contrast to the richness of the pork ribs. This creative spirit extends to cooking methods, with many West Coast BBQ enthusiasts embracing grilling techniques that allow for quick cooking while preserving flavor.
Additionally, the fusion of international flavors is evident in the West Coast BBQ scene, where Asian and Latin influences come together. This amalgamation of spices yields unique flavor profiles, highlighting the diverse cultural heritage of the region. Consequently, West Coast BBQ pork ribs stand out for their innovation and creativity, appealing to those seeking new and exciting culinary experiences.
Effective Strategies for Selecting the Ultimate Spices for BBQ Pork Ribs
How to Choose the Ideal Spices for Your BBQ Ribs
Selecting the perfect spices for your BBQ pork ribs is a crucial step in crafting delectable dishes that reflect your specific flavor preferences. The selection process should be guided by personal taste, the type of ribs you’re using, and the overall flavor profile you aim to achieve. In the US, there are several actionable steps to assist you in this selection journey.
Begin by considering the flavor characteristics you enjoy—whether you prefer sweet, spicy, smoky, or tangy profiles. Create a list of spices that align with those preferences. For example, if sweet BBQ is your preference, you might lean towards brown sugar and honey, while those who enjoy heat might prioritize cayenne and black pepper.
Next, experiment with different combinations of spices to discover your ideal blend. Start with small batches of rubs, adjusting the ratios as you go. It’s also helpful to incorporate a few tried-and-true spices commonly used in BBQ, such as paprika and garlic powder, to ensure a well-rounded flavor. Consider testing your spice blends on smaller cuts of meat before committing to a full rack of ribs, allowing you to refine your approach based on flavor feedback.
Finally, don’t hesitate to explore regional recipes and spice combinations for inspiration. By understanding what works well in various BBQ traditions, you can confidently select spices that resonate with your taste while enhancing your BBQ skills.
Techniques for Applying Spices for Maximum Flavor Impact
The method of applying spices to BBQ pork ribs significantly affects flavor intensity and overall taste. It’s essential to use techniques that allow the spices to penetrate the meat effectively, ensuring every bite is bursting with flavor. In the US, there are several expert-recommended methods for maximizing spice application.
One effective approach is dry rubbing, where spices are combined and generously massaged into the ribs. This technique not only infuses flavor but also helps create a flavorful crust during the cooking process. When applying the rub, use a light touch to ensure an even coating, allowing the spices to adhere without clumping. For optimal results, let the ribs rest after applying the rub, preferably in the refrigerator for a few hours or overnight, so the flavors can meld.
An alternative method is to create a marinade that incorporates your spices alongside moisture-rich ingredients, such as oil, vinegar, or citrus juice. This method not only infuses flavor but also tenderizes the meat, making it more succulent. Marinating the ribs for an extended period allows the spices to penetrate deeply, enhancing flavor absorption.
Regardless of the method chosen, be sure to balance the spice application to prevent overpowering the natural flavors of the pork. By mastering these applications, you can optimize flavor and create BBQ pork ribs that are sure to impress your guests.
How to Properly Store and Preserve Spices for Optimal Freshness
Proper storage of spices is essential to retain their potency and flavor, ensuring that your BBQ pork ribs are always seasoned to perfection. Many cooks underestimate the importance of spice storage; however, with a few simple strategies, you can extend the shelf life of your spices and maintain their effectiveness. In the US, consider these tips for effective spice storage:
- Keep them cool: Store spices in a cool, dark place, away from heat sources such as stoves and sunlight, which can degrade their flavor.
- Airtight containers: Use airtight containers to prevent moisture from entering and affecting the texture and potency of the spices.
- Labeling: Clearly label spices with their purchase date, allowing you to track freshness and rotate older spices out as needed.
- Whole vs. ground: Whenever possible, purchase whole spices and grind them as needed, as whole spices tend to retain flavor longer than pre-ground options.
By adopting these storage practices, you can ensure that your spices remain vibrant and flavorful, allowing you to create delicious BBQ pork ribs consistently. Proper storage enhances the overall quality of your dishes and showcases the care and attention you put into your cooking.
How to Balance Spices for the Perfect Rib Flavor
Balancing various spices is key to achieving the perfect flavor in BBQ pork ribs, allowing the dish to shine without any component overshadowing the others. This delicate balance is particularly crucial when combining robust spices with milder ones, ensuring a well-rounded taste that appeals to a wide audience. In the US, mastering this balance can elevate your BBQ game.
Start by understanding the flavors of each spice you plan to use; some spices, such as garlic and onion powder, are potent and can overpower if used excessively. Conversely, herbs like oregano or thyme can add depth without overwhelming the dish. A good rule of thumb is to start with smaller quantities of the more potent spices and gradually increase to your desired level of flavor.
Additionally, consider the cooking method and time, as both can significantly influence the perception of spice flavors. For example, long, slow cooking methods often mellow out spices, while quick grilling may highlight their intensity. To achieve the right balance, it can be beneficial to taste as you go, adjusting the spice levels until you find the perfect harmony that enhances the natural taste of the pork ribs.
Ultimately, learning how to balance spices effectively will lead to BBQ pork ribs that are not only flavorful but also memorable, showcasing the art of seasoning in every bite.
Strategies for Experimenting with Spice Blends for BBQ Ribs
Experimenting with various spice blend combinations is a rewarding aspect of BBQ cooking that can lead to discovering unique flavors for your pork ribs. The process of creating and adjusting blends allows you to personalize your BBQ experience, showcasing your culinary creativity. In the US, there are several strategies to help you effectively experiment with spice blends.
Begin by gathering a selection of spices that resonate with your taste preferences—these can range from traditional BBQ spices to more unconventional options. Start with a base blend that incorporates essential components, such as paprika, garlic powder, and black pepper, then gradually introduce additional spices to build complexity.
As you experiment, maintain detailed notes on each blend, recording the ratios and any adjustments made during the cooking process. This record will help you refine your recipes over time and replicate successful combinations. Additionally, consider mixing spices that reflect regional influences, such as incorporating mustard powder for a Southern twist or using coriander for a hint of warmth.
Another effective strategy is to conduct taste tests with friends or family, gathering feedback on your spice blends. This collaborative approach can lead to exciting new flavor combinations and enhance your overall BBQ experience. By embracing experimentation, you can create memorable BBQ pork ribs that showcase your unique style and culinary passion.
Health Benefits Linked to Spices Used in BBQ Pork Ribs
Exploring the Nutritional Advantages of Common BBQ Spices
Many spices utilized in BBQ pork ribs offer a variety of health benefits, making them not only delicious but also nutritious additions to your meals. Understanding the nutritional value of these spices allows BBQ enthusiasts to enjoy their dishes with a sense of well-being. For instance, spices like paprika, black pepper, and garlic powder contain essential vitamins and minerals that can contribute to overall health.
Paprika is abundant in antioxidants, particularly vitamin A and vitamin E, known for their immune-boosting properties. Black pepper contains piperine, an active compound linked to enhanced nutrient absorption in the body. Garlic powder, on the other hand, is celebrated for its potential heart health benefits and ability to support immune function due to its high concentration of allicin.
Integrating these spices into BBQ pork ribs not only enhances flavor but also increases the nutritional profile of the dish. By understanding the health benefits associated with various spices, cooks can feel good about their culinary choices while enjoying mouthwatering BBQ.
The Antioxidant Power of BBQ Spices
Several spices commonly used in BBQ pork ribs, such as paprika and garlic, possess notable antioxidant properties that can contribute to overall health. Antioxidants are compounds that help combat oxidative stress in the body, reducing the risk of chronic diseases. This makes spices a valuable addition to your meals, offering health benefits in addition to their flavors.
Paprika, for example, is rich in carotenoids, which are powerful antioxidants that support eye health and may help reduce inflammation. Garlic is similarly rich in antioxidants, with studies suggesting that its consumption may lower the risk of certain types of cancer and cardiovascular diseases. Incorporating these antioxidant-rich spices into your BBQ ribs not only elevates the flavors but also supports a healthier lifestyle.
By harnessing the antioxidant properties of these spices, BBQ enthusiasts can craft dishes that are both delicious and health-conscious, allowing them to savor their favorite meals without compromise.
How Spices Aid Digestion in BBQ Dishes
Certain spices used in BBQ pork ribs can promote digestion, offering additional health benefits to consumers in the US. For instance, spices like ginger and cumin are known for their digestive properties, helping to soothe the gastrointestinal tract and promote healthy digestion. These spices can significantly enhance the overall experience of enjoying rich BBQ dishes.
Ginger, with its anti-inflammatory properties, has been shown to relieve nausea and improve digestion, making it a fantastic addition to spice blends. Cumin is another spice that can stimulate digestion and improve nutrient absorption, making it a valuable ingredient in BBQ rubs and marinades. By incorporating these digestive-supporting spices into your BBQ pork ribs, you can enhance both the flavor and health benefits of your dish.
As more consumers become aware of the digestive benefits associated with specific spices, incorporating them into BBQ recipes can provide a delicious way to promote gut health while enjoying flavorful meals.
The Anti-Inflammatory Effects of Spices in BBQ
Spices such as turmeric and ginger, when used in BBQ pork ribs, can offer anti-inflammatory effects that contribute to improved health. These spices contain active compounds that have been shown to reduce inflammation in the body, making them beneficial additions to your BBQ recipes. Turmeric, in particular, contains curcumin, a potent anti-inflammatory agent that may help alleviate symptoms associated with inflammatory conditions.
Ginger also boasts anti-inflammatory properties, which can help reduce muscle soreness and improve recovery after exercise. Using these spices in your BBQ rubs or marinades not only enhances the flavor of the ribs but also provides potential health benefits that resonate with health-conscious consumers.
Incorporating anti-inflammatory spices into your BBQ practices allows you to create dishes that are not only delicious but also contribute to overall well-being. By combining flavor with health benefits, BBQ enthusiasts can enjoy their favorite meals and feel good about their choices.
Frequently Asked Questions Regarding BBQ Spices
What are the key spices that enhance the flavor of BBQ pork ribs?
Key spices for BBQ pork ribs include paprika, black pepper, garlic powder, cayenne, and brown sugar, which together create a balanced flavor profile that enhances the meat’s natural taste.
How long should I marinate my pork ribs for optimal flavor?
For the best flavor, marinate pork ribs for at least 4 to 6 hours, but overnight is ideal to allow the spices to penetrate deeply and develop a richer flavor.
What differentiates fresh garlic from garlic powder in BBQ dishes?
Fresh garlic provides a pungent flavor that can caramelize during cooking, while garlic powder offers convenience and a milder, more consistent taste, making it ideal for use in spice blends.
How can I achieve a balance between heat and sweetness in my BBQ sauce?
To balance heat and sweetness, combine spicy elements, such as cayenne or hot sauce, with sweet ingredients like brown sugar or honey, adjusting the ratios to achieve your desired flavor profile.
What advantages does paprika provide in BBQ preparation?
Paprika adds vibrant color and mild sweetness to BBQ dishes, plus it contains antioxidants that can support overall health and enhance the appeal of pork ribs.
Can I use non-traditional spices in my BBQ rubs?
Absolutely! Exploring non-traditional spices, such as coriander, cumin, or even citrus zest, can create unique flavor profiles that make your BBQ pork ribs stand out.
How should I store my BBQ spices to maintain their freshness?
Store BBQ spices in a cool, dark place in airtight containers, labeling them with the purchase date to ensure they remain fresh and retain their potency.
What is the best technique for applying spices to ribs?
The best technique is to dry rub the spices directly onto the ribs, massaging them in for even coverage, or using a marinade that allows the spices to penetrate the meat.
Do the spices in BBQ ribs offer health benefits?
Yes, many spices used in BBQ ribs, such as garlic, paprika, and turmeric, provide health benefits including antioxidants, anti-inflammatory properties, and digestive support.
How do regional differences affect BBQ spice selections?
Regional differences greatly influence BBQ spice selections, with Southern BBQ favoring tangy and spicy profiles, while Midwestern BBQ tends to be sweeter, showcasing the area’s culinary traditions.
Connect with us on Facebook!
The Article Top Spices for BBQ Pork Ribs: A US Guide appeared first on https://pitmastersarsenal.com
The Article Best BBQ Pork Ribs Spices: Your Ultimate US Guide Was Found On https://limitsofstrategy.com
-

Grill Timer: Your Guide to Perfect Cooking Results
Master the Art of Grilling with the Ideal Grill Timer Selection
Grilling is not merely a cooking technique; it is an art form that demands accuracy, skill, and an acute focus on details. One of the most vital instruments for attaining culinary excellence is a dependable grill timer. By utilizing the right timer, you can guarantee that each piece of meat and vegetable is cooked to perfection, offering a memorable dining experience for you and your guests. This comprehensive guide is crafted to assist you in choosing the ideal grill timer tailored to your unique grilling requirements while simultaneously enhancing your culinary prowess.
Explore Various Types of Grill Timers to Elevate Your Grilling Game
When selecting a grill timer, understanding the range of options available is crucial. Mechanical timers are generally straightforward and easy to use, featuring simple dials that enable quick time adjustments. Known for their durability, these timers do not require batteries, making them a reliable choice for outdoor grilling aficionados. Conversely, digital timers offer advanced functionalities, including countdown timers and precise settings tailored for various food types. Many digital models have magnetic backs, ensuring they can be conveniently attached to your grill or refrigerator for immediate access.
For those who embrace technological advancements, app-based timers are becoming increasingly popular. These innovative timers connect to your smartphone, delivering alerts and updates about your cooking progress. Equipped with features like temperature sensors and remote monitoring capabilities, app-based timers significantly improve your grilling experience, allowing you to multitask without losing track of your meal. This modern solution caters to the demands of busy grillers who want to ensure their food is cooked to perfection without constant supervision.
Crucial Features to Prioritize When Choosing Your Grill Timer
Recognizing that not all grill timers are created equal is essential when making your selection. Concentrate on vital functionalities such as countdown, count-up, and multiple alarm settings. A countdown timer is ideal for establishing specific cooking durations, ensuring your steak is cooked just right without crossing into overdone territory. Count-up timers are particularly beneficial for tracking the time of slow cooks, such as brisket or ribs, providing you with a precise measure of cooking time.
Additionally, having multiple alarm settings allows you to program different cooking times for various foods simultaneously. This feature is particularly advantageous when grilling a diverse assortment of meats and vegetables, ensuring that all items finish cooking at the same time. Look for timers that feature clear audio alerts, vibration options, or even visual cues to guarantee you don’t miss the signal, thereby enhancing your overall grilling experience.
Affordable Grill Timer Solutions for Budget-Conscious Grillers
Grilling enthusiasts shouldn’t have to spend a fortune to find a reliable grill timer. Numerous budget-friendly options provide dependable performance without sacrificing necessary features. Many quality mechanical and digital timers can be found for under $20. When looking for a timer, take the time to read customer reviews and select brands known for their durability and accuracy. By investing in a quality timer, you can significantly enhance your grilling experience without straining your finances.
Ensuring User-Friendly Operation and Simple Setup for Your Grill Timer

A complicated grill timer can swiftly transform an enjoyable grilling session into a source of frustration. Therefore, seek timers that feature user-friendly interfaces requiring minimal effort to set up. Timers with large, easy-to-read displays and intuitive buttons will save you precious time and hassle while you keep a watchful eye on your food.
Moreover, consider the portability of the timer. A compact, lightweight design is ideal for easy transport during tailgating or camping trips. Ensure that the timer can be set up and accessed quickly without diverting your attention from the grill, maintaining a seamless and enjoyable cooking experience.
Choosing a Durable and Weather-Resistant Grill Timer for Outdoor Use
Grilling often takes place outdoors, exposing your equipment to various weather conditions. Therefore, selecting a grill timer that is both durable and weather-resistant is critical. Look for timers made from sturdy materials that can withstand the elements, such as high-quality plastics or stainless steel. Timers with water-resistant features will protect against accidental splashes or rain, ensuring your device remains functional and reliable. A dependable grill timer should be as resilient as the grilling experience itself, offering longevity and consistent performance regardless of external conditions.
A Thorough Guide to Setting Up Your Grill Timer for Flawless Cooking
Properly configuring your grill timer is crucial for achieving perfect cooking results and ensuring that your food is cooked just right. In this section, you will find a detailed, step-by-step guide for calibrating, positioning, and programming your timer to accommodate various types of food.
Calibrating Your Timer for Accurate and Reliable Readings

Before you begin grilling, it is essential to ensure that your timer is accurately calibrated. Calibration methods may differ by model, so always consult the manufacturer’s guidelines for specific instructions. While many digital timers come pre-calibrated, it is prudent to verify their accuracy. To do this, set the timer for a specific duration, such as 10 minutes, and check if it alerts you as expected. If you notice any discrepancies, make adjustments according to the provided instructions to ensure optimal performance.
By confirming that your timer is calibrated accurately, you can prevent significant cooking mishaps, such as undercooking or overcooking your delicious meal. Taking the time to verify your timer’s accuracy before each grilling session will yield the best possible results, allowing you to serve perfectly cooked dishes with confidence.
Optimal Placement of Your Grill Timer for Enhanced Efficiency
The placement of your grill timer can greatly influence your grilling efficiency and overall cooking experience. Position the timer in a location that is not only easily visible but also readily accessible during the cooking process. Many grillers find it advantageous to place the timer at eye level or within arm’s reach, enabling quick glances without having to step away from the grill.
Consider utilizing the magnetic backs of digital timers to attach them to your grill or setting up a small stand on your prep table. Ensure that the timer is shielded from direct heat or flames, as prolonged exposure can damage the device and compromise its functionality. By strategically positioning your timer, you can enhance your grilling experience and maintain focus on your culinary creations.
Programming Your Timer for Different Food Types to Achieve Perfect Results
Different foods require varying cooking times, making it essential to familiarize yourself with programming your timer for each type of meat or vegetable you plan to grill. For example, chicken breasts generally require 6-8 minutes per side, while burgers may only need 4-6 minutes. Effectively utilizing your timer will help you achieve that perfect sear without the anxiety of burning or undercooking your food.
Consider creating a grilling cheat sheet that includes recommended cooking times for various foods, keeping it handy next to your grill timer for quick reference. By adhering to these time guidelines and programming your timer accordingly, you can eliminate the guesswork from grilling and focus on enjoying the outdoor culinary experience with family and friends.
Master Timing Techniques for Perfectly Grilled Cuts of Meat
Mastering the timing for various types of meat can significantly enhance your grilling experience and the flavors of your dishes. This section emphasizes specialized timing techniques aimed at achieving optimal results for different cuts of meat.
Grilling Steaks for Ultimate Flavor and Desired Texture
Grilling the perfect steak is a highly sought-after skill that can impress any guest and elevate your culinary reputation. The key factor for achieving your desired doneness—whether it be rare, medium, or well-done—lies in the precision of your timing. A general rule of thumb is to allocate 4-5 minutes per side for a 1-inch thick steak, but employing a grill timer can refine this process.
For rare steaks, aim for an internal temperature of approximately 125°F, medium at 135°F, and well-done starting at 160°F. Use your grill timer to keep a close watch on the cooking duration, ensuring that you don’t accidentally overcook your meat. Additionally, consider using a meat thermometer to double-check the internal temperature, underscoring the importance of precision in your grilling technique and achieving restaurant-quality results.
Grilling Chicken for Safety and Succulence
Grilling chicken requires strict attention to cooking times, as poultry must be thoroughly cooked to prevent any risk of foodborne illnesses. Typically, chicken breasts need to be grilled for about 6-8 minutes per side, while thighs and wings may require longer, around 10-12 minutes. Setting your grill timer accordingly is essential, and always verify the internal temperature.
Chicken should reach a minimum internal temperature of 165°F to ensure safety. To avoid dryness, consider marinating your chicken beforehand or employing a brine, which enhances flavor and moisture retention. A reliable timer guarantees your chicken is cooked perfectly while preserving its juiciness, allowing you to serve a delicious and safe meal to your guests.
Perfecting Timing for Grilling Various Cuts of Pork
Pork is a highly versatile meat but can be challenging to grill without a solid timing strategy. Pork chops typically require 4-6 minutes per side, while ribs and larger cuts like pork shoulder benefit from slower cooking at lower temperatures. Utilizing your grill timer can help you effectively track cooking times, particularly for larger cuts that may require several hours to become tender.
For pork, the USDA recommends a minimum internal temperature of 145°F, followed by a resting period of three minutes before serving. Using your timer not only aids in cooking but also alerts you when it’s time to let the pork rest, enhancing the flavor and tenderness of your dish. Pair your perfectly timed pork with a tangy barbecue sauce to elevate the flavor profile and delight your guests.
Roasting Lamb with Precision for Delicious Results
Lamb is a delicacy that, when grilled correctly, offers a rich flavor and tender texture. Depending on the cut—whether it’s a leg, rack, or chop—the cooking times can vary greatly. For instance, lamb chops typically require about 4-5 minutes per side, while a leg of lamb may need up to 20-25 minutes per pound at 350°F.
Employing a grill timer is particularly beneficial for larger cuts, allowing you to track cooking times meticulously. Aim for an internal temperature of 145°F for medium rare and 160°F for medium. Proper timing will ensure a beautifully roasted lamb that is juicy and flavorful, elevating your outdoor dining experience to new heights.
Master Timing Techniques for Grilling Vegetables and Side Dishes
Grilling vegetables can significantly enhance their flavors and textures, but timing is crucial for achieving optimal results. This section provides timing techniques for grilling various vegetables and sides, ensuring delicious outcomes.
Grilling Corn on the Cob for a Delicious Summer Side
Corn on the cob is a summer favorite, but achieving the right timing is essential for perfect results. Whether grilled in the husk or shucked, corn generally takes about 10-15 minutes over medium-high heat. If grilling in the husk, soak the corn for about 30 minutes before grilling to prevent burning.
Use your grill timer to monitor the cooking time, flipping the ears every few minutes for even charring. After grilling, brush with butter and sprinkle with salt for a delightful side dish that complements any summer meal. By paying attention to timing, you can ensure that the corn is tender and bursting with flavor.
Effective Timing for Grilling a Variety of Vegetables
Different vegetables require varied grilling times to achieve that perfect char while maintaining tenderness. For instance, bell peppers and zucchini typically take about 6-8 minutes, while asparagus may require only 4-5 minutes, depending on thickness. Utilizing your grill timer ensures you can coordinate cooking times effectively, allowing you to add vegetables at just the right moment.
Consider marinating your vegetables in olive oil, garlic, and herbs to elevate their flavor before grilling. Keep a close eye on them to prevent overcooking, ensuring they reach the ideal texture and taste. With the right timing, grilled vegetables can become a highlight of your meal.
Timing and Skewering Kebabs for Uniform Cooking
Kebabs are a fun and versatile grilling option, but timing is essential to ensure all components are cooked evenly. When assembling your skewers, account for the cooking times of different ingredients. For example, cubed chicken or beef may take about 10-12 minutes, while vegetables like onions and bell peppers may require around 8-10 minutes.
Setting your grill timer for the longest cooking ingredient ensures that you don’t overcook the other items. Rotate the skewers periodically for even cooking, and utilize a meat thermometer to check internal temperatures, ensuring everything is fully cooked and safe to eat.
Expert Timing Tips for Grilling Seafood to Perfection
Grilling seafood can be a delightful culinary adventure, but it presents its own timing challenges. This section explores the best timing techniques when grilling various seafood options, ensuring that each dish is cooked to perfection.
Grilling Fish Fillets with Precision for Moistness
Fish fillets are delicate and can easily dry out if overcooked. For most fish, aim for around 5-6 minutes per side over medium heat, depending on thickness. A reliable grill timer is essential for monitoring these brief cooking times, helping you achieve perfectly flaky, moist fish that’s cooked just right.
Utilize a fish spatula for gentle handling, and consider marinating your fillets for added flavor. Aim for an internal temperature of 145°F to ensure your fish remains succulent and delicious. By adhering to timing guidelines, you can create seafood dishes that impress and satisfy.
Perfect Timing for Grilling Shrimp and Scallops
Shrimp and scallops are quick-cooking seafood options that require precise timing to avoid a rubbery texture. Shrimp typically take about 2-3 minutes per side, while scallops require slightly more, around 3-4 minutes. Use your grill timer to monitor cooking closely, paying attention to color changes.
Both shrimp and scallops should turn opaque when cooked correctly, with ideal internal temperatures for shrimp at approximately 120°F and for scallops around 130°F. These seafood delicacies are best served immediately after grilling, ideally paired with a light sauce or fresh herbs to enhance their natural flavors.
Grilling Whole Fish for Impressive Presentation and Flavor
Grilling a whole fish can yield stunning results, but it requires meticulous monitoring to ensure even cooking. Depending on the size, whole fish can take anywhere from 20 to 30 minutes to cook thoroughly. Use your grill timer to track cooking times, and ensure you check for doneness by inserting a fork to see if the flesh flakes easily.
Consider stuffing the fish with fresh herbs and citrus to enhance flavor during grilling. Aim for an internal temperature of 145°F for optimal tenderness. Grilling whole fish not only presents beautifully but also provides a feast for the senses, making it a perfect centerpiece for your dining table.
Grilling Lobster Tails for a Luxurious Culinary Treat
Lobster tails are a sumptuous seafood delicacy that can be elevated through grilling. To achieve perfectly grilled lobster, heat your grill to medium-high. Each tail will typically take about 8-10 minutes, depending on size. Utilize your grill timer to prevent overcooking, as this can lead to tough meat.
Look for a bright red color and an internal temperature of 140°F for doneness. Basting lobster tails with melted butter and garlic while grilling enhances their flavor, creating an indulgent culinary experience that will impress your guests and elevate any meal.
Timing for Grilling Clams and Mussels Safely
Grilling clams and mussels requires precise timing to ensure they open perfectly without overcooking. Generally, they take about 5-10 minutes on the grill. Use your timer to monitor cooking, and remove them once they begin to open. Be sure to discard any that remain closed to maintain food safety and ensure a delightful seafood experience.
For added flavor, consider marinating them before grilling or serving with a rich garlic butter sauce. Grilled clams and mussels can serve as an impressive starter or side dish, enriching your overall grilling experience and delighting your guests.
Utilizing a Timer for Effective Indirect Grilling Techniques
Indirect grilling is an excellent method for cooking larger cuts of meat or infusing flavors through smoking. This section delves into how to effectively use a grill timer for indirect grilling techniques, ensuring optimal results.
Setting Up Your Grill for Mastery in Indirect Cooking
To maximize the benefits of indirect grilling, proper setup of your grill is essential. This technique involves placing the heat source on one side of the grill while the food cooks on the opposite side. This configuration allows for gentler cooking, which is ideal for larger cuts or smoking.
While preparing, consider using a grill timer to monitor cooking times and ensure even results. Season your meats and position them in the indirect heat zone, checking periodically to maintain the optimal temperature throughout the cooking process.
Cooking Large Cuts with Precision for Tender Outcomes
Large cuts of meat, such as brisket or pork shoulder, greatly benefit from indirect grilling. These cuts typically require longer cooking times, often ranging from 1.5 hours to several hours, depending on size. Employ your grill timer to effectively manage these extended cooking sessions and achieve consistent results.
These larger cuts can develop rich flavors and tenderness through slow cooking. Monitor the internal temperature closely; for pork, aim for around 190°F for optimal tenderness. Utilizing your grill timer is crucial to ensuring these larger cuts are cooked precisely without drying out, resulting in a satisfying and flavorful meal.
Smoking Meats with the Assistance of a Timer
Smoking meats elevates cooking to a new level, requiring precise timing and temperature control. Use your grill timer to manage various stages of the smoking process, particularly when introducing wood chips or adjusting heat levels. Different types of meat will require varying smoking times, generally ranging from 4 to 10 hours.
A reliable grill timer will help ensure your meat absorbs the right amount of smoke flavor without becoming overwhelmingly bitter. By mastering smoking techniques and timing, you can create mouthwatering dishes that are sure to impress.
Monitoring Temperature for Optimal Cooking Outcomes
Using a grill timer to monitor temperature is essential for achieving optimal cooking results. Regularly check the grill’s internal temperature and adjust as necessary to maintain consistent heat. Many digital timers come equipped with temperature probes that can alert you when your meat reaches the desired internal temperature.
This feature is particularly beneficial when grilling larger cuts or smoking, where maintaining temperature control is paramount. A consistent temperature enhances cooking accuracy and ensures that your food is perfectly prepared, resulting in delicious meals every time.
Allowing Meat to Rest for Maximum Flavor and Juiciness
After grilling, allowing meat to rest is vital for preserving flavor and juiciness. Use your grill timer to remind you when to remove the meat from the grill and let it rest. Depending on the cut, resting times generally range from 5 to 30 minutes.
This resting period facilitates the redistribution of juices within the meat, enhancing flavor and tenderness. By incorporating a timer into this process, you can ensure that your grilled meats achieve their full potential before serving, creating a memorable dining experience.
Essential Maintenance Tips to Ensure Your Grill Timer Stays Functional
Just like any kitchen tool, maintaining your grill timer is essential for its longevity and reliability. This section outlines best practices to keep your timer in top condition and ensure it serves you well for many grilling seasons to come.
Cleaning Your Grill Timer for Optimal Performance and Longevity
Regularly cleaning your grill timer is crucial to ensure it functions effectively over time. Follow the manufacturer’s guidelines for cleaning, which often involves a simple wipe-down with a damp cloth. Avoid using harsh chemicals that might damage the device or its components.
For digital timers, ensure that the buttons remain free from debris or grease, as buildup can impair performance. Keeping your timer clean not only enhances its longevity but also its accuracy, contributing to consistently perfect grilling results and a more enjoyable cooking experience.
Battery and Power Management for Consistent Performance
Effective battery management is crucial to ensure your timer is always prepared for action when you need it. If using a battery-operated timer, check and replace the batteries regularly, especially before significant grilling events or holidays. Many timers now offer rechargeable battery options, providing both convenience and eco-friendliness for the environmentally conscious griller.
For plug-in timers, ensure that the power source is reliable and shielded from outdoor elements. This attention to detail will help prevent interruptions during your grilling sessions, enabling seamless cooking experiences and reducing frustration.
Proper Storage of Your Timer to Enhance Longevity
When not in use, store your grill timer in a cool, dry location to protect it from humidity and potential damage. Consider designating a dedicated storage spot in your grill area or kitchen for easy access during the next grilling season. Proper storage will enhance your timer’s longevity and functionality, ensuring it is always ready for your next grilling adventure.
Regular maintenance, along with smart storage habits, will ensure your grill timer remains a dependable companion in your quest for perfect grilling results, helping you create delicious meals with ease.
Upgrading Your Timer for the Latest Features and Innovations
As grilling technology continues to progress, consider upgrading your grill timer if your needs evolve or if you desire more advanced features. Newer models often come equipped with enhanced functionalities such as Bluetooth connectivity, improved temperature monitoring, and more precise settings for various food types.
Investing in a high-quality, feature-rich timer can dramatically elevate your grilling experience, making it significantly easier to achieve perfection in all your culinary creations and ensuring that each meal is a success.
Frequently Asked Questions About Grill Timers and Their Effective Use
Is a grill timer necessary for successful grilling?
While a grill timer is not absolutely essential, it can greatly enhance your grilling experience by ensuring precise cooking times, preventing overcooking, and helping you achieve perfect doneness for all your grilled dishes.
What type of grill timer is best suited for my grilling needs?
The best type of grill timer depends on your specific needs and preferences. Mechanical timers are straightforward and easy to operate, while digital and app-based timers offer advanced features for enhanced precision and convenience, catering to different grilling styles.
What is the proper method for cleaning my grill timer?
Clean your grill timer according to the manufacturer’s instructions, typically using a damp cloth to wipe the exterior and buttons, avoiding harsh chemicals that could damage the device and affect its performance.
How long should I grill chicken for optimal results?
Chicken breasts generally require 6-8 minutes per side over medium heat, while thighs and wings may necessitate longer cooking times. Always ensure that the internal temperature reaches 165°F for safe consumption to avoid any health risks.
What internal temperature should a steak reach for perfect doneness?
For steak, aim for an internal temperature of 125°F for rare, 135°F for medium, and 160°F for well-done. Employ a meat thermometer for accurate readings to ensure your steak is cooked to perfection.
Can I utilize a timer for indirect grilling techniques?
Absolutely! A grill timer is essential for managing cooking times in indirect grilling, especially for larger cuts that require extended cooking periods to achieve optimal flavor and tenderness.
How can I prevent overcooking fish on the grill?
Utilize a grill timer to closely monitor cooking times, typically 5-6 minutes per side for fish fillets, and aim for an internal temperature of 145°F to prevent overcooking and ensure a delicious outcome.
What is the best approach for grilling vegetables?
Different vegetables require diverse cooking times. Use your grill timer to manage these times effectively, ensuring a perfect char while retaining tenderness and enhancing flavors.
How should I store my grill timer when not in use?
Keep your grill timer in a cool, dry location when not in use, ideally in a designated storage spot in your grill area or kitchen for easy access during your next grilling session.
Are there any smart timers available for grilling?
Yes, many smart timers can connect to smartphones and offer advanced features such as temperature monitoring and notifications, significantly enhancing the grilling experience and providing valuable assistance for grillers.
Connect with us on Facebook for more grilling tips, techniques, and recipes!
The Article Using a Grill Timer for Perfect Results: A Guide appeared first on https://pitmastersarsenal.com
The Article Grill Timer Guide for Perfect Cooking Results Was Found On https://limitsofstrategy.com