Your cart is currently empty!
Category: Cooking Tips
-

Beginner BBQ Books: The Ultimate Guide to Grilling
Master the Art of BBQ: Essential Techniques for New Grill Enthusiasts
Finding the top beginner BBQ books is your gateway to enhancing your culinary skills and immersing yourself in the barbecue culture. Barbecuing goes beyond simple cooking; it is an art form that can significantly develop your culinary expertise. By learning foundational techniques, even novice grillers can produce delicious dishes that rival those of expert pitmasters. Your path to BBQ mastery begins with grasping the nuances of heat zones, equipping yourself with the right tools, and following vital safety measures. These invaluable beginner BBQ books will serve as your compass, shedding light on the core principles and methods needed for a fulfilling and enjoyable grilling experience.
Utilize Heat Zones for Perfectly Cooked BBQ Every Time
Crafting delectable grilled dishes starts with a thorough understanding of heat zones present on your grill. These zones represent the different temperature areas within your cooking space and are crucial for effectively utilizing various cooking methods. By segmenting your grill into direct and indirect heat zones, you gain enhanced control over the cooking process. For example, direct heat—where flames are positioned directly beneath the food—is ideal for searing meats and roasting vegetables, yielding the desired caramelization and beautiful grill marks that enhance both the flavor and presentation of your dishes.
Conversely, indirect heat zones are essential for cooking larger cuts of meat slowly, such as briskets or roasts, which require ample time to break down tough fibers without charring. Establishing these zones can be easily achieved by arranging charcoal or burners depending on whether you’re using a gas or charcoal grill. Consulting the top beginner BBQ books offers valuable diagrams and practical advice on how to optimally configure your grill, ensuring you maintain precise control over cooking temperatures for remarkable results.
The temperature of your grill also plays a pivotal role in your cooking journey. A well-calibrated grill thermometer is indispensable for determining when your grill reaches the ideal cooking temperature. While numerous backyard chefs rely on traditional hand-testing methods for gauging temperature, investing in a quality thermometer provides accurate readings, ultimately preventing both overcooking and undercooking. This precision is vital for achieving that coveted restaurant-quality sear and guaranteeing your meats are perfectly cooked every time.
Essential BBQ Tools Every Aspiring Griller Should Own
Equipping yourself with the right tools is fundamental for any novice eager to dive into the world of BBQ. Key tools include a dependable set of grilling tongs, a durable spatula, and a grill brush for maintenance. Each tool serves a specific function, significantly enhancing your grilling experience. For example, tongs allow you to flip and manage food without piercing it, thereby retaining those precious juices. A sturdy spatula is vital for handling burgers and delicate fish fillets, while a grill brush ensures your cooking surface remains clean and safe for food preparation.
Investing in a meat thermometer is another smart decision. This tool eliminates uncertainty regarding cooking times and temperatures, enabling you to determine the perfect doneness for various meats—crucial for achieving that tender, flavorful result everyone desires. Many of the top beginner BBQ books include internal temperature charts, simplifying the process of knowing precisely when to take your meat off the grill for optimal outcomes.
Additionally, don’t overlook the importance of a sturdy apron and heat-resistant gloves. These straightforward accessories not only protect you from burns and spills but also add a professional touch to your BBQ style. Some books even recommend specific brands and models, allowing you to make informed choices when investing in your grilling equipment.
Prioritizing Safety While Grilling: Essential Practices
Safety should always be your foremost concern when grilling. Understanding and adhering to safe grilling practices can significantly minimize accidents and ensure a delightful BBQ experience for everyone involved. Always grill in an outdoor area with ample ventilation, steering clear of flammable materials or structures. While it may seem obvious, confirming that your grill is stable and secure on a flat surface can prevent tipping and potential injuries.
When handling raw meats, it’s critical to use separate utensils and plates for raw and cooked items. This practice not only mitigates the risk of cross-contamination but also safeguards your guests from foodborne illnesses. Familiarizing yourself with proper cleaning techniques is vital for maintaining hygiene throughout your grilling sessions. Many of the top beginner BBQ books underscore the importance of cleanliness in both the kitchen and grilling areas.
Having a fire extinguisher readily available is also wise for emergencies. Knowing how to extinguish a grease fire—by covering it with a lid or using baking soda—can save crucial time and potentially avert disaster. A confident griller is a successful one, and understanding these safety protocols will bolster your confidence when cooking for family and friends.
Irresistible BBQ Recipes Ideal for New Grillers

Embarking on your BBQ adventure can be incredibly fulfilling, especially as you start crafting mouthwatering meals that wow your family and friends. With the right recipes at your disposal, even beginners can create flavorful dishes without feeling overwhelmed. From classic burgers to succulent ribs and flawlessly grilled chicken, a world of flavors awaits your discovery. The following sections delve into easy-to-follow recipes designed to transform any backyard into a culinary paradise. Whether you’re flipping burgers or slow-cooking ribs, these recipes will leave a lasting impression and entice everyone to come back for more.
Crafting the Perfect Burger: Simple Recipes for New Grillers
Burgers are a cornerstone of American BBQ culture, making them an excellent starting point for beginners. Creating the perfect burger requires attention to detail, but with a few straightforward recipes from the top beginner BBQ books, you’ll be whipping up mouthwatering patties in no time. Begin with the classic beef burger—a simple mixture of ground beef, salt, and pepper can yield fantastic results. Experts recommend using ground chuck with a fat content of around 80/20 for optimal juiciness and flavor.
After shaping your patties, resist the temptation to press down on them while grilling; this practice releases vital juices and can lead to a dry burger. Instead, strive for a perfect sear by placing the patties on a preheated grill and allowing them to form a crust on both sides. Flip them only once for the best results. Don’t forget to add cheese during the final minute of cooking; this allows it to melt just right without overcooking the meat, enhancing both flavor and presentation.
For added variety, explore recipes that incorporate different seasonings and toppings. A classic BBQ burger can be elevated with smoked paprika for a hint of smokiness, while a blue cheese burger offers a rich, tangy contrast. Many books also suggest unique toppings—like crispy fried onions or caramelized mushrooms—that can elevate your burger from ordinary to extraordinary, captivating the taste buds of all who sample them.
Simple and Flavorful Rib Recipes for Aspiring BBQ Chefs
While ribs may seem intimidating, with the right guidance, you can master them as a beginner. Start by choosing your ribs wisely; baby back ribs, known for their tenderness, are often easier to handle than spare ribs. A straightforward dry rub made from brown sugar, paprika, garlic powder, and salt enhances flavor without overwhelming your palate. Applying the rub a few hours before grilling allows the flavors to penetrate the meat effectively.
Utilizing a two-zone method on your grill for cooking yields the best results. Start by searing the ribs over direct heat to create a crust, then move them to indirect heat for slow cooking. This approach allows the meat to become tender while preserving that irresistible BBQ flavor. Many of the top beginner BBQ books offer insights into cooking times and methods to achieve that coveted fall-off-the-bone tenderness.
Lastly, don’t overlook the finishing touch: BBQ sauce. Applying a homemade sauce during the last few minutes of grilling allows it to caramelize on the ribs, creating a sticky, flavorful glaze. Experiment with various sauces, from tangy vinegar-based types to sweet tomato-based varieties, to discover your favorite flavor profile that perfectly complements your BBQ creations.
Effortless and Delicious Chicken BBQ Recipes for New Grillers

Chicken is a versatile protein and an excellent choice for those just starting their BBQ journey. One of the simplest recipes involves marinating bone-in, skin-on chicken thighs in a mixture of olive oil, garlic, lemon juice, and your favorite herbs. This marinating process not only infuses flavor but also helps retain moisture while grilling, ensuring a juicy outcome.
When grilling chicken, achieving even cooking is crucial. Begin with indirect heat; this technique allows the chicken to cook thoroughly without burning the skin. Once it’s nearly cooked through, transfer it to direct heat for the finishing touches, achieving crispy skin and that sought-after char. Many authors of the top beginner BBQ books stress the necessity of cooking chicken to a safe internal temperature of 165°F, so keep your meat thermometer handy for accurate results.
For added flair, consider experimenting with different marinades or rubs, such as a zesty jerk marinade or a vibrant lemon herb blend. Pairing your BBQ chicken with simple, complementary sides—like coleslaw or grilled corn on the cob—can create a memorable meal that showcases your newly acquired BBQ skills, impressing everyone at your next gathering.
Exploring BBQ Styles Across the United States
The cultural diversity of the United States is reflected in its BBQ styles, each region presenting unique flavors, techniques, and traditions that have evolved over generations. Understanding these various BBQ styles not only enriches your grilling repertoire but also deepens your appreciation for this culinary art. From the sweet and tangy notes of Kansas City to the bold, beef-centric BBQ of Texas, each style invites exploration and experimentation. Here’s a comprehensive guide to some of the most popular BBQ styles across the U.S.
Delve into the Rich Flavors of Kansas City BBQ
Kansas City BBQ is celebrated for its sweet and tangy flavors, highlighted by a thick, tomato-based sauce. This style often features a variety of meats, including pork, beef, and chicken, all slow-cooked to perfection over a blend of woods, predominantly hickory. The BBQ culture in this city has evolved, showcasing a mix of cooking styles and sauces that ensures there’s something to satisfy every palate.
One of the hallmark dishes from Kansas City is the burnt ends, which are the flavorful, charred bits of brisket often served as a delectable appetizer. To recreate this delicacy at home, you’ll want to cook your brisket low and slow, allowing it to develop that rich flavor. Many of the top beginner BBQ books provide recipes and tips for achieving the perfect burnt ends, including selecting the right cut of beef and mastering the best smoking techniques.
Experimenting with different types of sauces is also essential for capturing that authentic Kansas City flavor. Many local chefs have their secret recipes, which often incorporate elements like molasses, brown sugar, and a hint of vinegar. Feel free to experiment with these components to create a sauce that caters to your unique taste preferences.
Texas BBQ: Bold Flavors and Culinary Techniques
Texas BBQ is as bold and diverse as the state itself, with a primary focus on beef, especially brisket. This style emphasizes the quality of the meat, often seasoned simply with salt and pepper to highlight its natural flavors. Many Texas pitmasters adhere to the “low and slow” mantra, smoking their briskets for hours over post oak wood, resulting in tender, flavorful meat adorned with a beautiful smoke ring.
In Texas, regional variations abound, such as Central Texas BBQ, heavily influenced by German and Czech immigrants, and East Texas BBQ, known for its more sauce-heavy dishes. To experience this style at home, consider trying a smoked brisket recipe that underscores the importance of properly trimming and seasoning the meat for optimal results.
A unique aspect of Texas BBQ is the communal experience it fosters. Many of the top beginner BBQ books discuss the importance of sharing your BBQ creations with friends and family, transforming it into a cherished social event. Pairing your smoked brisket with classic sides like potato salad and coleslaw will create an authentic Texas BBQ experience that everyone will remember.
Carolina BBQ: A Tangy and Unique Culinary Adventure
Carolina BBQ is distinctive, known for its vinegar-based sauces and unique cooking techniques. There are two primary styles in the Carolinas: Eastern and Western. Eastern Carolina BBQ specializes in whole hogs, complemented by a tangy, vinegar-based sauce that perfectly balances the richness of the pork. In contrast, Western Carolina BBQ typically emphasizes pork shoulder with a mustard-based sauce, offering a refreshing take on flavor profiles.
Understanding the key elements of Carolina BBQ is vital for any BBQ enthusiast. For beginners, smoking a whole hog may seem overwhelming, but starting with pork shoulder or ribs can help you achieve that signature flavor. Many BBQ books offer detailed marinating processes for meat, often recommending a simple vinegar-based recipe that balances savory and tangy flavors.
Experimenting with the two styles of sauce can significantly enhance your BBQ skills. Consider mixing a simple vinegar sauce with red pepper flakes for added heat or crafting a mustard sauce that can be brushed on meats during cooking for extra flavor. The top beginner BBQ books can guide you toward achieving these regional flavors successfully.
Memphis BBQ: Celebrating Dry Rubs and Slow-Smoked Excellence
Memphis BBQ is famous for its dry rubs and slow-smoked meats, especially those made from pork. The city hosts the renowned Memphis in May World Championship Barbecue Cooking Contest, showcasing the immense talent and tradition embedded in this BBQ style. Memphis ribs are typically seasoned with unique spice blends, cooked to tender perfection, and often served with a side of tangy sauce.
To create authentic Memphis-style ribs at home, focus on mastering the dry rub. A combination of paprika, garlic powder, brown sugar, and various spices can yield a rich, flavorful crust on your meat. The key is to apply the rub generously and allow the ribs to rest for several hours before grilling, permitting the flavors to penetrate deeply.
As with other BBQ styles, the accompaniments are essential. Pair your Memphis BBQ with classic sides like baked beans or coleslaw for a complete meal. Many of the top beginner BBQ books offer insights on cooking timelines and methods that ensure your BBQ experience is both delicious and authentic, leaving your guests thoroughly impressed.
Choosing the Right BBQ Equipment for New Grillers
Investing in the appropriate equipment is crucial for ensuring your success on your BBQ journey. The world of grilling features a variety of grills, accessories, and tools that can enhance your cooking experience and make it more enjoyable. By understanding the different grill types, essential accessories, and budget-friendly options available, you’ll cultivate the confidence necessary to tackle any BBQ challenge. Dive in and discover which equipment best suits your needs as a beginner.
Understanding the Different Types of Grills for New Grill Enthusiasts
As a novice, selecting the right grill is vital for establishing your BBQ success. The grilling market features three primary types of grills: gas, charcoal, and electric. Gas grills are favored for their convenience and quick heating capabilities, making them ideal for those who want to start cooking without a lengthy wait. They also provide precise temperature control, a significant advantage for new grillers still mastering the basics.
Charcoal grills offer a traditional BBQ flavor that many enthusiasts swear by. While they may require more time and attention to reach the desired temperature, the rich, smoky flavor achieved through charcoal is unparalleled. Many of the top beginner BBQ books highlight the importance of learning to manage charcoal heat, presenting a rewarding challenge for newcomers eager to elevate their skills.
Electric grills serve as an excellent alternative for individuals with limited outdoor space or those residing in apartments. They provide an easy way to enjoy grilled food without the need for gas or charcoal. However, the flavor may not be as robust as that of traditional grilling methods. Understanding the pros and cons of each grill type will help you make the best choice for your BBQ setup, setting you on the path to grilling success.
Essential Accessories for an Enhanced BBQ Grilling Experience
Equipping yourself with the right accessories can significantly amplify your grilling experience. Start with a dependable pair of grilling tongs, a spatula, and a grill brush for cleaning. These fundamental tools assist you in managing food on the grill while ensuring your cooking surface remains clean and safe for food preparation. Investing in a quality meat thermometer is equally important, as it allows you to check for doneness without cutting into your food, preserving its juices and flavor.
In addition to these essentials, consider adding a grill basket for vegetables, a pizza stone for grilled pizzas, and skewers for delicious kabobs. Many beginner BBQ books emphasize the convenience of these accessories, as they help expand your cooking repertoire and enhance your overall grilling experience. A good apron and heat-resistant gloves are also essential for protection and comfort while grilling.
As you progress in your BBQ journey, you may want to invest in more advanced tools, such as a smoker box for enhanced flavor or a rotisserie attachment for your grill. These accessories can elevate your BBQ game and introduce you to new cooking techniques that will leave your friends and family amazed by your culinary prowess.
Affordable BBQ Solutions for New Grillers
Starting your BBQ journey doesn’t have to be financially overwhelming. Numerous budget-friendly options exist to help you pave the way toward becoming a successful griller. Look for basic charcoal or gas grills that offer solid performance without unnecessary extras. Often, entry-level grills can deliver excellent results without a hefty price tag.
Consider gradually purchasing essential tools. Instead of buying a complete set at once, start with a few high-quality items and add more as your skills develop. Many of the top beginner BBQ books will suggest budget-friendly alternatives and DIY solutions for various BBQ setups, simplifying your start without overspending.
Don’t forget to source your ingredients wisely. Local farmers’ markets or butcher shops can provide quality meats at competitive prices, enhancing your BBQ experience without straining your budget. With a bit of creativity and resourcefulness, you can savor fantastic BBQ experiences while keeping your financial commitments in check.
Understanding BBQ Cooking Methods for Flavorful Results
Grasping the various cooking methods available in BBQ can unlock a realm of flavor possibilities and techniques for beginners. From direct and indirect grilling to smoking and low-and-slow cooking, each method has its unique charm and application. Delve into these essential methods to elevate your BBQ repertoire and build confidence on the grill.
Direct vs. Indirect Grilling: Key Techniques Explained
The choice between direct and indirect grilling can significantly influence the outcome of your dishes. Direct grilling involves cooking food directly over the heat source, making it ideal for quick-cooking items like burgers, steaks, and vegetables. This method allows for beautiful searing and caramelization, resulting in deliciously charred flavors. Many of the top beginner BBQ books recommend preheating your grill to achieve optimal results.
On the other hand, indirect grilling is crucial for larger cuts of meat, such as roasts or whole chickens, which require longer cooking times. This method prevents the exterior from cooking too quickly while allowing the interior to reach the desired doneness. Setting up your grill for indirect cooking typically involves turning off one side of the burners or relocating charcoal to one side, creating a cooler zone for your food.
Understanding when to utilize each method can elevate your BBQ skills, enabling perfect results across a variety of dishes. Mastering both techniques will allow you to tackle a wide array of grilling challenges, whether you’re hosting a casual cookout or preparing an elaborate feast for a special occasion.
Smoking Fundamentals: A Flavorful Technique for New Grillers
Smoking is a time-honored technique that imparts a unique and delicious flavor to meats, making it a must-try for any BBQ enthusiast. For beginners, grasping the fundamentals of smoking can significantly enhance your culinary repertoire. The first step is selecting the appropriate wood for smoking, such as hickory, mesquite, or applewood, with each variety contributing a distinct flavor profile to your dishes.
Many of the top beginner BBQ books provide guidelines for setting up a smoker or utilizing your existing grill for smoking. The key is to maintain a low and consistent temperature, typically between 225°F and 250°F, allowing the meat to cook slowly while absorbing the rich flavors from the wood. Using a meat thermometer will help you monitor the temperature and prevent overcooking, ensuring consistently delightful results.
Start with forgiving cuts of meat, like chicken or pork ribs, which can benefit from the smoking process. As you gain experience, experiment with larger cuts, such as brisket, and even vegetables. Learning how to manage smoke levels and cooking times will transform your grilling experience, impressing your guests with the depth of flavor you can achieve.
Mastering Low and Slow Cooking Techniques for Tender Results
The low-and-slow cooking method is fundamental in BBQ, particularly for tougher cuts of meat that require extended cooking times to become tender and flavorful. This technique allows the collagen in the meat to break down, resulting in juicy, fall-apart textures that BBQ enthusiasts crave.
Setting up your grill or smoker for low and slow cooking typically involves utilizing indirect heat, as previously mentioned. Maintaining a consistent temperature over several hours is crucial; many pitmasters recommend using a combination of wood chunks and charcoal to achieve a rich, smoky flavor that enhances your BBQ experience.
The top beginner BBQ books frequently include recipes that guide you through the low and slow cooking process, such as pork shoulder or beef brisket. Understanding the importance of resting the meat after cooking is equally vital; this allows the juices to redistribute, resulting in a flavorful and satisfying bite that showcases your BBQ skills.
Reverse Searing: Achieving Perfectly Cooked Meats
The reverse searing method is an excellent technique for achieving perfectly cooked meats with a stunning crust. This method entails cooking the meat at a low temperature first, allowing it to reach the desired internal temperature, and then finishing it off with a quick sear over high heat. This approach is particularly effective for thick cuts, such as ribeye steaks or pork chops, ensuring a great mix of textures and flavors.
Beginning with indirect heat, you’ll gradually bring the meat up to temperature, often using a meat thermometer for accuracy. Once it reaches about 10-15°F below your target temperature, it’s time to transfer it to direct heat for a quick sear. The result is a beautifully browned exterior with a juicy interior, providing the perfect combination of flavors and textures that will impress any BBQ enthusiast.
Many of the top beginner BBQ books will offer detailed instructions on reverse searing, helping you master this technique for consistently impressive results that leave your guests wanting more.
Elevating Your BBQ Flavors with Techniques and Ingredients
Flavor is the essence of BBQ, and learning how to enhance the taste of your dishes can significantly improve your grilling experience. From marinades and rubs to sauces and glazes, there are countless ways to infuse your BBQ creations with remarkable flavors. Experimenting with various ingredients, techniques, and combinations will contribute to your growth as a BBQ enthusiast and chef.
Marinades and Rubs: Essential Flavoring Tools for BBQ Beginners
Marinades and rubs are fundamental tools for adding flavor and tenderness to your BBQ creations. A well-crafted marinade typically consists of an acidic component (like vinegar or citrus juice), oil, and various spices or herbs. Marinating meats for a few hours or overnight not only enhances their flavor but also helps break down tough fibers, resulting in a more tender and enjoyable product.
Rubs, on the other hand, are dry mixtures of spices and herbs applied to the meat before cooking. A basic rub can be as simple as salt, pepper, and garlic powder, while more complex blends might include smoked paprika, cumin, and brown sugar. The top beginner BBQ books often feature recipes for both marinades and rubs tailored to different types of meat, making it easy for newcomers to explore a variety of flavor profiles.
Experimenting with these ingredients can yield exciting results. For instance, a citrus marinade can add brightness to chicken, while a sweet and spicy rub can elevate your ribs to the next level. The key is to find a balance that enhances the natural flavors of the meat without overpowering them, creating a harmonious dining experience for you and your guests.
Enhancing Flavor with Wood Chips for Smoking
Incorporating wood chips into your grilling setup is an effective way to introduce a smoky flavor to your food. Different types of wood, such as hickory, apple, or cherry, impart unique flavors that allow you to customize your BBQ experience to suit your preferences. Soaking the chips in water for a few hours before use can help them smolder and produce more smoke, rather than burning up quickly, which enhances the overall flavor of your dishes.
To use wood chips effectively, place them in a smoker box or wrap them in aluminum foil to create a pouch with holes that allow smoke to escape. Many of the top beginner BBQ books provide guidance on selecting the right wood for your specific dish, thereby enhancing both flavor and aroma.
Experimenting with different combinations of wood can yield delightful results and elevate your BBQ to new heights. For instance, a blend of hickory and cherry can produce a rich, sweet smoke that pairs perfectly with pork and chicken, adding depth and complexity to your meals.
Creating Sauces and Glazes to Elevate Your BBQ Experience
Finishing your BBQ creations with a flavorful sauce or glaze can elevate the entire experience, providing the final touch that brings all the flavors together. BBQ sauces can range from sweet and tangy to spicy and smoky, depending on regional traditions and personal preferences.
Crafting your sauce allows you to balance flavors to suit your taste. A classic vinegar-based sauce might work wonders with pork, while a rich tomato-based sauce pairs perfectly with beef. Many of the top beginner BBQ books offer recipes for both traditional sauces and modern adaptations, providing a foundation to create your signature sauce that reflects your unique culinary style.
Applying a glaze to your meats during the final minutes of cooking can create a sticky, caramelized exterior that enhances flavor and visual appeal. Experiment with various sauces, and don’t hesitate to mix and match ingredients to find your perfect blend that captivates the taste buds of all who partake.
Experimenting with Herbs and Spices for Unique Flavor Combinations
Herbs and spices can significantly enhance the flavor profile of your BBQ dishes. From fresh herbs like rosemary and thyme to spices like cumin and coriander, the possibilities are endless. Utilizing these ingredients can create unique flavor combinations that will undoubtedly impress your guests and elevate your dishes.
When grilling, consider integrating herbs and spices into your marinades, rubs, or sauces. Fresh herbs can impart brightness and freshness, while dried spices can add depth and warmth. The top beginner BBQ books often highlight specific herb and spice pairings, guiding you toward creating balanced and flavorful dishes that resonate with the essence of BBQ.
Don’t be afraid to experiment with unconventional combinations. For example, a rosemary-garlic rub can work wonders on lamb, while a mint-cilantro sauce can brighten grilled chicken, creating a delightful contrast that enhances your BBQ offerings. The key is to taste as you create, adjusting the quantities to achieve your desired flavor and making your BBQ truly one-of-a-kind.
Brining Techniques for Juicier and More Flavorful Meats
Brining is a technique that can drastically improve the juiciness and flavor of your BBQ meats. The process involves soaking the meat in a saltwater solution, often infused with sugar, herbs, and spices, which helps enhance moisture retention during cooking. This technique is particularly effective for lean cuts, such as chicken breasts or pork chops, ensuring they remain juicy and flavorful.
Brining for several hours or overnight allows the flavors to penetrate the meat while also increasing its moisture content. Many of the top beginner BBQ books feature simple brine recipes that can be adjusted to suit your preferences, making it easy for any beginner to experiment with this technique.
When you’re ready to cook, remember to rinse the meat before grilling to avoid excessive saltiness. The result will be a perfectly juicy and flavorful piece of meat that will impress your family and friends, showcasing your growth as a BBQ enthusiast who understands the nuances of flavor and technique.
Complementary BBQ Side Dishes and Accompaniments
No BBQ meal is complete without delicious side dishes that pair beautifully with your grilled creations. From timeless classics to refreshing salads and delectable desserts, these accompaniments can elevate your BBQ experience while providing balance to the rich flavors of your grilled meats. Explore these ideas to round out your next BBQ feast and delight your guests with a well-rounded meal.
Timeless BBQ Side Dishes That Enhance Your Meal
Classic BBQ side dishes possess enduring appeal and can enhance your meal without overshadowing your main offerings. Coleslaw, for instance, is a staple that provides a crunchy, tangy contrast to rich meats. A simple mix of shredded cabbage, carrots, and a creamy dressing can complement nearly any BBQ dish, making it a must-have.
Baked beans are another beloved side that can be prepared in myriad ways, from sweet and smoky to spicy and tangy. Incorporating ingredients like bacon or brown sugar adds depth of flavor, transforming them into a hearty accompaniment to your grilled meats. Many of the top beginner BBQ books will include recipes for both coleslaw and baked beans, ensuring you have delightful sides ready to enhance your BBQ spread.
Potato salad is also a classic BBQ side, offering a cool, creamy contrast to the hot, grilled meats. Consider experimenting with diverse ingredients, such as fresh herbs, mustard, or even crispy bacon, to create a unique twist on this beloved dish that will have guests asking for seconds.
Refreshing Salads That Brighten Your BBQ Gatherings
Salads can introduce a refreshing element to your BBQ spread and are often quick to prepare. Consider a simple mixed green salad with vinaigrette, which offers a light and crisp complement to hearty grilled meats. Incorporating seasonal fruits, like peaches or berries, can elevate the dish and add a delightful contrast of flavors.
Another fantastic choice is a pasta salad, which can be prepared ahead of time and served cold. Mixing cooked pasta with fresh vegetables, herbs, and a light dressing creates a colorful and flavorful side dish that pairs beautifully with BBQ dishes. Many of the top beginner BBQ books will feature recipes for salads that can easily be tailored to your taste preferences, ensuring a perfect match for your meal.
Don’t overlook the potential of grilled salads either. Grilling vegetables or even fruits, such as watermelon, can add a smoky flavor that significantly enhances the overall dining experience, creating a unique and memorable meal for your guests.
Decadent Desserts to Finish Your BBQ Feast
Ending your BBQ meal on a sweet note can leave your guests feeling satisfied and happy. Consider classic desserts like peach cobbler or strawberry shortcake, which are perfect for summer gatherings and provide a refreshing end to your BBQ. Grilling fruits can also add a unique twist; for instance, grilling peaches and serving them with ice cream creates a delightful dessert that’s both simple and impressive.
Brownies or cookies can be prepared in advance and served warm, offering a comforting finish to your BBQ feast. Many of the top beginner BBQ books will provide dessert recipes tailored for outdoor gatherings, ensuring you can satisfy everyone’s sweet tooth and create lasting memories around the table.
Offering a selection of desserts can elevate the conclusion of your BBQ experience, leaving a lasting impression on your guests. Remember, presentation also matters—consider serving desserts in individual portions or with a decorative touch to enhance the overall experience.
BBQ Tips and Tricks for Successful Grilling
Mastering BBQ requires practice, patience, and a willingness to learn from both your successes and failures. By incorporating tips and tricks into your grilling routine, you’ll sidestep common pitfalls and achieve superior results. Embrace the journey and remember that every grilling session is an opportunity to refine your skills and grow as a BBQ enthusiast.
Avoiding Common BBQ Mistakes for Better Results
Steering clear of common BBQ mistakes can significantly enhance your results and overall experience. One major pitfall is grilling on a dirty grill, as residue from previous sessions can impart undesirable flavors to your food and pose hygiene risks. Make it a priority to clean your grill before each use, ensuring a safe and tasty cooking surface that enhances the flavor of your dishes.
Another mistake to avoid is rushing the cooking process. BBQ is all about low and slow cooking, allowing flavors to develop and meats to tenderize properly. Resist the temptation to crank up the heat; patience is key. Many of the top beginner BBQ books elaborate on this principle, helping you understand the significance of cooking times and techniques.
Overcrowding the grill is another common error. Providing each piece of meat with adequate space allows for even cooking and proper airflow. Cooking in batches can yield better results, especially when managing items with varying cooking times and techniques, ensuring everything is cooked to perfection.
Time-Saving Techniques for Efficient BBQ Sessions
Incorporating time-saving tips can streamline your BBQ experience, allowing you to relish quality time with family and friends instead of getting caught up in the kitchen. Preparing marinades and rubs a day in advance can save valuable time on the day of the BBQ. Additionally, consider prepping your sides and desserts ahead of time, so they’re ready to serve once the grilling is complete.
Utilizing a high-quality grill with multiple burners or zones can help you cook different items simultaneously, reducing overall cooking time. Many of the top beginner BBQ books offer strategies for efficient cooking, ensuring you maximize your time while still delivering delicious results that impress your guests.
Investing in quality tools that expedite the cooking process can also be beneficial. For instance, a reliable grill thermometer can eliminate the guesswork from cooking times. At the same time, a timer helps you keep track of everything happening on the grill, ensuring that nothing gets overcooked or forgotten.
Essential BBQ Tools and Accessories for Success
Equipping yourself with the right tools and accessories can drastically enhance your BBQ experience. Essential items include a dependable meat thermometer, which helps you avoid overcooked meats, and a set of sturdy grilling tongs for easy handling. A grill brush is also crucial for maintaining a clean cooking surface, ensuring your food tastes its best and eliminating any potential contaminants.
Investing in high-quality utensils, like a durable spatula, can enhance your efficiency and confidence on the grill. Many of the top beginner BBQ books emphasize the significance of having the right tools for various tasks, making your grilling experience more enjoyable and successful, ultimately leading to better outcomes.
Consider adding specialized tools, such as a fish basket or grill mats, which can broaden your cooking options and increase your versatility. The right accessories can enhance your BBQ experience, making it easier to experiment with new techniques and recipes that delight your family and friends.
Frequently Asked Questions About BBQ
What are the top recommended beginner BBQ books?
The top recommended beginner BBQ books include “Meathead: The Science of Great Barbecue and Grilling” by Meathead Goldwyn, “BBQ Bible” by Steven Raichlen, and “Franklin Barbecue: A Meat-Smoking Manifesto” by Aaron Franklin. Each offers invaluable tips and recipes tailored for novice grillers, setting you on the path to BBQ mastery.
Which type of grill is best for newcomers?
For beginners, a gas grill is often recommended due to its ease of use and quick heating capabilities. Charcoal grills provide a more traditional flavor, while electric grills offer a great option for those with limited outdoor space or restrictions.
What are some essential BBQ tools for beginners?
Essential BBQ tools include a meat thermometer, grilling tongs, a spatula, a grill brush, and heat-resistant gloves. Investing in quality tools will enhance your grilling experience and ensure safety while cooking.
How do I prevent overcooking meat on the grill?
Using a reliable meat thermometer is essential. Monitor the internal temperature and remove the meat from the grill once it reaches the desired doneness. Allowing the meat to rest will also help retain moisture, resulting in juicy, flavorful dishes.
What are some beginner-friendly BBQ recipes?
Beginner-friendly BBQ recipes include classic burgers, easy chicken marinades, and simple rib preparations. Starting with straightforward recipes will help build confidence and skills as you refine your BBQ technique.
How can I enhance the flavor of my BBQ dishes?
Flavor can be added through marinades, dry rubs, and sauces. Experimenting with herbs, spices, and wood chips will also enhance the taste of your BBQ creations, allowing you to develop your signature flavor profile.
What are some common BBQ mistakes to avoid?
Common BBQ mistakes include failing to preheat the grill, overcrowding the cooking surface, and neglecting to clean the grill. Learning to avoid these pitfalls will significantly improve your grilling results and overall enjoyment.
What’s the best way to cook ribs?
Slow-cooking ribs using indirect heat ensures tenderness and flavor. Applying a dry rub and finishing with BBQ sauce during the last minutes of grilling will yield delicious results that satisfy any BBQ lover.
How do I properly clean my grill?
To clean your grill, scrape off residue with a grill brush while it’s still warm. For a deeper clean, remove grates and wash them with soapy water. Regular maintenance ensures better cooking and flavor, prolonging the life of your grill.
Can I grill vegetables?
Absolutely! Grilling vegetables adds a delicious smoky flavor and enhances their natural sweetness. Consider using a grill basket or skewers to prevent smaller pieces from falling through the grates, ensuring perfectly cooked veggies every time.
Connect with us on Facebook!
This article Best Beginner BBQ Books to Read: A Guide to Grilling first appeared on https://pitmastersarsenal.com.
The Article Beginner BBQ Books: Your Essential Grilling Guide Was Found On https://limitsofstrategy.com
-

Grill Chicken Juicily: Tips to Avoid Drying It Out
Transform Your Grilling Skills: Proven Strategies for Selecting the Ideal Chicken for Optimal Juiciness
Excelling in the art of grilling chicken without it turning dry is a vital culinary talent that starts with the careful selection of the right kind of chicken. The quality and cut of chicken you opt for are instrumental in shaping the ultimate flavor and juiciness of your grilled dish. Given the vast selection available in the U.S. chicken market, it’s essential to discern which options truly excel. Prioritizing fresh, high-quality chicken is paramount for ensuring that your grilled meals are succulent and bursting with flavor. By gaining insight into the critical factors influencing chicken selection, you will establish a solid foundation for grilling success that will leave your guests impressed.
Discovering the Freshest Chicken Cuts for Unforgettable Grilling Experiences
To achieve juicy and flavorful grilled chicken, it is crucial to start with the freshest and highest-quality cuts available. Fresh chicken should exhibit vibrant colors and a firm texture, which are indicative of proper handling and freshness. Chicken breasts should ideally showcase a light pink hue, while the thighs and wings will display deeper shades. When you handle chicken, gently press the meat; it should feel firm yet slightly springy. If the texture is mushy or slimy, it’s advisable to discard it and choose a fresher option that guarantees quality grilling results.
High-quality chicken is typically sourced from local farms where the birds are raised under optimal conditions. Always choose chicken that has been correctly refrigerated, and steer clear of packages that exhibit signs of frost or ice crystals, as these can signify freezer burn and compromised quality. Additionally, familiarize yourself with the USDA grading system; chicken labeled as ‘Grade A’ signifies a superior quality product devoid of visible defects, aiding you in making informed choices for your grilling ventures.
Comprehending Different Chicken Cuts for Enhanced Grilling Success
To fully elevate your grilling experience, it is essential to grasp the various chicken cuts available and their performance on the grill. Chicken breasts are lean and cook rapidly, making them prone to drying out if overcooked. In contrast, thighs and drumsticks contain darker meat with a higher fat content, rendering them more forgiving during grilling since they retain moisture even with longer cooking durations. Chicken wings also shine in grilling, especially when marinated to amplify both flavor and juiciness.
As you prepare for your grilling session, pay close attention to the thickness of each cut. Thicker pieces will necessitate longer cooking times, whereas thinner cuts will cook more quickly. A valuable guideline is to maintain a consistent temperature while adjusting your grilling time based on both the thickness and type of meat. By mastering this knowledge, you will grill confidently, achieving consistently juicy and tender results with every cook.
Ready to Dive Into Grilling?
The Significance of Sourcing Chicken from Reliable Suppliers
Obtaining chicken from reputable sources is crucial for ensuring the highest quality possible. Local butchers and farmers’ markets often offer fresher selections compared to mass-produced chicken found in grocery stores. These sources typically adhere to superior animal husbandry practices and often provide organic or free-range options. Knowing the origins of your chicken not only enhances its flavor but also enriches your overall dining experience, fostering a meaningful connection with the food you enjoy.
When visiting a butcher, don’t hesitate to ask questions. A knowledgeable butcher can share valuable insights about the chicken’s origin, the conditions in which it was raised, and the best preparation methods. Engaging in this dialogue empowers you to make informed choices, ensuring you receive the best product for your grilling adventures. Inquire about farm practices, how the chickens were raised, and whether they were administered any antibiotics or hormones during their growth cycle.
Exploring the Benefits of Choosing Organic and Free-Range Chicken for Grilling

Choosing organic or free-range chicken can significantly elevate the flavor and texture of your grilled dishes while aligning with ethical eating practices. Organic chickens are raised without synthetic pesticides or fertilizers and are fed organic feed, positively influencing their flavor profile. Free-range chickens, in contrast, have access to outdoor spaces, allowing them to exhibit natural behaviors, which results in richer-tasting meat.
In the United States, there is a growing trend among consumers who prioritize the welfare of farm animals. Opting for organic or free-range chicken reflects this conscientious approach to food sourcing. Many local farms offer these options, and purchasing directly from these sources can unveil unique flavors often absent in conventionally raised chickens. Although these choices may come with a higher price tag, consider the investment in quality, taste, and ethical practices that resonate with your values.
Essential Steps for Preparing Chicken for Grilling Achievement
Proper preparation is just as vital as selecting the right chicken to ensure your grilled chicken retains its moisture and flavor. Each step in the preparation phase plays a critical role in enhancing the overall outcome. Techniques such as brining and marinating can significantly impact the juiciness and taste of your grilled chicken, setting you up for grilling success.
Boosting Moisture and Flavor in Chicken Through Brining Techniques
Brining chicken is a time-honored technique for infusing moisture and flavor into the meat, ensuring it remains juicy during the grilling process. A basic brine typically consists of water, salt, and sometimes sugar, along with optional herbs and spices for added complexity. Soaking the chicken in this solution for at least 30 minutes, though preferably for several hours or overnight, can yield optimal results. The salt in the brine helps break down certain proteins in the chicken, enabling it to absorb water and flavor, which ultimately helps maintain moisture throughout the grilling process.
In the U.S., you can elevate your brining experience by incorporating local flavors such as apple cider or citrus juices, which not only enhance overall taste but also contribute to the chicken’s tenderness. After the brining process, rinse the chicken thoroughly to eliminate any excess salt and pat it dry with paper towels to ensure even cooking. This crucial step assists in achieving a beautiful crust on the grill while keeping the meat moist and flavorful.
Marinating Chicken for a Flavorful Grilling Experience

Marinades have the power to transform grilled chicken into a gourmet delight. A well-crafted marinade combines oil, acid, and various flavoring agents—the perfect trifecta for enhancing taste and moisture retention. Oils help lock in moisture, acids like vinegar or citrus juice tenderize the meat, and a variety of spices and herbs infuse bold flavors that tantalize the palate.
For an American twist, consider using regional flavors such as barbecue sauces, citrus-based marinades, or southwestern spice blends. Marinate your chicken for a minimum of 30 minutes, but for maximum flavor absorption, aim for overnight marination. This allows the flavors to meld beautifully, resulting in an unforgettable grilled experience. Remember to discard any leftover marinade that has come into contact with raw chicken to prevent cross-contamination and ensure food safety.
The Crucial Importance of Drying Chicken Before Grilling
While it may seem counterintuitive, patting your chicken dry before grilling is an essential step that should not be overlooked. Excess moisture on the surface of the chicken can inhibit browning and create steam rather than a proper sear, resulting in less flavorful outcomes. Gently dab the chicken with paper towels to remove excess moisture while preventing flare-ups on the grill, which can disrupt the cooking process.
This step becomes particularly crucial if you’ve brined or marinated the chicken, as these processes can introduce additional liquid to the surface. Once the chicken is dry, season it generously with salt, pepper, and any additional spices to ensure that every bite is packed with flavor. Properly preparing the chicken’s surface enhances its texture and contributes to forming a gorgeous, golden-brown crust that is both visually appealing and delicious.
Optimizing Your Grill Setup for Outstanding Results
The way you set up your grill can profoundly influence your chicken grilling experience. Proper grill preparation controls cooking temperatures, enhancing both safety and flavor. Gaining a solid understanding of your grill’s mechanics will allow you to cook chicken to juicy perfection consistently, regardless of the type of grill you are using.
Selecting the Most Suitable Grill for Your Chicken Cooking Needs
When it comes to grilling chicken, the choice of grill largely depends on personal preference and available resources. Gas grills offer remarkable convenience, allowing for quick heat adjustments and maintaining consistent temperatures. In contrast, charcoal grills provide a classic smoky flavor that many grilling enthusiasts cherish. Electric grills serve as a versatile option for those living in apartments or areas where traditional grilling methods may not be feasible.
Each type of grill has its distinct advantages. Gas grills heat up rapidly and are user-friendly, making them perfect for busy weeknights. Charcoal grills, while requiring more time and effort to set up, impart a unique flavor profile that is hard to replicate. Electric grills, though they may lack the depth of flavor, are ideal for those seeking simplicity and ease of use. Assess your grilling needs and choose a grill that aligns with your cooking style and lifestyle preferences.
The Essential Step of Preheating Your Grill for Optimal Cooking
Preheating your grill is a non-negotiable step for effective grilling. A properly preheated grill ensures that your chicken cooks evenly and develops that coveted sear. Whether you’re using a gas, charcoal, or electric grill, establishing the right temperature is crucial for success. For chicken, a medium-high heat range of about 375°F to 450°F is ideal for achieving a crisp exterior while cooking the meat thoroughly without drying it out.
Plan to preheat your grill for at least 10-15 minutes before placing the chicken on it. This process allows the grill grates to reach the optimal temperature, helping to prevent sticking and resulting in beautiful grill marks. Utilize a grill thermometer to verify that the grill has reached the desired temperature, ensuring optimal results each time you cook.
Creating Effective Temperature Zones for Perfectly Grilled Chicken
Establishing temperature zones on your grill can revolutionize your chicken grilling technique. By creating direct and indirect heat zones, you can control the cooking process and prevent the chicken from overcooking. Direct heat is perfect for searing the chicken and forming that sought-after crust, while indirect heat allows for more gradual cooking, which is ideal for thicker cuts.
For gas grills, activate half of the burners to create a hot zone, leaving the other half off for indirect heat. For charcoal grills, gather the coals on one side of the grill to achieve a similar effect. This setup allows you to sear the chicken over direct heat and then transfer it to the cooler side to finish cooking without the risk of drying out. Understanding these grill dynamics will greatly enhance your chicken grilling skills.
Essential Grilling Techniques for Achieving Perfectly Cooked Chicken
Grilling chicken is not solely about the setup; the techniques employed during the grilling process are equally crucial in achieving delightful results. Mastering these methods can help you retain moisture, infuse flavors, and ultimately create mouthwatering grilled chicken that will impress your family and friends.
The Distinction Between Direct and Indirect Grilling Methods
The choice between direct and indirect grilling has a significant impact on the outcome of your chicken. Direct grilling involves placing the chicken directly over the heat source, which is fantastic for achieving a delicious sear on the outside. However, this method can quickly lead to overcooked or dried-out meat if not closely monitored.
Conversely, indirect grilling is preferable for larger cuts or chicken pieces that require longer cooking times. By positioning the chicken away from the heat source, you allow it to cook slowly, retaining moisture and flavor. This technique is particularly beneficial for bone-in cuts, such as thighs and drumsticks, where the meat is more forgiving and thrives with the tenderizing effects of slow cooking. Mastering the balance between these two grilling methods will result in perfectly cooked chicken every time.
Ensuring Even Cooking by Flipping and Rotating Chicken on the Grill
Regularly flipping and rotating your chicken on the grill is essential for ensuring even cooking and minimizing the risk of burning. Chicken can develop hot spots on the grill, and by turning it frequently, you promote uniform browning and prevent any one side from becoming charred. A general guideline is to flip the chicken every 4-5 minutes, allowing it to develop a delightful crust without overcooking.
When grilling smaller pieces, such as wings or thighs, consider rotating them around the grill to expose each piece to varying heat levels. This technique not only enhances the flavor through better grill marks but also helps maintain moisture by ensuring consistent cooking throughout all chicken cuts. Mastering the art of flipping and rotating can be the key to achieving juicy, flavorful chicken.
Utilizing a Meat Thermometer for Perfectly Cooked Chicken Every Time
Employing a meat thermometer is an essential tool for achieving perfectly grilled chicken. The USDA recommends cooking chicken to an internal temperature of 165°F to ensure it’s safe for consumption. However, removing the chicken from the grill at this temperature can often lead to overcooking, as it continues to cook slightly while resting.
For the best results, consider removing the chicken from the grill when it reaches an internal temperature of approximately 160°F, then allowing it to rest until it reaches the safe and delicious 165°F mark. This technique prevents the chicken from drying out while ensuring you serve safe and flavorful meat to your guests. Understanding the importance of accurate temperature management will elevate your grilling proficiency.
The Art of Marinating and Seasoning Chicken for Maximum Flavor
The significance of marinating chicken for grilling cannot be overstated. A well-seasoned chicken will shine on its own, while a good marinade can infuse it with a depth of flavor that transforms the dish into something extraordinary. Whether you opt for a simple mix of salt and pepper or a more intricate blend of spices, ensure that the seasoning is applied generously.
When marinating, allow the chicken to soak for at least 30 minutes; overnight marination will yield even more intense flavors. Use a combination of herbs, spices, and oils to create a balanced marinade that tantalizes your taste buds. Experiment with different flavor profiles, from tangy citrus to rich barbecue sauces, to discover your favorite combinations. The proper seasoning is vital to achieving mouthwatering grilled chicken that will leave you and your guests raving.
Maintaining Grill Temperature for Juicy Chicken Every Time
Maintaining a consistent grill temperature is crucial for grilling chicken that is both juicy and flavorful. Fluctuating temperatures can lead to uneven cooking and the dreaded dried-out chicken. Utilize grill thermometers to monitor temperatures and adjust the grill vents accordingly for charcoal grills or manage the burners on gas grills to maintain the desired heat level.
During the grilling process, keep a close eye on any flare-ups, which can quickly lead to burnt chicken. If flare-ups occur, move the chicken to the cooler side of the grill until the flames subside. Consistently managing the grill temperature ensures that the chicken cooks evenly, resulting in every bite being as juicy and flavorful as the last. Effectively managing your grill temperature can be the key to your success in grilling.
Monitoring Cooking Time for Perfectly Juicy Chicken
Cooking chicken to perfection while maintaining the right temperature requires meticulous attention to timing. Each cut has different cooking requirements, and understanding these differences is paramount for avoiding dry, overcooked meat. Keeping a close watch on the cooking process will yield the best results.
Adjusting Cooking Times Based on the Thickness of Chicken Cuts
The thickness of your chicken cuts plays a critical role in determining cooking time. Thicker cuts, such as chicken breasts, will naturally require more time on the grill compared to thinner pieces like wings or tenders. It’s a good practice to take note of the thickness of your cuts and adjust your cooking time accordingly to ensure optimal results.
On average, boneless chicken breasts require approximately 6-8 minutes per side, while thighs may take longer due to their higher fat content. Always remember to use a meat thermometer to check the internal temperature, ensuring that your chicken reaches a minimum of 165°F before serving. Being attentive to the thickness of your chicken cuts and adjusting your cooking time accordingly will significantly reduce the risk of dryness.
The Impact of Grill Temperature on Cooking Times for Chicken
The temperature of your grill is another critical factor in achieving perfectly grilled chicken. Higher temperatures can yield quicker cooking times but also pose a risk of drying out the chicken if not monitored closely. For the best results, aim for a medium to medium-high heat when grilling chicken. This temperature range typically allows the chicken to cook through without burning the exterior.
Adjust your cooking approach based on the temperature of your grill. If you’re working with a hotter grill, consider moving the chicken to an indirect heat zone after searing to prevent overcooking. Understanding the relationship between grill temperature and cooking time will enhance your ability to produce consistently juicy and tender chicken.
The Importance of Allowing Chicken to Rest After Grilling for Maximum Juiciness
Resting your chicken after grilling is essential for ensuring maximum juiciness. Once the chicken has been removed from the grill, allow it to rest for about 10 minutes before slicing. This resting period enables the juices to redistribute throughout the meat, resulting in a more succulent and flavorful bite.
Cutting into the chicken too soon can lead to the juices running out, resulting in dryness. Use this time wisely to prepare side dishes or wrap up any other grilling tasks. Understanding the importance of resting your chicken will elevate your grilling technique, ensuring that each bite is as juicy and enjoyable as possible.
Enhancing Flavor for Unforgettable Grilled Chicken Experiences
Flavor enhancement is crucial when grilling chicken, as it can transform simple ingredients into a remarkable dish. From smoking techniques to unique seasonings, the possibilities for flavor enhancement are vast, enabling you to cater to a diverse range of tastes and preferences.
Incorporating Wood Chips for an Irresistible Smoky Flavor
Integrating wood chips into your grilling process can impart an incredible depth of flavor to your chicken. Different types of wood, such as hickory, mesquite, or fruitwoods like apple and cherry, provide unique flavors that can beautifully complement your chicken. Soaking wood chips in water for at least an hour before placing them in a smoker box or directly on the coals allows for a slow release of smoke.
Employing smoking techniques in your grilling can create a rich and complex flavor profile that distinguishes your chicken from the rest. Experiment with various wood varieties to uncover your favorites. For instance, hickory offers a robust smokiness, while apple wood delivers a sweet, mild flavor. Understanding the nuances of different wood types allows you to customize your chicken to suit your palate perfectly.
Basting with Sauces for Extra Flavor and Moisture
Basting your chicken with sauces during the final moments of grilling enhances flavor while minimizing the risk of burnt sugars. Apply barbecue sauces, glazes, or even herb-infused oils during the last few minutes of cooking. This technique allows the sauce to caramelize slightly without burning, creating a delicious, sticky finish that elevates your dish.
When basting, use a brush to apply the sauce evenly. Keep in mind that sauces with high sugar content can burn quickly, so it’s essential to monitor the chicken closely during this process. Basting not only adds flavor but also helps retain moisture, ensuring a juicy and flavorful grilled chicken that will impress your guests.
Enhancing Chicken Flavor with Well-Crafted Dry Rubs
Utilizing dry rubs is another fantastic method for infusing flavor into your grilled chicken. A well-blended rub consists of various spices and herbs that add depth and complexity without overpowering the natural flavors of the meat. Classic American-style rubs often include paprika, garlic powder, onion powder, and a hint of brown sugar for sweetness.
Generously apply the rub to the chicken, allowing it to penetrate the meat for optimal flavor development. For best results, let the chicken sit with the rub for at least 30 minutes before grilling, allowing the flavors to meld. The outcome is a beautifully seasoned chicken that is flavorful both inside and out, creating an enjoyable experience with every bite.
Marinating Chicken for Ultimate Flavor Infusion Before Grilling
Marinating is one of the most effective methods to enhance flavor and tenderness before grilling your chicken. A good marinade combines acidic elements, such as yogurt or citrus juice, with a blend of herbs and spices, creating a dynamic flavor profile that tantalizes the palate. Consider experimenting with regional influences, such as a buttermilk marinade for southern-inspired fried chicken or a soy sauce-based marinade for Asian flavors.
Allow your chicken to marinate for a minimum of 30 minutes, but for the best results, aim for several hours or even overnight. This process infuses the chicken with flavor while also tenderizing it, resulting in a juicy and delicious final product. Recognizing the impact of marinating can transform your grilling repertoire, leading to consistently flavorful chicken dishes.
Essential Techniques to Prevent Overcooking for Juicy Chicken Every Time
Overcooking is the nemesis of juicy chicken, but with the right knowledge and techniques, you can easily avoid it. Focusing on temperature management and optimal methods is essential for compromising the best flavor without sacrificing moisture and taste.
The Dangers of Excessive Heat When Grilling Chicken
Grilling at excessively high temperatures can lead to dry, overcooked chicken in no time. While high heat is effective for searing, it can quickly become counterproductive if the chicken is left on the grill for too long. Aim for medium to medium-high heat, which allows for a perfect balance of searing the exterior while gently cooking the interior through.
If you find that your grill is running hotter than expected, consider adjusting the vents or relocating the chicken to an area with indirect heat. This adjustment enables the chicken to cook more evenly, reducing the risk of burning or drying out. Avoiding high heat is crucial for retaining juiciness and ensuring that your chicken remains flavorful and tender with every bite.
Monitoring Grill Lid Usage for Optimal Cooking
Keeping the grill lid closed while cooking chicken is crucial for maintaining consistent heat and humidity. Leaving the lid open allows heat to escape, resulting in temperature fluctuations that can lead to uneven cooking. A closed lid creates an oven-like environment, enabling the chicken to cook through evenly while retaining its moisture.
Open the lid only when necessary, such as when flipping the chicken or checking for doneness. This practice helps promote even cooking and prevents food from becoming dry. Mastering grill management by keeping the lid closed allows you to focus on other aspects of your grilling, ultimately leading to a superior chicken dish.
Strategies for Maintaining Consistent Heat During Grilling
To achieve excellent results when grilling chicken, it is essential to maintain a consistent cooking temperature, as temperature fluctuations can lead to uneven cooking and dry meat. Utilize a thermometer to monitor grill temperature, adjusting the vents on charcoal grills or the burners on gas grills to maintain a steady cooking temperature.
Make it a habit to check the temperature regularly, especially during longer grilling sessions. If you notice the temperature dropping, adjust your heat source to bring it back into the ideal range. Keeping a close watch on the heat will enable you to achieve perfectly grilled chicken every time.
Final Insights on Mastering Chicken Grilling Techniques for Delicious Results
Grilling chicken without drying it out is an art that combines knowledge, technique, and a willingness to experiment. By understanding the intricacies of chicken cuts, preparation methods, and grill management, you can achieve juicy, flavorful results that are sure to impress. With practice, the techniques discussed will elevate your chicken grilling skills to new heights, ensuring that each bite is not only delicious but also memorable.
Frequently Asked Questions About Grilling Chicken
Which Cut of Chicken is Best for Grilling?
Boneless chicken thighs are often regarded as the best cut for grilling due to their higher fat content, which helps prevent them from drying out during the cooking process. However, chicken breasts can also retain juiciness when cooked properly, making them a viable option.
How Long Should Chicken Be Marinated Before Grilling?
It is recommended to marinate chicken for at least 30 minutes, but for optimal flavor absorption, aim for several hours or overnight to allow the flavors to penetrate the meat fully.
What Temperature Should Chicken Be Grilled At for Best Results?
Grill chicken at a medium to medium-high temperature, approximately 375°F to 450°F, to achieve a good sear while ensuring it is fully cooked without drying out.
Is Brining Chicken Recommended Before Grilling?
Brining chicken is an excellent technique for enhancing moisture and flavor. A simple saltwater brine can dramatically improve the juiciness of your grilled chicken.
How Can I Determine When My Chicken is Done Cooking?
Use a meat thermometer to check that the internal temperature of the chicken reaches 165°F. This ensures it’s safely cooked while avoiding overcooking.
Is it Better to Grill with the Lid Open or Closed?
Keeping the grill lid closed helps maintain consistent heat and moisture, leading to more evenly cooked chicken. Open the lid only when necessary to check or flip the chicken.
Can I Use a Dry Rub Instead of Marinating?
Absolutely! A dry rub can significantly enhance the flavor of grilled chicken. Apply it generously before grilling for the best results.
What Wood Chips are Best for Smoking Chicken?
Hickory, apple, and cherry wood chips are popular choices for smoking chicken, each imparting unique flavors that can elevate your dish to new heights.
How Can I Avoid Flare-Ups When Grilling Chicken?
To avoid flare-ups, trim excess fat from the chicken and use indirect heat. Move the chicken away from direct flames if flare-ups occur.
Is it Advisable to Grill Frozen Chicken?
While grilling frozen chicken is possible, it is not recommended, as it may cook unevenly. It’s best to thaw chicken in the refrigerator before grilling for optimal results.
Connect with Us on Facebook for More Grilling Tips!
The Article How to Grill Chicken Without Drying It: A Juicy Guide appeared first on Pitmasters Arsenal.
The Article Grill Chicken Juicily Without Drying It Out: A How-To Guide Was Found On Limits of Strategy.
-

Smoke a Whole Turkey: Your Ultimate Even Cooking Guide
Your Comprehensive Strategy for Selecting the Perfect Smoker for an Exquisite Smoked Turkey
To truly master the art of smoking a whole turkey evenly, it all begins with making a well-informed choice regarding the right smoker. The smoker type you opt for plays a pivotal role in shaping the flavor, texture, and overall culinary quality of your turkey. With an abundance of choices on the market, it’s vital to understand the distinct features and functionalities of each smoker type. Whether you lean toward the effortless operation of electric smokers, the classic allure of charcoal smokers, or the innovative convenience of pellet smokers, each category comes with its own benefits and challenges that can significantly affect your smoking experience and ultimately the outcome of your turkey.
Identifying the Best Smoker Types for Perfectly Cooking Your Turkey
When it comes to smoking a whole turkey evenly, the choice of smoker is an essential factor to consider. Electric smokers are particularly beneficial for novices looking for a straightforward smoking experience. They excel in maintaining a consistent temperature with minimal supervision, allowing you to concentrate on enhancing the flavors and seasoning of your turkey without the extra concern of managing fuel levels. On the other hand, charcoal smokers offer a traditional smoking technique that delivers a profound, rich smoky flavor. While they necessitate more active temperature management, the depth of flavor can be incredibly gratifying. Pellet smokers combine the advantages of both electric and charcoal, providing the robust essence of hardwood while maintaining the convenience associated with electric models. Each smoker type offers unique advantages, making it crucial to select one that aligns seamlessly with your cooking style and personal taste preferences.
Ready to Dive In and Enhance Your Skills?
Assessing Smoker Size and Cooking Capacity for Uniform Results
Choosing the correct size for your smoker is imperative for achieving an evenly smoked turkey. A smaller smoker can easily lead to overcrowding, hindering proper air circulation and resulting in uneven cooking. For a typical turkey weighing between 12 and 16 pounds, it is advisable to select a smoker with a minimum of 600 square inches of cooking space. This ample area allows the turkey to be centered, promoting optimal heat and smoke distribution around it. Larger turkeys may necessitate an even roomier smoker, so it’s essential to consult your smoker’s capacity guidelines. Proper placement and spacing are vital components in mastering the art of smoking a whole turkey evenly, leading to a deliciously cooked bird.
Key Temperature Control Features for Perfect Smoking Outcomes
Effective temperature management is a fundamental aspect of successful smoking. Smokers equipped with dependable temperature control systems are essential for maintaining consistent heat, which is crucial for attaining evenly cooked turkey. Look for advanced features such as digital thermostats, built-in probes, and even Wi-Fi connectivity that allows for real-time temperature monitoring. These technological advancements enable you to track your turkey’s cooking progress without needing to frequently open the smoker, which can disrupt heat levels and lead to variations in cooking time. By ensuring a stable cooking environment, you can achieve the golden-brown, juicy results that are synonymous with a flawlessly smoked turkey.
Finding Affordable Smoker Options for Budget-Conscious Smokers

Your budget plays a critical role when selecting a smoker, but it’s crucial to find a balance between cost and functionality. While high-end smokers often feature advanced technology, there are numerous budget-friendly options available that can still produce outstanding results. Invest time in researching various brands and models to discover one that meets your culinary needs without exceeding your budget. Additionally, consider the long-term value of your smoker. Spending a bit more initially may lead to savings in the future through enhanced durability and performance. As you explore your choices, reflect on how frequently you plan to use the smoker, as this will guide you toward the best selection for your cooking ambitions.
Step-by-Step Strategy for Preparing Your Perfectly Smoked Turkey
Preparation is a critical component of mastering how to smoke a whole turkey evenly. A well-prepared turkey not only enhances the flavor but also optimizes cooking efficiency, leading to a more enjoyable smoking experience. From the essential thawing phase to the intricate seasoning process, each step plays a vital role in ensuring a deliciously smoked feast that will impress your guests and delight their taste buds.
Thawing Your Turkey for Consistent Cooking Success
Beginning with a fully thawed turkey is crucial for achieving even cooking throughout the bird. A frozen turkey can create temperature inconsistencies, resulting in some sections being overcooked while others remain undercooked. The safest method for thawing a turkey is to place it in the refrigerator, allowing approximately 24 hours for every 4 to 5 pounds. For example, a 12-pound turkey necessitates roughly three full days in the refrigerator to thaw completely. If you’re pressed for time, submerging the turkey in cold water offers a quicker alternative; however, this method requires constant vigilance to ensure the water stays cold. Regardless of the method you choose, ensuring your turkey is entirely thawed before placing it in the smoker is paramount for achieving that perfectly smoked turkey.
The Brining Process: Elevating Flavor and Moisture Retention

Brining is an essential step in the turkey preparation process, offering significant benefits in flavor enhancement and moisture retention. A basic brine solution typically consists of water, salt, and sugar, but feel free to incorporate spices and herbs that reflect your personal taste preferences. The salt within the brine encourages the turkey to absorb moisture, substantially reducing the chance of dryness during the smoking process. Aim to brine your turkey for a minimum of 12 hours, although extending this to 24 hours is ideal for maximum flavor infusion. After the brining period, ensure you rinse the turkey thoroughly to remove any excess salt. This careful step is vital for achieving the succulent juiciness and rich flavor that will elevate your smoked turkey to new culinary heights.
Crafting the Perfect Seasoning Rub for Unmatched Flavor
Once your turkey has been brined and dried, it’s time to apply an ample seasoning rub. This moment allows you to unleash your culinary creativity by developing a flavor profile that perfectly complements your smoking technique. A thoughtfully crafted blend of herbs, spices, garlic powder, onion powder, and perhaps a hint of cayenne can work wonders to amplify the flavor of the turkey. Ensure that the seasoning is evenly spread across the entire surface of the turkey, including under the skin, allowing the flavors to penetrate deeply into the meat. Allowing the turkey to rest for a period following the application of the rub gives the spices time to meld and infuse the meat with flavor. The ultimate outcome? An aromatic, flavorful turkey that will tantalize the taste buds of everyone gathered around your dining experience.
Successfully Setting Up Your Smoker for an Impeccable Experience
Creating the ideal environment within your smoker is a critical aspect of mastering how to smoke a whole turkey evenly. A well-prepared smoker immensely impacts the quality of your finished turkey, ensuring consistent cooking and delightful flavor throughout the smoking process.
Thorough Preparation of Your Smoker for Peak Performance
Before placing your turkey into the smoker, it is essential to prepare the unit properly. Start by cleaning the smoker meticulously to remove any leftover grease or residue from prior uses. A clean smoker not only enhances flavor but also helps to prevent undesirable smoke from negatively affecting your turkey. Preheat the smoker to the recommended temperature, typically between 225°F and 250°F, to create a hot and controlled environment for smoking. Pay close attention to the heat during this initial phase, as fluctuations can affect both cooking time and the overall quality of your turkey. This preparatory stage is vital for establishing the foundation for a successful and enjoyable smoking adventure.
Selecting and Incorporating Flavorful Wood Chips or Chunks
The choice of wood for smoking turkey can have a profound impact on the signature smoky flavor of your dish. Popular wood varieties such as hickory, apple, and cherry each impart distinct flavor notes that can elevate the overall taste of your turkey. For a balanced flavor profile, consider experimenting with a combination of different types of wood. Soaking your wood chips in water for approximately 30 minutes before adding them to the smoker is a technique that prolongs the smoking process and generates a steady stream of smoke. Exercise caution, as excessive smoke can lead to a bitter taste; aim for a light, consistent smoke throughout the cooking duration. Mastering proper wood selection and preparation is essential for achieving a consistently smoked whole turkey that delights the palate.
Utilizing a Water Pan to Preserve Moisture During Smoking
Incorporating a water pan into your smoker setup can be a transformative element for your smoking process. The water pan plays a crucial role in maintaining humidity levels, especially during extended smoking sessions. By keeping moisture in the cooking chamber, the water pan prevents the turkey from drying out, ensuring it emerges juicy and flavorful. Position the water pan directly above the heat source to allow it to absorb heat and radiate moisture back into the cooking environment. To enhance flavor further, contemplate adding herbs, spices, or even apple juice to the water. This additional flavor layer will seep into the turkey, creating a succulent, evenly smoked bird that is sure to impress your guests.
Perfecting the Smoking Technique for a Delectable Turkey
After setting up your smoker and preparing your turkey, it’s time to dive into the actual smoking process. This is the stage where the magic happens, and understanding how to navigate it effectively is essential for ensuring your turkey is evenly smoked and bursting with flavor.
Strategically Positioning the Turkey in the Smoker for Optimal Cooking
Correctly placing your turkey within the smoker is crucial for achieving evenly cooked results. Start by positioning the turkey breast-side up in the center of the cooking grate. This optimal placement allows heat and smoke to circulate evenly around the entire bird. Ensure the turkey does not touch the smoker walls, as this can create hot spots and lead to uneven cooking. If your smoker features multiple racks, consider utilizing the middle rack for the best heat distribution. This simple yet effective act of proper placement can greatly enhance your results and contribute to mastering the art of smoking a whole turkey evenly.
Consistently Monitoring Temperature and Smoke Levels for Best Results
Throughout the smoking journey, it is imperative to regularly monitor both temperature and smoke levels. Utilize a reliable meat thermometer to track the internal temperature of the turkey, aiming for a target of 165°F to ensure safe consumption. Additionally, keep a close eye on the smoker’s ambient temperature; it should remain consistent throughout the cooking duration. Be mindful that excessive smoke can overpower the turkey’s natural flavors, while insufficient smoke can lead to a bland outcome. Strive for a light, steady stream of smoke that maintains a balanced flavor profile. By diligently monitoring these key factors, you can ensure that your turkey is both safe to consume and deliciously flavorful.
Rotating the Turkey for Even Cooking Throughout the Process
For truly even cooking, consider rotating the turkey periodically during the smoking process. Depending on your smoker’s size, certain areas may generate more heat than others. By rotating the turkey every hour or so, you expose all sides to the heat and smoke, preventing uneven cooking and promoting a uniform golden-brown color. This technique is especially beneficial for larger turkeys, which may require an extended cooking time. By being proactive and attentive, you can ensure that every bite of your smoked turkey is as tender and flavorful as the last.
Identifying When Your Turkey is Cooked to Perfection
Knowing when your turkey is perfectly cooked is a crucial aspect of mastering how to smoke a whole turkey evenly. Recognizing the indicators of doneness will help you avoid the pitfalls of undercooking or overcooking, ensuring a delicious and safe meal for you and your guests.
Using a Meat Thermometer for Accurate Temperature Readings
A high-quality meat thermometer is an invaluable tool for checking the doneness of your turkey. Insert the thermometer into the thickest part of the turkey thigh, being careful to avoid the bone, as this can lead to inaccurate readings. The USDA recommends an internal temperature of 165°F for poultry to guarantee safety. However, many seasoned chefs suggest removing the turkey from the smoker when it reaches 160°F, as it will continue to cook while resting. Investing in a high-quality instant-read thermometer can provide you with accurate and swift readings, helping you achieve that perfectly smoked turkey every time.
Conducting Temperature Checks in Multiple Areas of the Turkey
To ensure that your turkey is evenly cooked, it’s essential to check the temperature in several spots. In addition to the thigh, be sure to assess the thickest part of the breast and the other thigh. This multi-point temperature check guarantees that all areas of the turkey reach the necessary temperature, eliminating the risk of undercooked spots. If you find any area lagging behind, return the turkey to the smoker until all sections reach the desired doneness. This thorough approach is vital for delivering a consistently cooked turkey that will leave your guests raving about your culinary skills.
The Crucial Step of Allowing Your Turkey to Rest
Once you’ve confirmed that your turkey has reached the desired internal temperature, it’s essential to allow it to rest before carving. Resting provides the juices a chance to redistribute throughout the meat, resulting in a moister turkey with enhanced flavor. Aim for at least 20-30 minutes of resting time, covering the turkey loosely with aluminum foil to keep it warm. Skipping this crucial step can lead to dry meat, as the juices will drain out when you begin carving. A well-rested turkey is guaranteed to be juicy, flavorful, and ready to impress all those gathered at your holiday table.
Conducting a Final Visual Inspection for Perfectly Cooked Turkey
A visual inspection serves as a final step in confirming your turkey’s doneness. Look for a deep golden-brown skin, which indicates a well-cooked bird. Additionally, check the juices flowing from the turkey; they should be clear, not pink. This visual cue, combined with the internal temperature readings, will ensure that your turkey is not only safe to eat but also beautifully cooked. By taking the time to observe and inspect, you can confidently present a stunning, evenly smoked turkey that will be the centerpiece of any gathering.
Serving and Enjoying Your Deliciously Smoked Turkey
After the extensive effort and careful attention to detail in preparing and smoking your turkey, it’s now time to serve and revel in the delightful results of your hard work. The manner in which you present and pair your turkey can significantly elevate the meal, creating a memorable experience for everyone at the table.
Carving Your Turkey with Precision and Elegance
Carving a smoked turkey is an art that allows you to showcase its succulent meat and impressive presentation. Start by removing the legs and thighs before proceeding to carve the breast. Use a sharp carving knife to create even slices, ensuring that each piece retains its beautiful, smoky appearance. Carving against the grain will yield tender slices that are easy to chew and bursting with flavor. As you carve, neatly arrange the pieces on a serving platter for a visually appealing presentation. An elegantly carved turkey not only looks inviting but also highlights the even smoking and seasoning that you’ve successfully achieved.
Thoughtfully Selecting Side Dishes to Complement Your Smoked Turkey
Choosing the right side dishes to accompany your smoked turkey can elevate your meal to extraordinary levels. Traditional sides, such as stuffing, cranberry sauce, and creamy mashed potatoes, pair wonderfully, but don’t hesitate to explore regional flavors and unique dishes. Consider adding items such as sweet potato casserole, coleslaw, or cornbread for a delightful Southern twist. Fresh, seasonal vegetables like roasted Brussels sprouts or green bean almondine can provide a wonderful crunch and brightness to your plate. By thoughtfully selecting your sides, you create a cohesive and delicious meal that beautifully complements the smoky flavors of your turkey.
Storing Leftover Smoked Turkey for Future Culinary Enjoyment
To fully appreciate the deliciousness of your smoked turkey, proper storage is essential for preserving its flavor and texture. Allow any leftover turkey to cool to room temperature before transferring it to an airtight container. For optimal flavor retention, store the turkey in the refrigerator for up to 3 or 4 days. If you find yourself with more turkey than you can consume, consider freezing portions for future meals. Wrap individual pieces tightly in aluminum foil or freezer-safe bags, ensuring that all air is removed to prevent freezer burn. Enjoying smoked turkey leftovers can serve as a delightful reminder of your culinary triumph, making every bite just as enjoyable as the first.
Frequently Asked Questions About Smoking a Turkey: Clear Answers to Your Queries
What is the average time required to smoke a whole turkey?
Typically, smoking a whole turkey takes about 30 minutes per pound at temperatures ranging from 225°F to 250°F. For a 12-pound turkey, this translates to approximately 6 hours of cooking time; however, always verify doneness with a reliable meat thermometer.
Which type of wood is best for smoking turkey?
Popular woods for smoking turkey include hickory, apple, and cherry. Each wood provides a unique flavor profile, so feel free to experiment with various combinations to discover your favorite blend.
Is brining necessary before smoking a turkey?
While brining is not mandatory, it significantly enhances the flavor and moisture retention of your turkey, resulting in a juicier final product. It is highly recommended for achieving optimal results.
Can you smoke a turkey without brining?
Yes, it is possible to smoke a turkey without brining. However, for the best flavor and moisture retention, brining is advisable, as it helps prevent dryness during the smoking process.
What temperature should I aim for when smoking my turkey?
The ideal smoking temperature for turkey lies between 225°F and 250°F. This range allows for even cooking while ensuring the meat remains tender and juicy throughout the cooking process.
How can I determine if my smoked turkey is finished cooking?
Utilize a meat thermometer to check the internal temperature; it should reach at least 165°F in the thickest part of the turkey. Additionally, look for clear juices and a beautifully golden-brown skin.
Should I cover my turkey while it smokes?
Covering the turkey with aluminum foil during the initial smoking phase can help retain moisture. Remove the foil during the last hour to achieve a crispy skin that is visually appealing.
Is it possible to smoke a turkey on a gas grill?
Yes, you can smoke a turkey on a gas grill by utilizing a smoker box filled with wood chips. It is crucial to maintain a low and consistent temperature for the best results.
What side dishes pair well with smoked turkey?
To complement your smoked turkey, consider serving traditional sides like stuffing, mashed potatoes, cranberry sauce, coleslaw, and seasonal vegetables to create a well-rounded and satisfying meal.
How should I store leftover smoked turkey?
Allow leftovers to cool before transferring them to an airtight container and storing them in the refrigerator for up to 3 or 4 days. For longer storage, wrap portions in foil and freeze them for later use.
Connect with us on Facebook for more expert tips and delicious recipes!
The Article How to Smoke a Whole Turkey Evenly: A Perfect Guide first appeared on https://pitmastersarsenal.com
The Article Smoke a Whole Turkey Evenly: The Ultimate Guide Was Found On https://limitsofstrategy.com
-

Grill Chicken Tips for Juicy, Moist Results
Selecting the Perfect Chicken Cuts for Irresistibly Juicy Grilling Success
To achieve perfectly grilled chicken, it’s essential to understand how to select the ideal chicken cuts that guarantee moist and flavorful results. The quality and specific cuts of chicken you choose significantly influence the overall taste and juiciness of your grilled dish. With a vast array of options available in the U.S. chicken market, it’s crucial to identify which selections stand out. Opting for fresh, premium-quality chicken is vital for ensuring that your meal remains juicy and flavorful throughout the grilling process. By mastering the art of chicken selection, you set the foundation for your grilling triumphs.
Spotting Fresh Chicken Cuts for a Flavorful Grilling Experience
To ensure your grilled chicken is both juicy and flavorful, beginning with the freshest chicken cuts is imperative. Fresh chicken should showcase vibrant colors and a firm texture, which indicate its freshness and quality. Ideally, chicken breasts should exhibit a light pink hue, while thighs and wings should have deeper, richer tones. When handling chicken, a gentle press should reveal a firm yet slightly springy texture. If the chicken feels mushy or slimy, it is advisable to seek a fresher option to guarantee the best grilling experience possible.
High-quality chicken is frequently sourced from local farms where the birds are raised under optimal conditions. Always choose chicken that has been properly refrigerated, avoiding any packages that show signs of frost or ice crystals, as these may indicate freezer burn and compromised quality. Familiarizing yourself with the USDA grading system can also be beneficial; chicken labeled as ‘Grade A’ signifies higher quality with no visible defects, thereby aiding you in making a more informed choice for your grilling endeavors.
Exploring Different Chicken Types for Exceptional Grilling Results
To fully enjoy the grilling experience, it’s essential to comprehend the various chicken cuts available and how each behaves on the grill. Chicken breasts are lean and cook quickly, making them more prone to drying out if overcooked. In contrast, thighs and drumsticks contain darker meat with a higher fat content, which allows them to remain moist even during longer cooking times. Chicken wings also shine on the grill, especially when marinated to enhance both taste and juiciness.
When preparing for your grilling adventure, pay attention to the thickness of each cut. Thicker pieces will require more extended cooking times, while thinner cuts will cook more rapidly. A valuable guideline is to maintain a steady temperature while adjusting your grilling time based on the thickness and type of meat. By mastering this knowledge, you can grill with confidence, ensuring consistently juicy and tender results with every cook.
Are You Ready to Elevate Your Grilling Skills?
Understanding the Importance of Sourcing Quality Chicken from Trusted Suppliers
Acquiring chicken from reputable suppliers is crucial for ensuring exceptional quality. Local butchers and farmers’ markets typically offer fresher selections compared to mass-produced chicken found in grocery stores. These providers often adhere to superior animal welfare practices and frequently offer options that are organic or free-range. Knowing the origins of your chicken not only enhances its flavor but also enriches your overall dining experience, fostering a deeper connection with the food you consume.
When shopping at a butcher shop, don’t hesitate to ask questions. A knowledgeable butcher can share valuable insights regarding the chicken’s origin, the conditions under which it was raised, and the best preparation methods. Engaging in this dialogue empowers you to make informed decisions, ensuring you receive the best product for your grilling adventures. Inquire about farm practices, the conditions under which the chickens were raised, and whether they were given antibiotics or hormones throughout their growth cycle.
Realizing the Benefits of Choosing Organic and Free-Range Chicken for Grilling

Selecting organic or free-range chicken can significantly enhance the flavor and texture of your grilled dishes while aligning with ethical eating practices. Organic chickens are raised without synthetic pesticides or fertilizers and receive organic feed, which positively impacts their flavor profile. On the other hand, free-range chickens have access to outdoor spaces, allowing them to express natural behaviors, resulting in richer-tasting meat that you’ll love.
In the United States, an increasing number of consumers prioritize the welfare of farm animals. Choosing organic or free-range chicken reflects this conscientious approach to food sourcing. Many local farms offer these options, and purchasing directly from these sources can lead to discovering unique flavors often absent in conventionally raised chickens. Although these ethical choices may come with a higher price tag, consider it an investment in quality, taste, and sustainable practices that resonate with your values.
Essential Techniques for Preparing Chicken Before Grilling
Preparation is just as vital as selecting the right chicken when it comes to ensuring your grilled chicken retains its moisture and flavor. Each step in the preparation phase significantly influences the final outcome. Techniques like brining and marinating profoundly affect the juiciness and flavor of your grilled chicken, effectively setting you up for success on the grill.
Boosting Moisture and Flavor in Chicken Through Brining Techniques
Brining chicken is a traditional technique designed to infuse moisture and flavor into the meat, ensuring it remains juicy during grilling. A basic brine consists of water, salt, and sometimes sugar, along with optional herbs and spices for added complexity. Soaking the chicken in this solution for at least 30 minutes, though preferably several hours or overnight, can yield optimal results. The salt in the brine breaks down some of the proteins in the chicken, allowing it to absorb water and flavor, which ultimately helps retain moisture throughout the grilling process.
In the U.S., you can elevate your brining game by incorporating local flavors such as apple cider or citrus juices, enhancing the overall taste while contributing to the chicken’s tenderness. After the brining process, it is essential to rinse the chicken thoroughly to remove any excess salt, and then pat it dry with paper towels to ensure even cooking. This crucial step helps achieve a beautiful crust on the grill while keeping the meat moist and flavorful throughout the cooking process.
Maximizing Flavor Profiles with Chicken Marinades

Marinades have the transformative power to elevate grilled chicken into a gourmet masterpiece. A well-crafted marinade combines oil, acid, and various flavoring agents—the perfect trifecta for enhancing taste and moisture retention. Oils help lock in moisture, while acids like vinegar or citrus juice tenderize the meat, and a variety of spices and herbs infuse bold flavors that tantalize the palate.
For an American twist, consider using regional flavors such as barbecue sauces, citrus-based marinades, or southwestern spice blends. Marinate your chicken for at least 30 minutes; however, for maximum flavor absorption, consider marinating overnight. This allows the flavors to meld beautifully, resulting in an unforgettable grilled experience. Remember to discard any leftover marinade that has come into contact with raw chicken to prevent cross-contamination and ensure food safety.
The Importance of Drying Chicken Before Grilling
Although it may seem counterintuitive, patting your chicken dry before grilling is a critical step that should never be overlooked. Excess moisture on the surface of the chicken can inhibit browning and create steam instead of a proper sear, leading to less flavorful outcomes. Using paper towels to gently dab the chicken removes excess moisture while also preventing flare-ups on the grill, which can disrupt the cooking process.
This step is especially crucial if you’ve brined or marinated the chicken, as these processes can add extra liquid to the surface. Once the chicken is dry, generously season it with salt, pepper, and any additional spices to ensure that every bite is packed with flavor. Properly preparing the chicken’s surface enhances its texture and contributes to forming a beautiful, golden-brown crust that is both visually appealing and delicious.
Optimizing Your Grill Setup for Perfect Grilling Results
The arrangement of your grill can significantly impact your chicken grilling experience. Proper grill preparation controls cooking temperatures, enhancing both safety and flavor. Understanding your grill’s mechanics will enable you to cook chicken to juicy perfection consistently, regardless of the type of grill you are using.
Choosing the Best Grill for Your Chicken Grilling Needs
When it comes to grilling chicken, your choice of grill largely depends on personal preference and available resources. Gas grills offer remarkable convenience, allowing for quick heat adjustments and maintaining steady temperatures. In contrast, charcoal grills provide a classic smoky flavor that many grilling enthusiasts cherish. Electric grills serve as versatile options for those residing in apartments or areas where traditional grilling methods may not be practical.
Each grill type has its distinct advantages. Gas grills heat up rapidly and are user-friendly, making them perfect for busy weeknights. Charcoal grills, while requiring more time and effort to set up, impart a unique flavor profile that is hard to replicate. Electric grills, despite lacking the depth of flavor, are ideal for simplicity and ease of use. Assess your grilling needs and choose a grill that aligns with your cooking style and lifestyle preferences.
Understanding the Crucial Role of Preheating Your Grill
Preheating your grill is a non-negotiable step for effective grilling. A properly preheated grill guarantees that your chicken cooks evenly and develops that sought-after sear. Whether you’re using a gas, charcoal, or electric grill, establishing the right temperature is critical for success. For chicken, a medium-high heat range of about 375°F to 450°F is ideal for achieving a crisp exterior while cooking the meat thoroughly without drying it out.
Plan to preheat your grill for at least 10-15 minutes before placing the chicken on it. This process allows the grill grates to reach the optimal temperature, helping to prevent sticking and resulting in beautiful grill marks. Utilize a grill thermometer to verify that the grill has reached the desired temperature, ensuring optimal results each time you cook.
Creating Effective Temperature Zones for Grilling Chicken
Establishing temperature zones on your grill can revolutionize your chicken grilling technique. By creating direct and indirect heat zones, you can control the cooking process and prevent the chicken from overcooking. Direct heat is perfect for searing the chicken, forming that sought-after crust, while indirect heat allows for more gradual cooking, which is ideal for thicker cuts.
For gas grills, activate half of the burners to create a hot zone, leaving the other half off for indirect heat. For charcoal grills, gather the coals on one side of the grill to achieve a similar effect. This setup allows you to sear the chicken over direct heat and then transfer it to the cooler side to finish cooking without the risk of drying out. Mastering these grill dynamics will significantly enhance your chicken grilling skills.
Grilling Techniques for Achieving Perfectly Cooked Chicken
Grilling chicken is not just about the setup; the techniques you employ during the grilling process are equally essential for achieving delightful results. Mastering these methods can help you retain moisture, infuse flavors, and create mouthwatering grilled chicken that will impress your family and friends.
Direct vs. Indirect Grilling Methods: Understanding the Differences
The choice between direct and indirect grilling has a significant impact on the outcome of your chicken. Direct grilling involves placing the chicken directly over the heat source, which is fantastic for achieving a delicious sear on the exterior. However, this method can quickly lead to overcooked or dried-out meat if not carefully monitored.
Conversely, indirect grilling is preferable for larger cuts or chicken pieces that require longer cooking times. By positioning the chicken away from the heat source, you allow it to cook slowly, retaining moisture and flavor. This technique is particularly beneficial for bone-in cuts, such as thighs and drumsticks, where the meat is more forgiving and benefits from the tenderizing effects of slow cooking. Mastering the balance between these two grilling methods will result in perfectly cooked chicken every time.
Flipping and Rotating Chicken for Even Cooking
Regularly flipping and rotating your chicken on the grill is essential for ensuring even cooking and minimizing the risk of burning. Chicken can develop hot spots on the grill, and by turning it frequently, you promote uniform browning and prevent any one side from becoming charred. A general guideline is to flip the chicken every 4-5 minutes, allowing it to develop a delightful crust without overcooking.
When grilling smaller pieces, such as wings or thighs, consider rotating them around the grill to expose each piece to varying heat levels. This technique not only enhances the flavor through better grill marks but also helps maintain moisture by ensuring consistent cooking throughout all chicken cuts. Mastering the art of flipping and rotating can be the key to achieving juicy, flavorful chicken.
Utilizing a Meat Thermometer for Perfectly Grilled Chicken
Using a meat thermometer is essential for achieving perfectly grilled chicken. The USDA recommends cooking chicken to an internal temperature of 165°F to ensure it’s safe to eat. However, removing the chicken from the grill at this temperature can often lead to overcooking, as it continues to cook slightly while resting.
For optimal results, consider removing the chicken from the grill when it reaches an internal temperature of approximately 160°F, then allowing it to rest until it attains the ideal 165°F mark. This technique prevents the chicken from drying out while ensuring you serve safe and delicious meat to your guests. Understanding the significance of accurate temperature management will elevate your grilling proficiency.
The Essential Art of Marinating and Seasoning Chicken for Flavor
The importance of marinating chicken for grilling cannot be overstated. A well-seasoned chicken can shine on its own, while a good marinade infuses it with a depth of flavor that transforms the dish into something extraordinary. Whether you choose a simple mix of salt and pepper or a more intricate blend of spices, ensure that the seasoning is applied generously.
When marinating, allow the chicken to soak for at least 30 minutes; overnight marination will yield even more intense flavors. Use a combination of herbs, spices, and oils to create a balanced marinade that tantalizes your taste buds. Experiment with different flavor profiles, from tangy citrus to rich barbecue sauces, to discover your favorite combinations. Proper seasoning is vital to achieving mouthwatering grilled chicken that will leave you and your guests raving.
Managing Grill Temperature for Juicy Chicken Every Time
Maintaining a consistent grill temperature is crucial for grilling chicken that is both juicy and flavorful. Fluctuating temperatures can lead to uneven cooking and the dreaded dried-out chicken. Utilize grill thermometers to monitor temperatures and adjust the grill vents accordingly for charcoal grills, or manage the burners on gas grills to maintain the desired heat level.
During the grilling process, keep a close eye on any flare-ups, which can quickly result in burnt chicken. If flare-ups occur, move the chicken to the cooler side of the grill until the flames subside. Consistently managing the grill temperature ensures that the chicken cooks evenly, resulting in every bite being as juicy and flavorful as the last. Effectively managing your grill temperature can be the key to your success in grilling.
Timing Your Cooking for Optimal Juiciness in Chicken
Cooking chicken to perfection and maintaining the right temperature requires meticulous attention to timing. Each cut has different cooking requirements, and understanding these differences is paramount for avoiding dry, overcooked meat. Keeping a close watch on the cooking process will yield the best results.
Adjusting Cooking Times Based on Chicken Thickness
The thickness of your chicken cuts plays a critical role in determining cooking time. Thicker cuts, such as chicken breasts, will naturally require more time on the grill compared to thinner pieces like wings or tenders. A good practice is to take note of the thickness of your cuts and adjust your cooking time accordingly to ensure optimal results.
On average, boneless chicken breasts require approximately 6-8 minutes per side, while thighs may take longer due to their higher fat content. Always remember to use a meat thermometer to check the internal temperature, ensuring that your chicken reaches a minimum of 165°F before serving. Being attentive to the thickness of your chicken cuts and adjusting your cooking time accordingly will significantly reduce the risk of dryness.
Impact of Grill Temperature on Cooking Times
The temperature of your grill is another critical factor in achieving perfectly grilled chicken. Higher temperatures can yield quicker cooking times but also pose a risk of drying out the chicken if not monitored closely. For the best results, aim for a medium to medium-high heat when grilling chicken. This temperature range typically allows the chicken to cook through without burning the exterior.
Adjust your cooking approach based on the temperature of your grill. If you’re working with a hotter grill, consider moving the chicken to an indirect heat zone after searing to prevent overcooking. Understanding the relationship between grill temperature and cooking time will enhance your ability to produce consistently juicy and tender chicken.
The Importance of Allowing Resting Time for Chicken
Always allow your chicken to rest. After the chicken has been cooked, let it sit for about 10 minutes before slicing. This resting period enables the juices to redistribute throughout the meat, resulting in a more succulent and flavorful bite.
Cutting into the chicken immediately can lead to the juices running out, causing dryness. Use this time to prepare side dishes or finish any other grilling tasks. Recognizing the importance of resting your chicken will elevate your grilling technique, ensuring that each bite is as juicy and enjoyable as possible.
Enhancing Flavor for Unforgettable Grilled Chicken Experiences
Flavor enhancement is essential when grilling chicken because it can transform simple ingredients into a memorable dish. From smoking techniques to unique seasonings, the possibilities for flavor enhancement are vast, allowing you to cater to a diverse range of tastes and preferences.
Incorporating Wood Chips for a Rich Smoky Flavor
Integrating wood chips into your grilling process can impart an incredible depth of flavor to your chicken. Different types of wood, such as hickory, mesquite, or fruitwoods like apple and cherry, provide unique flavors that can complement your chicken beautifully. Soaking wood chips in water for at least an hour before placing them in a smoker box or directly on the coals allows for a slow release of smoke.
Utilizing smoking techniques in your grilling can create rich and complex flavor profiles that distinguish your chicken from the rest. Experiment with different wood varieties to uncover your favorites. For instance, hickory offers a robust smokiness, while apple wood delivers a sweet, mild flavor. Understanding the nuances of different wood types allows you to customize your chicken to suit your palate perfectly.
Basting with Sauces for Added Flavor and Moisture
Basting your chicken with sauces during the final moments of grilling enhances flavor while minimizing the risk of burnt sugars. Apply barbecue sauces, glazes, or even herb-infused oils during the last few minutes of cooking. This technique allows the sauce to caramelize slightly without burning, creating a delicious, sticky finish that elevates your dish.
When basting, utilize a brush to apply the sauce evenly. Keep in mind that sauces with high sugar content can burn quickly, so it’s essential to monitor the chicken closely during this process. Basting not only adds flavor but also helps retain moisture, ensuring a juicy and flavorful grilled chicken that will impress your guests.
Enhancing Chicken Flavor with Dry Rubs
Employing dry rubs is another fantastic method for infusing flavor into your grilled chicken. A well-blended rub consists of various spices and herbs that add depth and complexity without overpowering the natural flavors of the meat. Classic American-style rubs often include paprika, garlic powder, onion powder, and a hint of brown sugar for sweetness.
Generously apply the rub to the chicken, allowing it to penetrate the meat for optimal flavor development. For best results, let the chicken sit with the rub for at least 30 minutes before grilling, allowing the flavors to meld. The outcome is beautifully seasoned chicken that is flavorful both inside and out, creating an enjoyable experience with every bite.
Marinating Chicken for Ultimate Flavor Infusion
Marinating is one of the most effective methods to enhance flavor and tenderness before grilling your chicken. A good marinade combines acidic elements, such as yogurt or citrus juice, with a blend of herbs and spices, creating a dynamic flavor profile that tantalizes the palate. Consider experimenting with regional influences, such as a buttermilk marinade for southern-inspired fried chicken or a soy sauce-based marinade for Asian flavors.
Allow your chicken to marinate for a minimum of 30 minutes, but for the best results, aim for several hours or even overnight. This process infuses the chicken with flavor while also tenderizing it, resulting in a juicy and delicious final product. Recognizing the impact of marinating can transform your grilling repertoire, leading to consistently flavorful chicken dishes.
Essential Techniques to Prevent Overcooking for Juicy Chicken
Overcooking is the nemesis of juicy chicken, but with the right knowledge and techniques, you can easily avoid it. Focusing on temperature management and optimal methods is essential for preserving the best flavor without sacrificing moisture and tenderness.
Avoiding Excessive Heat for Optimal Juiciness
Grilling at excessively high temperatures can lead to dry, overcooked chicken in no time. While high heat is effective for searing, it can quickly become counterproductive if the chicken is left on the grill for too long. Aim for medium to medium-high heat, which allows for a perfect balance of searing the exterior while gently cooking the interior through.
If you find that your grill is running hotter than expected, consider adjusting the vents or relocating the chicken to an area with indirect heat. This adjustment enables the chicken to cook more evenly, reducing the risk of burning or drying out. Avoiding high heat is crucial for retaining juiciness and ensuring that your chicken is flavorful and tender with every bite.
Monitoring Grill Lid Usage for Optimal Cooking
Keeping the grill lid closed while cooking chicken is crucial for maintaining consistent heat and humidity. Leaving the lid open allows heat to escape, resulting in temperature fluctuations that can lead to uneven cooking. A closed lid creates an oven-like environment, enabling the chicken to cook through evenly while retaining its moisture.
Only open the lid when necessary, such as when flipping the chicken or checking for doneness. This helps promote even cooking and prevents food from becoming dry. Mastering grill management by keeping the lid closed allows you to concentrate on other aspects of your grilling, ultimately leading to a superior chicken dish.
Strategies for Maintaining Consistent Heat During Grilling
To achieve excellent results when grilling chicken, maintaining a consistent cooking temperature is essential, as temperature variations can lead to uneven cooking and dry meat. Utilize a thermometer to monitor grill temperature, adjusting the vents on charcoal grills or the burners on gas grills to maintain a steady cooking temperature.
Make it a habit to check the temperature regularly, especially during longer grilling sessions. If you notice the temperature dropping, adjust your heat source to bring it back into the ideal range. Keeping a close watch on the heat will enable you to achieve perfectly grilled chicken every time.
Final Thoughts on Mastering Chicken Grilling Techniques for Success
Grilling chicken without drying it out is an art that blends knowledge, technique, and a willingness to experiment. By understanding the intricacies of chicken cuts, preparation methods, and grill management, you can achieve juicy, flavorful results that are sure to impress. With practice, the techniques discussed will elevate your chicken grilling skills to new heights, ensuring that each bite is not only delicious but also memorable.
Frequently Asked Questions About Grilling Chicken: Your Essential Guide
Which Chicken Cut is Best for Grilling?
Boneless chicken thighs are often regarded as the best cut for grilling due to their higher fat content, which helps prevent them from drying out during the cooking process. However, chicken breasts can also remain juicy when cooked properly, making them a viable option.
How Long Should Chicken Be Marinated Before Grilling?
It is recommended to marinate chicken for at least 30 minutes, but for optimal flavor absorption, aim for several hours or overnight to allow the flavors to penetrate the meat thoroughly.
At What Temperature Should Chicken Be Grilled?
Grill chicken at a medium to medium-high temperature, approximately 375°F to 450°F, to achieve a good sear while ensuring it is fully cooked without drying out.
Is Brining Chicken Recommended Before Grilling?
Brining chicken is an excellent technique for enhancing moisture and flavor. A simple saltwater brine can dramatically improve the juiciness of your grilled chicken.
How Can I Determine When My Chicken is Done Cooking?
Use a meat thermometer to check that the internal temperature of the chicken reaches 165°F. This ensures it’s safely cooked while avoiding overcooking.
Should I Grill with the Lid Open or Closed?
Keeping the grill lid closed helps maintain consistent heat and moisture, leading to more evenly cooked chicken. Open the lid only when necessary to check or flip the chicken.
Can I Use a Dry Rub Instead of Marinating?
Absolutely! A dry rub can significantly enhance the flavor of grilled chicken. Apply it generously before grilling for the best results.
What Wood Chips are Best for Smoking Chicken?
Hickory, apple, and cherry wood chips are popular choices for smoking chicken, each imparting unique flavors that can elevate your dish to new heights.
How Can I Avoid Flare-Ups When Grilling Chicken?
To avoid flare-ups, trim excess fat from the chicken and use indirect heat. If flare-ups occur, move the chicken away from direct flames until they subside.
Is it Advisable to Grill Frozen Chicken?
While grilling frozen chicken is possible, it is not recommended, as it may cook unevenly. It’s best to thaw chicken in the refrigerator before grilling for optimal results.
Connect with us on Facebook!
The Article How to Grill Chicken Without Drying It: A Juicy Guide appeared first on https://pitmastersarsenal.com
The Article Grill Chicken Without Drying It: Tips for Juicy Results Was Found On https://limitsofstrategy.com
-
Smoke Venison: Essential Tips for Perfect Flavor Without Drying
Unlock the Secrets to Selecting the Ideal Venison Cuts for Smoking
Explore the Most Delicious Cuts for Smoking Venison with Confidence
Starting the thrilling adventure of how to smoke venison without drying it requires an in-depth understanding of the essential role that choosing the right cut plays in achieving fantastic results. Cuts like the hindquarter and backstrap are not only favored for their rich flavors; they also have the structural integrity necessary to endure the smoking process effectively. The backstrap, often known as the tenderloin, is highly sought after for its unmatched tenderness and robust flavor profile. By deliberately selecting cuts that are capable of retaining moisture, you create the foundation for a successful and flavor-packed smoking experience that is sure to impress even the most discerning gourmets.
In addition to the backstrap, the hindquarter stands out as another remarkable choice, presenting a well-balanced mix of meat and fat, which is crucial for moisture retention during the cooking process. Look for cuts that display good marbling; the intramuscular fat will melt away during smoking, basting the meat from within and ensuring a juicy, succulent outcome. For those residing in the United States, sourcing these desirable cuts should be fairly easy, as they are typically available at local butcher shops and grocery stores, particularly in areas with a rich hunting culture.
Crucial Insights into Fat Content for Successful Venison Smoking
The reputation of venison is founded on its leanness, which can present challenges during the smoking process. To effectively master how to smoke venison without drying it out, it is essential to understand the importance of the fat content in your selected cut. Opting for cuts that contain a higher fat content can significantly enhance your smoking results. For example, cuts from the shoulder area generally have more fat, playing a crucial role in keeping the meat moist throughout the lengthy smoking process.
Although lean cuts like the backstrap are undeniably delicious, they demand meticulous attention to moisture retention techniques. Pairing these lean cuts with a flavorful marinade or brine can effectively counterbalance their lower fat content, enhancing both flavor and moisture retention. Consider fat as a natural flavor enhancer; even a small amount can ensure that your venison remains juicy, flavorful, and far from dry, leading to a delightful culinary experience that is worth savoring.
Are You Ready to Explore Further?
Essential Preparatory Steps for Your Venison Cut
Preparation is a vital element in mastering the art of smoking venison without drying it. Start by carefully trimming away any excess fat and silver skin from the cut. This crucial step not only enhances the overall flavor but also allows your marinade or brine to penetrate the meat more effectively. Many home cooks tend to overlook this critical step; removing the silver skin can significantly enhance the eating experience by making the meat more enjoyable and tender, thus elevating your culinary efforts.
Moreover, marinating your venison is an equally important step that should never be underestimated. A well-crafted marinade, featuring aromatic olive oil, tangy vinegar, and a selection of herbs and spices, can infuse the meat with layers of flavor while promoting moisture retention. For example, consider a marinade that combines garlic, rosemary, and a splash of red wine to elevate your venison to extraordinary heights. Allow the meat to soak in the marinade for at least a few hours, though ideally overnight, to maximize flavor absorption and achieve the best possible outcomes.
Maximizing Your Smoker Setup for Exceptional Outcomes

Maintaining the Ideal Smoking Temperature for Tender Venison
A key technique in mastering how to smoke venison without drying it is sustaining the correct temperature throughout the smoking process. A low, consistent temperature of around 225°F is essential for slowly cooking the venison, promoting even cooking while facilitating the breakdown of connective tissues. This results in tender meat that retains its natural juices and flavor, creating a delightful eating experience.
It is important to recognize that fluctuations in temperature can lead to uneven cooking, ultimately resulting in dry venison. Investing in a high-quality thermometer is a wise choice to effectively monitor the smoker’s internal temperature. While many smokers come equipped with built-in thermometers, for greater accuracy, consider utilizing a dual-probe thermometer that enables you to track both the smoker temperature and the meat temperature simultaneously for optimal results.
In colder regions of the United States, outdoor temperatures can significantly impact the internal environment of your smoker. Be vigilant regarding the weather conditions and adjust your smoking times as needed. Remember, the overarching goal is to take your time; slow and steady truly wins the race in the pursuit of the perfect smoked venison!
Selecting the Perfect Wood to Enhance the Flavor of Your Venison
Choosing the right wood is a fundamental aspect of learning how to smoke venison without drying it. Different types of wood impart unique flavor profiles, and for venison, a milder smoke is often preferred to enhance rather than overpower its natural taste. Fruit woods such as apple and cherry are excellent choices, as they provide a subtle sweetness that complements the gamey flavor of venison beautifully.
Avoid using stronger woods, such as hickory or mesquite, which can overwhelm the delicate flavor of the meat. Instead, consider experimenting with blends, such as mixing apple and oak for a sophisticated flavor profile. The key is to start with a small amount of wood and gradually increase it as you become more familiar with the flavor profiles and your personal preferences.
Additionally, the moisture content of the wood chips you use is crucial. Soaking your wood chips in water for at least 30 minutes before adding them to the smoker can facilitate a cleaner, more flavorful smoke. This technique also helps maintain the overall moisture level within your smoking environment, contributing to the juiciness of your venison and enhancing its flavor.
Ensuring Consistent Heat for Reliable Smoking Results

Consistency is paramount when it comes to smoking venison. To guarantee that your efforts in smoking venison yield delicious results without drying it out, it’s crucial to maintain steady heat throughout the entire process. Many smokers are designed with adjustable vents that can aid in regulating airflow and temperature. Understanding how to operate these vents can significantly enhance your smoking experience and yield better results.
A good practice is to monitor the heat levels frequently, especially during the initial hour of smoking when temperature fluctuations can be most pronounced. Additionally, consider keeping a log of your smoking sessions, documenting external temperature, wind conditions, and how your smoker responded. This detailed record can guide you in adjusting your approach for optimal results in future smoking endeavors.
Incorporating a water pan into your smoker can also help maintain consistent heat. By introducing moisture into the cooking environment, you not only regulate the temperature but also keep your venison juicy throughout the smoking process, leading to enhanced flavor and texture that will elevate your dishes.
Perfecting Smoke Levels for an Exceptional Flavor Experience
The level of smoke is a vital factor in refining your venison smoking techniques. To achieve the best flavor without overwhelming the meat, it’s essential to monitor smoke levels closely. Aim for thin, blue smoke, which indicates that the wood is burning cleanly, producing a more aromatic quality and less bitterness that can detract from the overall flavor.
If the smoke becomes thick and white, it typically signifies that the wood is smoldering instead of burning, which can lead to undesirable flavors. To prevent this, adjust the air vents on your smoker to increase airflow, allowing for the dissipation of excess smoke and maintaining a clean, enjoyable flavor profile that highlights the venison’s natural qualities.
Experimenting with your smoking techniques will help you discover the perfect balance for your palate. Every cut of venison and type of wood will create a unique flavor profile. Learning to monitor and adjust smoke levels will elevate your venison smoking skills to new heights of culinary excellence, ensuring a delicious outcome every time.
Preparing Smoker Grates for Optimal Cooking Performance
Before placing your venison into the smoker, it’s essential to adequately prepare the smoker surface. Thoroughly cleaning and oiling the grates will help prevent sticking, which can result in tearing when you attempt to remove the meat later on. A clean surface also promotes even cooking, allowing your venison to develop a beautifully crusty exterior that is visually appealing and delicious.
Select a high-smoke-point oil, such as canola or grapeseed, to lightly coat the grates. This not only aids in preventing sticking but also contributes to achieving a better sear on the meat. Be sure to clean the grates after each use, removing any residue that could impart undesirable flavors in future smoking sessions, thus ensuring a consistently high-quality outcome every time.
Taking the time to prepare your smoker adequately creates an optimal cooking environment, which significantly impacts the quality of your venison. Proper maintenance will also extend the lifespan of your smoker, allowing you to enjoy perfectly smoked venison for many seasons to come, enhancing your culinary adventures.
Enhancing Flavor Through Brining and Marinating Techniques
Crafting a Flavor-Infused Brine for Optimal Results
Brining is an essential technique that plays a pivotal role in mastering how to smoke venison without drying it. A simple brine composed of salt, sugar, and water can dramatically enhance the moisture content and flavor profile of your meat. The salt in the brine acts to break down muscle proteins, allowing the meat to absorb both water and seasoning more effectively, which is crucial for achieving juicy results that are bursting with flavor.
To create an effective brine, mix water, kosher salt, and sugar in a large container. The typical ratio is about 1 cup of salt and 1 cup of sugar for every gallon of water. Feel free to experiment by incorporating spices, herbs, or even fruit juices to add an extra layer of flavor. For example, adding crushed garlic, black peppercorns, or citrus zest can elevate your brine to an entirely new level, providing a more complex and satisfying flavor experience.
Once your brine is prepared, fully submerge the venison and refrigerate it for at least 12 hours. This allows the flavors to penetrate deeply, resulting in a juicy, flavorful outcome that will impress any guest. After the brining process, remember to rinse the meat thoroughly to eliminate excess salt, ensuring a perfectly balanced flavor profile that captivates the palate and enhances the overall dining experience.
Maximizing Flavor and Moisture Retention Through Marinating
Marinating is another crucial technique in your culinary toolkit when it comes to smoking venison without drying it. A high-quality marinade not only infuses the meat with flavor but also aids in retaining moisture throughout the smoking process. A basic marinade typically consists of oil, vinegar, and an array of herbs and spices tailored to your preferences and desired flavor profile.
Using oil as a base creates a protective barrier around the meat, preventing moisture loss while enhancing flavor. For example, an olive oil-based marinade combined with balsamic vinegar, minced garlic, and fresh rosemary can produce a delightful infusion that elevates the venison’s natural flavors to new heights. Allow the venison to marinate for a few hours or overnight to maximize flavor absorption and ensure the best results.
Don’t hesitate to explore various flavor profiles; for instance, a marinade featuring soy sauce, ginger, and sesame oil can provide a unique twist that surprises and delights your taste buds. The beauty of marinating lies in its creative potential, enabling you to craft unique combinations that yield delicious results every time, enhancing your culinary repertoire.
Timing and Temperature Strategies for Effective Brining
When brining venison, timing is critical to ensure maximum moisture retention and flavor enhancement. Ideally, allow the brine to permeate the meat for a minimum of 12 hours, but avoid exceeding 24 hours to prevent overly salty results. This timeframe allows the meat to absorb sufficient liquid without compromising its flavor profile and overall quality, leading to a delectable outcome.
Temperature is equally significant. Always brine in the refrigerator to protect against bacterial growth. A cold environment also aids in the effective absorption of the brine by the meat. If you find yourself pressed for time, consider cutting the meat into smaller portions, which can expedite the brining process without sacrificing flavor or moisture retention.
After the brining period, remember to rinse the venison thoroughly to remove any excess salt. This step is vital in achieving a balanced flavor, ensuring that your smoked venison is as delicious as possible and ready to impress your guests with its juicy, flavorful qualities.
Advanced Smoking Techniques for Impeccable Results
Utilizing a Water Pan for Superior Moisture Control
Incorporating a water pan during the smoking process is an invaluable technique for ensuring your venison remains succulent and juicy throughout cooking. During smoking, heat can often draw moisture out of the meat, leading to dryness. By using a water pan, you can introduce humidity to the smoker, creating a more forgiving cooking environment that helps maintain moisture throughout the process.
Simply place a shallow pan filled with water beneath the grates of the smoker. As the water heats, it will evaporate, generating steam that envelops the meat. This not only keeps the venison moist but also assists in regulating the cooking temperature, ensuring even heat distribution throughout the smoking process, which is critical for achieving the best results.
For an extra flavor boost, consider infusing the water with herbs, citrus, or even beer. This addition can impart subtle flavors to the meat as it cooks, enhancing the overall taste profile. The moisture from the water pan could even contribute to achieving that coveted smoke ring that many pitmasters strive for, elevating your dish to new culinary heights.
Monitoring Internal Temperature for Perfect Doneness
A critical factor in mastering how to smoke venison without drying it is the close monitoring of the internal temperature of the meat. Utilizing a dependable meat thermometer ensures that your venison reaches the optimal temperature for both tenderness and juiciness. For a medium-rare finish, aim for an internal temperature of around 140°F for the best results.
Insert your thermometer into the thickest part of the cut, avoiding any bones or fatty areas to obtain an accurate reading. Cooking venison to the correct temperature not only enhances flavor but also ensures food safety, making it essential to get it right for a delicious meal that you can enjoy without worry.
Additionally, remember that venison continues to cook even after it’s removed from the smoker due to residual heat, a phenomenon known as carryover cooking. To prevent overcooking, consider removing it from the smoker when it’s about 5°F below your target temperature. Allow it to rest for several minutes before slicing to enable the juices to redistribute, resulting in tender, juicy, and flavorful meat that will leave a lasting impression.
Gradually Applying Smoke for Balanced Flavor Development
The gradual application of smoke is a crucial element in achieving perfectly smoked venison. Beginning with a light smoke and progressively increasing it is the most effective approach for enhancing flavor without overwhelming the meat’s natural qualities.
During the initial smoking phase, consider using a small amount of wood chips. Allow the chips to smolder gently, producing a thin blue smoke. This will infuse the meat with flavor while avoiding the bitterness commonly associated with thick, white smoke, which can detract from the overall experience.
As the smoking process continues, you can gradually add more wood chips. Regularly check the smoke level and adjust as needed to ensure a consistent supply of flavor without overpowering the delicate taste of the venison. This technique not only maximizes flavor but also enhances the overall quality of your smoked venison, making it a dish that you and your guests will remember.
Resting and Slicing for the Ultimate Flavor Experience
The Importance of Allowing Venison to Rest for Maximum Flavor
Resting your smoked venison is a critical step that is often overlooked but can greatly affect the final outcome. After removing the meat from the smoker, allow it to rest for a minimum of 10 minutes. This important process enables the juices to redistribute within the meat, resulting in a more flavorful and tender cut that will truly delight your taste buds and enhance your overall dining experience.
If you slice into the venison too soon, the juices will escape, leading to a dry texture that detracts from the overall enjoyment. A useful rule of thumb is to cover the meat loosely with aluminum foil to keep it warm during the resting period. This simple step can significantly enhance the flavor and moisture of your smoked venison, making for a more satisfying and enjoyable meal.
Beyond just improving flavor, resting also enhances the overall eating experience. Well-rested slices of venison are not only juicier but also more tender, creating a delightful meal that showcases your impressive smoking skills and culinary expertise for all to enjoy.
Mastering the Technique of Slicing Against the Grain for Optimal Tenderness
When it comes to serving your perfectly smoked venison, the method of slicing can significantly impact the overall enjoyment of the dish. Always cut against the grain of the meat to ensure that each slice is tender and easy to chew. Slicing with the grain can result in a chewier texture, which can detract from the overall satisfaction of your dish and diminish the culinary experience.
To determine the direction of the grain, examine the lines in the meat and position your knife perpendicular to them. This technique ensures that each slice retains its flavor and is easy to chew, enhancing the overall dining experience and making it more enjoyable for you and your guests.
Consider serving the venison alongside accompaniments that complement its rich flavor. Roasted seasonal vegetables or a fresh salad can provide a delightful contrast and balance to the meal. Presentation is equally important; arrange the slices neatly on a platter, perhaps garnished with fresh herbs for an elegant touch that will impress your guests and elevate your dining experience to new heights.
Creative Serving Suggestions for Your Smoked Venison
When it comes to serving your smoked venison, the possibilities are as diverse as they are delicious. A fantastic way to complement the rich flavor of smoked venison is to pair it with grilled vegetables. Seasonal options, such as asparagus, bell peppers, and zucchini, can be lightly seasoned and grilled to perfection, providing a fresh and vibrant contrast to the robust flavor of the meat.
Another wonderful option is to serve your venison with a colorful salad. A mix of greens, nuts, and fruits can introduce a refreshing element to the dish. Consider adding sliced apples or pears, along with candied pecans and a light vinaigrette. The sweetness of the fruit beautifully offsets the savory notes of the venison, creating a well-rounded and satisfying meal that will delight any palate and make for an unforgettable dining experience.
Don’t overlook the potential of sauces! A homemade barbecue sauce or a red wine reduction can further elevate the dish. The key is to enhance the flavors without overpowering the venison itself, allowing its natural richness to shine through irresistibly and create an unforgettable culinary experience that your guests will rave about.
Effective Storage and Reheating of Smoked Venison for Future Enjoyment
Essential Techniques for Properly Storing Smoked Venison
After enjoying your delicious smoked venison, proper storage is paramount for preserving its flavor and moisture. Store any leftover smoked venison in an airtight container in the refrigerator for up to three days. This method helps maintain the meat’s freshness and prevents it from drying out, ensuring it remains enjoyable for future meals.
To enhance storage further, consider wrapping the venison in plastic wrap before placing it in the container. This additional layer of protection can help maintain moisture and prevent exposure to air, which can lead to drying out and flavor loss over time, ensuring your venison is still delightful when you choose to enjoy it later.
In the United States, if you have an abundance of leftovers, freezing is an excellent option for long-term storage. Vacuum-sealed bags are ideal for this purpose, as they eliminate excess air and protect the meat from freezer burn, allowing you to savor your smoked venison for an extended period without compromising its quality.
Reheating Techniques That Preserve Moisture and Flavor
Reheating smoked venison can be a delicate process, especially when your goal is to maintain its moisture and flavor. One of the best methods is to gently reheat the venison in a low-temperature oven, ideally set around 250°F. This technique ensures that the meat warms through without further cooking, preserving both flavor and juiciness that you worked hard to achieve.
Another effective approach is to wrap the venison in aluminum foil before placing it in the oven. This traps steam and helps retain moisture, preventing the meat from drying out during the reheating process. Alternatively, if you prefer to reheat on a grill, wrapping the venison in foil can achieve similar results while adding a hint of smoky flavor that enhances the overall taste.
Regardless of the reheating method you choose, be sure to monitor the internal temperature closely, ensuring it reaches a safe eating temperature without overcooking and losing its delicious qualities. This attention to detail will guarantee that every bite remains as delightful as the first, providing a satisfying meal that showcases your culinary skills.
Freezing Smoked Venison for Long-Term Enjoyment
Freezing smoked venison is an excellent way to prolong its enjoyment beyond the initial smoking day. When properly vacuum-sealed in bags, the venison can retain its quality for several months, allowing you to savor its flavors later without compromising texture or taste. Be sure to label the bags with the date to keep track of freshness and ensure you enjoy it at its best.
For optimal results, slice the venison before freezing. This allows for quicker thawing and makes it easier to incorporate into various dishes later on. Whether you plan to use the leftover smoked venison in soups, tacos, or sandwiches, having it pre-sliced can save you both time and effort in the kitchen while maximizing flavor in every dish.
Thawing Frozen Venison Safely and Effectively
When it comes to thawing frozen smoked venison, patience is essential. The best method is to transfer the vacuum-sealed bag to the refrigerator and allow it to thaw overnight. This gradual process ensures that the meat retains its texture and flavor, preventing any loss of quality during the thawing process.
Avoid quick thawing methods, such as microwaving or leaving the meat at room temperature, as these can lead to uneven thawing and potential bacterial growth. Proper thawing not only preserves the integrity of the venison but also ensures a delicious and safe meal for you and your guests, allowing for a satisfying dining experience that you can enjoy together.
Creative Ways to Repurpose Leftover Smoked Venison
Leftover smoked venison is incredibly versatile and can be repurposed into a myriad of dishes. Incorporating it into soups, stews, or sandwiches can breathe new life into the remnants of your smoking session. The rich, smoky flavor of the venison can enhance a variety of recipes, transforming simple meals into gourmet experiences that delight the senses and showcase your culinary creativity.
For instance, consider adding chopped smoked venison to a hearty vegetable soup. The meat will infuse the broth with flavor, creating a delightful, warming dish that is perfect for chilly days. Alternatively, use the venison in a grilled cheese sandwich, paired with sharp cheddar and roasted red peppers for a flavorful twist on a classic favorite that is sure to impress your family and friends.
The options for utilizing leftover smoked venison are endless, and taking the time to reuse it creatively can lead to satisfying culinary adventures that excite your palate and inspire your cooking endeavors, making every meal a chance to explore new flavors and techniques.
Your Questions Answered: Comprehensive FAQs on Smoking Venison
Which cut of venison is best for achieving optimal smoking results?
The most suitable cuts for smoking venison are the hindquarter and backstrap, as they provide the ideal balance of flavor and moisture retention, essential for achieving optimal smoking outcomes that delight the palate.
How long should I brine venison before smoking?
Brine venison for a minimum of 12 hours, but no longer than 24 hours, to ensure maximum moisture retention without resulting in an overly salty flavor that detracts from the meat’s natural qualities and tenderness.
What type of wood is recommended for smoking venison?
Mild woods such as apple and cherry are perfect for smoking venison, as they enhance the meat’s flavor profile without overpowering its natural taste, allowing the venison to shine in every bite.
What temperature should I maintain while smoking venison?
Maintain a low smoking temperature of approximately 225°F to gently cook the venison, helping to retain its moisture throughout the entire smoking process for optimal tenderness and flavor.
Is it necessary to let my smoked venison rest before serving?
Yes, allowing smoked venison to rest for at least 10 minutes after smoking enables the juices to redistribute within the meat, resulting in a more tender and flavorful cut that enhances the overall dining experience for you and your guests.
Can I freeze smoked venison for later enjoyment?
Absolutely! You can freeze smoked venison in vacuum-sealed bags for several months, allowing you to enjoy it later without sacrificing quality, flavor, or texture.
How do I reheat smoked venison without compromising its moisture?
Gently reheat smoked venison in a low-temperature oven set at 250°F, wrapping it in foil to retain moisture and prevent drying out during the reheating process, ensuring a delicious meal every time.
Is marinating venison before smoking a good idea?
Definitely! Marinating venison enhances its flavor and moisture retention, making it a crucial step in the smoking process for achieving optimal results and a delicious meal that will impress anyone.
What dishes pair well with smoked venison?
Smoked venison pairs beautifully with grilled vegetables, fresh salads, and various sauces, enhancing its rich flavor while creating a balanced and satisfying meal experience for your guests to enjoy.
How can I prevent my venison from drying out while smoking?
To prevent drying, select cuts with higher fat content, maintain a consistent low temperature, use a water pan, and diligently monitor smoke levels throughout the smoking process for best results that will delight the palate.
Connect with us on Facebook for more tips!
The Article How to Smoke Venison Without Drying It: A Comprehensive Guide appeared first on https://pitmastersarsenal.com
The Article Smoke Venison Without Drying: Essential Tips and Tricks Was Found On https://limitsofstrategy.com
-

Tagine Pot Cooking: Essential Tips and Techniques
Unveil the Secrets of Cooking with a Tagine Pot for Flavorful Dishes
To truly appreciate the best techniques for cooking with a tagine pot, it is essential to recognize its remarkable structure and intended purpose. Hailing from North Africa, the tagine pot is characterized by its distinctive conical lid, which plays a vital role in achieving a self-basting effect throughout the cooking process. This unique design promotes moisture circulation within the pot, leading to dishes that are not only incredibly tender but also bursting with rich flavors. Typically made from clay or ceramic, tagines function as both practical cooking vessels and stunning art pieces that embody the cultural heritage of their origins, making them cherished additions to any culinary collection.
The materials used in crafting a tagine pot are pivotal in enhancing your cooking experience. Some tagines are crafted without a glaze, encouraging a more authentic flavor, while others are glazed for easier upkeep. This choice between glazed and unglazed significantly influences the cooking process. Unglazed tagines are well-known for their capability to absorb and amplify flavors, enriching each dish with complex taste profiles. Moreover, the tagine’s design is crucial for the cooking method, as it affects both heat distribution and moisture retention—two key elements necessary for successful slow cooking.
Furthermore, the conical shape of the lid serves a significant functional purpose beyond mere aesthetics. As the ingredients heat up, steam rises, condenses on the lid, and then drips back down into the pot. This creates a continuous moisture cycle, enhancing flavors while requiring less water than traditional cooking methods. By understanding these essential features, you can elevate your culinary skills and deepen your appreciation for the best techniques for cooking with a tagine pot.
Exploring How Materials and Design Affect Tagine Cooking
The selection of materials for your tagine pot is crucial in determining its cooking capabilities and overall performance. Traditional tagines are primarily constructed from clay or ceramic, both of which excel at retaining heat and distributing it evenly. Clay tagines, in particular, are revered for their porous nature, allowing moisture to escape during cooking, resulting in dishes that boast a unique texture and flavor. By choosing the right materials, you can significantly enhance your cooking experience and improve the taste of your meals.
When selecting a tagine, it’s vital to consider the cooking techniques you intend to use. Unglazed tagines are particularly beneficial for recipes requiring longer cooking times, as they absorb and meld flavors beautifully, contributing to a rich, earthy taste. Conversely, glazed tagines offer easy cleaning and versatility, making them suitable for both stovetop and oven use, which makes them a popular choice for everyday cooking.
Moreover, the conical lid shape serves a critical role in moisture retention. As the lid heats up, steam rises and collects at the top, condensing and dripping back down into the dish, facilitating a self-basting effect. This design ensures that meats remain juicy while vegetables are perfectly steamed, ultimately enhancing the quality of the meals you prepare in your tagine.
Essential Techniques for Creating Delectable Tagine Dishes
To achieve outstanding results in your cooking endeavors, it is essential to grasp the fundamentals of tagine cooking. The primary principle revolves around utilizing low heat to encourage moisture retention. Unlike conventional cooking methods that often rely on high temperatures, the art of tagine cooking promotes gentle heat, allowing flavors to develop and deepen over time, leading to deeply satisfying meals.
Starting your cooking on a low flame is vital; this method allows the ingredients to simmer slowly, harmonizing their natural flavors. Many authentic tagine recipes suggest searing the meat before adding other ingredients. This initial step is crucial for enhancing flavor depth while sealing in the juices. After searing the meat, reduce the heat and introduce your vegetables and spices, allowing them to cook harmoniously together.
Moisture retention is another crucial aspect of successful tagine cooking. The unique lid shape guarantees efficient steam circulation, meaning less liquid is required during cooking. This preservation of moisture not only maintains nutrients but also results in a more concentrated flavor in every dish. Using high-quality ingredients, such as fresh herbs and spices, can further elevate the taste of your tagine creations, making them truly unforgettable.
Maximizing the Versatility of Your Tagine Pot for Culinary Exploration
One of the most remarkable advantages of the tagine pot is its extraordinary versatility. Beyond traditional stews and slow-cooked meats, the tagine can be employed to create a wide array of dishes, ranging from vibrant vegetable medleys to fragrant rice and couscous preparations. This adaptability makes it an invaluable asset in any kitchen, regardless of the cook’s skill level or experience.
For example, the tagine is perfect for crafting a variety of vegetarian dishes that highlight seasonal produce. The slow cooking method allows the natural sugars in vegetables to caramelize beautifully, enhancing their flavor profiles. A simple combination of eggplant, zucchini, and bell peppers can transform into a delightful medley when seasoned with spices such as cumin and coriander, showcasing the tagine’s cooking prowess.
Additionally, the tagine excels in preparing grains. Dishes such as couscous or quinoa can be infused with spices and cooked alongside meats or vegetables, ensuring each grain is steeped in rich, aromatic flavors. Serving your tagine dishes not only as functional cooking vessels but also as stunning centerpieces embodies the vibrant culture and history of the dishes created within, transforming every meal into a celebration of culinary traditions.
Essential Steps for Preparing Ingredients for Superior Tagine Cooking

The success of the best techniques for cooking with a tagine pot greatly depends on the meticulous preparation of ingredients. Selecting the right components and employing effective preparation techniques can significantly enhance the quality of your meals, ensuring they are both nutritious and bursting with flavor.
Choosing Quality Meats and Fresh Vegetables for Flavorful Tagine Creations
Selecting high-quality meats and fresh vegetables is paramount for crafting flavorful tagine dishes. Traditional meats used in tagine cooking include lamb, chicken, and beef, each contributing its unique flavor profile to the pot. When choosing meats, it’s advisable to opt for cuts that are well-marbled, as the fat enhances the overall richness of the dish. For instance, lamb shanks or chicken thighs are excellent options due to their tenderness and juiciness during the extended cooking times that tagine recipes typically require.
Fresh vegetables also play a pivotal role in the overall flavor of your tagine. While seasonal produce such as carrots, potatoes, and tomatoes are commonly used, don’t hesitate to explore and experiment with other vegetables that align with your taste preferences. When selecting your vegetables, focus on those that are firm, vibrantly colored, and free from blemishes to ensure they maintain their integrity throughout the cooking process.
Marinating meats in advance can significantly enhance their flavor and tenderness. A simple marinade crafted from olive oil, garlic, and an array of spices can yield fantastic results. For optimal outcomes, allow the meat to marinate overnight, giving the flavors ample time to penetrate deeply, resulting in a delicious and satisfying meal.
Advanced Marinating Techniques to Intensify Flavor
Marinating is a crucial technique that enhances the quality of your tagine dishes, infusing meats and vegetables with a rich spectrum of flavors. An effective marinade typically includes oil, acid, and various herbs and spices. The oil carries fat-soluble flavors, while the acid, such as lemon juice or vinegar, tenderizes the meat and enhances its juiciness.
To create a delectable marinade, begin with a base of extra virgin olive oil, known for its health benefits and robust flavor. Incorporating ingredients like garlic, ginger, and fresh herbs such as parsley or coriander can add delightful complexities to your dish. Moreover, don’t forget to season with salt and pepper to further elevate the natural flavors of your ingredients.
Allowing your ingredients to marinate for several hours, or ideally overnight, can greatly enhance the depth of flavor. For meats, using a resealable plastic bag can ensure thorough coverage and penetration of the marinade. Be certain that the meat is fully coated and refrigerate during the marinating process for optimal results.
For vegetables, a shorter marinating time of about 30 minutes to an hour is usually sufficient. The goal is to infuse your ingredients with bold flavors without compromising their texture. By mastering marinating techniques, you are setting the stage for exceptional tagine dishes that will impress even the most discerning guests.
Key Spices and Herbs to Elevate Your Tagine Dishes

The spices and herbs that form the backbone of tagine dishes are essential for evoking the vibrant colors and flavors characteristic of North African cuisine. Common spices include cumin, coriander, paprika, and turmeric, each contributing its distinct character to the dish. The careful selection and balance of these spices are fundamental to achieving an authentic flavor experience.
Cumin is often regarded as the cornerstone of tagine cooking, providing a warm, earthy flavor that pairs beautifully with rich meats. Coriander introduces a refreshing citrus note, while paprika adds a touch of sweetness and vibrant color. Turmeric not only enhances the visual appeal of your dish with its golden hue but also imparts a subtle, slightly bitter undertone that rounds out the overall flavor.
Herbs also play a vital role in flavor development. Fresh herbs like cilantro and parsley are frequently used as garnishes, adding brightness and freshness to the finished dish. Additionally, dried herbs such as thyme or oregano can be introduced during cooking to deepen the overall flavor profile.
When utilizing spices, consider toasting whole spices in the tagine before adding other ingredients. This technique helps release their essential oils and intensifies their flavors, transforming your dish into a fragrant and flavorful masterpiece that delights the senses.
Preparing Ingredients for Consistent Cooking Results
Properly chopping and preparing your ingredients is essential for achieving even cooking and optimal flavor in your tagine. Ensuring uniformity in size guarantees that all components cook evenly, preventing some from becoming overcooked while others remain underdone.
Begin with your choice of meats and vegetables. For meats, cut them into uniform pieces, typically around 2-3 inches, to ensure they cook at the same rate. When it comes to vegetables, consider their individual cooking times; denser vegetables like carrots may require smaller cuts compared to softer options like zucchini.
For aromatic ingredients, such as onions and garlic, finely chop or slice them to allow their flavors to infuse thoroughly into the dish. A good practice is to sauté these aromatics first in the tagine before adding the main ingredients, as this enhances their sweetness and complexity, contributing to a richer overall dish.
Don’t overlook the importance of fresh herbs. These should be chopped just before use to retain their vibrant flavors. For dried herbs, introduce them at the beginning of the cooking process, allowing them to release their oils and flavors into the dish. Taking a thoughtful approach to chopping and preparing your ingredients will significantly enhance the quality and enjoyment of your tagine meals.
Mastering Cooking Techniques with Your Tagine Pot
To truly excel in the best techniques for cooking with a tagine pot, mastering a variety of cooking methods is crucial. The unique design of the tagine pot lends itself to a set of techniques that ensure your dishes are not only delicious but also showcase the pot’s special qualities.
Strategic Layering of Ingredients for Enhanced Flavor and Cooking Efficiency
Layering ingredients is a fundamental technique in tagine cooking that is essential for achieving optimal flavor distribution and even cooking. This principle involves arranging ingredients in a specific order within the pot, allowing flavors to meld while retaining moisture throughout the cooking process.
Begin by layering your base ingredients, such as onions and spices, at the bottom of the tagine. This creates a flavor-rich foundation that seeps into the dish as it cooks. Next, add your meats, ensuring they are spaced evenly. This promotes proper heat circulation, allowing each piece to cook uniformly and effectively.
Following this, layer your vegetables on top. Since they generally require less cooking time than meats, placing them above allows for gentle steaming. The conical lid plays a vital role in moisture retention, ensuring that the vegetables become tender without losing their shape or nutrients.
Consider incorporating a variety of textures in your layers; for instance, crunchy vegetables like carrots can complement softer ingredients like eggplant. This not only enhances the mouthfeel but also enriches the overall taste experience. Mastering the art of layering will elevate your tagine cooking, resulting in every dish being a delightful culinary adventure.
Understanding Cooking Times and Temperatures for Perfectly Cooked Meals
Navigating cooking times and temperatures is crucial for achieving tender, well-cooked meals in your tagine pot. Unlike conventional cooking methods that might require high heat, tagine cooking thrives on gentle, consistent temperatures, allowing flavors to meld and develop gradually.
Begin by heating your tagine slowly over a low flame. This gradual heating process is essential to prevent cracking or breaking, especially if you are using a clay pot. Aim for a steady simmer rather than a vigorous boil. The gentle heat allows meats to break down gradually, resulting in tender and succulent dishes.
Cooking times can vary based on the ingredients used. For example, tougher cuts of meat like lamb shanks may require up to two hours, while chicken can be ready in approximately 45 minutes to an hour. Keep an eye on your dish; the design of the tagine enables you to monitor progress without removing the lid, thus retaining moisture.
As a general guideline, meats should reach an internal temperature of 75°C (165°F) for chicken and 85°C (185°F) for lamb or beef. Using a meat thermometer can help you achieve perfect results, allowing you to reach the desired tenderness without overcooking. Understanding these variables will lead to consistently delightful meals from your tagine.
Mastering Steaming and Simmering Techniques for Flavorful Tagine Dishes
Two of the most effective techniques for tagine cooking are steaming and simmering, both of which contribute to the pot’s unique ability to create moist, flavorful dishes. These methods work in harmony, providing the perfect balance of heat and moisture.
Simmering involves cooking food in liquid just below the boiling point, allowing flavors to meld and ingredients to tenderize without the risk of boiling over. In a tagine, this is achieved by using a small amount of liquid at the beginning of the cooking process. The lid’s conical shape promotes steam retention, which condenses and drips back into the pot, effectively self-basting the dish and enhancing its flavor.
Conversely, steaming allows for a delicate cooking method, particularly for vegetables, which can lose their vibrant colors and nutrients if boiled. The steam generated within the tagine cooks the vegetables gently, preserving both their flavor and texture. By layering your vegetables above the meats, you ensure they cook perfectly without becoming mushy.
By mastering both steaming and simmering techniques, you can create a variety of dishes that celebrate the natural flavors of the ingredients while ensuring they remain nutritious and appealing to the palate.
Exploring Popular Tagine Recipes to Enhance Your Culinary Skills
Delving into the best techniques for cooking with a tagine pot opens up a world of culinary possibilities. Tagine cooking is synonymous with flavor and tradition, and there are numerous recipes that can showcase the pot’s versatility in your kitchen.
Creating a Classic Lamb Tagine Rich in Flavor
A classic lamb tagine epitomizes North African cuisine, celebrated for its rich, aromatic flavors. The process begins with marinating lamb shoulder or shanks overnight in a combination of olive oil, garlic, cumin, coriander, and cinnamon. This not only tenderizes the meat but also infuses it with robust flavors that are emblematic of the region.
Once marinated, sauté onions in your tagine until they turn golden, then add the lamb to sear until browned on all sides. Next, layer in chopped tomatoes, dried apricots, and a drizzle of honey for sweetness, followed by a sprinkle of almonds for added texture.
Allow the tagine to simmer gently over low heat, adding a splash of broth or water as necessary. The result is a tender lamb dish with a harmonious balance of sweet and savory notes, perfect for serving alongside fluffy couscous or crusty bread.
Exploring Vegetarian Tagine Options for Flavorful Plant-Based Meals
Vegetarian tagines present a wonderful opportunity to showcase seasonal produce while embracing the warmth and depth of this cooking style. A vibrant vegetarian tagine can feature a medley of vegetables such as zucchini, eggplant, carrots, and bell peppers, along with chickpeas for an added protein boost.
Start by sautéing onions and garlic in your tagine, then add spices like cumin, paprika, and turmeric to create an aromatic base. Next, layer in your vegetables, ensuring they are cut into even pieces. Include a can of diced tomatoes and a splash of vegetable broth, then cover and allow to simmer until the vegetables become tender.
Finish the dish with a handful of fresh herbs like coriander and parsley for a burst of freshness. Serve this colorful dish with couscous or flatbread, enjoying the harmony of flavors that tagine cooking brings to vegetarian meals, making them just as satisfying as their meat counterparts.
Indulging in Seafood Tagine Delights for a Coastal Twist
Seafood tagines provide a unique twist, merging the essence of coastal ingredients with traditional tagine cooking methods. A seafood tagine can incorporate a variety of fish and shellfish, such as prawns, mussels, and white fish, all simmered in a fragrant broth that highlights the bounty of the sea.
Begin by sautéing onions and garlic, then add spices like saffron and paprika to create an enticingly aromatic base. Layer in your seafood along with chopped tomatoes and a splash of white wine for added depth of flavor. Be cautious not to overcook the seafood; it should only take about 15-20 minutes to become perfectly tender and flavorful.
Finish with a squeeze of lemon juice and a sprinkle of fresh herbs to brighten the dish. The seafood tagine is not only visually stunning but also offers an explosion of flavors that transport you straight to coastal shores, making it an unforgettable dish.
Diverse Chicken Tagine Variations to Satisfy Every Palate
Chicken tagine recipes are incredibly diverse, allowing for a wealth of flavors and ingredients. A popular variation includes olives and preserved lemons, adding a tangy depth to the dish. To prepare, start by marinating chicken thighs in olive oil, garlic, spices, and lemon juice.
Once marinated, sauté onions in your tagine, adding the chicken to brown it before introducing green olives and slices of preserved lemons. A splash of chicken broth will help create a rich sauce as the dish simmers. The result is a succulent chicken tagine that pairs beautifully with couscous or crusty bread, offering a delightful dining experience.
Another delightful variation features apricots and almonds, adding a sweet and nutty twist to the dish. The incorporation of dried fruits and nuts is a hallmark of Moroccan cuisine, providing a lovely contrast to the spices and savory elements of the dish, making it a must-try for any tagine enthusiast.
Creative Sweet and Savory Tagine Combinations for Unique Flavor Profiles
Experimenting with sweet and savory tagine combinations can lead to unforgettable dining experiences. One delightful option is a tagine featuring duck with figs and prunes. The rich flavor of duck pairs beautifully with the sweetness of dried fruits, creating a dish that is both luxurious and comforting.
Begin by marinating the duck in a mixture of spices such as cinnamon, allspice, and honey. Sear the duck in your tagine until golden brown, then add a mix of figs, prunes, and a splash of red wine to enhance the depth of flavor. Allow the dish to simmer gently, infusing the duck with sweet and aromatic notes.
Serve this exquisite dish alongside couscous and a fresh salad for a well-rounded meal that beautifully balances sweet and savory elements. Exploring these unique combinations will elevate your tagine cooking experience and impress your dinner guests with the depth of flavors achievable through this traditional cooking method.
Enhancing Your Dining Experience: Serving and Pairing Tagine Dishes
The enjoyment of tagine extends beyond the cooking process; it encompasses serving and pairing, which can significantly elevate the overall dining experience. Understanding traditional accompaniments and beverage pairings can create an immersive atmosphere that celebrates the rich flavors of North African cuisine.
Traditional Accompaniments to Complement Your Tagine Meals
Classic sides and breads beautifully enhance tagine dishes, elevating their flavors and creating a satisfying meal. The most iconic accompaniment is couscous, a staple in North African cuisine that serves as a perfect base for the aromatic sauces produced by the tagine.
To prepare couscous, simply steam it over boiling water or broth, allowing it to fluff up and absorb the flavors. Consider adding a touch of olive oil and fresh herbs for added depth. Alternatively, Moroccan bread, known as khobz, is another excellent option for sopping up the delicious sauces, contributing a hearty element to the meal that enhances the overall dining experience.
For a refreshing contrast, consider serving a simple salad of tomatoes, cucumbers, and onions dressed with olive oil and lemon juice. This bright salad balances the richness of the tagine, providing a delightful contrast of flavors and textures that keeps the meal vibrant and enjoyable.
Wine and Beverage Pairings to Complement Your Tagine Creations
Finding the perfect beverage to accompany your tagine dishes can significantly enhance the dining experience. When pairing wine with tagine, consider the spices and main ingredients of the dish. For instance, a classic lamb tagine pairs beautifully with a robust red wine like Syrah or Grenache, whose fruity notes complement the richness of the meat, enhancing the overall experience.
For seafood tagines, a crisp white wine, such as Sauvignon Blanc or a dry Rosé, can enhance the fresh flavors without overwhelming the dish. When serving vegetarian options, a light-bodied red or a floral white can harmonize with the vibrant spices and herbs, creating a cohesive meal that is both satisfying and enjoyable.
Non-alcoholic options like mint tea or homemade lemonade are also excellent choices, providing refreshing contrasts to the meal’s aromatic flavors. Experimenting with various beverage pairings will enrich the overall dining experience, allowing you to discover new and exciting flavor combinations that enhance your tagine dishes.
Presentation Tips for an Inviting Tagine Dining Experience
The presentation of your tagine dishes significantly enhances their visual appeal and overall impact. Start with the tagine pot itself, as it serves as an eye-catching centerpiece that embodies the culinary tradition of North Africa. When serving, consider garnishing your dishes with fresh herbs or toasted nuts to add visual interest and elevate the presentation.
Using colorful plates or bowls to serve the tagine can further enhance the overall display. A vibrant assortment of couscous or vegetables alongside the tagine pot creates an inviting and appetizing vista that entices your guests to indulge in the meal.
Additionally, serve condiments like harissa or preserved lemons on the side, allowing guests to personalize their meals with their preferred level of heat and flavor. A thoughtfully presented meal not only invites enjoyment but also highlights the care and effort put into creating each dish, making the dining experience truly memorable.
Essential Care and Maintenance Tips for Your Tagine Pot
To ensure the longevity of your tagine pot and the ongoing success of your best techniques for cooking with a tagine pot, appropriate care and maintenance are crucial. Understanding how to clean, store, and repair your tagine will keep it in optimal condition for many years of culinary adventures.
Effective Cleaning and Maintenance Techniques for Your Tagine Pot
Cleaning your tagine pot requires careful attention to avoid damaging its delicate surface. After cooking, allow the pot to cool before rinsing it with warm water. Avoid using harsh detergents or abrasive scrubbers, as these can strip away the natural oils that have developed over time. Instead, opt for a soft sponge or cloth to gently wipe away any residue, ensuring the longevity of your tagine pot.
For stubborn stains, consider soaking the pot in warm water for a few hours before cleaning. If necessary, a mixture of baking soda and water can help lift tough bits without scratching the surface. Always ensure the pot is thoroughly dried before storing it, as moisture can lead to cracking or mold growth, compromising the integrity of your tagine.
Regular maintenance is also vital for optimal performance. Periodically check for any cracks or chips, as these can affect the pot’s cooking capabilities. If your pot is unglazed, consider seasoning it with olive oil occasionally, which can help maintain its non-stick properties and preserve its quality for many culinary adventures to come.
Optimal Storage Solutions for Extending Your Tagine’s Lifespan
Properly storing your tagine pot is essential for prolonging its lifespan. Ideally, keep the pot in a dry, cool place away from direct sunlight, as exposure can lead to deterioration over time. If your tagine is unglazed, consider placing a cloth between the lid and base to prevent moisture accumulation during storage.
Avoid stacking heavy items on top of your tagine, as this can lead to cracks or breakage. Instead, store it in a dedicated space where it won’t be jostled or bumped. If space is limited, consider using a tagine stand or rack that provides support and protection for your treasured cooking vessel.
If you have multiple tagines, store them nested with protective padding to prevent scratching. By taking these precautions, you will ensure that your tagine remains in pristine condition, ready for your next culinary adventure, and will last for generations of delicious meals.
Repair and Restoration Techniques for Your Tagine Pot
If your tagine pot sustains damage, there’s no need to despair. Many minor issues, such as small cracks or chips, can be repaired using the right techniques to restore your tagine’s functionality. For hairline cracks, consider using a food-safe epoxy resin, carefully following the manufacturer’s instructions to ensure the repair is both safe and effective for cooking.
For unglazed pots, re-seasoning the pot after a repair may be necessary. This involves applying a thin layer of olive oil and placing the tagine in a cool oven, gradually increasing the temperature to allow the oil to absorb into the clay, restoring its non-stick qualities.
For more significant damage, such as a break, you may need to consult a professional potter or artisan who is experienced with traditional repair methods. By addressing issues promptly and correctly, you can extend the life of your tagine and continue to enjoy its incredible cooking capabilities for years to come.
Common Questions About Tagine Cooking Answered
What is the primary purpose of a tagine pot?
A tagine pot is primarily designed for slow-cooking dishes, encouraging moisture retention and flavor infusion. It can be used to prepare a variety of dishes, including stews, soups, and even desserts, making it a versatile cooking tool.
Can I use a tagine pot on the stovetop?
Yes, many tagine pots are specifically designed for stovetop use. However, it is essential to ensure that your pot is compatible with your stovetop type, whether it be gas, electric, or induction.
What types of dishes are best suited for cooking in a tagine pot?
Tagine pots excel at cooking slow-cooked stews, braises, and even vegetarian dishes. Their unique design promotes tender meat and flavorful vegetables, resulting in delicious meals that celebrate the art of cooking.
How can I prevent my tagine pot from cracking?
To prevent cracking, always heat the tagine gradually and avoid sudden temperature changes. Store it carefully and refrain from stacking heavy items on top, ensuring its longevity and performance.
Is it possible to put my tagine pot in the oven?
Yes, many tagine pots are oven-safe. Always check the manufacturer’s instructions to confirm the maximum oven temperature that your pot can withstand without damage.
What is the best method for cleaning a tagine pot?
Clean your tagine pot using warm water and a soft sponge. Avoid harsh detergents, and make sure to let it dry completely before storing to maintain its quality and performance.
How long does it typically take to cook in a tagine pot?
Cooking times vary based on the ingredients used, but generally, meats require 1 to 2 hours, while vegetables may take around 30 to 45 minutes, depending on their type and size.
Can I cook rice in a tagine pot?
Yes, you can cook rice in a tagine pot. Consider layering it with vegetables and spices to enhance the flavor, creating a delicious and aromatic dish that complements your main meal.
What are the best meats for tagine cooking?
Lamb, chicken, and beef are traditional meats suited for tagine cooking, but feel free to experiment with other proteins as well, as the tagine’s versatility allows for a wide range of culinary creations.
Is it necessary to season a tagine pot?
Seasoning an unglazed tagine pot is recommended to enhance its non-stick properties and prolong its lifespan. Regularly seasoning with olive oil can help maintain its quality and cooking performance.
Join us on Facebook for the latest updates!
The post Best Ways to Cook with a Tagine Pot: A Guide appeared first on https://cookinggods.com
The Article Cooking with a Tagine Pot: Top Tips and Techniques Was Found On https://limitsofstrategy.com
-

Effortless Cleanup with Sheet Pan Recipes: A Quick Guide
Exciting One-Pan Meal Ideas for Effortless Cooking
Irresistible Sheet Pan Chicken with Colorful Seasonal Vegetables
Explore the ultimate sheet pan chicken recipe that harmoniously combines a variety of seasonal vegetables for a delightful dining experience that your family will love. Roasting chicken on a sheet pan not only elevates the flavors but also simplifies meal preparation significantly. To achieve a burst of flavor, marinate the chicken in a blend of olive oil, garlic, and aromatic herbs before roasting. Pair it with a vibrant mix of carrots, zucchini, and red onions to craft a dish that is not only nutritious but also visually captivating, ensuring it becomes a cherished favorite at your dinner table.
The beauty of this dish is in its straightforward preparation: simply preheat your oven, prepare the marinade, and chop the vegetables into bite-sized pieces. Everything cooks simultaneously, allowing the chicken to soak up the delicious flavors of the veggies, resulting in rich drippings ideal for creating a savory sauce or gravy. This technique promotes a delightful blend of flavors while minimizing cleanup, making it a perfect choice for busy weeknights when a quick and tasty meal is desired.
While the taste of this recipe is incredibly satisfying, it also offers plenty of opportunities for culinary creativity. Feel free to experiment by adding spices such as paprika for a smoky flavor or a splash of balsamic vinegar for a tangy twist. The adaptability of top sheet pan recipes that prioritize easy cleanup allows home cooks to explore various proteins and sides, establishing them as a staple across families worldwide in search of quick and flavorful meal options.
Delicious Sheet Pan Salmon Paired with Tender Asparagus
Imagine the tantalizing aroma of freshly baked salmon paired with tender asparagus spears, creating a dish that not only delights the palate but also caters to health-conscious diners in search of nutritious meal options. The combination of omega-3-rich salmon and nutrient-dense asparagus results in a hearty meal that is both quick and simple to prepare.
In this recipe, proper seasoning is crucial. A harmonious blend of lemon juice, garlic, and fresh dill elevates the flavor profile, making the salmon flaky and incredibly juicy. As the dish bakes, the natural oils from the salmon infuse into the asparagus, resulting in a beautifully cohesive taste experience that is simply irresistible. In just 20 minutes in a hot oven, you can indulge in a complete meal that is both satisfying and efficient.
If you’re feeling adventurous, consider adding other vegetables such as cherry tomatoes or bell peppers. This addition not only enhances the nutritional profile but also adds a burst of color to the dish. The beauty of top sheet pan recipes for easy cleanup is their versatility; you can easily swap ingredients based on seasonal availability or personal preferences, making this meal an adaptable choice for any home cook.
Hearty Sheet Pan Steak with Crispy Potatoes for a Satisfying Dinner
When it comes to fulfilling meals, few combinations can rival the satisfaction of juicy steak served alongside crispy potatoes. Cooking both on a single sheet pan allows the flavors to meld beautifully while keeping cleanup to a minimum. Seasoning the steak with a blend of rosemary and garlic creates an aromatic experience that tantalizes your senses and enhances the entire dining experience.
Preparation is incredibly easy—just marinate the steak and toss your potatoes in olive oil, salt, and pepper. As they roast together, the steak releases its juices, which flavor the potatoes and create a delightful golden crust. This method exemplifies the essence of top sheet pan recipes, which prioritize easy cleanup and allow you to enjoy the cooking process without the burden of extensive cleaning afterward.
Another remarkable aspect of this recipe is its adaptability. Whether you opt for different cuts of steak or explore various types of potatoes—such as sweet potatoes or fingerling potatoes—the possibilities are endless. This flexibility is what makes sheet pan meals a go-to for home cooks seeking flavorful and stress-free dining experiences worldwide.
Quick and Nutritious Sheet Pan Shrimp with Broccoli for a Flavorful Meal
If you’re looking for a nutritious yet quick meal, the delightful combination of shrimp and broccoli is an excellent choice. This dish is celebrated for its simplicity and speed, making it perfect for hectic weeknight dinners. Season the shrimp with a mix of soy sauce, garlic, and ginger to create a mouth-watering glaze that invigorates the palate and enhances the overall dish.
Roasting shrimp and broccoli together on the same pan ensures that they cook evenly while allowing their flavors to intermingle beautifully. As the shrimp cook, they absorb the essence of the broccoli, creating a dish that is both delicious and visually stunning—ideal for impressing guests or enjoying a quiet dinner at home.
Utilizing top sheet pan recipes for easy cleanup significantly reduces the hassle associated with preparing elaborate meals. With just one pan to wash, you can focus on what truly matters—savoring good food in great company. Feel free to add other vegetables, such as bell peppers or snap peas, for an extra splash of color and flavor, further enhancing this already delightful dish.
Classic Sheet Pan Sausage with Peppers for a Hearty Dinner
The beloved combination of sausage and peppers is a time-honored dish that merges bold flavors with hearty ingredients, making it a staple in many households. The beauty of this recipe lies in its simplicity; by roasting sausage alongside a colorful assortment of bell peppers and onions, you create a meal that is both satisfying and easy to prepare.
The secret to this dish’s success lies in using high-quality sausage, whether it be Italian, chorizo, or a plant-based alternative. The sausages impart a depth of flavor that permeates the peppers as they roast, resulting in a deliciously savory combination that is hard to resist. This dish truly shines when served over a bed of rice or alongside crusty bread, providing an ideal way to soak up the tasty juices.
Customizing this recipe to cater to varied taste preferences is a breeze, making it an appealing choice for larger gatherings. You can mix and match different types of peppers or even add mushrooms for an earthy twist. The essence of top sheet pan recipes for easy cleanup lies in their flexibility, allowing you to create meals that cater to diverse dietary needs while maintaining great taste and ease of preparation.
Delicious Vegetarian Sheet Pan Creations for Healthy Eating
Vibrant Sheet Pan Veggie Fajitas for a Colorful Meal
Bursting with color and flavor, sheet pan veggie fajitas are an exceptional way to enjoy a meal that is both nutritious and visually captivating. The combination of bell peppers, onions, and mushrooms roasted to perfection creates a delightful medley that can take center stage at any dinner table, appealing to both vegetarians and meat lovers alike.
To prepare these fajitas, slice your vegetables, toss them in olive oil, and season with cumin, chili powder, and lime juice. Roasting them on a sheet pan allows the natural sugars in the vegetables to caramelize, intensifying their flavor while keeping the cooking process straightforward. Once out of the oven, serve with warm tortillas and your choice of toppings, such as avocado, salsa, or fresh cilantro.
The versatility of these veggie fajitas is a standout feature; by adding other seasonal vegetables or beans, you can create a dish that caters to any dietary preference. This adaptability is one of the many advantages of top sheet pan recipes, offering easy cleanup and allowing for creativity without excessive effort or mess.
Classic Sheet Pan Ratatouille for a Taste of France
Ratatouille is a classic French dish that celebrates the rich flavors of summer vegetables, creating a hearty and wholesome medley. By preparing it on a sheet pan, you simplify the cooking process while still achieving beautifully roasted results. Imagine a combination of eggplant, zucchini, tomatoes, and bell peppers harmonizing to create a dish that bursts with flavor and freshness.
The preparation for this dish is as simple as it gets; chop the vegetables, toss them with olive oil, and season with aromatic herbs like thyme and basil. As they roast, the vegetables soften, and their flavors deepen, resulting in a dish that can be enjoyed hot or cold, making it an excellent choice for meal prep or outdoor picnics.
When it comes to serving, the beauty of top sheet pan recipes for easy cleanup is that you can enjoy ratatouille as a side dish, a main course, or even as a topping for crusty bread. This flexibility allows it to fit seamlessly into various meal contexts while minimizing the mess, making it an ideal choice for home cooks.
Creative Sheet Pan Stuffed Peppers for a Wholesome Meal
Stuffed peppers present a delightful way to incorporate wholesome grains and vegetables into your meals, and cooking them on a sheet pan makes the process even more convenient. You can fill vibrant bell peppers with a hearty mixture of quinoa, beans, corn, and spices, resulting in a dish that is not only visually appealing but also packed with nutrients.
The key to achieving success with stuffed peppers lies in ensuring they are perfectly cooked. By roasting them on a sheet pan, the heat circulates evenly, allowing for a beautifully roasted exterior while keeping the filling moist and flavorful. Top with cheese in the final minutes of cooking for a deliciously melty finish that elevates the dish even further.
The adaptability of top sheet pan recipes for easy cleanup shines through in this dish, as you can easily mix and match different fillings based on what you have available. Whether you choose a Mediterranean-inspired filling with feta and olives or a spicy Mexican-inspired mix with black beans and salsa, the possibilities are truly endless.
Effortless Breakfast Ideas on a Sheet Pan for Busy Mornings
Fluffy Sheet Pan Pancakes for a Family-Friendly Breakfast
Who doesn’t adore pancakes? Now, imagine a fluffy stack of pancakes baked effortlessly on a sheet pan, perfectly ready to serve a whole family without the hassle of flipping each pancake individually. This innovative breakfast solution allows you to prepare a delightful batch in a fraction of the time that traditional methods would require, making your mornings much smoother.
To create these pancakes, mix your batter and pour it onto a greased sheet pan. Bake until golden brown and then slice into squares for serving. The result is a uniform texture that everyone can enjoy, eliminating the stress of timing individual pancakes on the stovetop and ensuring everyone gets to enjoy breakfast together in harmony.
Enhance these pancakes with a variety of toppings such as maple syrup, fresh berries, or a light dusting of powdered sugar. The joy of top sheet pan recipes for easy cleanup not only lies in the cooking process but also in the shared experience, transforming breakfast into a delightful occasion rather than a morning chore.
Hearty Sheet Pan Breakfast Hash to Fuel Your Day
Kickstart your day with a hearty sheet pan breakfast hash that combines potatoes, sausages, and eggs into a single-pan meal that’s both satisfying and uncomplicated. This dish is perfect for early risers who crave a filling breakfast without the fuss of multiple pots and pans cluttering the kitchen.
Begin by chopping your potatoes and tossing them onto a sheet pan with seasoned sausages, allowing them to roast until crispy and golden. Once they are nearly cooked through, crack a few eggs over the top to bake alongside the mixture. The result is a delicious and visually appealing meal that can be savored any day of the week.
One of the fantastic aspects of using top sheet pan recipes for easy cleanup in breakfast preparation is the ability to customize according to your preferences. Whether you prefer vegetarian options or different types of meat, this dish can easily adapt to suit various tastes, making it an excellent choice for families with diverse palates and preferences.
Easy Sheet Pan Breakfast Burritos for a Quick Meal
Breakfast burritos are a fantastic way to kickstart your day, and preparing them on a sheet pan dramatically simplifies the process. Lay out tortillas filled with scrambled eggs, cheese, and a colorful mix of veggies, then bake until everything is warm and flavorful, creating a satisfying morning meal that everyone will love.
This method allows you to prepare multiple burritos simultaneously, making it ideal for busy mornings or family gatherings where everyone can enjoy a hearty breakfast together. Once baked, you can easily roll them up and serve, keeping cleanup to a minimum and allowing you to focus on enjoying your meal.
The beauty of top sheet pan recipes for easy cleanup is showcased here, as you can incorporate various fillings based on what you have on hand. Whether it’s beans, salsa, or avocado, the adaptability of this dish ensures that breakfast can be both convenient and bursting with flavor, tailored to suit everyone’s tastes.
Delightful Sheet Pan French Toast for a Sweet Start to Your Day
French toast is a cherished breakfast treat, and making it on a sheet pan elevates the experience while keeping it stress-free and convenient. By soaking thick slices of bread in a sweet egg mixture and baking them, you create a beautifully golden dish that can easily be served to a crowd, making breakfast a joyful occasion for everyone.
The secret is to use thicker bread, such as brioche or challah, which can absorb the egg mixture without falling apart. Before baking, top with a sprinkle of cinnamon or a drizzle of maple syrup for a delightful finish that brings out the best in this classic dish.
The joy of top sheet pan recipes for easy cleanup is clear here, as you can prepare a delicious breakfast for family or friends without the stress of cooking each slice individually. This method saves time and allows you to enjoy quality moments with your loved ones around the breakfast table, making it a cherished part of the day.
Effortless Seafood Specialties with Minimal Cleanup
Flavorful Sheet Pan Shrimp Boil for a Coastal Experience
Imagine relishing the classic flavors of a New England shrimp boil, all prepared effortlessly in one pan, featuring a delightful array of ingredients. Cooking shrimp, potatoes, corn, and sausage on a sheet pan not only results in a delicious meal but also ensures that cleanup is a breeze, making it an ideal option for casual gatherings.
To bring this dish to life, season your shrimp and vegetables with Old Bay seasoning and lemon juice for a refreshing burst of flavor. As everything roasts together, the flavors meld beautifully, capturing the essence of a traditional boil without the hassle of boiling pots and large gatherings, allowing you to enjoy the experience in a relaxed setting.
This approach, using top sheet pan recipes for easy cleanup, is perfect for casual get-togethers or family dinners, where a laid-back vibe is appreciated. Serve it directly from the pan for a rustic feel, inviting everyone to dig in and enjoy this flavor-packed feast together.
Innovative Sheet Pan Fish and Chips for a Healthy Twist
Fish and chips are a beloved classic, and preparing them on a sheet pan introduces a modern twist that simplifies the cooking process. By baking crispy fish fillets alongside seasoned fries, you create a satisfyingly delicious dish that satisfies cravings without excessive oil or mess, making it a healthier alternative to traditional frying methods.
Coat your fish in a light batter or breadcrumbs, and toss thinly sliced potatoes with olive oil and seasonings. As everything bakes together, you achieve that signature crispy exterior while ensuring the fish remains moist and flaky, providing a delightful contrast in textures that will please any palate.
The convenience of top sheet pan recipes for easy cleanup is evident here, as you can enjoy this traditional dish without the need for deep-frying or multiple cooking vessels. This makes it a fantastic choice for a weekday dinner that feels indulgent yet remains accessible and healthy, allowing you to enjoy a classic meal with less effort.
Exquisite Sheet Pan Seafood Paella for a Festive Meal
Paella is a dish renowned for its rich flavors and vibrant colors, typically cooked in a wide, shallow pan. However, preparing it on a sheet pan transforms the cooking process while still delivering a satisfying meal that’s perfect for any occasion. Combining seafood, rice, and an array of vegetables creates a harmonious dish that transports you to coastal regions with every bite.
Start by sautéing a mixture of vegetables and spices in a splash of olive oil, then add your rice and stock. Once the rice absorbs the liquid, top it with an assortment of seafood, allowing it to steam and flavor the dish beautifully. The result is an inviting paella that’s bursting with flavor and perfect for sharing with family and friends.
Utilizing top sheet pan recipes for easy cleanup allows you to savor the depth of traditional paella without the usual fuss, making it a practical choice for home cooks everywhere. The outcome is a flavor-packed meal that can be enjoyed by everyone, regardless of their culinary expertise, making it a wonderful addition to any gathering.
Meat Lover’s Sheet Pan Favorites for Hearty Appetites
Tender Sheet Pan BBQ Ribs for the Ultimate Indulgence
For meat lovers, few dishes can match the satisfaction of savory BBQ ribs, and preparing them on a sheet pan makes the process remarkably straightforward. By slow-roasting the ribs, you allow the meat to become tender and flavorful, while the BBQ sauce caramelizes beautifully, creating a sticky glaze that’s hard to resist.
Begin by marinating your ribs in a rich BBQ sauce, allowing the flavors to penetrate deeply. Once they are well-coated, place them on a sheet pan and roast until tender and juicy. The beauty of this dish lies not only in its exceptional flavor but also in the ease of preparation, as everything cooks in one place, making it perfect for busy days when you want to enjoy a hearty meal.
This method perfectly exemplifies the essence of top sheet pan recipes, making for easy cleanup and allowing you to indulge in a satisfying meal without the hassle of cleaning multiple pans. Pair these ribs with coleslaw or cornbread for a truly indulgent feast that satisfies even the heartiest appetites, making it a favorite for gatherings and celebrations.
Comforting Sheet Pan Meatloaf with Roasted Vegetables for a Family Favorite
Meatloaf is a comforting classic that warms the heart, and cooking it on a sheet pan allows for even baking while incorporating a side of roasted vegetables. This technique not only enhances the flavors but also significantly simplifies the cooking process, making it a wonderful choice for family meals.
To create your meatloaf, prepare a mixture using ground meat, breadcrumbs, and seasonings, then shape it into a loaf on a pan. Surround it with your choice of vegetables, such as carrots and green beans, allowing them to roast and absorb the delicious juices from the meatloaf. The result is a hearty dish that pleases everyone at the table and provides a complete meal.
The practicality of top sheet pan recipes for easy cleanup is especially evident here, as you can serve a complete meal that feels homely without the usual mess of multiple pots and pans. This method encourages families to gather around the table and enjoy a comforting meal together while simplifying the cooking experience.
Flavor-Packed Sheet Pan Sausage with Peppers for a Hearty Dinner
Once again, the delightful combination of sausage and peppers shines through, this time prepared in a sheet pan format. Roasting Italian sausage with a medley of colorful bell peppers creates a flavor explosion that’s perfect for a hearty meal any day of the week, appealing to a variety of tastes.
To prepare this dish, slice your sausage and peppers, toss them with olive oil and aromatic Italian herbs, and spread them evenly on the pan. As they roast, the sausages release their juices, infusing the peppers with flavor for a deliciously savory experience that pairs perfectly with crusty bread or over pasta.
The convenience of top sheet pan recipes for easy cleanup is unmatched here, allowing for a meal that’s simple to prepare and packed with flavor. This dish can be easily adjusted to suit different dietary needs, making it a satisfying dinner that caters to everyone at the table and brings families together with its comforting appeal.
Quick and Effortless Dinner Solutions for Busy Lives
Speedy Sheet Pan Chicken Fajitas for Quick Weeknight Dinners
Bringing together the bold flavors of Mexican cuisine, sheet pan chicken fajitas offer a quick and easy dinner solution for busy weeknights. Combining seasoned chicken strips with an array of colorful bell peppers and onions, this dish delivers all the classic fajita flavors without the fuss of complicated cooking methods.
Marinating the chicken in lime juice, cumin, and chili powder enhances the flavors, making for an irresistibly tasty meal. Once everything is combined on a sheet pan, roasting them together allows the vegetables to become tender and flavorful. At the same time, the chicken retains its juicy texture, resulting in a satisfying meal that everyone will enjoy.
This approach exemplifies the benefits of top sheet pan recipes, offering easy cleanup and transforming a traditionally hands-on dish into something manageable and convenient. Once cooked, serve with warm tortillas and your favorite toppings to create a delicious, satisfying dinner that brings the whole family together for a delightful meal experience.
Common Questions About Sheet Pan Cooking Explained
What Are Sheet Pan Recipes and Their Benefits?
Sheet pan recipes involve preparing multiple ingredients on a single baking sheet, streamlining meal prep and significantly reducing cleanup time, ultimately making dinner a breeze.
What Are the Advantages of Opting for Sheet Pan Meals?
Sheet pan meals are incredibly convenient as they allow you to roast proteins and vegetables together, cutting down cooking time and simplifying the cleanup process significantly.
Can I Make Sheet Pan Recipes Ahead of Time?
Yes, many sheet pan recipes can be made in advance, allowing for easy reheating when mealtime arrives, which is perfect for busy families.
Are There Vegetarian Options for Sheet Pan Recipes?
Absolutely! There are countless vegetarian sheet pan recipes, including delicious roasted vegetables, stuffed peppers, and vibrant veggie fajitas that are sure to please.
How Can I Prevent Sticking on My Sheet Pan?
Using parchment paper or a silicone mat can help prevent sticking, ensuring your food comes off easily after cooking and simplifying the cleanup process.
Can I Use Frozen Ingredients in My Sheet Pan Recipes?
Yes, frozen vegetables and proteins can be incorporated, although cooking times may need to be adjusted depending on the ingredients used.
What Is the Ideal Temperature for Cooking Sheet Pan Meals?
Most sheet pan meals are best cooked at temperatures between 200°C and 220°C (400°F and 425°F) for optimal roasting, ensuring everything is cooked through and delicious.
Is It Okay to Mix Different Proteins on One Sheet Pan?
While it’s possible to mix different proteins, it’s advisable to use similar cooking times and temperatures for proteins to ensure even cooking and optimal results.
What Are Good Side Dishes to Serve with Sheet Pan Meals?
Side dishes such as salads complement sheet pan meals wonderfully, adding variety and balance to your meal experience.
How Can I Tell When My Sheet Pan Meal Is Done?
Use a meat thermometer to ensure proteins reach a safe internal temperature, and check vegetables for tenderness and caramelization to confirm they are fully cooked.
Stay Updated with Our Latest Recipes on Facebook!
The post Top Sheet Pan Recipes for Easy Cleanup: A Simple Guide appeared first on https://cookinggods.com
The Article Sheet Pan Recipes for Effortless Cleanup: A Quick Guide Was Found On https://limitsofstrategy.com
-

Smoker Temperature Tips for Mastery and Success
Elevate Your Smoked Dishes with Expert Temperature Control Techniques
Mastering smoker temperature control is an essential skill for anyone aspiring to elevate their smoking game. This expertise transitions cooking from a casual pastime into a precise science, ensuring that each dish surpasses mere satisfaction to become a culinary triumph. By refining this crucial skill, you can consistently prepare meals that not only achieve culinary perfection but also magnify flavors and adhere to important safety protocols. A deep understanding of temperature management can metamorphose an ordinary meal into an unforgettable gastronomic adventure, celebrating the diverse and rich food heritage found throughout the United States.
Proven Techniques for Achieving Stable Heat in Your Smoker
Consistent heat maintenance is critical when it comes to effectively smoking meats and achieving the best possible results. Ensuring a stable temperature allows the meat to cook uniformly, forming a delicious crust on the exterior while keeping the inside juicy and flavorful. Temperature fluctuations can lead to overdone edges or inadequately cooked centers, potentially ruining your culinary endeavors. This principle becomes particularly crucial when dealing with larger cuts of meat, such as briskets or pork shoulders, which require longer cooking times for optimal outcomes.
Furthermore, maintaining a steady cooking temperature is vital for preventing the common issue of meat drying out. When temperatures fall too low, cooking time increases, leading to significant moisture loss. Conversely, if temperatures rise too high, you risk burning your meat, which can compromise its flavor profile. Experienced pitmasters know that achieving the perfect temperature equilibrium is essential for creating a beautiful smoke ring and rich flavor, both signature characteristics of expertly smoked meats.
Moreover, consistent heat significantly improves the texture of your food. Subjecting meat to fluctuating temperatures can result in a tough or rubbery consistency, detracting from your hard work. Cooking at a controlled temperature allows collagen in the meat to break down gradually, resulting in a tender and juicy final product. This meticulous approach to temperature management can transform a simple barbecue into a remarkable feast, whether you are hosting a backyard gathering or a festive neighborhood block party.
The Crucial Role of Temperature Control in Enhancing Food Quality and Flavor
Effective temperature regulation not only dictates cooking duration but also profoundly impacts the final flavor and texture of smoked dishes. For example, smoking beef within the optimal range of 225-250°F enables the meat to absorb the rich, complex flavors produced by the smoke, resulting in a robust and satisfying taste profile. This method of slow cooking facilitates the development of intricate flavors, a fundamental aspect of barbecue traditions across the United States.
In addition to flavor, the texture of the meat is equally important. Cooking at the right temperature yields that coveted melt-in-your-mouth quality. For instance, a brisket prepared using low and slow techniques will break down connective tissues, creating a fork-tender and flavor-packed dish. Any deviation in temperature during the smoking process could result in a tough, chewy final product—exactly what no dedicated barbecue lover desires.
While factors like seasoning, wood selection, and cooking techniques are significant, without precise temperature management, these components may not achieve their full potential. Attaining the correct temperature guarantees that flavors blend harmoniously, producing a delightful medley that tantalizes the palate. Whether you’re smoking pork ribs in Kansas City or brisket in Texas, mastering the nuances of temperature control is key to enhancing your barbecue experience to remarkable heights.
Ready to Dive Deeper into Smoking Techniques?
Crucial Safety Practices for Effective Temperature Management
Temperature control is not just a matter of achieving the best flavor; it is a vital safety concern. Undercooking meats can lead to serious foodborne illnesses, posing health risks and ruining gatherings. The USDA has established specific internal temperature guidelines for various types of meat to ensure they are safe for consumption. For instance, poultry must attain a minimum of 165°F to eliminate harmful pathogens like Salmonella from your meal.
Comprehending the importance of temperature allows you to make informed decisions about cooking times and techniques. Utilizing a dependable smoker that effectively manages temperature minimizes the risk of foodborne illnesses, ensuring your meats are not only delectable but also safe to eat. This knowledge is especially crucial for those hosting outdoor events where food safety is a top priority.
Additionally, mastering temperature control can help prevent potential mishaps during the smoking process. When temperatures drop too low, the risk of bacterial growth increases, leading to significant health hazards. Conversely, maintaining optimal temperatures ensures food safety while enhancing your overall smoking experience, transforming it into a culinary success.
Enhancing Energy Efficiency through Intelligent Temperature Management

Another significant benefit of effective temperature control is the energy efficiency it provides. Smokers that can maintain stable temperatures typically require less fuel, whether it be wood, charcoal, or electricity. For example, electric smokers equipped with digital thermostats are designed to automatically regulate temperature, ultimately leading to lower energy costs over time. This advantage is especially appealing for frequent smokers, particularly during holidays or family gatherings when preparing substantial quantities of meat.
Charcoal and pellet smokers also gain from proper temperature management. A well-controlled fire burns more efficiently, requiring less fuel while producing minimal smoke. This not only saves you money but also reduces your environmental footprint, making your smoking activities more sustainable over time.
Moreover, using less fuel allows for more quality time spent enjoying your barbecue with friends and family, rather than constantly managing the fire. This aspect of efficiency permits dedicated pitmasters to focus on flavor enhancement and presentation without the continuous concern of energy consumption logistics.
Exploring Various Smoker Types and Their Temperature Regulation Methods
Developing a comprehensive understanding of the different types of smokers available is essential for mastering temperature control. Each smoker type offers a distinct set of features and challenges. From electric to charcoal to pellet smokers, knowing how to manage temperature in each can significantly enhance your smoking experience.
Discovering the Advantages of Electric Smokers
Electric smokers have gained popularity among both novice and seasoned pitmasters due to their user-friendly design and precise temperature control capabilities. Equipped with digital thermostats, these smokers maintain consistent temperatures with minimal effort. Users can simply set their desired temperature, and the smoker automatically regulates the heat, making it a perfect choice for beginners or those with tight schedules.
Many electric smokers feature built-in components such as meat probes and timers, allowing for easy monitoring of the cooking process without the need for constant checks. This technology is invaluable for achieving consistent results, especially when smoking larger cuts like brisket or pork shoulders. The controlled environment within these smokers helps prevent temperature fluctuations, resulting in meats that are not only juicy but also bursting with flavor.
Additionally, electric smokers are recognized for their energy efficiency. They generally consume less fuel than traditional smokers, leading to reduced operational costs. This feature is particularly beneficial for avid smokers, especially during tailgating events or festive occasions. However, while electric smokers offer convenience, traditionalists may argue that they lack the authentic smoky flavor derived from burning wood or charcoal.
Perfecting Temperature Management in Charcoal Smokers

Charcoal smokers are renowned for the rich flavors they impart to meats, although they require more hands-on temperature management. Achieving the perfect temperature in a charcoal smoker demands diligent monitoring and timely adjustments. Pitmasters often utilize vents and dampers to regulate airflow, directly affecting how the charcoal burns.
A unique characteristic of charcoal smokers is the ability to create varied heat zones. By strategically placing the charcoal, you can manage hot and cooler sections within the smoker, allowing for versatile cooking techniques. This approach is especially advantageous when preparing multiple types of meat that require different temperatures.
However, managing temperature in a charcoal smoker can be challenging for beginners. It necessitates an understanding of how airflow and charcoal quantity influence heat levels. With practice, many find that the rich flavors achieved through charcoal smoking are well worth the effort. Whether you’re preparing ribs in North Carolina or a classic brisket in Texas, the unique smoky taste from a charcoal smoker is unrivaled.
Unveiling the Flexibility of Pellet Smokers
Pellet smokers have become increasingly popular due to their convenience and versatility. These smokers utilize wood pellets that are automatically fed into a burn pot, igniting to produce smoke. Temperature regulation is managed through an electronic control panel, offering a precision level that rivals electric smokers while still delivering authentic wood flavor.
Pellet smokers are particularly user-friendly. The ability to set a desired temperature and let the smoker manage the rest removes much of the uncertainty associated with traditional smoking methods. This feature is especially beneficial for extended smoking sessions, such as preparing a whole turkey for Thanksgiving or a large brisket for summer barbecues.
However, although pellet smokers are easy to operate, they do require regular maintenance, including keeping the hopper stocked with pellets and ensuring the auger is functioning correctly. Nevertheless, when properly maintained, pellet smokers can produce some of the most delightful flavor profiles, making them an excellent choice for both novice and seasoned smokers.
Identifying Optimal Smoking Temperatures for a Variety of Meats
To achieve the best results, it is essential to understand the ideal smoking temperatures for different types of meat. Each meat variety reacts differently to heat, and knowing the appropriate range can significantly influence both flavor and texture.
Perfecting the Technique of Smoking Beef
When smoking beef, especially cuts like brisket and ribs, the mantra “low and slow” cannot be overstated. The ideal temperature range of 225-250°F is crucial for breaking down tough connective tissues in the meat, leading to a tender, flavor-rich finish.
Smoking beef at these temperatures allows the meat to absorb the smoky flavors while cooking to perfection over time. For brisket, maintaining this temperature for several hours ensures it achieves that melt-in-your-mouth quality. The extended cooking time also contributes to the formation of a beautiful bark—a caramelized crust resulting from the Maillard reaction, enhancing both flavor and visual appeal.
Furthermore, it’s vital not only to reach the correct cooking temperature but also to closely monitor the internal temperature. Aim for an internal temperature of around 195°F to 205°F for brisket. This higher temperature is essential for collagen to render and transform into gelatin, enriching the meat’s flavor and moisture. This technique is especially celebrated among Texas barbecue enthusiasts who swear by the results.
Smoking Pork for Maximum Flavor and Texture
Pork is another meat that excels when smoked at the 225-250°F range. This temperature is ideal for cuts like pulled pork and smoked ham, allowing the meat to cook evenly while absorbing robust smoke flavors.
When smoking pulled pork, maintaining this consistent temperature helps break down the connective tissues in the shoulder, resulting in that fork-tender texture that defines exceptional barbecue. A pork shoulder cooked within this range may take anywhere from 10 to 14 hours, depending on the cut’s size, but the results are undoubtedly worth the wait.
For smoked ham, the same temperature range applies. Slow cooking allows the smoke to penetrate the meat, yielding a rich, smoky flavor that complements the pork’s natural sweetness. It’s crucial to monitor the internal temperature, aiming for around 190-205°F, to ensure the ham is thoroughly cooked and infused with flavor. This technique is particularly popular during holiday gatherings across the United States, where smoked ham often takes center stage.
Best Practices for Smoking Poultry
Smoking poultry, including chicken and turkey, requires a slightly higher temperature range of 250°F to 275°F. This range ensures that the meat cooks thoroughly while remaining juicy, thus preventing dryness that may occur at lower temperatures.
For chicken, this temperature range allows the skin to crisp beautifully while keeping the meat moist and tender. Many backyard cooks prefer to smoke chicken at around 250°F, cooking it until the internal temperature reaches 165°F. This is crucial for food safety, as poultry must achieve this temperature to eliminate harmful bacteria.
When smoking turkey, the same principles apply. Cooking at 250-275°F helps retain moisture, resulting in tender, juicy meat. Additionally, employing a brining method before smoking can greatly enhance both flavor and moisture retention. The combination of well-regulated temperature and effective cooking techniques ensures a turkey that will be the highlight of any Thanksgiving or festive gathering.
Unlocking the Flavor Potential of Smoked Lamb
Lamb is a flavorful meat that shines when smoked at 225-250°F, particularly for cuts such as leg and shoulder. These cuts are often tougher, making low-and-slow cooking essential for breaking down connective tissue and enhancing flavor.
When smoking lamb, it’s vital to closely monitor the internal temperature. Aim for a temperature of around 130-145°F for medium-rare doneness, which is optimal for enjoying the rich, gamey flavor that lamb offers. This smoking technique not only yields a tender texture but also allows the unique smoky flavors to meld beautifully with the lamb’s natural essence.
Smoking lamb is notably popular in various regions of the United States, from Mediterranean-inspired dishes in California to Southern BBQ styles. Regardless of preparation style, understanding the ideal temperature for smoking lamb is key to achieving a delicious and memorable dish.
Utilizing Thermometers for Precision in Smoking
In the realm of smoking, precision is crucial. Effectively using thermometers can be the difference between a perfectly cooked dish and one that disappoints. Understanding the various types of thermometers available and how to use them is vital for every serious pitmaster.
Examining Different Thermometer Types for Smokers
When it comes to smoking meats, several types of thermometers can cater to your needs. Probe thermometers are ideal for long smoking sessions, allowing you to keep an eye on the internal temperature of the meat without needing to open the smoker. Instant-read thermometers are perfect for quick checks, delivering accurate readings in seconds. Lastly, leave-in thermometers are designed to remain in the meat while it cooks, providing real-time updates without lifting the smoker’s lid.
Each type of thermometer has its advantages, suited for specific situations. For instance, probe thermometers are invaluable when smoking larger cuts like brisket or pork shoulder, where knowing the internal temperature is critical for ensuring doneness and safety. Instant-read thermometers, conversely, are perfect for checking smaller cuts or even side dishes that may be cooking simultaneously.
Investing in a reliable thermometer can substantially enhance your smoking experience, enabling you to replicate successful results consistently. Whether you are a novice or an experienced professional, having the right tools at your disposal can elevate your barbecue skills to new heights.
Optimizing Thermometer Placement for Accurate Temperature Readings
Proper placement of thermometers can significantly affect the accuracy of your readings. For probe thermometers, insert the probe into the thickest part of the meat, taking care to avoid bones and fat. The goal is to obtain a reading that accurately reflects the meat’s internal temperature.
When using a leave-in thermometer, ensure the probe is positioned correctly from the beginning. This setup allows you to monitor the meat’s progress without needing to open the smoker, which can cause temperature fluctuations that might affect cooking results.
Additionally, consider the thermometer’s placement concerning your heat source. In larger smokers, significant temperature variations may occur based on the meat’s location, so understanding your specific smoker’s characteristics is critical for optimal results. With the right thermometer type and placement, you can ensure that your meats reach safe and delectable internal temperatures every time.
The Importance of Continuous Temperature Monitoring and Adjustments
Regularly monitoring temperatures is essential when smoking meats. It’s not sufficient to set your smoker and walk away; checking the internal temperature periodically allows you to make necessary adjustments throughout the cooking process.
If you observe that the temperature is rising too high, you can adjust the vents or fuel source to bring it back down to an appropriate level. Conversely, if the temperature drops too low, adding more fuel or adjusting airflow can help stabilize it and maintain the desired cooking environment.
Investing in a high-quality thermometer can significantly simplify this process. Many modern thermometers are equipped with alarms that notify you when the meat reaches a predetermined temperature, allowing you to focus on other aspects of your barbecue. This level of monitoring ensures your smoked meats turn out perfectly every time, boosting your confidence in your smoking abilities.
Addressing Common Temperature-Related Challenges in Smoking
Even the most seasoned smokers can encounter temperature-related challenges. Recognizing these common issues and knowing how to address them can greatly improve your smoking experience and the quality of your food.
Managing Temperature Fluctuations for Consistent Results
Temperature fluctuations can pose a significant challenge during smoking. These variations may result from poor insulation, drafty conditions, or inadequate fuel management. For example, if your smoker lacks proper insulation, external temperature changes can greatly influence internal temperatures, complicating your cooking process.
To combat these issues, consider investing in a high-quality smoker with excellent insulation properties. Additionally, if you’re smoking in cooler temperatures, wrapping your smoker in a weather-resistant blanket can help maintain heat stability.
Another factor to consider is the type of fuel you use. For charcoal smokers, managing the amount and arrangement of charcoal can help sustain steady temperatures. Using quality charcoal and controlling airflow through vents can dramatically improve how effectively your smoker retains heat, effectively addressing temperature fluctuations.
Mitigating Hot Spots for Even Cooking
Hot spots within a smoker can lead to uneven cooking, causing certain areas to cook faster than others. This can be particularly frustrating when striving for perfectly smoked meats.
To combat hot spots, consider using heat deflectors or placing water pans in your smoker. These elements can help distribute heat more evenly, reducing the impact of hot spots. Additionally, rotating your meats during the smoking process can ensure even cooking throughout, resulting in a more consistent flavor and texture.
Understanding your smoker’s design and heat circulation can also help minimize hot spots. For instance, in offset smokers, positioning the meat further away from the firebox can often yield more uniform results, creating a more consistent cooking environment.
Avoiding Over-Smoking Issues
Over-smoking is a common issue that can result in bitter flavors in your meats. This often occurs when smoking at low temperatures for prolonged periods, leading to excess smoke accumulating on the meat’s surface.
To prevent over-smoking, be attentive to the type and quantity of wood you’re using. Opt for milder wood varieties, such as fruitwood, which impart subtle flavors without overwhelming the meat. Additionally, keep an eye on the smoke color emanating from your smoker. Thin, blue smoke is ideal, while thick, white smoke often indicates that you may be using too much wood, which can lead to that undesirable bitterness.
Understanding the balance between smoke and temperature is essential for a successful barbecue. Through practice and experimentation, you can discover the right combination that produces a beautifully smoked product without the harsh flavors associated with over-smoking.
Addressing Cold Spots for Safe Cooking
Cold spots can result in undercooked areas within your meat, negatively affecting both flavor and texture while posing potential food safety risks. Inconsistent temperatures often arise from poor airflow or inefficient heat distribution within the smoker.
To tackle cold spots, consider using a thermometer to monitor temperatures in different sections of your smoker. This practice enables you to identify cooler zones and make necessary adjustments, such as rotating the meat or repositioning the heat source.
Enhancing airflow within the smoker can also help alleviate cold spots. Adjusting vents and dampers can create better heat circulation. In larger smokers, utilizing multiple heat sources or adding a water pan can foster a more uniform cooking environment.
Adapting to Environmental Factors for Optimal Smoking Success
Weather conditions can significantly impact your smoking experience. Recognizing and adapting to various environmental factors is crucial for maintaining optimal temperatures throughout your cooking process.
Strategies for Smoking in Cold Weather
Smoking in colder weather presents unique challenges, including extended pre-heating times and the necessity for increased fuel. When outside temperatures drop, it can greatly influence your smoker’s internal temperature, resulting in fluctuations that complicate your cooking.
To counteract this, consider insulating your smoker with blankets or thermal jackets specifically designed for smokers. These tools can help maintain a stable cooking temperature even in frigid conditions. Additionally, it’s wise to allow extra time for the smoker to reach your desired cooking temperature, as colder ambient air can slow this process.
When smoking during winter months, selecting the right fuel source is equally important. Charcoal may struggle to maintain heat in extremely cold conditions, so opting for high-quality briquettes or lump charcoal can ensure a steadier burn. By taking these precautions, you can enjoy delicious smoked meats even in the depths of winter.
Adjusting for Challenges in Hot Weather
Conversely, smoking in hot weather can lead to rapid temperature increases, necessitating more frequent monitoring and adjustments. As the ambient temperature rises, your smoker may reach higher temperatures faster than desired, which can result in overcooked meats.
To adapt to hot weather, be vigilant about monitoring your smoker’s temperature. Utilizing a dual-probe thermometer can help you track both the internal meat temperature and the smoker temperature. Additionally, consider using more wood or charcoal to balance the increased heat, ensuring your meats are cooked perfectly without drying out.
Another effective strategy is to smoke during the cooler parts of the day, such as early morning or late evening, to avoid the harsh midday sun. This simple adjustment can significantly enhance your smoking experience and yield better results.
Mitigating Windy Conditions for Stable Cooking
Wind can greatly affect your smoker’s temperature, making it challenging to maintain a stable cooking environment. Strong gusts can cool down the smoker or disrupt airflow, resulting in temperature fluctuations that can impact your cooking process.
To mitigate these issues, consider positioning your smoker in a sheltered area, away from direct wind. If possible, use windbreaks or barriers to protect the smoker while still allowing for adequate ventilation.
Monitoring the smoker’s temperature more frequently during windy conditions is essential. Adjusting vents to control airflow can help maintain steadiness, ensuring your meats cook evenly while preserving their rich flavors. With the right adjustments, you can successfully navigate windy conditions and achieve outstanding results.
Implementing Techniques for Effective Temperature Management
Mastering temperature management techniques is crucial for achieving perfection in smoking. Several strategies can help stabilize your smoker’s environment, making the smoking process more seamless and enjoyable.
Utilizing Water Pans for Temperature and Humidity Control
Incorporating water pans is a time-honored method for managing both temperature and humidity within your smoker. Placing a pan of water inside the cooking chamber serves multiple purposes. Firstly, it adds moisture to the air, preventing meats from drying out during the lengthy cooking process. This is particularly beneficial for lean cuts that are prone to drying, such as poultry or pork loin.
Secondly, water pans help stabilize the smoker’s temperature. The water absorbs heat, creating a more even cooking environment and reducing temperature fluctuations. This method is particularly effective for long smoking sessions, as it aids in maintaining a consistent temperature throughout the cooking process.
Moreover, the steam produced from the water can enhance the flavor and tenderness of the meat, resulting in a juicy and delicious final product. This technique is favored by both seasoned pitmasters and casual cooks alike, as it can significantly elevate the quality of your smoked meats.
Mastering Vent Control for Optimal Smoking Outcomes
Effective vent control is another critical technique for maintaining proper temperature within your smoker. Vents regulate airflow, directly affecting fuel combustion and, consequently, the heat levels inside the cooking chamber.
Most smokers come equipped with adjustable vents, allowing you to fine-tune airflow. Opening the vents increases oxygen flow, which can raise temperatures, while closing them can lower temperatures. Therefore, understanding how your specific smoker responds to vent adjustments is vital for effective temperature management.
Additionally, monitoring the smoke color can provide insights into whether your vents are correctly adjusted. Thin, blue smoke indicates good airflow and combustion, while thick, white smoke often suggests that your vents may need adjustment.
Utilizing Insulation for Enhanced Temperature Stability
Employing insulation is an effective approach to managing temperature fluctuations, especially in extreme weather conditions. Insulating your smoker with blankets specifically designed for this purpose can help maintain stable heat levels, ensuring consistent cooking results regardless of external temperatures.
For example, during colder months, wrapping your smoker in insulation can minimize heat loss, guaranteeing that your cooking environment remains optimal. This technique is particularly beneficial for charcoal and offset smokers, which may struggle to retain heat in chilly conditions.
Moreover, if you use a smoker with thin metal construction, adding insulation can significantly enhance heat retention and reduce fuel consumption. Regardless of the season, having the appropriate level of insulation ensures your smoking experience is both enjoyable and efficient.
Advanced Temperature Management Techniques for Aficionados
For those looking to further refine their smoking skills, advanced temperature management methods can make a marked difference. Implementing strategies like reverse searing and sous vide can enhance the quality of your smoked meats.
Reverse Searing for Perfectly Cooked Meats
Reverse searing is an advanced technique that merges low-temperature smoking with high-heat finishing. This method involves smoking your meat at a low temperature until it nears the desired doneness, followed by a high-heat sear to create a beautiful crust.
The advantage of reverse searing lies in its ability to preserve juiciness while developing an exquisite outer layer. For instance, smoking a steak at 225°F until it reaches an internal temperature of 120°F allows for uniform cooking throughout. Following this, a quick sear on a hot grill or cast-iron skillet enhances both texture and flavor, resulting in a steak that is both tender and flavorful.
This technique is particularly favored among barbecue enthusiasts eager to impress at social gatherings and events. The combination of smoky flavor from the low-and-slow process and caramelization from searing delivers a dish that is nothing short of extraordinary.
The Importance of Resting Your Meat
Resting your smoked meats is a crucial step that is often overlooked. Throughout cooking, the juices are forced toward the center of the meat. Allowing the meat to rest lets these juices redistribute throughout, resulting in a more flavorful and moist final product.
The ideal resting period varies based on the size of the cut. For larger cuts like brisket or pork shoulder, resting for at least 30 minutes is recommended. Smaller cuts, such as ribs or chicken, typically require only about 10-15 minutes. Covering the meat with foil during this period can help retain warmth while allowing juices to settle.
This straightforward technique significantly improves the quality of your smoked meats, yielding a more succulent and enjoyable eating experience—perfect for impressing guests at your next barbecue.
Integrating Sous Vide with Smoking Techniques for Perfect Outcomes
Combining sous vide cooking with smoking is a cutting-edge method that allows for precise temperature control while enhancing flavor. Sous vide involves vacuum-sealing food and cooking it in a water bath at a carefully monitored temperature, ensuring perfect doneness every time.
By smoking the meat after sous vide cooking, you can infuse it with rich, smoky flavors without the risk of overcooking. For example, cooking a brisket sous vide at 155°F for 48 hours guarantees a tender result. Afterward, a quick smoke for a couple of hours provides that desirable smoky flavor, creating a dish that is both perfectly cooked and bursting with flavor.
This method is increasingly popular among chefs and home cooks alike, blending the best of both worlds: precision cooking and traditional smoking techniques. Whether you’re a professional chef or a backyard enthusiast, experimenting with sous vide and smoking can elevate your culinary creations to impressive new levels.
Frequently Asked Questions Regarding Smoker Temperature Control
What is the ideal temperature range for smoking meats?
The optimal smoking temperature generally falls within the range of 225°F to 250°F for most meats, ensuring even cooking and optimal flavor absorption.
How can I ensure a consistent temperature in my smoker?
To maintain consistent smoker temperatures, regularly monitor readings with thermometers, control airflow through vents, and utilize water pans to enhance humidity.
Which thermometer types work best for smoking?
Probe thermometers are excellent for long cooking sessions, while instant-read thermometers are perfect for quick checks. Leave-in thermometers provide ongoing monitoring without lifting the lid.
What measures can I take to prevent over-smoking my meat?
To avoid over-smoking, use milder wood types, pay attention to smoke color, and refrain from using excessive amounts of wood during the cooking process.
How can I address cold spots in my smoker?
To remedy cold spots, rotate your meat during cooking, adjust vent settings for improved airflow, and consider adding heat sources to those areas.
Is it possible to smoke meat in cold weather?
Yes, you can smoke meat in cold weather by insulating your smoker, allowing for longer pre-heating times, and utilizing quality fuel to maintain the desired temperature.
What is the reverse searing technique?
Reverse searing is a method that involves smoking meat at low temperatures first, followed by searing at high heat to create a crispy crust while retaining the meat’s juiciness.
How long should I allow smoked meat to rest after cooking?
Larger cuts, such as brisket, should rest for at least 30 minutes, while smaller cuts can rest for 10-15 minutes to allow juices to redistribute.
How does sous vide enhance the smoking process?
Sous vide cooking enables precise temperature control, resulting in perfectly cooked meat that can then be smoked for added flavor without the risk of overcooking.
What is the best way to use water pans in a smoker?
Place a water pan inside the smoker to add moisture and stabilize temperatures, which helps keep the meat juicy and enhances its overall flavor during the cooking process.
Connect with us on Facebook for more tips and tricks!
The Article Understanding Smoker Temperature Basics: Essential Tips appeared first on https://pitmastersarsenal.com
The Article Smoker Temperature Basics: Key Tips for Mastery Was Found On https://limitsofstrategy.com
-

Stir-Frying Vegetables: Essential Techniques for Success
Master the Art of Stir-Frying with Essential Preparation Techniques
Expert Strategies for Selecting the Freshest and Most Flavorful Vegetables
Choosing fresh, crisp vegetables is absolutely vital for mastering the technique of stir-frying vegetables effectively. The choices you make can significantly enhance not only the flavor but also the texture and nutritional value of your delightful dish. In the vibrant realm of stir-frying, colorful vegetables such as bell peppers, broccoli, carrots, and snap peas are particularly appealing due to their vivid colors and satisfying crunch. Their quick cooking times make them perfect for this culinary style, enabling them to retain essential nutrients and natural sweetness, resulting in a burst of flavor with every bite you take.
While shopping for your vegetables, always look for unmistakable signs of freshness—such as brilliant colors and firm textures, which are excellent indicators of superior produce quality. Seasonal vegetables often provide the best taste while also being more budget-friendly. For example, during the warmer months, zucchini and asparagus make wonderful additions, while root vegetables like carrots and sweet potatoes shine in the winter months. Additionally, think about the flavor profiles of the vegetables you choose; combining sweet bell peppers with the earthy taste of green beans can create a delightful balance, elevating your stir-fry experience to extraordinary levels.
Don’t hesitate to try less conventional vegetables, such as bok choy, snow peas, or even eggplant, to add an exciting twist to your dish. The key is to ensure everything is fresh, providing a satisfying crunch and enhancing the vibrant presentation that stir-frying is famous for. Embrace your creative side and enjoy exploring new flavor combinations that will make your stir-fried dishes even more enticing and memorable.
Perfect Your Precision Cutting Skills for Even Cooking
Achieving uniform cuts is essential for ensuring even cooking and creating a visually appealing stir-fry. Imagine biting into a crunchy piece of bell pepper alongside a mushy carrot—that’s definitely not the outcome you want! Begin by using a sharp knife to create precise, consistent cuts, as this not only helps maintain uniformity but also facilitates quicker cooking times.
Pay close attention to the size of your vegetable pieces; smaller cuts will cook more rapidly than larger chunks. Aim for bite-sized pieces that are easy to stir and enjoy. For example, slice bell peppers into thin strips and chop broccoli into small florets. This guarantees even cooking and enhances the overall presentation of your dish, making it visually appealing and appetizing.
Moreover, consider the textures you aim to achieve. Certain vegetables, such as onions and shallots, can be diced finely to create a robust base flavor, while others, like bell peppers, can be sliced into strips to provide a satisfying crunch. Mixing various shapes and sizes can create visual interest and a delightful eating experience, making your stir-fry not only delicious but also enjoyable to look at.
Optimize Your Vegetable Preparation for a Hassle-Free Cooking Experience
To enhance efficiency and streamline the cooking process, prepping your vegetables in advance can be a game-changer. The excitement of cooking can quickly turn into chaos if you find yourself frantically chopping while the pan heats up. By preparing all your vegetables ahead of time, you can focus on achieving the perfect stir-fry without any last-minute stress or distractions.
Start by thoroughly washing and drying your vegetables. Excess moisture can lead to steaming instead of stir-frying, which can compromise the quality of your dish. After drying, chop your vegetables and store them in separate containers. This organizational strategy allows you to easily grab what you need during cooking, ensuring a seamless cooking experience that flows smoothly from start to finish.
Additionally, consider marinating your vegetables or pre-seasoning them with a dash of salt or oil. This not only enhances flavor but also allows the seasonings to penetrate deeply, adding layers of complexity to your dish. Preparing in advance guarantees that you can whip up a delicious stir-fry effortlessly, making the entire cooking process more enjoyable and relaxed.
Explore Effective Cooking Techniques for Stir-Frying

Harness High Heat for Perfectly Stir-Fried Vegetables
High heat is your best ally when it comes to perfecting the best techniques for stir-frying vegetables. This cooking method ensures that vegetables cook rapidly, preserving their vibrant colors, crisp textures, and essential nutrients. The principle behind high-heat cooking is straightforward: fast cooking locks in flavors while preventing the loss of water-soluble vitamins that are crucial for health.
Using a wok or a large skillet, preheat your pan until it’s smoking hot before adding your oil. The oil should shimmer immediately upon contact, indicating it’s at the ideal temperature. This quick sear is essential for achieving the perfect balance of tenderness and crunch. In fact, the high heat will caramelize the natural sugars in vegetables, imparting a delightful complexity to their flavor that is simply irresistible.
Feel free to experiment with different heat levels based on the types of vegetables you are using. For instance, leafy greens like bok choy require less time and can be added towards the end, allowing them to wilt slightly while maintaining their vibrant color. With practice, you’ll master the timing and temperature, elevating your stir-fry skills and impressing your family and friends with your culinary expertise.
Cook in Batches for Optimal Texture in Your Stir-Fried Dishes
Overcrowding the pan is a common mistake that can turn your stir-fry into a soggy disappointment. Cooking in batches ensures that each piece of vegetable receives direct heat, which is vital for achieving that iconic stir-fry texture. When vegetables are packed too closely together, they steam rather than fry, leading to a less-than-desirable outcome that can ruin your dish.
Start by dividing your vegetables based on their cooking times. Hard vegetables like carrots and broccoli typically require longer cooking, while softer options like bell peppers and zucchini need less time in the pan. By cooking them separately, you can ensure that each variety reaches its ideal texture without compromising the quality of the others.
Furthermore, if you find your stir-fry becoming too crowded, it’s perfectly acceptable to remove cooked batches from the pan and set them aside. Once everything is cooked, you can combine them back in the pan for a final stir and seasoning. This cooking method not only enhances the overall quality of your dish but also provides you with better control over cooking times, resulting in a perfectly cooked stir-fry that will impress everyone at the table.
Employ Constant Stirring Techniques for Uniform Cooking

Keeping your vegetables in constant motion is crucial for achieving uniform cooking and preventing burning. The best techniques for stir-frying vegetables involve a rhythmic tossing motion that ensures all parts of the vegetables receive equal heat exposure. This technique is not merely about avoiding burnt bits; it also enhances the dish’s texture and flavor, making your stir-fry even more delectable.
Utilize a spatula or tongs to keep the vegetables moving. This continuous motion guarantees that they sear nicely without sticking to the pan. Furthermore, stirring allows the vegetables to release their natural sugars, creating a delicious caramelization effect that enhances the overall taste of the dish.
The importance of timing cannot be overstated. By maintaining vigilance and attentiveness, you can easily detect when certain vegetables are done and promptly remove them from the heat, ensuring a perfect cook on every piece. As you refine your skills, you’ll discover your rhythm, making the process both enjoyable and rewarding for you as a cook.
Maximize Heat Distribution with a Wok for Optimal Stir-Frying
A wok is an essential tool in the stir-frying process, enabling even heat distribution that is critical for successful cooking. The design of a wok, with its deep, curved shape, not only accommodates a larger volume of ingredients but also allows heat to concentrate at the bottom while maintaining cooler areas on the sides. This unique feature is perfect for stir-frying, as it enables you to control the cooking process effectively.
When using a wok, ensure that you preheat it thoroughly before adding oil. The high sides of the wok facilitate vigorous tossing, reducing the risk of ingredients spilling out during cooking. This design makes it much easier to achieve that perfect sear on your vegetables, locking in flavors and ensuring a delightful crunch that everyone will love.
If a wok is unavailable, a large skillet can serve as an excellent alternative. Just make sure that it has a heavy bottom, which allows for better heat retention. Regardless of the pan you choose, understanding the principles of heat distribution will significantly enhance your stir-frying skills, leading to consistently delicious dishes that will impress your family and friends.
Ensure Proper Preheating of Your Cooking Pan for Optimal Results
Preheating your pan is a crucial step to ensure that it reaches the ideal temperature for stir-frying. A hot pan is essential for achieving that signature sear, which locks in flavors and prevents the vegetables from becoming mushy or overcooked. This step is often overlooked, but it is vital for a successful stir-fry.
To preheat effectively, place your pan over medium-high heat and allow it to warm up for several minutes. A few drops of water should sizzle and evaporate almost instantly when the pan is adequately heated. This is your cue to add oil. Once the oil is shimmering and flowing fluidly across the surface, it’s time to introduce your prepared vegetables into the pan.
By ensuring that your pan is hot before adding the ingredients, you create an immediate sear that enhances both the flavor and texture of your vegetables. This simple yet critical practice can elevate your stir-frying from ordinary to extraordinary, allowing you to create dishes that are of restaurant-quality right in your own kitchen.
Enhance Your Stir-Fry with Flavorful Seasoning and Flavoring Techniques
Enhance Your Dish with Essential Salt and Pepper Seasoning
One of the simplest yet most effective best techniques for stir-frying vegetables involves utilizing basic seasonings like salt and pepper. While they may seem trivial, these two staples can dramatically enhance the natural flavors of your vegetables. Salt, in particular, brings out the inherent sweetness and elevates the overall taste profile of your dish.
Start with a moderate amount of salt while cooking, keeping in mind that you can always add more, but correcting over-salting can be quite challenging. Consider the type of salt you use—coarse sea salt distributes differently than table salt, so adjust accordingly. Freshly cracked pepper adds an extra layer of warmth and complexity, enhancing the dish without overpowering it.
When seasoning your vegetables, remember to do so in stages. Season early in the cooking process to allow the flavors to penetrate deeply into the ingredients. For added complexity, consider incorporating other basic flavor enhancers like garlic or ginger, which can seamlessly blend into your stir-fry and elevate it to new heights, making your dish truly memorable.
Transform Your Stir-Fry with Flavorful Sauces and Marinades
Incorporating sauces and marinades is another powerful technique that adds depth and variety to your stir-fried vegetables. Whether you’re using soy sauce, teriyaki, or a homemade concoction, these flavor enhancers can elevate an ordinary dish into a culinary masterpiece that tantalizes taste buds.
Before cooking, consider marinating your vegetables for 15 to 30 minutes. This allows the flavors to meld beautifully, giving your stir-fry a punchy taste that is hard to resist. A fantastic marinade might include soy sauce, sesame oil, and a splash of rice vinegar. This combination not only adds flavor but also tenderizes the vegetables, enhancing their texture and making your dish even more enjoyable.
Don’t shy away from experimenting with different sauces. Whether it’s a spicy Szechuan sauce or a creamy peanut sauce, the variety is endless. Just ensure you achieve a balance of flavors; if you’re adding a sweet sauce, counteract it with something savory or acidic to create a harmonious blend that will delight everyone at the table.
Balance Flavors with the Right Spices for Stir-Frying
Spices can easily elevate your stir-fried vegetables, providing a unique twist to the dish. Understanding how to use spices effectively is one of the best techniques for stir-frying vegetables. Start with a base of familiar spices such as paprika or cumin before building up with more complex flavors like five-spice powder or curry powder.
Each spice contributes its own set of flavors and aromas. Toasting spices in the pan before adding vegetables can significantly enhance their fragrance and overall taste. This method activates the essential oils within the spices, enriching the overall flavor profile of your dish and making it truly unforgettable.
As you experiment with spices, keep in mind the importance of achieving balance. A dash of spice can provide warmth, while fresh herbs can brighten the dish. For instance, adding coriander or basil at the end of cooking can offer a fresh burst of flavor that complements the other ingredients beautifully. With practice, you’ll develop the skill to customize your stir-fry dishes to suit your taste preferences and those of your guests, creating culinary delights that leave a lasting impression.
Select the Best Oils for Effective Stir-Frying
Select Oils with High Smoke Points for Optimal Cooking
Choosing the right oil is essential for achieving the best techniques for stir-frying vegetables. Oils with high smoke points, such as peanut or canola oil, are optimal because they can withstand the intense heat of stir-frying without breaking down or developing off-flavors. It’s vital to avoid oils like olive oil, which may smoke and impart undesirable flavors at high temperatures.
When selecting an oil, consider the flavor profile you wish to achieve in your dish. For instance, sesame oil provides a nutty aroma that can enhance Asian-inspired dishes, while avocado oil has a mild flavor that pairs well with most vegetables. Always pour just enough oil to lightly coat the bottom of the pan; this promotes even cooking and prevents sticking, ensuring a perfect stir-fry every time.
Feel free to experiment with blending oils as well. A mix of sesame oil and canola oil can offer the benefits of both a high smoke point and added flavor, making your stir-fry even more delightful. The right oil selection not only affects the cooking process but also contributes significantly to the overall taste of the dish, making it a vital component of your culinary creations.
Add Extra Flavor with Infused Oils for Enhanced Stir-Frying
Incorporating flavored oils into your stir-frying routine can add an extra layer of taste and excitement to your vegetables. Infused oils, such as garlic or chili oil, can transform an ordinary stir-fry into something extraordinary. These oils not only impart rich flavors but also create an aromatic experience that elevates your meal to new heights.
When using flavored oils, it’s essential to strike a balance. Start with a small amount, as they can be potent and easily overwhelm the dish. Drizzling a bit of garlic-infused oil over the stir-fried vegetables just before serving can elevate the dish and impress your guests with your culinary finesse.
Additionally, consider making your own infused oils at home. Simply heat your choice of oil with herbs or spices and let it cool. This not only gives you control over the flavors but also allows you to experiment with unique combinations tailored to your palate, making your cooking experience even more enjoyable.
Adopt Healthier Stir-Frying Options by Reducing Oil Usage
For a healthier stir-fry that doesn’t compromise on taste, minimizing oil usage is key. Aim to use just enough oil to lightly coat the vegetables, allowing their natural flavors to shine through. This approach not only reduces calorie content but also promotes a cleaner taste, aligning with a health-conscious cooking style that many people aspire to achieve.
Utilizing non-stick pans or well-seasoned woks can further reduce the amount of oil needed. These surfaces provide a natural release, preventing vegetables from sticking while allowing for effective cooking. Additionally, consider adding a splash of water or broth during cooking to create steam, which can help soften tougher vegetables without adding extra oil.
Ultimately, minimizing oil while still achieving a delicious stir-fry is entirely possible with the right techniques. Your dishes will be lighter, healthier, and still bursting with flavor, creating a delightful experience for you and your family that everyone will appreciate and enjoy.
Master Timing and Sequence for Perfect Stir-Frying
Strategically Add Vegetables According to Their Cooking Times
One of the most essential aspects of stir-frying is the timing and sequence in which you add your vegetables. This technique ensures that each ingredient is cooked to perfection, allowing for a harmonious blend of textures and flavors. Begin by categorizing your vegetables based on their cooking times—hard veggies like carrots and broccoli take longer to cook than softer options like bell peppers and snow peas.
Start your stir-fry with the vegetables that require longer cooking times. Once they begin to soften, gradually add the quicker-cooking varieties. This method ensures that no vegetable is overcooked or undercooked, which can often be a common pitfall in stir-frying that detracts from the dish’s quality.
Understanding the specific cooking times for each vegetable may take some practice. However, as you become more familiar with your ingredients, you’ll develop an instinct for how to time each addition. This mastery will elevate your stir-fry game significantly, resulting in consistently delicious dishes that impress everyone at your table.
Achieve Crisp-Tender Results with Quick Cooking Techniques
The ultimate goal of stir-frying is to achieve crisp-tender vegetables that retain their vibrant colors and nutritional benefits. This can be accomplished through quick cooking techniques, allowing the vegetables to cook through without losing their satisfying crunch.
To achieve this ideal texture, maintain high heat and swift movements. Stir-fry in small batches to ensure maximum heat exposure for each piece. A common misconception is that longer cooking times lead to better flavor; however, with stir-frying, the opposite is true—quick cooking locks in flavors while preserving the integrity of the ingredients.
Utilize a timer if necessary, especially when you’re starting. Knowing precisely how long to cook each type of vegetable will help you achieve that desirable crisp-tender texture. Over time, you’ll develop a sense for how long each variety should spend in the pan, making you a more confident and skilled cook.
Recognize the Perfect Moment to Stop Cooking for Ideal Results
Recognizing when your vegetables are perfectly cooked is an essential skill that separates a good stir-fry from a great one. Overcooking can lead to soggy, unappetizing vegetables that lose their nutrients and vibrant colors. Learn to identify the signs that indicate your vegetables are done—cooked but still crisp, showcasing a bright hue that is appealing to the eye.
A handy tip is to taste a piece or two as you cook. This practice will help you develop a sense of timing and familiarity with your vegetables. Remember that they will continue to cook slightly even after being removed from the heat, so aim to take them off when they are just shy of perfect to achieve the best results.
For leafy greens, like bok choy or spinach, a brief wilt is ideal. They only require a minute or two before they reach that perfect texture. Mastering the timing of when to stop cooking will enhance your stir-fry, ensuring that every bite is a delightful experience that everyone will savor and enjoy.
Adjust Cooking Times for Different Vegetables for Optimal Results
Understanding how to adjust cooking times for different vegetables is key to mastering stir-frying. Each type of vegetable has its own ideal cooking time, and knowing how to modify these based on size and cut is essential for achieving a perfectly cooked dish that highlights each ingredient.
For instance, consider the thickness of your vegetable slices. Thicker cuts require longer cooking times, while thinly sliced options cook quickly and evenly. As a general guideline, start with the hardest vegetables and work your way towards the softer ones in your stir-fry.
Additionally, factors such as freshness and size can affect cooking times. Fresh vegetables tend to cook faster than older ones, while larger pieces will take longer to soften. Keep a close eye on your stir-fry, and adjust your timing accordingly to ensure each ingredient shines in the final dish, making for a truly impressive meal that everyone will appreciate.
Essential Tools and Equipment for Successful Stir-Frying
Choosing Between a Wok or Large Skillet for Effective Stir-Frying
When it comes to stir-frying, using the right equipment is vital for achieving the best results. A wok or large skillet is ideal, as it provides the necessary surface area for cooking multiple ingredients evenly. The design of a wok allows for superior heat distribution, which is essential for achieving that perfect stir-fry texture that everyone adores.
If you’re using a wok, ensure it’s well-seasoned or non-stick to prevent sticking. Begin by preheating the wok until it’s smoking hot, and then add your oil. The heat should be high enough to allow for quick cooking while still enabling you to maintain control over the ingredients as they cook.
If a wok isn’t an option, a large, heavy-bottomed skillet can work just as effectively. Look for a skillet made from materials that conduct heat evenly, such as cast iron or stainless steel. With the right equipment, you’ll be able to master the art of stir-frying in no time, impressing your family and friends with your culinary skills and delicious creations.
Essential Utensils to Enhance Your Stir-Frying Experience
Having the right utensils on hand can significantly improve your stir-frying experience. Essential tools include a spatula, tongs, and a ladle, all of which will help you effectively stir and toss your vegetables during cooking. A sturdy spatula allows for easy flipping and mixing, while tongs provide the control needed for handling delicate ingredients.
Invest in high-quality utensils that can withstand high heat and are ergonomically designed for comfort. These tools will make it easier to manage your stir-fry, promoting an enjoyable and efficient cooking experience that you’ll look forward to every time.
Consider keeping a bowl nearby to hold your prepped vegetables or a plate for the finished product. Organization is key in the kitchen, and having everything within reach will streamline your cooking process, ensuring that you can focus on creating a delicious stir-fry without any distractions or delays.
Prepare Your Cooking Surface for Optimal Stir-Frying Results
Preparing your cooking surface is one of the most fundamental steps in the stir-frying process. A hot, well-oiled surface ensures that the vegetables cook evenly and don’t stick to the pan, which is vital for achieving the desired texture and flavor. Start by preheating your wok or skillet over medium-high heat.
Once the surface is hot, add a thin layer of oil. The oil should shimmer immediately, indicating it’s at the right temperature for cooking. It’s crucial to avoid adding vegetables to a cold pan, as this can lead to steaming rather than frying, resulting in a suboptimal texture that can be disappointing.
Maintaining a clean and organized cooking surface is equally important. Any residue from previous cooking can affect the flavors of your current dish. Take the time to wipe down your utensils and cooking area to ensure that the flavors shine through, allowing you to create the best stir-fry possible that will impress everyone at the table.
Combine Stir-Fried Vegetables with Other Delicious Ingredients
Enhance Your Stir-Fry by Incorporating a Protein Source
Incorporating proteins into your stir-fried vegetables can create a balanced and satisfying meal that is both nutritious and delicious. Whether you choose chicken, beef, tofu, or shrimp, adding protein not only enhances flavor but also boosts the nutritional content of your dish, making it more wholesome and filling.
When adding protein, consider cooking it separately first to ensure it reaches the correct temperature and texture. Once the protein is cooked, remove it from the pan and set it aside while you stir-fry your vegetables. This way, you can ensure that both components are cooked to perfection, creating a harmonious blend of flavors and textures that will please everyone at the table.
To create a cohesive dish, toss the protein back in with the vegetables towards the end of cooking. This ensures that everything is heated through without overcooking the vegetables, resulting in a vibrant stir-fry that is as nutritious as it is flavorful, leaving your guests craving more of your culinary creations.
Incorporate Grains and Noodles for a Heartier Meal Experience
Adding grains or noodles to your stir-fry not only makes for a heartier meal but also enhances the overall texture and experience. Consider using rice, quinoa, or various types of noodles as a base for your stir-fried vegetables and protein, creating a satisfying and filling dish that everyone will love.
When incorporating grains or noodles, ensure they are cooked beforehand. For noodles, choose varieties that suit your taste—such as rice noodles, udon, or egg noodles. Toss the cooked noodles into the stir-fry during the final few minutes of cooking to allow the flavors to meld beautifully, creating a harmonious dish that is both satisfying and delicious.
Don’t hesitate to experiment with different combinations to keep things exciting. For instance, combine brown rice with a medley of vegetables and tofu for a nutrient-packed meal that is both fulfilling and delightful. The addition of grains or noodles elevates your stir-fry from a side dish to a complete meal that everyone will enjoy and appreciate.
Frequently Asked Questions About Stir-Frying Techniques
What is the best oil for stir-frying vegetables?
High smoke point oils like peanut, canola, or avocado oil are ideal for stir-frying, as they can withstand the high temperatures needed without breaking down or smoking.
How can I achieve crisp-tender vegetables in my stir-fry?
To achieve crisp-tender vegetables, cook them quickly over high heat, ensuring they remain in motion in the pan to prevent sogginess and maintain their delightful crunch.
Can I stir-fry frozen vegetables effectively?
Yes, you can stir-fry frozen vegetables, but make sure to thaw and dry them beforehand to avoid excess water in your dish, which can lead to unwanted steaming and a less appealing texture.
How do I know when my vegetables are done cooking in a stir-fry?
When vegetables are bright in color and crisp to the bite, they are typically done. Tasting them is the best way to check for doneness, ensuring they’re cooked just right for the perfect stir-fry.
What types of vegetables are best for stir-frying?
Vegetables like bell peppers, broccoli, snap peas, and carrots are excellent choices for stir-frying due to their quick cooking times and vibrant flavors that enhance any dish.
Should I marinate vegetables before stir-frying for better flavor?
Yes, marinating vegetables before stir-frying can greatly enhance their flavor and texture. A simple marinade of soy sauce and garlic works exceptionally well to elevate your dish and make it more enjoyable.
Can I add sauces to my stir-fry for additional flavor?
Absolutely! Adding sauces like soy sauce, teriyaki, or sweet and sour sauce can significantly enhance the flavor of your stir-fry. Just be sure to add them towards the end of cooking to maintain their integrity and flavor.
Is it necessary to use a wok for stir-frying?
While a wok is ideal for stir-frying due to its shape and heat distribution capabilities, a large skillet can also work effectively for this cooking method, achieving great results.
How can I adjust cooking times for different vegetables in my stir-fry?
Cooking times can be adjusted based on the size and type of vegetables. Harder vegetables should be added first, while softer ones can follow to ensure everything cooks perfectly without becoming overcooked or mushy.
What should I do if my stir-fry is too oily?
If your stir-fry is too oily, consider adding a bit of broth or water to the pan to help balance the oiliness, or serve it over rice to absorb excess oil and enhance the overall dish.
Connect with us on Facebook for the latest updates and culinary tips!
The post Best Techniques for Stir-Frying Vegetables: A Universal Guide appeared first on https://cookinggods.com
The Article Techniques for Stir-Frying Vegetables: Your Ultimate Guide Was Found On https://limitsofstrategy.com
-
Iranian Pilaf: A Step-by-Step Cooking Guide for Fragrance
Essential Elements for Mastering Authentic Iranian Pilaf
Choosing the Ideal Rice for Your Irresistible Pilaf
To truly master how to cook a fragrant Iranian pilaf, it is vital to start with the right selection of rice. The choice of rice profoundly impacts the texture and aroma of your pilaf, making it a fundamental aspect of creating an authentic dish. High-quality long-grain rice varieties, particularly Basmati, are essential for achieving that signature pilaf texture. Renowned for its nutty flavor and fluffy consistency, Basmati rice features long, slender grains that are aromatic and adept at absorbing flavors while keeping their form. Ensure that you source your rice from trusted suppliers to guarantee quality and purity, as these factors significantly influence the success of your pilaf.
The preparation of your rice begins with a thorough rinse under cold running water, an essential practice to eliminate excess starch. Rinsing until the water runs clear indicates that the grains are ready for cooking. Following this, soaking the rice for at least 30 minutes is highly recommended. Soaking not only enhances the texture but also significantly reduces cooking time, allowing the rice to hydrate for even cooking—an indispensable aspect of crafting an exceptional pilaf.
Moreover, feel free to experiment with various rice blends or multi-grain combinations to enhance the nutritional value of your fragrant Iranian pilaf. Integrating whole grains like quinoa or barley not only introduces a delightful flavor twist but also boosts the dish’s health benefits. Ultimately, selecting the right rice establishes a solid foundation for a superb pilaf, enabling it to become the highlight of your meal.
Crafting a Luxurious Medley of Spices and Herbs
The essence of a fragrant Iranian pilaf is rooted in the deliberate selection of spices and herbs. A thoughtful combination of flavors can elevate a simple rice dish into a culinary masterpiece. Traditional Iranian cuisine highlights essential spices such as cumin, turmeric, and cinnamon. Each spice contributes its unique profile: the warm, earthy tones of cumin blend harmoniously with the subtle sweetness of cinnamon, while turmeric offers vibrant color and notable health benefits. To unlock their full potential, toast these spices before cooking; this crucial step releases their essential oils, significantly enriching both aroma and taste.
Fresh herbs are equally critical for creating an aromatic profile. Frequently used herbs in Iranian pilafs, such as dill, mint, and parsley, add refreshing bursts of flavor. Dill particularly complements rice beautifully, while mint contributes a bright note that elevates the entire dish. When incorporating fresh herbs, finely chop them and add them towards the end of the cooking process to retain their vibrant color and flavor.
Don’t hesitate to introduce unconventional spices into your pilaf. For instance, saffron is a luxurious touch that provides a unique flavor and a stunning golden hue. Infuse saffron threads in a small amount of warm water before integrating them into your dish to preserve their delicate qualities during cooking. Ultimately, the meticulous selection and balance of spices and herbs will be instrumental in mastering how to cook a fragrant Iranian pilaf, resulting in a delightful array of flavors that transport you to the heart of Iran.
Elevating Flavor with Unique Ingredients
Enriching your Iranian pilaf with additional ingredients can dramatically enhance its flavor profile and nutritional value. Traditional elements such as nuts and dried fruits not only provide texture but also create a lovely contrast to the savory components of the dish. Common nut varieties include almonds, pistachios, and walnuts, which contribute a satisfying crunch. Lightly toasting these nuts before incorporating them into the pilaf amplifies their nutty aroma and deepens their flavor, making them a standout feature of the dish.
Dried fruits like barberries, raisins, and apricots also make excellent additions, offering a pleasant sweet-tartness that beautifully balances the savory spices. Notably, barberries are a staple in Persian cuisine, bringing vibrant color and a tangy flavor to the dish. To ensure optimal integration, soak these fruits briefly in warm water to plump them before adding them to the pilaf, guaranteeing a seamless blend with the rice.
If you aim to incorporate protein into your Iranian pilaf, consider adding tender meats such as chicken or lamb. Marinating these proteins with spices beforehand allows their flavors to infuse the dish. Alternatively, for a vegetarian option, chickpeas or lentils can be added, providing both protein and substance. Carefully layering these additional components during the cooking process ensures even cooking, allowing the flavors to meld beautifully in your how to cook a fragrant Iranian pilaf.
Mastering Preparation Techniques for Impeccable Pilaf

Achieving the Optimal Texture through Rice Soaking
Soaking rice is a crucial step in preparing the ultimate Iranian pilaf, as it significantly influences both texture and cooking time. This process involves submerging the grains in water for a specified period, typically ranging from 30 minutes to several hours. This is particularly important for varieties like Basmati rice, which is celebrated for its long grains and delicate flavor. Soaking allows the rice to absorb water, softening the grains and minimizing the risk of breakage during cooking.
By soaking the rice, you also reduce the cooking time, since the grains have already soaked up moisture. This ensures they cook evenly and achieve that desired fluffy texture instead of becoming sticky or mushy. For best results, a minimum soaking time of 30 minutes is advised, but soaking for up to two hours can yield even better results. Some culinary enthusiasts even suggest soaking overnight for the ideal rice, depending on personal preference and the specific recipe.
Additionally, consider seasoning the soaking water with a pinch of salt or infusing it with spices to further enhance the flavor of the rice before it enters the cooking pot. This initial step lays a strong foundation for a beautifully aromatic pilaf and is vital for those eager to master the art of cooking a fragrant Iranian pilaf.
Unlocking Rich Flavors through Toasted Spices
Toasting spices is an essential culinary technique that enhances the full range of flavors in your Iranian pilaf. This straightforward yet impactful method amplifies both the aroma and taste of spices, transforming them into bold, fragrant components of the dish. Begin by selecting your preferred spices, such as cumin, turmeric, and cinnamon, then place them in a dry pan over low to medium heat.
As you toast the spices, remain attentive; they can easily burn and develop a bitter taste if left unattended. Stirring frequently ensures even toasting. This process usually takes a few minutes, during which the spices will darken slightly and release their essential oils, filling your kitchen with an irresistible aroma. Once fragrant, promptly remove them from the heat to prevent over-roasting.
Incorporating these toasted spices into your pilaf at the appropriate time is crucial for achieving optimal flavor. For best results, add them at the start of the cooking process, allowing them to infuse into the oil used for sautéing onions or other aromatic ingredients. This technique guarantees that the spices permeate every grain of rice, resulting in a well-rounded flavor throughout. Toasting spices is a key step in creating a perfectly flavored and fragrant Iranian pilaf, enriching the dish with warmth and depth.
Layering Techniques for Superior Flavor Integration
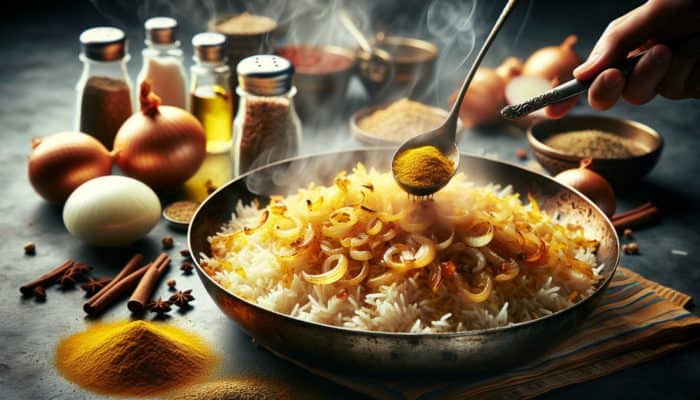
Layering is a technique that plays a critical role in achieving well-cooked and flavorful Iranian pilaf. Unlike basic rice cooking methods that may simply mix all ingredients together, layering promotes better heat distribution and flavor integration. Start by sautéing your aromatics, such as onions, in oil or butter until they turn golden and fragrant. This foundational layer of flavor is essential as it creates the base of your pilaf.
Once your aromatics are ready, sprinkle in the spices and stir them over the onions for about a minute to release their fragrances. Next, add the soaked rice, allowing it to coat in the aromatic mixture. To ensure even distribution, gently fluff the rice with a spatula instead of stirring vigorously, which could break the grains.
One effective layering technique is the ‘dough lid’ method. By placing a layer of dough around the pot’s rim, you can create a seal that traps steam inside, facilitating even cooking. Alternatively, using a clean kitchen towel placed over the rice before covering the pot with a lid serves a similar purpose. This ensures that each grain of rice cooks evenly and absorbs the delightful flavors from the lower layers of the dish. Mastering the art of layering is essential for learning how to cook a fragrant Iranian pilaf that is both visually stunning and packed with flavor.
Exploring Diverse Cooking Methods for Authentic Results
Traditional Stovetop Techniques for Genuine Pilaf Preparation
The stovetop method remains the classic approach for preparing Iranian pilaf, allowing for complete control over the cooking process. Begin by preparing your ingredients, which include the soaked rice, spices, and any additional components. Start by heating a generous amount of oil or butter in a heavy-bottomed pot over medium heat. Once the oil is hot, add your sautéed onions, allowing them to caramelize slightly before introducing the spices.
Next, gently fold in the soaked rice, ensuring it is well-coated with the mixture of spices and onions. At this stage, it’s crucial to add the right amount of water or broth—typically, a 1:2 ratio of rice to liquid. Bringing the mixture to a boil is essential for kicking off the cooking process. Once it reaches a rolling boil, reduce the heat to low and cover the pot with a tight-fitting lid.
Letting the rice simmer gently for 20-30 minutes allows it to absorb the liquid fully. Avoid lifting the lid during this time, as the steam generated is vital for cooking the rice evenly. After the cooking time is complete, it’s advisable to let the pilaf rest off the heat for an additional 10 minutes. This resting period helps to evenly distribute any remaining moisture throughout the rice, enhancing its fluffy texture. This classic stovetop method is fundamental for mastering how to cook a fragrant Iranian pilaf with rich flavors and delightful aromas.
Oven Baking for the Perfect Crispy Tahdig
Oven baking presents a terrific alternative to stovetop cooking, particularly for those who crave a crispy tahdig, the prized layer of crispy rice that forms at the bottom of the pot. Begin by preheating your oven to 180°C (350°F). Follow the initial steps of sautéing your onions and toasting your spices, then mix in the soaked rice as before. However, instead of cooking on the stovetop, transfer the mixture to an ovenproof dish.
Add the appropriate amount of water or broth, ensuring the grains are fully submerged. Cover the dish tightly with a lid or foil to trap steam during the cooking process. Baking the dish in the preheated oven allows the rice to cook evenly while the bottom layer develops that sought-after crispy tahdig. Bake for approximately 45-60 minutes, or until the rice is tender and the liquid has been fully absorbed.
For an even crispier tahdig, consider removing the lid during the final 10-15 minutes of baking. This allows the bottom layer to crisp up beautifully, adding a delightful crunch that contrasts with the fluffy rice above. Once baked, let the pilaf rest briefly before serving, allowing the flavors to meld together. Oven cooking is an enjoyable way to master the art of cooking a fragrant Iranian pilaf, allowing the richness of the ingredients to shine while providing an impressive presentation.
Embracing Slow Cooking for Flavorful Convenience
The slow cooker offers a convenient, hands-off approach to preparing Iranian pilaf, making it an excellent choice for busy weeknights or gatherings. To begin, gather your ingredients and prepare them as you would for traditional methods. Sauté the onions and spices in a skillet, then transfer this mixture to the slow cooker. Add the soaked rice along with the required water or broth, ensuring all ingredients are well combined.
Set the slow cooker to the appropriate setting—low or high, depending on your available time. Cooking on low for approximately 4-6 hours allows flavors to develop gradually, while cooking on high will yield tender rice in about 2-3 hours. One added benefit of using a slow cooker is the ability to incorporate proteins like chicken or lamb from the start, allowing them to tenderize as they cook alongside the rice.
When using a slow cooker, it’s important to adjust the liquid accordingly, as these appliances retain moisture more effectively than traditional methods. Monitoring the dish as it cooks is advisable, checking for doneness as the cooking time approaches its conclusion. The convenience and ease of a slow cooker make it a compelling option for learning how to cook a fragrant Iranian pilaf, allowing you to focus on other tasks while the dish comes together beautifully.
Utilizing the Pressure Cooker for Rapid Cooking
For those seeking a quick and efficient method to prepare Iranian pilaf, the pressure cooker is a true game-changer. This technique drastically reduces cooking times while ensuring the rice remains fluffy and flavorful. Begin by preparing your ingredients as you would for other methods. Sauté your onions, toast your spices, and add the soaked rice to the pot.
The key to effective pressure cooking is maintaining the correct liquid ratio. Generally, a 1:1.5 ratio of rice to water is ideal, as the pressure cooker requires less liquid than stovetop cooking. After adding the liquid, secure the lid tightly and set the pressure cooker to high. Cooking times will vary depending on your specific model, but it typically takes 7-10 minutes for the rice to cook through.
Once the cooking cycle is complete, allow the pressure to release naturally for the best results. This step permits any residual steam to continue cooking the rice gently. Carefully remove the lid and fluff the pilaf with a fork before serving, ensuring that each grain is separate and infused with flavor. The pressure cooker method provides a practical solution for those eager to master the art of cooking a fragrant Iranian pilaf without spending extensive time in the kitchen.
Microwave Method for Quick and Effortless Preparation
For those pressed for time, microwave cooking offers a rapid method for preparing Iranian pilaf without sacrificing flavor. Begin by combining your soaked rice with the sautéed onions and spices in a microwave-safe bowl. Ensure the bowl is large enough to accommodate the rice as it expands during cooking. Add the necessary liquid, ensuring it fully covers the rice.
Loosely cover the bowl with a microwave-safe lid or plate, permitting steam to escape during cooking. Microwave on high for approximately 10-15 minutes, checking for doneness and adjusting the time as needed. Stirring halfway through can help ensure even cooking and prevent sticking.
While the microwave method may not deliver the same depth of flavor as traditional techniques, it serves as a quick solution for meals. Consider enhancing the dish with fresh herbs or toppings after microwaving to introduce a burst of freshness. The microwave method is an invaluable technique for mastering the art of cooking a fragrant Iranian pilaf, especially for those in need of a rapid yet satisfying meal.
Perfecting the Tahdig Layer for the Ultimate Crispy Experience
Grasping the Importance of the Tahdig Layer
Tahdig, the revered crispy rice layer at the bottom of an Iranian pilaf, is often considered the crown jewel of the dish. This golden layer is cherished for its delightful crunch, providing a beautiful textural contrast to the fluffy rice above. Understanding the significance of tahdig is essential for anyone aiming to refine their culinary skills in preparing Iranian dishes.
Traditionally, tahdig is achieved by selecting a cooking method that encourages the rice to develop a crispy crust on the bottom. This can be accomplished through stovetop cooking, oven baking, or even in a pressure cooker, though each method requires meticulous attention to detail. The process involves using ample oil or butter, which not only enhances flavor but also facilitates that desired crispiness.
The ideal tahdig is golden brown, with a texture that balances crunchiness and slight chewiness. Attaining this balance may take practice, but the rewards are certainly worth the effort. Many culinary enthusiasts advocate using a thin, flat lid or a dough barrier to trap steam and distribute heat evenly, ensuring that the rice cooks perfectly and results in a stunning layer of tahdig. Understanding tahdig’s characteristics is vital for mastering how to cook a fragrant Iranian pilaf, as it embodies the essence of this beloved dish.
Key Techniques for Creating Perfect Tahdig
Mastering the art of crafting perfect tahdig involves several essential techniques that aspiring cooks should be familiar with. Firstly, using a non-stick pot or pan is crucial, as this prevents the rice from sticking and facilitates easy removal of the tahdig once cooked. Start by heating a generous amount of oil or butter in the pot before adding the rice. This not only helps in crisping but also infuses the rice with rich flavor.
Another effective technique involves carefully layering the rice. Once the rice is added, gently flatten the surface with a spatula to create an even layer. This ensures that heat distributes uniformly across the rice, promoting even cooking. Covering the pot with a tight-fitting lid, ideally lined with a kitchen towel to capture steam, creates a steaming effect that aids in developing that crispy bottom layer.
Timing is everything—allow the rice to cook for the recommended duration, usually around 20-30 minutes, depending on the chosen cooking method. Towards the end, you can check for doneness by gently peeking under the rice with a spatula. Once golden and crispy, carefully invert the pot onto a serving platter, allowing the tahdig to slide out gracefully. Employing these techniques will help ensure that your tahdig consistently becomes a highlight in how to cook a fragrant Iranian pilaf.
Addressing Common Challenges in Achieving Tahdig
Even experienced cooks may encounter challenges when striving for the perfect tahdig. Common issues include uneven cooking, burnt rice, or tahdig that refuses to release from the pot. Thankfully, practical solutions exist for each of these problems. If the tahdig is burning, it usually indicates that the heat is set too high. Lowering the heat and allowing the rice to cook slowly can prevent this issue.
For rice that sticks to the pot, consider the quality of your cooking vessel. Opting for a non-stick pot is highly recommended; if using a traditional pot, generously coating it with oil can aid in preventing sticking. Moreover, allowing the rice to rest after cooking can help loosen the tahdig, making it easier to lift out.
If the tahdig appears less crispy than desired, it may require additional time or a higher cooking temperature. Gently lifting the lid to check on the rice can provide insight into how much longer it needs to cook. With practice and careful attention, troubleshooting tahdig challenges will become second nature, thereby enhancing your overall skills in cooking a fragrant Iranian pilaf.
Experimenting with Unique Variations of Tahdig
Diving into variations of tahdig can add an exciting twist to your Iranian pilaf, allowing for creativity and personalization. While the traditional tahdig made from rice is beloved, consider experimenting with alternative ingredients to introduce variety. A popular variation is potato tahdig, where thinly sliced potatoes are layered at the bottom of the pot before adding rice. This method yields crispy potato slices that provide a unique flavor and texture.
Another inventive option involves using bread, such as lavash or pita, to create a crust. Placing a layer of bread beneath the rice not only adds a delightful crunch but also absorbs the pilaf’s flavors, making it an irresistible accompaniment. This variation can be particularly appealing for those looking to showcase new textures in their meal presentation.
For the adventurous cook, incorporating vegetables into the tahdig, such as sliced eggplant or zucchini, can add an exciting depth of flavor. These vegetables can be lightly sautéed before layering beneath the rice, resulting in a tahdig that is as colorful as it is delicious. Exploring variations of tahdig allows you to express your culinary creativity while mastering the art of cooking a fragrant Iranian pilaf, adding new dimensions to this cherished dish.
Enhancing Flavor Profiles for Unforgettable Culinary Experiences
Infusing Saffron for a Touch of Luxury
Incorporating saffron into your Iranian pilaf is a luxurious enhancement that elevates both the flavor and visual appeal of the dish. Renowned for its vibrant color and unique taste, saffron is often hailed as the world’s most expensive spice due to its labor-intensive harvesting process. To infuse your pilaf with saffron, begin by steeping the threads in a small amount of warm water or stock. This release of color and flavor is essential for achieving the beautiful golden hue that saffron is famous for.
Once the saffron is infused, mix the saffron water into the cooking liquid to ensure that its distinctive qualities permeate the rice. The subtle floral notes of saffron enhance the spices and herbs within the pilaf, creating a well-rounded flavor profile. Beyond its culinary merits, saffron offers various health benefits, including antioxidant properties, making it a valuable addition to your dish.
When using saffron, it’s crucial to prioritize quality. Seek out high-grade saffron from reputable suppliers, as this can significantly impact the final dish. Typically, a small pinch is sufficient; a little goes a long way. Mastering the incorporation of saffron is key to understanding how to cook a fragrant Iranian pilaf that dazzles both the palate and the eye.
Enhancing Flavors with the Essence of Rose Water
Rose water is a cherished ingredient in Iranian cuisine, celebrated for its delicate floral aroma and flavor. Adding rose water to your pilaf can create a subtly enchanting taste that elevates the dish to new heights. This ingredient works particularly well when paired with saffron, enhancing the overall aroma of the pilaf.
To effectively incorporate rose water, use it sparingly—a few teaspoons usually suffice, added towards the end of the cooking process. This timing ensures that the aromatic qualities of rose water remain intact. It’s also wise to avoid excessive use, as too much can overpower the dish. Striking a balance between the floral notes and the savory elements of the pilaf is crucial for achieving harmonious flavor.
Rose water isn’t limited to traditional pilafs; consider using it to flavor accompanying dishes or sauces. Its versatility allows for a creative fusion of flavors that can significantly transform your meal. Exploring the use of rose water is essential for mastering the art of cooking a fragrant Iranian pilaf, infusing your dish with an irresistible and aromatic appeal.
Balancing Sweet and Savory for Culinary Harmony
Crafting a delicious Iranian pilaf involves skillfully balancing sweet and savory elements. The addition of dried fruits, such as raisins, apricots, or barberries, introduces a natural sweetness that beautifully complements the savory spices. This balance is crucial in creating a well-rounded dish that excites the palate.
When incorporating sweet elements, consider the overall composition of the pilaf. For instance, if using sweet dried fruits, balance their flavors with the richness of toasted nuts or the warmth of spices like cumin and cinnamon. This interplay of flavors can create a symphony that elevates the dish to a gourmet level.
To achieve this balance, add the dried fruits towards the end of the cooking process. This timing allows them to plump up and integrate into the pilaf without losing their texture. The ultimate goal is to create a dish where the sweet and savory elements engage in harmonious dialogue, each enhancing the other. Mastering the art of balance is a crucial aspect of learning how to cook a fragrant Iranian pilaf that delights and surprises all who partake.
Elevating Serving and Presentation Techniques for Your Pilaf
Artfully Presenting Your Pilaf for Maximum Appeal
Plating your Iranian pilaf with care significantly enhances its visual allure, transforming it into an eye-catching centerpiece for any meal. When serving, consider the colors and textures of the dish, opting for a wide, shallow serving platter that showcases the fluffy rice alongside the golden tahdig. Gently fluff the pilaf with a fork before transferring it to the platter, ensuring that each grain remains separate and fluffy.
Incorporating fresh herbs as a garnish can introduce a vibrant pop of color and a hint of freshness to the dish. Chopped parsley, mint, or dill can be sprinkled generously over the pilaf, creating a visually appealing contrast against the golden rice. For an added touch, consider using edible flowers, which not only elevate the aesthetic but also introduce a hint of floral notes that can complement the dish’s flavors.
To further enhance the presentation, consider serving the pilaf alongside colorful accompaniments, such as a vibrant salad or a tangy yogurt sauce. These additions can add depth and complexity, inviting guests to explore different flavor combinations. A beautifully plated Iranian pilaf not only demonstrates your culinary skills but also invites enjoyment and appreciation from those at your table, embodying the essence of how to cook a fragrant Iranian pilaf.
Complementing Your Pilaf with Ideal Accompaniments
Pairing your Iranian pilaf with suitable side dishes and sauces can significantly elevate the overall dining experience. Traditional accompaniments include grilled meats, stews, or a tangy yogurt sauce, all of which beautifully complement the flavors of the pilaf. For a classic pairing, consider serving the pilaf alongside kebabs, marinated and grilled to perfection, creating a harmonious blend of flavors and textures.
A refreshing salad featuring ingredients like cucumbers, tomatoes, and radishes can provide a crisp contrast to the richness of the pilaf. Drizzle it with a lemon vinaigrette to enhance its flavors and cut through the richness of the tahdig. Another popular option is to serve the pilaf with a side of kashk-e bademjan, a delicious eggplant dip that adds depth and complexity to the meal.
For those looking to add a touch of creaminess, a yogurt sauce is an excellent accompaniment. Mixing yogurt with herbs like mint and dill creates a refreshing dip that perfectly balances the savory notes of the pilaf. These accompaniments are essential in learning how to cook a fragrant Iranian pilaf that delights the senses and creates a well-rounded dining experience.
Properly Storing and Reheating Leftover Pilaf for Freshness
Properly storing and reheating Iranian pilaf is crucial for retaining its flavor and texture. If you have leftovers, allow the pilaf to cool to room temperature before transferring it to an airtight container. Proper storage extends the dish’s freshness and prevents it from drying out. When stored in the refrigerator, the pilaf can last for up to 3 or 4 days.
When reheating, consider either the stovetop or microwave method. For stovetop reheating, add a splash of water or broth to the pilaf in a pan, covering it with a lid to create steam. This helps rehydrate the rice and prevents it from becoming dry. Alternatively, if using a microwave, place the pilaf in a microwave-safe dish, add a small amount of water, and cover loosely to allow steam to escape. Heat in short intervals, stirring occasionally, until heated through.
It’s advisable to avoid reheating pilaf multiple times, as this can affect its quality and taste. Instead, aim to store and consume the pilaf within a few days for optimal flavor. Mastering the art of storing and reheating is essential for learning how to cook a fragrant Iranian pilaf that remains delicious and enjoyable long after its initial preparation.
Innovative Garnishing Techniques for a Stunning Presentation
Employing creative garnishing techniques can add flair to your Iranian pilaf, enhancing both its appearance and flavor. While fresh herbs are a classic choice, consider using toasted nuts or seeds to introduce texture and crunch. Sprinkling slivered almonds or pistachios over the top creates an attractive contrast against the fluffy rice, enhancing the visual appeal of your dish.
Another option for garnishing is to incorporate pomegranate seeds, which lend a vibrant pop of color and a refreshing burst of sweetness. These bright seeds can be scattered generously over the pilaf, enhancing aesthetics while also adding a delightful flavor. Edible flowers can also be a lovely touch, particularly for special occasions, creating a stunning presentation that captivates the eye.
For a dramatic finish, consider drizzling a flavored oil over the pilaf, such as infused olive oil with herbs or spices. This adds a touch of elegance and enhances the overall flavor profile. By incorporating these garnishing techniques, you’ll create a visually appealing and delicious dish that showcases your skills in cooking a fragrant Iranian pilaf and delights everyone at the table.
Frequently Asked Questions About Cooking Iranian Pilaf
What is the best type of rice for preparing Iranian pilaf?
Basmati rice is the ideal selection for Iranian pilaf due to its long grains, nutty flavor, and aromatic qualities, ensuring a fluffy and fragrant dish.
Can I create a vegetarian version of Iranian pilaf?
Absolutely! You can make vegetarian Iranian pilaf by omitting meat and including chickpeas or lentils for protein, along with an array of vegetables and spices.
What’s the secret to achieving perfectly crispy tahdig?
To achieve crispy tahdig, use a non-stick pot, preheat the oil, layer the rice evenly, cover with a tight-fitting lid, and cook on low heat to allow the bottom layer to crisp perfectly.
Is saffron necessary for Iranian pilaf?
While saffron adds a unique flavor and stunning color to Iranian pilaf, it’s not strictly necessary. You can still create a delicious dish without it by utilizing other spices.
Can I substitute brown rice for traditional Iranian pilaf?
Yes, brown rice can be used, but it requires a longer cooking time and more liquid than white rice. Adjust your recipe accordingly for the best results.
How should I store leftover pilaf to maintain its freshness?
Leftover Iranian pilaf should be cooled to room temperature, transferred to an airtight container, and stored in the fridge for up to 3-4 days to maintain its freshness.
What are some popular accompaniments for Iranian pilaf?
Common accompaniments include grilled meats, tangy yogurt sauces, fresh salads, or kashk-e bademjan, all of which beautifully enhance the overall dining experience.
Is it possible to prepare Iranian pilaf in advance?
Yes, you can make Iranian pilaf ahead of time. Just reheat it thoroughly before serving to ensure it remains delicious and fluffy.
Which spices are essential for making Iranian pilaf?
Essential spices for Iranian pilaf include cumin, turmeric, and cinnamon, which create a warm, aromatic flavor profile that defines the dish.
How can I prevent the rice from sticking together while cooking?
To prevent rice from sticking, rinse it thoroughly before cooking, soak it, and refrain from stirring excessively during cooking to keep the grains separate.
Join us on Facebook for more culinary tips!
The post How to Cook a Fragrant Iranian Pilaf: A Step-by-Step Guide appeared first on https://cookinggods.com
The Article Fragrant Iranian Pilaf: Step-by-Step Cooking Guide Was Found On https://limitsofstrategy.com