Your cart is currently empty!
Category: Cooking Tips
-

BBQ Communities for Beginners: Your Ultimate Online Guide
Launch Your BBQ Journey: An In-Depth Guide for Newbies in the USA
Embarking on your journey into the world of BBQ is more than just cooking; it’s a thrilling adventure brimming with mouthwatering flavors and unique culinary experiences that can be especially exhilarating for those at the beginning of their journey. As you delve into this rich culinary landscape, filled with diverse techniques and scrumptious recipes, it can seem a bit daunting initially. Fortunately, a plethora of resources tailored specifically for novices exists, making the transition smoother. Among these, the leading online BBQ communities emerge as essential resources, simplifying the BBQ process while nurturing a sense of belonging among those passionate about grilling and smoking meats.
Discover the BBQ Community: Your Pathway to Flavorful Connections
New BBQ enthusiasts can immerse themselves in a warm and welcoming online atmosphere, where they can learn and enhance their skills alongside a supportive network of like-minded individuals. Many beginners often find themselves overwhelmed by the vast array of techniques, equipment, and recipes available in the BBQ universe. However, communities designed specifically for newcomers offer a sanctuary where individuals can pursue their passion in an encouraging and friendly environment. Within these communities, members are encouraged to share their triumphs and challenges, fostering a transparent atmosphere that transforms the learning experience into a collaborative adventure. This spirit of camaraderie not only ignites motivation but also empowers newcomers to evolve from uncertain cooks into confident grillers.
Moreover, these vibrant communities frequently host forums and discussion boards, allowing newcomers to ask questions without fear of criticism or judgment. Beginners are invited to seek guidance on various topics, ranging from selecting the finest cuts of meat to mastering the intricate details of smoker settings. The abundance of accessible information, coupled with the generosity of seasoned members eager to share their expertise, makes these platforms indispensable for anyone keen to embark on their BBQ adventure.
Essential Features of Engaging BBQ Communities
These online forums are rich with an array of features tailored specifically for beginners, including comprehensive tutorials, interactive Q&A sessions, and vibrant recipe-sharing platforms. At the heart of these BBQ communities lies a treasure trove of resources designed to guide newcomers through their grilling journeys. Detailed tutorials break down complex BBQ techniques into manageable steps, simplifying the learning process for beginners as they hone essential skills. Live Q&A sessions offer a unique opportunity for members to interact directly with BBQ experts, enabling them to seek clarification on culinary challenges or gain valuable tips that can elevate their grilling abilities.
Additionally, the recipe-sharing section serves as a goldmine for novices. Members can upload their favorite recipes, accompanied by personal anecdotes and helpful tips, creating a dynamic database of culinary inspiration for everyone to explore. This collaborative spirit not only enriches the community but also emphasizes the joy of sharing experiences and flavors, reinforcing the belief that BBQ is best enjoyed together with friends and family.
Encouraging Engagement and Participation in the BBQ Community
A thriving community relies on ongoing challenges and events designed to keep members engaged and eager to learn. One of the most thrilling aspects of being part of a BBQ community is the multitude of engagement opportunities available. Frequent challenges inspire members to experiment with new techniques and ingredients while fostering a friendly sense of competition. These events not only motivate skill enhancement but also cultivate friendships among participants, creating bonds that transcend the culinary realm.
Furthermore, virtual meetups, live cook-alongs, and theme-based BBQ nights significantly enhance member interaction. These events cultivate an environment where beginners can learn from one another while embracing the social aspects of BBQ culture. This continuous engagement keeps the learning experience fresh and exciting, ensuring that members remain dedicated to advancing their skills and sharing their BBQ journeys with others.
Uncover the Smoke & Sizzle Forum: The Ultimate Hub for Smoking Aficionados

For those eager to dive into the art of smoking meats, the Smoke & Sizzle Forum is the ultimate destination. Here, beginners can deeply immerse themselves in the fundamentals of smoking, guided by experienced pitmasters and fellow enthusiasts. This lively community provides a wide range of resources aimed at helping newcomers navigate the intricacies of smoking meats with confidence and enthusiasm.
Crucial Insights for Beginners: Initiating Your Smoking Experience
The Smoke & Sizzle Forum features dedicated segments designed to educate beginners on the subtleties of smoking meats. This encompasses everything from learning about the various types of wood that contribute distinctive flavors to mastering the art of maintaining optimal temperatures throughout the smoking process. Acquiring this foundational knowledge is vital for novices who aspire to elevate their BBQ skills and create delectable smoked dishes that impress family and friends.
Expert tips shared within the forum often dispel common myths, such as the ideal timing for wrapping a brisket or the most effective techniques for achieving a perfect smoke ring. By accessing these invaluable insights, beginners can sidestep typical pitfalls and position themselves for success as they embark on their smoking journey.
Selecting the Ideal BBQ Equipment: A Comprehensive Beginner’s Guide
The vast array of BBQ equipment can be quite overwhelming, especially for newcomers uncertain about what they genuinely require. The Smoke & Sizzle Forum offers detailed guides that assist new smokers in making informed decisions about purchasing their first smoker or grill. Community members actively share their experiences with different brands and models, offering insights into what works best for various cooking styles and personal preferences.
This peer-to-peer advice proves invaluable, allowing beginners to cut through the confusion and invest in equipment that matches their specific needs and budgets. Community members frequently recommend starter kits that include essential tools, easing the transition for novices as they embark on their BBQ journeys without overspending.
Recipe Sharing: A Collaborative Space for Culinary Discovery

The recipe-sharing section of the forum is bustling with activity as members eagerly post their favorite smoking recipes. These submissions range from simple smoked chicken to more intricate dishes such as smoked ribs, allowing beginners to gradually expand their culinary repertoire. The lively exchange of recipes not only inspires creativity but also encourages members to experiment with new flavors and techniques, enriching their BBQ experiences.
Feedback from fellow members enhances the experience, as individuals share tips on how to modify recipes to cater to personal preferences or dietary restrictions. This collaborative environment nurtures a sense of community where everyone, regardless of skill level, can contribute and learn from one another, significantly enhancing the overall BBQ experience.
Overcoming Common Smoking Challenges: A Resourceful Guide for Novices
Smoking meats can be a complex art form, presenting its own set of challenges. The troubleshooting section of the forum is a treasure trove for beginners facing common issues, such as avoiding overcooking or under-smoking their meats. Members actively engage in discussions, offering solutions based on their personal experiences and insights gained throughout their BBQ journeys.
This shared wisdom not only empowers individuals to overcome obstacles but also fosters a culture of support within the community. New smokers leave the forum feeling more equipped to tackle challenges confidently, knowing they have the backing of fellow BBQ enthusiasts who understand the learning curve involved in mastering smoking techniques.
Exciting Community Events and Challenges for Engagement
To maintain enthusiasm and excitement, the Smoke & Sizzle Forum hosts regular events and challenges specifically designed for beginners. These challenges often revolve around specific themes, such as “best smoked brisket” or “creative use of leftovers,” prompting members to think creatively and push their culinary limits.
Participation in these events not only hones skills but also fosters camaraderie as members share their cooking journeys and celebrate each other’s accomplishments. The sense of achievement that comes from completing a challenge serves as a significant confidence booster for beginners, solidifying their passion for BBQ and smoking.
Enroll in the Grill Master Academy for Structured Learning and Skill Enhancement
The Grill Master Academy stands out as a premier destination for aspiring BBQ enthusiasts, providing a wealth of resources specifically tailored for beginners. With a strong focus on structured learning and community support, this platform offers a comprehensive approach to BBQ education that is both accessible and engaging for novices.
Organized Online Courses for New BBQ Enthusiasts
Central to the Grill Master Academy are its series of online courses designed specifically for BBQ beginners. These courses encompass a wide range of topics, from essential safety practices to advanced techniques that experienced grillers may utilize. Each module is thoughtfully crafted to be engaging and informative, ensuring that novices absorb critical knowledge while enjoying the learning process.
The combination of video tutorials, written materials, and quizzes enables learners to progress at their own pace, making the experience both accessible and enjoyable. This structured approach guarantees that beginners build a solid foundation upon which they can confidently expand their BBQ expertise.
Interactive Workshops for a Hands-On Learning Experience
Interactive workshops are a cornerstone of the Grill Master Academy, providing invaluable opportunities for beginners to learn from seasoned instructors in real-time. These live sessions allow participants to practice techniques under expert guidance, receive immediate feedback, and ask questions as they arise. This hands-on approach empowers beginners to elevate their skills by directly applying what they learn in a supportive environment.
The immersive nature of these workshops fosters a deeper understanding of BBQ techniques, ensuring a smoother and more enjoyable transition from novice to skilled griller. By participating in these interactive sessions, beginners gain confidence and practical experience that significantly enhances their overall BBQ journey.
Certification Program: A Pathway to Attaining BBQ Mastery
The Grill Master Academy also offers a certification program, providing a tangible goal for beginners eager to validate their skills. This certification not only serves as a mark of accomplishment but also motivates learners to delve deeper into the world of BBQ and refine their techniques.
By completing the certification, beginners gain confidence in their abilities and a sense of achievement that encourages them to explore more complex methods. The credibility that accompanies certification can also elevate a beginner’s status within BBQ communities, facilitating connections with other enthusiasts and industry professionals.
Experience the BBQ Pit Boys Network for Visual Learning and Culinary Inspiration
The BBQ Pit Boys Network serves as a vibrant hub for BBQ enthusiasts, especially those initiating their culinary journey. With a focus on visual learning and community support, this platform offers a unique blend of entertainment and education that positions it as an excellent resource for novices.
Engaging Video Tutorials Specifically Designed for Beginners
At the core of the BBQ Pit Boys Network is an extensive library of video tutorials crafted specifically for novices. These tutorials encompass a diverse range of topics, from basic grilling techniques to more sophisticated recipes that are sure to impress friends and family. Visual learning proves particularly effective in the culinary arts, as it allows beginners to witness techniques in action.
The BBQ Pit Boys expertly break down each process, showcasing everything from marinating techniques to achieving the perfect sear. This engaging format ensures that learners can easily replicate the steps at home, fostering confidence in their abilities and encouraging them to experiment with their own BBQ creations.
A Supportive Community for Aspiring BBQ Enthusiasts
The BBQ Pit Boys Network thrives on its sense of community, where members actively support one another in their culinary journeys. Newcomers can engage with seasoned BBQ enthusiasts eager to share their tips and tricks, creating an environment conducive to learning and growth. This supportive network fosters a culture where beginners feel comfortable asking questions and sharing their experiences.
The camaraderie that develops within the community encourages members to grow together, celebrating each other’s successes while learning from challenges faced along the way. This collaborative spirit makes the BBQ Pit Boys Network an ideal place for novices to enhance their skills and connect with like-minded individuals.
Dynamic Event Calendar for Engagement and Continuous Learning
To keep the BBQ spirit alive, the BBQ Pit Boys Network features a robust event calendar filled with virtual BBQ gatherings and competitions. These events offer beginners numerous opportunities to showcase their skills, learn from others, and engage in friendly competition. Whether it’s a themed cook-off or an instructional live demonstration, these events foster a sense of excitement and community involvement.
Participating in these events can significantly enhance a beginner’s skills and culinary knowledge while providing a platform for them to connect with fellow BBQ enthusiasts. This engagement not only enriches the learning experience but also strengthens the bonds within the community.
Connect with the Smokin’ Hot BBQ Group for Expert Mentorship
The Smokin' Hot BBQ Group is an excellent option for beginners seeking to connect with experienced pitmasters and fellow novices. With an emphasis on mentorship and hands-on learning, this community provides a comprehensive approach to BBQ education that is both supportive and informative.
A Dedicated Beginner’s Corner for Resources and Guidance
The Beginner’s Corner of the Smokin’ Hot BBQ Group serves as a welcoming space where newcomers can access the essential resources they need to kickstart their BBQ journey. This area is specifically designed to offer mentorship, guidance, and a sense of community, ensuring that beginners feel supported as they learn the intricacies of BBQ.
Experienced pitmasters frequently contribute to this section, providing advice based on years of practice and expertise. The camaraderie established here creates a nurturing environment where novices can confidently ask questions and seek guidance, knowing they are supported by those who have successfully navigated the same learning curve.
Engaging Weekly Challenges to Promote Skill Development
Weekly challenges are a highlight of the Smokin’ Hot BBQ Group, encouraging participation and experimentation among members. These challenges are designed to be both enjoyable and educational, providing beginners with opportunities to practice their skills in a low-pressure environment. By participating in these challenges, members can explore new recipes, techniques, and flavor profiles while sharing their results with the community.
This not only enhances their skill set but also nurtures a sense of camaraderie as members cheer each other on, creating a supportive network that inspires growth and creativity in BBQ practices.
Recipe of the Month: Focused Learning and Collaboration
Each month, the Smokin’ Hot BBQ Group spotlights a specific recipe crafted with beginners in mind. This “Recipe of the Month” initiative enables newcomers to focus on a manageable dish, providing step-by-step guidance to ensure success. Members can experiment with these recipes in their kitchens and share their experiences with the community.
The collective discussion surrounding the recipe encourages collaboration and feedback, allowing everyone involved to refine their techniques and expand their culinary horizons. This initiative not only enhances individual skills but also fortifies community bonds as members celebrate each other’s culinary adventures.
BBQ Basics Workshops for a Hands-On Learning Experience
The Smokin’ Hot BBQ Group also hosts interactive workshops centered on the fundamentals of BBQ. These workshops provide beginners with hands-on experience in essential techniques, covering everything from proper seasoning to mastering various cooking methods. Led by experienced pitmasters, these workshops offer personalized learning experiences where novices can ask questions, practice techniques, and receive immediate feedback.
The supportive atmosphere cultivates confidence in their abilities, fostering a passion for BBQ that can last a lifetime. By actively participating in these workshops, beginners are equipped with the necessary tools to succeed and thrive in their BBQ pursuits.
Monthly Pitmaster Q&A Sessions for Direct Learning Opportunities
The Pitmaster Q&A sessions are invaluable resources within the Smokin’ Hot BBQ Group, where newcomers can engage directly with seasoned BBQ professionals. These monthly live sessions provide an open forum for members to ask pressing questions, whether about specific techniques or general BBQ practices. The insights shared during these sessions can significantly enhance a beginner’s understanding of BBQ, offering tailored advice that resonates with their individual journey.
This unique opportunity to connect with experts fosters a sense of community and enriches the learning experience for all involved. By participating in these sessions, beginners can gain confidence and deepen their knowledge, furthering their passion for the art of BBQ.
Join the BBQ Enthusiasts Hub for Comprehensive Support and Resources
The BBQ Enthusiasts Hub is a vibrant online community where beginners can find support, resources, and camaraderie. With a focus on inclusivity and learning, this platform is designed to assist novices in their BBQ journeys, making it an ideal space for anyone looking to enhance their grilling skills.
Getting Started with BBQ: Comprehensive Guides for Newcomers
The BBQ Enthusiasts Hub offers in-depth guides that serve as excellent starting points for newcomers. These resources cover a variety of topics, from selecting the right cuts of meat to understanding diverse grilling techniques. For beginners, the multitude of options can be overwhelming; however, the Hub’s guides simplify the decision-making process by providing valuable insights into meat selection, preparation methods, and cooking techniques.
By breaking down these essential steps, beginners can confidently embark on their BBQ journey, ensuring they have a solid foundation upon which to build their skills. The accessible nature of these guides empowers novices to explore their culinary creativity while minimizing confusion and uncertainty.
Constructive Community Feedback: A Platform for Growth and Improvement
Community feedback is a pivotal element of the BBQ Enthusiasts Hub, where beginners can share their results and receive constructive criticism. This collaborative environment fosters growth and improvement, encouraging novices to refine their skills based on the insights and experiences of others. Members are encouraged to upload photos of their BBQ creations, accompanied by descriptions of their processes.
Experienced members often provide feedback, offering suggestions on how to enhance techniques or improve flavors. This interactive approach not only boosts confidence but also cultivates a supportive community spirit that enriches everyone’s BBQ journey, making it a mutually beneficial experience.
Seasonal BBQ Tips: Enjoying the BBQ Experience All Year Round
To keep the BBQ spirit alive throughout the year, the BBQ Enthusiasts Hub offers seasonal tips and recipes tailored for beginners. This includes guidance on how to adapt BBQ techniques to accommodate various weather conditions or seasonal ingredients. Whether it involves learning how to smoke meats during colder months or grilling light, fresh dishes in the summer, the Hub provides accessible advice that encourages beginners to enjoy BBQ all year round.
By emphasizing simplicity, these seasonal tips ensure novices can explore their culinary creativity without feeling overwhelmed. This approach not only enhances their cooking skills but also allows them to embrace the joy of BBQ regardless of the season, transforming BBQ into a year-long culinary celebration.
Frequently Asked Questions About BBQ for Beginners
What advantages come with joining an online BBQ community?
Becoming part of an online BBQ community provides invaluable resources, support, and camaraderie among fellow enthusiasts, making the learning journey enjoyable and enriching for everyone involved.
How can beginners effectively choose the right BBQ equipment?
Beginners can identify suitable BBQ equipment by participating in forums, reading reviews, and seeking recommendations from experienced members within BBQ communities, ensuring they make informed decisions based on real experiences.
What types of recipes should BBQ beginners focus on initially?
BBQ beginners should prioritize simple recipes that demand minimal techniques, such as grilled chicken, smoked vegetables, or basic ribs, to effectively build their confidence and skills in the kitchen.
Are certification opportunities available for BBQ enthusiasts?
Yes, various BBQ communities offer certification programs that validate skills and knowledge, motivating beginners to advance their culinary expertise while networking with other enthusiasts and professionals in the field.
How crucial is community support for BBQ novices?
Community support is essential for BBQ novices, as it provides encouragement, constructive feedback, and shared experiences that greatly enhance the learning process and foster growth among members.
What types of challenges can beginners participate in within BBQ communities?
Beginners can engage in community-driven BBQ challenges, often focusing on specific techniques or recipes, which encourage skill development and creativity in their cooking practices while fostering a sense of community.
Can beginners learn smoking techniques through online resources?
Absolutely! Many online BBQ communities offer tutorials, forums, and resources specifically dedicated to teaching smoking techniques designed for beginners to grasp easily and effectively.
What should newcomers prioritize when starting their BBQ journey?
Beginners should focus on mastering basic grilling and smoking techniques, understanding different cuts of meat, and experimenting with simple recipes to efficiently build their confidence and skills as BBQ enthusiasts.
How can I receive constructive feedback on my BBQ outcomes?
Members of BBQ communities can post pictures and descriptions of their BBQ creations, allowing others to provide constructive feedback along with suggestions for improvement and personal growth within their culinary journey.
What seasonal BBQ tips can assist beginners in their culinary journey?
Seasonal BBQ tips may include adapting recipes to utilize seasonal ingredients, understanding how various weather conditions affect cooking, and exploring different grilling methods suitable for changing climates, ensuring year-round enjoyment.
Connect with us on Facebook for more BBQ tips and insights!
The Article Top Beginner-Friendly BBQ Communities Online: A Guide appeared first on https://pitmastersarsenal.com
The Article Beginner-Friendly BBQ Communities: Your Online Guide Was Found On https://limitsofstrategy.com
-

BBQ Cooking Times: A Beginner’s Essential Guide
Explore an Extensive Selection of BBQ Meats to Enhance Your Grilling Journey
Indulge in Delectable Beef Cuts That Will Transform Your BBQ Experience
When picturing an ideal BBQ, the selection of beef cuts plays a crucial role, as they can elevate your grilling experience into a delightful culinary journey. Noteworthy cuts such as brisket and ribs are particularly renowned for their unique flavor profiles and require specific cooking techniques to fully reveal their delicious potential. The allure of brisket lies in its exceptional marbling, which calls for a low-and-slow cooking method. By maintaining a cooking temperature of 225-250°F for approximately 1 to 1.5 hours per pound, the connective tissues gradually break down, resulting in tender, juicy beef that practically dissolves in your mouth. Conversely, ribs can be transformed into a mouthwatering delight with the right combination of spice rubs and sauces; baby back ribs generally need about 5-6 hours at 225°F, while spare ribs can take up to 7 hours. Mastering these cooking techniques is essential for any BBQ enthusiast who wishes to impress friends and family with their grilling prowess.
The significance of a skillfully crafted seasoning rub cannot be emphasized enough. A well-seasoned brisket can profoundly enhance your BBQ experience, making the wait truly worthwhile. Utilizing the “Texas Crutch” technique—wrapping the brisket in foil after several hours of cooking—can effectively retain moisture and expedite cooking time while ensuring that the prized melt-in-your-mouth tenderness is preserved. This approach is vital for achieving the finest flavor and texture in your BBQ meats, allowing you to serve dishes that will be the talk of the gathering.
Unleash the Bold Flavors of BBQ Pork Cuts
Pork occupies a revered spot in the BBQ landscape, featuring beloved staples like pulled pork and pork chops that consistently delight taste buds. Pulled pork, typically sourced from the shoulder or butt, necessitates an extended cooking period to break down tough connective tissues, yielding the tender, juicy texture that BBQ aficionados crave. Cooking at a low temperature of around 225°F can require between 8 to 12 hours, depending on the cut’s size. The result is a mouthwatering, easily shredded meat that serves as a perfect filling for sandwiches or sliders, making it a family favorite for gatherings and celebrations.
In contrast, pork chops represent a quicker option for grilling. They can be grilled directly over high heat, taking approximately 4-6 minutes per side, based on thickness, making them an excellent choice for those seeking a speedy yet satisfying BBQ meal. Gaining a solid understanding of the varying cooking times for different pork cuts is essential to avoiding the pitfalls of overcooking or undercooking, both of which can lead to a disappointing meal experience that falls short of expectations.
Seasoning is pivotal in amplifying the flavor of pork dishes. A perfectly balanced sweet and tangy sauce can enhance the inherent flavors without overwhelming them, creating a delightful culinary experience. For those new to BBQ, mastering the timing for cooking pork cuts can significantly elevate your grilling skills and leave your guests thoroughly impressed with the delicious outcomes that you present.
Achieve Grilling Greatness Through Chicken Mastery
Chicken is an incredibly versatile protein that adapts seamlessly to various grilling methods, from whole birds to wings, each requiring unique cooking times to guarantee both safety and flavor. A whole chicken generally takes about 1.5 to 2 hours at 350°F to ensure the internal temperature reaches the critical safety threshold of 165°F. Achieving this temperature is essential for food safety and ensures a succulent, well-cooked bird that is sure to please every palate.
For individual chicken cuts, such as thighs or breasts, the cooking time is considerably shorter—approximately 20-30 minutes, depending on size. Chicken wings are best cooked over high heat for around 20-30 minutes, resulting in a delightfully crispy exterior. The secret to preparing delicious chicken lies in consistently monitoring the internal temperature with a meat thermometer, guaranteeing that your dish is not only safe to consume but also remains juicy and flavorful throughout the cooking journey.
Brining chicken prior to grilling can yield fantastic results, as it helps infuse moisture and flavor into the meat. When BBQing chicken, grasping the necessary cooking times for various cuts is crucial to achieving a perfectly cooked meal without drying out the meat, ensuring a delightful experience for everyone gathered around the table.
Relish the Distinctive Flavors of Lamb Cuts for BBQ Aficionados

Lamb is an exquisite and rich option that requires careful attention to cooking times to achieve optimal tenderness and flavor. Cuts like shoulder and chops have distinct time requirements that must be adhered to for the best results. A lamb shoulder is ideally prepared using a slow cooking technique at 250°F for about 4-6 hours, allowing the meat to become incredibly tender, which has made it a favorite among BBQ enthusiasts everywhere.
Conversely, lamb chops are more akin to preparing steaks and can be grilled quickly over high heat for about 4-5 minutes per side, depending on their thickness. Understanding the correct cooking durations for lamb is essential to avoid drying out the meat while capturing the unique flavor that makes lamb a standout choice for BBQ lovers seeking variety.
Utilizing marinades rich in herbs and spices can beautifully complement lamb. Classic pairings, such as fresh rosemary and garlic, can elevate the dish to extraordinary heights. Mastering the cooking times and techniques for lamb will undoubtedly enhance your BBQ skill set, impressing your guests and adding delightful variety to your grilling repertoire.
Crucial BBQ Techniques to Perfect Your Grilling Skills
Master Direct Heat Grilling for Quick and Flavorful Results
Direct heat grilling is an exceptional technique for swiftly cooking popular items like burgers, hot dogs, and chicken breasts. This method involves placing food directly over the flame, resulting in a beautifully seared exterior and an irresistible smoky flavor that enhances the overall dining experience. Timing is critical with this approach, as most items only require a few minutes on each side. For instance, burgers typically need approximately 4-5 minutes per side to achieve a medium-rare result, while chicken breasts can take around 6-8 minutes to reach perfection.
A common pitfall when grilling over direct heat is the inability to manage the heat effectively, which can lead to uneven cooking and less-than-satisfactory results. Always preheat your grill to ensure that you achieve the perfect sear and prevent food from sticking, which is essential for a successful BBQ gathering.
For those aiming to achieve various levels of doneness, it is crucial to comprehend the specific cooking times associated with each type of meat. Employing a meat thermometer will help you attain your desired doneness without risking overcooking, ensuring that every bite is cooked to absolute perfection and bursting with flavor.
Harness Indirect Heat Grilling for Larger Cuts of Meat

Indirect heat grilling is the preferred method for larger cuts of meat that require extended cooking times. This technique involves positioning the food away from the direct flame, allowing it to cook slowly and evenly. For instance, a whole chicken or a brisket is best cooked using this method, typically at temperatures ranging from 225°F to 275°F, which fosters a richer flavor profile to develop.
Cooking times will vary based on the size of the meat, but a general guideline is approximately 30-40 minutes per pound. This approach not only ensures that the meat cooks evenly but also allows it to retain its natural juices, resulting in an exceptionally tender and flavorful final product that will impress your guests at any BBQ gathering.
To further enhance the flavor during indirect grilling, consider adding wood chips to your fire for that perfect smoky finish. This additional layer of flavor combined with extended cooking time will create a BBQ experience that is both memorable and delicious, leaving your guests craving more and eager for your next grilling adventure.
Embrace the Art of Smoking Meat for BBQ Mastery
Smoking is a revered BBQ technique that involves cooking meat at low temperatures over an extended period, often incorporating wood chips to infuse unique flavors into the meat. This process can take several hours—ranging anywhere from 5 to 12 hours—depending on the type of meat and the desired intensity of smoke flavor. The low and slow method allows the meat to absorb the smoke while becoming tender and incredibly flavorful.
Brisket and pork shoulders are prime candidates for smoking, typically cooked at a temperature of around 225°F for an extended duration. This slow cooking method permits the smoke to permeate the meat, creating a rich and complex flavor profile that is simply unmatched. Though smoking may seem daunting to some, the delicious results are well worth the effort, rewarding your patience with an extraordinary BBQ experience that will be remembered long after the last bite.
The choice of wood used for smoking can significantly influence the flavor profile, with options like hickory, mesquite, and applewood being particularly popular among BBQ enthusiasts. Understanding the balance of cooking time, temperature, and smoke flavor will yield a BBQ experience that impresses any crowd and elevates your grilling game to new heights of excellence.
Achieving BBQ Perfection Through Temperature Control
Understanding Grill Temperature for Optimal Cooking Success
Maintaining the correct grill temperature is crucial for a successful BBQ. Different types of meat have specific optimal temperature ranges for cooking, ensuring both safety and flavor. For instance, beef is best cooked around 130-160°F for medium-rare to medium doneness, while chicken must reach a minimum internal temperature of 165°F to be safe for consumption, making temperature control essential for delivering delicious results that satisfy every guest.
Utilizing a reliable grill thermometer is vital for monitoring temperature, allowing you to make necessary adjustments as needed. Additionally, understanding the type of grill you are using—whether it is gas, charcoal, or electric—can enhance your mastery of temperature control and improve your grilling outcomes significantly, leading to perfectly cooked meats every time.
Hot and cold spots on the grill can lead to uneven cooking, which can be frustrating for any BBQ enthusiast. Rotating your meat and being mindful of where you place it on the grill can help mitigate these issues, ensuring everything cooks uniformly and to perfection, thus elevating your BBQ skills to the next level of expertise and satisfaction.
Ensuring Meat Temperature for Safety and Quality
Utilizing a meat thermometer to check internal temperatures is crucial for ensuring food safety and reaching the desired doneness. Each type of meat has specific temperature thresholds that must be met. For example, ground meats should reach 160°F, beef steaks can vary from 130°F for rare to 160°F for well-done, while pork should reach 145°F. Understanding these temperature benchmarks is essential for achieving the perfect BBQ.
When measuring temperature, it is essential to insert the thermometer into the thickest part of the meat, avoiding contact with bones, which can provide inaccurate readings. Recognizing these specific temperatures not only ensures safety but also helps achieve the desired texture and juiciness of your meats, significantly enhancing the overall quality of your BBQ meals and leaving a lasting impression on your guests.
For those new to BBQ, investing in a high-quality meat thermometer can be life-changing, allowing you to cook with confidence and precision. Achieving the right internal temperature is one of the most critical aspects of BBQ success, making it an essential tool in your grilling arsenal that you will rely on time and time again.
Adjusting to Environmental Conditions for Consistent Cooking Results
Ambient conditions, including weather and altitude, can significantly influence cooking times and outcomes. For example, windy days can cause temperature fluctuations, necessitating adjustments to cooking times. Cooking at higher elevations can lead to longer cooking durations due to lower air pressure, meaning that meats may require additional time to reach their ideal cooking temperature.
If you’re grilling outdoors during colder months, consider wrapping meats in foil to help retain heat and moisture. Conversely, on hot summer days, it may be beneficial to adjust your cooking strategy to prevent overcooking or drying out your dishes, ensuring that every BBQ session is successful and enjoyable for all involved.
Being aware of these environmental factors can enable you to plan your BBQ more effectively, leading to consistent results regardless of the conditions. This knowledge can enhance your confidence and skill as a BBQ enthusiast, creating unforgettable meals every time you gather around the grill with friends and family.
Utilizing Temperature Probes for Precise Cooking
Employing accurate temperature probes can assist in monitoring cooking temperatures precisely, ensuring that your meat is cooked evenly across different zones of the grill. Temperature probes can be either wired or wireless, allowing you to keep an eye on the temperature from a distance without having to hover over the grill, thus freeing you to attend to other tasks.
Many advanced models come equipped with alerts that notify you when your meat has reached the desired temperature, enabling you to focus on other aspects of your BBQ while ensuring perfect results. This technology can be particularly advantageous when smoking meats, as maintaining consistent temperatures is critical during long cooking sessions, ensuring that everything is cooked to perfection and delighting your guests with every bite.
Investing in high-quality temperature probes can significantly enhance your BBQ experience, providing you with greater control over the cooking process and increasing the likelihood of a successful cook every time you fire up the grill for a memorable gathering.
Techniques for Adjusting Temperature During Grilling
Mastering techniques such as vent control and heat deflection is essential for fine-tuning grill temperatures and achieving optimal cooking results. In charcoal grills, adjusting the vents can increase or decrease airflow, subsequently altering the temperature levels to your desired setting.
Adding or removing coals can also help regulate heat effectively. For gas grills, utilizing multiple burners can create zones of varying temperatures, allowing for both direct and indirect cooking methods to be executed simultaneously. This flexibility can greatly enhance your BBQ capabilities and ensure that all items are cooked to perfection.
Becoming familiar with these techniques will empower you to achieve the right cooking temperatures consistently, whether you are grilling burgers or smoking a succulent brisket. This mastery can elevate your BBQ skills and impress your guests, making every gathering a delicious success that they will remember fondly.
Avoid Common BBQ Mistakes for an Unforgettable Experience
Prevent Overcooking Your Meats for Maximum Enjoyment
Overcooking is a frequent pitfall that can ruin even the finest cuts of meat, diminishing their flavor and texture. Understanding and meticulously monitoring cooking times is crucial for preventing dryness and ensuring that your BBQ experience remains enjoyable. For instance, brisket can easily become tough if cooked for too long, while chicken can dry out quickly if left unattended, resulting in disappointing meals that no one wants to experience.
To avoid the overcooking trap, it is essential to invest in a reliable meat thermometer. Regularly checking the internal temperature will aid you in determining when the meat is just right, allowing you to serve dishes that are juicy and flavorful. Additionally, techniques such as wrapping meat in foil during the final stages of cooking can help retain moisture, creating a juicy and satisfying outcome that everyone will appreciate.
Learning to recognize visual and textural cues can also prevent overcooking. For instance, meat should feel firm yet springy when done, and juices should run clear. Mastering these indicators will enhance your BBQ success and boost your cooking confidence, ensuring that every meal you serve is a hit with your guests.
Avoid Undercooking for Health and Safety
Undercooking poses serious health risks, particularly with poultry and pork, making it essential to ensure that meats reach safe internal temperatures. For chicken, this means cooking it to at least 165°F, while pork should reach 145°F to ensure safety, flavor, and texture. These temperature requirements are crucial for preventing foodborne illnesses that can detract from your BBQ enjoyment.
To guarantee thorough cooking, utilizing a meat thermometer is essential. Understanding the specific safe cooking temperatures for each type of meat allows you to prepare food safely while also retaining its flavor and appealing texture, making your BBQ gatherings enjoyable and safe for everyone involved.
Visual cues can also assist in determining doneness. For example, chicken should no longer appear pink in the center, and juices should run clear when pierced. Avoiding undercooked meats is crucial for a safe and enjoyable BBQ experience that reflects your dedication to quality cooking and ensures that all your guests leave satisfied.
Manage Inconsistent Heat for Even Cooking Results
Managing hotspots and cold spots on the grill can significantly impact cooking results, leading to uneven doneness and frustrating outcomes. Understanding your grill’s mechanics and conducting test runs can help identify these areas, allowing you to adjust your cooking strategy accordingly. This knowledge is vital for achieving consistent results every time you fire up the grill.
Rotating your food during cooking can help mitigate these issues, ensuring more even heat distribution and consistent results that will impress your guests. Furthermore, keeping the lid closed while cooking can help maintain steady temperatures, enhancing your results and improving your cooking efficiency.
Adjusting your placements based on identified hotspots can lead to a more successful grilling experience, ultimately honing your BBQ skills over time and making you a more confident cook who delivers delicious meals every time.
The Importance of Using the Right BBQ Tools
Choosing the right utensils and equipment is vital for enhancing BBQ results and preventing damage to both food and grill. For instance, using metal tongs instead of forks helps prevent juices from escaping, keeping your meat moist and flavorful. This simple switch can have a significant impact on the quality of your BBQ dishes and elevate your grilling game to new heights.
Investing in a quality set of grilling tools can dramatically improve your overall experience. Consider tools like grilling baskets for smaller items, which can prevent food from falling through the grates, and sharp knives for easy slicing and serving. Having the right tools on hand can streamline your cooking process, making it more enjoyable and efficient.
Avoid using non-BBQ-specific tools, as they can lead to accidents and damage during your grilling sessions. Ensuring you have the right tools at your disposal will make your BBQ process smoother and more enjoyable, allowing you to focus on creating delicious meals for your friends and family while showcasing your grilling expertise.
Essential Tools and Accessories for an Exceptional BBQ Experience
Reliable Thermometers for Accurate Cooking
Thermometers are indispensable for obtaining accurate temperature readings, guiding cooking times, and ensuring food safety throughout your BBQ. Digital instant-read thermometers provide quick and precise readings, allowing you to monitor your meat without losing valuable heat that could impact the cooking process.
Investing in a quality thermometer can greatly enhance your BBQ experience, offering peace of mind that your food is cooked to perfection. Some advanced models even feature Bluetooth capabilities, enabling you to monitor temperatures remotely, which is incredibly convenient during longer cooking sessions, freeing you to engage with your guests.
Understanding how to properly use and calibrate your thermometer is also essential to ensure accuracy. Regularly checking its functionality can ensure that you are always cooking with confidence and precision, minimizing the risk of undercooked or overcooked meats that could disappoint your guests.
Timers to Keep Your Cooking on Schedule
Setting timers is crucial for managing long cooks, ensuring that you check on your food at appropriate intervals. An easy-to-use kitchen timer can help you keep track of cooking times, especially for lengthy smokes or roasts, preventing overcooking or burning that can ruin your carefully prepared dishes.
Utilizing timers can also help you avoid common pitfalls in BBQ, allowing you to focus on other tasks while still ensuring that your food receives the attention it deserves. Having timers in place is invaluable for a smooth cooking process that keeps everything on schedule.
Consider using timers that offer multiple settings, enabling you to manage several items simultaneously. This feature can be particularly helpful during busy BBQ gatherings, ensuring that everything is cooked to perfection and ready to serve at just the right moment, delighting your guests with every bite.
Grilling Baskets for Versatile Cooking Options
Grilling baskets are a versatile tool for handling smaller items like vegetables and seafood that require frequent turning to achieve even cooking. These baskets allow for better airflow around the food, ensuring that your items are grilled to perfection without falling through the grates, enhancing your BBQ experience and ensuring that every bite is packed with flavor.
Moreover, these baskets can enhance flavor by allowing food to be coated in marinades during grilling, which can intensify the overall taste profile of your dishes. Investing in a high-quality grilling basket can significantly improve your BBQ experience, ensuring that no delicious morsel is left behind and that everything is enjoyed to the fullest.
Additionally, they simplify cleanup, minimizing mess and ensuring smooth transitions between dishes, making your grilling session more enjoyable overall. This added convenience lets you focus on enjoying quality time with friends and family rather than worrying about the cooking process and cleanup afterward.
Versatile Tongs for Safe and Efficient Grilling
Tongs are an essential tool for safely handling hot food on the grill. They offer a firm grip, allowing for easy flipping and turning, which is crucial for preventing food from sticking and ensuring even cooking across all items. Selecting the right tongs can significantly enhance your BBQ experience.
Using tongs instead of forks helps retain juices, resulting in a more succulent final product that showcases your grilling skills. Opting for high-quality, heat-resistant tongs can provide better maneuverability and control during cooking, making the process smoother and more efficient.
Tongs come in a variety of designs, so choosing a pair that feels comfortable in your hand can also contribute to a more enjoyable BBQ experience, allowing you to grill with confidence and ease, impressing your guests with your cooking prowess.
Durable Spatulas for Efficient Food Handling
Spatulas are ideal for lifting and turning larger food items on the grill, ensuring even cooking while preventing sticking. A good grilling spatula should be sturdy yet flexible, allowing for easy maneuverability when handling various foods, including delicate items like fish, which require a gentle touch to flip without breaking apart.
Using a spatula can significantly improve your efficiency and precision when grilling, allowing you to serve up perfectly cooked dishes that highlight your skill and attention to detail. Ensure that your spatula is made of heat-resistant materials to withstand high temperatures, making it a reliable tool for all your BBQ needs.
A high-quality spatula will serve you well for many grilling sessions to come, elevating your cooking experience and ensuring that you can tackle any recipe with confidence and ease.
Comprehensive BBQ Cooking Time Charts for Every Meat Type
Understanding Cooking Times for Beef and Pork for Perfect Results
Familiarity with the average cooking times for various cuts of beef and pork is essential for any BBQ enthusiast looking to achieve the best results. For beef brisket, you should anticipate approximately 1 to 1.5 hours per pound when cooked at 225°F, ensuring that it becomes tender and incredibly flavorful. Ribs typically require around 5-7 hours at the same temperature for optimal outcomes, giving you that iconic BBQ flavor that everyone loves.
On the pork side, a pork shoulder intended for pulled pork can take 8-12 hours at 225°F, allowing the connective tissue to break down into melt-in-your-mouth goodness. In contrast, pork chops are much quicker to prepare, needing only about 4-6 minutes per side over direct heat. These cooking times can vary based on grill temperature, meat thickness, and desired doneness, making it essential to monitor your BBQ carefully for the best results.
Utilizing resources like cooking time charts can provide a quick reference guide, simplifying your BBQ planning and ensuring you serve perfectly cooked meats every time, delighting your guests with each flavorful bite that you serve.
Perfect Cooking Times for Poultry to Ensure Safety and Flavor
Different chicken parts require varying cooking times for optimal results. A whole chicken should be cooked for about 1.5-2 hours at 350°F, while chicken thighs and breasts typically take about 20-30 minutes to cook through. Wings require similar timing, around 20-30 minutes, depending on the cooking method used, making proper timing crucial for a successful BBQ that everyone can enjoy.
Utilizing a poultry cooking time chart can help ensure that you achieve juicy, flavorful chicken without any risk of undercooking. This knowledge is especially beneficial for those hosting BBQ gatherings, guaranteeing that the chicken will be a crowd-pleaser and a highlight of the meal that everyone looks forward to savoring.
Understanding cooking times for poultry is not only essential for safety but also for flavor, allowing you to serve a delicious meal that everyone will enjoy without any worry or hesitation about food safety.
Guidelines for Grilling Seafood and Vegetables to Achieve Delicious Results
Grilling seafood and vegetables requires specific guidelines to achieve the desired doneness and flavor. Fish fillets typically take around 8-10 minutes per inch of thickness at medium heat, while shrimp can cook in as little as 2-3 minutes per side, making them a quick and tasty option for your BBQ. Knowing these timing nuances can help you serve perfectly cooked dishes every time.
Vegetables vary widely in their cooking times, with denser options like potatoes needing around 20-30 minutes, while softer vegetables like zucchini can take only 5-10 minutes to reach that perfect tenderness. Following these cooking times is crucial for ensuring quality and flavor, making it essential to adhere to guidelines for optimal results during your grilling sessions.
Using a cooking time chart for seafood and vegetables can streamline your BBQ experience, ensuring that everything cooks harmoniously and flavors shine through, creating an enjoyable meal for all that will leave a lasting impression on your guests.
Frequently Asked Questions About BBQ Techniques
What is the ideal temperature for grilling beef brisket?
The ideal temperature for grilling beef brisket is around 225-250°F, allowing for a low and slow cook that results in tender, mouthwatering meat that is sure to impress everyone at your BBQ gathering.
How long should I cook pork chops on the grill for best results?
Pork chops typically take about 4-6 minutes per side on direct heat, depending on their thickness, to achieve optimal doneness and flavor that satisfies every palate and leaves guests wanting more.
What internal temperature must chicken reach to ensure safety?
Chicken should reach an internal temperature of 165°F to ensure that it is safe to eat and thoroughly cooked, minimizing health risks and guaranteeing a delicious meal that everyone can enjoy.
How can I tell when my ribs are fully cooked?
Ribs are fully cooked when they reach an internal temperature of approximately 190-203°F, and the meat is tender, easily pulling away from the bone, showcasing your grilling prowess and dedication to quality BBQ.
Is it possible to grill vegetables directly on the grill?
Yes, you can grill vegetables directly on the grill, but using a grilling basket is advisable to prevent them from falling through the grates, ensuring even cooking and delicious results that enhance your overall BBQ experience.
What’s the best method to avoid overcooking meat?
Using a reliable meat thermometer to monitor internal temperatures is the best way to avoid overcooking meat, ensuring it reaches the desired doneness without drying out, resulting in juicy and flavorful dishes that everyone will love.
How long does it typically take to smoke a pork shoulder?
Smoking a pork shoulder usually takes 8-12 hours at 225°F, depending on its size and desired tenderness, making it a time-consuming but rewarding process for BBQ lovers who appreciate great flavor.
What steps should I take if my grill has hot spots?
To manage hot spots on your grill, rotate your food during cooking and adjust your meat placement to ensure even cooking across all items, leading to a more successful BBQ experience that delights all your guests.
How can I keep my BBQ tools in top condition?
Regularly cleaning your BBQ tools after each use and storing them in a dry, safe place will help maintain their longevity and performance, ensuring they’re always ready for your next grilling session with ease and efficiency.
What advantages does brining chicken offer?
Brining chicken helps to enhance its flavor and moisture, resulting in juicier meat that is less likely to dry out during cooking, making it a popular technique among BBQ enthusiasts seeking perfection in their dishes.
Join Us on Facebook for More BBQ Tips and Tricks!
The Article Understanding BBQ Cooking Times for Beginners: A Comprehensive Guide appeared first on https://pitmastersarsenal.com
The Article BBQ Cooking Times for Beginners: Essential Guide Was Found On https://limitsofstrategy.com
-

Pizza Stone at Home: A Simple Guide for Perfect Results
Essential Techniques for Maximizing Your Pizza Stone Experience
Thoroughly Clean Your Pizza Stone for Optimal Cooking Performance
To truly unlock the full potential of your pizza stone, it is crucial to start with a meticulously clean surface. An immaculate stone is the foundation for achieving that desired crispy crust and flavorful base on your pizzas. Begin by gently using a dry brush to sweep away any remnants from previous baking sessions. This straightforward yet effective method efficiently removes burnt bits while preserving the integrity of the stone, ensuring it’s primed for all your future culinary creations.
Avoid using soap and water, as the porous nature of the stone can absorb these substances, potentially distorting the delightful flavors of your pizza. Instead, leverage the natural properties of your stone for maintenance. Regularly using a dry cloth or a soft brush will keep your pizza stone in pristine condition, fully prepared for crafting the culinary masterpiece you envision.
If you encounter stubborn stains, carefully use a spatula or scraper to dislodge them without damaging the stone’s surface. This practice not only maintains the stone’s integrity but also ensures it is ready for your next baking endeavor. Establishing a consistent cleaning routine enhances the flavor of your pizza and extends the lifespan of your stone, making it an invaluable tool in your kitchen repertoire.
Preheat Your Oven for Perfectly Cooked Pizzas Every Time
Preheating your oven is a fundamental aspect of mastering the effective use of a pizza stone at home. For the best results, position your pizza stone in a cold oven and set the temperature between 230 °C and 260 °C. This method guarantees that the stone heats evenly from the center outwards, eliminating any risk of thermal shock that can occur when introducing a cold stone into a hot oven. A gradual increase in temperature allows the stone to absorb and retain heat, which is essential for achieving the restaurant-quality crust you crave.
The significance of achieving the correct temperature cannot be overstated. A properly preheated pizza stone provides an instant burst of heat that contributes to a beautifully crisp base, sealing in moisture and enhancing the flavors of your toppings. Allow the stone to remain in the oven for approximately 30 to 45 minutes before placing your pizza, ensuring that the high temperature required for perfect cooking is consistently maintained.
Utilizing an oven thermometer can further refine this process, ensuring your oven reaches the desired temperature accurately. This meticulous attention to detail can distinguish a good pizza from an extraordinary one, elevating the enjoyment and satisfaction of your homemade creations.
Strategically Positioning Your Pizza Stone for Even Cooking
The placement of your pizza stone within the oven is critical for the cooking process. For optimal results when learning to use a pizza stone at home, place the stone on the middle rack of your oven. This strategic positioning facilitates optimal heat distribution, ensuring that both the top and bottom of the pizza cook evenly.
If the stone is positioned too close to the heat source, such as at the bottom of the oven, there’s a risk of burning the base while the toppings remain undercooked. Conversely, placing the stone too high may result in a soggy base, as the heat is predominantly directed from above. By positioning the stone centrally, you create a balanced environment that allows your pizza to thrive.
Moreover, it’s essential to avoid overcrowding your oven. If you are cooking multiple pizzas, ensure ample space between them to allow for proper airflow. This promotes even cooking and prevents any undesirable steaming effect. By mastering the art of positioning, you set the stage for a delightful pizza experience that will tantalize your taste buds.
Crafting the Perfect Pizza Dough for Unforgettable Pizzas

Selecting the Best Flour for Your Pizza Dough Creation
The foundation of any exceptional pizza lies in its dough, making the choice of flour a pivotal factor in this equation. When exploring how to use a pizza stone at home, opting for high-protein flour, such as bread flour or ‘00’ flour, can significantly elevate your pizza-making prowess. High-protein flours yield robust gluten structures, resulting in a chewy and crisp crust that can support a variety of toppings.
The unique characteristics of ‘00’ flour, commonly employed in traditional Italian pizzerias, offer an incredibly smooth texture that is perfect for an authentic Neapolitan-style base. This finely milled flour type adeptly absorbs moisture, enhancing the extensibility of the dough while delivering that desired airy texture. If you’re experimenting with various styles, consider blending different flours to achieve a crust that aligns with your personal taste preferences.
Incorporating other flour types, such as whole wheat or rye, can add depth of flavor and nutritional benefits to your pizza dough. However, it’s crucial to balance these with higher-gluten flours to maintain structural integrity. The choice of flour may also vary based on regional preferences, with certain cultures favoring specific grains or mixtures that embody their culinary heritage. Understanding these nuances can enrich your pizza-making experience, making it even more enjoyable.
Mixing and Kneading Your Dough to Perfect Consistency
Creating the ideal pizza dough begins with the right combination of ingredients and techniques. Start by mixing your chosen flour with yeast, water, and salt, ensuring that the water is lukewarm to activate the yeast effectively. The ratio of ingredients is paramount; typically, a 3:1 ratio of flour to water yields a manageable dough that is neither too wet nor too dry.
Once combined, the kneading process begins, which is essential for developing gluten, responsible for the dough’s elasticity and structure. Knead the dough for about 8 to 10 minutes on a lightly floured surface until it becomes smooth and elastic. If the dough feels excessively sticky, sprinkle in small amounts of flour as needed, but exercise caution not to overdo it, as too much flour can lead to a dense crust.
During the kneading phase, consider infusing additional flavors, such as herbs or spices, to give the dough a unique character. Once the dough reaches the desired consistency, place it in a greased bowl, cover it with a damp cloth, and allow it to rise until it has doubled in size. This fermentation stage is vital; it develops flavors and enhances the texture of the dough, creating a delightful base for your pizza.
Shaping Your Dough for the Ideal Pizza Base

Once your dough has successfully risen, the next step is to shape it into the perfect pizza base. This process is where your creativity can truly shine. Gently punch down the dough to release air bubbles, then divide it into portions based on the size of the pizzas you wish to create.
When shaping, you can either roll out the dough with a rolling pin or stretch it by hand. If you choose the latter, begin from the center and work your way to the edges, allowing gravity to assist in the process. The goal is to achieve an even thickness, typically around 1/4-inch, while ensuring the edges remain slightly thicker for a delightful crust.
Be mindful of the dimensions of your pizza stone when shaping the dough, as it should match the stone’s size to ensure even cooking. A well-shaped dough not only enhances the aesthetic appeal of your pizza but also significantly impacts its cooking process. Uneven thickness can lead to undercooked or overcooked areas, detracting from the overall experience.
As you shape the dough, consider adding toppings directly onto the unbaked base to visualize how your pizza will look. This practice can inspire creativity in topping combinations, ensuring a balanced distribution of flavors across your pizza.
Proofing Your Dough for an Airy Texture
Proofing, or allowing the dough to rise a second time, is a crucial step in achieving a light, airy texture while developing rich flavors. After shaping, let the dough proof for a final rise, typically lasting between 1 and 2 hours at room temperature. This stage enhances the dough’s flavor profile and contributes to that quintessential pizzeria texture.
Alternatively, for those who prefer a more robust flavor, consider placing the shaped dough in the fridge overnight. Cold fermentation allows complex flavors to develop, resulting in a more nuanced dough that reflects traditional practices found in pizzerias worldwide. This method, often favored by professional bakers, enhances the crust while also improving the dough’s handling characteristics.
As the dough proofs, keep an eye on its expansion; it should grow noticeably. Ensure it’s covered with a damp cloth or plastic wrap to prevent it from drying out. This technique not only retains moisture but also promotes a healthier rise.
Once the dough has doubled in size, it’s ready to be prepared for the stone. This final proofing stage is where the magic occurs and should never be rushed. The patience you invest here will reward you with a delicious, airy crust that is nothing short of spectacular.
Preparing Your Dough for the Pizza Stone
Before placing your pizza on the hot stone, it’s essential to prepare the surface to prevent sticking. Dust your pizza stone lightly with cornmeal or semolina, creating a non-stick barrier while allowing for a slight crunch on the bottom of your pizza. This technique is widely employed by professional pizza makers and is crucial for mastering the use of a pizza stone at home effectively.
Once the stone is prepared, carefully transfer your shaped dough onto a pizza peel or an inverted baking sheet dusted with flour or cornmeal. This method enables a smooth slide onto the stone without risking the dough’s integrity. If you don’t have a peel, improvisation is possible, but take care to maintain the dough’s shape during the transfer.
Ensure that your toppings are ready and strategically placed on the pizza to avoid overcrowding, which can lead to a soggy outcome. The key to a successful pizza is achieving balance; toppings should complement rather than overwhelm the base. By properly preparing the dough and utilizing a hot pizza stone, you set the stage for a delicious culinary experience that brings the authentic flavors of Italy to your home.
Mastering the Art of Topping and Cooking Your Pizza for Perfection
Evenly Distributing Sauce and Arranging Toppings for Maximum Flavor
One of the most exciting aspects of mastering pizza stone use at home is the art of topping your pizza. Begin by evenly spreading your chosen sauce across the dough, ensuring to leave a border for the crust. The sauce should enhance your ingredients without overpowering them; consider using homemade tomato sauce, pesto, or even a white sauce for a unique twist on tradition.
When it comes to toppings, remember that less is often more. Overloading your pizza can lead to a soggy mess, preventing that perfect crust from forming. Instead, adopt a balanced approach by utilizing fewer high-quality ingredients. For example, a classic Margherita pizza usually features fresh mozzarella, basil, and a drizzle of olive oil, while a gourmet option might include toppings such as prosciutto, arugula, and truffle oil for an elevated experience.
The order of your toppings also plays a significant role; start with cheese to create a protective layer that prevents the base from absorbing too much moisture. Then, add your meats and vegetables. Vegetables with high water content, such as tomatoes and mushrooms, should be pre-cooked or applied sparingly to avoid excess moisture during baking.
Feel free to experiment with flavors from various cuisines to elevate your pizza-making game. Consider globally-inspired toppings, such as tandoori chicken or Greek feta, to create a unique culinary fusion on your stone. The possibilities are endless, allowing you to tailor each pizza to your taste and culinary adventures, ensuring every bite is a delight.
Carefully Transferring Your Pizza to the Stone for Even Cooking
Transferring your assembled pizza to the preheated stone requires steady hands and a bit of finesse. Using your pizza peel or an inverted baking sheet, gently slide the pizza onto the stone, ensuring there are no hiccups that could compromise your culinary masterpiece. A quick, confident motion is essential; hesitation may lead to sticking or misalignment.
If you encounter any sticking, remain calm. A spatula can help nudge the pizza free without damaging the base. After positioning the pizza, promptly close the oven door to maintain the high temperature needed for proper cooking.
As the pizza bakes, watch it closely through the oven window. The intense heat from the pizza stone will begin to work its magic, crisping the base while melting and browning the cheese. This is the moment where anticipation builds as you envision that perfect slice ready to be enjoyed.
Be mindful of your cooking time, which typically ranges from 10 to 15 minutes, depending on your oven and the thickness of the dough. Key indicators of a perfectly cooked pizza include a golden-brown crust and bubbling cheese. If you notice the crust browning too quickly, consider rotating the pizza halfway through for even cooking, resulting in a delightful, uniformly baked treat.
Understanding Cooking Time and Temperature for Impeccable Results
Achieving the ideal pizza requires a keen understanding of cooking time and temperature. When exploring how to use a pizza stone at home, setting your oven between 230 °C and 260 °C ensures that your pizza cooks quickly, resulting in a crispy crust while keeping the toppings vibrant and flavorful.
Generally, a cooking time of 10 to 15 minutes will suffice, but this can vary based on the thickness of your crust and the toppings used. Thicker crusts may require a few additional minutes, while thin crusts may finish more quickly. It’s vital to monitor the pizza closely during the final minutes of cooking, as the line between perfect and burnt can be precariously thin.
An oven thermometer can be invaluable in this situation. Subjectivity can play a role when relying on standard oven settings, and an accurate reading will help you refine your technique for consistent results.
As your pizza approaches completion, pay attention to the bubbling cheese and the delightful aroma filling your kitchen; these sensory cues will guide you to the right moment for removal. Once you’ve achieved that golden crust and melted perfection, carefully extract the pizza from the oven using your peel or a spatula, allowing it to cool briefly before slicing into this delicious creation.
Essential Maintenance Practices for Your Pizza Stone
Thoroughly Clean Your Stone After Each Use for Longevity
Proper maintenance of your pizza stone is crucial for ensuring its longevity and optimal performance, especially when learning how to use a pizza stone at home. After cooking, allow the stone to cool completely before attempting to clean it; attempting to clean a hot stone can result in thermal shock and potential cracking.
Once cooled, use a spatula to scrape off any stuck-on food gently. This step is crucial for preserving the stone’s surface and ensuring readiness for your next use. For stubborn residue, a soft brush can help dislodge any remnants without damaging the stone.
A damp cloth can be used to wipe down the surface, but avoid using soap or soaking the stone in water. The porous nature of the stone means it can absorb these substances, leading to unwanted flavors in your future pizzas. Regular cleaning after each use will keep your pizza stone in prime condition, enhancing your overall pizza-making experience.
Consider how often you use your stone; the more frequently you bake, the more crucial it is to maintain consistent cleaning. By integrating these practices into your routine, you’ll ensure that your pizza stone remains a reliable tool in your kitchen arsenal, ready to deliver perfect pizzas time and time again.
Preventing Damage to Your Pizza Stone for Optimal Performance
When learning how to use a pizza stone at home, understanding how to avoid damage is of utmost importance. The stone is designed to withstand high temperatures, but improper handling or maintenance can lead to cracks and deterioration.
Always handle the stone with care, as dropping it or exposing it to drastic temperature fluctuations can cause it to crack. When storing your pizza stone, choose a dry place to prevent moisture buildup, which can compromise its structural integrity. If your stone does become damp, allow it to air dry completely before using it again.
Additionally, avoid using metal utensils on the stone’s surface, as they can scratch and damage the material. Opt for wooden or silicone tools when working with your pizza stone to preserve its quality and longevity. By adopting these simple yet effective practices, you can ensure your pizza stone remains in pristine condition, ready to produce artisanal pizzas for years to come.
Optimal Storage Techniques for Your Pizza Stone
Proper storage plays a significant role in the longevity of your pizza stone. After cleaning, ensure the stone is thoroughly dry before putting it away. Moisture can lead to mold growth or cracking during subsequent uses, undermining your efforts to master using a pizza stone at home.
Store your pizza stone flat, rather than on its side, to avoid undue pressure that could lead to fractures. If space permits, keep it in a designated area in your kitchen where it won’t be jostled by other kitchenware. Some enthusiasts even opt to keep their stones in the oven, providing the dual benefit of easy access and additional thermal mass, which can enhance oven performance.
Maintaining your stone in optimal conditions will ensure it remains a reliable companion on your pizza-making journey. With proper care, your pizza stone will continue to produce perfectly cooked pizzas, offering an authentic taste experience that rivals your favorite pizzeria.
Troubleshooting Common Issues with Your Pizza Stone
Addressing Cracks in Your Pizza Stone for Continued Use
Cracks in your pizza stone can be disheartening, especially after investing time in mastering the art of using a pizza stone at home. However, it’s essential to understand that minor cracks are often normal and will not significantly affect the stone’s performance. These small fissures are typically cosmetic and can occur due to rapid temperature fluctuations or prolonged use.
If you encounter larger cracks, it may be time to consider replacing the stone. While small cracks won’t impede functionality, larger ones can disrupt heat distribution and lead to uneven cooking. Regularly inspecting your stone can help you identify potential issues early, allowing for timely intervention and prevention.
To mitigate future cracking, ensure that you’re allowing the stone to cool gradually before cleaning, as sudden temperature shocks are a primary cause of damage. Additionally, maintaining consistent care practices will prolong the life of your stone, enabling it to continue delivering delicious pizzas.
Preventing Pizza from Sticking to the Stone for Effortless Removal
Sticking can be a frustrating issue when exploring how to use a pizza stone at home. When your pizza adheres to the stone, it can lead to an unsightly mess and an unfortunate cooking experience. To prevent sticking, always remember to dust the stone with a generous amount of cornmeal or semolina before placing your dough onto it. This creates a barrier that allows for easy sliding during the transfer and promotes a delightful crunch on the crust.
Additionally, ensure that your dough is well-floured when you shape it. If the dough is too sticky, it can cause adhesion to the stone, complicating removal. Use flour liberally during the shaping process, but be cautious not to overwork the dough, as this can affect its final texture.
If you do encounter a sticking issue, a gentle nudge with a spatula can help release it without damaging the pizza. By implementing these strategies, you can enjoy a hassle-free pizza experience, allowing you to focus on the delightful toppings and flavors that make each pizza unique.
Perfecting Your Pizza Crust for Restaurant-Quality Results
Achieving a flawless crust is the holy grail of pizza-making, and understanding the key elements can help you master how to use a pizza stone at home. The first and most crucial factor is ensuring your oven is fully preheated, alongside the pizza stone. This step is vital, as a hot stone provides the instant heat necessary to create that coveted crispy bottom while retaining moisture in the toppings.
Another critical aspect is the dough itself. A well-made dough should have the right balance of ingredients, allowing for elasticity and structure. This balance ensures your crust rises adequately during cooking, resulting in the perfect airy texture you desire.
Consider experimenting with different cooking times and temperatures based on your preferences. Some may prefer a slightly softer crust, while others enjoy a robust crunch. A good practice is to monitor the pizza closely, observing the crust’s color and texture as it cooks.
By honing these techniques and paying attention to detail, you can achieve a crust that rivals those found in traditional pizzerias, bringing the authentic taste of Italy directly to your home kitchen.
Managing Uneven Heating in Your Oven for Consistent Results
Uneven heating can lead to disappointments when creating pizzas, particularly when navigating how to use a pizza stone at home. If you find that certain areas of your pizza are cooking faster than others, it’s crucial to rotate your pizza halfway through the cooking time. This practice ensures even heat distribution, allowing every part of your pizza to receive equal treatment.
It’s also important to ensure that your oven is functioning correctly. An oven thermometer can help diagnose temperature inconsistencies, enabling you to adjust your cooking times accordingly. If your oven has hot spots, consider using a pizza stone with a thicker base, as it can help regulate temperature more effectively.
Regular maintenance of your oven can also contribute to even heating. Periodically clean the oven to remove food residue and grease, maintaining efficient airflow and heat distribution, ensuring every pizza comes out perfectly cooked. By incorporating these strategies, you’ll be well on your way to achieving pizza perfection in your kitchen.
Keeping Your Pizza Stone Clean and Well-Maintained for Longevity
Maintaining the cleanliness of your pizza stone is essential for preserving its quality and ensuring each pizza is as delicious as the last. After every use, allow the stone to cool completely before cleaning. This critical step prevents thermal shock and potential cracking.
Once cooled, use a spatula or scraper to gently remove any stuck-on food. A stiff brush can help dislodge stubborn bits, but avoid using soap or soaking the stone in water. The porous nature of the stone can absorb these substances, affecting future flavors in your pizzas.
For persistent stains, consider gently scrubbing the area with a damp cloth, but ensure the stone is thoroughly dry before storing it. Regular cleaning will help maintain the stone’s performance and enhance your overall pizza-making experience, ensuring that you can consistently create perfect pizzas.
Exploring Innovative Pizza Recipes and Flavor Combinations
Diving into Unique Flavor Profiles for Your Pizza Creations
One of the most exciting aspects of mastering how to use a pizza stone at home is the opportunity to experiment with various recipes and flavor combinations. Beyond traditional pizzas, consider venturing into gourmet toppings or alternative bases. For instance, a dessert pizza featuring Nutella, fresh fruits, and a sprinkle of icing sugar can provide a delightful end to a meal, showcasing the versatility of your pizza stone.
Incorporating globally inspired toppings can also elevate your pizza-making game. Imagine a Thai-inspired pizza with peanut sauce, shredded chicken, and fresh cilantro or a Middle Eastern twist featuring lamb, tzatziki, and roasted vegetables. The possibilities are endless, and each recipe can reflect the diverse culinary influences from around the world.
Moreover, don’t shy away from using alternative flours, such as chickpea or cauliflower, to create gluten-free bases that appeal to a broader range of dietary preferences. This experimentation allows you to tailor your creations to accommodate various tastes and dietary needs, making your pizza nights even more inclusive and enjoyable for all.
Innovating by Combining Unique Ingredients for Extraordinary Pizzas
Embracing creativity is essential when exploring how to use a pizza stone at home. Combining unexpected ingredients can lead to delightful surprises. For example, consider blending gourmet cheeses like gorgonzola with traditional mozzarella for a rich flavor profile, or incorporate seasonal vegetables to enhance freshness and taste.
Experimenting with different sauces can also add depth to your pizza. Instead of the classic tomato sauce, try using pesto, barbecue sauce, or even a drizzle of balsamic glaze to elevate your dish and surprise your guests.
Engaging with local markets can inspire your pizza toppings. Seasonal produce not only enhances flavor but also supports local agriculture, making your pizza experience both delicious and community-focused. By sourcing fresh ingredients, you can create pizzas that are not only satisfying but also celebrate the diversity of global cuisines.
Creating Memorable Experiences with Interactive Pizza Nights
Consider hosting a pizza night as a fun and interactive way to explore how to use a pizza stone at home. Invite friends and family to join in on the culinary adventure, providing a variety of doughs, sauces, and toppings for everyone to create their unique masterpieces.
This communal experience encourages creativity and collaboration, with guests sharing their flavor combinations and techniques. You could even set up a mini-competition for the best pizza, motivating everyone to step out of their comfort zones and try new ideas.
Hosting a pizza night not only creates memorable experiences but also fosters a sense of community around cooking and sharing food. By embracing this tradition, you’ll find that making pizzas becomes not just a process but a celebration of culture and collaboration, enhancing your culinary journey.
Frequently Asked Questions About Using a Pizza Stone
Can I use any oven with a pizza stone?
Yes, you can utilize a conventional oven or even a grill. However, ensure that the oven can reach high temperatures for optimal cooking results.
How do I know when my pizza is fully cooked?
Your pizza is done when the crust is golden brown, the cheese is bubbling, and the toppings appear cooked but not burnt, indicating perfect readiness.
Is it safe to wash my pizza stone with soap and water?
No, avoid using soap, as the stone is porous and can absorb it. Instead, clean with a dry brush or scraper to maintain quality.
What distinguishes a baking stone from a pizza stone?
While both serve similar purposes, pizza stones are generally thicker and specifically designed to withstand high temperatures and absorb moisture more effectively.
What can I do if my pizza dough keeps sticking to the stone?
Ensure your dough and the pizza stone are well-floured. Consider dusting with cornmeal or semolina to create a non-stick surface, preventing sticking.
What is the expected lifespan of my pizza stone?
With proper care, a pizza stone can last many years. Regular cleaning and avoiding thermal shock will significantly contribute to its longevity.
Can I place frozen pizza directly on a pizza stone?
Yes, you can place frozen pizza directly on the preheated stone. Adjust cooking times accordingly based on the pizza’s size and thickness for optimal results.
Can I use my pizza stone for baking bread?
Absolutely! A pizza stone is excellent for baking bread as it helps create a crispy crust due to even heat distribution, enhancing the baking process.
How do I re-season my pizza stone?
You don’t need to season your pizza stone. Please keep it clean and dry after each use to maintain its surface and performance.
What should I avoid placing on my pizza stone?
Avoid using metal utensils, immersing them in water, or applying soap, as these actions can damage the stone and affect its functionality.
Connect with us on Facebook!
The post How to Use a Pizza Stone at Home: A Simple Guide appeared first on https://cookinggods.com
The Article Using a Pizza Stone at Home: Your Simple Guide Was Found On https://limitsofstrategy.com
-

Stress-Free Rice Cooking: Your Easy Success Guide
Master the Art of Selecting the Perfect Rice for Every Recipe
Choosing the ideal rice is an essential culinary skill that can significantly enhance your cooking experience and enable you to prepare rice effortlessly. With a plethora of rice varieties available, understanding their distinct characteristics and benefits can turn your meals into exquisite culinary adventures that are both fulfilling and delightful. Each type of rice offers unique nutritional benefits and specific cooking techniques, making your choices exciting and varied. By selecting the most suitable rice for your dish, you take a crucial step towards achieving culinary excellence and satisfying your taste buds.
Explore the Diverse World of Rice Varieties and Their Uses in Cooking
Many individuals perceive rice as merely a singular ingredient; however, it actually comprises a vast assortment of varieties, each possessing unique traits and culinary applications. Long-grain rice types such as Basmati and Jasmine are cherished for their light, fluffy texture, making them perfect for dishes like pilafs, salads, or enjoyed on their own. Conversely, medium-grain rice tends to be slightly stickier, making it suitable for sushi and creamy risottos. Short-grain rice, commonly found in Asian cuisine, tends to cluster together, making it the ideal choice for sushi rolls or rice balls that require a unified texture.
Aromatic rice varieties such as Basmati and Jasmine are not only famous for their enticing fragrances but also for their remarkable ability to absorb flavors, transforming any dish into a fragrant culinary masterpiece. By familiarizing yourself with these distinctions, you can make informed decisions about which rice to utilize for your specific culinary needs, thereby enhancing your overall gastronomic experience.
Understand the Importance of Grain Length and Its Impact on Cooking Methods
The length of rice grains plays a pivotal role in determining cooking time and the necessary water-to-rice ratio. Generally, long-grain rice requires a water-to-rice ratio of two cups of water for every cup of rice, cooking until it achieves a tender yet fluffy consistency. In contrast, medium-grain rice may need slightly less water, while short-grain rice often requires more due to its elevated starch content, resulting in a stickier texture that many recipes demand.
Grasping these nuances enables you to consistently prepare flawlessly cooked rice. For instance, when creating a comforting risotto, using Arborio rice—a short-grain variety—will yield the creamy texture this dish is renowned for. In contrast, light and fluffy Basmati rice complements pilafs exquisitely or serves as an elegant side dish, significantly enhancing the presentation and flavor of your meal.
Enhance Your Culinary Creations with Gourmet and Specialty Rice Varieties
By venturing beyond conventional rice options, gourmet and specialty varieties can dramatically elevate your culinary creations and introduce exciting flavors to your dishes. Consider incorporating black rice or red rice into your cooking repertoire; these varieties not only add vibrant colors to your plate but are also rich in antioxidants. Often referred to as “forbidden rice” and “nutty rice,” respectively, they can serve as visually appealing bases for salads or side dishes, enhancing both nutritional value and visual appeal.
Don’t overlook aromatic rice types either. Fragrant options like Jasmine and Basmati can transform your dining experience with their delicate scents, heightening the enjoyment of any meal they accompany. By experimenting with these specialty rice options, you can unlock a new dimension of flavors and textures, making your culinary journey both enjoyable and less stressful.
Master Essential Techniques to Prepare Rice Perfectly Every Time

Preparation is crucial in achieving successful rice cooking, whether you are an experienced chef or a kitchen novice. Mastering the fundamental techniques of rice preparation ensures that you can attain optimal results each time. From rinsing to precise measurements, every step is essential to achieving the fluffy and flavorful rice you desire.
The Critical Importance of Rinsing Rice for Optimal Cooking Results
Rinsing rice is a vital step that many home cooks often neglect. This simple yet effective technique removes excess starch, which can lead to clumping and a gummy texture in the finished product. To begin, place your rice in a fine-mesh strainer and rinse it under cold water until the water runs clear. Though this process may take a few minutes, the results are well worth the effort.
Beyond improving texture, rinsing enhances the rice’s flavor by eliminating surface impurities. This step is particularly crucial for varieties like Basmati or Jasmine, where achieving a light and airy texture is the goal. For those preparing rice in larger quantities, rinsing becomes even more critical to ensure uniform results across all servings, leading to a more enjoyable dining experience.
Unlock the Benefits of Soaking Rice Before Cooking
Soaking rice prior to cooking is an age-old practice celebrated around the world, and for good reason. This technique can significantly enhance the texture of your rice while also reducing cooking time. Soaking allows the grains to absorb water, resulting in a more consistent cooking process. For varieties like Basmati, soaking for at least 30 minutes can yield exceptionally fluffy results.
Moreover, the soaking process helps release the rice’s natural flavors, making it more fragrant and enjoyable. In cultures where rice is a dietary staple, such as in Indian or Thai cuisines, soaking is a prevalent method that elevates the dish. Consider incorporating soaking into your cooking routine to enhance your meals and minimize the stress associated with rice preparation.
Perfect the Art of Accurate Measurement for Rice and Water Ratios
Achieving the perfect rice-to-water ratio is a fundamental skill in how to cook rice without stress. While the common guideline suggests using two cups of water for every one cup of rice, this can vary based on the specific type of rice you are using. For example, sticky rice may require slightly more water, while certain long-grain varieties might need a little less.
Investing in a reliable measuring cup can be transformative, as precision is paramount for successful cooking. Many seasoned chefs recommend the finger method: after adding the water, place your finger on top of the rice; the water level should reach your first knuckle. This technique helps you avoid common pitfalls and ensures perfectly cooked rice without guesswork, enhancing your overall cooking experience.
Selecting the Ideal Rice for Specific Culinary Creations
Understanding the various rice types and their optimal uses can greatly streamline your cooking process. For instance, if you’re preparing a stir-fry, opting for long-grain rice ensures that the grains remain separate and fluffy. For indulgent dishes like risotto, Arborio rice is preferred due to its high starch content, which contributes to a rich, creamy consistency.
When selecting rice for particular recipes, consider the overall flavor profile and texture you wish to achieve. For example, pairing aromatic Jasmine rice with a spicy curry creates a delightful contrast that enhances your dining experience. The right rice selection can transform your meals from ordinary to extraordinary, making your cooking journey not only more enjoyable but also less stressful.
Diverse Cooking Methods to Perfectly Prepare Rice
The cooking method you choose can significantly affect the final outcome of your rice. With various techniques available, understanding which method to use for different situations can save you time and reduce the anxiety often associated with cooking rice.
Classic Stovetop Cooking Techniques for Flawless Rice
Cooking rice on the stovetop is a traditional method that many rely on due to its simplicity and minimal equipment requirements—just a pot with a lid and a heat source. Begin by rinsing and soaking your rice if desired. Next, add the appropriate amount of water, bringing it to a boil before covering the pot and reducing the heat to maintain a gentle simmer.
Monitoring the cooking time is crucial; for long-grain rice, this typically takes around 15-20 minutes. Avoid lifting the lid too often, as this can release steam and negatively affect the cooking process. Once the water is absorbed, allow the rice to rest for a few minutes off the heat before fluffing it with a fork. This classic method allows for hands-on monitoring, alleviating the stress associated with cooking rice.
Achieve Perfect Results with a Rice Cooker
Rice cookers have transformed how many prepare rice, offering a hands-off approach that fits seamlessly into busy lifestyles. With just the push of a button, you can achieve flawlessly cooked rice every time. The key lies in using the correct rice-to-water ratio, which is often indicated on the rice cooker itself.
Many rice cookers also have functions that allow for steaming vegetables or cooking other grains simultaneously, streamlining meal preparation even further. The automatic shut-off feature alleviates the worry of overcooking, allowing you to focus on other aspects of your meal, significantly reducing kitchen-related stress.
Effortless Rice Cooking in the Microwave
If you’re short on time, microwaving rice can be a quick and effective method. Start by rinsing the rice and placing it in a microwave-safe bowl. Add the appropriate water amount, ensuring you follow the recommended ratios, and cover the bowl with a microwave-safe lid or plate. Microwave on high for approximately 10-12 minutes, checking for doneness and adjusting as necessary.
This technique is particularly beneficial for single servings or when you need rice in a hurry. Microwaving rice can save you time and alleviate the stress of cooking, especially when managing multiple tasks in the kitchen.
Essential Strategies for Perfectly Cooked Rice Every Time
While cooking rice may seem simple, there are numerous tips and strategies that can enhance your results and make the process more enjoyable. From flavoring techniques to achieving the perfect texture, these insights can turn your rice cooking experience into a culinary triumph.
Prevent Rice from Sticking Together
A common challenge encountered when cooking rice is its tendency to stick together. To prevent this, thoroughly rinsing the rice before cooking is essential. Additionally, adding a small amount of oil or butter to the cooking water creates a barrier that keeps the grains separate.
Stirring the rice during the initial cooking phase can also help avoid clumping. If you’re using a rice cooker, be careful not to overfill the pot, as this can lead to sticky rice. By employing these techniques, you can ensure a fluffy, perfectly cooked outcome every time, boosting your cooking confidence.
Achieving the Desired Texture for Your Rice
The texture of rice is crucial in determining the overall success of your dish. To achieve rice that is neither too soft nor too firm, it’s vital to adhere to the recommended cooking times and water ratios specific to the variety you are using.
Allowing the rice to rest post-cooking is equally important. This resting period enables steam to settle, resulting in a more uniform texture. Fluffing the rice with a fork before serving will separate the grains, enhancing the overall presentation. Mastering these techniques will make your rice cooking experience both less stressful and incredibly satisfying.
Enhancing the Flavor Profile of Your Rice
Rice acts as a blank canvas, ready to absorb a variety of flavors. Simple additions like fresh herbs, spices, or vegetable broth can elevate bland rice into a culinary masterpiece. For instance, cooking rice in coconut milk creates a creamy base that pairs beautifully with tropical dishes.
Experimenting with seasonings such as garlic, onion, or bay leaves added to the cooking water can infuse your rice with enticing aromas. This versatility allows you to tailor the flavor of rice to complement any meal, enhancing its role in your culinary repertoire and improving the overall dining experience.
Avoiding Common Mistakes in Rice Cooking
Avoiding common pitfalls is critical to achieving stress-free rice cooking. Many home cooks encounter similar challenges that can lead to unsatisfactory outcomes, but with a few straightforward tips, you can effectively navigate these issues.
Prevent Overcooked Rice
Overcooked rice often results in an undesirable mushy texture. To avoid this, closely monitor cooking times and water ratios. Use a kitchen timer to track how long the rice has been cooking, and taste a few grains for doneness a few minutes before the suggested time.
If you find that the water has been absorbed but the rice remains firm, add a splash of water, cover it, and allow it to steam for a few additional minutes. This technique can help salvage overcooked rice in many cases, ensuring you achieve the ideal texture every time.
Avoid Undercooked Rice
Undercooked rice can be frustrating, especially when you’re eager to enjoy your meal. To prevent this issue, it’s crucial to adhere to the recommended cooking times and water ratios specific to the type of rice you’re using.
When in doubt, taste a few grains to check for doneness. If you discover that your rice is still crunchy, simply add a bit more water, cover, and continue cooking for a few more minutes. This precaution will help ensure that your rice is perfectly tender and enjoyable.
Correct Water Ratios for Perfect Rice
Using incorrect water ratios can lead to various problems, from soggy rice to a dry, uncooked mess. Each type of rice possesses unique characteristics and required water ratios, making it crucial to follow specific guidelines for the rice variety chosen.
Investing in a reliable measuring cup and adhering to the recommended ratios for long, medium, and short-grain rice is essential. This attention to detail will set you up for success, allowing you to cook rice without the stress of uncertainty while delivering delicious results every time.
Troubleshooting Common Rice Cooking Challenges
Even with the best preparation and cooking methods, challenges can still arise when preparing rice. Knowing how to troubleshoot these issues can save your dish and enhance your cooking experience, making it more enjoyable overall.
Salvaging Burnt Rice Like a Pro
If you find yourself with burnt rice, don’t despair. The first step is to salvage what you can—carefully transfer any unburned rice to a new pot, leaving the burnt layer behind. To prevent this mishap in the future, always use a pot with a heavy bottom to distribute heat evenly.
You might also consider adding a splash of water to the burnt rice and covering it for a few minutes, which may help to steam and loosen the burnt bits. This approach is a practical way to salvage your meal and minimize waste while allowing you to enjoy your rice without compromising quality.
Fixing Soggy Rice Issues
Soggy rice can be disappointing, but all is not lost. If your rice has absorbed too much water, consider spreading it out on a baking tray and allowing it to dry out for a few minutes in a low oven. This method lets moisture escape, restoring some texture to your rice.
Alternatively, you can transform soggy rice into fried rice by stir-frying it in a pan with fresh vegetables and soy sauce. This creative solution can turn your soggy mishap into a delightful dish, showcasing your resourcefulness in the kitchen while minimizing waste.
Reviving Cold Rice for a Tasty Meal
Leftover rice can lose its charm, but reviving it is easier than you might expect. One effective method is to sprinkle a few drops of water over the cold rice, then microwave it for a minute or two. The steam generated will help rehydrate the rice, restoring its desired texture.
Alternatively, creating a stir-fry with fresh vegetables, proteins, and a splash of soy sauce can breathe new life into your cold rice. This delicious transformation can elevate what might have been a mundane leftover meal into something exciting and enjoyable.
Addressing Undercooked Rice Issues with Ease
If you discover that your rice is still hard or crunchy after the cooking time, don’t fret. Simply add a small amount of water, cover the pot, and continue cooking for a few more minutes. This technique allows the rice to absorb the extra moisture it needs to cook evenly and thoroughly.
If you’re using a rice cooker, the automatic settings may not account for variations in rice type. Checking for doneness occasionally can help you avoid undercooked rice in the future, ensuring a consistently enjoyable meal experience.
Effectively Managing Overcooked Rice Challenges
Overcooked rice can present a challenge, but there are ways to salvage it. If your rice has become mushy, consider repurposing it in soups or as a base for creamy dishes where the texture won’t be as noticeable.
Another clever solution is to make rice pudding—this allows you to transform overcooked rice into a delightful sweet treat. By embracing these creative solutions, you can navigate the challenges of rice cooking with confidence and flair.
Best Practices for Storing and Reheating Cooked Rice
Understanding the proper storage and reheating techniques is crucial to maintaining the quality of your cooked rice. Whether you’re meal prepping or saving leftovers, knowing the best practices will ensure that your rice remains delicious and safe to consume.
Safe Storage Practices for Cooked Rice
Correctly storing cooked rice is vital to prevent foodborne illnesses. After cooking, allow the rice to cool to room temperature before transferring it to an airtight container. Store the rice in the refrigerator for up to four days, ensuring it remains fresh and safe for consumption.
If you plan to keep rice for an extended period, consider freezing it. Spread the cooled rice onto a baking sheet and freeze until solid. Once frozen, transfer the rice to a sealable plastic bag, removing as much air as possible. This method prevents freezer burn and allows you to enjoy cooked rice at your convenience.
Effective Techniques for Reheating Rice
Reheating rice properly is essential for preserving its original texture and flavor. The microwave is a popular option, but be sure to add a splash of water and cover the bowl to create steam. This technique ensures that your rice remains moist and fluffy during the reheating process.
Alternatively, reheating on the stovetop with a bit of water can also yield excellent results. Simply place the rice in a saucepan, add water as needed, and heat gently while stirring until warmed through. This method provides a more controlled reheating process, helping to maintain the rice’s texture and flavor.
Smart Methods for Freezing Cooked Rice
Freezing cooked rice can save time and provide a convenient meal option later on. To freeze effectively, ensure the rice has cooled completely before transferring it to a freezer-safe container. Portioning the rice into individual servings can also simplify thawing only what you need at any given time.
When you’re ready to use the rice, simply remove it from the freezer and reheat directly from frozen, adding a little water to prevent it from drying out. This technique allows for quick meals on busy days without sacrificing quality or taste, making your cooking experience more enjoyable.
Innovative Ways to Incorporate Rice into Your Culinary Creations
Rice is an incredibly versatile ingredient that can shine as both a side dish and a main component in various meals. Exploring different methods to incorporate rice into your cooking can enhance your culinary repertoire and delight your palate.
Rice as a Flavorful Accompaniment to Side Dishes
Rice often serves as an ideal complement to a wide range of dishes, enhancing flavors and providing balance to the overall meal. Whether it’s fragrant Jasmine rice served alongside spicy curries or herbed Basmati rice accompanying grilled meats, the possibilities are truly endless.
Consider enhancing plain rice by adding sautéed vegetables, fresh herbs, or a squeeze of citrus to elevate its flavor profile. These simple additions can transform your side dish into a vibrant and flavorful element of your meal. Experimenting with different flavor combinations allows you to customize your rice to suit any occasion, making it an exciting part of your culinary adventures.
Making Rice the Star of Main Courses
From hearty casseroles to delectable stir-fries, rice often takes center stage in many beloved dishes worldwide. For instance, a traditional Spanish paella showcases rice as the star ingredient, soaking up the rich flavors of saffron and seafood, resulting in a truly unforgettable dining experience.
In Asian cuisines, fried rice is a popular method to utilize leftover rice, combining it with fresh vegetables and proteins for a satisfying and flavorful meal. The adaptability of rice enables it to complement various ingredients and cooking styles, making it an indispensable component in countless recipes, enhancing the overall enjoyment of your meals.
Addressing Common Questions About Cooking Rice
What type of rice is best for making sushi?
Short-grain rice, especially varieties like Japonica, is ideal for sushi due to its high starch content, which makes it sticky and easier to mold into rolls.
Can rice be cooked in a slow cooker?
Yes, rice can be cooked in a slow cooker. Simply add the appropriate water ratio, cover, and allow it to cook on low for about 2-3 hours until tender.
Is soaking rice before cooking necessary?
Soaking rice is not always mandatory, but it can enhance texture and reduce cooking time, particularly for long-grain varieties that benefit from this method.
How can I prevent rice from boiling over during cooking?
To prevent boiling over, ensure you use a pot that is large enough for the amount of rice and water, and maintain the heat at medium to avoid rapid boiling.
Is it safe to reheat leftover rice?
Yes, leftover rice can be safely reheated. Ensure it is heated thoroughly to eliminate any bacteria, adding moisture as needed to prevent it from drying out.
What’s the best way to store leftover rice?
Leftover rice should be stored in an airtight container in the refrigerator for up to four days or frozen for longer storage, allowing for convenient future meals.
How much water is needed for cooking brown rice?
Typically, brown rice requires a water-to-rice ratio of about 2.5:1, and it generally takes longer to cook compared to white rice varieties.
Can I add spices to the cooking water for extra flavor?
Absolutely! Adding spices or herbs to the cooking water can infuse the rice with additional flavor, greatly enhancing the overall dish.
What should I do if my rice is undercooked?
If your rice is undercooked, add a bit more water, cover the pot, and continue cooking until the grains are tender and fully cooked.
Why does my rice turn out sticky after cooking?
Rice can become sticky if it’s overcooked or if the wrong type of rice is used. Rinsing the rice before cooking can also help reduce stickiness, ensuring a better texture.
Stay connected with our latest news and tips on Facebook!
The post How to Cook Rice Without Stress: A Simple Guide appeared first on https://cookinggods.com
The Article Cook Rice Stress-Free: Your Simple Guide to Success Was Found On https://limitsofstrategy.com
-
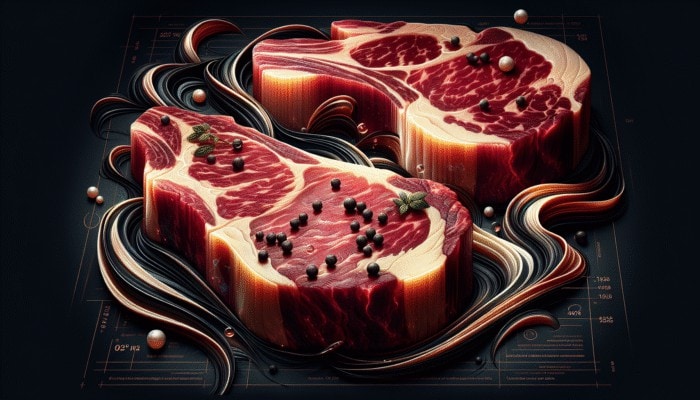
Grill Wagyu Beef: The Ultimate Step-by-Step Guide
Master the Art of Selecting the Perfect Wagyu Cut for Grilling
To truly excel in grilling Wagyu beef, the first step is to carefully choose the ideal Wagyu cut. With a wide variety of cuts available, understanding their unique characteristics is crucial for elevating your grilling technique and ensuring a memorable culinary experience. By getting acquainted with the different cuts and their grading levels, you can enhance your grilling results significantly. Wagyu beef is celebrated for its exquisite marbling and tenderness, transforming even the simplest meal into an unforgettable feast that your guests will reminisce about long after the last bite.
Make Informed Choices by Understanding Wagyu Beef Grading
The USDA grading system is essential for evaluating the quality of Wagyu beef, enabling you to make knowledgeable selections for your grilling endeavors. Wagyu is graded based on two primary criteria: quality grade and yield grade. The quality grade assesses aspects like marbling, color, and texture, while the yield grade measures the amount of usable meat. Premier grades, such as USDA Prime, are particularly renowned for their exceptional marbling, offering a rich, buttery flavor that melts in your mouth. By understanding these grades, you can make informed choices that will greatly improve your grilling outcomes, as higher grades are often preferred for their superior taste and tenderness.
While many grilling enthusiasts may be captivated by the allure of premium-grade Wagyu, it is also vital to find a balance between quality and budget. Although USDA Prime is a superb choice, there are also delightful cuts within lower grades that can provide an outstanding grilling experience. By familiarizing yourself with these grading levels, you can appreciate the subtleties of Wagyu beef and select cuts that perfectly align with your personal taste preferences and financial considerations.
Explore the Best Wagyu Cuts for Grilling Success
When it comes to grilling, certain Wagyu cuts truly shine. The ribeye, often referred to as the king of grilling cuts, showcases remarkable marbling that renders beautifully over direct heat. Its rich flavor and incredible tenderness make it a favorite among grilling aficionados. The strip loin is another popular option, striking a perfect balance between marbling and leanness, making it versatile for various grilling techniques.
The tenderloin, while leaner, offers an unmatched melt-in-your-mouth experience that is simply extraordinary. This cut is ideal for those who savor the buttery texture of Wagyu without an excess of fat. Each of these cuts brings unique characteristics to the grill, encouraging grillers to experiment and discover their personal favorites.
Exploring local markets and specialty butcher shops that focus on Wagyu may lead you to discover exciting alternatives, including lesser-known cuts like flank or skirt steak, which can also yield exceptional results on the grill. These options not only diversify your grilling repertoire but often come at more accessible price points, making Wagyu beef more attainable for a wider audience.
Excited to Immerse Yourself in the World of Wagyu?
Where to Source Authentic Wagyu Beef Across the United States
Embarking on a journey to find genuine Wagyu beef can be an exhilarating experience, especially given the rising popularity of this exquisite meat in the United States. Numerous reputable suppliers are distributed across the country, offering high-quality options for both home cooks and grilling enthusiasts. Online retailers specializing in premium meats, such as Crowd Cow and Snake River Farms, provide a vast selection of Wagyu cuts that can be conveniently delivered straight to your door. These companies usually provide detailed information about the sourcing and grading of their beef, allowing consumers to make informed choices.
Local butcher shops and gourmet markets can serve as treasure troves for Wagyu lovers. Establishments that prioritize quality frequently stock Wagyu cuts, offering you the opportunity to consult with knowledgeable staff about the best options tailored to your grilling needs. Many regions across the United States have embraced Wagyu farming, resulting in local brands that offer fresh and high-quality products.
For those who enjoy the thrill of discovery, farmers’ markets can be excellent venues for finding local Wagyu beef. Building relationships with local farmers or ranchers not only supports small businesses but also provides insights into the origins of the beef. By sourcing Wagyu directly from reputable suppliers, you can ensure a more authentic and delicious grilling experience.
Essential Preparation Steps for Grilling Wagyu Beef
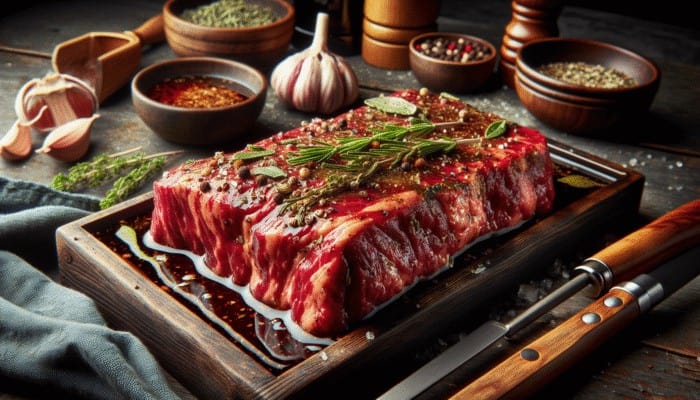
The preparation phase is a critical factor when it comes to grilling Wagyu beef. Implementing the correct marinating and seasoning techniques can significantly enhance the meat’s natural flavors, resulting in a more satisfying culinary experience. Learning how to prepare Wagyu correctly involves more than merely placing it on the grill; it requires a delicate touch and meticulous attention to detail to unlock its rich potential.
Thawing and Tempering Wagyu: Best Practices for Optimal Results
Properly thawing Wagyu is essential for achieving an even cook and maximizing its natural flavors. If you’ve acquired frozen Wagyu, the most effective method is to transfer it to the refrigerator, allowing it to thaw gradually over 24 to 48 hours. This gentle thawing technique preserves the meat’s integrity and texture. Once thawed, it’s crucial to temper the meat by allowing it to reach room temperature before grilling. This step typically takes about 30-60 minutes and ensures the meat cooks evenly, preventing the exterior from overcooking while the inside remains undercooked.
Bringing Wagyu to room temperature not only facilitates even cooking but also allows the flavors to develop fully. As the meat warms, the natural fats within the Wagyu begin to soften, enhancing its flavor when grilled. This simple yet frequently overlooked step can be a game-changer for those who aspire to master the art of grilling Wagyu beef perfectly.
Effective Seasoning Techniques for Elevating Wagyu Flavor
When it comes to seasoning Wagyu, simplicity is paramount. Given the rich and buttery flavor inherent in Wagyu, it’s crucial to enhance rather than overpower it. A classic method involves using coarse sea salt and freshly cracked black pepper. This combination allows the beef’s natural flavors to shine through while adding a subtle crunch to the exterior once grilled.
For those who enjoy exploring flavors, consider incorporating a hint of garlic powder or onion powder for added depth without overshadowing the meat. A light sprinkle of smoked paprika can also impart a subtle smoky flavor that beautifully complements the richness of the Wagyu.
Another effective technique is to apply the seasoning just before grilling. This approach prevents the meat from drawing out moisture, which helps maintain its juiciness. By keeping the seasoning uncomplicated and applying it at the right moment, you can ensure that your Wagyu remains the focal point of the meal, delivering an unforgettable grilling experience.
Essential Strategies for Marinating Wagyu Beef
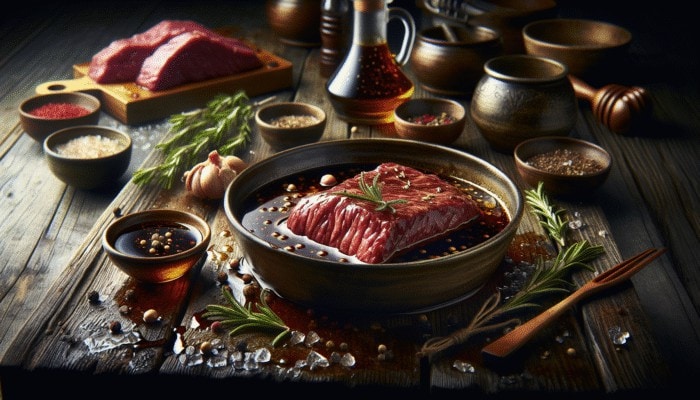
Marinating Wagyu requires a careful balance. While it can introduce wonderful flavors, there’s a fine line between enhancing and overpowering the meat’s natural richness. When considering whether to marinate, opt for light marinades that enhance the inherent flavors rather than mask them.
A straightforward marinade consisting of soy sauce, mirin, and a hint of sesame oil can introduce an umami flavor without overshadowing the beef. It’s important to limit marinating time to avoid excessively breaking down the meat’s texture; generally, a few hours in the refrigerator will suffice. For those seeking a herbal touch, consider incorporating fresh herbs like rosemary or thyme, but use them sparingly to maintain the balance.
Ultimately, understanding when and how to marinate Wagyu is crucial for mastering the perfect grilling technique for Wagyu beef. Utilizing appropriate techniques not only enhances the flavor but also respects the quality of this exceptional meat.
Advanced Grilling Techniques for Achieving Perfectly Cooked Wagyu
Grilling Wagyu involves more than just knowledge of cuts and preparation; it requires expertise in various grilling techniques to ensure that the beef reaches its optimal state. Each technique offers distinct advantages, enabling grillers to achieve the ideal flavor and texture.
Prepare Your Grill for the Ultimate Wagyu Experience
Before diving into the grilling process, preparing your grill is the first essential step toward achieving that delectable Wagyu experience. Whether you’re using a charcoal or gas grill, the setup plays a significant role in the outcome. For charcoal grills, ensure that the coals are evenly distributed and fully ashed over, creating a consistent heat source.
If you’re utilizing a gas grill, preheat it to the desired temperature, ideally between 450°F and 500°F for direct grilling. This high heat is crucial for creating a beautiful sear and locking in the rich juices of the Wagyu. Additionally, ensure that the grill grates are clean and lightly oiled to prevent sticking and ensure optimal grilling.
Understanding the differences between direct and indirect heat is also crucial in the grilling setup. Direct heat is perfect for searing, while indirect heat is ideal for cooking thicker cuts more evenly without burning the exterior. Mastering these techniques will elevate your grilling skill set, allowing you to focus solely on achieving that perfect Wagyu cook.
Mastering Direct and Indirect Grilling Techniques for Exquisite Wagyu
Understanding when to utilize direct versus indirect grilling techniques can dramatically enhance your Wagyu grilling experience. Direct grilling involves placing the meat directly over the heat source, allowing for a quick sear that caramelizes the exterior while sealing in moisture. This method is ideal for tender cuts such as ribeye or strip loin, where a flavorful crust is desired.
Conversely, indirect grilling entails cooking the meat away from the direct heat source, providing a gentler cooking method that’s perfect for thicker cuts or larger portions. This technique ensures that the interior of the meat cooks evenly without the risk of burning the outside. Many experienced grillers prefer a hybrid approach, beginning with a direct sear to develop a crust and finishing with indirect heat to achieve the desired doneness.
Knowing when to switch between techniques is crucial for mastering the art of grilling Wagyu beef perfectly. Experimenting with both methods will help you determine which approach best suits your preferred cuts and desired outcomes.
Critical Temperature Control for Perfectly Grilled Wagyu
Achieving the perfect temperature when grilling Wagyu is vital for unlocking its full potential. Utilize a high-quality meat thermometer to accurately assess the internal temperature, ensuring that your Wagyu reaches the desired level of doneness. For a perfect medium-rare steak, aim for an internal temperature of 130°F to 135°F. Cooking Wagyu to medium is generally around 140°F to 145°F, but be cautious, as overcooking can compromise the meat’s tenderness.
To effectively monitor the grill’s heat, consider using a combination of thermometer readings and visual cues. An experienced griller will recognize the difference between a perfect sear and an overcooked crust by observing the color and texture of the meat’s exterior. Mastering temperature control will significantly enhance your grilling skills, allowing you to present Wagyu that is both juicy and satisfying.
Utilizing the reverse sear method can also be an effective approach for temperature control. This technique involves cooking the meat slowly at a lower temperature before finishing it with a high-heat sear. This method ensures that the meat is cooked evenly and retains its juiciness, culminating in an exceptional grilling experience.
Understanding Cooking Times and Achieving Ideal Doneness for Wagyu
Familiarizing yourself with the nuances of cooking times and doneness is essential when grilling Wagyu. Each cut has specific requirements, and mastering these guidelines will help you serve perfectly cooked beef every time.
Important Cooking Times for Various Cuts of Wagyu
To avoid overcooking and ensure each cut of Wagyu is grilled to perfection, it is essential to adhere to specific time guidelines. Generally, thicker cuts, such as ribeye or strip loin, require around 6-8 minutes per side on high heat for medium-rare, while thinner cuts may only need 3-4 minutes per side. Keeping a close eye on the clock can help prevent the risk of turning your premium Wagyu into an overdone disappointment.
When using indirect heat, cooking times may vary. Thicker cuts benefit from a longer cooking duration, approximately 12-20 minutes, depending on their thickness. A reliable meat thermometer remains your best ally during this process, ensuring accuracy and eliminating guesswork.
By mastering these recommended cooking times, you can elevate your grilling expertise and confidently serve Wagyu beef that delights the palate.
Effective Techniques for Determining Wagyu Doneness
Determining the doneness of your Wagyu is paramount to achieving a perfect grill. Relying on visual cues combined with a meat thermometer can provide a comprehensive understanding of when your beef is ready. For medium-rare, look for an internal temperature of 130°F to 135°F, which should yield a slightly warm, red center.
Another effective technique involves the touch test; gently press the center of the meat with your finger. A medium-rare cut will feel soft yet firm, similar to the fleshy part of your palm beneath your thumb. With practice, this method can enhance your ability to gauge doneness without always relying solely on a thermometer.
Visual cues can also offer valuable insights into the ideal cooking stage. A well-seared exterior with slight grill marks indicates proper caramelization, while juices that begin to surface on the meat suggest it is nearing optimal doneness. By combining these methods, you can perfect your timing and serve Wagyu that satisfies even the most discerning palates.
The Importance of Resting Wagyu After Grilling
Resting your grilled Wagyu is an often overlooked yet critical step in achieving peak flavor and tenderness. After removing the meat from the grill, allow it to rest for at least 5-10 minutes before slicing. This short break enables the juices to redistribute throughout the meat, resulting in a more succulent and flavorful bite.
Cutting into the meat too soon can cause the juices to escape, leading to dryness. Taking the time to rest Wagyu not only enhances its flavor but also improves the overall eating experience. Many grilling experts recommend covering the resting meat with foil to keep it warm without trapping excessive steam.
By incorporating this simple yet impactful step into your grilling routine, you ensure your Wagyu is as juicy and delicious as possible, solidifying your reputation as a grilling expert.
Adjusting Cooking Times for High-Altitude Grilling
Grilling at high altitudes presents unique challenges, particularly concerning cooking times and temperature control. The decrease in atmospheric pressure can affect how meat cooks, often leading to longer grilling times. If you’re grilling Wagyu in elevated regions, be prepared to modify your cooking approach accordingly.
A general guideline is to increase the cooking time by approximately 10% for every 1,000 feet above sea level. This adjustment may require some trial and error, as different cuts and thicknesses may react differently to the modification. Utilizing a meat thermometer remains your best bet for ensuring that your Wagyu reaches the desired doneness without guesswork.
As you adapt to the altitude conditions, understanding your grill and the impact of external factors is crucial. Wind, temperature fluctuations, and humidity can all influence cooking times. By staying vigilant and adjusting accordingly, you can successfully navigate the challenges of high-altitude grilling while achieving perfect Wagyu every time.
Elevate Your Grilling Game with the Reverse Sear Technique
Employing the reverse sear technique can significantly enhance your Wagyu grilling experience by ensuring even cooking and intensified flavor. This method involves starting with low-temperature cooking, allowing the interior to reach the desired doneness without overcooking the exterior.
Start by preheating your grill to a lower temperature, around 225°F. Place the Wagyu on indirect heat, allowing it to cook slowly and evenly. Using a meat thermometer, monitor the internal temperature until it reaches about 10°F below your target doneness.
Once the meat is almost done, increase the grill’s temperature for a rapid sear over direct heat. This searing process locks in the juices and develops a beautiful crust that is characteristic of exceptional Wagyu. The reverse sear technique not only enhances the overall flavor but also showcases the quality of the beef.
By incorporating this method into your grilling repertoire, you elevate your understanding of how to grill Wagyu beef perfectly and ensure a memorable dining experience for your guests.
Enhancing Wagyu Flavor with American Ingredients
Pairing Wagyu with complementary American ingredients can elevate your grilling experience to new heights. By incorporating local cheeses, herbs, and traditional side dishes, you enhance the overall flavor profile of the meal.
Delicious Cheese Pairings to Enhance Your Wagyu Experience
The rich and buttery flavor of Wagyu beef harmonizes beautifully with the addition of local American cheeses. Aged cheddar, blue cheese, or even creamy goat cheese can create an enticing flavor contrast that enhances the overall experience. For a simple yet sophisticated touch, consider topping your grilled Wagyu with a slice of aged cheddar that melts beautifully into the warm meat.
For those who appreciate bold flavors, crumbled blue cheese adds a delightful tang that complements the richness of Wagyu. Consider drizzling a balsamic reduction or sprinkling fresh herbs for an elegant finish. The key is to choose a cheese that complements rather than competes with the natural flavors of the Wagyu.
Exploring artisan cheese shops or local dairy farms can yield a variety of options, allowing you to personalize your Wagyu experience. By thoughtfully pairing cheeses with this exquisite meat, you craft a memorable culinary journey that highlights the best of both worlds.
Incorporating Regional Herbs and Spices for Enhanced Flavor
Integrating regional herbs and spices can elevate your Wagyu dishes in delightful ways. Fresh herbs like rosemary, thyme, or sage can add a fragrant touch that harmonizes beautifully with the richness of the beef. A simple herb compound butter, made from local herbs and high-quality butter, can elevate grilled Wagyu without overpowering its natural flavors.
As you explore various regions of the U.S., consider the unique spices that are locally celebrated. For instance, spices from the Southwest, such as smoked paprika or chili powder, can introduce a new layer of flavor that enhances the overall experience. A hint of dill or tarragon can offer a refreshing contrast that delights the palate.
The beauty of using regional herbs and spices lies in the ability to customize your Wagyu dishes based on seasonal availability. Create your signature blends to showcase the rich flavors of the beef while celebrating local culinary traditions.
Pairing Wagyu with Classic American Side Dishes
Classic American side dishes can elevate your grilled Wagyu experience to new heights. Consider serving your Wagyu alongside creamy coleslaw, buttery corn on the cob, or even traditional baked beans. These sides not only complement the robust flavors of the beef but also enhance the overall grilling experience.
Roasted vegetables, seasoned with local herbs and garlic, offer a vibrant and healthy complement to the richness of Wagyu. For a more substantial side, creamy mashed potatoes or cheesy grits can create a satisfying pairing that brings comfort to the meal.
Exploring the local culinary scene can yield inventive side dishes that may surprise and delight. By thoughtfully pairing your Wagyu with classic American sides, you create a well-rounded meal that showcases the best of both the beef and its accompaniments.
Enhancing Your Wagyu Dining Experience
The manner in which you present and serve Wagyu can significantly elevate the overall dining experience. By mastering plating techniques, wine pairings, and proper storage for leftovers, you can take your Wagyu grilling game to new levels of sophistication.
Artful Plating Techniques to Showcase Your Grilled Wagyu
The presentation of your grilled Wagyu can transform an ordinary meal into a visually stunning experience. Start with a clean, warm plate and consider using a simple backdrop, such as a bed of arugula or sautéed greens, to create contrast. Slicing the Wagyu against the grain highlights the marbling and tenderness, resulting in a visually appealing display.
Adding garnishes like microgreens, edible flowers, or fresh herbs can enhance the visual appeal while also elevating the overall flavor. Drizzling a balsamic reduction or herb-infused oil can add an elegant touch to the dish. By paying attention to these details, you create an extraordinary presentation that impresses guests and enhances the enjoyment of the meal.
Wine Pairing Recommendations to Complement Your Wagyu
Selecting the right wine to pair with your grilled Wagyu can significantly enhance the dining experience. Full-bodied red wines such as Cabernet Sauvignon or Syrah complement the richness of Wagyu beautifully, while lighter options like Pinot Noir can provide a refreshing contrast. Consider exploring local American wineries that craft wines specifically intended for robust dishes, thereby elevating your meal while supporting local producers.
For those who prefer white wine, an oaked Chardonnay can provide a creamy texture that pairs wonderfully with the beef. The key is to find a wine that balances the richness of the Wagyu without overshadowing its flavors. Experimenting with different pairings can lead to delightful discoveries and enhance the overall dining experience.
Proper Storage Techniques for Leftover Wagyu
Effectively storing any leftover Wagyu is crucial for maintaining its quality and flavor for future meals. Allow any uneaten meat to cool to room temperature before wrapping it in plastic wrap or aluminum foil. For optimal freshness, store it in an airtight container in the refrigerator for up to 3-4 days. If you wish to keep it for an extended period, consider freezing the leftover Wagyu.
When reheating, avoid using high heat to prevent the meat from drying out. Instead, consider utilizing a gentle heat source, such as a low-temperature oven or sous-vide method, to maintain moisture and tenderness. By following these storage techniques, you can relish the luxurious flavors of Wagyu long after the grill is turned off.
Your Questions About Wagyu Beef Answered
What is Wagyu beef, and what makes it unique?
Wagyu beef originates from a specific breed of cattle renowned for its high marbling, tenderness, and rich flavor. It is often regarded as one of the highest-quality beef options available on the market.
How do I select the best Wagyu cut for grilling?
Choosing the right cut involves understanding the grades and options available, such as ribeye, strip loin, and tenderloin. Higher grades provide increased marbling and richer flavor, making them ideal for grilling.
Where can I find authentic Wagyu beef in the U.S.?
You can find Wagyu beef at specialty butcher shops, gourmet markets, and online retailers like Crowd Cow or Snake River Farms that specialize in high-quality meats.
What is the best way to season Wagyu beef for grilling?
Keep the seasoning simple with coarse salt and freshly cracked black pepper to enhance the natural flavors. Avoid overwhelming the meat with heavy marinades.
What temperature should I aim for when grilling Wagyu beef?
Aim for a grill temperature of around 450°F to 500°F for direct grilling. This high heat is crucial for achieving a beautifully seared exterior and retaining the meat’s juices.
How can I tell when Wagyu is fully cooked?
Use a meat thermometer to check for an internal temperature of approximately 130°F to 135°F, which indicates medium-rare doneness. Visual cues and the touch test can also help determine doneness.
Why is it essential to rest Wagyu after grilling?
Resting allows the juices to redistribute throughout the meat, resulting in a more tender and flavorful experience. Avoid cutting into the meat too soon after grilling to maintain its juiciness.
What should I serve alongside grilled Wagyu?
Classic American sides, such as creamy coleslaw, roasted vegetables, and buttery corn on the cob, pair beautifully with grilled Wagyu, enhancing the overall meal experience.
Can I freeze leftover Wagyu beef?
Yes, you can freeze leftover Wagyu beef. Wrap it tightly in plastic wrap or aluminum foil and store it in an airtight container to preserve its freshness.
Which wines pair best with grilled Wagyu beef?
Full-bodied red wines such as Cabernet Sauvignon or Syrah complement the richness of Wagyu, while oaked Chardonnay can provide a creamy contrast. Experimenting with local options can enhance your experience.
Connect with us on Facebook for more expert grilling tips!
The Article How to Grill Wagyu Beef Perfectly: A Step-by-Step Guide appeared first on Pitmasters Arsenal.
The Article Grill Wagyu Beef Perfectly: Your Ultimate Step-by-Step Guide Was Found On https://limitsofstrategy.com
-
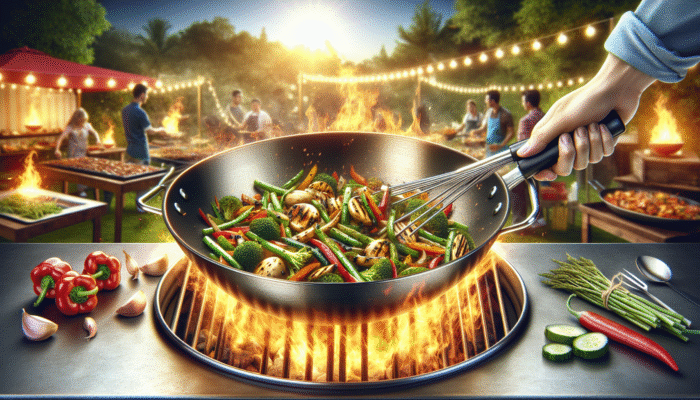
Grill Wok: Your Guide to Perfect Stir-Fried Veggies
Expert Strategies for Choosing the Perfect Grill Wok for Exceptional Stir-Frying
Exploring the Best Materials for Your Ideal Grill Wok
Selecting the perfect material for your grill wok is crucial for achieving outstanding results when preparing delicious stir-fried vegetables. The most common options include stainless steel, cast iron, and non-stick coatings, each offering unique benefits that can enhance your cooking journey. Stainless steel is renowned for its incredible durability and resistance to rust, making it an excellent choice for passionate grillers. This material heats up quickly and provides even heat distribution, which is vital for maintaining high cooking temperatures while creating your favorite dishes.
In contrast, cast iron is a tried-and-true option, celebrated for its remarkable heat retention capabilities. This sturdy material can endure high temperatures, making it perfect for achieving that sought-after sear on your vegetables. However, it’s important to recognize that cast iron requires more maintenance than stainless steel, necessitating regular seasoning to preserve its non-stick qualities and prevent rust from forming over time.
Modern non-stick coated woks offer a convenience level that is hard to surpass, providing easy food release and streamlining the cleaning process. These woks are particularly useful for cooking delicate vegetables that may stick or burn without careful attention. Nevertheless, it’s essential to follow the manufacturer’s recommendations concerning heat levels to prevent damaging the coating. Whatever material you opt for, ensure it aligns with your cooking style and preferences to foster the most enjoyable grilling experience.
Determining the Optimal Size and Shape for Your Grill Wok
The size and shape of your grill wok are crucial factors that can significantly influence your grilling success, particularly when focusing on stir-fried vegetables. Generally, a wok with a diameter ranging from 12 to 16 inches strikes the perfect balance between capacity and ease of handling. A larger wok can accommodate multiple servings simultaneously, making it an ideal choice for family gatherings or vibrant outdoor barbecues where everyone can savor delicious food.
Additionally, carefully consider the wok’s shape. A traditional rounded design is specifically engineered for high-heat cooking, facilitating optimal heat circulation around your vegetables. Conversely, if your grill features a flat surface, a flat-bottomed wok may be a better fit, ensuring maximum contact with the heat source. Regardless of the shape you choose, the key is to select a wok that fits comfortably on your grill, promoting even cooking throughout your vegetables.
It’s also wise to factor in the weight of the wok. While a heavier wok often signifies better durability, it can be cumbersome to manage. If you frequently toss and stir your vegetables to achieve the best stir-fry results, opting for a lighter option may prove more practical. Be sure to measure your grill before making a purchase to ensure a perfect fit, maximizing both your cooking efficiency and enjoyment throughout the grilling process.
The Importance of Handle Design in Your Grill Wok Selection
The design of your grill wok’s handle can greatly impact your overall grilling experience. Long, heat-resistant handles are essential for safe and easy maneuvering, especially when dealing with intense flames. Look for woks that feature ergonomically designed handles offering a comfortable grip, which allows you to toss and stir your vegetables effortlessly and with precision, minimizing the risk of burns or accidents.
Furthermore, consider the configuration of the handles. Some woks come with a single long handle, while others feature two short handles on either side. A single long handle can facilitate easy lifting and flipping but may require a bit more skill for proper balance. In contrast, two short handles provide better stability when removing the wok from the grill, which is particularly beneficial when handling heavy or hot contents.
It’s also prudent to evaluate the materials used for the handles. Handles made from stainless steel and silicone-coated materials offer durability and heat resistance. Wooden handles can add aesthetic appeal but generally require additional care to ensure their longevity and usability. Regardless of the handle design you select, prioritize safety and ergonomics to enhance your grilling experience with a wok tailored for stir-fried vegetables.
Essential Steps for Preparing Your Vegetables for Stir-Frying

Ensuring Cleanliness and Mastering Chopping Techniques
Preparation is the foundation of an exceptional stir-fry, starting with the careful washing and chopping of your vegetables. When using a grill wok for stir-fried veggies, it’s crucial to rinse your produce thoroughly under cold water to remove any dirt or pesticide residues. This cleaning step is vital not only for hygiene but also for enhancing flavor by eliminating any unpleasant remnants, ensuring a cleaner and more enjoyable taste.
Once your vegetables are washed, the art of chopping begins. Achieving uniform pieces is critical for ensuring even cooking. Instead of randomly slicing your vegetables, aim for consistent sizes—typically between 1 to 2 inches in width. This technique guarantees that all ingredients, from vibrant bell peppers to crunchy green beans, cook at the same rate, allowing for a harmonious blend of flavors and textures. Additionally, consider the type of vegetable; softer options like zucchini or mushrooms may benefit from smaller cuts, while sturdier choices like carrots can be sliced thicker for added texture.
Don’t underestimate the significance of presentation when using a grill wok for stir-fried veggies. A visually appealing assortment of your chopped produce not only stimulates the appetite but also signifies a variety of flavors and textures. Strive to incorporate a rainbow of colors—greens, reds, yellows, and purples. This approach not only enhances the visual appeal of your dish but also promotes a diverse nutrient profile, enriching your meal with essential vitamins and minerals.
Enhancing Flavor Through Effective Marination Techniques
To elevate the taste of your stir-fried veggies, marinating is an essential step that infuses flavors and transforms simple vegetables into a culinary delight. A basic marinade typically consists of oil, herbs, and spices; however, feel free to experiment! Try incorporating ingredients such as soy sauce, sesame oil, garlic, and ginger for an Asian-inspired twist that tantalizes the palate and enhances the overall flavor profile.
Allow your chopped vegetables to soak in the marinade for a minimum of 30 minutes, giving the flavors ample time to blend. This process not only improves taste but also aids in slightly tenderizing the veggies, making them more enjoyable once they hit the grill. For an even more robust flavor, consider marinating overnight in the refrigerator to deepen the flavor profile of your stir-fried veggies.
While marinating, be mindful of maintaining balanced proportions. Excess oil can lead to a greasy finish, while insufficient seasoning may result in bland vegetables. Aim for a ratio of about three parts oil to one part acidity (such as vinegar or citrus juice), adjusting according to your taste preferences. Once marinated, allow any excess liquid to drain before grilling, preventing steaming and ensuring your veggies achieve the desired char.
The Crucial Role of Preheating Your Wok
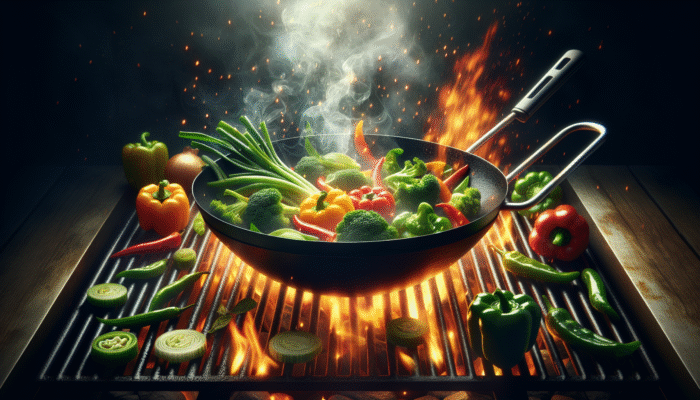
Preheating your grill wok is a transformative step in the art of stir-frying, particularly when using a grill wok for stir-fried veggies. The primary purpose of this step is to create a non-stick surface that facilitates easy food release and promotes the caramelization of the vegetables. Simply placing your wok on the grill for a few minutes before adding your vegetables can significantly enhance both the cooking process and the final outcome.
Aim for high heat during the preheating phase, as this temperature is essential not only for preventing sticking but also for achieving that delightful sear that enhances both flavor and texture. A well-preheated wok ensures that your veggies hit a hot surface immediately, initiating the cooking process while locking in their natural juices for optimal flavor.
It’s advisable to check the temperature of the wok before adding your vegetables. A simple test is to drop a few droplets of water on the surface; if they sizzle and evaporate almost instantly, your wok is sufficiently hot. Once preheated, add a small amount of oil to the wok before introducing your marinated vegetables. This step not only helps prevent sticking but also creates a beautiful, glossy finish on your stir-fried veggies.
Enhancing Vegetable Texture with Blanching Techniques
Blanching is a technique that can remarkably enhance the texture and color of your vegetables, making it a crucial step when using a grill wok for stir-fried veggies. By briefly boiling your vegetables before grilling, you can soften them slightly while preserving their vibrant colors and nutritional values. This method is particularly effective for tougher vegetables like broccoli or asparagus, which may require longer cooking times on the grill to achieve the desired tenderness.
To blanch, fill a pot with water and bring it to a rolling boil. Adding a pinch of salt to the water not only flavors the veggies but also helps maintain their bright hues during cooking. Once the water reaches a boil, add the vegetables and allow them to cook for approximately 1-3 minutes, depending on the type. After blanching, promptly transfer the veggies to an ice bath to halt the cooking process, locking in their color and crunch.
After cooling, be sure to pat the vegetables dry before adding them to the grill wok. This step is crucial because excess water can lead to steaming instead of stir-frying, resulting in a less desirable texture. By incorporating blanching into your preparation routine, you can achieve a perfect balance of tenderness and crispness, elevating your stir-fried veggies to restaurant-quality levels.
Strategically Arranging Your Vegetables in the Grill Wok
The strategic arrangement of your vegetables in the grill wok can be the distinguishing factor between a mediocre dish and a culinary masterpiece when using a grill wok for stir-fried veggies. After preparing and marinating your vegetables, it’s essential to position them effectively within the wok to maximize heat exposure and ensure even cooking.
Begin by thoroughly heating your wok, then add the oil and allow it to shimmer before placing the vegetables inside. Start with denser vegetables that require longer cooking times, such as carrots or bell peppers. Arrange them in a single layer, ensuring there’s some space between each piece. This prevents overcrowding and allows for even cooking, avoiding the dreaded steaming effect on your vegetables.
As cooking progresses, you can begin adding softer vegetables that require less time, such as zucchini or snap peas. This staggered approach ensures that each type of vegetable is cooked to perfection, maintaining a pleasant crunch without becoming soggy. Additionally, remember to toss the vegetables occasionally using a long-handled spatula or tongs to promote even charring and caramelization, enhancing the overall flavor profile.
By employing these thoughtful techniques in arranging your vegetables, you’ll not only elevate the flavor but also create a visually stunning presentation that is sure to impress your guests. A well-executed stir-fry derives its charm from the vibrant colors and textures of the veggies, making this step vital in achieving culinary success.
Perfecting Grilling Techniques for Impeccable Stir-Fried Veggies
Stirring and Tossing for Optimal Flavor and Texture
Mastering the technique of stirring and tossing your veggies in the wok is essential for achieving the best texture and flavor when using a grill wok for stir-fried veggies. Once your vegetables begin sizzling in the hot wok, it’s time to get them moving. Keeping your veggies in motion is vital to ensure even cooking, guaranteeing that every piece receives equal exposure to heat.
Utilize a long-handled spatula or tongs to lift and toss the vegetables. This action not only helps distribute heat evenly but also allows those delicious char marks to develop, adding depth to the flavor profile. Picture your wok as a mini arena where the vegetables perform—the more you stir, the better they dance!
Timing is also critical when it comes to stirring and tossing. You don’t want to overdo it, as some charring is desirable for flavor, but too much stirring can lead to burning. A good rule of thumb is to stir every 30 seconds, allowing the veggies to rest momentarily to develop that coveted caramelized crust.
Additionally, consider the type of vegetables you’re cooking. Softer veggies like spinach or bell peppers require less time and can be stirred more frequently, while denser options like carrots may need longer periods on the heat before being stirred. Ultimately, the perfect stir-fry is a balance of heat, motion, and timing, all crucial elements when using a grill wok for stir-fried veggies.
Effectively Managing Heat Zones on Your Grill
Understanding how to manage heat zones on your grill can significantly enhance your stir-fry game, particularly when utilizing a grill wok for stir-fried veggies. Grills typically have areas of varying temperatures—some zones are hotter than others—and learning to utilize this can elevate your cooking technique to new heights.
Start by preheating your grill with all burners on high, then adjust the heat to create zones. For example, maintain one side at high heat for searing while keeping another at medium for slower cooking or warming food. This setup allows you to sear denser vegetables while moving softer ones to a cooler zone to prevent overcooking.
When you first add your veggies to the hot side, they will quickly sear and caramelize, locking in flavor. After achieving that desirable char, you can shift them to the cooler side to finish cooking through without burning. This technique maximizes flavor and enhances the texture of your stir-fried veggies, ensuring they are perfectly cooked and visually appealing.
Using a grill wok for stir-fried veggies also opens the door for experimenting with indirect heat. For instance, after searing, you can cover the grill for a few minutes to allow steam to circulate, which helps soften the vegetables while preserving their vibrant colors. This control over heat zones is a powerful tool in your grilling arsenal, paving the way for a flawless stir-fry every time.
Timing for Achieving Perfect Doneness
Timing is a crucial element in the world of cooking, and when it comes to using a grill wok for stir-fried veggies, it can mean the difference between achieving crunchy perfection and ending up with overcooked mush. Keeping a close watch on cooking time is essential for obtaining that ideal crisp-tender texture that makes stir-fried vegetables so delightful.
As a general guideline, most vegetables require 5 to 10 minutes of cooking time in a hot grill wok, but this can vary based on the type. Softer vegetables like bell peppers and zucchini may only need around 5 minutes, while denser veggies like carrots or broccoli could take closer to 8-10 minutes. A good strategy is to toss the vegetables every couple of minutes to ensure even cooking and to prevent burning.
Always taste-test as you go. You want your veggies to be tender enough to bite through easily while still maintaining a satisfying crunch. The ideal stir-fried vegetable should retain its vibrant color and nutritional value while also offering delightful texture and flavor.
Visual cues can also be beneficial. Look for vibrant colors; if they begin to dull, it may be a sign that they are overcooking. A well-timed stir-fry is a beautiful balance of heat, timing, and attention to detail—all crucial for using a grill wok for stir-fried veggies that impress.
Maximizing Flavor in Your Stir-Fried Veggies
Incorporating Sauces and Seasonings for Ultimate Taste
Elevating your stir-fried veggies with the right sauces and seasonings can dramatically transform your dish from ordinary to extraordinary. When utilizing a grill wok for stir-fried veggies, the timing of adding these flavor enhancers is critical. The last few minutes of cooking present the perfect opportunity to introduce your favorite sauces or seasonings, allowing the flavors to meld without the risk of burning.
Soy sauce is a staple in many stir-fries, providing a savory umami flavor that pairs beautifully with vegetables. Consider adding a splash of teriyaki or hoisin sauce for a sweet and tangy twist. When applying these sauces, moderation is vital; start with a small amount, tossing the veggies to evenly distribute the flavor. You can always add more if needed, ensuring your dish is perfectly seasoned.
In addition to sauces, consider enhancing your dish with spices and herbs. A sprinkle of sesame seeds adds delightful crunch, while a dash of red pepper flakes can introduce a hint of heat. Fresh garlic or ginger, added just a minute before finishing, can provide an aromatic punch that elevates the entire dish. The key is to balance flavors thoughtfully; each addition should enhance the overall experience without overpowering the natural essence of the vegetables.
As you cook, keep a vigilant eye on your flavors. If you notice your veggies beginning to dry out, a quick splash of broth or water can add moisture and help the sauces adhere better. This method not only enhances flavor but also keeps your vegetables vibrant and appealing. Mastering the art of flavor enhancement is essential when using a grill wok for stir-fried veggies, ensuring a culinary delight with every bite.
Brightening Your Dish with Fresh Herbs and Citrus
Finishing your stir-fried veggies with fresh herbs and a squeeze of citrus adds a bright, refreshing element that can truly elevate your dish. When using a grill wok for stir-fried veggies, these final touches are where you can really shine. Fresh herbs such as cilantro, basil, or parsley introduce an aromatic quality that enlivens the entire dish.
Finely chop your herbs and sprinkle them over the vegetables just before serving. This simple act infuses your stir-fry with a burst of freshness that contrasts beautifully with the grilled flavors. Additionally, herbs like basil or cilantro can complement specific vegetable profiles; for instance, basil pairs exceptionally well with zucchini and bell peppers.
Citrus is another powerful ingredient for flavor enhancement. A squeeze of lime or lemon juice can brighten the dish, cutting through the richness of any oils or sauces used. This acidity not only elevates the flavor but also balances the natural sweetness of the vegetables. Use citrus sparingly; a little goes a long way in enhancing the dish without overwhelming it.
When using a grill wok for stir-fried veggies, these finishing touches can transform an already delicious meal into a vibrant, mouthwatering experience. They not only enhance flavor but also boost visual appeal, making your dish as pleasing to the eye as it is to the palate.
Adding Toppings and Garnishes for Visual Appeal
The final flourish in your stir-fried veggie dish can make all the difference, and choosing the right toppings and garnishes can elevate your meal to restaurant-quality. When using a grill wok for stir-fried veggies, consider adding elements that introduce different textures and flavors. Toasted nuts, such as almonds or cashews, deliver a satisfying crunch that contrasts beautifully with the soft, tender veggies.
Seeds, like sesame seeds, provide a nutty flavor and added texture. Toast them lightly in the grill wok for a few moments before garnishing your finished dish. This step not only enhances their flavor but also increases their visual appeal as a garnish.
For an extra layer of flavor, crispy fried onions or shallots can be sprinkled on top just before serving. Their sweetness and crunch create an enticing combination with the grilled vegetables, ensuring that every bite is delightful. Fresh herbs can also serve as a beautiful garnish; a sprinkle of chopped parsley or cilantro adds color and freshness that invites diners to dig in.
Keep in mind that garnishing isn’t solely about aesthetics; it’s about enhancing the overall experience of the dish. Each topping should complement the primary flavors of your stir-fried veggies. By thoughtfully selecting and applying these finishing touches, you’ll create a visually stunning and delicious dish that celebrates the art of grilling.
Creative Serving Suggestions for Your Stir-Fried Veggies
Enhancing Your Dish with Complementary Accompaniments
Pairing your stir-fried veggies with the right accompaniments can create a well-rounded meal that satisfies all taste buds. When utilizing a grill wok for stir-fried veggies, consider options like rice, noodles, or grilled meats to enhance the experience and add substance to your dish.
White or brown rice is a classic pairing, providing a neutral base that allows the vibrant flavors of your stir-fry to shine. For a touch of flair, consider preparing fried rice or jasmine rice, which can introduce additional flavors and aromas that beautifully complement your vegetables. Noodles are another fantastic choice; from soba to rice noodles, they offer a chewy texture that seamlessly complements the crispness of the stir-fried vegetables.
If you’re looking to elevate your meal further, grilled meats such as chicken, shrimp, or beef can add protein and heartiness to the dish. This combination not only creates a satisfying meal but also results in a stunning presentation with a variety of colors and textures on your plate.
Don’t forget about sauces! A drizzle of soy sauce or a dollop of spicy chili paste can complement your stir-fried veggies perfectly, tying the meal together. By thoughtfully selecting accompaniments, you can create a complete and delightful dining experience that showcases your culinary skills and creativity.
Artful Plating and Presenting Your Stir-Fried Veggies
Visual appeal is critical when it comes to serving your stir-fried veggies, as a beautifully plated dish can significantly enhance the dining experience. When using a grill wok for stir-fried veggies, consider the arrangement of your food. Start by placing your stir-fried vegetables in the center of a large platter or bowl to create a focal point that draws the eye.
Utilize contrasting colors to make your dish pop. A vibrant mix of greens, reds, yellows, and purples can attract attention and highlight the freshness of your ingredients. Garnish with fresh herbs sprinkled on top for added color and aroma. This not only makes the dish look appetizing but also indicates freshness and attention to detail in your cooking.
For a more upscale presentation, consider serving your stir-fried veggies in individual portions, perhaps on a bed of rice or noodles. This approach facilitates easy serving and adds an element of sophistication to your meal. You could also incorporate decorative accents, like edible flowers or citrus wedges, to enhance visual interest and appeal.
Ultimately, plating is about creating a feast for the eyes that complements the flavors on the plate. A well-presented dish elevates the culinary experience and reflects the level of care and effort you invested in preparing the meal, leaving a lasting impression on your guests.
Innovative Ideas for Repurposing Leftover Stir-Fried Veggies
Repurposing leftover stir-fried veggies is an excellent way to minimize waste while enjoying a variety of delicious meals. When using a grill wok for stir-fried veggies, the possibilities for leftovers are virtually limitless. One of the simplest options is to incorporate them into an omelet, creating a hearty breakfast or brunch. Whisk some eggs, pour them into a heated skillet, and add your leftover veggies as the eggs begin to set.
Wraps are another fantastic way to utilize leftover stir-fried veggies. Take a tortilla or lettuce leaf, fill it with the vegetables, add some protein such as grilled chicken or tofu, and drizzle with sauce for a quick and delicious meal. You can even transform them into a grain bowl; serve your stir-fried veggies over quinoa or farro, topped with avocado, chickpeas, or a dollop of hummus for an energizing lunch.
For a unique twist, consider using your leftover stir-fried veggies as a topping for pizzas. Spread some sauce on a pre-made crust, add cheese, and pile on the veggies for a flavorful, veggie-packed pizza. The versatility of stir-fried vegetables means you can easily transform them into new dishes, ensuring that nothing goes to waste and every meal remains exciting and enjoyable.
Thoughtful Beverage Pairings for Your Stir-Fried Veggies
Complementing your stir-fried veggies with the right beverages can significantly enhance your dining experience. When using a grill wok for stir-fried veggies, consider refreshing drinks that balance the flavors of your dish. Green tea is a classic choice, offering a light, herbal quality that pairs beautifully with grilled flavors and enhances the overall meal.
If you’re in the mood for something a bit stronger, light white wines such as Sauvignon Blanc or Pinot Grigio can elevate your meal. Their crisp acidity cuts through the richness of any oils or sauces, refreshing your palate with each sip. For a more adventurous pairing, consider citrus-based cocktails, such as mojitos or margaritas. The bright flavors of lime and mint can amplify the freshness of your stir-fried veggies.
Non-alcoholic options are equally important. Freshly squeezed lemonade with mint can provide a cooling effect, while sparkling water with a splash of fruit juice adds a refreshing touch. Whether you’re hosting a gathering or enjoying a quiet meal at home, thoughtful beverage pairings can elevate your stir-fried veggie experience and enhance your overall enjoyment.
Essential Cleaning and Maintenance Strategies for Your Grill Wok
The Importance of Immediate Cleaning After Use
Cleaning your grill wok promptly after use is vital for maintaining its condition and ensuring lasting durability. When using a grill wok for stir-fried veggies, food residues can harden quickly, making them more challenging to remove if left unattended. As soon as you finish cooking, allow the wok to cool slightly, but not completely, to facilitate effective cleaning.
Using a brush or sponge with warm, soapy water, gently scrub the surface of the wok. Avoid abrasive cleaners or steel wool, as these can scratch the material and diminish its non-stick properties. For stubborn spots, consider soaking the wok in warm, soapy water for a few minutes to loosen any stuck-on food. This focused attention to immediate cleaning can save you time and effort in the long run, ensuring that your grill wok remains in top condition for all your future cooking adventures.
It’s also crucial to dry your wok thoroughly after washing. Moisture can lead to rust, particularly in materials like cast iron. Consider heating the wok briefly on the grill after cleaning to evaporate any residual moisture. This practice helps maintain the integrity of the wok and keeps it ready for your next grilling session, ensuring it serves you well for years to come.
Effective Techniques for Removing Stubborn Residue
Despite your best cleaning efforts, stubborn residue may occasionally cling to your grill wok. When this occurs, don’t panic. There are effective methods for removing these pesky bits without damaging the wok. Start by soaking the wok in warm, soapy water for about 30 minutes to soften any stuck-on food, making it easier to clean.
If soaking doesn’t fully do the trick, consider using a gentle scrubber designed for non-stick surfaces. Avoid harsh chemicals or abrasive sponges, as these can scratch your wok and compromise its integrity. For cast iron woks, a mixture of coarse salt and a little water can serve as an effective abrasive that aids in lifting stubborn residue while being gentle on the surface.
For particularly stubborn spots, consider creating a paste made of baking soda and water. Apply this paste to the affected area and allow it to sit for a while before scrubbing gently. This natural approach is effective and safe for most wok materials. Following these cleaning practices ensures that your grill wok remains clean and ready for your next culinary adventure, allowing you to enjoy cooking without worry.
Best Practices for Proper Storage of Your Grill Wok
Storing your grill wok properly is essential for preserving its longevity and maintaining its performance. When using a grill wok for stir-fried veggies, it’s best to store it in a cool, dry place to prevent moisture buildup. Avoid stacking heavy items on top of it to prevent scratches or dents, and if possible, store it upright to allow for proper airflow.
For cast iron woks, consider applying a thin layer of cooking oil before storage to prevent rust formation. This practice helps maintain the seasoning while ensuring the surface remains in optimal condition for your next use. If your wok has a non-stick coating, ensure it’s completely dry before storage to prevent moisture buildup, which can degrade the coating over time.
Lastly, cover your grill wok with a breathable cloth or store it in a dedicated space away from direct sunlight. This precaution can help protect it from dust and environmental factors that may affect its longevity. By following these simple storage tips, you can ensure that your grill wok remains in great shape for all your future stir-frying endeavors.
Frequently Asked Questions About Grill Woks
What is a grill wok, and how is it utilized?
A grill wok is a specially designed cooking utensil used for grilling vegetables and other foods on a grill. It facilitates even cooking and efficient heat distribution, making it ideal for crafting delicious stir-fries and other grilled dishes.
Can I use a grill wok on both gas and charcoal grills?
Yes, a grill wok can be utilized on both gas and charcoal grills. Ensure that the wok is properly preheated and securely placed on the grill to achieve optimal cooking results without any complications.
What types of vegetables are best for grilling in a wok?
You can grill a variety of vegetables, including bell peppers, broccoli, zucchini, carrots, and snap peas. Choosing a colorful mix will enhance both flavor and presentation, making your dish visually appealing.
How can I prevent my vegetables from burning while grilling?
To prevent burning, make sure your grill wok is preheated correctly and adjust the heat zones on your grill. Stir the vegetables frequently for even cooking, which helps to prevent them from burning during the grilling process.
Is marinating my vegetables necessary before grilling?
Marinating is not essential, but it significantly enhances the flavor of your vegetables. A simple marinade of oil, herbs, and spices can elevate your dish to new heights, making it more flavorful and enjoyable.
Can I grill frozen vegetables in a wok?
While it’s possible to grill frozen vegetables, it’s best to thaw them first to ensure even cooking. Frozen veggies tend to release water, which can lead to steaming instead of stir-frying, impacting the desired texture of your dish.
What’s the best way to clean my grill wok?
Clean your grill wok immediately after use with warm, soapy water and a soft sponge. For stubborn residue, soak it first or use a mixture of baking soda and water for effective cleaning without damaging the surface.
Is it safe to use metal utensils on a non-stick grill wok?
It’s best to avoid using metal utensils on a non-stick grill wok, as they can scratch the surface. Opt for wooden or silicone utensils to preserve the integrity of the coating and extend the life of your wok.
How long do grilled vegetables typically take to cook?
Grilled vegetables usually take between 5 to 10 minutes to cook, depending on the type. Softer veggies cook faster, while denser ones require more time for thorough cooking to achieve the best texture.
What beverages pair well with grilled veggies?
Beverages such as green tea, light white wines, or citrus-based cocktails pair nicely with grilled veggies, enhancing the fresh flavors of the dish and improving your overall dining experience.
Connect with us on Facebook!
The Article Using a Grill Wok for Stir-Fried Veggies: A Tasty Guide appeared first on https://pitmastersarsenal.com
The Article Grill Wok for Stir-Fried Veggies: A Delicious Guide Was Found On https://limitsofstrategy.com
-

Clay Oven Cooking: Essential Tips and Tricks for Success
Enhance Your Cooking Skills with Proven Strategies for Maximizing Your Clay Oven Experience
Mastering the use of a clay oven can significantly improve your cooking abilities and expand your culinary horizons. To achieve optimal results from your oven, careful preparation is paramount. By implementing these essential steps, you can effectively prepare your oven, empowering you to explore the full spectrum of exciting cooking possibilities while ensuring a gratifying experience with every meal you create.
Achieve Cooking Excellence by Thoroughly Cleaning Your Clay Oven
Prior to embarking on your culinary adventure, it’s vital to conduct a comprehensive cleaning of your clay oven. This important preparatory step entails the removal of any debris, ash, or remnants from prior cooking sessions, ensuring that your oven is primed to deliver exceptional flavors. Start by allowing the oven to cool completely, as safety must always be your top priority. Once cooled, utilize a brush or cloth to meticulously clean the interior surfaces. For tougher residues, a paste made from water and baking soda can work wonders. Avoid using harsh chemicals, as these can linger and adversely affect the flavors of your dishes.
Regular maintenance not only promotes hygiene but also enhances the efficiency of your oven. A clean oven heats more uniformly, leading to superior cooking outcomes. If you are a frequent user of your clay oven, consider setting a routine that includes a thorough cleaning after every few cooking sessions. This proactive method will help stave off build-up that could negatively impact the quality of your future meals, ensuring that every dish you prepare is as delightful as the last.
Master the Art of Preheating for Optimal Cooking Results
The significance of preheating your clay oven cannot be emphasized enough, as it is crucial for achieving evenly cooked and thoroughly prepared dishes. A well-preheated oven guarantees that your culinary creations develop an appetizing crust while maintaining moist interiors. Begin by igniting your chosen fuel source, allowing it to burn down until the desired temperature is reached—typically around 400-500°C (752-932°F) for the best baking outcomes.
Utilizing a thermometer will help you keep an eye on the internal temperature, ensuring precision in your cooking endeavors. If you plan to prepare multiple dishes at once, consider adopting a two-zone cooking strategy. By creating areas of varying temperatures, you can effectively manage the cooking process for each item—ideal for meals that require different cooking times. Allow approximately 30-60 minutes for preheating, depending on your oven’s size and the type of fuel used, to fully unlock your culinary potential.
Achieve Consistent Cooking Temperatures in Your Clay Oven
Once your clay oven reaches the desired temperature, maintaining that heat is crucial for producing consistent and reliable cooking results. This requires effective management of both the fuel and airflow within the oven. Experimenting with different fuel types, such as hardwood or charcoal, can yield varying heat levels and burning durations, significantly influencing your cooking outcomes. Well-seasoned wood not only enhances the flavors of your dishes but also promotes a consistent, efficient burn.
Another essential factor in temperature control is managing the airflow within the oven. By adjusting the vents or the door, you can increase or decrease the heat as necessary. Keep a vigilant eye on your dishes and rotate them as needed to ensure even cooking throughout the process. Mastering the skill of temperature maintenance will elevate your clay oven culinary adventures to unprecedented levels, enabling you to create exceptional meals with ease and confidence.
Select the Best Fuel for Unmatched Cooking Results

The choice of fuel plays a pivotal role in shaping your cooking experience and influencing the flavors of your dishes. Traditional wood options such as oak, hickory, or mesquite impart distinct smokiness and complexity to your culinary creations. Conversely, hardwood charcoal can offer a steady burn with less smoke, making it an ideal choice for those who prefer a milder flavor profile.
Consider exploring various types of wood to discover your preferred flavor profiles. For instance, fruitwoods like apple or cherry can introduce a subtle sweetness that pairs exquisitely with meats and vegetables. Always ensure that your wood is well-seasoned and free from chemicals to achieve the best results. The right fuel not only heats your oven effectively but also enriches the overall quality of your culinary creations, resulting in dishes that are both delicious and unforgettable.
Enhance Your Culinary Creations by Choosing Quality Ingredients
The foundation of any remarkable dish begins with the thoughtful selection of high-quality ingredients. When cooking in a clay oven, the choice of meats, vegetables, and other components can elevate your meals, transforming them into delightful sensory experiences that tantalize your taste buds and satisfy your cravings.
Expert Insights for Selecting Premium Meats and Vegetables
The flavor and texture of your dishes are profoundly influenced by the quality of your meats and vegetables. When choosing meats, look for fresh, high-quality cuts that exhibit good marbling; this fat content enhances juiciness and flavor during the cooking process. Options such as grass-fed beef, free-range chicken, and ethically sourced pork yield outstanding results, especially when prepared in a clay oven.
For vegetables, seek seasonal, locally sourced produce. Fresh, vibrant vegetables not only have superior flavor but also retain more nutrients, contributing to healthier dishes. Root vegetables like potatoes and carrots flourish in the warm environment of clay ovens, developing a tender texture and rich flavor. Experimenting with diverse combinations can lead to colorful, hearty meals that truly highlight the deliciousness of fresh ingredients, enhancing your overall cooking experience.
Maximize Flavor with Fresh Herbs and Spices
Herbs and spices are indispensable tools for elevating flavors, transforming simple ingredients into memorable culinary masterpieces. Fresh herbs such as rosemary, thyme, and basil blend beautifully in a clay oven environment, providing aromatic notes that enhance any meal. Dried spices like paprika, cumin, and coriander can introduce depth and complexity, enriching the overall flavor profile of your dishes.
When working with herbs, consider the timing of their addition during the cooking process. For example, incorporating hardy herbs like rosemary and bay leaves early on allows their flavors to meld into the dish, while delicate herbs such as parsley or cilantro can be added towards the end for a fresh finish. Embrace the art of experimenting with various spice blends to discover unique flavors that resonate with your palate, elevating your culinary creations to new heights.
Perfect Your Dough Preparation for Artisan-Quality Breads
Baking bread in a clay oven is a fulfilling experience, but mastering the dough preparation process is vital for achieving that perfect crust and fluffy interior. Begin with high-quality flour; options such as bread flour or whole wheat flour provide the necessary structure for a robust loaf. Proper ratios of water, yeast, and salt are crucial for effective fermentation and flavor development.
Thoroughly kneading the dough contributes to the gluten structure, and allowing it to rise in a warm, draft-free area significantly enhances texture. Once risen, shaping and proving the dough correctly is key to achieving a beautiful loaf. Remember to preheat your clay oven adequately before placing the dough inside, as this ensures a crispy crust and evenly baked bread. Experimenting with various recipes, from traditional sourdough to artisan-style loaves, will reward you with impressive results and a delightful aroma that fills your kitchen.
Incorporate Dairy for Richer Flavors in Your Culinary Creations
Integrating dairy products into your clay oven dishes can elevate flavors and textures, transforming meals into rich and indulgent experiences. Fresh cheeses like mozzarella or feta can complement grilled vegetables or enhance pastas baked in the oven. Creamy elements such as ricotta or crème fraîche can be stirred into sauces or spread onto focaccia for an extra touch of decadence.
When cooking meats, consider marinating them in yoghurt or buttermilk. The acidity in these dairy products breaks down proteins, resulting in tender, juicy dishes that burst with flavor. For those who prefer to avoid dairy, alternatives such as nut-based cheeses or plant-based yoghurts can provide similar richness. Whether it’s a creamy sauce or a cheesy topping, thoughtfully integrating dairy into your clay oven creations can transform them into delightful culinary experiences that leave a lasting impression.
Select the Right Oils and Vinegars for Enhanced Flavor Profiles
When finishing your clay oven meals, the right oils and vinegars can significantly amplify flavors and bring balance to your dishes. High-quality olive oil is a versatile choice, perfect for drizzling over finished meals or incorporating into marinades. Experimenting with infused oils—such as garlic, herb, or chili—can add new dimensions to your cooking, enhancing the overall taste experience and providing a delightful contrast.
Vinegars also play a crucial role in elevating dishes, introducing brightness and acidity to counterbalance richness. Varieties such as balsamic, red wine, and apple cider vinegar each impart unique flavors. Wisely utilizing these components can transform a simple salad or roasted vegetable dish into a culinary masterpiece, showcasing the capabilities of your clay oven while keeping your taste buds engaged and satisfied, ensuring every meal is a memorable occasion.
Unleash the Full Potential of Your Clay Oven by Exploring Varied Cooking Techniques
Understanding the diverse cooking techniques available with a clay oven opens the door to a wide array of flavors and textures. Each method highlights unique characteristics in your ingredients, showcasing the versatile nature of clay oven cooking and empowering you to create an array of culinary delights that will impress even the most discerning guests.
The Art of Roasting and Grilling for Flavor Perfection
Roasting and grilling are fundamental methods for cooking in a clay oven, providing high, direct heat that locks in flavors and moisture. For roasting, larger cuts of meat, such as whole chickens or pork shoulders, thrive under the radiant heat of the clay. Generously seasoning the meat before placing it in the oven helps develop a beautifully caramelized exterior while ensuring the interior remains juicy and tender.
When grilling, the intense heat enables you to achieve the perfect char marks on both vegetables and meats. Utilizing skewers or grilling baskets can streamline the process and facilitate easier flipping. Consider marinating your ingredients beforehand to infuse them with additional layers of flavor. The unique environment of a clay oven results in dishes that are not only delicious but also rich in character and culinary appeal, providing a dining experience that is truly unforgettable.
Baking Artisan Breads and Pizzas with Unmatched Results
The clay oven is renowned for its exceptional baking capabilities, particularly for breads and pizzas. The intense heat creates a crust that is nearly impossible to replicate in conventional ovens, yielding that coveted crispy exterior and soft, airy interior. Preheating the oven properly is essential; aim for approximately 400-500°C (752-932°F) for optimal baking results.
When creating pizzas, apply a thin layer of flour or cornmeal on the surface to prevent sticking, which also contributes delightful crunch to the base. For bread, ensure you score the dough before placing it in the oven, as this allows for proper expansion and a beautiful presentation. Experimenting with different styles of bread, from flatbreads to artisanal loaves, can yield impressive results that are sure to captivate your guests and enhance your culinary repertoire, creating dishes that are as visually stunning as they are delicious.
Utilize Slow Cooking Methods for Exceptionally Tender Results
Slow cooking in a clay oven can transform tough cuts of meat into tender delicacies, allowing flavors to meld beautifully over time. Dishes such as stews and braised meats excel in this environment, as the gradual cooking process enriches the ingredients’ richness. To retain moisture, seal your pot or dish with a lid to trap steam and create a succulent result, ensuring each bite is flavorful and satisfying.
Utilize the residual heat from the oven by placing your slow-cooking dish in after finishing a baking session. This practice conserves energy while allowing the dish to benefit from the remaining warmth, creating an ideal cooking environment. Incorporating aromatic vegetables such as onions, garlic, and fresh herbs can further elevate the flavors, resulting in meals that are comforting and inspiring, making for an enjoyable dining experience.
Smoking and Barbecuing for Rich, Complex Flavor Profiles
Smoking and barbecuing in a clay oven can infuse your dishes with rich, complex flavors that are simply irresistible. The combination of heat and smoke adds depth to meats and vegetables, transforming straightforward meals into culinary masterpieces. Utilizing wood chips or chunks enhances the smoking effect, with options like mesquite, hickory, or applewood each providing unique flavor profiles that will captivate your guests.
To smoke effectively, soak your wood chips in water for about 30 minutes before cooking, then place them on the hot coals. It’s crucial to monitor the temperature closely, as smoking requires lower heat compared to standard grilling. Allow the ingredients to absorb the smoke for an extended duration, resulting in tender, flavor-packed dishes that vividly showcase your clay oven’s capabilities and potential, creating a dining experience that is both memorable and enjoyable.
Searing and Pan-Frying for Enhanced Textures
Searing and pan-frying can create beautifully caramelized surfaces on meats and vegetables when executed correctly. The intense heat of a clay oven facilitates quick cooking, locking in juices and enhancing textures. Start with a hot pan or cast iron skillet for optimal results; add a splash of oil before introducing your ingredients to ensure even cooking.
When searing, avoid overcrowding the pan to guarantee even cooking and browning. As the exterior caramelizes, consider finishing the dish in the oven to achieve perfect doneness throughout. This method works exceptionally well for cuts like steaks, chicken breasts, or thick-cut vegetables, resulting in dishes that are not only succulent but also visually appealing, showcasing your culinary skill and creativity while impressing your family and friends.
Prioritize Safety and Proper Maintenance for Your Clay Oven
Ensuring safety and proper maintenance is crucial for a successful and enjoyable clay oven experience. Understanding how to handle and care for your oven not only extends its lifespan but also creates a safe cooking environment for all your culinary endeavors, allowing you to focus on creating delicious meals without concern.
Implement Safe Handling Practices for Your Clay Oven
Handling a clay oven necessitates awareness and care to prevent accidents and injuries. Always use protective gloves or mitts when interacting with a hot oven or cookware. Ensure your cooking area is clear of flammable materials and avoid using water on hot surfaces, as this can lead to cracking and damage, jeopardizing the longevity of your oven.
Familiarize yourself with the specific handling requirements of your oven model, as some may have unique quirks or needs. Regularly inspect your oven for signs of wear or damage, and refrain from using it if you observe significant cracks or structural issues. Prioritizing safety ensures that your culinary adventures remain enjoyable and free from mishaps, allowing you to concentrate on crafting delightful meals that will impress your loved ones.
Establish a Routine for Regular Cleaning and Care
Maintaining your clay oven through regular cleaning and care is vital for optimal performance and longevity. After each use, allow the oven to cool completely before cleaning out ashes and debris, preventing build-up that can lead to inefficient heating and unpleasant flavors in future meals, potentially detracting from your culinary creations.
Periodically check for cracks or damage, addressing them promptly to prevent further deterioration. A light oiling of the exterior can help preserve the clay and extend its life, ensuring that your oven remains a reliable cooking companion. With proper care and attention, your clay oven can serve as a dependable culinary tool for many years, providing you with countless delightful cooking experiences and unforgettable meals.
Promptly and Effectively Repair Minor Damages
Even the sturdiest clay ovens can experience wear and tear over time. Addressing minor damages promptly can prevent costly repairs or replacements in the future, ensuring the continued functionality of your oven. For small cracks, use a mixture of clay and water to fill in the gaps, allowing it to dry thoroughly before using the oven again, thereby maintaining its structural integrity.
In cases of more significant damage, consider consulting a professional who specializes in clay oven repairs. They can provide tailored solutions to restore your oven to its original condition, ensuring its continued functionality and safety. Knowing how to maintain and repair your oven will empower you to keep enjoying the delicious benefits of clay oven cooking for years to come, enriching your culinary repertoire with each new recipe you attempt.
Techniques for Elevating the Flavors in Your Dishes
The beauty of cooking in a clay oven lies in its remarkable ability to amplify flavors. Here are some effective techniques to enhance the taste of your dishes, transforming them into unforgettable culinary experiences that tantalize the senses and delight your palate, making every meal a celebration.
Discover the Unique Flavor Profiles of Different Wood Types
Different types of wood can impart distinct flavors to your food when cooking in a clay oven. For instance, fruit woods like cherry or apple provide a mild sweetness that beautifully complements poultry and pork. Hardwoods such as oak or hickory offer a more robust flavor, ideal for red meats and heartier dishes that call for depth and richness.
Experimenting with various wood types can lead to delightful discoveries in flavor combinations that elevate your culinary creations. Consider creating a blend of different woods for a more complex flavor profile, mixing them to achieve a unique taste that enhances your cooking. Always ensure that the wood is well-seasoned to prevent unwanted bitterness or off-flavors from affecting your dishes, thereby maintaining the integrity and quality of your culinary creations.
Enhance Tenderness and Flavor through Marinating and Brining
Marinating and brining are highly effective methods for enhancing flavor and tenderness in your dishes. A simple marinade composed of oil, acid (such as vinegar or citrus), and spices can significantly elevate the taste of both meats and vegetables. Allowing your ingredients to soak in the marinade for a few hours or overnight can yield remarkable results that are sure to impress your guests.
Brining, on the other hand, involves soaking meats in a saltwater solution, which helps retain moisture during the cooking process. This technique is particularly beneficial for lean meats like chicken or pork, ensuring they remain juicy and flavorful throughout cooking. Experiment with different brine recipes to discover the perfect balance for your palate, enhancing your dishes’ overall taste and satisfaction, and ensuring memorable meals every time.
Incorporate Smoke for Depth of Flavor
Incorporating smoke into your clay oven cooking can create a tantalizing depth of flavor that elevates even the simplest of dishes. The gentle infusion of smoke enhances the taste of meats, vegetables, and even breads, adding a layer of complexity that is hard to resist and enjoy.
To achieve this, consider using wood chips or chunks, as previously mentioned. The key is to control the amount of smoke—too much can overwhelm a dish, while too little may not impart any noticeable flavor. Taste-testing your dishes as they cook can help you find the sweet spot for optimal smoky goodness, ensuring each meal is flavorful and satisfying, making it an unforgettable dining experience.
Embrace Culinary Experimentation with Unique Recipes
One of the most exciting aspects of cooking in a clay oven is the opportunity for experimentation. With its unique cooking environment, your oven becomes a canvas for creativity, allowing you to explore traditional recipes while inventing modern twists that reflect your personal style and culinary preferences.
Recreate Traditional Dishes Using Clay Oven Techniques
There exists a treasure trove of traditional recipes that shine in a clay oven. Dishes like tandoori chicken, focaccia bread, or Moroccan tagines are perfect examples of how this cooking method can enhance flavors and textures, offering a rich culinary experience that celebrates heritage. Researching regional dishes can inspire your culinary adventures and provide insights into how various cultures have embraced clay oven cooking over generations, enriching your understanding and appreciation of this timeless technique.
When attempting traditional recipes, adhere to time-honored techniques while also allowing room for personalization. Striking this balance between heritage and innovation will lead to dishes that celebrate the rich history of clay oven cooking while showcasing your unique taste and flair for creativity, ensuring that every meal tells a story that resonates with your guests.
Infuse Modern Twists into Classic Recipes for Creative Culinary Adventures
Integrating modern twists to classic recipes can lead to exciting culinary creations that surprise and delight. Take a traditional lasagne and incorporate roasted vegetables, or substitute the béchamel with a spicy cheese sauce for a contemporary kick that elevates the dish. Utilizing seasonal ingredients can also inspire fresh variations on classic meals, ensuring each dish reflects the best of available produce and showcases your culinary creativity.
Consider incorporating global flavors as well, fusing culinary traditions for innovative tastes. Pairing a classic Italian pizza with Middle Eastern spices or a Thai-inspired barbecue can create dishes that are both familiar and novel, enticing your guests with unexpected combinations that surprise their palates and excite their taste buds, making every meal an adventure.
Create Your Own Unique Recipes to Showcase Your Culinary Style
The versatility of a clay oven allows for endless possibilities when it comes to creating your own recipes. Start by understanding the basic principles of flavor pairing—combine ingredients that complement one another, considering both taste and texture for an optimal culinary experience. Experiment with various cooking techniques to discover what works best for your unique creations, allowing your creativity to shine.
Document your process, noting successful combinations and cooking times. This practice not only helps refine your skills but also serves as a reference for future culinary adventures. Embrace the journey of experimentation, and allow your passion for cooking to flourish in the warm embrace of your clay oven, leading to delightful and memorable meals that showcase your culinary prowess.
Explore Regional Variations in Clay Oven Cooking for Diverse Flavors
Cooking in a clay oven offers the chance to explore regional variations from around the world. Each culture possesses its unique take on clay oven cooking, ranging from the tandoori ovens of India to the iconic pizza ovens of Italy. Delving into these diverse culinary traditions and researching authentic recipes that embody the spirit and essence of their respective regions can greatly enhance your cooking repertoire.
Incorporating elements from different cultures can create a fusion of flavors that excite the palate and broaden your culinary horizons. For example, consider using a traditional Middle Eastern spice blend on a classic Italian pizza or infusing Indian spices into a French ratatouille. This exploration not only expands your culinary repertoire but also celebrates the rich diversity of global cuisine, enhancing your cooking experience and inviting creativity to the forefront.
Celebrate Seasonal Specialties with Fresh Ingredients for Timely Dishes
Utilizing seasonal ingredients is a wonderful way to craft timely dishes that celebrate the best offerings of each season. Spring may inspire fresh salads filled with tender greens, while autumn calls for hearty root vegetables and warming spices that comfort the soul. Your clay oven can adapt to these seasonal changes, enhancing the natural flavors of the ingredients and showcasing their freshness.
Consider experimenting with recipes that highlight seasonal produce, such as a summer vegetable ratatouille or a winter squash pie. These dishes not only showcase the capabilities of your oven but also promote a sustainable approach to cooking, embracing the rhythm of nature and its bountiful gifts while creating meals that are both delicious and nutritious, ensuring a delightful dining experience for all.
Frequently Asked Questions (FAQs) About Clay Ovens
What type of fuel is optimal for a clay oven?
Choosing hardwoods like oak, hickory, or fruitwoods is ideal, as they provide consistent heat and infuse unique flavors into your dishes. Always opt for well-seasoned wood to ensure optimal performance and flavor that enhances your cooking experience.
How should I properly clean my clay oven after use?
After cooling, use a brush and a damp cloth to remove ash and debris. Avoid harsh chemicals; natural cleaning solutions such as baking soda are preferred to maintain the oven’s integrity and ensure a safe cooking environment for all your culinary adventures.
What temperature is required for baking in a clay oven?
For baking bread and pizzas, aim for temperatures ranging between 400-500°C (752-932°F). Preheating is essential to achieving that perfect crust and ensuring an even bake that showcases your culinary expertise.
Can I cook vegetables in my clay oven?
Absolutely! Root vegetables, squash, and even greens can be roasted or baked in a clay oven, significantly enhancing their flavor and tenderness while creating delicious side dishes that beautifully complement your main courses.
How can I maintain a consistent temperature in my clay oven?
Maintain temperature control by adjusting the fuel and airflow. Monitoring your oven with a thermometer is crucial for ensuring consistent cooking results throughout your meal, allowing for perfectly cooked dishes that impress your family and friends.
Are there any safety concerns associated with clay ovens?
Yes, always use protective gloves when handling hot items, and ensure your cooking area is safe and free from flammable materials to prevent accidents and injuries during food preparation, creating a secure cooking environment for all.
What can I do to prevent my bread from sticking to the oven?
Utilize flour or cornmeal on the surface before placing your dough in the oven. This will help create a barrier, ensuring easy removal and a lovely crust that enhances your bread’s overall quality and appeal.
What’s the best way to enhance flavors when cooking?
Experiment with different wood types for smoking, incorporate marinades for meats, and utilize fresh herbs and spices to elevate your dishes’ flavor profiles, resulting in truly memorable meals that tantalize the taste buds.
Can I roast meat in a clay oven?
Yes! Roasting meats in a clay oven yields rich flavors and a succulent texture, making it an ideal cooking method for dishes like whole chickens or roasts that benefit from the unique environment your oven provides.
What are the advantages of using a clay oven for cooking?
Clay ovens provide even heat distribution, enhance flavors, and allow for a variety of cooking techniques, making them versatile for a broad range of dishes, from baking to slow cooking and beyond, ensuring delightful meals every time.
Stay updated with our latest news and tips on Facebook!
The post Top Tips for Cooking with a Clay Oven: A Guide appeared first on https://cookinggods.com
The Article Cooking with a Clay Oven: Essential Tips and Tricks Was Found On https://limitsofstrategy.com
-
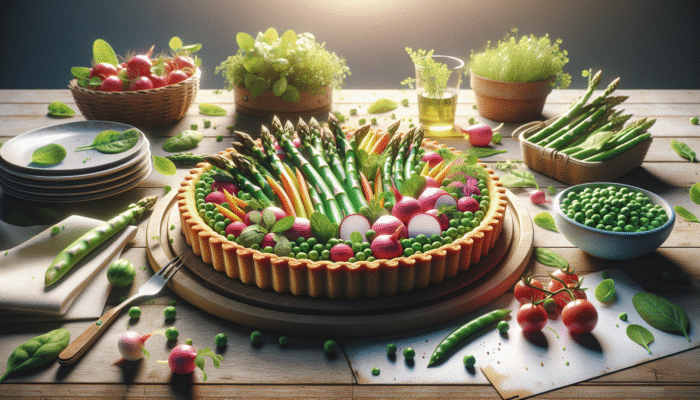
Spring Vegetable Tart: A Fresh Guide to Cooking Delight
Proven Techniques for Choosing the Finest Ingredients for Your Spring Vegetable Tart
Enhance Flavor with Fresh, Seasonal Vegetables
The vibrant colors and fresh flavors that seasonal vegetables bring to your dish are crucial for creating a delectable spring vegetable tart. When choosing your vegetables, it is important to consider what is currently in season in your local area, as this directly influences both the taste and texture of your tart. In the spring, you can find delightful options such as asparagus, peas, radishes, and baby spinach. These vegetables not only taste significantly better when they are in season, but they also offer essential nutrients that promote a healthy and vibrant lifestyle, enhancing your overall culinary experience and enjoyment.
Selecting organic vegetables can significantly enhance the flavor profile of your tart. Organic produce is often harvested at peak ripeness, ensuring maximum sweetness and crunch. To discover a fantastic variety of fresh, in-season vegetables, consider visiting local farmers’ markets or participating in a community-supported agriculture (CSA) program. Let your culinary creativity shine by experimenting with unique varieties like heirloom radishes or rainbow chard. This not only boosts the visual appeal of your tart but also introduces an array of intriguing textures and flavors that can elevate your dish to new heights, making it a memorable culinary creation.
It’s important to pay attention to the balance of colors and textures in your tart. Aim for a delightful mix of leafy greens, crunchy vegetables, and sweet options to create a dynamic eating experience. For instance, pairing tender asparagus with vibrant green peas and earthy mushrooms not only satisfies the palate but also results in a visually striking presentation that is sure to impress your dinner guests, creating memorable moments around the table and enhancing the overall dining experience.
Choosing the Ideal Pastry for Your Tart Base
The base of your tart is just as essential as the filling, making it vital to dedicate time to selecting the right pastry. A high-quality pastry can elevate your dish significantly, so aim for flaky options like puff pastry or shortcrust, which pair beautifully with a spring vegetable tart. Opt for products made with real butter to achieve a rich flavor that complements your fresh vegetables, enhancing every bite with a delightful buttery essence that adds depth to your dish.
If you’re feeling adventurous, consider crafting your own pastry from scratch. Making your own pastry allows you to control the ingredients and achieve the perfect texture. A simple homemade shortcrust pastry, crafted from flour, butter, and a pinch of salt, results in a buttery, crumbly base that holds up beautifully against the moisture from your vegetables. Don’t hesitate to experiment with wholemeal flour for a nuttier flavor or incorporate a hint of herbs for an unexpected twist that makes your tart uniquely yours, adding personal flair to your creation.
For those short on time, store-bought pastry can still yield impressive results. Just be sure to choose a reputable brand known for its quality. Always scrutinize the ingredient list; avoiding hydrogenated fats or preservatives can enhance both the flavor and health quotient of your dish. Remember, when rolling out the pastry, it should be even, neither too thick nor too thin, to provide the best foundation for your tart, ensuring a perfectly baked creation that brings joy to the table while showcasing your culinary skills.
Enhance Your Tart with Key Herbs and Spices
Herbs and spices are vital in how to cook a spring vegetable tart, acting as the unsung heroes that elevate the dish by enhancing the natural flavors of your vegetables without overpowering them. Fresh herbs such as thyme, chives, and basil are excellent choices for a spring tart. The earthy notes of thyme pair beautifully with asparagus, while chives introduce a hint of onion flavor that complements various vegetables, creating a harmonious taste experience that captivates the palate.
Incorporating spices like nutmeg or black pepper can also add depth to your tart. A pinch of nutmeg enhances the creaminess of the filling, while freshly cracked black pepper introduces a subtle heat that rounds out the flavors perfectly. It’s essential to strike the right balance; you want the herbs and spices to elevate the dish without overshadowing the fresh tastes of your vegetables, ensuring a delightful harmony on the palate that keeps diners coming back for more.
The use of herbs and spices isn’t solely about flavor; it’s also about crafting a sensory experience. The aroma of freshly chopped herbs can awaken your senses, making the cooking process even more enjoyable. Consider cultivating a herb garden at home, even if it’s just a small windowsill garden. Fresh herbs add an aromatic touch that evokes the essence of the season and encourages you to use them generously in your cooking, transforming every dish into a celebration of flavor that delights the senses.
Selecting the Right Cheese to Elevate Your Tart Experience

Incorporating cheese into your spring vegetable tart adds a luscious richness that is vital to its overall flavor profile. When selecting cheese, choose varieties that melt beautifully and enhance the overall flavors of your dish. Feta, goat cheese, and mozzarella are all exceptional choices that can elevate your tart and provide a delightful contrast to the fresh vegetables, enriching every bite with creamy goodness.
Feta cheese, with its creamy, tangy profile, pairs wonderfully with earthy vegetables like spinach and roasted peppers. Meanwhile, goat cheese introduces a creamy texture with a hint of tanginess, making it an excellent option for enhancing the flavor of your tart. For a milder choice, mozzarella offers a gooey, stretchy texture that melds beautifully with fresh vegetables, creating a satisfying mouthfeel that complements the dish perfectly.
Don’t hesitate to experiment by combining different cheeses for a complex flavor profile. A mixture of goat cheese and mozzarella can provide both creaminess and stretch, while a sprinkle of Parmesan on top before baking can create a crunchy, flavorful crust. For a gourmet touch, consider using a local artisan cheese, which not only supports local producers but also adds a unique element to your dish, showcasing your commitment to quality ingredients and enhancing the overall dining experience.
When selecting cheese, be mindful of dietary restrictions. Many individuals are lactose intolerant or have dairy allergies. In such cases, plant-based cheese alternatives can be used, allowing everyone to enjoy your delightful creation without compromise, making your tart a versatile dish perfect for various dietary needs while ensuring that no one feels left out during mealtime.
Perfecting the Pastry Preparation Process for an Impeccable Tart
Rolling Out the Ideal Dough for Your Tart Base
Creating the perfect tart begins with rolling out your pastry. Achieving an even thickness is critical to ensure that your pastry cooks uniformly without becoming overly tough or soggy. Start by lightly flouring your work surface to prevent sticking, and be gentle as you roll out the dough. If you’re using a pre-made pastry, allow it to sit at room temperature for a few minutes to soften, making it easier to roll and ensuring a seamless rolling process that enhances the overall quality of your tart.
Aim for a thickness of approximately 3mm to 5mm, which provides enough structure to support the filling without overwhelming the tart with excessive dough. If you roll it too thin, it may break during assembly; too thick, and it can yield a chewy, dense crust that detracts from the dish’s appeal. Use a rolling pin to gently flatten the dough, applying even pressure and rotating the dough as you go to maintain a circular shape that fits perfectly into your tart pan, creating a beautifully crafted base for your creation.
Once rolled out, carefully transfer the dough to your tart pan, ensuring it fits snugly into the edges. Avoid stretching the pastry, as this can lead to shrinkage during baking. Trim any excess dough hanging over the edges, but leave a little extra to crimp the edges later. This attention to detail ensures your pastry looks as beautiful as it tastes, setting the stage for a stunning spring vegetable tart that will impress your guests and enhance the overall dining experience.
Mastering Blind Baking Techniques for a Flawless Tart Base

Blind baking is a crucial technique in how to cook a spring vegetable tart, particularly for preventing a soggy bottom. This method involves pre-baking the pastry before adding the filling. Start by preheating your oven to a moderate temperature, ensuring it’s at the right level for even baking. Line your tart with parchment paper and fill it with baking weights or dried beans to keep the pastry from puffing up during baking, allowing it to maintain its shape and ensuring a perfect texture throughout your tart.
Bake the pastry for about 15-20 minutes, or until it begins to turn a light golden color. The weights prevent the crust from rising while allowing the bottom to cook through adequately. Once the edges are lightly colored, remove the weights and parchment paper. If the base has puffed up, gently press it down with a spatula before returning it to the oven for an additional few minutes until the base is fully cooked and lightly golden, ensuring a perfect tart base that highlights your culinary skills.
Blind baking not only preserves the pastry’s texture but also enhances its flavor. This technique is especially beneficial for moist fillings such as those found in vegetable tarts. A well-baked shell ensures that your tart remains crispy even when filled with delicious, moisture-laden vegetables, creating a delightful contrast that enhances the overall dining experience and leaves a lasting impression on your guests.
Finishing Touches: Trimming and Crimping Edges for Elegance
The finishing touches on your tart can truly set it apart, beginning with trimming and crimping the edges. After blind baking, assess the edges of your pastry. Trim any excess dough to create a clean line, allowing for a neat presentation that enhances the visual appeal of your tart. An uneven edge can detract from the overall aesthetic, so take your time to ensure a tidy finish that reflects your culinary skill and attention to detail, making it a standout dish at any gathering.
Crimping the edges not only enhances the visual appeal but also helps to secure the filling in place during baking, preventing any spillage. To crimp, use your finger and thumb to pinch the edges into a decorative pattern. This can be as simple or ornate as you desire, depending on the occasion and your personal style. A beautifully crimped edge can give your tart a professional look, showcasing the care and attention you’ve put into your cooking and making it a memorable centerpiece for any meal.
Additionally, consider brushing the edges with a beaten egg or milk before baking. This step will give your pastry a golden, glossy finish that makes it even more appealing, enticing your guests before they even take a bite. The combination of a clean trim and a decorative crimp elevates your tart, transforming it from a mere meal into a work of art that reflects your culinary expertise and creativity, leaving a lasting impression on everyone who enjoys it.
Streamlining the Vegetable Preparation Process for Your Tart
Thorough Washing and Precision Slicing Techniques for Freshness
The preparation of your vegetables is fundamental to the success of how to cook a spring vegetable tart. Begin by thoroughly washing your vegetables under cold running water to eliminate any dirt or pesticides. This step is particularly vital for leafy greens, which can harbor grit. For root vegetables like carrots or radishes, gently scrub them to ensure they are clean while retaining their natural skin, enhancing both flavor and nutrition in your final dish.
Once washed, uniform slicing is key to achieving even cooking. Aim for slices that are similar in thickness to ensure they cook at the same rate, resulting in a harmonious texture throughout the tart. For example, cut asparagus into pieces about 1-2 inches long, while bell peppers can be sliced into strips or small chunks. The visual appeal of your tart is significantly enhanced by well-cut vegetables, making it more inviting and appetizing for your guests and elevating the overall dining experience.
Consider the order of your vegetables as well. Place the denser vegetables, like carrots or potatoes, towards the bottom, and lighter, more delicate items, like baby spinach or herbs, on top. This arrangement not only creates a pleasing aesthetic but also ensures that all ingredients cook optimally, allowing the flavors to meld beautifully for a delightful culinary experience that showcases the best of spring produce for all to enjoy.
Blanching for Vibrant Color and Ideal Texture
Blanching is a valuable technique that can elevate your spring vegetable tart by preserving the vibrant colors and crisp textures of your vegetables. To do this, bring a pot of salted water to a boil and prepare an ice bath—this will stop the cooking process and lock in both color and crunch, ensuring your vegetables look and taste their best.
Once the water reaches a rolling boil, add your vegetables in batches. For instance, blanch asparagus for about two minutes, while peas may only require one minute. After the designated time, promptly transfer the vegetables to the ice bath using a slotted spoon. This quick shock halts cooking and preserves the bright, fresh colors that make your tart visually appealing and appetizing, enhancing both the dish’s presentation and flavor.
Blanching not only enhances the appearance but also improves the texture. This technique softens the vegetables slightly while retaining a tender-crisp bite. This balance ensures that when baked in the tart, they don’t become mushy, allowing each ingredient to shine in its own right, contributing to a satisfying and enjoyable eating experience for everyone at the table, making your tart a memorable dish for all.
After blanching, pat the vegetables dry to remove any excess moisture before adding them to your tart. This step is essential; excess moisture can lead to a soggy pastry base, which is something we all want to avoid. A well-prepped vegetable filling is the foundation of a great tart, ensuring a delightful and memorable dish that showcases your culinary skills and dedication to quality.
Artfully Arranging Your Vegetables for Stunning Visual Appeal
Once your vegetables are blanched and dried, it’s time to showcase your artistic skills in arranging them. The arrangement of vegetables in your tart adds a stunning visual element, transforming it from a simple meal into a centerpiece that captivates the eye. Consider colors, shapes, and textures as you layer them on the pastry, creating a visually striking presentation that invites admiration.
Start with a base layer of vegetables that provide stability, such as sliced potatoes or carrots. Then, build upwards with lighter vegetables such as asparagus, greens, or even colorful bell peppers. Arranging the vegetables in a circular pattern or a spiral can create an eye-catching design that draws attention and enhances the overall appeal of your tart, making it a true showstopper at any gathering or dinner party.
Don’t hesitate to play with height and depth. Placing some vegetables at different angles can add dimension, creating an appealing presentation that invites curiosity and excitement. This artistic approach can elevate a simple dish into something that looks gourmet and professionally crafted, making it a memorable addition to any table setting that showcases your culinary creativity and skill.
Remember that the way you arrange your vegetables can also impact the distribution of flavors. Ensuring even coverage across the tart means every slice will feature a balanced mix of flavors and textures, providing a delightful eating experience for everyone at the table and showcasing the beauty of spring produce in each bite that encapsulates the essence of the season.
Drying Your Vegetables Thoroughly for Optimal Tart Texture
Moisture is the enemy of a crisp tart base, so drying your vegetables properly after washing and blanching is crucial. Excess moisture can lead to sogginess, which is something no one wants in a beautifully crafted tart. After blanching, use a clean kitchen towel or paper towels to pat your vegetables dry gently, ensuring they are ready to go into your tart without compromising the pastry’s integrity, allowing for the perfect texture and flavor balance.
Take extra care with leafy greens, as they tend to retain more water. Ensuring that they are dried thoroughly will help maintain the structure of the pastry. If you’re working with particularly watery vegetables, like zucchini, consider salting them lightly and letting them drain in a colander for about 15 minutes. This process draws out additional moisture, allowing for a drier filling overall, which is essential for achieving the perfect tart texture that will delight everyone at the table.
By prioritizing proper drying techniques, you’re setting your tart up for success. Imagine slicing into your tart to discover a perfectly crisp base with fresh, vibrant vegetables that retain their integrity and flavor. That’s the result of careful preparation and attention to detail, ensuring a delightful dining experience for all and showcasing the beauty of your culinary creation, making it truly special.
Seasoning Your Vegetables for Maximum Flavor Impact
Seasoning is the magic ingredient that can elevate your spring vegetable tart from good to extraordinary. Before arranging your vegetables on the pastry, take a moment to season them with salt, pepper, and your choice of herbs. This step not only enhances flavor but also prepares your vegetables for their starring role in the tart, ensuring they shine in every bite and contribute to the overall taste experience.
Begin with a light sprinkle of sea salt to draw out the natural flavors of the vegetables. Salt enhances sweetness and balances bitterness, creating a harmonious taste profile that captivates the palate. Freshly cracked black pepper adds a subtle kick that can awaken the senses and invigorate the dish, making each bite more exciting and enjoyable for everyone at the table.
Incorporate herbs that resonate with the flavors of your chosen vegetables. For instance, a hint of thyme pairs beautifully with asparagus, while dill complements peas remarkably well. Tossing the vegetables gently in a bowl with your selected seasonings ensures even distribution, so every bite is flavor-packed and delivers a delightful burst of freshness that enhances the overall culinary experience.
Remember, seasoning is not a ‘one and done’ approach. It’s essential to taste as you go. After adding your seasonings, take a moment to sample a piece of your prepared filling. This practice allows you to adjust flavors before they’re baked into the tart, ensuring a delightful result that pleases the palate and showcases your culinary expertise and attention to detail, making it a dish everyone will enjoy.
Crafting the Ideal Filling for Your Spring Vegetable Tart
Blending Together Essential Ingredients for a Cohesive Base
The filling is the heart of your spring vegetable tart, making the selection and combination of ingredients crucial for a successful dish. Begin by whisking together eggs, cream, and cheese to create a cohesive base that binds the vegetables together beautifully. The eggs provide structure, while the cream adds richness and a delightful creaminess that enhances the overall experience of your tart, making it a comforting and satisfying meal that everyone will appreciate.
When selecting your cream, opt for a heavy or thickened variety that will create a luxuriously smooth filling. This choice ensures that your tart has a velvety texture that contrasts beautifully with the crisp pastry. As for cheese, choose one that complements your vegetable selection while providing that delightful gooeyness we all love in a well-crafted tart, enhancing the flavor profile and creating a satisfying bite.
Consider adding a splash of milk or a dollop of sour cream to your mixture for added creaminess and depth. Mixing the filling ingredients together thoroughly ensures that you achieve a uniform texture, preventing any lumps that could detract from the overall quality. This smooth filling will envelop your vegetables, creating a cohesive blend of flavors that makes every bite enjoyable and satisfying for your guests, ensuring that your tart is a hit at any gathering.
Don’t hesitate to experiment with different ratios of egg to cream to find your preferred level of richness. A classic ratio is about three large eggs to one cup of cream, but adjusting based on your taste can lead to delightful results. This base will serve as the foundation for your tart, so take the time to get it just right, ensuring a delectable outcome that showcases your culinary skills and attention to detail, making your dish stand out.
Perfectly Seasoning Your Filling for Enhanced Flavor
Once your filling base is combined, it’s time to season it to perfection. Seasoning the filling is just as important as seasoning the vegetables, ensuring that every layer of your tart is flavorful and cohesive. Aim for a balance that enhances the overall flavor without overwhelming the dish. Start with a pinch of salt and freshly cracked black pepper, adjusting to taste as you mix to achieve the ideal flavor balance.
Incorporate a blend of herbs that resonate with the spring theme and enhance the overall experience. Fresh parsley, dill, or chives can add a burst of freshness that pairs beautifully with the creaminess of the filling, creating a delightful contrast with the vegetables that elevates the dish. A touch of nutmeg can provide warmth and depth, making it a classic pairing with egg-based dishes that enriches the flavor profile of your tart.
Taste as you go! This is the secret to ensuring that your filling is perfectly seasoned. A well-balanced filling will provide a delightful contrast to the fresh, vibrant vegetables in your tart, creating an overall harmonious dish that is both satisfying and memorable for anyone who enjoys it, showcasing your culinary creativity and skill.
Incorporating some cheese into the filling mixture can also enhance flavor. As the tart bakes, the cheese melts, creating a rich, gooey texture that adds to the overall satisfaction. This blend of flavors is a key element of what makes a spring vegetable tart so appealing, offering a delightful experience for all and making your dish a true standout at any gathering.
Carefully Folding Vegetables into Your Filling for Harmony
Now it’s time to bring your luscious filling and vibrant vegetables together harmoniously. Gently fold the blanched and seasoned vegetables into the filling mixture, ensuring even distribution without breaking them apart. This step is crucial, as you want every slice of your tart to contain a delightful mix of both filling and vegetables, creating a balanced and enjoyable experience for your guests that enhances the overall quality of your dish.
Using a spatula, start from the bottom of the bowl and gently lift the mixture over the vegetables. This technique ensures that everything is evenly coated, allowing the flavors to meld beautifully while maintaining the integrity of the individual vegetables. Be careful not to overmix; you want to retain the textures of each ingredient to create a visually appealing tart that invites everyone to dig in and enjoy your culinary creation.
Consider the colors and shapes of the vegetables as you fold. A beautiful visual presentation results in a more enticing dish that captivates the eye. The contrast of vibrant greens against the creamy filling creates a stunning tableau that draws attention and enhances the overall appeal of your tart, making it a true showstopper at any gathering that showcases your culinary talent.
Once you’ve folded everything together, take a moment to taste the mixture once more, adjusting seasonings as needed. The filling should be well-balanced and flavorful, ensuring that each bite delivers a delightful burst of deliciousness that showcases the best of seasonal produce and your culinary talents, making your tart a memorable dish for all who partake.
Adding a Subtle Kick: Incorporating Heat into Your Filling
For those who enjoy a little zing in their dishes, introducing a touch of heat into your filling can elevate your spring vegetable tart to new heights. A sprinkle of chili flakes or a dash of hot sauce can introduce a subtle kick that adds complexity to the overall flavor profile, making each bite more exciting and memorable for your guests.
Begin with a small amount; a pinch of chili flakes can go a long way. As you mix the filling, taste it to ensure that the heat is balanced and not overpowering. The key is to enhance the flavors without overshadowing the freshness of the vegetables, creating a delightful contrast that keeps your guests coming back for more and adds an exciting element to your dish.
Consider pairing the heat with complementary flavors. For example, if your tart includes sweet bell peppers, the added heat will create a delightful contrast, making each bite interesting and dynamic. The heat from the chili can also bring out the natural sweetness of vegetables, creating an enhanced flavor experience that delights the palate and leaves a lasting impression on everyone who enjoys your tart.
If you prefer a milder approach, consider using a milder hot sauce or a sprinkle of smoked paprika for a subtle warmth without overwhelming the dish. This flexibility allows you to tailor the heat level to suit your taste, ensuring that your spring vegetable tart is a crowd-pleaser that everyone will enjoy, regardless of their spice tolerance.
Ensuring a Smooth Texture for Your Filling
Achieving a smooth and creamy filling is essential for a successful tart that delights the senses. After folding in the vegetables, take a moment to blend the filling mixture thoroughly. Using a hand mixer or a blender can ensure that your filling is silky smooth and free from lumps, resulting in a luxurious texture that envelops the vegetables beautifully and enhances the overall quality of your tart.
Take care not to over-blend; you want a smooth consistency, but it’s equally important to maintain the integrity of the vegetables. A few pulses should suffice to achieve the desired texture. The goal is to create a filling that is cohesive but still features delightful bites of vegetables throughout, offering a satisfying contrast that enhances the overall enjoyment of each slice and showcases the beauty of your dish.
This smooth filling not only enhances the mouthfeel but also creates a beautiful contrast against the crisp pastry. The combination of textures is what makes each bite satisfying and enjoyable, providing a delightful culinary experience that highlights the best of your spring vegetable tart and showcases your culinary skills and creativity.
Before pouring the filling into the tart, take a moment to taste it one last time. A well-balanced, smooth filling will elevate your tart, ensuring every slice is a perfect blend of flavors and textures that leave a lasting impression on everyone who enjoys it. This meticulous attention to detail is what transforms your spring vegetable tart from a simple dish into a culinary masterpiece that is sure to impress.
Assembling Your Spring Vegetable Tart for Optimal Presentation
Layering the Filling for an Impressive Presentation
With your pastry perfectly prepared and your luscious filling ready, it’s time for the exciting part—assembling your spring vegetable tart. Begin by pouring the filling mixture over the blind-baked pastry. Aim for an even distribution, ensuring that the filling reaches the edges of the tart for an appealing presentation that showcases your hard work and enhances the overall dining experience.
Utilize a spatula to gently spread the filling if necessary, ensuring that all those vibrant vegetables are nestled evenly throughout. This not only enhances the visual appeal but also guarantees that each slice of tart is flavor-packed and provides a delightful eating experience for everyone at the table, making your dish a true standout.
As you layer, take care not to overfill; leaving a small gap at the top can help prevent spillage during baking. The filling will expand slightly, and this space allows for even cooking without any messy overflow, ensuring a beautifully baked tart that highlights the freshness of your ingredients and showcases your culinary skills.
Once layered, take a moment to admire your creation. The combination of colors from the vegetables against the creamy filling is visually stunning, making it a dish that not only tastes incredible but looks impressive as well, perfect for serving at gatherings or special occasions where presentation matters and highlights your culinary expertise.
Arranging Beautiful Toppings for Added Visual Appeal
To elevate your tart even further, consider adding additional vegetable slices or herbs on top before baking. This decorative touch not only enhances the visual appeal but also adds layers of flavor to the final dish. For instance, placing thinly sliced tomatoes or zucchini on top can create an enticing layer that speaks to the freshness of the dish, inviting everyone to enjoy it and enhancing the overall dining experience.
Use a light hand when arranging toppings; the goal is to create an attractive design that complements the filling without overwhelming it. Fresh herbs like thyme or basil can be scattered on top for a burst of color and flavor, making your tart even more inviting and appealing to your guests, enhancing the overall presentation and flavor profile.
This step allows for creativity; consider organizing the toppings in a pattern or spiral for an artistic touch that showcases your culinary flair. A well-decorated tart is not only a feast for the taste buds but also for the eyes, making it a memorable dish for any occasion that leaves a lasting impression on everyone who enjoys it.
Once arranged, give everything a gentle press to ensure the toppings adhere to the filling. This will help keep them in place during baking and ensure a beautiful presentation when it comes time to slice and serve, showcasing the meticulous care you’ve put into your culinary creation and enhancing the overall dining experience.
Ensuring Even Distribution for Optimal Baking Results
To ensure that your tart bakes evenly, it’s crucial to check the distribution of both the filling and toppings before placing it in the oven. Look for any imbalances or clumps that could lead to uneven cooking, which can affect the overall quality of your tart and diminish the dining experience for everyone at the table.
Gently shake the tart pan from side to side; this can help settle the filling and toppings into an even layer. If you notice any areas that seem overpacked or sparse, adjust them as necessary. This simple step can make a significant difference in the final outcome, ensuring that every bite delivers a consistent experience that highlights the best of your ingredients and showcases your culinary expertise.
Even distribution is particularly important for cooking times. An evenly filled tart will bake more consistently, allowing the pastry to crisp up while the filling sets perfectly. Taking the time to ensure that everything is well-distributed will lead to a beautifully baked tart that showcases the freshness of your ingredients and enhances the overall dining experience for everyone at the table.
With everything in place, your tart is ready to bake. This meticulous attention to detail ensures a dish that not only looks spectacular but tastes divine, giving you the satisfaction of knowing you’ve created something truly special that will be enjoyed by all, making it a memorable culinary experience.
Baking Your Spring Vegetable Tart to Perfection
Setting the Optimal Temperature for Even Baking
The key to achieving a beautifully baked spring vegetable tart lies in setting your oven to the right temperature. Preheating your oven is a crucial step that ensures even cooking throughout the tart. Aim for a moderate temperature, typically around 180°C (or 350°F). This allows the pastry to cook through while ensuring that the filling sets perfectly without burning, resulting in a delicious and satisfying dish that everyone will appreciate.
Using an oven thermometer can help you verify that your oven is at the correct temperature. An oven that is too hot can lead to a burnt crust, while one that is too cool may result in a soggy base. Maintaining an even temperature allows the pastry to crisp up beautifully, creating the ideal contrast between the flaky crust and the creamy filling that everyone will love and enjoy.
Before placing your tart in the oven, take a moment to check that the oven rack is positioned in the center. This ensures that heat circulates evenly around the tart, preventing any hot spots that could burn certain areas. This attention to detail will pay off with a perfect bake that impresses everyone at the table, showcasing your culinary expertise and dedication to quality cooking.
Keeping the oven door closed during baking is also important. Every time you open the door, heat escapes, which can affect the cooking time and overall results. Be patient and allow your tart to bake undisturbed until it reaches that perfect golden hue, ensuring a delightful outcome that reflects your culinary skills and attention to detail.
Monitoring the Baking Time for Ideal Results
As your tart bakes, monitoring the time is essential to achieving a golden, crisp crust that everyone will love. Generally, a spring vegetable tart will take about 30-40 minutes to bake, but keep an eye on it as it approaches the final baking time. Every oven is different, so your tart may require slight adjustments to achieve the desired outcome and ensure a delightful dining experience.
Around the 25-minute mark, begin checking for doneness. The pastry should be golden brown, and the filling should appear set, with only a slight jiggle in the center. If the edges are browning too quickly, consider covering them with a strip of foil to prevent burning while allowing the filling to cook through, ensuring a beautifully baked tart that highlights your culinary skills and attention to detail.
Use this time to savor the delicious aromas wafting through your kitchen. The scent of fresh vegetables mingling with the buttery pastry is a sign that you’re on the right track to creating a mouthwatering dish that will delight everyone who has the pleasure of enjoying it, enhancing the overall dining experience.
Do not rush the process; a perfectly baked tart is worth the wait. Allowing the tart to fully bake ensures a firm filling and a crisp base, making each slice delightful to eat and memorable for all who gather around the table, showcasing your culinary talents and skills that shine through in every bite.
Checking for Doneness to Ensure Perfection
Determining whether your spring vegetable tart is fully cooked is a vital step in ensuring that your hard work pays off. To check for doneness, insert a toothpick or knife into the center of the tart. If it comes out clean or with just a few moist crumbs, your tart is ready to be removed from the oven, signaling that it has reached its ideal state and is ready for serving.
If you notice that the center is still too wet, return it to the oven for an additional 5-10 minutes, checking periodically to ensure it doesn’t overcook. The filling should be fully set, with a slight jiggle indicating that it’s cooked through but not overdone, ensuring a delightful texture that everyone will enjoy and appreciate, enhancing the overall quality of your dish.
Don’t overlook the edges of the pastry. They should be golden brown and crisp, providing that satisfying crunch with each bite. A well-cooked crust is crucial to the overall texture of your tart, so take the time to ensure it’s achieved the perfect color and consistency that reflects your culinary skills and dedication to quality cooking, making your tart a standout dish.
Once checked, remove the tart from the oven and set it aside to cool. This resting period allows the filling to set completely, making slicing easier and preventing any spillage, ensuring a beautiful presentation that showcases your hard work and attention to detail, enhancing the overall dining experience.
Rotating the Tart for Even Browning
To promote even browning and prevent any areas from overcooking, consider rotating your tart halfway through the baking process. Ovens can have hot spots, which sometimes lead to uneven cooking. By rotating your tart, you can ensure that every side gets equal exposure to the heat, resulting in a beautifully baked dish that delights the senses and showcases your culinary talent.
This simple step can make a significant difference in the final outcome. For instance, if one side of your tart begins to brown quicker than the other, rotating it allows for a more uniform color and texture that enhances the overall experience for everyone who enjoys it, showcasing the care and effort you’ve put into your cooking.
To rotate, carefully use oven mitts to turn the tart 180 degrees, ensuring that you maintain the integrity of the crust and filling. This small adjustment is a mark of a skilled cook, showing that you’re paying attention to every detail of the baking process, which is essential for achieving the perfect spring vegetable tart that impresses your guests.
Keep in mind that rotating is about more than just appearance. It ensures that your tart is cooked evenly throughout, providing a better overall experience for anyone who is lucky enough to enjoy a slice that reflects the care and effort you’ve put into your cooking, making it a delightful dining experience.
Properly Cooling Your Tart for Optimal Enjoyment
After your spring vegetable tart has finished baking, it’s important to cool it properly before serving. Allow the tart to cool in the tart pan on a wire rack for at least 15-20 minutes before attempting to slice it. This cooling period is essential for the filling to set firmly, making for cleaner slices that maintain their shape and presentation, enhancing the overall dining experience.
Trying to cut into a hot tart can lead to a messy presentation, with the filling spilling out and diminishing the visual appeal. Giving it time to cool ensures that the textures meld beautifully and provides a more enjoyable eating experience for everyone at the table, allowing them to appreciate your culinary skills and dedication to quality cooking.
Once cooled, you can remove the tart from the pan. Carefully run a knife around the edges to loosen it before gently lifting it out. For an elegant presentation, consider serving it on a decorative platter, garnished with fresh herbs or microgreens for added flair that enhances the overall experience and showcases your culinary creativity.
As your guests admire your creation, the aroma of fresh vegetables and baked pastry will entice them to indulge. This beautiful tart, with its perfectly set filling and crisp crust, is not just a meal; it’s a celebration of seasonal flavors and your culinary skills, creating memorable moments around the table that everyone will cherish.
Cooling and Serving Your Spring Vegetable Tart
Cooling the Tart for Improved Texture and Flavor
Once your vegetable tart has emerged from the oven, resist the urge to slice into it immediately. Cooling the tart on a wire rack for at least 20-30 minutes is essential. This allows the filling to firm up, resulting in cleaner, more professional-looking slices that reflect your attention to detail. A properly cooled tart will maintain its shape, ensuring that each piece looks as good as it tastes, enhancing the overall dining experience for everyone.
The cooling process also allows the flavors to meld, creating a more cohesive taste experience that delights the palate. As it sits, the residual heat continues to cook the filling slightly, perfecting that silky texture you’ve worked hard to achieve, ensuring that every bite is a delight for your guests.
If you’ve used a delicate pastry, cooling is particularly vital. A hot tart can cause the crust to become soggy if it’s cut too soon, diminishing the quality of your dish. Allowing it to cool completely enhances the crispness of the pastry, giving you that satisfying crunch with each bite that everyone will appreciate and enjoy.
While the tart cools, consider setting the table or preparing accompaniments. A light salad or a dollop of crème fraîche can complement the flavors beautifully, enhancing the overall dining experience and making your meal even more memorable for everyone at the table, showcasing your culinary skills and creativity.
Serving Suggestions for an Unforgettable Experience
When it comes time to serve your spring vegetable tart, presentation matters immensely. Carefully slice the tart into even pieces, showcasing the colorful layers of vegetables and the golden crust that reflects your culinary efforts. Serve it warm or at room temperature, as both options provide delightful experiences that will impress your guests and enhance the overall dining experience.
Consider pairing your tart with a light green salad dressed with a citrus vinaigrette to balance the richness of the filling. The freshness of the salad beautifully complements the tart and brings a burst of flavor that enhances the entire meal, creating a delightful dining experience that everyone will remember and appreciate.
When serving, think about garnishing your platter with edible flowers or fresh herbs. This not only adds a beautiful visual element but also reinforces the fresh, spring theme of your dish, making it even more appealing to your guests. They will appreciate the extra effort you’ve put into making the meal special and memorable, enhancing their overall dining experience.
Encourage your guests to savor each bite, enjoying the delightful textures and flavors that you’ve expertly crafted. This isn’t just food; it’s a celebration of spring produce and your culinary creativity, leaving everyone satisfied and impressed with your skills and attention to detail, making it a memorable experience for all.
Storing Leftovers for Maximum Freshness and Enjoyment
If you find yourself with leftover spring vegetable tart, storing it properly is key to maintaining its quality. Allow the tart to cool completely before covering it gently with plastic wrap or foil to prevent drying out. Store it in the refrigerator for up to three days, ensuring that it remains fresh and delicious for later enjoyment that highlights your culinary efforts and dedication to quality cooking.
Reheating is simple; preheat your oven to a low temperature, around 150°C (or 300°F), and place the tart on a baking sheet for about 10-15 minutes, or until warmed through. This gentle reheating process helps to retain the crispness of the pastry while warming the filling evenly, allowing your tart to shine once again and provide a delightful dining experience.
Alternatively, individual slices can be reheated in a microwave for quick enjoyment, though this may sacrifice some of the pastry’s crispness. Regardless of how you choose to reheat, your spring vegetable tart can continue to be a delightful meal that brings people together, showcasing the beauty of seasonal produce and your culinary skills that shine through in every bite.
Frequently Asked Questions About Making Spring Vegetable Tarts
Which vegetables are best for a spring vegetable tart?
Spring vegetables like asparagus, peas, radishes, and spinach are ideal for a spring vegetable tart. Their vibrant colors and fresh flavors shine when in season, enhancing the overall taste and presentation of your dish, making it a delightful culinary experience for all.
Can I use store-bought pastry for my tart?
Absolutely! High-quality store-bought pastry can save time and still yield delicious results. Just be sure to follow the preparation instructions for the best outcome, ensuring that your tart turns out beautifully and satisfies everyone’s taste buds, enhancing the overall dining experience.
How can I prevent a soggy tart base?
Blind baking your pastry before adding the filling is key to preventing sogginess. Ensure to cool the vegetables thoroughly and pat them dry after washing to minimize moisture, creating a crisp and delightful tart base that everyone will love and enjoy, making your dish a standout.
Can I make the filling ahead of time?
Yes, you can prepare the filling a day in advance and store it in the fridge. Just mix it with the vegetables right before assembling the tart, ensuring that every component is fresh and flavorful for your guests to enjoy, enhancing the overall quality of your dish.
Is it possible to freeze the tart?
Yes, you can freeze the unbaked tart. Wrap it tightly in plastic wrap and aluminum foil, and bake from frozen, adding a few extra minutes to the cooking time to ensure it bakes evenly and thoroughly, creating a delightful dish that everyone will enjoy.
What cheese works best in a spring vegetable tart?
Feta, goat cheese, and mozzarella are excellent choices for a spring vegetable tart. Each offers unique flavor profiles that beautifully complement the vegetables, creating a harmonious blend of tastes that delights the palate and enhances the overall dining experience.
How long does it take to bake the tart?
Typically, a spring vegetable tart takes about 30-40 minutes to bake at 180°C (or 350°F). Keep an eye on it to achieve a golden crust and perfectly set filling that makes for a delightful meal, showcasing your culinary skills.
Can I add protein to my tart?
Yes! Incorporating cooked chicken, bacon, or even tofu can add protein to your tart, making it a more substantial meal that satisfies everyone’s hunger while still highlighting the fresh vegetables, enhancing the overall quality of your dish.
What should I serve with the tart?
Pair your tart with a light salad dressed with vinaigrette, or serve it with a dollop of crème fraîche for added creaminess and balance that enhances the overall dining experience, making it even more enjoyable for your guests.
How do I know when my tart is done baking?
Your tart is done when the filling is set with a slight jiggle in the center, and the pastry edges are golden brown. A toothpick inserted should come out clean, indicating that your tart is perfectly baked and ready to be enjoyed, showcasing your culinary skills.
Connect with us on Facebook!
The post How to Cook a Spring Vegetable Tart: A Fresh Guide appeared first on https://cookinggods.com
The Article Spring Vegetable Tart: Your Fresh Cooking Guide Was Found On https://limitsofstrategy.com
-

Gluten-Free Cooking Tips for Memorable Group Gatherings
Exploring the Essential Components of a Gluten-Free Diet
Diving Deeper into Gluten: Understanding Its Role and Importance in Food
Gluten is a fundamental type of protein that significantly influences the texture and structure of many baked goods. It is primarily found in grains such as wheat, barley, and rye, which contribute to the chewy and satisfying qualities that many people adore in bread and pastries. For individuals adhering to a gluten-free lifestyle, strict avoidance of gluten is crucial, as even minimal exposure can trigger severe health complications. Consequently, recognizing the myriad sources of gluten is essential for anyone who must follow this dietary approach, whether due to specific medical diagnoses like celiac disease or personal health choices.
It may surprise many to discover that gluten is present in a broad spectrum of common foods, often hidden from view. While gluten is typically linked to obvious sources such as bread and pasta, it can also lurk in unexpected places like sauces, dressings, and certain processed meats. Understanding gluten comprehensively is the initial step towards successfully implementing a gluten-free lifestyle. In today’s health-conscious society, awareness around gluten has increased; however, misconceptions remain widespread. A prevalent myth is that gluten-free products are inherently healthier than their gluten-containing counterparts, which is not always the case. It is vital to prioritize whole foods that are naturally gluten-free, rather than relying solely on processed gluten-free alternatives, which may not offer significant nutritional benefits.
The impact of gluten on individuals can vary significantly; some may face severe reactions due to conditions like celiac disease, while others may only experience mild discomfort associated with gluten sensitivity. Therefore, when determining how to cook for a gluten-free group, it is crucial to acknowledge these differences and provide a diverse array of options that cater to varied dietary requirements and preferences.
Exploring the Motivations Behind Adopting a Gluten-Free Lifestyle
Individuals choose to embark on a gluten-free diet for many diverse reasons. For a significant number, medical conditions such as celiac disease—a serious autoimmune disorder—render this dietary choice essential. For these individuals, consuming gluten can cause substantial harm to the small intestine, leading to various health complications. This condition affects roughly 1% of the global population, emphasizing the urgent need for greater awareness and understanding of gluten-related issues.
Others may experience non-celiac gluten sensitivity, a condition that, while less precisely defined, can still lead to uncomfortable symptoms such as bloating, fatigue, and joint pain. Additionally, some people adopt a gluten-free lifestyle as a part of a broader health strategy, viewing it as a cleaner and more nutritious approach to eating. This trend has gained traction within the wellness community, where gluten-free diets are often promoted for their perceived health benefits, despite mixed scientific opinions on the matter.
In designing meals for a gluten-free group, it is vital to consider the various motivations that inform each person’s dietary restrictions. Some may avoid gluten strictly for medical reasons, while others may adopt a more flexible stance, perceiving gluten-free options as enhancements to a balanced lifestyle. Understanding these distinctions will aid in creating meals that are both delectable and inclusive, addressing a range of dietary motivations effectively.
Recognizing Key Ingredients for Successful Gluten-Free Cooking
Embarking on gluten-free cooking opens up a world of ingredients, allowing for creativity and variety in meal preparation. Staples such as rice, corn, quinoa, and gluten-free oats provide excellent foundational elements for a gluten-free menu. These ingredients not only deliver essential nutrients but also serve as versatile bases for flavors and culinary techniques drawn from various cultures.
For instance, rice’s adaptability allows for numerous preparations—from comforting risottos to vibrant stir-fries. Quinoa, regarded as a pseudo-grain rich in protein, can be showcased in hearty salads or grain bowls, providing a nutritious and filling gluten-free base. Meanwhile, corn, particularly in the forms of polenta or corn tortillas, introduces delightful textures and flavors, making it a beloved ingredient across different cuisines. Additionally, gluten-free oats are perfect for breakfast or baking, easily transforming into oatmeal or delicious cookies.
Beyond these staples, the gluten-free market has seen significant expansion, presenting innovative alternatives to traditional grains, such as almond flour, coconut flour, and chickpea flour. These substitutes not only meet gluten-free requirements but also introduce unique flavors and health benefits—such as enhanced protein content and healthy fats—into your culinary creations. By identifying and incorporating these essential gluten-free ingredients, you can craft satisfying meals that everyone will enjoy, regardless of their dietary restrictions.
Mastering the Process of Gluten-Free Meal Planning

Creating a Nutritionally Balanced Gluten-Free Menu
Developing a well-rounded gluten-free menu is essential for ensuring nutritional adequacy and variety in meals. A balanced plate should consistently incorporate a source of protein, an array of vegetables, and gluten-free grains or starches. This approach not only supports overall health but also elevates the dining experience, transforming each meal into a delightful and satisfying occasion.
When planning your menu, aim to include proteins from both animal and plant sources. Options such as lean meats, fish, legumes, and dairy products provide essential nutrients that enhance muscle health and overall energy levels. Pairing these proteins with vibrant vegetables introduces a wealth of vitamins, minerals, and antioxidants, significantly boosting the nutritional profile of each dish. Imagine colorful salads featuring seasonal produce, topped with nuts or seeds for additional crunch and nutrition.
Gluten-free grains like quinoa, brown rice, and buckwheat not only complement proteins and vegetables but also deliver vital carbohydrates necessary for sustained energy. These grains can play a starring role in recipes such as stuffed peppers or hearty grain bowls, where they can absorb flavors from a variety of spices and sauces, creating a delightful culinary experience.
Remember that variety is essential. Incorporating ingredients from diverse cuisines—such as Mexican, Asian, or Mediterranean—can keep your menu exciting and appealing. By weaving a broad spectrum of flavors and textures into your offerings, you ensure that meals can satisfy even the most discerning palates. This approach is especially important when mastering how to cook for a gluten-free group, as it allows for a menu that feels inclusive and celebratory.
Implementing Effective Strategies to Prevent Cross-Contamination
Cross-contamination poses a significant risk when preparing meals for individuals with gluten sensitivities or celiac disease. Even the smallest traces of gluten can trigger severe health reactions, making it crucial to adopt proactive measures in the kitchen.
To minimize cross-contamination, designate specific utensils, cookware, and surfaces exclusively for gluten-free meal preparation. This includes using separate cutting boards, knives, and pots for gluten-free items to ensure that no gluten-containing crumbs or residues remain. When cooking gluten-free grains, always utilize clean water and distinct colanders to prevent any gluten from tainting your food.
Labeling serves as another effective tactic, improving the identification of gluten-free items while clearly marking equipment intended solely for gluten-free cooking. If gluten-free meals are being prepared in a shared kitchen, communicating with all parties involved is advisable to ensure that everyone understands the importance of these precautions.
Furthermore, educate yourself about gluten-free cooking techniques and products. While many brands offer gluten-free sauces and condiments, not all may be adequately labeled, making it essential to read labels meticulously. By prioritizing safety and mindfulness in the kitchen, you create a welcoming environment for those with dietary restrictions, allowing everyone to enjoy the meal without concern.
Budgeting Smartly for Gluten-Free Ingredients

One of the challenges associated with gluten-free cooking is the often elevated costs tied to gluten-free ingredients and products. Recognizing this can help you plan your grocery budget more effectively, ensuring a variety of gluten-free options without straining your finances.
Start by exploring bulk-buying opportunities for staples such as rice, quinoa, and gluten-free flours. Many health food stores offer these items at more budget-friendly rates when purchased in larger quantities. Additionally, consider shopping at local farmers’ markets for fresh produce, which can often be both less expensive and more flavorful than supermarket offerings. Purchasing seasonal fruits and vegetables not only supports local farmers but also tends to be more economical.
When it comes to gluten-free products, exercise caution with pre-packaged items, as these can carry a hefty price tag. Instead, focus on buying whole foods that are naturally gluten-free. For instance, legumes, nuts, and seeds are typically affordable and can be integrated into numerous recipes to provide protein and texture.
Plan your meals in advance by creating a shopping list that prioritizes essential gluten-free ingredients. This strategy will help you avoid impulse purchases, enabling you to adhere to your budget. Embrace creative cooking by utilizing what you have on hand to minimize waste and save money while still providing delicious gluten-free meals. By being mindful of your spending, you can ensure that everyone at your meal feels valued and included without straining your finances.
Mastering the Art of Shopping for Gluten-Free Ingredients
Developing Proficiency in Reading Labels
Mastering the skill of reading labels is paramount when shopping for gluten-free ingredients. Gluten can hide behind various names, making it essential to meticulously scrutinize the ingredients list of every product. Even seemingly harmless items—like salad dressings, marinades, and processed meats—may contain gluten-based additives or thickeners.
When purchasing packaged goods, seek out certified gluten-free labels, which signify that the product adheres to stringent gluten-free standards. This certification provides reassurance, confirming that cross-contamination did not occur during production. Additionally, familiarize yourself with common terminology that may indicate gluten’s presence. Terms like “wheat flour,” “barley malt,” and “rye” are clear indicators that a product is not gluten-free.
Consider utilizing resources or apps that provide updated lists of gluten-free products. Many stores feature extensive gluten-free sections, simplifying the process of discovering safe options. However, it’s wise to remain vigilant, as product formulations can change without notice.
Don’t hesitate to reach out to manufacturers if you have queries about their products. Many companies are willing to provide information regarding gluten-free status, ingredients, and cross-contamination protocols. By taking these precautions and staying informed, you can confidently fill your cart with gluten-free ingredients, setting the stage for delicious meals that everyone can enjoy.
Finding Practical Gluten-Free Substitutes
Discovering effective gluten-free substitutes can greatly enhance your culinary experience, enabling you to recreate cherished recipes without gluten. Numerous gluten-free flours, including almond flour, coconut flour, and rice flour, can often replace wheat flour in various cooking and baking scenarios. Each flour possesses unique characteristics, so understanding their properties will help you achieve optimal results.
For example, almond flour is fantastic for baked goods, adding moisture, while coconut flour is high in fiber and requires additional liquid in recipes due to its absorbent nature. Blending gluten-free flours can also yield excellent results; for instance, a combination of almond and coconut flour can create a delightful pancake mix that everyone will love.
When it comes to pasta, gluten-free options such as brown rice pasta or lentil-based pasta are widely available, providing similar textures and tastes to their gluten-containing counterparts. Experiment with different brands to discover your favorites, as flavors and cooking times can vary.
Furthermore, gluten-free grains like quinoa, millet, and buckwheat can serve as excellent substitutes in traditional dishes, offering unique flavors while remaining gluten-free. Whether you’re crafting a risotto or preparing a comforting casserole, these ingredients can shine, delivering hearty and fulfilling meals.
With the right substitutes, you need not shy away from your favorite recipes when cooking gluten-free. Instead, embrace the challenge and creativity that gluten-free cooking brings, ensuring that each dish is both safe and delicious.
Establishing a Well-Stocked Gluten-Free Pantry
Creating a well-stocked gluten-free pantry can significantly enhance your ability to prepare gluten-free meals with ease. Essential gluten-free staples should encompass a diverse array of grains, flours, and ingredients that facilitate versatility in cooking.
Grains such as brown rice, quinoa, and buckwheat should take center stage in your pantry. These not only provide a solid foundation for meals but also offer varied nutrient profiles. Keep gluten-free flours like almond flour, coconut flour, and gluten-free all-purpose flour readily available to adapt recipes as needed.
Additionally, consider stocking up on gluten-free condiments, sauces, and snacks. Items like gluten-free soy sauce, tamari, and a selection of spices can elevate your dishes while ensuring they remain safe for your guests. Having a variety of canned goods, such as beans and tomatoes, can simplify meal preparation and enhance the depth of your gluten-free menus.
To maximize your pantry’s potential, periodically check your inventory and replenish items that are running low. This practice can save time and money while reducing food waste. By maintaining a well-stocked gluten-free pantry, you’ll be prepared to whip up delicious meals at a moment’s notice, ensuring that everyone at your table feels included and satisfied.
Discovering Unique Ingredients at Specialty Stores
Shopping at specialty stores can greatly enrich your gluten-free cooking experience. Many health food shops and gluten-free bakeries offer a plethora of unique ingredients, making it easier to find high-quality products that may not be available in standard supermarkets.
Visiting these stores can be an adventure in itself. You might come across locally produced gluten-free items, such as artisanal bread, pasta, or baked goods, specifically crafted for those avoiding gluten. These products often originate from smaller producers who prioritize quality and flavor, providing a delightful alternative to mass-produced gluten-free options.
Take the time to engage with knowledgeable staff who can guide you to the best gluten-free selections and potentially introduce you to new products. Exploring these stores enables you to expand your culinary repertoire, trying ingredients you may not have previously considered.
Moreover, specialty stores frequently host gluten-free workshops or tasting events, providing valuable opportunities to learn new recipes and cooking techniques. Engaging with the gluten-free community can boost your confidence as a cook, offering support and inspiration as you navigate the world of gluten-free dining.
By exploring these unique resources, you not only enhance your gluten-free cooking skills but also contribute to a supportive community that celebrates inclusive dining experiences.
Mastering Techniques for Preparing Gluten-Free Dishes
Strategies for Modifying Recipes for Gluten-Free Cooking
Adapting traditional recipes for a gluten-free audience is entirely achievable and can lead to delightful, innovative dishes. The key lies in understanding the role of gluten in recipes and identifying suitable replacements that maintain the dish’s integrity.
The initial step in modifying a recipe is to pinpoint the gluten-containing ingredients. This often includes wheat flour, bread, pasta, and certain thickeners. Once you identify these components, you can explore gluten-free substitutes. For instance, in baking, consider using a gluten-free all-purpose flour blend that typically combines rice flour, potato starch, and tapioca flour. These blends are designed to replicate the properties of traditional flours, yielding similar textures and flavors.
In savory dishes, gluten-containing components can often be replaced with gluten-free alternatives without sacrificing flavor. For example, instead of soy sauce, opt for tamari, which is gluten-free and adds depth to stir-fries and marinades. Similarly, using quinoa or brown rice in place of couscous or traditional pasta can provide a nutritious alternative while maintaining the dish’s gluten-free status.
Experimenting with spices, herbs, and flavorings can further enhance gluten-free recipes, allowing you to impart unique tastes that elevate the dish. By being open to experimentation and embracing new ingredients, you can create satisfying meals that are both gluten-free and full of flavor.
Developing Proficiency in Gluten-Free Baking
Baking gluten-free can be an enjoyable challenge, requiring a few adjustments to achieve the desired texture and flavor. One of the most crucial ingredients in gluten-free baking is xanthan gum or guar gum, which can replicate the binding properties of gluten, helping to maintain the structure of baked goods and enhance their texture.
When working with gluten-free flours, remember they behave differently than standard wheat flour. For example, almond flour is denser and may require additional eggs or liquid to achieve the right consistency. Conversely, coconut flour is extremely absorbent, often necessitating more wet ingredients in recipes to reach the desired outcome.
Start by following gluten-free recipes specifically crafted for these alternative flours. This approach provides a solid foundation before you venture into making your adaptations. Once you feel confident, begin substituting gluten-free flours in your favorite baked goods, keeping in mind the necessary ratios and adjustments for each type of flour.
Don’t be discouraged if your initial attempts don’t turn out perfectly—baking gluten-free often requires practice and fine-tuning. Celebrate your successes and learn from your setbacks, and soon you’ll be creating gluten-free cookies, cakes, and breads that everyone will adore.
Refining Cooking Techniques for Gluten-Free Meals
Adapting your cooking techniques for gluten-free meals can significantly enhance both flavor and texture, ensuring that your dishes are enjoyable and satisfying. Gluten-free ingredients often necessitate different cooking methods or times, so being attentive is key.
When cooking gluten-free grains, it’s essential to follow specific instructions, as cooking times can vary considerably between types. For instance, quinoa generally cooks faster than brown rice, so keep a close watch on both to prevent overcooking. Experimenting with techniques like toasting grains before cooking can also deepen their flavors, adding an extra layer of complexity to your dishes.
In baking, adjusting oven temperatures can yield better results with gluten-free products. Often, gluten-free baked goods benefit from being baked at slightly lower temperatures or for shorter durations to prevent drying out.
If you’re using gluten-free pasta, be mindful of the cooking times, as they can differ from traditional pasta. After cooking, rinsing your gluten-free pasta can help remove excess starch, preventing it from becoming gummy.
By refining these techniques and remaining adaptable in your approach, you can create gluten-free dishes that are not only safe for your guests but also bursting with flavor and texture.
Ensuring Safety and Comfort in Gluten-Free Dining Experiences
Establishing Clear Communication with Guests
The foundation of a successful gluten-free dining experience is clear and open communication with your guests. Before finalizing your menu, it is wise to inquire about any dietary restrictions, allergies, or preferences to foster a safe and enjoyable atmosphere.
Encourage guests to share their concerns regarding gluten and any other allergens they may have. This openness cultivates a sense of trust and allows you to tailor your menu effectively. Moreover, discussing dietary needs in advance helps to eliminate last-minute stresses during meal preparation.
Ensure that you also educate yourself about the specific requirements of individuals with celiac disease or gluten sensitivities. Understanding the severity of their reactions can assist you in crafting a menu that considers their needs and prioritizes safety.
Offering extra options or variations can also be advantageous. For example, if you’re preparing a dish that can easily be made gluten-free, consider creating a separate version to ensure every guest feels welcomed at the table. Ultimately, clear communication will not only enhance the meal experience but also cultivate an inviting and supportive dining environment.
Cultivating an Inclusive and Welcoming Dining Atmosphere
An inclusive environment is vital when hosting a gluten-free gathering. Your guests should feel comfortable and valued, regardless of their dietary restrictions. Begin by setting the stage for inclusivity through thoughtful meal planning and presentation.
Consider decorating the table with a variety of gluten-free dishes, showcasing the creativity and diversity that gluten-free cooking offers. Encourage guests to serve themselves, allowing them to navigate the buffet and select their favorites while ensuring they have control over their dietary choices.
Be attentive and approachable throughout the meal. Offer to answer questions about the dishes you’ve prepared and share insights into the ingredients used. This not only alleviates any concerns your guests may have but also encourages engaging conversations about gluten-free cooking and living.
Additionally, fostering a relaxed atmosphere goes a long way in ensuring everyone feels at ease. Avoid drawing attention to dietary restrictions; instead, focus on the joy of sharing a meal together. When diners feel comfortable and included, they’re more likely to appreciate the experience and recognize the effort you put into accommodating their needs.
Preparing for Dietary Emergencies
Despite the best precautions, dietary emergencies can arise, making it essential to be prepared. Accidental gluten exposure can lead to severe reactions, particularly for those with celiac disease. Having a plan in place can help mitigate these situations effectively.
Begin by familiarizing yourself with the symptoms of gluten exposure, which may include digestive distress, fatigue, and headaches. If you suspect a guest has been affected, approach the situation calmly and ask how you can assist them. Depending on their needs, this may involve ensuring they have access to safe foods, hydration, or even medical assistance if required.
Maintain an emergency kit for dining events, including gluten-free snacks and hydration options. This can offer immediate relief and comfort to a guest who may feel unwell after accidental gluten exposure.
Educating yourself about first aid procedures for allergic reactions can also be beneficial. Be prepared to offer assistance and assure your guests that you are committed to their safety. Handling these emergencies with care and compassion will enhance your reputation as a considerate and conscientious host.
Implementing Clear Food Labeling for Safety
Clear food labeling is an essential aspect of hosting a gluten-free meal. By ensuring all dishes are labeled with their ingredients, you empower your guests to make informed choices and avoid potential allergens.
Use simple, visible labels to identify gluten-free items, specifying any other potential allergens as well. This not only demonstrates your commitment to their dietary needs but also allows guests to navigate the meal confidently, enhancing their overall dining experience.
In addition to labels, consider providing a brief description of each dish, highlighting any unique ingredients or flavors. This transparency can spark conversations and encourage guests to try new foods.
If you’re serving dishes that can be modified, such as a taco bar with various fillings, clearly separate the gluten-free options from those containing gluten. This practice further reduces the risk of cross-contamination and reassures guests that their dietary needs are being respected.
By prioritizing clear food labeling, you foster a safe and welcoming environment, allowing everyone to enjoy the meal without concern.
Understanding the Etiquette Surrounding Gluten-Free Dining
Valuing the Dietary Needs of All Guests
Respecting dietary needs is paramount when hosting meals that include gluten-free options. Acknowledging the significance of gluten-free diets for your guests helps create an inclusive atmosphere where everyone feels valued.
Take the time to learn about the various dietary restrictions that may be present at your gathering. Understanding the distinctions between celiac disease and gluten sensitivity, for instance, can guide you in providing appropriate options tailored to each individual’s needs.
Avoid trivializing or dismissing dietary restrictions, as this can lead to discomfort for those affected. Instead, celebrate the opportunity to create diverse and delicious gluten-free dishes that highlight the richness and variety of gluten-free cooking.
Encouraging open dialogue about dietary needs fosters an environment of respect and understanding. Guests will appreciate your efforts to accommodate their requirements, and this experience can strengthen bonds through shared meals that embrace all dietary preferences.
Providing Thoughtful Alternatives for Greater Inclusivity
When preparing meals for a diverse group, offering alternatives is essential to ensure that everyone feels included and satisfied. Provide gluten-free options alongside traditional dishes, allowing guests to select what works best for them.
For example, if you’re serving sandwiches, include gluten-free bread or wraps for those who avoid gluten. This consideration demonstrates your thoughtfulness towards their dietary needs and ensures that no one feels left out during the meal.
When preparing side dishes, consider offering both gluten-containing and gluten-free versions whenever feasible. For instance, serve a gluten-free pasta salad alongside a traditional one, enabling guests to enjoy the flavors without worry.
Moreover, educating other guests about the gluten-free options can help promote understanding and inclusivity. Sharing information about gluten-free ingredients can spark conversations and foster a sense of community at the table.
By prioritizing alternatives and showcasing the variety of gluten-free cooking, you create a welcoming environment that celebrates the beauty of diverse dining experiences.
Facilitating Education on Gluten-Free Living
Educating others about gluten-free diets not only raises awareness but also promotes understanding and inclusivity at shared meals. Your role as a host provides an opportunity to share knowledge and insights into gluten-free cooking, debunking myths and misconceptions that may exist.
Begin by sharing your own journey with gluten-free cooking. Whether it’s a recipe that turned out unexpectedly well or a challenge you overcame, personal stories can make the topic relatable and enjoyable.
Encourage guests to ask questions, providing clear and informative answers. Be prepared to discuss common gluten-containing ingredients, the importance of preventing cross-contamination, and the benefits of gluten-free eating. This knowledge can help build a supportive community around gluten-free dining, creating a sense of camaraderie among those present.
Additionally, consider creating resources such as recipe cards or pamphlets for guests to take home. These can include helpful tips, gluten-free substitutes, and information about gluten sensitivity. By equipping others with knowledge, you empower them to make informed choices in their own lives.
Cultivating an educational atmosphere enriches the dining experience, transforming a simple meal into an opportunity for learning and connection.
Maintaining Clear Communication Throughout the Dining Experience
Clear communication is essential when hosting a gluten-free gathering. Inform guests about gluten-free options and any potential cross-contamination risks associated with the meal. By being transparent, you foster trust and ensure that everyone feels secure while dining.
Consider providing a menu ahead of time, outlining the dishes being served along with their ingredients. This enables guests to review options and communicate any concerns in advance.
During the meal, don’t hesitate to engage your guests in conversation about the dishes prepared. Encourage them to ask questions regarding ingredients and preparation methods, offering insights into your gluten-free cooking techniques.
If you’re serving a buffet-style meal, ensure that gluten-free items are clearly marked, assisting guests in confidently navigating their options. Additionally, highlight any items that may contain gluten to further assist those with dietary restrictions.
By prioritizing clear communication, you foster an atmosphere of respect, allowing everyone to relish the meal without anxiety surrounding their dietary needs.
Exciting Gluten-Free Recipe Ideas for Every Occasion
Irresistible Starters and Appetizers
When it comes to starters and snacks, gluten-free options can be both scrumptious and satisfying. Consider preparing gluten-free crackers, served alongside a variety of dips and spreads. Hummus, guacamole, or a zesty salsa can offer a burst of flavor, perfect for socializing and mingling.
Vegetable-based starters present another fantastic way to kick off a gluten-free meal. Roasted seasonal vegetables, drizzled with olive oil and sprinkled with herbs, create a colorful and appealing display. Alternatively, stuffed mushrooms filled with gluten-free breadcrumbs, cheese, and herbs provide a delightful bite-sized treat.
For a unique twist, consider assembling gluten-free skewers with grilled chicken, vegetables, and pineapple. Marinated and grilled to perfection, these skewers are sure to be a hit at any gathering.
If you’re feeling adventurous, whip up gluten-free energy bites made with oats, nut butter, honey, and your choice of add-ins such as chocolate chips or dried fruits. These can serve as a delightful snack for guests to enjoy throughout the evening.
By offering a variety of gluten-free starters, you set the tone for an inclusive meal that caters to all dietary preferences while showcasing the flavors and creativity that gluten-free cooking can achieve.
Flavorful Main Course Choices
Main courses are the essence of any meal, and gluten-free options can be both comforting and flavor-packed. Grilled chicken served with quinoa salad exemplifies a balanced dish that is not only gluten-free but also loaded with nutrients. Tossed with fresh herbs, vegetables, and a light dressing, this dish is bound to satisfy.
Gluten-free pasta offers another fantastic option, with countless ways to prepare it. Consider crafting a rich and savory sauce to accompany your pasta, such as a homemade marinara or a creamy pesto. Add seasonal vegetables and proteins like grilled shrimp or sautéed chicken to create a hearty meal that everyone will enjoy.
Another delicious gluten-free main course is a hearty vegetable curry served with brown rice. This vibrant dish, brimming with spices and flavors, showcases the versatility of gluten-free ingredients. Using coconut milk adds richness while keeping the dish dairy-free, making it accessible to a broader audience.
Don’t overlook the potential of stuffed peppers, filled with a mixture of rice, beans, and spices. Baked until tender, these peppers can be both visually stunning and incredibly satisfying.
By focusing on bold flavors and wholesome ingredients, you can create gluten-free main courses that are not only safe for your guests but also highlight the joys of gluten-free cooking.
Decadent Gluten-Free Desserts
No meal is complete without a sweet finish, and gluten-free desserts can be just as indulgent as their gluten-containing counterparts. Consider crafting a fruit crumble, where gluten-free oats and almond flour create a delicious topping over a medley of fresh fruits. This warm dessert, served with a scoop of vanilla ice cream, is sure to impress.
Chocolate mousse is another delightful gluten-free option. Made with high-quality chocolate, eggs, and cream, this rich and airy dessert satisfies any sweet tooth. Serve in individual cups for an elegant touch.
For a lighter choice, consider gluten-free pavlova topped with whipped cream and seasonal fruits. This meringue-based dessert is naturally gluten-free and presents beautifully, making it an ideal selection for special occasions.
If you’re feeling adventurous, gluten-free brownies can be a crowd-pleaser. Made with almond flour or a gluten-free flour blend, these can be dense and fudgy, perfect for a decadent treat.
By incorporating gluten-free desserts into your meal, you ensure that everyone can indulge in a sweet finish, leaving a lasting impression on your guests.
Essential Resources for Mastering Gluten-Free Cooking
Invaluable Cookbooks and Trusted Websites
In the realm of gluten-free cooking, a wealth of resources is available to inspire and guide your culinary journey. Seek out cookbooks specifically dedicated to gluten-free recipes, which often provide invaluable insights and tips tailored to this dietary preference. Popular titles typically feature a broad array of recipes, from quick weeknight meals to elaborate desserts, ensuring you have ample options at your fingertips.
Many online platforms offer invaluable resources, including blogs and websites dedicated to gluten-free living. These sites often include user-generated recipes, allowing for a community-driven approach to cooking. You can also find forums and discussions where gluten-free cooks share their experiences and advice, creating a supportive network for those navigating this dietary lifestyle.
Social media also serves as a fantastic avenue for discovering new gluten-free recipes and ideas. Platforms like Instagram and Pinterest are rich with visuals that can stimulate your culinary creativity. Look for hashtags like #glutenfreerecipes or #glutenfreebaking to uncover engaging content and connect with fellow gluten-free enthusiasts.
By utilizing these resources, you can enrich your gluten-free cooking repertoire, gaining confidence in your ability to create meals that delight and satisfy every palate.
Connecting with Supportive Gluten-Free Communities
Engaging with gluten-free communities can provide invaluable support and camaraderie as you navigate your gluten-free cooking journey. Online forums, social media groups, and local meet-up events allow individuals to share experiences, recipes, and advice, creating a nurturing environment for gluten-free cooking.
Many communities also host events, such as gluten-free food fairs or cooking classes, providing opportunities to learn new skills and connect with like-minded individuals. Participating in these events can expand your knowledge, deepen your understanding of gluten-free cooking techniques, and introduce you to new products and ingredients.
Additionally, local support groups focused on gluten-free living often share resources for dining out, shopping, and recipe exchanges, helping you feel empowered and informed in your journey.
Engaging with gluten-free communities fosters a sense of belonging and connection, making the transition to gluten-free living a more enjoyable experience.
Frequently Asked Questions (FAQs) About Gluten-Free Living
What are some common gluten-free grains?
Common gluten-free grains include rice, quinoa, millet, buckwheat, and gluten-free oats. These grains can serve as the base for various dishes and provide essential nutrients.
How can I avoid cross-contamination in the kitchen?
To prevent cross-contamination, utilize separate utensils, cutting boards, and cooking surfaces for gluten-free food. Thoroughly clean all equipment before use to ensure safety.
Are gluten-free products always healthier?
Not necessarily. Some gluten-free products can be heavily processed and may contain added sugars or fats. Focus on whole foods for a healthier diet.
Can I use regular flour in gluten-free recipes?
Regular flour contains gluten, so it cannot be directly substituted in gluten-free recipes. Always opt for gluten-free flours for the best results.
How can I make gluten-free bread rise?
Utilizing xanthan gum or guar gum can help enhance the texture and rising ability of gluten-free bread, mimicking the properties of gluten.
Is gluten-free pasta available in different varieties?
Yes, gluten-free pasta comes in various types, including those made from rice, quinoa, lentils, and chickpeas, each offering unique textures and flavors.
What are some gluten-free snack options?
Gluten-free snacks include fresh fruits and vegetables, gluten-free crackers, popcorn, and energy bites made from nuts, seeds, and dried fruits.
How do I communicate dietary needs to guests?
Inquire about guests’ dietary restrictions ahead of time and encourage open dialogue about their needs to ensure a safe dining experience.
What are some simple gluten-free dessert ideas?
Simple gluten-free desserts include fruit crumbles, chocolate mousse, pavlova, and gluten-free brownies, allowing for indulgence without gluten.
Where can I find gluten-free recipes?
Gluten-free recipes can be found in dedicated cookbooks, websites, food blogs, and social media platforms, offering a plethora of options for various tastes and dietary needs.
Connect with us on Facebook for the latest updates!
The post How to Cook for a Gluten-Free Group: Essential Tips appeared first on https://cookinggods.com
The Article Gluten-Free Cooking Tips for Your Group Gatherings Was Found On https://limitsofstrategy.com
-

Meat Tenderizer Boosts Flavor and Texture for Delicious Meals
Master the Technique of Meat Tenderization to Transform Your Culinary Creations
The remarkable benefits of a meat tenderizer arise from its unparalleled ability to mechanically break down muscle fibers. This essential process not only increases the tenderness of various types of meat but also significantly amplifies their overall flavor. By delving into the complex interplay between texture, flavor, and diverse cooking techniques, both amateur cooks and seasoned chefs can utilize this understanding to create exceptional dishes that tantalize the taste buds and elevate the overall dining experience.
Unpacking the Science Behind Effective Meat Tenderization
When meat is subjected to the mechanical force of a tenderizer, it initiates a significant disruption of the tough muscle fibers. This disruption is crucial for enhancing the tenderness of naturally tough cuts, such as brisket or chuck, which come from muscles that are well-exercised, rendering them fibrous and chewy. The action of breaking down these fibers alters the structural integrity of the meat, making it far more enjoyable and palatable, thus transforming any dining occasion into a delightful experience.
As the meat becomes increasingly tender, the overall dining experience shifts dramatically. Chewing transitions from being a chore to a pleasure, allowing diners to relish the rich flavors rather than struggle with tough fibers. This transformation is particularly significant in various culinary contexts, ranging from the traditional Australian barbecues to hearty, slow-cooked stews prevalent in Europe, where the balance of texture and flavor is paramount to the enjoyment of any dish.
Optimize Marinade Absorption by Increasing Meat Surface Area
The mechanical disruption of muscle fibers not only tenderizes the meat but also considerably expands its surface area. This increased surface area enhances the ability of marinades and spices to penetrate more deeply, enriching the flavor profile of the dish. As the meat becomes more porous and tender, seasonings can perform their magic more effectively, ensuring that the flavors permeate every morsel rather than merely coating the exterior.
Imagine the exquisite sensation of biting into a perfectly marinated steak or chicken breast bursting with flavor. This phenomenon is especially apparent in global cuisines that prioritize marinades, such as the citrus-infused marinades celebrated in Caribbean cuisine or the complex spice blends typical of Middle Eastern dishes. The ability of the tenderizer to enhance flavor through improved marinade absorption is a true game-changer for both home cooks and culinary professionals alike.
Boost Juiciness for a Truly Memorable Dining Experience
Juiciness is a hallmark characteristic of high-quality meat that many diners crave, and the mechanical action of a meat tenderizer plays a pivotal role in retaining moisture within the meat. By creating a softer structure, the meat can better retain its natural juices during the cooking process, which significantly enhances its flavor. This is essential for achieving that succulent experience that diners desire.
When cooked properly, a tender piece of meat holds onto its juices instead of losing them to the cooking environment, resulting in a mouth-watering experience. This aspect is especially crucial in high-heat cooking methods such as grilling or roasting, where moisture loss can lead to a dry final product. The juicy, flavorful meat that results from the tenderization process is what culinary traditions strive for, whether in a classic barbecue or a sophisticated gourmet dish.
Delve into Enzymatic Processes for Superior Meat Tenderization and Flavor Enhancement

In addition to the mechanical aspects, the enzymatic properties of a meat tenderizer are vital in enhancing flavor. These natural compounds operate at a molecular level to break down proteins, resulting in a substantial improvement in the meat’s texture and taste. Understanding these enzymes can provide valuable insights into achieving optimal results in meat preparation and flavor enhancement.
Exploring Protein Degradation for Maximum Tenderness and Flavor
Enzymes like papain (sourced from papaya) and bromelain (extracted from pineapple) are commonly used in meat tenderizers to facilitate the breakdown of proteins. These enzymes specifically target the long chains of amino acids that make up the proteins in meat, breaking them down into shorter, more manageable segments. This degradation not only softens the meat but also has significant implications for flavor development.
As the proteins decompose, they release smaller peptides and amino acids, many of which contribute to umami, the savory taste often recognized as the fifth flavor. The presence of umami is particularly important in meats, as it adds a depth of flavor that is both rich and satisfying. By utilizing enzyme-based tenderizers, cooks can elevate the overall taste of their dishes, making them far more appealing to discerning diners.
Maximize Flavor Enhancement Through Enzymatic Tenderization
The enzymatic action involved in tenderization goes beyond merely softening the meat; it greatly enhances its flavor profile. As enzymes break down proteins, they can release existing flavor compounds, enriching the overall taste experience. This effect is particularly pronounced in tougher cuts of meat, which, when prepared correctly, yield deep, complex flavors often lacking in more tender cuts.
These enhanced flavors can be appreciated across various cuisines. For instance, in South American barbecue traditions, where meats are marinated with tropical fruits rich in natural enzymes, the resulting dishes are vibrant and full of flavor, celebrating the art of grilling. This highlights the potential of enzymatic tenderizers to elevate ordinary dishes into extraordinary culinary experiences.
Achieving Improved Texture for an Unforgettable Dining Experience
Achieving the right texture is crucial in cooking meat. The enzymatic process not only tenderizes but also cultivates a smoother, more enjoyable texture. Meat that has undergone enzymatic tenderization is not only softer but also delivers a satisfying mouthfeel, significantly enriching the overall dining experience.
When cooked, tenderized meat maintains a desirable texture that keeps diners engaged with each bite. This quality is especially important in cuisines that emphasize intricate flavors and textures, such as in Japanese cooking, where the quality of the meat is paramount in dishes like shabu-shabu. The synergy between tenderness and texture greatly enhances the enjoyment of meat-based meals, ensuring they are both memorable and delightful.
Enhancing Nutritional Value with Enzymatic Tenderization
Another key benefit of enzymatic tenderization is the potential enhancement in the bioavailability of essential amino acids. When proteins are broken down, the body can absorb these nutrients more efficiently. For individuals looking to maximize their protein intake—especially athletes and health-conscious consumers—tenderizing meat can play a beneficial role in achieving their dietary objectives.
Moreover, the tenderization process can lead to a more enjoyable eating experience, encouraging individuals to increase their consumption of lean proteins within a balanced diet. This consideration is particularly relevant in diverse global contexts where protein plays a significant dietary role, from the protein-rich diets of the Mediterranean to the high-protein staples prevalent throughout the Americas.
Reducing Cooking Time for Greater Culinary Efficiency
The use of enzymes can dramatically shorten cooking times, making meal preparation more efficient. As the proteins break down, the meat becomes less dense, allowing heat to penetrate more rapidly during the cooking process. This time-saving benefit is invaluable for busy home cooks and professional chefs alike.
Shorter cooking times not only save time but also decrease energy consumption, which is advantageous for both the environment and your wallet. In areas where energy costs are elevated, such as certain regions of Europe or Australia, utilizing meat tenderizers can lead to considerable savings in both cooking time and energy expenditures, all while preserving flavor and quality.
Utilizing Marinade Absorption to Amplify Flavor with a Meat Tenderizer
The relationship between marinade and meat is a fundamental aspect of flavor enhancement that deserves careful attention. When meat is tenderized, its capacity to absorb marinades improves significantly, directly impacting the overall flavor profile. Understanding this relationship is essential for maximizing the taste potential of any dish.
Enabling Enhanced Marinade Penetration
The structural transformations in meat caused by tenderization greatly improve its ability to absorb marinades. A tenderizer creates pathways within the meat that allow the marinade to penetrate more effectively. This results in flavors enveloping the meat rather than merely coating the surface, leading to a more harmonious taste experience.
When marinades rich in herbs, spices, and acids are applied to tenderized meat, their effectiveness is maximized. Techniques such as marinating overnight allow the meat to absorb the full spectrum of flavors, whether it’s the zesty brightness of citrus in a Thai marinade or the deep, smoky profiles characteristic of a barbecue rub.
Deep Flavor Infusion for Complex and Layered Tastes
The profound flavor infusion achieved through tenderizing is crucial for crafting complex, layered tastes that resonate throughout the entire dish. When marinades penetrate deeply into the meat, they interact with the proteins and fats, creating flavor compounds that enrich every bite.
This is particularly significant in dishes that highlight bold flavors, such as Mexican carne asada or Indian tikka, where the spices and herbs in the marinade meld beautifully with the meat. The infusion process transforms the meat from a simple protein source into a culinary canvas, showcasing the depth and richness of global flavors that excite the palate.
Ensuring Moisture Retention for Juicy and Flavorful Meat
One of the most important advantages of marinating tenderized meat is moisture retention. When meat is marinated, it absorbs not just flavors but also moisture. This dual absorption ensures that the meat remains juicy during cooking, leading to a more gratifying eating experience.
Dishes such as Moroccan tagines, which rely on juicy, tender meat, exemplify the importance of moisture retention. In these cases, the processes of tenderization and marination work together to create meat that melts in the mouth, bursting with flavor and moisture. The result is a dish that feels luxurious and indulgent without being overly rich or heavy.
Texture Improvement Through the Combination of Tenderizing and Marinating
The synergy of tenderizing and marinating can dramatically enhance the texture of the meat. A tenderizer breaks down the fibers, allowing the marinade to penetrate effectively, resulting in a meat product that is both tender and enjoyable to eat.
From perfectly cooked steaks to juicy chicken thighs, the improved texture achieved through this process makes meals more pleasurable. The contrast between tender meat and a crunchy exterior, often found in grilled or roasted dishes, creates a delightful eating experience celebrated in culinary traditions worldwide.
Enhancing Cooking Efficiency with a Meat Tenderizer
Cooking efficiency is a crucial consideration for anyone involved in meal preparation, whether in a home kitchen or a professional setting. The application of a meat tenderizer can significantly enhance this aspect, resulting in a streamlined cooking process that maintains both quality and flavor.
Achieving Shorter Cooking Times for Greater Convenience
One of the most immediate benefits of using a meat tenderizer is the reduction in cooking time. Tenderized meat cooks faster due to its altered structure, allowing heat to penetrate more easily and resulting in quicker cooking times. This efficiency is particularly advantageous for busy individuals or those preparing large meals.
Imagine the difference it makes when hosting a family barbecue or dinner gathering; tenderized meats facilitate faster preparation, enabling you to spend more time enjoying your guests’ company rather than laboring away in the kitchen. This benefit is universally appreciated, whether in bustling urban areas or relaxed rural settings across the globe.
Ensuring Even Cooking for Consistent and Delicious Results
Another significant advantage of tenderized meat is the assurance of even cooking. When the fibers are broken down, the meat cooks more uniformly, minimizing the risk of overcooked surfaces and undercooked interiors. This aspect is essential for achieving the perfect medium-rare steak or ensuring chicken is thoroughly cooked without becoming dry.
The implications for food safety and quality are considerable. With evenly cooked meat, diners can enjoy a consistent texture and flavor, which is particularly crucial across various culinary traditions, from Asian stir-fries to Western roasts.
Realizing Energy Savings for Sustainable Cooking Practices
Efficiency in cooking not only saves time; it also translates into energy savings. With reduced cooking times, overall energy consumption decreases, making meal preparation more sustainable. This is an important consideration in today’s eco-conscious world, where reducing energy usage is vital.
Cooks in both home kitchens and restaurants are recognizing the benefits of energy-efficient cooking methods. Utilizing meat tenderizers can contribute to this goal, allowing chefs and home cooks to create delicious meals while being mindful of their environmental impact and energy consumption.
Maximize Cooking Versatility with a Meat Tenderizer
The versatility offered by a meat tenderizer is a game-changer for anyone who enjoys cooking. Tenderized meat can be prepared using a variety of cooking techniques, each contributing uniquely to the flavor and experience of the dish.
Grilling to Achieve Flavorful Results
Grilling is synonymous with flavor, and tenderized meat shines in this cooking method. The high heat of the grill can be unforgiving, but tenderized meat remains juicy and flavorful, even when subjected to intense temperatures.
When grilling, the caramelization of sugars and the Maillard reaction enhances the meat’s natural flavors, resulting in a flavorful crust. Tenderized cuts, whether it’s a steak or chicken breast, are ideal for this technique, ensuring that the final product is not just tender but also bursting with flavor, making it a popular choice at barbecues around the world.
Roasting to Perfection for an Impressive Meal
Roasting is another technique where the benefits of using a meat tenderizer come to light. Tenderized meat results in even cooking, which is crucial when roasting larger cuts. The combination of dry heat and the breakdown of fibers leads to a succulent, flavorful dish that is sure to impress.
Consider classic meals like herb-crusted roast lamb. The tenderness achieved through tenderization allows for the full expression of spices and herbs, creating a dish that resonates with flavor. The ability to infuse and retain moisture ensures that the final product is enjoyable and memorable, delivering a culinary experience that diners will cherish.
Braising for Rich and Flavorful Results
In braising, where meats are slowly cooked in liquid, tenderized pieces excel due to their enhanced tenderness. The slow cooking process allows the flavors of the braising liquid to permeate the meat, resulting in a rich and complex dish.
This technique is widely employed in cuisines that thrive on hearty meals, such as French coq au vin or Italian osso buco. The tenderization process ensures that the meat can withstand prolonged cooking times without becoming tough, resulting in a mouth-watering dish that embodies the essence of home-cooked comfort.
Crafting Unique Flavor Profiles with a Meat Tenderizer
The enhancement of flavor profiles is arguably one of the most exciting aspects of utilizing a meat tenderizer. By improving the meat’s interaction with spices, herbs, and sauces, cooks can achieve a depth of flavor that elevates any dish to new culinary heights.
Integrating Spices for Maximum Flavor Impact
Tenderized meat allows spices to blend more thoroughly, enhancing the overall flavor profile. The increased surface area and improved texture facilitate deeper penetration of spices, ensuring an even distribution of flavors throughout the meat.
In cuisines where spices are essential, such as Indian or Middle Eastern cooking, the ability to completely integrate these flavors is paramount. Dishes like biryani or shawarma depend on the total immersion of spices into the meat, which cannot be accomplished with tougher cuts. The tenderizing process ensures that every bite delivers a burst of flavor, resonating with the rich culinary traditions of these cultures.
Infusing Fresh Herbs for Elevated Flavor Experience
Herbs, often used to brighten and elevate dishes, greatly benefit from the tenderizing process. When herbs are applied to tenderized meat, they can penetrate deeply, imparting complex and aromatic flavors that linger on the palate.
Consider classic meals like Italian osso buco, where fresh herbs harmonize with tenderized meat to create a symphony of flavors. The infusion of herbs not only enhances the taste but also contributes to the visual appeal of the dish, crafting a feast for the senses that embodies the essence of culinary artistry.
Boosting Sauce Compatibility for Memorable Culinary Creations
The compatibility of tenderized meat with various sauces is invaluable. The enhanced texture and flavor absorption capabilities ensure that sauces adhere well and elevate the overall dish. Whether it’s a rich barbecue sauce or a delicate chimichurri, tenderized meat provides the perfect canvas for culinary creativity.
In global cuisines, sauces often define the character of a dish—think of tangy salsa in Mexican cuisine or hearty gravy in classic British meals. The ability of tenderized meat to pair seamlessly with a variety of sauces enhances the overall taste experience, making each meal memorable and satisfying, leaving diners eager for more.
Creating an Exceptional Eating Experience with a Meat Tenderizer
Ultimately, the primary goal of cooking is to create a delightful eating experience. The use of a meat tenderizer significantly enriches this experience by improving tenderness, flavor intensity, and texture variety. Understanding these elements can transform how meals are appreciated and enjoyed.
Enhancing Tenderness for Effortless Enjoyment
Tenderized meat fundamentally alters how diners engage with their food. Enhanced tenderness makes the meat easier to chew and savor, allowing the full range of flavors to come alive without requiring excessive effort. This transformation is particularly crucial in settings that celebrate shared meals or communal dining experiences.
In cultures that honor food as a communal experience—think of a traditional Italian family meal or a South African braai—the ease of consuming tender meat fosters a warm atmosphere. Diners can focus on conversation and enjoyment rather than struggling with tough fibers, greatly enhancing the overall experience.
Maximizing Flavor Intensity for Lasting Impressions
The enhanced flavor intensity that results from using a meat tenderizer is transformative. Each bite becomes a revelation, as tenderized meat bursts with flavor thanks to the processes of tenderization, marination, and cooking. This transformation resonates with diners, creating a memorable meal that lingers long after the last bite.
For chefs and home cooks alike, this intensity serves as a point of pride, enabling them to showcase their culinary skills and creativity. Dishes rich in flavor resonate deeply with diners, often leading to repeat requests and cherished memories of shared meals, solidifying the tenderizer’s role in crafting unforgettable dining experiences.
Enhancing Texture Variety for a Delightful Culinary Journey
Texture variety is a critical aspect of the eating experience, and tenderization allows for a spectrum of textures that enhance enjoyment. The contrast between tender meat and accompanying elements like crisp vegetables or creamy sauces creates a multi-layered experience that engages the palate in exciting ways.
In various culinary traditions, the appreciation for texture is paramount. Consider the balance of textures in Japanese kaiseki dining or the interplay of tender meat with crunchy pickles in Korean barbecue. The ability to create and appreciate this variety is significantly enhanced when meat is tenderized, leading to a satisfying and delightful meal that leaves diners craving more.
Frequently Asked Questions About Meat Tenderizers
What is a meat tenderizer?
A meat tenderizer is a tool or substance designed to break down tough muscle fibers in meat, making it softer and easier to chew, ultimately improving the overall eating experience.
How does a meat tenderizer enhance flavor?
A meat tenderizer boosts flavor by breaking down muscle fibers, enabling marinades and spices to penetrate deeper, resulting in more intense and evenly distributed flavors.
Can natural tenderizers be used?
Absolutely, natural tenderizers such as pineapple, papaya, or vinegar are effective. They contain enzymes that assist in breaking down proteins, making the meat tender and flavorful.
Is it safe to use meat tenderizers?
Yes, meat tenderizers are generally considered safe when used as directed. However, it’s crucial to follow recommended usage instructions to avoid over-tenderizing the meat, which can negatively affect its texture and quality.
How long should meat be tenderized?
The time needed to tenderize meat varies based on the type and thickness of the cut. Typically, 30 minutes to a few hours is adequate, but over-tenderizing can result in excessively mushy meat, which is not desirable.
Which cuts of meat benefit most from tenderizing?
Tougher cuts of meat, such as flank steak, brisket, and chuck roast, gain the most from tenderizing, as they contain more connective tissue that can be effectively broken down.
Can tenderized meat be cooked in any manner?
Yes, tenderized meat can be grilled, roasted, braised, or sautéed, and it often cooks more evenly and quickly compared to un-tenderized cuts, making it versatile for a wide range of cooking methods.
Does tenderizing impact the nutritional value of meat?
Tenderizing meat can enhance the bioavailability of essential amino acids, allowing for more efficient absorption by the body, thus positively contributing to dietary goals.
How can I tell if meat has been properly tenderized?
Properly tenderized meat should feel soft to the touch and exhibit a more uniform texture. When cooked, it should be easy to cut and chew, indicating successful tenderization.
Can I tenderize meat at home?
Yes, you can easily tenderize meat at home using tools like mallets, forks, or natural tenderizers like fruit juices, making it accessible for everyday cooking.
Connect with us on Facebook!
The post Why a Meat Tenderizer Improves Flavor: Enhancing Taste and Texture appeared first on https://cookinggods.com
The Article Meat Tenderizer Enhances Flavor and Texture for Better Meals Was Found On https://limitsofstrategy.com