Category: Dessert Ideas

  • Dessert Tower Display: A Simple Guide to Crafting It

    Dessert Tower Display: A Simple Guide to Crafting It

    Unlock the Secrets to Crafting an Eye-Catching Dessert Tower Display

    Choose an Irresistible Array of Desserts for Your Tower

    How to Make a Dessert Tower Display: A towering display of assorted desserts including macarons, éclairs, fruit tarts, mini cakes, cookies, and savory bites.

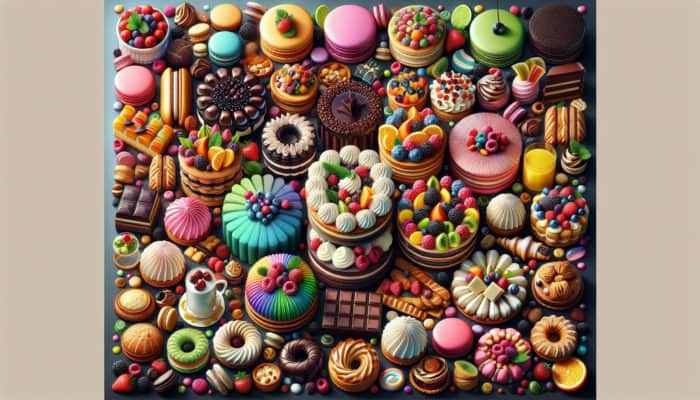
    Designing a visually captivating dessert tower display starts with the careful selection of a wide variety of desserts. Aim for an assortment that showcases an enticing mix of sizes, colors, and textures. This diversity not only captures the attention of your audience but also tempts them to indulge in the delicious options available. Think about contrasting elements, such as light and airy macarons, decadent chocolate éclairs, and vibrant, fruity tarts. By including an array of mini cakes, cookies, and even savoury bites, you can create a well-rounded selection that caters to various taste preferences while enhancing the overall experience.

    During your planning phase, also consider the color palette for your dessert selection. Bright, bold hues can infuse energy and excitement, while softer pastel tones evoke elegance and tranquility. The textures of your desserts matter greatly; for instance, pairing crunchy cookies with smooth mousses provides a delightful tactile experience. Additionally, consider your guests’ dietary restrictions; offering gluten-free or vegan options makes your display inclusive, ensuring that everyone finds something that pleases their palate.

    Regarding quantity, a good rule of thumb is to prepare approximately three to four desserts per guest. This approach not only creates a visually abundant display but also allows guests to sample a variety of items. To maintain visual balance and appeal, arrange desserts of similar sizes together, creating natural breaks within the display that invite exploration without overwhelming the senses.

    Establish the Perfect Height and Width for Your Dessert Tower

    The dimensions of your dessert tower play a crucial role in how it integrates within the event space and its accessibility for all guests. Begin by assessing the venue; a grand hall can accommodate a tall, multi-tiered display, while a cozy setting would benefit from a more compact arrangement. Generally, for larger events, aim for three to five tiers to ensure that all guests have easy access to enjoy the enticing offerings.

    Height significantly affects visibility and attractiveness. A taller display can attract guests from a distance, creating an inviting focal point. However, ensure that the width is sufficient to support the height; a tall, narrow tower risks tipping and could lead to a disappointing dining experience. Pay attention to the flow of the venue, ensuring ample space around the tower to prevent congestion as guests gather to sample the desserts.

    Moreover, consider the accessibility of your display. The top tier should not be positioned so high that guests struggle to reach it; a maximum height of 1.5 to 2 meters is generally recommended. This height ensures even shorter guests can easily access their favorite treats. Ultimately, a well-measured display enhances the overall experience, combining aesthetic beauty with practical functionality.

    Essential Materials Required for Crafting Your Dessert Tower

    Creating a striking dessert tower display demands thoughtful selection of materials that blend aesthetics and functionality. First and foremost, a sturdy base is essential; options include acrylic, wood, or even metal, each offering unique visual qualities. Ensure that your chosen material is food-safe and capable of supporting the weight of your desserts. For the tiers, utilize cake stands or platforms of various sizes to add visual intrigue and height variation, enhancing the overall presentation.

    Next, contemplate decorative elements such as fresh flowers, ribbons, or themed decorations that resonate with the event’s aesthetic. These embellishments not only enrich the appearance of the dessert display but also tie it cohesively to the event theme, enhancing the overall experience for your guests. Avoid any items that aren’t food-safe to ensure that all decorative elements are free from harmful chemicals or pesticides.

    As you build your tower, ensure you have enough cake boards or small platters to support each dessert appropriately. Additionally, consider investing in tiered serving platters or stands that allow for easy assembly and disassembly. The right materials will not only elevate the visual appeal of your display but also ensure the structural integrity of your dessert tower, allowing it to remain a delightful highlight throughout the event.

    Maximize Visual Impact with Strategic Dessert Arrangement Techniques

    A towering dessert display with a stable base of multi-layered cakes and large pastries, ascending to smaller tiers of mini tarts, chocolates, and petit fours, arranged in inviting clusters.

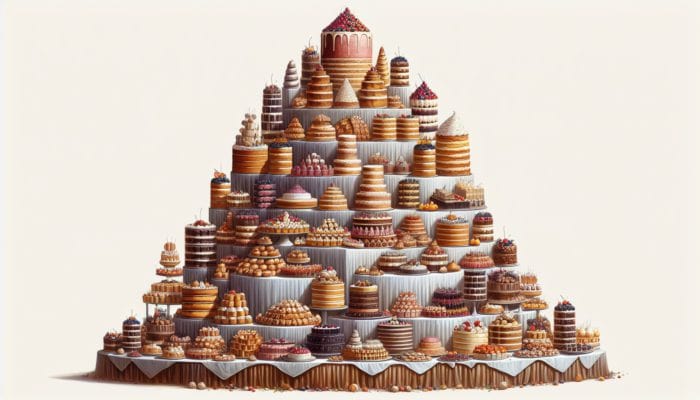
    The arrangement of your desserts is vital in creating a stunning dessert tower. Start by placing larger and heavier items on the bottom tier. This method provides a solid foundation and conveys a sense of stability. Beginning with substantial items like multi-layered cakes or large pastries establishes a grounding effect that supports the lighter, more delicate desserts above.

    As you progress to the upper tiers, gradually introduce smaller desserts such as mini tarts, chocolates, or petit fours. This cascading effect not only beautifully showcases each item but also creates an inviting visual hierarchy. Make sure to display desserts in clusters rather than scattering them randomly; this strategic arrangement fosters focal points and encourages guests to explore the tower.

    Consider the flow and accessibility for your guests. Arrange desserts so they are easy to reach without requiring guests to navigate around other items. Position popular treats, such as cupcakes or brownies, at the front to capture attention from a distance. Lastly, ensure the dessert tower is well-lit; strategic lighting can highlight its vibrant colors and textures, making it even more enticing for guests.

    Pro Tips for Crafting an Exceptional Dessert Tower Display

    Select the Perfect Base for Your Dessert Tower

    Choosing the right base is a critical factor in designing a captivating dessert tower. The base not only determines the overall aesthetic but also plays a vital role in stability. For example, a sturdy, round acrylic base is a great match for modern themes, while a rustic wooden base can enhance a vintage or countryside aesthetic. Different types of bases come with unique benefits; for instance, glass bases provide a sophisticated appearance but require careful handling to avoid breakage.

    When selecting your base, keep these key factors in mind:

    • Stability: Ensure the base can support the total weight of the desserts without tipping over.
    • Height: Choose a height that complements the number of tiers you plan to use.
    • Style: Match the material and color of the base with your event theme for cohesive design.
    • Food Safety: Always opt for food-safe materials to prevent contamination.

    A solid base not only supports your dessert tower but also enhances its overall aesthetic, making it an essential component of your design strategy.

    Ensure Your Dessert Tower’s Stability with Essential Techniques

    A tall, multi-tiered dessert tower with dowels and pillars on a wide, heavy base, securely fastened.

    To guarantee that your dessert tower remains stable and secure throughout the event, strategically incorporate structural supports. Start by using dowels or sturdy pillars between the tiers; these elements prevent the stacked desserts from collapsing under their weight. For instance, if you’re using a cake as the bottom tier, inserting dowels can help distribute the weight evenly across the base.

    Moreover, consider reinforcing the base itself. If your tower is particularly tall, a wider base can significantly enhance its stability. Always ensure that the base is not only heavy enough to support the desserts but also proportionate to the tower’s height. When transporting the dessert tower, ensure that all elements are securely fastened, and avoid sharp turns that could compromise stability.

    During assembly, visually assess the stability of each tier. If any tier appears wobbly or unbalanced, readjust the positioning or add additional supports. A well-constructed, stable dessert tower can withstand the excitement of an event, allowing guests to focus on enjoying the delectable offerings rather than worrying about potential mishaps.

    Effective Decorative Techniques for Your Dessert Display

    The visual appeal of your dessert tower can be significantly enhanced with various decorative techniques. One of the most effective methods is to incorporate fresh flowers, strategically placed to complement the colors of your desserts. Edible flowers can also be utilized, adding an extra layer of sophistication while connecting the display to its culinary roots.

    Another impactful decorative approach involves the use of ribbons and fabrics. Draping a beautifully colored ribbon around the tiers can introduce elegance and texture. Opt for colors that either contrast or complement your desserts for maximum visual impact. Furthermore, themed decorations that align with the occasion—such as seasonal elements for winter weddings—can enhance the overall aesthetic.

    Lighting plays a crucial role in showcasing your dessert tower. Using fairy lights or strategically placed spotlights can illuminate the desserts and create a warm, inviting atmosphere. Incorporating glass or reflective materials in your design can further enhance the lighting effects, ensuring that the tower captures attention from all angles.

    Your Comprehensive Guide to Successfully Assembling a Dessert Tower

    Prepare Your Tiers for a Flawless Assembly

    Preparing the tiers is a fundamental step in ensuring a successful dessert tower display. Start by thoroughly cleaning and sanitizing all surfaces to guarantee that your display is hygienic and ready for food placement. Once cleaned, securely assemble the tiers, ensuring they are level and stable to prevent any mishaps during the event.

    Follow these steps for effective tier preparation:

    • Clean: Wipe down all surfaces with appropriate cleaning agents.
    • Assemble: Securely attach each tier to the base, ensuring they fit together well.
    • Level: Use a spirit level to verify that each tier is even and stable.
    • Secure: If necessary, reinforce with dowels or supports to enhance stability.

    Once your tiers are prepared, you can shift your focus to arranging the desserts. The meticulous preparation of your tiers lays the groundwork for a stunning presentation that guests will remember fondly.

    Arrange Desserts on Each Tier for Maximum Visual Appeal

    Arranging desserts on each tier requires a thoughtful approach to ensure both beauty and accessibility. Begin with the bottom tier, placing heavier items first. This strategy provides a solid foundation and prevents lighter desserts from tipping over. For instance, positioning a multi-tier cake at the base can offer stability for the entire structure.

    As you move upward, gradually introduce lighter desserts, such as éclairs or macarons, on the upper tiers. This pyramid-like structure helps create a visually appealing balance while ensuring that guests can reach their desired treats without difficulty. Arranging desserts in clusters rather than scattering them randomly can create focal points that attract guests’ attention.

    Also, consider the color and texture of the desserts as you arrange them. A harmonious blend of colors and sizes across the tiers creates an inviting and aesthetically pleasing display. Ensure that every guest can easily access their favorite items without having to reach over or navigate around other desserts. This thoughtful arrangement not only enhances visual appeal but also enriches the overall guest experience.

    Achieve a Balanced Look for Your Dessert Tower with Strategic Arrangements

    Achieving a balanced look for your dessert tower involves carefully distributing colors, sizes, and types of desserts across all tiers. Begin by selecting a color palette that resonates with the event’s overall theme. By evenly distributing colors across the tiers, you create a cohesive and visually striking arrangement.

    When arranging desserts, vary their sizes across the tiers. Larger desserts should anchor the base, while mid-sized and smaller items are placed on higher tiers. This layering effect not only draws the eye upward but also ensures a sense of harmony and proportion. Careful placement of each dessert enhances the tower’s overall aesthetic and invites guests to indulge.

    Incorporating a variety of dessert types can also enhance balance. Consider adding a mix of cakes, tarts, cookies, and savoury options to create a display that appeals to diverse tastes. Guests are naturally attracted to variety, and a well-rounded selection encourages exploration and engagement with the display. Ultimately, a balanced dessert tower not only looks stunning but also invites guests to indulge in the delightful creations it offers.

    Secure Your Dessert Tower for Optimal Stability

    Securing your dessert tower for stability is an essential step that should not be overlooked. A well-constructed tower with proper supports will prevent any unfortunate mishaps during the event. Begin by using dowels or pillars between the tiers, ensuring they are aligned properly. This technique distributes weight evenly, reducing the risk of collapse.

    Additionally, double-check the base of the tower. A wider base provides added stability, especially if your display is particularly tall. Ensure that it is securely fastened to the first tier and that all elements are aligned. When stacking desserts, always place heavier items at the bottom to maintain balance.

    If you plan to transport the dessert tower, take extra precautions. Secure all components with appropriate materials to prevent shifting during transit. Once at the venue, carefully inspect the assembled tower. Adjust any tiers that appear unbalanced and test the overall stability by gently shaking it to ensure everything is secure. A well-secured dessert tower allows guests to enjoy the display without worry, creating an unforgettable experience.

    Research-Backed Advantages of Creating a Dessert Tower Display

    Enhance Event Aesthetics with a Stunning Dessert Tower

    A dessert tower display can serve as a breathtaking focal point, dramatically enhancing the overall aesthetics of any event. By selecting a theme that aligns with the occasion—whether it’s a wedding, birthday, or corporate gathering—you can create a visual masterpiece that draws guests’ attention from the moment they arrive. Start by choosing desserts that embody your theme, ensuring each element—from color to style—harmonizes beautifully.

    To effectively use dessert towers as focal points, consider their placement. Position the tower centrally in areas where guests are likely to congregate, such as near the entrance or buffet area. This strategic positioning not only highlights the tower but also invites guests to engage with the display. To create an even more captivating experience, enhance the tower’s visual appeal by incorporating thematic decorations around it—such as flowers or props.

    Additionally, pay attention to lighting. Well-placed lights can dramatically transform the presentation of your dessert tower, accentuating its colors and textures while creating a warm and inviting atmosphere. This combination of aesthetic beauty, strategic placement, and atmospheric lighting makes the dessert tower not just a display of sweets but a central piece that elevates the entire event.

    Encourage Increased Guest Engagement with Dessert Towers

    Dessert towers naturally promote guest interaction, creating an engaging environment where attendees gather to admire and sample a variety of treats. This communal aspect fosters conversation and connection among guests as they navigate the display. Choosing desserts can become a shared activity, leading to memorable experiences and cherished moments.

    To further enhance guest engagement, consider incorporating a “build your own dessert” element, where guests can layer their chosen items—such as cupcakes or fruit tarts—with toppings and sauces. This interactive approach delights guests and encourages them to connect as they share ideas and selections.

    Moreover, the visual allure of a well-constructed dessert tower sparks curiosity. Guests are drawn to explore, often leading them to initiate conversations with others who share similar tastes. This social interaction enhances the event atmosphere, creating a lively and enjoyable experience where guests can bond over their love of desserts.

    Understand the Psychological Impacts of Dessert Towers on Guests

    The psychological effect of a dessert tower display on guests can be significant, influencing their perceptions of the event. A beautifully arranged dessert tower evokes feelings of abundance and luxury, sparking excitement and anticipation. Guests often associate visually appealing displays with high-quality experiences, which can elevate their overall enjoyment of the event.

    Furthermore, dessert towers can elicit positive emotions because they are often associated with celebrations and special occasions. The mere sight of an enticing dessert display can trigger fond memories and feelings of happiness, enhancing the atmosphere of the event. This emotional connection encourages guests to indulge, leading to a more satisfying experience.

    The perception of abundance created by a dessert tower can also positively influence guests’ interactions. When guests perceive a plethora of delectable treats, it fosters a sense of generosity and sharing. This collective experience not only enhances individual enjoyment but also leaves a lasting impression of the event, encouraging guests to fondly reminisce about the time spent together.

    Perfecting the Details and Presentation of Your Dessert Tower

    Add Decorative Elements for Maximum Visual Appeal

    Incorporating decorative elements into your dessert tower can significantly enhance its overall appearance, transforming it into a culinary work of art. Begin by selecting decorations that align with the event’s theme; fresh flowers can add elegance, while vibrant ribbons can infuse a sense of joy and celebration. Ensure that any decorations used are food-safe, especially if they will be positioned near the desserts.

    Consider utilizing themed decorations that resonate with the occasion. For instance, seasonal elements such as pinecones and holly for a winter event or seashells for a summer gathering can beautifully tie the display to the event theme. Additionally, varying the height of your decorations can create a balanced visual effect; taller flowers or decorative elements can draw the eye upwards, enhancing the overall look.

    Don’t overlook the practical aspects of decoration. Ensure that any added elements do not obstruct access to the desserts. Guests should be able to view and easily select their treats without having to navigate through excessive decorations. The final presentation should be a harmonious blend of aesthetics and accessibility, inviting guests to indulge in the delightful offerings.

    Implement Lighting Techniques for an Eye-Catching Display

    Proper lighting techniques are essential in showcasing the colors and textures of your dessert tower, making it more visually appealing. Start by assessing the venue’s natural light; if the event occurs during the day, use it to your advantage by positioning the dessert tower in a well-lit area. Natural light can enhance the vibrancy of your desserts, making them even more enticing to guests.

    For evening events, consider incorporating soft, ambient lighting. Fairy lights wrapped around the base or tiers can create a magical atmosphere, drawing guests in. Spotlights can be used to highlight the tower, focusing attention on the intricate details of the desserts. Be mindful of harsh lighting, as it can create unflattering shadows and diminish the visual appeal of your display.

    In addition to traditional lighting options, think about using colored lights to enhance the event’s theme. For example, soft pastels can create a romantic atmosphere, while bright colors can inject energy into a festive gathering. Ultimately, the right lighting can transform a simple dessert tower into a stunning centerpiece, captivating all guests and enhancing their overall experience.

    Ensure Accessibility for All Guests at Your Dessert Tower

    Positioning your dessert tower in a central, accessible location is crucial for ensuring all guests can enjoy the delightful offerings. Choose a spot that is easy to navigate, away from high-traffic areas that could create congestion. This allows guests to approach the tower comfortably without feeling rushed or obstructed by other attendees.

    When arranging the dessert display, keep the tower’s height in mind. Ensure it is not so tall that shorter guests struggle to reach the top tiers. A maximum height of 1.8 to 2 meters is generally advisable, allowing easy access without compromising stability. Additionally, consider using serving tools such as tongs, spoons, or serving platters to facilitate self-service, making it easier for guests to select their desired treats.

    Finally, clearly label each dessert, especially if dietary restrictions are a concern. Use elegant, well-designed cards to inform guests about flavors, allergens, and any special ingredients. This not only enhances accessibility but also demonstrates consideration for your guests’ needs, contributing to a positive overall experience.

    Maintain Quality and Efficiently Serve Your Dessert Tower

    Keep Your Dessert Tower Fresh Throughout the Event

    Ensuring the freshness of your dessert tower throughout the event is crucial for allowing guests to enjoy the highest quality treats. Begin by monitoring the venue’s temperature. If the environment is warm, consider using refrigerated displays or covers to protect desserts from heat. This is particularly important for items like cream-filled pastries or chocolate desserts that can melt or spoil quickly.

    To maintain freshness, avoid leaving desserts out for extended periods. If your event lasts several hours, consider periodically covering the desserts or rotating them with a back-up supply stored in a cooler. This practice not only keeps the desserts looking pristine but also ensures they maintain their flavor and texture throughout the event.

    Additionally, pay attention to any visible signs of deterioration, such as wilting flowers or melting chocolate. Regularly check the tower and replace any desserts that may not look appealing. Ensuring that each item is fresh will leave a lasting impression on guests, enhancing their overall experience and enjoyment of the event.

    Manage the Serving Process Smoothly for Guest Satisfaction

    Efficiently managing the serving process for your dessert tower is crucial to ensuring a seamless guest experience. Assign staff to oversee the area, helping maintain order and ensuring guests can easily access desserts without disrupting service. Trained servers can guide guests through the selection process and provide information about each dessert, enhancing their understanding and enjoyment.

    Consider establishing designated serving stations or platters to facilitate the process. This allows guests to pick and choose their desired items with ease, reducing congestion around the main dessert tower. Encourage servers to engage with guests, offering recommendations and sharing insights about the desserts. This personal touch enhances the guest experience and fosters a welcoming atmosphere.

    It’s also important to have enough utensils and serving tools available to accommodate the number of guests. Ensure that tongs, spoons, and plates are readily accessible so guests can serve themselves easily. By managing the serving process effectively, you create an enjoyable experience that encourages guests to explore and indulge in the delightful offerings of your dessert tower.

    Post-Event Procedures for Your Dessert Tower Cleanup

    Once the event concludes, carefully disassemble the dessert tower, handling all components delicately to prevent damage. Start by removing any decorative elements and placing them aside for future use. Next, remove the desserts, considering any that may still be suitable for consumption. If feasible, offer leftovers to guests or staff, or consider donating them to local charities.

    After clearing the desserts, disassemble the tower’s tiers and base. Store reusable components in a clean, dry area to keep them in good condition for their next use. Proper storage of materials will prolong their lifespan and save costs in the long run.

    Finally, dispose of any remaining items responsibly. Composting food waste and recycling decorative materials when possible contributes to a more sustainable approach. This thoughtful process ensures that no elements go to waste and sets a positive tone for future events.

    Cleaning and Sanitizing Your Dessert Tower After Use

    Cleaning and sanitizing the components of your dessert tower is essential for maintaining hygiene, especially when reusing items for future events. Start by disassembling the tower into its individual parts, including the base, tiers, and serving platters. Use warm, soapy water to thoroughly clean all surfaces, ensuring any food or decoration remnants are removed.

    After washing, sanitize each component with an appropriate food-safe sanitizer. This step is crucial for eliminating bacteria and ensuring the surfaces are safe for future use. Allow all parts to air dry completely before storing them, as moisture can lead to bacterial growth.

    Regular maintenance of your dessert tower components keeps them in excellent condition for future displays. Store items in a clean, dry area, and regularly check for any signs of wear or damage. By prioritizing cleanliness and hygiene, you create an inviting and safe dessert experience for future events.

    Frequently Asked Questions About Dessert Towers

    What is a dessert tower display?

    A dessert tower display is a visually striking arrangement of various desserts, presented on a tiered stand to create a stunning focal point at events such as weddings, parties, or corporate gatherings.

    How do I choose desserts for the tower?

    Select desserts that vary in size, color, and texture to create visual appeal. Include a mix of flavors and dietary options to cater to diverse guest preferences.

    How tall should a dessert tower be?

    A dessert tower should generally be no taller than 1.8 to 2 meters to ensure that all guests can easily reach the top tiers.

    What materials do I need for a dessert tower?

    You will need a sturdy base, tiered platforms, decorative elements like flowers or ribbons, and serving utensils such as tongs or spoons for guest use.

    How can I ensure the stability of my dessert tower?

    Use dowels or pillars between tiers to provide structural support and prevent collapse. Ensure the base is sturdy and wide enough to handle the weight of the desserts.

    What lighting works best for a dessert tower display?

    Soft, ambient lighting enhances the colors and textures of the desserts. Fairy lights or strategically placed spotlights can create a captivating atmosphere around the tower.

    How do I keep the desserts fresh during the event?

    Monitor temperature and exposure time. Use covers for delicate items and rotate desserts from a cooler supply to keep them looking appealing throughout the event.

    What decorative elements can I use for my tower?

    Consider using fresh flowers, ribbons, or themed decorations that align with the event. Ensure all decorations are food-safe and do not obstruct access to the desserts.

    How do I manage the serving process at the dessert tower?

    Assign staff to oversee the serving area and ensure guests can easily access the desserts. Provide serving utensils and consider having designated serving stations to streamline the process.

    What should I do with leftovers after the event?

    Carefully disassemble the tower, offer the leftovers to guests or staff, or donate them to local charities. Properly store or dispose of any remaining components to promote sustainability.

    Connect with us on Facebook for the latest updates!

    The post How to Make a Dessert Tower Display: A Step-by-Step Guide appeared first on https://cookinggods.com

    The Article Dessert Tower Display: Step-by-Step Guide to Create It Was Found On https://limitsofstrategy.com

  • Halloween Dessert Ideas: Whip Up Spooky Treats

    Halloween Dessert Ideas: Whip Up Spooky Treats

    Ignite Your Imagination with the Perfect Halloween Dessert Theme

    Embarking on your Halloween baking journey begins with selecting the ideal Halloween dessert theme, a decision that sets the stage for an exhilarating culinary experience. The theme you choose will significantly shape the colors, shapes, and flavors that come together, crafting a delightful masterpiece. Whether you are enchanted by the eerie charm of ghosts, the spellbinding allure of witches, or the terrifying presence of monsters, your theme will not only guide your dessert creations but also create an atmosphere of fun and excitement that will be cherished by friends and family alike.

    Choose an Engaging Theme That Sparks Creativity

    Fluffy white meringue ghosts on chocolate, green witch hat cookies, haunted houses, pumpkin patches.

    As you dive into the thrilling adventure of creating spooky Halloween desserts, your first step is to select a theme that ignites a sense of delight and inspiration. The possibilities are endless, ranging from timeless Halloween icons to contemporary inspirations drawn from pop culture. Classic symbols like vampires, haunted houses, and pumpkin patches provide rich backdrops for your artistic expressions. Infuse your desserts with these iconic elements by meticulously choosing color palettes, shapes, and decorative accents. For example, a ghost-themed dessert might feature fluffy white meringue ghosts gracefully set upon a decadent chocolate base, while a witch-inspired treat may dazzle with vibrant green frosting and whimsical hat-shaped cookies.

    The beauty of a Halloween theme lies in its versatility. You can mix and match elements to create a unique dessert that captivates and delights. For instance, combining witchy features with ghostly elements can produce a dessert that tells a magical story. Allow your creativity to flow freely, ensuring that your chosen theme resonates with your personality while charming your guests, setting the stage for a fun-filled culinary adventure that is both delicious and memorable.

    Discovering Creative Inspiration for Your Halloween Dessert Theme

    Finding inspiration in classic Halloween legends and beloved characters can elevate your dessert from ordinary to extraordinary. Reflect on the iconic figures that are synonymous with Halloween, such as the mischievous witches from folklore and the terrifying creatures that haunt horror films. These narratives not only provide thematic concepts but also evoke emotional connections, enriching your guests’ experience as they savor your delectable treats.

    You may want to explore literary influences, such as the haunting tales of Edgar Allan Poe or the chilling stories crafted by H.P. Lovecraft. These evocative narratives can inspire the colors and textures you incorporate into your desserts. For instance, a dessert inspired by “The Tell-Tale Heart” could feature deep, rich chocolate, vibrant raspberry coulis mimicking blood, and a sprinkle of crushed cookies to represent an ominous heartbeat. The outcome is a dessert that is visually captivating and narratively rich, significantly enhancing your guests’ overall experience and making it unforgettable.

    Customizing Your Halloween Theme to Engage Your Audience

    Understanding your audience is key when selecting the perfect theme for your Halloween desserts. Tailoring your creations to align with the age and preferences of your guests can greatly enhance their enjoyment and satisfaction. For younger attendees, playful themes featuring friendly ghosts or cartoonish monsters are often more appealing, while adults may appreciate a sophisticated approach that showcases rich dark chocolate and complex flavor profiles.

    Moreover, considering dietary restrictions is essential for ensuring that all guests can indulge in your spooky culinary delights. Providing a diverse range of options that cater to different tastes and dietary needs guarantees that everyone can partake in the festivities. Ultimately, your goal is to foster a festive atmosphere that embodies the true spirit of Halloween while offering each guest a delightful dessert experience they will cherish for years.

    Crucial Ingredients for Creating Irresistible Halloween Treats

    A witch's cauldron with green liquid, surrounded by bat wings, spider legs, and glowing pumpkins in a dark, misty forest at night.

    At the heart of every delectable dessert are its ingredients, a principle that holds particularly true for your spooky Halloween creations. Selecting the right components not only guarantees that your dessert tastes incredible but also allows for a visually stunning presentation that aligns perfectly with your chosen theme. Let’s explore the essential ingredients that will pave the way for your spooky Halloween dessert journey to success.

    Fundamental Ingredients for Crafting the Perfect Dessert Base

    The adventure of creating your spooky dessert begins with assembling the key baking ingredients that will lay the foundation for your recipe. Essential elements such as flour, sugar, eggs, and butter are critical for achieving the desired texture. Opting for high-quality ingredients can significantly impact the final result; for instance, using European-style butter can enhance the richness of your dessert, while organic flour may elevate its flavor profile.

    As you craft your Halloween dessert, consider the flavor profile you wish to develop. Flavors like vanilla, chocolate, or pumpkin spice can seamlessly set the mood for your theme. Incorporating cocoa powder can provide a dark, moody base ideal for a ghost-themed dessert, while a light sponge cake could be just right for a whimsical witch-inspired creation. Always remember to sift your dry ingredients together to ensure a consistent texture throughout your batter, paving the way for a smooth baking experience and a delightful end product.

    Exciting Additions to Elevate the Spooky Factor

    To truly capture the spirit of Halloween, incorporating intriguing additives is essential for a captivating dessert. Food coloring can dramatically transform your dessert, introducing vibrant hues that breathe life into your creation. For example, a few drops of green food dye can give your frosting an eerily enchanting look, while orange can evoke the essence of pumpkins. Adding edible glitter can infuse a magical touch that mesmerizes your guests, enhancing the visual allure of your delightful dessert.

    Including candy eyes is another playful detail that brings your spooky characters to life, whether placed on cookies, cakes, or cupcakes to surprise your guests with an unexpected delight. Think about integrating gummy worms, chocolate spiders, or even a hint of fake blood (your homemade raspberry coulis) to amplify the scare factor. These small yet impactful details not only enhance the visual appeal but also introduce an element of fun that embodies the festive spirit of Halloween.

    Inclusive Alternatives for Diverse Dietary Needs

    A Halloween dessert table with vegan and gluten-free treats like cakes, cookies, and puddings, all spookily decorated.

    With the growing awareness of dietary restrictions, exploring substitution options while creating your Halloween desserts is vital. Vegan and gluten-free alternatives can ensure that all your guests can indulge in your treats. For instance, you can replace traditional eggs with flaxseed meal or applesauce in vegan recipes, while almond flour or coconut flour serve as excellent gluten-free options.

    Additionally, dairy-free milk alternatives like almond milk or oat milk can seamlessly replace conventional dairy in your recipes. Always consider the flavors and textures these substitutes bring, adjusting your recipe as necessary to maintain the integrity of your spooky dessert. This thoughtful approach not only broadens your guest list but also showcases your culinary creativity and expertise in accommodating diverse dietary needs.

    Achieving the Perfect Base Preparation for Outstanding Desserts

    The foundation of any remarkable dessert lies in its base. Crafting a delicious and visually appealing base is essential when exploring how to create a spooky Halloween dessert. The right preparation, mixing methods, and baking techniques will yield a delectable result that serves as the ideal canvas for your spooky decorations.

    Pro Techniques for Mixing the Batter to Perfection

    The process of mixing your batter is where the enchantment begins. Start by creaming together your butter and sugar until the mixture is light and fluffy; this aeration process ensures a tender and enjoyable final product. Gradually incorporate your eggs, one at a time, mixing thoroughly after each addition to infuse air and moisture into the batter. Next, sift together your dry ingredients—flour, baking powder, and any cocoa powder if you’re aiming for a chocolate base—to eliminate lumps and achieve a uniform mixture.

    Once the dry ingredients are well combined, gently fold in any wet components, such as milk or plant-based alternatives. Be cautious not to overmix, as this can lead to a denser cake. The final batter should be smooth and glossy, free from lumps. The key to a successful spooky dessert lies in the consistency of your batter; ensure it is pourable yet thick enough to retain its shape during baking, providing a solid base for your creative decorations.

    Mastering Baking Techniques for Exceptional Results

    The techniques you employ during the baking process are crucial for achieving the perfect texture for your Halloween dessert. Preheat your oven to the appropriate temperature, typically around 180°C (350°F), and prepare your baking tin by greasing it with butter or lining it with parchment paper. This ensures that your dessert can be easily removed once baked, preventing any mishaps in the process.

    When pouring your batter into the tin, use a spatula to level it off for even baking. The baking time will vary based on the size and shape of your dessert, so keep a close eye. To check for doneness, use a toothpick or cake tester; it should come out clean or with a few moist crumbs. This step is vital, as overbaking can lead to a dry base that won’t hold up under elaborate decorations, jeopardizing your beautiful creation.

    Cooling and Setting Your Dessert for Optimal Results

    Once your dessert has baked to perfection, the next essential step is cooling and setting it properly. Allow your baked goods to rest in the tin for approximately 10-15 minutes before transferring them to a wire rack. This cooling process is crucial as it helps to firm up the structure of your dessert, making it easier to handle and decorate.

    Ensure the base cools completely before adding any decorations; a warm dessert can cause frosting to melt and lose its intended form. If you’re working with layered cakes or intricate designs, chilling your dessert in the refrigerator for a brief period can help solidify the layers and provide a stable canvas for decorating. This attention to detail guarantees that your spooky Halloween dessert is as visually stunning as it is delicious.

    Creative Decorating Techniques for Spooktacular Desserts

    Once your base is prepared and cooled, the real fun begins: decorating! This is where you can unleash your creativity and bring your spooky Halloween dessert to life. Employing various decorating techniques will enable you to create visually striking and thematic treats that are sure to impress your guests and elevate their overall experience.

    Perfecting the Art of Piping for Dazzling Designs

    Mastering the art of piping can elevate your dessert to a new level of sophistication. Piping bags filled with various colored frostings allow you to create intricate designs that capture the essence of Halloween. For instance, a simple swirl can be transformed into a ghostly figure with a few strategic swipes of the piping bag, adding a whimsical touch to your creation.

    Consider utilizing different piping tips to create diverse textures and patterns. For example, a star tip can produce exquisite rosettes, while a round tip is ideal for detailing eyes or fine lines, such as spider webs. Practicing your piping technique on parchment paper before decorating your dessert can help you build confidence. With some practice, you can turn any dessert into a visually stunning masterpiece that will captivate your guests.

    Integrating Edible Art for Enhanced Creativity

    Incorporating edible art into your dessert can add an extra layer of delight and creativity. Edible markers and paints provide an excellent means to create detailed spooky faces and scenes on cookies or cake surfaces. With a steady hand and a dash of imagination, you can transform a simple treat into an adorable or frightening character that enchants all who behold it.

    You might also explore using edible images that can be printed on frosting sheets, allowing you to replicate intricate designs with ease. These techniques open endless possibilities, enabling you to create a perfectly themed dessert that reflects your initial vision. This approach not only makes your dessert visually appealing but also engages the creativity of those who indulge in it, making the experience even more memorable.

    Creating Layering Effects for Maximum Visual Impact

    Layering effects can add depth and dimension to your spooky dessert, significantly enhancing its visual impact. Consider employing multiple layers of frosting or fillings in contrasting colors to create an eye-catching design. For example, a black-and-green cake can evoke a witchy aesthetic, while layers of orange and purple may suggest a haunted theme, captivating your guests.

    You can also utilize techniques like marbling to create visually striking patterns with your frosting. This can be achieved by swirling two contrasting colors of frosting together using a spatula or a toothpick. Layering not only enhances aesthetics but also provides delightful varieties of flavors and textures in each bite, making your dessert a true experience that guests will rave about long after the event.

    Advanced Techniques for Fondant Sculpting

    Fondant sculpting is an advanced yet rewarding technique that can bring your spooky dessert to life. This pliable icing allows you to create intricate figures such as skeletons, pumpkins, or bats that can adorn your cake as decorative elements. Working with fondant requires some practice, but the results can be absolutely stunning, leaving your guests in awe of your creativity.

    Begin by kneading your fondant until it becomes smooth and pliable. Use gel food coloring to achieve the desired shades, then roll it out to create shapes that fit your theme perfectly. Employ cookie cutters or template patterns for consistency. Once shaped, place your fondant figures onto your dessert, giving it a professional appearance that will undoubtedly impress your guests. This level of detail transforms your dessert into a show-stopping centerpiece for your Halloween celebration.

    Using Spooky Shapes and Molds for Added Fun

    Incorporating spooky shapes and molds not only enhances creativity but also reinforces the Halloween theme in an engaging way. Selecting the right molds and shapes can significantly elevate the visual appeal of your spooky dessert, converting it into an eye-catching treat that guests will rave about long after the festivities.

    Choosing the Ideal Molds for Your Desserts

    Selecting the appropriate molds is crucial for creating spooky shapes that beautifully complement your Halloween desserts. Molds in the shapes of skulls, pumpkins, bats, or ghosts can greatly enhance the thematic elements of your creations. Silicone molds are particularly effective because they allow for easy removal while preserving intricate details that add charm to your desserts.

    Consider utilizing a variety of mold sizes to create a playful assortment of shapes. For instance, mini molds can produce bite-sized treats, while larger molds can form impressive centerpieces that will wow your guests. The choice of shapes should reflect your overall theme, ensuring that every element of your dessert is cohesive and visually delightful.

    Preparing Molds for Optimal Results

    Before pouring your batter into the molds, proper preparation is essential to ensure easy release. Greasing your molds with butter or oil and lightly dusting them with flour creates a non-stick surface that helps maintain the integrity of your spooky shapes. Alternatively, using parchment paper can facilitate a smooth release, ensuring your desserts come out perfectly.

    Avoid overfilling your molds, as this can lead to overflow during baking and distort the intended shape. Always tap the molds gently on the counter after filling to eliminate any air bubbles, ensuring a smooth finish upon unmolding. Properly prepared molds will yield stunning desserts that showcase your skills and meticulous attention to detail.

    Expert Tips for Perfectly Molded Shapes

    Pouring batter into molds requires careful technique to ensure even distribution and a flawless finish. Use a ladle or a pour spout to control the flow, filling the molds approximately three-quarters full to allow for rising during baking. Tapping the molds gently on the counter also helps eliminate any trapped air, ensuring a smooth and beautiful outcome.

    Once your batter is poured, take a moment to smooth the surface with a spatula, creating an even layer. Keeping your workspace organized reduces mess and invites a more pleasant baking experience. Patience is key; allow the dessert to bake fully and develop a lovely golden color before attempting to remove it from the mold, ensuring every shape is perfect.

    Cooling and Unmolding for Impressive Presentation

    Allowing your spooky shapes to cool completely before unmolding is crucial for maintaining their eerie forms. After baking, let the molds rest for about 10-15 minutes; this resting period helps the dessert set while still warm. Use a gentle touch to prevent any breakage or deformation of your carefully crafted shapes.

    When ready to unmold, carefully invert the mold onto a wire rack or a clean surface, giving it a gentle tap to encourage the release of the dessert. If the dessert is adhering, you might need to run a knife around the edges to loosen it. This cautious handling ensures your shapes retain their spooky charm, ready to be adorned with decorations and served to eager guests.

    Enhancing Molds with Creative Decorations

    After your spooky shapes are fully cooled and unmolded, the decorating fun can begin. Using icing, edible glitter, or fondant, you can elevate the appearance of your Halloween-themed desserts. This is where your creative flair truly shines. For example, a skull-shaped cake could benefit from a dusting of edible glitter to create a ghoulish shine that captivates all who see it.

    Keep in mind the theme of your shapes when decorating. For pumpkin molds, vibrant orange frosting with green accents can create a festive appearance that delights guests. Don’t hesitate to experiment with various textures and patterns; layering different colors of icing can create a more dynamic look, allowing your spooky creations to stand out magnificently on any Halloween table.

    Infusing Your Desserts with a Touch of Fright

    To fully embrace the Halloween spirit, adding an extra layer of fright to your dessert can make all the difference. A few creative touches can elevate your creation from simply spooky to spine-chilling, leaving a lasting impression on all who dare to indulge in your delicious offerings.

    Incorporating Scary Details for Maximum Fright Factor

    Integrating scary details into your dessert can enhance its fright factor and create a memorable experience for your guests. Elements like fake blood, easily crafted using raspberry coulis or red gel, can simulate a gruesome effect. Drizzling this over a cake or around your dessert platter can create a chilling scene that perfectly aligns with Halloween’s eerie theme, mesmerizing all who behold it.

    Consider using edible spiders or worms as decorations. These small yet effective elements can evoke gasps of delight and horror simultaneously. Strategically placing these components within or around your dessert will amplify the spooky atmosphere, ensuring that your guests remain engaged and entertained throughout the event.

    Utilizing Lighting Effects for Enhanced Ambiance

    Creating an eerie ambiance can significantly enhance the presentation of your Halloween dessert. Using LED lights or candles in your dessert display can cast haunting shadows and provide a warm glow that draws attention to your creations. Consider placing your dessert on a dark tablecloth to enhance the contrast between the treats and the backdrop, creating a visually striking display.

    For added creativity, use colored lights to match your dessert theme. Green or purple lights can create an otherworldly glow, while orange lights can evoke the essence of pumpkins. Combining lighting with your dessert display not only results in a stunning visual experience but also adds an element of intrigue that captivates your guests, enhancing the overall atmosphere of your Halloween gathering.

    Incorporating Sound Effects for a Complete Experience

    Integrating sound effects can heighten the Halloween experience, engaging guests in a multi-sensory celebration that leaves a lasting impression. Consider playing spooky soundtracks or eerie sound effects as guests approach the dessert table. Ambient sounds, such as creaking doors, howling winds, or even ghostly whispers, can immerse everyone in the Halloween spirit, enhancing the overall atmosphere of your event.

    Setting up a small speaker near your dessert display can create a delightful surprise for those who venture closer. This element of surprise can elevate the overall experience, allowing your guests to relish every aspect of the spooky celebration. A well-orchestrated combination of visuals, flavors, and sounds will create unforgettable memories that linger long after the event has ended.

    Presenting Your Desserts with Style and Flair

    The final step in your journey of mastering how to create Halloween desserts is presentation. The way you showcase your creations can significantly impact their overall appeal. A carefully curated presentation transforms an ordinary dessert into an extraordinary centerpiece that captivates your audience, ensuring your efforts are recognized and appreciated.

    Creating a Themed Table Setting for Maximum Visual Impact

    Establishing a cohesive table setting can enhance the overall impact of your dessert display. Begin by selecting a themed tablecloth that complements your dessert’s aesthetic. Dark, moody colors evoke a haunted ambiance, while bright hues promote a playful atmosphere. Incorporating themed decorations such as cobwebs, pumpkins, or bats will tie everything together beautifully, creating a visually stunning display that enchants guests.

    Consider displaying your desserts on decorative platters or stands to elevate their presence. Using varying heights adds visual interest, allowing guests to appreciate the beauty of each treat. Scattering themed confetti or edible glitter around the table can also create a festive touch that excites every viewer, capturing the spirit of Halloween in every detail of your display.

    Thoughtful Dessert Display Arrangements for Impact

    Arranging your desserts thoughtfully can create a striking visual impact that leaves guests in awe. Using tiered stands can create an eye-catching display that allows each dessert to shine in its own right. You could even craft a spooky graveyard scene using chocolate cookies as tombstones and crushed cookies as “dirt” surrounding your desserts, adding a creative and thematic twist that guests will love.

    For a more interactive experience, consider displaying mini desserts individually. This allows for easy sampling and encourages guests to try a little bit of everything. Each dessert will become a focal point that draws attention and sparks curiosity, enhancing the overall enjoyment of your Halloween celebration and ensuring that every guest leaves with delightful memories.

    Innovative Serving Suggestions for Maximum Enjoyment

    Offering small portions or individual servings can be a delightful way for guests to enjoy a variety of treats. Mini cupcakes, cake pops, or shot glasses filled with dessert can create a playful and interactive experience that encourages tasting and sharing among guests. This approach allows everyone to sample multiple flavors without feeling overwhelmed by larger servings, making it a truly enjoyable experience for all.

    Be sure to label each dessert with its name and any notable ingredients, particularly regarding dietary restrictions. This thoughtful touch ensures everyone can indulge safely while maintaining the spooky theme. The combination of portion control and creativity in serving can lead to a memorable and enjoyable dessert experience that guests will fondly remember long after the celebration.

    Engaging Interactive Dessert Stations for Added Fun

    Setting up interactive dessert stations can engage your guests in the dessert-making process, adding an element of fun to your celebration. Consider creating a “decorate your cupcake” station where guests can choose from a variety of toppings, such as spooky sprinkles, edible glitter, or fondant decorations. This hands-on experience encourages creativity and allows each guest to customize their treats, resulting in unique and personal creations.

    Another engaging idea is to offer a “build your own dessert” station, where guests can assemble their mini desserts using pre-prepared components. This not only adds an element of fun but also fosters social interaction among guests as they collaborate on their spooky creations. Each station can be themed to reflect your overall Halloween aesthetic, transforming dessert into an unforgettable experience that resonates with everyone involved.

    Best Practices for Storing and Preserving Your Halloween Desserts

    To ensure your spooky Halloween dessert remains fresh and delicious for as long as possible, it’s essential to understand proper storage and preservation techniques. The goal is to maintain the flavors and textures of your creations while providing guests with a delightful experience they won’t forget.

    Effective Solutions for Short-term Storage

    For short-term storage, keeping your dessert fresh is essential to maintaining its quality and taste. Store your creations in airtight containers at room temperature for up to a few days, depending on the type of dessert. This prevents moisture loss and helps preserve the intended textures that make your dessert enjoyable.

    If your dessert includes dairy-based elements, such as cream cheese frosting, it’s best to store it in the refrigerator to avoid spoilage. Ensure to cover it securely to prevent it from absorbing any other flavors in the fridge. Always remember to bring desserts back to room temperature before serving; this enhances flavors and improves overall enjoyment for your guests, ensuring they savor every bite.

    Long-term Preservation Techniques for Your Desserts

    For long-term preservation, freezing is an excellent option to extend the life of your spooky desserts. Properly wrapping your creations is crucial to prevent freezer burn and maintain quality. Use airtight containers or freezer bags, and be sure to label each item with the date to ensure optimal quality when you decide to enjoy them later.

    When freezing layered cakes or desserts with intricate decorations, consider freezing them without the decorations first. Once fully frozen, you can apply your decorations upon thawing. This method ensures that your desserts look their best when it’s time to serve them again, maintaining their spooky allure and visual appeal.

    Freezing for Extended Freshness and Enjoyment

    Freezing your spooky desserts can significantly extend their freshness. Ensure all desserts are completely cooled before wrapping them tightly in plastic wrap and placing them in airtight containers. This helps to lock in moisture and flavor, providing a delightful treat when you’re ready to indulge.

    To thaw frozen desserts, transfer them from the freezer to the refrigerator and allow them to defrost slowly. This method helps prevent condensation from forming on the surface, preserving the integrity of your dessert’s textures. Once thawed, feel free to add any additional decorations or frostings to restore their spooky visual appeal before serving, ensuring they look as fantastic as they taste.

    Frequently Asked Questions About Halloween Desserts

    What are some popular Halloween dessert themes?

    Popular themes include ghosts, witches, monsters, pumpkins, and haunted houses. Each theme offers unique opportunities for creative baking and decoration that can delight your guests and enhance the festive spirit.

    Can I make a spooky dessert vegan?

    Absolutely! There are numerous vegan substitutes for traditional ingredients, such as using flaxseed meal instead of eggs and plant-based milk instead of dairy. This allows everyone to partake in the Halloween festivities without compromising their dietary preferences.

    How can I create a spooky atmosphere for my dessert table?

    Utilizing themed decorations, lighting effects, and sound effects can create an immersive Halloween atmosphere that enhances the overall experience for your guests. These elements work together to evoke the spirit of Halloween and make your dessert table a focal point of excitement.

    What are some easy decorating techniques for Halloween desserts?

    Piping icing, using edible markers for details, and applying edible glitter are simple yet effective ways to add a spooky touch to your desserts, making them visually appealing and festive for the occasion.

    How long can I store my Halloween desserts?

    Short-term storage typically lasts a few days at room temperature, while freezing can extend the freshness of your desserts for several months, allowing you to enjoy your creations long after Halloween has passed.

    What is the best way to decorate cupcakes for Halloween?

    Utilizing vibrant frosting colors, fun toppers like candy eyes, and creative piping techniques can transform cupcakes into spooky delights that capture the imagination and excite your guests.

    How do I ensure my desserts stay moist after baking?

    Proper cooling, using quality ingredients, and storing desserts in airtight containers can help maintain moisture and freshness, ensuring that every bite is just as delightful as the first.

    Can I incorporate children into the dessert-making process?

    Definitely! Involving children in the decorating process can make the experience fun and engaging for them, allowing them to enjoy being creative with their spooky treats while creating memorable moments.

    What type of food coloring is best for Halloween desserts?

    Gel food coloring is recommended for its vibrant colors and ability to mix easily into batters and frostings without altering the consistency, allowing for strikingly colorful creations that capture the Halloween spirit.

    How can I make my desserts safe for guests with allergies?

    Always ask about dietary restrictions before planning your menu, and consider offering gluten-free or nut-free options to accommodate various needs, ensuring that everyone can enjoy the festivities without worry.

    Join our community on Facebook for more tips and ideas!

    The post How to Make a Spooky Halloween Dessert: A Guide to Frightful Treats appeared first on https://cookinggods.com

    The Article Spooky Halloween Dessert Ideas: Create Frightful Treats Was Found On https://limitsofstrategy.com