Your cart is currently empty!
Category: Food & Drink
Auto Added by WPeMatico
-

Few Ingredient Beginner Desserts: Simple and Delicious Recipes
Unlock the Secrets to Effortless Dessert Mastery
Discover the Essential Characteristics of Beginner-Friendly Desserts
A beginner-friendly dessert is defined by its straightforward preparation, a concise list of ingredients, and the absence of complex cooking techniques. For those stepping into the realm of dessert-making, the primary aim is to craft a dish that is not only simple to prepare but also yields delicious results. This approach demystifies the baking experience, allowing for creative experimentation without the fear of failure. Simple recipes not only provide novices with a sense of achievement but also nurture their culinary skills. Furthermore, these desserts are designed to be forgiving, accommodating small errors without leading to disastrous outcomes.
The charm of beginner-friendly desserts lies in their accessibility. Many recipes utilize common pantry staples, readily available in most kitchens, which makes it easy for anyone to embark on their baking journey. From timeless chocolate mug cakes to tempting no-bake cookies, the possibilities are limitless. This ease of access can motivate even the most inexperienced bakers to take the plunge and create delightful sweet treats to share with their loved ones.
Key Ingredients Essential for Crafting Simple and Delicious Desserts
As you embark on the delightful journey of crafting uncomplicated desserts, it is vital to understand the fundamental ingredients that serve as the backbone of numerous recipes. Common ingredients such as sugar, flour, eggs, and butter are incredibly versatile and can be utilized in a wide array of delicious creations.
Sugar acts as a sweetening agent, enhancing flavors and contributing to the overall texture of desserts. Flour is crucial for providing the structural foundation necessary for cakes and cookies to rise properly. Eggs play an essential role in binding ingredients together and adding moisture to the mix, while butter enriches flavor and adds a creamy texture to the final product. Additionally, other ingredients such as milk, cocoa powder, and baking soda are often combined with these staples to elevate simple components into extraordinary desserts.
Having these foundational ingredients on hand not only streamlines the dessert-making process but also allows for flexibility when it comes to recipe modifications. With just a handful of items, one can create a multitude of desserts, making the baking experience both enjoyable and rewarding.
Essential Baking Techniques Every Aspiring Baker Should Master
Gaining proficiency in essential baking techniques is crucial for anyone aspiring to excel in the art of dessert-making. Fundamental skills such as mixing, baking, and chilling are vital in achieving successful results and delightful desserts.
Mixing typically represents the initial stage in most recipes, where the combination of dry and wet ingredients is essential for achieving the desired consistency. Mastering the technique of mixing is important to avoid overworking the batter, as this can result in dense or tough desserts. Techniques such as folding and creaming can significantly influence the texture and outcome of the final product.
Baking requires a keen understanding of temperature settings and timing, which can differ based on the specific recipe. Utilizing a reliable oven thermometer can help maintain accuracy, and recognizing the significance of preheating the oven can prevent common baking mishaps. Chilling is another critical technique, especially for desserts like mousses or no-bake options, where sufficient setting time is required to achieve the desired texture.
By familiarizing themselves with these core techniques, beginners will build confidence and gradually progress to more complex recipes as their skills develop.
Simple and Quick Dessert Recipes for Beginners to Try

For those eager to dive into dessert creation, experimenting with simple recipes serves as an excellent starting point. Mug cakes and no-bake cookies exemplify quick and easy desserts that demand minimal effort and can be prepared in mere minutes.
Mug cakes are single-serving desserts made by combining ingredients directly in a mug and microwaving them. They are perfect for satisfying sweet cravings without extensive preparation or cleanup. Conversely, no-bake cookies eliminate the need for an oven, making them an ideal choice for those who might not have access to baking appliances.
These recipes generally involve straightforward steps: mixing ingredients, portioning them out, and either microwaving or refrigerating them. Not only do they provide immediate gratification, but they also offer beginners a chance to practice their skills in a relaxed and pressure-free environment.
Innovative Presentation Techniques to Enhance Your Dessert Displays
The way a dessert is presented can dramatically elevate its appeal, making it more enticing regardless of how simple the creation may be. Basic presentation techniques can transform even the most straightforward recipes into visually stunning delights.
One effective method is garnishing with fresh fruits, such as vibrant berries or citrus slices, which add pops of color and a refreshing touch. Utilizing simple molds can also create appealing shapes without the need for advanced skills. For instance, layering desserts in clear glasses can beautifully showcase the rich colors and textures of the ingredients, enticing guests before they take their first bite.
Furthermore, dusting desserts with powdered sugar or drizzling sauces can elevate the sophistication of a dish. The key is to keep it simple; even minor alterations in presentation can significantly influence how the dessert is perceived. These techniques not only enhance aesthetics but also enrich the overall dining experience, making the dessert more enjoyable for everyone.
Expert Tips on the Most Accessible Beginner Desserts with Minimal Ingredients
Identify the Key Components for Crafting Simple Yet Delicious Desserts

Successful simple desserts typically share several essential components that contribute to their appeal and effectiveness. The first crucial component is simplicity in preparation. Recipes that require only a few steps and minimal ingredients tend to be more approachable, allowing beginners to feel confident in their baking endeavors. For instance, a basic rice pudding recipe may consist solely of rice, milk, and sugar, making it an excellent choice for novice bakers.
Another vital factor is taste. Even with a limited number of ingredients, effective desserts must be flavorful. This can be achieved by utilizing high-quality components or incorporating flavors such as vanilla or spices that elevate the overall experience. A prime example is a lemon curd tart, where the bright and sweet flavors shine through despite its minimal ingredient list, showcasing how simplicity can lead to delightful outcomes.
Lastly, presentation should not be overlooked. A dessert that appears visually appealing can enhance the perception of taste. Even the simplest dish can be elevated with thoughtful presentation—consider adding a sprig of mint or a dusting of cocoa powder to increase visual interest. By focusing on these components, beginners can craft desserts that are not only easy to prepare but also a joy to savor.
Strategies for Beginners to Effectively Enhance Their Dessert-Making Skills
Improving dessert-making abilities involves practice, experimentation, and a readiness to learn from both successes and challenges. Beginners can take several practical steps to elevate their culinary skills in the kitchen.
First, mastering basic techniques such as measuring, mixing, and baking will lay a strong foundation. Beginners should start with straightforward recipes that reinforce these skills, gradually advancing to more complex creations as their confidence grows. Keeping a baking journal can help track progress and document what works well.
Second, experimenting with different recipes is essential. Trying an array of desserts, from cookies to cakes, encourages the exploration of flavors, textures, and techniques. This experimentation can reveal personal preferences and highlight areas that may require improvement, allowing for a more tailored baking journey.
Finally, seeking feedback from friends and family can provide invaluable insights. Constructive criticism helps beginners understand what works and what doesn’t, allowing them to refine their techniques and recipes over time. This iterative learning process is crucial for anyone looking to elevate their dessert-making skills.
Avoiding Common Mistakes in Simple Dessert Preparation
Steering clear of common errors can significantly enhance the results of simple desserts. One frequent mistake is overmixing, which can lead to dense or tough textures. Beginners should be mindful of mixing only until ingredients are combined, particularly in baked goods where gluten development is a consideration.
Another common pitfall is incorrect measurements. Precision is vital in baking, and using the wrong quantities can drastically affect the final result. Beginners should invest in quality measuring tools and comprehend the differences between weight and volume measurements, as grains and liquids can vary significantly in density, impacting the outcome of their desserts.
Additionally, neglecting to follow recipe instructions can lead to disappointing outcomes. Each recipe is carefully structured to achieve a specific result, and skipping steps or making substitutions without understanding the implications can lead to frustration and unsatisfactory results. By closely adhering to instructions, beginners can avoid many common pitfalls and ensure successful baking experiences.
Beginner-Friendly Desserts to Kickstart Your Baking Journey
Certain desserts are undeniably more beginner-friendly than others, making them excellent starting points for novice bakers. Mug cakes, for instance, are incredibly easy to prepare and require minimal ingredients. They can be made in just a few minutes, offering a variety of flavor combinations to satisfy any sweet tooth.
Another fantastic option is no-bake cookies, which completely eliminate the need for an oven. These cookies typically involve mixing ingredients such as oats, peanut butter, and chocolate, resulting in a quick and satisfying treat that anyone can whip up.
Additionally, fruit-based desserts like banana ice cream or fruit salads provide a simple yet delightful choice. These recipes often require little more than chopping and mixing, enabling beginners to focus on fresh flavors without intricate techniques. Highlighting these easy options encourages beginners to build confidence and enjoy the rewarding process of creating delightful desserts.
Enhancing Dessert Flavors through Minimal Ingredients
Utilizing fewer ingredients can often lead to more pronounced flavors in desserts. The concept of minimalism in cooking allows the natural characteristics of each ingredient to shine through. For example, a classic lemon bar heavily relies on the balance of lemon juice and sugar, where each component plays a critical role in crafting a harmonious flavor profile that delights the palate.
Similarly, a chocolate mousse crafted with high-quality chocolate, cream, and eggs exemplifies how minimalism can enhance taste. By prioritizing quality over quantity, the dessert transforms into an experience that celebrates the ingredients in their purest forms, allowing each flavor to stand out and complement one another beautifully.
This minimalist approach encourages creativity, enabling beginners to experiment with various flavor combinations while keeping the ingredient list concise. By focusing on quality ingredients and thoughtful preparation, one can yield desserts that are not only simple but also remarkably satisfying and memorable.
Top 3 Beginner-Friendly Desserts with Minimal Ingredients
Indulgent Classic Chocolate Mug Cake Recipe
The classic chocolate mug cake is a quintessential dessert for any novice baker, seamlessly blending simplicity and indulgence into a single serving. This delightful treat is incredibly easy to prepare, requiring only a handful of basic ingredients. In under five minutes, you can savor a warm, chocolatey delight that satisfies your sweet cravings.
- 4 tablespoons of all-purpose flour
- 4 tablespoons of sugar
- 2 tablespoons of cocoa powder
- 1/8 teaspoon of baking powder
- 3 tablespoons of milk
- 2 tablespoons of vegetable oil
- 1/4 teaspoon of vanilla extract
- Optional: chocolate chips for extra richness
To prepare this scrumptious mug cake, begin by mixing the dry ingredients in a microwave-safe mug until thoroughly combined. Next, add the milk, vegetable oil, and vanilla extract, stirring until you achieve a smooth batter. If desired, include some chocolate chips for an extra gooey texture. Microwave on high for approximately 1 minute and 30 seconds, keeping a close watch to prevent overcooking. Allow it to cool slightly before indulging in this quick dessert that exemplifies just how simple and rewarding dessert-making can be.
Effortless No-Bake Cookies Recipe
No-bake cookies epitomize convenience and deliciousness, making them an ideal treat for beginners. They require no baking—just a bit of mixing and chilling—allowing you to prepare a delightful dessert in no time at all.
To create these cookies, follow these straightforward steps:
- In a saucepan over medium heat, combine 1 cup of sugar, 1/2 cup of milk, and 1/2 cup of butter. Stir until the mixture bubbles.
- Once boiling, remove from heat and mix in 1/2 cup of peanut butter and 1 teaspoon of vanilla extract.
- Stir in 3 cups of oats until well combined.
- Drop spoonfuls of the mixture onto parchment paper and allow them to cool and set for about 30 minutes.
These no-bake cookies are not only quick to prepare but also offer a delightful fusion of chocolate and peanut butter flavors. Their simplicity makes them the perfect choice for novice bakers eager to create something delicious without the hassle of baking.
Simplified Homemade Vanilla Ice Cream Recipe
Creating homemade vanilla ice cream is an exciting dessert venture for beginners looking to explore flavor experimentation. This recipe requires just a few ingredients and yields a creamy, indulgent treat that is perfect for warm days or special occasions.
To prepare this ice cream, gather the following ingredients:
- 2 cups of heavy cream
- 1 cup of whole milk
- 3/4 cup of granulated sugar
- 1 tablespoon of pure vanilla extract
Begin by whisking together the heavy cream, milk, sugar, and vanilla extract in a large bowl until the sugar dissolves. Once well combined, pour the mixture into an ice cream maker and churn according to the manufacturer’s instructions. If you don’t have an ice cream maker, pour the mixture into a shallow dish and place it in the freezer. Stir every 30 minutes until the ice cream reaches the desired consistency, typically around 3-4 hours. This simple recipe allows beginners to craft a classic dessert while providing opportunities for flavor experimentation, such as adding fruits or cookie bits for a unique twist.
Customizing Beginner Desserts for Unique Flavor Experiences
Simple Techniques to Infuse Flavors into Basic Dessert Recipes
Incorporating rich flavors into basic desserts can be a delightful way to enhance their complexity without complicating the recipe. One easy technique is to add extracts such as vanilla, almond, or peppermint into batters and frostings. Just a teaspoon can dramatically alter the flavor profile of a dish, making it more inviting and exciting for the palate.
Utilizing cocoa powder is another fantastic method for chocolate enthusiasts. It can be seamlessly integrated into batters for cakes or muffins, enriching their richness without requiring additional ingredients. Fresh fruits, like berries or citrus zest, can introduce a burst of freshness. For instance, adding lemon zest into a basic cake batter can elevate its flavor and enhance its aroma, creating a more delightful dessert experience.
Incorporating spices such as cinnamon or nutmeg can beautifully complement desserts. A straightforward chocolate chip cookie recipe can be transformed by adding a pinch of sea salt or a dash of cinnamon, crafting a more sophisticated dessert. By utilizing these simple flavor enhancements, beginners can explore their palates and enjoy a broader spectrum of dessert experiences.
Elevating Desserts with Everyday Pantry Ingredients
Common pantry items can significantly enhance the flavors and textures of beginner desserts. Nuts, such as walnuts or pecans, can introduce crunch and richness when chopped and sprinkled over cakes or incorporated into cookies. They not only enhance flavor but also provide a delightful contrast in texture, making desserts more appealing.
Chocolate chips are another pantry staple that can enhance a simple dessert. Whether added to cookies or used as a topping for cupcakes, they create an indulgent finish that satisfies any sweet tooth. Moreover, spices like cinnamon, nutmeg, or even chili powder can introduce unexpected depth of flavor. A sprinkle of cinnamon can transform a basic vanilla cake into a warm, comforting dessert.
Dried fruits such as raisins or cranberries can impart natural sweetness and chewiness to cookies and muffins, making them more interesting and enjoyable. By incorporating these common items, beginners can create desserts that are not only simple but also boast a richer flavor profile that delights the senses.Innovative Presentation Techniques to Make Desserts Stand Out
The presentation of a dessert can have a considerable impact on its appeal, and even the simplest creations can be enhanced through a few creative techniques. For example, layering desserts in clear glasses can beautifully display their vibrant colors and textures. Parfaits made with yogurt, fruit, and granola offer an attractive and delicious option that requires minimal skills to prepare.
Utilizing garnishes is another effective method to elevate presentation. A sprig of mint or a dusting of powdered sugar can elevate the look of a simple dessert, transforming it into a gourmet experience. For cakes and cupcakes, consider drizzling a homemade sauce or chocolate ganache over the top for an elegant finish that impresses guests.
Serving desserts on attractive plates or platters can also make a significant difference. Using colorful, patterned dishes can make even basic recipes stand out. Simple techniques like these can transform the appearance of any dessert, making it look professionally crafted and appealing, thereby enhancing the overall dining experience.
Adjusting Recipes for Dietary Restrictions with Ease
Adapting recipes for various dietary restrictions can be straightforward, enabling more individuals to enjoy homemade desserts. For example, when creating a gluten-free dessert, consider using almond flour or coconut flour as substitutes for all-purpose flour. These alternatives can yield delicious results while accommodating gluten intolerance without compromising texture or flavor.
For vegan desserts, replacing eggs can be accomplished using ingredients like flaxseeds or applesauce. These substitutes provide binding and moisture, ensuring the integrity of the dessert remains intact. In dairy-free recipes, oat or almond milk can replace regular dairy milk, maintaining the creamy texture that makes desserts enjoyable.
Understanding how to implement these adjustments not only broadens the range of recipes available but also facilitates inclusive baking that caters to diverse dietary needs. As more individuals adopt restricted diets, learning these modifications becomes increasingly essential for creating desserts that everyone can enjoy, fostering a sense of community and shared experiences around food.
Embracing Seasonal Ingredients for Flavorful Dessert Creations
Utilizing seasonal ingredients in desserts is a wonderful way to enhance flavors while supporting local produce. Fresh fruits and vegetables that are in season typically possess superior taste and nutrition compared to those that are out of season. For example, ripe strawberries during the summer can be used to create simple desserts like strawberry shortcake or fruit tarts that highlight their natural sweetness and vibrant flavor.
Incorporating pumpkin in autumn can lead to delightful treats such as pumpkin pie or muffins, celebrating the flavors of the season. Winter citrus fruits, including oranges and grapefruits, add brightness to cakes and puddings during the colder months.
Additionally, local herbs like mint or lavender can introduce unique flavors, enriching traditional recipes with fresh, fragrant notes. By focusing on seasonal ingredients, beginners can craft desserts that are not only delicious but also encapsulate the essence of the season, fostering a deeper connection to the food they prepare and enjoy.
Research-Backed Advantages of Simple Desserts for New Bakers
How Simple Desserts Contribute to a Balanced Diet
Incorporating simple desserts into a balanced diet can be both enjoyable and beneficial. When crafted with wholesome ingredients, these desserts can offer a balance of nutrients while satisfying sweet cravings. For instance, desserts that include fruits can provide essential vitamins, minerals, and fiber, contributing to overall health and well-being.
Moreover, creating desserts at home allows for greater control over ingredients, enabling the use of natural sweeteners like honey or maple syrup, which can serve as healthier alternatives to refined sugars. Simple desserts can also satisfy the psychological need for sweetness without leading to overindulgence when portioned appropriately, promoting mindful eating habits.
Furthermore, desserts made from whole ingredients typically contain fewer additives compared to store-bought options. This emphasis on quality can enhance the overall nutritional profile, making them a more health-conscious choice. By embracing the concept of moderate indulgence, simple desserts can seamlessly integrate into a balanced diet, promoting a healthier lifestyle.
The Psychological Benefits of Baking Simple Desserts
Baking, especially simple desserts, can yield significant psychological benefits. The act of preparing food engages the mind and fosters creativity, serving as a powerful outlet for stress relief. The tactile experience of mixing ingredients and the anticipation of watching something transform in the oven can evoke feelings of mindfulness and enjoyment, creating a fulfilling and rewarding activity.
Additionally, the satisfaction derived from creating a dessert can boost self-esteem and foster a sense of accomplishment, particularly for beginners. Sharing baked goods with friends and family can further enhance feelings of connection and community, amplifying the positive impact on mental well-being and social interactions.
Moreover, the sensory experience of baking—such as the aroma of freshly baked cookies—can evoke memories and emotions, creating a comforting and nostalgic atmosphere. This combination of creativity, connection, and sensory pleasure can make baking a rewarding hobby that enhances overall happiness and life satisfaction.
The Social Benefits of Sharing Homemade Desserts
Sharing homemade desserts can significantly strengthen social bonds and foster a sense of community. Whether at a family gathering, a friend’s birthday, or a community event, desserts often serve as a focal point for connection. Simple recipes that are easy to transport, like cookies or bars, encourage sharing and can lead to delightful interactions with others, enriching personal relationships.
Furthermore, the act of sharing food represents a universal gesture of hospitality and generosity. Bringing a homemade dessert to a gathering not only demonstrates thoughtfulness but also provides an opportunity for conversation and laughter, creating lasting memories that strengthen personal ties.
As simple desserts can be made in batches, they are perfect for sharing among groups, allowing more people to enjoy the fruits of one’s labor. This communal aspect of baking transcends the food itself; it’s about the connections forged through the act of sharing something made with love, highlighting the social significance and joy of dessert-making.
Effective Strategies for Perfecting Your Beginner Desserts
Best Practices for Accurate Ingredient Measurement in Baking
Precise measuring is critical for successful dessert-making. Adopting best practices for measuring ingredients can substantially influence the final product. Utilizing the correct tools, such as dry measuring cups for solids and liquid measuring cups for liquids, ensures accuracy and consistency in your baking efforts.
For dry ingredients, spoon the ingredient into the measuring cup and level it off with a straight edge, avoiding the temptation to pack it down. This technique prevents over-measuring, which can lead to dense and undesirable textures in baked goods. For liquids, ensure that you’re at eye level when reading measurements to achieve precision and accuracy in your recipes.
When dealing with small quantities, such as baking soda or spices, a set of measuring spoons is indispensable. Understanding the difference between teaspoons and tablespoons is crucial for maintaining the balance of flavors in your desserts. By prioritizing accurate measurement, beginners can achieve consistent and successful results in their dessert-making endeavors, paving the way for more advanced baking experiences down the line.
How to Adjust Recipes for Various Dietary Needs with Ease
Modifying recipes for different dietary needs can be a straightforward process, particularly when crafting simple desserts. Understanding how to substitute key ingredients empowers beginners to cater to a variety of dietary requirements, including gluten-free or vegan options, ensuring that everyone can enjoy delicious desserts.
For gluten-free desserts, consider replacing all-purpose flour with almond flour, coconut flour, or gluten-free all-purpose blends. These substitutes can provide the necessary structure while accommodating those with gluten sensitivities, allowing for a delightful dessert experience without compromising on taste or texture.
When adjusting for vegan diets, eggs can be substituted with flaxseed meal or applesauce, which serve as effective binding agents. For dairy-free variations, plant-based milks like almond or oat milk can replace cow’s milk, ensuring the dessert remains creamy and enjoyable while catering to diverse dietary preferences.
By familiarizing themselves with these substitutions, beginners can create inclusive desserts that satisfy a wide variety of dietary preferences, making their baking efforts more versatile and accommodating for everyone.
Time-Saving Techniques for Busy Beginners in the Kitchen
For busy beginners, implementing time-saving techniques can streamline the dessert-making process without sacrificing quality. One effective strategy is to use pre-measured ingredients whenever possible. Preparing ingredients in advance or purchasing pre-measured mixes can facilitate quick assembly and eliminate last-minute stress.
Additionally, choosing quick recipes is essential. Opting for no-bake desserts or those that can be prepared in under 30 minutes helps integrate baking into a busy schedule without feeling overwhelming. These quick options can provide immediate satisfaction without a significant time investment.
Another practical approach is to prepare in bulk. Making larger batches of cookies or bars can save time and ensure that treats are readily available for later enjoyment or sharing. Storing these in airtight containers can maintain freshness, making it easy to indulge in homemade goodness on hectic days without the need for extensive preparation each time.
Selecting the Right Baking Tools for Novice Bakers
Choosing the right baking tools can significantly enhance a beginner’s experience in the kitchen. Starting with essential tools such as mixing bowls, measuring cups, and spoons provides a solid foundation for any budding baker. A reliable baking pan or muffin tin is also crucial, as it will be frequently used for various recipes.
Investing in a quality oven thermometer can help ensure accurate baking temperatures, resulting in more consistent outcomes and delicious desserts. A whisk is another indispensable tool for smoothly mixing ingredients, while a spatula is invaluable for scraping bowls and ensuring nothing goes to waste in your baking endeavors.
As beginners build confidence, they can expand their collection with more specialized tools, such as piping bags for decorating or sifting tools for dry ingredients. However, starting with the basics will provide a strong foundation for successful baking experiences and lead to a positive baking journey.
Frequently Asked Questions (FAQs) About Beginner Desserts
What is the easiest dessert to make for beginners?
The easiest dessert for beginners is often a chocolate mug cake. It requires minimal ingredients and can be quickly prepared in a microwave, offering a delicious treat with little hassle and great satisfaction.
How can I make desserts healthier?
To make desserts healthier, utilize whole ingredients, reduce sugar, and incorporate fruits or nuts. Opting for natural sweeteners and whole-grain flours can also enhance the nutritional value and overall appeal of your creations.
Can I make desserts without an oven?
Yes, many desserts can be created without an oven. No-bake cookies, cheesecakes, and mousses are excellent options that require minimal equipment and can set in the refrigerator, making them perfect for quick and easy dessert preparation.
What are some common dessert-making mistakes?
Common mistakes include overmixing, inaccurate measurements, and not adhering closely to the recipe. Avoiding these pitfalls can lead to improved results in your dessert-making adventures, ensuring that your creations turn out as intended.
How do I know when my dessert is finished baking?
To check if your dessert is done baking, use a toothpick or cake tester. If it comes out clean or with a few crumbs attached, it’s finished. For other desserts, follow the timing indicated in the recipe for guidance on doneness.
What can I substitute for eggs in baking?
You can substitute eggs with ingredients like flaxseed meal, applesauce, or mashed bananas. Each option serves different purposes depending on the recipe, making it essential to select the appropriate one for your baking needs.
How long do homemade desserts last?
Homemade desserts typically last about 3 to 5 days when stored in an airtight container in the fridge. Some items, such as cookies, may last longer if kept at room temperature, allowing for enjoyment over several days.
What tools do I need to start baking desserts?
Essential tools for beginners include mixing bowls, measuring cups and spoons, a whisk, a spatula, and a baking pan. These will cover most basic dessert recipes and provide a solid foundation for your baking journey.
Can I freeze homemade desserts?
Yes, many homemade desserts freeze well. Items like cookies, cakes, and muffins can be tightly wrapped and stored in the freezer for later enjoyment, making them a convenient option for busy days or unexpected guests.
Are there vegan dessert options?
Absolutely! A variety of delicious vegan dessert options exist, such as vegan brownies, fruit sorbets, and no-bake vegan cheesecakes, ensuring everyone can indulge in sweets regardless of dietary preferences or restrictions.
Stay updated with our latest news on Facebook!
The post Best Beginner Desserts With Few Ingredients: Simple Recipes appeared first on https://cookinggods.com
The Article Beginner Desserts With Few Ingredients: Easy Recipes Was Found On https://limitsofstrategy.com
-

BBQ Recipes for Beginners: Easy Grilling Ideas
Essential BBQ Tools You Must Have for an Unforgettable Grilling Experience
Choosing the Right Grill: Charcoal vs. Gas for Your BBQ Journey
Selecting the right type of grill is a pivotal step for newcomers eager to embark on their BBQ journey. Charcoal grills are renowned for their remarkable ability to infuse a distinctive, smoky flavor that many BBQ enthusiasts treasure. Although they require more attention to maintain the ideal cooking temperature, they are ideal for those who relish the art of grilling itself. On the other hand, gas grills provide unmatched convenience and precision, enabling users to effortlessly adjust heat levels and achieve consistent cooking results with minimal effort. Ultimately, the decision rests on your personal cooking style, flavor preferences, and the overall grilling experience you wish to create.
For beginners, diving into the charcoal grilling adventure can be immensely rewarding, as it introduces you to a variety of techniques, such as airflow regulation and strategic charcoal placement for optimal heat distribution. A great starting point would be a compact, portable charcoal grill that is easy to transport for picnics or tailgating events. Conversely, if you prefer a quick setup without the intricacies of lighting coals, a gas grill featuring multiple burners might be your perfect choice. Regardless of which option you select, mastering the nuances of your specific grill type will serve as a solid foundation for developing your BBQ skills over time.
Essential Utensils You Need for an Outstanding BBQ Experience
Equipping yourself with the right utensils is vital for effectively managing your BBQ sessions. Essential tools include tongs, spatulas, and meat thermometers. Tongs are indispensable for flipping and maneuvering various meats, ensuring you maintain the integrity of your dishes while keeping your hands safe from heat. A sturdy spatula is crucial for handling burgers and other delicate food items, guaranteeing they remain intact on the grill. Moreover, a reliable meat thermometer is essential for monitoring internal temperatures, ensuring that your meats are thoroughly cooked and safe to eat without the risk of overcooking.
Additionally, other helpful utensils include grill brushes for effective cleaning and basting brushes for applying marinades. Investing in high-quality tools will significantly enhance your culinary adventures, while proper maintenance ensures they last through many BBQ seasons, allowing you to create mouth-watering meals for your friends and family.
Crucial Safety Gear for a Secure and Enjoyable Grilling Experience
Prioritizing safety during grilling is of the utmost importance. Protecting yourself from heat and potential accidents is essential for a successful BBQ experience. Key safety gear includes aprons, heat-resistant gloves, and fire extinguishers. An apron not only keeps your clothing clean but also provides handy pockets for your utensils. Heat-resistant gloves protect your hands when handling hot items, while having a fire extinguisher readily accessible is a wise precaution against unexpected flare-ups.
- Always keep a fire extinguisher nearby.
- Wear heat-resistant gloves when handling hot items.
- Utilize long-handled tools to maintain a safe distance from the heat.
- Maintain a clean grill area to minimize the risk of grease fires.
- Never leave the grill unattended while in use.
- Ensure your grill is positioned on a stable, non-flammable surface.
- Check for gas leaks before igniting a gas grill.
- Allow your grill to cool completely before cleaning.
Delicious BBQ Recipes Perfect for Beginners

Choosing the Best Cuts of Meat for BBQ Success
Selecting the right cuts of meat can greatly impact your BBQ experience. For beginners, chicken thighs and pork ribs are excellent choices due to their forgiving nature during cooking. Chicken thighs contain a higher fat content compared to breasts, making them less prone to drying out while grilling. In contrast, pork ribs, whether you opt for baby back or spare ribs, are flavorful cuts that eagerly soak up marinades and rubs, making them an ideal starting point for novices venturing into the world of BBQ.
Beef, particularly flank steak or brisket, may present more challenges for newcomers, as these cuts require patience and specific cooking techniques to achieve optimal tenderness. For your first BBQ, focus on cuts that are readily available and can be easily prepared using straightforward grilling methods. Visiting local butcher shops can provide valuable insights into the best meat cuts for grilling, as they often offer personalized recommendations tailored to your preferences and unique cooking style.
Enhancing BBQ Flavor with Marinades and Rubs
Marinades and rubs are vital in transforming your BBQ dishes from ordinary to extraordinary. A well-prepared marinade typically includes acids like vinegar or citrus juice, which help tenderize the meat while infusing it with delightful flavor. For instance, a simple marinade for chicken might consist of olive oil, lemon juice, garlic, and fresh herbs, allowing the chicken to marinate for at least an hour or even overnight for optimal results.
Rubs, on the other hand, create a delicious crust on the meat. They generally consist of a mix of spices and herbs, including paprika, garlic powder, brown sugar, and salt. Applying a rub before grilling not only enhances the taste and texture of the meat but also promotes the desired caramelization on the outer layer. Don’t hesitate to experiment with various combinations to find your favorite flavor profiles and adjust quantities to suit your personal taste preferences.
Essential Cooking Times and Temperatures for Perfect BBQ

Mastering cooking times and temperatures is crucial for achieving delectable BBQ results. Utilizing a meat thermometer is essential to ensure food safety and reach your desired level of doneness. For example, chicken should be cooked to an internal temperature of 165°F, while pork is best served at 145°F. For beef, preferences can vary: medium-rare typically falls around 135°F, while medium is approximately 145°F.
To effectively track cooking times, it’s beneficial to familiarize yourself with general grilling durations for various cuts. For instance, chicken thighs may require about 30-40 minutes at medium heat, while pork ribs can take between 2-4 hours depending on the cooking technique employed. Always allow meats to rest for a few minutes after cooking, as this step enhances juiciness and overall flavor. Keeping a reference guide or timer handy can assist in ensuring a successful and enjoyable grilling session.
Achieving the Perfect BBQ Smoke Flavor for Your Dishes
Choosing the Best Types of Wood for Smoking BBQ
Different types of wood impart distinct flavors to your BBQ, and selecting the right variety can significantly elevate your dishes. Hickory is well-known for its robust, bacon-like flavor, making it an excellent choice for pork and ribs. If you’re in search of something with a more earthy profile, mesquite is a popular option, particularly in Texas BBQ, offering a bold flavor that complements heartier meats beautifully.
For novices, applewood is frequently recommended due to its mild and sweet flavor profile, which is ideal for chicken and fish. Cherry wood also provides a delightful fruity aroma and pairs well with nearly any meat, adding a beautiful hue to your final dish. The key to using wood is mastering smoke control; too much smoke can overpower the meat, while too little may fail to deliver the desired flavor. Soaking wood chips in water before use can help prevent them from igniting too quickly, ensuring a consistent level of smoke throughout your cooking process.
Simple Smoking Techniques to Enhance Your BBQ Experience
Starting with straightforward smoking techniques can greatly enhance your BBQ journey. One popular method is the two-zone fire technique, where you create one side of the grill for direct heat and the opposite side for indirect heat. This arrangement allows you to sear meats over high heat before moving them to the cooler side for slow cooking, resulting in tender, juicy BBQ products.
Another effective method involves wrapping your meat in foil during the smoking process. This technique helps retain moisture while allowing the smoke flavor to permeate the meat effectively. Managing smoke and heat is crucial; always monitor your temperature gauge and adjust airflow as necessary. Here are some fundamental smoking techniques to consider:
- Utilize a water pan in your smoker to maintain moisture levels.
- Start with small amounts of wood, gradually adding more as necessary.
- Closely monitor temperatures, adjusting vents to control airflow.
- Experiment with various wood combinations for unique flavor profiles.
- Employ a meat probe to ensure precise cooking temperatures.
- Allow the meat to rest after smoking for improved flavor infusion.
- Exercise patience; excellent BBQ requires time!
- Keep the grill lid closed as much as possible to maintain temperature consistency.
Avoiding Common Mistakes While Smoking Meats
Avoiding common smoking mistakes can significantly enhance your BBQ experience. One frequent error is neglecting to soak wood chips before using them, which can lead to excessive flare-ups and bitter flavors. Instead, soak your chips for at least an hour before adding them to the grill; this practice helps produce a steady stream of smoke rather than erratic bursts.
Another common pitfall is over-smoking your meat, which can overpower the natural flavors and create an unpleasant taste. It’s vital to find the right balance; start with a minimal amount of smoke and gradually increase it based on your preferences. Improper temperature regulation is also a prevalent issue; maintaining a consistent grill temperature is essential for achieving optimal results.
To avoid these mistakes, familiarize yourself with your grill’s specific characteristics and always keep a thermometer handy. Remember, practice makes perfect, so don’t be discouraged; every BBQ is an opportunity to learn and refine your grilling techniques.
How to Select the Best Smoker for Your BBQ Needs
Selecting the right smoker is vital for achieving the ideal BBQ smoke. There are various types to consider, each offering its unique set of advantages. Charcoal smokers are often favored for their ability to deliver traditional BBQ flavors and provide hands-on control over the cooking process. They also allow for versatility in fuel choice, enabling the incorporation of wood for smoking.
Electric smokers, while easier to operate, may lack some of the depth of flavor that charcoal smokers provide. However, they are excellent for beginners seeking a more hands-off approach. Pellet smokers combine the best of both worlds, utilizing wood pellets as fuel to generate smoke while offering a user-friendly experience, making them ideal for those new to smoking.
When choosing a smoker, consider your cooking style and the amount of time you wish to commit. A reliable, beginner-friendly smoker will enhance your BBQ experience and help you create delicious meals for years to come.
Perfect Side Dishes to Complement Your BBQ Meal
Classic BBQ Side Dishes That Enhance Your Meal
Classic BBQ sides like coleslaw, baked beans, and potato salad are ideal accompaniments for any BBQ feast. These dishes are not only traditional but also simple to prepare and can be made in advance, allowing you more time to focus on grilling.
To prepare homemade coleslaw, combine shredded cabbage, grated carrots, and a dressing made of mayonnaise, vinegar, sugar, and spices. This refreshing side perfectly balances the richness of BBQ meats. Baked beans, often enhanced with brown sugar and bacon, provide a hearty element to your meal—just bake canned beans with your chosen seasonings for a quick and satisfying side dish. Meanwhile, potato salad can be customized with ingredients like mustard, pickles, and herbs, providing a creamy texture that pairs seamlessly with grilled meats.
These classic sides not only enhance the flavor profile but also add vibrant color to your BBQ spread, ensuring your meal is just as enjoyable as the main event.
Flavorful Grilled Vegetable Options to Include in Your BBQ
Grilling vegetables not only adds a smoky flavor but also enhances their natural taste, making them a fantastic addition to any BBQ spread. Certain vegetables grill exceptionally well, such as bell peppers, zucchini, and corn on the cob.
To grill bell peppers, slice them into quarters and brush with olive oil and seasoning before placing them directly on the grill. This method caramelizes the natural sugars in the peppers, bringing out their inherent sweetness. Zucchini can be sliced into thick rounds or lengthwise and seasoned similarly, resulting in tender, charred pieces that beautifully complement any meat dish.
Corn on the cob can be grilled in the husk or wrapped in foil for a delightful smoky flavor. Grilling corn enhances its sweetness while adding a pleasing texture. These simple vegetable recipes ensure that your BBQ is well-rounded and visually appealing, catering to a variety of tastes.
Quick and Easy Salad Ideas to Freshen Up Your BBQ Feast
Salads provide a refreshing addition to any BBQ, and simple recipes can elevate your meal. A straightforward mixed green salad can be quickly prepared by tossing together greens, tomatoes, cucumbers, and a light vinaigrette. This dish adds a crisp texture and vibrant flavors to your BBQ spread.
Another quick salad option is a pasta salad, where cooked pasta is combined with diced vegetables, olives, and a tangy dressing. This dish can be prepared a day in advance, allowing the flavors to meld together and making it a convenient time-saver for busy BBQ days.
For a fruity twist, combine various seasonal fruits to create a refreshing fruit salad, garnished with mint for an extra touch. These salads not only enhance your BBQ offerings but also cater to lighter palates, ensuring everyone at your gathering has something delightful to enjoy.
Savory Breads and Rolls to Elevate Your BBQ Feast
Enhancing your BBQ experience with homemade bread and rolls can add a charming touch. Simple recipes for cornbread, Garlic bread, or soft dinner rolls pair wonderfully with your grilled meats.
To create cornbread, mix cornmeal, flour, eggs, and milk, then bake until golden brown. This dish is both sweet and savory, perfect for soaking up delicious sauces. Garlic bread is another crowd favorite—simply spread butter mixed with minced garlic over slices of French bread and toast them on the grill for an aromatic side.
For fluffy rolls, a simple recipe using flour, yeast, and butter can yield soft rolls ideal for sopping up BBQ sauce. These recipes are not only delectable but also provide a homemade touch to your BBQ, impressing and satisfying your guests.
Smart Strategies for Crafting Beginner-Friendly BBQ Recipes
How to Plan Your BBQ Menu for Maximum Enjoyment
A well-structured menu is critical for hosting a successful BBQ. When designing your menu, aim for a balance between meats, sides, and desserts to create a cohesive dining experience. Start by selecting your main proteins, such as chicken, ribs, or burgers, and then consider sides that will complement these choices.
For example, if you’re grilling ribs, pairing them with coleslaw and cornbread creates a classic BBQ experience that many diners appreciate. Additionally, keep your guests’ dietary needs and preferences in mind; incorporating a few vegetarian options ensures everyone feels included and satisfied. Desserts, such as grilled fruit or s’mores, can beautifully round off your meal. Planning ahead will streamline your cooking process, making the event enjoyable and stress-free.
Timing and Preparation Tips for a Seamless BBQ Experience
Proper timing and preparation are vital for a smooth BBQ experience. Start your prep the day before by marinating meats and chopping vegetables to save time on the day of the event. Setting up your grill area in advance, with all utensils and tools easily accessible, will allow you to focus on cooking rather than scrambling for items during the grilling process.
Aim to prepare your sides closer to serving time to ensure they remain fresh. Depending on the complexity of your menu, consider cooking some items while others are still grilling to enhance efficiency. For instance, if you are grilling chicken, you can have your salads and sides ready while the main dish cooks. This approach will help maintain a steady flow throughout the BBQ event, ensuring everything is served at its best.
How to Manage Leftovers and Clean-Up After Your BBQ
Effectively managing leftovers and cleaning up after your BBQ is essential for both safety and convenience. Store leftovers in airtight containers and refrigerate them promptly to prevent spoilage. Most grilled items can be safely stored and enjoyed for several days, making for easy meals later in the week.
When it comes to cleaning up, tackle the grill while it’s still warm; this makes removing residue much easier. Brush off the grates and use a mixture of water and vinegar to clean surfaces without resorting to harsh chemicals. Organizing your clean-up process can help you wrap up the event smoothly, allowing you to relax and savor the aftermath of your delicious BBQ.
Choosing the Best BBQ Tools for Your Grilling Journey
Selecting essential tools such as tongs, spatulas, and thermometers can significantly enhance your BBQ experience. Opt for long-handled tongs to protect your hands from heat, while a sturdy spatula is crucial for flipping burgers or handling delicate items. A high-quality meat thermometer will eliminate the guesswork in cooking, ensuring your meats are perfectly cooked and safe to eat.
Don’t overlook other valuable tools, such as grill brushes for cleaning and basting brushes for applying marinades. Investing in quality tools not only elevates your cooking experience but also ensures your BBQ preparations are efficient. Regular maintenance of these tools will extend their lifespan, ensuring they serve you well through many grilling seasons.
Fundamental BBQ Safety Tips for a Secure Grilling Environment
Creating a safe BBQ environment is of utmost importance. Begin with fire safety by keeping a fire extinguisher nearby and knowing how to use it effectively. When handling raw meat, always practice good food handling habits, such as using separate cutting boards and utensils to prevent cross-contamination.
Familiarize yourself with the specific safety requirements of your grill, whether it be charcoal, gas, or electric. Always check for gas leaks if utilizing a gas grill, and ensure your grill is positioned on stable, non-flammable surfaces. Maintaining a clean cooking area can help prevent grease fires, and never leave the grill unattended while in use. Adhering to these safety tips will foster a secure environment for you and your guests, allowing everyone to fully enjoy the BBQ experience.
Delicious and Easy BBQ Desserts to Try
How to Make Grilled Fruit Desserts for a Sweet Finish
Grilling fruit enhances its natural sweetness and introduces a smoky flavor that’s perfect for desserts. Fruits like peaches, pineapples, and bananas grill exceptionally well due to their sugar content, which caramelizes beautifully over heat.
To prepare grilled peaches, simply slice them in half, remove the pit, and brush the cut side with a bit of olive oil or butter before placing them on the grill. This process significantly enhances the flavors, and they pair wonderfully with a scoop of ice cream for a delightful dessert. Pineapples, sliced into rings, can be brushed with honey to further amplify their sweetness while grilling.
Bananas can be grilled in their skins; simply slice them down the middle, sprinkle with cinnamon, wrap in foil, and place on the grill. Grilling fruit not only offers a unique dessert option but also adds a refreshing note to your BBQ meal, leaving guests feeling fully satisfied.
Creating S’mores and Campfire Treats for Sweet Indulgence
S’mores are a classic BBQ dessert that evokes nostalgia and is incredibly easy to prepare. To create them, layer graham crackers, chocolate, and marshmallows, then place them over the grill or campfire until the chocolate melts and the marshmallows become gooey. For an added twist, consider incorporating peanut butter cups or flavored chocolates for extra richness and indulgence.
Other campfire treats can include grilled banana boats, where you slice a banana down the middle, stuff it with chocolate and marshmallows, wrap it in foil, and place it on the grill until everything melts and becomes deliciously gooey. These simple desserts are sure to impress your guests and provide a sweet conclusion to your BBQ gathering.
How to Set Up a DIY Ice Cream Sundae Bar for Fun Dessert Experiences
Ice cream sundaes are a straightforward yet satisfying dessert option for any BBQ. Setting up a DIY sundae bar allows guests to customize their creations, adding an engaging element to dessert time. Offer a variety of ice cream flavors, such as vanilla, chocolate, and strawberry, along with a selection of toppings like sprinkles, crushed cookies, fruits, and various sauces.
Don’t forget essentials like whipped cream and cherries for the classic sundae experience. Encourage creativity by providing unique options such as caramel sauce or peanut butter drizzle. This setup not only simplifies dessert preparation but also engages guests, making it a fun and enjoyable part of your BBQ event.
Frequently Asked Questions About BBQ
Which type of grill is best for beginners?
For beginners, a gas grill is often recommended due to its ease of use, precise temperature control, and quick start-up time. However, a charcoal grill can offer a richer flavor and a more hands-on experience for those eager to learn the art of BBQ.
What can I do to prevent my meat from drying out while grilling?
To prevent drying, marinate your meat before grilling and closely monitor cooking temperatures with a thermometer. Allowing meat to rest after cooking will help retain its juices, enhancing both flavor and moisture.
What are some simple BBQ sides to prepare?
Classic sides such as coleslaw, baked beans, and potato salad are easy to prepare and pair beautifully with any BBQ meal. Grilled vegetables also provide colorful and flavorful accompaniments that everyone will enjoy.
What is the most effective way to clean my grill after using it?
After grilling, use a grill brush to scrub the grates while they are still warm. For tougher residue, a mixture of water and vinegar can be effective. Always allow the grill to cool before performing a thorough clean.
What common mistakes should I avoid while grilling?
Common mistakes to avoid include failing to preheat the grill, overcrowding the grill surface, and neglecting food safety practices, such as cross-contamination and maintaining proper cooking temperatures.
Is it possible to grill frozen meat?
While it’s best to thaw meat for even cooking, you can grill frozen meat by adjusting cooking times. However, keep in mind that it may not achieve the desired quality or tenderness.
How long should I grill chicken thighs for optimal results?
Chicken thighs typically require about 30 to 40 minutes on the grill, depending on the heat level. Always verify that the internal temperature reaches 165°F for safe consumption.
What are some beginner-friendly meat cuts for BBQ?
Beginner-friendly cuts include chicken thighs, pork ribs, and flank steak. These options are forgiving and generally yield excellent results with basic grilling techniques.
How can I enhance the flavor of my BBQ dishes?
To elevate BBQ flavor, utilize marinades, rubs, and wood chips for smoking. Experimenting with different combinations can lead to delicious and unique flavor profiles that will truly impress your guests.
Are there vegetarian options suitable for BBQ?
Absolutely! Vegetarian options can include grilled vegetables, veggie burgers, and plant-based skewers. These choices ensure that everyone at your BBQ can enjoy a satisfying meal.
Connect with us on Facebook!
The Article Top Beginner-Friendly BBQ Recipes: Easy Grilling Ideas appeared first on https://pitmastersarsenal.com
The Article Beginner-Friendly BBQ Recipes: Simple Grilling Ideas Was Found On https://limitsofstrategy.com
-

BBQ Carving Knife Sharpening: Essential Tips for Success
Mastering the Art of BBQ Carving Knife Sharpness for Perfect Cuts
Identifying the Essential Traits of an Ultra-Sharp Knife
The sharpness of a knife is influenced by several critical factors, such as the angle and smoothness of its edge. Attaining the correct edge geometry is vital for effective cutting, which significantly enhances the carving process of meats with precision. To better understand knife sharpness, consider the following key components:
- Edge angle: A narrower angle usually results in a sharper knife, facilitating easier and more exact cuts.
- Edge smoothness: A finely polished edge minimizes resistance during cutting, thereby improving overall performance.
- Blade material: Premium steel retains sharpness longer than its lower-grade counterparts.
- Edge retention: Specific sharpening methods and blade materials contribute to prolonged sharpness.
- Maintenance frequency: Regular sharpening is essential to keep the knife in peak condition.
Grasping these elements is essential for both professional chefs and dedicated BBQ enthusiasts. A knife that maintains its sharpness not only performs better but also elevates your cooking experience. Sharp knives effortlessly slice through meats, ensuring that fibers are cleanly cut rather than torn, which is crucial for presenting BBQ dishes in an appealing manner.
The Indispensable Role of a Sharp BBQ Carving Knife
A sharp BBQ carving knife is a fundamental tool for any enthusiastic pitmaster. Its significance cannot be emphasized enough, as the precision and efficiency of your carving can greatly influence the overall quality of the meal served. Here are the primary advantages of maintaining a sharp knife:
- Clean cuts: A sharp knife smoothly slices through meat without shredding, providing beautifully presented portions that enhance the dining experience.
- Minimized meat wastage: Efficient cutting preserves more of the meat’s juices and flavors, enriching the overall taste.
- Enhanced presentation: Skillfully carved meats improve the visual appeal of your BBQ spread, leaving a positive impression on your guests.
- Increased safety: A sharp knife is less likely to slip, reducing the risk of accidents in the kitchen.
- Improved efficiency: Quick, precise cuts streamline the carving process, making your cooking sessions smoother and more enjoyable.
Employing a sharp knife not only elevates the quality of your BBQ dishes but also transforms your cooking experience into a more pleasurable and efficient endeavor. The right knife ensures you maximize the potential of your meats without sacrificing quality.
Recognizing the Signs Your Knife Needs Sharpening
Identifying the optimal moment to sharpen your BBQ carving knife is vital for maintaining its performance. Many cooks overlook this important aspect, leading to ineffective cutting and frustration during food preparation. Look for these indicators that your knife requires sharpening:
- Dull edges: If the blade feels rounded when you run your finger along it, this is a clear signal that sharpening is necessary.
- Difficulty slicing: Struggling to cut through meat is a strong indication of a dull knife.
- Uneven cuts: Inconsistent slices suggest that your knife may require sharpening.
- Resistance while cutting: Increased friction during cuts indicates that the edge is likely dulled.
- Visible damage: Any chips or nicks on the blade require immediate attention to prevent further issues.
By recognizing these warning signs early, you can avert more significant problems in the future, ensuring your BBQ carving knife remains a dependable tool in your culinary arsenal.
Effective Techniques for Sharpening Your BBQ Carving Knife

Numerous effective techniques exist for sharpening your BBQ carving knife, each providing unique advantages according to your skill level and preferences. Explore these popular methods for achieving a razor-sharp edge:
- Sharpening stones: Whetstones or diamond stones offer precise control over the sharpening angle, allowing for a customized edge.
- Professional services: Consulting a professional ensures your knife is expertly sharpened when you’re unsure of the process.
- Pull-through sharpeners: These tools provide convenience and speed, perfect for quick touch-ups.
- Stroping: Using a leather strop refines the edge post-sharpening, yielding a flawless finish.
- Electric sharpeners: For those prioritizing speed, electric options can swiftly restore an edge but may remove more material than necessary.
Selecting the appropriate sharpening technique hinges on the desired sharpness level and your familiarity with each method. Regular practice will enhance your skills, ensuring that your BBQ carving knife remains in peak condition.
Strategic Maintenance for Sustaining Knife Sharpness
Proper maintenance is crucial in ensuring your BBQ carving knife retains its sharpness over time. By implementing a few straightforward practices, you can significantly extend the knife’s life while maintaining peak cutting performance. Here are some effective maintenance strategies:
- Regular honing: Utilizing a honing rod realigns the blade’s edge between sharpening sessions, allowing it to stay sharp longer without losing its effectiveness.
- Proper storage: Store your knife in a dry environment, ideally within a knife block or on a magnetic strip to protect the blade from damage.
- Immediate cleaning: Clean your knife right after use to prevent build-up and rust formation, ensuring longevity.
- Avoid hard surfaces: Always use a cutting board to shield the edge from damage, preserving its sharpness.
- Periodic professional sharpening: Have your knife professionally sharpened once or twice a year to maintain optimal performance.
By adhering to these maintenance practices, you can ensure that your knife remains sharp and ready for all your BBQ adventures, enhancing both your efficiency and the quality of your meals.
Essential Equipment for Knife Sharpening Success
Exploring the Various Types of Sharpening Stones

Sharpening stones are vital tools for maintaining the sharpness of your BBQ carving knife. They come in various types, each serving different purposes and levels of sharpness. Understanding these distinctions can help you choose the most suitable stone for your needs. Here are common types of sharpening stones:
- Whetstones: Versatile and effective, available in various grits to address different sharpening requirements.
- Diamond stones: Renowned for their durability and speed, ideal for quickly honing edges.
- Oil stones: Require oil for lubrication and can provide a fine finish on the blade.
- Water stones: Soaked in water before use, they sharpen efficiently and leave a polished edge.
- Combination stones: Offering two grits in one unit, these stones are convenient for home use, accommodating varying sharpening needs.
Selecting the appropriate sharpening stone is essential for achieving the desired sharpness on your BBQ carving knife. Each stone type provides unique benefits, so consider your sharpening needs and preferences when choosing.
The Role of Honing Rods in Knife Maintenance
Honing rods are indispensable tools for preserving the edge of your BBQ carving knife. While they do not sharpen in the traditional sense, honing rods assist in realigning the blade’s edge, preventing it from dulling between sharpening sessions. The advantages of using a honing rod include:
- Edge alignment: Keeps the blade’s edge straight, which is crucial for making precise cuts consistently.
- Extended intervals between sharpening: Regular honing reduces the need for frequent sharpening sessions, saving you time and effort in the long run.
- Quick touch-ups: Ideal for on-the-spot maintenance during a BBQ, ensuring your knife is always prepared for use.
- Preservation of blade material: Honing removes less material than sharpening, prolonging the lifespan of your knife.
Incorporating a honing routine into your knife maintenance can save you time and enhance your cutting performance, making it an invaluable addition to your BBQ toolkit.
Evaluating Electric Sharpeners for BBQ Carving Knives
Electric sharpeners can be a convenient option for many home cooks and BBQ enthusiasts. They provide quick results and are user-friendly, yet they come with both advantages and disadvantages. Here’s a comparison between electric sharpeners and manual methods:
Electric sharpeners quickly restore a dull edge, appealing to those who prioritize speed and convenience. However, they may remove more material than necessary, potentially shortening the knife’s lifespan. Conversely, manual sharpening methods, such as using a whetstone, offer greater control over the sharpening angle and the amount of material removed. This precision enables a longer-lasting edge and is often favored by professional chefs.
Ultimately, the choice between electric and manual sharpeners depends on your sharpening needs and the time you are willing to invest in maintaining your BBQ carving knife.
Expert Tips for Sharpening Your BBQ Carving Knife
Insights from Professional Chefs on Sharpening Techniques
Professional chefs possess unique techniques for sharpening their BBQ carving knives to ensure optimal performance. Many emphasize the significance of maintaining the correct angle while sharpening, typically around 15 to 20 degrees for a BBQ carving knife. This angle strikes a balance between sharpness and durability, enabling the knife to handle tough meats without chipping.
For example, renowned BBQ chef John Doe from Memphis recommends using a water stone for its ability to create a razor-sharp edge while minimizing the risk of overheating the blade. He begins with a coarser grit to reshape the edge and gradually transitions to finer grits for polishing. Additionally, he advises consistently using a honing rod after each use to keep the blade aligned and sharp for extended periods.
Many chefs also suggest investing in a high-quality knife that retains its edge well, which reduces the frequency of sharpening needed. By implementing these techniques, home cooks can adopt professional insights into their knife maintenance routines, enhancing their BBQ carving skills significantly.
How to Maintain the Correct Angle for Effective Sharpening
Maintaining the appropriate sharpening angle is essential for achieving a sharp edge on your BBQ carving knife. To sharpen effectively, follow these actionable steps:
1. Determine the blade angle: Most BBQ carving knives require an angle between 15 and 20 degrees. Use a protractor or angle guide to establish the correct angle for your knife.
2. Position the knife: Securely hold the knife in one hand, ensuring the blade remains at the identified angle relative to the sharpening stone.
3. Utilize smooth strokes: Move the knife across the stone in a sweeping motion, applying consistent pressure while maintaining the angle. Repeat this motion for several passes on each side of the blade.
4. Assess sharpness: After several strokes, periodically test the edge for sharpness by slicing through a piece of paper. If the knife cuts cleanly, you’ve achieved the desired sharpness.By adhering to these steps, you can ensure that your BBQ carving knife remains sharp and effective, making your meat preparation more efficient and enjoyable.
Common Mistakes to Avoid During the Sharpening Process
Several common mistakes can occur during the sharpening process, leading to a poorly sharpened knife or even damage to the blade. Being aware of these pitfalls is crucial for achieving the best results. Here are some mistakes to avoid:
- Inconsistent angle: Sharpening at varying angles can create an uneven edge, reducing cutting efficiency and effectiveness.
- Applying excessive force: Pressing too hard can damage the blade and remove unnecessary material, leading to a shorter lifespan.
- Neglecting proper maintenance: Failing to hone regularly can lead to rapid dulling of the blade, requiring more frequent sharpening.
- Overlooking blade damage: If your knife has chips or nicks, sharpening may worsen these issues instead of resolving them.
- Ignoring stone maintenance: Using a dirty or worn sharpening stone can hinder the sharpening process, making it less effective.
By steering clear of these common mistakes, you can ensure that your BBQ carving knife remains sharp and functional, leading to improved outcomes in your BBQ preparation endeavors.
Your Complete Guide to Sharpening a BBQ Carving Knife
How to Prepare Your Knife for Effective Sharpening
Before sharpening your BBQ carving knife, it’s crucial to prepare it properly to ensure an effective sharpening process. Start by thoroughly cleaning the knife to remove any debris or residue from previous uses. Use warm, soapy water along with a soft cloth to wipe down the blade, ensuring that you pay attention to the handle and bolster as well.
After cleaning, dry the knife completely with a soft towel to prevent rust and create a safe sharpening environment. Inspect the blade for any visible damage, such as nicks or chips, as these may require specialized attention. It’s also wise to clarify your sharpening method and gather all necessary tools, such as your chosen sharpening stone, honing rod, and a stable workspace.
By adequately preparing your knife, you set the stage for an effective sharpening session that can lead to a well-maintained edge.
Correct Techniques for Using a Whetstone
Using a whetstone is one of the most effective methods for sharpening your BBQ carving knife, provided you follow the correct technique. Begin by soaking the whetstone in water for approximately 10-15 minutes to ensure it’s adequately lubricated. This lubrication is crucial for preventing heat buildup, which could potentially damage the blade.
Hold the knife at the correct angle—typically between 15 and 20 degrees—against the stone and place the blade’s heel at the starting point. With smooth, controlled strokes, move the knife across the stone while applying even pressure. Start with the coarse side of the stone to reshape the edge, then switch to the finer side for polishing. Repeat this process for both sides of the blade, ensuring you maintain the same angle throughout.
After several passes, check the sharpness of your knife by attempting to cut through a piece of paper. If it slices cleanly, your sharpening session has been successful. Finally, rinse both the knife and whetstone with water to remove any metal shavings and debris, ensuring optimal performance for future use.
Finalizing Your Knife Edge with a Honing Rod
After sharpening your BBQ carving knife, the concluding step is to refine the edge using a honing rod. This tool is essential for achieving a perfectly aligned blade, significantly enhancing cutting performance. Begin by holding the honing rod vertically, ensuring a firm grip on the handle. Position the knife’s blade against the rod at the correct angle, mirroring the angle used during sharpening.
With a gentle and controlled motion, sweep the blade down the rod in a smooth stroke, ensuring you cover the entire length of the edge. Repeat this process several times on each side of the blade. The honing rod will realign any misaligned edges created during the sharpening process, ensuring that your knife is perfectly prepped for your next BBQ session.
This final step guarantees that you maintain the sharpness achieved during sharpening and enhances your knife’s overall performance and longevity, leading to better results in your culinary endeavors.
The Impact of Knife Sharpness on BBQ Carving
The Connection Between Knife Sharpness and Meat Slicing Quality
A sharp BBQ carving knife greatly enhances the quality of your meat slicing. The primary advantage of a well-sharpened knife lies in its ability to slice through meat cleanly, preserving the juices and intensifying the flavor of the meat. When a knife is sharp, it effortlessly cuts through the fibers of the meat without tearing, maintaining both texture and moisture content.
The texture of sliced meat is crucial for an enjoyable dining experience. Slices made with a sharp knife are uniform and visually appealing, making them more attractive on the plate. Conversely, a dull knife can produce ragged cuts that appear unappetizing and may dry out the meat, resulting in a less enjoyable meal. Thus, sharpening your knife is essential for both flavor enhancement and presentation.
Safety Considerations to Remember with Sharp Knives
Contrary to common belief, a sharp knife is actually safer to use than a dull one. A dull knife requires more force to cut through meat, increasing the likelihood of slipping and causing injuries. A sharp knife, on the other hand, glides through the meat with minimal effort, allowing for greater precision and control.
Proper knife handling and technique also contribute significantly to safety. Always cut away from your body, maintain focus, and use a stable cutting surface to avoid accidents. By ensuring that your BBQ carving knife is sharp, you not only protect yourself, but you also make the entire cooking process more efficient and enjoyable.
Enhancing BBQ Presentation with Perfect Cuts
Presentation is a vital aspect of any BBQ meal, and the quality of your cuts plays a significant role in how your dish is perceived. Clean, sharp cuts enhance the visual appeal of your BBQ creations, making them appear professionally prepared. A sharp knife allows you to create uniform slices, whether it’s brisket, pork, or ribs, thereby adding to the overall aesthetic of your serving platter.
Moreover, well-cut meat is easier to serve and eat, improving the dining experience for your guests. The effort you invest in sharpening your knife pays off in the form of impressively presented dishes that capture attention and admiration at any BBQ gathering. Ultimately, a sharp knife elevates both the taste and visual appeal of your BBQ creations.
Proven Maintenance Strategies for BBQ Carving Knives
Effective Storage Techniques for Knife Longevity
Proper storage is essential for maintaining the sharpness and longevity of your BBQ carving knife. Incorrect storage can lead to blade damage, dulling it prematurely. Here are some effective storage techniques:
- Knife blocks: A wooden knife block protects the blades while ensuring they remain easily accessible for use.
- Magnetic strips: These keep knives visible and readily available while preventing blade contact with other surfaces, which can cause damage.
- Sheaths: Utilize blade sheaths to protect the edge when storing knives in drawers, ensuring they stay sharp and free from damage.
- Keep dry: Ensure that knives are stored in a dry area to prevent rust and corrosion, which can compromise the blade’s integrity.
- Avoid overcrowding: Store knives separately to prevent accidental edge nicks or damage, maintaining their effectiveness.
By implementing these storage practices, you can significantly extend the life of your BBQ carving knife and keep it in optimal condition for your next grilling session.
Establishing a Regular Honing Schedule
Creating a regular honing schedule is essential for maintaining the sharpness of your BBQ carving knife between sharpening sessions. Honing realigns the blade’s edge and minimizes the frequency of required sharpening, making it a practical aspect of knife maintenance. The recommended frequency for honing depends on usage, but generally falls within these guidelines:
- After every use: For avid BBQ enthusiasts, honing after each use keeps the blade aligned and ready for action.
- Weekly: For those who use their knife regularly, a weekly honing can help maintain edge alignment and performance.
- Monthly: For occasional users, honing once a month may suffice to keep the knife in shape.
- Before special occasions: Conduct a honing session before hosting events or BBQs to ensure optimal performance.
- After sharpening: Always hone your knife after sharpening to refine and finalize the edge effectively.
By establishing a consistent honing routine, you’ll guarantee that your BBQ carving knife remains sharp, safe, and ready for use whenever you need it.
Essential Cleaning and Care Practices for Longevity
Proper cleaning and care are fundamental for maintaining the sharpness and longevity of your BBQ carving knife. Immediately after use, clean your knife to prevent residue buildup, which can lead to rust and dulling of the blade. Use warm, soapy water along with a soft cloth to gently wash the blade, steering clear of abrasive materials that could scratch the surface.
Once cleaned, thoroughly dry your knife to prevent moisture-related issues. It’s also vital to store your knife properly, as discussed earlier, to protect the blade from damage. Additionally, consider avoiding harsh dishwashers, as they can cause wear and tear over time, compromising the knife’s integrity.
By incorporating these cleaning and care practices into your routine, you can ensure that your BBQ carving knife remains in top condition, ready for all your culinary adventures and BBQ gatherings.
The Benefits of Regular Knife Sharpening
Extending Your Knife’s Longevity Through Regular Maintenance
Regular sharpening significantly enhances the lifespan of your BBQ carving knife. By consistently maintaining a sharp edge, you prevent excessive wear on the blade. When a knife becomes dull, users often apply more force while cutting, which can damage the blade and lead to chipping or bending.
By keeping your knife sharp through regular sharpening, you not only sustain its effectiveness but also preserve the integrity of the blade materials. This practice ultimately saves you money over time, as you won’t need to replace your knife as frequently, ensuring you have a reliable tool at your disposal for many BBQs to come.
Boosting Efficiency in BBQ Preparation with a Sharp Knife
A sharp BBQ carving knife significantly enhances the efficiency of your BBQ preparation. With a sharp blade, you can slice through meat swiftly and cleanly, streamlining the overall cooking process. This efficiency allows you to spend more time enjoying your BBQ and less time grappling with dull knives that slow you down.
Consequently, your BBQ sessions can become more enjoyable and productive, making it easier to serve your guests promptly and efficiently. A sharp knife is truly a time-saving tool that can elevate your BBQ experience to new heights.
The Cost-Effectiveness of Regular Knife Maintenance
Maintaining the sharpness of your BBQ carving knife is a cost-effective practice. A well-maintained knife reduces the need for frequent replacements, ultimately saving you money over time. Instead of purchasing new knives every few years, regular sharpening extends the life of your existing tools, providing excellent value.
Moreover, investing in high-quality knives that can be sharpened effectively contributes to overall cost-effectiveness. High-quality knives are designed to withstand the sharpening process, allowing them to serve you well for numerous delightful BBQs to come without the need for frequent replacements.
Enhancing Kitchen Safety Through Knife Sharpness
A sharp knife contributes to safety in the kitchen and during BBQ preparations. It may seem counterintuitive, but sharp knives are less likely to slip and cause accidents. When a knife is dull, it requires more force to cut through meat, increasing the chances of losing control and accidentally injuring yourself.
By keeping your BBQ carving knife sharp, you enable more precise cuts, allowing for greater control during slicing. This focus on safety is crucial, especially when handling large cuts of meat or when you’re working quickly in a bustling BBQ environment.
Improving Cutting Precision Through Regular Sharpening
Regular sharpening ensures that your BBQ carving knife maintains a keen edge, facilitating more precise and controlled cuts. A sharp knife allows you to create uniform slices, which is particularly important for presentation and serving, making your dishes more appealing to guests.
Enhanced cutting precision allows you to showcase your culinary skills, impressing your guests with beautifully carved dishes that elevate your BBQ gatherings. A knife that retains its edge well contributes to an overall superior BBQ experience, making the effort of regular sharpening well worth your time and investment.
How to Select the Ideal BBQ Carving Knife
Understanding Blade Materials and Their Durability
When choosing a BBQ carving knife, the material of the blade plays a crucial role in its durability and performance. Two common materials are stainless steel and high-carbon steel, each offering distinct properties:
- Stainless steel: Recognized for its resistance to rust and corrosion, making it an excellent choice for outdoor use. However, it may demand more frequent sharpening compared to other materials.
- High-carbon steel: Offers superior sharpness and edge retention, although it can be more susceptible to rust if not properly cared for.
- Damascus steel: Combines aesthetics with functionality, known for its strength and ability to retain a sharp edge.
- Ceramic: Lightweight and retains sharpness exceptionally well but is more brittle and can chip easily if not handled with care.
- Composite materials: Often blend different metals, providing a balance of durability and performance, catering to various user preferences.
Taking these factors into account will assist you in selecting a BBQ carving knife that meets your specific needs and withstands the rigors of frequent use.
The Importance of Handle Comfort and Ergonomics
The handle of your BBQ carving knife is just as important as the blade itself. A comfortable, ergonomic handle minimizes fatigue during lengthy BBQ sessions while providing better control over your cuts, allowing for precision while preparing meals.
When choosing a knife, look for handles made from non-slip materials like rubber or textured plastics, which provide a secure grip even when wet. Additionally, consider the balance of the knife; a well-balanced knife feels light and easy to maneuver, allowing for extended use without discomfort or strain.
Investing in a knife with a comfortable handle can enhance your BBQ experience, making it easier to achieve precision cuts while minimizing the risk of strain or injury during food preparation.
The Influence of Size and Weight on Optimal Performance
The size and weight of your BBQ carving knife are essential factors to consider when making a selection. A knife that feels balanced in your hand will enable more controlled and precise cuts, enhancing your overall cooking experience.
Typically, a BBQ carving knife should be long enough to slice through large cuts of meat while remaining light enough for easy maneuverability. A good rule of thumb is to choose a knife that measures between 10 to 14 inches in length, providing ample reach without feeling cumbersome or awkward during use.
Ultimately, the right size and weight will depend on your personal preferences and the types of meats you typically carve. Testing different knives can help you find one that feels comfortable and effective in your hands, ensuring you can achieve the best results during your BBQ preparations.
Frequently Asked Questions About BBQ Carving Knives
How often should I sharpen my BBQ carving knife?
You should sharpen your BBQ carving knife every few months or whenever you notice it becoming dull. Regular honing can help extend the time between sharpening sessions, ensuring optimal performance and ease of use.
What is the best way to clean my BBQ carving knife?
Clean your BBQ carving knife using warm, soapy water and a soft cloth immediately after each use. Avoid abrasive materials that could scratch the blade, preserving its integrity and sharpness.
Can I use an electric sharpener on my BBQ carving knife?
Yes, electric sharpeners can be employed, but they may remove more material than necessary. For optimal results, consider utilizing a whetstone or honing rod for better control and precision.
What distinguishes honing from sharpening?
Honing realigns the blade’s edge without removing material, while sharpening shapes the blade and removes material to create a new edge, ensuring peak performance and longevity for your knife.
Is it safe to use a dull BBQ carving knife?
Using a dull knife can be unsafe as it requires more force, increasing the risk of slips and accidents. Always keep your knife sharp for better control and safety during use, particularly when handling large cuts of meat.
What features should I seek in a BBQ carving knife?
Look for high-quality materials, a comfortable handle, balanced weight, and a blade length of 10 to 14 inches for optimal performance and ease of use while preparing your BBQ dishes.
How can I tell when my knife needs sharpening?
Signs that your knife requires sharpening include difficulty slicing, dull edges, and uneven cuts. If you notice these indicators, it’s time to sharpen your knife for optimal performance and efficiency.
Can I sharpen my knife at home?
Yes, you can sharpen your knife at home using sharpening stones, honing rods, or pull-through sharpeners, depending on your skill level and preferences, ensuring it remains effective for all your culinary needs.
What angle should I use to sharpen my BBQ carving knife?
For BBQ carving knives, a sharpening angle of 15 to 20 degrees is recommended for optimal sharpness, ensuring a balance between precision and durability while handling various types of meats.
How can I maintain my BBQ carving knife effectively?
To maintain your knife, hone it regularly, clean it after each use, store it properly, and sharpen it as needed to ensure it stays sharp and effective for all your culinary endeavors and BBQ gatherings.
Connect with us on Facebook!
The Article How to Sharpen a BBQ Carving Knife: Essential Tips appeared first on https://pitmastersarsenal.com
The Article Sharpen a BBQ Carving Knife: Key Tips for Success Was Found On https://limitsofstrategy.com
-

Smoke a Prime Rib Perfectly: Your Ultimate Guide
Enhance Your Prime Rib Smoking Skills with Proven Techniques
Selecting the Optimal Cut of Prime Rib for Maximum Flavor During Smoking
Choosing the perfect cut of prime rib is essential for creating a flavorful and juicy smoked masterpiece. Focus on cuts that showcase excellent marbling and a generous fat cap, as these characteristics profoundly enhance both flavor and tenderness in the meat. The fat embedded in the marbling melts during cooking, imparting moisture and elevating the overall taste. Cuts such as the standing rib roast stand out for their rich, juicy results that are hard to resist. When purchasing prime rib, strive for USDA Prime or Choice grades to guarantee a top-tier culinary experience.
Additionally, consider the size of your cut; larger roasts typically require longer cooking times, making them well-suited for gatherings and celebrations. Always seek advice from your local butcher for their expert recommendations on the best options available, as they can guide you to the freshest and highest quality prime rib cuts for your smoking venture.
Mastering Trimming and Seasoning Techniques for Flavorful Prime Rib
Meticulously trimming excess fat from your prime rib is vital for achieving uniform cooking results and reducing flare-ups in your smoker. Aim to leave a quarter-inch layer of fat, which will render beautifully while smoking, adding both flavor and moisture to the meat. Once trimmed, generously season your prime rib with a blend of salt, pepper, and your preferred herbs to significantly enhance its flavor profile and overall appeal.
- Coarse sea salt
- Freshly cracked black pepper
- Garlic powder
- Onion powder
- Rosemary
- Thyme
- Smoked paprika
- Mustard powder
After seasoning, allow the meat to rest at room temperature for approximately one hour. This crucial step enables the seasoning to penetrate deeply into the meat, promoting even cooking throughout the roast and amplifying its overall flavor. Proper seasoning is the foundation of a delicious smoked prime rib, ensuring that every bite is packed with flavor.
Optimal Marination Time for Enhanced Flavor in Prime Rib
The duration for marinating your prime rib can vary based on your preference, but generally, a marination period of 24 hours is optimal for maximum flavor infusion. This timeframe allows the flavors to deeply penetrate the meat, enhancing both taste and tenderness significantly. If you prefer a dry rub, applying it the night before can yield outstanding results. Conversely, if you choose to use a marinade, ensure it contains an acid, such as vinegar or citrus juice, which tenderizes the meat while infusing it with flavor.
You might also consider adding ingredients such as soy sauce, Worcestershire sauce, or a splash of red wine to enrich the marination process. Always remember to store your marinated prime rib in the refrigerator to address any food safety concerns effectively. When it’s time to smoke, allow the meat to return to room temperature for about 30 minutes to ensure even cooking and optimal flavor development.
The Importance of Using a Meat Thermometer for Perfectly Cooked Prime Rib

Investing in a high-quality meat thermometer is crucial for achieving the desired doneness of your prime rib. Insert the thermometer into the thickest section of the rib, avoiding bones that can skew the readings. For a medium-rare finish, aim for an internal temperature of 125°F; this allows for carryover cooking, which will elevate the final temperature to approximately 130°F as it rests. Accurate temperature monitoring is essential for achieving the perfect doneness and ensuring a tender, juicy prime rib.
Opting for a reliable meat thermometer, particularly one with wireless capabilities, can significantly enhance your cooking experience by allowing you to track the temperature without opening the smoker. This method helps maintain a stable cooking temperature, ensuring that your prime rib is perfectly cooked every time.
Proven Strategies for Smoking Prime Rib to Achieve Perfection
Choosing the Ideal Wood for Smoking Prime Rib
The choice of wood for smoking can dramatically influence the flavor profile of your prime rib. Hickory and oak are among the most popular options, known for delivering a robust flavor that complements the richness of the meat. Hickory imparts a strong, smoky essence that enhances the overall experience, while oak provides a milder flavor, allowing the prime rib’s natural qualities to shine through.
If you’re seeking a touch of sweetness, consider utilizing fruitwoods like cherry or apple. These woods add a subtle sweetness and depth to the meat, creating a delightful flavor combination. Many seasoned pitmasters recommend blending hardwoods, often pairing hickory with applewood or cherry for a nuanced flavor profile that keeps your guests coming back for more.
Crucial Temperature Control Techniques for Optimal Smoking Results

Maintaining a consistent temperature in your smoker is vital when striving for perfectly smoked prime rib. Aim for a smoking temperature range of 225°F to 250°F. A dependable thermometer is essential, and you should be ready to adjust vents as required to keep the heat steady. Start by preheating your smoker, allowing it to stabilize before placing your prime rib inside to ensure optimal cooking conditions.
For charcoal smokers, consider employing a two-zone fire setup. This involves positioning the coals on one side while keeping the meat on the other side, allowing for indirect heat cooking. If you are using a pellet smoker, remain vigilant about pellet levels and ensure your feed system is functioning correctly to avoid any temperature fluctuations during the smoking process.
Avoiding Common Mistakes When Smoking Prime Rib for Best Results
One of the most significant pitfalls in smoking prime rib is over-smoking, which can result in a bitter taste, while under-smoking may leave the meat lacking flavor. It is essential to monitor the smoking process closely to achieve the perfect balance. Another frequent error is neglecting to let the meat rest post-smoking, which is vital for juice redistribution. Additionally, avoid using an excessive amount of wood in the smoker; the smoke should be thin and blue rather than thick and white, which could overwhelm the meat’s natural flavors.
Another common blunder is opening the smoker too frequently, which can lead to heat loss. Instead, rely on a good thermometer to check the internal temperature without lifting the lid. By steering clear of these common mistakes, you can ensure that your prime rib is both flavorful and perfectly cooked, making it a memorable dish for every occasion.
Preparing Your Smoker for Successful Prime Rib Smoking Adventures
Choosing the Right Smoker for Your Prime Rib Smoking Needs
When it comes to smoking prime rib, picking the right type of smoker can greatly influence your results and overall enjoyment. Electric smokers are often favored for their convenience and user-friendliness, making them ideal for novice smokers. While they maintain consistent temperatures, they may lack the deep, smoky flavor that traditional wood or charcoal smokers can provide.
Charcoal smokers are prized for their ability to impart a rich, deep flavor to the meat, although they require more expertise in temperature management. Pellet smokers offer a fantastic balance between convenience and flavor, utilizing wood pellets for fuel and providing automatic temperature control. Selecting the smoker that aligns with your cooking style and level of expertise will significantly enhance your prime rib smoking experience.
Steps for Preparing Your Smoker for Optimal Smoking Results
To achieve the best results, ensure that your smoker is clean and preheated before use. A dirty smoker can introduce undesirable flavors to your meat and disrupt airflow, leading to uneven cooking. Begin by cleaning the grates, ash pan, and any remnants from previous cooking sessions to create an ideal cooking environment.
Next, preheat your smoker to the desired temperature. If your smoker includes a water pan, fill it with water to maintain moisture throughout the smoking process. This moisture helps prevent the meat from drying out and enhances the overall texture of your finished product. Allow your smoker to stabilize before placing your prime rib inside to achieve optimal results.
Maintaining Consistent Smoke Levels During the Cooking Process
Consistent smoke levels are vital for imparting rich flavor to your prime rib. To achieve this, add wood chips or chunks as needed and monitor the smoke to prevent over-smoking. A general guideline is to use a handful of wood chips every hour, adjusting based on your preferred intensity of smoke flavor.
- Soak wood chips for at least 30 minutes before use to prolong smoke duration.
- Combine different wood varieties for a more complex flavor profile.
- Limit the size of wood chunks to promote even burning.
- Place wood chips directly on hot coals or in a smoker box for optimal smoke generation.
- Visually monitor smoke output; aim for thin, blue smoke.
- Quickly replace wood chips to minimize heat loss when checking smoke levels.
- Consider using a smoke tube to generate additional smoke flavor.
- Avoid overfilling the smoker with wood; often, less is more.
By maintaining a steady flow of smoke throughout the cooking process, you will ensure that your prime rib is infused with the irresistible smoky flavor that all barbecue enthusiasts crave.
Selecting the Right Wood Varieties for Smoking Prime Rib
Choosing the right types of wood, such as hickory, apple, or mesquite, based on the meat and desired flavor profile is crucial for an exceptional smoking experience. As previously mentioned, hickory imparts a strong, rich flavor while applewood offers a milder, fruity undertone that complements the natural sweetness of prime rib. Mesquite wood can provide a bold, intense smoke flavor, best used sparingly.
Experimenting with various wood combinations is key to discovering your favorite flavors. Start with familiar woods and gradually introduce new options into your smoking routine. Keeping a record of the wood types used, smoking duration, and resulting flavors will help you refine your ideal smoking profile over time.
Monitoring and Adjusting Temperature for Perfect Smoking Results
To maintain the ideal smoking temperature, utilize a reliable thermometer to monitor both the temperature of your smoker and the internal temperature of your prime rib. Adjust vents or settings as necessary to keep the smoker at a consistent heat level throughout the cooking process. Regularly check the smoker’s temperature, making adjustments to ensure it remains within your desired range.
If you are using charcoal smokers, consider the positioning of the coals and the airflow within the smoker. For those utilizing pellet smokers, be attentive to the pellet feed, ensuring there is enough fuel to uphold the desired temperature. Regular monitoring and timely adjustments will ensure a flawlessly smoked prime rib every time.
Executing the Smoking Process: Key Steps for Achieving Success
Proper Placement of Your Prime Rib in the Smoker
When it’s time to smoke your prime rib, carefully position it on the smoker grate, ensuring it does not touch the sides. This allows for optimal heat and smoke circulation around the meat. If smoking multiple pieces, a rib rack can maximize space and facilitate airflow, leading to more even cooking.
Always place the prime rib fat side up, allowing the fat to render down into the meat, which enhances both flavor and moisture retention. Close the lid and resist the temptation to open it frequently; every time you do, you lose valuable heat and smoke. Instead, wait for the designated cooking time to pass before checking on your delectable creation.
Strategies for Effectively Monitoring the Cooking Process
Utilize a meat thermometer to monitor the internal temperature of your prime rib throughout the smoking process. Aim for approximately 135°F for medium-rare, adjusting according to your preferred level of doneness. A thermocouple thermometer can provide quick readings, enabling you to track the meat’s progress without opening the smoker.
Pay special attention to the internal temperature, especially during the final hour of cooking. Keep in mind that the prime rib will continue to cook slightly after being removed from the smoker due to carryover cooking. This consideration is crucial for achieving your desired doneness while avoiding overcooking the prime rib.
Expected Duration for Smoking Your Prime Rib to Perfection
The smoking duration can vary significantly, typically ranging from 4 to 6 hours, depending on the size of the cut and the smoker’s temperature. A general guideline is to allow approximately 30 minutes of cooking time per pound of meat at a temperature of 225°F. Factors such as smoker type, temperature, and cut size will influence the overall duration.
For instance, a 5-pound prime rib may take around 2.5 to 3 hours, while a larger 10-pound roast could require closer to 5 hours. It’s critical to monitor the internal temperature rather than relying solely on time, as this ensures your prime rib reaches the perfect level of doneness, resulting in a tender and flavorful dish.
The Importance of Resting Your Prime Rib After Smoking
After smoking your prime rib, allowing it to rest for approximately 30 minutes is essential. This resting period enables the juices to redistribute throughout the meat, enhancing both flavor and tenderness. Resting is a vital step that should not be overlooked; slicing into the roast too soon can lead to a loss of those valuable juices, resulting in a drier final product.
Loosely cover the prime rib with foil during the resting period to keep it warm without causing steaming. This simple step guarantees a beautifully juicy and flavorful result that is sure to impress your family and friends at your next gathering, creating a memorable dining experience.
Research-Backed Benefits of Smoking Prime Rib to Perfection
Health Benefits of Savory Smoked Prime Rib
In moderation, smoked prime rib can fit into a balanced diet, providing high-quality protein and essential nutrients. It serves as an excellent source of protein, crucial for muscle repair and growth. Additionally, it contains vital nutrients such as iron, zinc, and B vitamins, which are important for energy metabolism and overall health.
While indulging in smoked prime rib can align with a healthy lifestyle, it is essential to complement it with plenty of vegetables and whole grains. Monitoring portion sizes and frequency can help mitigate concerns regarding the saturated fat content associated with red meat. Savoring prime rib on special occasions allows you to relish its rich flavors while maintaining an overall balanced diet.
How Smoking Enhances the Flavor Profile of Prime Rib
Smoking introduces a rich, smoky flavor profile that elevates the inherent taste of prime rib. The slow cooking process further tenderizes the meat, making it even more enjoyable to eat. The Maillard reaction that occurs during smoking creates a flavorful crust, sealing in moisture and ensuring a delightful eating experience.
The time it takes for the smoke to infuse its flavor into the meat can transform the prime rib into a culinary masterpiece, delivering a perfect blend of smoky, savory, and rich flavors. This process creates layers of taste that are challenging to replicate through other cooking methods, making smoked prime rib a favored choice among barbecue enthusiasts.
The Social and Cultural Significance of Smoked Prime Rib
Smoked prime rib often serves as the centerpiece for gatherings, fostering social connections and becoming a cherished tradition for many families. Whether it’s a holiday feast, a backyard barbecue, or a special occasion, serving smoked prime rib elevates the event and unites people around the table.
This tradition of smoking prime rib not only showcases culinary skills but also creates lasting memories and stories shared over a delicious meal. The act of preparing and enjoying prime rib together strengthens familial bonds and friendships, transforming it into more than just a meal; it becomes a shared experience filled with joy and connection that resonates with everyone present.
Final Steps and Best Practices for Your Prime Rib
Determining When Your Prime Rib Is Perfectly Done
Your prime rib is considered done when it achieves your desired internal temperature. Remove it from the smoker and allow it to rest before slicing. For medium-rare, aim for an internal temperature of 130°F to 135°F, as it will continue to cook while resting. Investing in a reliable thermometer ensures that you can accurately gauge doneness, which is vital for achieving the perfect outcome for your prime rib.
Once the prime rib has reached the desired temperature, transfer it to a cutting board and loosely cover it with aluminum foil to keep it warm during the resting phase. This downtime is crucial for producing a juicy, flavorful roast that your guests will rave about, ultimately enhancing the dining experience.
Proper Techniques for Resting Your Prime Rib
Allow the prime rib to rest for at least 20 minutes. This essential step helps redistribute the juices, ensuring a moist and flavorful outcome. Resting is often overlooked in the cooking process, but cutting into the meat too soon can lead to the loss of those delicious juices, resulting in a drier roast.
Lightly cover the meat with foil during this time to maintain warmth without steaming it. The resting period allows the fibers to relax, leading to a tender and juicy final product that will impress your guests and leave them craving more.
Best Serving Suggestions for Your Delectable Smoked Prime Rib
To create a well-rounded meal that highlights the richness of prime rib, serve it alongside classic sides such as mashed potatoes and roasted vegetables. A tangy horseradish sauce complements the smoky flavors beautifully, providing a zesty kick that enhances the overall dining experience. Pairing the prime rib with a bold red wine, like Cabernet Sauvignon, can elevate the meal even further, creating a delightful combination of flavors.
- Garlic mashed potatoes
- Roasted Brussels sprouts
- Grilled asparagus
- Creamed spinach
- Yorkshire pudding
- Horseradish cream sauce
- Au jus for dipping
- Fresh herb salad
The classic pairing of prime rib with these delectable side dishes creates an unforgettable meal that accentuates the rich flavors of the meat while introducing fresh and flavorful elements to the table, ensuring that every guest enjoys a memorable dining experience.
Techniques for Carving Your Prime Rib for Stunning Presentation
To carve your prime rib, utilize a sharp carving knife and slice against the grain for optimal tenderness. Start by carefully removing the bones, then cut into even slices for an appealing presentation. Carving against the grain ensures that each slice is tender, as it shortens the meat fibers, making them easier to chew and enhancing the overall dining experience.
Begin by placing the roast on a cutting board with the fat side facing up. Remove the ribs carefully by following the natural curve of the bone. Once the bones are removed, slice the meat into thick pieces for a hearty serving or thinner slices for a more delicate presentation. A well-carved prime rib not only looks impressive but also enhances the enjoyment of the meal for your guests.
Best Practices for Storing Leftover Prime Rib to Preserve Flavor
To maintain the quality and flavor of leftover prime rib, securely wrap it in foil or plastic wrap. Refrigerate for up to 3 days or freeze for up to 3 months. Proper storage ensures that your leftover prime rib retains its delicious flavor and moisture. When you are ready to enjoy it again, reheat gently to maintain moisture, ideally using an oven set to low heat.
Avoid microwaving, as this can lead to dryness. Instead, place the wrapped prime rib in a baking dish, adding a splash of broth or water to preserve moisture, and cover it loosely with foil. This method will allow you to savor the flavors of your perfectly smoked prime rib long after the initial feast, making every bite enjoyable.
Expert Tips and Tricks for Achieving Flawless Results with Your Prime Rib
Creating a Perfect Crust on Your Prime Rib
A beautifully developed crust adds both texture and flavor to your prime rib. Searing the meat before smoking can lock in juices and create a flavorful exterior. For those who prefer to skip the searing step, consider applying a high-heat finish during the last 30 minutes of cooking to promote caramelization, further enhancing the crust and overall flavor profile.
To achieve an even better crust, generously apply seasoning, which will not only flavor the meat but also contribute to an impressive bark. The combination of seasoning and smoking creates a delightful contrast between the crispy exterior and tender interior, making each bite a memorable experience that will leave your guests wanting more.
Utilizing a Water Pan for Enhanced Moisture During Smoking
Incorporating a water pan in your smoker helps maintain humidity, preventing the meat from drying out. Fill the pan with water or a flavorful liquid, such as apple juice or broth, to infuse subtle flavors during the smoking process. The steam generated from the water pan maintains moisture levels, ensuring that the prime rib remains juicy and succulent throughout the cooking experience.
Position the water pan close to the heat source to create steam that circulates throughout the smoker. This added moisture will enhance the overall texture of the smoked prime rib, resulting in a moist and flavorful final product that your guests will appreciate and rave about.
Encouraging Flavor Experimentation with Rubs and Sauces
Feel free to explore a variety of rubs and sauces to discover your perfect flavor combination. Experimentation can lead to new favorite tastes for your prime rib, enhancing the overall dining experience. A simple blend of salt and pepper can be elevated with the addition of herbs, spices, or even a hint of brown sugar for a sweet-and-savory balance that will delight your palate.
Consider incorporating marinades or glazes that can be brushed on during the final hour of smoking. For instance, a mixture of balsamic vinegar, honey, and mustard can create a delicious glaze that caramelizes beautifully on the crust. Continue experimenting until you find a combination that resonates with your taste buds and enhances the natural flavors of the prime rib.
Frequently Asked Questions About Smoking Prime Rib for Best Results
What is the best wood for smoking prime rib?
The best woods for smoking prime rib include hickory, oak, and fruitwoods such as apple and cherry. Each wood offers a unique flavor profile, allowing you to customize your smoking experience.
How long should I smoke a prime rib?
Smoking a prime rib typically takes 4-6 hours, depending on the size and smoking temperature, with approximately 30 minutes of cooking time per pound at 225°F.
What is the ideal temperature for medium-rare prime rib?
For medium-rare prime rib, the internal temperature should be around 130°F to 135°F. Remember that the temperature will rise slightly during the resting period, so keep that in mind when planning your cooking.
Can I smoke prime rib without a thermometer?
While it is possible to smoke prime rib without a thermometer, using one is highly recommended to ensure accurate doneness. Relying solely on cooking time can lead to overcooking or undercooking, compromising the quality of the meat.
What should I serve with smoked prime rib?
Classic sides such as garlic mashed potatoes, roasted vegetables, and horseradish sauce pair wonderfully with smoked prime rib, enhancing its rich flavors and complementing the meal beautifully.
How can I store leftover smoked prime rib?
Wrap leftover smoked prime rib tightly in foil or plastic wrap and refrigerate for up to 3 days or freeze for up to 3 months. Reheat gently to retain moisture and flavor, ensuring a delightful leftover experience.
Is it necessary to rest prime rib after smoking?
Yes, resting is essential as it allows the juices to redistribute, resulting in a more flavorful and tender roast. Rest for approximately 20-30 minutes before slicing to achieve optimal results.
Can I use a dry rub instead of marinating?
Absolutely! A dry rub can enhance flavor without the need for marinating. Apply it generously and allow the prime rib to sit for a while before cooking to achieve the best results.
What can I use if I don’t have a smoker?
If you lack a smoker, consider using a grill with indirect heat or an oven with a smoking box or wood chips to achieve a similar smoky flavor in your prime rib.
How can I achieve a crispy crust on my prime rib?
To achieve a crispy crust, sear the prime rib before smoking or increase the heat during the last 30 minutes of cooking to promote caramelization, resulting in a flavorful exterior that enhances the overall dish.
Connect with Us on Facebook for More Tips!
The Article How to Smoke a Prime Rib to Perfection: Ultimate Guide appeared first on https://pitmastersarsenal.com
The Article Smoke a Prime Rib to Perfection: The Ultimate Guide Was Found On https://limitsofstrategy.com
-
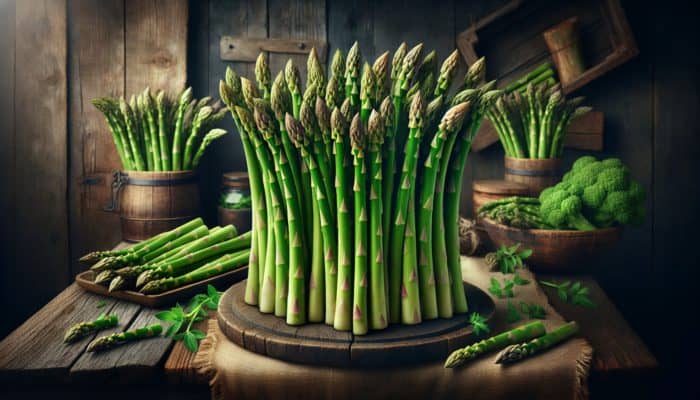
Grilled Asparagus with Lemon Zest: A Delicious Delight
Elevate Your Grilling Skills: The Ultimate Guide to Grilling Asparagus with a Zesty Lemon Infusion
Choosing the Perfect Asparagus for Your Grilling Experience
Selecting the right asparagus is crucial for achieving a delightful flavor and ideal texture in your grilled dish. Focus on fresh green asparagus that exhibits essential characteristics: firm and straight stalks, tightly closed tips indicating freshness, and a vibrant green color devoid of any browning or imperfections. The thickness of the stalks can significantly influence your cooking results; thicker stalks provide a satisfying crunch, while thinner ones cook quickly and offer a more tender bite. Here’s a comprehensive checklist of key attributes to consider when choosing your asparagus:
- Firm, straight stalks
- Tightly closed tips
- Bright green color with no discoloration
- Minimal blemishes or wrinkles
- Stalk thickness that matches your cooking style
- Fresh, appealing aroma
These qualities ensure that your asparagus delivers the best taste and texture possible. Whenever feasible, opt to purchase your asparagus from local farmers’ markets; the freshness can significantly enhance the overall flavor profile of your dish, promising a truly unforgettable culinary experience.
Mastering the Art of Preparing Lemon Zest for Enhanced Flavor
To truly elevate the flavor profile of grilled asparagus, mastering the preparation of lemon zest is essential. Utilize a fine grater to zest the lemon, being mindful to avoid the bitter white pith, which can adversely impact the flavor of your dish. The zest is loaded with vibrant oils that burst with citrus flavor, perfectly complementing your asparagus. For optimal flavor infusion, aim for approximately 1 tablespoon of lemon zest for each pound of asparagus. This ratio guarantees a bright, tangy kick that harmonizes beautifully with the natural earthy notes of the vegetable without overwhelming its inherent essence.
Incorporating zest can transform your dish entirely; however, its utility extends beyond grilling. Consider utilizing lemon zest in marinades, dressings, or as a finishing touch to other dishes where you seek an added layer of freshness and flavor.
Essential Techniques for Perfectly Grilling Asparagus to Perfection
Grilling asparagus requires meticulous attention to detail to achieve the perfect char while avoiding overcooking. Begin by preheating your grill to medium-high heat, which typically falls between 375°F and 450°F. This temperature range ensures proper caramelization while preserving a crisp texture. Once your grill is ready, place the asparagus directly on the grates for optimal grilling.
Grill the asparagus for about 5 to 7 minutes, turning it occasionally to ensure even cooking. Monitor the color closely; it should shift to a vibrant green while developing slight grill marks. Use tongs to gently rotate the spears to prevent breakage. Cooking times may vary based on stalk thickness; thinner stalks will cook faster, while thicker spears may require additional time. The ultimate objective is to achieve a tender yet crisp texture that showcases the natural flavors of the asparagus.
Key Seasoning Techniques for Outstanding Grilled Asparagus

After grilling, it’s essential to elevate your asparagus with the right finishing touches. Start by drizzling high-quality olive oil over the spears to enhance their flavors and add richness. Evenly distribute freshly grated lemon zest across the asparagus, ensuring that every piece is enveloped in its zesty aroma. Finally, season with salt and pepper to taste, creating a harmonious blend of flavors that elevates the overall profile of the dish.
You might also consider introducing complementary elements such as Parmesan cheese or crushed red pepper flakes to create additional layers of flavor. This final step not only enhances taste but also adds moisture, ensuring that the zest and seasoning adhere well while the asparagus retains its delightful grilled essence.
Expert Insights for Transforming Grilled Asparagus with a Zesty Lemon Flavor
Enhancing Flavor Profiles with Culinary Techniques and Ingredients
The versatility of grilled asparagus allows for a myriad of flavor enhancements that can beautifully complement the lemon zest. Experimenting with various herbs and spices can lead to delightful combinations that elevate the dish beyond the ordinary. For instance, adding minced garlic infuses a rich flavor, while fresh thyme introduces an earthy, aromatic profile that pairs splendidly with the zesty notes of lemon.
Real-world examples highlight the classic pairing of lemon zest and garlic, often utilized by chefs to create a vibrant side dish. Furthermore, a dash of sea salt not only amplifies the sweetness of the asparagus but also brightens the lemon’s flavor. For those with adventurous palates, incorporating smoked paprika can add a subtle smokiness that surprisingly complements citrus flavors, creating an exciting taste experience.
Exploring the Nutritional Benefits of Asparagus

Incorporating asparagus into your meals is not just about flavor enhancement; it also delivers numerous health benefits. Asparagus is rich in essential nutrients, including vitamins A, C, E, K, and several B vitamins, alongside dietary fiber and folate. These components significantly support overall health, enhancing immune function, promoting skin health, and aiding digestive wellness. Regular consumption of asparagus may contribute to lowering the risk of chronic conditions such as heart disease and certain types of cancer.
Moreover, the fiber content in asparagus promotes a healthy digestive system, while the antioxidants present combat oxidative stress. Thus, grilled asparagus stands out not only as a delicious addition to any meal but also as a nutritious one, establishing it as a valuable component of a balanced diet that supports overall wellness.
Professional Chef Tips for Enhancing Grilled Asparagus Flavor
Professional chefs frequently share invaluable tips for enhancing the flavor of grilled asparagus. A common recommendation is to marinate the asparagus before grilling. A simple mixture of olive oil, lemon juice, and a pinch of salt creates a marinade that draws out the natural flavors of the asparagus while adding a zesty layer.
To marinate effectively, combine 2 tablespoons of olive oil, the juice of one lemon, and a pinch of salt in a bowl. Toss the asparagus in this mixture, ensuring each spear is well-coated. Allow it to marinate for at least 15 minutes prior to grilling to maximize flavor absorption. This approach not only intensifies the taste but also aids in achieving a tender texture, making your grilled asparagus a standout dish for any gathering.
Creative Ways to Serve Grilled Asparagus with Zesty Lemon Flavor
Best Serving Suggestions for Grilled Asparagus as a Side Dish
Grilled asparagus with lemon zest serves as an ideal side dish, beautifully complementing a variety of main courses. Its bright, zesty flavor can elevate grilled meats or fish, providing a refreshing contrast that balances richer flavors. Consider pairing it with options such as:
- Grilled salmon
- Roasted chicken
- Steak or beef tenderloin
- Pork chops
- Stuffed bell peppers
- Marinated tofu
The combination of grilled asparagus with any of these primary dishes not only enhances the meal visually but also nutritionally, providing fiber and vitamins that complement the protein-rich elements on the plate, creating a well-rounded dining experience.
Incorporating Grilled Asparagus into Salads for Enhanced Flavor
Chopping grilled asparagus into smaller pieces opens up a world of salad possibilities. Tossed with mixed greens, cherry tomatoes, and a light lemon vinaigrette, the asparagus adds a delightful crunch and a burst of flavor. To deepen the taste, consider incorporating ingredients such as:
– Avocado for creaminess
– Feta cheese for tanginess
– Radishes for extra crunch
– Cucumbers for freshnessAdding these components not only enhances the overall flavor but also boosts the nutritional value, transforming your salad into a well-rounded meal option that satisfies both taste and health.
Unique Ways to Serve Grilled Asparagus as an Appetizer
For an elegant appetizer, present grilled asparagus spears on a platter accompanied by a lemon aioli dipping sauce. This combination is sure to impress guests at any gathering. To create a simple lemon aioli, mix 1/2 cup of mayonnaise, 1 clove of minced garlic, the juice of half a lemon, and a pinch of salt in a bowl. Whisk until smooth, adjusting the seasoning to your preference.
The creamy texture of the aioli pairs beautifully with the grilled asparagus, resulting in an indulgent yet straightforward starter that highlights seasonal flavors. Arrange the asparagus attractively on a serving dish, making it visually appealing and inviting for your guests.
Incorporating Grilled Asparagus into Pasta Dishes for Added Nutrition
Grilled asparagus can be seamlessly integrated into various pasta dishes, enhancing both flavor and nutrition. Toss the asparagus with your favorite pasta, olive oil, minced garlic, and freshly grated Parmesan for a light yet satisfying meal. This combination allows the asparagus to shine while providing a hearty base for the dish.
Other pasta dishes that work harmoniously with grilled asparagus include:
- Fettuccine with lemon cream sauce
- Pasta primavera featuring mixed vegetables
- Orzo salad with feta and olives
- Spaghetti aglio e olio with garlic and oil
These variations introduce differing textures and flavors, allowing for creative culinary exploration while showcasing the versatility of grilled asparagus in various culinary contexts.
Brunch Ideas Featuring Grilled Asparagus
For a delightful brunch dish, consider incorporating grilled asparagus into a frittata or quiche. Its fresh, vibrant flavor pairs exquisitely with eggs, creating a dish that feels sophisticated yet remains easy to prepare. To enhance the dish, think about adding ingredients such as cheese, sun-dried tomatoes, or herbs like dill or chives.
The inclusion of grilled asparagus not only boosts the nutritional profile of your brunch but also creates an eye-catching presentation. Serve alongside crusty bread or a light salad for a complete meal that will impress guests and family alike, ensuring a memorable dining experience.
Ideal Seasonings for Grilled Asparagus with Zesty Lemon Flavor
The Importance of Classic Salt and Pepper as Fundamental Seasonings
A fundamental yet effective seasoning approach for grilled asparagus involves a straightforward blend of salt and pepper. This combination enhances the natural flavors of the asparagus and the zest of the lemon without overshadowing them. When grilling, opt for a coarse salt, such as sea salt or kosher salt, as these varieties provide a delightful crunch and burst of flavor that can significantly elevate the dish.
The key is to season the asparagus prior to grilling; a sprinkle of salt and pepper amplifies the sweetness of the spears, allowing their natural flavors to shine. Aim for approximately 1/4 teaspoon of salt per pound of asparagus, adjusting based on personal taste preferences.
Enhancing Grilled Asparagus with Fresh Herb Infusions
Incorporating fresh herbs can introduce an exciting new dimension to grilled asparagus with lemon zest. Herbs like parsley, dill, or basil complement the dish exceptionally well, offering aromatic notes that enhance the citrus flavors. Finely chop the herbs and sprinkle them over the asparagus just before serving for a fresh burst of flavor that invigorates the dish.
Different herbs can dramatically alter the taste profile; for instance, dill introduces a fresh, slightly tangy note, while basil adds a hint of sweetness. Experimenting with herb combinations can lead to delightful discoveries, allowing you to tailor the flavor to your liking and preferences.
Adding Spice to Grilled Asparagus for Extra Flavor
For those who appreciate a bit of heat, consider adding spicy elements to your asparagus dish. A pinch of red pepper flakes or a dash of your favorite hot sauce can provide a zesty kick that contrasts beautifully with the lemon zest. The warmth enhances the dish, creating a more layered and engaging flavor profile that excites the palate.
Here’s a list of spicy seasonings that pair well with asparagus:
- Crushed red pepper flakes
- Cayenne pepper
- Hot paprika
- Chipotle powder
- Harissa paste
These additions can transform your grilled asparagus into a bold statement dish that’s perfect for those looking to spice things up during their meal.
How Garlic and Parmesan Elevate Grilled Asparagus to New Heights
Incorporating minced garlic and grated Parmesan cheese into your grilled asparagus adds a rich, savory depth that beautifully complements the vegetable. For optimal results, sprinkle these ingredients over the asparagus before grilling. The garlic infuses the spears with a robust aroma, while the Parmesan contributes a salty, umami punch that enhances the overall flavor.
Consider merging garlic and Parmesan with a drizzle of olive oil for an even more enhanced flavor experience. This combination not only elevates the taste of the asparagus but also creates a visually appealing presentation, with melted cheese slightly clinging to the spears, adding to the allure of the dish.
Exploring Citrus Variations for Grilled Asparagus Excitement
While lemon zest is a standout option, experimenting with different citrus zests can introduce a refreshing and tangy twist to your dish. Zests from fruits like lime or orange can brighten the flavor, providing a delightful contrast to the earthy notes of asparagus. Combining lemon and lime zest, for instance, adds depth and complexity that invigorates the palate.
Feel free to mix and match various citrus zests to discover the ideal balance that suits your taste preferences. This playful approach keeps the dish lively and offers endless opportunities for flavor exploration and culinary creativity.
Research-Backed Health Benefits of Grilled Asparagus with Zesty Lemon Flavor
The Health Benefits of Antioxidant Properties in Asparagus
Asparagus is well-known for its antioxidant properties, which play a pivotal role in combating oxidative stress within the body. Antioxidants are essential for neutralizing free radicals, thereby reducing the risk of chronic diseases. The addition of lemon zest further amplifies these benefits by providing a significant source of vitamin C, renowned for its immune-boosting and skin-health-promoting qualities.
Research indicates that combining asparagus with lemon zest not only preserves the nutritional integrity of the vegetable but also enhances its health benefits. This powerful combination positions grilled asparagus as not merely a flavorful dish but also a crucial addition to a health-conscious diet, making it an intelligent choice for those prioritizing wellness.
The Role of Asparagus in Supporting Digestive Health
The fiber content in asparagus is instrumental in promoting healthy digestion by encouraging regular bowel movements and preventing constipation. Furthermore, lemon zest can stimulate the production of digestive juices, improving the body’s ability to break down food efficiently. Together, asparagus and lemon zest create a potent duo that supports the digestive process.
Incorporating this combination into your meals can significantly aid in maintaining digestive health and enhancing overall wellness. Regularly consuming grilled asparagus with lemon zest can be especially beneficial for individuals looking to improve their digestive efficiency and comfort.
How Grilled Asparagus Supports Your Weight Management Goals
In the context of weight management, grilled asparagus with lemon zest stands out as an excellent choice. This dish is low in calories while being packed with nutrients, providing essential vitamins and minerals without contributing to excessive calorie intake. This makes it an ideal addition to any diet focused on maintaining or losing weight.
The fiber found in asparagus contributes to feelings of fullness, effectively reducing the likelihood of overeating. Coupled with the bright flavors of lemon zest, this dish can satisfy cravings without compromising your dietary goals, making it an essential component of a balanced diet that supports healthy living.
Avoiding Common Mistakes When Grilling Asparagus with Zesty Lemon Flavor
Strategies to Prevent Overcooking Your Asparagus
One of the most prevalent mistakes when grilling asparagus is overcooking it. While the goal is to achieve a tender texture, overcooking can result in mushiness and a loss of flavor. The best indicator of perfectly grilled asparagus is its vibrant green color and slight char, while still maintaining a crisp bite.
To avoid overcooking, closely monitor the grilling process and test for doneness at the 5-7 minute mark. Remember that thicker stalks may require more time, making it crucial to adjust your cooking duration according to the thickness of your asparagus.
Understanding the Impact of Excessive Lemon Zest
While lemon zest adds a delightful flavor, using too much can overpower your dish. It’s essential to apply it judiciously to maintain a balanced taste. The ideal ratio of lemon zest to asparagus is around 1 tablespoon of zest for every pound of asparagus, ensuring the zest enhances the dish without overshadowing the natural flavor of the vegetable.
Excessive zest may mask the earthy qualities of the asparagus, leading to an unbalanced dish. To ensure you’re using the appropriate amount, start with a small quantity and taste; you can always add more if necessary, allowing for a well-rounded flavor profile.
The Importance of Proper Seasoning for Grilled Asparagus
One cannot underestimate the significance of seasoning grilled asparagus. Neglecting to season it can lead to a bland dish, undermining the potential flavors of both the asparagus and the lemon zest. A simple seasoning of salt and pepper can profoundly enhance the overall flavor of the dish.
For best results, season the asparagus with salt and pepper before grilling, and consider adding additional flavors, such as garlic or herbs, to create a more complex flavor profile. The consequences of under-seasoning can lead to a lackluster dining experience, so don’t overlook this vital step in the cooking process.
Creative Variations to Elevate Grilled Asparagus with Zesty Lemon Flavor
Incorporating Cheese into Your Grilled Asparagus Dish
Incorporating cheese into your grilled asparagus can introduce a savory twist that enhances the overall dish. Sprinkling grated Parmesan or crumbled feta over the warm asparagus allows the cheese to melt slightly, creating a rich, creamy texture that beautifully complements the crispness of the spears.
Various cheese types can work well, including goat cheese or blue cheese, each bringing distinct flavors to the table. The contrast between the tangy cheese and the bright lemon zest can create an exciting flavor dynamic that elevates your dish to new culinary heights.
Adding Nuts for Extra Flavor in Grilled Asparagus
Integrating toasted nuts, such as almonds or pine nuts, introduces a delightful crunch and flavor complexity to your grilled asparagus. Nuts not only enhance the dish’s texture but also provide healthy fats, making it a more nutritious option overall.
For the best results, lightly toast the nuts in a skillet prior to sprinkling them over the asparagus after grilling. This process amplifies their flavor, creating a charming contrast with the zesty asparagus. The combination of nuts and asparagus culminates in a satisfying dish that is visually appealing and delicious, perfect for impressing your guests.
Creating a Flavorful Medley by Mixing Grilled Asparagus with Other Vegetables
Grilling asparagus alongside other vegetables can create a colorful and flavorful medley. Bell peppers, zucchini, and cherry tomatoes make excellent companions for asparagus, adding diversity in taste and texture to the dish.
This combination not only enhances the visual appeal of your plate but also allows for a variety of flavors that can cater to different palates. Consider drizzling the mixed vegetables with olive oil and a sprinkle of salt before grilling to create a harmonious dish that celebrates the flavors of seasonal produce.
Proper Storage and Reheating Techniques for Grilled Asparagus with Zesty Lemon Flavor
Best Storage Techniques for Leftover Grilled Asparagus
To maintain the freshness of your grilled asparagus, it’s vital to follow proper storage techniques. Store any leftover grilled asparagus in an airtight container in the refrigerator, where it can stay fresh for up to 3 days. This method helps preserve the flavor and texture, allowing you to enjoy the dish later without significant degradation.
Avoid leaving grilled asparagus at room temperature for extended periods, as this can lead to spoilage. Additionally, consider keeping the asparagus unseasoned until you’re ready to reheat to maintain the integrity of the flavors and overall quality.
Optimal Reheating Methods for Grilled Asparagus
When it comes to reheating grilled asparagus, it’s essential to do so gently to prevent it from becoming soggy. One effective method is to reheat in a skillet over medium heat for a few minutes until warmed through. Alternatively, you can place the asparagus in the oven at 350°F for a few minutes as well.
Both methods allow you to quickly warm the asparagus without compromising its texture and taste. Avoid using the microwave, as it can lead to steam buildup and result in a mushy texture, detracting from the original grilling experience.
Freezing Grilled Asparagus for Future Enjoyment
If you have surplus grilled asparagus, freezing can be a practical option for future enjoyment. However, it requires a brief preparation step: blanch the asparagus briefly in boiling water for 2-3 minutes before freezing. This process helps preserve the texture and flavor during storage, ensuring you can enjoy it later.
Once blanched, immediately transfer the asparagus to an ice bath to halt the cooking process. After cooling, pat the asparagus dry and place it in freezer-safe bags or containers. When properly stored, grilled asparagus can last up to 3 months in the freezer. When you’re ready to use it, thaw it in the refrigerator overnight and reheat as desired for a delightful dish.
Enhancing Flavor When Reheating Grilled Asparagus
To improve the flavor of reheated grilled asparagus, consider adding a sprinkle of fresh lemon zest or a drizzle of olive oil just before serving. This revitalizes the flavors and brings back the bright notes that may have diminished during storage, ensuring a delightful tasting experience.
By following these straightforward steps, you can ensure that your grilled asparagus retains its deliciousness, providing a delightful addition to your meals even after being stored.
Frequently Asked Questions about Grilled Asparagus
How do I choose the best asparagus for grilling?
Look for firm, straight stalks with tightly closed tips and a vibrant green color. Avoid any that appear limp, wilted, or have browning.
What’s the best way to prepare lemon zest?
Use a fine grater to remove the colored part of the lemon peel, avoiding the bitter white pith. About 1 tablespoon of zest is ideal for enhancing flavor.
How long should I grill asparagus?
Grill asparagus for 5-7 minutes on medium-high heat, turning occasionally. Thicker stalks may take a bit longer, so monitor for doneness.
What dishes pair well with grilled asparagus?
Grilled asparagus is a versatile side that pairs excellently with grilled meats, fish, pasta dishes, salads, and even as an appetizer with dips.
Can I marinate asparagus before grilling?
Yes, marinating asparagus in olive oil, lemon juice, and salt for 15 minutes can enhance its flavor and tenderness before grilling.
What are the health benefits of asparagus?
Asparagus is high in vitamins A, C, E, K, fiber, and folate, supporting immune function, digestive health, and overall nutrition.
How should I store leftover grilled asparagus?
Store leftover grilled asparagus in an airtight container in the refrigerator for up to 3 days to maintain freshness and texture.
Can I freeze grilled asparagus?
Yes, you can freeze grilled asparagus. Blanch it briefly before freezing to preserve its texture and flavor, and store for up to 3 months.
What are common mistakes when grilling asparagus?
Common mistakes include overcooking, using too much lemon zest, and neglecting to season properly, all of which can detract from the dish’s flavor.
What are some creative variations of grilled asparagus?
Consider adding cheese, nuts, or mixing with other vegetables. These variations enhance flavor and texture, making the dish even more enjoyable.
Connect with us on Facebook!
The Article Grilled Asparagus with Lemon Zest: A Flavorful Delight appeared first on https://pitmastersarsenal.com
The Article Grilled Asparagus with Lemon Zest for a Tasty Treat Was Found On https://limitsofstrategy.com
-

Seaweeds for Healthy and Flavorful BBQ Options
Explore the Savory Benefits of Seaweed in Your BBQ Recipes
Understanding Seaweed: A Must-Have Ingredient for BBQ Aficionados
Seaweed, a versatile form of marine algae, has gained immense popularity as a flavorful and nutritious addition to BBQ cooking. Its extraordinary ability to enhance dishes with rich depth and complexity makes it a crucial ingredient for grilling enthusiasts. So, what makes seaweed a transformative element in BBQ recipes? Here are several compelling benefits:
- Rich in Nutrients: Seaweed boasts an impressive array of essential vitamins and minerals, including iodine, calcium, and iron, all of which are essential for supporting overall health and well-being.
- Low in Calories: This makes it an ideal ingredient for those who wish to maintain a healthy diet while indulging in delicious meals.
- Umami Flavor: Seaweed is naturally rich in umami, which amplifies the savory essence of grilled meats and vegetables, enhancing the overall dining experience.
- Antioxidant Properties: It is packed with antioxidants that help combat oxidative stress during the grilling process, resulting in healthier cooking outcomes.
- Sustainable Choice: With minimal environmental impact, seaweed farming presents a smart choice for eco-conscious cooks who prioritize sustainability.
- Diverse Usage: Seaweed can be seamlessly integrated into marinades, rubs, or served alongside grilled dishes, elevating flavor profiles effortlessly.
Given these remarkable benefits, it’s evident that seaweed not only enhances BBQ flavors but also promotes a healthier lifestyle, establishing itself as an essential ingredient in your grilling toolkit.
Selecting the Perfect Seaweed Varieties for Your BBQ Cooking Needs
When it comes to BBQ, not all seaweeds are created equal. Each variety contributes its own unique flavors and textures to the grilling experience. Here’s a closer examination of some popular seaweed types to consider for your next BBQ:
- Nori: Famous for its use in sushi, nori adds a delicate umami note to BBQ dishes and is perfect for wraps or as a seasoning element.
- Kelp: Known for its rich umami flavor and mineral content, kelp shines in marinades and can also be grilled to impart a delightful smoky essence.
- Dulse: With its sweet and smoky flavor profile, dulse is ideal for rubs and sauces, offering a unique twist to your BBQ meats.
- Wakame: Frequently featured in salads, wakame can be charred to create a flavorful addition to grilled vegetables, enhancing their taste.
- Irish Moss: This variety provides a subtle flavor and is well-suited for blending into sauces or marinades for added depth.
By understanding the distinct characteristics of these various seaweeds, you can choose the perfect one for your BBQ recipes, enriching both their taste and health benefits.
Mastering the Art of Preparing Seaweed for BBQ Cooking
Preparation is key when it comes to incorporating seaweed into BBQ dishes. Properly preparing seaweed ensures that its flavors complement, rather than overpower, the main ingredients. Here’s how to effectively prepare seaweed for your BBQ:
- Rinse Thoroughly: Always rinse dried seaweed under cold water to eliminate any salt or impurities before using it in your recipes.
- Soak if Necessary: Certain seaweed types, like nori, may benefit from a brief soak in warm water to soften them, making them easier to work with.
- Chop or Tear: Depending on your intended use, chop or tear the seaweed into smaller pieces for even distribution in marinades or rubs.
- Toast for Extra Flavor: Lightly toasting seaweed in a dry pan can enhance its flavor, making it even more aromatic when added to BBQ dishes.
By following these preparation techniques, you can ensure that seaweed enhances your BBQ experience, adding layers of flavor and nutritional benefits to your meals.
Expert Insights on Selecting the Best Seaweeds for Flavorful and Nutritious BBQ

Criteria Used by Culinary Experts to Choose Optimal Seaweeds for BBQ
Chefs and nutritionists utilize specific criteria when selecting the best seaweeds for BBQ. They typically evaluate flavor, nutritional content, and sustainability during their selections. For example, chefs at reputable restaurants often prefer local varieties to elevate their dishes while supporting sustainable fishing practices. A renowned BBQ chef may choose dulse for its sweet and smoky flavor, while another might select kelp for its robust umami profile.
Real-world examples demonstrate that expert selections can vary based on regional availability and specific BBQ styles. For instance, chefs in the Pacific Northwest often use kombu to enhance broths and marinades, while dulse is favored in New England for its unique taste and health benefits. This approach not only enhances culinary creations but also supports local economies.
Ultimately, the best seaweed aligns with culinary goals while being both sustainable and flavorful. By understanding these expert selections, home cooks can replicate high-quality BBQ experiences in their own kitchens.
Health Benefits of Incorporating Seaweed into Your BBQ Dishes
Integrating seaweed into your BBQ meals goes beyond merely enhancing flavor; it significantly improves the nutritional profile of your food. Seaweed is a nutritional powerhouse, offering numerous key benefits that elevate the quality of your meals.
To begin with, seaweed is an exceptional source of essential vitamins and minerals, including vitamins A, C, E, and K, along with minerals like magnesium and calcium. These nutrients are crucial for maintaining overall health, playing vital roles in everything from bone strength to immune system function. Additionally, seaweed is abundant in iodine, which is essential for thyroid health, making it a valuable addition to any dietary plan.
Moreover, the fiber content in seaweed promotes digestive health, acting as a prebiotic that supports gut function. This is especially important since BBQ meals can sometimes be heavy; integrating seaweed can help balance the digestive impact. Research indicates that adding seaweed to grilled dishes can substantially enhance their nutritional value, providing a delicious way to include healthy ingredients in your meals.
Innovative Techniques Used by Professionals to Incorporate Seaweed into BBQ

Culinary professionals employ a variety of creative techniques to incorporate seaweed into BBQ recipes, maximizing both flavor and health benefits. One popular method involves using seaweed as a flavorful base for marinades. For example, blending kelp with soy sauce, garlic, and ginger creates a rich marinade that infuses meats with deep umami flavor.
Another technique is using seaweed as a finishing touch. Chefs often sprinkle toasted dulse flakes over grilled vegetables or proteins, adding a delightful crunch and a burst of flavor just before serving. This not only enhances the dish’s visual appeal but also creates a sensory experience that elevates the meal.
Lastly, experts recommend pairing seaweed with complementary ingredients to achieve harmonious flavor profiles. For instance, combining nori strips with grilled fish or adding wakame to vegetable skewers enhances the overall flavor without overwhelming the palate. By implementing these techniques, home cooks can confidently incorporate seaweed into their BBQ repertoire, transforming ordinary dishes into extraordinary culinary delights.
Top Seaweed Varieties for Elevating BBQ Flavor
When selecting the ideal seaweed for BBQ, several varieties stand out due to their distinct flavors and health benefits. Among these, nori, kelp, and dulse are frequently highlighted by culinary professionals.
Nori, with its mild umami flavor, is particularly versatile and can be utilized in wraps, as a garnish, or blended into marinades. Its ability to enhance flavors without overshadowing other ingredients makes it a staple in BBQ recipes. Kelp is renowned for its deep, savory taste and is often used in marinades to enrich the flavor profile of grilled meats with its robust umami notes.
Dulse offers a unique sweet and smoky flavor that pairs beautifully with various meats, making it an excellent choice for BBQ rubs and sauces. Each of these seaweed varieties brings something special to the table, inviting creativity and exploration in BBQ cooking.
How Seaweed Contributes to BBQ Sustainability Efforts
Incorporating seaweed into BBQ practices promotes sustainability in several impactful ways. As a rapidly growing marine organism, seaweed requires no freshwater, fertilizers, or pesticides, making its cultivation significantly more environmentally friendly than traditional crops. This drastically reduces the carbon footprint associated with food production.
Moreover, seaweed farming can enhance coastal ecosystems by providing habitats for marine life and absorbing excess nutrients that contribute to ocean pollution. As consumer demand for sustainable food options continues to rise, chefs and restaurants that integrate seaweed into their menus can attract eco-conscious diners while positively impacting the environment.
By embracing seaweed in BBQ, cooks not only create flavorful dishes but also support practices that protect our planet. This alignment with sustainability trends reinforces the notion that delicious food can also be responsibly sourced.
Exciting Seaweed Varieties to Experiment with in BBQ Cooking
Nori: The Essential Ingredient for BBQ Flavor Enhancement
Nori is arguably the most recognized seaweed variety, particularly in the culinary realm, where it plays a pivotal role in sushi. Its versatility extends well beyond sushi, making it an invaluable ally in BBQ cooking. Nori imparts a subtle umami flavor to dishes, enhancing the overall taste without overpowering other elements.
To utilize nori in BBQ, consider incorporating it into wraps, where grilled proteins and vegetables can be combined with nori sheets for a unique handheld dish. Additionally, crumbled nori can be sprinkled over grilled fish or vegetables, adding a delicate touch that elevates the meal’s flavor profile. This adaptability makes nori a go-to seaweed for many chefs and home cooks alike.
Furthermore, nori is incredibly easy to prepare. It typically requires just a quick rinse before use and can be seamlessly integrated into various recipes, showcasing its convenience and flavor-enhancing qualities. This combination of flavor and simplicity makes nori a staple in any BBQ enthusiast’s kitchen.
Kelp: The Umami Powerhouse for BBQ Dishes
Kelp is another powerhouse when it comes to BBQ. Known for its robust umami flavor, kelp is frequently used to elevate the taste of marinades and rubs. Its thick, leafy texture makes it ideal for infusing flavors into meats, particularly during longer cooking processes such as slow grilling or smoking.
One effective way to use kelp is to create a marinade that combines kelp with garlic, soy sauce, and ginger. This mixture not only enhances the flavor of meats but also infuses them with essential nutrients. Grilling meats marinated with kelp can lead to a savory, flavorful, and deeply satisfying BBQ experience.
Additionally, kelp is not just a flavor enhancer; its health benefits are considerable. Rich in minerals and vitamins, it adds nutritional value to any grilled dish. Incorporating kelp into your BBQ repertoire not only boosts taste but also supports a healthier lifestyle.
Dulse: The Sweet and Smoky Delight for BBQ Applications
Dulse is often celebrated for its unique sweet and smoky flavor, making it an ideal candidate for BBQ applications. Its texture allows it to be effectively used in both rubs and sauces, providing an exciting twist to traditional BBQ flavors.
For instance, you can create a dulse-based BBQ rub by combining dried dulse flakes with spices such as paprika, garlic powder, and black pepper. This mixture forms a flavorful crust on meats that enhances their natural sweetness and smokiness when grilled. Dulse can also be incorporated into BBQ sauces, adding depth and complexity to the dish.
Moreover, the health benefits of dulse are noteworthy. Alongside its flavorful contribution, dulse is packed with nutrients, including antioxidants and minerals, that support a balanced diet. Its ability to enhance flavor while promoting health makes dulse a must-try for any BBQ enthusiast.
Examining the Health Benefits of Seaweed in BBQ
How Seaweed Elevates the Nutritional Value of Your BBQ Meals
Incorporating seaweed into BBQ not only enhances flavors but also significantly boosts the meal’s nutritional profile. Seaweed is an exceptional source of essential nutrients, including iodine, omega-3 fatty acids, and dietary fiber, all of which play vital roles in maintaining overall health.
The iodine found in seaweed supports thyroid function, regulating metabolism and energy levels. Omega-3 fatty acids, known for their anti-inflammatory properties, promote heart health and overall well-being. Additionally, seaweed is a rich source of dietary fiber, which aids digestion and encourages a healthy gut.
By adding seaweed to your BBQ dishes, you can transform a traditional cookout into a nutrient-rich feast. Whether used in marinades, rubs, or as a garnish, seaweed enhances the health benefits of grilled meals while maintaining delicious flavors.
Antioxidants in Seaweed for Enhanced BBQ Health Benefits
Seaweed is not only nutritious but also a rich source of antioxidants, which are crucial for combating oxidative stress caused by grilling. The grilling process often produces harmful compounds, and incorporating antioxidant-rich ingredients like seaweed can help mitigate these effects.
Some of the primary antioxidants present in seaweed include vitamins C and E, along with polyphenols and carotenoids. These antioxidants work to neutralize free radicals, protecting cells from damage and reducing inflammation. When added to BBQ dishes, seaweed not only enhances flavor but also provides these protective compounds.
Practically speaking, using seaweed as a marinade or rub can help decrease the formation of harmful compounds during grilling, making your BBQ meals not only tastier but also healthier. It’s a simple yet effective way to boost both the flavor and health benefits of your cooking.
Can Seaweed Consumption Mitigate Health Risks Associated with BBQ?
Integrating seaweed into BBQ can indeed help reduce certain health risks linked to grilling. Studies indicate that seaweed can mitigate the formation of carcinogenic compounds that may arise during high-heat cooking methods like grilling.
For example, the antioxidants in seaweed can neutralize free radicals generated during grilling, potentially lowering the risk of cancer associated with charred foods. Furthermore, seaweed contains natural compounds that inhibit the absorption of harmful substances in the gut, providing an additional layer of protection.
By incorporating seaweed into traditional BBQ practices, you can take a proactive approach to meal safety. Marinating meats in seaweed-infused mixtures or using seaweed as a seasoning allows you to enjoy delicious BBQ while minimizing health risks.
Understanding the Flavor Profiles of Seaweed in BBQ
The Role of Umami: Essential Flavor in Seaweed BBQ
The concept of umami, often described as the fifth taste, plays a crucial role in enhancing BBQ dish flavors. Seaweed is naturally rich in umami, which amplifies the savory notes of grilled meats and vegetables, creating a more satisfying culinary experience.
When incorporated into BBQ, seaweed’s umami richness deepens the flavor profile, making dishes more complex and enjoyable. For instance, adding kelp to a marinade can significantly enhance the savory characteristics of meats, transforming an ordinary grilling experience into an extraordinary one.
Understanding how to harness the umami potential of seaweed can aid BBQ enthusiasts in crafting dishes that resonate with depth and richness, ensuring every bite is a flavor-packed adventure. Emphasizing umami through seaweed not only enhances taste but also aligns with contemporary culinary trends that favor complex flavor profiles.
Complementing BBQ Meats with Seaweed
Seaweed’s unique flavor profiles make it an exceptional complement to various BBQ meats. The natural umami and briny notes of seaweed can enhance the inherent flavors of grilled proteins, creating a harmonious balance that elevates the overall dish.
For example, pairing nori with salmon creates a delightful flavor combination, where the fish’s richness is perfectly complemented by nori’s subtle umami. Similarly, kelp can be used in marinades for beef, infusing it with depth and complexity that enhances the meat’s flavor.
Moreover, the texture of seaweed can also contribute to complementing BBQ meats. Grilling with seaweed can impart a slightly smoky flavor, adding a new dimension to the dishes. Understanding these pairings allows cooks to create BBQ meals that are not only delicious but also memorable.
Best Seaweed Combinations for Flavorful BBQ Dishes
Creating a balanced and flavorful BBQ experience often involves thoughtfully combining different seaweeds. By mixing varieties, you can achieve a unique flavor profile that complements your grilled dishes. Here are some recommended combinations:
- Nori and Dulse: This combination provides an ideal balance of umami and sweetness, enhancing grilled fish or chicken.
- Kelp and Wakame: Both rich in umami, these seaweeds can deepen flavors in marinades for red meats.
- Dulse and Nori: Combining these two offers a sweet, smoky flavor that works beautifully with grilled vegetables.
- Kombu and Dulse: This duo enhances both flavor and nutrition, making it perfect for slow-cooked BBQ dishes.
- Wakame and Kelp: Together, they create a rich, savory base for sauces and marinades.
Experimenting with these combinations allows BBQ enthusiasts to craft unique flavor experiences that delight the palate and showcase the versatility of seaweed in cooking.
Research-Backed Insights on the Benefits of Seaweed for Healthy BBQ Flavor
Recent Research Findings on Seaweed and BBQ
Recent studies increasingly support the notion that incorporating seaweed into BBQ can enhance both flavor and health benefits. Research has shown that seaweed’s unique chemical composition, abundant in antioxidants and umami compounds, can significantly contribute to the sensory experience of grilled foods.
For instance, studies indicate that using seaweed in marinades can reduce harmful compounds produced during grilling, thereby enhancing the safety of BBQ meals. Moreover, flavor studies suggest that traditional BBQ methods can benefit from seaweed’s natural properties, leading to tastier and more nutritious dishes.
This body of research positions seaweed not only as a flavorful ingredient but also as a health-conscious choice for BBQ enthusiasts. By selecting seaweed as a key ingredient, cooks can explore innovative ways to enhance their grilling practices.
Impact of Seaweed on the Health Profile of BBQ Meals
The health profile of BBQ meals can be significantly enhanced by incorporating seaweed. With its high nutrient density, seaweed contributes essential vitamins, minerals, and antioxidants that may often be lacking in traditional BBQ fare.
In practical terms, adding seaweed to BBQ recipes increases fiber content, aiding digestion and promoting gut health. Additionally, the presence of omega-3 fatty acids in certain seaweeds supports cardiovascular health, making BBQ meals more heart-friendly.
This nutritional boost not only enhances the health benefits of BBQ but also aligns with consumer trends favoring healthier dining options. By focusing on integrating seaweed, BBQ enthusiasts can create meals that are both delicious and beneficial for their health.
Sustainability Benefits of Using Seaweed in BBQ Recipes
Incorporating seaweed into BBQ practices can yield substantial sustainability benefits. Seaweed farming is known for its minimal environmental impact, requiring no fresh water, fertilizers, or pesticides, thus setting it apart from land-based agriculture.
Moreover, seaweed farming can positively impact marine ecosystems by providing habitats for fish and absorbing excess nutrients that can degrade ocean health. This ecological advantage resonates with the growing consumer demand for sustainable food sources.
By choosing seaweed as a primary ingredient in BBQ, culinary professionals and home cooks can contribute to a more sustainable food system, promoting environmental health while enjoying flavorful meals.
Practical Tips for Using Seaweed in BBQ Recipes
Seamlessly Incorporating Seaweed into Your BBQ Dishes
Integrating seaweed into your BBQ recipes is easier than it seems. Here are some practical methods to elevate your grilling game with this nutritious ingredient:
- Add to Marinades: Blend kelp or dulse into your marinades for a significant umami enhancement.
- Use as a Rub: Create a seasoning mix with dried seaweed for a unique flavor profile that will surprise your taste buds.
- Wrap Proteins: Utilize nori sheets to wrap fish or chicken before grilling, imparting added flavor and moisture.
- Top Grilled Vegetables: Sprinkle toasted seaweed flakes over grilled veggies for a crunchy finish that enhances the overall dish.
By experimenting with these methods, you can discover various ways seaweed enhances the flavor and nutrition of BBQ dishes. Each technique showcases the versatility of seaweed, ensuring it becomes a valuable addition to any grilling session.
Best Cooking Techniques for Seaweed in BBQ
Using the right cooking methods for seaweed ensures that its flavor and nutritional benefits are maximized during BBQ sessions. Here are some effective techniques:
- Grilling: Directly grilling seaweed adds a wonderful smoky flavor, enhancing its natural taste while complementing other ingredients.
- Marinating: Soaking meats in seaweed-infused marinades allows flavors to penetrate deeply, resulting in a more flavorful dish.
- Smoking: Incorporating seaweed into smoker boxes can infuse unique flavors into meats and vegetables, elevating the overall BBQ experience.
- Roasting: Roasting seaweed with other ingredients can create a crunchy topping for dishes that adds texture and flavor.
Each cooking method provides distinct advantages, ensuring that seaweed not only enhances flavor but also contributes health benefits to your BBQ meals. Understanding these techniques allows you to harness the full potential of seaweed in your culinary creations.
Proper Storage of Seaweed for BBQ Use
Proper storage of seaweed is essential for maintaining its flavor and nutritional value for BBQ applications. Here are the best practices for storing both dried and fresh seaweed:
- Keep it Dry: Store dried seaweed in an airtight container in a cool, dark place to prevent moisture absorption that can lead to spoilage.
- Refrigerate Fresh Seaweed: Fresh seaweed should be stored in the refrigerator, ideally in a sealed bag to retain moisture and freshness.
- Avoid Sunlight: Exposure to sunlight can degrade seaweed’s flavor and nutrients, so always keep it in a shaded area.
- Check for Freshness: Regularly inspect stored seaweed for signs of spoilage or off odors to ensure quality.
By following these storage guidelines, you can ensure that your seaweed remains flavorful and ready for use in your BBQ adventures.
Safety Considerations When Using Seaweed in BBQ
Ensuring Seaweed Safety for BBQ Applications
Seaweed is generally safe for BBQ applications when sourced from reputable suppliers. When obtained from reliable sources, seaweed is free from contaminants and safe for consumption. However, it’s essential to be aware of the origin of your seaweed, as certain types may accumulate heavy metals if harvested from polluted waters.
Incorporating seaweed into your BBQ practices can be a healthy choice. Ensuring that your seaweed is sustainably harvested from clean environments helps mitigate any potential risks associated with its use. Always check labels and sourcing information to make informed decisions.
Precautions to Take When Using Seaweed in BBQ
When utilizing seaweed in BBQ, it’s important to take proper precautions to ensure both safety and quality. Here are some key practices to follow:
- Check for Allergies: Some individuals may have allergies to specific types of seaweed. Always verify with guests regarding any potential allergies.
- Source Responsibly: Choose seaweed from reputable suppliers to avoid contamination and ensure quality.
- Limit Intake: While seaweed is nutritious, consuming it in moderation is essential due to its iodine content, which can be excessive if eaten in large amounts.
- Rinse Before Use: Always rinse dried seaweed to remove any impurities or excess salt that may affect flavor.
By adhering to these precautions, you can enjoy the benefits of seaweed in your BBQ while ensuring a safe cooking environment for all.
Understanding Allergies Related to Seaweed Usage in BBQ
Seaweed consumption may trigger allergic reactions in some individuals, which can impact your BBQ plans. It’s essential to be aware of any potential allergies among your guests. Symptoms can range from mild reactions, such as skin irritation, to more severe responses, including gastrointestinal distress.
To mitigate risks, inform your guests beforehand about the use of seaweed in your BBQ dishes. Provide alternative options for those with allergies to ensure everyone can safely enjoy the meal. By being mindful of allergies, you create a more inclusive dining experience while still showcasing the flavors and benefits of seaweed.
Best Practices for Storing Seaweed for BBQ Use
Storing seaweed correctly is crucial for maintaining its quality and flavor. Dried seaweed should be kept in a cool, dry place, ideally in an airtight container to prevent moisture absorption. This helps preserve its texture and flavor for extended periods.
Fresh seaweed should be stored in the refrigerator, ideally in a sealed container or bag to retain moisture levels. It’s important to check for freshness regularly and use it within the recommended time frame to enjoy its full flavor and health benefits.
By following these storage practices, you can ensure that your seaweed remains in optimal condition, ready to enhance your BBQ dishes whenever needed.
Future Trends in Seaweed and BBQ Culinary Practices
Emerging Innovations for Seaweed in BBQ
As culinary practices evolve, the incorporation of seaweed into BBQ is poised for exciting innovations. Advances in cultivation and processing techniques are anticipated to improve the quality and variety of seaweed available for BBQ applications. For instance, vertical farming methods may enhance the yield and sustainability of seaweed production, providing chefs with greater access to fresh ingredients.
Moreover, the development of seaweed-based products, such as marinades and seasoning blends, is gaining traction. These innovations not only simplify the cooking process but also promote the health benefits of seaweed, making it easier for home cooks to experiment with this ingredient in their BBQ dishes. This trend is likely to influence how grilling is approached in households and restaurants alike.
How Changing Consumer Preferences Will Shape Seaweed BBQ Practices
Consumer preferences are shifting towards healthier and more sustainable dining options, which will undoubtedly influence the future of seaweed in BBQ. As people become increasingly health-conscious, they seek out foods that offer nutritional benefits without sacrificing taste.
This growing interest in plant-based and sustainable ingredients positions seaweed as a favorable choice for BBQ. Consumers will likely demand more innovative recipes and products that highlight the unique flavors and health benefits of seaweed, driving restaurants and food manufacturers to adapt to these trends.
As awareness of seaweed’s versatility spreads, BBQ enthusiasts will have more opportunities to explore and enjoy this nutrient-rich ingredient, further embedding it into the culinary culture of grilling.
The Role of Sustainability in the Future of Seaweed BBQ Practices
Sustainability will be a key factor in the future of seaweed BBQ as consumers continue to prioritize eco-friendly choices. As a highly sustainable food source, seaweed farming has a lower environmental impact than traditional agriculture, making it an attractive option for conscientious eaters.
As sustainability concerns grow, the culinary world is responding by integrating seaweed into menus and recipes that reflect these values. By promoting seaweed as a primary ingredient in BBQ, chefs and home cooks can contribute to a more sustainable food system, appealing to environmentally minded consumers.
This alignment of culinary practices with sustainability trends not only enhances the dining experience but also fosters a deeper connection between food, health, and the environment.
Frequently Asked Questions About Seaweed and BBQ
1. Which types of seaweed are best suited for BBQ?
Seaweed varieties such as nori, kelp, and dulse are popular choices for BBQ due to their unique flavors and health benefits. They can be utilized in marinades, as rubs, or garnishes to enhance dishes.
2. How should I prepare seaweed for BBQ cooking?
You can rinse dried seaweed to remove impurities, soak it if needed, chop or tear it into smaller pieces, and lightly toast it for added flavor before incorporating it into BBQ dishes.
3. What nutritional benefits does seaweed provide for BBQ meals?
Seaweed is rich in vitamins, minerals, and antioxidants, including iodine, omega-3 fatty acids, and dietary fiber, significantly enhancing the overall nutritional value of BBQ meals.
4. Can seaweed help reduce health risks associated with grilling?
Yes, seaweed contains antioxidants that can help neutralize harmful compounds produced during grilling, potentially reducing health risks associated with charred foods.
5. How can I effectively incorporate seaweed into my BBQ recipes?
You can add seaweed to marinades, use it as a seasoning rub, wrap proteins with it, or sprinkle toasted flakes over grilled vegetables for added flavor and nutrition.
6. Is seaweed safe for everyone to consume?
While generally safe, some individuals may have allergies to specific types of seaweed. It’s important to check with guests and source seaweed from reputable suppliers to ensure safety.
7. How should I store seaweed for BBQ use?
Dried seaweed should be stored in an airtight container in a cool, dark place, while fresh seaweed should be refrigerated in a sealed bag to maintain its quality and freshness.
8. What cooking methods work best for seaweed in BBQ?
Effective cooking methods for seaweed in BBQ include grilling, marinating, smoking, and roasting, with each method providing distinct flavor profiles and benefits to enhance your dishes.
9. What role does sustainability play in using seaweed for BBQ?
Seaweed farming is more sustainable than traditional agriculture, requiring no freshwater or fertilizers, making it an eco-friendly choice for BBQ enthusiasts concerned about environmental impacts.
10. What future trends are emerging in the relationship between seaweed and BBQ?
Innovations in seaweed cultivation and processing, along with growing consumer interest in healthy and sustainable foods, are expected to shape the future of seaweed in BBQ culinary practices.
Connect with us on Facebook!
The Article Top Seaweeds For Healthy BBQ Flavor: Best Picks appeared first on https://pitmastersarsenal.com
The Article Best Seaweeds for Flavorful and Healthy BBQ Options Was Found On https://limitsofstrategy.com
-

Herbs Garnishing: A Guide to UK Style
Enhance Your Culinary Skills with Expert Herb Garnishing Techniques in the UK
Understand the Vital Role of Herbs in British Culinary Traditions
Explore the intricacies of herbs in British cuisine, where they serve as essential ingredients that go beyond mere flavour enhancement. These culinary herbs add depth to traditional dishes like shepherd’s pie and roast lamb with mint sauce, while also creating a stunning visual presentation that captivates diners. The UK’s diverse climate allows an array of herbs to thrive, making them accessible for home cooks and professional chefs alike. As culinary practices evolve, herbs have seamlessly integrated into modern cooking, merging classic recipes with innovative techniques, thus ensuring they remain indispensable in contemporary kitchens.
Herbs serve a dual purpose in the culinary world: not only do they elevate flavours, but they also enhance the visual appeal of dishes. A garnish of fresh parsley or a delicate sprig of rosemary can transform a basic plate into a breathtaking presentation. This dual role—serving as both flavour enhancers and decorative elements—contributes to the growing trend of incorporating herbs into various cooking styles, from traditional Sunday roasts to sophisticated dishes found in upscale restaurants across London.
Discover the Most Commonly Used Herbs in British Culinary Practices
The culinary landscape of the UK is enriched by a selection of commonly used herbs that impart distinct flavours and aromas. Dominating this landscape are rosemary, thyme, mint, basil, and parsley. These herbs are integral to local cooking traditions and methods, with rosemary perfectly complementing lamb dishes and mint being essential for creating traditional condiments like mint sauce, a classic pairing with roast lamb.
Additionally, herbs such as coriander and chives add refreshing nuances to modern British cuisine, reflecting the influence of global culinary trends. The easy availability of these herbs in local markets encourages home cooks to incorporate them into their everyday meals, thereby enhancing flavour profiles. You might frequently encounter thyme in hearty stews or basil in fresh salads, showcasing these herbs’ versatility across various dishes and occasions.
Explore the Historical Significance of Herbs in British Cooking
The historical importance of herbs in British cooking is rich and multifaceted, tracing back to medieval times when they played a crucial role in both culinary and medicinal practices. During this era, herbs like sage and chervil were highly valued not only for their flavouring capabilities but also for their perceived health benefits. Historical recipes often included a variety of herbs to enhance taste and preserve meats, especially in a time when refrigeration was not commonplace.
As British cuisine progressed, so did the use of herbs. The Victorian era marked a significant shift, driven by advancements in gardening and botanical studies, which fostered a renewed appreciation for fresh herbs and spices. This legacy continues to thrive today, with chefs in the UK experimenting with both traditional and innovative herb varieties, often incorporating elements like microgreens and edible flowers into their dishes. This evolution from practical use to artistic garnishing reflects a broader trend of valuing both the aesthetic and flavour-enhancing roles of herbs in modern British gastronomy.
Your Ultimate Guide to Mastering Herb Garnishing Techniques

How to Choose the Ideal Herbs for Garnishing Your Culinary Creations
Selecting the perfect herbs for garnishing is essential to balance flavour and visual appeal effectively. Begin by evaluating the flavour profile of your dish; for example, robust herbs like rosemary work wonderfully with hearty meats, enhancing the dish without overpowering it. The visual aspect is equally crucial; vibrant herbs can dramatically elevate the presentation of your culinary masterpieces.
When choosing herbs, consider the following key factors:
- Flavour Compatibility: Ensure the herb’s taste harmonizes with the main components of the dish.
- Visual Appeal: Opt for herbs that contribute vivid colour and contrast to the plate.
- Freshness: Prioritize the freshest herbs available to maximize flavour and presentation.
- Texture: Think about how the herb’s texture will complement or contrast with the dish.
- Seasonality: Choose herbs that are in season for optimal flavour and availability.
By carefully considering these aspects, you can successfully select herbs that not only enhance the taste but also elevate the visual presentation of your culinary creations.
Master Techniques for Artfully Arranging Herbs on Your Plates
Perfecting the arrangement of herbs can significantly enhance how your dishes are presented. A well-placed herb can draw attention and create an inviting atmosphere on the plate. One effective method is to scatter finely chopped herbs across the dish, accentuating specific areas without overwhelming the overall presentation. This technique is particularly effective with soups and salads, where vibrant herbs can contrast beautifully with other ingredients.
Another creative approach involves using herbs as a layering technique, where you place a sprig of herb centrally on the plate and surround it with other components. This not only captures the eye but also establishes a focal point that encourages diners to explore the dish. Furthermore, using herbs as a centrepiece—like a sprig of thyme next to a roast—conveys rustic charm while adding elegance to the presentation.
Experimenting with various arrangements can yield delightful and unexpected results. The key is to ensure that the herb arrangement not only enhances the dish’s visual appeal but also complements the overall dining experience, inviting diners to appreciate both the flavours and the artistry of their meal.
Explore Unique Ideas for Garnishing with Herbs
Innovative herb garnishing techniques can elevate your culinary creations, transforming ordinary meals into extraordinary dining experiences. One exciting method is to create herb-infused oils, which can be drizzled over dishes to enhance flavour while adding a glossy finish. Blend fresh herbs such as basil or parsley with high-quality olive oil, then strain the mixture. This vibrant concoction can elevate the appearance and taste of grilled vegetables or pasta.
Another creative approach involves pairing herbs with edible flowers, like nasturtiums or pansies, to introduce a burst of colour and whimsy. These combinations not only look stunning but also provide a delightful burst of flavour when consumed. For instance, consider placing a few edible flowers alongside finely chopped chives or dill atop a creamy dip for a visually striking and flavourful garnish.
Incorporating herb butters into your presentations is another excellent technique; mix finely chopped herbs into softened butter and use it as a finishing touch for meats or vegetables. This method not only adds richness but also injects a splash of colour, transforming even the simplest dish into a luxurious experience. By embracing these innovative ideas, you can elevate your garnishing techniques, creating dishes that are both delicious and visually captivating.
Essential Steps for Preparing Herbs for Garnishing
How to Effectively Wash and Dry Herbs for Maximum Freshness
Washing and drying herbs correctly is vital for preserving their freshness and ensuring optimal flavour in your dishes. Start by rinsing the herbs under cold, running water to remove any dirt or residue. Avoid soaking the herbs, as this can lead to waterlogging and dilute their inherent flavours. After rinsing, gently shake off any excess water and pat the herbs dry using a clean kitchen towel or paper towels.
For the best results, follow these steps for washing and drying herbs:
- Rinse under cold water: This effectively removes dirt while preserving the integrity of the herbs.
- Shake gently: Dislodge any residual water without damaging the leaves.
- Pat dry: Use a towel to absorb excess moisture, ensuring the herbs remain crisp.
- Utilize a salad spinner: This can be more effective in removing moisture if available.
Ensuring your herbs are moisture-free before use not only helps prevent contamination but also enhances their longevity and flavour, allowing them to shine as garnishes in your culinary creations.
Chopping and Shaping Herbs for Optimal Presentation
Skillfully chopping and shaping herbs is essential for achieving a visually appealing presentation. The way you prepare herbs can greatly influence their contribution to a dish’s aesthetic identity. For example, finely chopping herbs like parsley or coriander results in a soft, delicate appearance, making them ideal for sprinkling over a dish. Conversely, using whole leaves or sprigs can create a striking visual impact, especially on larger plates.
Different cutting techniques yield various visual effects:
– Chiffonade involves stacking and rolling leaves before slicing them into thin strips, making it ideal for herbs like basil.
– Rough chopping adds a rustic touch to dishes, while finely minced herbs are more suitable for refined presentations.Consider the context of the dish when deciding how to cut the herbs; a delicate garnish for a light fish dish should reflect the dish’s overall elegance. The presentation of herbs should enhance the dish’s appeal while hinting at the flavours to come, creating anticipation for diners.
What Is the Best Method for Storing Fresh Herbs for Longevity?
Proper storage of fresh herbs is essential to maintain their flavour and extend their lifespan. The optimal method varies depending on the type of herb, but some general practices are widely applicable. For sturdier herbs like rosemary and thyme, refrigeration can prolong their freshness. Wrap them in damp paper towels and place them in a plastic bag to retain moisture while preventing the leaves from suffocating.
For more delicate herbs such as basil and cilantro, treat them like flowers: place the stems in a glass of water, loosely covering the leaves with a plastic bag, and store them upright in the refrigerator. This technique helps the herbs stay hydrated and fresh for extended periods.
Utilize these techniques for optimal herb storage:
- Wrap in damp paper towels: This method is effective for hardy herbs.
- Store upright in water: Best for delicate herbs.
- Avoid washing until ready to use: This helps prevent spoilage.
- Freeze for long-term storage: Chopped herbs can be frozen in ice cube trays with water or oil.
By implementing these storage methods, you can ensure that your herbs maintain their vibrant flavours and significantly contribute to your garnishing efforts.
Choosing the Most Appropriate Herbs for Effective Garnishing
Selecting the right herbs for garnishing requires thoughtful consideration. The herbs you choose should harmonize with the dish’s flavours while enhancing its visual appeal. Consider the texture of the herb; for instance, basil offers a soft touch, while sage provides a more robust presence.
The aroma of herbs also plays a critical role in shaping the overall dining experience. Fresh herbs can enhance not only the appearance of the dish but also its olfactory appeal, making the meal more inviting. Keep these points in mind when selecting herbs:
- Complementary Flavours: Ensure the herb enhances the dish without overpowering it.
- Visual Contrast: Look for herbs that create a striking contrast with the colours on the plate.
- Aromatic Qualities: Choose herbs that enrich the dish’s aroma profile.
- Texture Considerations: Assess how the texture of the herb complements the dish’s other elements.
By thoughtfully selecting herbs, you can create a harmonious and appealing presentation that elevates the entire dining experience.
Perfecting the Arrangement of Herbs on Your Plate
The arrangement of herbs on a plate is an art that can significantly enhance the presentation of your dish. Mastering this technique allows you to create visual interest and capture diners’ attention. One effective method is to scatter small amounts of finely chopped herbs around the plate, fostering a sense of abundance and liveliness. This technique works particularly well for dishes like risotto or pasta, where the herbs can enhance the overall appearance and beautifully balance the plate.
Another successful technique involves layering herbs to create depth and dimension. For example, a small pile of chopped chives can be placed at the corner of the dish, drawing the eye and adding height. Alternatively, using herbs as a centrepiece can establish a focal point, especially on larger plates. A sprig of rosemary or a few leaves of sage can anchor a dish, providing stunning contrast to the surrounding elements.
The key to effective herb arrangement is to ensure that the presentation feels intentional and balanced. Avoid overcrowding the plate or overpowering other components with herbs; instead, strive for a harmonious interaction that enhances the dish’s overall appeal. Through thoughtful arrangement, herbs can take centre stage, turning your dish into a feast for both the eyes and the palate.
Proven Benefits of Herb Garnishing
How Do Herbs Enhance the Flavour of Culinary Creations?
Herbs play a transformative role in cooking, significantly amplifying the taste of a wide variety of dishes. Their unique flavour profiles can elevate even the simplest meals into extraordinary culinary experiences. For example, a sprinkle of fresh basil on a tomato salad creates a vibrant contrast with the acidity of the tomatoes, resulting in a well-rounded taste sensation. Similarly, thyme adds earthy undertones that deepen the flavours of roasted meats and vegetables.
The influence of herbs goes beyond mere enhancement; they can introduce layers of flavour, transforming a dish into a multi-sensory delight. Chefs often blend different herbs to create intricate profiles that surprise and delight diners. When employed thoughtfully, herbs can turn an ordinary dish into something exceptional, ensuring a memorable dining experience.
Health Benefits of Incorporating Herbs into Your Meals
Integrating herbs into your meals not only boosts flavour but also significantly enhances their nutritional value. Many herbs are rich in essential vitamins, minerals, and antioxidants, which are crucial for maintaining good health. For instance, parsley is packed with vitamins A, C, and K, while basil is known for its anti-inflammatory properties. By incorporating these herbs into your dishes, you can enrich both flavours and health benefits, making meals more nutritious.
Moreover, herbs like cilantro and rosemary contain compounds associated with various health benefits, including improved digestion and enhanced immune function. By using herbs as garnishes, you can elevate the nutritional profile of your meals, ensuring they are not only delicious but also beneficial for your health. This dual purpose highlights the growing trend of health-conscious dining, where flavour and nutrition go hand in hand.
How Do Herbs Influence the Overall Dining Experience?
Herbs profoundly impact the overall dining experience, engaging multiple senses and enhancing enjoyment. The aromatic qualities of fresh herbs can elevate a dish even before it reaches the table, stimulating anticipation and appetite. The fragrance of fresh dill or mint can evoke comforting memories of home-cooked meals, creating a deeper emotional connection to the food.
Furthermore, the visual appeal of herbs significantly contributes to the aesthetic experience of dining. A beautifully garnished plate excites the eyes, prompting diners to appreciate not just the flavours but also the presentation. This engagement can enhance satisfaction, leading diners to remember and recommend the meal. The psychological effects of a well-presented dish can elevate the dining experience, transforming a meal into a cherished occasion.
The Visual Appeal of Herb Garnishes
The visual allure of herb garnishes is a crucial aspect of modern culinary presentation. Fresh herbs not only infuse vibrant colours and textures but also create a sense of freshness on the plate. A dish adorned with bright green basil or deep purple sage becomes instantly more inviting and visually appealing. The interplay of colours and shapes creates a dynamic visual experience that enhances the overall enjoyment of the meal.
Different herbs contribute uniquely to the aesthetics of a dish. For example, the delicate leaves of micro basil can introduce an elegant touch, while the bold presence of rosemary can add rustic charm. Careful arrangement of these herbs can amplify their visual appeal; a simple sprig placed with intention can dramatically alter the dish’s appearance. Ultimately, the aesthetic benefits of herb garnishes are crucial in encouraging diners to appreciate not only the flavours but also the artistry behind the meal.
Diverse Herb Garnishing Techniques for Traditional UK Dishes
Enhancing Iconic British Dishes with Thoughtful Herb Garnishes
Traditional British dishes significantly benefit from the careful application of herbs as garnishes. For example, elevating a classic roast dinner is easily accomplished with a sprig of rosemary or a sprinkle of freshly chopped parsley. These herbs not only complement the rich flavours of the meat and vegetables but also introduce a burst of colour, enhancing the dish’s overall appeal.
When garnishing fish and chips, consider adding a sprinkle of dill or a few chives for a fresh element that balances the richness of the batter. Similarly, pairing mint with lamb dishes, such as shepherd’s pie, can elevate the meal, providing a refreshing contrast to hearty flavours. These traditional combinations have stood the test of time, demonstrating how herbs can enhance classic meals while preserving their authenticity.
Innovative Herb Garnishing in Contemporary British Cuisine
In modern British cuisine, chefs are increasingly utilizing herbs in creative ways, reflecting the evolving culinary landscape. They experiment with herbs not just as flavour enhancers but as key components of their dishes. For example, incorporating microgreens into salads or as garnishes adds visual flair and an explosion of flavour.
A prominent trend involves crafting herb-infused oils and butters, which can be drizzled over dishes or used as finishing touches. This technique allows for a more pronounced herb flavour while enhancing the dish’s aesthetic appeal. Additionally, using herbs alongside unexpected ingredients—like basil with strawberries or coriander with chocolate desserts—demonstrates the versatility of herbs in modern cooking and garnishing.
Seasonal Herb Garnishing Techniques to Embrace Across the UK
Adapting your garnishing techniques to reflect the changing seasons is an excellent way to highlight fresh produce and herbs. In spring, vibrant herbs like mint and chives are abundant, making them ideal for garnishing light dishes such as salads and grilled fish. As summer unfolds, the flavours of basil and tarragon shine in dishes featuring tomatoes, making them fantastic additions to summer salads or pasta dishes.
Autumn brings the earthy flavours of sage and rosemary, which are perfect for garnishing hearty stews and roasts. Meanwhile, winter calls for robust herbs like thyme and bay leaves, suitable for warming dishes. By being mindful of the seasons and utilizing herbs at their peak, you can create garnishes that not only taste exceptional but also celebrate the diversity of UK produce throughout the year.
Preventing Common Mistakes in Herb Garnishing
How to Avoid Overusing Herbs in Garnishing
A common mistake in herb garnishing is overusing them, which can easily overpower a dish. While herbs are intended to enhance flavour and presentation, excessive quantities can lead to confusion on the palate, masking the intended tastes of the primary ingredients. For instance, a small amount of finely chopped coriander can elevate a curry, but an excessive quantity can dominate the dish, disrupting the intended flavour balance.
To avoid this frequent mistake, aim for a balanced approach when incorporating herbs. Start with a modest quantity and assess the flavour before adding more. This practice ensures that the herbs complement rather than overwhelm the dish. Additionally, consider the visual impact; a garnish should enhance the presentation without cluttering the plate. Moderation with herbs is essential for successful garnishing.
How to Avoid Incorrect Herb Pairings?
Another common error involves incorrectly pairing herbs with specific dishes. Not every herb suits every meal; for example, using oregano in a delicate seafood dish might clash, while it beautifully complements robust tomato-based sauces. Understanding the flavour profiles of various herbs and their interactions with other ingredients is crucial for successful garnishing.
To avoid these mismatches, familiarize yourself with classic pairings. For example, pairing thyme with roasted meats or using basil with tomato dishes can enhance the overall flavour profile. While experimentation is encouraged, grounding your choices in established combinations can help you avoid less palatable outcomes.
What Signs Indicate Improperly Stored Herbs?
Recognizing the signs of improperly stored herbs is essential for maintaining their freshness and flavour. Herbs that have lost their vibrant colour, become limp, or developed a slimy texture are clear indicators that they are no longer suitable for use. Additionally, if the herbs emit an off or musty smell, it is best to discard them.
To prevent improper storage, always check herbs for freshness when purchasing and ensure they are stored correctly. Keeping them in airtight containers or wrapping them in damp paper towels can help prolong their lifespan. Regularly inspecting your herb supply ensures that you are using the best quality ingredients, contributing to successful garnishing.
What Is the Optimal Timing for Adding Herbs During Cooking?
The timing of herb addition during cooking can significantly impact their flavour and texture. Adding delicate herbs like basil or cilantro too early in the cooking process can lead to a loss of their vibrant flavours and fresh appearance. Ideally, these herbs should be added toward the end of cooking or used as a garnish just before serving to preserve their flavour and aroma.
Conversely, sturdier herbs like rosemary or thyme can withstand longer cooking times and should be added early to allow their flavours to thoroughly infuse into the dish. Understanding the ideal moment for adding each type of herb is crucial for achieving the desired taste and presentation. By mastering this timing, you can ensure that your garnishes enhance rather than detract from the overall meal experience.
Frequently Asked Questions About Herb Garnishing
Which Herbs Are Ideal for Garnishing Your Dishes?
The most suitable herbs for garnishing include parsley, chives, basil, rosemary, and mint. Each of these herbs contributes unique flavours and visual appeal to your dishes.
How Should I Prepare Herbs for Garnishing Effectively?
To prepare herbs, gently wash them under cold water, dry them thoroughly, and chop or shape them as desired. This ensures freshness and optimal presentation.
Can Dried Herbs Be Used for Garnishing Purposes?
While dried herbs can enhance flavour, they lack the visual appeal of fresh herbs. Whenever possible, opt for fresh herbs for garnishing to achieve the best aesthetic impact.
What Is the Ideal Method for Storing Fresh Herbs?
Fresh herbs should be stored wrapped in damp paper towels in the fridge or upright in a glass of water, loosely covered with a plastic bag to maintain moisture.
What Distinguishes Culinary Herbs from Non-Culinary Herbs?
Culinary herbs are specifically utilized in cooking for flavour and garnish, while non-culinary herbs may possess medicinal or aromatic properties but are not typically used in food.
How Can I Create Herb-Infused Oils?
To make herb-infused oil, blend fresh herbs with olive oil, strain the mixture, and store it in a bottle. This adds flavour and can be used as a finishing touch for various dishes.
What Common Mistakes Should Be Avoided When Garnishing with Herbs?
Common mistakes include overusing herbs, incorrect herb pairing, and neglecting to consider the timing of herb addition during cooking.
How Do Herbs Enhance the Dining Experience?
Herbs engage the senses through aroma and visual appeal, enhancing flavour and creating a more enjoyable dining experience overall.
What Fresh Herbs Are Currently in Season in the UK?
In the UK, seasonal herbs include mint in spring, basil in summer, sage and rosemary in autumn, and thyme in winter, providing a variety of garnishing options.
What Innovative Methods Can Be Used for Herb Garnishing?
Innovative methods for using herbs include creating herb-infused oils, pairing herbs with edible flowers, and crafting herb butters for finishing touches on dishes.
Connect with Us on Facebook for More Culinary Insights!
The Article: How to Garnish with Herbs: UK Style appeared first on https://mcrtherapies.co.uk
The Article Garnish with Herbs: A UK Style Guide Was Found On https://limitsofstrategy.com
-

Blowtorch Cooking: Essential Safety Tips to Follow
Proven Safety Strategies for Using a Blowtorch in Your Cooking Adventures
Choosing the Ideal Blowtorch for Your Culinary Needs
Selecting the most suitable blowtorch is vital for not only ensuring safety but also achieving stunning results in your culinary ventures. When searching for a culinary blowtorch, give priority to models that boast essential safety features such as a safety lock and an adjustable flame. These attributes allow users to effectively control the intensity of the flame, which is crucial when applying heat to specific areas of food without causing damage or creating hazardous situations. Additionally, a blowtorch designed with a user-friendly grip enhances stability during operation, significantly reducing the likelihood of accidents and ensuring a more controlled cooking process.
As you explore various options, it’s recommended to focus on blowtorches explicitly marketed for culinary applications, as they are designed to meet the unique requirements of cooking. Choose models that come with built-in igniters, providing an additional layer of safety by eliminating the need for conventional matches or lighters. Furthermore, it’s advantageous to browse product reviews and seek feedback from seasoned users to confirm that your selected model is both reliable and safe for your culinary endeavors.
Wearing Protective Gear: A Key Component of Safe Blowtorch Use
Prioritizing your safety while using a blowtorch is of utmost importance. Wearing appropriate protective gear significantly reduces the risks associated with open flames and excessive heat. Essential items of protective equipment include:
- Heat-resistant gloves: These gloves provide crucial insulation against heat while allowing the necessary dexterity to handle food and tools effectively.
- Apron: A sturdy, heat-resistant apron protects your clothing and body from splashes and flames, ensuring you maintain a professional appearance while cooking.
- Safety goggles: Goggles protect your eyes from flying debris and harmful vapors generated during blowtorch use, adding an essential layer of safety.
- Closed-toe shoes: Wearing durable footwear safeguards your feet from dropped tools or accidental flames, greatly lowering the chance of injury.
- Long-sleeve clothing: This type of attire offers an extra layer of protection against potential burns, shielding your arms from heat.
Always ensure that your protective gear fits well and is in good condition before starting your cooking session. Regularly inspecting your gloves and goggles will significantly enhance safety while you explore the exciting world of culinary blowtorches.
The Importance of Proper Ventilation and Workspace Preparation for Safe Cooking
Sufficient ventilation is critical when using a blowtorch, as it helps to disperse potentially harmful fumes. A workspace with good airflow reduces the risk of inhaling toxic gases released during combustion, thereby creating a safer cooking environment. Choose a workspace that offers adequate airflow; you may need to open windows or utilize an exhaust fan to ensure proper ventilation. Equally important is organizing your cooking area away from flammable materials. Items such as papers, cloths, and even certain foods should be kept at a safe distance from the flame of the blowtorch to prevent unintended fires.
Additionally, the surface you work on requires careful consideration. An ideal workspace features a sturdy, non-flammable surface, such as a metal table or countertop, specifically designed for blowtorch cooking. Keeping your cooking tools organized and within reach will help minimize unnecessary movements that could lead to accidents. By establishing a designated cooking zone for blowtorch use, you significantly reduce risks and enhance your overall enjoyment of culinary experiences.
Safe Techniques for Igniting and Extinguishing Your Blowtorch

Mastering the safe methods for igniting and extinguishing your blowtorch is essential for effective and responsible use. Always adhere to the manufacturer’s guidelines to mitigate accidents. When igniting, ensure that the blowtorch is directed away from your body and any flammable materials. Gradually open the gas valve and utilize the igniter to produce a flame, maintaining a steady hand to keep the flame controlled.
To extinguish the blowtorch, immediately turn off the gas valve after completing your cooking tasks. Allow the flame to extinguish completely before storing the blowtorch. This practice prevents any residual gas from escaping, significantly minimizing the risk of accidental ignition. Always double-check that the flame is fully out and that the device has cooled down before storing it, ensuring your workspace remains safe for future culinary endeavors.
Emergency Procedures and First Aid Knowledge: Essential for Safety
In the unfortunate event of an accident involving burns or fires, being knowledgeable about emergency procedures can significantly reduce the severity of injuries. For burns, cool the affected area by running it under cold water for at least 20 minutes. Avoid using ice, as it can cause further damage to the skin. Cover the burn with a clean, non-stick dressing and seek medical attention if necessary.
If a fire occurs, remember the acronym “PASS” for effective fire extinguisher use: Pull the pin, Aim low, Squeeze the handle, and Sweep side to side. Always keep a fire extinguisher readily accessible while using a blowtorch, and ensure that everyone in the kitchen knows its location and how to use it. Maintaining an emergency contact list nearby, including poison control and local emergency services, can prove invaluable during a crisis.
Insights from Experts on Safe Blowtorch Use in Culinary Practices
How Professional Chefs Ensure Safety When Using Blowtorches

Professional chefs frequently incorporate blowtorches into their cooking routines, showcasing their versatility and safety when utilized correctly. For instance, renowned pastry chefs often use blowtorches to caramelize the tops of crème brûlée. They apply the flame in a sweeping motion, maintaining constant movement to avoid burning the sugar. This technique not only enhances the dessert’s flavor but also creates an impressive visual appeal that delights diners.
Another notable example comes from chef and BBQ expert Steven Raichlen, who emphasizes the benefits of blowtorches for achieving perfectly seared meat. He highlights the importance of ensuring the meat’s surface is dry before using a blowtorch for optimal results. Raichlen underscores that controlling the flame is essential for forming a perfect crust while keeping the interior tender and juicy. These professionals exemplify the significance of techniques and safety precautions, demonstrating that blowtorches can be safely integrated into a diverse array of culinary applications.
Avoiding Common Mistakes When Using a Blowtorch
To maximize safety and effectiveness when cooking with a blowtorch, it is crucial to avoid certain common errors. These include:
- Leaving the blowtorch unattended: Always keep your blowtorch within sight during use to prevent accidents and ensure safety.
- Using it near flammable materials: Maintain a safe distance from flammable items, as even a small spark can ignite them, leading to disastrous results.
- Ignoring gas leaks: Regularly check for gas leaks by applying soapy water to the connections; if bubbles appear, it indicates a leak that requires immediate attention.
- Not having a fire extinguisher on hand: Always keep a fire extinguisher nearby when utilizing a blowtorch, ready for any emergencies that may arise.
Being aware of these pitfalls can significantly enhance your safety while using a blowtorch in your cooking. By taking a proactive approach to safety, you can explore culinary possibilities without exposing yourself to unnecessary risks.
Expert Techniques for Safe and Effective Blowtorch Use
Culinary experts consistently emphasize best practices for the safe usage of blowtorches. One key technique involves maintaining a consistent distance from the food being cooked, generally recommended to be about 6 inches. This distance allows for adequate control over the flame, preventing burns to the dish while achieving uniform caramelization, which enhances the overall appeal of your culinary creations.
Experts also suggest using short bursts of flame rather than a continuous burn. This method allows for better control and prevents excessive heat buildup, which can lead to burnt food. Incorporating these controlled and deliberate techniques into your cooking routine ensures a safer and more enjoyable experience. Furthermore, understanding the flame adjustment features of your blowtorch enables you to modify the intensity according to your cooking needs, providing greater flexibility and safety while preparing food.
Selecting the Perfect Blowtorch for Your Cooking Needs
Choosing the right blowtorch involves considering several critical features tailored for culinary use. Safety should always be your top priority; seek blowtorches that come equipped with safety locks to prevent accidental ignition. Moreover, an adjustable flame control is essential as it allows you to customize the heat to your specific cooking needs, whether you are caramelizing sugar or searing meat.
Another important factor to consider is the type of fuel. butane is the most commonly utilized fuel for culinary blowtorches due to its clean burn and ease of use. Ensure that the model you select is compatible with the fuel canisters available in your area. Comfort and usability are also crucial; a blowtorch that feels sturdy in your hand will promote safe maneuverability during cooking. Reading user reviews and seeking recommendations from experienced chefs can further assist you in making an informed choice for your culinary adventures.
Mastering Techniques for Blowtorch Use in Cooking
Perfecting Caramelization with a Blowtorch
Achieving flawless caramelization with a blowtorch requires both skill and a touch of patience. The key is to maintain a consistent distance from the sugar, typically around 6 inches, to ensure even melting. Start by evenly sprinkling a thin layer of sugar over the surface of your dish; a uniform layer promotes even caramelization, preventing burnt spots from forming.
Once the sugar is applied, ignite your blowtorch and set the flame to a medium level. Move the flame in a circular motion, ensuring it remains in constant motion to avoid overheating any single spot. This method allows for a beautifully caramelized finish without burning. It is essential to closely monitor the sugar as it melts; the change from white to golden brown occurs rapidly. Remember, caramelization is about patience and control, so take your time to achieve the desired color and texture.
Precision Searing of Meat and Seafood with a Blowtorch
Searing meat and seafood with a blowtorch can impart a delightful charred flavor that elevates your dish. The first step is to ensure that the surface of the meat is dry. Pat it down with paper towels, as moisture can create steam and hinder effective searing.
Once dry, season the meat or seafood according to your preferences. Hold the blowtorch at a distance of about 6 inches, using a sweeping motion to evenly apply the flame across the surface. For meat, concentrate on the edges and areas where you desire a deeper char. This technique not only enhances flavor but creates an appealing crust. Seafood, such as scallops, can also benefit from this method; just be cautious not to overdo it, as seafood cooks quickly. Searing with a blowtorch is an effective way to enhance your dishes while ensuring safety and precision throughout the cooking process.
Expert Tips for Toasting and Browning with a Blowtorch
A blowtorch is an excellent tool for toasting and browning various dishes, particularly when adding a finishing touch to meringues or casseroles topped with cheese. To start, prepare the dish by applying a layer of sugar or cheese that you wish to brown. Ensure that this layer is evenly distributed to promote uniform browning.
When using the blowtorch, hold it at a distance of about 6 to 8 inches from the surface. Keep the flame moving in a circular motion to prevent burning any specific area. This technique allows for controlled browning while ensuring that the entire surface receives adequate heat. It is crucial to monitor the process closely, as browning can occur rapidly. The visual transformation from pale to golden brown not only showcases a culinary technique but also significantly enhances the dish’s overall presentation.
Research-Backed Benefits of Safe Blowtorch Cooking
Practical Steps for Safe Blowtorch Usage
To safely utilize a blowtorch in your cooking, follow these practical steps. Start by ensuring you are wearing appropriate protective gear, including heat-resistant gloves, an apron, and safety goggles. Next, arrange your workspace in a well-ventilated area, far from flammable materials, to create a safe cooking environment.
When igniting your blowtorch, remember to turn on the gas valve slowly and use the igniter while keeping the torch pointed away from your body. After using the blowtorch, immediately turn off the gas valve to safely extinguish the flame. Regularly inspect your blowtorch for any signs of wear or leaks, and keep a fire extinguisher readily accessible. By diligently following these steps, you can fully enjoy the culinary benefits of a blowtorch while prioritizing your safety.
Health Benefits of Cooking with a Blowtorch
Utilizing a blowtorch in cooking presents various health benefits worth noting. One significant advantage is the ability to prepare food at elevated temperatures for shorter durations, which can help preserve essential nutrients. Traditional cooking methods often necessitate longer cooking times, potentially leading to nutrient loss; using a blowtorch retains more vitamins and minerals, especially in vegetables, thereby enhancing their health benefits.
Additionally, blowtorches can minimize the need for added fats in cooking. Instead of frying, you can achieve a delicious char or caramelization with minimal oil, resulting in healthier dishes that are lower in calories. This style of cooking aligns with contemporary dietary trends that prioritize health-conscious cuisine while still delivering exceptional flavor and presentation that tantalizes the palate.
Enhancing Culinary Presentation with a Blowtorch
A blowtorch can dramatically elevate the presentation of various dishes, providing professional touches that impress guests and enhance your dining experience. The visual allure of caramelized sugar on desserts not only looks stunning but also adds a unique texture and flavor profile that heightens the overall dish. Similarly, achieving perfectly browned cheese atop a casserole creates an enticing golden crust that beckons diners to indulge.
Moreover, the dramatic effect of a blowtorch can transform even the simplest meals, converting a standard dish into a visually striking feast. By mastering the art of blowtorch usage, home cooks can impress their family and friends with beautifully finished dishes that showcase both creativity and skill. This element of flair, combined with technique, ultimately enriches the culinary experience and leaves a lasting impression on diners.
Best Practices for Maintaining and Storing Your Blowtorch
Essential Steps for Cleaning Your Blowtorch
Routine cleaning is vital for sustaining the performance of your blowtorch and ensuring its longevity. After each use, allow the torch to cool completely. Utilize a soft brush to clean the nozzle and eliminate any food residue or soot that may have accumulated during cooking. For a deeper clean, apply a mild detergent with a damp cloth to wipe down the exterior surfaces.
Avoid using abrasive materials that may scratch the surface or damage the internal components of your blowtorch. Regular maintenance not only extends the lifespan of your equipment but also ensures optimal performance during cooking. A clean blowtorch will provide a more consistent flame, enhancing the quality of your culinary creations and making your cooking experiences more enjoyable.
Proper Storage Techniques for Safety and Longevity
Proper storage of your blowtorch is crucial for both safety and durability. After cleaning and ensuring the device is cool, store the blowtorch in a cool, dry location, away from children and pets. It is essential to ensure that the gas cylinder is secure and that the valve is completely closed. This practice prevents accidental leakage and ensures the blowtorch is ready for safe use the next time you need it.
Consider using a dedicated container or case for the blowtorch to keep it protected from dust and damage. Creating a designated area in your kitchen for the blowtorch and its accessories ensures that it remains organized and easily accessible while still being secure, promoting efficiency in your cooking space.
Recognizing When to Replace Your Blowtorch
Recognizing the right time to replace your blowtorch is essential for maintaining safety in the kitchen. Signs that it may be time for a replacement include an inconsistent flame that flickers or fails to ignite reliably. Additionally, any visible gas leaks or hissing sounds when the torch is activated indicate a malfunction that can pose a danger.
Physical damage to the body of the blowtorch or the nozzle can also compromise safety and functionality. If you notice any of these issues, consult the user manual for guidance and consider replacing the unit. Investing in a new blowtorch when necessary ensures that you can continue enjoying safe and effective culinary experiences without exposing yourself to unnecessary risks.
Troubleshooting Common Blowtorch Issues
Addressing Ignition Problems with Your Blowtorch
If your blowtorch fails to ignite, the first step is to check the gas level. If the gas canister is empty, replace it with a full one. Next, inspect the nozzle to ensure it is clean and free from obstructions. A clogged nozzle can hinder gas flow, leading to ignition issues. Always refer to the manufacturer’s manual for specific troubleshooting steps tailored to your blowtorch model to ensure you address the issue effectively.
If the blowtorch still does not ignite, consider checking the igniter mechanism. Some blowtorches have built-in igniters that may require replacement after extended use. Regular maintenance can help avoid these problems; however, it is crucial to address ignition issues immediately to prevent any potential safety hazards and ensure a smooth cooking experience.
Managing an Uneven Flame for Optimal Cooking
An uneven flame can significantly impact your cooking results. If you encounter this issue, start by adjusting the flame control on your blowtorch. Ensure that there is consistent gas flow, as fluctuations can result in an uneven burn that affects cooking outcomes.
Additionally, inspect the nozzle for any blockages that could disrupt the flame pattern. Regularly cleaning the nozzle will help sustain a steady flame and improve overall performance. If adjustments to the flame control do not resolve the issue, consider consulting the user manual for specific troubleshooting steps related to your blowtorch model to ensure safe and effective operation.
Actions to Take If You Detect a Gas Smell
If you smell gas while using a blowtorch, immediate action is required. First, turn off the blowtorch and vacate the area to avoid any potential ignition sources. Ventilate the space by opening windows and doors to disperse the gas and ensure safety.
Once the area is ventilated, refrain from using any electrical appliances or igniting any flames until you are confident that the leak has been addressed. If the smell persists, consider consulting a professional for assistance. It’s essential to take gas leaks seriously to ensure the safety of yourself and others nearby, preventing potential accidents or injuries.
Resolving Clogged Nozzle Issues Effectively
If you experience a clogged nozzle, it’s important to address the issue quickly to maintain optimal performance. Begin by turning off the blowtorch and allowing it to cool completely. Carefully disassemble the nozzle according to the manufacturer’s instructions, taking care not to damage any components during the process.
Using a fine wire or needle, gently clean the nozzle to remove any food particles or debris that may be causing the blockage. After cleaning, reassemble the blowtorch and perform a test ignition to confirm proper functionality. Regular cleaning and maintenance will help prevent clogged nozzles, ensuring consistent performance during your culinary sessions.
Managing Excessive Soot Production for Cleaner Cooking
Excessive soot production can indicate an improper fuel-air mixture, leading to inefficient combustion and a less desirable cooking experience. To manage this issue, first ensure that the blowtorch is being utilized in a well-ventilated area. Insufficient airflow can contribute to incomplete combustion, resulting in soot buildup that affects your cooking results.
Adjusting the air intake on the blowtorch can also help improve the fuel-air ratio, facilitating better combustion. If excessive soot continues to be a problem, consider consulting the user manual for troubleshooting tips specific to your model. Regular maintenance, including cleaning the nozzle and ensuring proper airflow, will help mitigate soot production and enhance the overall performance of your blowtorch.
Frequently Asked Questions About Blowtorch Usage
Is it safe to use a blowtorch indoors?
Using a blowtorch indoors can be safe, provided that proper ventilation is established and all flammable materials are kept at a safe distance. Always adhere to safety precautions and ensure the area is free from hazards to minimize risk.
What type of fuel should I use for my culinary blowtorch?
The most commonly used fuel for culinary blowtorches is butane. It is favored for its clean burn and user-friendly nature, making it ideal for a variety of cooking applications that require precision and control.
Can I use a blowtorch for baking?
Absolutely, a blowtorch can be effectively employed in baking for tasks such as caramelizing sugars, toasting meringues, or creating a beautifully brown crust on specific desserts, enhancing both flavor and presentation in your culinary creations.
How far should I hold the blowtorch from the food?
It is generally recommended to maintain a distance of about 6 inches when holding the blowtorch from the food to achieve an even burn without risking burns or overcooking, ensuring optimal results in your cooking process.
What should I do if I accidentally burn my food?
If food becomes burnt, the best approach is to remove the burnt portions, if feasible. For minor burns, consider using a blowtorch to lightly sear the surface again to enhance flavor and improve presentation.
How often should I clean my blowtorch?
It is advisable to clean your blowtorch following each use to ensure optimal performance and safety. Regular cleaning prevents buildup that can affect functionality and extends the lifespan of your equipment.
Can I use a blowtorch to grill food?
Yes, a blowtorch can be effectively used to grill food, especially for achieving a charred finish on meats or vegetables. It imparts a unique flavor without requiring a full grill setup, making it a versatile cooking tool.
What are the signs of a malfunctioning blowtorch?
Signs of a malfunctioning blowtorch include an inconsistent flame, difficulty igniting, gas leaks, or visible damage. If you notice any of these issues, consider replacing the unit to ensure safe and effective cooking.
Is it necessary to wear protective gear when using a blowtorch?
Yes, wearing protective gear such as gloves, safety goggles, and an apron is essential when utilizing a blowtorch to protect yourself from burns and injuries while ensuring a safer cooking environment.
How can I ensure my blowtorch lasts a long time?
To extend the lifespan of your blowtorch, store it properly, clean it regularly, and use it in accordance with the manufacturer’s instructions. Consistent maintenance is key to ensuring longevity and optimal performance.
Connect with us on Facebook!
The post How to Cook with a Blowtorch Safely: Essential Tips appeared first on https://cookinggods.com
The Article Cook with a Blowtorch Safely: Essential Tips to Follow Was Found On https://limitsofstrategy.com
-

Pork Cuts for BBQ: Top Picks for Competitive Cooking
Explore the Exciting World of BBQ Competitions
Understanding BBQ Competitions and Their Cultural Significance
BBQ competitions are vibrant events that bring together talented pitmasters who showcase their cooking skills by preparing a variety of meats, with pork often being the star ingredient. These contests are rigorously judged based on criteria such as taste, tenderness, and presentation, fostering an environment that promotes both creativity and culinary expertise. Participants dedicate countless hours to perfecting their recipes and cooking techniques, all to impress a panel of discerning judges. The role of BBQ competitions is deeply rooted in American culinary traditions, especially in the South, where BBQ is more than just food—it’s a cherished social and cultural experience that connects communities.
Why Pork is the Star of BBQ Competitions
Pork is a fundamental element in BBQ competitions due to several compelling reasons. Its remarkable versatility allows for a wide variety of cuts, which can be prepared using diverse cooking methods such as smoking, grilling, and roasting. Pork’s unique ability to soak up marinades and rubs significantly enhances its flavor profile, making it the perfect canvas for competitors to demonstrate their culinary creativity. Furthermore, many cuts of pork can endure long cooking times without drying out, which is crucial for achieving the tender and flavorful results that judges expect. This unique adaptability cements pork’s reputation as a vital ingredient in BBQ competitions.
Choosing the Perfect Pork Cut for Winning BBQ
Selecting the right pork cut is crucial for achieving remarkable results in BBQ competitions. Competitors should evaluate several important factors, including cooking methods, desired flavor profiles, and specific judging criteria. A solid understanding of the unique characteristics of each cut enables contestants to make informed decisions. For instance, cuts like Boston Butt are ideal for low-and-slow cooking, while ribs may be more suited for quicker, high-heat methods. Recognizing the subtle differences among these cuts can be the key to transforming a contestant’s experience from a potential win to a missed opportunity.
Examining Shoulder Cuts for BBQ Excellence
Boston Butt: The Timeless Champion of Competitive BBQ
Boston Butt is widely regarded as the quintessential choice for BBQ competitions, celebrated for its marbling and tenderness when cooked using low-and-slow methods. This cut originates from the upper shoulder region and is rich in fat, which helps maintain moisture and infuses the meat with deep, savory flavors. Competitors frequently select Boston Butt for pulled pork presentations due to its forgiving nature throughout the cooking process, making it a reliable choice that can consistently score high in competitions.
- Smoke low and slow for up to 12 hours at 225°F to maximize flavor development.
- Wrap the meat in foil during the final stages of cooking to retain moisture and enhance tenderness.
- Inject a flavorful marinade before cooking to add depth to the flavor.
- Apply a dry rub to create a flavorful crust that judges will appreciate.
The versatility of Boston Butt makes it a dependable option that can earn high scores in competitions, especially when paired with innovative sauces or unique seasoning blends that showcase the cook’s creativity and skills.
Picnic Shoulder: The Affordable Flavor Sensation
Picnic shoulder emerges as another fantastic option for BBQ competitions, offering rich flavors without the higher price tag often associated with Boston Butt. While it contains more connective tissue and requires careful cooking to achieve optimal tenderness, when prepared correctly, picnic shoulder can yield mouthwatering results that rival those of more expensive cuts. This cut is frequently underestimated, making it a wise choice for competitors who want to impress judges while sticking to a budget.
Why Shoulder Cuts are Perfect for BBQ Competitions

Shoulder cuts are particularly well-suited for BBQ competitions due to their significant intramuscular fat content, which is essential for keeping the meat moist during extended cooking sessions. This fat not only enhances tenderness but also enriches the overall flavor profile of the dish. Additionally, the structural characteristics of shoulder cuts allow for various cooking techniques, ranging from smoking to braising, making them adaptable to the diverse requirements of competitions. The perfect balance of flavor and tenderness makes shoulder cuts a favored choice among seasoned pitmasters looking to impress judges.
Ribs: A Key Element of BBQ Competitions
Choosing Between Baby Back Ribs and Spare Ribs
In the realm of BBQ competitions, ribs are an indispensable component, with two primary types in contention: baby back ribs and spare ribs. Baby back ribs are generally leaner, cook more quickly, and provide a tender bite that many judges prefer. Conversely, spare ribs possess a higher fat content, resulting in a richer flavor but requiring more careful cooking to achieve the desired tenderness and texture.
- Baby back ribs are shorter and curve along the spine, offering a delicate texture that is favored by judges.
- Spare ribs are longer and wider, with more meat nestled between the bones, providing a heartier option.
- Baby back ribs cook faster, making them ideal for time-sensitive competition situations.
- Spare ribs are often deemed more flavorful due to their increased fat content, contributing to a deeper taste experience.
Understanding the distinctions between these two types of ribs empowers competitors to select the best option based on their cooking style and the preferences of the judges, ultimately enhancing their chances of success.
Effective Rib Preparation for Competition Success
Careful preparation is vital when getting ribs ready for competition. The first step involves trimming excess fat and removing the silver skin to promote even cooking and enhance flavor. Following this, competitors typically apply a dry rub to elevate the ribs’ taste. The cooking process usually entails smoking at a low temperature, wrapping the ribs in foil at strategic intervals to preserve moisture, and finishing with a glaze or sauce that creates a sticky, flavorful exterior. The ultimate goal is to achieve a perfect bite that balances tenderness with an appealing texture that judges crave.
Key Judging Criteria for Ribs in Competitions
Ribs are primarily evaluated based on appearance, tenderness, and taste. Judges seek visually appealing presentations characterized by rich colors and enticing glazes. Tenderness is assessed by how easily the meat separates from the bone, while taste encompasses the overall flavor and balance of the dish. A successful rib entry must harmonize smoky, sweet, and savory notes, creating a memorable experience for the judges that leaves a lasting impression and encourages high scores.
Expert Tips on Selecting the Best Pork Cuts for BBQ Competitions
Real-World Success Stories of Exceptional Pork Cuts
Many successful pork cuts have gained recognition in BBQ competitions, with numerous award-winning pitmasters swearing by the reliability of Boston Butt. For instance, esteemed competitors often showcase their unique interpretations of this classic cut by incorporating innovative rubs or unexpected flavor combinations to elevate traditional preparations. The adaptability of Boston Butt allows for artistic expression while consistently delivering the tender and flavorful outcomes that judges are eager to reward.
Action Steps for Selecting and Preparing Pork Cuts
The first actionable step in choosing the optimal pork cut is to source high-quality, fresh meat from reputable suppliers. Look for cuts that exhibit a good amount of marbling and are free from excessive bruising or defects. After selection, trim any excess fat, as this can lead to flare-ups during cooking. Applying the right seasonings tailored to each specific cut is crucial; for example, a dry rub for shoulder cuts can enhance the bark, while a wet marinade may be more suitable for tenderloin. Developing a comprehensive understanding of each cut’s nuances will guide competitors in selecting the best approach for achieving their desired results and impressing judges.
Evaluating the Impact of Pork Cuts on Competition Scores
The choice of pork cut significantly influences competition scores, as judges have clear preferences for tenderness and flavor. For instance, expertly cooked shoulder cuts consistently earn high scores due to their ability to remain moist and flavorful, even after prolonged cooking durations. Competitors who invest time in perfecting their chosen cut often observe a direct correlation between their efforts and their final scores, highlighting the critical importance of selecting the right cut for any competitive event.
Pork Belly: The Rising Star in BBQ Competitions
Understanding the Popularity of Pork Belly Among Competitors
Pork belly has gained significant traction within BBQ competitions, primarily due to its rich flavor profile and versatility. This cut shines in various preparations, including the increasingly popular burnt ends, which have delighted judges’ palates. Its natural fat content not only amplifies flavor but also ensures moisture, making it an exceptional choice for dishes that require a crispy exterior and tender interior. As competitors continue to innovate with this cut, its presence in competitions is expanding, reflecting the evolving landscape of BBQ.
Strategies for Cooking Pork Belly in BBQ Competitions
Cooking pork belly for competitions typically involves a two-step process to achieve the ideal balance of tenderness and crispiness. Start by slow-smoking the pork belly at a low temperature, allowing the fat to render and the meat to absorb the rich flavors of the smoke. Once the meat is tender, competitors often finish with a glaze or sauce to enhance its taste, caramelizing the exterior for added flavor depth. Techniques such as scoring the skin can also help achieve the coveted crispy texture that judges highly appreciate, making it a standout dish.
Challenges Associated with Cooking Pork Belly
While pork belly offers numerous advantages, it also presents specific challenges. One major difficulty involves managing the high fat content, which can lead to greasiness if not cooked properly. Additionally, achieving the perfect balance between tenderness and crispiness often requires considerable practice and careful adjustments to cooking times and temperatures. Competitors must remain attentive to their cooking process to ensure they create a product that impresses judges without being overly rich or unpalatable.
Loin Cuts: Lean and Adaptable Selections for BBQ Competitions
Pork Tenderloin: The Lean and Flavorful Choice
Pork tenderloin, known for its leanness, poses distinctive challenges in BBQ competitions. While it offers a refined flavor, its low-fat content can make it difficult to retain moisture during cooking. Competitors who choose this cut must focus on specific techniques, such as marinating or wrapping it in bacon, to enhance both flavor and moisture retention. When executed correctly, pork tenderloin can emerge as a standout dish that showcases a pitmaster’s skill, precision, and meticulous attention to detail.
Pork Loin: A Versatile Cut for BBQ Enthusiasts
Pork loin, being a larger cut, can be utilized in various ways within BBQ competitions. Competitors can roast, smoke, or grill this cut, allowing for a plethora of options in terms of presentation and flavor. The pork loin can also be sliced into chops, enabling contestants to create a variety of dishes that highlight diverse cooking techniques. This adaptability makes pork loin a valuable asset for any competitor aiming to impress judges with inventive and creative presentations that showcase skill and originality.
Maximizing Loin Cuts for BBQ Competition Success
Loin cuts, such as pork tenderloin and pork loin, can be creatively transformed into numerous appealing dishes for BBQ competitions. Pork tenderloin can be served as medallions or stuffed with various ingredients, while pork loin can shine as tender chops or an elegant roast. This variety allows competitors to express their culinary creativity while utilizing lean cuts that may appeal to health-conscious judges. Proper seasoning and cooking techniques are essential to ensure these cuts stand out under the scrutiny of competition judging, ultimately leading to higher scores and recognition.
Pork Loin Chops: A Versatile Cut for Grilling Excellence
Pork loin chops represent an incredibly adaptable option for BBQ competitors. Their thickness provides ample opportunity for achieving perfect grill marks while maintaining juiciness. Competitors can explore a variety of marinades, dry rubs, or brining techniques to enhance both flavor and tenderness. When grilled to perfection, pork loin chops deliver a delightful texture and tender bite that can impress judges, making them a crucial cut in any competitor’s culinary toolkit, capable of elevating their competition entry.
Ham: An Overlooked Yet Flavorful BBQ Option
Fresh Ham vs. Cured Ham: Understanding the Differences
When discussing ham in the context of BBQ competitions, it’s essential to distinguish between fresh and cured ham. Fresh ham is unprocessed and provides a unique flavor profile, while cured ham is commonly associated with holiday meals and features more pronounced seasonings. Each type has its distinct advantages; fresh ham serves as a blank canvas for competitors to infuse flavors through marinades and rubs, while cured ham can offer a rich and complex taste that appeals to judges’ palates seeking depth and character in their dishes.
Effective Techniques for Smoking Ham in Competitions
Smoking ham for competitions demands specific techniques to achieve the desired flavor and texture. Selecting the right wood for smoking is critical; fruit woods like apple or cherry impart a subtle sweetness that beautifully complements the ham’s natural flavors. Applying a rub made of sugar, spices, and mustard can elevate the flavor profile while creating an attractive crust. The key to success lies in cooking the ham low and slow, allowing the flavors to meld and the meat to become tender and delicious, ultimately winning over judges with its appeal.
Unique Advantages of Incorporating Ham in BBQ Competitions
Including ham in BBQ competitions brings several unique benefits. Its distinctive flavor can set it apart from traditional pork entries, captivating judges with its versatility. Ham can be presented in various forms, from pulled ham sandwiches to glazed ham steaks, giving competitors the opportunity to showcase their culinary creativity and technical prowess. Additionally, introducing something unconventional can create a lasting impression, leading to potentially higher scores from judges who appreciate innovation and originality in their evaluations.
Strategic Approaches for Selecting the Best Pork Cuts in BBQ Competitions
Expert Recommendations for Ideal Pork Cuts in Competition Categories
Experts advise tailoring pork cuts to specific competition categories to maximize the chances of success. Shoulder cuts, such as Boston Butt, are often preferred for pulled pork entries, while ribs are essential for any rib category. Pork belly has emerged as a formidable contender for burnt ends, showcasing its rich flavors and textures that captivate judges. Understanding the focal point of each competition category empowers competitors to choose cuts that align with their strengths and resonate with judges’ preferences, thereby enhancing their opportunities for triumph.
Real-World Examples of Strategic Pork Cut Selection in Competitions
Many seasoned pitmasters strategically select their pork cuts based on competition requirements and personal cooking strengths. For example, a competitor renowned for their smoking expertise may opt for Boston Butt or spare ribs, where low-and-slow cooking techniques truly shine. Others might highlight their ability to work with leaner cuts, such as pork tenderloin, showcasing their skills in moisture retention and flavor enhancement. Real-world success stories illustrate that the right cut, combined with culinary proficiency, can yield outstanding results on competition day, making it essential to choose wisely.
Actionable Steps to Enhance Pork Cut Performance in BBQ Competitions
To optimize pork cut performance during competitions, participants should focus on several key steps. Begin by selecting high-quality meat from reputable suppliers, ensuring that the cuts are fresh and well-marbled. Next, experiment with various cooking techniques, such as brining, marinating, or utilizing different wood types for smoking. Understanding the specific judging criteria of each competition is crucial, allowing competitors to fine-tune their flavor profiles and presentation styles to align with judges’ expectations. Lastly, consistent practice and refinement of techniques will lead to impressive results that elevate a competitor’s standing in the eyes of the judges, showcasing their dedication and skill.
Mastering Pork Cuts in BBQ Competitions: A Comprehensive Approach
The Importance of Practice and Experimentation in BBQ Mastery
Mastering pork cuts in BBQ competitions requires a harmonious blend of practice and experimentation. Competitors must be open to exploring new techniques, flavors, and cuts to discover what resonates most with judges and enhances their culinary repertoire. Continuous practice not only sharpens skills but also builds confidence, enabling pitmasters to refine their methods and develop unique signature styles that set them apart. The journey of perfecting BBQ skills is as rewarding as the results, fostering a deep connection to the craft and a passion for the art of BBQ.
Staying Informed on the Latest Trends in BBQ
Remaining updated on BBQ trends is vital for any serious competitor looking to stay ahead. Following prominent BBQ blogs, subscribing to industry newsletters, and attending workshops or competitions can provide valuable insights into emerging techniques and flavor profiles. Networking with fellow pitmasters at competitions offers opportunities for knowledge exchange, helping competitors continuously adapt their practices to remain competitive in a fast-evolving environment filled with new ideas and inspirations.
The Future of Pork Cuts in BBQ Competitions: Trends and Innovations
As BBQ competitions continue to evolve, the future of pork cuts may witness an increasing acceptance of unconventional options, such as pork belly and lesser-known cuts. The growing interest in diverse flavor profiles and regional influences will likely shape how competitors approach pork preparation. Additionally, as global cuisines blend with American BBQ traditions, we can anticipate innovative cooking techniques and flavor combinations that challenge conventional practices while still honoring the essence of BBQ, leading to exciting new directions in the competitive landscape.
Effective Presentation Techniques for Pork Cuts in Competitions
The presentation of pork cuts can significantly enhance scores in BBQ competitions. Focus on visual appeal by utilizing garnishes that complement the dish and add visual intrigue. Creating a narrative around the dish can also be impactful; sharing a personal story or background about the dish can resonate profoundly with judges, making it more memorable. Remember, a well-presented dish not only tastes exceptional but also embodies the essence of the pitmaster’s journey and culinary philosophy, leaving a lasting impression that can elevate scores.
Your Questions Answered: FAQs on BBQ Competitions
What is the best pork cut for BBQ competitions?
The best pork cut for BBQ competitions often varies by category. Boston Butt is a popular choice for pulled pork, while spare ribs are preferred in rib categories due to their flavor and texture.
How do I effectively prepare pork for BBQ competitions?
To prepare pork for BBQ competitions, select high-quality cuts, trim excess fat, apply a suitable rub or marinade, and utilize cooking techniques tailored to the specific cut to maximize flavor and tenderness.
What are the key judging criteria for BBQ pork entries?
Judging criteria generally encompass appearance, tenderness, taste, and creativity. Judges evaluate the visual appeal, texture, flavor balance, and overall presentation of the dish, which can significantly influence scoring.
Can I use pork belly in BBQ competitions?
Absolutely! Pork belly is gaining traction in BBQ competitions due to its rich flavor and versatility, making it an excellent choice for unique presentations such as burnt ends that stand out to judges.
What cooking methods yield the best results for pork shoulder?
Pork shoulder is best cooked using low-and-slow methods such as smoking, braising, or slow roasting, effectively breaking down connective tissues to achieve tender and flavorful results.
How can I enhance the flavor of pork cuts for competitions?
Flavor enhancement can be achieved through marinades, dry rubs, or glazes, allowing competitors to experiment with diverse seasonings and innovative cooking techniques that captivate judges’ attention.
What are the benefits of incorporating ham into BBQ competitions?
Ham offers a distinctive flavor profile and versatility, allowing for creative presentations that surprise judges and stand out in a competitive environment, showcasing the cook’s culinary artistry.
How crucial is presentation in BBQ competitions?
Presentation is critical in BBQ competitions, as it significantly influences judges’ overall impressions of the dish. An appealing presentation can enhance scores considerably, demonstrating attention to detail and creativity.
What trends are emerging for pork cuts in BBQ competitions?
The future trend for pork cuts may include a rise in unconventional choices, emphasizing creativity and unique flavor profiles influenced by global cuisines, making competitions more innovative and exciting.
How can I improve my BBQ skills for competitions?
Improving BBQ skills involves diligent practice, experimentation with different techniques, staying updated on industry trends, and learning from other experienced pitmasters through networking and collaboration.
Connect with us on Facebook!
The Article Best Pork Cuts for BBQ Competitions: Top Picks appeared first on https://pitmastersarsenal.com
The Article Pork Cuts for BBQ Competitions: Our Top Recommendations Was Found On https://limitsofstrategy.com
-
Pickling Techniques for Success at Home
Unlock the Secrets of Pickling: Your Ultimate Guide to Food Preservation
Understanding the Pickling Process and Its Numerous Advantages
Pickling is a vital culinary art and a time-honored practice focused on preserving food, utilizing an acidic solution—most commonly vinegar or brine—to extend the shelf life of a variety of food items. The pickling process not only enhances the flavor of the ingredients but also produces a distinctive texture that many food enthusiasts adore. A diverse array of fruits and vegetables, including cucumbers, carrots, and even peaches, can be transformed into scrumptious pickled delicacies. The secret to successful pickling lies in achieving the ideal balance between acidity, sugar, and spices, which together create a rich flavor profile that tantalizes the taste buds and adds excitement to meals.
- Cucumbers
- Carrots
- Beets
- Green beans
- Cauliflower
- Onions
- Garlic
- Fruits (like peaches and watermelon)
Across the globe, numerous cultures have embraced the technique of pickling, establishing it as a universal method for food preservation. From savoring pickled kimchi in Asia to relishing the sharp taste of sour gherkins in Europe, the tradition of pickling has been passed down through generations, underscoring its significance in flavor enhancement and food safety practices.
Essential Tools for Successful Home Pickling
Before embarking on your exhilarating journey into the world of pickling, it’s crucial to gather the necessary equipment that will streamline your home pickling experience. Having the right tools not only simplifies the process but also ensures safety during your pickling adventure. Here’s a comprehensive list of essential equipment you should consider:
- Glass jars with secure lids
- Large pot for sterilization
- Tongs
- Funnel
- Measuring cups and spoons
- Thermometer (for checking brine temperature)
- Cutting board and knife
- Labels for storage
Glass jars are highly recommended as they do not react with acidic solutions, allowing you to visually monitor the contents. Sterilizing jars is crucial to prevent contamination and spoilage; hence, it is advisable to sterilize your jars in boiling water before using them. The funnel is invaluable for pouring brine without spills, ensuring a clean and efficient process. As you set up your pickling station, organizing these tools will enhance your experience, allowing you to focus on creating mouthwatering pickles.
Crucial Safety Protocols for Home Pickling
Ensuring safety during the pickling process is paramount, as improper techniques can lead to spoilage and potential foodborne illnesses. Adhering to hygiene practices and understanding the importance of sterilization is vital for safe pickling. Always begin with fresh, high-quality ingredients to ensure the best outcomes. Here are some essential safety measures to keep in mind:
- Thoroughly wash your hands and all equipment.
- Utilize only fresh, unblemished produce.
- Follow established recipes for accurate vinegar concentrations.
- Store pickles in the refrigerator if they are not processed.
- Watch for signs of spoilage, such as unusual smells or mold.
- Employ suitable sealing methods for jars to prevent contamination.
- Label jars with dates and contents for easy tracking.
- Educate yourself on safe canning practices if you’re new to pickling.
Implementing these precautions will not only extend the shelf life of your pickled products but also ensure their safety for consumption. Remember, a knowledgeable pickler is a successful pickler, so invest time in learning about food safety for a rewarding and worry-free pickling experience.
Proven Techniques for Mastering Home Pickling

Expert-Recommended Methods for Achieving Optimal Pickling Results
When diving into the world of home pickling, seasoned experts typically recommend two primary methods: the water bath canning method and the fermentation method. Each approach presents distinct advantages and caters to different flavor profiles and preservation preferences. The water bath canning method is particularly advisable for high-acid foods, such as cucumbers, as it effectively eliminates harmful bacteria through boiling, ensuring safety.
On the other hand, the fermentation method harnesses the natural bacteria present on vegetables, resulting in a tangy and probiotic-rich pickle that can significantly benefit gut health. For example, traditional Korean kimchi exemplifies the rich flavors achievable through this technique. Real-world applications of these methods showcase the vast diversity of pickling—from the crisp, tangy dill pickles of North America to the spiced, fermented vegetables prevalent in Asian cuisines; the possibilities are truly endless. Choose a method based on your desired outcome—whether it be a quick, safe preserve or a complex, flavorful ferment.
Choosing the Finest Ingredients for Your Pickling Projects
The success of your pickling endeavor largely hinges on the quality of your ingredients. Opting for fresh, high-quality produce is non-negotiable. Select seasonal ingredients to ensure peak flavor and optimal texture. When selecting vinegar or brine, remember that different types can drastically influence the taste of your pickles. Here’s how to ensure you select the finest ingredients:
- Inspect produce for firmness and freshness.
- Choose organic options where feasible to avoid pesticides.
- Experiment with various vinegars (white, apple cider, rice vinegar).
- Consider using sea salt instead of table salt for enhanced flavor.
- Add spices that harmonize with your main ingredient (e.g., dill with cucumbers).
- Seasonal ingredients often yield the most vibrant flavors.
- Research local varieties for unique tastes.
- Trust your palate—choose what tastes best to you.
By meticulously selecting your ingredients, you not only enhance the flavor of your pickles but also engage in a sustainable practice by supporting local markets and consuming seasonal produce. This thoughtful approach to ingredient selection elevates your pickling to new heights of culinary creativity.
Avoiding Common Pitfalls in the Pickling Process

As you embark on your pickling journey, being aware of several common mistakes can greatly enhance your results. Recognizing these common pitfalls is essential for achieving the best possible pickles. Overfilling jars is a frequent error; it restricts the brine’s ability to circulate and fully flavor the ingredients. Additionally, overlooking proper sterilization can jeopardize safety and freshness.
Another common mistake involves using vinegar with insufficient acidity levels, which fails to adequately preserve the food. The appropriate vinegar concentration is critical; typically, a 5% acidity level is deemed safe for pickling. Moreover, neglecting to allow sufficient time for flavors to meld can result in bland pickles. Understanding these pitfalls empowers you to refine your technique and produce pickles that not only taste fantastic but are also safe for consumption. Adjust your methods, keep experimenting, and you’ll discover your path to pickling perfection.
Enhancing the Flavor Profiles of Your Pickled Foods
Optimal Spices and Herbs for Flavorful Pickling
Spices and herbs are essential for flavor development in pickling, enabling you to create a depth of taste that elevates your pickled products. Popular choices include <a href=”https://cookinggods.com/top-tips-for-poaching-fish-in-broth-a-culinary-guide/”>dill</a>, mustard seeds, garlic, and peppercorns. Each of these ingredients lends its distinct flair and can be combined in various ways to craft unique flavor profiles.
Dill is a classic choice for cucumber pickles, imparting a fresh, herbaceous note that complements the natural sweetness of the cucumbers. Mustard seeds contribute mild heat and crunch, making them a fantastic enhancement for various pickles. Garlic adds a robust flavor, while peppercorns introduce a slight bite that enriches the overall complexity. When experimenting with spices, consider these tips:
- Begin with small quantities and adjust to your taste.
- Combine spices for a distinctive blend (e.g., dill, garlic, and coriander).
- Infuse the brine with spices for an aromatic experience.
- Keep records of combinations that work well together.
Experimentation is vital for discovering your favorite flavor profiles. Don’t hesitate to explore unconventional herbs or spices, as the realm of pickling is open to innovation. By trying different combinations, you can create pickles that are uniquely yours.
Incorporating Sweetness for a Balanced Pickle Flavor
Absolutely! Adding sweetness to pickles is not only feasible but can also elevate the overall flavor profile by creating a delightful balance between sweet and tangy. Ingredients like sugar or honey can complement the acidity of vinegar and contribute depth to the taste. This balance is particularly enjoyable in recipes such as bread and butter pickles, where sweetness is a defining feature.
When incorporating sweetness, it’s essential to determine the right amount. Excessive sweetness can overpower the pickles, while too little might leave them lacking. Start with small quantities and adjust according to your taste preferences. Consider using different types of sweeteners for varied effects; for instance, honey imparts a floral note, while brown sugar adds depth and a hint of caramelization. Here are some suggestions for achieving the right balance of sweetness:
- Pair sweetness with spices for added complexity (e.g., cinnamon or cloves).
- Utilize natural sweeteners to maintain a healthier profile.
- Test and adjust during the pickling process.
- Consider the main ingredient’s flavor when introducing sweetness.
By thoughtfully incorporating sweet elements, you can create a harmonious taste that appeals to diverse palates, enhancing the enjoyment of your pickled creations.
Optimal Fermentation Times for Flavorful Pickles
The duration of fermentation for pickles can vary widely depending on the recipe and your desired flavor profile. Typically, this timeframe can range from a few days to several weeks. Longer fermentation allows for deeper flavor development and complexity, making it a vital factor in achieving the ideal pickle. For instance, traditional dill pickles usually require a minimum of a week, while lacto-fermented varieties might need a more extended period to cultivate beneficial bacteria.
During the fermentation phase, tasting your pickles periodically is essential. This practice helps you monitor flavor development and determine when they reach your preferred level of tanginess. Keep in mind that warmer conditions can accelerate fermentation, while cooler environments will slow it down. Here are some guidelines for successful fermentation:
- Look for bubbles—this indicates active fermentation.
- Utilize a weight or lid to keep vegetables submerged in brine.
- Store in a cool, dark location away from direct sunlight.
- Taste regularly to track flavor changes.
Patience is key in this process; waiting for the right moment can lead to a rewarding explosion of flavor in your pickles. The beauty of fermentation lies in its unpredictability and the artisanal touch it adds to your pickles.
Impact of Vinegar Selection on Pickle Flavor
The type of vinegar you select significantly influences the overall flavor of your pickles. Various vinegars, such as white vinegar, apple cider vinegar, and rice vinegar, each impart distinct characteristics and flavor nuances. For example, white vinegar is sharp and clean, making it an ideal choice for traditional pickles, while apple cider vinegar offers a fruity undertone that enhances the natural flavors of the produce.
Rice vinegar, however, is milder and slightly sweet, making it perfect for pickling Asian-inspired vegetables. Each vinegar type can transform your pickling experience, making it worthwhile to experiment with different options. Here are some factors to keep in mind when selecting vinegar:
- Match the vinegar flavor with the main ingredient (e.g., apple cider with apples).
- Consider acidity levels—aim for at least 5% acidity.
- Opt for organic vinegars for a more robust flavor.
- Experiment by blending different vinegars for a unique taste.
By understanding how vinegar affects flavor, you can tailor your pickling recipes to create delightful and complex profiles that make your pickles stand out. Whether you prefer a sharp crunch or a sweet tang, the right vinegar can be transformative in your pickling journey.
How Brine Strength Influences Pickle Flavor
Absolutely, the strength of your brine—specifically the salt concentration—has a significant impact on the final flavor and preservation of your pickles. A higher salt concentration can enhance the flavor and texture of the pickles, providing a satisfying crunch while effectively preventing spoilage due to its preservative qualities. Achieving the right balance of salt is critical; too little can lead to bland pickles, while too much can make them inedible.
Typically, a brine solution consists of a ratio of water to vinegar and salt, and finding that optimal balance is essential. Many recipes suggest a brine strength of 2-3 tablespoons of salt per quart of liquid. However, preferences can vary based on regional tastes; for instance, a southern-style pickle might favor a sweeter, less salty brine. Here’s how to effectively manage brine strength:
- Start with standard recipes for guidance and adjust as needed.
- Experiment with different salts—kosher, sea, or pickling salt.
- Consider the overall flavor balance in your final product.
- Monitor brine concentration throughout the pickling process.
Understanding brine strength not only improves the preservation of your pickles but also contributes to the overall sensory experience of your pickled foods. Mastering this aspect will enable you to create pickles that are bursting with flavor and perfectly preserved.
Exploring the Benefits of Home Pickling
Does Pickling Effectively Preserve Nutritional Value?
Yes, pickling can effectively retain nutrients, especially when vinegar is utilized. Many vitamins and minerals found in fruits and vegetables, such as vitamin C and antioxidants, are preserved during the pickling process. This characteristic makes pickled foods not only a delightful addition to meals but also a nutritious one. For example, pickled cucumbers can maintain their vitamin content while providing beneficial probiotics in fermented varieties.
Moreover, this preservation method allows you to enjoy seasonal produce throughout the year. By pickling your summer harvest, you can savor the flavors of fresh vegetables even during the coldest months. This aspect of pickling offers a sustainable approach to maintaining a healthy diet while reducing food waste. Here’s why preserving nutrients through pickling is advantageous:
- Retains vitamins and minerals compared to other preservation methods.
- Provides a source of probiotics in fermented varieties.
- Allows enjoyment of seasonal produce out of season.
- Can enhance overall diet quality with healthy additions.
By incorporating pickled foods into your meals, you not only enhance flavor but also contribute to a balanced, nutrient-rich diet. This makes pickling an appealing option for health-conscious individuals eager to explore new culinary techniques.
Is Pickling a Cost-Effective Method of Food Preservation?
Absolutely, pickling can be an exceedingly economical way to preserve food. By taking advantage of seasonal produce, you can benefit from lower prices and abundant supplies. Making large batches of pickles maximizes your investment, allowing you to buy in bulk during peak seasons and create delicious preserves that can be enjoyed throughout the year.
Furthermore, pickling helps prevent food waste by enabling you to utilize surplus vegetables from your garden or local markets. This practice not only saves money but also encourages resourcefulness in the kitchen. Here are a few ways pickling can lead to significant savings:
- Utilize leftover vegetables that might otherwise spoil.
- Purchase seasonal produce at lower prices.
- Create large batches for long-term storage.
- Reduce grocery bills by making your own condiments.
The financial benefits of pickling extend beyond immediate savings; it’s a sustainable practice that fosters a deeper appreciation for food and encourages mindful consumption. Engaging in this rewarding activity can lead to tangible savings on your grocery bills while simultaneously enhancing your culinary skills.
Is Pickling an Environmentally Responsible Practice?
Yes, pickling aligns seamlessly with environmentally conscious practices. It diminishes food waste by preserving excess produce that might otherwise be discarded. Additionally, by making your pickles, you eliminate the need for commercial packaging, which often involves plastic and contributes to environmental pollution.
Home pickling is a sustainable method of food preservation that supports local farmers and markets by promoting seasonal consumption. By purchasing fresh, local produce for your pickling endeavors, you contribute to a more sustainable food system. Here’s how pickling can promote environmental responsibility:
- Minimizes food waste by preserving surplus produce.
- Reduces reliance on single-use plastic packaging.
- Encourages the use of seasonal and local ingredients.
- Supports a circular economy through food preservation.
Engaging in pickling not only benefits your palate but also your planet. By choosing to pickle at home, you actively participate in a movement toward sustainability, making a positive impact on your environment.
Can Pickling Elevate the Flavor of Foods in Unique Ways?
Yes, pickling can significantly enhance the flavor of food, transforming ordinary ingredients into extraordinary culinary delights. By incorporating elements like vinegar, salt, and various spices, pickling creates complex profiles that enrich the taste of dishes. A well-crafted pickle can elevate anything from sandwiches to salads, providing a zesty contrast that excites the palate.
The art of pickling allows for creativity and experimentation, enabling you to customize flavors to suit your preferences. Whether you’re seeking something tangy, sweet, or spicy, pickling offers a versatile method to enhance your meals. Here are some ways pickling enhances food flavor:
- Brings out the natural sweetness in vegetables.
- Provides a tangy contrast to rich dishes.
- Can be paired with meats and cheeses for balance.
- Offers a unique twist to classic recipes.
By embracing the flavors of pickling, you can transform humble ingredients into flavorful companions that enrich your culinary repertoire. This versatility makes pickled foods a valuable addition to any kitchen.
Is Pickling a Simple Activity for Home Cooks?
Indeed, pickling is a straightforward and enjoyable activity that anyone can undertake at home with minimal equipment. The process is accessible, allowing individuals to explore their culinary creativity without the need for extensive training or complex machinery. With just a few jars, some fresh produce, and a basic brine recipe, you can start making delicious pickles in no time.
Furthermore, pickling is a fun way to engage with family and friends, fostering creativity and culinary exploration. It encourages experimentation with flavors and ingredients, making it a fulfilling hobby for anyone interested in cooking. Here are some aspects that highlight the simplicity of pickling:
- Minimal equipment required for successful pickling.
- Easy-to-follow recipes available for beginners.
- Quick process with rewarding results.
- Accessible to anyone, regardless of cooking skill level.
With its approachable nature and engaging process, pickling can become a beloved ritual in your home. It invites you to explore diverse flavors while preserving the best of seasonal produce, making it a delightful and rewarding activity.
Effective Strategies for Mastering Home Pickling Techniques
Ensuring Consistent Results in Your Pickling Adventures
To achieve consistent results in pickling, precision is crucial. Following recipes carefully and maintaining stable temperatures throughout the process ensures that your pickles turn out perfectly every time. This meticulous attention to detail not only enhances the quality of your pickles but also builds your confidence as a pickler.
Utilizing a trusted recipe as your guide is essential. Ensure that you measure ingredients accurately and follow specified cooking times. Furthermore, maintaining a stable temperature during the pickling process optimizes the flavors and preservation qualities of your pickles. Here are several strategies for achieving consistent results:
- Keep a kitchen scale for precise measurements.
- Utilize a thermometer to monitor brine temperatures.
- Document your processes and adjustments for future reference.
- Adhere to standard recipes until you’re comfortable experimenting.
By implementing these strategies, you can produce pickles that maintain their quality and flavor over time. Consistency in your approach will not only yield better results but also enhance your overall pickling experience.
Best Practices for Storing Pickled Foods
Proper storage practices are essential for preserving the quality and longevity of your pickles. Ideally, store them in a cool, dark place, as exposure to light and heat can diminish the flavor and texture over time. Additionally, refrigeration is advisable for extending shelf life, especially for fermented varieties that require consistent cool temperatures.
When storing pickles, ensure that jars are tightly sealed to prevent contamination and spoilage. Be vigilant for any signs of spoilage, such as off smells or texture changes. Here are some optimal practices for pickle storage:
- Store in a cool, dark pantry or refrigerator.
- Label jars with dates and contents for easy identification.
- Avoid exposure to direct sunlight or heat sources.
- Check for signs of spoilage before consumption.
By following these storage practices, you can enjoy your pickles at their best quality for an extended period. Proper storage ensures that all your hard work in the kitchen translates into delicious, flavorful results when it’s time to savor your pickled creations.
Tackling Common Pickling Challenges Effectively
Addressing common pickling issues is a vital skill for anyone aiming to refine their pickling techniques. If your pickles are excessively soft, it may indicate insufficient acidity levels or over-processing. Conversely, if they turn out too salty, you might need to adjust your brine concentration in future batches. Recognizing these common issues will not only enhance your current batch but also improve your skills as a pickler.
Tasting your pickles regularly throughout the process can help identify issues early, allowing for necessary adjustments. Here are some tips for troubleshooting common pickling challenges:
- Check acidity levels if pickles are too soft.
- Adjust brine strength for optimal saltiness.
- Monitor fermentation times to avoid over-fermentation.
- Maintain thorough notes on each batch to identify patterns.
By being proactive in troubleshooting, you can continually improve your pickling techniques and produce consistently delicious results. This iterative process fosters growth in your culinary skills and deepens your understanding of the art of pickling.
Vegetables That Are Ideal for Pickling
When it comes to pickling, certain vegetables excel due to their flavor, texture, and ability to absorb brine effectively. Cucumbers stand out as the quintessential pickling vegetable, often chosen for their crispness and versatility. However, many other vegetables shine in the pickling process, transforming into delightful treats that pair beautifully with various dishes.
Green beans, carrots, and cauliflower are also excellent candidates for pickling, each contributing unique textures and flavors to the jar. Fresh, firm vegetables yield the best results, as they can withstand the pickling process without becoming mushy. Here are some vegetables particularly suited for pickling:
- Cucumbers
- Green beans
- Carrots
- Cauliflower
- Radishes
- Turnips
- Beets
- Onions
Selecting the appropriate vegetables not only enhances your pickling success but also adds variety to your culinary creations. Each vegetable offers a distinct taste and texture, allowing you to explore the exciting world of pickling and discover new flavors that are sure to impress.
Innovating Unique Flavor Combinations in Pickling
Experimenting with flavors is an exhilarating aspect of the pickling process that enables you to create unique and exciting combinations. Adding various herbs and spices, such as dill or mustard seeds, can introduce new dimensions to your pickles, making the experience more enjoyable and personalized. The beauty of pickling lies in its versatility; there are no strict rules, allowing you to explore and innovate.
When experimenting, consider starting with a basic recipe and gradually introducing new elements. Tasting throughout the process can help you determine the ideal balance of flavors. Here are some strategies for flavor experimentation:
- Incorporate citrus zest or juice for brightness.
- Add spicy ingredients like chili flakes for heat.
- Mix and match different herbs to discover your signature blend.
- Use infused vinegars for added complexity.
Being adventurous with flavors allows you to create pickles that reflect your personal taste, making the process not only rewarding but also deeply satisfying. The thrill of discovery will keep you engaged in the art of pickling for years to come.
Creative Uses for Pickled Foods in Culinary Applications
Incorporating Pickles into Your Cooking Creations
Yes, pickles can serve as a versatile ingredient in cooking, injecting a burst of flavor into a variety of dishes. Their tangy and zesty notes can elevate sandwiches, salads, and even soups, making them a valuable addition to your culinary repertoire. Integrating pickles into your meals allows for a creative twist, transforming familiar recipes into exciting new offerings.
For instance, consider adding pickles to a classic potato salad to introduce a delightful crunch and tang. Chop them up and mix them into coleslaw for an unexpected flavor boost, or use them as a garnish for burgers to enhance the overall experience. Here are some ideas for incorporating pickles into your cooking:
- Chop and add to sandwiches for extra crunch.
- Mix into salads as a flavor-packed component.
- Incorporate into dips like tzatziki or creamy dressings.
- Use as a topping on tacos or nachos.
By creatively incorporating pickles into your cooking, you can enhance the overall flavor profile of your dishes, providing your family and friends with new and exciting culinary experiences that will leave them wanting more.
Enhancing Snack Options with Pickled Delights
Pickles make an excellent addition to snacks, providing a zesty twist that can awaken your palate. Whether enjoyed independently or paired with other ingredients, pickled vegetables can be a healthy and flavorful snacking option. Their crunchiness and flavor make them a delightful complement to cheese, crackers, or even charcuterie boards.
For example, pairing pickled vegetables with a selection of cheeses creates a harmonious balance of flavors that enhances the overall snacking experience. You can also add sliced pickles to a charcuterie board, offering a refreshing contrast to cured meats. Here are some creative ways to incorporate pickles into your snacks:
- Serve pickles alongside cheese and crackers.
- Include in a veggie platter with dips.
- Wrap pickles in prosciutto or deli meats.
- Top avocado toast with sliced pickles for a tangy kick.
By creatively incorporating pickles into your snacks, you can enjoy their vibrant flavors while making them a staple in your snack rotation. With their versatility, pickled foods can elevate simple gatherings into memorable tasting experiences.
Exploring Unique and Innovative Pickle Recipes
Exploring unique pickle recipes can broaden your pickling horizons and introduce exciting new flavors to your pantry. Beyond traditional dill pickles, there are countless creative varieties to try, such as pickled fruits or spiced kimchi. These alternative recipes can add a new dimension to your meals and preserve seasonal produce in innovative ways.
For example, pickling watermelon rind transforms this often-discarded part of the fruit into a sweet and tangy delicacy. Spicy kimchi, a staple in Korean cuisine, showcases the art of fermentation and offers a rich flavor profile that enhances various dishes. Here are a few unique pickle recipes to inspire your next culinary adventure:
- Pickled jalapeños for a spicy kick.
- Sweet pickled peaches for a delightful dessert topping.
- Curried pickled vegetables for an exotic twist.
- Pickled beets with a hint of orange for a vibrant side dish.
Experimenting with these unique recipes not only keeps the pickling process exciting but also provides opportunities to enjoy a wider array of flavors and textures. Embrace the creative aspect of pickling, and don’t hesitate to venture into unfamiliar territory.
Innovative Beverage Ideas Featuring Pickles
Incorporating pickles into beverages may sound unconventional, but it can add a unique tang that elevates your drink experience. A classic example is the Bloody Mary, where pickle juice is often used as a key ingredient, providing a zesty kick that perfectly complements the cocktail’s base flavors. Moreover, pickle slices can serve as a refreshing garnish, adding visual appeal and an additional layer of flavor.
Another trend is the use of pickle juice shots, touted for their potential health benefits and refreshing taste. This briny elixir can be surprisingly revitalizing, making it a popular choice for those seeking a unique twist on traditional shots. Here are some ideas for enhancing beverages with pickles:
- Add pickle juice to cocktails for an unexpected flavor boost.
- Use as a brine for marinating meat or fish before grilling.
- Make a pickle-flavored soda for a fun twist on a classic drink.
- Garnish drinks with pickle slices for a charming presentation.
By embracing the innovative use of pickles in beverages, you can delight your guests with unexpected flavors and create memorable drinking experiences that stand out from the ordinary.
Frequently Asked Questions About the Art of Pickling
What is the best vinegar for pickling?
The optimal vinegar for pickling is typically white vinegar with 5% acidity, as it imparts a sharp flavor. However, apple cider vinegar and rice vinegar also work well, depending on the desired taste profile.
How long do homemade pickles last?
Homemade pickles can last several months when stored properly in a cool, dark place. Refrigerated pickles may last longer, often up to a year.
Can I pickle without vinegar?
Yes, you can pickle without vinegar by employing a fermentation method, which relies on salt and natural bacteria to preserve the food.
What types of jars are best for pickling?
Glass jars with tight-sealing lids are ideal for pickling, as they prevent contamination and allow you to monitor the contents effectively.
How do I know if my pickles have spoiled?
Signs of spoiled pickles include off smells, changes in color, or the presence of mold. If in doubt, it’s safest to discard them.
Do I need to sterilize jars for pickling?
Yes, sterilizing jars is essential to prevent spoilage and ensure the safety of your pickles.
Can I use frozen vegetables for pickling?
While you can technically pickle frozen vegetables, fresh produce is recommended for optimal flavor and texture.
How much salt should I use for pickling?
A common guideline is 2-3 tablespoons of salt per quart of brine, but this can vary based on personal taste and the specific recipe.
Can I pickle fruits?
Absolutely! Many fruits, such as peaches, watermelon rind, and even cherries, can be pickled and enjoyed in various dishes.
What is the fermentation process for pickles?
Fermentation involves submerging vegetables in a saltwater brine to allow natural bacteria to convert sugars into lactic acid, enhancing flavor and preserving the food.
Connect with us on Facebook!
The post Best Methods For Pickling At Home: A Universal Guide appeared first on https://cookinggods.com
The Article Pickling at Home: Top Techniques for Success Was Found On https://limitsofstrategy.com