Your cart is currently empty!
Category: Food & Drink
Auto Added by WPeMatico
-

Korean BBQ Recipes for the Ultimate Grilling Experience
Master Authentic Korean BBQ: Key Ingredients and Techniques
Explore the Best Meats for an Authentic Korean BBQ Experience
Delve into the enticing world of Korean BBQ, celebrated for its diverse selection of meats that contribute distinctive flavors and textures vital to traditional culinary practices. The most sought-after choices include beef, pork, and chicken. Each protein can be prepared in exciting ways that tantalize the taste buds. Selecting the right meat is crucial, as each cut possesses unique attributes that enhance the delightful BBQ experience.
- Brisket: Juicy and flavorful, this cut is perfect for marinating and grilling to achieve tender results that melt in your mouth.
- Short Ribs (Galbi): Known for their rich flavor and tenderness, these ribs excel when marinated properly.
- Pork Belly (Samgyeopsal): A beloved favorite, renowned for its savory fat content and mouthwatering flavor.
- Chicken Thighs: Tender and juicy, these cut absorb marinades beautifully, enhancing their taste.
- Sirloin: A lean cut that delivers bold flavor and is ideal for grilling.
- Skirt Steak: Celebrated for its strong taste and excellent texture when cooked at high temperatures.
- Spare Ribs: A leaner option that retains moisture and flavor while grilling.
- Tenderloin: A delicate and tender cut that cooks quickly, perfect for those who appreciate subtle textures.
While meat selections may differ based on regional preferences and family traditions, the fundamental aim remains the same—choosing the ideal cut to complement the flavors of the marinades and grilling techniques employed.
Enhance Your BBQ Experience with Savory Marinades and Sauces
Marinades and sauces are the essence of Korean BBQ, infusing the meat with a rich blend of flavors that are sweet, savory, and aromatic. These mixtures typically contain key ingredients that create a harmonious balance, enhancing the dish’s overall appeal. Beyond flavor enhancement, these marinades also tenderize the meat, guaranteeing a delightful culinary experience with each bite.
- Soy Sauce: The backbone of umami, providing a salty base that deepens flavor complexity.
- Garlic: Freshly minced garlic adds a robust flavor and enticing aroma to marinades.
- Sesame Oil: A fragrant oil that enhances the overall richness of the marinade.
- Brown Sugar: Balances the saltiness of soy sauce with a hint of sweetness.
- Ginger: Fresh ginger brings a zesty kick that harmonizes beautifully with savory ingredients.
- Pear or Apple Puree: Imparts natural sweetness while assisting in meat tenderization.
- Chili Paste (Gochujang): Introduces heat and depth, adjustable to your spice preferences.
- Green Onions: Finely chopped for a burst of freshness in the marinades.
When these ingredients come together with the right meat, they create a symphony of flavors that transports you to the heart of Korean culinary traditions, ensuring that every BBQ gathering is an enchanting culinary adventure.
Elevate Your BBQ Feast with Delicious Vegetables and Side Dishes
Vegetables and side dishes play an essential role in complementing the rich flavors of Korean BBQ. They provide a refreshing contrast to the grilled meats, enhancing the overall dining experience. Common sides include traditional staples that deliver both texture and taste, ensuring a well-rounded meal that satisfies the senses.
- Kimchi: A fermented vegetable dish made with napa cabbage and radishes, known for its spicy tang.
- Lettuce Leaves: Often used as wraps for grilled meats, adding a crisp, refreshing texture.
- Bean Sprouts: Lightly seasoned, providing a refreshing crunch that contrasts with the meat.
- Rice: A staple that acts as the perfect base to balance the rich BBQ flavors.
- Pickled Vegetables: Add a zesty contrast to the richness of the meats.
- Noodles: Cold noodles (Naengmyeon) serve as a refreshing side dish to enhance the meal.
- Stir-Fried Vegetables: Seasonal vegetables sautéed to elevate their natural flavors.
- Egg Soufflé: A light, fluffy egg dish that beautifully complements BBQ, adding a delicate touch.
Incorporating these vegetables and sides not only enhances the main dishes but also cultivates a balanced meal that reflects the harmony of Korean culinary practices.
Effective Techniques for Perfecting Your Korean BBQ Grilling Skills

Which Iconic Korean BBQ Dishes Should You Try?
When exploring Korean BBQ, certain dishes have captured the hearts of culinary enthusiasts worldwide, showcasing unique flavors and cooking techniques that can be easily replicated at home. For instance, Bulgogi, or marinated beef, is famous for its tender slices soaked in a sweet-savory marinade. To recreate this dish, select thinly sliced beef (sirloin or brisket works best) and marinate it for at least an hour in a mixture of soy sauce, garlic, and brown sugar. Grill the marinated beef over high heat until caramelized, and serve it with lettuce wraps for an authentic experience.
Another standout option is Galbi, featuring marinated short ribs that are prized for their rich flavor and tenderness. For preparing Galbi, marinate the short ribs overnight with a mixture of soy sauce, sesame oil, garlic, and grated pear. Grill on medium-high heat, turning occasionally until beautifully charred. Pair it with a dollop of ssamjang (a thick, spicy-sweet dipping sauce) and fresh vegetables for an unforgettable meal.
Lastly, Samgyeopsal, or grilled pork belly, offers a satisfying option. Slice the pork belly into thick pieces and grill them on high heat until crispy. Serve with garlic cloves and ssamjang, allowing diners to create their own wraps using lettuce leaves. These successful recipes not only highlight traditional Korean techniques but also invite creativity in personalizing flavors.
What Makes Korean BBQ Recipes Truly Exceptional?
For a Korean BBQ recipe to stand out, it must achieve a fine balance of flavors that tantalize the palate. The essential components of a memorable dish include the appropriate marination technique, optimal cooking time, and achieving the perfect char on the meat. When marinating, it’s crucial to use a diverse range of ingredients that provide depth and sweetness, ensuring the meat absorbs significant flavor while tenderizing efficiently.
The grilling process itself is vital; high-heat searing not only caramelizes the meat but also enhances the flavor profile, creating that desired smoky essence. A genuine Korean BBQ dish often strikes a delightful balance between sweet, savory, and spicy elements, allowing the meat’s natural characteristics to shine through.
Moreover, presentation should not be overlooked. A well-plated dish with vibrant colors and a variety of sides enhances visual appeal, making the meal more inviting. By focusing on these key aspects—flavor balance, grilling technique, and presentation—you can elevate a Korean BBQ recipe from ordinary to extraordinary, making it a favorite among diners.
How to Perfect Your Grilling Technique for Korean BBQ?

Perfecting your grilling technique is essential for achieving the desired outcomes in Korean BBQ. It begins with recognizing the importance of high heat. Searing the meat at elevated temperatures locks in juices, creating a beautifully caramelized exterior while keeping the interior tender. To achieve this, preheat your grill thoroughly before placing the meat on it.
Implementing a two-zone cooking method is another crucial aspect. This involves creating a hot zone for searing and a cooler zone for cooking through. Start by searing the meat on the hot side, then transfer it to the cooler side to finish cooking without burning or drying out. Additionally, be cautious of overcrowding the grill, as this can lead to uneven cooking. Maintain adequate space between pieces to ensure proper airflow and even heat distribution.
Rotating the meat during grilling further ensures even cooking and enhances those coveted grill marks. Furthermore, allowing the meat to rest after grilling enables the juices to redistribute, resulting in a more succulent bite. By mastering these techniques, anyone can elevate their Korean BBQ game, creating mouth-watering dishes that impress guests and satisfy cravings.
Strategize Your Korean BBQ Gathering for Maximum Enjoyment
How to Marinate Meat for Maximum Flavor Impact?
Mastering the art of marinating meat is essential for significantly enhancing the flavor profile of your Korean BBQ dishes. The marination process can range from a few hours to overnight, depending on the cut of meat and the desired flavor intensity. To maximize the impact of your marinade, it’s crucial to start with high-quality ingredients and balanced ratios.
First, ensure that your marinade comprises a combination of salty, sweet, and acidic components. For example, soy sauce provides saltiness, brown sugar adds sweetness, and ingredients like rice vinegar or citrus juice offer acidity, which aids in tenderizing the meat. Using a sealable plastic bag or a non-reactive container allows the meat to soak evenly in the marinade, ensuring thorough distribution.
When marinating, keep these fundamental tips in mind for maximum flavor:
- Use Fresh Ingredients: Incorporate fresh garlic, ginger, and fruits (like pear or apple) to enhance the marinade’s effectiveness.
- Massage the Marinade: For even coverage, gently massage the marinade into the meat, allowing it to penetrate more effectively.
- Marinate in the Fridge: Always marinate in the refrigerator to prevent bacterial growth.
- Time It Right: For tougher cuts, marinate longer (up to 24 hours); for tender cuts, a few hours is sufficient.
- Don’t Over-Marinate: Marinating for too long can lead to a mushy texture; adhere to the recommended times for each meat type.
- Reserve Some Marinade: Set aside some marinade to use as a basting sauce during grilling.
- Pat Dry Before Grilling: Remove excess marinade to achieve a proper sear on the grill.
By following these marinating principles, you can create mouth-watering BBQ dishes that burst with flavor and authenticity.
How to Organize Your Grilling Station for an Optimal Experience?
A well-organized grilling station is essential for a seamless and enjoyable Korean BBQ experience. The setup enhances efficiency and contributes to the overall enjoyment of the cooking process. When creating your grilling station, consider the following tools and organizational strategies to ensure everything is within reach and functioning optimally.
Begin by investing in a quality grill, whether charcoal or gas. Each type has its advantages; charcoal provides a smoky flavor, while gas offers convenience. Ensure you have a sufficient supply of fuel, whether it’s charcoal briquettes or propane. Gather essential grilling tools such as long-handled tongs, a spatula, a wire brush for cleaning the grill, and a meat thermometer for checking doneness.
Organize your workspace by placing marinade containers, seasonings, and sauces within easy reach. Use trays or cutting boards for prepping vegetables and sides, allowing for a seamless cooking process. Remember to include a small bowl for holding the cooked meats, keeping everything separate from raw ingredients to avoid cross-contamination.
Including a small cooler with refreshing beverages is wise to keep everyone hydrated during the grilling session. Lastly, ensure your grilling area is well-ventilated, especially if grilling indoors. With an organized setup, the focus can shift to enjoying the grilling experience while creating delicious Korean BBQ.
Understanding Cooking Timing and Order for a Seamless BBQ Experience
Timing and cooking order are crucial when preparing a delightful Korean BBQ feast, ensuring that all elements come together seamlessly. The key is to grasp which ingredients require longer cooking times and arrange your cooking sequence accordingly. This strategic planning will help you serve fresh, hot dishes while maintaining an enjoyable dining pace.
Start by marinating your meats well in advance. While the meats marinate, prepare your sides and accompaniments. Begin grilling the items that require more time, such as thicker cuts of meat like pork belly or short ribs. These cuts can take longer to cook through, so placing them on the grill first ensures they reach perfect doneness.
Once those cuts have had a head start, add quicker-cooking items, such as thinly sliced beef or chicken thighs. Vegetables can be introduced towards the end of the grilling process, as they cook quickly and are best enjoyed fresh. For instance, grilling garlic cloves or mushrooms can add a delightful char without taking too much time.
Finally, consider the serving arrangement. Have your rice and sides ready to go so that when the last piece of meat comes off the grill, everything is hot and ready to enjoy. By mastering timing and cooking order, you’ll create a harmonious and satisfying Korean BBQ experience that leaves your guests wanting more.
Choosing the Best Cuts of Meat for Korean BBQ Success
Selecting the right cuts of meat is fundamental for an authentic and flavorful Korean BBQ experience. Each cut possesses unique characteristics that can profoundly influence the cooking process and final taste. Understanding which cuts work best will help you create dishes that are not only delicious but also true to Korean culinary traditions.
For beef, brisket is often favored for its tender texture and ability to absorb marinades effectively. Short ribs (Galbi) are cherished for their rich flavor and tenderness, ideally suited for marinating and grilling. For a leaner option, sirloin provides a robust taste with a pleasing texture, making it a popular choice for grilling.
When it comes to pork, samgyeopsal (pork belly) is renowned for its rich fat content, which renders beautifully on the grill, resulting in a crispy exterior and a juicy interior. Spare ribs are another excellent choice, delivering a balance of meatiness and tenderness when grilled correctly.
Chicken thighs are often preferred over breasts due to their juiciness and ability to stay moist during grilling. These cuts can absorb marinades well and add delightful flavor to the overall meal. By carefully selecting your meats based on these considerations, you can elevate your Korean BBQ to new heights, delivering an authentic and unforgettable dining experience.
Explore Iconic Korean BBQ Dishes to Savor and Enjoy
Bulgogi: The Timeless and Beloved Korean Classic
Bulgogi is a cherished dish in Korean cuisine, celebrated for its thinly sliced, marinated beef that encapsulates the essence of Korean BBQ. The term translates to “fire meat,” reflecting the traditional cooking method involving grilling over an open flame. The marinade typically combines soy sauce, sugar, garlic, and sesame oil, resulting in a sweet and savory profile that captivates diners.
To prepare Bulgogi, start with thinly sliced beef sirloin or ribeye, which are ideal due to their tenderness and ability to absorb marinades. Marinate the beef for a minimum of an hour—preferably overnight—to maximize flavor. When ready to cook, grill the marinated beef over high heat until caramelized, approximately 2-3 minutes per side. The key is to achieve a slight char without overcooking, preserving the beef’s juiciness.
Serve the Bulgogi wrapped in lettuce leaves with sliced garlic, green onions, and a dollop of ssamjang for a refreshing and interactive dining experience. This dish exemplifies the balance of flavors that Korean BBQ is known for and offers a perfect introduction for those new to this culinary delight.
Galbi: Irresistible Grilled Short Ribs to Relish
Galbi, or marinated short ribs, represents a quintessential Korean BBQ dish that combines tender, juicy meat with a rich, savory marinade. Often reserved for special occasions, Galbi showcases the luxurious flavors of Korean cuisine. The marinade typically consists of soy sauce, garlic, sesame oil, and grated pear, which not only adds sweetness but also helps tenderize the meat.
To prepare Galbi, opt for beef short ribs, which provide a perfect balance of meat and bone, enhancing the grilling experience. Marinate the ribs for several hours or overnight to ensure the flavors penetrate deeply. When ready to grill, preheat your grill to a medium-high setting. Grill the ribs for about 5-7 minutes per side, turning occasionally to achieve that coveted char.
Galbi is traditionally enjoyed wrapped in lettuce leaves, accompanied by a side of ssamjang and a selection of banchan (side dishes). The combination of tender meat and fresh, crispy vegetables creates a delightful contrast that embodies the essence of Korean BBQ, satisfying the appetite while highlighting the social aspect of communal dining.
Samgyeopsal: The Delight of Grilled Pork Belly
Samgyeopsal, or grilled pork belly, is a favorite among BBQ enthusiasts, celebrated for its rich flavor and texture. Unlike many other meats, samgyeopsal is often grilled simply with no marination, allowing the natural taste of the pork to shine through. This dish is best enjoyed with a variety of accompaniments for a complete culinary experience.
When preparing samgyeopsal, choose thick slices of pork belly to ensure optimal juiciness and flavor. Grill the pork on high heat until the edges become crispy and caramelized, around 3-4 minutes per side. The key is to resist the temptation to flip the meat too often, as this allows for a beautiful sear to develop.
Serve the grilled pork belly with a selection of condiments, such as sliced garlic, green chilies, and ssamjang. Diners typically wrap pieces of the grilled pork in lettuce leaves, adding a slice of garlic or a dollop of sauce for an authentic experience. Samgyeopsal embodies the joy of sharing food and encourages a communal atmosphere, making it a beloved choice at gatherings.
How to Create a Memorable Korean BBQ Experience at Home
Crafting the Ideal Atmosphere for Your BBQ Gathering
Establishing the right atmosphere is crucial for an authentic Korean BBQ experience at home. The environment can significantly enhance meal enjoyment and foster social interaction among diners. To create an inviting space, consider the lighting, seating arrangements, and overall décor that reflect the essence of Korean culture.
Begin by ensuring your grilling area is well-lit, as good visibility is vital for cooking and enjoying the food. Soft ambient lighting can create a warm and welcoming atmosphere. Arrange seating to promote conversation, ideally around the grill, where everyone can participate in the cooking process. A round table fosters a communal atmosphere, allowing diners to share dishes easily.
Incorporate elements of Korean culture into your décor, such as traditional tableware or floral arrangements, to add authenticity to the dining experience. Music also plays a vital role; consider playing soft Korean music in the background to enhance the ambience. Additionally, offering a selection of beverages, including soju or Korean beer, can elevate the experience and promote relaxation among guests.
Ultimately, the goal is to create an environment that invites laughter, conversation, and the joy of sharing a meal, making your Korean BBQ gathering a memorable occasion for all involved.
What Are the Best Accompaniments to Enhance Your BBQ Experience?
Accompaniments are vital for a complete Korean BBQ meal, providing complementary flavors that balance the richness of grilled meats. Traditional Korean side dishes, known as banchan, are an integral part of the dining experience, enhancing the overall meal while offering variety.
Among the must-have accompaniments, kimchi stands out as a quintessential side, providing a spicy and tangy contrast that pairs beautifully with grilled meats. Another popular option is ssamjang, a thick dipping sauce made from fermented soybean paste and chili paste, perfect for adding depth to the wraps made with lettuce and grilled goodies.
Pickled vegetables, including radishes and cucumbers, offer a refreshing crunch and additional flavors. A bowl of steamed rice is also indispensable, serving as a neutral base that complements the richness of the BBQ. Additionally, bean sprouts or stir-fried vegetables add a fresh touch and nutritional balance to the meal.
Don’t forget about the egg soufflé, a light and fluffy dish that pairs wonderfully with the robust flavors of the BBQ. By including these accompaniments, you create a well-rounded and satisfying Korean BBQ experience that caters to various tastes and preferences.
Understanding Proper Serving and Eating Etiquette
Korean BBQ is not merely about the food; it also involves specific dining etiquette that enriches the experience. Understanding these customs can add to the authenticity of your meal and demonstrate respect for Korean traditions.
One of the key etiquettes is the practice of sharing. When serving food, it’s customary to offer selected dishes to guests first as a gesture of hospitality. Additionally, using chopsticks and a spoon is standard, and it’s considered polite to serve food to others rather than serving yourself directly.
When enjoying grilled meats, the proper way to eat is to take a piece of grilled meat, wrap it in a lettuce leaf, and add a dollop of ssamjang along with garlic or green chili. This not only enhances the flavor but also creates a fun, interactive dining experience as everyone can customize their wraps according to their preferences.
Always show appreciation for the meal by expressing gratitude to the host or the person who cooked. This fosters goodwill and acknowledges the effort put into preparing the food. Adhering to these etiquettes will enrich your Korean BBQ experience, creating a sense of community and respect that is central to the culture.
Choosing the Right Cuts of Meat for Optimal Results
Selecting the right cuts of meat is essential for achieving authentic Korean BBQ flavors. The choice of cuts can significantly influence the overall taste and texture of the dishes, making it worthwhile to understand your options.
For beef, Bulgogi is best made with tender cuts like sirloin or ribeye, which can soak up marinades effectively. For grilling, short ribs (Galbi) are a favorite due to their flavor and tenderness. Additionally, brisket is a great choice for those who enjoy a rich and meaty texture.
When it comes to pork, samgyeopsal (pork belly) is ideal for grilling, offering a balance of fat and flavor. Spare ribs can also be an excellent choice, ensuring tenderness and juiciness when cooked correctly. For chicken, opt for thighs rather than breasts, as they tend to retain moisture and flavor during grilling.
Understanding these cuts and how they interact with marinades and cooking techniques will significantly enhance your Korean BBQ experience, ensuring a satisfying and delicious meal every time.
Research-Backed Benefits of Korean BBQ Recipes for Health and Enjoyment
What Is the Nutritional Value of Korean BBQ?
Korean BBQ can be a nutritious option, offering various health benefits when prepared thoughtfully. The primary meats used in Korean BBQ, such as beef, pork, and chicken, provide essential proteins vital for muscle growth and overall health. Moreover, incorporating vegetables and sides contributes to a balanced meal, ensuring a mix of macronutrients and essential vitamins.
Many of the marinades used in Korean BBQ, such as those containing garlic and ginger, are associated with numerous health benefits. Garlic possesses anti-inflammatory and antibacterial properties, while ginger aids digestion and provides additional anti-inflammatory benefits. Furthermore, the use of sesame oil, rich in healthy fats, can positively contribute to heart health when consumed in moderation.
However, it’s essential to be mindful of portion sizes and the types of sauces used, as some can be high in sodium and sugars. By balancing indulgent elements with fresh vegetables and whole-grain sides, such as rice, you can create a nutritious meal that satisfies without compromising your health goals.
How Does Korean BBQ Impact Overall Health and Well-Being?
Enjoying Korean BBQ in moderation can be a delightful addition to a healthy diet. The combination of high-protein meats and nutrient-rich vegetables contributes to a well-balanced meal that provides essential nutrients. For individuals seeking to maintain a healthy lifestyle, focusing on lean cuts of meat and incorporating a variety of vegetables can help manage caloric intake while still enjoying this communal dining experience.
Moreover, the social aspect of sharing meals is linked to improved mental well-being. Eating together fosters connections and strengthens bonds among friends and family, contributing to overall happiness. The act of grilling and sharing food encourages conversation and interaction, which can be particularly beneficial for mental health.
Incorporating elements of Korean BBQ into your diet can also promote culinary creativity, as experimenting with marinades and sides can lead to healthier variations of traditional dishes. By being mindful of ingredients and portion sizes, it’s possible to enjoy the flavors of Korean BBQ while maintaining health-conscious choices.
What Social Benefits Are Associated with Korean BBQ?
Korean BBQ is renowned for its communal and social dining experience, which fosters connections and creates lasting memories among family and friends. The interactive nature of cooking at the table encourages participation, allowing everyone to engage in the meal preparation process. This shared experience can enhance relationships, as it brings people together around food, promoting conversation and laughter.
The act of sharing food is deeply ingrained in Korean culture, symbolizing hospitality and community. When dining together, sharing dishes and presenting food demonstrates care and respect for one another. This shared atmosphere can reduce stress and promote relaxation, creating an enjoyable environment for all involved.
Moreover, the ritual of grilling and serving food encourages mindfulness and appreciation for the meal, transforming eating from a mere necessity into a joyful celebration. By embracing the social aspects of Korean BBQ, you not only enjoy delicious food but also nurture relationships and strengthen bonds with those around you.
Expert Tips and Tricks for Mastering Korean BBQ Grilling
How to Achieve the Perfect Char on Your Meats?
Achieving the perfect char on your Korean BBQ is crucial for enhancing flavor and texture. The caramelization that occurs during grilling not only adds depth to the meat but also contributes to the visual appeal of the dish. To accomplish this, various techniques can be employed.
First and foremost, ensure your grill is properly preheated. This step is vital, as a hot grill surface is essential for creating that sought-after sear. For best results, allow your grill to heat for at least 15-20 minutes before placing the meat on it.
Another key factor is choosing the right type of meat. Cuts with a higher fat content, such as pork belly, are more likely to develop a beautiful char due to the rendered fat. Additionally, avoid overcrowding the grill; give each piece enough space to allow heat circulation and prevent steaming.
Technique also plays a role; flipping the meat too often can disrupt the searing process. Instead, allow each side to cook undisturbed for a few minutes before checking for the perfect char. Finally, consider finishing meats over direct heat briefly after they’ve cooked through—this can help to create a stunning finish and enhance overall flavor, making your Korean BBQ truly memorable.
What Strategies Can Help Prevent Meat from Sticking to the Grill?
Preventing meat from sticking to the grill is essential for a smooth grilling experience and ensures the integrity of your dishes. Sticking can lead to torn pieces and an uneven cooking process, so implementing a few strategies can make grilling more enjoyable.
Begin by ensuring your grill is clean and well-oiled before cooking. Clean grill grates help prevent sticking, as debris can create additional friction and cause food to stick. Use a grill brush to remove any residue from previous grilling sessions, then apply a light coating of oil to the grates when they are hot.
Another effective method is to oil the meat itself. Drizzling a small amount of oil on the surface of the meat before grilling helps create a non-stick barrier. Additionally, avoid moving the meat too soon; let it sear and form a crust before attempting to flip it. This allows the meat to release from the grill naturally.
Lastly, consider using a grill mat or basket if you’re grilling smaller cuts or vegetables. These tools feature a non-stick surface, preventing delicate items from falling through the grates and ensuring a hassle-free grilling experience while achieving delightful results.
What Are the Essential Grilling Tools for Korean BBQ?
Having the right tools can significantly enhance your Korean BBQ grilling experience, making the process more efficient and enjoyable. Essential grilling tools provide functionality and versatility, ensuring that you have everything you need at your fingertips.
A quality set of long-handled tongs is indispensable, allowing you to flip and move meats without getting too close to the heat. A sturdy spatula is equally important, especially for managing larger cuts. A meat thermometer is invaluable for ensuring that meats are cooked to the desired doneness while preventing overcooking.
Investing in a grill brush for cleaning is essential for maintaining your grill’s performance, and a basting brush can be useful for applying additional marinades or sauces during cooking. Consider a pair of skewers for grilling smaller items, such as vegetables or marinated chicken pieces, to add versatility to your BBQ offerings.
Lastly, an insulated cooler for drinks or a table with an umbrella can enhance the overall experience, providing comfort while you enjoy your meal. With the right tools, you’ll elevate your Korean BBQ sessions, ensuring a delicious and memorable feast every time.
Innovative Korean BBQ Recipes to Try
How to Create Fusion Korean BBQ Dishes?
Fusion dishes have become increasingly popular, blending traditional Korean BBQ elements with flavors from other cuisines to create innovative and exciting recipes. These creative combinations celebrate the versatility of Korean flavors while introducing new dimensions to familiar dishes.
One delightful fusion is Korean BBQ Tacos, where marinated and grilled bulgogi beef is tucked into soft corn tortillas, topped with fresh cilantro, sesame seeds, and a spicy kimchi salsa. This unique twist allows for the enjoyment of Korean flavors in a portable and convenient format, perfect for casual gatherings or taco nights.
Another intriguing option is Korean BBQ Pizza. Start with a pizza base, then layer it with Bulgogi or grilled pork belly, along with traditional toppings such as mozzarella and kimchi. Bake until the cheese is bubbly and the crust is crispy, creating a deliciously unique twist on a classic favorite.
For a lighter option, consider Korean BBQ Lettuce Wraps with Mediterranean Flavors. Use seasoned grilled chicken or beef, then wrap it in lettuce with tabbouleh, hummus, and tahini for a refreshing and nutritious meal that showcases the best of both culinary worlds.
These fusion recipes encourage creativity while preserving the essence of Korean BBQ, inviting both seasoned fans and newcomers to explore the endless possibilities of flavor combinations.
How to Experiment with New Marinades for Unique Flavors?
Experimenting with new marinades can breathe fresh life into your Korean BBQ experience, allowing you to explore various flavors and ingredients that elevate your dishes. The beauty of marinades lies in their versatility; the base components can be easily adjusted to suit personal preferences or seasonal availability.
Start with a classic marinade base of soy sauce, garlic, and sesame oil. From there, you can introduce new elements to create unique combinations. For a tropical twist, consider incorporating fresh pineapple juice or mango puree, which adds sweetness and helps tenderize the meat.
For those who enjoy heat, adding chili paste, sriracha, or even wasabi can give your marinades an exciting kick. Similarly, experimenting with different herbs, such as cilantro or basil, can introduce fresh notes that elevate the flavor profile.
Consider adding nuts or seeds, such as ground peanuts or sesame seeds, which can add depth and texture to your marinades. Allow yourself to play with proportions and flavor combinations until you discover your favorite blends. This experimentation not only diversifies your Korean BBQ offerings but also encourages culinary creativity, making every meal a new adventure.
Discover Delicious Vegetarian and Vegan Korean BBQ Options
Korean BBQ is often associated with meat, but there are plenty of delicious vegetarian and vegan options that can shine on the grill. These dishes can be just as flavorful and satisfying, providing a diverse dining experience for everyone.
To create a vegan alternative to Bulgogi, consider using marinated tofu or tempeh. Slice it thinly and marinate in a mixture of soy sauce, garlic, and brown sugar, allowing it to absorb the flavors before grilling. The result is a hearty and satisfying dish that mirrors the traditional flavors.
Another excellent option is grilled vegetables such as eggplant, zucchini, and bell peppers, marinated in a sweet soy glaze. These veggies can be skewered or grilled directly on the grill, enhancing their natural sweetness while adding a lovely char.
Mushrooms, particularly portobello or shiitake, can also serve as a meat substitute, offering a rich umami flavor when grilled. Marinate them and grill until tender; then serve alongside traditional sides, such as kimchi and rice.
Finally, consider making Korean-style vegetable pancakes (jeon), filled with seasonal vegetables and served with a soy dipping sauce. These innovative options ensure that vegetarian and vegan diners can enjoy the flavors of Korean BBQ without sacrificing taste or authenticity.
Proven Strategies for Mastering Korean BBQ Recipes
What Are the Steps to Master Korean BBQ at Home?
Mastering Korean BBQ at home involves a combination of understanding recipes, employing proper techniques, and timing various elements to achieve restaurant-quality results. By following a few trusted strategies, you can elevate your BBQ experience to new heights.
Start by thoroughly researching traditional recipes, understanding the key ingredients and cooking methods involved. Gather the essential ingredients, including quality meats, fresh vegetables, and authentic marinades. Preparing marinades in advance will allow you to experiment with flavors while ensuring that your meats are well-seasoned.
Next, focus on mastering the grilling technique. Preheat your grill for optimal results and practice managing heat effectively. Learning to use the two-zone cooking method will allow you to sear meats perfectly while ensuring they cook through without drying out.
Timing is crucial; prepare sides and accompaniments ahead of time to ensure everything is ready to serve simultaneously. Coordinate cooking orders based on the required cooking times for each item, ensuring that meats and vegetables are cooked to perfection.
Lastly, embrace the communal aspect of Korean BBQ by encouraging guests to participate in the cooking and serving process. This engagement fosters a sense of enjoyment and creates memorable experiences.
By implementing these actionable steps, you can confidently master Korean BBQ at home and impress friends and family with your culinary skills.
What Are the Secrets to Achieving Restaurant-Quality Korean BBQ?
Achieving restaurant-quality Korean BBQ at home requires understanding the secrets that chefs utilize to enhance their dishes. These techniques and practices can transform your grilling experience, allowing you to create restaurant-quality flavors in your kitchen.
One key secret lies in the quality of ingredients. Chefs often source high-grade cuts of meat that are well-marbled and of the highest quality. This attention to ingredient quality has a significant impact on the final taste, so investing in high-quality meat is essential.
Marination is another critical aspect. Utilizing a well-balanced marinade that incorporates various flavors, including sweet, salty, and spicy, allows the meat to absorb depth and complexity. Chefs typically allow for longer marination times to ensure enhanced flavor and tenderness.
Grilling techniques also play a significant role. Professional chefs are adept at managing grill temperatures and recognizing the right time to flip or move the meat. They usually employ high heat for searing, followed by cooking through on a cooler part of the grill, ensuring even cooking and optimal texture.
Presentation is also vital; chefs often plate dishes with attention to aesthetics, incorporating vibrant colors and garnishes. By focusing on quality ingredients, marination, grilling techniques, and presentation, you can replicate the restaurant experience in the comfort of your home.
How to Scale Korean BBQ for Large Gatherings Effectively?
Hosting a large gathering with Korean BBQ necessitates careful planning and preparation to ensure a smooth and enjoyable experience for guests. Scaling up your BBQ session can be fun, but it also involves strategic considerations to accommodate the increased number of diners.
Start by determining the guest count and planning your menu accordingly. Choose a variety of meats and sides to cater to diverse tastes. Having options like Bulgogi, Galbi, and Samgyeopsal ensures that there is something for everyone to enjoy.
Next, marinate meats in bulk to save time on the day of the event. Preparing marinades in advance and using large containers for marinating simplifies the process. Additionally, consider pre-cooking or par-grilling some items to reduce cooking time during the gathering.
Setting up multiple grilling stations can also be beneficial. If possible, use more than one grill or grill pan to increase efficiency and allow guests to cook their own food simultaneously. This not only speeds up the cooking process but also enhances the interactive aspect of BBQ.
Lastly, ensure that you have enough seating and table space for everyone. Setting up buffet-style serving can help manage the flow of guests and make it easier for them to access food at their own pace. By implementing these strategies, you can successfully scale your Korean BBQ for a large gathering, creating a memorable experience for all.
Frequently Asked Questions About Korean BBQ
What Types of Meat Are Best for Korean BBQ?
The best types of meat for Korean BBQ include beef cuts like brisket, short ribs, and sirloin, as well as pork belly and chicken thighs. Each cut offers unique flavors and textures that enhance the dining experience.
How Long Should I Marinate Meat for Korean BBQ?
Marinating times can vary; tougher cuts benefit from overnight marination, while tender cuts may require only a few hours to absorb the flavors effectively without becoming mushy.
What Are the Essential Sides for Korean BBQ?
Essential sides for Korean BBQ include kimchi, ssamjang, pickled vegetables, steamed rice, and stir-fried vegetables. These accompaniments complement the grilled meats and enhance the overall meal experience.
Can I Use Vegetarian Options for Korean BBQ?
Absolutely! Vegetarian options, such as marinated tofu, grilled mushrooms, and various vegetables, can be just as delicious as BBQ dishes, providing a diverse dining experience for all.
What Is the Best Way to Prevent Meat from Sticking to the Grill?
To prevent sticking, ensure your grill grates are clean and well-oiled before cooking. You can also oil the meat itself and avoid moving it too soon to allow for proper searing.
How Do I Choose the Right Marinade for Korean BBQ?
Choose a marinade that balances sweet, salty, and spicy elements. Common ingredients include soy sauce, garlic, sesame oil, and fresh fruits for sweetness. Experimenting with different ratios can yield unique flavors.
How Long Does It Take to Grill Korean BBQ Meats?
Grilling times vary by meat type; generally, thin cuts like Bulgogi may take just a few minutes, while thicker cuts, such as pork belly or short ribs, may require 5-7 minutes per side, depending on the heat.
What Utensils Do I Need for Grilling Korean BBQ?
Essential utensils include long-handled tongs, a spatula, a meat thermometer, and a basting brush. These tools will help you manage meat effectively while ensuring optimal cooking results.
How Can I Create an Authentic Korean BBQ Experience at Home?
To create an authentic experience, focus on quality ingredients, traditional marinades, and proper grilling techniques. Setting the right ambience and involving guests in cooking will enhance the dining experience.
What Are Some Creative Fusion Ideas for Korean BBQ?
Creative fusion ideas include Korean BBQ tacos, pizza topped with grilled meats, and lettuce wraps filled with Mediterranean-style ingredients, offering exciting flavor combinations that celebrate both cuisines.
Connect with us on Facebook!
The post Top Korean BBQ Recipes for Grilling: Ultimate Guide appeared first on https://cookinggods.com
The Article Korean BBQ Recipes: Your Ultimate Grilling Guide Was Found On https://limitsofstrategy.com
-

BBQ Glazes: Healthy Tips for Low-Fat Grilling
Key Ingredients for Creating Flavorful Low-Fat BBQ Glazes
How to Select the Ideal Base for Your BBQ Glaze
When it comes to crafting low-fat BBQ glazes, choosing the right base ingredient is essential for achieving a glaze that is not only delicious but also considerate of your calorie goals. Opting for low-fat options like vinegar or fruit juice can significantly lower the overall calorie count while still providing a full-bodied and satisfying flavor. These bases are excellent for dissolving other ingredients, allowing for a harmonious blend of flavors while keeping unwanted fats at bay.
Here is a curated list of popular low-fat base ingredients that can elevate your BBQ glazes:
- Apple cider vinegar
- Balsamic vinegar
- Orange juice
- Pineapple juice
- Lemon juice
- Tomato juice
- Low-sodium soy sauce
- Vegetable or chicken stock
These base ingredients do more than just keep the fat content low; they introduce a diverse range of flavors that can elevate your BBQ dishes to new heights. For example, apple cider vinegar adds a tangy zest, while pineapple juice contributes a sweet and tropical essence that pairs perfectly with grilled meats.
Boosting Flavor with Natural Sweeteners and Flavor Enhancers
Incorporating natural sweeteners is crucial for amplifying the flavor of low-fat BBQ glazes without the addition of unhealthy fats. Ingredients such as honey and maple syrup provide the necessary sweetness while also offering health benefits compared to processed sugars.
In addition to sweeteners, consider adding natural flavor enhancers that will keep your glaze both nutritious and mouthwatering. Below are some impactful options to enhance your glaze’s flavor profile:
- Fresh or powdered garlic
- Fresh or ground ginger
- Onion powder
- Whole grain or Dijon mustard
- Liquid smoke
- Hot sauce or chili paste
- Herbs such as rosemary or thyme
- Fruit purees like mango or peach
These flavor enhancers enrich the overall taste and add complexity to your glazes. For instance, a dash of liquid smoke imparts a mouthwatering BBQ aroma, while ginger lends warmth and spice, making the glaze more dynamic and enjoyable.
Elevating Grilling Flavor with a Variety of Herbs and Spices
Incorporating an assortment of herbs and spices into your low-fat BBQ glazes is a fantastic way to elevate the flavor without adding unnecessary fat. These ingredients can transform a basic glaze into a zesty, flavorful condiment that enhances your entire dining experience.
Here are some commonly used herbs and spices that work exceptionally well in low-fat BBQ glazes:
- Smoked paprika
- Black pepper
- Cayenne pepper
- Chili powder
- Dried oregano
- Fresh basil
- Thyme
- Cumin
By utilizing a combination of these herbs and spices, you can create a well-rounded flavor profile. For example, smoked paprika adds a rich, smoky depth, while cayenne pepper provides a spicy kick that enlivens your taste buds. A well-seasoned glaze can significantly enhance grilled meats and vegetables, ensuring every bite is a delightful culinary adventure.
Innovative Techniques for Reducing Fat Content in BBQ Glazes

Effective Cooking Techniques to Minimize Fat in Glazes
Utilizing specific cooking methods can significantly lower the fat content in BBQ glazes. Techniques such as simmering and boiling allow excess fats to be expelled, resulting in a healthier and more flavorful end product.
Consider these effective cooking methods to reduce fat content in your BBQ glazes:
- Simmering
- Boiling
- Steaming
- Reducing (concentrating flavors by cooking down)
- Grilling (utilizing natural fats from meats)
- Broiling
- Baking (for thicker glazes)
- Infusing (extracting flavors without fats)
For example, simmering a glaze allows the flavors to meld beautifully while reducing the liquid volume, thus thickening the sauce and eliminating excess fats. This technique intensifies the flavor concentration, ensuring your glaze remains rich and savory.
How to Balance Flavors Without Adding Unhealthy Fats
Creating a well-rounded flavor profile in low-fat BBQ glazes is crucial for a delicious final product. You can develop depth and complexity without relying on fats by carefully balancing sweet, sour, and savory elements.
One effective strategy for balancing flavors in low-fat BBQ glazes is through the thoughtful selection and combination of ingredients. As you craft your glaze, take the time to taste and adjust as needed. If you find the glaze too acidic, consider adding a natural sweetener to counterbalance the sharpness. Conversely, if the glaze is overly sweet, a splash of vinegar or citrus juice can provide the necessary acidity.
Employing contrasting flavors is equally important. For example, the sweetness of honey can be balanced by the tanginess of mustard. Experimenting with these contrasts enriches the glaze’s flavor while keeping it healthy. This method ensures that each ingredient shines through without the addition of extra fats, making it suitable for diverse dietary preferences.
Utilizing Natural Thickeners for a Leaner Glaze Consistency

Incorporating natural thickeners is an excellent way to maintain a low-fat profile in BBQ glazes while achieving the desired consistency. Unlike traditional thickeners that rely on cream or butter, these alternatives help achieve the perfect texture without adding unhealthy fats.
Here are some effective natural thickeners you can use in your BBQ glazes:
- Cornstarch (mixed with water)
- Arrowroot powder
- Flaxseed meal (mixed with water)
- Pureed fruits (such as dates or bananas)
- Mashed sweet potatoes
- Pureed beans (like white beans or chickpeas)
- Agar-agar (a plant-based gelatin)
- Chia seeds (soaked)
For instance, cornstarch can be combined with cold water to create a slurry that can then be added to your simmering glaze to thicken it effectively. Pureed fruits not only thicken the glaze but also contribute natural sweetness, making them an excellent option for a flavorful and healthy choice.
Selecting Lean Ingredients for Flavorful and Rich Glazes
The choice of ingredients is pivotal in determining the fat content of your BBQ glazes. By opting for lean meats and low-fat components, you can create healthier glazes that do not compromise on flavor or texture.
When selecting ingredients, focus on:
- Lean cuts of meat (like chicken breast or turkey)
- Non-fat or Greek yogurt
- Low-sodium stocks or broths
- Vegetable purees (such as carrot or pumpkin)
- Low-fat cheeses (for creamy glazes)
- Fresh fruits (for natural sweetness and moisture)
- Vegetables (like onions or peppers for umami)
- Natural extracts (such as vanilla or almond)
The impact of these ingredient choices is substantial. For example, opting for chicken breast instead of higher-fat cuts ensures that the glaze remains low in fat while still providing essential moisture and flavor. Furthermore, incorporating vegetable purees can both thicken your glaze and boost its nutritional value.
Strategies for Straining and Reducing Fat in Your Glazes
Employing straining techniques is an effective way to remove excess fat from BBQ glazes, resulting in a cleaner and more refined flavor profile. When preparing a glaze that has rendered fat, straining can help achieve the desired low-fat quality.
To effectively strain glazes for reduced fat content, consider these methods:
- Utilizing a fine-mesh sieve
- Employing cheesecloth for finer particulates
- Skimming excess fat from the surface before straining
- Using a fat separator
- Cooling and skimming solidified fat
- Blending and then straining for a smoother texture
- Using a coffee filter for ultra-fine straining
- Pressing ingredients to extract flavors without fat
By implementing these techniques, you can effectively eliminate unwanted fats while preserving the robust flavors of your ingredients. For instance, using a fine-mesh sieve allows you to capture solid ingredients while discarding any floating fat. This method not only lightens the glaze but also enhances the overall flavor experience.
Insights from Experts on Crafting Flavorful Low-Fat BBQ Glazes
Showcasing Successful Low-Fat Glaze Creations by Renowned Chefs
Many esteemed chefs have mastered the art of crafting low-fat BBQ glazes that retain vibrant flavors without introducing unnecessary fats. For instance, Chef David Chang, known for his innovative work with Momofuku, is celebrated for his glazes that incorporate miso paste, delivering a savory umami punch while keeping the fat content minimal.
Another notable chef, Thomas Keller, frequently utilizes fruit purees in his glazes to provide depth and natural sweetness. His innovative use of pureed peaches in a glaze can elevate grilled chicken or pork, demonstrating that low-fat options can be both flavorful and exciting.
These examples illustrate that effective low-fat glazes can be both delicious and vibrant, debunking the myth that healthier choices must lack taste. By drawing inspiration from the creativity of these chefs, home cooks can embark on their own journey to create flavorful, low-fat glazes.
A Comprehensive Approach to Creating Your Unique Glaze
Creating a personalized low-fat BBQ glaze can be a delightful and rewarding culinary endeavor. Follow these actionable steps to develop your own distinctive blend:
1. Choose Your Base: Start with a low-fat base, such as apple cider vinegar or fruit juice.
2. Add Sweetness: Incorporate natural sweeteners like honey or maple syrup to balance acidity.
3. Incorporate Flavor Enhancers: Add ingredients such as garlic, onion powder, or mustard for depth.
4. Season Generously: Blend in various herbs and spices to amplify the flavor profile.
5. Thicken Your Glaze: Use natural thickeners like cornstarch or pureed fruit to achieve the desired consistency.
6. Simmer: Cook the glaze over low heat to meld flavors and thicken the mixture.
7. Taste and Adjust: Sample your glaze and modify seasoning or sweetness to suit your preferences.By following these steps, you can craft a flavorful low-fat BBQ glaze that caters to your unique tastes. The beauty of this process lies in its flexibility; feel free to experiment with various combinations and ingredients to discover your favorites.
Understanding Flavor Profiles in Low-Fat Glazes
Grasping the science behind flavor profiles in low-fat BBQ glazes can greatly enhance your culinary skills. The interplay of sweet, sour, and umami flavors is vital for crafting a complex glaze that captivates the palate.
Each component serves a specific purpose; for example, sweetness from honey or fruit balances the acidity of vinegar, while umami-rich ingredients like soy sauce or miso enhance depth. This balance becomes especially crucial in low-fat versions, where fats typically contribute mouthfeel and richness.
Moreover, consider the concept of flavor layering. Start with a foundational flavor and build upon it with secondary flavors. For instance, a tangy vinegar base can be complemented by sweet fruit puree, finished with a hint of spice from cayenne pepper. This method not only creates a rich flavor profile but also keeps the glaze low in fat, ensuring a healthier option that doesn’t compromise on taste.
How to Adapt Existing Recipes for Low-Fat Glazes
Effectively Substituting High-Fat Ingredients
Transforming traditional BBQ glaze recipes into lower-fat versions often involves swapping high-fat ingredients for healthier alternatives. This approach not only reduces calorie counts but also enhances the overall nutritional profile of your glaze.
Here are some common high-fat ingredients typically found in traditional BBQ glazes, along with their healthier replacements:
- Brown sugar (replace with agave nectar or honey)
- Butter (replace with apple sauce or Greek yogurt)
- Heavy cream (replace with low-fat yogurt or cashew cream)
- Oils (replace with vegetable stock or fruit juice)
- High-fat meats (replace with lean cuts like chicken breast)
- Sour cream (replace with yogurt or low-fat sour cream)
- High-fructose corn syrup (replace with natural sweeteners)
- Full-fat dressings (replace with vinegar-based dressings)
These substitutions not only lower fat content but also introduce exciting new flavors that can enhance the overall taste of your glaze. For instance, swapping butter for apple sauce reduces fat while adding moisture and a hint of sweetness—perfect for your BBQ glazes.
Adjusting Recipe Portions for Lower Fat Content
Modifying the portions of high-fat ingredients in recipes is an effective strategy for reducing the fat content of BBQ glazes. By simply adjusting the quantities of certain ingredients, you can create a healthier version without sacrificing flavor.
Reducing the amount of rich ingredients allows other components to shine. For instance, if a recipe calls for a cup of sugar, consider cutting it back to half a cup or substituting it with a natural sweetener that provides more flavor with fewer calories. Similarly, using less oil or butter while enhancing the glaze with spices or herbs can yield a delicious low-fat alternative.
This adjustment applies not only to sweeteners or fats but also to the overall balance of the glaze. If a glaze feels too rich, simply decreasing the quantities of richer ingredients will result in a lighter, healthier alternative. This approach enables you to savor the indulgent flavors of BBQ without the guilt.
Exploring Exciting Flavor Combinations
Venturing into new and innovative flavor combinations can lead to unique, low-fat BBQ glaze recipes that offer a refreshing twist. By thinking creatively, you can develop glazes that are as distinctive as they are delicious.
Here are some inventive flavor combinations to try in low-fat BBQ glazes:
- Apricot and curry powder
- Pineapple and jalapeño
- Peach and bourbon (using a non-alcoholic version)
- Cherry and chipotle
- Honey and lime
- Mango and ginger
- Strawberry and balsamic
- Garlic and rosemary
These combinations not only deliver a delightful burst of flavor but also maintain a low-fat profile. By experimenting with various ingredients, you may uncover personal favorites that bring excitement to your grilling adventures.
Research-Based Benefits of Making Low-Fat BBQ Glazes
Health Benefits Associated with Low-Fat Grilling Practices
Utilizing low-fat BBQ glazes offers a multitude of health benefits, making them an appealing choice for health-conscious individuals. A low-fat glaze can help decrease calorie intake while still providing rich flavors that enhance the taste of grilled foods.
Research indicates that diets lower in saturated fats can reduce the risk of heart disease and other health issues. By swapping traditional high-fat glazes for low-fat alternatives, individuals can enjoy the grilling experience while minimizing their intake of unhealthy fats. Furthermore, these glazes often contain more fruits, vegetables, and herbs, which provide essential vitamins and antioxidants.
The health benefits go beyond calorie reduction; low-fat glazes can also aid in weight management and overall wellness. By incorporating these healthier options into your meals, you are proactively taking steps toward maintaining a balanced and nutritious lifestyle.
The Impact of Low-Fat Glazes on Overall Diet and Nutrition
Low-fat BBQ glazes play a vital role in a balanced diet, helping individuals achieve their nutritional goals without sacrificing flavor. These glazes provide a satisfying BBQ experience while accommodating various dietary restrictions or preferences.
Incorporating low-fat BBQ glazes into meals can enhance overall nutrient intake by supplying additional vitamins and minerals. For instance, fruit-based glazes contribute natural sugars, vitamins, and antioxidants, while vinegar-based options can add probiotics and support digestive health.
Moreover, these glazes can help individuals manage portion sizes, as their enhanced flavors mean that less is needed to achieve satisfaction. This not only encourages healthy eating habits but also makes it easier to adhere to dietary goals, resulting in a more balanced and enjoyable approach to food.
Long-Term Health and Wellness Benefits
Regularly incorporating low-fat BBQ glazes into your meals can yield long-lasting health benefits. Embracing a diet that prioritizes lower-fat options can lead to healthier weight management, improved cardiovascular health, and overall enhanced well-being.
Studies show that individuals who follow diets lower in saturated fats experience fewer health issues related to obesity and chronic diseases. By transitioning to low-fat BBQ glazes, you can establish sustainable habits that benefit your health over time.
Furthermore, enjoying flavorful and healthy meals can positively influence mental well-being. When individuals feel good about their food choices, they are more likely to maintain those habits, ultimately fostering a healthier lifestyle.
Techniques for Amplifying Flavor with Low-Fat Glazes
Enhancing the flavor of low-fat BBQ glazes is critical for crafting a satisfying grilling experience. Effectively utilizing herbs and spices can elevate the taste profiles of your glazes without adding any fat.
Experimenting with diverse herbs and spices can transform an ordinary glaze into a flavor-packed masterpiece. Techniques such as infusing oils with herbs or creating custom spice blends can yield richer, more complex flavors. For example, marinating meats in a mixture of low-fat glaze and fresh herbs before grilling can impart a more intense flavor.
Incorporating acids, such as citrus juice or vinegar, can also brighten the overall taste of your glaze, adding vibrancy. By focusing on these flavor enhancement techniques, you can create low-fat BBQ glazes that are just as enjoyable as their traditional counterparts.
Comparing Low-Fat and Traditional BBQ Glazes
When comparing low-fat BBQ glazes with traditional high-fat options, the differences in nutritional content and health impacts can be significant. Traditional BBQ glazes often contain elevated levels of sugars and fats, leading to higher calorie counts and potential health risks.
Conversely, low-fat BBQ glazes typically utilize natural sweeteners and flavorful bases that deliver satisfying tastes without the added calories. Research suggests that diets lower in saturated fats are associated with improved heart health and a reduced risk of chronic diseases.
Furthermore, low-fat glazes often incorporate more fruits, vegetables, and herbs, significantly enhancing their nutritional profiles. By opting for low-fat options, individuals can relish flavorful meals while making healthier choices that support long-term well-being.
Explore Popular Recipes for Low-Fat BBQ Glazes
Classic American Low-Fat BBQ Glaze Recipe You Must Try
One standout classic American low-fat BBQ glaze is a tangy vinegar-based sauce that captures traditional BBQ flavors while keeping a light profile. Here’s a straightforward recipe to create this delightful glaze:
Ingredients:
– 1 cup apple cider vinegar
– ½ cup honey
– 2 tablespoons Worcestershire sauce
– 1 teaspoon garlic powder
– 1 teaspoon onion powder
– ½ teaspoon black pepper
– 1 teaspoon smoked paprika
– Salt to taste1. In a medium saucepan, combine the apple cider vinegar and honey over medium heat, stirring until the honey fully dissolves.
2. Add Worcestershire sauce, garlic powder, onion powder, black pepper, and smoked paprika.
3. Bring the mixture to a simmer, then reduce the heat and allow it to cook for about 15 minutes, letting the flavors meld together.
4. Season with salt to taste, adjusting as necessary to achieve your desired flavor.
5. Allow the glaze to cool before using it to marinate meats or applying it during grilling.This recipe captures the essence of traditional BBQ while staying low in fat, making it perfect for any grilling occasion.
Exciting Creative Variations of Low-Fat BBQ Glazes to Try
If you’re looking to explore unique flavor profiles, here are some innovative low-fat BBQ glaze recipes that offer exciting taste experiences:
– Mango-Habanero Glaze:
– Blend 1 cup fresh mango puree, one tablespoon minced habanero, two tablespoons apple cider vinegar, and a dash of salt for a spicy-sweet glaze that pairs wonderfully with chicken.– Cherry Balsamic Glaze:
– Mix 1 cup pitted cherries with ½ cup balsamic vinegar, two tablespoons honey, and a pinch of black pepper for a rich, tangy glaze that complements pork beautifully.– Ginger-Sesame Glaze:
– Combine ½ cup soy sauce, one tablespoon ground ginger, one tablespoon honey, and one teaspoon sesame oil for an Asian-inspired glaze that’s perfect for grilling fish or tofu.These variations demonstrate how low-fat glazes can be both creative and flavorful, ensuring your BBQ remains exciting and satisfying.
Seasonal Low-Fat BBQ Glazes for Festive Occasions
When crafting seasonal BBQ glazes, using fresh, seasonal ingredients can enhance flavors and create a festive atmosphere. Here are some seasonal low-fat BBQ glaze ideas:
- Spring: Lemon-Basil Glaze – Combine 1 cup lemon juice, ¼ cup honey, and fresh basil.
- Summer: Watermelon and Mint Glaze – Mix 2 cups of pureed watermelon, two tablespoons of fresh mint, and a splash of lime juice.
- Fall: Pumpkin Spice Glaze – Blend 1 cup pureed pumpkin, two tablespoons maple syrup, one teaspoon cinnamon, and a hint of nutmeg.
- Winter: Cranberry Orange Glaze – Simmer 1 cup of fresh cranberries, 1 cup of orange juice, and one tablespoon of honey.
These glazes not only celebrate the seasons but also offer delicious, low-fat options that pair beautifully with a variety of meats and vegetables.
Proven Techniques for Crafting Low-Fat BBQ Glazes
Selecting High-Quality Ingredients for Maximum Flavor
Choosing high-quality, low-fat ingredients is essential for creating exceptional BBQ glazes. The right ingredients can significantly enhance the flavor and nutritional profile of your glaze, leading to a superior overall experience.
When selecting ingredients, aim for:
- Fresh fruits and vegetables (preferably organic)
- Low-sodium stocks or broths
- Natural sweeteners without additives
- High-quality vinegars (like balsamic or apple cider)
- Fresh herbs and spices (consider purchasing in bulk for better quality)
- Low-fat dairy options (such as Greek yogurt)
- Non-GMO ingredients
- Salt-free condiments (to keep sodium levels low)
Utilizing high-quality ingredients not only enhances flavors but also ensures that your low-fat BBQ glazes are as nutritious as they are delicious.
Mastering Flavor Layering Techniques for Depth
Layering flavors is a vital skill in crafting a well-rounded low-fat BBQ glaze. By thoughtfully combining ingredients, you can build complexity and depth without relying on fats.
To master flavor layering, consider these techniques:
- Begin with a strong base flavor (like vinegar or juice).
- Gradually incorporate sweetness to find the ideal balance.
- Add acid to brighten the mixture.
- Layer in spices and herbs at various cooking stages for added depth and complexity.
- Finish with fresh herbs or zest just before serving for a burst of brightness.
- Adjust seasoning throughout the cooking process.
- Utilize umami-rich ingredients, such as tomatoes or mushrooms, to enhance depth.
- Experiment with textures by incorporating purees and chunky ingredients.
By focusing on these techniques, you can create low-fat BBQ glazes that are brimming with flavor and complexity. This approach not only enhances your BBQ dishes but also highlights the art of cooking.
Best Practices for Storing Low-Fat BBQ Glazes
Properly storing and preserving low-fat BBQ glazes is essential for maintaining their quality and flavor over time. Following best practices can help extend the shelf life of your glazes, allowing you to enjoy them across multiple grilling sessions.
To effectively store and preserve your low-fat BBQ glazes:
- Allow the glaze to cool completely before transferring it to a container.
- Use airtight containers to prevent oxidation.
- Label containers with dates for easy tracking.
- Store in the refrigerator for up to two weeks.
- Freeze glazes in ice cube trays for convenient portioning.
- Thaw frozen glazes in the refrigerator overnight before use.
- Gently reheat on the stove to restore consistency.
- Always check for signs of spoilage before use.
By employing these storage techniques, you can ensure your low-fat BBQ glazes remain flavorful and fresh, ready for your next grilling adventure.
Common Questions About Low-Fat BBQ Glazes
What Are Low-Fat BBQ Glazes?
Low-fat BBQ glazes are sauces specifically designed to enhance the flavor of grilled foods while minimizing fat content. They typically use vinegar, fruit juices, and natural sweeteners to achieve rich flavors without the extra calories associated with traditional sauces.
How Can I Effectively Reduce Fat in My BBQ Glaze?
To lower fat in BBQ glazes, choose low-fat ingredients, employ natural thickeners, and use cooking methods like simmering. Opt for vinegar or fruit juice as bases to keep calories minimal.
What Are Some Suitable Natural Sweeteners for Low-Fat BBQ Glazes?
Natural sweeteners ideal for low-fat BBQ glazes include honey, maple syrup, agave nectar, and fruit purees. These alternatives provide sweetness without increasing fat content.
Can I Adapt Traditional BBQ Glaze Recipes to Create Low-Fat Versions?
Yes, you can modify traditional BBQ glaze recipes by substituting high-fat ingredients with low-fat alternatives and adjusting portion sizes to create healthier versions without sacrificing flavor.
Which Herbs and Spices Work Best for Low-Fat BBQ Glazes?
Ideal herbs and spices for low-fat BBQ glazes include smoked paprika, garlic powder, cumin, black pepper, and fresh herbs like basil or thyme, which contribute depth and flavor.
How Should I Store Low-Fat BBQ Glazes?
Store low-fat BBQ glazes in airtight containers in the refrigerator for up to two weeks or freeze them in ice cube trays for longer preservation. Always label containers with dates for easy identification.
Are Low-Fat BBQ Glazes Healthier Options?
Absolutely! Low-fat BBQ glazes are generally healthier since they contain less saturated fat and fewer calories compared to traditional glazes, making them a better option for those monitoring their diet or managing health conditions.
Can I Freeze Low-Fat BBQ Glazes for Later Use?
Yes! Freezing low-fat BBQ glazes is an excellent way to extend their shelf life. They can be portioned into ice cube trays for convenient access later on.
What Steps Should I Take to Create My Own Low-Fat BBQ Glaze?
To create your own low-fat BBQ glaze, start with a low-fat base, such as vinegar or juice, and add natural sweeteners. Incorporate flavor enhancers and adjust the seasonings to suit your taste.
What Are the Benefits of Using Low-Fat BBQ Glazes?
Utilizing low-fat BBQ glazes allows for flavorful grilling while decreasing calorie and fat intake, promoting healthier eating habits without compromising taste.
Connect with us on Facebook!
The Article How to Make Low-Fat BBQ Glazes: Healthy Grilling Tips appeared first on https://pitmastersarsenal.com
The Article Low-Fat BBQ Glazes: Tips for Healthy Grilling Was Found On https://limitsofstrategy.com
-

Grilled Watermelon and Feta: A Summer Delight
Master the Art of Grilling Watermelon with Feta: Expert Techniques for Flavorful Results
Essential Tips for Choosing the Perfect Watermelon for Grilling
When it comes to achieving the ultimate flavor in grilled watermelon, selecting the right fruit is of paramount importance. To ensure you pick a ripe and juicy watermelon, focus on those that feel surprisingly heavy for their size, indicating an abundance of water content and peak ripeness. A ripe watermelon will typically display a yellow spot on one side, signifying it matured naturally on the vine, which enhances its sweetness and overall flavor profile. Here are some essential traits to consider when selecting your watermelon:
- A smooth, uniform skin devoid of bruises or cuts.
- A deep, hollow sound when tapped, indicating perfect ripeness.
- It should feel heavier than it appears to ensure juiciness.
- A symmetrical shape; irregularities may indicate internal flaws.
- A consistent, matte color, avoiding overly shiny surfaces.
- A stable yellow spot that shows the fruit rested on the ground during ripening.
- Firmness: it should yield slightly to pressure without being overly soft.
By focusing on these characteristics, you will greatly improve your chances of selecting the ideal watermelon for grilling, ultimately creating a delicious blend of sweetness and smokiness that will elevate your dish and impress your guests.
Ready to Dive Deeper?
Marinating Watermelon: A Game-Changer for Flavor Enhancement Before Grilling
Marinating your watermelon is an excellent way to significantly elevate its flavor profile. Infusing the fruit with various flavors before grilling allows you to achieve a more intricate and satisfying dish. A simple yet effective marinade can be crafted using a mixture of lime juice, honey, and fresh mint. The acidity from the lime brightens the natural sweetness of the watermelon, while honey introduces a rich layer of flavor. Additionally, fresh mint adds a refreshing herbal note that enhances each bite. Here are some other effective marinade options worth considering:
- Balsamic vinegar paired with a drizzle of olive oil.
- Chili powder combined with lime juice for a spicy twist.
- Honey mixed with rosemary for an aromatic infusion.
- Mango puree blended with lime for an exotic flavor boost.
- A simple seasoning of salt and pepper to elevate the natural flavors.
- Ginger and sesame oil for a delightful Asian-inspired taste.
- Orange juice and zest for a refreshing citrusy punch.
Allow your watermelon to marinate for at least 30 minutes before grilling to give it ample time to absorb the flavors. This crucial step will transform your dish into a culinary delight, elevating grilled watermelon with feta to new heights of flavor that will undoubtedly impress your guests.
Grilling Techniques to Achieve the Perfect Watermelon Texture
To ensure you achieve the desired texture for grilled watermelon, it is crucial to grill the slices over medium heat. This temperature allows the natural sugars within the fruit to caramelize properly, developing that sought-after smoky flavor without leading to a mushy result. Ensure your watermelon slices are at least 1 inch thick; this thickness helps them maintain their integrity while grilling. Grill your watermelon for approximately 3 to 4 minutes on each side, or until you notice beautiful char marks and a slight softness. This method not only enhances the flavor but also provides a stunning presentation for your dish. After grilling, let the watermelon rest for a minute or two; this enables the juices to redistribute, ensuring a juicy bite every time. This technique is vital for creating a textural contrast that pairs beautifully with the creamy feta cheese.
Creating Flavor Harmony: How to Pair Watermelon with Feta

Choosing the right feta cheese is essential for achieving the perfect balance against the sweetness of the watermelon. Opt for high-quality feta, preferably made from sheep’s milk, as it offers a creamier texture and richer flavor profile. Crumble or slice the feta and distribute it evenly over the grilled watermelon slices to create a harmonious flavor experience. The saltiness of the feta beautifully complements the sweetness of the watermelon, resulting in a delightful blend. To further enhance the flavor complexity, consider incorporating additional elements such as:
- Chopped olives for a briny depth.
- Chili flakes for a hint of heat.
- Toasted nuts for added crunch.
- Drizzles of olive oil to enhance richness.
- A sprinkle of lemon zest for a refreshing burst.
- Fresh herbs like basil or mint to finish with an aromatic touch.
These thoughtful pairings not only elevate the overall flavor but also contribute to a visually stunning dish. The contrast of textures and tastes will undoubtedly make grilled watermelon with feta a highlight at any table, impressing everyone fortunate enough to sample it.
Garnishing and Serving Techniques for a Stunning Presentation
To enhance both the visual appeal and flavor profile of grilled watermelon with feta, consider garnishing it with fresh herbs like mint or basil. A drizzle of balsamic glaze adds a sweet-tart element, while a sprinkle of black pepper or sea salt can further enhance the dish’s flavors. When plating, arrange the watermelon slices in a fan shape for a dramatic effect, or stack them in layers with feta in between for a rustic look. Additional garnishing ideas include:
- Crushed pistachios or walnuts for a delightful nutty crunch.
- Edible flowers for an elegant touch.
- A dusting of smoked paprika for added depth.
- Fresh lime wedges on the side for an extra zing.
- Microgreens for a sophisticated finish.
- Drizzles of local honey for a touch of sweetness.
These finishing touches not only enhance the dish’s visual appeal but also amplify the overall flavors, creating a memorable culinary experience. Serving grilled watermelon with feta can transform a simple gathering into a festive occasion, leaving a lasting impression on your guests.
Expert Insights on Mastering Grilled Watermelon with Feta
Chef’s Secrets for Amplifying Flavor in Grilled Dishes

Professional chefs possess unique insights when it comes to enhancing flavors in dishes like grilled watermelon with feta. One widely used technique involves adding a pinch of salt or a drizzle of balsamic reduction to the final dish, elevating the sweet notes of the watermelon while accentuating the salty creaminess of the feta. In many renowned restaurants, chefs often pair grilled watermelon with grilled meats, utilizing herb-infused oils to enhance the dish’s complexity. Some chefs might even incorporate smoked sea salt to mimic the grill’s smoky flavor, resulting in a multi-dimensional taste experience that delights the palate.
Additionally, another innovative approach focuses on utilizing seasonal ingredients. During the summer months, chefs may add diced stone fruits or cucumbers alongside the watermelon for additional texture and flavor, making the dish even more refreshing. This highlights the versatility of grilled watermelon, allowing chefs to tailor it to local and seasonal offerings. By exploring these tips and integrating them into your cooking, you can elevate your grilled watermelon with feta to restaurant-quality fare that impresses family and friends alike.
Unveiling the Nutritional Benefits of Watermelon and Feta
Watermelon and feta are not only a delicious pairing, but they also offer impressive nutritional benefits. Watermelon is an incredibly hydrating fruit, consisting of approximately 92% water, making it an excellent option for maintaining hydration, especially during the hot summer months. It is also rich in vitamins A and C, both of which are essential for maintaining healthy skin and supporting the immune system. Conversely, feta contributes a boost of protein and calcium, crucial for muscle function and bone health.
Moreover, watermelon is a rich source of antioxidants, including lycopene, which is recognized for its various health benefits, such as reducing inflammation and improving heart health. The combination of these two ingredients creates a dish that is not only delightful but also positively contributes to a balanced diet. For instance, a serving of grilled watermelon with feta can provide a substantial amount of vitamin A, essential for maintaining healthy vision and supporting immune function. This nutritional synergy makes grilled watermelon with feta a smart choice for anyone looking to incorporate healthy options into their meals.
What Makes Grilled Watermelon with Feta a Flavor Sensation?
The combination of grilled watermelon and feta creates an exquisite pairing that plays on contrasting flavors. The sweetness of the watermelon perfectly offsets the saltiness of the feta, creating a delightful balance that captivates the palate. To enhance the flavor experience, consider adding fresh herbs like basil or mint, which contribute aromatic qualities that beautifully complement both ingredients. Chef recommendations often highlight the use of cilantro for an unexpected twist, as its bright notes can elevate the dish even further.
To maximize flavor, think about incorporating complementary elements such as citrus or spice. A drizzle of citrus vinaigrette can brighten the dish, while a sprinkle of crushed red pepper flakes introduces a kick of heat. The versatility of this pairing allows for endless creativity in the kitchen. By utilizing a range of herbs and spices, you can tailor the dish to suit various palates while maintaining that essential sweet-salty balance that makes grilled watermelon with feta so appealing.
Discovering the Health Benefits of Grilled Watermelon with Feta
How Grilled Watermelon Enhances Hydration and Nutrient Intake
Grilled watermelon is not just a delicious dish; it also serves as an excellent source of hydration and essential nutrients. As previously mentioned, watermelon is primarily composed of water, making it an ideal choice for staying hydrated, especially during the sweltering summer months. Its high vitamin A and C content supports immune function and skin health, while the addition of feta introduces protein and calcium, making the dish more filling and nutritious.
The combination of these elements creates a refreshing and healthy option for summer meals. Consuming grilled watermelon with feta can help replenish electrolytes lost during physical activity or in hot weather, making it a perfect post-workout snack. This nutrient-rich dish plays a significant role in promoting overall wellness, contributing positively to your daily intake of essential vitamins and minerals that your body craves.
Why Grilled Watermelon with Feta is a Low-Calorie Delight
One of the remarkable features of grilled watermelon with feta is its low-calorie nature yet high satisfaction level, making it an excellent choice for individuals monitoring their calorie intake. A typical serving is light but brimming with flavors that satisfy your taste buds while keeping calorie counts in check. The dish combines the juiciness of watermelon with the creamy texture of feta, creating a fulfilling experience without overindulging.
Here are some of the nutritional benefits of grilled watermelon with feta:
- Low in calories, making it ideal for weight management.
- High water content promotes hydration and a feeling of fullness.
- Rich in vitamins A and C, crucial for immune support.
- Contains protein and calcium from feta, supporting muscle and bone health.
- Antioxidants from watermelon help combat inflammation and oxidative stress.
- Low in fat, supporting heart health when consumed in moderation.
- High in natural sugars, providing a quick energy boost.
This makes grilled watermelon with feta an excellent option for individuals looking to maintain a balanced diet without sacrificing flavor.
Exploring the Antioxidant Properties of Watermelon and Feta
Watermelon stands out as a unique fruit known for its high levels of lycopene, an antioxidant that protects against cell damage and reduces the risk of chronic diseases. Grilling watermelon does not significantly diminish these beneficial properties, allowing you to enjoy both the taste and health advantages of this refreshing dish. Lycopene is particularly recognized for its heart health benefits, as it may help lower cholesterol levels and reduce blood pressure.
Furthermore, the combination of watermelon and feta means that you not only benefit from lycopene but also from the protein and calcium provided by feta. Together, they create a dish that not only tastes fantastic but also supports your body’s overall health. Including grilled watermelon with feta in your diet allows you to reap the benefits of these antioxidant properties while enjoying a delightful culinary experience that nourishes both body and soul.
Serving Grilled Watermelon with Feta for Maximum Impact
Effective Plating Techniques for an Impressive Presentation
When serving grilled watermelon with feta, the presentation can significantly enhance the dining experience. Begin by arranging the grilled watermelon slices on a large platter, allowing their vibrant colors to shine. Generously crumble feta over the top to ensure a balanced distribution of flavors. To elevate the dish further, consider garnishing with fresh herbs, such as mint or basil, which not only add color but also impart a fresh aroma that entices the senses.
A drizzle of balsamic glaze over the top not only adds visual appeal but also contributes a sweet-tart flavor that beautifully complements the sweetness of watermelon. For a more elegant presentation, you might stack slices or serve them in a fan shape. Creative plating techniques can transform grilled watermelon with feta into the centerpiece of your meal, impressing guests with its stunning appearance and inviting aroma.
Additionally, consider the serving vessel. Using a rustic wooden board or a pristine white platter can enhance the aesthetic appeal of your dish. Arrange slices in a circular pattern, adding feta in between layers, to create a visually enticing display. Don’t forget to include a small bowl of extra garnishes on the side, allowing guests to customize their servings as desired, making the experience interactive and memorable.
What Accompaniments and Side Dishes Enhance Grilled Watermelon with Feta?
Grilled watermelon with feta pairs exceptionally well with a variety of accompaniments and side dishes, making it a versatile option for any meal. Consider serving it alongside grilled chicken or fish, where the smoky flavors complement one another beautifully. For a lighter option, pair it with a fresh garden salad featuring mixed greens, cherry tomatoes, and a light vinaigrette. This contrast of textures and flavors creates a delightful balance on the plate. Here’s a list of side dishes that pair wonderfully with grilled watermelon with feta:
- Grilled shrimp skewers with a citrus marinade.
- Quinoa salad dressed with lemon vinaigrette.
- Caprese salad featuring fresh mozzarella and basil.
- Roasted vegetables drizzled with balsamic reduction.
- Herbed couscous for a Mediterranean touch.
- Summer corn salad with lime and cilantro.
- Toasted pita chips served with hummus for a crunchy option.
These options not only complement the flavors of grilled watermelon with feta but also contribute to a well-rounded, satisfying meal that will leave your guests craving more.
Presentation Tips for Memorable Gatherings and Events
For gatherings or parties, serving grilled watermelon with feta in innovative and approachable ways can make all the difference. Consider using skewers to create easy-to-eat bites. Thread cubes of grilled watermelon and crumbled feta onto skewers, interspersing them with fresh basil leaves or mint sprigs for a visually appealing presentation. These can be served as finger food, making them perfect for mingling guests.
Alternatively, you might serve the dish in small cups or bowls for individual servings. Layer the grilled watermelon with feta, adding a small amount of balsamic glaze and herbs to each cup for a visually appealing presentation. This method allows guests to enjoy the dish without the need for utensils, enhancing the casual atmosphere of gatherings.
Another idea is to create a grilled watermelon platter, arranging slices in a circular pattern, enabling guests to help themselves. This communal style fosters a friendly atmosphere and encourages guests to share their experiences with this delightful dish. Regardless of how you choose to present it, grilled watermelon with feta is bound to be a hit at any gathering, leaving everyone satisfied and impressed.
What Are the Best Dressing and Marinade Options for Grilled Watermelon?
To elevate the flavor profile of grilled watermelon with feta, consider incorporating a variety of dressings or marinades to enhance the taste. A classic honey-lime dressing can amplify the natural sweetness of the watermelon while adding a citrusy zing. Combine honey, lime juice, and a pinch of salt for a simple yet effective dressing. Another excellent option is a mint vinaigrette, which adds a refreshing herbal note to the dish that beautifully complements the other flavors.
For a more adventurous flavor, consider a spicy chili-lime marinade, which pairs beautifully with the sweetness of the watermelon and the saltiness of feta. Additionally, a sesame ginger dressing introduces an Asian flair, enriching the overall complexity of flavors in the dish. These dressings not only add depth but also create a unique culinary experience for your guests, allowing you to explore new taste dimensions.
Don’t hesitate to experiment with different dressings and marinades to discover the combinations that resonate most with your taste preferences. By varying the flavors, you can keep grilled watermelon with feta exciting and adaptable for a range of occasions, ensuring that there is always something new to try.
Temperature and Timing: Key Considerations for Serving Grilled Watermelon
To ensure the best taste and texture, serve grilled watermelon with feta at room temperature. This allows the flavors to develop fully, ensuring that the dish is enjoyable to eat. Preparing it just before serving helps maintain freshness and the ideal texture, preventing the watermelon from becoming overly soft.
Timing is also essential when grilling. Aim to serve the dish immediately after grilling to capture the smoky flavors and juicy texture of the watermelon. If preparing ahead of time, consider grilling the watermelon and allowing it to cool slightly before refrigerating. When ready to serve, please remove it from the refrigerator and let it come to room temperature to revive the flavors, making it as tasty as when it was freshly grilled.
By paying attention to these temperature and timing considerations, you can enhance the overall experience of enjoying grilled watermelon with feta, ensuring it is both delicious and refreshing for everyone at your table.
Research-Backed Benefits of Grilled Watermelon with Feta
How Does Grilled Watermelon Promote Heart Health?
Research suggests that the lycopene present in watermelon may have a positive impact on heart health. This powerful antioxidant has been linked to a reduced risk of heart disease by lowering cholesterol levels and promoting improved blood flow throughout the body. The inclusion of feta cheese, which is rich in calcium, further supports cardiovascular health by maintaining proper blood vessel function and reducing the risk of hypertension.
Integrating grilled watermelon with feta into a heart-healthy diet can be a delicious way to enhance cardiovascular well-being. Consider pairing it with whole grains, such as quinoa or brown rice, along with healthy fats like avocado or olive oil, to create a balanced meal that promotes heart health and overall wellness.
For actionable steps, start by incorporating grilled watermelon with feta into your weekly meal plans. Use it as a refreshing side dish to lean proteins or whole grains, ensuring a well-rounded diet that supports heart health while tantalizing your taste buds.
What Are the Effects of Grilled Watermelon on Skin Health?
The vitamins and antioxidants present in watermelon play a significant role in promoting skin health. Vitamin C, in particular, is essential for collagen production, which helps maintain the skin’s elasticity and firmness. Watermelon’s high water content also aids in hydration, giving the skin a plump and youthful appearance. Meanwhile, the protein found in feta supports skin repair and maintenance, making this dish an excellent choice for promoting healthy skin.
Regularly consuming grilled watermelon with feta can enhance your skin’s appearance. You can further boost benefits by pairing it with other skin-friendly foods, such as nuts and seeds, which are rich in omega-3 fatty acids and vitamin E. This combination supports a holistic approach to maintaining, repairing, and nourishing your skin, ensuring it remains vibrant and healthy.
How Does Grilled Watermelon Support Digestive Health?
Grilled watermelon with feta is a dish that also promotes digestive health. The high water content in watermelon aids digestion by preventing constipation and encouraging regular bowel movements. Additionally, the probiotics found in feta cheese can positively impact gut health by supporting a balanced microbiome, which is crucial for effective digestion.
Together, these elements make grilled watermelon with feta a gut-friendly option that satisfies your cravings while nurturing your digestive system. Incorporating it into your diet can help regulate digestion while its natural sweetness satisfies cravings for sugary foods. For added digestive benefits, consider serving it alongside high-fiber foods, such as whole grains or leafy greens, to create a well-rounded meal that supports overall digestive health.
Why Is Grilled Watermelon with Feta Beneficial for Weight Management?
Grilled watermelon with feta is a low-calorie option, making it an excellent choice for individuals seeking to manage their weight effectively. The satisfying nature of watermelon, combined with the protein found in feta, effectively controls hunger and creates a sense of fullness. This makes it easier to enjoy a flavorful dish without the guilt often associated with higher-calorie options.
To aid in weight management, consider using grilled watermelon with feta as a light appetizer or side dish. By incorporating it into meals, you can relish its refreshing taste while keeping calorie counts in check. This approach promotes a balanced diet, allowing you to enjoy delicious flavors without compromising your health goals or dietary needs.
What Are the Best Occasions for Grilled Watermelon with Feta?
Why Is Grilled Watermelon Ideal for Summer Barbecues and Picnics?
Grilled watermelon with feta is a perfect addition to summer barbecues and picnics. Its refreshing nature and vibrant flavors make it a hit at outdoor events, where guests appreciate light, hydrating options. The bright colors and unique flavor combination can attract attention and spark conversations, making it an ideal dish for sharing among friends and family.
At summer gatherings, consider pairing grilled watermelon with feta alongside grilled meats, such as chicken or burgers. This pairing not only complements the main dishes but also offers a bright contrast that enhances the overall meal experience, ensuring everyone leaves satisfied.
How Does Grilled Watermelon Shine at Casual Dinners and Gatherings?
This dish is versatile enough to shine at casual dinners and gatherings. Its ease of preparation makes it an excellent choice for weeknight meals or gatherings with friends. Grilled watermelon with feta can be served as an appetizer or side dish, offering a refreshing element that balances heartier fare, making it a hit with guests.
To elevate a casual dinner, think about incorporating themed elements. For example, a Mediterranean night could feature grilled watermelon with feta, accompanied by pita bread and tzatziki sauce, creating a cohesive culinary experience that delights guests and encourages conversation.
Why Is Grilled Watermelon Excellent for Special Events and Celebrations?
For special events like birthdays or anniversaries, grilled watermelon with feta can serve as a unique and elegant dish that impresses guests. Its stunning visual appeal and sophisticated flavor make it a standout option for any gathering. Additionally, it aligns with modern culinary trends that emphasize fresh, seasonal ingredients, allowing you to cater to health-conscious guests while still offering something delightful.
For these occasions, consider serving the dish as part of a multi-course menu. Pair it with lighter appetizers, such as bruschetta or a charcuterie board, to create a memorable dining experience that will be talked about long after the event.
How Does Grilled Watermelon Fit into Holiday Cookouts and Festivities?
Grilled watermelon with feta adds a festive touch to holiday cookouts, enhancing celebrations like Independence Day or Labor Day. Its vibrant colors evoke the spirit of summer, making it a delightful addition to any festive table. The refreshing nature of the dish offers relief during hot summer days, ensuring it remains a crowd favorite that everyone will enjoy.
To incorporate grilled watermelon with feta into holiday celebrations, consider serving it alongside traditional barbecue foods. This balance of flavors helps create a memorable meal that captures the essence of summer gatherings, allowing everyone to enjoy the season to the fullest.
Why Is Grilled Watermelon Perfect for Beach Parties and Poolside Snacks?
Grilled watermelon with feta is an excellent choice for beach parties and poolside snacks, offering a light and refreshing option that matches the relaxed atmosphere. Its vibrant colors and cooling flavors make it a perfect fit for warm weather, keeping guests satisfied without weighing them down.
For beach or poolside settings, consider serving grilled watermelon with feta on skewers or in portable containers, making it easy for guests to enjoy while mingling. Pairing the dish with other light snacks, like veggie platters or fruit salads, can create a delightful spread that keeps everyone refreshed throughout the day.
What Are Some Creative Variations of Grilled Watermelon with Feta?
How Can Spices and Herbs Transform Grilled Watermelon into a Gourmet Dish?
Experimenting with spices and herbs can add exciting new dimensions to grilled watermelon with feta. For instance, a sprinkle of chili powder can introduce a delightful heat that complements the sweetness of the watermelon. Cilantro offers a bright, citrusy flavor that pairs well with the other ingredients, enhancing the dish’s overall appeal.
Other spices that can enhance flavor include:
- Smoked paprika for a hint of smokiness.
- Cumin for an earthy element.
- Garlic powder for added depth of flavor.
- Black pepper for a mild kick.
- Crushed red pepper flakes for a more intense heat.
- Herbs de Provence for an aromatic touch.
By incorporating these variations, you can create a dish that is uniquely yours, appealing to a range of palates while still celebrating the classic flavors of grilled watermelon with feta.
What Other Cheeses Can Be Incorporated into This Dish for Unique Flavors?
While feta is a traditional choice, experimenting with other cheeses can yield different taste experiences. Consider using goat cheese, which offers a tangy flavor that pairs beautifully with the sweetness of watermelon. Alternatively, blue cheese adds a strong, pungent contrast that can elevate the dish to new heights of flavor complexity.
Each cheese introduces its own unique flavor profile, allowing you to further personalize the dish. For example, ricotta can provide a creamier texture, while parmesan can add a savory bite. By mixing and matching different cheeses, you can create a gourmet experience that showcases your culinary creativity and impresses your guests.
What Additional Ingredients Can Add Complexity to Grilled Watermelon?
To create a more complex and satisfying dish, consider mixing in additional ingredients such as arugula, which provides a peppery bite, or balsamic glaze for an extra layer of flavor. You might also add prosciutto, which contributes a salty, savory note that complements the sweetness of the watermelon and the creaminess of the feta.
Other options for adding depth to the dish include:
- Chopped nuts for a satisfying crunch.
- Diced cucumbers for a refreshing crunch.
- Roasted red peppers for added sweetness.
- Fresh fruits like berries or peaches for a unique twist.
- Caramelized onions for sweetness and depth of flavor.
These creative variations not only enhance the flavor and texture of grilled watermelon with feta but also make it a versatile option suitable for a variety of occasions, ensuring that every serving is memorable.
Frequently Asked Questions About Grilled Watermelon with Feta
Can I use any watermelon for grilling, or is there a specific type I should choose?
Yes, while any type of watermelon can be used, opting for a seedless variety is often best for grilling, as it offers a sweeter taste and more appealing texture that enhances the overall dish.
How long should I grill watermelon for the best results?
Grill watermelon slices for about 3 to 4 minutes on each side over medium heat until grill marks appear and the fruit is slightly softened, creating a delightful texture.
What is the best way to cut watermelon for grilling purposes?
Cut the watermelon into thick slices (approximately 1 inch) to prevent them from falling apart on the grill and maintain their texture, ensuring a successful grilling experience.
Is grilled watermelon with feta a suitable vegetarian option for my guests?
Absolutely! Grilled watermelon with feta is a delicious vegetarian dish that combines fresh, flavorful ingredients, making it a great choice for meat-free meals and gatherings.
How can I store leftover grilled watermelon with feta to maintain its freshness?
Store any leftovers in an airtight container in the refrigerator for up to 2 days. Enjoy it cold or at room temperature for optimal flavor and enjoyment.
Can I make grilled watermelon with feta in advance of my gathering?
While grilling is best done fresh, you can prepare the watermelon slices and marinade in advance—grill just before serving to maintain optimal flavor and texture for your guests.
What are some good side dishes to serve alongside grilled watermelon with feta?
Grilled chicken, a fresh garden salad, or roasted vegetables pair exceptionally well with grilled watermelon, creating a balanced and harmonious meal that guests will love.
Can I add other fruits to grilled watermelon with feta for added sweetness?
Yes, incorporating other fruits, such as peaches or berries, can enhance the dish’s sweetness and provide additional flavor layers, making it even more enjoyable.
Is feta cheese gluten-free, making it safe for those with sensitivities?
Yes, feta cheese is naturally gluten-free, making it a safe ingredient for those with gluten sensitivities or dietary restrictions.
Can I use different types of cheese besides feta to create new variations?
Absolutely! Goat cheese, ricotta, or blue cheese can provide unique flavors and textures, making for an exciting variation of the dish that keeps things fresh and interesting.
Connect with us on Facebook for more delicious recipes and tips!
The Article Grilled Watermelon With Feta: A Summer Delight appeared first on https://pitmastersarsenal.com
The Article Grilled Watermelon and Feta: A Refreshing Summer Treat Was Found On https://limitsofstrategy.com
-

Miso Paste: Easy Steps to Create Your Own at Home
Essential Ingredients for Crafting High-Quality Miso Paste at Home
Choosing the Finest Soybeans for Superior Miso Production
Crafting a premium miso paste begins with the careful selection of high-quality soybeans, which are crucial in shaping the texture and flavor profile of the final product. The fermentation process ingeniously transforms the inherent qualities of the soybeans into a rich, savory paste that has garnered global admiration. The most popular soybean varieties utilized in miso production include:
- Yellow Soybeans: The most prevalent choice, offering a versatile and mild-flavored miso that enhances a wide range of culinary dishes.
- Black Soybeans: Renowned for their distinctive flavor profile, black soybeans produce a richer and more complex miso, often associated with premium varieties.
- Green Soybeans (Edamame): Although not a traditional option, they can yield a lighter and fresher miso paste.
- Organic Soybeans: Increasingly popular among health-conscious consumers, organic soybeans are cultivated without synthetic pesticides.
The choice of soybean is pivotal in determining the flavor and quality of your miso paste, so feel free to experiment with different varieties to discover your ideal taste and texture.
Understanding Koji: The Key Player in Miso Fermentation
Koji is an indispensable fermentation agent in the creation of miso. This vital ingredient consists of steamed soybeans or grains that have been inoculated with Aspergillus oryzae, a specific fungus responsible for kickstarting fermentation. Koji plays a crucial role in converting the starches within the soybeans into sugars, setting the stage for the emergence of deep and nuanced flavors. The following are common types of koji utilized in miso production:
- Rice Koji: The most widely used variant, imparting a sweet and mild flavor profile.
- Barley Koji: Adds a nutty character and is frequently featured in traditional miso recipes.
- Wheat Koji: Though less common, it can lend a distinctive flavor that enhances specific styles of miso.
- Mixed Koji: A combination of different grains, resulting in a complex flavor that artfully balances sweetness with umami.
Selecting the appropriate koji can greatly enhance the fermentation process and profoundly influence the final flavor of your miso paste.
Exploring the Impact of Salt on Miso Paste: Preservation and Flavor Amplification
Salt plays a critical role in both the preservation of miso paste and the enhancement of its flavor. The type and quantity of salt used are vital for achieving optimal fermentation, fostering beneficial bacteria while keeping harmful microorganisms at bay. Various types of salt can yield different outcomes, so consider the following options:
- Sea Salt: Harvested from evaporated seawater, it retains essential minerals and infuses a subtle flavor.
- Himalayan Pink Salt: Esteemed for its mineral content, this salt adds a unique taste while effectively preserving the paste.
- Kosher Salt: With larger grains, it is easy to handle and dissolves efficiently within the miso mixture.
- Table Salt: While convenient, additives in table salt can alter flavor; opting for pure salt is advisable when possible.
The amount of salt incorporated also significantly influences the flavor profile and shelf life of the miso, underscoring the importance of finding the right balance for an optimal outcome.
Thorough Guide to Preparing Ingredients for Miso

Expert Tips for Effectively Soaking Soybeans
Soaking soybeans is a fundamental step in their preparation for miso paste. This process softens the beans, making them easier to cook and mash. To ensure effective soaking, keep these essential tips in mind:
- Use Fresh Soybeans: Fresh beans absorb water more efficiently, resulting in a superior miso.
- Soak Overnight: Allowing the beans to soak for 8-12 hours guarantees they are adequately hydrated.
- Use Plenty of Water: Fill a large bowl with water that covers the soybeans by several inches, as they will expand significantly.
- Rinse Before Cooking: Rinsing the soaked beans removes impurities, ensuring a cleaner flavor.
Proper soaking not only prepares the soybeans for cooking but also initiates the hydration process, which is crucial for achieving a smooth and creamy miso paste.
Steps to Cook Soybeans for the Perfect Consistency
After soaking, the next crucial step is cooking the soybeans to achieve the ideal consistency for mashing. Proper cooking ensures that the beans become tender enough to blend into a creamy paste. Follow these essential steps for effective soybean cooking:
Begin by draining the soaked beans and placing them in a large pot. Cover the beans with fresh water and bring to a boil. Once boiling, reduce the heat to a simmer and cook the soybeans until they are tender, which typically takes between 1 and 2 hours. To check for doneness, remove a bean, allow it to cool slightly, and crush it between your fingers; it should mash easily with minimal resistance.
Once cooked, let the beans cool slightly before moving on to the next step. Properly cooked soybeans are crucial for achieving your desired texture in miso paste, whether you prefer it to be smooth or chunky.
The Importance of Proper Koji Preparation for Miso

Correctly preparing koji is essential for ensuring effective fermentation of the soybeans. This preparation involves mixing koji with the cooked soybeans and salt to create an optimal environment for fermentation. Here’s how to do it properly:
First, confirm that your koji is fresh and free of contaminants. If using rice koji, it should be dry and crumbly; if it has clumped together, gently break it apart for a smooth texture. Combine the cooled, cooked soybeans with the koji in a large mixing bowl or container, using a wooden or silicone spatula to ensure even distribution.
Next, accurately measure the salt according to your recipe and sprinkle it into the mixture. Ensure that the salt is mixed thoroughly, coating each soybean. This combination of soybeans, koji, and salt creates an ideal fermentation environment, allowing the koji to function effectively.
Proven Strategies for Crafting Homemade Miso Paste
Real-Life Examples of Miso Production Techniques
Exploring the world of miso making reveals a rich tapestry of techniques and traditions. For instance, in Japan, traditional miso is often crafted by families who pass down cherished recipes through generations, showcasing the cultural significance of this culinary craft. These family recipes can vary widely, influenced by regional preferences, the types of soybeans used, and fermentation durations.
Conversely, artisanal miso producers in the United States are creatively incorporating local ingredients, utilizing bean or grain varieties native to their regions. This innovative approach can yield unique flavor profiles that honor both the tradition of miso making and local terroir. Engaging with local miso artisans can provide insights into various techniques, specific fermentation methods, and ingredient variations, inspiring your own miso-making journey.
Steps for Successful Miso Fermentation
To ensure the proper fermentation of your miso paste, it’s essential to adhere to clear, actionable steps during the fermentation process. Once your ingredients are mixed, transfer the mixture to a clean fermentation container. Ensure the container is food-safe and airtight, protecting the miso from contaminants while allowing gases to escape.
Temperature regulation is vital; aim for a stable environment between 60°F and 75°F (15°C and 24°C). If your kitchen is cooler, find a warm spot near the oven or use a heating pad to maintain this range. Regularly check the miso paste by assessing its aroma and texture. Initially, you may notice a slightly sour scent, but as fermentation progresses, the aroma will deepen, signaling successful development.
To encourage even fermentation, stir the mixture every few days with a clean utensil, breaking up any air pockets that may form. This practice not only promotes uniform flavor development but also allows you to monitor its progress over time. Maintaining ideal conditions and being diligent will enable you to produce high-quality miso paste.
Evaluating the Quality of Your Homemade Miso Paste
Assessing the quality of your miso paste can significantly enhance your understanding of what defines a superior product. High-quality miso should exhibit a smooth, creamy texture without any graininess. The flavor will vary depending on the type produced: white miso is typically sweeter and milder, while red miso delivers a deeper, more robust flavor.
Another important aspect is the color of the paste, which can range from pale beige to dark brown, influenced by fermentation duration and ingredients. A vibrant hue indicates a well-managed fermentation process. Additionally, the aroma should be rich and complex, reflecting the nuances of fermentation without any unpleasant odors.
When assessing miso quality, consider sampling it at different fermentation stages. Understanding how flavors evolve throughout the process will help refine your techniques and develop a discerning palate for the subtleties of miso.
Understanding the Role of Each Ingredient in Miso Production
Comprehending the function of each ingredient in miso making is essential for achieving the desired quality and flavor of your paste. Soybeans provide the essential base, delivering texture and protein. The choice of soybean can significantly impact both the nutritional value and flavor complexity, making it vital to select varieties that align with your culinary objectives.
Koji is critical as it drives the fermentation process, transforming starches into sugars that enhance the umami flavor of the paste. Your selection of koji—whether rice, barley, or wheat—will determine the sweetness and depth of flavor in your final product.
Lastly, salt plays a crucial role in preservation and flavor enhancement. The type of salt can introduce subtle flavor variations; for instance, sea salt may infuse a hint of ocean richness, while Himalayan pink salt may impart a different mineral complexity. Every ingredient contributes significantly, and understanding their interactions will elevate your miso paste to new heights.
Effective Strategies for Storing and Preserving Your Miso Paste
Implementing effective storage and preservation techniques is vital for maintaining the quality of your miso paste over time. After fermentation, once the desired flavor is achieved, transfer the miso to a clean, airtight container. Glass jars or food-safe plastic containers are excellent choices, but ensure they are sterilized to prevent contamination.
Store your miso paste in the refrigerator to prolong its shelf life, where it can last several months to a year, depending on the salt content and fermentation duration. If you observe any surface mold, don’t be alarmed; simply scrape it off, and the miso underneath should be safe to use.
To further enhance preservation, consider adding a thin layer of extra salt or a piece of parchment paper on top of the paste before sealing it. This additional barrier can help prevent spoilage by minimizing exposure to air. By following these storage guidelines, your homemade miso paste will remain fresh and flavorful, ready to enhance your culinary creations.
Best Practices for Mixing and Fermenting Miso Paste for Optimal Results
Combining Ingredients for Superior Miso Quality
Combining the prepared soybeans, koji, and salt is a fundamental step in crafting miso paste. Proper mixing ensures that all ingredients are evenly distributed, facilitating uniform fermentation. Start by placing your cooked and cooled soybeans in a large mixing bowl. Utilize a potato masher or food processor to mash the soybeans to your desired smooth or chunky consistency.
Once the soybeans reach your preferred texture, gradually incorporate the koji and salt into the mixture. It’s critical to mix these components thoroughly; use your hands or a spatula to ensure each soybean is coated with koji and salt. The ratio of koji and salt to soybeans can vary based on your recipe, but a common guideline is approximately 20% koji and 10% salt relative to the weight of the cooked soybeans.
Paying close attention during this step is vital, as the quality of your miso paste hinges on the careful blending of these core ingredients. An even distribution not only aids fermentation but also enhances the overall flavor, ensuring a rich, well-developed miso.
The Importance of Properly Packing the Miso Mixture
Packing the miso mixture into a fermentation container is essential for the process. An airtight container helps maintain optimal humidity and temperature while preventing contamination. When packing the mixture, utilize clean hands or a spatula to press the miso paste firmly into the container, eliminating any air pockets. Creating a dense, compact layer encourages even fermentation.
Ensure the top of the miso paste is smooth and level prior to sealing the container. If you are working with a large batch, consider dividing the mixture into smaller portions for easier management throughout fermentation. This approach allows you to monitor the progress of each batch independently.
After packing, place a weight on top of the miso paste to keep it submerged and reduce air exposure. A small plate with a clean weight or a jar filled with water serves this purpose well. This step is crucial to prevent spoilage and ensure that the miso ferments evenly.
Creating Ideal Conditions for Miso Fermentation
The conditions under which miso paste ferments greatly affect its quality. Ideal fermentation conditions typically range from 60°F to 75°F (15°C to 24°C), with humidity levels kept relatively high to prevent the fermentation from drying out. In cooler climates, locate a warm spot in your home, such as near a radiator or on top of the fridge, to encourage fermentation.
Monitoring the environment is paramount. To maintain the correct temperature, consider using a thermometer to ensure the area stays within the desired range. If your kitchen experiences temperature fluctuations, a fermentation heater or temperature-controlled environment can be beneficial.
Humidity is equally important; if it’s too dry, the surface of the miso may harden, leading to uneven fermentation. An effective way to manage humidity is by covering the container with a damp cloth or plastic wrap, ensuring it retains moisture while allowing gases to escape during fermentation. Proper fermentation conditions will yield a well-balanced flavor profile and texture in your miso paste.
Monitoring the Fermentation Progress of Your Miso Paste
Regularly checking the miso paste for changes in texture and aroma is essential for ensuring proper fermentation and identifying potential issues early. In the beginning, the miso may have a mild scent, but as fermentation progresses, it will develop a more pronounced and complex aroma.
Start tasting your miso paste around the one-week mark. Use a clean spoon to scoop out a small sample; this allows you to assess its flavor and texture. The flavor will evolve throughout fermentation, ranging from sweet and mild to deep and savory. If you detect any off-smells or unexpected textures, address them immediately—this may involve adjusting the temperature or adding more salt if spoilage is suspected.
Make it a habit to observe how the miso changes over the fermentation period. Documenting your observations can help you refine your process for future batches, leading to more consistent and desirable results each time you craft miso paste.
Adjustments During Fermentation for Optimal Miso Quality
Modifying factors such as temperature or adding more salt during fermentation can help refine the flavor and texture of your miso paste as it matures. If you find that your miso is fermenting too rapidly—resulting in an overly sharp or sour taste—consider lowering the temperature by relocating it to a cooler area in your home or adjusting nearby heat sources.
Conversely, if your miso paste isn’t fermenting adequately, you may need to slightly increase the temperature or extend the fermentation period. Regular taste tests are crucial at this stage; they will guide you in making adjustments that align with your flavor preferences. If the paste is too salty, consider adding more soybeans to balance it without disrupting the fermentation process.
Additionally, you can refine the texture by occasionally blending the miso paste during fermentation. This technique integrates flavors and can help achieve a smoother consistency. Overall, being proactive and attentive to the fermentation process can lead to a more flavorful and well-rounded miso paste.
Determining the Ideal Fermentation Duration for Miso Paste
Factors That Influence Fermentation Time for Miso
Numerous factors can affect the duration of miso paste fermentation. These include the type of miso being produced, the surrounding temperature and humidity, and the desired flavor profile. Generally, lighter miso varieties, such as white miso, ferment for a shorter period—usually around two weeks. In contrast, darker miso, like red miso, often requires several months for flavors to develop fully.
The type of koji used can also impact fermentation time. For example, rice koji may lead to quicker fermentation compared to barley koji, which may take longer to develop flavor complexity due to its denser starch content. Additionally, warmer ambient temperatures can speed up fermentation, whereas cooler temperatures can significantly slow the process.
Ultimately, the key lies in balancing these variables to achieve your desired results. Regular taste tests throughout the fermentation process will help you determine when your miso paste has reached the perfect flavor and texture.
Monitoring Fermentation Progress for Quality Assurance
Monitoring the fermentation progress of miso paste is critical for ensuring it develops the desired flavor and texture. One of the most effective methods is conducting regular taste tests. Begin tasting your miso after the first week, using a clean spoon to scoop out a small amount. This will allow you to assess the evolving flavor and texture.
Watch for changes in aroma, which should become richer and more complex as fermentation continues. If your miso smells excessively sour or has an off-putting odor, it may indicate that fermentation is off track. Additionally, pay attention to the color; it should deepen as fermentation progresses.
Keeping a fermentation log can also aid in tracking your observations and adjusting your process accordingly. Documenting aspects such as taste, texture, and aroma will enable you to replicate successful batches in the future or identify issues as they arise. Consistent monitoring will help you fine-tune your miso paste for optimal results.
Adjusting Fermentation Time Based on Desired Flavor
At times, you may need to modify the fermentation duration based on taste tests or other indicators. If your miso tastes underdeveloped or lacks complexity, it may need additional time. Monitoring through regular sampling can guide this decision. If you find that the flavor remains too mild after a couple of weeks, allow it to ferment longer—up to several months if you’re seeking a richer, deeper taste.
Conversely, if the miso develops an overly pungent or sharp flavor, it could signal that fermentation has gone too far. In such cases, you may want to adjust future batches by shortening the fermentation time or tweaking environmental conditions to slow the process.
Ultimately, successful fermentation hinges on balancing these adjustments with your flavor preferences, leading to a uniquely customized miso paste.
Optimal Fermentation Durations for Different Miso Types
The ideal fermentation duration varies among different types of miso, including white, red, and aged varieties. Each type possesses unique characteristics that are influenced by fermentation length. Generally, the following guidelines will assist you in achieving the best results:
– White Miso: Typically fermented for 2-3 weeks, this variety is celebrated for its sweet and mild flavor, often used in dressings and light soups.
– Yellow Miso: Fermented for 1-3 months, it strikes a balance between sweetness and robustness, making it versatile for various dishes.
– Red Miso: Aged for 3-6 months, red miso is more pungent and rich, ideal for hearty soups, marinades, and stews.
– aged miso: Some varieties can be aged for over a year, resulting in a complex flavor profile suitable for gourmet uses.Understanding these fermentation durations will enable you to tailor the process to your specific taste preferences, guiding you toward achieving the perfect miso paste.
Techniques for Storing and Aging Your Miso Paste
Effective Strategies for Storing Miso Paste
Proper storage is vital for maintaining the quality of your miso paste. After fermentation, transfer the paste into a clean, airtight container to minimize air exposure. Glass jars or food-grade plastic containers are excellent choices, as they prevent contamination and maintain flavor integrity.
Ensure the container is filled to the brim, leaving minimal air space to help prevent oxidation. Additionally, store the miso paste in the refrigerator to extend its shelf life; it can last anywhere from several months to a year, depending on the salt content and fermentation duration.
To further enhance preservation, consider placing a layer of parchment paper or plastic wrap directly on the surface of the miso paste before sealing the container. This method helps create a barrier against air, reducing the risk of spoilage. By following these storage techniques, your miso paste will remain fresh and flavorful for an extended period.
The Benefits of Aging Miso Paste
Aging miso paste can significantly enhance its flavor and texture, resulting in a more complex profile. The longer it ages, the richer and deeper the taste becomes. While certain miso types are ready for use after just a few weeks, others can greatly benefit from extended aging.
Generally, miso can be aged from 3 months to a year, with flavors intensifying as the paste matures. For instance, red and aged miso varieties can develop a deep, umami-rich character that pairs beautifully with robust dishes.
To effectively age your miso paste, store it in a cool, dark place, ideally in the refrigerator. Periodically check on it and sample the flavor to determine when it has reached your desired taste. Keep in mind that the aging process is subjective; the best aging duration depends on your personal palate and culinary objectives.
Identifying Signs of Spoilage in Miso Paste
Recognizing signs of spoilage in miso paste is crucial for ensuring it remains safe to consume. Though miso is a fermented product with a long shelf life, it can spoil if not stored correctly. Watch for the following indicators:
– Off Smells: If your miso develops a strong, unpleasant odor, it may indicate spoilage.
– Mold Growth: Surface mold can occur; however, if it is limited to the surface and smells fine beneath, you can scrape it off. If mold is extensive, it’s best to discard the paste.
– Changes in Color: If the miso darkens excessively or presents an unusual color, it’s worth further investigation.
– Texture Changes: A slimy texture or significant liquid separation may indicate spoilage.Always err on the side of caution regarding food safety. If you notice any signs of spoilage, it is better to discard the miso than risk foodborne illness.
Research-Backed Benefits of Making Your Own Miso Paste
Health Benefits Associated with Miso Consumption
Miso is celebrated for its numerous health benefits, particularly due to its rich probiotic content. Homemade miso typically contains a higher concentration of beneficial bacteria compared to commercial varieties, which are often pasteurized, eliminating these live cultures. Probiotics support gut health, enhance digestion, and strengthen the immune system.
Moreover, homemade miso generally contains fewer preservatives and additives, making it a healthier choice. The fermentation process produces various nutrients, including vitamins B, E, and K, as well as minerals like zinc and copper. These components contribute to overall health and well-being, making homemade miso a nutritious addition to your diet.
Furthermore, the act of making miso at home fosters a deeper connection with your food, promoting mindfulness around what you consume. Engaging in this tradition can cultivate a positive relationship with your dietary choices and encourage a more health-conscious lifestyle.
Nutritional Composition of Miso Paste
Miso is rich in a wide array of nutrients that can support a healthy diet. It is particularly high in protein, making it an excellent plant-based source for those looking to increase their protein intake. A typical serving of miso contains essential amino acids, which are crucial for various bodily functions.
Additionally, miso is a source of numerous vitamins and minerals, including B vitamins, which play vital roles in metabolism and energy production. The fermentation process enhances the bioavailability of these nutrients, meaning your body can absorb them more effectively.
While the sodium content in miso is notable, moderation is key for individuals monitoring their salt intake. However, when used wisely, miso can enrich your meals with flavor while providing valuable nutrients, making it a worthy component of a balanced diet.
Environmental Impact of Homemade Miso
Creating your own miso paste can positively influence the environment by reducing packaging waste and transportation emissions. Store-bought miso often comes in single-use plastic containers, contributing to landfill waste. By making your own at home, you can utilize reusable glass jars and minimize the overall environmental footprint of your food.
Additionally, sourcing local ingredients for your homemade miso supports local agriculture and reduces the carbon footprint associated with transporting food products. This practice fosters a sustainable food system that benefits both the environment and your community.
Homemade miso also encourages mindful consumption and awareness of food origins, leading to more responsible food choices. Embracing the art of making miso at home aligns with a broader movement towards sustainable living and conscious eating.
Innovative Ways to Use Miso Paste in Your Cooking
Incorporating Miso into Your Favorite Culinary Creations
Miso paste is incredibly versatile and can be integrated into various dishes, enhancing flavor and adding depth to your meals. One of the most popular applications is in miso soup, where the paste is dissolved in hot water or broth, creating a fragrant and nourishing base.
Additionally, consider using miso in marinades for meats or vegetables. The umami flavor beautifully complements proteins, elevating the taste of grilled chicken, fish, or roasted vegetables. You can also stir miso into salad dressings for a unique twist, providing both richness and a tangy kick.
Miso can also be blended into sauces, used as a base for glazes, or added to stews and casseroles to deepen flavors. Experimenting with different types of miso will allow you to explore new culinary possibilities, showcasing its adaptability across various cuisines and dishes.
Distinct Flavor Profiles of Various Miso Varieties
Different types of miso possess unique flavor profiles that can elevate a wide array of dishes. White miso, known for its mild and sweet taste, is ideal for dressings, light soups, and dips. Its delicate flavor pairs well with ingredients like tofu and seafood.
Yellow miso offers a slightly bolder flavor, making it suited for heartier dishes such as stir-fries and marinades. Its balanced profile allows it to shine in versatile recipes across diverse cuisines.
Conversely, red miso has a more robust flavor that is perfect for rich dishes such as stews, braises, and marinades for meats. Its depth adds complexity and a satisfying umami punch to any meal.
Finally, aged miso can provide intense flavors that are excellent for gourmet applications, enhancing sauces and glazes with depth that elevates dishes to the next level. Understanding these flavor profiles will enable you to select the right miso for your culinary creations, enriching your cooking experience.
Best Practices for Storing Miso After Opening
After opening, miso paste requires proper storage to maintain its quality. If it isn’t already in one, transfer the miso to an airtight container to minimize air exposure, which can lead to spoilage.
Keep the miso refrigerated to prolong its shelf life—this is essential for maintaining flavor and freshness. Always use a clean utensil when scooping out miso to prevent contamination.
Additionally, be mindful of the surface of the miso drying out or developing a crust. Covering it with a layer of plastic wrap or parchment paper before sealing the container may help retain moisture and flavor. Following these best practices will ensure your miso paste remains delicious and ready for your culinary adventures.
Frequently Asked Questions About Miso
What type of soybean is best for making miso?
Yellow soybeans are the most commonly utilized choice for miso production, providing a versatile base for various miso types. Black soybeans yield richer, more complex flavors, while organic varieties are increasingly favored by health-conscious consumers.
How long does it typically take to make miso paste at home?
Creating miso paste generally involves a fermentation period of 2-6 months, depending on the type of miso. White miso ferments for about 2-3 weeks, whereas red miso requires several months for deeper flavor development.
Can you use different types of koji to make miso?
While rice koji is the most commonly employed for miso, you can also experiment with barley or wheat koji. Each type will impart different flavors and characteristics to the miso paste.
What should I do if my miso develops mold?
If surface mold appears, it’s often safe to scrape it off if it’s isolated. However, if the mold is widespread or accompanied by off smells, it’s best to discard the miso paste to avoid health risks.
How can I determine if my miso has been properly fermented?
Properly fermented miso will exhibit a complex aroma, a deeper color, and a flavor that evolves from mild to rich and umami-packed. Regular taste tests can help you determine the right fermentation time for your preferences.
What are common uses for miso in cooking?
Miso can be utilized in various applications, including soups, marinades, salad dressings, sauces, and glazes. It adds depth and umami flavor, making it a versatile ingredient in many dishes.
How should I store miso once opened?
Store opened miso in an airtight container in the refrigerator. Always use clean utensils when scooping out the paste to prevent contamination and ensure it stays fresh.
Can homemade miso be used in the same way as store-bought?
Yes, homemade miso can be utilized just like store-bought miso. However, flavors may vary, so adjust the quantities based on your taste preferences in recipes.
Is homemade miso healthier than store-bought?
Homemade miso generally contains fewer preservatives and additives compared to store-bought varieties, making it a healthier option. It’s also richer in probiotics, enhancing gut health.
How can I ensure the best quality in my homemade miso?
To ensure high-quality homemade miso, use fresh, high-quality ingredients, maintain proper fermentation conditions, and monitor progress regularly through taste testing. This attention to detail will yield the best results.
Stay updated with our latest news on Facebook!
The post How to Make Your Own Miso Paste: A Step-by-Step Guide appeared first on https://cookinggods.com
The Article Miso Paste: A Simple Step-by-Step Guide to Making Your Own Was Found On https://limitsofstrategy.com
-
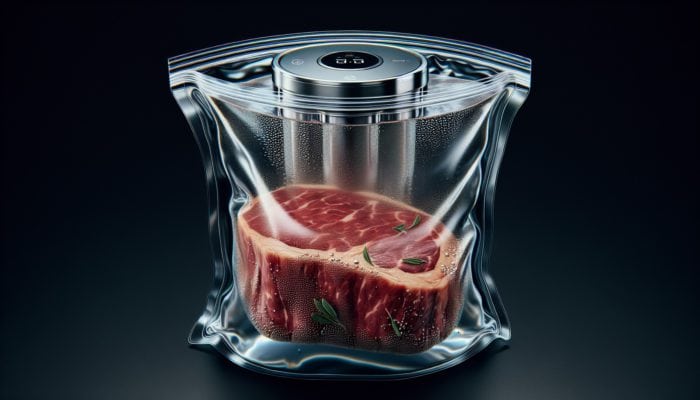
Sous Vide Machine: Your Easy Guide to Home Cooking
Enhance Your Cooking Skills with Expert Sous Vide Techniques
Understanding the Sous Vide Cooking Method and Its Advantages
The technique known as sous vide is a groundbreaking method that involves vacuum-sealing food inside a bag and immersing it in a precisely regulated water bath. This innovative approach guarantees that each ingredient cooks at an even rate, creating a consistent cooking experience that locks in moisture and amplifies flavors. Unlike conventional cooking techniques, which often result in overcooked edges and undercooked centers, sous vide ensures that food is perfectly cooked from the outside in, yielding delightful textures and maximizing taste.
Imagine enjoying a steak that is cooked exactly how you like it from the first cut. With sous vide cooking, achieving this level of culinary precision and satisfaction is fully within reach. The key lies in maintaining consistent water temperatures, which empowers you to refine your cooking skills, whether you’re preparing a delicate fish fillet or a robust beef brisket. This method has gained significant popularity among both professional chefs and home cooks, establishing its reputation as an essential technique that transforms culinary creativity into practical reality.
Discover the Life-Changing Benefits of Sous Vide Cooking
The advantages of sous vide cooking are as compelling as the method itself. Firstly, it offers unmatched precision in temperature control. This level of accuracy enables you to achieve reliable results each time you cook, making it remarkably straightforward to recreate your favorite dishes. A hallmark of sous vide is its ability to cook food evenly from edge to center, enhancing both flavor and texture, resulting in tender, juicy meals that are utterly irresistible.
In addition, sous vide cooking brings exceptional convenience to the table. By allowing you to preset your cooking time and temperature, you can prepare meals well in advance. Picture hosting a dinner party where the main course requires minimal last-minute adjustments, freeing you to focus entirely on your guests. Furthermore, sous vide preserves the natural juices and flavors of your ingredients, resulting in dishes that are both rich and delightful, elevating your dining experience.
Essential Tools and Equipment for Your Sous Vide Cooking Journey
To kick off your sous vide adventure, it’s important to gather a few essential tools. The cornerstone of this cooking technique is a sous vide immersion circulator, which acts as the heating element that maintains the water temperature. This adaptable device can be easily attached to a pot or container, making it suitable for kitchens of all sizes, allowing you to effortlessly create gourmet meals.
Another crucial piece of equipment is a vacuum sealer, which effectively extracts air from the bags, ensuring that your food cooks evenly and remains submerged during the sous vide process. Vacuum-seal bags are indispensable as well, specifically designed to withstand prolonged cooking times while preventing water from seeping in. These tools are vital for achieving optimal results, ensuring that your sous vide experience is both enjoyable and efficient.
Lastly, while not absolutely essential, having containers such as large pots or food-safe plastic bins can greatly ease the process when cooking larger quantities of food. Investing in quality sous vide equipment can significantly enhance the quality of your meals and your overall cooking experience, setting the stage for sous vide expertise.
Kickstart Your Sous Vide Culinary Adventure Effectively

Embarking on your sous vide journey can be an exciting exploration into the world of culinary precision. Start by selecting recipes that align with your taste preferences and skill level. A multitude of sous vide recipes is available online, encompassing a wide range of foods and preparation styles. Begin with straightforward dishes, such as chicken breasts or vegetables, to master the fundamentals of sous vide cooking, laying a solid foundation for future culinary explorations.
Understanding the cooking times and temperatures specific to each food type is essential for mastering this technique. Different foods demand unique conditions for optimal results. For example, a medium-rare steak typically cooks at 55°C (130°F) for 1 to 4 hours, whereas root vegetables may require several hours at 85°C (185°F). Acquainting yourself with these parameters will greatly enhance your overall cooking experience.
As you gain confidence, venturing into more complex dishes will allow you to further develop your skills. Don’t hesitate to explore sauces and accompaniments that can elevate your sous vide creations. Through practice, you’ll find that sous vide cooking not only refines your culinary abilities but also offers a unique way to indulge in food that is both exquisite and satisfying.
Expert Strategies for Mastering Your Sous Vide Machine at Home
Selecting the Perfect Temperature for Culinary Success
Choosing the appropriate temperature is crucial when operating a sous vide machine, as different foods require specific heat levels to achieve the desired doneness and ensure safety. Understanding these temperature variations can elevate your cooking to new levels. For instance, a well-done steak might need a temperature setting of around 70°C (158°F), while a perfectly poached egg requires a gentle bath at 63°C (145°F).
Here’s a handy list of temperature settings for common foods that can guide your culinary endeavors:
- Medium-rare steak: 55°C (130°F)
- Medium steak: 60°C (140°F)
- Well-done steak: 70°C (158°F)
- Chicken breasts: 65°C (149°F) for 1-2 hours
- Eggs (poached): 63°C (145°F) for 45 minutes
- Carrots (sliced): 85°C (185°F) for 1 hour
- Fish (salmon): 50°C (122°F) for 45 minutes
- Pork tenderloin: 60°C (140°F) for 1-2 hours
By mastering temperature settings, you can fully harness the sous vide method, allowing you to create dishes that are not only safe to eat but also extraordinarily enjoyable, transforming every meal into a culinary delight.
Determining the Ideal Cooking Duration for Sous Vide Foods

The cooking time for sous vide can vary greatly based on the thickness and type of food being prepared. Thicker cuts of meat require longer cooking durations to ensure heat penetrates fully to the center. A general rule of thumb is that the thicker the cut, the longer the cooking time needed.
For example, a standard beef steak that is around 2.5cm thick should typically cook for 1 to 4 hours, while a thicker cut, such as a ribeye, may need up to 6 hours for optimal tenderness. Conversely, lean cuts like chicken breasts can be cooked for approximately 1 to 2 hours at 65°C (149°F), ensuring they stay juicy while being thoroughly cooked.
Here’s a concise overview of recommended cooking times for various meats:
- Beef steak (1 inch thick): 1-4 hours
- Pork chops: 1-4 hours
- Chicken breasts: 1-2 hours
- Fish fillets: 45 minutes to 1 hour
- Vegetables: 1-2 hours, depending on type
- Eggs: 45 minutes to 1 hour
Utilizing a precise timer can contribute to achieving the best results, ensuring that you avoid overcooking your dishes. This aspect of sous vide cooking also allows for greater flexibility in meal preparation, enabling you to organize your cooking around other tasks or commitments.
Finishing Techniques to Elevate Your Sous Vide Dishes
Once you’ve successfully cooked your food sous vide, employing finishing techniques is essential to enhance both flavor and visual appeal. Many sous vide dishes benefit from a quick sear or grill after cooking, which creates that coveted golden-brown crust while intensifying the overall taste.
For example, searing a steak in a hot pan with a splash of oil after sous vide cooking not only develops a beautiful color but also introduces a layer of complexity with its caramelized surface. This is where the Maillard reaction occurs, significantly altering the texture and flavor profile, making each bite even more enticing.
Moreover, it’s crucial to thoroughly dry food before searing or grilling. Any moisture on the surface can hinder proper browning and lead to steaming instead of searing. A quick pat dry with paper towels is a simple yet effective method to ensure your food achieves optimal browning.
In addition to searing, consider finishing techniques like torching for delicate proteins or glazing vegetables for enhanced flavor. These steps can elevate your sous vide creations, improving both their taste and visual appeal, making your meals not only delicious but also impressive.
Understanding How a Sous Vide Machine Works
Key Components of a Sous Vide Machine Explained
A sous vide machine consists of several key components that work together seamlessly to establish the ideal cooking environment. At its heart is the heating element, which heats the water to the desired temperature, ensuring your food cooks evenly. This element is typically combined with a circulation pump, which is crucial for maintaining uniform water temperature by circulating the water around the cooking vessel.
The temperature controller is another essential feature, allowing you to set and maintain the precise temperature required for your cooking tasks. Most modern sous vide machines come equipped with digital displays that facilitate easy adjustments and monitoring of temperature fluctuations, guaranteeing a smooth cooking experience.
These components are designed to function in unison, ensuring that the water bath remains at a constant temperature throughout the cooking process. This precision is what makes sous vide cooking so reliable and enjoyable, empowering home cooks to achieve restaurant-quality results effortlessly.
The Importance of Water Circulation in Sous Vide Cooking
Water circulation is a fundamental aspect of sous vide cooking, as it ensures that heat is evenly distributed throughout the bath. Without proper circulation, certain areas of the water could become hotter or cooler than others, leading to uneven cooking and potentially compromising food safety.
The circulation pump within a sous vide machine effectively addresses this concern by continuously moving the water around the food bags. This constant flow of water prevents hot spots and guarantees that every part of the food reaches the desired temperature simultaneously, enhancing cooking effectiveness.
Moreover, effective water circulation enhances the flavors and textures of your dishes by promoting an even cooking process. This allows marinated proteins to absorb flavors uniformly and vegetables to cook perfectly, bringing out their natural sweetness. The result is a meal that is not only visually stunning but bursting with flavor, showcasing the true potential of sous vide cooking.
Understanding Temperature Control Mechanisms in Sous Vide Machines
Sous vide machines are well known for their precise temperature control mechanisms, which maintain the set temperature to within 0.1 degrees Celsius. This level of precision is particularly crucial when cooking delicate items, such as fish or eggs, where even slight temperature fluctuations can lead to undesirable outcomes.
Most sous vide machines utilize advanced sensors and feedback systems that continuously monitor the water temperature. If the temperature strays from the desired setting, the heating element responds promptly to restore it to the correct level. This automation removes guesswork and minimizes the risk of human error, making sous vide cooking a dependable method for achieving perfect results.
The benefits of precise temperature control extend beyond mere safety; they also enhance the flavors and textures of your dishes. By cooking at specific temperatures for extended periods, you can achieve results that are unattainable with conventional cooking methods. For instance, cooking meat at lower temperatures for longer periods allows collagen to break down gradually, resulting in tender, melt-in-your-mouth dishes that impress diners everywhere.
The Outstanding Benefits of Sous Vide Cooking
Discover Enhanced Flavors and Textures in Every Dish
One of the most significant advantages of sous vide cooking is its extraordinary ability to enhance the flavor and texture of food. By sealing ingredients in vacuum bags, sous vide locks in natural juices and flavors, resulting in dishes that are incredibly rich and satisfying. Traditional cooking methods often lead to moisture loss, but with sous vide, the environment created inside the bag helps retain those valuable liquids, yielding tender, succulent meals.
The precise temperature control afforded by sous vide cooking guarantees that food is never overcooked, which is especially crucial for proteins like chicken or fish that can easily become dry or tough when exposed to high heat for too long. By cooking these items at their ideal temperatures, you can maintain their natural tenderness and juiciness, ensuring that each bite is a delightful experience.
Additionally, sous vide cooking presents endless opportunities for experimenting with flavor pairings in ways that may not be feasible with traditional methods. The vacuum sealing process allows for the infusion of herbs, spices, and marinades, resulting in layers of flavor that permeate the food. This technique can elevate ordinary dishes into extraordinary culinary experiences, raising home cooking to new levels of sophistication and enjoyment.
Achieving Consistency in Cooking Results with Sous Vide
Consistency is a defining feature of sous vide cooking, making it the preferred method for chefs and home cooks alike who seek dependable results. With the ability to set specific temperatures and cooking times, sous vide ensures that every dish is prepared uniformly, whether you’re cooking for one or for a large gathering.
This consistency is particularly valuable in professional kitchens, where chefs must deliver high-quality meals to every customer. Sous vide eliminates the guesswork that typically accompanies traditional cooking methods, providing a reliable way to achieve the perfect doneness for each type of protein.
Imagine hosting a dinner party where every steak is served at the same ideal temperature, ensuring that guests enjoy a uniformly delectable dining experience. This reliability also extends to meal prep; you can confidently prepare sous vide dishes in advance, knowing that they will yield the same exceptional results when it’s time to serve.
Furthermore, the ability to cook multiple items simultaneously at different temperatures opens new possibilities in the kitchen. You can cater to diverse tastes and preferences without sacrificing quality or risking overcooking any individual dish. Sous vide enables you to create a cohesive and delightful dining experience for everyone.
Enjoy Time-Saving Flexibility with Sous Vide Cooking
Sous vide cooking offers remarkable flexibility, allowing you to plan meals around your busy schedule. Unlike traditional cooking methods that require constant attention, sous vide allows for longer cooking times at lower temperatures, giving you the freedom to step away from the kitchen without fearing that your food will burn or dry out.
This aspect of sous vide is particularly advantageous for individuals who wish to savor home-cooked meals without dedicating excessive hours to the cooking process. You can set your sous vide machine to cook while you tackle other tasks, whether that’s prepping side dishes, setting the table, or enjoying quality time with family.
Additionally, the ability to prepare food in advance and store it for later use adds another layer of convenience. Sous vide meals can be prepared days or even weeks ahead and stored in the refrigerator or freezer. When it’s time to eat, simply reheat the sealed bags in the water bath for a quick and effortless meal that retains its quality and flavor.
This time-saving feature makes sous vide an excellent choice for meal prepping, allowing you to create an entire week’s worth of healthy dishes in one go. Whether you’re looking to streamline your dinner routine or impress guests with gourmet meals, sous vide offers the time and flexibility needed for culinary success.
Research-Backed Advantages of Incorporating a Sous Vide Machine into Your Kitchen
Health and Safety Benefits of Sous Vide Cooking
Sous vide cooking presents significant health and safety benefits, particularly in reducing the risk of foodborne illnesses. The precise temperature control inherent in sous vide methods guarantees that food is thoroughly cooked and safe, reaching the necessary internal temperatures to eliminate harmful bacteria. For example, cooking poultry at 65°C (149°F) for just one hour effectively destroys pathogens while preserving a moist texture.
In practical terms, this makes sous vide especially advantageous for meal preparation in environments where food safety is paramount, such as restaurants or meal prep services. By cooking food at controlled temperatures for extended periods, you can ensure that it is safe to consume and retains its quality, providing peace of mind for both chefs and consumers.
Moreover, sous vide allows for proper pasteurization of food, which can be critical when preparing meals in advance or for sous vide meal deliveries. This method not only bolsters safety but also extends the shelf life of cooked meals, making it an appealing option for both home cooks and food service professionals.
Nutritional Benefits of Sous Vide Cooking
In terms of nutrition, sous vide cooking excels by retaining more vitamins and minerals compared to traditional methods. High heat and prolonged cooking times often lead to nutrient degradation, but sous vide minimizes exposure to extreme temperatures and air, ensuring that more nutrients remain intact in the food.
For instance, vegetables cooked using sous vide maintain their vibrant colors and nutritional content, resulting in healthier meals that are rich in antioxidants and vitamins. The sealed environment also limits oxidation, preserving the integrity of the food and its beneficial properties, contributing to a healthier diet.
Furthermore, by cooking proteins at lower temperatures, you can avoid the formation of harmful compounds that can occur during high-heat cooking methods, thereby offering a healthier overall cooking experience. This focus on nutrient retention aligns with modern dietary preferences for wholesome, minimally processed foods, making sous vide an excellent choice for health-conscious individuals.
Energy Efficiency of Sous Vide Cooking Explained
Sous vide cooking is significantly more energy-efficient compared to traditional methods. The ability to maintain a constant temperature for extended periods means that sous vide machines consume less power overall. Unlike ovens or stovetops that may require substantial energy to heat and cool, sous vide machines operate at lower wattages and achieve efficient thermal stability.
This efficiency not only helps reduce energy bills but also promotes a more eco-friendly cooking environment. For example, cooking a large batch of food in a sous vide water bath uses less energy than operating multiple ovens at high temperatures. This makes sous vide an attractive option for environmentally conscious home cooks who aim to minimize their carbon footprint.
Additionally, the precision and consistency of sous vide cooking can lead to less food waste. By consistently achieving perfect doneness, you reduce the likelihood of overcooked or spoiled meals, further enhancing the sustainability of your cooking practices.
Precision and Consistency: The Foundations of Sous Vide Cooking
Sous vide cooking is synonymous with precision and consistency, enabling home cooks to achieve exceptional results that rival those of professional chefs. The technology behind sous vide allows for precise control over cooking temperatures, ensuring that food is cooked uniformly and remains tender throughout.
This precision is particularly beneficial when preparing delicate items, such as fish or eggs, which require specific temperature profiles to achieve the desired texture without compromising safety. With sous vide, you can confidently explore new recipes and techniques, knowing that you can consistently replicate successful outcomes.
Moreover, consistency in results is a key factor that enhances the overall cooking experience. Whether you are cooking for family or hosting guests, the assurance that every dish is prepared to perfection allows you to focus more on creativity and presentation. The reliability offered by sous vide empowers home cooks to elevate their culinary skills while enjoying the entire process.
Unlocking Enhanced Flavor and Texture through Sous Vide Cooking
The potential for enhanced flavor and texture is perhaps the most celebrated benefit of sous vide cooking. By cooking food in vacuum-sealed bags, you create an environment that locks in moisture and flavors, yielding dishes that are rich and satisfying.
This method allows for unique culinary experiences, as the infusion of marinades and herbs occurs efficiently within the sealed bags, deepening flavors in a way that traditional methods may not achieve. For example, marinating meats in herbs and spices before sous vide cooking enhances the overall taste, resulting in an intricate layering of flavors that delights the palate.
Moreover, the low-and-slow cooking technique used in sous vide promotes the breakdown of collagen in tougher cuts of meat, transforming them into tender, melt-in-your-mouth creations. This ability to produce exquisite textures is what sets sous vide apart from conventional cooking, allowing for the enjoyment of dishes that are not only delicious but also visually appealing.
Effective Strategies for Successful Sous Vide Cooking at Home
Preparing Ingredients for Optimal Sous Vide Cooking
Preparation is key for successful sous vide cooking, as it lays the groundwork for achieving optimal results. Before sealing your food in vacuum bags, ensure it is well-seasoned, as a lack of seasoning can result in bland outcomes. The vacuum-sealing process prevents moisture from escaping, ensuring that flavors are locked in during the cooking process, thereby enhancing the overall taste of your dishes.
Here are some practical tips to elevate your food preparation for sous vide cooking:
- Remove excess air from the bag to prevent floating during the cooking process.
- Season your ingredients generously; they will absorb the flavors during cooking, leading to more flavorful meals.
- Cut food into uniform sizes for even cooking, promoting uniform doneness throughout.
- Use herbs and spices creatively to infuse flavors that will enhance the dishes.
- Pat dry proteins before sealing to enhance browning later, ensuring a more appealing appearance.
- Consider using aromatics like garlic or citrus for added depth and complexity in flavors.
- Label bags with cooking time and temperature for easy reference during cooking.
- Avoid overpacking the bags to ensure proper circulation of water around the food.
By adhering to these preparation tips, you will set yourself up for a successful sous vide experience, allowing you to enjoy the flavors and textures that this cutting-edge technique can provide.
How to Monitor and Fine-Tune the Sous Vide Cooking Process
During the sous vide cooking process, actively monitoring and adjusting conditions as needed is essential to achieve your desired results. While sous vide machines are designed to maintain consistent temperatures, factors such as water loss through evaporation can affect your cooking results. Regularly checking the water level is critical to ensure that your food remains submerged, preventing uneven cooking or floating.
If you find that the water level has dropped, add hot water to the bath to maintain the proper cooking environment. Additionally, keeping an eye on the temperature display on your sous vide machine ensures that it remains stable throughout the cooking process, allowing you to achieve optimal results.
This level of attention enables you to make necessary adjustments, ensuring that your meals turn out as desired, whether you’re preparing a quick dinner for one or an elaborate feast for many. Embracing the monitoring aspect of sous vide cooking ultimately enhances your confidence and competence in the kitchen.
Effective Storage and Reheating Techniques for Sous Vide Meals
Sous vide meals can be stored efficiently in the refrigerator or freezer, making meal prep and storage incredibly convenient. Once cooked, the vacuum-sealed bags can be kept in the fridge for several days or in the freezer for months without compromising quality. This extends the life of your meals and facilitates efficient meal planning.
When it’s time to enjoy your sous vide meals, reheating them directly in the sealed bags is an incredibly effective method. Simply place the bags back in the water bath set to the original cooking temperature for a quick reheat without losing moisture or flavor. This approach ensures that meals are revived to their original state, ready to be served in an instant.
For those who prefer a little extra texture, a quick sear or grill after reheating can add a delicious finish. This step reintroduces that sought-after crust and enhances the meal’s overall appeal. With sous vide, not only do you create exceptional dishes, but you also simplify the meal prep and reheating process, allowing you to enjoy gourmet culinary experiences with ease.
Frequently Asked Questions About Sous Vide Cooking
What is the ideal temperature for cooking steak using the sous vide method?
The ideal temperature for cooking steak sous vide varies based on your preferred level of doneness. Typically, a medium-rare steak is cooked at 55°C (131°F), while a medium steak is cooked at around 60°C (140°F), allowing for precise control over your culinary outcomes.
How long should I cook chicken sous vide?
Chicken breasts should be cooked sous vide at 65°C (149°F) for 1 to 2 hours, ensuring they remain juicy and tender, providing a delightful dining experience.
Can I cook vegetables using sous vide?
Yes, vegetables can be cooked sous vide. Common settings include 85°C (185°F) for 1-2 hours, depending on the type and thickness of the vegetables, ensuring perfect texture and flavor.
Is sous vide cooking safe?
Yes, sous vide cooking is safe when proper temperatures and times are adhered to, significantly reducing the risk of foodborne illnesses through consistent and controlled cooking.
What types of bags are best for sous vide cooking?
Vacuum-seal bags designed specifically for sous vide are ideal, as they withstand high temperatures and prevent water from entering while cooking, ensuring optimal results.
How do I prevent my sous vide bags from floating?
To prevent bags from floating, ensure all air is removed before sealing. You can also use weights or sous vide clips to keep them submerged, ensuring consistent cooking.
Can I cook multiple items at once using sous vide?
Yes, you can cook multiple items simultaneously, but ensure they are similar in size and cooking temperature for even and desirable results.
How do I reheat sous vide meals effectively?
Reheat sous vide meals by placing the vacuum-sealed bags back in a water bath at the original cooking temperature for a quick and effective method, ensuring quality is maintained.
What is the best way to finish sous vide steak?
Finish sous vide steak by quickly searing it in a hot pan with oil for a golden crust, enhancing both flavor and texture, making every bite exceptional.
How does sous vide cooking compare to traditional methods?
Sous vide cooking offers greater precision in temperature control and consistency in results compared to traditional methods, enhancing flavor and texture while minimizing the risk of overcooking.
Join us on Facebook for the latest updates!
The post How to Use a Sous Vide Machine at Home: A Guide appeared first on https://cookinggods.com
The Article Sous Vide Machine Guide: Cooking at Home Made Easy Was Found On https://limitsofstrategy.com
-

Day Drinking Cocktails: Bartender-Recommended Favorites
Uncover the Most Sought-After Daytime Cocktails in the United States
Experience Unforgettable Classic Brunch Cocktails That You Must Try
When it comes to daytime drinking in the United States, the excitement surrounding classic brunch cocktails is unparalleled. These delightful beverages, such as mimosas, Bloody Marys, and Bellinis, transcend mere refreshment; they encapsulate the joy of leisurely weekend mornings filled with laughter and good company. Mimosas, a delightful mix of champagne and orange juice, have solidified their status as a brunch staple across the nation. On the other hand, Bloody Marys, with their savory blend of tomato juice, spices, and creative garnishes, are often hailed as the ultimate remedy for hangovers, making them a favorite choice. Meanwhile, Bellinis, crafted from peach puree and prosecco, add a refreshing fruity twist to your midday cocktail repertoire, making every sip a celebration.
Across cities in the United States, these iconic cocktails are not merely served; they are celebrated with flair, often accompanied by inventive presentations. Here’s a curated list of celebrated brunch venues where you can indulge in these cherished cocktail favorites:
- The Clover Club – Brooklyn, NY
- Brunch & Kava – San Francisco, CA
- The Bungalow – Santa Monica, CA
- The Spotted Pig – New York, NY
- Cafe Beaujolais – Mendocino, CA
- The Breakfast Klub – Houston, TX
- Park Avenue Autumn – New York, NY
- The Olde Pink House – Savannah, GA
Dive into Unique Regional Cocktail Masterpieces
Beyond the classic cocktails, the U.S. features a diverse array of regional cocktail specialties that beautifully showcase local flavors and traditions. Each region proudly presents its distinct drinks that highlight locally sourced ingredients and cultural heritage. For instance, the Sazerac, a timeless creation from New Orleans, combines rye whiskey, sugar, and Peychaud’s bitters, resulting in a bold and spirited drink that perfectly mirrors the city’s vibrant atmosphere. In contrast, the Mai Tai from California, featuring a delightful blend of rum, lime juice, and orgeat syrup, captures the essence of laid-back beachside relaxation while paying homage to the state’s rich tiki culture.
Ready to Immerse Yourself in the Cocktail Scene?
To honor these regional treasures, cocktail aficionados are encouraged to partake in various cocktail festivals that highlight the uniqueness of local flavors and ingredients. Below is a list of must-attend regional cocktail festivals that promise exceptional experiences:
- New Orleans Cocktail Week – New Orleans, LA
- San Francisco Cocktail Week – San Francisco, CA
- Miami Rum Renaissance – Miami, FL
- Tales of the Cocktail – New Orleans, LA
- Chicago Cocktail Conference – Chicago, IL
- Austin Cocktail Week – Austin, TX
- Nashville Cocktail Festival – Nashville, TN
- Seattle Cocktail Week – Seattle, WA
Celebrate Seasonal Cocktail Innovations
As the seasons transition, so too do the cocktails crafted by talented bartenders who excel at creating seasonal variations that utilize fresh, local ingredients to capture the essence of each time of year. For instance, in the fall, you might encounter cocktails infused with pumpkin spice, providing warmth and comfort as the leaves change color. Conversely, summer brings refreshing concoctions that celebrate the bounty of Fresh Berries, fragrant herbs, and vibrant citrus fruits. By adapting cocktails to highlight seasonal offerings, bartenders not only enrich the drinking experience but also promote sustainability and support local agriculture.
To inspire your own mixology at home, consider incorporating these seasonal ingredients into your daytime cocktails:
- Pumpkin Spice – ideal for fall-inspired beverages
- Fresh Berries – perfect for summer cocktails such as berry mimosas
- Mint – a refreshing addition for spring and summer drinks
- Cranberries – excellent for holiday-themed cocktails in winter
- Citrus Fruits – versatile for use throughout the year
- Honey – a natural sweetener for summer cocktails
- Fresh Ginger – adds a zesty kick to fall and winter beverages
- Herbs like Basil and Thyme – great for unique flavor pairings
Gain Expert Insights on Bartender-Recommended Cocktails for Day Drinking

Master Your Skills in Crafting the Ideal Daytime Cocktail
Crafting the perfect daytime cocktail is an exquisite blend of artistry and science. Skilled bartenders across the U.S. emphasize the importance of achieving a balance of flavors and alcohol content that suits the concept of daytime drinking. The objective is to create cocktails that are both refreshing and light, allowing guests to relish each sip without feeling overwhelmed by alcohol. This balance often involves utilizing lower-alcohol spirits or mixers that dilute stronger flavors while preserving complexity.
Home mixologists can replicate professional techniques by following a series of actionable steps. Start by selecting a base spirit that pairs well with lighter mixers. For example, vodka harmonizes beautifully with fruit juices and soda water, resulting in a revitalizing cocktail. Incorporate fresh elements, such as herbs and fruits, to enhance the drink’s depth and character. Lastly, pay attention to the spirit-to-mixer ratio; a 1:3 ratio is an excellent foundation for crafting a well-balanced daytime drink that’s enjoyable and satisfying.
Explore How Ingredients Shape Flavor Profiles
The choice of ingredients is pivotal in defining the flavor profiles of daytime cocktails. Bartenders are discerning in their selection of spirits and mixers, often opting for high-quality, fresh ingredients that elevate the overall drinking experience. For instance, craft spirits made from local produce often deliver richer flavors, transforming straightforward cocktails into extraordinary creations. Additionally, the use of artisanal sodas or syrups can introduce unique flavor elements that set a drink apart from the rest.
Understanding the role of each ingredient is key. Citrus juices can invigorate a cocktail, while bitters contribute depth and complexity. Fresh herbs not only add flavor but also provide aromatic qualities that enhance the overall experience. Bartenders frequently experiment with various combinations, resulting in refreshing cocktails that delight the palate and resonate with patrons, ensuring a memorable drinking experience.
Stay Current with Trends in Daytime Cocktail Culture

The landscape of daytime cocktail culture is in a constant state of evolution, with new trends emerging regularly. One noteworthy trend is the increasing popularity of low-alcohol cocktails, catering to an audience that desires healthier drinking options. These beverages provide the enjoyment of cocktails without the heavy intoxicating effects, allowing for leisurely sipping throughout the day. Ingredients such as kombucha or low-alcohol wines are becoming trendy mixers, offering complex flavors without overwhelming strength.
Another exciting trend involves the use of innovative garnishes. Bartenders are shifting away from conventional garnishes like cucumbers or olives, opting instead for unique additions such as edible flowers, flavored ice cubes, or house-made dehydrated fruit chips. These creative options not only elevate the visual appeal but also introduce additional flavor notes that surprise and delight cocktail enthusiasts. Staying informed about these trends allows cocktail lovers to enjoy fresh and exciting experiences, whether at a bar or while mixing at home.
How Do Bartenders Choose Cocktails for Day Drinking?
Gain Insight into Customer Preferences and Trends
Bartenders possess an intuitive understanding of customer preferences, skillfully tailoring their cocktail offerings to align with patron feedback and local tastes. This process involves actively engaging with guests, posing insightful questions, and observing popular ordering trends. By gathering this valuable information, bartenders can create a cocktail menu that resonates with their clientele, ensuring that each drink garners enthusiastic approval.
Moreover, seasonal events and regional happenings significantly influence cocktail selections. For instance, during summer festivals, refreshing fruity cocktails may dominate orders, while winter might see an increase in spiced or warming beverages. By remaining attuned to these evolving preferences, bartenders can enhance the day-drinking experience, fostering a sense of community among their patrons.
Understand the Importance of Balancing Alcohol Content
Achieving the right balance of alcohol content is crucial when crafting daytime cocktails. Daytime drinking typically favors lower-alcohol beverages that allow guests to remain comfortable and hydrated throughout their day. Bartenders employ various techniques to achieve this balance, such as incorporating more mixers or selecting lighter spirits. For example, a classic spritz combines low-alcohol Prosecco with soda water and a splash of liqueur, resulting in a refreshing drink that offers just a hint of kick.
Additionally, bartenders often recommend serving smaller portions or “session cocktails,” which maintain flavor while reducing alcohol content. This approach not only caters to patrons’ comfort but also encourages responsible drinking practices, ensuring that everyone can relish their drinks without concerns of overindulgence.
Prioritize Fresh Ingredients for Optimal Flavor
Fresh ingredients are the cornerstone of vibrant daytime cocktails. Bartenders recognize that incorporating seasonal fruits, herbs, and even vegetables can significantly enhance both the flavor and visual appeal of a drink. Fresh mint can rejuvenate a mojito, while muddled berries can add a sweet and tangy element to a cocktail. Utilizing local produce not only enriches flavor but also supports local farmers, aligning with sustainable practices.
Best practices for using fresh ingredients involve selecting high-quality items at their peak ripeness and thoughtfully integrating them into cocktails. For instance, when crafting a cocktail with fresh herbs, bartenders often gently muddle them to release their oils without overpowering the drink. This careful balance is essential in ensuring that fresh ingredients shine through, resulting in an exceptional drinking experience that guests will remember.
Discover the Best Bars in the U.S. for Exceptional Daytime Cocktails
Experience Iconic Bars in Major Cities
Exploring iconic bars in major cities reveals some of the finest daytime cocktail offerings in the United States. These establishments have built their reputations not only on their expertly crafted drinks but also on their unique atmospheres and innovative menus. For example, in New York City, Please Don’t Tell combines a speakeasy vibe with expertly crafted cocktails, making it an ideal spot for brunch. In Chicago, The Aviary offers an extraordinary cocktail experience, featuring innovative drinks served in captivating presentations that enchant patrons.
Each bar stands out due to its unique approach to daytime drinking, whether through exclusive menu offerings or exceptional service. With extensive cocktail lists and knowledgeable bartenders, these venues provide a quintessential experience for anyone seeking to enjoy delightful daytime libations.
Uncover Hidden Gems in Smaller Towns
While major cities boast iconic bars, many charming smaller U.S. towns offer unique and delightful daytime drinking experiences. For instance, The Owl’s Nest in Asheville, NC, pairs local brews with artisanal cocktails crafted from ingredients sourced from nearby farms. Another noteworthy spot is The Small Town Bar in Eureka Springs, AR, known for its cozy atmosphere and signature cocktails that reflect the local charm.
These lesser-known bars often provide a more intimate setting, allowing patrons to connect with bartenders and discover innovative cocktails that may not be available in larger establishments. Visiting these hidden gems can yield delightful surprises and create unforgettable experiences for cocktail enthusiasts.
Savor Cocktails in Rooftop and Outdoor Venues for Stunning Views
There’s something special about enjoying daytime cocktails in picturesque settings, and rooftop or outdoor bars offer the perfect backdrop. From breathtaking city skyline views to lush garden patios, these venues enhance the drinking experience. In New York, 230 Fifth Rooftop Bar is renowned for its sweeping vistas of the Empire State Building and inventive cocktails that elevate the urban landscape. Meanwhile, in Los Angeles, The Rooftop at The Standard not only provides stunning views but also showcases a vibrant cocktail menu that captures the essence of Southern California.
Whether basking in the sun or enjoying a refreshing breeze, outdoor venues create an inviting atmosphere for sipping cocktails. Recommendations for top spots include The Roof in Chicago and The Deck in Newport, RI, both of which offer exceptional drinks amidst breathtaking views. These venues are perfect for socializing with friends while soaking up the best that daytime drinking has to offer.
Elevate Your Cocktails by Pairing Them with Daytime Activities
Enhance Your Meals with Perfect Cocktail Pairings for Brunch and Lunch
Pairing cocktails with brunch and lunch dishes elevates the overall dining experience. Specific cocktails complement particular flavors, enriching both the drink and the meal. For instance, a Bloody Mary pairs beautifully with savory breakfast dishes like eggs Benedict or a classic breakfast burrito, thanks to its rich, spicy profile. Conversely, mimosas are a fantastic pairing with lighter fare, such as fruit salads or pastries, enhancing the freshness of the meal.
Here are some top pairings to consider for an optimized culinary experience:
- Bloody Mary with eggs Benedict
- Mimosas with fruit salad
- Bellinis with peach cobbler
- Sparkling Rosé with smoked salmon
- Sangria with tapas
- Aperol Spritz with bruschetta
- Classic Daiquiri with grilled fish tacos
- Pimm’s Cup with cucumber sandwiches
Select Refreshing Cocktails for Outdoor Adventures
Outdoor activities call for refreshing cocktails that are portable and easy to enjoy. Whether you’re having a picnic in the park or spending a day at the beach, the right drink can elevate your experience. Cocktails like a Frozen Margarita or Watermelon Mojito are perfect for hot summer days, offering refreshment and a burst of flavor. Additionally, consider cocktails that can be easily made in batch form, such as Sangria or a Pimm’s Cup, making them ideal for sharing with friends.
For outdoor adventures, it’s essential to select drinks that are easy to transport and serve. Here are some of the best options:
- Frozen Margaritas – refreshing and ideal for hot days
- Watermelon Mojitos – light and hydrating
- Sangria – easy to batch for group outings
- Pimm’s Cup – a refreshing garden cocktail
- Aperol Spritz – light and bubbly for picnics
- Spiked Lemonade – perfect for summer barbecues
- Classic Gin and Tonic – always refreshing and easy to make
- Moscow Mule – served in a portable copper mug
Craft Cocktails for a Cozy Day at Home
On those cozy days spent at home, the right cocktail can significantly enhance your relaxation. Simple cocktails, such as a Gin and Tonic or a Whiskey Sour, are not only easy to prepare but also provide a satisfying touch to any lazy afternoon. When winding down with a movie or diving into a good book, consider drinks that are straightforward to make yet deeply satisfying.
Here are a few easy-to-make cocktail recipes ideal for enjoying at home:
- Gin and Tonic – crisp and refreshing, perfect with a slice of lime
- Whiskey Sour – a balanced mix of whiskey, lemon, and simple syrup
- Mojito – light and minty, great for a summer afternoon
- Old Fashioned – a timeless classic that’s simple yet sophisticated
- Aperol Spritz – bubbly and refreshing, ideal for sunny days
- Raspberry Lemonade Fizz – a sweet and tart option for a relaxed vibe
- Margarita – perfect for any occasion, even at home
- Bellini – a fruity choice for sipping while lounging
Health Considerations to Keep in Mind While Enjoying Daytime Cocktails
Understand Alcohol Content and Hydration Practices
When indulging in cocktails throughout the day, moderation is essential for maintaining hydration and overall well-being. Responsible day drinking practices can significantly enhance enjoyment while preventing negative effects. By balancing alcohol intake with water and opting for lighter, refreshing cocktails, guests can remain hydrated and savor their drinks without compromising their health.
Best practices for responsible day drinking include alternating alcoholic beverages with water, selecting cocktails with lower alcohol content, and being mindful of total consumption. Additionally, consuming a meal alongside drinks can slow absorption and help reduce the likelihood of unwanted side effects.
Examine the Nutritional Aspects of Your Cocktails
Cocktails vary widely in caloric and nutritional content, making it essential to make informed selections. Ingredients such as sugary mixers or heavy creams can add unnecessary calories, while fresh fruits and herbs can elevate nutritional value. Being aware of your cocktail’s composition enables smarter selections that align with your health goals.
For healthier choices, consider using fresh fruit juices instead of pre-packaged mixes, which often contain added sugars. Opting for spirits like vodka or gin can also result in lighter cocktails. Here are some ingredients that can enhance the nutritional value of cocktails:
- Fresh Fruits – provide vitamins and natural sweetness
- Herbs – add flavor without extra calories
- Low-Calorie Mixers – such as soda water or tonic
- Natural Sweeteners – like honey or agave syrup
- Citrus Juices – packed with vitamin C
- Vegetable Juices – for a savory twist with added nutrients
- Ginger – can aid digestion and add a hint of spice
- Berry Purees – rich in antioxidants
Assess the Effects of Day Drinking on Daily Productivity
Engaging in daytime drinking can impact energy levels and productivity, making timing and moderation crucial for optimal performance. Cocktails with lower alcohol content allow for enjoyment without significantly impairing focus or drive. Recognizing personal limits and understanding how alcohol affects the body can help manage productivity throughout the day.
The best times to enjoy cocktails without disrupting your routine typically fall during leisurely afternoons, especially on weekends or holidays. By being mindful about when and how much you consume, it’s possible to enjoy cocktails while maintaining a productive day.
Understand the Impact of Day Drinking on Sleep Patterns
Day drinking can disrupt sleep patterns if not managed properly. Alcohol is known to affect sleep quality, especially when consumed in excess. Cocktail enthusiasts should be cautious of their drinking habits, particularly if they plan to engage in evening activities that require them to rise early the next day.
To maintain optimal sleep hygiene, consider limiting alcohol intake and allowing adequate time for metabolism before bedtime. Practicing moderation and prioritizing hydration can help mitigate some negative effects on sleep. Simple steps can ensure that day drinking remains an enjoyable experience without compromising nighttime rest.
Explore Social and Safety Considerations While Day Drinking
Understanding the social implications and safety concerns of day drinking is vital. Engaging in responsible behaviors helps cultivate a safe and enjoyable atmosphere for everyone involved. Bartenders and patrons alike should foster a culture of moderation, ensuring that all can partake in social drinking without excessive indulgence.
To ensure a safe environment, consider using designated drivers or rideshare services if alcohol consumption is planned. Encouraging open conversations about drinking limits among friends can also promote responsible drinking habits, allowing everyone to enjoy cocktails responsibly and safely.
Discover Research-Backed Benefits of Bartender-Recommended Cocktails for Day Drinking
Enhance Social Experiences Through Cocktails
Research indicates that enjoying cocktails during the day can significantly enhance social interactions and bonding among friends and family. Sharing drinks fosters a sense of community, encouraging connectivity and enriching positive experiences. The ritual of toasting or gathering over cocktails strengthens relationships, making it a cherished aspect of social culture.
Expert analysis suggests that cocktails serve as a social lubricant, promoting relaxation and openness in social settings. The enjoyment of drinks in a communal environment facilitates conversations, laughter, and memorable moments, contributing to overall well-being.
Utilize Cocktails for Stress Relief and Relaxation
Studies show that moderate daytime drinking can help alleviate stress and promote relaxation. Sipping a well-crafted cocktail can create a soothing experience, allowing individuals to unwind and briefly escape from daily pressures. The combination of enjoyable flavors and the ambiance of social settings contributes to an overall sense of well-being.
Real-world examples abound of how cocktails can offer a moment of respite. From savoring a refreshing drink in a sunlit garden to gathering with friends at a favorite bar, the experience of daytime drinking can provide a necessary break from routine and positively impact mental health.
Appreciate the Cultural and Historical Significance of Cocktails
The cultural and historical importance of daytime cocktails in the U.S. is profound. From the Prohibition era, when cocktails became symbols of rebellion, to modern trends celebrating craft cocktails, the beverage landscape has undergone significant evolution. Understanding this heritage enriches the drinking experience and fosters appreciation for the art of cocktail making.
To appreciate this heritage, consider exploring the stories behind classic cocktails, visiting historical bars, or participating in cocktail-making classes. Engaging with the cultural significance of drinks allows enthusiasts to connect more deeply with their choices and the stories behind them.
Boost Creativity and Productivity Through Daytime Drinking
Research indicates that moderate daytime drinking can enhance creativity and productivity. The right cocktail can spark innovative thinking and inspire new ideas, making it an appealing option for individuals in creative fields. The relaxation that accompanies sipping a drink can help remove mental blocks, allowing for freer thinking.
By incorporating cocktails into brainstorming sessions or casual meetings, professionals can cultivate an environment conducive to creativity. Finding the right balance between enjoyment and productivity is essential to leveraging the benefits of daytime drinking in professional settings.
Best Practices for Daytime Cocktail Service
Prioritize Speed and Efficiency in Service
In the bustling world of daytime cocktail service, speed and efficiency are paramount. Bartenders must deliver cocktails rapidly, especially during busy brunch hours, without sacrificing quality. Techniques to enhance service speed include pre-prepping ingredients, creating batch cocktails, and ensuring clear communication among staff.
Effective organization behind the bar can also elevate service quality. Bartenders should keep frequently used ingredients and tools within easy reach, minimizing downtime. Training staff on streamlined processes fosters smoother operations, enhancing customer experiences and overall satisfaction.
Enhance Presentation with Creative Garnishes
The visual appeal of cocktails plays a crucial role in service, and creative garnishes can significantly elevate the overall experience. Bartenders often employ eye-catching presentations to entice patrons, whether through unique glassware, colorful ingredients, or artistic garnishing techniques. The visual aspect of a cocktail can significantly influence a customer’s perception and enjoyment of the drink.
Popular presentation styles include using fresh herbs, vibrant fruit slices, or even specialty ice cubes made from juices or herbs. Experimenting with various garnishes not only enhances aesthetics but also adds layers of flavor to cocktails, creating a more memorable experience for guests.
Build Customer Interaction and Personal Recommendations
Engaging with customers is essential for bartenders, as it allows them to recommend the best daytime cocktails. Effective communication strategies include active listening and understanding customer preferences, helping bartenders tailor their recommendations. By asking about flavor preferences or dietary restrictions, bartenders can provide personalized suggestions that enhance the drinking experience.
Building rapport with patrons encourages repeat visits and fosters a welcoming atmosphere. Encouraging feedback on cocktails also aids bartenders in refining their offerings, ensuring that the menu remains relevant and appealing. Customer interaction is a vital component of successful cocktail service.
Explore Innovative Daytime Cocktail Recipes
Create Low-Alcohol and Non-Alcoholic Options
As the demand for low-alcohol and non-alcoholic cocktails rises, bartenders are becoming inventive with recipes that allow for enjoyable daytime drinking without excessive alcohol content. These drinks cater to those wishing to moderate their intake while still enjoying flavorful concoctions. Options like mocktails, which mimic classic cocktails without the use of alcohol, are gaining popularity.
Consider experimenting with innovative recipes that showcase fresh ingredients and unique flavor combinations. Examples include a Cucumber Mint Cooler, made with muddled cucumber, fresh mint, and tonic water, or a Citrus Spritz, featuring fresh citrus juices mixed with sparkling water. These drinks provide a refreshing alternative without compromising taste or enjoyment.
Discover Unique Flavor Combinations for Memorable Cocktails
Creating unforgettable daytime cocktails often involves unexpected flavor pairings. Bartenders are renowned for their creativity, combining ingredients that may not typically coexist to craft truly unique drinks. For instance, a Spicy Pineapple Margarita blends the sweetness of pineapple with a kick of jalapeño, offering a delightful surprise for the palate.
Some other surprising yet delightful combinations include a Lavender Lemonade, where floral notes add complexity to classic lemonade, and a Beetroot Gin & Tonic, introducing earthy flavors to a traditional favorite. These innovative combinations not only excite the taste buds but also inspire cocktail enthusiasts to explore new flavors in their own mixing adventures.
Utilize DIY Cocktail Kits for Home Enjoyment
DIY cocktail kits have surged in popularity as a way for cocktail enthusiasts to enjoy professional-quality drinks at home. These kits often contain pre-measured ingredients and detailed instructions, making it easy for anyone to craft cocktails without requiring extensive bartending knowledge. A comprehensive kit typically includes high-quality spirits, mixers, garnishes, and essential tools such as shakers or muddlers.
When selecting a kit, look for essential components, such as unique flavor profiles or local ingredients, that resonate with your personal tastes. Some kits even offer customization options based on preferences, allowing for a personalized cocktail experience. With a DIY cocktail kit, you can easily recreate the magic of a bar at home, making daytime drinking accessible and enjoyable.
Frequently Asked Questions (FAQs)
What are some popular daytime cocktails for brunch?
Popular daytime cocktails for brunch include Mimosas, Bloody Marys, and Bellinis. These drinks are refreshing and pair well with a variety of brunch dishes, enriching the overall dining experience.
How can I create a low-alcohol cocktail at home?
To create a low-alcohol cocktail, use a light base spirit, such as vodka or gin, and mix it with soda water or fresh juices. A good ratio is 1 part spirit to 3 parts mixer, ensuring a refreshing drink with moderate alcohol content.
What are some unique garnishes for cocktails?
Unique garnishes can include fresh herbs like basil or mint, edible flowers, flavored ice cubes, or house-made dehydrated fruit chips. These additions enhance both the flavor and visual appeal of cocktails.
How can I ensure responsible day drinking?
To ensure responsible day drinking, alternate alcoholic drinks with water, choose lower-alcohol cocktails, and consume food alongside beverages. Being mindful of your limits helps maintain a safe and enjoyable experience.
What are the best cocktails for outdoor activities?
Best cocktails for outdoor activities include Frozen Margaritas, Watermelon Mojitos, and Sangria. These beverages are refreshing, portable, and easy to share, making them ideal for outdoor enjoyment.
How do I choose a cocktail for a first date?
For a first date, consider selecting a cocktail that reflects your personality and preferences. Classic options like a Gin and Tonic or a Mojito can be excellent choices, as they are generally well-liked and approachable.
What are some creative non-alcoholic cocktail recipes?
Creative non-alcoholic cocktail recipes include Cucumber Mint Coolers, Strawberry Basil Lemonades, and Sparkling Lavender Lemonade. These drinks provide refreshing options without alcohol while still being flavorful and enjoyable.
Can cocktails be healthy?
Yes, cocktails can be healthy by incorporating fresh fruits, herbs, and natural sweeteners. Choosing lower-calorie mixers and focusing on quality ingredients can enhance the nutritional value of your drinks.
When is the best time to enjoy cocktails during the day?
The best time to enjoy cocktails during the day typically falls during leisurely afternoons, such as brunch on weekends or casual afternoon gatherings. This timing allows for relaxed enjoyment without impacting daily productivity.
What are some popular cocktail festivals in the U.S.?
Popular cocktail festivals in the U.S. include Tales of the Cocktail in New Orleans, San Francisco Cocktail Week, and Miami Rum Renaissance. These events showcase regional specialties and innovative cocktails, offering unique experiences for attendees.
Connect with us on Facebook!
The Article Bartender-Recommended Cocktails for Day Drinking: Best Picks appeared first on https://showme.vegas
The Article Bartender-Recommended Day Drinking Cocktails: Top Choices Was Found On https://limitsofstrategy.com
-

High-Heat Grilling Oils: Top BBQ Choices for Your Grill
Master the Art of Selecting the Perfect Oils for Exceptional High-Heat Grilling
Discover Why Avocado Oil is the Top Pick for High-Temperature Grilling
Avocado oil stands out as an exceptional option for high-heat grilling, celebrated for its remarkable high smoke point of around 520°F (271°C). This unique quality enables you to achieve an ideal sear on meats and a delightful char on vegetables without the danger of burning. Beyond its cooking benefits, avocado oil is rich in monounsaturated fats, which are beneficial for heart health and can help lower bad cholesterol levels. Additionally, its subtle, buttery flavor enhances the inherent taste of grilled dishes, making it versatile enough for various culinary creations, including fish, steak, and grilled fruits.
To fully capitalize on the advantages of avocado oil when grilling, consider marinating your proteins beforehand. This technique not only imparts deep, rich flavors but also aids in effectively tenderizing the meat. A simple yet flavorful marinade can be made by combining avocado oil, citrus juice, and fresh herbs, drastically improving your grilling experience. Furthermore, applying avocado oil directly to your grill grates can prevent food from sticking, ensuring that your meals come off the grill beautifully intact and ready to serve.
Unleash the Flavor Potential of Peanut Oil for Memorable Grilling Adventures
Peanut oil has become a favorite among grilling aficionados for its neutral flavor and robust high smoke point, typically around 450°F (232°C). This oil excels in grilling a diverse array of foods, especially when the goal is to let the natural ingredients shine rather than the oil itself. Its ability to maintain stability at elevated temperatures means it remains intact without degrading, ensuring a clean and enjoyable cooking experience every time.
One of the best uses for peanut oil is in Asian-inspired grilled dishes, where its nutty flavors beautifully complement marinated chicken skewers or grilled shrimp. Additionally, when applied for frying or stir-frying after grilling, peanut oil can deliver a satisfying crunch to both vegetables and meats. Its versatility and reliability make peanut oil a kitchen staple for many chefs, facilitating a smooth transition from grilling to other cooking techniques without sacrificing flavor integrity.
Explore the Exceptional Qualities of Grapeseed Oil for Grilling Excellence
Grapeseed oil emerges as another top-tier choice for high-heat grilling, boasting a smoke point of approximately 420°F (216°C). This oil possesses a mild flavor that enhances your grilled foods without overpowering their natural tastes. Its light texture makes it ideal for brushing onto grill grates, ensuring consistent cooking while effectively preventing sticking.
Utilizing grapeseed oil as a foundation for marinades can significantly elevate your grilling results. It harmonizes wonderfully with various herbs and spices, creating endless creative and flavorful combinations. For example, a marinade featuring grapeseed oil, garlic, and rosemary can impart an irresistible aroma to grilled vegetables or meats. Moreover, its high vitamin E content provides numerous health benefits, making it a smart choice for health-conscious grillers looking to elevate their meals without sacrificing flavor.
Gain Expert Insights on Selecting the Best Oils for High-Heat Grilling

Why Do Culinary Experts Advocate for Avocado Oil in Grilling?
Culinary experts consistently recommend avocado oil for high-heat grilling due to its impressive smoke point and a multitude of health benefits. The profile of heart-healthy fats in avocado oil makes it a prime choice for those who prioritize wellness while cooking. Here are some expert suggestions for effectively incorporating avocado oil into your grilling routine:
- Use avocado oil for marinating meats, enhancing both flavor and tenderness.
- Brush it onto vegetables to achieve a delightful char while preventing sticking.
- Incorporate it into salad dressings to provide a fresh, vibrant finish to grilled meals.
- Experiment with flavored avocado oils, such as garlic or chili, to add complexity and excitement.
By adhering to these expert tips, you can fully harness the properties of avocado oil, ensuring your grilled dishes are not only delicious but also health-conscious. Experts agree that integrating avocado oil into your grilling practices can significantly improve your cooking outcomes, making every meal a delightful experience.
How Does Peanut Oil Shine in Grilling Techniques?
Peanut oil excels in grilling due to its high smoke point and stability at high temperatures. This reliability allows for consistent heat application, essential for achieving perfect grill marks on meats and vegetables. Many chefs value peanut oil for its ability to withstand high heat without breaking down, ensuring that flavors remain vibrant throughout the cooking process.
For optimal grilling techniques using peanut oil, consider these expert suggestions. Start by using it for direct grilling of proteins like chicken or pork, allowing the oil’s neutral flavor to enhance the dish without overpowering it. When grilling vegetables, lightly coat them in peanut oil to prevent sticking and promote even cooking. Lastly, incorporating peanut oil into a basting sauce can add an extra layer of flavor, particularly when paired with spices or marinades. This versatility makes peanut oil a trustworthy ally in the grilling process.
What Advantages Does Grapeseed Oil Offer for Grilling Success?

Grapeseed oil is favored for grilling due to its high smoke point and mild flavor profile. These characteristics make it a versatile option that enhances the natural flavors of grilled foods without overshadowing them. For grilling enthusiasts, grapeseed oil presents a variety of applications that can elevate their culinary creations to new heights.
To maximize the benefits of grapeseed oil while grilling, consider using it as a marinade base, combining it with herbs and spices to create a flavorful soak for meats. Its light texture also allows it to be effectively used as a spray oil on grill grates, ensuring even coverage and preventing sticking. When grilling delicate items like fish, grapeseed oil provides a non-intrusive flavor, allowing the primary ingredients to shine. By following these expert recommendations, you can fully leverage grapeseed oil’s unique properties for an enhanced grilling experience.
Uncover the Health Benefits of Quality High-Heat Grilling Oils
What Health Advantages Does Avocado Oil Offer?
Avocado oil is brimming with numerous health advantages, primarily due to its rich profile of monounsaturated fats and antioxidants. These valuable components significantly contribute to overall well-being. For example, the high levels of healthy fats found in avocado oil are known to support heart health by reducing bad cholesterol levels. Additionally, avocado oil is rich in antioxidants, which assist in combating oxidative stress within the body.
Here are some key health benefits associated with avocado oil:
- Rich in heart-healthy monounsaturated fats.
- Contains antioxidants that combat free radicals.
- Enhances nutrient absorption from other foods.
- May help reduce inflammation and support joint health.
Incorporating avocado oil into your grilling routine not only enhances the flavors of your meals but also provides essential health benefits, making it a wise choice for any health-conscious griller.
How Does Peanut Oil Positively Impact Health?
Peanut oil is not only a versatile grilling option but also offers an array of health benefits. Its composition includes healthy fats and vitamin E, both of which are crucial for maintaining good health. The monounsaturated fats in peanut oil can support heart health by promoting healthy cholesterol levels and reducing the risk of cardiovascular diseases.
Furthermore, peanut oil is rich in vitamin E, a powerful antioxidant that plays a vital role in immune function and skin health. Regular use of peanut oil can contribute to improved skin elasticity and overall well-being. Its capacity to withstand high temperatures without degrading makes it an ideal choice for grilling, ensuring that health benefits remain intact while you prepare delicious meals.
What Nutritional Benefits Does Grapeseed Oil Provide?
Grapeseed oil is recognized for its rich content of polyunsaturated fats and vitamin E, both of which offer distinct health benefits. The oil’s polyunsaturated fat profile can support cardiovascular health and help maintain healthy cholesterol levels. Additionally, grapeseed oil serves as an excellent source of vitamin E, essential for skin health and may aid in reducing inflammation in the body.
Beyond its heart-healthy properties, grapeseed oil can promote skin healing and may improve the appearance of scars. When used in cooking, it retains its beneficial properties even at high temperatures, making it an excellent choice for health-conscious grilling. Incorporating grapeseed oil into your meals adds not only flavor but also vital nutrients that support overall wellness.
What Health Benefits Does Safflower Oil Provide?
Safflower oil is a lesser-known but highly beneficial oil rich in omega-6 fatty acids and vitamin E. These components can improve blood sugar levels and promote cardiovascular health, making safflower oil a valuable addition to your grilling repertoire. Its high smoke point also makes it suitable for high-heat grilling, allowing for various cooking applications.
Integrating safflower oil into your grilling practices can foster healthier meals. Its neutral flavor allows it to blend seamlessly with spices and marinades, enhancing the overall taste of grilled dishes. Furthermore, the vitamin E content in safflower oil contributes to skin health and bolsters the immune system, making it a nutritious choice for your grilling needs.
How Does Sunflower Oil Contribute to Your Health?
Sunflower oil is another fantastic option for grilling, known for being rich in <a href="https://limitsofstrategy.com/energy-boost-a-uk-guide-to-healthy-eating/">healthy fats</a>, vitamin E, and phytosterols. These components work synergistically to support heart health by lowering cholesterol levels and promoting better cardiovascular function. The oil’s light flavor profile makes it an ideal choice for a variety of dishes, ensuring that the natural flavors of grilled foods are preserved.
Additionally, sunflower oil possesses anti-inflammatory properties that can contribute to overall health. By incorporating sunflower oil into your grilling routine, you reap its nutritional value while enjoying flavorful meals. Whether used as a marinade or brushed onto grill grates, sunflower oil’s versatility and health benefits make it an essential addition to any grilling repertoire.
Key Considerations for Choosing the Right Oil for Grilling
What Factors Should You Assess When Selecting an Oil for Grilling?
Choosing the right oil for grilling requires careful evaluation of several factors to ensure optimal results. Key elements to consider include the oil’s smoke point, flavor profile, and nutritional content. Each of these components plays a crucial role in how well the oil performs during the grilling process.
When selecting grilling oils, consider the following factors:
- Smoke point: Ensure the oil can withstand high temperatures without breaking down.
- Flavor profile: Choose an oil that complements the dish you are preparing.
- Nutritional content: Look for oils rich in healthy fats and vitamins.
- Cost and availability: Take into account your budget and access to various oils.
By evaluating these considerations, you can make an informed decision that enhances your grilling experience while promoting healthy eating.
How Does Smoke Point Affect Grilling Performance?
The smoke point of an oil is a critical factor that dictates its suitability for high-heat grilling. Oils with lower smoke points can burn and produce harmful compounds, which not only affect the flavor of your food but may also pose health risks. For effective grilling, it is essential to use oils with a high smoke point that can withstand intense heat without degrading.
When grilling, oils such as avocado, peanut, or grapeseed oil are excellent choices due to their high smoke points. They allow you to achieve that perfect sear on meats and vegetables while imparting delicious flavors. Understanding the smoke point of your chosen oil can elevate your grilling technique and ensure that your meals are both flavorful and safe for consumption.
What Role Does Flavor Play in Selecting Grilling Oils?
Flavor is a significant factor when choosing grilling oils, as it can either enhance or overpower the natural taste of your food. Selecting an oil with a complementary flavor profile is crucial for crafting delicious grilled dishes. For instance, oils like avocado and grapeseed have mild flavors that can enhance other ingredients without overwhelming them.
When selecting an oil, consider how its flavor will interact with the main ingredients. A robust oil may pair well with hearty meats, while lighter oils are better suited for delicate fish or vegetables. By thoughtfully considering the flavor of the oil in relation to your dish, you can ensure a harmonious balance that elevates your grilling experience.
How Does Nutritional Content Influence Oil Selection for Grilling?
The nutritional content of an oil greatly influences its selection for grilling, especially for health-conscious individuals. Oils rich in beneficial nutrients such as healthy fats, vitamins, and antioxidants contribute to the overall healthiness of grilled meals. When choosing oils for grilling, prioritize those with favorable nutritional profiles that align with your dietary objectives.
For example, oils like avocado and grapeseed provide heart-healthy monounsaturated fats and antioxidants that are beneficial for overall health. Conversely, oils high in saturated fats may not be the best choice for health-minded grillers. By considering the nutritional content of your selected oils, you can create meals that are not only delicious but also nourishing.
Can You Safely Reuse Oil for Grilling?
Reusing oil for grilling can be a cost-effective practice, but it requires careful attention to ensure safety. Oils degrade over time and can develop off-flavors or harmful compounds, particularly if they have been exposed to high heat multiple times. To safely reuse oil for grilling, ensure it is properly stored and filtered.
After grilling, allow the oil to cool before straining it through a fine mesh sieve or cheesecloth to remove food particles. Store the filtered oil in a dark, cool place to prolong its shelf life. However, keep in mind that even with proper storage, the oil should ideally be used within a few weeks. Always assess the oil’s smell and appearance before reusing it; if it smells rancid or appears cloudy, it is best to dispose of it.
Effective Strategies for Optimal Use of Oils in High-Heat Grilling
How to Maximize the Benefits of Avocado Oil When Grilling?
To fully harness the advantages of avocado oil, consider using it for both marinating and basting grilled foods. Its high smoke point enables it to withstand intense heat without burning, making it an ideal choice for various grilling methods. Begin by crafting a flavorful marinade that includes avocado oil, fresh herbs, garlic, and citrus juice. This not only infuses rich flavor but also helps tenderize meats effectively.
While grilling, use avocado oil for basting throughout the cooking process to keep your meats moist and add layers of flavor. Simply brush the oil over your food as it grills, allowing it to caramelize and create a beautiful crust. Additionally, integrate avocado oil into your sauces or dressings served alongside grilled dishes for an extra boost of flavor and nutrition, ensuring every meal is a delightful experience.
What Are the Best Practices for Using Peanut Oil in Grilling?
Peanut oil’s versatility makes it an excellent choice for both marinating and direct grilling. To use peanut oil effectively, begin by marinating your proteins for at least 30 minutes, allowing the oil to penetrate and enhance flavor. Combine peanut oil with soy sauce, ginger, or garlic for an Asian-inspired twist that pairs beautifully with grilled chicken or shrimp.
When grilling, consider using peanut oil as a finishing oil. After grilling, drizzle a small amount over your dish to amplify the nutty flavor. This technique works particularly well with grilled vegetables or seafood, making each bite memorable. Additionally, peanut oil can also be utilized for stir-frying leftover grilled items, ensuring that no flavor goes to waste while providing a seamless transition from grilling to another cooking method.
How to Effectively Incorporate Grapeseed Oil in Grilling?
Grapeseed oil can be effectively used in grilling by applying it as a spray or brush-on oil. This method ensures even coverage and enhances flavor without overshadowing the natural tastes of the food. Start by lightly spraying grapeseed oil onto your grill grates to prevent sticking and promote even cooking, which is essential for achieving those perfect grill marks.
In addition to its application on grill grates, grapeseed oil is perfect for crafting marinades or dressings. Mix grapeseed oil with herbs, spices, and vinegar to create a vibrant dressing that can be brushed onto meats or vegetables before grilling. Furthermore, drizzling grapeseed oil over grilled dishes before serving adds a finishing touch that enhances both the visual appeal and flavor of your meal, ensuring a delightful dining experience.
Avoid Common Mistakes When Grilling with Oils
What Risks Are Associated with Using the Wrong Oil for Grilling?
Utilizing oils with low smoke points can lead to significant cooking challenges, including burning food and generating harmful compounds. This not only affects the flavor and texture of your meal but may also pose health risks. Oils like olive oil may be suitable for sautéing but are not recommended for high-heat grilling due to their lower smoke points, which can compromise the quality of your dishes.
Choosing the appropriate oil is essential for achieving flavorful, well-cooked meals. Always opt for oils specifically designed for high-heat applications, such as avocado, peanut, or grapeseed oil, to avoid compromising the quality and safety of your grilled dishes. Taking this precaution ensures that your grilling experience is both enjoyable and health-conscious, allowing you to savor each bite.
How Can Excessive Oil Use Affect Your Grilling Results?
Overusing oil while grilling can lead to several issues, including flare-ups and overly greasy food. Excess oil can ignite flames that make it difficult to control the cooking process, leading to burnt or unevenly cooked meals. Additionally, an excess of oil can make food excessively greasy, detracting from the intended flavors of the ingredients.
To avoid these complications, practice moderation when applying oil. A light coating is typically sufficient for preventing sticking and enhancing flavor. For best results, consider using a brush or spray to evenly distribute the oil, ensuring your meals are delicious without being overly oily, creating a more enjoyable cooking and dining experience.
What Are the Consequences of Neglecting to Preheat the Grill?
Failing to preheat the grill can result in uneven cooking and food sticking to the grates, significantly impacting your grilling experience. When the grill isn’t adequately hot, food can cling to the grates, making it challenging to achieve those beautiful grill marks. Although proper oil application can help mitigate these issues, preheating is still vital for successful grilling.
To ensure optimal grilling results, allow your grill to reach the appropriate temperature before placing any food on it. A preheated grill not only creates a sear that locks in moisture but also enhances the overall flavor and texture of your dishes. This simple step can greatly improve your grilling outcomes, making your cooking process much more efficient and enjoyable.
Enhance Flavor Profiles with Grilling Oils
How Can You Infuse Oils with Flavorful Herbs and Spices?
Infusing oils with herbs and spices is a fantastic method for enhancing the flavor of your grilled foods. By infusing oils prior to grilling, you can create unique flavor profiles that elevate your dishes to new heights. Start by gently heating your chosen oil, such as avocado or grapeseed, and adding fresh herbs, garlic, or chilies. Allow the mixture to simmer on low heat for about 10 minutes, then strain out the solids for a flavorful infusion.
Once your oil is infused, use it as a marinade for meats or vegetables, or brush it onto your food before grilling. The infused oil will impart a delightful aroma and flavor that complements the natural tastes of the ingredients. Experimenting with various herbs and spices allows you to customize your infusions to suit your preferences, making your grilled meals more exciting and flavorful, while delighting your guests.
What Oils Are Most Effective for Marinating Grilled Foods?
When it comes to marinating, oils like avocado and peanut oil excel due to their ability to withstand high heat and enhance flavor. The creamy texture of avocado oil effectively helps adhere spices and seasonings, creating a well-balanced marinade. Combine avocado oil with citrus juice or vinegar for a zesty marinade that works perfectly with chicken or fish, providing a fresh and vibrant taste.
Peanut oil also serves as an excellent option for Asian-inspired marinades, as its neutral flavor allows it to blend seamlessly with other ingredients. Consider mixing peanut oil with soy sauce, sesame oil, and ginger for a vibrant marinade that infuses flavor into grilled meats and tofu. Both oils significantly contribute to the tenderness of the food, making them ideal choices for marinating before grilling, ensuring a mouthwatering result.
How to Use Oils Effectively to Prevent Sticking?
Applying a thin layer of oil to the grill grates is a simple yet effective technique to prevent food from sticking during grilling. This method is particularly beneficial when working with lean proteins or delicate vegetables that are prone to sticking. Use a paper towel or cloth dipped in oil to wipe down the grates before preheating the grill for optimal results, ensuring a smooth cooking process.
Additionally, consider lightly coating the food itself with oil before placing it on the grill. This practice not only helps prevent sticking but also promotes even cooking and enhances flavor. By combining these techniques, you can ensure that your grilled dishes come off the grill perfectly intact, creating a more enjoyable cooking and dining experience for everyone involved.
Frequently Asked Questions about Grilling Oils
What is the best oil for high-heat grilling?
Avocado oil is widely acknowledged as one of the best oils for high-heat grilling due to its high smoke point and heart-healthy properties, making it ideal for searing meats and achieving flavorful results.
Can I use olive oil for grilling?
While olive oil is celebrated for its various health benefits, its lower smoke point makes it less suitable for high-heat grilling. It is better suited for low to medium heat cooking applications, where its flavor can shine without burning.
Is peanut oil a healthy choice for grilling?
Yes, peanut oil is a healthy option for grilling as it contains monounsaturated fats and vitamin E, both of which contribute to heart health while providing a stable choice for high-heat cooking.
Should I oil the grill grates before cooking?
Absolutely, oiling the grill grates prior to cooking helps prevent sticking and ensures even cooking, which is critical for achieving perfect grill marks on your food and enhancing overall flavor.
How long can I safely store reused grilling oil?
Reused grilling oil can be safely stored for a few weeks if filtered properly and kept in a cool, dark place. Always check for off smells or discoloration before reusing it to ensure safety.
Can I mix different oils for grilling purposes?
Yes, combining different oils can create unique flavor profiles and adjust the smoke point. Just ensure that all oils used are suitable for high-heat applications to avoid burning.
What is the smoke point of grapeseed oil?
Grapeseed oil has a smoke point of approximately 420°F (216°C), making it an excellent choice for high-heat grilling and frying without breaking down, ensuring the best cooking results.
How do I determine if my oil has gone bad?
If your oil smells rancid, has an off-color, or appears cloudy, it has likely gone bad and should be discarded to ensure safe cooking practices and to maintain the quality of your meals.
What are some alternatives to high-heat oils?
Alternatives to high-heat oils include safflower oil and sunflower oil, both of which have high smoke points and beneficial health properties, making them suitable for grilling.
Can I use flavored oils for grilling?
Yes, flavored oils can add depth to your grilled dishes. Just ensure they have a suitable smoke point for grilling to avoid burning the flavors, allowing you to enjoy a variety of tastes.
Connect with Us on Facebook for More Grilling Tips!
The Article Best Oils for High-Heat Grilling: Top Picks for BBQ appeared first on https://pitmastersarsenal.com
The Article Top Picks for High-Heat Grilling Oils: Best BBQ Options Was Found On https://limitsofstrategy.com
-

Worcestershire Sauces for BBQ: Best Picks to Enhance Flavor
Elevate Your BBQ Experience with the Unique Flavor of Worcestershire Sauce
Understanding Worcestershire Sauce: The Essential Ingredient for BBQ Lovers
Worcestershire sauce is a renowned fermented condiment that excels in enhancing the flavors of various dishes, particularly in the BBQ realm. This intriguing sauce is a blend of ingredients including vinegar, molasses, anchovies, and an assortment of spices, creating a rich and versatile flavor profile that is both complex and adaptable. It not only functions as a flavor enhancer but also acts as a culinary secret weapon for BBQ enthusiasts, infusing vibrancy into meats, marinades, and even side dishes. The remarkable depth of flavor imparted by Worcestershire sauce enriches BBQ recipes, securing its esteemed position in kitchens across the United States.
The unique combination of savory and subtly sweet flavors makes Worcestershire sauce an outstanding partner for grilling, harmonizing perfectly with the smoky essence characteristic of barbecued meats. Home cooks often rely on this luxurious condiment, confident that it will elevate their grilling efforts. Whether marinating ribs or seasoning brisket, Worcestershire sauce introduces a layer of complexity that can transform an ordinary meal into a culinary masterpiece.
Diving into the Rich Heritage of Worcestershire Sauce in BBQ Tradition
The historical origins of Worcestershire sauce in the world of BBQ date back to the early 20th century. Initially developed in England, it quickly made its way into American kitchens, gaining popularity for its remarkable ability to infuse depth and nuance into grilled meats. As BBQ culture flourished across the United States—particularly in the Southern and Midwestern regions—the use of Worcestershire sauce in marinades and sauces became a widespread practice. Its versatility soon made it a favorite among both professional grillers and casual backyard cooks.
This sauce has become intrinsically linked with BBQ, thanks to its umami-rich flavor that pairs wonderfully with the charred, smoky notes typical of grilled dishes. Over the years, it has evolved into an essential ingredient, cherished for its capacity to enhance everything from marinades to BBQ rubs. Today, Worcestershire sauce represents more than just a condiment; it embodies a crucial component that shapes various BBQ styles, reflecting the diverse culinary traditions that enrich American barbecue culture.
Mastering the Art of Using Worcestershire Sauce in Your BBQ Recipes
Incorporating Worcestershire sauce into BBQ recipes is a simple yet impactful task. This multifaceted condiment can serve various roles, including acting as a marinade, a basting liquid, or a principal ingredient in BBQ sauces. When using it as a marinade, combine it with complementary ingredients such as garlic, onion, and spices to develop a well-rounded flavor profile that deeply penetrates the meat. This technique guarantees that the essence of Worcestershire sauce infuses the proteins, significantly enhancing their overall taste.
When utilized as a basting liquid, Worcestershire sauce can be brushed onto meats while grilling, helping to retain moisture and infuse flavor. It is crucial to balance its potent taste with other ingredients to prevent it from overpowering the dish. Furthermore, when incorporated into BBQ sauces, Worcestershire sauce adds richness and complexity, enhancing the overall flavor without overshadowing other components. A fantastic approach involves mixing it with ketchup, brown sugar, and spices to create a homemade BBQ sauce that beautifully marries sweet, tangy, and savory flavors.
Expert Guidance on Selecting the Finest Worcestershire Sauces for BBQ

Identifying Key Characteristics of an Ideal Worcestershire Sauce for BBQ
The ideal Worcestershire sauce for BBQ should possess a robust flavor profile that enhances the smoky and charred tastes inherent to grilled meats. It should amplify rather than mask the meat’s natural flavors, contributing to a richer taste experience. Essential characteristics to look for include:
- Umami richness: The sauce should deliver a profound savory flavor that enhances the taste of the meat.
- Balanced acidity: This aspect helps cut through the richness of fatty meats, adding brightness to a variety of dishes.
- Robust flavor: A strong enough profile to withstand the intensity of grilling.
- Versatility: The sauce should perform well in marinades, as a baste, or when mixed into sauces.
- Natural ingredients: Choose sauces that have fewer artificial additives to ensure the best flavor.
- Regionally inspired variants: Some sauces reflect local flavors, enhancing the authenticity of BBQ dishes.
These qualities help distinguish a high-quality Worcestershire sauce from inferior alternatives, making it a must-have item in the pantry of any BBQ enthusiast.
Expert Tips for Effectively Utilizing Worcestershire Sauce in BBQ
BBQ experts consistently highlight the versatility of Worcestershire sauce, recommending its use as a foundational element in marinades and sauces. To effectively integrate it into your BBQ repertoire, consider the following practical steps:
Begin by using Worcestershire sauce as a base for your marinades. Combine it with harmonious flavors such as garlic, onion powder, and herbs to craft a well-balanced marinade that enhances meat without overwhelming it. Allow the meat to marinate for several hours or even overnight to maximize flavor absorption. Additionally, consider blending Worcestershire sauce into your BBQ sauces. This method adds depth and richness, infusing the sauce with savory notes.
Another expert tip is to utilize Worcestershire sauce as a finishing touch. A light drizzle just before serving can elevate dishes like grilled chicken or ribs, enhancing their flavor profile. Whether grilling steaks, chicken, or even vegetables, this sauce can provide that extra punch of flavor that makes your BBQ truly unforgettable.
Highly Recommended Worcestershire Sauces According to BBQ Experts

BBQ experts frequently recommend specific Worcestershire sauces that exemplify ideal flavor profiles for grilling. Top recommendations often include brands that deliver rich umami notes combined with balanced acidity. These sauces enhance the natural flavors of various meats and are versatile enough for assorted barbecue applications.
Among the favorites is Lea & Perrins, celebrated for its classic recipe that has withstood the test of time. Its complex profile, featuring hints of spices and a deep, aged taste, makes it a staple in numerous BBQ recipes. Another recommendation is French’s Worcestershire Sauce, which offers a slightly sweeter flavor profile that appeals to those who prefer milder sauces in their cooking. It is widely praised for its ease of use and availability in American kitchens.
For those seeking organic options, Annie’s Worcestershire Sauce has gained popularity due to its clean ingredient list and tangy flavor, making it perfect for health-conscious grillers. Additionally, Kroger’s Worcestershire Sauce is recognized for its affordability while providing balanced flavor, making it a popular choice for everyday BBQ enthusiasts. These sauces not only excel in flavor but also enhance the overall BBQ experience.
Discovering the Best Worcestershire Sauces for BBQ Across the United States
Lea & Perrins Worcestershire Sauce: A Beloved Classic with Enduring Appeal
Lea & Perrins Worcestershire Sauce is a cherished choice among BBQ aficionados, renowned for its traditional recipe and bold flavor profile. With a legacy dating back to the 1830s, this sauce has established itself as a staple in kitchens throughout the United States. Its unique blend of flavors, including anchovies, garlic, tamarind, and an array of spices, creates a rich and complex taste that pairs exceptionally well with grilled meats.
What sets Lea & Perrins apart is its aging process, allowing the flavors to meld and mature, resulting in a depth that enhances a multitude of BBQ dishes. Whether used as a marinade for meats or incorporated into sauces, this Worcestershire sauce delivers a savory richness that elevates the dining experience. Its versatility and availability make it a go-to option in many American households.
- Traditional recipe: A trusted flavor profile that has endured for generations.
- Complex flavor: Aged to perfection, providing depth to BBQ dishes.
- Widely available: Found in most grocery stores across the United States.
- Versatile use: Ideal for marinades, sauces, and direct seasoning.
French’s Worcestershire Sauce: A Sweet and Flavorful Alternative
French’s Worcestershire Sauce introduces a slightly sweeter flavor profile that resonates with those who prefer a milder Worcestershire experience in their BBQ dishes. This sauce has carved out its niche among home cooks who appreciate its accessibility and ease of incorporation. The sweetness in French’s version arises from a balanced mix of ingredients, making it ideal for those who enjoy a less intense flavor while still benefiting from the sauce’s umami richness.
The harmonious blend of flavors in French’s Worcestershire Sauce enhances meats without overpowering them, making it an excellent choice for marinades and basting liquids. Its user-friendly nature allows BBQ enthusiasts to effortlessly integrate it into various recipes, whether grilling chicken, pork, or beef. The versatility of this sauce also makes it suitable for adding flavor to side dishes, further enriching the overall meal.
- Sweeter profile: Milder flavor that is approachable for all palates.
- User-friendly: Easy to incorporate into a variety of BBQ recipes.
- Family favorite: Popular among home cooks for its balanced taste.
- Accessible: Readily available in grocery stores across the country.
Unique Features of These Worcestershire Sauces and Their Impact on BBQ
Each Worcestershire sauce brings unique characteristics to the table, enhancing its appeal for BBQ enthusiasts. Lea & Perrins is famous for its traditional, aged flavor that boasts a depth few can rival. Its complexity makes it suitable for a wide range of BBQ styles, from classic Southern ribs to hearty grilled steaks. The savory profile of this sauce, coupled with its time-honored recipe, positions it as a go-to choice for serious grillers seeking authentic flavor.
In contrast, French’s Worcestershire Sauce stands out with its more approachable and slightly sweeter taste. This characteristic makes it a favorite among those who prefer a gentler flavor in their BBQ. Its ability to enhance without overshadowing the natural flavors of the meat is a significant attraction for home cooks seeking a reliable, everyday sauce. Both sauces have secured their places in American kitchens, catering to different flavor preferences while delivering the essential profile needed for great BBQ.
- Lea & Perrins: Traditional, aged flavor offering robust savory notes.
- French’s: Sweeter, more approachable profile that appeals to a broader range of tastes.
- Versatility: Both sauces can be utilized in various BBQ dishes.
- Accessibility: Widely available in grocery stores nationwide.
Annie’s Worcestershire Sauce: The Organic Choice for Health-Conscious Grillers
Annie’s Worcestershire Sauce provides an organic option that caters to health-conscious BBQ lovers. With a tangy flavor profile and free from artificial ingredients, it appeals to those seeking wholesome alternatives without sacrificing taste. Annie’s commitment to natural ingredients allows the sauce to enhance BBQ dishes while aligning with healthier cooking practices.
The organic certification means that Annie’s Worcestershire Sauce is not only beneficial for your meals but also better for the environment. Its distinct flavor pairs exceptionally well with grilled meats, adding a zesty kick that can elevate everything from beef to chicken. This sauce has gained popularity among BBQ enthusiasts in the United States, proving that health-conscious options can also deliver robust flavors.
- Organic ingredients: Free from artificial additives, emphasizing natural flavors.
- Unique tanginess: Provides a zesty kick that enhances BBQ dishes.
- Health-conscious: Suitable for those seeking healthier condiment options.
- Growing popularity: Increasingly favored in the organic food movement.
Kroger Worcestershire Sauce: Quality on a Budget for Everyday BBQ
Kroger Worcestershire Sauce represents an excellent budget-friendly choice that does not compromise on flavor. This sauce delivers a balanced taste ideal for everyday BBQ use, making it a popular pick among casual grillers. Its affordability allows BBQ enthusiasts to stock up without straining their budget, while still enjoying the rich umami and acidity that Worcestershire sauce is known for.
Perfect for marinades, Kroger’s version works well with a variety of meats and can be utilized either as a basting liquid or mixed into BBQ sauces. The versatility of this sauce makes it an essential pantry staple for those who frequently grill. Its well-rounded flavor profile contributes to a satisfying BBQ experience, ensuring that even budget-conscious cooks can achieve exceptional taste.
- Budget-friendly: Affordable option that does not compromise on quality.
- Balanced flavor: Delivers a well-rounded taste suited for various meats.
- Versatile: Ideal for both marinades and direct seasoning.
- Widely available: Easily found in Kroger stores across the United States.
Guidelines for Choosing the Best Worcestershire Sauce for Your BBQ
Flavor Profiles to Aim for When Selecting Worcestershire Sauce
When selecting a Worcestershire sauce for BBQ, it is crucial to consider the flavor profiles you wish to achieve. Look for sauces that strike a harmonious balance of sweetness, acidity, and umami, which are essential components for complementary BBQ flavors. A well-rounded Worcestershire sauce should enhance the meats while imparting a delightful complexity to your dishes.
For instance, when grilling richer meats like beef, a robust sauce with pronounced umami will amplify the savory notes of the meat. Conversely, when preparing lighter proteins such as chicken or fish, a Worcestershire sauce with a more balanced acidity can brighten and elevate those flavors. Additionally, consider how the sauce will interact with other ingredients in your recipes—whether it will serve as a base for marinades or a mix-in for BBQ sauces. Tailoring your selection to the specific meat and cooking method can make a significant difference in your final dish.
Ingredients to Verify When Purchasing Worcestershire Sauce
Before buying Worcestershire sauce, it is essential to scrutinize the ingredient list to ensure quality components. Aim for sauces that prominently feature vinegar, molasses, and anchovies, as these foundational ingredients contribute to the sauce’s signature flavor. High-quality Worcestershire sauces will utilize natural flavors instead of artificial ones, preserving the integrity of the taste.
Furthermore, avoid sauces that are loaded with high levels of preservatives or artificial additives, which can detract from the overall flavor experience. Ingredients like corn syrup or excessive sugar can lead to an overly sweet taste that masks the intended balance of flavors. By prioritizing sauces with simple and recognizable ingredients, you can elevate your BBQ experience and ensure a more authentic flavor profile in your dishes. Remember, the quality of the sauce you choose directly impacts the taste of your BBQ.
Testing Worcestershire Sauces Before Making a Purchase
Sampling Worcestershire sauces before making a purchase can significantly enhance your culinary experience. Many grocery stores offer tasting stations or provide sample bottles in their condiment aisles, allowing you to try before you buy. This hands-on approach enables you to discern which flavors you enjoy most, allowing you to select a sauce that aligns with your taste preferences.
Additionally, consider reading online reviews from fellow BBQ enthusiasts. Websites dedicated to BBQ culture often feature discussions and ratings for various sauces, offering insights into user experiences and recommendations. Engaging with local BBQ communities, whether online or in-person, can also yield valuable information about popular and effective Worcestershire sauces worth trying. By tasting and researching, you can refine your selection and discover the perfect Worcestershire sauce for your BBQ endeavors.
Brand Reputation and Its Influence on Worcestershire Sauce Selection
The reputation of Worcestershire sauce brands can significantly affect your choice. Established brands often come with a history of consistent quality and flavor, which can enhance your trust in their products. When a brand has a solid reputation, it typically indicates that they have refined their recipes and quality control over time, resulting in a product that delivers excellent results.
Conversely, lesser-known brands may not guarantee the same level of quality or flavor consistency. Opting for trusted brands can lead to more satisfying BBQ experiences, as you can be more certain of the flavor profiles and ingredient quality. As you build your BBQ repertoire, consider sticking to well-reviewed brands that boast a loyal following among grilling enthusiasts. This approach will enable you to make informed choices that elevate your BBQ dishes.
Understanding the Ideal Price Range for Quality Worcestershire Sauce
The price of Worcestershire sauces can vary widely, but generally, quality sauces fall within a mid-range price category. Expect to pay anywhere from $3 to $8 for a good bottle, allowing you to balance cost and quality effectively. While it may be tempting to opt for the cheapest option available, investing in a quality sauce can significantly enhance your BBQ experience.
More expensive sauces often feature higher-quality ingredients and superior flavor profiles, which can translate into better-tasting dishes. Conversely, extremely low-priced options may include fillers or artificial ingredients that compromise flavor. To ensure you’re getting great value, look for sauces in the mid-price range that have received positive reviews and offer natural ingredients. This strategy guarantees exceptional BBQ flavor without straining your budget.
Strategies for Maximizing Worcestershire Sauce in Your BBQ
Amplifying BBQ Flavors with Worcestershire Sauce
Worcestershire sauce is a fantastic ingredient for amplifying BBQ flavors, adding depth and complexity to grilled dishes. One effective strategy is to use it as a base for marinades. For example, combine Worcestershire sauce with olive oil, minced garlic, and fresh herbs to create a marinade that beautifully penetrates chicken or beef. Marinating for a few hours allows the flavors to infuse deeply, resulting in tender, flavorful meat.
Another excellent approach is to utilize Worcestershire sauce as a finishing touch. Drizzling it over grilled meats just before serving can elevate the dish, adding a savory punch that enlivens the flavors. For instance, a light brush of Worcestershire sauce on grilled ribs just before serving can enhance their savory profile, making them irresistible. Experimenting with different ways to incorporate this sauce can lead to unique flavor combinations that set your BBQ apart.
Best Practices for Storing Worcestershire Sauce
Proper storage of Worcestershire sauce is essential for maintaining its flavor and quality over time. Store unopened bottles in a cool, dark place, such as a pantry or cupboard, away from direct sunlight and heat sources. Once opened, it is best to refrigerate Worcestershire sauce to extend its shelf life and preserve its flavor integrity.
For optimal usage, ensure that the cap is tightly sealed after each use to prevent air and moisture from degrading the sauce. Additionally, check for any changes in color or flavor before using an older bottle—this can indicate that it may not perform as well in your recipes. Following these storage practices ensures that your Worcestershire sauce remains fresh and ready to enhance your BBQ creations whenever you need it.
Exploring Creative Uses for Worcestershire Sauce in BBQ
Experimenting with Worcestershire sauce in BBQ can lead to exciting and unique flavor combinations that elevate your grilling experience. One strategy is to mix Worcestershire sauce with other condiments to create distinctive marinades and sauces. For instance, combining it with honey can produce a sweet-savory glaze that works perfectly for chicken wings. Alternatively, mixing it with mustard can create a tangy marinade for pork that amplifies flavor.
Additionally, consider using Worcestershire sauce as a base for BBQ rubs. By blending it with dry spices like paprika, cumin, or brown sugar, you can create a flavorful paste that adheres to meats beautifully. This technique adds moisture and flavor to your BBQ, enhancing the overall taste experience. Don’t hesitate to explore unconventional uses, such as adding Worcestershire sauce to vegetable marinades or even homemade salad dressings to uncover its versatility beyond traditional BBQ applications.
Leading Worcestershire Sauce Brands for BBQ Enthusiasts
Several Worcestershire sauce brands stand out for their quality and suitability for BBQ. As previously mentioned, Lea & Perrins is a leading brand, known for its rich, traditional flavor that has been a favorite for generations. Its complex profile enhances a variety of BBQ dishes, making it a staple among grill masters.
French’s Worcestershire Sauce is another excellent choice, particularly for those who favor a milder, sweeter flavor. This sauce is user-friendly and versatile, perfect for everyday cooking. Annie’s Worcestershire Sauce appeals to health-minded consumers, offering an organic product with a tangy flavor profile. Kroger’s Worcestershire Sauce provides an affordable option without sacrificing taste, making it a practical choice for budget-conscious grillers.
These top brands not only deliver on flavor but also come with reputations built on quality and consistency, ensuring that your BBQ experiences are satisfying and memorable.
Enhancing the Flavor of Various BBQ Meats with Worcestershire Sauce
Worcestershire sauce serves as an exceptional flavor enhancer that complements a variety of BBQ meats, including beef, pork, and chicken. Its savory, umami-rich profile pairs particularly well with beef cuts like steaks and brisket, infusing them with depth and complexity. For instance, marinating a ribeye in Worcestershire sauce combined with garlic and herbs results in a tender, flavor-packed steak that is sure to impress.
Pork also benefits significantly from Worcestershire sauce; using it in marinades for ribs or pulled pork adds layers of flavor that elevate these dishes. The sauce’s acidity helps tenderize the meat, ensuring juicy, flavorful results. Additionally, chicken, whether grilled or smoked, absorbs the savory notes of Worcestershire sauce beautifully. A simple marinade of Worcestershire sauce, olive oil, and lemon juice can transform grilled chicken breasts into a succulent meal that is bursting with flavor.
Overall, Worcestershire sauce’s versatility and ability to enhance the flavors of various meats make it a must-have for any BBQ enthusiast.
Perfect Pairings: Worcestershire Sauce and BBQ
Meats That Are Perfectly Complemented by Worcestershire Sauce
Worcestershire sauce is an exceptional pairing for a wide array of meats, including beef, pork, and chicken. Its rich, umami flavor profile elevates the natural taste of grilled steaks, ribs, and chicken wings, making it an essential condiment for any BBQ lover. When applied as a marinade or a basting liquid, it amplifies the flavor of meats, ensuring a deliciously savory experience.
Beef, particularly cuts like brisket and ribeye, pairs wonderfully with Worcestershire sauce, as the sauce’s acidity helps tenderize the meat while adding depth to its flavor. Pork ribs, whether baby back or spare ribs, benefit from the tangy notes of Worcestershire sauce, creating a perfect harmony of flavors when grilled or smoked. For chicken, the sauce’s versatility shines—whether in a marinade or a finishing drizzle, it complements the meat without overpowering it, enriching the overall barbecue experience.
BBQ Sauces Enhanced by Worcestershire Sauce
Worcestershire sauce can be effectively mixed with various BBQ sauces to create a harmonious balance of flavors. Popular regional styles like Kansas City, Memphis, and Carolina sauces can benefit from a splash of Worcestershire sauce, adding an extra layer of savory depth. This combination enhances the natural sweetness and tanginess typically found in these sauces, resulting in a well-rounded flavor profile.
For instance, Kansas City BBQ sauce, known for its thick, sweet richness, becomes even more complex with Worcestershire sauce added to the mix. Similarly, when combined with the vinegar-based tang of Carolina sauce, Worcestershire sauce can balance the acidity and provide a savory note that enhances the overall taste. Experimenting with these combinations can lead to unique and flavorful BBQ sauces that elevate your grilling game.
Complementary Side Dishes for Worcestershire-Infused BBQ
Worcestershire-infused BBQ dishes pair beautifully with a variety of side dishes, enhancing the overall meal experience. Classic sides like coleslaw, which offers a crunchy and creamy contrast, complement the rich flavors of grilled meats. The tanginess of coleslaw provides a refreshing balance, making it an ideal companion for BBQ.
Baked beans, with their sweet and savory notes, also make an excellent side dish. The hearty texture of beans pairs well with the umami flavors of Worcestershire sauce-infused BBQ, creating a satisfying combination. Additionally, grilled vegetables, seasoned with Worcestershire sauce, can add a healthy and flavorful element to your BBQ spread. Their slight char and caramelization complement the smokiness of the grilled meats, enhancing the meal’s overall flavor profile.
Incorporating Worcestershire Sauce into BBQ Rubs
Integrating Worcestershire sauce into BBQ rubs can significantly enhance the flavor and moisture of your grilled meats. Mixing Worcestershire sauce into a dry rub helps create a paste that adheres to the meat, allowing for even flavor distribution. This method not only boosts taste but also helps keep meats tender and juicy during the grilling process.
To create a flavorful BBQ rub, combine Worcestershire sauce with spices like paprika, garlic powder, and brown sugar. This mixture can be rubbed onto beef, pork, or chicken, allowing the flavors to meld together before grilling. The moisture from the Worcestershire sauce ensures that the dry rub sticks effectively, resulting in a beautifully seasoned and flavorful crust once grilled. This technique can elevate even the simplest cuts of meat, making them extraordinarily delicious.
Choosing Beverages That Complement Worcestershire-Infused BBQ
Selecting the right beverages to accompany Worcestershire-infused BBQ dishes can enhance your overall dining experience. Beers, especially those with robust flavors like IPAs or stouts, pair well with the savory and umami notes of grilled meats. The carbonation and bitterness of beer can cleanse the palate, complementing the richness of BBQ.
Red wine, particularly varietals like Zinfandel or Syrah, can also be a fantastic match, as their fruitiness and tannins enhance the flavors of the meats while maintaining balance. For non-alcoholic options, iced tea with lemon offers a refreshing contrast to the savory flavors of BBQ, while sparkling water can cleanse the palate between bites, making it a favorable choice for BBQ gatherings.
Frequently Asked Questions About Worcestershire Sauce
What is the primary ingredient in Worcestershire sauce?
Worcestershire sauce primarily features vinegar, anchovies, molasses, and various spices, giving it a complex flavor profile that enhances BBQ dishes.
How should I store Worcestershire sauce once opened?
Once opened, Worcestershire sauce should be refrigerated to extend its shelf life and preserve its flavor. Always ensure the cap is tightly sealed.
Can I use Worcestershire sauce as a marinade?
Yes, Worcestershire sauce is excellent as a marinade. Its acidity helps tenderize meats while imparting rich flavors.
What meats pair best with Worcestershire sauce?
Worcestershire sauce pairs well with various meats, including beef, pork, and chicken, enhancing their natural flavors and adding depth.
Are there vegetarian options for Worcestershire sauce?
Yes, some brands offer vegetarian Worcestershire sauce made without anchovies, using alternative ingredients to achieve a similar flavor profile.
How does Worcestershire sauce enhance BBQ flavors?
Worcestershire sauce adds umami and acidity, enhancing the savory flavors of grilled meats and complementing the smoky notes of BBQ.
Can I make my own Worcestershire sauce?
Yes, it’s possible to make your own Worcestershire sauce at home using ingredients like vinegar, soy sauce, tamarind, and spices, allowing for customization.
What’s the difference between Worcestershire sauce and soy sauce?
Worcestershire sauce has a more complex flavor profile, including sweetness and tang, while soy sauce is primarily salty and savory.
How long does Worcestershire sauce last?
Unopened Worcestershire sauce can last for several years when stored properly. Once opened, it should be used within 1-2 years for the best flavor.
Can Worcestershire sauce be used in BBQ sauce recipes?
Absolutely! Worcestershire sauce is a fantastic addition to BBQ sauces, imparting depth and complexity to the overall flavor profile.
Connect with us on Facebook!
The Article Best Worcestershire Sauces for BBQ: Top Picks appeared first on https://pitmastersarsenal.com
The Article Worcestershire Sauces for BBQ: Top Recommendations Was Found On https://limitsofstrategy.com
-

Easy and Nutritious Meal Ideas for New Parents
Essential Meal Preparation Strategies for New Parents to Nourish Their Recovery
Selecting Nutritious Ingredients for Optimal Recovery and Energy
Choosing the right ingredients is crucial for new parents as they adjust to their new roles while recovering from childbirth. It’s essential to focus on foods that are rich in essential vitamins and minerals, which are fundamental in boosting energy levels and fortifying the immune system during this pivotal time. Prioritize adding nutrient-dense foods such as leafy greens, vibrant vegetables, quality lean proteins, and wholesome whole grains to your grocery list. Include nutrient-packed options like quinoa, sweet potatoes, and legumes to provide lasting energy, which is vital for those sleepless nights spent caring for a newborn.
When planning meals, it’s also important to select ingredients that are gentle on the digestive system. New parents often face fatigue and stress, both of which can impact digestive health. Foods that are easy on the stomach, such as bananas, rice, applesauce, and toast—often referred to as the BRAT diet—provide necessary nutrients without overwhelming the digestive tract. Furthermore, adding healthy fats like avocados, nuts, and olive oil can enhance nutrient absorption and deliver immediate energy boosts.
To simplify meal preparation, aim for nutrient-rich meals that can be consumed at any time of day, be it breakfast, lunch, or dinner. The ideal options for new parents should be not only nourishing and easy to prepare but also able to be reheated without compromising quality.
- Prioritize whole, unprocessed ingredients to maximize nutrition.
- Ensure your plates are colorful to reflect a diverse range of nutrients.
- Utilize frozen fruits and vegetables for convenient access to nutrition.
- Explore meal kits or pre-prepped ingredients for quick assembly.
Accommodating Dietary Restrictions with Thoughtfulness and Care
Recognizing and accommodating dietary restrictions is a vital component of preparing meals for new parents. Many individuals may have specific dietary needs stemming from allergies, intolerances, or personal choices, such as vegetarianism or veganism. It’s important to inquire about these preferences beforehand to prevent any unintended discomfort or health complications.
Common dietary restrictions include gluten-free and dairy-free diets. For those steering clear of gluten, consider substituting grains with brown rice, quinoa, or gluten-free pasta. For dairy alternatives, options such as almond or oat milk can provide similar textures and flavors without the lactose concerns. Additionally, being mindful of food allergies, particularly to nuts, shellfish, or soy, is crucial, as these can pose significant health risks for certain individuals.
Moreover, pay attention to cultural dietary practices, which can greatly influence food choices. Some families may have traditional recipes that hold sentimental value, and incorporating these elements can render meals more meaningful and comforting for the new parents.
- Always inquire about dietary restrictions before preparing meals.
- Research substitutes for prevalent allergens such as gluten and dairy.
- Incorporate culturally significant dishes to enhance the emotional resonance of meals.
- Clearly label all ingredients if meals are delivered to prevent confusion.
Smart Meal Prep Techniques to Save Time and Stress
New parents often find themselves pressed for time, making efficient meal preparation an essential skill. Creating meals that can be easily reheated or enjoyed cold not only saves time but also reduces stress during the hectic early days of parenting. Batch cooking is a great strategy, allowing you to prepare larger quantities of meals at once, yielding multiple servings that can be stored and reheated throughout the week.
Utilizing pre-chopped vegetables or frozen fruits can drastically cut down on preparation time. These options usually retain similar nutritional values to their fresh counterparts and allow for quicker meal assembly. Another effective strategy is to designate specific times during the week for meal prep; for instance, setting aside Sundays for cooking and portioning meals for the week ahead can help parents save precious time and ensure they have healthy options readily available.
Encouraging new parents to keep a well-stocked pantry filled with staple items can facilitate quick meal preparation. Items like canned beans, whole grains, and frozen vegetables can be effortlessly combined into nutritious meals, providing convenience during the busiest of days.
- Prepare large batches of meals that can be frozen in individual servings.
- Utilize a slow cooker or instant pot to minimize hands-on cooking time.
- Maintain a well-stocked pantry with essentials for quick meal assembly.
- Plan meals around similar ingredients to reduce waste and prep time.
Valuable Insights for Effective Meal Preparation for New Parents
What Nutritional Requirements Should Be Met for New Parents?
New parents experience elevated nutritional needs as they recover from childbirth and adjust to the demands of caring for an infant. It’s essential to focus on meals that are rich in iron, calcium, and protein, all of which support recovery and maintain energy levels. Foods abundant in iron, such as lean meats, legumes, and dark leafy greens, help combat fatigue and promote overall health. Calcium is particularly important for bone health, especially for breastfeeding mothers, making dairy products, almonds, and fortified plant-based alternatives crucial additions to their diets.
Protein is vital for muscle recovery and overall wellness. Including sources such as chicken, fish, tofu, or legumes ensures that new parents receive the necessary building blocks for healing. Whole grains like brown rice or quinoa provide sustained energy, helping parents remain alert during those long nights with their newborn.
Examples of nutrient-dense meals include a hearty lentil soup filled with spinach and carrots, served alongside whole-grain bread. Another option is a baked chicken breast paired with roasted sweet potatoes and steamed broccoli, delivering a well-balanced mix of protein, complex carbohydrates, and vital vitamins.
- Lentil soup featuring spinach and carrots for a nutrient-rich meal.
- Grilled salmon served with quinoa and asparagus for omega-3 fatty acids.
- Chickpea curry accompanied by brown rice for a vegetarian protein source.
- Scrambled eggs with sautéed vegetables and whole-grain toast for a healthy breakfast.
How Can Meals Contribute to Emotional Well-Being for New Parents?
Comfort foods play a significant role in providing emotional support, particularly for new parents who confront the challenges of parenthood. Meals that evoke happy memories or feelings of warmth and care can offer a much-needed emotional lift during overwhelming times. Foods reminiscent of childhood or family gatherings can be especially comforting.
Consider integrating familiar dishes that evoke nostalgia. For example, creamy mac and cheese or a traditional beef stew served with crusty bread can provide warmth and reassurance. Additionally, meals that are visually appealing and aromatic can enhance the overall dining experience, creating a comforting atmosphere.
Adding thoughtful touches, such as garnishing dishes with fresh herbs or presenting meals attractively, can elevate the dining experience. Comforting desserts like homemade cookies or a warm slice of banana bread can also offer a delightful touch to the meal, providing a moment of joy and indulgence amidst the chaos of new parenthood.
- Prepare traditional family recipes that evoke positive memories.
- Ensure meals are visually appealing for a comforting dining experience.
- Add sweet treats like cookies for an uplifting moment.
- Focus on hearty and filling dishes to provide satisfaction.
What Expert-Recommended Recipes Are Perfect for New Parents?
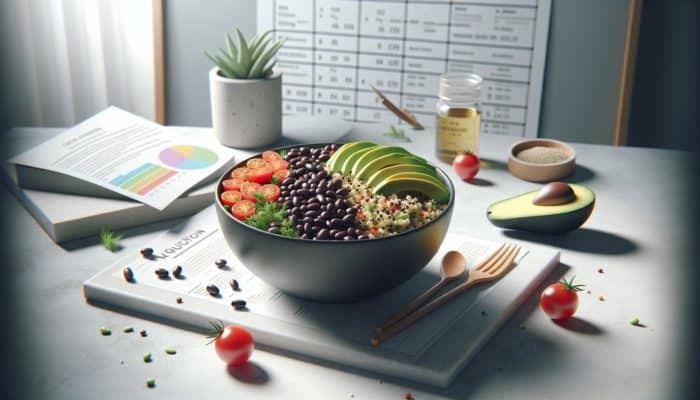
Gathering recipes from nutritionists or chefs who specialize in meals for new parents can be tremendously advantageous. Focus on balanced meals that are easy to prepare and can be tailored to accommodate dietary restrictions. Here are some expert-recommended recipes:
1. Quinoa and Black Bean Salad: Rich in protein and fiber, this salad combines fresh avocado and cherry tomatoes, making it a nutritious, no-cook option that can be enjoyed cold or at room temperature.
2. Baked Vegetable Frittata: This dish can be prepared ahead of time and enjoyed for breakfast or lunch. With eggs, spinach, and cheese, it offers a good source of protein and calcium—essential for recovery.
3. Chicken Stir-Fry: Quick and easy to prepare, this dish can be customized with various vegetables and served over brown rice or quinoa. The protein and fiber help maintain stable energy levels throughout the day.
4. Slow Cooker Chili: Perfect for batch cooking, this one-pot meal allows for easy preparation and can be loaded with beans, lean ground meat, and vegetables, providing a hearty, nutritious option.
Each of these recipes not only addresses the nutritional needs of new parents but is also designed to be easy to prepare and reheat, making them ideal for busy days.
- Quinoa and black bean salad for a refreshing, protein-rich meal.
- Baked vegetable frittata for a nutritious breakfast option.
- Chicken stir-fry for a quick, versatile dinner solution.
- Slow cooker chili for a hearty, satisfying meal.
How Can Meal Planning Simplify Life for New Parents?
Meal planning can transform the experience for new parents, significantly reducing stress and saving time. By organizing meals in advance, parents can ensure they have nutritious options available without the last-minute rush to prepare food. Create a simple weekly meal plan that includes healthy, easy-to-reheat dishes, aiming for a variety of proteins, vegetables, and grains.
Start by allocating time each week to meal planning, creating a shopping list based on necessary ingredients. Consider batch-cooking staples like grains or proteins that can be used in various meals throughout the week. For example, cooking a large batch of brown rice or quinoa can serve as a base for different dishes, from stir-fries to salads.
Using containers for portioning meals can also streamline the process, making it easy for parents to grab a meal when they need it. Encourage parents to involve their support network in the meal planning process, which can enhance the overall experience by allowing for shared responsibilities and diverse culinary perspectives.
- Set aside dedicated time each week for meal planning and preparation.
- Batch-cook staple ingredients for easy meal assembly.
- Involve family or friends in the meal planning process.
- Create a variety of meals to keep things engaging.
Best Practices for Cooking Meals for New Parents
What Cooking Techniques Are Most Efficient for New Parents?
New parents often have limited time and energy, making simplicity in cooking methods essential. Opting for straightforward cooking techniques such as baking, steaming, and slow-cooking can significantly ease the meal preparation process. These methods demand less active time in the kitchen, allowing for multitasking; while a casserole bakes in the oven, parents can attend to their baby or complete other household tasks.
Baking is an excellent method for preparing nutritious meals. Dishes like baked chicken or roasted vegetables enhance flavor with minimal effort. Steaming preserves the nutrients in vegetables, locking in their health benefits without the need for added fats or oils. Slow-cooking is particularly useful on busy days, allowing meals to develop rich flavors while cooking unattended—comforting stews or chili can simmer while parents focus on their newborn.
Encouraging the use of one-pot meals or sheet-pan dinners can simplify clean-up and preparation, reducing the overall time spent in the kitchen. These methods not only save time but also ensure that meals are wholesome and nourishing.
- Opt for baking or roasting for minimal hands-on cooking.
- Utilize steaming to preserve nutrients in vegetables.
- Slow-cook meals to develop flavors without constant supervision.
- Embrace one-pot meals for easy preparation and clean-up.
How to Properly Store and Reheat Meals for Safety?
Proper storage and reheating of meals are crucial to ensure safety and maintain the quality of food prepared for new parents. Using airtight containers is essential for keeping meals fresh and preventing spoilage. Label each container with reheating instructions and the date it was prepared to help parents easily identify meals and know how long they remain safe to consume.
Reheating meals should be thorough to guarantee food safety. It’s vital that meals reach an internal temperature of at least 75°C (165°F) to eliminate any potential bacteria. While microwaving is quick, it’s important to stir the food midway through to ensure even heating. Using a food thermometer can provide peace of mind that the meal is heated adequately, especially when preparing meals for those recovering from childbirth.
Encourage new parents to be mindful of how long food has been stored. Generally, meals can be kept in the fridge for up to three days or frozen for several months, depending on the ingredients. Providing clear instructions on storage and reheating can make the process seamless for busy new parents.
- Utilize airtight containers to keep meals fresh.
- Label containers with reheating instructions and dates.
- Ensure meals reach safe internal temperatures when reheating.
- Advise on storage time limits for refrigerator and freezer meals.
How to Ensure Food Safety and Hygiene Standards?
Maintaining food safety and hygiene is paramount when preparing meals for new parents. Always adhere to basic food safety guidelines to prevent foodborne illnesses. Begin by washing hands thoroughly before and after handling food, as well as cleaning surfaces and utensils to ensure a sanitary cooking environment.
Keep hot foods hot and cold foods cold to prevent spoilage. Use separate cutting boards for raw meats and ready-to-eat foods to avoid cross-contamination. It’s vital to store perishables in the fridge promptly, ideally within two hours of cooking, to minimize the risk of bacterial growth.
Educating new parents about food safety practices can empower them to maintain a safe kitchen environment as they navigate their new responsibilities. Providing a brief overview of essential hygiene practices when delivering meals can further enhance their confidence in safely handling food, ensuring that their focus remains on their newborn.
- Wash hands and surfaces regularly during food preparation.
- Use separate boards for raw and cooked foods.
- Store perishable items promptly in the fridge.
- Educate new parents on food safety practices during delivery.
Key Considerations for Delivering Meals
How to Select Appropriate Packaging for Meal Delivery?
Choosing suitable packaging for meal delivery is essential to maintain food quality and safety. Opt for eco-friendly and microwave-safe containers that can withstand reheating without leaching harmful chemicals. Consider portion sizes that are manageable for new parents, as large servings may feel overwhelming during their busy schedules.
Utilizing containers with tight-fitting lids can help maintain freshness and prevent spills during transport. Smaller, individual portions make it easier for parents to reheat only what they need, reducing waste and allowing them to enjoy their meals without feeling pressured to finish large amounts at once.
Incorporating insulated bags for delivery can assist in maintaining the correct temperature for hot foods, ensuring they arrive in optimal condition. Paying attention to these details not only enhances the meal experience but also demonstrates care and consideration for new parents.
- Choose eco-friendly, microwave-safe containers for meal delivery.
- Opt for manageable portion sizes to minimize waste.
- Use tight-fitting lids to prevent spills during transport.
- Consider insulated bags to maintain food temperature.
What Can Make Delivery Special for New Parents?
Adding a personal touch to meal delivery can significantly enhance the experience for new parents, providing a sense of care and community during this transformative time. Consider including a handwritten note with encouraging words or well wishes, which can uplift their spirits and create a sense of connection.
Timing the delivery to align with the new parents’ schedule is also vital. Coordinating the delivery for a time when parents are likely to be available and not overwhelmed can enhance their experience. This thoughtful consideration can help align the meal with mealtime, facilitating a seamless transition into enjoying the food.
Including a small gift, such as a treat for the parents or a little something for the baby, can further personalize the delivery. Thoughtful touches like these show that you care not only about their nutritional needs but also their emotional well-being.
- Include a handwritten note to add a personal touch.
- Coordinate delivery times to fit the parents’ schedule.
- Add a small gift or treat to enhance the delivery experience.
- Consider including a little something for the baby as well.
What Essentials Should Be Included in Meal Delivery?
When delivering meals to new parents, it’s crucial to include everything they may need to enjoy their food without additional hassle. Along with the meal itself, providing clear reheating instructions is essential, as it ensures that the food can be enjoyed at its best.
Including necessary utensils, such as forks, spoons, or serving spoons, can also be helpful, especially if the parents may not have had time to restock their kitchen supplies amidst their new routine. A small dessert or snack can be a delightful addition, offering a sweet treat to brighten their day.
Additionally, consider including a small card with tips for quick meal preparation or suggestions for side dishes that pair well with the main meal. This thoughtful detail can enhance their dining experience and make it easier for them to manage their meals effectively.
- Provide clear reheating instructions with the meal.
- Include necessary utensils for easy dining.
- Add a small dessert or snack for enjoyment.
- Consider including tips for quick meal prep or side dish suggestions.
Strategic Approaches for Meal Preparation for New Parents
How to Personalize Meals for New Parents?
Personalizing meals for new parents can significantly enhance the emotional impact of your thoughtful gesture. Understanding their culinary preferences, favorite foods, and cultural backgrounds can help you create meals that resonate on a personal level. Engaging them in conversation about their favorite dishes or family traditions can provide valuable insights into what they might appreciate the most.
Consider incorporating familiar flavors or comfort foods that hold sentimental value. For instance, if the parents have a heritage that includes specific spices or ingredients, using these can create a deeper connection to their cultural identity. Personal touches, such as utilizing family recipes or adapting meals to reflect their tastes, can turn a simple meal into a cherished experience.
To personalize meals effectively, gather information from family or friends who know the new parents well. This collaboration can lead to meals that are not only nutritious but also infused with love and thoughtfulness, making the dining experience more memorable.
- Engage in conversations to learn about their favorite foods.
- Consider cultural backgrounds and incorporate traditional dishes.
- Utilize family recipes for added sentimental value.
- Collaborate with others who know the parents for personalized insights.
What Advantages Does Batch Cooking Provide?
Batch cooking is an efficient strategy that can simplify meal preparation for new parents. By preparing multiple servings of meals in one session, parents can significantly reduce the time spent cooking throughout the week. This approach allows for a well-stocked fridge or freezer with nutritious options readily available, offering convenience during busy days.
The benefits of batch cooking include saving time and effort, as parents can enjoy a variety of meals without the need to cook from scratch daily. It also promotes healthier eating, as having home-cooked meals on hand can reduce the temptation to order takeout or rely on unhealthy snacks. Additionally, batch cooking can be a cost-effective strategy, allowing families to buy ingredients in larger quantities and minimize food waste.
To implement batch cooking, encourage parents to choose a few versatile recipes that can be mixed and matched throughout the week. For example, a large pot of soup can be paired with different sides, such as bread or rice, to create varied meals that feel fresh and satisfying.
- Prepare multiple servings of meals for easy access.
- Encourage the use of versatile recipes for variety.
- Promote healthier eating choices with home-cooked meals.
- Teach parents batch cooking techniques to save time and money.
How to Ensure Meals Are Balanced and Varied?
To maintain nutritional integrity, it’s essential to ensure that meals for new parents are balanced and varied. Incorporating a wide range of food groups in each meal helps provide essential nutrients necessary for recovery and energy. Focus on including proteins, whole grains, healthy fats, fruits, and vegetables to create well-rounded dishes.
Rotating different proteins, such as chicken, fish, legumes, and plant-based alternatives, can keep meals exciting while ensuring a diverse nutrient intake. Similarly, varying the types of vegetables used can introduce new flavors and textures, making mealtime more enjoyable.
When planning meals, aim for a colorful plate, as a variety of colors often indicates a wider range of nutrients. Encourage parents to embrace seasonal produce, which can inspire creativity and experimentation in the kitchen while supporting local farmers.
To further enhance variety, consider introducing themed meal nights, such as taco night, stir-fry night, or pasta night. This approach not only simplifies planning but also adds an element of fun to mealtime.
- Incorporate a variety of food groups in each meal.
- Rotate different proteins and vegetables to enhance variety.
- Focus on colorful plates to indicate nutrient diversity.
- Introduce themed meal nights for added creativity and fun.
How to Keep Meals Fresh and Safe?
Maintaining freshness and safety in meals is crucial for new parents who are often juggling numerous responsibilities. Proper storage techniques are essential to avoid spoilage and ensure that meals remain enjoyable for consumption. Use airtight containers that prevent air exposure and maintain the quality of the food.
Label each meal with the date it was prepared, and encourage parents to consume meals within a safe timeframe—typically, meals can be kept in the refrigerator for three days or frozen for longer periods. It’s important to educate new parents on how to assess the freshness of food, including looking for signs of spoilage or off smells.
When reheating meals, remind parents to heat only what they plan to eat, as repeated reheating can compromise quality and safety. Using a food thermometer to check that food reaches the appropriate internal temperature is an effective way to ensure meals are safe to consume.
- Store meals in airtight containers to maintain freshness.
- Label meals with dates for easy tracking.
- Educate parents on assessing food freshness.
- Encourage reheating only what will be consumed to avoid spoilage.
Providing Support to New Parents Beyond Meal Preparation
How to Offer Additional Support and Assistance?
Beyond providing meals, offering additional support can be immensely beneficial for new parents. Small gestures can make a significant difference in their daily lives and contribute to a smoother adjustment period. Consider volunteering to help with household chores, such as laundry, cleaning, or grocery shopping. These tasks can quickly become overwhelming when caring for a newborn, and any assistance can provide invaluable relief.
Another gesture that can be appreciated is babysitting for short periods, allowing parents a moment to rest or spend quality time together. Even offering to run errands or pick up supplies can alleviate their burden and contribute to their overall well-being.
Encouraging parents to take breaks and prioritize self-care is vital. Remind them that taking care of themselves enables them to care for their baby more effectively. By providing not just meals but a supportive framework, you can create a nurturing environment where new parents feel valued and cared for.
- Offer to help with household chores to ease their burden.
- Consider babysitting to give parents a much-needed break.
- Run errands or pick up supplies as needed.
- Encourage self-care and remind them of its importance.
How to Promote Healthy Eating Habits for New Parents?
Encouraging healthy eating habits is essential for new parents as they navigate their postpartum journey. Suggest simple ways to incorporate fruits and vegetables into their daily routine, such as adding greens to smoothies or creating vegetable-based snacks. Preparing a variety of colorful, nutrient-dense meals can also inspire them to make healthier choices.
Offering tips for maintaining hydration is equally important. Encourage new parents to drink plenty of water throughout the day, particularly if breastfeeding, as hydration supports milk production and overall health. Creating infused water with fruits and herbs can make hydration more enjoyable and visually appealing.
Additionally, providing information about balanced meals can empower new parents to make conscious food choices. Suggest simple meal ideas that incorporate protein, healthy fats, and complex carbohydrates, ensuring they have the energy needed for their new responsibilities.
- Suggest ways to easily incorporate fruits and vegetables into meals.
- Encourage hydration by promoting water intake.
- Provide information on balanced meals for energy and well-being.
- Incorporate variety in snacks and meals to keep things interesting.
How to Build a Reliable Support Network for New Parents?
Encouraging new parents to connect with a support network can provide invaluable assistance during this transitional period. Support groups, whether in-person or online, can offer a platform for sharing experiences, advice, and encouragement. Connecting with other families going through similar challenges can help alleviate feelings of isolation and provide a sense of community.
Local parenting groups often organize meet-ups, playdates, and informational sessions. These interactions can foster friendships and create lasting bonds, providing new parents with a reliable support system. Encourage parents to seek out resources in their community, such as workshops or classes focused on parenting skills, infant care, or wellness.
Additionally, remind new parents to lean on their existing support network of family and friends. Having trusted individuals available for babysitting or emotional support can significantly ease the transition into parenthood.
- Encourage participation in local parenting groups or support networks.
- Highlight the importance of sharing experiences with others.
- Remind them to lean on family and friends for support.
- Suggest workshops or classes on parenting skills.
Research-Backed Benefits of Providing Meals for New Parents
How Does Meal Support Positively Impact New Parents’ Health?
Providing meal support for new parents can significantly enhance their health and well-being during a crucial period. Research suggests that access to nutritious meals can alleviate stress and improve overall nutrition, leading to better health outcomes. Meals that are well-balanced and rich in essential nutrients can aid recovery during the postpartum phase and contribute to overall energy levels.
The key health benefits of providing meals include:
- Improved mental health due to reduced stress and anxiety.
- Enhanced recovery from childbirth through proper nutrition.
- Increased energy levels, facilitating better daily functioning.
- Stronger immune response, reducing the risk of illness.
Moreover, meal support can alleviate the pressure of cooking and meal preparation, allowing new parents to focus on bonding with their newborn and adapting to their new roles.
What Psychological Benefits Arise from Receiving Meals?
Receiving meals can offer significant psychological benefits for new parents, providing a sense of support and community during a time of profound change. The act of receiving a meal often transcends physical nourishment; it serves as a reminder that they are not alone in their journey.
The comfort of knowing that someone cares enough to provide assistance fosters a sense of belonging and emotional support. This outreach can boost morale, alleviate feelings of isolation, and reinforce social connections, all of which are crucial for mental health during the postpartum period.
Additionally, sharing meals can create opportunities for connection with family and friends. Engaging in communal dining experiences—even if virtually or through a simple drop-off—can enhance feelings of togetherness, serving as positive reinforcement that helps new parents feel supported and valued during this transition.
- Receiving meals fosters a sense of support and community.
- Meals can alleviate feelings of isolation and boost morale.
- Sharing meals can enhance connections with family and friends.
- The act of receiving reinforces social bonds and emotional well-being.
How Can Meals Strengthen Family Bonds?
Shared meals provide an excellent opportunity for family bonding, creating moments of connection that can strengthen relationships within the household. For new parents, taking time to enjoy meals together can foster a sense of togetherness and create lasting memories amidst the challenges of parenthood.
Family-friendly dishes, such as tacos, pizza, or pasta, can be particularly engaging, allowing everyone to participate in the meal preparation. This involvement can help children feel included and valued, while also providing a sense of normalcy and routine.
Moreover, sharing mealtime stories or discussing the day can promote communication and emotional connection among family members. The simple act of sitting down to enjoy a meal together can reinforce family dynamics and create a nurturing environment that supports emotional well-being.
- Shared meals create opportunities for family bonding.
- Engaging in meal preparation together fosters inclusion.
- Mealtime discussions can enhance communication and emotional connection.
- Establishing routines around mealtime promotes stability and support.
How Can Nutritious Meals Aid in Postpartum Recovery?
Nutritious meals are essential for postpartum recovery, providing the necessary energy and nutrients to support healing and adaptation to new responsibilities. During this critical time, new parents require adequate amounts of protein, healthy fats, vitamins, and minerals to facilitate recovery.
Foods rich in iron, such as red meat, poultry, and legumes, play a vital role in replenishing iron stores after childbirth, which can be especially important for those experiencing fatigue. Calcium-rich foods, including dairy products and leafy greens, are essential for maintaining bone health, particularly for breastfeeding mothers.
Incorporating a variety of whole foods, such as fruits, vegetables, whole grains, and healthy fats, can support overall physical and mental health during the postpartum period. By providing balanced meals that meet the unique needs of new parents, supportive meal providers can contribute to a smoother recovery journey and enhance overall well-being.
- Nutritious meals promote energy levels and healing.
- Iron-rich foods replenish iron stores post-childbirth.
- Calcium is crucial for bone health during breastfeeding.
- Variety in whole foods supports both physical and mental health.
Future Meal Planning Insights for Ongoing Support
How to Plan for Ongoing Meal Support?
Planning for ongoing meal support can ensure that new parents continue to receive the nourishment they need as they settle into their new routines. Consider coordinating a meal train with friends, family, or community members willing to contribute meals over an extended period. A meal train allows for scheduled deliveries, ensuring a variety of foods while alleviating the burden on any single individual.
When organizing meal support, establish guidelines for the types of meals to provide, focusing on nutritious options that are easy to prepare and reheat. Encourage contributors to communicate any dietary restrictions to ensure that everyone’s preferences are taken into account.
Planning for a variety of meals can keep the experience exciting and reduce the likelihood of repetitive meals. By coordinating efforts, you can create a supportive network that ensures new parents have a steady supply of nourishing meals during their adjustment period.
- Coordinate a meal train with friends and family for ongoing support.
- Establish guidelines for nutritious and easy-to-reheat meals.
- Communicate dietary restrictions to accommodate preferences.
- Plan for a variety of meals to keep things interesting.
How to Adapt Meals as the Family Grows?
As families expand, meal needs and preferences may evolve. Adapting meals to accommodate new family members or different age groups can help ensure that everyone enjoys nutritious food that meets their individual needs. For instance, when introducing solids to babies, consider preparing pureed versions of family favorites, allowing infants to experience familiar flavors from an early age.
As toddlers grow, meals can be adapted to include bite-sized portions or finger foods that encourage self-feeding. Involving older children in meal preparation can also promote healthy eating habits and foster a sense of responsibility.
Celebrating cultural diversity within the family can be a wonderful way to introduce new foods and flavors. Consider incorporating international recipes that reflect the family’s heritage or that provide a fun cooking experience together. This diversity not only enriches the family’s diet but also creates opportunities for shared experiences and learning.
- Adapt meals to accommodate new family members and their needs.
- Introduce pureed versions of family favorites for infants.
- Encourage self-feeding with toddler-friendly portions.
- Incorporate cultural recipes to celebrate diversity and create shared experiences.
How to Keep Meals Fresh and Exciting?
To ensure meals remain fresh and exciting for new parents, consider rotating different cuisines and flavors. Experimenting with new recipes can invigorate the meal experience, introducing parents to a variety of ingredients and culinary styles.
Incorporating themed dinner nights, such as Mediterranean or Asian cuisine, can add a fun twist to meal planning and encourage exploration of new flavors. Additionally, integrating seasonal produce into meals not only enhances freshness but also provides opportunities to try different recipes based on what’s currently available.
Encourage parents to get creative with meal presentation, as visually appealing dishes can make mealtime more enjoyable. Simple touches, such as garnishing with fresh herbs or arranging meals artfully on the plate, can elevate the dining experience and make it feel special, even amidst a busy parenting schedule.
- Rotate different cuisines and flavors to keep meals interesting.
- Introduce themed dinner nights for fun meal exploration.
- Incorporate seasonal produce for freshness and variety.
- Enhance visual appeal with creative presentation techniques.
Frequently Asked Questions about Meal Preparation for New Parents
What meals are best suited for new parents?
Nutritious meals that are high in protein, iron, and calcium, such as lentil soup, baked chicken, and quinoa salads, are ideal for new parents to support recovery and energy levels.
How can I accommodate dietary restrictions when cooking for new parents?
Always ask about specific dietary needs and preferences. Consider gluten-free, dairy-free, or vegetarian options and substitute ingredients accordingly to ensure meals are safe and enjoyable.
What are some effective time-saving meal prep tips?
Batch cook meals, use frozen or pre-chopped ingredients, plan meals around similar ingredients, and allocate specific times for meal prep to save time and reduce stress.
How can I make meal delivery special for new parents?
Add a personal touch with a handwritten note, coordinate delivery times to fit their schedule, and consider including a small dessert or treat alongside the meal.
Why is meal support crucial for new parents?
Meal support reduces stress, ensures proper nutrition, and fosters a sense of community, which is essential for new parents adjusting to their new roles.
How can I encourage healthy eating habits in new parents?
Suggest incorporating fruits and vegetables into meals, encourage hydration, and provide easy recipes for balanced meals that promote energy and well-being.
What are the benefits of batch cooking for new parents?
Batch cooking saves time, allows for healthier eating options, reduces the stress of daily cooking, and can be cost-effective by buying ingredients in bulk.
How can I ensure meals are balanced for new parents?
Include a variety of food groups in each meal, rotate different proteins and vegetables, and aim for colorful plates to ensure nutritional diversity.
What cooking methods are most effective for meal preparation for new parents?
Simple cooking methods like baking, steaming, and slow-cooking are ideal as they require less active time and can often be managed alongside caring for a newborn.
How should meals be stored and reheated for safety?
Use airtight containers, label meals with dates, and ensure foods are reheated to an internal temperature of at least 75°C (165°F) to ensure safety and quality.
Connect with us on Facebook!
The post How to Make a Meal for New Parents: Easy and Nutritious appeared first on https://cookinggods.com
The Article Meal Ideas for New Parents: Easy and Nutritious Recipes Was Found On https://limitsofstrategy.com
-

BBQ Competition Tips for Effective Practice
Enhance Your BBQ Equipment Choices for Ultimate Competition Success
Discover the Top Smokers and Grills Ideal for BBQ Competition Success
Selecting the optimal BBQ equipment is a critical factor in achieving victory in BBQ competitions. Competitors must carefully evaluate essential elements such as fuel type, size, and temperature control when choosing smokers and grills. Each of these aspects is crucial for ensuring that your BBQ can attain the ideal cooking conditions on the day of the competition. For instance, while electric smokers provide stable cooking temperatures, they might fall short in delivering the rich and intricate flavors that come from wood or charcoal options. On the other hand, charcoal grills impart a profound smokiness but require a higher degree of skill to effectively manage temperatures during the cooking process.
Among the most reputable brands favored by BBQ competitors across the U.S. are:
- Traeger
- Weber
- Big Green Egg
- Camp Chef
- Ooni
- Brinkmann
- Pit Boss
- Masterbuilt
The decision to select the appropriate smoker or grill can profoundly influence both the flavor profile and the cooking efficiency of your BBQ, making this choice one of the most crucial steps in preparing for a competition.
Must-Have BBQ Tools for Every Competitor’s Success
Equipping yourself with the right tools is fundamental for any dedicated BBQ competitor. The right BBQ tools can substantially enhance your cooking efficiency and the overall quality of your final product. Here are some essential items that should be included in every competitor’s toolkit:
- High-quality meat thermometers for accurate temperature readings
- Spatulas and grilling tongs for safe and effective handling
- BBQ gloves to shield against high heat
- Grill brushes for maintaining your equipment
- Injectors for infusing flavorful marinades
- Meat claws for easy shredding
- Non-slip cutting boards for safe food preparation
- Aluminum foil for wrapping and protecting meat
Each of these tools serves a specific function, from ensuring precise cooking temperatures to streamlining the overall preparation and serving process. Investing in high-quality tools will not only elevate your BBQ but will also facilitate a smoother operation on the crucial day of competition.
Implement Comprehensive Maintenance Practices for Your BBQ Gear
Maintaining your BBQ equipment is vital for ensuring its longevity and consistent performance. Regular cleaning and inspections are necessary to guarantee that your gear operates at its best, helping to avoid any unexpected challenges during competitions. It is advisable to clean your BBQ equipment after every use. For instance, the buildup of grease can negatively impact flavor and cooking efficiency, making it essential to keep your grills and smokers in pristine condition.
Additionally, routinely checking seals, grates, and other essential components allows you to identify potential issues before they escalate. By performing these checks after each use, you prepare yourself for success and can save significant time and stress on the day of the competition.
Understanding Fuel Types for BBQ Competitions: A Key Differentiator

Choosing the right fuel type is a pivotal aspect of BBQ competitions. Each fuel type offers unique benefits and drawbacks, making it essential to comprehend their specific characteristics. Charcoal is often favored for its ability to reach high temperatures quickly while imparting an exceptional smoke flavor, although it necessitates more vigilance during the cooking process. Gas offers convenience and allows for precise temperature control, but it may not deliver the depth of flavor that wood or charcoal can provide.
In contrast, wood provides distinct flavors that vary depending on the type used, making it a preferred choice among serious competitors. Understanding these various fuel types is crucial for selecting the best option tailored to your competition needs, whether you are preparing brisket or ribs.
Implementing Safety Equipment and Practices for BBQ Competitions
Safety is of utmost importance when participating in BBQ competitions. Utilizing appropriate gear and adhering to safety practices ensure that you and your team remain secure while concentrating on delivering outstanding BBQ. Essential safety items include fire extinguishers, which should always be easily accessible, and heat-resistant gloves that protect your hands from hot surfaces.
Moreover, consistently practicing safe BBQ handling techniques is crucial. This entails maintaining a clean cooking area, properly managing raw meats to prevent cross-contamination, and ensuring that your cooking equipment is securely set up. By prioritizing safety, you can avert accidents that could jeopardize your competition and, more importantly, ensure the safety of everyone involved.
Master Key BBQ Techniques to Secure a Competitive Edge
Exploring Essential Cooking Methods in BBQ for Maximum Flavor

Mastering BBQ techniques necessitates a comprehensive understanding of various cooking methods, each offering distinct advantages that are particularly suited for different types of meat. Low and slow cooking is perfect for tougher cuts such as brisket, as it promotes collagen breakdown and the development of deep, rich flavors. Although this method demands patience, it produces tender, flavorful results that are sure to impress competition judges.
Conversely, hot and fast techniques, typically applied to chicken or pork, can yield crispy skin and juicy interiors within a shorter cooking timeframe. Knowing which method to apply based on the type of meat significantly affects flavor, texture, and overall presentation—all of which are critical factors in competitions. Regularly practicing these techniques will deepen your understanding of their impacts on various meats.
Effective Temperature Control Techniques for BBQ Mastery
Maintaining the correct temperature is fundamental for achieving exceptional BBQ results. Numerous techniques can assist in effectively managing heat, particularly during competitions where environmental conditions can be unpredictable. One effective strategy involves utilizing a combination of direct and indirect heat, allowing for greater control over different cooking zones.
Additionally, investing in high-quality digital thermometers can provide real-time temperature readings, ensuring that you avoid overcooking or undercooking your meat. It’s also essential to routinely monitor the temperature of your cooking environment and adjust airflow in your smoker or grill as necessary. Mastering these temperature control techniques can significantly elevate your BBQ, making it an essential component of your practice regimen.
Perfecting Your Smoking Skills for BBQ Competitions
Smoking meat is often regarded as an art form in BBQ competitions, and achieving the ideal smoke ring and flavor involves several essential steps. First and foremost, selecting the proper type of wood is crucial, as each variety imparts distinct flavors. Common smoking woods and their corresponding flavor profiles include:
- Hickory: A robust, bacon-like flavor
- Mesquite: Earthy and bold, best suited for red meats
- Apple: Sweet and mild, ideal for poultry
- Cherry: Fruity and sweet, versatile for all meats
- Pecan: Rich and nutty, excellent for brisket
- Oak: A strong yet mellow flavor, perfect for larger cuts
To enhance the smoke flavor, managing your smoke levels is vital. Excessive smoke can result in bitterness, while insufficient smoke may lead to a lack of flavor depth. Perfecting your smoking skills necessitates consistent practice and a willingness to experiment with different woods and techniques to discover your unique flavor profile.
Elevating Flavor Profiles with Rubs and Marinades
Enhancing the taste of your BBQ is often achieved through expertly crafted rubs and marinades. The right combination of spices can dramatically amplify the natural flavors of your meat, resulting in a dish that stands out in competitions. Begin with a base of salt and sugar, and then layer in additional spices such as paprika, garlic powder, or cumin to create complexity and depth.
It is crucial to apply rubs uniformly before cooking to ensure that every bite bursts with flavor. Marinades can enhance this effect by allowing the meat to absorb additional flavors prior to cooking. For optimal results, allow your meat to marinate for several hours or overnight, depending on the type of meat and the intensity of the marinade. Mastering the balance of these flavors is essential for producing BBQ that can compete at the highest levels.
Identifying the Best Meats for BBQ Competition Success
How to Choose Quality Cuts for BBQ Competitions
Selecting high-quality cuts of meat is a crucial factor that can distinguish your BBQ from others in competitions. Not all meats are created equal; understanding which cuts excel in competitive settings is vital. For brisket, aim for well-marbled cuts, as the fat content aids in moisture retention during lengthy cooking times. When selecting ribs, opting for meat from young, tender animals ensures a desirable texture and bite.
Consider the specific category in which you are competing. For chicken, whole birds are often preferred, while pork shoulder is a popular choice in pulled pork categories. Establishing relationships with local butchers can grant you access to superior cuts that may not be available at standard grocery stores, thereby enhancing your competition entries and overall results.
Steps for Properly Preparing Your Meats for BBQ Competitions
Properly preparing meats is essential to achieving the best outcomes in BBQ competitions. Start by trimming excess fat and silver skin from cuts such as brisket and ribs, as these elements can hinder flavor absorption and affect texture. After trimming, marinating or applying a dry rub allows flavors to penetrate deeply into the meat.
Once your meats are prepared, allowing them to rest at room temperature before cooking is crucial for facilitating even cooking. This preparation phase lays the groundwork for successfully executing your BBQ and can significantly impact your performance on competition day.
Techniques for Cooking Different Types of Meat to Perfection
Each type of meat necessitates a distinct approach to achieve optimal results. For brisket, the secret lies in low and slow cooking, keeping the temperature steady around 225-250°F, and cooking until it reaches an internal temperature of approximately 195°F for the finest tenderness. Ribs benefit from the three-two-one method: three hours of smoking, two hours wrapped in foil, and one hour unwrapped to create a delightful bark.
When competing with chicken, it should ideally be cooked to a juicy 165°F, with skin crisping achieved through grilling or high-heat roasting techniques. Pork, particularly shoulder, is best cooked until it reaches around 195°F to ensure that it can be pulled apart effortlessly. Mastering these techniques ensures that you can handle each type of meat like a true champion in BBQ competitions.
Expert Strategies for Practicing Successfully for BBQ Competitions
Insights from Experienced Pitmasters for Skill Enhancement
Gaining insights from seasoned pitmasters can significantly enhance your BBQ skills. These experts often have years of experience and invaluable knowledge about what truly makes BBQ stand out in competitions. For instance, attending local BBQ workshops or viewing tutorials from respected competitors can expose you to advanced techniques and tips that are not widely known.
Real-world examples from competitions such as the American Royal or Memphis in May showcase the diverse techniques employed by successful pitmasters. Engaging with these experts can offer practical, hands-on learning opportunities that refine your approach and elevate your BBQ game to new heights.
Gaining Experience Through Participation in BBQ Competitions
Engaging in BBQ competitions not only provides valuable experience but also offers insights into the competitive landscape. Many events, ranging from local cook-offs to larger state fairs, cater to various skill levels. To discover competitions in the U.S., consider joining BBQ associations or clubs that frequently organize events and create networking opportunities.
Participating in these competitions allows you to test your skills against other passionate enthusiasts, receive constructive feedback, and learn what strategies work best under the pressure of competitive settings. This experience is invaluable for honing your skills while also fostering camaraderie within the BBQ community.
Analyzing Competition Results for Continuous Improvement
Understanding what judges look for in BBQ can significantly refine your techniques. Judges typically evaluate entries based on appearance, tenderness, flavor, and texture. Ensuring that every aspect of your dish meets high standards is essential for achieving favorable scores.
To improve, conduct a critical analysis of your competition results. If feedback indicates that your meat was overly salty or lacked a smoke ring, adjust your recipes accordingly. This analytical approach enables you to identify areas for improvement and ensures that your BBQ consistently meets the benchmarks set by judges in competitions.
Enhancing Your BBQ Flavors Through Strategic Practices
Best Practices for Experimenting with Rubs and Sauces
Experimenting with rubs and sauces is one of the most enjoyable ways to elevate your BBQ flavors. By trying different combinations of spices and ingredients, you can create unique profiles that will leave a lasting impression on judges. For example, blending brown sugar with paprika and chili powder can yield a sweet and spicy rub that works wonderfully for ribs.
When utilizing sauces, consider layering flavors; applying a base sauce during cooking and finishing with a glaze before serving can provide remarkable depth and complexity. Engaging in this experimentation allows you to discover signature flavors that resonate not only with your palate but also with competition judges, enhancing your overall BBQ offerings.
Utilizing Wood Wisely for Flavor Enhancement in BBQ
The choice of wood you select for smoking is crucial in determining the final flavor of your BBQ. Different woods impart unique flavors, making it essential to choose wisely based on the type of meat. For example, hickory’s robust flavor pairs excellently with pork, while lighter woods like apple complement chicken beautifully.
Understanding how each type of wood interacts with various meats enables you to create harmonious flavor profiles. Incorporating a variety of woods into your practice sessions can help you uncover unique combinations that will set your BBQ apart in competitions, giving you an edge over your competitors.
Achieving the Perfect Balance of Sweet and Savory in BBQ
Striking an ideal balance of sweet and savory is crucial for creating winning BBQ. A well-rounded flavor profile can elevate your dish and satisfy the discerning palates of judges. To effectively balance these flavors, consider incorporating elements like honey or brown sugar for sweetness while using spices like black pepper or mustard for a bold kick.
Experimentation is key—try applying different levels of sweetness to your rubs or sauces and gauge the reactions from your audience during practice. This testing will help you fine-tune the balance that resonates with competition judges and distinguishes your BBQ from others.
Best Practices for Marinating Techniques in BBQ
Marinating meats is an effective method to deeply enhance flavors. A good marinade can penetrate the meat, infusing it with spices and acids that tenderize while adding rich flavors. The best marinades combine acids (like vinegar or citrus), oil, and various seasonings to create a well-rounded flavor experience.
For optimal results, allow your meats to marinate for a minimum of two hours, though overnight is often preferable for tougher cuts. Experimenting with various marinating times and ingredients can help you develop unique flavor profiles that will impress judges during competitions and elevate your BBQ game.
Key Elements of Effective BBQ Presentation for Competitions
Mastering Plating Techniques to Enhance BBQ Appeal
Presentation plays a pivotal role in BBQ competitions, as it can significantly influence judges’ scores. The way you plate your BBQ enhances its visual appeal and provides a feast for the eyes that complements the flavors. Utilizing contrasting colors, such as garnishing smoked meats with vibrant green herbs or bright red sauces, can make your dish visually striking and appealing.
Additionally, consider how you arrange your plate; stacking ribs vertically or artfully slicing brisket can create an attractive display that catches the eye. Remember, first impressions matter, so investing time in mastering plating techniques can give you a competitive edge in BBQ competitions and help you stand out among your peers.
Effective Garnishing Tips to Elevate BBQ Presentation
Garnishes not only enhance visual appeal but also contribute flavor, making them a critical aspect of BBQ presentation. When selecting garnishes, aim for items that complement your dish. For instance, fresh herbs like parsley or cilantro not only add a pop of color but also provide refreshing flavors that contrast the richness of BBQ.
Consider incorporating edible flowers or colorful vegetables, such as pickled red onions, to enhance visual aesthetics. A thoughtfully selected garnish can elevate your dish, showcasing your attention to detail and creativity, which judges greatly appreciate in competitions.
Creating a Cohesive Look for Your BBQ Dishes
Consistency in presentation can set your entry apart in BBQ competitions. To ensure a uniform look, select a theme or style for your dishes and maintain that across your entries. This could involve using similar plating styles, colors, or types of garnishes for different meats, creating a visually appealing and cohesive presentation.
Moreover, practicing your presentation techniques repeatedly can help you develop a signature look that becomes recognizable to judges. A cohesive presentation not only demonstrates your skill but also leaves a lasting impression, which can be crucial for scoring in competitive environments.
Proven Strategies for Practicing BBQ Competitions Effectively
Developing a Structured Practice Schedule for BBQ Success
Establishing a structured practice schedule is essential for consistent improvement and success in BBQ competitions. Designate specific days and times each week for practice, ensuring that you allocate time to focus on different aspects of your BBQ skills. For example, you might dedicate one day to perfecting your rubs and sauces while another day is reserved for honing cooking techniques.
Consistency is key; regular practice not only helps refine your skills but also develops muscle memory, which is crucial for executing your techniques seamlessly during competitions. Additionally, incorporating a variety of practice scenarios, such as simulating competition conditions, can further enhance your preparedness and effectiveness.
Essential Components of Your Home BBQ Practice Area
Creating a dedicated practice area at home can significantly enhance your BBQ preparation. The ideal space should encompass essential equipment such as your smoker and grill, along with a prep station stocked with all necessary tools for cooking and organizing your ingredients.
Ensure that your practice area is organized to allow easy movement and access to crucial items, creating a workflow that mimics competition settings. By having a designated space for BBQ, you can streamline your practice sessions and hone your skills without the distractions of a less organized environment, ultimately improving your performance.
The Importance of Simulating Competition Conditions for Practice
Practicing under conditions that closely resemble a competition is vital for preparing yourself and your team. To replicate the stress and atmosphere of actual events, invite friends or fellow BBQ enthusiasts to act as judges during your practice sessions.
Set a timer for each cooking phase, mimicking the time constraints of competitions. Moreover, practice presenting your dishes to an audience to help you become comfortable with the pressure and expectations associated with competition day. This simulated environment will enhance your confidence and readiness for real competition scenarios.
Evaluating and Adjusting Your Recipes for Optimal Results
Regularly testing and refining your BBQ recipes is crucial for improving flavors and consistency. Start by documenting each recipe, including specific measurements and cooking times. After each practice session, take notes on what worked well and what didn’t, and critically taste everything.
This systematic review allows you to pinpoint areas for enhancement, whether that’s adjusting seasoning levels or cooking times. Continuously refining your recipes not only elevates the quality of your BBQ but also prepares you for the unpredictability of competition judging and scoring, ensuring that you present your best work.
The Value of Learning from Competition Feedback for Improvement
Feedback from judges provides invaluable insights into how you can improve your BBQ. After competitions, take the time to analyze the scores and comments provided by judges, focusing on their constructive criticism to enhance your craft.
Consider developing a strategy for incorporating this feedback into your practice routine. For instance, if a judge mentions a lack of smoke flavor, adjust your smoking techniques and flavor profiles during practice to address these concerns. Effectively utilizing feedback can lead to significant enhancements in your BBQ skills and overall performance, helping you achieve your competition goals.
Building a High-Performance BBQ Competition Team
Key Considerations for Recruiting Team Members
A strong BBQ competition team can significantly enhance your chances of success, making it essential to recruit members who share your passion for BBQ. Look for individuals with specific skill sets that complement your own, such as those knowledgeable in meat selection, cooking techniques, or presentation skills that can contribute to the team’s success.
Additionally, team members should be enthusiastic and willing to commit time to practice and competition preparation. Assembling a team with diverse talents can lead to innovative ideas and approaches that help set your BBQ apart in competitions, fostering a collaborative and dynamic environment.
Defining Roles and Responsibilities for Team Efficiency
Assigning clear roles and responsibilities within your BBQ team is critical to ensuring smooth operations during competitions. Identify each member’s strengths and interests, allowing them to take charge of specific tasks such as meat preparation, cooking, or presentation to enhance overall team efficiency.
This division of labor not only increases efficiency but also fosters accountability, as each member understands that their contributions are essential to the team’s overall success. Regularly reviewing and adjusting roles based on team dynamics can further enhance collaboration and performance during competitions, leading to better results.
Strategies for Fostering Team Spirit and Cohesion
Building a cohesive team spirit is essential for maximizing performance during competitions. Engaging in team-building activities can strengthen relationships and improve communication among team members. Whether through group cooking sessions, BBQ outings, or casual social events, these activities help promote camaraderie and collaboration.
Additionally, recognizing each member’s contributions and celebrating successes can significantly boost morale. A positive team environment can greatly impact how well your team performs under competition pressure, leading to a more enjoyable and productive BBQ experience for all involved.
Frequently Asked Questions (FAQs) Regarding BBQ Competitions
What Essential Equipment Do I Need for BBQ Competitions?
A solid competition setup includes a dependable smoker or grill, essential BBQ tools like thermometers and spatulas, heat-resistant gloves, and a fire extinguisher for safety.
How Do I Choose the Right Meat for Competitions?
Selecting quality cuts is crucial. Look for well-marbled brisket, tender ribs, and whole chickens, as these meet competition standards and appeal to judges, enhancing your chances of success.
What Are Effective Temperature Control Techniques for BBQ?
Utilizing a combination of direct and indirect heat, investing in quality thermometers, and regularly monitoring your cooking environment are effective methods for maintaining optimal temperature throughout the cooking process.
How Important Is BBQ Presentation in Competitions?
Presentation is critical in competitions as it can influence judges’ scores. Focus on plating, garnishing, and creating a cohesive look to enhance your BBQ’s visual appeal and overall impact.
How Can I Improve My BBQ Flavors for Competitions?
Experiment with different rubs and marinades, balance sweet and savory flavors, and consider using various woods for smoking to enhance flavor profiles and elevate your BBQ dishes.
What Is the Best Way to Practice for Competitions?
Develop a structured practice schedule, simulate competition conditions, and regularly evaluate and adjust your recipes based on feedback and results to continuously improve your BBQ skills.
How Do I Find BBQ Competitions to Enter?
Join BBQ associations, follow local BBQ clubs, and check online event listings to discover competitions in your area that suit your skill level and aspirations as a competitor.
What Are Common Judging Criteria for BBQ Competitions?
Judges typically evaluate appearance, tenderness, flavor, and texture in BBQ entries, making it essential to excel in these areas for a favorable score and recognition in competitions.
How Can I Build a Successful BBQ Competition Team?
Recruit team members with complementary skills, assign clear roles, and foster a positive team spirit through team-building activities and recognition to enhance collaboration and performance.
How Often Should I Clean My BBQ Gear?
Clean your BBQ gear after every use to ensure longevity, maintain performance, and prevent the buildup of grease and residue that can negatively affect flavor and cooking efficiency.
Connect with us on Facebook!
The Article How to Practice for BBQ Competitions: U.S. Tips appeared first on https://pitmastersarsenal.com
The Article BBQ Competition Tips: How to Practice Effectively Was Found On https://limitsofstrategy.com