Your cart is currently empty!
Category: Food & Drink
Auto Added by WPeMatico
-

Seafood Paella Recipes for Memorable Gatherings
Unlock the Secrets to Creating an Unforgettable Seafood Paella
Expert Tips for Choosing the Best Seafood Varieties for Your Paella
The journey to crafting the perfect seafood paella starts with making informed choices about the seafood varieties you select. Opting for a vibrant assortment of fresh, top-quality seafood is crucial to elevating the flavor and overall dining experience of your dish. The freshness of the ingredients plays a pivotal role; sourcing your seafood from local markets or reliable suppliers guarantees the best taste and texture. A traditional paella should showcase a beautiful mix of fish and shellfish. Consider integrating succulent shrimp, mussels, clams, and calamari to add richness and diversity to your culinary masterpiece. Incorporating delicate white fish, such as hake or cod, enhances the dish significantly, as these fish absorb the savory broth flavors beautifully.
When making your seafood choices, it’s essential to consider sustainability. By selecting responsibly sourced products, you not only support environmental health but also improve the quality of your dish. In coastal regions worldwide, particularly around the Mediterranean, you can discover indigenous seafood varieties that will infuse your paella with regional flair. For a touch of luxury, think about adding scallops or lobster; these extravagant choices will transform your paella into a culinary highlight suitable for any special occasion.
Choosing the Best Rice Varieties and Techniques for Perfect Paella
The selection of rice is fundamental for achieving the ideal texture in your paella. Short-grain rice options, such as Bomba or Calasparra, are favored due to their exceptional ability to absorb flavors, allowing them to soak up the rich broth while maintaining a delightful al dente consistency. A best practice is to rinse the rice under cold water before cooking; this step helps eliminate excess starch, preventing a gummy texture in the final dish.
The method used to cook the rice is equally significant. A common guideline is to use a ratio of 2.5 parts liquid to 1 part rice, although this may vary slightly depending on your specific recipe and chosen ingredients. Once you’ve added the rice to the pan, it’s vital to let it cook undisturbed, as stirring can release starch and disrupt the desired texture. Allowing the rice to rest for several minutes after cooking can further enhance its texture and flavor.
Elevating Paella Flavors with the Right Spices and Seasonings
The rich flavor profile of paella is greatly affected by the spices and seasonings you choose. Saffron, renowned for its distinctive golden hue and aromatic qualities, is a crucial ingredient that lends both color and a unique taste. This prized spice should be steeped in warm broth prior to being added to the rice, ensuring that its full flavor is infused into the dish.
Another vital seasoning is smoked paprika, which adds depth and a subtle smokiness that harmonizes beautifully with the seafood. Beyond these primary spices, other ingredients like garlic, onion, and parsley create a robust flavor foundation. A dash of freshly cracked black pepper can elevate the overall taste. You might also explore herbs like thyme or bay leaves to introduce additional layers of complexity. Striking the right balance with these flavors is essential; too much saffron can overwhelm the dish, while too little can leave your paella lacking in character.
Selecting the Right Stock and Broth for Maximum Flavor Impact

The liquid component in paella is critical for imparting flavors throughout the dish. While seafood stock or fish stock is the classic choice, alternatives such as chicken broth or vegetable broth can be utilized if seafood is unavailable. Homemade stock is always the preferred option, as it offers a depth of flavor that store-bought varieties often lack.
When crafting your broth, consider incorporating aromatic ingredients like leeks, carrots, and celery to enrich its flavor. These additions not only enhance the base but also contribute to a more nuanced flavor experience. If you choose to use store-bought broth, opting for low-sodium varieties allows for better control over seasoning during cooking. A key tip is to keep the broth heated while cooking the paella, as this maintains the cooking temperature and prevents the rice from becoming overly soft.
Incorporating Vegetables and Aromatics for a Flavorful Paella
Vegetables are integral to paella, contributing both color and nutritional value. Common choices include bell peppers, peas, green beans, and tomatoes, each adding unique flavors and textures to the dish. When sautéed, bell peppers deliver a gentle sweetness that balances the overall flavor, while peas introduce a vibrant green accent.
Aromatics such as onions and garlic lay the flavorful groundwork for the paella. Sautéing these ingredients in olive oil before adding the rice creates an aromatic base for the dish. Additionally, consider using seasonal vegetables or local specialties to enhance authenticity. For instance, in various Mediterranean regions, artichokes or even snails can take center stage. Thoughtful selection and preparation of these vegetables can elevate your seafood paella from a simple meal to a vibrant, flavor-rich experience.
Mastering the Techniques for Cooking the Ideal Paella
Layering Ingredients to Maximize Flavor in Your Paella

To achieve the ultimate flavor and texture in paella, it’s crucial to layer your ingredients correctly. Start with a well-crafted sofrito, a combination of sautéed garlic, onions, and peppers that forms a rich flavor foundation. This mixture should be cooked until it is soft and aromatic, a process that typically takes several minutes.
Once your sofrito is ready, add the rice, ensuring it’s thoroughly coated in the flavorful oil. Next, pour in the hot broth infused with saffron, allowing the rice to gradually absorb the liquid. Instead of mixing the seafood into the rice, arrange it on top in an aesthetically pleasing manner; this guarantees even cooking while preserving the integrity of the seafood.
Key steps for effectively layering ingredients include:
- Prepare the sofrito as your flavor base.
- Evenly coat the rice in the sofrito.
- Add hot broth infused with spices.
- Arrange seafood on top without stirring.
- Allow the paella to cook undisturbed.
- Monitor liquid absorption and adjust heat as necessary.
This method ensures that each ingredient contributes its unique flavor to the dish while allowing the rice to develop the coveted socarrat.
How to Perfect the Coveted Socarrat in Your Paella
The socarrat is the highly coveted crispy rice layer that forms at the bottom of a well-cooked paella. Achieving this delightful texture requires precise control of heat and timing. Once the liquid has been absorbed and the rice is nearly cooked through, briefly increase the heat to create a sizzling environment at the base of the pan, encouraging the formation of socarrat.
After a few minutes of high heat, reduce the heat to finish cooking. It’s essential not to stir during this stage, as doing so will disturb the socarrat formation. The ideal socarrat should be golden brown, fragrant, and slightly crunchy, providing a delightful contrast to the tender rice and succulent seafood above. To ensure success, listen for a gentle crackling sound, which indicates that the rice is toasting at the bottom.
Common Pitfalls to Avoid When Preparing Paella
Crafting paella may seem intimidating, but steering clear of common mistakes is vital for achieving success. One frequent error is overcooking the seafood. It’s essential to add shellfish and fish near the end of the cooking process, allowing them just enough time to steam and cook through without turning rubbery. Another typical blunder is stirring the rice after it has been added to the pan; this disrupts the cooking process and can prevent the socarrat from forming.
Using a wide, shallow pan is crucial for even cooking, as it allows the rice to spread out and absorb the broth effectively. Ensure that the heat is consistent throughout. If using a home stove, consider rotating the pan to promote even cooking.
Common mistakes to avoid include:
- Overcooking the seafood by adding it too early.
- Stirring the rice after adding broth.
- Using a pan that is too deep.
- Not closely monitoring liquid absorption.
- Neglecting to let the paella rest before serving.
By being mindful of these tips, you will be well on your way to creating a successful and delicious seafood paella.
Ideal Rice Varieties for Crafting the Perfect Paella
Choosing the right rice variety is critical for crafting an exceptional seafood paella. Bomba and Calasparra rice are the premier choices due to their unique characteristics. Bomba rice, which hails from Spain, has an extraordinary capacity to absorb liquid without becoming mushy, a quality essential for achieving the perfect paella texture. In contrast, Calasparra rice, also Spanish, is celebrated for its flavor and texture, making it another excellent choice.
When selecting rice, look for high-quality grains specifically marketed for paella or risotto. Avoid long-grain varieties, as they lack the necessary absorption capabilities and can result in a less cohesive dish. Proper preparation of the rice, including rinsing to eliminate excess starch, greatly enhances its cooking potential.
Achieving the Perfect Balance of Liquids and Seasonings in Paella
Finding the right balance of liquids and seasonings is essential for creating a delicious seafood paella. The ideal liquid-to-rice ratio is approximately 2.5 parts liquid to 1 part rice, ensuring that the rice absorbs ample flavor without becoming overly saturated.
When preparing your broth, consider the intensity of flavors you wish to achieve. If using homemade stock, you can control the salt content, which is important since the rice will absorb these flavors. Incorporate saffron judiciously; while it adds unique taste and color, an excess can overpower the dish.
Ultimately, achieving balance requires continuous tasting and adjusting throughout the cooking process. As the paella cooks, keep an eye on liquid levels to ensure that the flavors meld beautifully, resulting in a rich, aromatic dish that captivates the palate.
Effective Strategies for Perfect Seafood Paella Recipes at Large Gatherings
Real-Life Examples of Successful Paella Events
Hosting a successful paella event can be both rewarding and enjoyable. Learning from real-world examples can inspire your own gatherings. Organizing large-scale paella events, such as community festivals or family reunions, showcases the dish’s ability to serve many while fostering a communal atmosphere. A prime example is the annual Paella Festival held in various cities worldwide, where chefs compete to create the best paella, and guests can sample a diverse array of flavors.
When planning a paella gathering, it’s essential to scale your recipes appropriately to accommodate the number of guests. Considerations include the size of your paella pan and the cooking equipment available. Stocking up on high-quality ingredients is essential, as is ensuring you have sufficient utensils and plates for serving.
Here are valuable tips for hosting a successful paella event:
- Select a paella pan of appropriate size for the number of guests.
- Prepare ingredients in advance to streamline the cooking process.
- Incorporate a variety of seafood to create diverse flavor profiles.
- Establish a comfortable serving area for guests to enjoy their meal.
Creating a festive atmosphere with music and decorations can further enhance the experience, making it memorable for all attendees.
Actionable Steps for Scaling Recipes for Large Gatherings
Scaling recipes for large gatherings requires meticulous planning and execution. Start by determining the number of guests you plan to serve, then calculate the necessary quantities of each ingredient proportionally. For instance, if a standard recipe serves four and you have 20 guests, multiply each ingredient by five.
When preparing for large crowds, consider using multiple pans to ensure even cooking and temperature distribution. This approach allows for better heat distribution and reduces the risk of overcooking. If you’re using a single large pan, it’s crucial to monitor the cooking process closely, as heat may not distribute evenly.
Here are actionable steps for scaling recipes effectively:
- Determine guest count and adjust ingredient quantities accordingly.
- Use multiple pans for better heat distribution.
- Adjust cooking times based on the size of the preparation.
- Consider logistics for serving and keeping the paella warm.
Being proactive in your planning will allow you to enjoy the cooking process and deliver a delicious seafood paella experience for your guests.
Expert Insights on Flavor Combinations in Paella
Crafting a seafood paella is as much about the flavor combinations as it is about technique. Balancing the natural sweetness of fresh seafood with the smokiness of smoked paprika and the earthy notes of saffron is essential for creating a harmonious dish. Each ingredient must work together, forming a symphony of flavors that complement one another.
Consider the importance of balance when it comes to flavor. For instance, adding a splash of white wine or a hint of citrus, like lemon or orange zest, can brighten the dish and enhance the seafood’s natural sweetness.
Expert analysis of flavor combinations includes:
- Balance the sweetness of seafood with the smokiness of paprika.
- Add acidity with citrus for a fresh touch.
- Incorporate fresh herbs for brightness.
- Experiment with toppings like aioli for added richness.
These thoughtful combinations not only enhance the overall flavor profile but also create a dining experience that excites the palate and encourages guests to savor every bite.
Essential Equipment for Large-Scale Paella Cooking
Cooking paella for a crowd necessitates the right equipment to ensure success. Large paella pans are essential, typically available in sizes ranging from 30cm to an impressive 120cm diameter, depending on the number of servings required. A portable burner or outdoor grill is also recommended, enabling consistent heat across the wide surface area of the pan.
Investing in high-quality utensils, such as large wooden spatulas or ladles, ensures you can mix ingredients without damaging the rice. Thermometers can be useful for monitoring cooking temperatures, ensuring everything is cooked to perfection.
When planning your equipment needs, consider:
- Selecting a paella pan size based on guest count.
- Choosing the type of heat source (portable burner or grill).
- Investing in high-quality utensils for mixing and serving.
- Setting up portable tables for prep and serving space.
Equipping yourself with the right tools helps streamline the cooking process, allowing you to concentrate on creating a delicious paella that delights your guests.
Effective Time Management for Successful Paella Preparation
Effective time management is crucial for a smooth paella preparation process, especially when catering to large groups. Start by creating a detailed timeline that encompasses every stage, from shopping and ingredient preparation to cooking and serving.
Begin your shopping at least a day in advance to ensure all ingredients are fresh and ready to go. On the event day, allocate specific times for preparing the sofrito, cooking the rice, and adding the seafood. Keeping an eye on timing allows you to coordinate serving and ensures everything is at its best when guests are ready to eat.
Here are valuable strategies for effective time management:
- Create a timeline for shopping, prepping, and cooking.
- Prep ingredients beforehand to save time on the day.
- Organize your cooking space for efficiency.
- Involve helpers for tasks like stirring or plating.
An organized approach will help you enjoy the cooking process while ensuring that your paella is served fresh and hot, creating a memorable dining experience for everyone involved.
Discover the Benefits of Serving Paella at Gatherings
The Social Experience of Sharing Paella with Guests
Paella is more than just a meal; it’s a communal experience that encourages interaction and sharing among guests. The communal nature of serving paella fosters a sense of community and enjoyment, making it an ideal choice for gatherings and social events. Guests can gather around the paella pan, share stories, and serve themselves, creating a lively and convivial atmosphere.
The act of sharing food is deeply ingrained in cultural traditions worldwide, and paella embodies this spirit beautifully. Whether you’re hosting a casual barbecue, a family reunion, or a festive gathering, paella invites guests to interact and create memories together, enhancing the overall experience.
What makes paella an excellent choice for social events?
- Encourages interaction among guests.
- Promotes a sense of community and togetherness.
- Facilitates sharing and storytelling around the dish.
- Creates a visually appealing dining focal point.
By serving paella, you cultivate an inviting environment that fosters laughter and conversation, making your event truly memorable.
The Versatility of Paella for Various Occasions
The versatility of paella makes it a superb choice for a wide range of occasions, from casual get-togethers to more formal events. This adaptability allows you to customize dishes to suit the preferences and dietary restrictions of your guests.
Paella can be easily modified to accommodate different tastes, whether you choose to focus on seafood, incorporate meats, or create vegetarian options. This flexibility makes it suitable for various gatherings, including birthdays, weddings, and community festivals.
Consider the following aspects that contribute to paella’s versatility: customizable ingredient options for varied tastes.
- Adaptable for both casual and formal settings.
- Ability to cater to dietary preferences.
- Can be prepared in large batches for communal dining.
This flexibility not only makes it a popular choice among hosts but also ensures that guests from all backgrounds feel included in the dining experience.
The Nutritional Advantages of Seafood Paella
Seafood paella offers numerous nutritional advantages, particularly when prepared with fresh ingredients. The seafood component provides high-quality protein, essential for muscle growth and repair. Rich in omega-3 fatty acids, seafood positively impacts heart health and cognitive function.
Incorporating a variety of vegetables adds vital vitamins and minerals, enhancing the overall nutritional profile. When prepared thoughtfully, paella can be a healthy option, especially when using minimal oil and opting for whole ingredients.
Key nutritional benefits of seafood paella include:
- High-quality protein sourced from seafood.
- Rich in omega-3 fatty acids, beneficial for heart health.
- Vitamins and minerals from assorted vegetables.
- Potential for a balanced meal when paired with wholesome sides.
Focusing on fresh, quality ingredients not only makes your paella delicious but also ensures it is a nutritious option for your guests to enjoy.
Pairing Paella with Beverages and Sides for a Complete Dining Experience
The Perfect Wine Pairings for Your Paella
Choosing the right wine to accompany paella can significantly enhance the dining experience. A crisp white wine such as Albariño or Verdejo pairs beautifully with seafood paella, as the acidity balances the richness of the dish. Light reds like Garnacha can also make an excellent match, particularly when meat components are included.
When selecting a wine, consider the overall flavor profile of your paella. Wines with floral notes can elevate the dish’s aromatic qualities, while those with a hint of minerality can add depth to the seafood’s natural flavors.
For your guests, consider recommending:
- Albariño for its crispness and acidity.
- Verdejo as a refreshing white option.
- Garnacha for light red wine enthusiasts.
- Prosecco for a bubbly alternative to add festivity.
These selections will not only enhance the meal but also create an engaging experience that pairs beautifully with the flavors of the paella.
Enhancing Your Paella Meal with Side Dishes
Complementing paella with the right side dishes enhances the overall dining experience. Side dishes should be simple yet flavorful, allowing the paella to remain the star of the show. A fresh green salad with lemon vinaigrette offers a refreshing contrast, while crusty bread is perfect for soaking up the delicious broth.
Other options could include grilled vegetables, which add color and additional nutrients. For a more traditional touch, Spanish tortillas or patatas bravas can serve as delightful accompaniments.
Consider these side dishes to elevate your paella:
- Green salad with a light vinaigrette.
- Crusty bread for soaking up broth.
- Grilled vegetables for added color.
- Spanish tortillas as a classic side.
These thoughtfully chosen sides not only elevate the meal but also create a more enjoyable dining experience for your guests.
Refreshing Non-Alcoholic Beverage Options to Pair with Paella
For guests who prefer non-alcoholic beverages, numerous refreshing options can pair beautifully with paella. Sparkling water with a twist of lemon adds a zesty touch, balancing the rich flavors of the dish. Alternatively, a refreshing fruit punch can offer sweetness and vibrancy, making it a festive choice for larger gatherings.
You might also consider serving non-alcoholic mocktails, which can enhance the overall experience without alcohol. Flavors such as mint, ginger, or berries can provide a delightful contrast to the seafood paella while keeping everyone refreshed.
Here are some non-alcoholic beverage options to consider:
- Sparkling water with lemon or lime.
- Fruit punch for a festive touch.
- Herbal iced teas as a refreshing alternative.
- Mocktails featuring seasonal fruits and herbs.
Offering a variety of non-alcoholic options ensures that all guests feel included in the dining experience, regardless of their beverage preferences.
Proven Strategies for Perfect Seafood Paella Recipes at Large Gatherings
How to Effectively Plan and Prepare for a Paella Event
Effective planning and preparation are crucial for a successful paella event, particularly when serving large crowds. Begin by developing a detailed plan that outlines each step, from shopping for ingredients to cooking and serving. This foresight not only alleviates stress but also guarantees a smoother cooking process.
Start by creating a comprehensive shopping list that includes all ingredients, ensuring you have sufficient quantities for your expected guest count. Preparing ingredients the day before can save valuable time. Chopping vegetables, marinating seafood, and measuring rice will streamline the cooking process.
Helpful planning tips include:
- Create a comprehensive shopping list.
- Prep ingredients the day before.
- Assign tasks to helpers for efficiency.
- Set up clear communication to minimize confusion.
This level of preparation allows you to focus on cooking and enjoying the gathering, rather than frantically searching for misplaced ingredients or tools.
Strategies for Efficiently Managing Cooking Time and Equipment
Efficiently managing cooking time and equipment is paramount when preparing paella for a crowd. If possible, use multiple burners or outdoor grills to accommodate larger pans and distribute heat evenly. This approach allows for better temperature control and can expedite the cooking process.
Timing is everything; keep a close eye on the cooking stages to ensure all ingredients are prepared simultaneously. This coordination will enable you to serve the paella at its peak of freshness and flavor.
Strategies for managing cookware include utilizing multiple burners or grills for efficiency:
- Monitor cooking stages closely to avoid overcooking.
- Prepare a timeline for cooking tasks.
- Coordinate with helpers to streamline the process.
Adopting these strategies will help ensure a successful cooking experience, allowing you to focus on delivering a delicious paella.
Ensuring Food Safety and Quality When Making Paella
Maintaining food safety and quality is paramount when preparing seafood paella. Start by ensuring that all seafood is kept refrigerated until just before cooking to prevent spoilage. Fresh ingredients not only enhance flavor but also reduce the risk of foodborne illness.
Monitor cooking temperatures closely to ensure that seafood reaches the appropriate internal temperature for safe consumption. Utensils and surfaces should be clean and free from cross-contamination, especially when handling raw seafood.
Key food safety strategies include:
- Keep seafood refrigerated until ready to cook.
- Ensure all ingredients are fresh and of high quality.
- Monitor cooking temperatures to guarantee food safety.
- Maintain clean utensils and surfaces throughout the preparation process.
Taking these precautions will not only elevate the quality of your paella but also ensure a safe and enjoyable dining experience for you and your guests.
Customizing Paella for Dietary Preferences
Best Substitutions for Vegetarian Diets in Your Paella
Customizing paella to cater to vegetarian and vegan diets is entirely feasible and allows for creative substitutions. For vegetarian options, consider replacing seafood with a variety of vegetables, such as mushrooms, zucchini, and artichokes. For a heartier texture, tofu can be marinated and added for protein.
When preparing a vegan version, ensure you use vegetable broth instead of seafood stock. Infusing the dish with a medley of herbs and spices can maintain the depth of flavor typically associated with traditional paella.
Plant-based alternatives for seafood in paella include:
- Mushrooms for a meaty texture.
- Tofu for protein addition.
- Artichokes for a unique flavor.
- A variety of seasonal vegetables for freshness.
This adaptability not only makes paella inclusive but also opens up new flavor profiles for all your guests to enjoy.
Considerations for Gluten-Free and Allergen-Conscious Guests
For guests with gluten sensitivities or other dietary restrictions, ensuring that all ingredients are safe is crucial. Start by sourcing gluten-free broth, as many commercial broths may contain gluten. Additionally, avoid cross-contamination, especially when handling seafood and other allergens.
When selecting ingredients, always read labels carefully. Fresh, whole ingredients are typically the best choice, as they are less likely to contain hidden allergens. Open communication with your guests about the ingredients used ensures everyone can enjoy the meal without concern.
Considerations for gluten-free and allergen-conscious guests include:
- Sourcing gluten-free broth and ingredients.
- Avoiding cross-contamination during preparation.
- Communicating openly about dish ingredients.
- Using minimally processed whole foods to minimize allergen risk.
Taking these precautions allows you to create a safe and enjoyable dining experience for all guests, regardless of dietary needs.
Balancing Flavors for Dietary Restrictions in Your Paella
Customizing flavors when adapting paella to accommodate dietary restrictions can be a delightful challenge. When substituting traditional seafood or meats, consider using a mix of spices and herbs to maintain depth and richness.
For vegetarian or vegan paellas, incorporating robust flavors is key. Use smoked paprika, saffron, and fresh herbs to add complexity to the dish. Experimenting with different vegetables can also introduce new flavors, ensuring the dish remains vibrant and hearty.
Strategies for utilizing flavors include using spices liberally to enhance taste:
- Incorporating rich, seasonal vegetables.
- Using plant-based stocks to maintain depth.
- Adding acidity, like lemon juice, for brightness.
By focusing on flavorful substitutions, you can create a delicious paella that satisfies all guests while respecting their dietary preferences.
Tips for Serving and Presenting Your Paella
Effective Plating and Garnishing Techniques for Stunning Paella
Effective plating and garnishing can significantly enhance the visual appeal of paella, making it even more enticing for guests. Traditionally, paella is served directly from the pan, adding an element of authenticity and encouraging communal enjoyment. However, for a more polished presentation, consider transferring it to a large serving platter.
Garnishing with fresh herbs, such as parsley, or a light sprinkle of lemon zest can add a vibrant pop of color and contrast to the golden rice. Serve with lemon wedges on the side, allowing guests to squeeze fresh juice over their portions for added brightness.
Consider these plating and garnishing techniques:
- Serve paella in the pan for an authentic touch.
- Use a large serving platter for formal presentations.
- Garnish with fresh herbs for color and flavor.
- Provide lemon wedges for added brightness.
These techniques not only enhance the visual aspect but also create an inviting dining experience that guests will appreciate.
Methods for Keeping Paella Warm for Serving
Keeping paella warm for serving is essential, especially during large gatherings. A chafing dish is a popular option, as it maintains heat while allowing easy access for guests. Alternatively, you can keep the paella covered on a low heat source, ensuring it remains at an optimal temperature without continuing to cook.
If using a large pan, consider placing it on a hot plate or directly on a low flame to maintain warmth. Monitoring the paella closely will prevent it from drying out.
The best method for keeping paella warm includes using a chafing dish for easy serving:
- Cover the pan on a low heat source.
- Use a hot plate to maintain temperature.
- Monitor closely to prevent drying out.
By implementing these strategies, you can ensure that your paella remains warm and delicious, ready to delight your guests at any moment.
Engaging Guests with Interactive Serving Techniques
Interactive serving can elevate the dining experience during a paella event. Allowing guests to serve themselves directly from the pan not only fosters a sense of participation but also creates a lively atmosphere. Set up a designated serving area where guests can gather around the paella pan, encouraging interaction and conversation.
Providing a variety of serving utensils can enhance the experience, allowing guests to choose their portions and toppings. Consider offering additional toppings, such as aioli or fresh herbs, or even customizing kebabs for guests to tailor their dishes to their preferences.
Options for engaging guests include:
- Allowing guests to serve themselves from the paella pan.
- Setting up a customization station for toppings.
- Encouraging guests to share stories and experiences.
- Creating a communal dining area to enhance social interaction.
This interactive approach not only makes for a more enjoyable meal but also transforms dining into a shared experience, making your gathering memorable.
Frequently Asked Questions About Paella
What kind of rice is best for making paella?
The best rice for paella is short-grain varieties, such as Bomba or Calasparra, as they absorb liquid and flavors without becoming mushy.
How do you achieve a perfect socarrat?
To achieve the socarrat, increase the heat during the final minutes of cooking to create a crispy bottom layer without stirring the rice.
Can you make paella vegetarian?
Yes, paella can be easily adapted for vegetarian diets by replacing seafood with a variety of vegetables and using vegetable broth.
What sides complement paella?
Sides that pair well with paella include a simple green salad, crusty bread, grilled vegetables, or Spanish tortillas for a complete meal.
How long does it take to cook paella?
The cooking time for paella typically ranges from 30 to 45 minutes, depending on the batch size and the type of heat source used.
Can you use frozen seafood in paella?
Yes, frozen seafood can be used in paella, but ensure it is properly thawed and drained to prevent excess moisture in the dish.
What wine pairs best with seafood paella?
Crisp white wines like Albariño or Verdejo are excellent choices, while light reds like Garnacha can also complement the dish well.
How do you store leftover paella?
Leftover paella should be cooled and stored in an airtight container in the refrigerator, where it can last for 2-3 days.
Is paella gluten-free?
Yes, paella can be made gluten-free by ensuring all ingredients, including the broth, are gluten-free and avoiding cross-contamination.
How can I make paella for a large crowd?
To make paella for a large crowd, scale up ingredients proportionally, use multiple pans if necessary, and prepare a timeline for efficient cooking and serving.
Join Our Community on Facebook!
The post Top Seafood Paella Recipes for Crowds: Perfect for Any Gathering appeared first on https://cookinggods.com
The Article Seafood Paella Recipes: Perfect Dishes for Any Gathering Was Found On https://limitsofstrategy.com
-
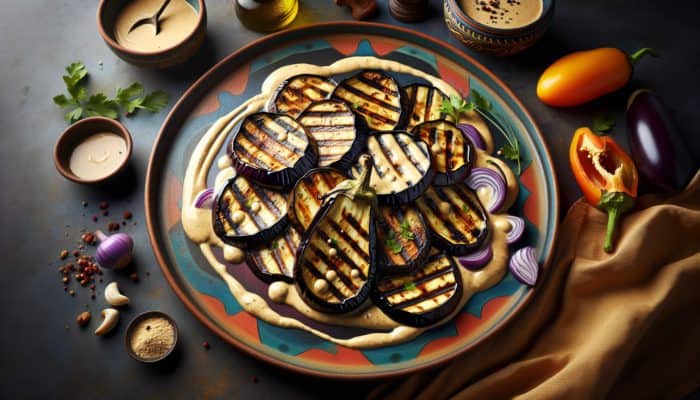
Grilled Eggplant with Tahini Sauce Delight
Discover the Delectable Taste of Grilled Eggplant Enhanced with Tahini Sauce
Why Grilled Eggplant with Tahini Sauce Should Be on Your Culinary Must-Try List
Grilled eggplant with tahini sauce is not just a dish; it’s an explosion of flavors that showcases beautifully grilled eggplant slices, generously drizzled with a rich and creamy tahini sauce. This dish captivates the palate with its unique combination of rich, smoky flavors paired with the nutty essence of tahini, making it an enticing vegetarian option. The grilling process caramelizes the natural sugars in the eggplant, adding a delightful char, while the tahini sauce introduces a smooth and luxurious texture that elevates the experience. This dish has become a beloved staple in numerous American kitchens and restaurants, delighting taste buds and providing a delicious experience for everyone.
Versatile and visually appealing, this dish can be enjoyed in various ways: as an appetizer, a side dish, or even as a satisfying main course, catering to diverse dietary preferences. Packed with essential nutrients and dietary fiber, it embodies the essence of healthy eating, making it a popular choice among health-conscious diners who seek fulfilling and wholesome meal options that are both flavorful and nutritious.
Exploring the Cultural Richness Behind Grilled Eggplant with Tahini Sauce
The delightful grilled eggplant with tahini sauce has its roots in the rich traditions of Middle Eastern cuisine, where it takes on various delightful forms. This remarkable pairing of grilled eggplant and tahini not only reflects the culinary heritage of the region but also emphasizes the importance of fresh ingredients and bold flavors. As Middle Eastern cuisine gained popularity in American culinary culture, this dish adapted to local tastes while remaining true to its authentic origins.
Over time, grilled eggplant with tahini sauce has evolved, embracing diverse cooking styles and cultural influences throughout the United States. Today, it is celebrated not only for its historical significance but also for its versatility, making it a preferred choice for those seeking nutritious vegetarian options. The harmonious blend of smoky grilled eggplant with rich tahini sauce continues to captivate diners, securing its spot on menus ranging from casual eateries to upscale dining establishments.
Exploring the Popularity of Grilled Eggplant with Tahini Sauce in American Dining
Grilled eggplant with tahini sauce has firmly established itself as a standout dish in the vibrant American food landscape, especially within Mediterranean and health-focused dining establishments. Its widespread appeal stems from its versatility, making it suitable for a variety of dining occasions—whether as a colorful component of a mezze platter or a hearty standalone dish in a grain bowl. Many health-conscious restaurants have embraced this dish due to its impressive nutritional profile, making it a go-to option for diners searching for light yet satisfying meals.
Additionally, this dish has gained popularity in home kitchens as culinary enthusiasts explore different grilling techniques and flavor adaptations. In recent years, social media influencers and food bloggers have showcased their unique takes on this dish, further amplifying its allure. Consequently, grilled eggplant with tahini sauce has become synonymous with healthy eating trends, attracting vegetarians, vegans, and anyone eager to incorporate flavorful and nutritious choices into their diets.
Your Ultimate Guide to Crafting Grilled Eggplant with Tahini Sauce

Choosing the Perfect Eggplant for Your Grilled Creation
Selecting the right eggplant is essential for achieving optimal flavor and texture in your grilled eggplant with tahini sauce. When shopping for eggplants, look for those that are firm and shiny with smooth skin, as these qualities indicate freshness and quality. Smaller eggplants are often preferred since they tend to be less bitter and contain fewer seeds, yielding a more enjoyable culinary experience.
Here are key characteristics to consider when selecting the perfect eggplant:
- Firmness: Aim for eggplants that feel heavy for their size and yield slightly when pressed to ensure ripeness.
- Color: Seek out those with vibrant, glossy skin; avoid dull or wrinkled skin, as this often signals overripeness.
- Shape: Smaller, rounder varieties typically possess a sweeter flavor and superior texture, enhancing the dish’s overall appeal.
- Seeds: Fewer seeds generally lead to a less bitter taste, contributing to a more delightful dining experience.
Once you’ve confidently selected the right eggplant, you can proceed to the grilling process, ensuring that each slice cooks evenly and retains its integrity during preparation.
Mastering Grilling Techniques for Perfectly Cooked Eggplant
Grilling eggplant can be achieved using various methods, including a barbecue grill, grill pan, or oven broiler. Regardless of the method you choose, it’s crucial to slice the eggplant evenly, ideally around ¾ inch thick, to ensure consistent cooking and create appealing grill marks that enhance the dish’s visual presentation.
Before grilling, salting the eggplant slices is a beneficial step. This vital process draws out excess moisture and mitigates bitterness, resulting in a more concentrated flavor profile. After salting, rinse the slices and pat them dry, then apply a light coating of olive oil to promote better browning and prevent sticking to the grill.
To grill effectively, preheat your grill to medium-high heat. Arrange the eggplant slices in a single layer, ensuring not to overcrowd them, as this can lead to steaming rather than grilling. Cook for approximately 4-5 minutes on each side, or until the eggplant is tender and showcases beautiful grill marks. If using a grill pan or broiler, adjust cooking times as necessary. The goal is to achieve a smoky flavor while ensuring the eggplant retains its structure, as overcooking can lead to mushiness and an unappetizing texture.
Crafting the Ideal Tahini Sauce to Complement Your Eggplant
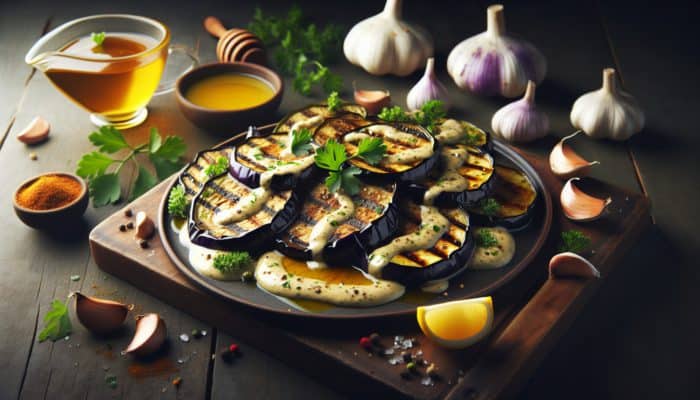
Creating an exceptional tahini sauce is a straightforward yet rewarding task that can elevate your grilled eggplant with tahini sauce to new culinary heights. A well-crafted tahini sauce should be creamy, flavorful, and versatile enough to enhance the smoky notes of the grilled eggplant. Begin with high-quality tahini made from ground sesame seeds, as its flavor and creaminess can vary significantly. This foundational ingredient will set the tone for your sauce.
To prepare a basic tahini sauce, mix tahini with fresh lemon juice, minced garlic, and water until you achieve your desired consistency. A good guideline is to use about 1 part tahini to 1 part water, adjusting as necessary. Garlic adds a delightful sharpness, while lemon juice contributes brightness that balances the richness of tahini. Season with salt and pepper to taste, and feel free to customize your sauce with herbs, spices, or even a hint of honey for a touch of sweetness, if desired.
Blend the ingredients until smooth. If the sauce is too thick, gradually add water, one tablespoon at a time, until the desired consistency is reached. The final product should be creamy yet pourable, making it ideal for drizzling over grilled eggplant. Experimenting with proportions will help you discover the perfect balance that suits your palate.
Expert Strategies to Elevate the Taste of Grilled Eggplant with Tahini Sauce
Chef’s Techniques for Enhancing Flavor
Enhancing the flavor of your grilled eggplant with tahini sauce is an art that many chefs have perfected. One highly effective technique involves marinating the eggplant slices before grilling, which not only infuses additional flavors into the eggplant but also helps tenderize it. A simple marinade can consist of olive oil, minced garlic, fresh herbs, and a selection of spices.
For example, consider a marinade featuring oregano, cumin, and a pinch of red pepper flakes to impart a Mediterranean-inspired kick. Alternatively, a fantastic combination could include fresh basil, lemon zest, and a splash of balsamic vinegar for an Italian twist. Allow the eggplant to marinate for at least 30 minutes before grilling for optimal flavor absorption. The acid in the marinade aids in softening the eggplant’s fibers, resulting in a juicier and more flavorful final dish.
Many chefs incorporate regional spices to enrich their grilled eggplant dishes, offering diners unique flavor profiles that set them apart. Whether hosting a summer barbecue or an intimate dinner gathering, these flavor enhancements will undoubtedly leave a lasting impression on your guests.
Essential Ingredients for Crafting a Remarkable Tahini Sauce
A great tahini sauce achieves a harmonious balance between the nutty richness of tahini, the bright acidity of lemon juice, and the pungency of garlic. The ideal consistency should be smooth and pourable, allowing it to drizzle effortlessly over your grilled eggplant. The flavor profile should complement the dish without overpowering it, striking a perfect balance.
To create this balance, start with a modest amount of garlic, approximately one clove per half cup of tahini. As you blend the ingredients, taste frequently and adjust the levels of garlic and lemon to suit your preferences. This method enables you to craft a sauce that perfectly pairs with the grilled eggplant, enhancing its natural flavors. If desired, add a pinch of salt or a sprinkle of cayenne for an extra flavor boost.
Additionally, consider experimenting with different tahini brands, as they can vary significantly in taste. Trying out various types can lead to delightful discoveries and allow you to personalize your tahini sauce according to your liking.
Presenting Grilled Eggplant with Tahini Sauce for Maximum Appeal
When served thoughtfully, grilled eggplant with tahini sauce can truly stand out as a highlight at any meal. A great approach is to present the grilled eggplant on a large platter, generously drizzled with tahini sauce and garnished with fresh herbs like parsley or cilantro. This presentation not only enhances the visual appeal but also elevates the dish’s flavors.
For plating and presentation, consider these actionable steps:
- Layer the grilled eggplant slices slightly overlapping on the plate for a more dynamic and inviting look.
- Artfully drizzle tahini sauce over the top, allowing it to cascade down the sides attractively.
- Garnish with a sprinkle of sesame seeds for added texture and visual interest.
- Serve alongside warm pita bread or a fresh salad to create a more rounded meal experience.
Incorporating contrasting colors and textures in your presentation can significantly enhance the overall dining experience. For instance, pairing the dark, smoky eggplant with vibrant green herbs and creamy tahini creates a feast for the eyes, enticing your guests to dig in and enjoy.
The Health Benefits of Consuming Grilled Eggplant with Tahini Sauce
Grilled eggplant with tahini sauce is not only a delicious dish but also offers numerous health benefits. Eggplant is low in calories yet high in dietary fiber, making it an excellent choice for individuals managing their weight. It is rich in a variety of vitamins and minerals, including vitamin C, vitamin K, and potassium, all of which play essential roles in maintaining overall health.
Tahini, derived from ground sesame seeds, contributes healthy fats, protein, and essential nutrients like calcium and iron. These components support heart health and promote bone strength. The combination of grilled eggplant and tahini sauce results in a wholesome dish that aligns well with various dietary plans, including vegan and vegetarian lifestyles.
Furthermore, consuming grilled eggplant can provide antioxidant benefits, particularly due to the presence of nasunin, a potent antioxidant found in the skin of the eggplant. This antioxidant helps protect brain cell membranes, potentially lowering the risk of chronic diseases. Thus, this dish not only delights the taste buds but also nourishes the body, making it a guilt-free addition to any meal.
Exploring Exciting Variations of Grilled Eggplant with Tahini Sauce
Delving into various cultural adaptations of grilled eggplant with tahini sauce can lead to exciting culinary discoveries. For example, in Middle Eastern cuisine, this dish may be served alongside tabbouleh or hummus, forming a delightful mezze spread. In Mediterranean regions, variations may include additional toppings such as roasted red peppers or olives, infusing their unique flavors into the dish.
In fusion cooking, consider incorporating unexpected ingredients, such as jalapeños for a spicy kick, or utilizing flavored tahini, like roasted garlic or sun-dried tomato tahini, to add a modern twist to the traditional recipe. Each variation not only diversifies the dish but also provides ample opportunities for creativity in the kitchen.
These adaptations enhance the dish’s appeal to a broader audience and inspire home cooks to experiment with their flavor profiles. The versatility of grilled eggplant with tahini sauce allows each cook to personalize it to reflect their tastes and preferences, creating a unique culinary experience.
Understanding the Nutritional Profile of Grilled Eggplant with Tahini Sauce
The Nutritional Power of Eggplant
Eggplant, the star ingredient in grilled eggplant with tahini sauce, is a nutritional powerhouse. It is low in calories and high in fiber, making it an excellent choice for those aiming to manage their weight. A cup of cooked eggplant contains only around 35 calories while providing approximately 9 grams of fiber, which aids in digestion and promotes a feeling of fullness.
Beyond its fiber content, eggplant is packed with vital vitamins and minerals. It contains vitamin C, which is crucial for a healthy immune system, and potassium, essential for maintaining healthy blood pressure levels. The antioxidants found in eggplant, such as nasunin and chlorogenic acid, support overall health by reducing oxidative stress and inflammation in the body.
Incorporating eggplant into your diet, particularly through a dish like grilled eggplant with tahini sauce, can significantly enhance your nutritional intake while providing a delightful culinary experience.
Why Tahini Is a Nutritional Marvel
The benefits of tahini, another essential component of grilled eggplant with tahini sauce, are extensive. Tahini serves as a rich source of healthy fats, particularly monounsaturated fats, which are known to bolster heart health by lowering bad cholesterol levels. Additionally, tahini is abundant in protein, making it an excellent addition to both vegetarian and vegan diets.
Furthermore, tahini contains essential minerals like calcium, magnesium, and iron, which contribute to bone strength and overall health. The presence of vitamin B6 and other B vitamins supports energy metabolism and cognitive function. By incorporating tahini into your meals, you not only enhance flavor but also provide a wealth of nutrients that support a balanced diet.
When combined with the nutritional benefits of grilled eggplant, tahini creates a dish that is not only satisfying but also healthful, making it a smart choice for any meal.
Integrating Grilled Eggplant with Tahini Sauce into a Healthy Lifestyle
Grilled eggplant with tahini sauce is a nutritious dish that seamlessly integrates into various dietary plans. Its vegan and vegetarian-friendly ingredients make it accessible to a wide array of eaters, while its low-calorie, high-fiber profile supports weight management and overall well-being. This dish is perfect for those seeking nutritious options that don’t compromise on flavor.
The combination of grilled eggplant and tahini sauce ensures a balance of macronutrients, featuring healthy fats from tahini and dietary fiber from eggplant. These elements work synergistically to promote satiety, helping you feel full for longer and curbing unhealthy snacking. Furthermore, the antioxidants and vitamins present in both ingredients support immune health and reduce inflammation, contributing to long-term health benefits.
Including grilled eggplant with tahini sauce in your meals not only enhances the flavor profile but also delivers significant nutritional benefits, making it a wise choice for those looking to maintain a healthy diet.
The Antioxidant Power of Eggplant
Eggplant is recognized for its impressive antioxidant properties, primarily attributed to the presence of nasunin, a potent antioxidant found in the skin of the vegetable. Nasunin is known to protect cell membranes from damage caused by free radicals, thereby playing a role in reducing the risk of chronic diseases such as cancer and heart disease. The vibrant purple skin of eggplant signifies a wealth of benefits that await those who include this vegetable in their diets.
In addition to nasunin, eggplant contains other beneficial antioxidants, including chlorogenic acid, which has been shown to exhibit anti-inflammatory and antimicrobial properties. These antioxidants work together to combat oxidative stress within the body, contributing to overall health and longevity.
By incorporating grilled eggplant with tahini sauce into your diet, you not only please your palate but also take proactive steps towards maintaining optimal health, particularly in reducing the risk of chronic diseases.
Enhancing Flavor and Nutrition with Fresh Herbs
Integrating fresh herbs into grilled eggplant with tahini sauce can significantly enhance both the flavor and nutritional profile of the dish. Herbs such as parsley, mint, and cilantro not only provide a burst of freshness but also contribute additional vitamins, minerals, and antioxidants. The vibrant colors of these herbs can enhance the presentation, making the dish even more appealing.
For instance, a sprinkle of chopped parsley over your grilled eggplant before serving enhances the dish’s flavor with its mild, peppery notes, while simultaneously boosting its vitamin K content. Similarly, fresh mint can offer a refreshing contrast to the rich, smoky flavors of the eggplant and the creamy tahini, creating delightful complexity in each bite.
Moreover, herbs like dill and basil can introduce unique flavor dimensions, allowing you to customize the dish to your personal preferences. These fresh additions not only elevate the overall taste experience but also underscore the dish’s nutritious benefits, making grilled eggplant with tahini sauce a well-rounded option for any meal.
Optimal Pairings to Enjoy Grilled Eggplant with Tahini Sauce
Complementary Dishes That Pair Perfectly with Grilled Eggplant
Grilled eggplant with tahini sauce is a versatile dish that pairs wonderfully with a variety of foods, enriching the overall dining experience. Its smoky flavor and creamy texture make it a delightful addition to numerous meal components, allowing for endless culinary creativity.
Consider these complementary dishes when planning your meal:
- Quinoa or couscous salads for an added layer of texture and nutrients.
- Fresh vegetable salads to introduce a crunchy, bright contrast.
- Grilled meats, such as chicken or lamb, can be incorporated to create a well-rounded, hearty meal.
- Stuffed grape leaves or falafel as part of a Mediterranean-inspired spread.
By thoughtfully combining grilled eggplant with tahini sauce with these dishes, you can create a balanced meal that appeals to diverse palates. Incorporating various textures and flavors will ensure your dining experience is both satisfying and memorable.
Refreshing Drink Pairings to Complement Your Meal
A variety of light and refreshing beverages can beautifully complement the rich flavors of grilled eggplant with tahini sauce. The right drink can enhance the overall meal and cleanse the palate between bites, enriching your dining experience.
Some excellent beverage pairings include:
- Lemon water, adding a citrus note that helps cut through the richness of tahini.
- Iced tea, particularly herbal or mint-infused varieties, providing a cooling contrast.
- Crisp white wines, such as Sauvignon Blanc or Pinot Grigio, that enhance the dish’s flavors without overpowering them.
- Sparkling water with a slice of lemon or cucumber for a refreshing non-alcoholic option.
These beverage choices not only complement the flavors of the dish but also contribute to a well-rounded and enjoyable meal. Experimenting with different pairings can lead to delightful surprises and help you discover the perfect match for your taste preferences.
Incorporating Grilled Eggplant into Your Daily Meals
Incorporating grilled eggplant with tahini sauce into your meals offers a seamless way to add flavor, nutrition, and excitement to your dining experience. Whether you’re preparing a casual lunch or an elaborate dinner, this dish can serve as a versatile component that enhances various culinary presentations.
Consider using grilled eggplant in sandwiches or wraps, layering it with fresh vegetables and drizzling with tahini sauce for a satisfying meal. It can also serve as a topping for grain bowls, paired with quinoa, brown rice, or farro, along with roasted vegetables and leafy greens. For a more casual approach, serve it as part of a mezze platter, accompanied by hummus, olives, and pita bread.
By thinking creatively about how to incorporate grilled eggplant with tahini sauce into your meals, you can delight your family and guests with diverse culinary experiences while ensuring they enjoy the health benefits of this delicious dish.
The Nutritional Benefits of Grilled Eggplant with Tahini Sauce
Grilled eggplant with tahini sauce presents an impressive array of nutritional benefits, making it a wholesome addition to any meal. The combination of low-calorie grilled eggplant and nutrient-dense tahini results in a dish that is high in fiber, vitamins, and healthy fats.
Eggplant offers essential vitamins such as vitamin C and K, along with a significant amount of fiber that promotes digestive health and aids in maintaining a healthy weight. Meanwhile, tahini enriches the dish with healthy fats, protein, and important minerals like calcium and iron, contributing to overall bone health and energy metabolism.
By enjoying grilled eggplant with tahini sauce, you’re not just savoring an incredibly flavorful dish; you’re also nourishing your body with essential nutrients, making it a smart and health-conscious choice for any meal.
Innovative Variations of Grilled Eggplant with Tahini Sauce
Transforming Your Dish with Different Spices
Spices can dramatically transform grilled eggplant with tahini sauce into a new culinary adventure. Experimenting with various spices allows you to tailor the dish to your preferences while introducing unique flavor dimensions that can surprise and delight your palate.
Common spices to consider include:
- Cumin adds a warm, earthy note that pairs beautifully with the nutty tahini.
- Paprika, both sweet and smoked varieties, for depth and subtle heat.
- Za’atar, a Middle Eastern spice blend that brings herbal and tangy notes.
- Curry powder for an unexpected twist that adds warmth and complexity.
By incorporating these spices into your marinade or tahini sauce, you can create a dish that resonates with your culinary heritage or introduces exciting new flavors. Each spice adds its unique character, inviting you to create a personalized version of grilled eggplant that reflects your individual taste.
Alternative Sauces That Can Elevate the Dish
While tahini sauce is a classic accompaniment to grilled eggplant, exploring other sauce options can elevate the dish and provide new flavor experiences. Different sauces can introduce contrasting flavors that harmoniously complement the grilled eggplant while maintaining the dish’s essence.
Consider these alternatives:
- Yogurt-based sauces, such as tzatziki, which add creaminess and a refreshing tang.
- Herb dressings, made from fresh herbs, olive oil, and vinegar, provide a bright flavor boost.
- Spicy harissa, which introduces heat and complexity for those who enjoy a kick.
- Chimichurri, a vibrant green sauce made with parsley, garlic, and vinegar, adds an herby twist.
These sauces not only provide a platform for creative expression but also invite experimentation in the kitchen, allowing you to find the perfect match for your palate and mood.
Creative Presentation Ideas for Grilled Eggplant with Tahini Sauce
The presentation of grilled eggplant with tahini sauce plays a crucial role in enhancing the overall dining experience. A visually appealing dish can elevate the meal, encouraging diners to engage with the food. Getting creative with how you present this dish can make it even more enticing.
Consider these imaginative presentation ideas to inspire your plating:
- Layer the grilled eggplant with other ingredients, such as roasted red peppers or fresh greens, to create height on the plate.
- Stacking slices of eggplant with tahini drizzled in between for a multi-layered effect.
- Using a ring mold to create a stunning tower of grilled eggplant, garnished with herbs and sauce.
- Serving in individual portions on small boards or plates to create a mezze-style dining experience.
These creative approaches not only enhance the visual appeal but also encourage diners to appreciate the dish’s flavors and textures, ultimately heightening their culinary experience.
Where to Savor Grilled Eggplant with Tahini Sauce Across America
Top Eateries Featuring This Flavor-Packed Dish
Numerous restaurants across the United States proudly feature grilled eggplant with tahini sauce on their menus, catering to those in search of delicious vegetarian options. From upscale Mediterranean establishments to casual cafes, this dish can be found in various dining settings.
Some notable restaurants renowned for their exceptional versions of this dish include:
- Shaya in New Orleans, famous for its modern take on Middle Eastern cuisine.
- The Mediterranean Grill in San Francisco, offering authentic flavors and fresh ingredients.
- Aladdin’s Eatery, with multiple locations, known for its focus on healthy Mediterranean offerings.
- Balaboosta in New York City, where you can enjoy a delightful fusion of Mediterranean and Middle Eastern flavors.
These establishments not only serve grilled eggplant with tahini sauce but also provide delightful pairings and a welcoming atmosphere, making them ideal destinations for food enthusiasts and casual diners alike.
How to Source Fresh Ingredients at Local Markets
Finding fresh ingredients for grilled eggplant with tahini sauce at local markets can help you recreate this dish in your own kitchen. Farmers’ markets and specialty food stores often offer a variety of quality produce, including eggplants and tahini.
When visiting local markets, look for:
- Fresh, firm eggplants, ideally in season during summer and early fall.
- High-quality tahini, often found in health food sections or Middle Eastern grocery stores.
- Fresh herbs such as parsley, mint, and cilantro to enhance your dish.
- Organic olive oil and spices to ensure the best flavors in your marinades and sauces.
By sourcing your ingredients from local suppliers, you not only support your community but also ensure that your grilled eggplant with tahini sauce is made with the freshest and most flavorful components.
Festivals and Events Celebrating Grilled Eggplant with Tahini Sauce
Throughout the United States, food festivals and cultural events often highlight dishes like grilled eggplant with tahini sauce, allowing you to experience different variations while celebrating diverse culinary traditions. These events provide opportunities to learn from renowned chefs, sample various dishes, and connect with fellow food enthusiasts.
Look for events such as:
- The Mediterranean Festival, showcasing the rich culinary heritage of Mediterranean countries.
- Local food truck festivals that frequently feature pop-up Mediterranean and Middle Eastern vendors.
- Farmers’ markets that host cooking demonstrations and tastings, introducing visitors to dishes like grilled eggplant.
- Cultural fairs that celebrate Middle Eastern heritage, complete with food, music, and art.
Attending these events not only offers a chance to savor grilled eggplant with tahini sauce in various forms but also fosters a greater appreciation for the culinary arts and the rich tapestry of flavors found in this beloved dish.
Exploring Regional Variations of Grilled Eggplant with Tahini Sauce
Exploring regional variations of grilled eggplant with tahini sauce across the United States reveals how local tastes and ingredients influence this beloved dish. Different regions often put their unique spin on the preparation and presentation of grilled eggplant, reflecting the diverse culinary landscape of the country.
For instance, in the Southwest, grilled eggplant may be paired with southwestern spices and served alongside smoky chipotle tahini, offering a unique flavor profile. In contrast, coastal areas like California might emphasize fresh herbs and citrus, leading to a lighter, brighter version of the dish that highlights the freshness of local produce.
In the Northeast, where Mediterranean cuisine has a strong presence, you might find grilled eggplant served with various dipping sauces, showcasing the fusion of flavors that characterize this region’s culinary scene. By exploring these regional differences, you can appreciate the adaptability of grilled eggplant with tahini sauce and its ability to resonate with diverse palates across the United States.
Frequently Asked Questions About Grilled Eggplant with Tahini Sauce
What Are the Health Benefits of Incorporating Grilled Eggplant into My Diet?
Eggplant is low in calories, high in fiber, and rich in vitamins like C and K. It contains antioxidants that may lower the risk of chronic diseases while promoting digestive health.
How Do I Choose the Best Tahini for My Sauce?
Opt for high-quality tahini made from pure sesame seeds, ideally with a smooth texture and minimal additives. Taste it before using to ensure it complements your dish.
Can I Use Frozen Eggplant for Grilling?
While fresh eggplant is recommended for grilling, frozen eggplant can be used as a substitute in a pinch. However, it may have a different texture once cooked.
What Other Dishes Can I Use Tahini Sauce In?
Tahini sauce is versatile and can be used in salads, drizzled over grains, as a dip for veggies, or blended into smoothies for added creaminess and nutrition.
Is Grilled Eggplant Suitable for Meal Prep?
Yes! Grilled eggplant can be prepared ahead of time and stored in the refrigerator for several days. Reheat it before serving with tahini sauce for a quick meal.
How Long Should I Marinate Eggplant Before Grilling?
For optimal flavor, marinate eggplant slices for at least 30 minutes. This allows the flavors to penetrate the eggplant, resulting in a more delicious outcome.
What Is the Best Way to Store Leftover Grilled Eggplant?
Store leftover grilled eggplant in an airtight container in the refrigerator for up to 3-4 days. Reheat gently before serving.
Can I Make Tahini Sauce Ahead of Time?
Yes, tahini sauce can be prepared in advance and stored in the fridge for up to a week. It may thicken over time, so add a little water to reach your desired consistency when ready to use.
What Are Some Good Side Dishes to Serve with Grilled Eggplant?
Good side dishes include quinoa salad, tabbouleh, roasted vegetables, or a fresh green salad. These options complement the flavors of grilled eggplant beautifully.
How Can I Make Grilled Eggplant More Flavorful?
Enhance the flavor of grilled eggplant by marinating it with olive oil, herbs, spices, and citrus juice before grilling for a delicious kick.
Connect with us on Facebook!
The Article Grilled Eggplant with Tahini Sauce: A Flavorful Delight appeared first on https://pitmastersarsenal.com
The Article Grilled Eggplant: A Delicious Tahini Sauce Treat Was Found On https://limitsofstrategy.com
-

Herbal Teas: Best UK Choices for Families
Dive Into the Enchanting Realm of Herbal Teas Across the UK
Understanding Herbal Teas: Unique Attributes and Benefits
Best Herbal Teas for Families: Often dubbed as tisanes, herbal teas are delightful beverages created by infusing an array of herbs, spices, and various plant materials in hot water. Unlike traditional teas derived from the Camellia sinensis plant, herbal teas can be prepared from a wide spectrum of botanicals, presenting an extensive variety of flavors and potential health benefits. In the UK, the demand for herbal teas is on a remarkable rise, which can be attributed not only to their unique taste profiles but also to their promising wellness advantages. Families across the nation increasingly opt for these naturally caffeine-free alternatives, relishing them as a comforting beverage suitable for any time of day.
The cultural significance of herbal teas in the UK is profound and diverse. These infusions have been treasured for centuries, providing numerous benefits, including the soothing effects of chamomile and the invigorating qualities of peppermint. The ritual of preparing and savoring herbal tea can be a joyful experience, strengthening family bonds and promoting mindfulness. As health and wellness become ever more crucial, many households actively integrate herbal teas into their daily lives, acknowledging the calming effects and potential health benefits these infusions can offer.
Uncover the Most Cherished Herbal Teas in the UK
The UK boasts a vibrant selection of herbal teas, catering to a diverse range of tastes and preferences. Among the most cherished varieties are chamomile, recognized for its calming properties; peppermint, celebrated for its refreshing flavor and digestive advantages; and ginger, often praised for its warming effects and immune support. These favored selections reflect the eclectic palates of UK families, ensuring that there is a brew for everyone to savor.
Another noteworthy contender is rooibos, a caffeine-free herbal tea from South Africa that has gained traction in the UK for its rich, sweet taste and impressive antioxidant properties. Families are increasingly attracted to herbal teas that not only satisfy their taste preferences but also contribute positively to their health. For instance, lavender tea is adored for its calming effects, making it an ideal choice for unwinding in the evening. With such an extensive variety available, herbal teas provide families with a wonderful opportunity to embark on a flavorful exploration and uncover their favorite blends.
Why Herbal Teas Stand Out as Ideal Family Beverages?
Herbal teas offer a natural, caffeine-free option that is particularly advantageous for families wishing to enjoy warm beverages together. In an era where sugary drinks dominate the market, herbal teas present an appealing and healthier alternative. They enable families to indulge in a soothing drink without the detrimental health implications associated with excessive sugar intake. The vast array of flavors guarantees that every family member can discover a tea that resonates with their unique tastes, promoting inclusivity during tea time.
Integrating herbal teas into family life can also help cultivate healthy habits from an early age. As children learn to value these natural infusions, they develop a preference for wholesome beverages, paving the way for healthier choices in the future. Furthermore, the process of brewing and enjoying herbal tea can evolve into a cherished family tradition, nurturing moments of connection and relaxation. Whether it’s a midday treat or a calming cup before bedtime, herbal teas can seamlessly become a staple in family routines, enhancing both health and togetherness.
Delve Into the Health Benefits of Herbal Teas for Families in the UK

What Health Benefits Do Herbal Teas Offer?
The health benefits associated with herbal teas are extensive, making them an excellent choice for promoting family wellness. Many herbal teas are rich in antioxidants, which play a critical role in combating oxidative stress within the body and potentially lowering the risk of chronic diseases. Additionally, specific herbal infusions can provide targeted health benefits, such as improved digestion, enhanced sleep quality, and reduced inflammation. For families, incorporating herbal teas into their diets can significantly enhance overall health and well-being.
For instance, ginger tea is renowned for its ability to alleviate digestive discomfort and nausea, while chamomile is often utilized to foster relaxation and promote restful sleep. The presence of these beneficial properties makes herbal teas an enjoyable way for families to enhance their nutritional intake. Furthermore, the calming effects of various herbal blends can contribute to improved mental health, as they often provide a soothing ritual that alleviates daily stress and anxiety. Ultimately, the wide array of health benefits offered by herbal teas makes them an outstanding addition to family lifestyles throughout the UK.
How Do Herbal Teas Strengthen Immune Health?
Certain herbal teas are particularly effective in bolstering immune health, rendering them invaluable during the cold and flu seasons in the UK. Teas like echinacea and elderberry are well-known for their immune-boosting properties. Echinacea has a long-standing reputation in traditional medicine for its effectiveness in preventing respiratory infections, while elderberry is celebrated for its high antioxidant content and vitamin richness that can enhance immune function. These herbal teas serve not only as comforting beverages but also as proactive measures to protect family health, especially during periods when illnesses are more prevalent.
Incorporating such herbal teas into a family’s routine can be as simple as brewing a pot on a chilly evening or enjoying a cup while sharing daily experiences. By doing so, families can transform their tea-drinking habit into an enjoyable and health-conscious practice. Regularly consuming these immune-supportive teas can help fortify the body’s natural defenses, ensuring families are better equipped to fend off seasonal ailments. The ritual of preparing and savoring these teas can also foster a sense of community and care among family members, reinforcing the importance of looking after each other’s health.
Can Herbal Teas Alleviate Stress and Anxiety?

Herbal teas, particularly chamomile and lavender, are celebrated for their calming properties, making them ideal for families seeking to reduce stress and anxiety levels. These herbal infusions promote relaxation, which is especially crucial in today’s fast-paced world, where families often juggle numerous responsibilities. Sipping herbal tea can serve as a simple yet effective method to unwind after a long day, providing family members with a moment of tranquility amid their hectic schedules.
Chamomile tea is especially renowned for its ability to soothe the mind and encourage restful sleep. Conversely, lavender tea is frequently used to alleviate anxiety and enhance emotional well-being. By incorporating these calming herbal teas into their daily routines, families can establish a soothing ritual that fosters mindfulness and relaxation. Sharing a cup of tea together also creates opportunities for open conversations about stressors and concerns, nurturing emotional support among family members. These peaceful moments over a warm beverage can significantly boost mental health and strengthen familial bonds.
Expert Recommendations on the Best Herbal Teas for Families
What Insights Do UK Experts Offer Regarding Herbal Teas?
Herbalists and nutritionists in the UK generally advocate for the inclusion of herbal teas in daily routines due to their numerous health benefits. Experts frequently emphasize the importance of selecting high-quality herbal teas and understanding the distinct properties that each herbal infusion can provide. Some key recommendations from professionals include:
- Select organic herbal teas to avoid harmful pesticides and chemicals.
- Experiment with a variety of herbs to discover blends that suit your family’s palate.
- Be mindful of specific health needs when selecting herbal teas.
- Integrate herbal teas into a balanced diet to maximize health benefits.
These insights reflect a growing awareness of the role herbal teas can play in enhancing overall wellness. Many experts also suggest that families can benefit from establishing herbal tea as part of their daily habits, whether it’s enjoying a cup in the morning to kickstart the day or unwinding in the evening with a calming blend. By being intentional with their tea selections, families can harness the full potential of these natural remedies, creating a comforting and health-promoting practice.
How Can Families Seamlessly Integrate Herbal Teas into Their Everyday Lives?
Incorporating herbal teas into daily family life can be both straightforward and enjoyable. Families can begin by replacing sugary beverages with herbal tea options, introducing children to a variety of new flavors and health benefits. Establishing a tea preparation ritual can make the process exciting and engaging for everyone involved. Here are some strategies for families to effortlessly weave herbal teas into their daily routines:
- Create a morning herbal tea ritual before school or work.
- Prepare iced herbal teas during warmer months for refreshing beverages.
- Host tea-tasting events to explore new favorite blends.
- Encourage children to participate in the tea preparation process as a fun activity.
These strategies not only increase the likelihood of consistent herbal tea consumption but also cultivate an atmosphere of excitement around healthy habits. By making herbal teas a regular part of family routines, households can enjoy the diverse flavors and health benefits these infusions offer while strengthening their connections with one another.
Which Herbal Teas Are Most Suitable for Children?
When considering herbal teas that are appropriate for children, gentle options such as chamomile and peppermint are highly recommended. Chamomile tea is particularly famous for its calming effects, making it an excellent choice for promoting relaxation before bedtime. Its mild nature makes it suitable for children, helping them unwind after an active day. Likewise, peppermint tea is generally well-tolerated by children and can assist with digestion, making it a delightful option for those experiencing tummy troubles.
Additionally, other herbal teas, such as lemon balm and rooibos, can be advantageous for children. Lemon balm has a pleasant flavor and is recognized for its calming properties. At the same time, rooibos is naturally caffeine-free and rich in antioxidants, making it a safe and healthy choice for kids. Parents should always ensure that teas are served at a safe temperature and may want to dilute stronger herbal teas with water or milk to enhance palatability. By introducing children to these gentle herbal infusions, families can encourage healthy drinking habits from an early age.
What Health Benefits Can Families Anticipate from Herbal Teas?
Herbal teas can offer numerous health advantages for families, making them a valuable addition to daily routines. Some notable benefits include:
- Enhanced digestion through teas like peppermint and ginger.
- Improved sleep quality with calming options like chamomile.
- Boosted immune function, especially during cold and flu seasons.
- Reduced stress and anxiety levels through relaxing blends such as lavender.
These benefits provide families with a holistic approach to health and wellness, allowing them to enjoy not only the delightful flavors but also the potential therapeutic effects of these herbal infusions. By prioritizing herbal teas in their dietary choices, families can come together to nurture their health, cultivate mindful habits, and create meaningful moments around the cherished tea-drinking ritual.
Leading Herbal Tea Brands in the UK
Which UK Brands Provide Premium Herbal Teas?
Several brands in the UK are highly regarded for their top-quality herbal teas, making them popular choices among families. Brands such as Pukka, Twinings, and Clipper have established themselves as frontrunners in the herbal tea market. Pukka is particularly known for its organic blends, often featuring unique combinations of herbs and spices designed to deliver various health benefits. Twinings, a longstanding tea brand, offers an extensive range of herbal infusions that cater to diverse tastes, while Clipper is recognized for its commitment to fair trade and eco-friendly practices.
These brands not only provide a variety of flavorful options but also prioritize quality and sustainability, making them appealing choices for health-conscious families. Choosing herbal teas from reputable brands ensures that families enjoy products that are both safe and beneficial for their health. The accessibility of these brands in supermarkets, health food stores, and online platforms makes it easier for families to explore and enjoy their offerings.
What Distinguishes These Brands from Others?
The standout features of these prominent UK herbal tea brands include their dedication to quality, sustainability, and innovation. For instance, Pukka is celebrated for its organic ingredients and thoughtfully crafted blends that emphasize both flavor and health benefits. The brand’s commitment to sustainable sourcing and ethical practices resonates with environmentally conscious consumers. Twinings, with its rich heritage, has cultivated an extensive selection of herbal teas that continually evolve to meet contemporary tastes and preferences.
Similarly, Clipper focuses on utilizing natural ingredients and maintaining high ethical standards, ensuring that their teas are not only delicious but also responsibly sourced. These brands often engage in community initiatives and support local farmers, further enhancing their appeal. The combination of quality ingredients, diverse flavor profiles, and ethical practices sets these brands apart in the competitive herbal tea market, making them trusted choices for families across the UK.
How Can Families Access These Popular Brands?
Families eager to access popular UK herbal tea brands will find them readily available through various retail channels. Most major supermarkets, including Tesco, Sainsbury’s, and Waitrose, stock a selection of herbal teas from brands like Pukka, Twinings, and Clipper. Health food stores and organic markets also carry these brands, providing families with additional options to explore.
Moreover, the convenience of online shopping allows families to easily purchase their favorite herbal teas directly from brand websites or platforms such as Amazon. This accessibility ensures that families can effortlessly find and enjoy their preferred herbal teas without any hassle. Additionally, many brands frequently offer special promotions, discounts, and subscription services, making it even more appealing for families to try new blends and stock up on their favorites.
Are There Any Current Promotions Available for These Brands?
Popular UK herbal tea brands often run promotions and discounts, particularly during festive seasons or significant events. Families can take advantage of sales, bundled offers, or promotional codes available through brand websites, social media channels, and email newsletters. These promotions present excellent opportunities for families to explore new flavors or stock up on their favorite blends at a reduced price.
Moreover, supermarkets frequently implement promotional campaigns that may include multi-buy offers or loyalty programs, allowing families to save money while purchasing their preferred herbal teas. By staying informed about current promotions and deals, families can enjoy the benefits of high-quality herbal teas without straining their budgets, making it easier to incorporate these healthful options into their daily lives.
What Are the Most Popular Herbal Tea Flavors Among Families?
Among the vast array of herbal tea flavors available, some particularly resonate with UK families. Chamomile leads the pack for its calming effects and delightful aroma, making it a favored choice for relaxation. Peppermint is another cherished option, known for its refreshing taste and digestive benefits. Families often appreciate the invigorating qualities of peppermint tea, especially after meals.
Other popular flavors include ginger, which provides a warming spice perfect for colder months, and lavender, admired for its delicate floral notes and calming properties. Rooibos, with its naturally sweet profile and rich color, is also gaining traction among families seeking caffeine-free options. These flavors not only cater to a variety of palates but also promote diverse health benefits, making them ideal for families looking for both enjoyment and wellness from their herbal tea selections.
Innovative Herbal Tea Recipes for Families in the UK
How Can Families Craft Their Own Herbal Teas?
Creating herbal teas at home can be a delightful and engaging activity for families. It allows them to experiment with various herbs and spices to concoct personalized blends that cater to their individual preferences. Preparing herbal teas together can foster creativity and encourage teamwork among family members. Here’s a list of simple herbal tea recipes for families to try:
- Chamomile and Honey Tea: Steep chamomile flowers in hot water and add a spoonful of honey for a touch of sweetness.
- Peppermint and Lemon Tea: Infuse fresh peppermint leaves with a slice of lemon for a refreshing drink.
- Ginger and Turmeric Tea: Boil fresh ginger and turmeric slices in water, strain, and enjoy with a splash of lemon juice.
- Apple and Cinnamon Tea: Simmer apple slices with a cinnamon stick for a warming and fragrant infusion.
These easy-to-make recipes not only introduce variety to family tea time but also encourage healthy drinking habits. By exploring different combinations and flavors, families can develop their herbal tea preferences while creating lasting memories around the tea-making process.
What Are the Most Beloved Herbal Tea Blends in the UK?
Popular herbal tea blends in the UK offer delightful flavors and health benefits that resonate with families. One well-loved blend is the combination of chamomile and lavender, known for its calming properties that promote relaxation and restful sleep. Similarly, peppermint and lemon create a refreshing blend that aids digestion and serves as a perfect afternoon pick-me-up.
Another popular choice is the fusion of ginger and turmeric, which provides a spicy kick and is celebrated for its anti-inflammatory properties. Families often enjoy this blend during colder months to help ward off colds and flu. Additionally, berry-infused herbal teas, such as hibiscus and raspberry, are gaining traction for their fruity flavors and antioxidant content. These blends not only taste delightful but also cater to various health needs, making them appealing options for families looking to enhance their wellness.
Can Herbal Teas Be Incorporated into Cooking?
Herbal teas can indeed be utilized in cooking to add flavor and depth to a variety of dishes. For instance, chamomile tea can be incorporated into baking recipes, such as cakes or muffins, imparting a subtle floral note. Additionally, peppermint tea can be infused into sauces and marinades, providing a refreshing twist to meats and vegetables.
Using herbal teas in cooking not only enhances flavor but also introduces the health benefits associated with these infusions into meals. For example, ginger tea can be added to stir-fries or soups to provide warmth and digestive support. Furthermore, families can experiment with using herbal teas as a base for soups or broths, enriching the overall profile of the dish. This creative approach to cooking with herbal teas allows families to explore new flavors while promoting healthy eating habits.
Research-Backed Benefits of Herbal Teas for Families
What Does Scientific Research Reveal About Herbal Teas?
Research has indicated that certain herbal teas possess significant health benefits, including improved digestion, enhanced sleep quality, and reduced inflammation. Studies have highlighted the positive effects of herbal ingredients such as chamomile, ginger, and peppermint, showcasing their potential to enhance overall well-being. These benefits align with traditional uses of herbal teas, providing families with a solid foundation for incorporating these beverages into their daily lives.
For instance, scholarly research has demonstrated that chamomile tea can help alleviate symptoms of insomnia and anxiety, making it an excellent choice for families facing stress. Similarly, ginger tea has been found to reduce nausea and improve digestive health, making it a practical option for family meals. The growing body of research supporting these health benefits reinforces the value of herbal teas as natural remedies, encouraging families to explore their options and discover what works best for their individual health needs.
How Do Herbal Teas Impact Digestive Health?
Herbal teas such as peppermint and ginger are particularly well-known for their positive effects on digestion. Peppermint tea has been shown to relax the muscles of the gastrointestinal tract, alleviating symptoms of indigestion and bloating. It can also aid in the overall digestive process, making it a popular choice for families after meals.
Conversely, ginger tea is often recommended for its ability to soothe nausea and promote healthy digestion. It can help stimulate saliva, bile, and gastric juices, which are essential in breaking down food more efficiently. For families, incorporating these herbal teas into their routines can lead to a more comfortable and enjoyable dining experience. Whether consumed before or after meals, these digestive herbal teas offer a natural approach to maintaining digestive health for the entire family.
Can Herbal Teas Enhance Sleep Quality?
Certain herbal teas, including chamomile and valerian root, have been shown to significantly improve sleep quality. Chamomile tea is particularly renowned for its calming properties, which can help individuals relax and prepare for restorative sleep. Research indicates that chamomile may enhance sleep quality by increasing glycine levels, a chemical that acts as a nerve relaxant.
Valerian root tea is another herbal option that has been utilized for centuries to treat insomnia and enhance sleep quality. Valerian is believed to promote relaxation and reduce the time it takes to fall asleep, making it a beneficial choice for families struggling with sleep issues. By incorporating these calming herbal teas into their evening routines, families can create a soothing environment that fosters better sleep hygiene and overall health.
Herbal Teas and Strengthening Family Connections in the UK
How Can Herbal Teas Foster Family Time?
Sharing herbal tea can transform a simple beverage into a meaningful bonding experience for families. The act of preparing and sharing tea nurtures connection, conversation, and relaxation. Families can establish tea time as a cherished ritual, allowing everyone to pause, unwind, and engage with one another without distractions.
Herbal tea also serves as an ideal backdrop for significant discussions. Whether sharing the highlights of the day or addressing family challenges, tea time provides a comfortable setting for open communication. This shared experience can greatly enhance emotional connections among family members, contributing to a supportive and nurturing home environment. By prioritizing moments of togetherness over a steaming cup of herbal tea, families can cultivate unity and understanding that strengthens their relationships.
What Engaging Family-Friendly Activities Around Herbal Teas Can Be Enjoyed?
Families can participate in a variety of enjoyable and educational activities centered around herbal teas. One exciting idea is to organize tea-tasting sessions, where family members sample different herbal teas and discuss their flavors and aromas. This activity can spark conversations about preferences and health benefits, fostering a deeper appreciation for herbal teas.
Another engaging activity could involve creating a family herb garden. Growing herbs such as mint, chamomile, and lemon balm allows families to cultivate their own tea ingredients, providing a hands-on learning experience about plant growth and food sustainability. Additionally, exploring tea blending can be a fun and interactive activity. Family members can experiment with different herbs and spices to create their custom blends, fostering creativity and collaboration within the family. Through these activities, families can deepen their connection to herbal teas while enjoying quality bonding time.
How Do UK Families Incorporate Herbal Teas into Daily Life?
Many families in the UK have seamlessly woven herbal teas into their daily routines, recognizing their health benefits and comforting attributes. For example, it’s common for families to enjoy a cup of chamomile or peppermint tea as part of their morning or evening rituals. This practice not only provides a moment of tranquility but also serves as a healthier alternative to caffeinated beverages or sugary drinks.
Additionally, families often maintain a selection of herbal teas on hand for various occasions. Whether it’s ginger tea to combat winter colds or a refreshing iced herbal tea during summer picnics, having a diverse range of options encourages experimentation and enjoyment. Tea parties or themed tea afternoons can also evolve into family traditions, enabling members to explore different flavors while relishing each other’s company. By incorporating herbal teas into their routines, families can foster a culture of health and wellness while creating lasting memories together.
Seasonal Considerations for Herbal Teas in the UK
Which Herbal Teas Are Best for Cold UK Winters?
During the colder months, warming herbal teas become essential for families seeking comfort and health. Blends featuring ginger and cinnamon are particularly favored in the UK, offering warmth as well as immune-boosting properties. Ginger tea, with its spicy kick, can help fend off colds and flu, while cinnamon tea is well-known for its ability to regulate blood sugar and enhance circulation.
Additionally, chamomile is a comforting choice during winter, promoting relaxation and aiding sleep, which can often be disrupted by seasonal stressors. Families can enjoy these warming herbal teas while snuggled together on chilly evenings, reinforcing the sense of togetherness during the winter months. By selecting herbal teas that provide both warmth and health benefits, families can enhance their seasonal wellness and share cozy moments.
How Can Herbal Teas Be Refreshing During Warm UK Summers?
In the summer, families often crave refreshing beverages to stay hydrated and cool. Herbal teas, such as peppermint and lemon balm, are excellent choices for warm weather, offering a soothing yet revitalizing experience. Iced herbal teas made from these ingredients can provide a delightful way to quench thirst while enjoying the benefits of herbal infusions.
Families can prepare iced herbal teas by steeping their favorite blends in hot water and then chilling them in the fridge. Adding slices of fresh fruit or herbs can enhance the flavor and make these drinks even more enticing. Moreover, herbal teas such as hibiscus, known for their tartness and vibrant color, can be a fun and colorful addition to summer gatherings. By incorporating these cooling herbal teas into their summer routines, families can stay refreshed and hydrated while relishing the warmth of the season together.
Are There Herbal Teas for Allergy Seasons in the UK?
During allergy seasons, certain herbal teas can help alleviate symptoms associated with hay fever and seasonal allergies. Herbal options such as nettle and elderflower are particularly effective in relieving allergy symptoms. Nettle tea is recognized for its anti-inflammatory properties and can help reduce histamine levels, while elderflower tea may assist in easing nasal congestion and promoting respiratory health.
These herbal teas can be especially beneficial for families during the spring months when allergens are at their peak. Consuming these teas regularly can help minimize the discomfort associated with allergies, making it easier for families to enjoy outdoor activities without the burden of allergy symptoms. By selecting herbal teas that offer seasonal relief, families can proactively manage their well-being while embracing the joys of the changing seasons.
Future Trends and Developments in Herbal Teas for UK Families
What Are the Anticipated Future Trends in Herbal Teas?
The future of herbal teas in the UK looks promising, with a growing interest in organic and sustainable options. As health-conscious consumers continue to seek natural remedies, the demand for high-quality herbal teas is likely to rise. Innovative blends that merge traditional herbs with contemporary flavors are expected to emerge, catering to a variety of tastes and health needs.
Moreover, there is a rising trend towards educating consumers about the health benefits of various herbal teas, empowering families to make informed choices regarding their tea consumption. This shift may lead to more personalized herbal tea options, allowing families to select blends that align with their unique health goals and preferences. As the herbal tea market continues to evolve, families can anticipate exciting developments that enhance both the enjoyment and health advantages of herbal tea consumption.
How Can Families Stay Updated on Herbal Teas?
Staying informed about herbal teas can be an enjoyable journey for families. Health and wellness blogs often provide valuable insights into the benefits of herbal tea, new blends, and recipes. Following tea brands on social media can also help families stay updated about promotions, product launches, and educational content.
Additionally, participating in local tea festivals or herbal workshops can deepen families’ knowledge and appreciation of herbal teas. These events often feature tastings, blending demonstrations, and expert talks, providing an immersive experience. Joining online tea enthusiast groups can offer families a supportive community to share experiences, tips, and recommendations. By actively seeking out information and engaging with the herbal tea community, families can remain informed and excited about their herbal tea journey.
What Role Do Herbal Teas Play in Promoting a Healthy Family Lifestyle?
Herbal teas play a vital role in advocating a healthy lifestyle for UK families. These beverages provide a natural and enjoyable avenue to enhance health and well-being, serving as a healthier alternative to sugary drinks and caffeinated beverages. The diverse array of flavors and health benefits associated with herbal teas encourages families to explore and discover their preferences while fostering healthier habits.
Incorporating herbal teas into daily routines helps families establish mindful drinking practices that prioritize wellness. The calming rituals surrounding tea preparation and consumption can create moments of connection and relaxation, enhancing family bonding. By making herbal teas a staple in their diets, families can embrace a lifestyle that values health, togetherness, and enjoyment.
How Can Families Successfully Integrate Herbal Teas into Everyday Life?
Integrating herbal teas into daily life is both simple and rewarding for families. One effective strategy is to replace sugary drinks with herbal tea options throughout the day. Offering a variety of herbal teas during family meals or snacks encourages healthier choices while providing a delightful beverage experience.
Additionally, families can establish regular tea times, creating dedicated moments for relaxation and connection. This can involve exploring different herbal flavors, sharing opinions on favorite blends, or discussing the health benefits of each infusion. Setting aside time for these rituals can help families build a stronger connection with one another and promote a culture of health and mindfulness.
Using herbal teas in cooking is another enjoyable way for families to incorporate these beverages into their daily lives. From baking to meal preparation, experimenting with herbal teas can enhance flavors and introduce health benefits into family meals. By embracing creative ways to enjoy herbal teas, families can cultivate lasting habits that promote well-being and togetherness.
What Benefits Do Herbal Teas Provide for Children?
Herbal teas can offer numerous benefits for children, making them a valuable addition to a child’s diet. Mild herbal teas such as chamomile and peppermint can aid digestion, promote relaxation, and support immune health. These advantages are particularly important during childhood, as establishing healthy habits is crucial for lifelong wellness.
Chamomile tea can assist in calming restless minds and promoting better sleep, while peppermint tea can help alleviate digestive discomfort, making it a suitable choice for children after meals. Furthermore, introducing herbal teas to children can instill an appreciation for natural flavors and healthful beverages, steering them away from sugary drinks. By incorporating herbal teas into their routines, families can foster healthy habits for their children, promoting overall well-being from an early age.
Frequently Asked Questions
What Are the Most Popular Herbal Teas in the UK?
The most popular herbal teas in the UK include chamomile, peppermint, ginger, and lavender. Each offers unique flavors and health benefits, making them beloved choices among families.
Can Children Safely Drink Herbal Teas?
Yes, children can safely enjoy mild herbal teas such as chamomile and peppermint, which can promote relaxation and aid digestion.
How Can Families Make Herbal Tea at Home?
Families can make herbal tea by steeping dried herbs or tea bags in hot water, allowing them to infuse for several minutes, and then enjoying their brewed beverage.
What Health Benefits Do Herbal Teas Provide?
Herbal teas can offer various health benefits, including improved digestion, better sleep, immune support, and reduced stress, depending on the specific herbs used.
Are Herbal Teas Caffeine-Free?
Yes, herbal teas are naturally caffeine-free, making them an excellent option for families seeking soothing beverages at any time of day.
Can Herbal Teas Be Utilized in Cooking?
Absolutely! Herbal teas can enhance the flavors of various dishes and can be used in baking, marinades, and sauces for added depth and health benefits.
How Do Herbal Teas Support Immune Health?
Certain herbal teas, like echinacea and elderberry, are known to boost the immune system, helping families ward off illnesses during cold and flu seasons.
What Are the Best Herbal Teas for Relaxation?
Chamomile and lavender teas are particularly effective for relaxation, known for their calming properties that help reduce stress and promote sleep.
How Can Families Incorporate Herbal Teas into Their Daily Routines?
Families can incorporate herbal teas by replacing sugary drinks, establishing daily tea times, and using them creatively in cooking and baking.
What Are the Benefits of Herbal Teas for Children?
Herbal teas can aid digestion, promote relaxation, and support immune health in children, making them a healthy alternative to sugary drinks.
Connect with us on Facebook!
The Article: Best Herbal Teas for Families: UK’s Top Picks appeared first on https://mcrtherapies.co.uk
The Article Herbal Teas for Families: Top UK Selections Was Found On https://limitsofstrategy.com
-

BBQ Rub: Easy Steps to Make Your Own at Home
Gather Essential Ingredients for Crafting Your Perfect BBQ Rub
Essential Spices for Creating a Flavorful BBQ Rub
The foundation of creating an irresistible BBQ rub lies in a carefully selected array of key spices. As you embark on the exciting adventure of crafting your own unique BBQ rub at home, focus on the essential trio of paprika, salt, and pepper. Paprika is instrumental in imparting a rich, smoky flavor to your dish, while salt is vital for enhancing the overall taste of the meat. Concurrently, pepper adds a gentle warmth that beautifully complements the smokiness of the paprika. Feel free to tweak the proportions of these spices to suit your individual taste preferences and the specific type of meat you are grilling. If you crave a spicier flavor, consider boosting the amount of pepper or experimenting with different types, such as cayenne pepper, to achieve that perfect balance that tantalizes your palate.
Enhance Your BBQ Rub with Flavorful Optional Ingredients
To elevate your BBQ rub from plain to extraordinary, consider incorporating optional ingredients that can significantly enrich its flavor profile. Components such as garlic powder, onion powder, and brown sugar can add layers of complexity and richness to your rub. Garlic powder brings a savory depth to the mix, while onion powder contributes a subtle sweetness and aromatic charm. Furthermore, brown sugar introduces a delightful caramelization effect during grilling, creating a beautifully crusted exterior on your meat. Reflect on how these flavors harmonize with your chosen protein; for example, brown sugar pairs exceptionally well with pork, providing a sweet contrast to its savory undertones. Don’t shy away from experimenting with various combinations until you discover the perfect blend that delights your taste buds.
Essential Measuring Tools for Accurate BBQ Rub Preparation
Accurate measurements are crucial when preparing the perfect BBQ rub, as they ensure a well-balanced combination of flavors. Utilizing teaspoons and tablespoons enables you to measure your spices with precision. A common starting point may involve a foundational ratio, such as two tablespoons of paprika, one tablespoon of salt, and one teaspoon of pepper. Remember, it’s always simpler to add more spices than to extract them, so start with smaller quantities and gradually enhance your rub. Keep your measuring tools readily accessible for consistent results in all your future batches of flavorful rub.
Master the Art of Crafting a Basic BBQ Rub at Home

Key Elements for an Effective BBQ Rub
A well-crafted BBQ rub is integral to enhancing flavor and achieving a delicious crust on your meat. The fundamental elements of a successful BBQ rub encompass salt for seasoning, paprika for vibrant color, and sugar for that essential caramelization. The skillful balance of these components aids in forming a crust that locks in moisture while delivering a robust flavor experience. Here’s a quick overview of the key components:
- Salt: Boosts flavor and promotes moisture retention.
- Paprika: Contributes color and a smoky essence.
- Pepper: Introduces heat and depth.
- Sugar: Facilitates caramelization and adds sweetness.
- Garlic & Onion Powder: Imparts savory notes and aromatic qualities.
When these components harmoniously blend, they create a multifaceted flavor experience that elevates your BBQ. For instance, applying a well-balanced rub to brisket not only accentuates the meat’s flavor but also develops a delectable bark during the smoking process, resulting in an unforgettable BBQ experience.
Achieving a Balanced Flavor Profile in Your BBQ Rub
Securing a harmonious balance in the flavors of your BBQ rub is essential for crafting a well-rounded taste experience. A successful rub typically incorporates sweet, savory, and spicy notes. Begin with your base of salt and paprika, then taste and make necessary adjustments. For example, if your rub is overly salty, consider adding a hint of sugar; conversely, if it leans too sweet, you might want to incorporate more pepper. The key is to taste continuously throughout the mixing process and adjust the ratios to create a delightful blend that will tantalize your taste buds.
Real-world examples of flavor balancing in BBQ rubs vary significantly across regions. For instance, in Kansas City, rubs tend to be sweeter, often utilizing brown sugar and similar sweeteners, whereas Texas-style rubs typically emphasize salt and pepper to highlight the meat’s natural flavors. Understanding these regional preferences can inspire your personal touch and help you craft a rub specifically tailored for different dishes.
Avoid Common Mistakes When Crafting Your BBQ Rub
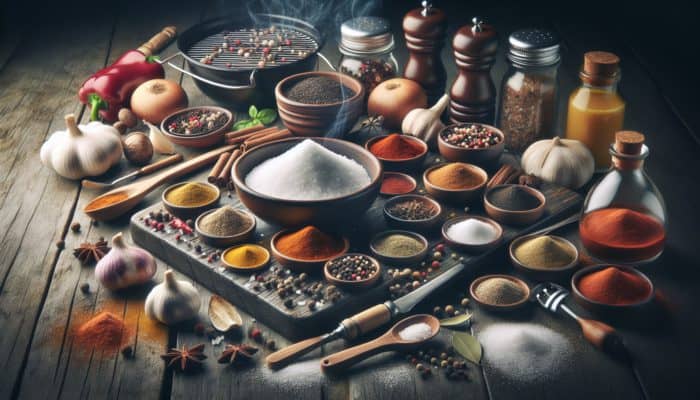
When creating a BBQ rub, several common mistakes can undermine your efforts. A prevalent error is over-salting, as excessive salt can overwhelm other flavors and ruin your dish. To minimize this risk, begin with a small amount and adjust according to your taste preferences. Another frequent issue is utilizing stale spices; over time, spices can lose their potency, making it crucial to check expiration dates and replace them as needed to maintain a vibrant flavor profile in your rub.
Moreover, the proper storage of your spices is vital. Keep them in a cool, dark area, away from heat and moisture. Tasting your rub as you mix can also help you identify any imbalances early on. By being mindful of these common pitfalls, you can elevate your BBQ rub to exceptional levels of excellence.
Customizing Your BBQ Rub for Various Types of Meat
Adapting your BBQ rub for different types of meat is a fantastic way to enhance the overall culinary experience. Each protein has unique flavor characteristics that can be amplified with specific spices and herbs. For instance, pork pairs wonderfully with sweeter rubs that may include brown sugar and cinnamon, while beef often thrives on richer, more robust flavors such as coffee and chili powder.
When considering chicken, its versatility calls for a light herbaceous rub featuring rosemary or thyme, enhancing its flavor without overwhelming it. For seafood, a zesty rub with citrus zest and dill can emphasize the freshness of the fish. Experimentation is key; try various combinations and design your rub to showcase the inherent flavors of each type of meat. The more you practice, the more adept you will become at creating the ideal rub for any occasion.
Perfecting the Blend for Your BBQ Rub
Effectively Combining Dry Ingredients for a Flavorful Rub
Combining your dry ingredients is a critical step in crafting the ultimate BBQ rub. Begin by carefully measuring each spice to ensure that you maintain the intended ratios. Once measured, transfer the spices into a mixing bowl. Using a whisk or fork is an effective method to thoroughly mix these ingredients, ensuring an even distribution of flavors. This process is crucial because it allows the unique flavors of each spice to meld together, forming a unified flavor profile that will significantly enhance your meat.
As you mix, pay attention to the textures of your ingredients. If you notice clumps, take extra care to break them down to ensure a consistent rub. The goal is to achieve a uniform blend where every bite of meat experiences the same level of seasoning. A well-mixed rub not only enhances flavor but also improves the visual appeal when applied to the meat.
Recommended Mixing Time for Your BBQ Rub
Mixing your BBQ rub should ideally take at least 2 minutes to guarantee that all components are thoroughly combined. This timeframe allows for complete blending of spices, ensuring that each bite of meat receives consistent flavor. If you desire a more integrated flavor profile, consider extending the mixing time; a longer duration can enhance flavor integration, yielding a more harmonious taste.
Remember that mixing also helps aerate the spices, releasing their essential oils and fragrances. This process can elevate the overall aroma and effectiveness of your rub. The more you practice mixing, the more instinctive you will become regarding timing and technique, resulting in an outstanding BBQ rub every time.
The Ideal Texture for Your BBQ Rub
The perfect consistency of your BBQ rub should be fine and powdery, allowing it to adhere well to the meat without forming clumps. A fine texture is essential for ensuring that the rub can penetrate the meat and create a flavorful crust during cooking. If your rub is too coarse, it may struggle to stick properly, resulting in uneven flavor distribution on your meat.
To achieve this desired texture, consider the types of spices you are using. Some spices, like garlic and onion powder, are naturally finer, while others, like brown sugar, may clump. If you find your rub contains excessive lumps or is too coarse, consider processing it in a spice grinder or food processor to achieve a smoother texture. A finely textured rub not only enhances flavor but also contributes to an appealing aesthetic when your dish is presented.
The Benefits of Sifting Your BBQ Rub for Consistency
Sifting your BBQ rub can be advantageous, particularly if you’re aiming for a smoother texture. A fine mesh sieve is ideal for this task, as it allows you to eliminate any lumps and ensures that your rub is uniform. Sifting is especially important if you’ve included ingredients like brown sugar or coarser spices that might clump together. By sifting, you promote an even distribution of spices, enhancing the overall flavor when the rub is applied to the meat.
Moreover, sifting can aerate your spices, helping to release their essential oils and fragrances. This can yield a more aromatic final product. Consider incorporating this step into your process, especially when preparing larger batches of rub, as it ensures consistency and quality. Ultimately, a well-sifted rub not only tastes better but also appears more appealing when applied to your meats.
Applying Your BBQ Rub to Meat for Maximum Flavor Infusion
Proper Meat Preparation for Optimal Rub Adherence
Effectively preparing your meat is a crucial step that ensures your BBQ rub adheres correctly. Start by patting the meat dry with paper towels; this removes any excess moisture that can hinder the rub from sticking. It is also advisable to trim any unnecessary fat, as an excess of fat can cause flare-ups during cooking and prevent the rub from flavoring the meat properly. Correctly preparing your meat lays the groundwork for flavors to penetrate deeply, ultimately leading to a superior BBQ experience.
After drying your meat, you can begin applying the rub. Take a moment to inspect the meat’s surface; a well-prepared exterior will absorb the flavors of the rub more effectively. The objective is to create a bond between the rub and the meat that enhances overall flavor during cooking. This preparation step is not merely cosmetic; it significantly contributes to the success of your BBQ.
Optimal Amount of Rub for Each Type of Meat
The quantity of rub you apply is crucial for achieving the ideal flavor profile. A general guideline suggests using approximately 1 tablespoon of rub per pound of meat. However, this can vary based on the meat’s surface area and your personal preferences. For larger cuts, you might want to increase the amount to ensure thorough coverage, while smaller cuts may require less.
Additionally, consider the intensity of the rub; a spice-rich rub can overpower a delicate protein like chicken, while a more subtle rub might be better suited for a robust cut of beef. Adjusting the quantity based on the meat type and your preferences will help you achieve the right balance. Ultimately, the key is to ensure that the rub is evenly distributed for consistent flavor in every bite.
Effective Techniques for Rubbing to Enhance Flavor Absorption
Applying the rub to your meat involves both technique and appropriate quantity. Gently massage the rub into the meat’s surface to ensure an even coating. This process not only helps the spices adhere better but also allows the flavors to penetrate the meat more deeply. Use your hands to press and rub the spices into the surface, taking care not to apply excessive pressure, as you don’t want to damage the meat’s fibers.
After applying the rub, allow the meat to rest for at least 30 minutes before cooking. This resting period enables the flavors to begin infusing into the meat. For an even deeper flavor, consider marinating the meat with the rub in the refrigerator for at least an hour or even overnight. This extended exposure allows for optimal flavor absorption, resulting in a tender, flavorful final product that highlights your homemade BBQ rub.
Optimal Marination Time for Flavor Infusion
The duration of marination is crucial for how effectively the rub penetrates the meat. While a minimum of an hour is ideal, allowing the meat to rest with the rub for a longer period—up to overnight—can significantly enhance the flavor profile. During this time, the spices work their magic, breaking down proteins and tenderizing the meat through osmosis, which also contributes to a juicier final product.
When marinating overnight, ensure to store your meat in an airtight container or tightly wrapped in plastic wrap to prevent it from drying out in the refrigerator. This extended marination not only ensures that the flavors meld beautifully but also allows for a more complex taste experience once the meat is cooked. The end result will be a succulent dish that showcases the depth of flavors from your BBQ rub.
Storing Your BBQ Rub for Long-Lasting Freshness
Selecting the Appropriate Container for Your BBQ Rub
Choosing the right container is vital for keeping your BBQ rub fresh. An airtight container is essential, as it prevents moisture and air from degrading the spices. Glass jars with tight-sealing lids or specially designed plastic containers are both excellent options. The key is to ensure that your chosen container seals well; this will help maintain the flavor integrity of your spices.
When storing your rub, consider placing it in a cool, dark area like a pantry or cupboard, away from direct sunlight and heat sources. This storage method not only preserves the potency of your spices but also prevents clumping. By taking these precautions, you can extend the shelf life of your BBQ rub, ensuring it’s always ready for your cooking adventures.
Expected Freshness Duration for Your BBQ Rub
A properly stored BBQ rub can last up to 6 months without losing its flavor. However, it’s crucial to regularly check for freshness by smelling and tasting the rub. If it lacks aroma or tastes bland, it may be time to prepare a new batch. Storing your rub under optimal conditions will help preserve its flavors longer, allowing you to enjoy your homemade creations without sacrificing taste.
If you’re preparing larger quantities, consider dividing them into smaller portions to minimize frequent exposure to air and moisture. This strategy lets you keep one batch fresh while using another as needed. Maintaining the vibrancy and flavor of your rub is vital for enhancing your BBQ dishes, and proper storage is key to achieving that goal.
The Importance of Labeling and Dating Your BBQ Rub
Always label your rub container with the creation date. This simple action aids in tracking the freshness of your rub and helps you avoid using spices that may have lost their potency over time. Use a permanent marker or label maker to clearly indicate the date; this ensures easy identification when rummaging through your spice cabinet.
Additionally, consider including a list of primary ingredients on the label, especially if you enjoy experimenting with different flavors. This can be beneficial if you create multiple blends or share with friends. By incorporating this organizational step, you can maintain a well-stocked spice cabinet and ensure that your BBQ rubs are always at their best.
- Utilize airtight containers to preserve freshness.
- Store in a cool, dark place away from heat sources.
- Regularly check spices for freshness.
- Label containers with creation dates and ingredient lists.
Research-Backed Benefits of Making Your Own BBQ Rub at Home
Health Benefits of Homemade BBQ Rubs
Creating homemade BBQ rubs offers the advantage of controlling the ingredients, leading to healthier meal options. By crafting your own rubs, you can manage the levels of salt and sugar, tailoring them to accommodate dietary preferences or restrictions. For instance, reducing sugar in your rub can lower calorie content while still enhancing flavor.
To develop healthier BBQ rubs, focus on utilizing natural spices and herbs, avoiding additives and preservatives typically found in store-bought blends. Incorporating elements like paprika, cumin, and turmeric not only elevates flavor but also offers health benefits associated with these spices, such as anti-inflammatory properties. By preparing your rub at home, you can indulge in flavorful, wholesome meals that are beneficial for both your taste buds and your health.
Enhancing the Cooking Process with a BBQ Rub
A well-crafted rub significantly enhances the cooking process by forming a flavorful crust on the meat and facilitating tenderization through osmosis. As the meat cooks, the rub develops a delectable bark, resulting in a satisfying texture and flavor that enriches the entire dish. This crust not only locks in moisture but also provides a delightful contrast to the tender meat inside.
Moreover, the spices in your rub can assist in tenderizing the meat by breaking down protein fibers, leading to a juicier final product. The combination of heat and spices works synergistically, allowing the flavors to meld and create a memorable BBQ experience. Understanding how rubs influence the cooking process can elevate your BBQ skills and consistently yield mouthwatering results.
Does a BBQ Rub Aid in Meat Preservation?
Certain spices in rubs, particularly salt, play a significant role in preserving meat by drawing out moisture and inhibiting bacterial growth. This preservation effect can extend the shelf life of your meat while enhancing its flavor when cooked. Salt acts as a natural preservative, making it a crucial ingredient in many traditional rubs.
Incorporating salt into your rub not only boosts flavor but also contributes to the longevity of your meat. This aspect is especially beneficial for cuts that may need to be stored for a while before cooking. However, it’s essential to balance salt levels to avoid overpowering the meat’s flavor. Properly crafted rubs can lead to delicious and safe BBQ experiences.
Exploring Flavor Variations for Your BBQ Rub
Incorporating Heat into Your BBQ Rub
If you enjoy a spicy kick, adding cayenne pepper or chili powder to your BBQ rub can dramatically transform its flavor profile. Start with small quantities, as these spices can quickly dominate your rub if overused. Even a pinch can introduce a delightful warmth that enhances the savory components of your rub, elevating the overall experience.
As you experiment with heat levels, consider the type of meat you are using. For instance, a spicy rub can amplify the flavors of rich meats like beef or pork, while a milder approach may be more suitable for chicken or fish. Finding the right balance will ensure that you serve BBQ that caters to diverse preferences, making your gatherings more enjoyable and memorable.
Unique Flavor Combinations to Experiment With
Exploring unique flavor combinations can lead to exciting discoveries in your BBQ rubs. For instance, consider blending cocoa powder and coffee for a rich, smoky flavor that pairs beautifully with beef. This combination enhances the meat’s natural umami and adds depth. Another intriguing alternative is to incorporate citrus zest, which can brighten your rub and provide a refreshing contrast to the richness of grilled meats.
Here’s a concise list of unique flavor combinations to inspire your next BBQ rub creation:
- Cocoa powder & coffee for a rich flavor profile.
- Citrus zest & herbs for a fresh, zesty twist.
- Smoked paprika & cayenne for a smoky heat.
- Brown sugar & cinnamon for a sweet, aromatic rub.
- Mustard powder & black pepper for a tangy kick.
By stepping outside traditional flavor boundaries, you can create memorable rubs that surprise and delight your guests, turning each BBQ into a culinary adventure.
Adapting Your BBQ Rub for Various Meats
When working with different meats, it’s essential to adjust your BBQ rub to suit the unique flavor profiles of each protein. For example, beef can handle bolder flavors, so don’t hesitate to incorporate robust spices like cumin and smoked paprika. Conversely, chicken typically benefits from lighter, more aromatic rubs that might include herbs like thyme or rosemary, allowing the meat’s natural flavors to shine through.
Fish, being delicate, usually requires a more subtle touch. Instead of overpowering the fish, use zesty herbs and light spices, ensuring that the rub complements rather than overshadows the fish’s natural flavor. As you gain more experience, you’ll develop an instinct for which flavors pair best with each meat, leading to perfectly seasoned BBQ every time.
Cooking Techniques to Maximize Your BBQ Rub
Grilling Methods for Perfect BBQ Results
When it comes to grilling, the technique you employ can greatly influence the effectiveness of your rub. For larger cuts of meat, using indirect heat is crucial to avoid burning the rub. This method allows the meat to cook evenly while providing ample time for the rub to develop a deep, flavorful crust. Keep a close eye on the temperature, adjusting your heat as necessary to ensure that your meat cooks perfectly without charring the exterior.
For smaller cuts, direct heat can be utilized, but ensure you monitor them closely. The rub should form a delectable crust, but not at the expense of burning. The interplay of heat and the sugars in your rub will result in beautiful caramelization that enhances the depth and richness of flavor. Mastering these grilling techniques will refine your BBQ skills, ensuring that your rub truly shines.
Influence of Cooking Time on Rub Flavor
Cooking time significantly affects how well the rub flavors the meat. Longer cooking durations allow flavors to meld and develop, resulting in a more complex taste. For instance, when smoking a brisket for several hours, the rub not only forms a flavorful crust but also enables the spices to penetrate deeply into the meat.
In contrast, shorter cooking times may necessitate a lighter application of rub, as there is less time for flavors to meld. For quick-cooking meats, consider using a more concentrated rub or a marinade that imparts flavor swiftly. Understanding how cooking time interacts with your rub will help you adjust your approach for different cuts and cooking methods, consistently leading to delightful results.
The Importance of Resting Meat After Cooking
Allowing your meat to rest after cooking is a crucial step often overlooked. Resting enables the juices to redistribute throughout the meat, enhancing the overall flavor and ensuring that every bite is moist and tender. The duration of the resting period can vary depending on the size of the cut; a general guideline is to let it rest for at least 10-15 minutes for smaller cuts and up to 30-60 minutes for larger ones.
This essential step allows the crust formed by your rub to harmonize with the natural juices of the meat, resulting in a dish that bursts with flavor. By incorporating this resting time into your cooking process, you’ll greatly improve the outcome of your BBQ, showcasing the effort put into crafting your flavorful rub.
Frequently Asked Questions About BBQ Rubs
How can I determine if my spices are still fresh?
Fresh spices should emit a robust aroma and possess a distinct flavor. If they lack scent or taste bland, it indicates that it’s time to replace them.
Are BBQ rubs suitable for vegetables as well?
Absolutely! BBQ rubs can significantly enhance the flavor of vegetables. Try it on grilled corn, potatoes, or even roasted Brussels sprouts for an added zest.
What’s the best method for applying rub to chicken?
Pat the chicken dry, generously apply the rub, and massage it into the skin. Allow it to rest for at least 30 minutes for optimal flavor absorption.
Can I prepare a BBQ rub in bulk?
Certainly! Preparing a larger batch can save you time. Just ensure proper storage in an airtight container to keep it fresh.
Is it acceptable to use a store-bought rub?
Store-bought rubs can be convenient, but making your own allows for customization and greater control over ingredients.
How can I modify a rub to suit my spice preferences?
To increase a rub’s spiciness, gradually add more cayenne pepper or chili powder until you reach your desired heat level.
Which types of meat benefit most from BBQ rubs?
Beef, pork, chicken, and even fish can all benefit from BBQ rubs, each requiring unique flavor combinations for optimal results.
How can I enhance my smoking technique with rubs?
Utilize rubs with a good balance of sugars and spices to ensure a flavorful crust while smoking, and maintain consistent temperatures for even cooking.
Should I remove the rub before cooking?
No, the rub should remain on the meat during cooking to form a crust and enhance flavor. Remove it only when serving.
Can I repurpose leftover rub for other culinary uses?
Yes, leftover rub can be sprinkled on roasted vegetables, incorporated into dips, or even used in marinades to boost flavor.
Connect with us on Facebook for more BBQ tips and recipes!
The Article How to Make a Basic BBQ Rub at Home: Easy Steps appeared first on https://pitmastersarsenal.com
The Article Basic BBQ Rub: Simple Steps to Create Your Own at Home Was Found On https://limitsofstrategy.com
-

Tarragon: Enhance Your Appetite in the UK
Explore the Culinary Treasures and Health Benefits of Tarragon in the UK
Understanding Tarragon: A Key Ingredient in British Culinary Heritage
Tarragon, scientifically referred to as Artemisia dracunculus, is a perennial herb that has intricately woven itself into the tapestry of British culinary culture. This remarkable herb is celebrated for its distinctive anise-like flavor, which not only enhances a diverse range of dishes but also elevates the entire dining experience. Highly prized for its culinary versatility, tarragon is a fundamental ingredient found in many British households, thanks to its aromatic leaves that can be utilized in both fresh and dried forms. Its extraordinary ability to transform everyday meals into exceptional culinary delights makes it a cherished herb in kitchens across the UK.
Professional chefs and home cooks throughout the UK regard tarragon with great admiration due to its unique characteristics. It frequently features in sauces, marinades, and dressings, where its flavor can truly be appreciated. Beyond its culinary uses, this herb has also attracted attention for its potential health advantages, further solidifying its position as a beloved staple in British cuisine.
Tracing the Historical Significance of Tarragon in British Culinary Practices
The historical significance of tarragon in the UK is rich and intriguing, with roots extending back several centuries. The Romans introduced tarragon to Britain, where its flavor and medicinal qualities were highly valued. During the medieval era, it quickly became a favorite among the aristocracy, often highlighted in opulent dishes and sauces. Its importance in traditional British cooking underscores its long-standing presence in the culinary history of the country.
By the 18th century, tarragon had firmly established itself in British culinary recipes, especially in the preparation of sauces like béarnaise, which remains a popular choice today. Its adaptability allows it to harmonize beautifully with various ingredients, making it a preferred herb for enhancing the flavors of dishes ranging from fish to poultry. Over time, tarragon transitioned from a luxury enjoyed by the elite to a common herb embraced in everyday British cooking.
Essential Tips for Successfully Growing Tarragon in the UK
Thriving in the UK’s temperate climate, tarragon is a relatively easy herb to cultivate, making it a favorite among home gardeners. This herb prefers well-drained soil and flourishes in sunny or partially shaded areas. For those eager to grow tarragon, it is crucial to maintain soil that is moist but not overly saturated. Many gardeners find success by planting tarragon in containers, which offers greater flexibility and control over growing conditions.
During the growing season, typically from late spring to early autumn, tarragon produces vibrant green leaves that can be harvested regularly to encourage a bushier growth habit, resulting in a more intense flavor profile. Even individuals with limited gardening experience can easily find fresh tarragon in supermarkets throughout the UK, allowing everyone to enjoy its culinary advantages. With proper care and attention, tarragon can thrive in many UK gardens, rewarding cultivators with its delightful fragrance.
Delicious Ways to Use Tarragon in Traditional British Dishes

The culinary applications of tarragon are extensive, establishing it as an indispensable herb in British kitchens. Its capacity to transform simple dishes into extraordinary culinary experiences is unmatched, enhancing the flavors of a variety of ingredients. For example, tarragon often takes center stage in classic British recipes, such as chicken in tarragon sauce and fish with tarragon butter. Additionally, its aromatic properties make it an exceptional addition to salad dressings, soups, and marinades.
Here is a selection of enticing recipes that highlight this herb:
- Chicken with tarragon cream sauce
- Salmon fillet drizzled with tarragon butter
- Herb-infused potato salad featuring tarragon
- Tarragon vinaigrette for fresh green salads
- Vegetable soups with a tarragon base
- Hearty beef stew seasoned with tarragon
- Omelette garnished with fresh tarragon
- Tarragon-flavored mayonnaise for dipping
In each of these delightful recipes, tarragon not only elevates flavor but also engages the palate, inviting diners to fully appreciate each meal.
Exploring the Health Benefits of Tarragon for UK Residents
Beyond its culinary applications, tarragon offers numerous health benefits, making it a valuable addition to the diets of UK residents. One of its primary advantages lies in its ability to aid digestion. Renowned for its gentle digestive properties, tarragon may help alleviate bloating and discomfort following meals. Furthermore, this herb is believed to possess anti-inflammatory properties, which can be beneficial in reducing symptoms associated with inflammation.
Moreover, tarragon is rich in essential vitamins and minerals, including vitamins A and C, iron, and potassium. These nutrients play a vital role in maintaining overall health, supporting immune function, and promoting general well-being. In the UK, where dietary choices can be influenced by climate and lifestyle, incorporating tarragon can provide a wholesome boost to one’s nutrition. Its versatility allows it to blend seamlessly into a wide range of meals, reinforcing its status as an important herb for health promotion.
How Tarragon Stimulates Appetite Among UK Residents
Compounds in Tarragon That Enhance Appetite Effectively

Tarragon contains various compounds that are believed to play a significant role in stimulating appetite. Among the most notable are estragole and ocimene, which are key components. These compounds interact with the body’s digestive system, enhancing hunger signals and fostering an overall sense of well-being associated with eating. Their presence in tarragon is crucial to its effectiveness as an appetite stimulant.
The biochemical interactions initiated by these compounds can lead to increased gastric motility and improved digestion. This is especially advantageous for individuals who may struggle with a low appetite or experience digestive issues, positioning tarragon as an excellent herb for those seeking to enhance their meal enjoyment. Furthermore, the aromatic qualities of tarragon can activate sensory receptors, further encouraging the desire to eat. Understanding how these compounds function provides valuable insight into why tarragon can be a beneficial ingredient in the culinary realm.
Creative Ways to Incorporate Tarragon into Daily Meals
Incorporating tarragon into your meals is both simple and rewarding, thanks to its remarkable versatility. Home cooks can explore a wide array of culinary creations featuring tarragon to effectively stimulate their appetite. The herb can be added to soups, stews, and casseroles, infusing dishes with its unique flavor profile. In salads, fresh tarragon leaves contribute a delightful taste that enhances the overall appeal, encouraging diners to consume more greens.
One effective method to harness the appetite-stimulating properties of tarragon involves the preparation of sauces. Adding tarragon to classic sauces such as béarnaise or hollandaise can elevate dishes and make them more enticing. To optimize its flavor, tarragon is often best used in conjunction with complementary ingredients such as lemon, garlic, or creamy bases. Below is a quick list of meal ideas:
- Tarragon-infused chicken broth
- Fish stew with tarragon and tomatoes
- Fresh herb vinaigrette featuring tarragon
- Stuffed mushrooms filled with tarragon and cheese
- Tarragon pesto made with nuts and olive oil
- Oven-roasted vegetables seasoned with tarragon
- Herbed rice pilaf with tarragon
- Egg dishes garnished with fresh tarragon
These straightforward incorporation strategies can significantly enhance the dining experience, making meals not only more pleasurable but also beneficial for stimulating appetite.
Assessing the Safety of Tarragon for Consumption in the UK
Generally, tarragon is considered safe for most individuals in the UK; however, it is essential to be aware of potential allergic reactions. While rare, some people may exhibit sensitivity to tarragon, particularly if they have allergies to other herbs in the Asteraceae family. As a precaution, individuals with known plant allergies should consult a healthcare provider before significantly increasing their tarragon intake.
Moreover, although tarragon is commonly used in cooking, moderation is key. Excessive consumption may lead to digestive discomfort for some individuals. As with any herb, it is advisable to gradually introduce tarragon into the diet, allowing the body to adapt. By doing so, individuals can enjoy the many benefits of tarragon while minimizing any potential side effects. Overall, tarragon is a safe and delightful herb that most can incorporate into their meals without concern.
Expert Insights on Utilizing Tarragon for Appetite Enhancement
Recommendations from UK Nutritionists on Tarragon Usage
Nutritionists throughout the UK frequently endorse tarragon due to its appetite-stimulating properties. Many professionals in the field advocate for incorporating this herb into daily meals to enhance overall appetite and enjoyment of food. They emphasize that tarragon’s unique flavor can motivate individuals to eat more, particularly those who may struggle with low appetite resulting from various health conditions.
Real-world examples from UK nutritionists indicate that adding tarragon to meals, whether through fresh leaves in salads or as a seasoning in cooked dishes, can yield positive outcomes. For instance, nutritionists suggest sprinkling dried tarragon over roasted vegetables or using fresh tarragon in marinades for meats to enhance flavor and stimulate interest in food. This approach aligns with the growing trend of using herbs not just for flavor, but also for their functional benefits in promoting health and wellness.
Innovative Uses of Tarragon by UK Chefs in Their Culinary Creations
Chefs across the UK have fully embraced tarragon as a potent flavor enhancer in their culinary creations. Renowned chefs frequently utilize tarragon in sauces, marinades, and dressings to elevate the taste of their dishes. For example, a classic French béarnaise sauce, which heavily relies on tarragon, has become a fixture on numerous British fine dining menus, showcasing the herb’s versatility and appeal.
Actionable steps from UK chefs include infusing oils or vinegars with tarragon to create unique dressings or marinades. Chefs also recommend pairing tarragon with complementary flavors, such as lemon or garlic, to maximize its appetite-stimulating effects. This innovative utilization allows tarragon to shine in both traditional and contemporary recipes, proving that it is not only a staple herb but also a key ingredient for creativity in the culinary world.
Research Insights on Tarragon’s Effects in the UK
Numerous studies conducted in the UK have examined the appetite-stimulating effects of tarragon, yielding valuable insights into its efficacy and safety. Research indicates that tarragon’s aromatic compounds can influence digestive health and enhance the sensory experience of eating. These studies suggest that including tarragon in meals may positively affect appetite, particularly in individuals experiencing appetite suppression.
Expert analysis of UK research findings suggests that further exploration into the specific compounds present in tarragon could unveil new potential health benefits. Ongoing studies aim to clarify how these compounds interact within the body, leading to a deeper understanding of their effects on appetite and digestion. Such research solidifies tarragon’s position as not only a culinary staple but also a subject of scientific interest in the field of nutrition.
Understanding the Historical Role of Tarragon in British Medicine
Historical Uses of Tarragon in British Herbal Medicine
Historically, tarragon played a pivotal role in traditional British medicine. Before the advent of modern pharmaceuticals, tarragon was cherished for its ability to aid digestion and stimulate appetite. Herbalists often brewed tarragon into teas or concocted herbal remedies to harness its medicinal properties. This practice reflects a broader reliance on herbs in early medicine, where natural ingredients were trusted for their health benefits.
In traditional practices, tarragon was commonly recommended for gastrointestinal issues, believed to alleviate bloating and discomfort. This herbal approach to health underscores the significance of tarragon in British culture and its lasting legacy as a traditional herbal remedy. Even today, many individuals turn to tarragon for its health benefits, linking it to its historical usage and valuing its ongoing relevance in contemporary wellness.
Modern Applications of Tarragon in the UK
In today’s landscape, tarragon remains a popular herb celebrated for its health benefits, particularly its appetite-stimulating properties. UK residents can find tarragon in various forms, including fresh, dried, and as supplements. This availability allows individuals to seamlessly incorporate tarragon into their diets, whether as a fresh herb in cooking or in more concentrated forms.
Today, many health-conscious consumers are gravitating toward herbal remedies, and tarragon is no exception. The herb frequently appears in discussions surrounding natural methods to boost appetite and digestive health. As awareness increases regarding the benefits of herbal supplementation, tarragon’s role in modern nutrition continues to adapt, reinforcing its status as a valuable herb in both culinary and health contexts.
Additional Health Benefits of Tarragon for UK Residents
Beyond its appetite-stimulating properties, tarragon is utilized in the UK for an array of health advantages. It is recognized for its anti-inflammatory and antioxidant properties, which can support overall health and well-being. These attributes make tarragon a holistic addition to a balanced diet, contributing to immune system support and potentially alleviating chronic inflammation.
Additionally, tarragon is believed to assist in digestion, aligning with its historical use as a digestive aid. Incorporating tarragon into meals can promote gut health and enhance overall digestive function, making it a practical choice for individuals seeking to improve their wellness. As more people explore natural remedies and holistic health approaches, tarragon’s multifaceted benefits continue to be embraced in contemporary dietary practices.
Exploring the Advantages of Tarragon for Appetite Stimulation in the UK
Enhancing Meal Enjoyment with Tarragon’s Unique Flavor
The distinctive flavor of tarragon significantly enriches the enjoyment of meals, making it an exceptional herb for stimulating appetite. Its unique anise-like taste can elevate the overall sensory experience of dining, encouraging individuals to truly savor their food. By adding complexity to simple dishes, tarragon can transform even the most ordinary meals into something more enticing.
This enhancement is particularly crucial when attempting to stimulate appetite, as enjoyment of food is often linked to the desire to eat. Chefs and home cooks alike leverage tarragon to create dishes that not only taste excellent but also delight the palate, enhancing overall satisfaction during mealtime. This connection between flavor and appetite is vital for individuals who may find it challenging to appreciate eating, further underscoring tarragon’s beneficial role in the culinary landscape.
Nutritional Benefits of Incorporating Tarragon
Tarragon is not only a flavor powerhouse but also a nutrient-rich herb that can bolster overall health. It is abundant in vitamins A and C, both of which are essential for immune function and skin health. Additionally, tarragon serves as a source of vital minerals such as iron and potassium, which play critical roles in bodily functions, including oxygen transport and muscle contraction.
The presence of these nutrients contributes to the herb’s ability to support appetite stimulation. When meals are both nutritious and flavorful, individuals are more inclined to consume adequate caloric intake, essential for maintaining energy levels and overall health. By incorporating tarragon into diets, individuals can enjoy these nutritional benefits while simultaneously enhancing their culinary experiences.
The Role of Tarragon in Supporting Weight Management for UK Residents
For those grappling with appetite issues, tarragon can be a powerful ally in weight management. By stimulating appetite, it can help ensure that individuals consume sufficient calories to meet their nutritional needs. This is particularly important for those who may have a low appetite due to various health conditions or lifestyle factors.
Incorporating tarragon into meals can make eating a more enjoyable experience and encourage a well-rounded diet. By focusing on flavor and nutrition, individuals can better regulate their food intake, promoting healthy weight management practices. The use of tarragon in cooking presents an opportunity not just to enhance meals but also to create an environment where eating becomes a pleasure rather than a chore. Its role in supporting appetite can be especially beneficial for maintaining a healthy lifestyle.
Where to Source Tarragon in UK Supermarkets and Specialty Stores
Finding Fresh Tarragon in the UK Market
Fresh tarragon is widely available across the UK, making it easy for consumers to incorporate this herb into their culinary endeavors. Major supermarkets such as Tesco, Sainsbury’s, and Waitrose consistently stock fresh tarragon in their herb sections. Additionally, local farmers’ markets and specialty stores often provide high-quality, fresh tarragon, allowing consumers to support local growers while enjoying the freshest produce available.
When purchasing fresh tarragon, look for vibrant green leaves that are aromatic and free from wilting or discoloration. Proper storage of fresh tarragon can extend its shelf life; keeping it in a sealed container in the refrigerator can help maintain its freshness. Overall, the availability of fresh tarragon across various retail outlets ensures that UK residents can conveniently access this versatile herb.
Options for Dried Tarragon in the UK
Dried tarragon serves as a convenient alternative to fresh tarragon and is readily available in most UK supermarkets. Typically found in the spice aisle, dried tarragon can serve as a valuable pantry staple for culinary enthusiasts. Its concentrated flavor means that a small amount can go a long way, making it an economical choice for flavoring various dishes.
In addition to supermarkets, dried tarragon can also be found in health food stores and online retailers nationwide. When selecting dried tarragon, choose brands that offer high-quality herbs to ensure optimal flavor. Using dried tarragon is straightforward; simply add it during cooking to allow the flavors to infuse into the dish. This versatility makes dried tarragon a practical option for busy cooks seeking to elevate their meals quickly.
The Availability of Tarragon Supplements in the UK
Tarragon supplements are increasingly available in the UK, catering to health-conscious individuals seeking the benefits of this herb without the need for culinary preparation. These supplements can often be found in health food stores, pharmacies, and online retailers, providing a convenient option for those wishing to incorporate tarragon into their wellness routines.
Typically available in capsule or tincture form, tarragon supplements present a practical means to enjoy the herb’s health benefits, particularly for individuals aiming to improve digestion or stimulate appetite. As with any supplement, consumers should carefully read labels and consult with healthcare providers before adding tarragon supplements to their regimen. This ensures safe usage and alignment with personal health goals.
Effective Strategies for Incorporating Tarragon for Appetite Stimulation
Seamlessly Integrating Tarragon Into Your Daily Diet
Integrating tarragon into your daily diet can be a straightforward endeavor, thanks to its versatility. One effective strategy involves adding tarragon to salads, enhancing their flavor while stimulating interest in healthy eating. Fresh tarragon leaves can be tossed with mixed greens, tomatoes, and cucumbers, topped with a simple vinaigrette for a refreshing dish.
Additionally, using tarragon in cooking presents another excellent way to enjoy its benefits. Incorporating it into sauces, marinades, or even baked goods can infuse meals with its distinct flavor. For those who prefer a more convenient option, consider adding dried tarragon to soups, stews, and casseroles, allowing its flavor to meld beautifully with other ingredients. Here are some actionable steps for daily integration:
- Add fresh tarragon to salads for an aromatic touch.
- Use dried tarragon in soups and stews.
- Infuse oils or vinegars with tarragon for dressings.
- Incorporate tarragon into marinades for meats and fish.
- Mix tarragon into scrambled eggs or omelettes.
- Create tarragon-flavored dips or spreads.
- Blend tarragon into smoothies for an unexpected twist.
- Add tarragon to roasted vegetables for enhanced flavor.
By implementing these simple steps, individuals can easily incorporate tarragon into their meals, enriching their culinary experiences while stimulating appetite.
Maximizing Tarragon’s Flavor through Cooking Techniques
Cooking with tarragon requires an understanding of its delicate flavor to maximize its appetite-stimulating properties. One of the best techniques involves using fresh tarragon to preserve its aromatic qualities. Adding fresh tarragon at the end of cooking or as a garnish can ensure that its flavor remains vibrant, enhancing the dish without overpowering it.
Another effective technique is infusing tarragon in oils or vinegars, allowing the herb’s flavor to permeate the medium. This method creates a base that can be employed in a variety of dishes, from salad dressings to marinades. Additionally, sautéing tarragon with other ingredients early in the cooking process can release its essential oils, creating a fragrant base for sauces or soups. Expert analysis suggests that balancing the use of tarragon with complementary flavors, such as lemon or garlic, can yield optimal results in appetite stimulation. By mastering these cooking techniques, one can truly harness the power of tarragon in their culinary pursuits.
Monitoring the Effects of Tarragon on Your Appetite
Monitoring the effects of tarragon on appetite involves employing straightforward strategies that can help individuals assess its impact. One practical method is to maintain a food diary, noting meals that include tarragon and tracking any changes in hunger levels and meal satisfaction. This record can provide insights into how tarragon influences appetite and overall enjoyment of meals.
Additionally, being attentive to physical sensations before and after consuming tarragon-infused dishes can offer clues into its effects. For instance, individuals may observe increased hunger or a greater appreciation for flavors when tarragon is included in their meals. Here are some bullet points for monitoring:
- Keep a food diary to track meals with tarragon.
- Note changes in hunger levels after consuming tarragon dishes.
- Reflect on overall meal enjoyment and satisfaction.
- Compare appetite responses on days with and without tarragon.
- Pay attention to any digestive changes associated with tarragon consumption.
- Seek feedback from family or friends on their experience with tarragon-enhanced meals.
- Monitor energy levels and overall well-being.
- Consider how tarragon pairs with other ingredients in meals.
By employing these strategies, individuals can gain a clearer understanding of how tarragon affects their appetite and overall culinary enjoyment.
Incorporating Tarragon into UK Dietary Plans Effectively
Creating Appetite-Stimulating Recipes with Tarragon
Creating appetite-stimulating recipes that incorporate tarragon can be a delightful way to enhance meals and encourage healthy eating. Recipes that utilize tarragon can be tailored to individual preferences while still promoting a sense of enjoyment in eating. Here are some key recipe ideas that showcase the versatility of tarragon:
- Classic chicken tarragon salad with walnuts and cranberries
- Fish tacos topped with tarragon-infused salsa
- Herbed lentil soup with tarragon and vegetables
- Grilled chicken marinated in tarragon and mustard
- Stuffed peppers filled with quinoa, tarragon, and mixed vegetables
- Tarragon and lemon butter sauce for steamed asparagus
- Vegetable stir-fry featuring tarragon and sesame oil
- Tarragon and apple chutney served alongside cheese platters
These recipes not only feature tarragon prominently but also encourage individuals to engage more meaningfully with their food, leading to greater appetite stimulation and enjoyment.
Incorporating Tarragon into Various Dietary Plans in the UK
Tarragon is incredibly versatile, making it suitable for incorporation into a variety of diets popular in the UK. Whether one follows a vegetarian, vegan, or keto diet, tarragon can enhance meals across these dietary preferences. For vegetarians and vegans, fresh tarragon can be added to salads, vegetable dishes, and plant-based proteins to amplify flavor and appeal.
In a keto setting, tarragon can be paired with fatty ingredients like butter or olive oil to create rich sauces that complement meats or vegetables. Its unique flavor profile allows it to fit seamlessly into diverse culinary applications, ensuring that those following specific dietary plans can still enjoy the benefits of tarragon without compromising their eating habits. This adaptability further solidifies tarragon’s place as a staple herb in the UK, encouraging individuals to explore its culinary potential regardless of their dietary restrictions.
Potential Side Effects of Tarragon Consumption in the UK
While tarragon is generally regarded as safe for consumption, some individuals in the UK may experience side effects, particularly if they have allergies to other herbs in the Asteraceae family. Allergic reactions, though rare, can lead to symptoms such as skin rashes or gastrointestinal discomfort. Additionally, for those with sensitive digestive systems, excessive consumption of tarragon may cause digestive upset.
To mitigate potential side effects, it is crucial to use tarragon in moderation and to consult healthcare providers before significantly increasing intake. Particularly for individuals with existing health conditions or those on medication, an informed approach to tarragon consumption ensures safety while maximizing its benefits. Overall, when used appropriately, tarragon remains a safe and beneficial addition to the diet.
Emerging Trends in the Use of Tarragon in the UK
Innovations in Tarragon Products
Exciting innovations in tarragon products are emerging, reflecting the growing recognition of the herb’s culinary and health benefits. New forms of tarragon, such as capsules and tinctures, are gaining traction, aimed at making tarragon more accessible for consumers seeking its health advantages without the need for cooking. These innovations cater to busy lifestyles while enabling individuals to incorporate tarragon into their wellness routines.
Furthermore, food manufacturers are beginning to explore the use of tarragon in pre-packaged meals and snacks, appealing to health-conscious consumers looking for convenient options. As awareness of herbal products expands, the demand for versatile forms of tarragon is likely to increase, paving the way for further development in the market. The future of tarragon products looks promising, offering a wider range of options for consumers.
Tarragon’s Role in UK Wellness Trends
In the UK, tarragon is increasingly becoming a part of wellness trends, particularly in the context of detox diets and health-focused meal plans. Its appetite-stimulating properties make it a valuable addition to recipes designed to promote digestive health and overall well-being. Health enthusiasts are recognizing the benefits of including tarragon in their diets, using it to enhance the flavor of dishes while emphasizing nutrition.
Additionally, tarragon’s potential to support gut health aligns with the growing emphasis on holistic health approaches. As more individuals adopt wellness-centric lifestyles, the demand for herbs like tarragon is likely to rise, leading to innovative culinary uses and a deeper appreciation for its benefits. This trend reinforces the growing recognition of the role of herbs in promoting health, marking a shift towards more natural dietary practices.
Influence of Tarragon on Culinary Trends in the UK
Tarragon is increasingly making its mark on UK culinary trends, where chefs are experimenting with this herb in both traditional and modern recipes. Its unique flavor profile offers a fresh twist to classic dishes, encouraging chefs to be innovative in their cookery. Tarragon-infused sauces and dressings are becoming staples in upscale dining establishments, showcasing its versatility and appeal.
Moreover, the rise of farm-to-table dining experiences has prompted chefs to source local tarragon, enhancing the quality of their dishes while supporting local agriculture. As culinary trends evolve, tarragon’s presence on menus across the UK continues to grow, fostering a renewed appreciation for this traditional herb and its potential to enrich contemporary gastronomy.
The Role of Tarragon in Sustainable Gardening Practices in the UK
Tarragon’s popularity in UK gardens is on the rise, particularly due to its sustainability and low-maintenance requirements. This herb requires minimal water and can thrive in a variety of soil types, making it an ideal candidate for eco-friendly gardening practices. Home gardeners appreciate tarragon’s ability to grow alongside other herbs, promoting biodiversity and encouraging organic gardening techniques.
Furthermore, tarragon’s perennial nature ensures that it can provide fresh herbs year after year without the need for replanting, making it a sustainable choice for herb enthusiasts. As the movement towards sustainable gardening grows, tarragon is poised to play an important role, reflecting a broader trend of valuing local and home-grown produce. Its resilience and ease of cultivation position it as a valuable herb for environmentally conscious gardeners throughout the UK.
Frequently Asked Questions about Tarragon
1. What culinary applications does tarragon have?
Tarragon is commonly used to enhance the flavor of sauces, dressings, and marinades in cooking. It pairs excellently with meats, fish, and vegetables, making it a versatile herb for various dishes.
2. Is it safe to consume tarragon daily?
Yes, tarragon is generally safe for daily consumption, but moderation is essential. Individuals with specific allergies should consult a healthcare provider before significant intake.
3. How does tarragon stimulate appetite?
Tarragon contains compounds like estragole and ocimene that interact with the digestive system, enhancing hunger signals and stimulating appetite.
4. Can I successfully grow tarragon in my garden?
Yes, tarragon thrives in the UK’s temperate climate and can be easily grown in gardens or containers, provided there is well-drained soil and adequate sunlight.
5. What health benefits does tarragon offer?
Tarragon provides several health benefits, including improved digestion, anti-inflammatory properties, and essential vitamins and minerals that support overall health.
6. What dishes can I prepare using tarragon?
Dishes such as chicken tarragon salad, béarnaise sauce, and roasted vegetables can be enhanced with tarragon, providing a unique flavor and aroma.
7. Where can I find tarragon in the UK?
Fresh tarragon is available at major supermarkets like Tesco and Sainsbury’s, as well as farmers’ markets and specialty grocery stores.
8. Are there any side effects associated with tarragon?
While generally safe, some individuals may experience allergic reactions or digestive discomfort if consumed excessively. Consulting a healthcare provider is advisable for those with allergies.
9. How should I store fresh tarragon properly?
Fresh tarragon should be stored in a sealed container in the refrigerator to maintain its freshness and flavor for extended periods.
10. Can tarragon be included in a vegan diet?
Absolutely! Tarragon is plant-based and can be used to flavor a variety of vegan dishes, enhancing both taste and nutritional value.
Connect with us on Facebook!
The Article: Tarragon for Appetite Stimulation: UK Guide appeared first on https://mcrtherapies.co.uk
The Article Tarragon Guide: Boost Your Appetite in the UK Was Found On https://limitsofstrategy.com
-

Storing Dried Herbs: Essential Tips for the UK
Comprehensive Guide to Storing Dried Herbs for Culinary Excellence in the UK
Understanding Dried Herbs: Their Importance in Culinary Arts
Grasping the concept of dried herbs is vital for any cooking enthusiast, especially in the UK, where these ingredients significantly enhance the flavours and aromas of a plethora of dishes. Dried herbs are produced from the leaves, stems, or flowers of various plants that have undergone a careful drying process to remove moisture. This essential dehydration technique not only preserves the herbs but also ensures that they retain their unique taste and scent long after the harvest. In British kitchens, dried herbs are crucial for elevating everything from traditional stews to innovative sauces, cementing their role as indispensable culinary ingredients.
The methods employed to dry herbs can differ, including air drying, using a dehydrator, or microwave drying, with air drying being the most traditional and widely used approach. This method not only reduces the physical mass of the herbs, making storage more manageable, but also enhances their flavours, allowing even small quantities to impact a dish’s overall taste significantly. The remarkable adaptability of dried herbs permits them to be stored for extended periods without spoiling, making them an excellent choice for both novice cooks and experienced culinary professionals alike.
The Importance of Proper Storage for Maintaining Herb Quality
The importance of proper storage techniques for dried herbs cannot be emphasized enough, as it is essential for preserving their flavour, aroma, and overall potency. In the UK’s variable climate, which is often characterized by unexpected humidity and temperature changes, inadequate storage methods can lead to a swift decline in the quality of herbs. Exposure to moisture or sunlight can result in the herbs losing their vibrant colours and essential oils, leading to bland tastes and a noticeable reduction in culinary effectiveness.
By ensuring that dried herbs are stored under optimal conditions, cooks can significantly prolong their shelf life—sometimes extending up to three years—while retaining the full range of their flavours. This is particularly crucial for home cooks who depend on these herbs to prepare authentic British dishes, ranging from hearty casseroles to delicate sauces. Proper storage not only enhances culinary results but also guarantees that the herbs will impart their optimal qualities whenever needed in any recipe.
Key Herbs Commonly Used in Traditional UK Cuisine
In the UK, a diverse array of herbs has become integral to the nation’s culinary traditions. For instance, rosemary is frequently associated with roast lamb, while thyme deepens the flavour profile of stews and casseroles. Mint, another classic herb, pairs beautifully with lamb and is often found in refreshing sauces. Additionally, parsley is commonly used as a garnish, and basil plays a vital role in Italian-inspired dishes that have gained popularity in British cooking.
The culinary applications of these herbs reach far beyond traditional recipes, as modern British chefs creatively incorporate them into innovative flavor profiles. From classic meat pies to contemporary vegetarian creations, the significance of dried herbs is undeniable. Their year-round availability makes them an essential ingredient for any home cook looking to infuse robust flavours into their meals.
Expert Techniques for Storing Dried Herbs Effectively

Real-World Examples of Successful Herb Storage Practices
Numerous households and professional chefs across the UK have perfected the art of maintaining the quality of dried herbs over time. For example, a renowned chef in London effectively utilizes glass jars with airtight seals to store her dried herbs in a cool, dark pantry, preserving their potency for months. Similarly, a family residing in the picturesque Kent countryside employs labeled containers to systematically manage their herb collection, ensuring they always have access to fresh, flavourful herbs.
These practical examples highlight several fundamental methods for successful herb storage:
- Choose airtight containers crafted from glass or metal to prevent moisture infiltration.
- Store herbs in a cool, dark environment, away from heat sources to maintain efficacy.
- Clearly label jars with the herb name and storage date for easy identification.
- Conduct regular inspections of herbs for freshness and replace them as needed.
By adopting these effective practices, anyone can replicate their success and fully unlock the flavour potential of dried herbs.
Choosing the Ideal Containers for Dried Herb Storage
The most suitable containers for storing dried herbs in the UK are those that are airtight and shield against moisture and light, both of which can significantly compromise the herbs’ quality. Glass jars with tight-sealing lids are a favored option, as they are non-reactive and do not impart any undesirable flavours. Opaque metal tins can also be effective, provided they are properly sealed to block light exposure.
Here are several recommended types of containers for dried herbs:
- Glass jars with airtight seals
- Opaque metal tins
- BPA-free plastic containers that are airtight
- Vacuum-sealed bags for extended storage
Selecting the right container is crucial to ensuring that dried herbs remain aromatic and potent, always ready to elevate any culinary creation.
Evaluating the Proper Storage of Your Dried Herbs

Properly stored herbs should exhibit vibrant colours and a robust aroma, both of which are clear indicators of freshness. If dried herbs appear dull or lack fragrance, it typically signifies that they have been compromised, likely due to exposure to light, air, or moisture.
To evaluate whether your herbs are stored correctly, consider these indicators:
- Vibrant colours: Fresh herbs should retain their characteristic hues.
- Strong aroma: A potent scent indicates that essential oils remain intact.
- No clumping: Properly stored herbs should be free-flowing and not clumped together.
- Good taste: A taste test can reveal if the herbs still provide flavour.
Being vigilant about these signs ensures that only the highest quality herbs are utilized in cooking, thus elevating the overall dining experience.
Optimal Locations for Storing Dried Herbs in UK Homes
Identifying the Best Storage Spots for Dried Herbs
Dried herbs thrive in cool, dark environments devoid of heat sources, making careful selection of storage locations essential for preserving their quality. In most UK homes, kitchen cupboards serve as ideal spots for storing dried herbs, provided they are not situated directly above the stove or near a window.
Consider these optimal storage locations within UK homes:
- Dark kitchen cupboards, positioned away from heat and moisture sources.
- Cool and dry pantry shelves.
- Utility rooms that maintain stable temperatures.
- Basements, provided they remain dry and free from dampness.
Choosing the appropriate location will help maintain the potency of your herbs, ensuring that they remain effective in cooking for an extended period.
Determining the Ideal Temperature for Herb Storage
The optimal temperature range for storing dried herbs in the UK generally falls between 15-20°C, a condition that is typically achievable in most homes. Storing herbs in environments with temperatures exceeding this range can lead to the breakdown of flavours and aromas, especially during warmer months when kitchens may become excessively heated.
Maintaining this temperature range is essential for several reasons:
- It prevents the degradation of essential oils that contribute to flavour.
- It minimizes the risk of moisture condensation, which can lead to spoilage.
- It helps preserve the vibrant colours of the herbs.
- It allows for an extended shelf life, making herbs viable for cooking over longer durations.
By closely monitoring the temperature, you can ensure that your dried herbs remain effective and flavourful.
Is Refrigeration a Viable Option for Storing Dried Herbs?
Although not typically recommended, dried herbs can be stored in the refrigerator if they are kept in airtight containers. This method may prove beneficial in particularly humid environments where moisture levels could compromise the quality of the herbs.
However, caution is advised, as the humidity commonly found in refrigerators can introduce unwanted dampness, potentially leading to clumping or spoilage. If you decide to refrigerate your herbs, ensure to:
- Use airtight containers to minimize moisture exposure.
- Avoid frequently opening the containers to maintain moisture control.
- Store herbs separately from strong-smelling foods, as they can absorb unwanted odours.
- Regularly check for any signs of degradation.
This approach can help extend the life of your herbs, particularly in regions of the UK experiencing high humidity levels.
Understanding the Shelf Life of Dried Herbs in UK Homes
When stored under optimal conditions, dried herbs can last up to three years in UK homes, although their flavour and potency may gradually diminish over time. While the three-year mark serves as a general guideline, herbs may still be safe to use after this period; however, their flavour may not be as pronounced.
To achieve the best culinary results, it is advisable to utilize dried herbs within one to two years. This timeframe allows for maximum flavour retention and ensures that the herbs are at their peak potency. Regular monitoring and timely replacement of older herbs can help maintain a well-stocked herb cabinet, enhancing all your cooking endeavors and ensuring that every dish achieves its intended flavour profile.
Understanding the Shelf Life of Dried Herbs in the UK
Typical Shelf Life of Dried Herbs: What to Expect
In the UK, the average shelf life of properly stored dried herbs typically ranges from one to three years. While they may not pose any harm after this period, their potency is likely to decline, resulting in diminished flavour in your culinary creations.
To sustain optimal quality, it is advisable to routinely check the freshness of your dried herbs. Look for any signs of fading colour or a decrease in aroma, as these can indicate a reduction in flavour potency. For the best tasting experience, consider replacing dried herbs at least once a year to ensure they continue to effectively enhance your culinary creations.
Strategies for Prolonging the Life of Dried Herbs
To extend the life of dried herbs in the UK, employing a few strategic practices that focus on controlling environmental factors is essential. Storing herbs in a cool, dry place and utilizing airtight containers are fundamental steps to prevent moisture and light exposure, both of which can drastically shorten their shelf life.
Other effective methods include:
- Regularly inspecting and replacing older herbs to maintain quality.
- Avoiding storage near heat sources, such as ovens or stoves.
- Using desiccants in storage containers to absorb excess moisture.
- Labeling containers with the date of storage for easy tracking.
By adopting these practices, you can effectively prolong the life and quality of your dried herbs, ensuring they remain a valuable asset in your kitchen.
Recognizing When to Replace Dried Herbs
It is essential to promptly replace dried herbs when they begin to show signs of losing their colour, aroma, or flavour. In the UK’s damp climate, these indicators can appear more rapidly, making regular inspections vital.
Signs that suggest it’s time to replace your dried herbs include:
- Faded colours that indicate a loss of potency.
- A weak or absent aroma, suggesting that essential oils have dissipated.
- Flavours that lack the depth they once had, leading to bland dishes.
- Clumping or the presence of moisture, which can lead to spoilage.
By being proactive about replacing herbs, you can ensure that your culinary dishes remain at their best, filled with rich flavours that delight the palate.
Effective Strategies for Properly Storing Dried Herbs
Impact of Storage Methods on Herb Quality
The chosen method of storage profoundly influences the quality of dried herbs. Factors such as temperature, light exposure, and humidity can alter the physical and sensory characteristics of these herbs. In the UK, where humidity levels can fluctuate considerably, proper storage is crucial for preserving their essential properties.
Consider these key impacts of storage on herb quality:
- Temperature control can prevent essential oils from degrading and maintain flavour.
- Light exposure may cause colour fading and flavour loss, making opaque containers a preferable option.
- Moisture can lead to clumping and spoilage, rendering herbs unusable.
- Airtight storage reduces air exposure, preserving freshness and potency.
Understanding these factors empowers cooks to make informed decisions about herb storage, ultimately enhancing their culinary creations.
Best Practices for Storing Various Types of Herbs
Different herbs may require specific methods for optimal storage. For instance, delicate herbs such as basil and cilantro may necessitate more careful handling and storage conditions compared to sturdier herbs like rosemary or thyme.
When storing various herbs, consider these best practices:
- Store delicate herbs in the refrigerator in airtight containers to maintain moisture levels.
- Robust herbs should be kept in a cool, dark cupboard in airtight jars.
- Always dry herbs thoroughly before storage to prevent moisture accumulation.
- Label containers clearly to track different herbs and their storage times.
By tailoring your storage methods to the specific needs of each herb, you can ensure that all herbs retain their unique flavours and aromas, enhancing the overall cooking experience.
Storage Techniques to Preserve the Flavour of Herbs
To maintain the flavour of dried herbs in the UK, strategic storage is essential. Proper storage not only safeguards the natural properties of the herbs but also prevents them from being tainted by external odours or moisture.
Here are several strategies to protect and preserve the flavour of herbs:
- Keep herbs away from strong-smelling foods, as they can absorb those aromas.
- Store herbs in airtight containers to minimize exposure to air.
- Utilize cool, dark storage areas to prevent light degradation.
- Regularly monitor stored herbs and replace them when signs of degradation are evident.
By implementing these practices, you can ensure that your dried herbs contribute the intended flavours to your dishes, elevating your culinary creations to new heights.
Long-Term Storage Solutions for Dried Herbs
Effective Methods for Long-Term Herb Storage
For long-term storage of dried herbs in the UK, several methods can significantly extend their shelf life while maintaining quality. Vacuum sealing is one of the most effective techniques, as it removes air and moisture, which are two primary culprits in herb degradation.
Consider these best methods for long-term storage:
- Vacuum-sealing herbs in bags to eliminate air exposure.
- Freeze-drying herbs in airtight containers for extended freshness.
- Using desiccants in storage containers to absorb excess moisture.
- Labeling containers with the date of storage for tracking purposes.
These methods not only extend shelf life but also ensure that the herbs retain their vibrant flavours, ready to enhance meals even after prolonged periods.
Can Freeze-Drying Preserve the Quality of Herbs?
Absolutely, you can freeze-dry herbs in the UK, and doing so can significantly extend their shelf life while preserving their flavour and aroma. Freezing is particularly advantageous for herbs that may lose potency over time in conventional storage.
To freeze-dry herbs effectively, follow these tips:
- Use airtight, freezer-safe containers to prevent freezer burn.
- Label containers with the herb name and freezing date.
- Portion herbs into smaller containers for easy access without thawing the entire batch.
- Ensure herbs are dry before freezing to avoid clumping.
This method allows you to enjoy the rich flavours of your favorite herbs even in the off-season, thereby enhancing your culinary repertoire.
Revitalizing Old Dried Herbs for Better Use
Reviving old dried herbs in the UK can breathe new life into your cooking, enabling you to salvage herbs that may have lost some potency. Lightly toasting the herbs can help to reactivate their flavours, as heat can stimulate some of the essential oils.
Here are some effective techniques to rejuvenate old dried herbs:
- Toast the herbs lightly in a dry pan to release their essential oils.
- Blend the herbs into a finer consistency to increase their surface area for flavour release.
- Add the herbs to dishes earlier in the cooking process to allow their flavours to infuse.
- Combine with fresh herbs to enhance the overall flavour profile of your dishes.
By employing these techniques, you can maximize the potential of dried herbs that might otherwise go unused, enriching your culinary creations.
Determining How Long Dried Herbs Can Be Stored Before Losing Potency
In the UK, properly stored dried herbs can last up to three years, but their potency diminishes over time. For the best flavour experience, it is advisable to use dried herbs within one to two years after storage.
Regularly assessing the quality of your herbs is crucial. Factors such as moisture and temperature can accelerate the degradation process. Therefore, while the herbs may still be safe to consume, their effectiveness in cooking can be reduced. Keeping track of storage dates and maintaining a good rotation system can help ensure that your culinary experiences are always at their best.
Common Mistakes to Avoid When Storing Dried Herbs
Identifying Common Storage Mistakes to Prevent Quality Loss
Common mistakes in storing dried herbs can lead to a significant decline in quality, adversely affecting the flavours of your culinary creations. One major pitfall involves storing herbs near heat sources, such as ovens or stoves, where temperature fluctuations can degrade their potency.
Here are several common mistakes to avoid:
- Storing herbs in non-airtight containers that allow moisture to penetrate.
- Exposing herbs to direct sunlight, which can fade colours and diminish flavours.
- Neglecting to label containers, making it difficult to track freshness.
- Failing to monitor stored herbs for signs of degradation.
By steering clear of these mistakes, you can ensure that your dried herbs maintain their quality and effectively enhance your cooking.
Understanding the Impact of Humidity on Herb Storage
Humidity in the UK can profoundly affect the storage of dried herbs, as excess moisture can result in clumping and spoilage. When dried herbs absorb moisture from the air, they may lose their potency and compromise their flavours.
To mitigate the effects of humidity, consider these tips:
- Store herbs in a cool, dry place away from moisture sources.
- Utilise airtight containers to minimize air and moisture exposure.
- Monitor the humidity levels in storage areas, especially during the summer months.
- Use desiccants in containers to absorb excess moisture.
By being mindful of humidity, you can ensure that your dried herbs remain fresh and flavourful for a longer duration.
Storing Different Herbs Together: Best Practices
While it is feasible to store different herbs together, it may not always be the most effective practice. Strong-smelling herbs such as oregano or sage can impart their aroma and flavour to milder herbs, potentially altering their intended taste profile.
Consider these tips when storing herbs:
- Store strong-smelling herbs separately from delicate herbs to avoid flavour contamination.
- Label containers clearly to keep track of different herbs.
- Utilize separate airtight containers for each type of herb.
- Check for flavour compatibility when combining herbs in the same container.
These practices will help maintain the integrity of each herb, allowing it to shine in your culinary adventures.
Monitoring When Dried Herbs Need Replacement
Dried herbs can last up to three years when properly stored; however, their flavour and potency often diminish over time. It’s generally advisable to use dried herbs within one to two years for optimal results.
Regular checks for signs of degradation, such as fading colour or reduced aroma, can indicate when herbs need to be replaced. By staying vigilant about storage conditions and monitoring the quality of your herbs, you can guarantee that your culinary endeavours are always enriched with vibrant flavours and aromas.
Optimal Containers for Storing Dried Herbs
The best containers for storing dried herbs include glass jars with airtight seals, which protect against moisture, light, and air, effectively preserving the herbs’ quality. These containers are ideal because they do not react with the herbs and can be securely sealed to prevent degradation.
Consider these options for optimal herb storage:
- Glass jars with airtight lids for visibility and protection.
- Opaque metal tins to block harmful light exposure.
- BPA-free plastic containers with airtight seals for versatile storage.
- Vacuum-sealed bags for long-term preservation.
By selecting the right containers, you can maintain the integrity of your dried herbs, ensuring that they remain flavourful and potent for your culinary creations.
Upholding the Quality of Herbs in UK Culinary Practices
Why Herb Quality Is Critical in UK Cooking
The quality of herbs is paramount in UK cooking, as it directly influences the flavour and aroma of various dishes. Whether preparing a classic Sunday roast or an innovative contemporary creation, the effectiveness of dried herbs can elevate the overall dining experience. Fresh, potent herbs bring depth, character, and authenticity, empowering cooks to create meals that resonate with both tradition and modern culinary trends.
Utilizing high-quality herbs is not just about taste; it also reflects a cook’s attention to detail and commitment to culinary excellence. The impact of quality herbs can transform meals and enhance appreciation for British cuisine.
Ensuring Consistent Quality of Herbs in Your Kitchen
To ensure consistent herb quality in the UK, regularly check and replace old herbs while storing them properly to maintain their potency. This involves adhering to best practices for storage and being mindful of the conditions that can affect herb quality, such as humidity and temperature.
Implementing a rotation system can help manage herb usage effectively, while labeling containers with storage dates provides an easy way to track freshness. By prioritizing quality, cooks can guarantee that their dishes maintain the intended flavours, achieving culinary success.
Benefits of Incorporating Fresh Herbs in UK Cooking
Incorporating fresh herbs into UK cooking can significantly enhance dishes with vibrant flavours and aromas that dried herbs may not replicate. Fresh herbs provide brightness and depth that can elevate everything from salads to sauces. However, they require different storage methods compared to dried herbs, often necessitating refrigeration to maintain their freshness.
Using fresh herbs introduces an additional layer of complexity to dishes, allowing cooks to experiment with flavours and textures. This versatility is essential for any chef looking to create memorable meals that resonate with diners.
Best Practices for Sourcing Quality Herbs in the UK
Sourcing herbs from reputable UK suppliers ensures freshness and quality, enriching your culinary repertoire while supporting local agriculture. Farmers’ markets often provide excellent access to seasonal herbs, while online suppliers can offer a broader selection, including organic options.
Engaging with local suppliers can also provide valuable insights into the best uses for specific herbs and effective storage methods, ultimately enhancing your overall cooking experience. Prioritising local sourcing not only enriches your dishes but also fosters a connection within the community and promotes sustainable practices.
Impact of Herb Quality on the Culinary Reputation of the UK
High-quality herbs play a pivotal role in enhancing the UK’s culinary reputation by ensuring that dishes are crafted with precision and authenticity. As global interest in British cuisine continues to rise, the emphasis on fresh, high-quality ingredients becomes paramount for chefs looking to stand out.
The culinary landscape of the UK is evolving, with chefs and home cooks alike emphasizing the importance of high-quality ingredients, including dried herbs. By prioritizing herb quality, British cuisine can continue to gain recognition on the world stage, showcasing the rich flavours and traditions that define it.
Frequently Asked Questions About Storing Dried Herbs
What is the best method for storing dried herbs to ensure freshness?
Dried herbs should be stored in airtight containers in a cool, dark place away from heat sources. This approach helps maintain their flavour and potency.
Is it acceptable to use plastic containers for storing dried herbs?
Yes, provided that they are BPA-free and airtight to protect the herbs from moisture and air exposure.
How can I determine if my dried herbs have gone bad?
Check for faded colours, weak aromas, or clumping. These are signs that the herbs may have lost their potency and should be replaced.
Is it safe to consume older dried herbs?
While older dried herbs are generally safe to consume, their flavour and aroma may diminish over time. It’s advisable to replace them regularly for the best culinary results.
What techniques can I use to enhance the flavour of old dried herbs?
You can lightly toast the herbs in a dry pan or blend them into a finer consistency to help revive their flavours.
What is the best way to label herb containers for easy identification?
Label containers with the herb name and storage date to help you track freshness and usage over time.
How long do dried herbs last when stored properly?
Properly stored dried herbs can last up to three years, but are best used within one to two years for optimal flavour retention.
Is it possible to freeze-dry herbs without losing quality?
Yes, freeze-drying herbs in airtight containers can significantly extend their shelf life while preserving their flavour and aroma.
What types of herbs are commonly found in UK cuisine?
Common herbs in UK cuisine include rosemary, thyme, mint, parsley, and basil, all of which enhance various traditional and modern dishes.
Should I store herbs in the refrigerator for better preservation?
It’s not usually recommended, but herbs can be stored in the fridge in airtight containers if humidity is a concern.
Connect with us on Facebook!
The Article: How to Store Dried Herbs Properly: UK Guide appeared first on https://mcrtherapies.co.uk
The Article Storing Dried Herbs Properly: A Guide for the UK Was Found On https://limitsofstrategy.com
-

Rare Spices in Cooking: Discover Unique Flavors with Saffron
Dive into the Fascinating World of Unique and Rare Spices
Understanding the Importance of Unique Spices in Culinary Arts
When we refer to rare spices, we are talking about exceptional culinary gems that are not commonly used in everyday cooking due to their unique flavors and often elevated prices. These remarkable spices can elevate your culinary creations, adding a touch of sophistication that transforms simple meals into gourmet experiences. Notable examples of such rare spices include Saffron, vanilla beans, black garlic, cardamom pods, Sumac, and grains of paradise. Their scarcity, combined with their remarkable ability to enhance even the most basic recipes, makes them invaluable additions to any chef’s toolkit.
The allure of rare spices stretches beyond their exquisite flavors; they are steeped in rich cultural narratives, adding layers of meaning to their culinary uses. Many of these spices are intimately linked to specific geographical regions, embodying centuries of tradition and culinary evolution. By incorporating rare spices into your cooking, you not only elevate your dishes but also forge connections with diverse culinary heritages from around the world, enriching your overall cooking experience.
Top Sources for Authentic Rare Spices
Locating authentic rare spices can feel challenging, but a variety of resources are available for the dedicated culinary enthusiast. Specialty shops, gourmet food retailers, and online marketplaces have streamlined the process of sourcing these elusive ingredients in recent years. When hunting for rare spices, it is essential to prioritize both freshness and authenticity in order to achieve the best results in your culinary endeavors. Here are several effective strategies to find these unique spices:
- Explore local farmers’ markets or specialty food stores for the freshest options available.
- Investigate online retailers that specialize in rare spices, ensuring high quality and authenticity.
- Engage with culinary communities or online forums for recommendations on reputable suppliers.
- Look for certifications or check customer reviews when purchasing spices online.
- Consider bulk purchasing for frequently used spices to save money.
If you are on the lookout for the most vibrant flavors and aromas, forging relationships with producers or wholesalers can unveil high-quality options. Building connections with suppliers often leads to exclusive finds and insights into the origins of these spices, thereby enriching your culinary journey.
Essential Techniques for Storing Rare Spices Effectively
Proper storage is vital for preserving the potency and flavor of rare spices. Exposure to elements like air, light, and moisture can diminish the quality of these precious ingredients over time, making effective storage methods crucial. Here are some recommended strategies for prolonging the shelf life of your rare spices:
- Use airtight containers to minimize exposure to air and moisture.
- Store spices in a cool, dark place, away from direct sunlight.
- Label containers with purchase dates for effective freshness monitoring.
- Avoid placing spices near heat sources such as stoves and ovens, which can compromise their quality.
- Do not use transparent glass containers that let light in, as this can negatively affect the spices.
By adhering to these storage guidelines, you can significantly extend the longevity of your rare spices, ensuring they maintain their full flavor potential when needed. With the right care, these exquisite spices will continue to enhance your culinary creations for many years.
Innovative Ways to Integrate Rare Spices into Your Culinary Creations

Rare spices can serve as the secret ingredient that transforms a mundane dish into an extraordinary culinary masterpiece. They are frequently utilized in gourmet cooking, traditional recipes, and experimental cuisine, providing limitless possibilities that range from intricate desserts to savory main courses. Here are some example dishes that brilliantly highlight the use of rare spices:
- Saffron-infused risotto, adding a luxurious touch to a classic dish.
- Cardamom-spiced carrot cake, elevating dessert experiences to new heights.
- Grilled meats marinated with sumac for a delightful tangy flavor.
- Vanilla bean crème brûlée, showcasing the spice’s rich depth and complexity.
- Black garlic pasta, providing a sweet and umami-rich experience with every bite.
These examples illustrate how rare spices can introduce unique flavors and elevate dishes, transforming each meal into an exciting culinary adventure. Incorporating these spices not only enhances taste but also provides diners with new sensory experiences, making every dining occasion enjoyable and memorable.
Expert Advice on Cooking with Rare Spices Such as Saffron
Unlocking the Full Flavor Potential of Saffron
To truly appreciate the flavor of saffron, it is essential to understand its distinct characteristics. This spice is renowned for its subtle yet complex taste, which can easily be overshadowed if not used correctly. The key to employing saffron effectively lies in using it sparingly and allowing it to steep in warm liquid before incorporating it into your dishes. This technique helps to unlock its full flavor potential and vibrant color.
For example, in traditional recipes like paella or risotto, adding saffron to warm broth allows the spice to release its vivid hue and delicate aroma throughout the dish. When preparing a simple broth, infusing saffron threads in simmering water allows its rich flavors to permeate the base. This adaptable method can be applied across various cuisines, from Moroccan tagines to Italian sauces, showcasing saffron’s versatility in enhancing a wide range of dishes.
Enhancing the Aroma of Rare Spices for Culinary Excellence
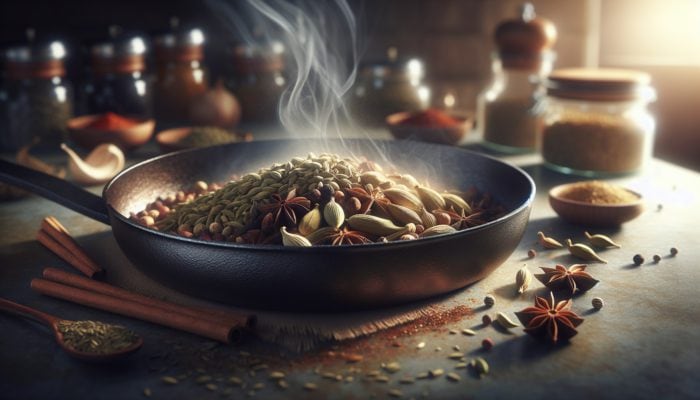
Enhancing the aroma of rare spices is an essential technique that can significantly elevate your culinary creations. Aroma plays a crucial role in cooking, engaging the senses and enhancing overall enjoyment. One effective method to unlock the full potential of spices is to toast them before use. This technique releases essential oils and intensifies their fragrance, making a considerable difference in your dishes.
To toast spices, follow these actionable steps:
1. Heat a dry skillet over medium heat.
2. Add whole spices like cardamom pods or cumin seeds in a single layer.
3. Stir continuously for a few minutes until they become fragrant and slightly darker in color.
4. Allow them to cool before grinding to preserve their flavor.This method is particularly effective for spices such as bay leaves or fenugreek, contributing depth to your dishes. Experimenting with toasting spices can reveal new dimensions in familiar recipes, transforming each meal into an opportunity to discover something extraordinary.
Pairing Rare Spices with Other Ingredients for Maximum Flavor Impact
Pairing rare spices with complementary ingredients can create harmonious flavors that elevate your dishes to gourmet levels. Understanding each spice’s unique characteristics and compatibility with various components can lead to delightful culinary experiences. For instance, saffron pairs beautifully with seafood, providing a delicate contrast to the brininess, while cardamom enhances sweet ingredients like chocolate or fruit.
When experimenting with pairings, consider the following combinations:
- Saffron with seafood and citrus for a Mediterranean twist.
- Vanilla with fruits and cream to enrich dessert richness.
- Black garlic paired with roasted vegetables adds a sweet and umami-rich flavor.
- Sumac with grilled meats for a delightful tangy finish.
By dedicating time to explore different combinations, you will discover unique pairings that resonate with your taste buds, resulting in flavor profiles that surprise and delight your senses.
Exploring the Health Benefits of Rare Spices
Health Advantages of Incorporating Saffron into Your Diet
Saffron is more than just a culinary delight; it is a spice rich in numerous health benefits. Research has linked saffron to mood enhancement, making it a valuable addition to a balanced diet. Its high antioxidant content contributes to overall well-being and is associated with various health advantages. Some notable health benefits of saffron include:
- Improved mood and reduced symptoms of depression.
- Enhanced cognitive function and memory.
- Antioxidant properties that combat oxidative stress.
- Potential benefits for menstrual health and relief.
Integrating saffron into your meals serves as a delightful way to promote health while enjoying its unique flavors. It serves as a reminder that rare spices can provide both culinary and medicinal benefits, enriching the overall dining experience.
Do Rare Spices Support Digestive Health?
Certain rare spices are recognized for their ability to support digestion, making them valuable additions to your culinary arsenal. Spices such as ginger and fennel are well-known for stimulating digestive enzymes, aiding the body in breaking down food more effectively. These spices can also soothe digestive discomfort and reduce gut inflammation.
For example, adding ginger to a stir-fry not only enhances the overall flavor but also promotes digestive health. Similarly, fennel seeds can be brewed into a tea after meals to assist digestion. Additional spices, such as turmeric, also contribute to reducing gut inflammation, making them essential for anyone striving to maintain gastrointestinal health.
Understanding the Risks of Consuming Rare Spices
While rare spices offer a multitude of health benefits, it is essential to use them in moderation, as excessive consumption may lead to adverse effects. For example, saffron is safe when used in culinary amounts, but large quantities may cause side effects such as nausea or dizziness. Other rare spices, like nutmeg, can be harmful in excess, potentially leading to hallucinogenic effects.
To ensure a safe culinary experience, it is essential to understand the recommended usage levels for each spice and consult with a healthcare professional if you have any concerns. By enjoying rare spices in moderation, you can savor their remarkable flavors while minimizing any potential risks associated with overconsumption.
Mastering Cooking Techniques with Rare Spices
Effectively Infusing Rare Spices into Your Culinary Creations
Infusing rare spices into your dishes can dramatically enhance their flavor profiles. This technique allows the spices to blend seamlessly with other ingredients, resulting in a cohesive and aromatic dish. Infusion can be accomplished through steeping or simmering, depending on the recipe.
To effectively infuse spices, start by selecting the appropriate method for your dish. For example, when preparing a broth, add whole spices such as bay leaves or cloves directly to the simmering liquid. Allow them to steep for a designated time before removing them prior to serving. For cream-based sauces, consider heating the cream with spices like saffron or cardamom and letting it steep for a few minutes before straining into the sauce. This approach ensures that the spices impart their flavors without leaving behind any gritty remnants.
Utilizing this infusion method not only heightens the taste but also creates an aromatic layer in your dishes, generating a sensory experience that engages both taste and smell.
Best Practices for Grinding Rare Spices
Grinding rare spices just before use is a practice that can significantly preserve their flavor and aroma. Maintaining the integrity of these spices is essential for achieving maximum culinary impact. Two effective methods for grinding spices include using a mortar and pestle or a spice grinder.
When using a mortar and pestle, you gain better control over the coarseness of the grind, which can be adjusted based on your recipe’s requirements. Place the spices into the mortar and use the pestle to crush and grind them until you reach the desired consistency. In contrast, a spice grinder offers efficiency and uniformity, making it ideal for larger quantities.
No matter which method you choose, freshly ground spices will always yield a more potent flavor and aroma compared to pre-ground alternatives, significantly enhancing your dishes with their vibrant characteristics.
Incorporating Rare Spices into Marinades and Rubs for Flavor Enhancement
Rare spices can introduce remarkable depth and complexity to marinades and rubs, making them essential components in flavorful dishes. When creating a marinade, consider how the unique qualities of rare spices can enhance the overall taste of meats, vegetables, or tofu.
For instance, saffron can be steeped in olive oil or yogurt to craft a luxurious marinade for chicken or lamb. Combine saffron threads with warm liquid, allow them to infuse, and then mix with spices such as cumin, garlic, and lemon juice. This combination not only enhances the protein but also adds a vibrant color and enticing aroma.
Similarly, a spice rub blending rare spices, such as smoked paprika, sumac, and black garlic, can elevate the flavor of roasted vegetables or grilled meats. The combination of these spices will enhance the overall taste while providing an appealing appearance, making every dish not only delicious but visually stunning.
Exploring the Research-Backed Advantages of Cooking with Rare Spices Like Saffron
Fostering Culinary Creativity with Saffron
The unique flavor profile and vivid color of saffron inspire chefs to push the boundaries of creativity in the kitchen. Its versatility allows for experimentation in both sweet and savory recipes, often leading to innovative dishes that captivate diners. The complexity of saffron encourages culinary professionals to think beyond traditional pairings, sparking a creative dialogue that results in exciting new flavors.
For example, saffron can be incorporated into unconventional desserts such as saffron-infused panna cotta or spiced custards, providing a rich and luxurious finish. In savory applications, it can elevate various dishes, from risottos to soups, encouraging chefs to explore its potential in unexpected contexts. By utilizing saffron, culinary professionals can create visually stunning plates that evoke intrigue and surprise.
This creative potential enriches individual dishes and contributes to the broader culinary landscape, motivating chefs globally to delve into the possibilities offered by rare spices.
Insights from Research on the Use of Rare Spices in Cooking
Research indicates that rare spices can enhance both the nutritional value and flavor of dishes, rendering them invaluable additions to traditional and contemporary cuisines. Studies have highlighted the role of spices in promoting health and well-being, showcasing their potential as natural flavor enhancers that help reduce reliance on salt and sugar.
For instance, research has shown that spices like turmeric and ginger not only enrich dishes with depth and flavor but also provide anti-inflammatory benefits. Additionally, the inclusion of spices such as saffron and cardamom has been linked to improved digestion and metabolic health. These findings underscore the importance of integrating rare spices into culinary practices, emphasizing their ability to elevate both taste and nutritional profiles.
By understanding the research surrounding rare spices, both home cooks and professional chefs can make informed decisions about their culinary practices, leading to healthier and more flavorful meals.
Enhancing the Dining Experience with Rare Spices
Rare spices possess the remarkable capability to transform a meal into a memorable dining experience by engaging multiple senses. Their distinctive flavors and aromas create an immersive sensory journey for diners, enhancing not only taste but also the overall atmosphere of the meal. The thoughtful utilization of rare spices can elevate ordinary dishes into extraordinary culinary creations, making dining feel special.
For instance, incorporating saffron into a risotto not only enhances the dish visually with its vibrant color but also adds a layer of complexity that can transport diners to distant lands. Similarly, using spices like smoked paprika or cardamom can evoke feelings of nostalgia, making the dining experience more personal and evocative. To elevate your dining experience, consider these actionable strategies:
- Incorporate rare spices into signature dishes to create a unique culinary identity.
- Pair flavors thoughtfully to develop a balanced and harmonious menu.
- Utilize spices to enhance the seasonality of local ingredients.
- Encourage diners’ engagement by sharing stories about the spices used in the dishes.
By embracing the potential of rare spices, chefs can create a dining experience that not only satisfies hunger but also leaves a lasting impression on guests.
Health Outcomes Associated with Saffron
Saffron has been linked to numerous health benefits, making it a valuable ingredient in both culinary and wellness contexts. Research suggests that saffron may positively affect mood, cognitive function, and even reproductive health. Its antioxidant properties play a crucial role in combating oxidative stress, which is associated with the development of chronic diseases.
Incorporating saffron into your cooking can enhance flavor while contributing to a healthier lifestyle. For example, adding saffron to soups, stews, or rice dishes can provide a nourishing boost, in addition to its culinary benefits. Increasingly, chefs and home cooks are seeking ways to utilize saffron not only for its taste but also for its potential health outcomes, making it a sought-after ingredient in modern cuisine.
Economic Benefits of Using Rare Spices
Integrating rare spices like saffron into menus can yield significant economic advantages for chefs and restaurants. The unique flavors and visual appeal of rare spices justify higher menu prices, leading to increased profit margins. By creatively utilizing these spices, chefs can attract discerning diners who seek distinctive culinary experiences.
Moreover, rare spices can enhance a restaurant’s brand, positioning it as a gourmet dining destination. As diners become more adventurous and curious about flavors, establishments that embrace rare spices can differentiate themselves in a competitive market. This not only boosts customer satisfaction but also fosters loyalty, encouraging repeat business.
Through strategic pricing and effective marketing of rare spices, chefs can unlock new profit streams while simultaneously enriching the culinary landscape.
Seamlessly Integrating Rare Spices into Your Daily Cooking
Simple Ways to Use Saffron in Everyday Cooking
Incorporating saffron into your everyday meals doesn’t have to be reserved for special occasions. This versatile spice can effortlessly enhance the flavor of common dishes, transforming them into culinary delights. One straightforward approach to using saffron is to add it to rice dishes, where its vibrant color and distinct flavor can truly shine.
For instance, a simple saffron-infused risotto can be created by adding a pinch of saffron threads to the broth while cooking your rice, allowing the flavors to meld beautifully. Saffron can also be incorporated into soups, curries, or even scrambled eggs to create a touch of luxury without requiring elaborate preparation. These easy applications demonstrate that saffron can be an everyday ingredient, elevating meals with minimal effort.
By adopting these simple recipes, home cooks can regularly enjoy the rich flavors of saffron, enhancing their culinary routine.
Integrating Rare Spices into Breakfast Dishes for a Unique Start
Breakfast is an excellent time to incorporate rare spices into your meals, adding unique flavors that can invigorate your morning routine. Experimenting with spices like cardamom or cinnamon in your oatmeal or smoothie bowls can create a warm and comforting start to the day. Cardamom, celebrated for its aromatic qualities, pairs exceptionally well with fruits and dairy, elevating standard breakfast items to new heights.
For example, a spiced oatmeal can be prepared by blending ground cardamom and a touch of saffron into your usual oats, resulting in a fragrant dish that is both nourishing and satisfying. Additionally, incorporating rare spices into scrambled eggs or frittatas can enhance the depth of your morning protein, making breakfast not just a meal but an indulgent experience to kickstart your day.
Utilizing Rare Spices in Desserts and Sweets for a Unique Twist
Rare spices can introduce an exotic flair to desserts, transforming simple sweets into extraordinary culinary creations. Incorporating spices like saffron or vanilla into cakes, cookies, and ice creams opens up a world of flavor possibilities that delight the palate.
For instance, a saffron-infused panna cotta can provide a luxurious finish to a dinner party, while cardamom can impart a unique flavor to a batch of chocolate chip cookies. Consider using vanilla beans in custards or ice creams for a rich, aromatic experience.
These applications highlight the versatility of rare spices in desserts, proving they can elevate sweets to new heights. By experimenting with these flavor combinations, you can create dessert experiences that not only satisfy but also surprise and delight your guests.
Strategic Approaches to Cooking with Rare Spices Like Saffron
Ensuring the Quality of Rare Spices for Optimal Flavor
Ensuring the quality of rare spices is crucial for achieving the best flavors and culinary outcomes. When sourcing spices like saffron, it is important to seek out reputable suppliers with a proven track record of quality. Checking for freshness and authenticity is essential, as inferior products can lead to disappointing culinary experiences.
To guarantee the quality of your spices, consider implementing the following strategies:
- Research suppliers and read customer reviews before making a purchase.
- Look for spices with clear labeling and origin information.
- Purchase from specialty stores that focus on gourmet products.
- Ask about the spice’s harvest date or batch number to ensure transparency.
By prioritizing quality sourcing, you can enhance your culinary creations and ensure that the flavors of rare spices shine through in your dishes.
Best Practices for Cooking with Rare Spices
Cooking with rare spices requires attention to detail and an understanding of their unique characteristics. Using them sparingly and at the right time is crucial for maximizing their impact. One effective practice is to consider the cooking method when incorporating spices. For instance, adding delicate spices like saffron towards the end of cooking helps retain their flavor and aroma.
Another best practice is to combine spices thoughtfully, ensuring that their flavors complement rather than overpower one another. Experimenting with different quantities can help you find the right balance in your dishes. Additionally, toasting spices before use can enhance their flavor, unlocking their full potential.
By adopting these best practices, you can create dishes that highlight the beauty and complexity of rare spices, making your culinary creations both flavorful and memorable.
Balancing Flavors with Rare Spices for Culinary Mastery
Balancing the flavors of rare spices with other ingredients is essential for crafting harmonious dishes. Each spice possesses its unique characteristics, and understanding how to pair them effectively can lead to delightful culinary experiences. When experimenting with rare spices, start with small amounts to avoid overwhelming your dish.
For instance, saffron’s delicate flavor balances beautifully with creamy ingredients, while spices like cardamom may work well with sweet components. It’s also important to consider the texture of spices and how they interact with other ingredients in your dish.
Through careful experimentation and observation, you can discover the specific ratios and pairings that best suit your palate, leading to exceptional culinary creations that showcase the beauty of rare spices.
Finding Quality Rare Spices Like Saffron for Your Kitchen
Finding reliable sources for rare spices is crucial for both home cooks and professional chefs. Local and international suppliers can offer high-quality saffron and other spices, making it essential to explore both options. Ethically sourcing spices is also important to ensure sustainability and quality.
To effectively source rare spices like saffron, consider these options:
- Local farmers’ markets for fresh and seasonal offerings.
- Online specialty retailers known for gourmet products.
- Ethical or organic suppliers that prioritize sustainability.
- Wholesalers who have established relationships with farmers for authenticity.
By utilizing a combination of these sources, you can ensure that your kitchen is stocked with the finest rare spices, enriching your culinary creations while supporting sustainable practices.
Proper Storage Techniques for Maintaining Spice Potency
Proper storage is essential for preserving the potency of rare spices, ensuring they remain vibrant and flavorful over time. The ideal storage conditions involve keeping spices in airtight containers, away from light and heat.
Consider these tips for maintaining the freshness of your spices:
- Utilize glass or opaque containers to prevent light exposure.
- Store spices in a cool, dark place, such as a pantry or cupboard.
- Label containers with purchase dates for easy tracking of freshness.
- Keep spices sealed tightly to avoid air exposure.
By following these storage practices, you can extend the shelf life of rare spices, ensuring they deliver their full potential whenever needed. Investing in proper storage techniques pays dividends in flavor and culinary satisfaction.
Frequently Asked Questions About Rare Spices
Understanding Saffron: What Makes It Rare?
Saffron is a spice derived from the flower of Crocus sativus, commonly known as the saffron crocus. It is considered rare due to the labor-intensive harvesting process, requiring thousands of flowers to yield just a small quantity of saffron.
How Long Can Saffron Last When Stored Correctly?
When stored in an airtight container away from light and heat, saffron can last up to four years while maintaining its potency and flavor.
Are Rare Spices Suitable for Everyday Cooking?
Absolutely! Rare spices can enhance everyday meals, transforming them into extraordinary dishes. Simple applications in rice dishes, soups, or marinades allow for frequent use without excessive expense.
Are There Health Risks Linked to Consuming Saffron?
While saffron is safe in culinary amounts, excessive consumption can lead to side effects such as nausea or dizziness. Moderation is key to ensuring a safe culinary experience.
Common Dishes That Benefit from Saffron
Saffron is commonly used in dishes such as paella, risotto, bouillabaisse, and various desserts. Its unique flavor and vibrant color significantly enhance these recipes.
How to Identify Authentic Saffron?
Authentic saffron features a deep, rich red hue and a distinct, aromatic scent. Look for reputable suppliers and check for certifications to ensure authenticity.
Complementary Spices for Saffron
Saffron pairs beautifully with ingredients such as seafood, chicken, citrus, and creamy sauces. Other complementary spices include cardamom and cumin, which enhance its unique flavor.
Is It Possible to Grow Saffron at Home?
Yes, saffron can be cultivated at home, but it requires specific conditions. It thrives in well-drained soil and needs a warm climate with ample sunlight to flourish.
How to Infuse the Flavor of Saffron?
To infuse saffron’s flavor, steep the threads in warm liquid (such as broth or water) for about 10-15 minutes before adding them to your dish, allowing their rich color and flavor to meld beautifully.
How to Incorporate Rare Spices into Your Diet?
Start by adding small amounts of rare spices to your favorite recipes, whether in marinades, desserts, or breakfast dishes. Gradual experimentation helps you discover new flavors while expanding your culinary horizons.
Stay updated with our latest news on our Facebook page!
The post How to Cook With Rare Spices Like Saffron: Unlocking Unique Flavors appeared first on https://cookinggods.com
The Article Rare Spices in Cooking: Unlock Unique Flavors with Saffron Was Found On https://limitsofstrategy.com
-

Hickory Wood: The Essential Guide for Smoky Chicken
Uncover the Top Choices of Hickory Wood for Flavorful Chicken Smoking
Explore the Varied Types of Hickory Wood for Your Smoking Needs
When you embark on your journey of smoking chicken with hickory wood, it’s crucial to grasp the different species of hickory available to ensure you achieve the ideal flavor. The two most popular varieties, Shagbark hickory and Mockernut hickory, each offer unique flavor profiles that can elevate your smoked chicken experience. Shagbark hickory, identifiable by its distinctive flaky bark, produces a smoke that is sweeter and milder, making it perfect for those who prefer a more nuanced flavor. On the other hand, Mockernut hickory delivers a robust, savory smoke that deeply enhances the chicken’s taste. The choice of hickory wood is pivotal, as it can significantly impact the overall flavor of your smoked chicken, highlighting the importance of selecting based on your individual taste preferences.
Moreover, the moisture content in hickory wood plays a critical role during the smoking process. Freshly cut hickory often contains excessive moisture, which can lead to unpleasant bitter flavors in the meat. For optimal results, always choose seasoned hickory that has been adequately dried. This preparation ensures that the smoke flavor is just right, complementing rather than overpowering the chicken’s natural taste. Whether you opt for Shagbark or Mockernut, ensuring your wood is well-prepared is essential for a rewarding smoking experience.
Where to Find High-Quality Hickory Wood for Your Smoking Projects
Locating premium hickory wood for your smoking endeavors can be straightforward if you know where to search. Local hardware stores typically stock hickory chunks and chips that are suitable for smoking. However, for a wider selection, specialty BBQ shops act as treasure troves filled with top-quality smoking woods. These stores often carry an array of hickory products, including unique blends that can create distinct flavor profiles for your dishes.
In addition, numerous online retailers offer an extensive variety of hickory wood products, making it easy to find exactly what you need. Websites specializing in BBQ supplies usually provide hickory in various forms, from chips to logs, catering to different smoking preferences. Purchasing in bulk can also be a savvy choice if you plan to smoke regularly. Regardless of your purchasing method, always ensure you prioritize reputable suppliers that guarantee their hickory is sourced ethically and sustainably.
Are You Ready to Embark on Your Smoking Adventure?
Crucial Techniques for Preparing Hickory Wood for Optimal Smoking
To achieve the coveted smoky flavor in your chicken, it is essential to prepare your hickory wood properly. One effective strategy is to soak the wood chips or chunks in water before use. This soaking process helps regulate the burn rate and enhances smoke production. Soaking not only prolongs the smoking duration but also prevents the wood from igniting too quickly, which can result in unwanted flavors. To ensure your hickory is primed for the smoking process, adhere to these critical preparation steps:
- Select the right type of hickory wood: Decide whether you prefer chips, chunks, or logs based on your smoker’s specifications for optimal results.
- Soak the wood: Immerse the hickory in water for at least 30 minutes before using it to enhance moisture retention, which is vital for effective smoking.
- Drain excess water: Remove any surplus water to prevent flare-ups during the smoking process, ensuring a smooth cooking experience.
- Store properly: Keep any leftover hickory in a cool, dry location for future use, ensuring it remains ready for your next smoking session.
By following these preparation guidelines, you’ll ensure your hickory wood is fully prepared for a fulfilling smoking session, resulting in chicken that is deliciously infused with a smoky flavor sure to impress anyone fortunate enough to taste it.
Perfecting Your Techniques for Flawlessly Smoked Chicken with Hickory

How to Achieve the Ideal Smoke Ring in Your Smoked Chicken?
The smoke ring is that desirable pink layer found just beneath the surface of smoked meats, indicating a successful smoking process. To create the perfect smoke ring when smoking chicken with hickory, several factors must be considered, particularly the interaction between the meat and the smoke. During combustion, hickory wood generates nitrogen dioxide, which interacts with the myoglobin in the meat, leading to the formation of the smoke ring. Here are essential strategies to refine your smoking technique for that ideal smoke ring:
- Use fresh hickory: Freshly cut wood produces more nitrogen dioxide, which is crucial for creating a prominent smoke ring.
- Maintain low temperatures: Smoking at lower temperatures (225-250°F) enhances the visibility of the smoke ring.
- Avoid covering the meat: Keeping the chicken exposed to smoke without any coverings optimizes the formation of the ring, allowing for better smoke absorption.
- Monitor humidity levels: Maintaining adequate humidity within the smoker aids in better smoke absorption, enhancing the smoke ring’s appearance.
By following these steps, you can significantly increase your chances of achieving that stunning smoke ring, making your smoked chicken not only visually appealing but also a testament to your smoking prowess.
Which Chicken Cuts Are Ideal for Smoking?
Different cuts of chicken offer distinct textures and flavors during the smoking process, with some being more desirable than others. For smoking, the most suitable cuts include wings, thighs, and whole chickens, as they retain moisture exceptionally well and absorb smoke beautifully. Chicken thighs, in particular, are highly sought after for their higher fat content, ensuring they remain juicy throughout the smoking process.
While wings are favored for their bite-sized nature and crispy skin, they do require a shorter smoking duration. Whole chickens present an excellent opportunity for the smoky flavor to deeply penetrate, ensuring the meat is thoroughly infused. When selecting cuts, consider the necessary smoking time and temperature adjustments for each. Typically, wings may take around 1.5 to 2 hours, while whole chickens can require 4 to 5 hours of consistent smoking temperature. Your selection of chicken cuts can greatly influence the final outcome, so choose wisely based on your preferences and those of your guests.
What Flavor Influence Does Hickory Impart on Chicken?

Hickory wood is famous for imparting a rich, bacon-like flavor to chicken, significantly enhancing its taste profile. The robust smokiness of hickory makes it a go-to choice for barbecue enthusiasts looking to elevate their dishes. When you smoke chicken with hickory, anticipate a complex flavor that beautifully harmonizes with a variety of seasonings and marinades.
The distinctive richness of hickory complements the natural flavors of chicken, creating an aromatic experience that tantalizes the palate. As the chicken absorbs the smoke during cooking, it develops a savory, subtly sweet flavor that is difficult to replicate with other woods. This unique flavor fusion makes hickory an exceptional choice for a wide range of chicken dishes, from classic barbecue plates to gourmet smoked creations, ensuring each bite is an explosion of delightful flavor.
Maximizing Your Smoker for Outstanding Smoking Results
Choosing the Right Smoker for Smoking Chicken
Choosing the appropriate smoker is a vital step when smoking chicken with hickory. A variety of smokers are available, each offering unique advantages tailored to different smoking styles and preferences. For example, offset smokers are favored for providing a traditional smoking experience using indirect heat, which results in more flavorful outcomes. They allow for gradual cooking, making them perfect for larger cuts of meat.
Alternatively, vertical smokers are space-efficient and excel at maintaining consistent temperatures. They are ideal for experimenting with various smoking woods, including hickory, ensuring that the smoke permeates every inch of the chicken. Pellet smokers represent a modern innovation that offers convenience and precise temperature control. They allow you to mix hickory pellets with other wood types for exciting flavor combinations. Regardless of your choice, ensuring that your smoker aligns with your cooking style and preferences will significantly enhance your hickory smoking experience.
Key Temperature Control Tips for Successful Chicken Smoking
Maintaining a consistent temperature is crucial for evenly smoking chicken with hickory. The ideal smoking temperature range for chicken typically lies between 225°F and 250°F. To achieve this, several temperature control techniques can assist you in managing your smoker effectively. Here’s how to maintain steady temperatures:
- Preheat your smoker: Make sure your smoker reaches the desired temperature before introducing the chicken inside to ensure even cooking.
- Utilize a digital thermometer: Investing in a high-quality thermometer enables accurate temperature monitoring of your smoker.
- Adjust air vents: Opening or closing air vents can control airflow, which directly affects the internal temperature of the smoker.
- Check for hot spots: Regularly rotate the chicken within the smoker to avoid uneven cooking caused by hot spots.
By employing these temperature control strategies, you can facilitate a smooth smoking process, resulting in perfectly cooked, hickory-flavored chicken.
What Is the Ideal Duration for Smoking Chicken for Optimal Flavor?
The duration required for smoking chicken varies significantly based on the cut and size of the meat. Generally, wings may need only about 2 hours to smoke, while larger cuts, such as whole chickens, may require 4 to 5 hours for optimal flavor and tenderness. Keeping a steady temperature of 225-250°F is crucial, as it allows the chicken to absorb that rich hickory flavor while ensuring thorough cooking.
For the best results, always monitor the internal temperature of the chicken. The USDA recommends that chicken reaches an internal temperature of 165°F for safe consumption. Using a meat thermometer will help you monitor this effectively. If you’re smoking a whole chicken, checking the thickest parts of the breast and thighs is advisable to ensure even cooking throughout. This practice ensures that your chicken is not only flavorful but also safe to eat.
How to Prepare Your Smoker Effectively Before Use?
Before commencing the smoking process, preparing your smoker is a critical step that can greatly impact your cooking experience. Start by thoroughly cleaning the smoker to eliminate any residue from previous uses. This step is essential since leftover flavors can adversely affect the taste of your hickory-smoked chicken.
Next, inspect the smoker for any damage and ensure that all components are properly assembled. A well-functioning smoker will maintain consistent temperatures, enhancing the overall smoking process. Once you confirm that everything is in order, preheat your smoker to the desired temperature before placing the chicken inside. Taking these preparatory steps will establish the foundation for a successful hickory smoking experience.
Exploring Alternative Wood Choices for Smoking Chicken
While hickory is a beloved choice for smoking chicken, experimenting with different wood types can lead to unique flavor profiles. Hickory provides a strong, savory smoke that beautifully complements chicken, but trying woods like apple, cherry, or mesquite can diversify your culinary repertoire. Apple wood imparts a mild, slightly sweet smoke that enhances the chicken’s natural flavor without overwhelming it. Cherry wood contributes a hint of sweetness and a beautiful color, making it an excellent option for presentation.
Mesquite, on the other hand, delivers a bold, earthy flavor that pairs well with heartier chicken cuts. Blending hickory with other wood types creates a layered flavor experience that can elevate your smoked chicken dishes. This exploration of wood flavors can genuinely transform your smoking game, leading to delicious and memorable meals.
Preparing Your Chicken for an Outstanding Smoking Experience
Effective Marinating Techniques for Flavorful Chicken
Marinating your chicken before smoking can significantly enhance its flavor and tenderness. An effective marinade consists of a blend of acids, oils, and seasonings that penetrate the meat, infusing it with flavor while also helping to retain moisture during the smoking process. Common marinades often include ingredients such as citrus juices, soy sauce, garlic, and a variety of herbs, each contributing unique flavor notes.
When marinating chicken for hickory smoking, consider a marinade rich in flavor that complements the strong smokiness of hickory. For instance, a citrus-based marinade can provide a refreshing contrast to the rich, savory smoke. Aim to marinate your chicken for at least 4 hours or overnight for maximum flavor absorption. This method not only enhances taste but also contributes to the overall juiciness of the smoked chicken, ensuring each bite is succulent and satisfying.
The Benefits of Brining Chicken for Enhanced Moisture Retention
Brining chicken is a classic technique that can significantly enhance its moisture content during the smoking process. This method involves soaking the chicken in a saltwater solution, allowing the meat to absorb moisture and flavor. A simple brine typically consists of water, salt, and optional flavorings such as sugar, herbs, or spices, which can elevate the taste of the chicken.
When brining chicken for smoking, aim for a solution with a balanced salt-to-water ratio, usually about 1 cup of salt to 1 gallon of water. Soak the chicken for a duration of 4 to 12 hours, depending on the size of the cut. The result is a juicy, flavorful piece of chicken that holds up beautifully against the hickory smoke, ensuring a satisfying bite every time.
What Are the Best Seasonings to Use for Hickory-Smoked Chicken?
Seasoning is vital when smoking chicken with hickory, as it amplifies the meat’s natural flavors while complementing the robust smokiness of hickory. Some of the best seasonings to consider include paprika, garlic powder, and black pepper, each adding depth and complexity to your chicken dishes. Paprika offers a rich color and subtle sweetness, while garlic powder provides an aromatic kick that pairs well with the savory notes of hickory.
Black pepper introduces a spicy edge, enhancing the overall flavor profile of the dish. If you prefer a bit more heat, consider incorporating cayenne pepper or chili powder into the mix. Applying these seasonings before marinating or brining allows the flavors to permeate the meat, resulting in delectably seasoned hickory-smoked chicken that tantalizes the taste buds. Be sure to balance these seasonings to elevate the smoky flavor without overpowering the dish.
Cooking Techniques for Achieving Perfectly Smoked Chicken
Understanding Direct vs. Indirect Heat in Smoking
Understanding the difference between direct and indirect heat is essential for achieving a successful smoking experience with chicken. For optimal results, using indirect heat is the preferred method for smoking, as it allows for even cooking without the risk of burning the chicken. Indirect heat involves positioning the chicken away from the direct flame, allowing the smoke to circulate and permeate the meat uniformly.
Direct heat can cause the exterior of the chicken to cook too quickly while leaving the interior undercooked. This method is generally reserved for grilling rather than smoking. To set up your smoker for indirect heat, arrange your hickory wood on one side and place the chicken on the opposite side, ensuring the smoke flows over the meat. This technique will help you achieve perfectly cooked, tender, and smoky chicken that is sure to impress your guests.
How to Effectively Monitor the Cooking Process?
Monitoring the cooking process is vital to ensure your chicken reaches the desired doneness while being infused with hickory smoke. Utilizing a reliable meat thermometer is the most accurate way to check the internal temperature of the chicken. This tool enables you to gauge doneness accurately without frequently opening the smoker, which can cause temperature fluctuations.
Insert the thermometer into the thickest part of the chicken, avoiding bones, as they can yield false readings. The USDA recommends that chicken reaches an internal temperature of 165°F for safe consumption. Regularly checking the temperature helps you maintain control over the cooking process, ensuring that your hickory-smoked chicken is both safe and delicious. This meticulous attention to detail will elevate your smoking skills and yield consistently excellent results.
The Importance of Resting Chicken After Smoking
Allowing your chicken to rest after smoking is a critical step that should never be overlooked. Letting the chicken sit for approximately 10 to 15 minutes after it comes out of the smoker enables the juices to redistribute throughout the meat. This process enhances the overall flavor and tenderness, resulting in a more enjoyable eating experience.
During the resting period, the chicken continues to cook slightly due to residual heat, ensuring that every bite is juicy and flavorful. Loosely covering the chicken with aluminum foil can help retain heat while preventing the skin from becoming soggy. Neglecting this step can lead to dry chicken, so be sure to incorporate resting into your smoking routine to achieve perfectly finished hickory-smoked chicken.
Selecting the Right Wood for an Exceptional Smoke Experience
The choice of wood can dramatically shape the flavor of your smoked chicken. While hickory is a favored option due to its strong and savory profile, exploring other woods can introduce unique taste dimensions. Woods such as oak, cherry, and apple each offer distinct characteristics that can complement the hickory smoke.
For instance, mixing hickory with cherry can create a sweet and smoky flavor that enhances the chicken’s taste while adding a beautiful color. Alternatively, apple wood provides a subtle sweetness that balances the richness of hickory. Each wood variety contributes its essence, making it worthwhile to explore and discover combinations that suit your personal palate. The flexibility in wood choices can elevate your smoking game, leading to delightful culinary experiences.
Health and Nutritional Benefits of Hickory-Smoked Chicken
Exploring the Health Benefits of Hickory-Smoked Chicken
Hickory-smoked chicken boasts numerous health benefits, making it a compelling alternative to traditional fried chicken. A significant advantage is its lower fat content. Smoking chicken, particularly when using lean cuts like the breast or thighs, results in a dish that is rich in protein without the added grease from frying.
Moreover, the smoking process may introduce compounds that possess antioxidant properties, potentially contributing to overall health when consumed as part of a balanced diet. Hickory smoke not only enhances flavor but also serves as a healthier cooking method, allowing you to indulge in your favorite dishes guilt-free while still enjoying that iconic smoky taste.
How Does Hickory Smoking Impact the Nutritional Value of Chicken?
While the primary goal of smoking is to enhance flavor, it’s important to consider how hickory smoking might influence the nutritional value of chicken. The smoking process can slightly alter the meat’s nutritional profile, often adding flavor without significantly changing the overall content of proteins or fats. Hickory itself introduces unique compounds into the chicken, contributing to a richer flavor experience.
Additionally, smoking tends to reduce moisture content, which can concentrate certain nutrients. However, with proper preparation methods, such as brining or marinating, you can retain moisture and preserve the nutritional integrity of the chicken. This thoughtful approach ensures that you enjoy flavorful, hickory-smoked chicken without compromising nutrition.
Expert Insights on Hickory’s Influence on Meat Texture
Hickory smoke can significantly affect the texture of chicken, leading to a tender and juicy outcome. The smoking process aids in breaking down collagen in the meat, making the chicken more tender and succulent. This aspect is particularly beneficial for tougher cuts, which thrive on the low-and-slow cooking method that hickory smoking provides.
The gradual introduction of smoke and heat allows the chicken to cook evenly, minimizing the risk of dry or overcooked meat. When executed correctly, the result is a beautifully textured piece of chicken that is both moist and flavorful. Incorporating hickory into your smoking technique not only enhances flavor but also elevates the overall mouthfeel, ensuring that every bite is satisfying.
How Does Hickory Enhance the Flavor Profile of Chicken?
Hickory wood possesses a remarkable ability to influence the flavor profile of chicken, imparting deep, savory notes that many barbecue enthusiasts crave. The strong, smoky flavor of hickory can be likened to the taste experience of bacon, adding an irresistible richness to the chicken. This robust flavor complements the natural taste of chicken, creating a delightful harmony that appeals to a wide range of palates.
Furthermore, the slight sweetness of hickory balances the savory notes, enriching the overall complexity of the dish. When paired with appropriate marinades and seasonings, hickory smoke creates a multi-layered flavor experience that elevates your smoked chicken to new heights. This characteristic makes hickory a beloved choice among grill masters and home cooks alike, ensuring it remains a staple in the world of barbecue.
Serving and Pairing Suggestions for Hickory-Smoked Chicken
Perfect Side Dishes to Accompany Hickory-Smoked Chicken
When serving hickory-smoked chicken, the right sides can significantly enhance the overall dining experience. Classic accompaniments include coleslaw, baked beans, and cornbread, all of which offer flavors that balance the robust smokiness of the chicken. Coleslaw provides a refreshing crunch that cuts through the richness of the smoke, while baked beans add a touch of sweetness that pairs perfectly with the savory flavor of hickory.
Cornbread, with its slightly sweet and buttery texture, is another fantastic side that complements the smoky chicken delightfully. Alternative options, such as grilled vegetables or potato salad, also work well, providing variety and balance to your meal. Choosing sides that enhance the hickory flavor while introducing different textures and tastes will create a well-rounded and satisfying barbecue spread.
Recommended Beverage Pairings for Your Meal
Enhancing your hickory-smoked chicken meal with the right beverages can elevate the entire dining experience. Lagers and ales are excellent choices, as their crispness can cut through the richness of the smoky flavor, refreshing your palate with each sip. The carbonation in these beers aids in cleansing the taste buds, allowing you to fully appreciate the hickory infusion in your chicken.
For wine enthusiasts, Zinfandel is an ideal option, as its fruity and spicy notes harmonize beautifully with the savory smokiness of hickory-smoked chicken. Additionally, cocktails featuring citrus elements or a hint of sweetness can complement the dish, creating a well-rounded dining experience. Selecting the right beverage pairing can enhance the flavors of your meal, making every bite and sip a delightful experience.
Tips for Presenting Hickory-Smoked Chicken Elegantly
Serving your hickory-smoked chicken with flair can significantly enhance the overall dining experience. A simple yet effective presentation tip is to serve the chicken on a wooden platter, which not only complements the rustic nature of smoked dishes but also adds visual appeal. Garnishing with fresh herbs like parsley or thyme lends a pop of color and elevates the aesthetic of your dish.
Consider arranging the chicken in a way that showcases its beautiful smoky color, perhaps by cutting into it to reveal the perfectly cooked interior. Pairing the chicken with colorful sides can create an inviting and appetizing display on the table. Thoughtful presentation not only enhances the meal visually but also sets the tone for a truly memorable dining experience.
Storing and Reheating Your Hickory-Smoked Chicken Properly
How to Store Leftover Hickory-Smoked Chicken for Maximum Freshness?
Properly storing leftover hickory-smoked chicken is essential for maintaining its flavor and texture. The best method for storing chicken is in airtight containers placed in the refrigerator. This technique helps preserve the delectable smoky flavor while preventing the chicken from drying out. When stored correctly, the chicken can remain fresh for up to four days.
Before placing the chicken in the refrigerator, allow it to cool to room temperature. Avoid leaving it out for too long to prevent bacterial growth. For longer storage, consider freezing the hickory-smoked chicken in vacuum-sealed bags, which can keep it fresh for up to three months. Proper storage techniques ensure that your hickory-smoked chicken retains its quality, allowing you to enjoy the rich flavors at a later date.
Reheating Techniques That Maintain Flavor and Juiciness
Reheating hickory-smoked chicken can be a delicate process if you want to maintain its delicious flavor and moisture. One effective method is to reheat the chicken in an oven or on a grill. Preheat the oven to a low temperature of approximately 300°F, then cover the chicken with foil to prevent it from drying out. This approach allows for gentle reheating, preserving the smoky flavor while keeping the chicken juicy.
Alternatively, reheating on a grill can add an extra touch of smokiness, further enhancing the flavor. Ensure you monitor the process closely to avoid overcooking, as this can lead to dry chicken. By using these reheating techniques, you can ensure that your hickory-smoked chicken remains just as flavorful and satisfying as it was when freshly cooked.
Guidelines for Freezing and Thawing Hickory-Smoked Chicken
Freezing hickory-smoked chicken is an excellent way to preserve its flavor for future meals. When freezing, utilize vacuum-sealed bags to eliminate air and prevent freezer burn. This technique helps maintain the chicken’s moisture and flavor for up to three months. Be sure to label and date the bags for easy identification later.
When it’s time to thaw the chicken, the best approach is to transfer it to the refrigerator and allow it to thaw slowly overnight. This gradual process helps retain moisture and flavor, ensuring that your hickory-smoked chicken is just as delicious when reheated. Avoid thawing at room temperature, as this can lead to bacterial growth. By adhering to these freezing and thawing tips, you can enjoy your hickory-smoked chicken at its best, even weeks after it was originally cooked.
Safe Reheating Temperatures for Chicken to Ensure Safety
Reheating hickory-smoked chicken to a safe internal temperature is crucial for ensuring it remains safe to eat. The USDA recommends reheating chicken to an internal temperature of 165°F. This temperature not only guarantees safety but also helps preserve the chicken’s flavor and juiciness.
Using a meat thermometer to check the temperature is the best method to ensure that your chicken has reached this safe level. Focus on the thickest parts of the meat, as they tend to take longer to heat through. By following these safe reheating temperatures, you can enjoy your hickory-smoked chicken with confidence, knowing it is both delicious and safe to eat.
Resolving Common Challenges When Smoking Chicken
What to Do If the Chicken Is Too Smoky?
If you find that your chicken has become excessively smoky, there are several adjustments you can make for future smoking sessions to address this issue. First, consider reducing the amount of hickory wood used during the smoking process. Hickory has a strong flavor, and using less can significantly tone down the smokiness.
Additionally, increasing the ventilation in your smoker can help prevent the build-up of excessive smoke, which can lead to bitter flavors. Opening vents or adjusting the smoker’s airflow can allow the smoke to disperse more effectively. Lastly, consider experimenting with blending hickory with milder woods, such as apple or cherry, to create a more balanced flavor profile in your smoked chicken.
How to Prevent Dry Chicken While Smoking?
Dry chicken can be disappointing when smoking, but several strategies can help keep your smoked chicken moist and juicy. Utilizing a water pan in the smoker is a common technique that adds humidity to the cooking environment, helping retain moisture in the chicken. Additionally, avoiding overcooking is crucial, so it is essential to closely monitor the internal temperature.
Brining your chicken before smoking can also be a game-changer, as it helps the meat retain moisture and flavor. Lastly, consider wrapping the chicken in foil halfway through the smoking process to lock in moisture. By implementing these techniques, you can enjoy perfectly moist hickory-smoked chicken every time.
How to Address Uneven Cooking When Smoking Chicken?
Uneven cooking can occasionally occur while smoking chicken, resulting in parts that are undercooked or overcooked. To combat this issue, regularly rotate the chicken within the smoker to ensure all sides receive equal exposure to the smoke and heat. This practice can help mitigate hot spots in the smoker that contribute to uneven cooking.
Maintaining a consistent smoker temperature is also crucial. Fluctuations can affect cooking times and results, so ensuring the smoker remains stable throughout the process will lead to more even cooking. By taking these steps, you can guarantee that your hickory-smoked chicken is cooked evenly, providing a delicious and satisfying meal.
Frequently Asked Questions About Smoking Chicken
1. Can I use hickory wood chips for grilling chicken?
Yes, hickory wood chips can be utilized for grilling chicken to impart a smoky flavor. Just be cautious with the quantity to avoid overpowering the meat.
2. How do I know when my hickory-smoked chicken is done?
Utilize a meat thermometer to check the internal temperature; it should reach 165°F for safe consumption.
3. Can I mix hickory with other woods for smoking?
Absolutely! Combining hickory with milder woods, such as apple or cherry, can create a balanced flavor profile.
4. How long should I soak hickory chips before using them for smoking?
Soak hickory chips for a minimum of 30 minutes to help control the burn rate and enhance smoke production during cooking.
5. What are the best sides to serve alongside hickory-smoked chicken?
Classic sides, such as coleslaw, baked beans, and cornbread, beautifully complement the smoky flavor of the chicken.
6. Can I smoke chicken at higher temperatures?
While it’s possible to smoke chicken at higher temperatures, it’s best to stay within the 225-250°F range for optimal flavor and tenderness.
7. How can I prevent my chicken from drying out while smoking?
Brining the chicken before smoking and using a water pan in the smoker can help retain moisture during the cooking process.
8. Is hickory-smoked chicken a healthy option?
Hickory-smoked chicken is a healthier alternative to fried chicken, offering lower fat content while being rich in protein.
9. How should I store leftover hickory-smoked chicken?
Store leftover chicken in airtight containers in the refrigerator for up to four days or freeze it in vacuum-sealed bags for longer preservation.
10. What should I do if my chicken tastes too smoky?
To reduce smokiness, use less hickory wood during smoking or enhance ventilation in your smoker to allow smoke to disperse more efficiently.
Connect with us on Facebook!
The Article Using Hickory For Smoky Chicken: A Guide appeared first on https://pitmastersarsenal.com
The Article Hickory for Smoky Chicken: Your Essential Guide Was Found On https://limitsofstrategy.com
-
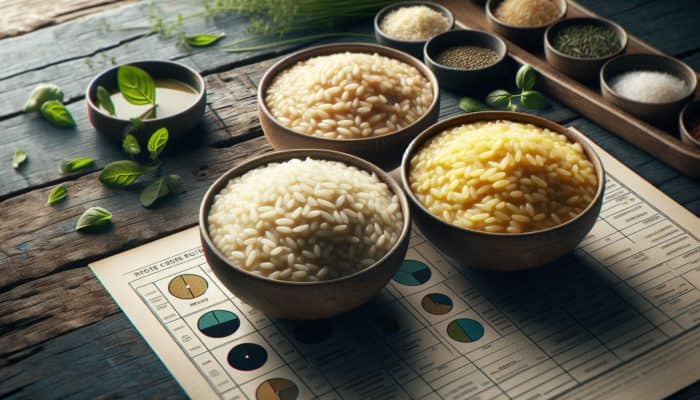
Risotto Techniques: Master Creamy Perfection Today
Key Ingredients for Crafting a Luxuriously Creamy Risotto
How to Select the Perfect Rice for Creamy Risotto
When it comes to creating the ultimate creamy Risotto, the selection of the right type of rice is of utmost importance. Varieties such as Arborio, Carnaroli, and Vialone Nano are particularly esteemed for their elevated starch content, which is vital for achieving the rich, velvety texture that distinguishes expertly prepared Risotto. Each rice variety imparts unique characteristics to the dish, influencing both its creaminess and overall flavor profile. By understanding these distinctions, you can tailor your Risotto to align with your preferences and the specific culinary creation you wish to accomplish.
- Arborio: This is the most commonly utilized variety, recognized for its short, plump grains that excel at absorbing liquid.
- Carnaroli: Often referred to as the “king” of risotto rice, it possesses a higher starch content and a firmer texture, making it perfect for achieving creamy outcomes.
- Vialone Nano: Known for its exceptional combination of creaminess and al dente texture, it is highly prized in regional Venetian dishes.
- Baldo: Comparable in quality to Arborio, it offers commendable starch characteristics, though it may be less readily available.
- Roma: While not traditional, it can yield satisfactory results if cooked correctly.
Your choice of rice can significantly influence the ultimate outcome of your Risotto. If you aim to venture beyond conventional options, Carnaroli offers a more luxurious texture, while Vialone Nano introduces a regional flair that is certainly worth exploring. Your rice selection should not only reflect your desired texture but also pay homage to the culinary traditions you wish to celebrate, thereby enhancing your entire cooking journey.
How Broth Enhances Creaminess and Flavor in Risotto
The type of broth you utilize in Risotto is paramount for enriching both the flavor and achieving that iconic creamy texture. A well-prepared broth acts as the foundation of the dish, infusing the rice with delicious taste while allowing it to absorb the moisture necessary for optimal cooking. For the best results, homemade broth made from chicken, beef, or an assortment of vegetables is often preferred. Nonetheless, high-quality store-bought alternatives can also provide satisfactory results when time constraints are a factor.
When selecting broth, chicken or vegetable options are typically favored, although seafood broth can elevate a Seafood Risotto with its briny depth and complexity. The key is to ensure that the broth is well-seasoned, as this directly affects the flavor profile of your Risotto. It is advisable to warm the broth before adding it to the rice, as this prevents sudden temperature drops that could adversely impact the cooking process and texture.
Understanding the Importance of Fats in Creamy Risotto Preparation
In the journey of crafting a wonderfully creamy Risotto, fats play an essential role in achieving a rich and satisfying mouthfeel. Both butter and olive oil not only serve to sauté the aromatics at the beginning of the cooking process, but they also impart a luxurious richness to the final dish. Olive oil offers a fruity, nutty flavor, while butter contributes a silky creaminess that envelops the rice grains, enhancing both taste and texture.
The introduction of fats is significant in the emulsion of the Risotto, assisting in binding the starches released during cooking into a creamy sauce. As you stir the rice and gradually add broth, the fats coat the grains, which elevates the overall mouthfeel. This interaction between fat and starch is what transforms Risotto from mere cooked rice into a sumptuous culinary experience. Careful consideration of the type and amount of fat used is vital; insufficient fat may result in a lackluster dish, while excessive fat can overwhelm the delicate balance of flavors.
Proven Techniques for Achieving the Ultimate Creamy Risotto

Mastering the Stirring Technique for Perfect Risotto
Stirring is far from a mundane task when preparing Risotto; it constitutes a fundamental technique that significantly impacts the final texture. Continuous stirring helps release starch from the rice grains, creating that creamy, luxurious sauce that epitomizes a well-crafted Risotto. The objective is to achieve a harmonious blend where the rice absorbs the broth evenly while maintaining a slight firmness, a hallmark of top-notch Risotto.
To hone your stirring technique, commence by heating your pan and adding your chosen fats to sauté the aromatics. Once the rice is lightly toasted, pour in a ladleful of broth and begin stirring. A wooden spoon is the preferred tool for this task, allowing for better control and even heat distribution. Stir gently yet consistently, ensuring you scrape the bottom of the pan to prevent sticking or burning.
As the liquid is absorbed, gradually add more broth while continuing to stir. This process typically takes around 18-20 minutes. You’ll know it’s time to stop stirring when the Risotto achieves that ideal creamy consistency without becoming overly mushy. This technique not only enhances the texture but also enriches the overall flavor, as the ingredients meld beautifully through your careful manipulation.
Gradual Broth Addition Method for Perfect Risotto Texture
Incorporating broth gradually is a vital technique for creating creamy Risotto, ensuring a consistent texture and preventing the rice from overcooking. This method requires adding small quantities of broth at a time, allowing the rice to fully absorb the liquid before adding more. This approach maximizes starch release from the grains, leading to that coveted creaminess.
Start with a ladleful of broth, pouring it into the rice only after the previous addition has been absorbed. Though this process may seem tedious, it is essential for achieving that perfect Risotto. Notably, renowned chef Massimo Bottura champions this method, emphasizing that slow cooking allows flavors to develop fully. Using a high-quality broth also significantly contributes to the dish’s flavor profile, so keep it warm on the stove for easy access.
Real-life examples, such as preparing a Mushroom Risotto, underscore the importance of this gradual addition. As the mushrooms release their moisture, they infuse the dish with rich umami. However, without the gradual incorporation of broth, the delicate balance could be compromised, resulting in a clumpy texture rather than the desired creaminess.
Final Touches That Elevate Risotto’s Creaminess
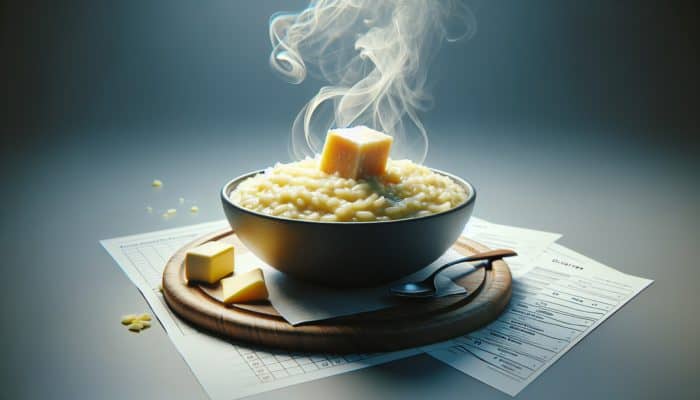
The finishing touches added to your Risotto are crucial for enhancing both its creaminess and flavor. Integrating ingredients like Parmigiano-Reggiano, cream, or additional butter just before serving can introduce layers of richness that elevate the entire dish. These final ingredients should be added right before plating to maintain their integrity and effectiveness.
Parmigiano-Reggiano is a classic addition, grated finely and stirred in until melted. This not only contributes to the creamy texture but also imparts a nutty, savory depth that beautifully complements the base flavors. Alternatively, a splash of cream can provide an even richer mouthfeel. Some chefs prefer to finish their Risotto with a knob of butter, which adds glossiness and smoothness, enhancing the overall dish.
Experimenting with various combinations can yield exciting variations. For an indulgent finish, consider drizzling truffle oil, which can elevate a simple Risotto into an extravagant dish. The key is to taste as you go, ensuring that the balance of flavors and textures is just right before serving to your guests.
How to Achieve the Perfect Texture in Risotto
Exploring the Critical Role of Starch in Achieving Creamy Risotto
The starch content in risotto rice is fundamental for achieving that signature creamy texture that is so highly coveted. As the rice cooks, it releases starch into the liquid, creating a natural sauce that binds the grains together. This process is essential for striking the perfect balance between the firmness of the rice and the creaminess of the dish.
When rice grains are stirred continuously, they rub against each other, releasing more starch into the mixture. This is why Risotto is traditionally stirred rather than left unattended. The right amount of starch released will yield a Risotto that is creamy yet retains its structure. Understanding this balance is crucial; too little starch can result in a dry dish, while excessive starch can lead to an undesirable gummy texture.
Various cooking techniques also influence the release of starch. The initial toasting of the rice helps lock in moisture while preparing it for cooking. As you gradually add broth and stir, you will notice how the texture gradually transforms. The goal is to achieve a creamy consistency where each grain is perfectly coated while retaining its shape, resulting in an exquisite dish.
What is the Ideal Cooking Time and Temperature for Perfect Risotto?
The correct cooking time and temperature for Risotto are fundamental for achieving the perfect texture. Risotto should be cooked over medium heat, allowing for even absorption of the broth without the risk of burning or uneven cooking. Generally, it takes about 18-20 minutes from the initial addition of broth to reach the desired creamy consistency.
Throughout the cooking process, closely monitoring the temperature is critical. High heat will cook the rice too quickly, leading to an uneven texture and potentially burning the bottom. Conversely, if the heat is too low, the rice will absorb the broth too slowly, resulting in an overcooked, mushy texture. A constant simmer is key, permitting the rice to absorb the liquid gradually while providing ample time to release starch.
As the cooking time progresses, continuously test the rice for doneness. It should be creamy with a slight bite to the grain, known as “al dente.” Upon achieving this perfect balance, your Risotto is ready to be enhanced with finishing ingredients, ensuring that every bite is a delightful combination of creaminess and texture that will please your palate.
Why Allowing Risotto to Rest is Essential for Optimal Texture
Allowing your Risotto to rest before serving is an often-overlooked yet critical step in achieving the perfect consistency. Resting permits the rice to absorb any remaining liquid, helping the dish reach an optimal texture. This resting phase can transform a good Risotto into an exceptional one by allowing the flavors to meld and the creaminess to settle.
The ideal resting time is typically around 2-3 minutes after cooking. During this period, the starches continue to work their magic, thickening the sauce while ensuring that it remains creamy without becoming overly dense. Covering the pot with a lid during this time helps retain heat, allowing the residual steam to further enhance the dish.
Resting is particularly important if you have added finishing touches like cheese or butter, as it gives them time to fully incorporate into the Risotto. After resting, gently fluff the Risotto with a fork before serving, allowing for an airy texture that complements its creamy nature. This small yet crucial step ensures that each portion remains cohesive and indulgently delicious, ready to impress your guests.
Common Mistakes to Avoid When Making Risotto
How to Prevent Overcooking Rice in Risotto
One of the most prevalent pitfalls when making Risotto is overcooking the rice, leading to a mushy texture devoid of the desirable creaminess. Overcooked rice can be unappetizing and lose its structure, resulting in a uniform, unappealing consistency that detracts from the dish’s overall appeal.
To avoid overcooking, it is essential to monitor the rice closely during the cooking process. The ideal texture should be creamy and al dente, with a slight firmness that allows the grains to hold their shape. Tasting regularly during the final stages of cooking will provide insights into the rice’s doneness. If you notice the rice becoming too soft, it is crucial to reduce the heat and adjust the cooking time as needed.
Another helpful tip is to pay attention to the amount of broth added. If too much liquid is introduced too quickly, it can lead to unintended softening of the rice. Gradually adding broth allows for better control over the cooking process. Maintaining the right heat level and stirring consistently will help ensure that the rice cooks evenly without becoming mushy, resulting in a delectably creamy Risotto.
Why Choosing the Wrong Type of Rice Can Ruin Your Risotto
Selecting an unsuitable type of rice can severely compromise the quality of your Risotto. Varieties such as long-grain rice or basmati are not appropriate for Risotto because they lack the necessary starch content required to create the desired creaminess. When these types of rice are utilized, you may end up with a dish that is dry and devoid of the luscious texture typical of authentic Risotto.
The best choices for Risotto are short-grain varieties like Arborio, Carnaroli, and Vialone Nano, each possessing a high starch content ideal for creamy dishes. The starches released during cooking create the signature silky sauce. If you inadvertently select a non-risotto rice, you will likely end up with a watery dish, far from the intended creamy texture.
It is essential to pay careful attention to the type of rice selected, as it is foundational to the dish’s success. Investing time in understanding the characteristics of different rice varieties will serve you well in the long run, enhancing your Risotto-making skills and ensuring delicious outcomes.
How to Avoid Rushing the Cooking Process in Risotto Preparation
Rushing the cooking process is a common mistake that can lead to disappointing results when preparing Risotto. This dish requires patience and attention, as it needs time to develop its flavors and achieve the perfect creamy consistency. Attempting to speed up the process can result in uneven cooking and a final product that lacks the desired texture.
Risotto demands a gradual approach, especially regarding broth addition and stirring. When broth is added too quickly, it can overwhelm the rice, causing uneven cooking and preventing proper starch release. Signs of rushed Risotto typically include a soupy texture and undercooked rice, which can be quite unsatisfactory.
To combat this, focus on maintaining a steady, manageable pace during the cooking process. Allow each addition of broth to be fully absorbed before adding more, and stir consistently to promote even cooking. By respecting the time and effort involved in making Risotto, you will be rewarded with a dish that embodies the rich, creamy qualities that make it a beloved classic in Italian cuisine.
Effective Strategies for Perfecting Creamy Risotto Techniques
How to Toast Rice for Enhanced Flavor in Risotto
Toasting the rice prior to adding liquid is a technique often overlooked, yet it significantly enhances both flavor and texture. This method involves heating the rice in the pan with a fat source, such as olive oil or butter, until the grains become slightly translucent and aromatic. This initial step is crucial for developing a deeper, more nuanced flavor profile in the final dish.
The benefits of toasting rice extend beyond flavor; it also helps create a barrier that protects the grains during the cooking process. This ensures that when you add broth, the rice absorbs it evenly, preventing the grains from becoming overly mushy. The result is a Risotto that possesses a pleasing bite while still being enveloped in a creamy sauce that delights the palate.
Expert chefs recommend toasting for just a few minutes until the rice is coated and fragrant. This transformative step elevates your Risotto from a simple side dish to a culinary delight, showcasing a depth of flavor that excites the senses and enhances the overall dining experience.
How to Layer Flavors for Maximum Impact in Risotto
Layering flavors in Risotto is a culinary art that can significantly enhance the dish’s complexity and enjoyment. By adding ingredients at various stages during the cooking process, you can create a harmonious blend of flavors, ensuring that each component shines while contributing to the overall experience.
Begin by sautéing aromatics such as onions or shallots in your chosen fat to form the flavor base. Once softened, add the rice and lightly toast it, allowing it to absorb the flavors of the aromatics. As you gradually add broth, consider incorporating additional ingredients such as mushrooms, herbs, or vegetables at different intervals; for instance, adding mushrooms early on allows them to impart their essence into the dish, while fresh herbs can be stirred in at the end for a bright, vibrant finish.
Utilizing this layering technique can elevate your Risotto to new culinary heights. By creating depth through careful timing of ingredient additions, you’ll cultivate a dish that not only boasts a creamy texture but also a complex flavor profile that invites exploration with every delectable bite.
Steps to Achieve the Right Consistency in Risotto
Achieving the perfect Risotto consistency is a delicate balance between creaminess and texture. The ideal Risotto should be thick enough to hold its shape slightly when plated but still ooze a creamy, sauce-like quality. To reach this level of perfection, several specific steps must be followed diligently.
- Start with the right rice: Choose short-grain varieties known for their starch content, such as Arborio or Carnaroli.
- Toast the rice: Heat in fat for a few minutes to develop flavor and create a barrier for moisture retention.
- Gradually add broth: Incorporate ladlefuls of warm broth slowly, allowing each addition to be completely absorbed before the next.
- Consistent stirring: Keep stirring to release starch and promote a creamy texture.
- Test for doneness: Taste the rice frequently to ensure it reaches al dente, maintaining a slight bite.
- Finish with fats: Add butter and cheese at the end for an extra layer of creaminess.
- Rest before serving: Allow the Risotto to sit, covered, for a few minutes to further enhance its texture.
By diligently following these steps, you will create a Risotto that achieves the ideal balance of creaminess and texture, allowing each grain to shine within a rich, cohesive sauce that is sure to impress your guests.
Choosing the Right Rice Variety for Creamy Risotto
Selecting the correct rice variety is fundamental to crafting a truly creamy Risotto. Not all rice is created equal; the right type can significantly impact the dish’s outcome. The most commonly used varieties include Arborio, Carnaroli, and Vialone Nano, each offering unique characteristics, recognizable texture, and flavor.
Arborio rice is the most widely recognized, known for its plump grains and ability to absorb liquid while retaining a slightly firm bite. Its high starch content makes it a staple for many Risottos. Carnaroli, often considered the superior choice, contains even more starch and retains its firmness during cooking, making it ideal for achieving a creamy texture. Lastly, Vialone Nano, with its shorter grains, is celebrated for its ability to absorb flavor while maintaining a tender texture, making it a favorite among chefs.
When selecting your rice, consider the dish you wish to create. For a luxurious seafood Risotto, Carnaroli is often favored for its rich mouthfeel, while Arborio serves well for traditional recipes. Understanding the differences among these rice types will empower you to make informed choices, ensuring your Risotto achieves the desired creaminess and flavor that will delight your diners.
Exciting Variations of Creamy Risotto to Try
Indulging in the Flavorful Risotto Milanese
Risotto Milanese is a variation that elevates traditional Risotto with the luxurious addition of saffron, imparting a distinctive golden hue and a unique flavor profile. This classic dish hails from Milan and is often associated with celebrations and special occasions, showcasing the finesse of Italian culinary artistry.
What sets Risotto Milanese apart is not only its vibrant color but also its aromatic depth, achieved by steeping saffron threads in broth before being incorporated into the rice. The use of butter and Parmigiano-Reggiano further enriches the dish, resulting in a creamy, indulgent texture that beautifully complements the delicate saffron notes.
To prepare this Risotto, begin by toasting the rice as usual, then gradually incorporate the saffron-infused broth while stirring constantly to achieve that signature creaminess. The saffron not only enhances the color but also provides an earthy, floral aroma that distinguishes it from more standard Risottos. This variation is a testament to the beauty of Italian cuisine, showcasing how simple ingredients can be combined to create an extraordinary dish that captivates the senses.
What Makes Seafood Risotto a Luxurious Choice?
Seafood Risotto presents a luxurious twist on the classic recipe, incorporating a variety of fresh seafood to create a rich and flavorful dish. This variation allows for creativity, as you can tailor the seafood components to reflect local offerings or personal preferences.
When preparing seafood Risotto, it is essential to select fresh ingredients such as prawns, scallops, clams, or squid, as their flavors elevate the overall dish. The cooking technique remains consistent with traditional Risotto; however, timing is crucial. Seafood should be introduced toward the end of the cooking process to prevent overcooking, which can result in a rubbery texture that detracts from the dish’s appeal.
Consider using a seafood broth for added depth or even incorporate the shells of the seafood into your base broth for a richer flavor profile. This method can significantly enhance the umami notes in your Risotto, making each bite a delectable experience. The combination of creamy rice with tender seafood creates a dish that is both comforting and refined, perfect for special occasions or a sophisticated weeknight dinner that will impress your guests.
Creating Delicious Vegetarian Risotto Options
Vegetarian Risottos offer a delightful alternative that showcases the versatility of this dish, allowing for an abundance of flavors and colors. By incorporating a variety of seasonal vegetables, you can create a vibrant and nutritious Risotto that appeals to both vegetarians and meat-eaters alike.
Popular vegetarian ingredients include:
- Asparagus
- Mushrooms
- Peas
- Spinach
- Butternut squash
- Tomatoes
- Artichokes
- Broccoli
Each of these ingredients brings its unique flavor and texture to the dish. For instance, adding asparagus and peas in the final stages of cooking offers a fresh, bright element, while mushrooms can be sautéed at the beginning to impart deep, earthy flavors. When incorporating vegetables, consider their cooking times to ensure they retain their integrity and complement the creamy texture of the Risotto.
A well-executed vegetarian Risotto can be just as indulgent as its meat-based counterparts, proving that this dish can cater to a variety of dietary preferences while remaining thoroughly satisfying and delicious, making it a fantastic choice for any occasion.
What is the Allure of Mushroom Risotto?
Mushroom Risotto is a beloved variation that enhances the creamy base with the earthy richness of mushrooms. This dish showcases how different mushroom types can dramatically impact flavor and texture, making it a favorite among both mushroom lovers and Risotto enthusiasts.
When preparing mushroom Risotto, consider using a blend of mushrooms for complexity. Options like shiitake, cremini, and portobello can provide a range of flavors from mild to robust. Start by sautéing the mushrooms early in the cooking process to develop their flavor and allow them to release their moisture, enriching the broth and enhancing the overall dish.
The technique remains consistent with traditional Risotto, involving the gradual addition of broth and continuous stirring to achieve that creamy texture. As the mushrooms blend with the rice, they contribute to the overall depth of umami, making each bite a rich and indulgent experience that is sure to satisfy. For an added touch, finish with a sprinkle of fresh herbs like thyme or parsley to brighten the dish and elevate the mushroom notes, creating a truly memorable meal.
Enhancing Risotto with Additional Ingredients
Incorporating Proteins into Your Risotto for Extra Flavor and Substance
Integrating proteins into Risotto can add depth and substance, transforming a simple dish into a hearty meal. Various meats, such as chicken, pork, or even beef, can be utilized to enhance the flavor and nutritional value of the dish, making it more satisfying.
For chicken Risotto, consider using diced chicken thighs for their succulent texture. Sauté the chicken first before adding the rice, allowing it to develop a nice sear that infuses the dish with rich flavors and enhances the overall experience. Pork can be introduced in the form of pancetta or chorizo, adding a salty, savory element that beautifully complements the creaminess of the Risotto.
For a seafood twist, incorporating shellfish like prawns or scallops can significantly elevate the dish. Their delicate flavors pair perfectly with the creamy rice, creating a luxurious dining experience that is both comforting and elegant. The key is to time the addition of proteins correctly, ensuring they are cooked to perfection without becoming tough or overdone, resulting in a delightful meal that showcases the versatility of Risotto.
Adding Vegetables for Enhanced Nutrition and Flavor in Risotto
Vegetables play a crucial role in enhancing both the nutrition and visual appeal of Risotto. By introducing seasonal vegetables, you not only add color but also texture and flavor to the dish, creating a well-rounded meal that is both satisfying and delicious. Cooking vegetables alongside the rice can create a harmonious blend of tastes and help brighten the overall profile.
Incorporating vegetables like peas or spinach towards the end of the cooking process allows them to retain their vibrant colors and fresh flavors, adding a lovely contrast to the creamy rice. For heartier vegetables, such as butternut squash or carrots, consider sautéing them to caramelize or soften them before adding the rice. This method allows their natural sugars to caramelize, enriching the Risotto with additional sweetness and depth of flavor.
Herbs, such as basil or parsley, can also be added in the final stages to provide a fresh lift and aroma. The combination of creamy Risotto with a variety of vegetables not only enriches the dish nutritionally but also creates a visually stunning presentation that is sure to impress your guests and make every meal a delightful experience.
Using Herbs and Spices to Elevate the Flavors of Risotto
Herbs and spices are powerful tools for enhancing the flavor profile of Risotto, allowing for a range of creative interpretations. Fresh herbs, in particular, can brighten the dish, while spices can introduce warmth and depth that enhance the overall experience.
Classic herbs to consider include parsley, basil, and thyme, which can enhance the overall complexity of the dish. Adding chopped herbs just before serving helps maintain their vibrant colors and fresh flavors, providing a stunning contrast against the creamy backdrop of the Risotto, which will excite the palate.
Spices also play a transformative role; for instance, a dash of nutmeg can add warmth, while a sprinkle of smoked paprika can introduce a subtle smokiness that complements the dish beautifully. Experimenting with different flavor combinations invites you to explore exciting new iterations of Risotto, turning each preparation into a culinary adventure filled with delightful surprises.
Frequently Asked Questions About Making Risotto
What is the best rice for making Risotto?
The best rice for making Risotto is short-grain varieties like Arborio, Carnaroli, and Vialone Nano, which possess a high starch content essential for achieving the desired creaminess.
Can I use broth from a carton for Risotto?
Yes, high-quality store-bought broth from a carton can be utilized for Risotto, but homemade broth often yields superior results in terms of flavor and richness.
How long should I cook Risotto?
Typically, Risotto should be cooked for approximately 18-20 minutes, involving gradual broth additions and consistent stirring to reach the perfect texture.
What can I add to Risotto for extra creaminess?
For extra creaminess, consider incorporating finishing ingredients like butter, cream, or grated Parmigiano-Reggiano just before serving to enhance the dish’s luxurious texture.
Should I cover the Risotto while cooking?
It’s best to leave Risotto uncovered during cooking to allow moisture to evaporate and ensure even cooking, resulting in the ideal creamy consistency.
Can I make Risotto ahead of time?
While it’s best served fresh, Risotto can be prepared ahead and reheated, but it may require additional broth to regain its creamy consistency and prevent drying out.
What are some common mistakes when making Risotto?
Common mistakes include overcooking the rice, using the wrong type of rice, or rushing the cooking process, all of which can negatively affect the dish’s texture and flavor.
How do I know when Risotto is done?
Risotto is considered done when it reaches a creamy consistency and the rice is al dente, with a slight bite to the grain that enhances the overall experience.
Can I freeze Risotto?
Yes, Risotto can be frozen, but it’s best to store it in individual portions and reheat gently with added broth to restore its creamy texture.
What vegetables work best in Risotto?
Vegetables such as peas, asparagus, mushrooms, and spinach are exceptional choices for Risotto, adding flavor, nutrition, and vibrant color to the dish.
Stay updated with our latest posts on Facebook!
The post Techniques for Making Creamy Risotto: A Universal Guide appeared first on https://cookinggods.com
The Article Creamy Risotto Techniques: Your Ultimate Guide Was Found On https://limitsofstrategy.com
-

Master Advanced Bread Scoring Techniques for Perfect Loaves
Enhance Your Baking Mastery with Advanced Bread Scoring Techniques
The Importance of Bread Scoring for Every Baker
Bread scoring is a vital baking technique that involves making precise cuts on the surface of the bread dough right before baking. This practice is essential because it allows for controlled expansion of the dough during the baking process, resulting in a loaf that is not just visually stunning but also has the perfect texture. Through effective scoring, bakers can manage the rise of the dough, minimizing the chances of unwanted bursting while promoting the desired shape of the loaf for optimal presentation.
To successfully achieve effective bread scoring, you will need to equip yourself with several essential tools. Below is a comprehensive list of must-have tools that every baker should consider adding to their baking toolkit:
- Lame: A specialized curved blade designed specifically for scoring.
- A sharp knife: A standard kitchen knife can work effectively if used with care.
- Scoring Knife: A tool specifically crafted for making clean, precise cuts.
- Razor Blade: Excellent for creating delicate, shallow scores on the dough’s surface.
- Board or Cutting Surface: A stable surface is crucial for effective scoring.
- Flour: Used to dust the blade, preventing sticking during the scoring process.
- Measuring Tape or Ruler: Essential for ensuring precise measurements in your scoring patterns.
- Safety Gloves: Important for protecting your hands while handling sharp tools.
Discover the Advantages of Mastering Effective Bread Scoring
Employing effective scoring techniques brings a wealth of advantages that significantly improve the overall quality of your baked bread. One primary benefit of proper scoring is the enhancement of the bread’s texture and crust. By allowing steam to escape through the scored cuts, bakers create a lighter crumb structure and a more robust, appealing crust. Additionally, well-executed scoring can elevate the visual allure of the bread, showcasing a rustic appearance that emphasizes the artisan nature of the baking process.
Moreover, effective scoring optimizes steam release, which is crucial for achieving a crust that is both crispy and visually attractive. This leads to a loaf that is as delicious as it is beautiful. Here are some key benefits to consider while scoring your bread:
- Controlled expansion of the dough for achieving desirable shapes.
- Enhanced aesthetic appeal that captivates the eye.
- Improved texture and quality of the crust.
- Better steam release during the baking process.
- Reduced risk of unwanted bursting or irregular shapes.
- Increased flavor development through optimal baking conditions.
- Consistent results across different baking sessions.
- Broader opportunities for creative presentation.
Avoid Common Mistakes in Bread Scoring for Better Results
When it comes to bread scoring, several common mistakes can undermine your efforts and lead to unsatisfactory outcomes. One frequent error is making cuts that are too shallow; shallow scores may not provide the necessary steam escape, resulting in the loaf bursting unpredictably during baking.
Another common issue is uneven scoring, which can lead to an unappealing appearance and inconsistent baking results. To achieve the best outcomes, it’s crucial to make your scores uniform and deliberate. Here’s a list of common pitfalls to avoid:
- Scoring either too shallow or too deep.
- Inconsistent depth of cuts across the loaf.
- Using a dull blade that leads to tearing.
- Failing to score at the optimal moment.
- Neglecting to adjust the blade angle for different dough types.
- Overlooking the importance of practice and technique refinement.
- Inadequate flouring of the blade before scoring.
- Ignoring the unique characteristics and behavior of the dough.
Master Advanced Strategies for Exceptional Bread Scoring Techniques

Identify the Best Tools for Professional Scoring
For those aiming to master advanced bread scoring techniques, selecting the right tools is paramount. The ideal tools should include sharp blades and lames specifically designed for scoring. An effective scoring tool must feature a sturdy handle along with a sharp, replaceable blade to ensure clean cuts that do not damage the dough.
When choosing your tools, consider the following actionable steps:
1. Assess Your Needs: Identify the types of bread you intend to score and select tools that are suitable for those specific styles.
2. Prioritize Quality: Invest in high-quality tools; sharper blades offer better control during scoring.
3. Experiment with Various Styles: Try different types of lames, knives, or even rotary cutters to discover what feels most comfortable for you.
4. Consider Ergonomics: Choose a scoring tool that fits comfortably in your hand, ensuring ease of movement and precision.
5. Keep Tools Sharp: Regularly replace or sharpen your blades to maintain optimal performance and achieve clean scoring lines.
6. Explore Innovative Options: Research new tools on the market, such as adjustable scoring devices, to provide versatility in your designs.Choosing the right tools is crucial for achieving the desired effects, making the scoring process smoother and more effective.
Achieve Consistent Scoring Patterns Through Dedicated Practice
Consistent scoring patterns are a skill that requires practice and a deep understanding of the dough’s behavior, as well as the angle of the blade. The key to consistency lies in maintaining even tension on the dough while keeping a steady hand during the scoring process.
Start by training your muscle memory; practice scoring on smaller batches to refine your technique. Real-world examples of bakers achieving consistent patterns often include utilizing templates or guides, which can help ensure uniform spacing and angles in your scores. Here are some practical strategies to help you achieve consistent scoring:
1. Practice Regularly: The more you score, the more consistently you will become.
2. Utilize a Template: A scoring template can assist in guiding your blade placement for uniformity.
3. Maintain Dough Tension: Ensure your dough is at the optimal stage of proofing before scoring to facilitate even expansion.
4. Control Blade Angle: Keep your blade at a consistent angle during cuts to help manage how the dough expands.
5. Experiment with Timing: Score at the right moment, typically just before baking, when the dough is fully proofed.
6. Observe Experienced Bakers: Watch tutorials or live demonstrations from skilled bakers to gain insights into their techniques and adapt them to your own.With dedicated practice and attention to detail, you’ll elevate your scoring skills to a level that significantly enhances your bread-making abilities.
Explore Advanced Scoring Techniques for Artisan Bakers

Advanced scoring techniques go beyond basic cuts, allowing bakers to showcase their creativity and craftsmanship. Techniques that involve intricate designs and patterns can elevate a simple loaf into an artisan masterpiece, highlighting the baker’s skill and meticulous attention to detail.
These advanced methods require not only precision but also a thorough understanding of how the dough behaves once scored. For instance, creating floral patterns or geometric shapes can add stunning visual appeal, and the choice of pattern can influence the texture and structure of the loaf during baking. Here are some expert insights into advanced scoring techniques:
1. Develop a Signature Style: Many artisan bakers create unique scoring patterns that reflect their personal style, making their bread instantly recognizable.
2. Combine Shapes: Experiment with blending different shapes and patterns for a multi-dimensional effect.
3. Consider Dough Characteristics: Understand how various dough types behave when scored; for example, high-hydration doughs may require gentler cuts.
4. Utilize Multiple Cuts: Don’t hesitate to layer your cuts for complex effects. A simple slash combined with a swirl can yield stunning results.
5. Look to Nature for Inspiration: Observe natural forms, such as flowers or leaves, and translate them into beautiful scoring designs.
6. Take Your Time: Don’t rush your scoring; a steady hand and careful execution will yield the best results.The impact of advanced scoring on the quality of bread is substantial, as these intricate designs not only enhance visual appeal but can also improve the overall structure and crust of the loaf.
Integrate Scoring into Your Bread’s Final Presentation
Incorporating scoring into the final presentation of bread can significantly enhance its aesthetic appeal, making it more enticing for customers or guests. Scoring should serve not only a functional purpose but also enhance the overall look of the bread.
When planning your scoring designs, consider the visual elements carefully. Aligning the scoring with the shape and size of the bread can create a harmonious appearance that captivates the eye. Here are some expert tips on aligning scoring with the overall design of the bread:
1. Match Shapes: Ensure that the scoring patterns complement the shape of the loaf; long scores are ideal for baguettes, while round scores are suited for boules.
2. Utilize Colour Contrast: Dusting the crust with flour or seasoning before scoring can create striking contrasts when baked.
3. Think about Texture: The crust’s texture can be enhanced through scoring; consider using a combination of deep and shallow cuts for visual interest.
4. Incorporate Themed Designs: If baking for a specific occasion, consider themed designs that reflect the event, such as hearts for Valentine’s Day or leaves for autumn.
5. Experiment with Decorative Flourishes: Small additional cuts or flourishes can add a professional touch to your bread, making it stand out.
6. Document the Process: Capture photographs of your scoring process to create a portfolio that showcases your skills and unique style.By thoughtfully incorporating scoring into your final presentation, you can create loaves that are not only delicious but visually stunning, appealing to both the eyes and the palate.
Preparing Your Dough for Scoring: Essential Techniques
How to Determine Dough Readiness for Scoring
Assessing the readiness of your dough for scoring is a crucial step that ensures your cuts will yield the desired results during baking. The ideal dough should be at its peak proofing stage—light, airy, and with a smooth surface that feels slightly tacky to the touch.
To determine when your dough is primed for scoring, consider the following factors:
1. Proofing Level: The dough should have approximately doubled in size and feel light and airy when gently poked.
2. Surface Tension: A well-proofed dough will exhibit a tight, smooth surface, indicating that it is ready for scoring.
3. Elasticity: The dough should spring back slightly when pressed, demonstrating that the gluten structure is well-developed.
4. Visual Cues: Look for a domed shape; if the dough begins to flatten, it may be over-proofed and unsuitable for scoring.
5. Sound Test: Gently tap the side of the bowl; a hollow sound indicates that the dough is ready.
6. Timing: Be mindful of proofing times; variations can occur based on factors such as ambient temperature and dough hydration.By accurately assessing dough readiness, you ensure that your scoring will facilitate optimal expansion, resulting in a beautifully baked final product.
Techniques for Achieving Ideal Dough Tension
Achieving the correct dough tension is crucial for effective scoring. Proper tension impacts how the cuts open during baking, influencing the final shape and texture of the bread. If the tension is too tight, the dough may resist scoring and burst unpredictably. Conversely, if the tension is too loose, the dough may not maintain its shape during baking.
Here are some techniques you can utilize to ensure optimal dough tension:
1. Knead Appropriately: Develop the gluten structure effectively through thorough kneading; this foundation is essential for achieving good tension.
2. Handle Gently: When shaping your dough, be gentle to avoid deflating the air pockets that contribute to tension.
3. Incorporate Rest Periods: Allow rest periods during shaping; this relaxation can help maintain consistent tension throughout.
4. Utilize the Stretch and Fold Technique: This method, during bulk fermentation, builds tension without excessively degassing the dough.
5. Monitor Hydration Levels: Adjust hydration based on the flour type used; some flours may require more water to maintain proper tension.
6. Use a Bench Scraper: When shaping, a bench scraper can help create tension by effectively sealing the seams of the dough.By mastering these techniques, you’ll create dough that is optimally tense, leading to more successful scoring and baking outcomes.
The Role of Dough Hydration in Scoring Success
Dough hydration is a critical factor in the scoring process, affecting both the extensibility and responsiveness of the dough. Hydration levels directly influence how the dough behaves during baking, impacting the final appearance and texture of the bread.
A well-hydrated dough typically expands beautifully when scored, allowing the cuts to open effectively and achieve the desired shape. Conversely, low hydration can result in a stiff dough that may crack or burst in undesirable ways. Here’s how dough hydration impacts scoring results:
1. Extensibility: Higher hydration doughs are generally more extensible, allowing for smoother and more defined scores.
2. Crust Quality: Proper hydration contributes to a crispy crust by enabling better steam generation during baking.
3. Air Pocket Formation: Adequate hydration supports the development of air pockets essential for achieving a light, airy crumb.
4. Scoring Precision: A well-hydrated dough permits cleaner cuts and more precise scoring patterns.
5. Fermentation Impact: The fermentation process is influenced by hydration; over-hydrated dough can lead to excessive fermentation, compromising the structure.
6. Flavor Development: Hydration levels can also affect the Maillard reaction, influencing both the color and flavor of the final baked loaf.Understanding the significance of dough hydration enables bakers to make informed decisions about their recipes, ultimately achieving optimal scoring results.
Exploring Scoring Patterns and Designs
Fundamental Scoring Patterns for Beginner Bakers
For novice bakers, mastering basic scoring patterns is a foundational step toward developing advanced techniques. Basic patterns, such as straight lines and simple crosses, not only help control the dough’s expansion but also serve as essential skills that every baker should master before progressing to more complex designs. Practicing these scoring patterns will build your confidence and enhance your scoring technique over time. Here are some fundamental patterns that beginners should focus on:
1. Straight Lines: Making straight cuts along the loaf’s length can effectively guide the dough’s expansion and is one of the simplest patterns to start with.
2. Crosses: A simple cross pattern adds visual appeal while allowing the dough to expand effectively.
3. Diagonal Cuts: Scoring diagonally across the loaf creates a traditional artisan look and promotes uniform expansion.
4. Single Slash: A single, deep slash down the center can create an attractive opening as the loaf expands during baking.
5. Grid Pattern: A basic grid pattern involves making evenly spaced cuts both horizontally and vertically, resulting in a classic look.
6. Curved Lines: Incorporating gentle curves in your scoring can add sophistication to your loaves.By focusing on these basic patterns, you will establish a solid foundation that will enable you to explore more advanced designs with confidence.
Intermediate Scoring Designs to Experiment With
As bakers progress beyond the basics, intermediate scoring designs offer greater opportunities for creativity and complexity. Patterns like spirals and geometric shapes require a steady hand and a deeper understanding of dough behavior. These designs not only enhance the visual appeal of the bread but also contribute to its overall structure during the baking process.
To improve your scoring designs as an intermediate baker, consider the following strategies:
1. Refine Your Technique: Focus on maintaining a consistent depth and angle while scoring; this is crucial for achieving clean, professional-looking patterns.
2. Incorporate Movement: Experiment with swirling motions to create spiral patterns, adding a dynamic look to your bread.
3. Utilize Guides: Consider using templates or stencils to help you accurately and consistently achieve geometric shapes.
4. Layer Patterns: Combine different patterns, such as overlays of crosses or diagonal lines, to create intricate designs that showcase your skill.
5. Observe Advanced Techniques: Watch professional bakers or attend workshops to learn about their approaches to intermediate scoring designs.
6. Practice on Smaller Batches: Use test loaves to practice new designs without the pressure of producing a perfect result on a larger scale.By honing your intermediate scoring techniques, you can elevate your baking to an artisan level, creating breads that are not only delicious but also visually striking.
Advanced Artistic Scoring Techniques to Try
Advanced artistic scoring techniques can transform bread into exquisite works of art, showcasing the baker’s creativity and technical skill. Techniques for creating intricate designs require both practice and a thorough understanding of how the dough responds to scoring.
These advanced methods often involve multiple scoring cuts and a keen eye for detail. If you’re looking to master artistic scoring, consider the following approaches:
1. Inspiration from Nature: Draw inspiration from natural forms, such as flowers or leaves, to create organic patterns in your scoring.
2. Experiment with Depth: Varying the depth of your cuts can create stunning visual contrasts and textures on the crust.
3. Mix Patterns: Combine different styles of scoring to create a unique and personalized design that reflects your artistry.
4. Utilize a Ruler or Template: For geometric patterns, using a ruler can ensure precision and uniformity in your cuts.
5. Focus on Timing: Scoring at the right moment is critical for achieving the best results; practice timing your scores just before placing the dough in the oven.
6. Document Your Creations: Keep a visual record of your artistic scores to analyze what works best and to catalog your progress.By embracing these advanced artistic techniques, you can create bread that delights the senses, elevating your baking from mere sustenance to a culinary masterpiece.
The Science of Bread Scoring Explained
The Effect of Scoring on Bread Expansion
Scoring plays a pivotal role in controlling bread expansion during the baking process. By providing designated pathways for the dough to rise, scoring allows for an even and aesthetically pleasing rise. When executed correctly, it prevents the loaf from bursting in unpredictable ways, which can lead to an undesirable appearance and texture.
Scoring has several noteworthy impacts on bread expansion:
1. Controlled Release of Steam: The cuts allow steam generated from the dough during baking to escape in a controlled manner, promoting an even rise.
2. Guided Shape: Scoring directs how the dough expands, helping maintain the desired shape, whether round or elongated.
3. Even Crust Formation: Properly scored bread expands uniformly, leading to a more even crust that is visually appealing.
4. Influence on Texture: Scoring allows for a more controlled crumb structure, resulting in a lighter, airier texture.
5. Aesthetic Appeal: The way a loaf expands through scoring creates beautiful patterns and shapes that enhance the overall presentation.
6. Preventing Over-Baking: By allowing steam to escape, scoring can help prevent the loaf from overbaking, ensuring optimal moisture retention.Understanding how scoring affects bread expansion enables bakers to make informed decisions about their techniques, leading to consistently impressive baking results.
The Influence of Scoring on Crust Formation
The impact of scoring on crust formation is significant and cannot be overstated. Proper scoring techniques lead to more controlled expansion, helping achieve a desirable crust. When the dough is scored correctly, it allows steam to escape, which directly affects both the texture and appearance of the crust.
Here are several key aspects of how scoring influences crust formation:
1. Even Expansion: Scoring promotes even expansion, contributing to a more uniform crust that is less likely to crack unexpectedly.
2. Crispness: The steam escaping through the scores helps form a crispy crust by creating a dry outer layer while keeping the interior moist.
3. Colour Development: The exposure created by scoring allows for better browning during baking, resulting in a visually appealing golden crust.
4. Texture Variation: Different scoring patterns can create varied crust textures; for instance, deeper cuts may lead to a more rugged appearance.
5. Surface Area: The cuts increase the surface area of the crust, enhancing flavor through the Maillard reaction, which occurs during browning.
6. Feedback Loop: Observing how the crust develops as a result of scoring can inform future baking decisions, allowing bakers to refine their techniques.Scoring is integral to achieving the perfect crust, transforming not just the look but also the overall flavor and texture of the bread.
The Impact of Scoring on the Maillard Reaction
Scoring significantly influences the Maillard reaction, a chemical process that occurs between amino acids and reducing sugars, contributing to the browning of baked goods. This reaction is essential for developing the aroma and flavor of bread, and effective scoring can enhance its impact.
Here’s how scoring affects the Maillard reaction in bread baking:
1. Increased Surface Area: Scoring increases the surface area exposed to heat, promoting more significant browning reactions during baking.
2. Steam Release: The cuts allow steam to escape, which helps maintain the ideal conditions for the Maillard reaction to occur effectively.
3. Enhanced Flavor: Improved browning due to scoring can lead to a richer, more complex flavor profile in the finished loaf.
4. Visual Appeal: The browning that results from the Maillard reaction not only enhances flavor but also improves the visual presentation of the bread.
5. Crust Development: A well-scored loaf will generally have a more robust crust that is not only beautiful but also contributes to the overall sensory experience.
6. Optimized Baking Conditions: Scoring helps regulate the oven environment by allowing for controlled steam escape, which can further influence the Maillard reaction.Understanding the relationship between scoring and the Maillard reaction enables bakers to create loaves that are not only visually impressive but also rich in flavor.
How Scoring Techniques Affect Bread Texture
Different scoring techniques can significantly influence the texture of bread by altering how the dough expands and sets during the baking process. The depth, angle, and pattern of the cuts all contribute to the final crumb structure and softness, key characteristics of quality bread.
When implementing scoring techniques, consider the following effects on texture:
1. Depth of Cuts: Deeper cuts allow for greater expansion, resulting in a light and airy crumb structure, while shallower cuts may lead to denser bread.
2. Angle of Blade: The angle at which you score can create varying levels of crust crispness; a flat angle may encourage more open crumb structures.
3. Pattern Complexity: More complex patterns can create interesting textures on the crust, adding to the overall mouthfeel of the bread.
4. Timing of Scores: Timing impacts how the dough responds to scoring; scoring too early can lead to deflation and undesirable textures.
5. Interaction with Dough Hydration: Higher hydration doughs may benefit from different scoring techniques to ensure they expand correctly, while drier doughs may require deeper cuts.
6. Post-Bake Handling: The way you handle the loaf after baking, combined with your scoring technique, can further influence the final texture.By mastering various scoring techniques, bakers can control the aesthetic qualities of their bread and achieve the desired texture that makes each loaf unique and enjoyable.
Research-Backed Benefits of Advanced Bread Scoring Techniques
Enhancing Visual Appeal Through Scoring
Enhancing the aesthetics of bread through scoring can lead to a more visually appealing product, significantly increasing its market value and customer satisfaction. A beautifully scored loaf captures attention and creates a lasting impression, making it essential for both home bakers and professional artisans alike.
Real-world examples illustrate how scoring enhances bread aesthetics in bakeries that specialize in artisanal products. Here are several benefits of scoring in this context:
1. Visual Appeal: Intricate and well-executed scores can transform an ordinary loaf into a stunning visual masterpiece.
2. Brand Identity: Unique scoring patterns can create a signature style associated with a particular bakery, enhancing brand recognition.
3. Customer Engagement: Visually appealing breads can attract customers, encouraging them to purchase and try new products.
4. Presentation for Events: For special occasions, such as weddings or holidays, a beautifully scored loaf can serve as a stunning centerpiece.
5. Increased Value: Artisan breads that are aesthetically pleasing often command higher prices, reflecting the skill and effort involved in their creation.
6. Culinary Trends: The rise of social media platforms has made beautiful bread more marketable, leading to increased sales for visually stunning products.By focusing on aesthetics through scoring, bakers can elevate their offerings, create a memorable experience for consumers, and enhance their overall market presence.
Steps to Improve Bread Texture with Advanced Scoring
Improving bread texture through advanced scoring techniques involves creating a more even crumb structure and a desirable crust texture. The right scores can enhance the eating experience, contributing to the overall enjoyment of the bread.
To achieve improved texture through advanced scoring, consider these actionable steps:
1. Experiment with Scores: Try different scoring patterns to observe how they influence the texture; for example, cross-hatching may create an interesting contrast.
2. Focus on Depth: Pay close attention to the depth of your cuts; a good balance will allow for optimal expansion while preserving the integrity of the loaf.
3. Observe Dough Behavior: Take note of how different types of dough respond to scoring; adjust your techniques based on hydration and gluten development.
4. Incorporate Different Flours: Varying flour types can yield different textures; experimenting with blends may lead to new scoring techniques that enhance the bite.
5. Control Baking Environment: Monitor oven temperature and steam levels; these factors heavily influence crust and crumb texture as well as scoring effectiveness.
6. Document Your Results: Keep a record of your experiments with scoring techniques and their effects on texture to create a blueprint for success.By employing advanced scoring techniques to improve bread texture, bakers can create loaves that not only look appealing but also provide a delightful sensory experience.
The Contribution of Scoring to Bread Flavor Development
Scoring plays a significant role in bread flavor development, influencing both the Maillard reaction and the overall steam release during baking. By allowing steam to escape properly, scoring creates an environment conducive to flavor enhancement.
Expert analysis reveals the following relationships between scoring and bread flavor development:
1. Steam Release: Properly scored bread releases steam that allows for even heat distribution, enabling flavor to develop uniformly.
2. Crust Browning: The Maillard reaction, influenced by scoring, contributes to the bread’s color and complex flavors; deeper cuts can enhance this effect.
3. Aroma Development: As steam escapes through the cuts, it carries aroma compounds that significantly enhance the sensory experience of the bread.
4. Improved Crust Texture: A well-developed crust not only provides a satisfying crunch but also serves to encapsulate and concentrate flavors within the loaf.
5. Unique Flavor Profiles: Experimentation with different scoring techniques can lead to unique flavor profiles, depending on how the dough responds to the scoring method.
6. Feedback Loop: Observing how scoring influences flavor can inform future baking techniques, allowing bakers to refine their methods for better results.By understanding the role of scoring in flavor development, bakers can create loaves that are not only visually stunning but also rich in flavor, thereby enhancing the overall consumer experience.
Essential Tools and Equipment for Effective Bread Scoring
Selecting the Ideal Blade for Precision Scoring
Choosing the right blade for scoring is crucial for ensuring clean cuts and optimal performance. The ideal scoring blade should be sharp, durable, and suitable for the type of dough being used. Using the appropriate blade can significantly impact the quality of your scores and, ultimately, the final loaf.
When selecting a scoring blade, consider the following factors:
1. Sharpness: A sharp blade is essential for making clean cuts without tearing the dough; opt for blades that are easily replaceable when they dull.
2. Blade Type: Different blade types, such as curved or straight, can affect scoring; experiment with various styles to find what works best for you.
3. Handle Comfort: Ensure the blade’s handle feels comfortable in your hand; a good grip allows for better control and precision while scoring.
4. Durability: Choose blades made from high-quality materials that can withstand regular use without compromising performance.
5. Size and Shape: Depending on your scoring needs, consider the size and shape of the blade to ensure it is suitable for the patterns you wish to create.
6. Ease of Use: Select a blade that you feel confident using; familiarity will enhance your precision and ultimately improve your scoring technique.By carefully selecting the right blade for scoring, you set yourself up for success in your bread-making endeavors.
Best Practices for Maintaining and Sharpening Your Scoring Tools
Maintaining and sharpening scoring tools is essential for achieving clean and precise cuts, which significantly impact the final appearance of the bread. Regular maintenance ensures that your tools remain effective and safe to use.
To effectively maintain and sharpen your scoring tools, follow these tips:
1. Regular Cleaning: Clean your blades after each use to prevent dough residue from building up, which can affect performance.
2. Sharpening Tools: Use a whetstone or sharpening tool to keep blades sharp; dull blades can tear dough instead of providing clean cuts.
3. Storage: Store blades in a protective sheath or holder to prevent accidental damage and to maintain sharpness.
4. Check for Wear: Regularly inspect blades for signs of wear or damage; replacing blades when necessary will improve scoring quality.
5. Lubrication: Occasionally apply food-safe oil to the blade and handle to prevent rust and ensure smooth operation.
6. Practice Safety: Always handle sharp blades with care; consider using safety gloves or protective gear to protect yourself during maintenance.By prioritizing the maintenance and sharpening of your scoring tools, you will ensure that they remain in optimal condition, leading to better scoring results.
Innovative Scoring Tools to Enhance Your Baking Experience
Innovative scoring tools on the market have transformed the way bakers approach scoring, offering unique features that facilitate better results and enhanced creativity. These tools can help achieve intricate and distinctive designs that elevate the quality of your bread.
Some of the innovative scoring tools available to bakers include:
1. Specialized Lames: Many new lames come with ergonomic handles and interchangeable blades, providing flexibility and ease of use.
2. Rotary Cutters: These allow for swift, even cuts and can be adjusted for depth, making them ideal for complex designs.
3. Adjustable Scoring Devices: Tools that permit customizable scoring depths and patterns provide versatility in crafting unique designs.
4. Multi-Blade Scoring Tools: These enable bakers to create multiple scores simultaneously, saving time and allowing for complex patterns in a single motion.
5. Digital Scoring Guides: Some advanced baking setups include digital guides that assist bakers in achieving precise cuts based on preset templates.
6. Flexible Blades: New materials allow for blades that can bend slightly, offering greater control and reducing the risk of tearing the dough.By exploring these innovative scoring tools, bakers can refine their techniques and create bread that is not only visually appealing but also showcases their skill and creativity.
Customizing Scoring Techniques for Various Types of Bread
Optimal Scoring Techniques for Sourdough Bread
Scoring techniques for sourdough bread are unique due to the dough’s higher hydration and fermentation characteristics. Successfully scoring sourdough requires a nuanced understanding of its specific behavior, enabling bakers to achieve optimal results.
Here are some of the best scoring techniques for sourdough bread:
1. Deep Cuts: Sourdough often benefits from deeper cuts, allowing for controlled expansion as moisture escapes during baking.
2. Cross Patterns: A simple cross pattern helps the dough expand evenly, creating a beautiful rise and a consistent crust.
3. Wavy Cuts: Incorporating wavy or curved cuts can add visual interest and allow for a more dramatic rise.
4. Multiple Cuts: Consider scoring multiple lines close together; this can create a lovely open crumb structure and enhance crust texture.
5. Adjusting Blade Angle: Experiment with the angle of the blade; steeper angles can create more dramatic openings in the crust.
6. Timing is Key: Ensure you score at the right moment, just before baking, to maintain the dough’s structure and prevent excessive deflation.By mastering these sourdough-specific scoring techniques, bakers can elevate their loaves, achieving the characteristic appearance and texture that sourdough is renowned for.
How to Score Baguettes and Batards Effectively
Scoring baguettes and batards requires a different approach compared to other bread types, primarily due to their shape and dough consistency. The unique characteristics of these loaves demand careful consideration in scoring techniques to ensure beautiful results.
Here’s how to effectively score baguettes and batards:
1. Long, Diagonal Cuts: For baguettes, long diagonal slashes (typically 3-5) along the length of the loaf are classic and effective.
2. Gentle Pressure: Use gentle pressure while scoring to ensure the dough remains intact and does not collapse.
3. Spacing: Ensure slashes are evenly spaced to allow for uniform expansion and to avoid overcrowding.
4. Depth Control: Aim for a depth of around 1/4 inch; this depth allows for a good opening without compromising the dough structure.
5. Angle of Cuts: Keep the cuts angled at around 30 degrees; this helps create a beautiful bloom during baking.
6. Adjust Timing: Score just before placing in the oven to ensure the dough retains its proofing levels and avoids deflation.By applying these scoring techniques to baguettes and batards, bakers can achieve the traditional look and texture that these loaves are celebrated for.
Scoring Techniques Suited for Artisan Breads
Scoring techniques for artisan breads can vary widely, reflecting the creativity and skill of the baker. Artisan loaves often lend themselves to more complex designs, allowing bakers to showcase their artistry truly.
Here are some scoring techniques that are best suited for artisan breads:
1. Intricate Patterns: Consider elaborate patterns such as leaves or flowers, which can be achieved with precision and practice.
2. Layered Designs: Overlaying different scoring patterns can create depth and visual interest in the final product.
3. Using a Template: For highly detailed patterns, using a template can help achieve consistent designs quickly.
4. Experimenting with Depth and Angle: Varying the depth and angle of cuts can significantly influence the crust and crumb structure.
5. Incorporating Symbols: Personal symbols or motifs can add a unique touch to artisan loaves, making them more memorable.
6. Focusing on Presentation: Think about the final presentation; consider how your scores will affect the visual appeal of the bread when served.By employing these artisan scoring techniques, bakers can create loaves that are not only delicious but also works of art, showcasing both skill and creativity.
Tackling Common Scoring Challenges
Correcting Uneven Scoring Cuts for Better Results
Addressing uneven scoring cuts can be a frustrating challenge, yet it is a common issue that many bakers encounter. Identifying the cause of uneven scores, such as improper blade angle or dough tension, is key to correcting the problem.
To rectify uneven scoring cuts, consider the following strategies:
1. Adjust Blade Angle: Ensure that you maintain a consistent angle while scoring; a steeper angle can lead to uneven cuts.
2. Check Dough Tension: Proper tension is crucial; if the dough is too loose or too tight, it may not respond well to scoring.
3. Practice Consistency: Regularly practice your scoring technique to develop muscle memory that fosters consistent cuts.
4. Use a Guide: Consider using a guide or template to help maintain uniformity in your scoring patterns.
5. Evaluate Your Tools: Dull or inappropriate tools can lead to uneven cuts; ensure your scoring blade is sharp and well-suited for the task.
6. Document and Learn: Keep track of what works and what doesn’t; this documentation will help you improve your technique over time.With a little practice and attention to detail, you can overcome uneven scoring cuts and achieve beautiful, consistent results in your baking.
Strategies to Prevent Bread from Bursting During Baking
Preventing bread from bursting during baking is critical to achieving a successful loaf. A well-executed scoring technique can mitigate the risk of undesirable bursting, ensuring that your loaf rises beautifully.
To prevent your bread from bursting during baking, consider the following steps:
1. Score at the Right Depth: Aim for a scoring depth that allows for controlled expansion; cuts that are too shallow may not facilitate proper steam release.
2. Monitor Proofing Levels: Ensure that your dough is at the optimal proofing level before scoring; over-proofed dough is more likely to burst.
3. Adjust Timing: Score your bread just before placing it in the oven to retain the dough’s structure and prevent excessive deflation.
4. Consider Dough Characteristics: Different doughs behave differently; high-hydration doughs may require deeper cuts to manage expansion effectively.
5. Control Oven Environment: Proper steam levels in the oven can impact how the bread expands; consider using a steam tray or a water pan.
6. Practice Scoring Techniques: The more you practice, the better you will become at understanding how your dough behaves and how to score effectively.By implementing these strategies, you can significantly reduce the risk of bursting and achieve beautifully baked loaves.
Effective Methods to Correct Scoring Mistakes
Correcting scoring mistakes involves understanding what went wrong and adjusting your technique accordingly. Whether you’ve made shallow cuts or uneven patterns, learning from these errors is essential for improvement.
To rectify scoring mistakes, consider the following approaches:
1. Assess the Error: Take a moment to evaluate what went wrong—was the depth incorrect, or was the angle off?
2. Adjust Patterns Mid-Bake: If possible, you may be able to make adjustments during baking; however, this requires careful observation and timing.
3. Learn for Future Bakes: Document what you’ve learned from the mistake, including any adjustments you made and the outcomes.
4. Practice More: The more you practice, the better you’ll become at anticipating how your scoring will affect the final product.
5. Seek Feedback: If you’re part of a baking community, consider seeking feedback from peers to gain insights into your technique.
6. Be Patient: Improving your scoring technique takes time; don’t be discouraged by mistakes, as they are part of the learning process.By focusing on correction and learning, you will improve your scoring skills and produce consistently high-quality bread.
Frequently Asked Questions About Bread Scoring Techniques
What is the best tool for scoring bread?
The best tool for scoring bread is a sharp lame or scoring knife, as they provide the precision and control needed for clean cuts.
How deep should I score my bread?
Score your bread about 1/4 inch deep, allowing for proper expansion without compromising the dough’s structure.
Can I score bread after it has risen?
Yes, scoring is typically done just before baking to ensure the dough maintains its shape and structure.
What happens if my cuts are too shallow?
If your cuts are too shallow, the loaf may not expand properly, leading to a burst or uneven rise during baking.
How can I create intricate designs in my scoring?
To create intricate designs, practice consistently, use templates, and experiment with different blade angles and depths.
Does dough hydration impact scoring?
Yes, higher hydration levels can result in more extensible dough, allowing for cleaner and more defined scores.
What should I do if my bread bursts in the oven?
If your bread bursts, assess your scoring technique, ensure proper proofing, and adjust your depth and timing for future bakes.
Is scoring necessary for all types of bread?
While not all bread types require scoring, artisanal and free-form loaves need to be scored to control expansion and enhance their appearance.
Can I use a regular knife to score bread?
Yes, a sharp, regular knife can be used for scoring, but a dedicated scoring tool, such as a lame, provides better precision.
How often should I sharpen my scoring tools?
Sharpen your scoring tools regularly, ideally after every few uses, to maintain optimal performance and achieve clean cuts.
Connect with us on Facebook!
The post Top Techniques for Advanced Bread Scoring: Master the Art appeared first on https://cookinggods.com
The Article Advanced Bread Scoring Techniques: Master the Craft Was Found On https://limitsofstrategy.com