Your cart is currently empty!
Category: Food & Drink
Auto Added by WPeMatico
-

Paleo Dinner Ideas for Quick and Easy Family Meals
Wholesome and Flavorful Paleo Dinner Recipes for Families
Incorporating Fresh and Natural Ingredients for Nutritious Paleo Dinners
To whip up scrumptious paleo dinners that delight every family member, it is crucial to emphasize whole, unprocessed foods that nourish the body and soul. The foundation of any paleo meal should consist of a diverse range of simple yet nutrient-rich ingredients, allowing families to explore an exciting array of flavors while staying committed to a healthful eating regimen. By prioritizing high-quality ingredients, you not only craft delectable dishes but also ensure they are packed with vital nutrients that support overall health. This culinary approach fosters family bonding, encouraging everyone to understand and appreciate the significance of wholesome nutrition.
When crafting your paleo dinners, make it a priority to source ingredients that are in their most natural form. The following essential paleo ingredients will help you create healthy, fulfilling meals:
- Lean meats (such as chicken, beef, and fish)
- Fresh vegetables (like leafy greens, broccoli, and bell peppers)
- Healthy fats (including avocado, olive oil, and coconut oil)
- Nuts and seeds (such as almonds, walnuts, and chia seeds)
- Fruits (like berries, apples, and bananas)
- Herbs and spices (including basil, oregano, and ginger)
- Eggs
- Coconut products (like milk, flour, and flakes)
These ingredients not only deliver a robust nutritional profile but also add a delightful variety of flavors and textures, ensuring that every family member discovers something they relish.
Crafting Family-Friendly Paleo Meals That Everyone Craves
The true beauty of paleo cooking lies in its adaptability, allowing you to create family-friendly meals that appeal to individuals of all ages. By concentrating on harmonious flavors and appealing textures, you can design dishes that even the fussiest eaters will find irresistible. Customizing meals to accommodate individual preferences is also simple, making it effortless to cater to varying tastes within the family unit.
Here are several family-favorite paleo recipes that are sure to be a hit:
- Sweet Potato and Beef Hash
- Herbed Lemon Chicken with Roasted Vegetables
- Spaghetti Squash with Turkey Bolognese
- Stuffed Bell Peppers with Quinoa and Veggies
- Fish Tacos with Cabbage Slaw
- Paleo Pancakes for Breakfast-for-Dinner
- Chicken and Vegetable Stir-Fry
- Cauliflower Rice Fried Rice
Each of these dishes caters to a variety of palates while ensuring the nutritional advantages of a paleo diet are maintained. Families can bond over the cooking experience, creating opportunities for shared moments and discussions about healthy eating practices.
Key Meal Prep Strategies for Busy Families
For families with hectic schedules, preparing healthy meals can often feel like a daunting challenge. However, by employing a few effective meal prep strategies, you can significantly reduce both time and stress throughout the week. Efficient cooking techniques, such as batch cooking, allow you to prepare multiple meals simultaneously, making it easier to uphold a paleo lifestyle without it becoming overwhelming.
Here are some time-saving meal prep strategies to consider:
- Plan your meals for the upcoming week, emphasizing paleo recipes that utilize similar ingredients.
- Batch-cook proteins like grilled chicken or roasted vegetables for versatile use in various dishes.
- Pre-chop vegetables and store them in airtight containers for quick access.
- Use slow cookers or pressure cookers for convenient, set-and-forget meal options.
- Prepare larger portions of meals to serve as leftovers for lunch or dinner.
- Maintain a well-stocked pantry with staple paleo ingredients to simplify your cooking process.
- Involve the whole family in meal prepping to make it a fun and engaging experience.
- Designate a specific time each week for meal preparation to establish a routine.
By adopting these strategies, families can enjoy the benefits of paleo dinners without feeling rushed, ensuring healthier options are consistently within reach.
Insights on Top Paleo Dinner Ideas for Families

Real-Life Success Stories of Delicious Paleo Dinners
Numerous families have successfully embraced a paleo diet, witnessing remarkable enhancements in their health and overall well-being. Real-life examples showcase that adopting this dietary approach can profoundly impact energy levels, mood, and even family dynamics. Sharing these experiences can inspire others to explore the advantages of integrating paleo dinners into their routines.
For instance, after grappling with energy slumps and weight gain, the Johnson family transitioned to a paleo lifestyle. They began with straightforward meals, such as herbed lemon chicken paired with roasted vegetables. Not only did they enjoy the flavors, but they also experienced a surge in energy and a decrease in cravings for unhealthy snacks. Additionally, they developed a weekly meal plan together, turning cooking into a family activity. This not only improved their dietary habits but also reinforced their bond as they collaborated in the kitchen.
If you are considering transitioning your family to paleo dinners, here are actionable steps to effectively implement these strategies:
- Start with a few familiar recipes that can be easily adapted to paleo standards.
- Involve each family member in selecting meals and planning the week’s menu.
- Experiment with new ingredients and flavors to keep meals exciting.
- Celebrate small victories, such as trying a new recipe or successfully meal prepping for the week.
By incorporating these steps, your family can thrive on a paleo diet, relishing the numerous health benefits it provides.
Expert Analysis on the Health Benefits of Paleo Meals
The paleo diet is abundant in nutrient-dense foods that confer a multitude of health benefits. By emphasizing whole ingredients, families can enhance their diets with essential vitamins and minerals that are frequently lacking in processed diets. Nutritional experts consistently highlight the significance of steering clear of processed foods and sugars, which contribute to various health issues, including obesity, diabetes, and heart disease.
One of the foremost advantages of a paleo diet is its emphasis on lean proteins, healthy fats, and a broad spectrum of vegetables. These components provide the body with the necessary nutrients for optimal functioning. For instance, lean meats deliver high-quality protein, vital for muscle maintenance and repair. Healthy fats found in avocados and nuts support brain health and hormone production. Furthermore, the diverse range of vegetables offers a wealth of vitamins and antioxidants that combat inflammation and bolster a robust immune system.
To further appreciate the health benefits of a paleo lifestyle, consider these key points:
- Improved satiety due to higher protein and healthy fat content, reducing instances of overeating.
- Increased energy levels stemming from stable blood sugar levels.
- A more balanced gut microbiome, thanks to a higher intake of fiber from vegetables and fruits.
- Reduced cravings for processed foods and sugars, leading to healthier eating habits.
These factors collectively contribute to better overall health, making paleo dinners not merely a meal option but a lifestyle choice that can positively impact families for years to come.
Effective Strategies for Transitioning to Paleo Dinners

Transitioning to paleo dinners may appear daunting, but by taking gradual steps, families can seamlessly acclimate to this healthier way of life. It is crucial to approach the change with patience and a willingness to experiment with new flavors and ingredients. By making incremental adjustments over time, families can establish sustainable habits without feeling overwhelmed.
Begin by selecting a few paleo recipes that resonate with your family. Focus on familiar dishes that can be easily modified to fit your needs. For instance, swap traditional pasta for zucchini noodles or choose sweet potatoes over white potatoes. Gradually incorporate these changes into your meal planning while still providing familiar favorites alongside new options.
Here are actionable steps to facilitate the transition:
- Start with one or two paleo meals each week, gradually increasing as comfort levels grow.
- Experiment with different cooking methods, such as roasting instead of frying, to improve flavors.
- Engage the family in exploring new recipes and cuisines to maintain excitement around mealtimes.
- Address cravings by finding paleo-friendly alternatives, such as utilizing almond flour for baking.
By implementing these strategies, families can transition smoothly to a paleo diet, relishing the journey as they discover delightful new meals together.
Highlighting Quick and Easy Paleo Dinner Recipes for Busy Families
In today’s fast-paced world, busy families often find it challenging to carve out time for preparing nutritious meals. Fortunately, a plethora of paleo dinner recipes can be prepared swiftly without compromising on nutrition or flavor. Time-saving techniques can assist families in adhering to their paleo lifestyle while simplifying the meal preparation process.
Consider recipes that require minimal prep time and can be completed in under 30 minutes. For instance, a quick stir-fry featuring lean protein and seasonal vegetables can easily transform into a satisfying meal. Additionally, utilizing kitchen gadgets like slow cookers or pressure cookers can dramatically reduce cooking time while allowing flavors to meld beautifully.
Here are some quick and easy paleo dinner recipes perfect for busy families:
- One-pan lemon herb chicken with asparagus
- Quick shrimp and broccoli stir-fry
- Egg and veggie frittata
- Sweet potato and black bean tacos
- Spicy chicken lettuce wraps
- Grilled salmon with avocado salsa
- Simple zucchini noodles with pesto
- Beef and vegetable kebabs
By choosing these recipes and employing efficient cooking methods, families can maintain their paleo goals while ensuring that dinner becomes a time for connection and enjoyment rather than stress.
How Can Paleo Dinners Boost Family Health?
Essential Nutrients Found in Nutrient-Rich Paleo Meals
Paleo meals prioritize a wide array of nutrient-dense foods that enhance overall health and vitality. By concentrating on whole ingredients, families can access essential nutrients often lacking in processed diets. The focus on lean proteins, healthy fats, and a diverse selection of vegetables ensures that every meal is both satisfying and nourishing.
Key nutrients present in paleo meals include:
- Protein: Essential for muscle growth and repair, crucial for active families.
- Healthy fats: Provide energy and support brain function.
- Fiber: Aids digestion and promotes a healthy gut.
- Vitamins and minerals: Found in fruits and vegetables, vital for immune support.
- Antioxidants: Combat oxidative stress and inflammation in the body.
- Omega-3 fatty acids, sourced from fish and nuts, promote heart health.
- Minerals like magnesium and potassium are essential for maintaining muscle and nerve function.
- Phytonutrients: Found in colorful fruits and vegetables, contributing to overall health.
Incorporating a variety of these nutrients within paleo dinners not only ensures balanced meals but also establishes a foundation for enhanced health outcomes for the entire family.
Supporting Effective Weight Management with a Paleo Diet
The paleo diet plays a significant role in weight management by emphasizing whole, unprocessed foods that promote satiety and reduce overall calorie intake. By integrating nutrient-dense foods, families can enjoy satisfying meals that keep hunger at bay, facilitating the maintenance of a healthy weight.
A key aspect of the paleo diet is its focus on high-quality protein and healthy fats, both of which contribute to feelings of fullness. Unlike processed foods, which can cause spikes and crashes in blood sugar levels, paleo meals encourage stability, helping to curb cravings and diminish the likelihood of overeating.
Consider these points on how a paleo diet supports effective weight management:
- Whole foods are more filling, leading to reduced calorie consumption.
- Healthy fats and proteins help regulate hormones related to hunger and satiety.
- High fiber content from vegetables and fruits aids in digestion and supports gut health.
- Avoiding processed foods helps eliminate added sugars and unhealthy fats that are often linked to weight gain.
By embracing a paleo lifestyle, families can cultivate healthy eating habits that not only support weight management but also nurture a positive relationship with food.
Enhancing Children’s Health Through Paleo Dinners
Absolutely! Paleo meals provide numerous benefits for children’s health, supplying essential nutrients required for growth and development. By focusing on whole, unprocessed foods, families can significantly enhance their children’s energy, focus, and overall well-being. Reducing the intake of processed foods can lead to better behavior and a healthier outlook on food.
Children thrive on nutrients that support their active lifestyles. A diet rich in paleo foods can lead to improved health outcomes, including enhanced immune function and cognitive development. Nutrient-dense meals help prevent deficiencies that could negatively impact a child’s growth and learning abilities.
Here are some advantages of paleo dinners for children:
- Improved energy levels due to balanced blood sugar from whole foods.
- Enhanced focus and concentration from nutrient-rich meals.
- A stronger immune system supported by vitamins and minerals found in fruits and vegetables.
- Reduced hyperactivity associated with sugar and processed foods.
By incorporating paleo meals into their diets, families can secure healthier futures, helping children develop lifelong healthy eating habits.
Quick and Simple Paleo Dinner Ideas for Busy Nights
Effortless One-Pot Paleo Meals for Family Convenience
One-pot meals are a lifesaver for busy families, offering a straightforward and effective way to prepare paleo dinners with minimal cleanup. These recipes are not only quick to put together but also bursting with flavor and nutrition. By consolidating ingredients and cooking methods, families can relish delightful meals without the hassle of managing multiple pots and pans.
Consider recipes that allow for the combination of proteins, vegetables, and healthy fats in one dish. One-pot options can include hearty soups, stews, or stir-fries that are packed with nutrients. The convenience of one-pot meals makes them an ideal choice for weeknight dinners when time is limited.
Here are some delightful one-pot paleo dinner recipes:
- One-Pot Chicken and Vegetable Curry
- Beef and Vegetable Stew
- Chicken and Cauliflower Rice Stir-Fry
- One-Pan Salmon with Asparagus and Sweet Potatoes
- Simple Tomato and Basil Zucchini Noodle Soup
- Spicy Shrimp and Vegetable Gumbo
- Chicken and Broccoli Alfredo with Cauliflower Noodles
- Hearty Lentil and Vegetable Chili
By embracing the simplicity of one-pot meals, families can enjoy nutritious paleo dinners without sacrificing time or flavor, making weeknight cooking a breeze.
30-Minute Paleo Dinners for Families on the Go
When time is short, paleo dinners do not have to be compromised. Many delectable paleo recipes can be prepared in under 30 minutes, allowing families to enjoy healthy meals even on the busiest of nights. The key is to focus on quick-cooking ingredients and efficient cooking methods that yield satisfying results in less time.
Consider utilizing pre-cut vegetables, fast-cooking proteins, and simple seasonings to create meals that are not only nutritious but also flavorful. Dishes that involve minimal cooking steps can help you get dinner on the table quickly while still enjoying the benefits of a paleo diet.
Here are some quick and easy 30-minute paleo dinner ideas:
- Sautéed Shrimp with Garlic and Broccoli
- Quick Chicken Fajitas with Peppers and Onions
- Ground Beef Tacos in Lettuce Wraps
- Paleolithic Stir-Fried Vegetables with Tofu
- Oven-Baked Fish with Lemon and Herbs
- Egg and Spinach Breakfast Bowls
- Grilled Chicken with Avocado Salsa
- Zucchini Noodles with Meat Sauce
By selecting these recipes, families can savor hearty and nutritious paleo meals that seamlessly fit into their busy schedules, ensuring that healthy eating remains a priority.
Making Paleo Dinners More Engaging and Fun
Paleo dinners can become monotonous if the same ingredients and flavors are used repeatedly. To keep meals exciting, it is important to incorporate a variety of herbs, spices, and cooking techniques that elevate the dining experience. By experimenting with different ingredients, families can explore flavors from around the globe while adhering to a paleo diet.
One effective method to enhance the excitement of paleo meals is to introduce a diverse range of cuisines. This can be achieved by incorporating flavors from Mediterranean, Asian, or Latin American dishes. Additionally, varying cooking techniques, such as grilling, roasting, or stir-frying, can provide different textures and tastes that keep meals fresh and enticing.
Here are some tips for making paleo dinners more exciting:
- Use fresh herbs and spices to elevate flavors—think cilantro, basil, ginger, and cumin.
- Experiment with international cuisines, such as Thai curry or Mediterranean grilled meats.
- Incorporate a variety of textures, such as crispy, crunchy, and creamy elements.
- Try new vegetables or fruits each week to introduce different flavors.
- Utilize various cooking techniques to enhance the experience—grilling, roasting, or slow cooking.
- Get creative with sauces and dressings that complement your meals.
- Involve family members in selecting recipes, allowing everyone to contribute their unique preferences and tastes.
By making these adjustments, families can transform paleo dinners into exciting culinary adventures that everyone eagerly anticipates.
Affordable Paleo Dinner Recipes That Fit Your Budget
Maintaining a paleo diet doesn’t have to come at a steep price. With a bit of planning and creativity, families can whip up delicious and nutritious paleo dinners that are budget-friendly. The key is to focus on affordable ingredients and simple recipes that deliver maximum flavor without compromising health.
Start by selecting budget-friendly proteins, such as chicken thighs or ground turkey, which can be utilized in a variety of dishes. Additionally, seasonal vegetables often come at a lower cost and can enhance meals while providing essential nutrients. Planning meals around sales and seasonal produce can significantly reduce grocery expenses.
Here are some affordable paleo dinner recipes to consider:
- Budget Chicken Stir-Fry with Seasonal Veggies
- Ground Beef and Sweet Potato Casserole
- Egg and Vegetable Scramble
- Slow-Cooked Beef and Vegetable Stew
- Roasted Vegetable and Quinoa Salad
- Simple Fish Tacos with Cabbage Slaw
- One-Pot Coconut Curry with Chickpeas
- Stuffed Peppers with Brown Rice and Ground Meat
By embracing these budget-friendly options, families can enjoy the benefits of a paleo lifestyle without straining their finances, ensuring that healthy eating is accessible to everyone.
Paleo Dinner Ideas for Leftovers and Meal Prep Success
Maximizing time in the kitchen is essential for busy families, and one effective way to achieve this is by preparing paleo dinners that work well for leftovers or can be prepped in advance. This approach not only saves time but also reduces food waste, allowing families to enjoy healthy meals throughout the week.
Consider preparing larger portions of meals that can be easily reheated or repurposed into new dishes. For example, a roasted chicken can be served for dinner one night and then shredded for salads or wraps the next day. Leftover roasted vegetables can be incorporated into omelets or soups, ensuring nothing goes to waste.
Here are some paleo dinner ideas ideal for leftovers or meal prep:
- Slow-Cooked Beef Stew—perfect for dinner and lunch the following day.
- Roasted Chicken—great for sandwiches or salads later in the week.
- Vegetable Frittata—can be enjoyed warm or cold.
- Stuffed Peppers—made in bulk and easily reheated.
- Soup-based meals—can be frozen and stored for future use.
- Grilled vegetables—perfect for adding to meals throughout the week.
- Curry dishes—flavors often improve when reheated.
- Chili—easily doubles and freezes well for future dinners.
By incorporating these paleo meal prep strategies, families can simplify their weeknight cooking while enjoying delicious and nutritious meals that align with their dietary goals.
The Advantages of Cooking Paleo Dinners Together
How Family Cooking Can Strengthen Bonds
Cooking together as a family can significantly enhance relationships, fostering a sense of teamwork and collaboration. The kitchen becomes a space for connection, where laughter and conversation thrive as everyone contributes to preparing paleo dinners. This shared experience cultivates cherished memories while teaching valuable life skills to children.
By engaging children in the cooking process, families can promote open communication and strengthen ties. As they collaborate on meal preparation, children learn the importance of healthy eating habits while developing a greater appreciation for the food they consume. This cooperative approach nurtures emotional bonds, fostering a supportive and loving environment.
Here are some emotional benefits of family cooking:
- Encourages communication and teamwork among family members.
- Creates opportunities for shared experiences and memories.
- Builds valuable life skills in children, such as cooking and nutrition.
- Promotes healthy eating habits through family involvement.
By making cooking a family affair, you can not only strengthen relationships but also instill healthy habits that can last a lifetime—all while enjoying the delicious results of your efforts in the form of paleo dinners.
Skills Children Can Develop from Cooking Paleo Meals
Cooking paleo meals presents a valuable opportunity for children to acquire a range of essential life skills. From meal planning and nutrition to kitchen safety, children can gain confidence and independence in the kitchen while learning about healthy eating habits. These skills can yield lasting benefits that extend well beyond mealtime.
Involvement in cooking encourages creativity as children experiment with diverse flavors and ingredients. Moreover, they develop critical thinking skills as they learn to follow recipes, measure ingredients, and adjust cooking times. This hands-on experience also teaches responsibility as they learn to clean up after cooking and take ownership of their contributions to family meals.
Here are some educational benefits of cooking with kids:
- Understanding nutrition and the significance of whole foods.
- Developing cooking skills and awareness of kitchen safety.
- Encouraging creativity through experimentation with flavors.
- Fostering teamwork and collaboration within the family.
By involving children in the cooking process, families can instill healthy habits while equipping them with essential life skills that will serve them well into adulthood.
Encouraging Healthier Eating Habits Through Family Cooking
Involving the entire family in meal preparation can significantly influence healthier eating choices. By cooking together, families develop a deeper understanding of where their food comes from and the nutritional value of what they consume. This awareness often leads to more mindful eating habits, making healthier choices an integral part of daily life.
When children actively participate in cooking paleo dinners, they are more likely to appreciate the flavors and textures of whole foods. This involvement fosters curiosity about different ingredients and encourages them to try new tastes. As they become accustomed to healthier options, they are less likely to gravitate towards processed foods or sugary snacks.
Here are ways family cooking influences dietary habits:
- Promotes awareness of food sources and their nutritional benefits.
- Encourages positive conversations around healthy eating.
- Fosters curiosity about new ingredients and flavors.
- Develops confidence in trying new foods and recipes.
By making cooking a family affair, families can create a supportive environment that promotes healthier eating habits, ultimately fostering a love for nutritious paleo meals.
Proven Strategies for Top Paleo Dinner Ideas for Families
Real-World Examples of Effective Paleo Meal Planning
Effective meal planning is vital for adhering to a paleo diet. By examining real-world examples of successful meal planning strategies, families can find inspiration and actionable steps to create balanced meals that align with their dietary goals. Learning from the experiences of others can provide valuable insights into practical meal planning techniques that work.
One inspiring example is the Lee family, who embraced paleo cooking after seeking healthier options. They committed time each week to plan their meals, concentrating on recipes that shared ingredients. This strategy not only simplified grocery shopping but also allowed them to explore a wide range of flavors without wasting food. By dedicating Sundays to meal prep, they amassed a stockpile of healthy options, ensuring that paleo dinners were always ready to go.
To effectively implement your meal planning, consider these strategies:
- Plan meals for the week, focusing on recipes that utilize similar ingredients.
- Involve all family members in selecting meals to encourage engagement.
- Set aside specific times for meal prep to establish a routine.
- Utilize leftovers creatively to minimize waste and keep meals interesting.
By adopting these strategies, families can streamline their meal planning, ensuring that paleo dinners are both delicious and achievable within their busy lives.
Cost-Effectiveness of Paleo Dinners Explained by Experts
A common misconception surrounding the paleo diet is that it is inherently expensive. However, with proper planning and approach, paleo dinners can be both economical and nutritious. By analyzing the potential costs of paleo ingredients and budgeting effectively, families can enjoy healthy meals without overspending.
The key to maintaining a budget-friendly paleo diet lies in selecting affordable ingredients and focusing on seasonal produce. Buying in bulk, planning meals around sales, and utilizing local farmers’ markets can significantly lower grocery costs. Furthermore, choosing versatile ingredients that can be used in multiple recipes allows for greater flexibility and reduces waste.
Here are some expert insights into the financial aspects of paleo dining:
- Buying in bulk can significantly reduce the cost of pantry staples such as nuts and seeds.
- Seasonal fruits and vegetables often come at a lower price and offer peak flavor.
- Meal planning helps minimize food waste, enabling families to maximize their grocery budget.
- Utilizing less expensive proteins, such as chicken thighs or ground meats, can help manage costs.
By understanding the financial implications of paleo dinners, families can navigate their budgets effectively while enjoying nutritious meals that support their health.
Actionable Steps for Adding Variety to Paleo Dinners
Maintaining variety in paleo dinners is essential to keep meals exciting and fulfilling. By exploring diverse recipes and ingredients, families can avoid the monotony that often arises from repetitive meal planning. Incorporating new flavors and cuisines can spark creativity in the kitchen while adhering to the principles of a paleo lifestyle.
To keep meals fresh, consider rotating recipes and trying new cooking techniques. Engaging the family in the recipe selection process can lead to discovering new favorites together. Moreover, exploring different cultural cuisines can introduce unique flavors that make paleo dinners even more delightful.
Here are actionable steps to incorporate variety in paleo dinners:
- Rotate meal options weekly, introducing a new recipe or ingredient each time.
- Explore international cuisines, incorporating flavors from different cultures.
- Experiment with various cooking techniques to change textures and tastes.
- Encourage family members to suggest their favorite dishes, fostering excitement around meal planning.
By implementing these strategies, families can create diverse and enjoyable paleo dinners that keep everyone looking forward to mealtime.
Sharing Time-Saving Techniques for Preparing Paleo Dinners
Time-saving techniques are vital for families committed to preparing paleo dinners while juggling busy schedules. By adopting efficient cooking methods and utilizing kitchen gadgets, families can streamline their meal preparation processes, ensuring that healthy options are always within reach.
One effective time-saving technique is batch cooking, where larger quantities of staple ingredients or meals are prepared in advance. This not only reduces cooking time during the week but also allows for quick reheating of nutritious meals. Additionally, employing kitchen tools like slow cookers, pressure cookers, and food processors can significantly decrease prep time and enhance flavor development.
Here are some time-saving techniques for preparing paleo dinners:
- Batch cook proteins and vegetables on weekends for easy meal assembly during the week.
- Utilize slow cookers for set-and-forget meals that develop rich flavors.
- Invest in a food processor to expedite time-consuming tasks, such as chopping or blending.
- Keep a well-organized pantry stocked with staples that simplify meal assembly.
By employing these time-saving methods, families can simplify paleo dinner preparations, making healthy eating achievable and enjoyable even on the busiest days.
Paleo Dinner Ideas for Picky Eaters
Making Paleo Meals More Attractive to Kids
Making paleo meals enticing for children requires a dash of creativity and a touch of fun. By incorporating vibrant colors, interesting textures, and engaging presentations, parents can capture children’s interest in healthy dining. Involving kids in the cooking process can also ignite curiosity and excitement about the meals being prepared.
Consider using fun shapes or arranging food in visually appealing patterns to make paleo dinners more engaging. Incorporating dips or sauces can also add an element of fun, making healthy options more attractive. Encouraging children to assist in cooking allows them to take ownership of their meals, increasing the likelihood that they will enjoy what they have helped create.
Here are some tips for making paleo meals more kid-friendly:
- Incorporate colorful vegetables and fruits to attract their attention.
- Use fun shapes with cookie cutters to create interesting food forms.
- Involve kids in the cooking process to increase their investment in the meal.
- Serve meals with healthy dips or sauces to enhance appeal.
By employing these strategies, families can transform paleo dinners into enjoyable experiences that children will look forward to, ultimately fostering a love for nutritious foods.
Exploring Paleo-Friendly Substitutes for Common Ingredients
For families navigating picky eaters, having a repertoire of paleo-friendly substitutes can make all the difference. By swapping out common non-paleo ingredients for healthier alternatives, families can create meals that satisfy specific dietary restrictions or preferences without sacrificing taste.
For example, using almond flour instead of traditional flour can provide similar textures for baking while adhering to paleo standards. Similarly, coconut milk can replace dairy milk in recipes, ensuring that creamy flavors remain intact while avoiding lactose. These substitutions allow families to maintain familiar flavors while embracing healthier options.
Here’s a list of common paleo-friendly ingredient swaps:
- Almond flour for traditional wheat flour
- Coconut milk for dairy milk
- Zucchini noodles for pasta
- Honey or maple syrup for refined sugars
- Cauliflower for rice or grains
- Coconut oil for vegetable oil
- Chia seeds or flaxseeds instead of eggs in baking
- Avocado for mayonnaise
By incorporating these substitutes into paleo dinners, families can enjoy familiar meals while maintaining their commitment to a healthy lifestyle.
Hiding Nutritious Ingredients in Paleo Dinners
Incorporating nutritious ingredients into paleo meals without overpowering flavors is an effective strategy for families with picky eaters. By using techniques such as pureeing vegetables or finely chopping them into dishes, parents can boost the nutritional value of meals while keeping them delicious and appealing.
For example, pureed vegetables can be added to sauces, smoothies, or soups to provide added nutrients without significantly altering the overall taste. Similarly, finely chopping greens or adding grated vegetables to meatballs or burgers can enhance the nutritional profile without drawing attention to their presence.
Here are some recipes for hiding nutritious ingredients in paleo meals:
- Pureed cauliflower added to mashed potatoes for enhanced creaminess and nutrients.
- Grated carrots or zucchini in meatloaf or burgers.
- Spinach or kale can be added to smoothies with fruits.
- Blended vegetables in sauces, such as tomato sauce with pureed carrots.
By employing these techniques, families can ensure that paleo dinners are both nourishing and appealing to even the fussiest eaters.
Seasonal Paleo Dinner Ideas
Utilizing Seasonal Produce in Paleo Dinners
Incorporating seasonal produce into paleo meals not only enhances flavor but also promotes optimal nutrition. Seasonal ingredients are often fresher and more affordable, making them an ideal choice for families aiming to maintain a healthy paleo lifestyle. By embracing seasonal cooking, families can create meals that reflect the natural bounty available throughout the year.
When planning your meals, consider the fruits and vegetables that are in season in your area. This not only supports local farmers but also allows families to enjoy ingredients at their peak flavor and nutritional value. For example, incorporating summer tomatoes into salads or using winter squash in hearty dishes can bring a delightful variety to paleo dinners.
Here are some seasonal produce options to incorporate into your paleo meals:
- Summer: Zucchini, tomatoes, bell peppers, and corn.
- Fall: Pumpkin, sweet potatoes, Brussels sprouts, and apples.
- Winter: Kale, butternut squash, citrus fruits, and root vegetables.
- Spring: Asparagus, peas, radishes, and fresh herbs.
By utilizing seasonal ingredients, families can enjoy vibrant and flavorful paleo dinners that nourish the body while celebrating the changing seasons.
Paleo Dinner Ideas for Different Seasons
Adapting paleo dinners to reflect the seasons can enhance meal enjoyment and provide a diverse range of flavors throughout the year. By focusing on seasonal ingredients, families can create dishes that not only taste great but also provide optimal nutrition.
Consider how different ingredients shine in each season. For instance, hearty dishes featuring winter squashes and root vegetables can warm up chilly evenings, while fresh salads with summer produce can offer refreshing lightness during hot months. Adapting meals based on seasonal availability can also help families avoid monotony, keeping mealtime exciting.
Here are some paleo dinner ideas for different times of the year:
- Summer: Grilled vegetable skewers with lean meats and fresh salads.
- Fall: Roasted butternut squash soup with a side of leafy greens.
- Winter: Slow-cooked beef stew with seasonal root vegetables.
- Spring: Light chicken and asparagus stir-fry with fresh herbs.
By embracing the flavors of each season, families can enjoy diverse and nutritious paleo dinners that celebrate the best of what nature has to offer.
Preserving Seasonal Ingredients for Year-Round Enjoyment
Preserving seasonal ingredients can be a fantastic way to extend the life of fresh produce, ensuring that families can enjoy their favorite flavors throughout the year. Techniques such as freezing, fermenting, or dehydrating can enhance the versatility of paleo meals, making it easy to incorporate seasonal ingredients even when they are out of season.
Freezing is an excellent method for preserving vegetables and fruits. By blanching vegetables before freezing, families can maintain their color, texture, and nutritional value. Fermenting seasonal produce, such as pickling cucumbers or fermenting tomatoes, can introduce exciting flavors and probiotic benefits, enhancing the overall nutritional profile of meals.
Here are some preservation methods for seasonal ingredients:
- Freezing: Blanch and freeze vegetables like green beans or broccoli.
- Fermenting: Create your own pickles or sauerkraut from seasonal produce.
- Dried: Dehydrate fruits or vegetables, such as apples or tomatoes, for snacks and meals.
- Jarring: Make jams or preserves from seasonal fruits for later use in desserts or as a breakfast treat.
By employing these preservation techniques, families can enjoy the benefits of seasonal produce all year long, enhancing their paleo dinners with fresh flavors regardless of the season.
Frequently Asked Questions
What is the paleo diet?
The paleo diet focuses on consuming whole, unprocessed foods similar to those eaten by our ancestors. It emphasizes lean meats, fish, fruits, vegetables, nuts, and seeds while avoiding grains, legumes, and processed foods.
Are paleo dinners suitable for families?
Absolutely! Paleo dinners can be nutritious and appealing for families, offering a variety of flavors and textures that cater to all ages. The emphasis on whole foods promotes healthy eating habits.
How can I make paleo meals kid-friendly?
To make paleo meals kid-friendly, use colorful vegetables, involve kids in the cooking process, and serve meals with fun dips. Creative presentation can also make meals more appealing.
What are some affordable paleo ingredients?
Affordable paleo ingredients include chicken thighs, seasonal vegetables, canned fish, eggs, and bulk grains like quinoa. Shopping sales and local markets can also help reduce costs.
Can I meal prep paleo dinners?
Yes, meal prepping paleo dinners is a great way to save time and ensure healthy meals are always ready. Batch-cook proteins and vegetables, and store them for easy assembly throughout the week.
How can I add variety to my paleo meals?
To add variety, experiment with different herbs, spices, and cuisines. Rotate recipes and introduce new ingredients to keep meals exciting and engaging for your family.
What are some quick paleo dinner ideas?
Quick paleo dinner ideas include stir-fries, one-pan meals, and salads. Focus on quick-cooking proteins and pre-chopped vegetables to speed up meal preparation.
How does the paleo diet support weight management?
The paleo diet supports weight management by promoting satiety through whole foods high in protein and healthy fats, thereby reducing cravings for processed foods and sugars that contribute to weight gain.
Can children benefit from the paleo diet?
Yes, children can benefit from the paleo diet by receiving essential nutrients for growth and development. Whole foods support energy levels and focus, fostering healthier eating habits.
How can I involve my family in cooking?
Involve your family in cooking by assigning specific tasks, exploring new recipes together, and encouraging everyone’s input in meal planning. This fosters teamwork and makes mealtime enjoyable.
Check out our awesome updates on Facebook!
The post Top Paleo Dinner Ideas for Families: Quick and Easy Meals appeared first on https://cookinggods.com
The Article Paleo Dinner Ideas: Quick and Easy Family Meals Was Found On https://limitsofstrategy.com
-

Easy Dinner Ideas for One: Quick Meal Solutions Made Simple
Explore Nutritious and Flavorful Dinner Options for Solo Diners
Unlock the Health Benefits of Quick and Easy Meals
Discovering easy dinner ideas designed for one person can lead to meals that are not only nutritious but also beneficial for sustaining a healthy lifestyle. Quick meals are often packed with a variety of balanced nutrients, which are crucial for overall well-being. By focusing on speed without sacrificing health, these meals offer considerable advantages, especially for those who frequently cook for themselves. Key benefits of quick meals include:
- Time Efficiency: Quick meals significantly lessen the time spent in the kitchen, freeing up valuable time for relaxation or more productive pursuits.
- Balanced Nutrition: These meals can be designed to combine carbohydrates, proteins, and essential fats, thus promoting holistic health.
- Stress Reduction: The ability to prepare a meal in just a few minutes can ease the cooking-related anxiety that many people face.
- Encourages Culinary Creativity: The necessity for quick meal preparation can spark innovative cooking methods, leading to exciting new flavor experiences.
Integrating quick meals into your daily routine does not require sacrificing health or nutrition. By utilizing fresh ingredients sourced from local markets, you can significantly boost the nutritional quality of your meals. Emphasizing whole foods such as vegetables, legumes, and lean proteins offers a wholesome base that is not only easy to prepare but also enjoyable to eat.
Discover Simple and Quick Recipes for Busy Evenings
When your evenings are packed with activities, the last thing you want is to spend hours cooking. Here are three straightforward dinner recipes that require minimal ingredients and preparation time, making them perfect for those busy nights:
- Stir-Fried Vegetables and Tofu: Sauté a colorful mix of your favorite vegetables, such as bell peppers, broccoli, and snap peas, with a splash of soy sauce. Toss in diced tofu for an added protein boost and serve it over a bed of rice or noodles for a satisfying meal.
- Chickpea Salad: Combine canned chickpeas, diced cucumbers, tomatoes, and parsley. Drizzle with olive oil and lemon juice for a refreshing, filling meal that is packed with flavor.
- Pasta Aglio e Olio: Cook pasta and toss it with sautéed garlic in olive oil, a sprinkle of red pepper flakes, and fresh parsley for a simple yet flavor-rich dish.
These recipes not only minimize preparation time but also illustrate how you can create satisfying meals tailored to your unique taste and nutritional needs. With minimal effort, you can enjoy delicious dinners that seamlessly fit into your hectic lifestyle.
Strategies for Creating a Balanced Meal
Creating a balanced meal is essential for maintaining energy levels and overall health. A well-rounded dinner typically includes a variety of food groups such as carbohydrates, proteins, and vegetables. To guarantee that your meals are well-balanced, consider implementing the following strategies:
1. Incorporate Whole Grains: Opt for brown rice, quinoa, or whole grain pasta as the base of your meals. These grains are rich in fiber and provide sustained energy for your day.
2. Add Lean Protein: Include sources such as chicken, fish, legumes, or tofu to enhance satiety and support muscle health.
3. Load Up on Vegetables: Aim for a vibrant assortment of vegetables to deliver essential vitamins and minerals. The greater the variety, the better the nutritional outcomes.
4. Incorporate Healthy Fats: Add healthy fats like avocado, nuts, or olive oil to improve nutrient absorption and boost flavor.By concentrating on these components, you can create meals that are not only simple to prepare but also rich in nutrition, contributing to long-term health benefits. It’s about making straightforward choices that contribute to comprehensive well-being, even when dining solo.
Expert Insights on Easy Dinner Solutions for Solo Diners
Nutritionists’ Recommendations for Solo Dinner Success
Nutritionists often endorse meals that are quick to prepare and nutritionally balanced, especially for individuals cooking for themselves. Recommended dinners typically encompass a variety of food groups, ensuring a comprehensive intake of nutrients. For instance, a nutritious dinner might feature grilled salmon alongside quinoa and steamed broccoli, delivering a wealth of healthy fats, protein, and fiber.
Another great option is a hearty vegetable soup packed with beans and lentils, which can be prepared in advance and enjoyed over several days. This type of meal not only supplies essential nutrients but also boosts your vegetable intake. Nutritional strategies often highlight the importance of variety in meals, which can enhance adherence to healthy eating patterns.
Incorporating snacks like nuts or yogurt can further enhance meal quality throughout the day, ensuring that your body remains well-fueled. By adhering to these guidelines, you can make informed choices that support your health while enjoying the convenience of cooking for one.
Strategies to Elevate Your Meals and Keep Them Interesting
Add variety to your meals to prevent monotony and ensure you receive a comprehensive range of nutrients. Experimenting with diverse flavors and ingredients not only elevates your cooking experience but also enhances your meals. Here are some strategies to keep your dinners exciting:
– Explore Global Cuisines: Dive into recipes from various cultures—think Thai curry, Italian risotto, or Mexican fajitas. Each cuisine offers distinct spices and techniques that can diversify your meal options.
– Play with Textures: Combine crunchy elements like nuts or seeds with softer dishes to create an intriguing mouthfeel. For instance, topping a creamy soup with toasted pumpkin seeds can add delightful contrast.
– Season Creatively: Utilize fresh herbs, spices, and condiments to enhance your dishes. A sprinkle of fresh basil or a dash of soy sauce can completely transform a meal’s profile.
– Swap Ingredients: Feel free to substitute ingredients based on what you have available. If a recipe calls for spinach but you have kale on hand, utilize it instead.By diversifying your meals, you not only keep your palate engaged but also maximize your intake of various nutrients. This approach fosters a healthier relationship with food, transforming cooking for one into an enjoyable experience rather than a mundane chore.
Effective Cooking Techniques for Solo Diners
Cooking for one can be challenging, but specific techniques can simplify the process and enhance your culinary experience. Learning efficient cooking methods can streamline your evening routine, allowing you to prepare quick yet delicious meals. Here are some of the best techniques to consider:
– Batch Cooking: Prepare larger quantities of meals and store them in individual portions. This strategy allows for effortless reheating, ensuring you always have a healthy option available.
– One-Pan Cooking: Focus on recipes that can be made in a single pan or pot. This method reduces cleanup time while allowing flavors to meld beautifully.
– Microwave Magic: Don’t underestimate the convenience of the microwave for rapidly steaming vegetables or reheating leftovers. It’s a valuable tool for those living a fast-paced lifestyle.
– Stir-Frying: This technique is both quick and allows you to incorporate a variety of vegetables and proteins in mere minutes. A hot wok can swiftly cook food while preserving essential nutrients.By mastering these techniques, you can elevate your solo cooking experience, making it both efficient and gratifying. Cooking for one doesn’t have to be laborious; with the right methods, you can enjoy a wide array of delicious meals with minimal effort.
Smart Strategies for Time-Saving Solo Cooking
How to Prep Meals in Advance for Effortless Convenience
Meal prepping is an effective way to save time and ensure you have healthy meals ready at a moment’s notice. Planning allows you to utilize your ingredients efficiently and avoid the last-minute scramble to prepare dinner. Here are some efficient strategies for preparing meals in advance:
– Designate a Prep Day: Set aside a specific day of the week for meal prep. This could be a Sunday afternoon or any day that aligns with your schedule.
– Batch Cook Staples: Make larger quantities of base foods like grains, legumes, and roasted vegetables. These can be mixed and matched throughout the week to create diverse meals.
– Use Portion Control Containers: Invest in high-quality containers that allow you to portion out meals for easy storage and quick access.
– Label and Date Everything: Keeping track of your prepped meals helps with freshness management. Labeling containers with dates can prevent food waste and ensure you consume meals promptly.Effective meal prepping not only saves time but also encourages healthier eating habits. With meals ready to go, you’re less likely to resort to unhealthy takeout options. This proactive approach allows you to focus on enjoying your cooking rather than rushing to prepare dinner after a long day.
Innovative Ways to Repurpose Leftovers
Leftovers can be transformed into new and exciting dishes, turning what may have been a monotonous meal into something fresh and invigorating. By learning how to creatively repurpose your meals, you can minimize food waste while enjoying a variety of flavors. Here are some ideas to get started:
– Create Wraps or Sandwiches: Leftover grilled chicken or vegetables can be tossed into a wrap with fresh greens and sauces for a quick lunch or dinner.
– Make a Frittata: Combine leftover vegetables and proteins with eggs to create a delicious frittata. This dish can be enjoyed warm or cold, making it versatile for any meal of the day.
– Transform into Soups or Stews: Blend leftover meats and vegetables with broth and seasoning to create hearty soups. This is an excellent way to utilize food that might otherwise go uneaten.
– Use as Pizza Toppings: Repurpose leftover meats, veggies, and sauces as toppings for homemade pizzas. A simple base can quickly become an entirely new meal.By thinking creatively, you can breathe new life into your leftovers. This not only helps you save money but also encourages a creative and enjoyable cooking experience.
Effective Strategies for Streamlined Grocery Shopping
Efficient grocery shopping can save you time and help you plan your meals more effectively. By streamlining your grocery trips, you can ensure you have everything you need without unnecessary stress. Here are some tips for quick and effective grocery shopping:
- Prepare a Shopping List: Create a shopping list based on your meal plans for the week. This helps prevent impulse purchases and ensures you stay focused.
- Shop During Off-Peak Hours: If possible, visit the store during less busy times. This allows for a more relaxed shopping experience and quicker checkout.
- Organize by Sections: Arrange your list by grocery store sections (produce, dairy, etc.) to minimize backtracking in the store.
- Consider Online Shopping: Many supermarkets now offer online shopping options, which can save time and allow you to compare prices effortlessly.
Implementing these strategies can make your grocery shopping experience more efficient and enjoyable. By preparing ahead, you set yourself up for success in cooking nutritious and satisfying meals throughout the week.
Budget-Friendly Dinner Choices for Cost-Conscious Diners
Identifying Economical Ingredients for Your Meals
Certain ingredients provide excellent value and can be utilized in multiple dishes, enabling you to stretch your budget while enjoying a variety of meals. Knowing which items to purchase can significantly assist in creating budget-friendly dinners. Here are some economical ingredients to consider:
- Rice and Grains: Staples like brown rice, quinoa, and pasta serve as versatile bases for numerous dishes and are typically affordable.
- Canned Beans: Canned beans are not only budget-friendly but also packed with protein and fiber, making them an excellent choice for quick meals.
- Seasonal Vegetables: Purchasing seasonal produce often results in lower prices. Look for local markets to find fresh and economical options.
- Eggs: A fantastic source of protein, eggs are budget-friendly and can be used in a variety of recipes—from breakfast to dinner.
By focusing on these economical ingredients, you can create a multitude of meals without overspending. This approach not only helps maintain a healthy diet but also fosters mindful shopping habits that enhance your overall fiscal health.
Strategies for Cooking Tasty Meals on a Budget
Creating delicious meals doesn’t have to deplete your finances. With a bit of creativity and planning, you can whip up tasty dishes while saving money. Here are some strategies to consider:
– Plan Your Meals: Develop a weekly menu that maximizes the use of your ingredients. This prevents waste and allows you to make the most of your groceries.
– Embrace Freezing: Prepare meals in bulk and freeze portions for later. This practice helps save time and money, ensuring you always have a homemade meal available.
– Utilize Store Brands: Store-brand products often provide similar quality at a lower price. This can apply to everything from grains to canned goods.
– Cook in Bulk: Preparing larger portions of meals can save both time and money, as leftovers can be enjoyed throughout the week or frozen for future use.By employing these strategies, you can savor a variety of delicious meals without straining your budget. Adopting a cost-conscious mindset in the kitchen enables you to create nourishing dishes that align with your financial situation.
Maximizing Your Ingredients for Optimal Value
Making the most out of your ingredients can help you save money and reduce waste. Understanding how to stretch your food further allows you to optimize your grocery budget while enjoying a diverse range of meals. Here are some effective techniques to stretch your ingredients:
– Use Leftovers Wisely: Repurpose leftover meats and vegetables into new dishes, as previously mentioned. This minimizes waste while creating exciting meals.
– Incorporate Fillers: Use grains, legumes, or starchy vegetables to bulk up meals. For example, adding lentils to a soup can enhance its volume and nutritional value without a significant cost increase.
– Practice Portion Control: Be mindful of portion sizes to prevent overconsumption and waste. This allows you to enjoy your meals without excess leftovers.
– Make Stock or Broth: Use vegetable scraps, bones, or meat trimmings to create homemade stock or broth. This not only enhances your dishes but also utilizes every part of the ingredient.Adopting these practices not only aids in budget management but also nurtures a sustainable cooking approach. By being resourceful, you can truly maximize the potential of each ingredient.
Effective Meal Planning for Financial Savings
Planning your meals can significantly impact your budget and help reduce waste. By creating a weekly menu that maximizes savings and minimizes waste, you can enjoy nutritious meals without overspending. Here are some steps to facilitate effective planning:
1. Assess Your Pantry: Start by checking your pantry and fridge for items you already possess. This can inspire meals and prevent unnecessary purchases.
2. Create a Weekly Menu: Draft a menu based on what you have available and what’s on sale. Ensure to include a mix of proteins, vegetables, and grains.
3. Shop Accordingly: Use your menu to create a shopping list, focusing solely on items needed to complete your meals. This helps to prevent impulse buying and keeps your budget intact.
4. Batch Cooking: Prepare meals in bulk for the week. This not only saves time but also ensures you have healthy options readily available.By implementing these planning strategies, you can achieve significant savings while still enjoying a variety of nutritious and delicious meals throughout the week.
Effortless One-Pot Meals for Simple Cooking
One-pot meals are an excellent approach to save both time and money while enjoying a hearty and satisfying dinner. These meals typically require minimal cleanup and can be easily adapted to suit your taste preferences. Here are some simple one-pot recipes that are both budget-friendly and delicious:
- Vegetable and Lentil Stew: Combine lentils, diced tomatoes, carrots, and spinach in a pot with vegetable broth—season with herbs and spices for a hearty meal.
- Chicken and Rice Casserole: Mix cooked chicken, rice, and mixed vegetables with a creamy sauce and bake in the same dish for an easy dinner.
- Quinoa and Black Bean Bowl: Cook quinoa and toss it with black beans, corn, diced tomatoes, and avocado for a filling and nutritious meal.
These recipes are not only cost-effective but also provide ample portions for enjoyable dinners throughout the week. The ease of preparation and cleanup makes one-pot meals an attractive option for anyone cooking solo.
Research-Backed Benefits of Quick Dinner Ideas for Individuals
Insights from Current Research on Quick Meals
Research shows that quick meals can form an integral part of a healthy diet, enhancing both physical health and overall well-being. Studies indicate that individuals who opt for quick, nutritious meals tend to exhibit improved dietary patterns and better health outcomes. The emphasis on whole ingredients in the preparation of quick meals underscores the significance of nutrition in our daily lives.
Moreover, quick meals facilitate a balanced intake of nutrients, which is crucial for maintaining energy levels and supporting bodily functions. The ability to prepare wholesome meals in a short timeframe is particularly advantageous for those with busy lifestyles, ensuring that healthy eating remains accessible.
Furthermore, research highlights the importance of meal variety in our diets. Quick meal preparation often allows for greater experimentation with different ingredients, potentially leading to a more balanced intake of vitamins and minerals.
The Impact of Quick Meals on Mental Health
Quick and easy meals can positively influence mental health by minimizing stress and the time spent cooking. The convenience of preparing meals in a short amount of time allows individuals to focus their energy on other essential aspects of their lives. This reduction in kitchen time can alleviate feelings of overwhelm and foster a healthier relationship with food.
Additionally, nourishing meals contribute to improved mental well-being. The act of preparing and consuming meals that are balanced and nutritious can instill a sense of accomplishment and satisfaction. Recognizing that you are taking care of your body can uplift your mood and enhance your overall mental health.
Research has also indicated that individuals who maintain a balanced diet often experience lower levels of anxiety and depression. Quick meals, when crafted with wholesome ingredients, can support this balance and contribute positively to mental health.
Long-Term Health Benefits Associated with Quick Meals
Regularly consuming balanced, quick meals can yield long-term health benefits. By prioritizing nutrition in your daily meals, you can establish healthy eating patterns that promote sustained well-being. Consistent consumption of nutritious meals supports heart health, assists with weight management, and reduces the risk of chronic diseases.
Moreover, cooking for oneself encourages mindful eating practices, which can lead to improved digestion and healthier food choices. The process of preparing meals allows individuals to be more conscious of what they consume, fostering greater awareness of nutritional needs.
Additionally, the convenience of quick meals can enhance adherence to dietary guidelines. When healthy options are readily available and easy to prepare, individuals are more likely to remain committed to their dietary goals, ultimately leading to better overall health outcomes in the long run.
Embrace One-Pot Meals for Easy Cleanup
Understanding the Benefits of One-Pot Meals
One-pot meals simplify the cooking and cleanup process, making them ideal for busy individuals. The convenience of preparing an entire meal in a single pot not only saves time but also reduces the mess typically associated with multiple cooking vessels. Here are some advantages of one-pot meals to consider:
– Time Efficiency: Cooking everything in one pot drastically reduces preparation and cooking time, making it easier to whip up dinner on a hectic night.
– Less Cleanup: With only one pot to wash, you can enjoy your meal without the worry of extensive cleanup afterwards.
– Flavor Infusion: Cooking ingredients together allows flavors to meld beautifully, enhancing the overall taste of the dish.
– Versatility: One-pot meals can be easily customized to suit your dietary preferences and can incorporate a variety of ingredients.By embracing one-pot meals, you can streamline your cooking routine and make dinnertime less of a chore. These meals offer the perfect balance of convenience and deliciousness, catering to those seeking quick, satisfying options.
Simple One-Pot Recipes to Try Today
Here are three one-pot recipes that require minimal cleanup while delivering scrumptious results:
- One-Pot Pasta Primavera: Toss your favorite pasta with seasonal vegetables, olive oil, and garlic. Cook everything in one pot for a quick and vibrant meal.
- Moroccan Chickpea Stew: Combine chickpeas, diced tomatoes, and spices in a pot. Serve with couscous or bread, all cooked in one vessel for flavor-packed simplicity.
- Beef and Vegetable Stir-fry: Cook thinly sliced beef and a medley of vegetables in a wok. Serve over rice, utilizing just one pot for easy preparation.
These recipes exemplify the beauty of one-pot cooking, making it easy to enjoy delicious meals without the hassle of extensive cleanup. Such meals are ideal for those dining alone, facilitating a satisfying dinner experience.
Maximizing Cooking Time with One-Pot Meals
One-pot meals can be optimized for even quicker preparation, making them an excellent choice for busy nights. Here are some techniques to enhance your cooking time:
– Pre-chop Ingredients: Spend a few minutes before cooking to chop vegetables and prepare proteins. This speeds up the cooking process when you’re ready to meal prep.
– Use Frozen Ingredients: Frozen vegetables and pre-cooked grains can significantly reduce cooking time. They are convenient and often just as nutritious as fresh produce.
– Cook in Batches: Prepare larger quantities and store them in individual portions for easy reheating. This method is ideal for quick lunches or dinners during the week.
– Utilize the One-Pan Method: Cook everything in one pan, layering ingredients that require different cooking times. Start with items that take longer to cook and add quicker-cooking ingredients later.By employing these techniques, you can optimize your time in the kitchen while still enjoying the benefits of one-pot meals. Efficiency becomes key, allowing for a more enjoyable and less stressful cooking experience.
Choosing the Right Pot for One-Pot Cooking Success
Selecting the appropriate pot can greatly enhance your cooking experience and outcomes. Different materials and sizes can impact the success of your one-pot meals. Here are some tips for choosing the best pot for various one-pot recipes:
– Material Matters: Choose pots made from materials that conduct heat evenly, such as stainless steel or cast iron. These options ensure even cooking and prevent hot spots.
– Size Counts: Select a pot that’s large enough to accommodate your ingredients without overcrowding. A pot with a capacity of at least 4–6 quarts is generally suitable for most one-pot meals.
– Consider Versatility: A good Dutch oven or a large saucepan can serve multiple purposes, making them ideal for soups, stews, and casseroles.
– Lid Usage: A pot with a well-fitting lid helps retain moisture and heat, ensuring your meals cook thoroughly and evenly.By understanding the importance of your pot selection, you can optimize your one-pot cooking experience. The right tools can elevate your meals while simplifying the cooking process.
Tips for Storing and Reheating One-Pot Meals
Proper storage and reheating methods can maintain the quality of one-pot meals, ensuring they remain fresh and delicious. Here are some practical tips to keep your meals in optimal condition:
– Cool Completely Before Storing: Allow your meals to cool before transferring them to storage containers to prevent moisture buildup and maintain quality.
– Use Airtight Containers: Store your meals in airtight containers to preserve freshness and prevent spoilage.
– Label and Date: Clearly label each container with the contents and date prepared for easy identification and to avoid confusion later.
– Reheat Gently: When reheating, do so gently over low heat to preserve the texture and avoid overcooking. Stir occasionally to ensure even heating.By implementing these storage and reheating tips, you can enjoy your one-pot meals at their best, minimizing waste and maximizing flavor. This practice promotes a sustainable approach to cooking, particularly when preparing meals for one person.
Delicious Vegetarian and Vegan Dinner Ideas for Solo Diners
Best Plant-Based Protein Sources for Your Meals
Plant-based proteins are essential for a well-rounded vegetarian or vegan diet. These proteins deliver vital nutrients to support a healthy lifestyle, especially for those dining alone. Here are some of the best options for solo dinners:
- Lentils: Rich in protein and fiber, lentils are versatile and cook relatively quickly, making them perfect for a variety of meals.
- Chickpeas: These legumes can be utilized in salads, stews, or roasted for a crunchy snack. They are high in protein and offer a multitude of culinary applications.
- Quinoa: This ancient grain is a complete protein, containing all nine essential amino acids. It can serve as a base for numerous dishes.
- Tofu and Tempeh: These soy products are excellent protein sources and can be marinated and cooked in various ways to enhance their flavor.
Incorporating these plant-based proteins into your meals can help you meet your nutritional needs while enjoying a diverse range of dishes. By focusing on protein sources, you can achieve a balanced diet that supports your overall health and well-being.
Quick and Easy Vegetarian and Vegan Recipes to Try
These recipes are ideal for those following a vegetarian or vegan diet and are quick and easy to prepare. Relish in delicious and nutritious meals that cater to your dietary preferences:
- Vegetable Stir-Fry: Sauté a mix of seasonal vegetables with tofu in soy sauce and sesame oil for a quick, flavor-packed meal served over rice.
- Chickpea Salad: Combine canned chickpeas, diced cucumbers, cherry tomatoes, and parsley, dressed with lemon juice and olive oil for a refreshing option.
- Vegan Curry: Cook mixed vegetables in coconut milk with curry paste for a rich and hearty dish, served alongside rice or quinoa.
These recipes are not only simple to prepare but also highlight the versatility of plant-based cooking. They can easily be tailored to suit individual tastes and preferences, making meal preparation enjoyable and satisfying.
Ensuring Nutritional Completeness in Vegetarian Meals
Ensuring that your vegetarian or vegan meals are nutritionally complete is crucial for overall health. While plant-based diets can be rich in many nutrients, it’s vital to address potential gaps. Here are some strategies to achieve nutritional completeness:
1. Combine Protein Sources: Pair different plant-based proteins to offer a complete amino acid profile. For example, combining rice and beans creates a full protein.
2. Include a Variety of Foods: Incorporate a wide array of fruits, vegetables, whole grains, nuts, and seeds to ensure you’re getting a broad spectrum of vitamins and minerals.
3. Watch for Micronutrient Intake: Pay attention to nutrients like vitamin B12, iron, and omega-3 fatty acids, which can be less prevalent in plant-based diets. Consider fortified foods or supplements if necessary.
4. Plan Balanced Meals: Aim to include a source of protein, healthy fats, and carbohydrates in each meal, ensuring that your diet remains well-rounded.By employing these strategies, you can create delicious, nutritionally complete vegetarian and vegan meals. This proactive approach to your diet fosters long-term health and wellness, supporting a sustainable lifestyle.
Frequently Asked Questions about Solo Dinner Ideas
What are easy dinner ideas for one person?
Easy dinner ideas for one person include simple recipes like stir-fried vegetables with tofu, chickpea salads, or pasta aglio e olio. These dishes require minimal ingredients and preparation time, yet are both nutritious and satisfying.
How can I make quick meals healthy?
To make quick meals healthy, focus on incorporating whole grains, lean proteins, and a variety of vegetables. Use fresh ingredients, opt for steaming or sautéing methods, and avoid processed foods when possible.
What are some budget-friendly dinner options?
Budget-friendly dinner options include meals that utilize inexpensive staples like rice, beans, seasonal vegetables, and eggs. Simple one-pot meals, such as vegetable stir-fry or lentil soup, are also cost-effective and satisfying.
How can I use leftovers creatively?
Leftovers can be creatively used in wraps, frittatas, soups, or as pizza toppings. By thinking outside the box, you can turn yesterday’s meal into a new and exciting dish.
Are there quick vegetarian meal options?
Yes, quick vegetarian meal options include vegetable stir-fries, chickpea salads, and quinoa bowls. These meals are nutritious, easy to prepare, and can be customized to your tastes.
What are some time-saving cooking techniques?
Time-saving cooking techniques for one include batch cooking, using frozen ingredients, and preparing simple one-pot meals. These methods help streamline meal preparation and reduce kitchen time.
How can I ensure my meals are balanced?
To ensure your meals are balanced, include a variety of food groups, such as carbohydrates, proteins, healthy fats, and plenty of vegetables. This approach supports energy levels and overall health.
What are the best plant-based protein sources?
The best plant-based protein sources include lentils, chickpeas, quinoa, and tofu. These ingredients are versatile, nutritious, and perfect for creating satisfying meals.
How do quick meals impact mental health?
Quick meals can positively impact mental health by reducing stress associated with cooking. Convenient and nutritious meals can foster a healthier relationship with food and enhance overall well-being.
What are the long-term health benefits of quick meals?
Long-term health benefits of quick meals include improved dietary patterns, better energy management, and a reduced risk of chronic diseases. Consistently balanced meals support overall health and well-being.
Connect with us on Facebook for the latest updates!
The post Top Easy Dinner Ideas for One Person: Quick and Simple Meals appeared first on https://cookinggods.com
The Article Easy Dinner Ideas for One: Quick and Simple Meal Solutions Was Found On https://limitsofstrategy.com
-

Smart Ovens: Master Modern Cooking Techniques in Your Kitchen
Unlock the Full Potential of Smart Ovens in Your Culinary Space
Understanding Smart Ovens: Functionality and Benefits
Smart ovens represent a groundbreaking evolution in the realm of cooking appliances, skillfully blending cutting-edge technology with traditional cooking methods to enhance culinary efficiency and precision. These sophisticated devices, equipped with Wi-Fi connectivity, empower users to monitor and control their cooking from a distance through mobile applications or voice commands. With a rich array of innovative features, smart ovens often include pre-set cooking modes customized for various dishes, enabling even those with little cooking experience to create meals that rival those from top-tier restaurants effortlessly. By integrating convenience, accuracy, and modern technology, smart ovens have emerged as essential tools in contemporary kitchens, enabling users to elevate their culinary skills with ease.
The true allure of smart ovens lies in their multifunctional capabilities. They not only streamline the cooking process but also significantly enhance it. Imagine being able to preheat your oven while out shopping for groceries or adjusting cooking temperatures from the comfort of your living room. This unprecedented level of control transforms traditional cooking techniques, making them more accessible and effective for everyone—from busy professionals to passionate home chefs. The ability to interact with your oven in real-time opens up a new world of culinary creativity and ease, previously thought unattainable.
Explore the Multifaceted Benefits of Utilizing Smart Ovens
The incorporation of smart ovens into your cooking practices offers a wide range of comprehensive advantages. One of the most significant benefits is accurate temperature control, ensuring consistent cooking results that are critical for dishes requiring exact heating levels. This precision not only enhances the quality of food but also promotes safety by minimizing the chances of overcooking or undercooking. The smart oven’s ability to maintain optimal cooking conditions contributes to a more reliable culinary experience, allowing even the most intricate recipes to shine.
Another compelling advantage is the time-saving features that smart ovens provide. Many models come equipped with programmable settings that allow users to pre-set cooking times and temperatures ahead of time. This functionality is particularly advantageous for individuals with busy lifestyles, freeing up valuable time for other essential activities while ensuring a delicious meal is ready at the end of the day. Additionally, numerous smart ovens can be monitored remotely, enabling users to keep an eye on their dishes without being confined to the kitchen, further enhancing flexibility.
Moreover, smart ovens cater to a variety of cooking styles and dishes, ranging from baking and roasting to air frying and dehydrating. This remarkable versatility opens up endless culinary possibilities, empowering home cooks to explore and refine their skills in ways they may not have previously considered. Diversifying cooking techniques not only fosters creativity but also encourages cooks to experiment with new flavors and textures in their meals, expanding their culinary repertoire.
What Varieties of Smart Ovens Are Currently Available?
In your journey through the landscape of smart ovens, you will discover various models tailored to meet specific kitchen needs and cooking preferences. Countertop models have gained immense popularity due to their user-friendly design and portability. These compact appliances can be conveniently placed on any kitchen surface, making them perfect for smaller spaces or for individuals who prefer not to install built-in units. Many countertop smart ovens boast advanced features, such as pre-programmed cooking modes and app connectivity, enhancing their usability.
Built-in units offer a more permanent culinary solution, seamlessly integrating into kitchen cabinetry for a streamlined aesthetic. These ovens typically feature larger capacities and additional functionalities, such as steam cooking or convection options, broadening the range of cooking techniques available and elevating the entire kitchen experience.
Combination ovens present yet another innovative solution, merging multiple cooking functionalities into one appliance. These versatile units commonly blend convection, microwave, and sometimes air-frying capabilities, making them incredibly useful for those looking to maximize kitchen efficiency. The ability to prepare a variety of dishes without the need for multiple appliances simplifies cooking and encourages culinary exploration.
How Are Smart Ovens Transforming the Cooking Process?

Smart ovens significantly enhance the overall cooking experience by merging innovative features with user-friendly design. One remarkable aspect is the incorporation of recipe applications that offer step-by-step cooking guidance, allowing users to tackle complex recipes with confidence. Many smart ovens come preloaded with a variety of recipes, and users can also download additional options, empowering them to explore exciting culinary adventures. This access to a diverse range of recipes fosters creativity and encourages users to experiment with new ingredients and techniques.
The voice control functionality represents another revolutionary feature, enabling users to operate their ovens hands-free. This capability is particularly beneficial during food preparation when your hands are busy. Through simple voice commands, you can preheat the oven or adjust settings, ensuring a smooth and uninterrupted cooking experience. This advancement not only streamlines the cooking process but also adds a layer of convenience that enhances kitchen productivity.
Additionally, smart ovens offer automatic cooking adjustments that evaluate the cooking environment and make real-time modifications for optimal results. Whether you are baking a delicate soufflé or roasting a flavorful chicken, these intelligent ovens help ensure your dishes are perfectly cooked every time, reducing guesswork and boosting your confidence in your culinary abilities. This sophisticated level of cooking technology equips home chefs with the necessary tools to tackle even the most challenging recipes effortlessly.
Essential Maintenance Strategies for Smart Ovens
Proper maintenance and care for smart ovens are fundamental to ensuring their longevity and peak performance. Regular cleaning is essential; while most smart ovens feature self-cleaning options that simplify this task, manual cleaning is still necessary to keep the appliance in pristine condition. It is vital to follow the manufacturer’s cleaning guidelines to avoid damaging sensitive components and ensure the oven remains in optimal working order.
Another crucial aspect of maintenance is keeping the oven’s software up to date. Smart ovens frequently receive firmware updates designed to enhance performance and introduce new features. Staying current with these updates ensures your appliance continues to operate as intended. Additionally, be mindful of any filters that may require replacement, as they can significantly impact performance and energy efficiency.
Moreover, it’s important to routinely inspect the oven’s seals and gaskets to ensure they are in good condition. Any deterioration can lead to heat loss, compromising cooking efficiency and increasing energy consumption. By implementing these maintenance practices, users can ensure their smart ovens provide reliable service for years to come, enabling consistent culinary success.
How Do Smart Ovens Operate?
Diving into the Advanced Technology Behind Smart Ovens
Smart ovens utilize sophisticated technology that incorporates sensors, algorithms, and connectivity features to create a seamless cooking experience. Central to this technology are several key components that collaborate to facilitate precise cooking:
- Sensors: These devices monitor the internal cooking temperature and adjust settings as necessary for accurate cooking.
- Wi-Fi Connectivity: This feature enables users to control and monitor the oven remotely via smartphone applications, allowing adjustments from virtually anywhere.
- Algorithms: Advanced algorithms calculate cooking times and temperatures based on specific recipes or cooking modes, ensuring optimal results.
- <a href="https://cookinggods.com/how-to-cook-with-voice-activated-gadgets-a-universal-guide/">Smart Home Integration:</a> Many smart ovens can connect with other smart home devices, creating a cohesive kitchen ecosystem that enhances overall functionality.
The real-time monitoring capabilities of smart ovens guarantee that food is cooked evenly and efficiently. For instance, if the oven detects temperature fluctuations, it can automatically adjust heat output to maintain a consistent cooking environment. This level of precision is critical for achieving perfect results, especially for delicate recipes like soufflés or pastries, where even minor variations can lead to disappointing outcomes.
Furthermore, the inclusion of smartphone applications allows users to access a wealth of resources right at their fingertips. From recipe suggestions to cooking advice, these applications can significantly enhance the cooking experience, making it more engaging and less intimidating for home cooks. This integration of technology and culinary expertise empowers users to explore new cooking methods and expand their culinary horizons.
Effectively Connecting and Controlling Your Smart Oven
Connecting and controlling a smart oven typically involves a straightforward process that begins with downloading the manufacturer’s app on your smartphone. After installation, you will need to create an account, usually requiring basic information like your email address and a password. The next step is pairing your oven with your home network, generally achieved through the app’s Wi-Fi settings, where you select your oven from the list of available devices.
Once connected, users can control a wide array of settings, from preheating the oven to adjusting cooking times and temperatures, all from their mobile devices. Many smart ovens send notifications to your phone, alerting you when your food is ready or if any issues arise that require your attention. This ability to stay connected enhances the cooking experience, allowing for a more flexible approach to meal preparation.
Additionally, some models come equipped with voice control capabilities that integrate with popular virtual assistants. This functionality allows users to operate their ovens using simple voice commands. For example, you might say, “Preheat the oven to 180 degrees,” and the oven will respond accordingly. Such hands-free operation is particularly beneficial when multitasking in the kitchen, making the cooking process more efficient and enjoyable.
Key Features to Consider When Choosing a Smart Oven
When selecting a smart oven, it’s essential to evaluate various features that can significantly enhance your cooking experience. Here are some critical aspects to consider:
- Wi-Fi Connectivity: Ensure the oven can connect to your home network for remote control and monitoring.
- Preset Cooking Programs: Look for ovens that offer a variety of preset options for different types of dishes, simplifying the cooking process.
- Voice Control Compatibility: Choose models compatible with smart home assistants for hands-free operation.
- Integration with Other Smart Devices: Consider ovens that can communicate with other smart appliances, like refrigerators or cooktops, for a cohesive cooking experience.
These features not only enhance the cooking experience but also help achieve consistent results. For example, preset cooking programs eliminate the guesswork of cooking times and temperatures, particularly beneficial for those less experienced in the kitchen.
Voice control compatibility can be a game-changer for multitasking cooks. You can ask your oven to adjust temperatures or cooking times while you’re busy preparing ingredients. Furthermore, integrating with other smart devices can create a connected kitchen, streamlining your cooking workflow and making meal preparation more cohesive and enjoyable.
Benefits of Incorporating Smart Ovens into Your Cooking Routine
Incorporating a smart oven into your culinary routine offers numerous advantages. One notable benefit is time efficiency. Smart ovens can significantly reduce cooking times by optimizing heating, often eliminating the need for preheating altogether. This efficiency is especially valuable for busy households where every minute counts, enabling quicker, hassle-free meal preparation.
Another essential advantage is improved cooking precision. With advanced sensors and algorithms, smart ovens guarantee meticulous temperature control, ensuring that your dishes are perfectly cooked every single time. This level of accuracy is particularly advantageous for complex recipes that require precise conditions, such as baking bread or preparing delicate pastries.
Smart ovens also enhance convenience with features such as remote control and automated cooking programs. Imagine being able to initiate dinner preparations from your office or setting your oven to cook while you’re out running errands. This level of connectivity and control allows for a flexible cooking schedule, making it easier to prepare meals around your life rather than the other way around.
Finally, many smart ovens promote energy efficiency. By optimizing cooking times and minimizing unnecessary heating, these appliances can reduce energy consumption. This not only benefits the environment but can also result in cost savings on your electricity bills—a win-win for both you and the planet.
Best Practices for Maintaining Your Smart Oven
Maintaining a smart oven is critical for ensuring its longevity and optimal performance. Regular cleaning is a foundational practice. Most smart ovens feature self-cleaning modes, but manual cleaning is often necessary to keep the appliance in peak condition. Use gentle, non-abrasive cleaners and follow the manufacturer’s instructions for the best results, avoiding damage to the oven’s surfaces.
In addition to routine cleaning, staying up to date with software upgrades is essential. Manufacturers frequently release updates that enhance functionality and performance, so it is vital to maintain current software. These updates often introduce new features or improve energy efficiency settings, contributing to a better overall cooking experience.
Another critical maintenance aspect involves checking and replacing any filters or seals. Many smart ovens come equipped with filters designed to capture grease and food particles, which can degrade performance if neglected. Regularly inspecting these components and replacing them as needed will ensure that your oven operates at peak efficiency.
Lastly, always consult the manufacturer’s guidelines for troubleshooting common issues, such as connectivity problems or error codes. Familiarizing yourself with these resources empowers you to address any challenges that may arise, ensuring that you can enjoy your smart oven for many years to come.
Expert Insights on Maximizing the Use of Smart Ovens
Pro Recommendations from Culinary Experts
Professional chefs have embraced smart ovens for their precision and consistency, making them indispensable tools in both commercial and home kitchens. One key recommendation from culinary experts is to utilize the preset cooking programs for common dishes. These settings are specifically engineered to optimize cooking times and temperatures, ensuring that items like roasted vegetables or baked goods turn out perfectly every single time.
Moreover, chefs encourage experimenting with custom settings to further refine recipes. The versatility of smart ovens allows users to adjust cooking modes, tailoring their dishes to personal preferences. For instance, if a recipe calls for baking but you desire a crispier finish, switching to convection mode can help achieve that ideal texture.
Another invaluable tip is to leverage the real-time monitoring features. Many smart ovens permit users to track cooking progress through smartphone applications, offering alerts when it’s time to check or adjust the dish. This eliminates guesswork and allows cooks to focus on other tasks without constantly monitoring the oven. Additionally, professional chefs suggest maintaining a cooking journal to document adjustments and outcomes, which can help refine techniques and enhance culinary skills over time.
How Smart Ovens Can Elevate Your Culinary Skills
Smart ovens serve as transformative tools that can significantly enhance your cooking abilities. They provide precise control over cooking conditions, allowing users to experiment and learn in ways that traditional ovens cannot facilitate. The ability to monitor temperature and cooking progress in real time fosters a deeper understanding of culinary techniques, empowering cooks to achieve professional results at home.
Furthermore, many smart ovens come equipped with educational resources via their companion apps. These resources can include video tutorials, cooking tips, and interactive guides to help users navigate complex recipes. By offering this level of support, smart ovens can demystify cooking processes and encourage users to try new techniques and cuisines.
For instance, a smart oven can guide you through the intricacies of sous vide cooking, a method many home cooks find daunting. By following the app’s instructions, users can confidently create perfectly cooked meats and vegetables that retain their moisture and flavor. This hands-on learning experience not only builds confidence but also unveils a world of culinary opportunities.
Additionally, many smart ovens feature functions that allow for adapting traditional recipes. Users can evolve family favorites by incorporating modern cooking techniques, expanding their culinary repertoire while preserving cherished traditions.
Emerging Trends in Smart Oven Technology
The field of smart oven technology is rapidly advancing, with several exciting trends emerging that enhance functionality and user experience. One significant trend is the increasing integration with smart home ecosystems. As more households adopt smart home devices, the ability of smart ovens to connect and communicate with other appliances, such as refrigerators or dishwashers, is becoming increasingly crucial for a coordinated kitchen setup.
Another notable trend is the enhancement of voice control capabilities. Many smart ovens now support advanced voice commands through popular virtual assistants, allowing users to operate their devices entirely hands-free. This feature is especially beneficial in fast-paced kitchens where multitasking is essential, enabling seamless cooking without interruption.
AI-driven cooking assistants are also gaining traction in smart oven technology. These intelligent assistants can analyze available ingredients and suggest recipes, making meal planning easier and more spontaneous. This functionality not only simplifies the cooking process but also encourages users to experiment with new ingredients and dishes, fostering culinary creativity.
Lastly, a heightened focus on energy efficiency is evident in smart oven designs. Many manufacturers are prioritizing eco-friendly features, such as energy-saving modes and improved insulation. As sustainability becomes increasingly important to consumers, smart ovens that emphasize energy conservation are likely to gain popularity, reflecting a shift towards more responsible cooking practices.
Cooking with Smart Ovens: A Guide to Recipes and Techniques
Simple Recipes for Beginners to Kickstart Their Cooking Journey
For those new to cooking with smart ovens, starting with uncomplicated recipes can build both confidence and familiarity with the appliance. Some beginner-friendly dishes that can be easily prepared include roasted vegetables, baked chicken, and simple casseroles. These recipes often feature preset cooking modes, making it easy for novice cooks to achieve delicious outcomes without extensive experience.
For example, roasted vegetables can be prepared by chopping your choice of seasonal veggies, tossing them in olive oil, salt, and pepper, and selecting the roasting preset on your oven. The smart oven will handle the rest, ensuring even cooking and caramelization for a delectable side dish.
Baked chicken is another uncomplicated recipe that can yield impressive results. By seasoning the chicken and placing it in the oven, users can select a preset program designed for poultry, which automatically sets the temperature and time. This ensures perfectly cooked chicken, eliminating the worry of undercooking or overcooking.
Casseroles also make excellent starting dishes. Many smart ovens are equipped with bake or casserole settings that optimize cooking conditions for layered dishes. These recipes typically require minimal preparation and can be assembled swiftly, making them ideal for busy weeknight dinners.
Here’s a helpful list of other beginner-friendly recipes for smart ovens:
- Stuffed bell peppers
- Sheet pan fajitas
- Pasta bake
- Fruit crumbles
- Garlic bread
- Oven-baked fish fillets
Embracing these easy recipes not only simplifies the cooking experience but also reinforces the advantages of using a smart oven, helping users gain confidence in their culinary skills and inspiring them to explore more complex dishes in the future.
Mastering Advanced Cooking Techniques with Smart Ovens
For those eager to elevate their cooking skills, smart ovens unlock a world of advanced cooking techniques that require precise temperature control and timing. One standout method is sous vide cooking, which involves sealing food in vacuum bags and cooking it at low temperatures for extended periods. Smart ovens equipped with sous-vide settings can automate this process, ensuring perfect doneness without the risk of overcooking, yielding tender, flavorful results.
Another advanced technique is dehydration, ideal for creating snacks like dried fruits or jerky. Smart ovens with dehydration modes allow users to precisely control temperature and time, ensuring food retains its nutrients while achieving the desired texture without additives or preservatives.
Proofing bread is another area where smart ovens excel. With the right settings, users can create a warm, controlled environment that promotes yeast activity, resulting in beautifully risen dough. This level of precision is essential for achieving the perfect loaf, and many smart ovens include dedicated proofing modes designed specifically for this purpose.
Lastly, air frying has become a popular choice for those seeking to enjoy crispy foods without excess oil. Smart ovens equipped with air-frying capabilities circulate hot air around the food, mimicking the frying process while significantly reducing fat. This technique is perfect for preparing everything from crispy vegetables to golden-brown chicken wings without the guilt.
Adapting Traditional Recipes for Smart Ovens
Adapting traditional recipes for smart ovens can be a rewarding process, allowing cooks to optimize their favorite dishes for modern technology. The key to successful adaptation is understanding the appliance’s capabilities and adjusting cooking times and temperatures accordingly to achieve the best results.
Begin by consulting the smart oven’s app or manual for guidance on cooking times and temperature settings for specific dishes. Many smart oven apps offer conversion guides that help translate traditional recipes into formats compatible with smart ovens, ensuring optimal cooking results.
For instance, if a traditional recipe calls for a conventional oven temperature of 180 degrees Celsius, the smart oven may suggest a slightly lower temperature for more even heating. Additionally, cooking times may need to be adjusted, as smart ovens often cook more efficiently than traditional ovens, ensuring food is cooked perfectly without being overdone.
It’s also beneficial to experiment with the various cooking modes available on smart ovens. For example, if a recipe specifies baking, you might find that switching to convection mode yields a better final product, especially for pastries and baked goods that benefit from even heat distribution.
Finally, don’t hesitate to document your adaptations in a cooking journal. Noting changes and outcomes can help you refine your techniques and create a repertoire of successful smart oven recipes tailored to your preferences and cooking style, expanding your culinary expertise over time.
What Are the Benefits of Cooking with Smart Ovens?
Maximizing Time and Energy Efficiency in the Kitchen
Smart ovens excel in both time and energy efficiency, making them a valuable addition to any kitchen. One of the most significant ways they save time is through optimized cooking processes. Many smart ovens eliminate the need for preheating by quickly reaching the desired temperature, allowing users to commence meal preparations without delay. This feature is particularly advantageous for busy families or individuals with hectic schedules, as it streamlines the cooking process and reduces overall kitchen time.
Additionally, the precise temperature control of smart ovens contributes to energy efficiency. By maintaining cooking temperature consistently, these ovens reduce energy consumption and lower utility bills. This not only benefits the environment but also helps users feel positive about their cooking choices and their impact on energy use.
Smart ovens often come equipped with energy-saving modes that automatically adjust cooking times and temperatures based on the dish being prepared. This further enhances their efficiency, optimizing resource use and minimizing waste. Ultimately, the time and energy savings provided by smart ovens make them a practical choice for contemporary households seeking to simplify their cooking routine while being conscious of their environmental footprint.
Achieving Superior Cooking Results with Smart Ovens
One of the standout benefits of cooking with smart ovens is the enhanced quality of the final dish. With their precise temperature control and advanced cooking algorithms, smart ovens ensure consistent results that can be challenging to replicate with traditional ovens. This accuracy is particularly crucial for recipes that require exact conditions, such as baking or delicate roasting, where even minor deviations can lead to unsatisfactory outcomes.
The even heat distribution of smart ovens eliminates hot spots that can cause uneven cooking. By ensuring that every portion of the dish receives uniform heat, these ovens help achieve optimal textures and flavors. Whether you’re baking a cake, roasting vegetables, or preparing a rack of lamb, the superior results attained through smart ovens can elevate your culinary creations to a new level of excellence.
Moreover, many smart ovens feature steam cooking and convection baking, further improving the quality of the dishes they prepare. These methods can impart moisture and create a desirable crust or texture, making even simple recipes taste gourmet. Consequently, home cooks can enjoy restaurant-quality meals from the comfort of their kitchens, making smart ovens a worthwhile investment for any culinary enthusiast.
Transforming Your Kitchen Experience with Smart Ovens
Smart ovens have the potential to transform your kitchen experience by offering convenience, control, and connectivity that traditional ovens cannot match. One of the primary improvements is the ability to monitor and control your oven remotely. With a smartphone app, users can preheat their ovens while commuting home from work, ensuring dinner is ready upon arrival. This flexibility fosters a more relaxed cooking environment, as meal preparation can be easily coordinated with other commitments.
Additionally, integrating smart technology simplifies meal planning and preparation. Many smart ovens come equipped with built-in recipe databases that guide users through the cooking process, offering step-by-step instructions and suggesting optimal cooking settings. This functionality can help demystify complex recipes, making them more accessible to home cooks of all skill levels, thus encouraging culinary experimentation and creativity.
Furthermore, smart ovens typically feature user-friendly interfaces that streamline operation. Touchscreen controls and programmable settings allow for quick adjustments without the hassle of searching for knobs or buttons, making the cooking process more intuitive and enjoyable. With these advancements, smart ovens can enhance not only the quality of the food prepared but also the overall cooking experience, fostering a deeper appreciation for the art of cooking.
Exploring the Versatile Cooking Options Provided by Smart Ovens
The versatility of smart ovens stands out as one of their most significant advantages, empowering users to explore various cooking methods and techniques without the need for multiple appliances. Smart ovens can handle a wide array of cooking tasks, including baking, roasting, air frying, dehydrating, and even sous vide cooking. This multifaceted capability makes them an excellent choice for anyone looking to expand their culinary repertoire and experiment with new cooking styles.
For instance, baking is a common application for smart ovens. Many models come equipped with specific baking modes that optimize heat distribution, ensuring baked goods rise and brown evenly for perfect results. Roasting is another area where smart ovens excel, as their precise temperature control allows for juicy meats and perfectly caramelized vegetables, enhancing the overall taste and presentation of the dish.
Air frying has gained popularity due to its ability to create crispy, fried textures with significantly less oil. Smart ovens with air-frying capabilities can deliver the same satisfying crunch without the added calories and mess of traditional frying, allowing for healthier meal options without sacrificing taste.
Dehydrating is another technique that smart ovens can perform, enabling users to preserve fruits and vegetables or make healthy snacks like homemade jerky. This versatility opens the door for creative experimentation in the kitchen, empowering users to try new recipes and techniques with ease and confidence.
Ensuring Safety with User-Friendly Features in Smart Ovens
Safety is a paramount consideration in modern kitchen design, and smart ovens feature a range of features that enhance user safety. One key safety feature is automatic shut-off, which turns off the oven after a specified period of inactivity, preventing accidental overheating and potential fire hazards. This feature is particularly beneficial for busy households where distractions can lead to forgetfulness and safety concerns.
Another essential safety feature is the child lock, which prevents young children from accidentally turning on the oven or changing settings. This peace of mind allows parents to encourage their children’s involvement in the kitchen without worrying about safety risks, fostering a positive cooking environment for everyone.
Many smart ovens also incorporate user-friendly interfaces, often featuring intuitive touch displays that simplify operation. These interfaces allow users to easily navigate through settings, choose cooking modes, and program cooking times with just a few taps, making it accessible for cooks of all experience levels. This combination of safety features and user-friendly designs contributes to a more efficient and enjoyable cooking environment, allowing home cooks to focus on creating delicious meals without unnecessary stress.
Cleaning and Maintenance Strategies for Smart Ovens
Effective Cleaning and Maintenance Practices
Proper maintenance is crucial for ensuring the longevity and optimal performance of your smart oven. Regular cleaning is one of the most significant aspects of maintenance, as it prevents the build-up of food residues and grease, which can affect performance and cause unpleasant odors. Most smart ovens feature self-cleaning modes that make deep cleaning convenient. However, manual cleaning is also essential and should use gentle, non-abrasive materials to avoid damaging surfaces and components.
It’s advisable to clean the oven after each use to maintain hygiene and performance. A damp cloth can often suffice for wiping down the interior, while any stubborn stains may require a baking soda paste for effective removal. Please pay close attention to the oven’s door and seal, as these areas are prone to residue build-up and need regular maintenance to ensure they function properly.
In addition to regular cleaning, it’s essential to perform routine checks on your oven’s components, including any removable parts and filters. Some smart ovens have grease filters that need to be cleaned or replaced periodically to maintain proper airflow and efficiency. Always refer to the manufacturer’s guidelines for cleaning specific components to ensure the longevity of your appliance.
Troubleshooting Common Challenges with Smart Ovens
Even the most advanced smart ovens may encounter issues from time to time. Common problems include connectivity issues, error codes, and uneven cooking. To effectively troubleshoot these challenges, start by consulting the user manual or the manufacturer’s website, which often provides detailed solutions for common issues.
For connectivity issues, ensure your Wi-Fi network is operational and that your oven is within range of the router. Restarting the oven or your network router can sometimes resolve these issues and restore functionality.
If you encounter error codes displayed on the oven’s interface, refer to the manual for specific troubleshooting steps for that code. Many manufacturers also offer customer support services to help users resolve more complex issues that may arise.
Uneven cooking can often be attributed to improper placement of food within the oven or an uncalibrated temperature setting. Ensure the oven racks are correctly positioned and avoid overcrowding, which can impede airflow. If uneven cooking persists, consider recalibrating the oven according to the manufacturer’s instructions to ensure optimal performance.
Extending the Lifespan of Your Smart Oven
Extending the life of your smart oven involves a combination of regular maintenance, careful usage, and adherence to manufacturer guidelines. One of the most effective ways to prolong your oven’s lifespan is to follow the recommended cleaning schedule, keeping both the interior and exterior free of grease and food particles.
Avoid using harsh chemicals or abrasive materials during cleaning, as these can damage the oven’s surfaces. Instead, opt for gentle, non-toxic cleaners and soft cloths. Additionally, be mindful of how you use your oven; avoid overloading it or placing heavy items that could cause damage, as this can impact both efficiency and longevity.
Regularly check and replace any filters or seals as recommended by the manufacturer. These components are crucial for maintaining optimal performance and efficiency. Furthermore, keep the oven’s software up to date, as manufacturers frequently release updates that improve functionality and fix bugs, thereby enhancing the user experience.
Finally, ensure your oven is well-ventilated and placed in a location that is not exposed to moisture or extreme temperatures. Proper care and attention can significantly extend the life of your smart oven, allowing you to enjoy its benefits for many years to come without the need for premature replacements.
Frequently Asked Questions (FAQs)
What defines a smart oven?
A smart oven is a modern cooking appliance that integrates technology, allowing for remote control, precise cooking, and various automated functions to enhance the cooking experience. These ovens are designed to make cooking easier and more efficient for users.
How do I connect my smart oven to Wi-Fi?
To connect your smart oven to Wi-Fi, download the manufacturer’s app, set up an account, and follow the prompts to connect the oven to your home network. This process usually involves selecting your oven from a list of available devices within the app.
Is it possible to use my smart oven without the app?
Most smart ovens can be used manually without the app, but you will miss out on remote control features and automated settings designed to enhance your cooking experience. The app often provides valuable resources and functionalities that enrich the cooking process.
What types of recipes can I prepare in a smart oven?
Smart ovens can handle a wide variety of recipes, including baking, roasting, air frying, steaming, and dehydrating, making them versatile cooking appliances suitable for any kitchen. This adaptability allows users to explore a wide range of culinary techniques and styles.
Are smart ovens energy-efficient?
Yes, smart ovens are designed to be energy-efficient, often reducing cooking times and optimizing heat use, which can lead to lower energy consumption than traditional ovens. This efficiency not only helps the environment but also saves users money on utility bills.
Do smart ovens come with safety features?
Many smart ovens come equipped with safety features such as automatic shut-off, child locks, and cooking alerts to prevent overheating and ensure safe operation during cooking. These features provide peace of mind while using the appliance.
What is the best way to clean my smart oven?
Cleaning your smart oven typically involves using its self-cleaning mode, followed by manual cleaning with non-abrasive cleaners for any stubborn stains or residues that may remain. Regular maintenance is essential to keep the appliance in top condition.
What should I do if my smart oven won’t connect to Wi-Fi?
If your smart oven won’t connect to Wi-Fi, check your router, ensure the oven is within range, and restart both the oven and router. Consult the user manual for specific troubleshooting tips to resolve connectivity issues.
Can I adapt traditional recipes for my smart oven?
Yes, you can adapt traditional recipes for smart ovens by adjusting cooking times and temperatures based on the appliance’s settings and by consulting any manufacturer-provided conversion guides. This ensures optimal results while utilizing modern technology.
How can I extend the life of my smart oven?
To extend the life of your smart oven, maintain a regular cleaning schedule, avoid using harsh cleaners, keep software updated, and check filters and seals as per the manufacturer’s guidelines. Proper care can help ensure long-lasting functionality.
Stay updated with our latest news and tips on our Facebook page!
The post How to Cook with Smart Ovens: Mastering Modern Kitchen Tech appeared first on https://cookinggods.com
The Article Smart Ovens: Master Modern Kitchen Cooking Techniques Was Found On https://limitsofstrategy.com
-

Honeys for BBQ Glazes: Top Recommendations and Tips
Explore the Best Honey Varieties for Creating Delicious BBQ Glazes
Understanding the Benefits of Honey in BBQ Glazes
The remarkable qualities of honey, including its natural sweetness and thick consistency, make it an exceptional choice for enhancing BBQ glazes. As a natural sweetener, honey not only elevates the flavor of grilled meats but also promotes a delightful caramelization process that results in a visually appealing, glossy finish. The unique characteristics of honey greatly enhance its application in BBQ dishes. Here are several essential features that illustrate why honey is the go-to ingredient for creating outstanding BBQ glazes:
- Natural sweetness that enhances and balances a variety of flavors.
- High viscosity ensures a thick, sticky consistency ideal for glazes.
- Facilitates caramelization when heated, achieving that perfect glaze.
- Serves as a natural preservative for sauces.
- Offers a broad spectrum of flavor profiles based on the specific honey variety.
- Balances out the acidity that may be present in sauces.
- Rich in nutrients and <a href=”https://pitmastersarsenal.com/top-grains-for-healthy-bbq-salads-best-picks/”>antioxidants</a> that promote overall health.
- Encourages local agriculture when sourced from nearby beekeepers.
When you decide to use honey in your BBQ recipes, it is vital to choose varieties that complement the specific meats and flavors you are working with. This careful selection process allows chefs to craft glazes that not only enhance the dish but also highlight the best attributes of the ingredients in use.
Discover the Most Popular Honey Varieties for BBQ in the U.S.
Across the United States, various honey types have gained popularity due to their unique flavor profiles and adaptability in BBQ glazes. Clover honey is renowned for its gentle sweetness, making it a perfect match for lighter meats like chicken and fish. Wildflower honey, sourced from an array of floral elements, boasts a rich flavor complexity that complements both meats and marinades. Orange blossom honey, celebrated for its citrusy undertones, adds a refreshing element to glazes, particularly for pork and poultry dishes. Each of these honey types contributes distinct qualities to the BBQ experience:
- Clover Honey: Mild, sweet, floral notes; ideal for chicken and fish.
- Wildflower Honey: Rich and complex flavors; perfect for marinades and sauces.
- Orange Blossom Honey: Bright citrus flavors; enhances pork and poultry dishes.
- Buckwheat Honey: Dark and robust; pairs well with bold meats like beef.
- Lavender Honey: Subtle floral hints; excellent for creative dessert glazes.
- Huckleberry Honey: Fruity and tart; complements game meats beautifully.
- Alfalfa Honey: Light and mild; versatile for various BBQ styles.
- Blueberry Honey: Sweet and fruity; perfect for berry-infused glazes.
Choosing the right honey variety can significantly enhance your BBQ dishes, improving both flavor and visual appeal.
Tips for Sourcing the Highest Quality Honey for BBQ Glazes
Selecting high-quality honey for your BBQ glazes is critical to achieving the best results. Choosing locally sourced honey not only guarantees freshness but also supports local beekeepers, thereby promoting sustainable agricultural practices. When searching for honey, prioritize options that are raw and unfiltered, as these retain beneficial nutrients and flavors that are often lost during processing. Farmers’ markets and specialized honey shops often provide a diverse range of regional honeys that reflect the unique flora of their respective areas.
Here are additional recommendations for sourcing premium quality honey:
- Visit local farmers’ markets to discover unique honey varietals.
- Explore online retailers that specialize in artisanal honey.
- Look for labels that indicate raw and unfiltered honey for optimal quality.
- Engage with vendors to learn about their sourcing practices and local beekeeping methods.
- Select honey with flavor profiles that align with your BBQ style.
- Experiment with different local honeys to find your favorites.
- Support smaller producers for a diverse range of unique flavors.
- Be aware of seasonal variations in honey flavor profiles.
By prioritizing quality and locally sourced options, you can elevate your BBQ glazes while positively impacting the sustainability of local ecosystems and agricultural practices.
Expert Insights on the Best Honeys for BBQ Glazes

Insights from Culinary Experts on Using Honey in BBQ
Renowned chefs across the United States have acknowledged the vital role honey plays in their BBQ techniques, praising its versatility and ability to enhance flavors. Leading chefs like Aaron Franklin, famous for his Texas BBQ, emphasize that honey can create balance in sauces. He notes that the sweetness of honey can effectively counterbalance the acidity found in vinegar-based sauces, resulting in a well-rounded glaze. Similarly, acclaimed chef and BBQ enthusiast Chris Lilly uses honey to achieve a beautifully caramelized crust on his pulled pork, demonstrating its effectiveness in crafting that coveted texture.
Many culinary professionals advocate for experimenting with honey in BBQ dishes, as it encourages creativity and personalization. Chef Tuffy Stone, a competitive BBQ participant, often combines honey with spices to elevate traditional recipes. His innovative approach showcases how honey can serve as a foundational element for other flavors, enhancing not only sweetness but also the dish’s overall complexity. The consensus among these culinary experts is clear: honey is an indispensable ingredient that can elevate BBQ flavors to extraordinary heights.
Guidelines for Choosing the Perfect Honey for Your BBQ Recipes
Selecting the appropriate honey can significantly influence the flavor profile of your BBQ dishes. Consider the type of meat you are using and the flavor experience you wish to create. For lighter meats like chicken or fish, a mild honey such as clover or orange blossom is ideal. On the other hand, for richer meats such as beef or pork, it is advisable to opt for more robust varieties like buckwheat or wildflower honey.
To streamline your selection process, follow these actionable steps:
- Assess the type of meat: Lighter meats pair best with mild honeys, while bolder meats thrive with stronger varieties.
- Consider the purpose of the glaze: Are you aiming for a sweet marinade or a flavorful finishing touch?
- Match honey flavors with additional ingredients: Think about any herbs, spices, or other flavorings you may incorporate.
- Experiment with different combinations: Test various honeys to find the perfect match for your unique BBQ style.
By making informed choices based on the type of meat and desired flavor outcomes, you can enhance your BBQ experience and impress your guests with exquisite flavor combinations.
The Role of Honey in Achieving Flavor Harmony in BBQ

Honey is essential for achieving a harmonious flavor profile in BBQ sauces, particularly when combined with the smoky and acidic components that characterize many BBQ dishes. Its natural sweetness helps to neutralize the sharpness of acidic ingredients like vinegar, creating a balanced blend that enhances the overall dish. This balance is crucial, not only for flavor but also for mouthfeel and overall enjoyment during the dining experience.
Experts recommend using honey to deepen your sauces’ flavor. For instance, a honey-based glaze can enrich a robust tomato sauce by softening its acidity while introducing a satisfying sweetness. Moreover, honey can mitigate any bitterness from charred meats, making it an invaluable component for achieving the desired flavor complexity. By focusing on the art of balance, you can develop BBQ sauces that resonate with your palate and elevate the dish as a whole.
Selecting Optimal Honey Varieties for Different BBQ Styles
Various BBQ styles throughout the United States benefit from specific honey varieties, each contributing unique flavor characteristics. In Southern BBQ, where sweet sauces are a defining feature, clover and wildflower honeys are frequently utilized to provide a mild sweetness that enhances both pork and chicken. Kansas City BBQ, known for its thick, sweet sauces, often incorporates robust varieties like buckwheat honey to add depth and richness to the dishes.
For regional flavor pairings, consider these recommendations:
- Southern BBQ: Choose clover or wildflower honey for a sweet, mild glaze.
- Kansas City BBQ: Opt for buckwheat honey to achieve a strong, rich flavor.
- Texas BBQ: Use mesquite honey to complement the smokiness of brisket.
- Carolina BBQ: Experiment with orange blossom honey for a citrusy twist.
Understanding these pairings can significantly enhance your BBQ experience, allowing you to create authentic flavors that reflect regional styles.
How to Elevate BBQ Glazes with Flavor-Infused Honey?
Infusing honey with additional flavors can transform your BBQ glazes into extraordinary creations, offering unique taste experiences that will impress and delight your guests. By incorporating herbs, spices, and fruits, you can create complex glazes that complement your meats beautifully. For example, rosemary-infused honey pairs exceptionally well with chicken, adding aromatic notes that enhance the overall flavor profile.
To create your own infused honey, follow these straightforward steps:
- Start with a base of raw honey for optimal flavor and maximum nutrient retention.
- Choose your desired infusion ingredients: Consider herbs like thyme, spices like chili, or fruits like peaches.
- Combine honey and infusion ingredients in a saucepan and gently heat.
- Allow the mixture to steep for several hours or overnight to maximize flavor extraction.
Experimenting with honey infusions empowers you to customize your BBQ glazes, resulting in distinctive dishes that showcase your culinary creativity and flair.
Essential Guide to Perfecting Honey BBQ Glazes
Simple Yet Flavorful Honey BBQ Glaze Recipe
Crafting a simple yet effective honey BBQ glaze is easy and requires only a few essential ingredients. Typically, a straightforward recipe includes honey, vinegar, and a mix of spices that will beautifully enhance your selected meat. This combination not only delivers sweetness but also adds the depth and complexity that are vital for an exceptional BBQ experience.
Here’s a simple recipe to help you get started:
- 1 cup of honey
- 1/2 cup of apple cider vinegar
- 2 tablespoons of soy sauce
- 1 teaspoon of garlic powder
- 1 teaspoon of onion powder
- Salt and pepper to taste
1. In a mixing bowl, combine honey, apple cider vinegar, and soy sauce.
2. Add garlic powder, onion powder, salt, and pepper.
3. Whisk until the mixture is smooth and well-combined.
4. Use immediately or store in an airtight container for later use.This foundational glaze can be modified by incorporating additional spices or flavorings, allowing for endless possibilities in your BBQ preparations and creativity.
Creative Variations for Honey Glaze
Once you have mastered the basic honey BBQ glaze, a world of creative variations awaits, inviting you to experiment with different flavors and ingredients. Consider adding fruits such as crushed pineapple or peaches for a refreshing tropical twist. Infusing the glaze with spices like cumin or ginger can also introduce warmth and complexity.
Some noteworthy variations include:
- Pineapple Honey Glaze: Blend honey with crushed pineapple and lime juice for a vibrant, tropical flavor.
- Spicy Chipotle Honey Glaze: Incorporate chipotle powder and lime for a smoky, spicy kick.
- Garlic and Thyme Honey Glaze: Infuse honey with minced garlic and fresh thyme for an aromatic touch.
- Maple Honey Glaze: Combine honey with maple syrup for an extra layer of sweetness and complexity.
By embracing creativity in your glazes, you can amplify the flavors of your BBQ dishes, making them more memorable and enjoyable for everyone at your table.
Optimal Cooking Time for Honey BBQ Glazes
Cooking times for honey BBQ glazes can vary depending on their thickness and the desired level of caramelization. Generally, a glaze should be cooked just long enough for the flavors to meld and for the sugars to caramelize slightly, resulting in a beautiful glossy finish on your meats.
As a general guideline, cook the glaze for approximately 10-15 minutes over medium heat if using it immediately. This duration allows the ingredients to blend together while thickening slightly. If you’re applying the glaze toward the end of the cooking process, brush it on during the last 5-10 minutes to prevent burning, which can occur due to honey’s high sugar content.
Carefully monitoring the cooking time ensures that your glaze retains its intended flavor profile and enhances your BBQ dishes without becoming overly charred or bitter.
Proper Storage Techniques for Your Honey BBQ Glazes
To maintain the flavor and quality of your honey BBQ glazes, proper storage is essential. After preparing your glaze, allow it to cool completely before transferring it to an airtight container. It is best to store honey glazes in the refrigerator, where they can last for several weeks without losing their flavor and freshness.
For long-term storage, consider freezing the glaze. Pour the cooled glaze into ice cube trays or freezer-safe containers to create portioned servings for future use. This method allows you to thaw only the amount you need for your upcoming BBQ sessions. Always label your containers with the date to keep track of freshness and usability.
Best Culinary Applications for Honey BBQ Glazes
Honey BBQ glazes are incredibly versatile and can enhance a wide variety of dishes. Beyond marinating meats, these glazes work beautifully as finishing sauces brushed on grilled items just before serving. Additionally, they make excellent dips for appetizers like chicken wings or vegetables, adding a sweet and savory element that tantalizes the taste buds.
Here are some of the best uses for honey BBQ glazes:
- Marinating meats before grilling to infuse them with flavor.
- Brushing on meats during the final moments of cooking for a caramelized finish.
- Using as a dip for fried or grilled appetizers.
- Drizzling over roasted vegetables for added sweetness.
The adaptability of honey BBQ glazes makes them a valuable addition to any home cook’s repertoire, allowing for endless exploration of flavors and techniques that can elevate your culinary creations.
Health Benefits of Including Honey in BBQ
Nutritional Advantages of Honey
In addition to its delightful sweetness, honey offers a multitude of nutritional benefits that can make it a healthier alternative to refined sugars in BBQ glazes. Naturally rich in antioxidants, honey helps combat oxidative stress in the body. It also contains various vitamins and minerals, such as B vitamins and vitamin C, which contribute to overall health and well-being.
Moreover, honey possesses antibacterial properties, particularly raw honey, which can aid in digestion and strengthen the immune system. By substituting honey for processed sugars in your BBQ sauces and glazes, you not only enhance flavor but also incorporate a range of health benefits into your culinary creations.
How Honey Supports Digestive Health
Honey contains natural enzymes that promote digestion, making it a versatile ingredient in BBQ dishes. Its prebiotic properties can nurture a healthy gut microbiome, which is essential for effective digestion and overall health. When used in BBQ, honey can help alleviate discomfort that sometimes accompanies heavier meals, enhancing the overall dining experience.
Additionally, honey’s natural sweetness can satisfy cravings, thereby reducing the likelihood of overindulging in less healthy sugary alternatives. By incorporating honey into your BBQ recipes, you enhance flavor while positively impacting your digestive health.
Is Honey a Suitable Option for Diabetics in BBQ Recipes?
While honey is a natural sweetener, individuals with diabetes should consume it cautiously due to its high sugar content. Although honey has a lower glycemic index than refined sugars, those managing diabetes must be mindful of portion sizes. Using honey sparingly can enhance flavor without significantly affecting blood sugar levels.
For individuals with diabetes, consider blending honey with other ingredients to create balanced glazes that incorporate acidity or bitterness, which can help mitigate its sweetness. It is essential to consult with healthcare professionals regarding dietary choices to ensure that honey is safely integrated into your BBQ recipes.
Pairing Honey Glazes with Various Meats
Meats That Benefit from Honey Glazes
Honey glazes are particularly effective with a variety of meats, each uniquely benefiting from the sweet and sticky characteristics of honey. Pork, chicken, and beef ribs are popular selections in BBQ, as they allow the honey’s natural sweetness to infuse the meat, enhancing both flavor and tenderness.
When applying honey glazes, consider the specific type of meat:
- Pork: Pairs excellently with honey glazes; the sweetness enhances the meat’s natural richness.
- Chicken: Absorbs flavors beautifully; honey glazes provide a stunning caramelized finish.
- Beef Ribs: Rich flavors pair wonderfully with robust honey varieties, enhancing their richness.
- Fish: Lighter honey varieties add a subtle sweetness without overpowering the dish.
Understanding which meats work best with honey glazes opens up a world of possibilities in your BBQ endeavors, allowing for delicious and satisfying meals.
Effective Pairing of Different Honey Types with Meats
Selecting the appropriate honey type to pair with specific meats can significantly enhance the overall flavor profile of your BBQ dishes. The key is to consider the intensity and flavor notes of both the honey and the meat. For example, light honeys like clover are ideal for delicate proteins, while darker honeys such as buckwheat beautifully complement richer meats.
Here are some ideal pairing suggestions to consider:
- Clover Honey with Chicken: Its mild sweetness enhances the flavor without overpowering.
- Orange Blossom Honey with Pork: Bright flavors add a delightful twist to the meat.
- Buckwheat Honey with Beef: Robust flavors work remarkably well with the richness of beef.
- Wildflower Honey with Lamb: Its complexity can beautifully complement the gamey flavors.
By pairing honey types with the appropriate meats, you can craft BBQ dishes that are not only delicious but also beautifully balanced and flavorful.
Techniques for Effectively Applying Honey Glazes to Meats
Applying honey glazes at the correct time during cooking is crucial for achieving the desired flavor and texture. Timing can significantly impact how the glaze caramelizes and how the flavors develop throughout the cooking process. A common technique involves applying the glaze in layers, allowing each coat to caramelize before adding more.
Here are some valuable tips for applying honey glazes:
- Brush the glaze on during the last 10-15 minutes of cooking to avoid burning.
- For longer cooking times, apply a base glaze early on and layer additional glaze toward the end.
- Utilize a basting brush or mop for even application across the meat’s surface.
- Monitor cooking temperatures carefully to avoid burning the sugars in the honey.
These techniques ensure that you achieve the flavorful and beautifully caramelized finish that honey glazes are renowned for, significantly enhancing your BBQ dishes.
Innovating with Unique Honey Glaze Recipes
Experimentation is vital for discovering unique flavors in honey glazes tailored to specific meats. While traditional combinations are undeniably delicious, incorporating unexpected ingredients can elevate your BBQ dishes to new heights. Think about adding elements like citrus juices, herbs, or even hot sauces to your honey glazes to introduce exciting new flavor dimensions.
Here are some innovative ideas for experimenting with honey glaze recipes:
- Infusing honey with citrus peels for a zesty and fragrant twist.
- Incorporating spices like smoked paprika or cumin for added depth and warmth.
- Adding fruit purees, such as raspberry or peach, for a perfect balance of sweetness and tartness.
- Mixing in balsamic vinegar for a rich, tangy glaze that tantalizes the taste buds.
By embracing the spirit of experimentation, you can create signature honey glazes that reflect your culinary style while perfectly complementing your BBQ dishes.
Proper Storage and Reuse of Honey Glazes
Proper storage of honey glazes is essential to maintain their quality and flavor. After preparing your glaze, allow it to cool completely before transferring it to an airtight container. Store your honey glazes in the refrigerator, where they can last for several weeks without compromising their flavor.
If you have leftover glaze, don’t discard it! Honey glazes can be reused in various culinary applications. Consider using them as marinades for different proteins or drizzling them over roasted vegetables for added flavor. Just be sure to gently reheat the glaze before use to restore its consistency and flavor.
Understanding how to store and creatively repurpose honey glazes allows you to maximize their potential in your cooking endeavors.
Best Practices for Storing and Preserving Honey BBQ Glazes
How Long Can Honey Glazes Be Kept Fresh?
Honey BBQ glazes can be stored in the refrigerator for several weeks while maintaining their quality and flavor. The natural preservatives found in honey help keep the glaze fresh, enabling you to create large batches for future use. When stored properly in an airtight container, you can expect your glaze to last up to three to four weeks without significant degradation in flavor.
If you notice any changes in color or texture, it’s best to discard the glaze. Regularly checking on your stored sauces ensures that you enjoy them at their best.
Ideal Containers for Storing Honey Glazes
Choosing the right containers for storing honey BBQ glazes is essential for maintaining freshness and preventing contamination. Glass jars are highly recommended due to their non-reactive properties and ability to seal tightly. Alternatively, high-quality, airtight plastic containers work well to prevent air exposure and moisture.
When storing, ensure that the containers are clean and dry before transferring the glaze. Label each container with the type of glaze and the date of preparation to make it easy to track freshness and usage.
Can Honey BBQ Glazes Be Frozen for Long-Term Storage?
Freezing honey BBQ glazes is an excellent method for prolonging their shelf life. Properly stored, a honey glaze can be frozen for up to six months without significant loss of flavor. However, it’s crucial to take precautions against crystallization, which can occur when honey is frozen.
To freeze honey glazes effectively, follow these steps:
- Pour the cooled glaze into ice cube trays or freezer-safe containers.
- Leave space for expansion, as the glaze may expand during the freezing process.
- Seal containers tightly to prevent air exposure.
- Label with the date and type of glaze for easy identification.
These steps ensure that your honey glazes retain their quality and flavor for future use, providing convenience and efficiency in your cooking.
How to Thaw Frozen Honey BBQ Glazes Properly?
Thawing frozen honey BBQ glazes should be done carefully to maintain their quality. The best method is to transfer the frozen glaze to the refrigerator and let it thaw overnight. This slow thawing process helps prevent changes in texture and preserves flavor integrity.
If you need to thaw the glaze more quickly, you can place the container in a bowl of warm water, but avoid using direct heat, as this could alter the glaze’s consistency. Once thawed, gently reheat the glaze over low heat to restore its pourable texture, making it ready to enhance your BBQ dishes once again.
Maximizing Flavor with Honey in BBQ
Key Insights for Effectively Using Honey in BBQ
Incorporating honey into your BBQ preparations offers numerous benefits, enhancing flavors while providing health advantages over refined sugars. Its versatility allows for creative glazes that can complement various meats and cooking styles. Key insights include understanding how to select the right honey varieties for your dishes, mastering effective storage techniques, and experimenting with infusions to create unique flavors.
By embracing the potential of honey, you can elevate your BBQ dishes, crafting memorable dining experiences for family and friends that leave a lasting impression.
Experimenting with Honey in BBQ to Elevate Your Dishes
Encouraging culinary creativity is essential when working with honey in BBQ recipes. Experiment with different honey types, infusion techniques, and glaze variations to discover unique flavor combinations that resonate with your palate. Consider hosting BBQ tastings with friends to explore various honey glazes on different meats, fostering a fun and interactive culinary experience.
Don’t hesitate to try unconventional ingredient pairings or cooking methods to find what works best for you. The journey of exploration can lead to delightful surprises in flavor that significantly enhance your BBQ offerings.
Finding More Resources on Honey and BBQ
Numerous resources exist for exploring the intersection of honey and BBQ, enriching your culinary knowledge and skills. Several cookbooks focused on BBQ and honey pairings are available, showcasing recipes and techniques from industry experts. Additionally, online blogs, cooking shows, and social media platforms provide a wealth of ideas and inspiration for incorporating honey into your BBQ practices.
Recommended resources include local cooking classes that focus on BBQ techniques, honey tasting events, and engaging with local beekeepers who can provide insights into selecting the best honey for your delicious dishes.
Frequently Asked Questions
Which Honey Types Are Best for BBQ Glazes?
Some of the best honey types for BBQ glazes include clover, wildflower, orange blossom, and buckwheat honey, each offering unique flavors that perfectly complement different meats.
How Can I Create a Honey BBQ Glaze at Home?
To make a honey BBQ glaze, combine honey with vinegar, soy sauce, and your choice of spices. Adjust flavors to taste, then use it to marinate or glaze meats.
How Should I Store Honey BBQ Glazes?
Honey BBQ glazes can be stored in an airtight container in the refrigerator for up to four weeks. For longer storage, they can be frozen in portioned containers for later use.
Can I Use Honey Glaze on Vegetables?
Absolutely! Honey glazes work wonderfully on roasted or grilled vegetables, adding a sweet and savory element that beautifully enhances their natural flavors.
Is Honey a Healthier Alternative to Sugar in BBQ Sauces?
Yes, honey offers nutritional benefits, including antioxidants and antibacterial properties, making it a healthier alternative to refined sugars in BBQ sauces.
How Do I Prevent Honey Glaze from Burning on the Grill?
To prevent burning, apply honey glaze during the last 10-15 minutes of cooking, allowing it to caramelize while avoiding charring.
Can I Combine Different Honey Types in a Glaze?
Absolutely! Mixing different honey types can create unique flavor profiles, allowing you to tailor the glaze to your specific taste preferences effortlessly.
How Can I Infuse Flavors into Honey?
You can infuse honey by gently heating it with herbs, spices, or fruits in a saucepan, allowing the flavors to meld before cooling and storing it.
What Meats Pair Best with Honey BBQ Glazes?
Honey BBQ glazes pair well with pork, chicken, and beef, enhancing their flavors and providing a beautiful caramelized finish that delights the senses.
How Long Does a Honey BBQ Glaze Last in the Fridge?
A honey BBQ glaze can last in the refrigerator for about three to four weeks when stored in an airtight container without compromising its quality.
Connect with us on Facebook!
The Article Top Honeys for BBQ Glazes: Best Picks and Tips appeared first on https://pitmastersarsenal.com
-

Searing Burgers for Juiciness: Top Techniques from the US
Unlock the Secrets to Selecting the Perfect Beef for Searing Delicious Burgers
Essential Qualities to Look for When Choosing Beef for Flavorful Burgers
Selecting the ideal beef for searing is crucial for crafting a juicy and mouthwatering burger. Key attributes to consider include marbling and fat content. Marbling describes the tiny specks of fat that are interspersed throughout the meat, which melt as the burger cooks, enhancing both moisture and flavor. For optimal juiciness, aim for beef that has at least 20% fat content. This fat not only enriches the flavor profile of your burger but also helps it maintain moisture during cooking. Choosing leaner cuts can lead to a drier burger, particularly when overcooked. Opt for richer cuts such as chuck or brisket to ensure a more satisfying and flavorful burger experience.
When shopping for beef, always select ground options that clearly indicate the fat ratio. Many butchers and suppliers provide labeling that assists in making an informed choice. Additionally, evaluate the overall quality of the beef. High-quality beef should exhibit a vibrant color, firm texture, and a fresh aroma, all of which are indicators of its freshness and flavor potential. By focusing on these attributes, you can ensure that your burgers turn out delicious and satisfying.
Grass-Fed vs. Grain-Fed Beef: Making the Right Choice for Your Burgers
Grasping the distinctions between grass-fed and grain-fed beef is essential for selecting the best option based on flavor and texture preferences. Grass-fed beef is typically leaner and boasts a more earthy, robust flavor profile. Often regarded as the healthier choice, it contains higher levels of omega-3 fatty acids and vitamin E, providing a unique taste that some describe as gamey. This distinct flavor can elevate your burger to a memorable culinary experience, setting it apart from standard fare.
Conversely, grain-fed beef usually has a higher fat content, resulting in superior marbling. This marbling enhances the burger’s buttery, rich flavor and juiciness. Most grain-fed beef in the U.S. comes from cattle raised in feedlots, ensuring consistent texture and taste. For those who prioritize richness and flavor in their burgers, grain-fed beef is often the preferred choice. Ultimately, your decision may hinge on personal taste preferences and the specific texture you desire in your burger.
Where to Source High-Quality Beef Across the United States
If you are searching for premium quality beef in the United States, there are several trustworthy sources worth exploring. Local butcher shops are an excellent starting point, as they frequently offer a variety of both grass-fed and grain-fed options. Butchers can provide personalized recommendations tailored to your preferences and may even custom grind beef specifically for your burgers. Farmers’ markets are another fantastic venue, showcasing locally sourced beef from sustainable farms committed to ethical practices.
Many supermarkets are also expanding their meat selections; stores like Whole Foods, Trader Joe’s, and Natural Grocers feature a diverse assortment of quality beef products. Below is a comprehensive list of top sources for purchasing beef across the U.S.:
- Local butcher shops
- Farmers’ markets
- Whole Foods
- Trader Joe’s
- Natural Grocers
- Costco
- Online meat delivery services (e.g., ButcherBox, Crowd Cow)
- Your local grocery store’s meat department
By exploring these various options, you can find the perfect beef for your next burger searing adventure, guaranteeing an enjoyable culinary experience that you won’t forget.
Proven Techniques for Preparing Burgers to Maximize Searing Potential
Expert Tips for Shaping Your Burgers to Ensure Even Cooking
Properly shaping your burgers is a vital step toward achieving even cooking while retaining juiciness. Start by dividing your ground beef into equal portions, targeting approximately 6 to 8 ounces for each patty. Using a scale can help achieve consistent sizes, which is crucial for uniform cooking. After portioning, gently press the beef into patties that are about 3/4 inch thick. This thickness is ideal, allowing for a beautifully cooked exterior while keeping moisture locked inside.
A common mistake is forming patties that are either too thick or too thin, which can lead to uneven cooking. To prevent burgers from puffing up during cooking, create a slight indentation in the center of each patty using your thumb. This easy technique ensures that as the burgers cook and swell, they maintain a flat shape that sears evenly, resulting in the ultimate burger experience.
How to Season Your Burgers for Unmatched Flavor Enhancement
Seasoning effectively is essential for elevating the flavor of your burgers. While a simple blend of salt and pepper can be remarkably effective, consider broadening your flavor profile by incorporating additional spices and seasonings. Ingredients like garlic powder, onion powder, or Worcestershire sauce can introduce depth and complexity to your burgers, making them truly memorable.
Applying seasonings just before cooking is crucial. This timing helps retain moisture within the meat, allowing flavors to infuse without drawing out valuable juices. When seasoning, be generous yet balanced, ensuring every side of the burger is evenly coated. For instance, aim for about 1 teaspoon of salt and 1/2 teaspoon of pepper for each pound of ground beef. This approach guarantees that your burgers are flavorful from the first bite to the last.
Why Chilling Your Burgers Before Searing is Vital for Success

Chilling your burger patties before searing is a technique that can dramatically improve your cooking results. Refrigerating the shaped patties for approximately 30 minutes helps them maintain their shape throughout the cooking process. This chilling phase allows the fats in the beef to firm up, which in turn aids in moisture retention and prevents the patties from breaking apart while grilling or frying.
To chill your patties effectively, arrange them on a tray lined with parchment paper. This not only prevents them from sticking together but also simplifies their transport to the grill or stovetop. Once chilled, the burgers are firm and ready for searing, ensuring a beautiful crust while locking in those essential juices that contribute to a flavorful eating experience.
Determining the Ideal Fat Content for Perfectly Juicy Burgers
The fat content in your ground beef plays a crucial role in determining the juiciness of your burger. For the best results, aim for ground beef with a fat content of 20-30%. This range strikes an ideal balance between flavor and moisture retention. Generally, higher fat content results in a richer, more delicious burger, as the melted fat helps baste the meat while it cooks.
When selecting your ground beef, consider the cut from which it is derived. For example, ground chuck is a popular choice due to its optimal fat-to-lean ratio, while ground sirloin offers a slightly leaner option without sacrificing significant moisture. Understanding the fat content allows you to tailor the burger experience to your personal taste, ensuring maximum juiciness and satisfaction with every bite.
Understanding the Importance of Preheating Your Grill or Pan for Searing
Preheating your grill or pan is an essential step for achieving the perfect sear on your burgers. A hot cooking surface is vital for creating that coveted crust while locking in juices. To prepare, heat your grill or cast-iron skillet over high heat for several minutes until it reaches the appropriate temperature. A good benchmark is around 450°F for grilling or 400°F for stovetop searing.
To verify that your cooking surface is adequately heated, perform a simple water test: drop a few water droplets onto the surface; if they sizzle and evaporate almost immediately, you’re ready to start cooking. Never rush this crucial step, as a properly heated grill or pan is essential for achieving that beautiful Maillard reaction, which imparts burgers with their signature flavor and appealing color.
Insider Tips for Searing Burgers to Achieve Ultimate Juiciness
Identifying the Optimal Temperature for Searing Burgers
Achieving a perfect sear requires precise temperature control. A hot pan is necessary for sealing in juices and developing that desirable crust. Aim for a pan temperature around 400°F. This temperature facilitates optimal browning without burning the exterior of the burger.
To measure the temperature accurately, consider using a thermometer or simply test with a drop of water; if the water sizzles and evaporates almost instantly, your pan is adequately heated. Professional chefs often favor cast-iron skillets for their superior heat retention properties. Knowing the right temperature will not only enhance the appearance of your burger but also elevate its overall flavor profile, ensuring a delightful meal.
Recommended Cooking Times for Perfectly Searing Each Side of Your Burgers
Timing is vital when searing burgers. For a medium-rare burger, sear each side for approximately 3-4 minutes. This timing may vary based on the thickness of your patties and the heat of your cooking surface. Avoid the temptation to press down on the burgers with your spatula during cooking, as this action releases the juices that keep your burger moist and flavorful.
While cooking, pay attention to the edges of the burger; as they begin to turn brown, it indicates that it’s time to flip. For varying levels of doneness, consider the following timing guidelines:
– Medium-Rare: 3-4 minutes per side
– Medium: 4-5 minutes per side
– Medium-Well: 5-6 minutes per sideUsing a meat thermometer can also help ensure your burger reaches the desired internal temperature without overcooking, leading to a perfectly cooked patty every time.
Choosing the Best Oils for Searing Your Burgers
Selecting the right oil is crucial for achieving the perfect sear on burgers. Oils with a high smoke point are ideal, as they can withstand the high temperatures necessary for searing without burning. Options like avocado oil or grapeseed oil are excellent choices; they not only possess high smoke points but also impart minimal flavor, allowing the natural taste of the beef to shine through.
Avoid oils with low smoke points, such as olive oil, which can burn and produce an off-putting flavor during cooking. Before adding your burger to the pan, ensure the oil is heated until it shimmers but does not smoke, which guarantees that the burgers will sear properly and lock in the juices for a delicious outcome.
The Science Behind the Advantages of Searing Burgers
Understanding How the Maillard Reaction Enhances Burger Flavor
One of the most significant benefits of searing burgers is the flavor enhancement achieved through the Maillard reaction. This complex chemical process occurs when proteins and sugars in the meat are exposed to high heat, resulting in the browning of the surface and creating a rich, flavorful crust. This process not only intensifies the overall taste of the burger but also adds depth and complexity that other cooking methods cannot replicate.
This caramelization not only improves flavor but also contributes to a more visually appealing presentation. A well-seared burger is often synonymous with high culinary standards, making your meal more enjoyable from both a taste and aesthetic perspective. By mastering the searing technique, you elevate your burger from a simple meal to a gourmet delight that impresses every guest at your table.
How Searing Helps Retain Juices for Moist and Flavorful Burgers
Searing is incredibly effective at sealing in the juices within the burger. As you sear the exterior, the heat causes the surface to form a crust that acts as a barrier, preventing moisture from escaping during the cooking process. This results in a burger that is not only flavorful but also incredibly moist, creating a succulent dining experience.
The ability to lock in moisture is especially crucial for preserving the integrity of the meat, particularly for those who prefer a medium-rare burger. When you slice into a perfectly seared burger, the juices should flow rather than run out, creating a delightful burst of flavor that tantalizes the palate with every bite.
Exploring How Searing Influences Burger Texture and Enjoyment
The texture of a seared burger is one of its most appealing features. Searing creates a crispy exterior while keeping the interior tender and moist. This contrast in texture enhances the overall eating experience, making each bite more enjoyable. The outer crust provides a satisfying crunch, while the inside remains juicy and flavorful.
Moreover, this interplay of textures is what makes a burger truly satisfying. The combination of a well-cooked, crispy outer layer and a succulent interior allows for a rich mouthfeel that is both hearty and delightful. By mastering the searing process, you not only improve the taste but also the textural appeal of your burgers, making them a standout dish at any meal.
Various Techniques for Searing Burgers to Perfection
Step-by-Step Guide for Searing Burgers on the Stovetop
Searing burgers on a stovetop is a straightforward and effective technique favored by many home cooks. Begin by heating a cast-iron skillet over high heat until it reaches the optimal temperature. Add a small amount of oil to the pan, ensuring it covers the surface evenly without pooling.
Once the oil shimmers, place the burger patties in the pan, ensuring they are not overcrowded. Allow them to cook undisturbed during the first few minutes; this undisturbed cooking is essential for achieving a perfect sear. After approximately 3-4 minutes, flip the burgers and continue cooking for another 3-4 minutes to reach your desired doneness. This method yields a flavorful crust while sealing in essential juices, creating a delicious burger experience.
Techniques for Achieving the Ideal Sear on a Grill
Grilling is another popular method for searing burgers, especially during outdoor gatherings. To start, preheat your grill to high heat, ensuring the grates are clean and well-oiled to prevent sticking. Once heated, place the burgers on the hottest part of the grill, allowing them to sear for a few minutes without flipping.
Close the lid to create an oven-like environment, which helps cook the burgers evenly. After about 3-4 minutes, flip the burgers and move them to a cooler part of the grill to finish cooking. This method not only imparts a delightful smoky flavor but also allows for the creation of grill marks, enhancing the visual appeal of your burgers for an impressive presentation.
Advantages of Utilizing a Searing Burner for Exceptional Results
A searing burner is a fantastic tool for those aiming to achieve a quick, high-temperature sear on their burgers. This specialized burner provides intense, direct heat, making it particularly useful for thicker patties. The benefits of using a searing burner include:
- Rapid heat-up time for quick cooking
- Intense heat for achieving a perfect crust
- Ideal for thicker burgers that require a good sear while cooking through
- Creates a restaurant-quality burger experience at home
Many modern grills come equipped with a searing burner, making it easy to incorporate this method into your cooking repertoire. By mastering the use of this burner, you can elevate your burger-making skills to the next level, impressing friends and family with perfectly seared patties.
Advanced Techniques to Perfectly Sear Burgers for Maximum Juiciness
Determining the Best Thickness for Searing Your Burgers
The thickness of your burgers is a critical factor in achieving a successful sear. Ideally, burgers should measure about 3/4 inch thick. This thickness encourages even cooking without compromising juiciness. Thicker burgers may not cook through evenly, resulting in an overcooked exterior with an undercooked interior. Conversely, thinner burgers can dry out quickly due to reduced fat content and increased exposure to heat.
For optimal results, strive for uniformity in thickness across all patties. This ensures that each burger cooks uniformly and reaches the desired doneness. Additionally, using a scale can help maintain consistency, preventing discrepancies in cooking times. Understanding the impact of thickness is essential for mastering the art of searing burgers to perfection.
Importance of Resting Burgers After Searing for Optimal Flavor
Once your burgers are perfectly seared, allowing them to rest is a critical step that is often overlooked. Resting allows the juices within the meat to redistribute, ensuring that each bite remains moist and flavorful. Let the burgers rest for about 5 minutes after cooking, covering them loosely with foil to retain warmth.
This resting phase permits the proteins to relax and reabsorb any juices that may have escaped during cooking. The result is a burger that is tender, juicy, and bursting with flavor. Skipping this step can lead to a drier burger, as cutting into it too soon releases those valuable juices. Incorporating a resting period into your cooking routine will yield optimal results, enhancing your overall burger experience.
Utilizing a Meat Thermometer for Accurate Cooking Results
A meat thermometer is an invaluable tool for achieving precise doneness in your burgers. Insert the thermometer into the thickest part of the burger, ensuring it doesn’t touch any bones or the cooking surface for an accurate reading. For ideal doneness, aim for the following internal temperatures:
- 135°F for medium-rare
- 140°F for medium
- 145°F for medium-well
Utilizing a meat thermometer eliminates the guesswork when cooking burgers, ensuring they are prepared safely and to your desired level. This practice enhances both the flavor and texture of the meat, resulting in consistently delicious burgers that impress every time.
Choosing the Right Type of Pan for Effective Searing
The choice of pan significantly influences the searing process. A cast iron skillet is often the preferred option due to its excellent heat retention capabilities. Cast iron allows for even cooking and creates a superior crust on the burgers. If you opt for a non-stick pan, be aware that while it may prevent sticking, it might not achieve the same level of searing as cast iron.
Before adding the burgers, thoroughly preheat the pan to ensure a good sear. Adjust the heat as necessary during cooking to maintain optimal temperatures. Understanding the differences between various pans can help you choose the best option for searing burgers, ultimately enhancing the final product and your cooking experience.
Identifying the Right Time to Flip Your Burgers for Best Results
Flipping your burgers at the right moment is essential for achieving a perfect sear. Wait until you notice juices pooling on the top surface of the burger; this is a clear indicator that it’s time to flip. Allowing the first side to cook undisturbed for at least 3-4 minutes ensures a good sear forms, locking in the juices and optimizing flavor.
Flipping burgers too early can result in a less desirable crust and may lead to sticking. Ideally, you want to flip each burger only once during cooking. This method helps retain moisture, resulting in a juicy and flavorful final product that satisfies every palate. Mastering the timing of flips can significantly improve the quality of your burgers and your overall cooking skills.
Common Mistakes to Avoid When Searing Burgers
Understanding the Pitfalls of Overcrowding the Grill or Pan
One of the most common mistakes when searing burgers is overcrowding the pan or grill. When too many burgers are crammed into a cooking space, the temperature drops, hindering proper searing and resulting in steaming instead. This leads to burgers that are less flavorful and moist, ultimately detracting from the overall dining experience.
To avoid this issue, cook burgers in batches if necessary. Ensure each patty has enough space to sear properly, ensuring they are not touching or overlapping. Cooking one batch at a time may extend the duration, but the outcome will yield far superior burgers that are juicy and satisfying.
Ensuring Your Burgers Don’t Stick: Best Practices
Preventing burgers from sticking to the cooking surface is vital for a smooth cooking experience. Ensure your pan is adequately preheated and well-oiled before introducing the patties. A hot surface creates a natural barrier that helps prevent sticking, leading to a more enjoyable cooking process.
Using a spatula to gently lift the burgers and check for a good sear before flipping can also be beneficial. If you encounter any resistance when attempting to flip, allow them a little more time to cook. Additionally, non-stick cookware can help mitigate sticking issues, providing an easier cooking experience for novice cooks who may be unsure of their flipping skills.
Minimizing Flipping: Why It Matters for Perfectly Seared Burgers
Flipping burgers too frequently is a common mistake that can prevent achieving an ideal sear. It is essential to let the first side cook undisturbed for the initial few minutes, allowing for a proper crust to develop. Flipping should be minimized to once or twice during cooking to ensure even cooking and retain moisture within the burger.
By keeping your hands off the burgers and allowing them to cook undisturbed, you enhance the chances of achieving that mouth-watering outer crust that everyone loves. Mastering the timing of flips can significantly elevate your burger searing skills, transforming your cooking into a culinary art form.
Enhancing Your Searing Technique with Advanced Methods
Using Butter for Added Richness and Flavor
One of the simplest ways to amplify the flavor of your seared burgers is to incorporate butter. After flipping the burgers, consider placing a pat of butter into the pan. As it melts, use a spoon to baste the burgers continuously. This technique not only enriches the flavor profile but also helps maintain moisture on the surface, resulting in a more succulent burger.
Butter also aids in achieving a beautiful golden-brown crust, making the burgers visually enticing. The combination of beef fat and butter creates a flavor explosion that elevates the overall burger experience to new heights. This technique is widely utilized by chefs who understand the importance of enhancing richness in burger flavor, making it a must-try for home cooks seeking to impress.
Discovering the Benefits of Using a Smoker for Flavor Depth
Utilizing a smoker can add a unique layer of flavor to your burgers. Briefly smoking the patties before searing can impart a subtle smokiness that enhances the overall taste. To achieve this, use wood chips such as hickory or mesquite and smoke the burgers for about 10-15 minutes at a low temperature before transferring them to the hot grill or pan.
This technique creates a depth of flavor that is challenging to accomplish through traditional cooking methods. Smoked burgers provide an exciting twist on the classic recipe, perfect for summer barbecues or special occasions where you want to impress your guests.
Exploring the Advantages of Reverse Searing for Optimal Results
Reverse searing is a technique that involves cooking burgers at a low temperature initially before finishing with a high-heat sear. This method promotes a more evenly cooked burger, ensuring that the interior reaches the desired doneness without burning the exterior.
By starting at a lower temperature, you reduce the risk of a dry burger, allowing the meat to stay juicy and tender throughout the cooking process. After reaching the target internal temperature, a quick high-heat sear creates that enticing crust. This technique is gaining popularity among home cooks and professionals alike due to its ability to enhance both flavor and texture, making it a powerful tool in your cooking arsenal.
Addressing Common Questions About Searing Burgers
What Type of Beef Produces the Best Burgers?
The best beef for burgers is ground beef with a fat content ranging from 20-30%. Cuts such as ground chuck or brisket deliver exceptional flavor and moisture, making them ideal for burger preparation.
How Do I Recognize When to Flip My Burgers?
Flip your burgers when you notice juices pooling on the top surface, signaling they are ready to be flipped without compromising moisture.
Is Grass-Fed or Grain-Fed Beef the Superior Option?
Ultimately, it depends on personal preference. Grass-fed beef is leaner with a distinctive flavor, while grain-fed beef is fattier and generally more juicy.
How Long Should I Cook Burgers on Each Side?
Cook burgers for approximately 3-4 minutes on each side for medium-rare, adjusting the time based on your desired level of doneness.
Is Olive Oil Suitable for Searing Burgers?
It’s best to avoid olive oil for searing due to its lower smoke point. Opt for oils such as avocado or grapeseed oil instead for the best results.
Should I Let My Burgers Rest After Cooking?
Yes, allowing burgers to rest for a few minutes helps redistribute juices, resulting in a moister and more flavorful burger experience.
What Thickness Should My Burger Patties Be?
Burger patties should ideally be around 3/4 inch thick for optimal cooking and searing, ensuring even doneness throughout.
How Can I Prevent My Burgers from Sticking to the Grill?
Ensure your grill grates are clean and well-oiled before adding burgers to prevent sticking during the cooking process.
What is the Ideal Internal Temperature for Medium-Rare Burgers?
The ideal internal temperature for medium-rare burgers is 135°F. Always use a meat thermometer for precise readings to ensure the best results.
Can I Smoke Burgers Before Searing Them?
Absolutely! Briefly smoking burgers before searing can add a unique flavor profile, enhancing the overall taste of your burger.
Connect with us on Facebook for more tips and recipes!
The Article How to Sear Burgers for Maximum Juiciness: US Techniques appeared first on https://pitmastersarsenal.com
The Article Searing Burgers for Maximum Juiciness: Techniques from the US Was Found On https://limitsofstrategy.com
-

Brunch Recipes: Your Ultimate Guide for Relaxed Sundays
Transform Your Brunch Preparation into an Unforgettable Culinary Adventure
Essential Ingredients for a Memorable Brunch Menu
Selecting the perfect ingredients is crucial in crafting a brunch experience that your guests will cherish. By emphasizing fresh, high-quality choices, you can enhance flavors and create a nourishing dining atmosphere. Begin with seasonal produce that is not only more vibrant but also packed with nutrients. Envision using ripe avocados, juicy, vine-ripened tomatoes, and aromatic fresh herbs to significantly uplift your dishes. These ingredients not only elevate taste but also contribute to a visually stunning brunch table, ensuring that every meal is a feast for the eyes as well as the palate.
Incorporating Artisan bread, such as crunchy sourdough or sweet brioche, lays a delightful foundation for various brunch dishes. When it comes to eggs, a quintessential brunch element, opt for those sourced from local farms to guarantee unmatched freshness and flavor. Moreover, think about adding luxurious proteins like smoked salmon or high-quality bacon, which not only enhance the flavor profile but also enrich the overall dining experience for your guests.
To truly elevate your dishes, assemble a diverse range of spices, herbs, and condiments. Ingredients such as saffron, smoked paprika, or truffle oil can transform a basic dish into something extraordinary. Don’t forget to stock essentials like olive oil, butter, and a variety of cheeses, as these provide the backbone for countless recipes, adding depth and richness to your brunch offerings.
- Seasonal vegetables
- Artisan bread
- Fresh herbs
- High-quality eggs
- Proteins like smoked salmon
- Spices and condiments
- Cheeses
- Fruits for garnishing
Master Key Cooking Techniques to Ensure a Flawless Brunch Experience
To impress your guests at brunch, mastering various cooking techniques is essential. Poaching is a method that allows you to prepare eggs to a soft, cloud-like perfection. This gentle technique ensures that the egg whites are perfectly set while the yolk stays rich and runny, making them ideal for drizzling over toast or adding to salads. Such techniques not only enhance flavors but also elevate the visual appeal of your dishes, creating a memorable dining experience.
Another vital cooking method is sautéing, which brings out the natural sweetness in vegetables. By applying high heat with a splash of oil, you can caramelize the edges while keeping the centers tender. This method is particularly effective for dishes like shakshuka, where spices and vegetables blend beautifully. Gaining proficiency in sautéing significantly adds depth to your brunch offerings, making them more flavorful and exciting for your guests.
Baking plays a pivotal role in dishes such as frittatas or casseroles, allowing the flavors to meld together and create a harmonious dish. Understanding how to balance temperature and cooking times is crucial to achieving a perfect golden, bubbly finish. Finally, mastering flavor layering through techniques like deglazing can enhance your sauces or complement dishes, enriching them with complexity and satisfaction for your diners.
- Poaching eggs to perfection
- Sautéing vegetables for flavor enhancement
- Baking casseroles for hearty entrees
- Layering flavors in sauces
- Grilling for added texture
- Roasting for depth of flavor
- Blanching for vibrant colors
- Confit for rich tastes
Implement Effective Time Management Strategies for a Stress-Free Brunch
Effective time management can transform your brunch from a hectic rush into a relaxing gathering. Begin by planning your menu and drafting a cooking timeline that aligns with your guests’ arrival. This proactive approach allows you to enjoy the gathering rather than feeling overwhelmed in the kitchen, significantly enhancing the overall enjoyment for both you and your guests.
Start with dishes that can be prepared in advance, such as overnight oats or a breakfast casserole that can bake while you prepare fresh items. Setting timers for each task can help you stay organized without succumbing to stress. This organizational technique not only boosts efficiency but also improves the quality of your brunch.
Multitasking is another effective strategy; while your coffee brews, you can chop vegetables or set the table. Establishing designated areas for prep, cooking, and serving simplifies your process, making everything smoother and more efficient. Lastly, ensure you allocate time for yourself to mingle and enjoy the fruits of your labor, creating a more pleasant atmosphere for everyone involved.
- Plan your menu ahead of time
- Create a cooking schedule
- Prepare dishes in advance
- Set timers for effective task management
- Engage in multitasking for efficiency
- Designate spaces for prep and serving
- Incorporate downtime for relaxation
- Keep your kitchen organized
Explore Expert Recommendations for Top Brunch Recipes Ideal for Lazy Sundays

Discover Delicious Brunch Dishes That Will Delight Your Guests
Brunch dishes can range from timeless classics to innovative culinary creations, but what truly sets them apart is their ability to provide a delightful combination of flavors, textures, and presentation. For instance, a vibrant avocado toast adorned with poached eggs, cherry tomatoes, and microgreens serves as a feast for both the eyes and the palate. This dish exemplifies how simple ingredients can enhance one another when presented thoughtfully, resulting in a visually stunning and delicious brunch option.
Another standout dish is a flavor-packed breakfast burrito. This delightful creation combines scrambled eggs, black beans, cheese, and fresh salsa all wrapped in a warm tortilla, delivering a satisfying bite. Key ingredients for this remarkable dish include large flour tortillas, free-range eggs, black beans, cheese, and fresh herbs, making it a wholesome and fulfilling option for any brunch gathering.
For an indulgent yet satisfying treat, consider a classic French toast bake featuring brioche bread soaked in a cinnamon-vanilla custard and baked until golden brown. This dish can be served with maple syrup and a light dusting of icing sugar, captivating both the eyes and taste buds while providing a sumptuous finish to your meal.
- Avocado
- Free-range eggs
- Cherry tomatoes
- Brioche bread
- Cinnamon
- Black beans
- Fresh salsa
- Maple syrup
Follow This Comprehensive Step-by-Step Guide to Create a Stunning Brunch Menu
Designing a well-balanced brunch menu requires thoughtful planning to ensure a delightful mix of flavors and textures. Start by selecting a theme or cuisine that inspires you. This could range from a rustic Italian brunch featuring frittatas and caprese salads to a contemporary brunch with Asian-inspired dishes, such as bao buns and matcha pancakes. The theme you choose establishes the atmosphere for your entire gathering.
Next, strive for balance by incorporating a combination of savory and sweet dishes, along with vegetarian and protein-rich options. Consider different textures; elements that are crispy, creamy, and fluffy can create a more engaging dining experience. Ensure that each dish contributes something unique to the overall menu, guaranteeing a satisfying meal for everyone present.
Once you have your core dishes established, think about how they can complement one another. For example, if you are serving a rich quiche, pairing it with a light salad can provide a wonderful contrast. Finally, make sure that your beverages harmonize with your menu, such as a refreshing mimosa or a frothy matcha latte, which beautifully rounds out the brunch experience.
- Select a theme for your brunch
- Incorporate a mix of savory and sweet dishes
- Balance different textures and flavors
- Choose complementary dishes
- Include beverages that match the theme
- Plan for dietary preferences
- Prepare a shopping list
- Set a preparation timeline
Stay Ahead with Insight on Current Brunch Trends

Staying updated on brunch trends can provide fresh inspiration and keep your offerings exciting. Presently, a significant trend is the growing popularity of plant-based dishes. Many brunch enthusiasts are seeking delectable vegan alternatives, such as chickpea scrambles or cashew cream pancakes, which showcase that plant-based options can be indulgent and satisfying without compromising flavor.
Additionally, there is an increasing trend of incorporating global flavors. Ingredients like miso, kimchi, and za’atar are finding their way into traditional brunch recipes, introducing unique twists on classic dishes. For instance, a miso-infused hollandaise can elevate eggs benedict, offering a fusion of flavors that tantalize the taste buds and surprise your guests.
Brunch cocktails are also evolving, adapting to healthier lifestyles. Low-calorie, fresh-pressed juices mixed with spirits or innovative mocktails are becoming more popular, providing refreshing alternatives to traditional brunch cocktails. This shift not only caters to health-conscious guests but also enhances the overall brunch experience, making it more inclusive and enjoyable for everyone.
- Plant-based dishes
- Global flavor combinations
- Healthier brunch cocktails
- Artisanal ingredients
- Interactive dining experiences
- Brunch boards for sharing
- Seasonal and local sourcing
- Creative garnishes and presentations
Innovative Presentation Ideas to Elevate Your Brunch
How to Create Visually Stunning Brunch Dishes
To craft a visually captivating brunch, presentation is of utmost importance. Utilizing colorful ingredients is an outstanding way to enhance the aesthetic appeal of your meal. A vibrant fruit platter featuring berries, kiwi, and watermelon not only adds color but also encourages guests to indulge in healthy options. The eye is naturally drawn to variety; therefore, consider incorporating a mix of colors, shapes, and heights in your dish arrangement to create visual intrigue.
Serving dishes in unique containers can also elevate the overall experience. Imagine using individual cast-iron skillets for baked eggs or charming jars for parfaits. These elements not only enhance visual appeal but also engage your guests in the dining experience. Moreover, garnishes are vital; fresh herbs and edible flowers can inject a burst of color and sophistication, transforming your brunch spread into a feast for the senses.
Lastly, pay attention to the overall table setting. Utilizing lively tablecloths or placemats, interesting plates, and coordinated cutlery can set the mood and beautifully frame your brunch offerings. Focusing on the details in the table setting can significantly enhance the overall dining experience, creating unforgettable moments for everyone involved.
- Utilize colorful ingredients
- Incorporate unique serving dishes
- Add garnishes for visual enhancement
- Focus on table settings
- Vary dish heights and arrangements
- Use seasonal decorations
- Consider lighting for ambience
- Mix textures in serving ware
Impressive Plating Techniques to Wow Your Guests
Plating is an art form that can elevate a simple dish into a culinary masterpiece. One innovative technique is layering, which can create depth and intrigue. For example, a parfait looks visually stunning when artfully layered with yogurt, granola, and fruit in a glass, showcasing the vibrant colors and textures that make the dish enticing and appealing to your guests.
Stacking is another effective technique; envision a tower of fluffy pancakes with syrup cascading down the sides. This not only creates height but also draws the eye to the center of the plate, making it a visually attractive option. Playing with negative space is also essential; leaving some areas of the plate empty can enhance the abundance of the food, making it appear more artfully arranged and inviting.
Utilizing sauces and purées can add an artistic touch, enabling you to “paint” the plate with complementary flavors. Dots, swooshes, or even a delicate smear can enhance both the visual and flavor experience. Lastly, don’t overlook the garnish; fresh herbs, microgreens, or edible flowers can transform your plate, adding a pop of color and a finishing touch that will certainly impress your guests.
- Layering for visual depth
- Stacking for height
- Playing with negative space
- Using sauces for artistic presentation
- Integrating edible flowers
- Creating contrasting textures
- Utilizing vibrant colors
- Incorporating themed garnishes
The Significance of Thoughtful Garnishes in Your Dishes
Garnishes serve a purpose beyond mere decoration; they enhance both the flavor and visual appeal of your brunch dishes. A well-chosen garnish can elevate an entire dish, making it more enticing and interesting. Fresh herbs like basil, chives, or dill can introduce a burst of flavor that complements the main ingredients beautifully. For instance, a sprig of dill atop a smoked salmon bagel not only enhances taste but also adds a visual element that enriches the dining experience.
Think about the textural contrast that garnishes can provide. Crispy shallots or toasted nuts can add a delightful crunch to creamy dishes, creating a satisfying contrast. Similarly, a sprinkle of pomegranate seeds can introduce a burst of color and freshness, brightening up a plate and making it visually appealing and delicious.
Moreover, the selection of garnishes should align with the overarching theme of your brunch. For a Mediterranean-inspired menu, olives or feta crumbles could harmoniously complement your offerings, while a tropical brunch might benefit from fresh mint or pineapple fronds. Thoughtful garnishes can profoundly enhance both the flavor and aesthetic of your dishes, making the brunch experience even more memorable for your guests.
- Fresh herbs for enhancing flavor
- Crispy elements for added texture
- Bright colors for visual appeal
- Theme-aligned garnishes
- Edible flowers for elegance
- Fruit slices for freshness
- Nuts for a satisfying crunch
- Spices for an aromatic touch
Nutritious and Delicious Brunch Options for Every Palate
What Are Some Healthy and Nutritious Brunch Recipes?
Healthy brunch recipes can be delicious and satisfying, catering to a variety of dietary preferences. Incorporating whole foods is a fantastic way to ensure your meal is nourishing without sacrificing flavor. Start with a vibrant array of salads featuring leafy greens, nuts, and fruits; a quinoa salad with roasted vegetables offers a filling and nutrient-rich option that your guests will appreciate.
Another excellent choice is a smoothie bowl, loaded with fruits and leafy greens, topped with seeds or granola. This not only allows for creativity in flavor and presentation but also ensures a wholesome start to the day. Consider dishes like vegetable omelettes packed with spinach and tomatoes, providing essential vitamins while being low in calories, making them an ideal choice for health-conscious diners.
Overnight oats represent another brilliant option, allowing for easy preparation and versatility. Combine rolled oats soaked in almond milk or yogurt, mixed with chia seeds, and topped with fresh fruits and nuts for a nutritious breakfast alternative. These dishes not only diversify your menu but also cater to various dietary needs, ensuring everyone finds something enjoyable at your brunch.
- Quinoa salad with roasted vegetables
- Smoothie bowls with fresh toppings
- Vegetable-packed omelettes
- Overnight oats with chia seeds
- Fruit and nut salads
- Yogurt parfaits with granola
- Whole grain pancakes
- Savory oatmeal dishes
Incorporating Superfoods into Your Brunch Menu
Superfoods are nutrient-dense ingredients that can significantly elevate the health value of your brunch. By incorporating these into your recipes, you enhance nutritional content while adding exciting flavors. Ingredients like chia seeds can be included in smoothies or overnight oats, offering omega-3 fatty acids and fiber that contribute to a healthy diet.
Another fantastic addition is quinoa, which can serve as a base for salads or be included in breakfast bowls, enhancing the overall nutritional profile. Packed with protein and essential amino acids, it makes for a nutritious option. Berries also qualify as superfoods, rich in antioxidants and perfect as toppings for yogurt or pancake dishes, providing both health benefits and vibrant color to your offerings.
Do not forget the benefits of greens like kale or spinach; these can be easily incorporated into frittatas or smoothies, enriching both color and nutritional content. Lastly, adding nuts and seeds, such as almonds or flaxseeds, can contribute healthy fats and crunch to salads or bowls, creating a satisfying and wholesome brunch spread that is both nutritious and delicious for all.
- Chia seeds in smoothies and oats
- Quinoa in salads and bowls
- Berries as toppings and sides
- Kale and spinach in frittatas
- Nuts and seeds in granola
- Avocados for healthy fats
- Sweet potatoes for complex carbs
- Cacao nibs for a sweet touch
Balancing Indulgence with Nutrition for an Ideal Brunch
Finding the perfect balance between indulgent and healthy brunch options is essential to satisfy all your guests. Consider incorporating dishes that provide both pleasure and nourishment. For instance, a decadent French toast can be made healthier by using whole grain bread and serving it with fresh fruit instead of syrup. This approach allows guests to indulge without feeling guilty.
Another effective strategy to achieve balance is to offer a variety of dishes at your brunch. For example, pairing rich, cheesy quiches with a vibrant salad dressed in a light vinaigrette creates contrast and allows guests to choose according to their preferences while enjoying a bit of everything. This thoughtful combination enhances the brunch experience for all attendees.
Incorporating healthier versions of traditional comfort foods can also satisfy cravings while maintaining nutritional integrity. Consider baked eggs in marinara sauce served with whole grain toast; this dish is hearty yet packed with nutrients. Crafting a menu that allows guests to indulge while still making mindful choices can result in a truly satisfying brunch experience that everyone will appreciate.
- Offer lighter versions of classic dishes
- Pair indulgent options with fresh salads
- Incorporate whole grains in comfort foods
- Offer a mix of sweet and savory
- Use fresh ingredients to enhance flavors
- Encourage sharing to try multiple dishes
- Provide nutrient-dense sides
- Keep portion sizes reasonable
Refreshing Brunch Beverages to Complement Your Meal
Classic Brunch Drinks That Everyone Will Adore
No brunch is complete without a selection of refreshing beverages that enhance the overall meal experience. Classic drinks like mimosas and Bloody Marys are not only traditional but also enhance the dining experience. Mimosas, made with equal parts champagne and fresh orange juice, provide a bright and bubbly start to the meal, setting a festive tone for the gathering.
For those who enjoy a hint of spice, the Bloody Mary is a favorite, featuring vodka, tomato juice, and a medley of spices and garnishes. Using ingredients like horseradish, Worcestershire sauce, and a squeeze of lemon creates a drink that is as flavorful as it is revitalizing, making it a perfect complement to savory dishes.
Consider also offering artisanal coffees or herbal teas, which can beautifully tie together the brunch experience. A well-brewed coffee can be an excellent companion to sweet dishes, while a refreshing iced herbal tea balances heavier options, creating a harmonious dining experience for all.
- Mimosas with fresh orange juice
- Bloody Marys with spices
- Artisanal coffee blends
- Herbal iced teas
- Sparkling water with fruits
- Fresh juices for health
- Flavored lemonades
- Mocktails for a non-alcoholic option
Creative Non-Alcoholic Brunch Options for Everyone
Providing non-alcoholic drink options is essential to cater to all guests, ensuring everyone can enjoy the brunch experience. Fresh juices can be a delightful addition, crafted from seasonal fruits to produce vibrant, refreshing beverages. Consider a blend of watermelon and mint for a summer-inspired drink or a spicy ginger and carrot juice for a warming winter option that tantalizes the taste buds.
Smoothies represent another fantastic choice, allowing for creativity and health. Blend together fruits, leafy greens, and a splash of almond milk for a nutritious drink that can double as a meal. Herbal teas, whether served hot or iced, provide a calming alternative, with options ranging from chamomile to hibiscus, catering to guests looking for something soothing.
Additionally, consider crafting unique mocktails that mimic classic cocktails without the alcohol. For instance, a non-alcoholic mojito made with muddled mint, lime, and soda water provides a refreshing twist that everyone can appreciate. Offering a diverse array of options ensures all guests can find something enjoyable while complementing the delicious food on offer.
- Fresh seasonal juices
- Smoothies with fruits and greens
- Herbal teas, hot or iced
- Unique mocktails
- Infused water with fruits and herbs
- Flavored sparkling waters
- Coconut water for hydration
- Chilled herbal tisanes
Pairing Drinks with Brunch Dishes for Maximum Enjoyment
Mastering the art of pairing drinks with brunch dishes can elevate the entire dining experience. For instance, a rich, cheesy quiche pairs beautifully with a crisp, dry sparkling wine, cutting through the richness while enhancing the flavors of the dish. Likewise, a light, herbaceous salad complements a refreshing cocktail like a gin and tonic, with the botanicals in the gin echoing the freshness and vibrancy of the meal.
When serving sweet dishes, consider lighter beverages that won’t overpower the palate. A well-balanced mimosa or a light-bodied rosé can enhance the sweetness of items such as pancakes or French toast without overwhelming the taste buds, ensuring a harmonious experience for everyone at the table.
For heartier meals, opt for more robust beverages. A dark roast coffee can stand up to a rich breakfast burrito, while an earthy red wine can harmonize with dishes featuring bold spices. Balancing sweetness, acidity, and texture is essential for creating harmonious pairings that enhance the overall brunch experience, leaving guests satisfied and delighted.
- Pair sparkling wines with rich dishes
- Match cocktails with fresh salads
- Use lighter drinks for sweet items
- Choose robust drinks for hearty meals
- Consider complementary flavors in pairings
- Balance acidity and sweetness in choices
- Utilize texture in drink selections
- Think seasonally for the best pairings
Seasonal Brunch Beverages to Celebrate the Time of Year
Incorporating seasonal beverages into your brunch can add a unique twist and reflect the flavors of the time of year. During the spring, consider light and refreshing drinks such as elderflower spritzers or a citrus-infused iced tea, which can invigorate and delight the palate while celebrating the season’s bounty.
Summer brings a wealth of fresh produce; consider berry-infused lemonades or watermelon coolers that celebrate the sweetness of the season. Incorporating fresh herbs like basil or mint can elevate these drinks, adding depth and complexity while enhancing their visual appeal.
As autumn arrives, warm spiced drinks can create a comforting atmosphere. Chai lattes or apple cider mimosas evoke feelings of nostalgia while complementing heartier brunch dishes. In winter, serving warm beverages like spiked hot chocolate or a comforting cinnamon-infused coffee invites warmth and cheer to your gathering, creating a cozy ambiance for your guests.
- Elderflower spritzers in spring
- Berry-infused lemonades in summer
- Warm spiced drinks in autumn
- Cinnamon hot chocolate in winter
- Seasonal fruits in beverages
- Herb-infused drink options
- Creative seasonal cocktails
- Fruity iced teas for summer
Brunch Beverage Trends to Keep Your Menu Fresh and Exciting
Staying updated with the latest trends in brunch beverages can enhance your menu and keep your offerings fresh. Currently, there is a noticeable shift towards healthier, low-sugar options. Many brunch-goers are now opting for fresh-pressed juices over sugary cocktails, focusing on natural flavors and health benefits that cater to a more health-conscious audience.
Artisanal cocktails are also gaining popularity, with mixologists creating unique blends using regional ingredients. These craft drinks often highlight seasonal produce, allowing for innovative flavor combinations that excite the palate. Consider incorporating local spirits and liqueurs to elevate your drink offerings while supporting local businesses, contributing to a unique dining experience.
Another trend is the rise of non-alcoholic options, with mocktails becoming increasingly sophisticated. Guests appreciate creative alcohol-free alternatives that maintain the essence of classic cocktails, such as smoked rosemary spritzers or spicy ginger fizz. Providing these options not only caters to all preferences but also enhances the brunch experience for everyone, ensuring that all guests feel included and satisfied.
- Low-sugar beverage options
- Artisanal cocktails with local ingredients
- Creative mocktails for non-drinkers
- Fresh-pressed juices over sugary drinks
- Seasonal flavor combinations
- Herb-infused cocktails
- Unique garnishes for beverages
- Craft beverage pairings
Proven Strategies for Successful Brunch Planning
Real-World Examples of Effective Brunch Planning
Effective brunch planning can significantly enhance the enjoyment of your relaxing Sundays. For example, consider a successful brunch gathering that features a well-thought-out menu balancing sweet and savory options. A host decided to pair fluffy blueberry pancakes with a savory spinach and feta frittata, creating a diverse and satisfying spread that catered to various tastes while keeping guests engaged and happy.
Planning ahead is essential; this host prepared the frittata the night before, simply reheating it in the oven while the pancakes were cooking. Incorporating elements that can be made in advance, such as overnight oats or fruit salads, allowed for a stress-free morning without the pressure of last-minute cooking, creating a relaxed atmosphere for everyone.
Focusing on a theme can tie the meal together cohesively. For instance, a Mediterranean brunch could include dishes like hummus, pita bread, and Greek yogurt, creating a united dining experience that transports guests to another place. Engaging the guests in the planning process by requesting dietary preferences can also ensure everyone is catered to, making the gathering more inclusive and enjoyable.
- Plan a balanced menu
- Prepare some dishes in advance
- Choose a cohesive theme
- Engage guests for dietary preferences
- Create a timeline for preparation
- Incorporate interactive dishes like a DIY toast bar
- Streamline cooking with multitasking
- Set up a designated serving area
Actionable Steps for Hosting an Unforgettable Brunch Gathering
Hosting a brunch can be a fulfilling experience when approached with a clear plan. Start by deciding on a date and time, ensuring you have ample opportunity to prepare and relax before your guests arrive. Consider sending out invitations that outline the theme and menu, allowing guests to know what to expect and build excitement for the event.
Next, create your menu with a mix of dishes that appeal to your guests. Aim for a variety of flavors and textures, ensuring you include both sweet and savory options. Once your menu is established, compile a comprehensive shopping list to ensure you have everything you need, streamlining the preparation process for a smooth brunch experience.
On the day of the brunch, set a timeline for food preparation, factoring in time to set the table and create a welcoming atmosphere. Prepare a designated drink station where guests can help themselves to beverages, freeing you to focus on the food. Finally, foster an inviting atmosphere with thoughtful décor and music to enhance the brunch experience, making it a memorable occasion for all.
- Decide on a date and time
- Send out invitations with details
- Create a balanced menu
- Compile a shopping list
- Set a preparation timeline
- Prepare a designated drink station
- Focus on creating atmosphere
- Have fun and enjoy your guests
Understanding Brunch Etiquette for a Seamless Experience
Grasping brunch etiquette can enhance the experience for both hosts and guests. One key aspect is ensuring that the host creates a welcoming environment, allowing guests to feel comfortable and at home. It’s essential to greet guests personally, take their coats if necessary, and offer them a drink upon arrival, setting a positive tone for the gathering.
Guests should also be aware of their arrival time; being punctual is respectful to the host. When dining, engaging in conversation and including everyone fosters an enjoyable atmosphere. Additionally, being considerate of dietary restrictions and preferences is crucial. If you have specific dietary needs, communicate this to your host in advance to ensure everyone enjoys the meal.
For the host, it’s important to manage the flow of food and drink throughout the brunch. Ensuring that everything is well-stocked and readily available keeps guests happy and engaged. Lastly, when it comes to clean-up, it’s courteous for guests to offer help, while hosts should graciously decline but appreciate the gesture, fostering a spirit of community and gratitude.
- Arrive on time as a guest
- Engage in inclusive conversation
- Communicate dietary needs to the host
- Host should greet guests warmly
- Ensure ample food and drink supply
- Host should manage the flow of the meal
- Guests can offer help with clean-up
- Be gracious and appreciative
Brunch for Special Celebrations and Occasions
How to Elevate Brunch for Celebratory Events
Elevating brunch for special occasions involves thoughtful touches that create lasting experiences. Start with unique dishes that reflect the celebration; for example, a birthday brunch could feature a stunning croquembouche or a themed cake that serves as a centerpiece, delighting guests and setting the tone for the event.
Incorporating decorations can also enhance the celebratory vibe. Balloons, fresh flowers, and elegant table settings can transform a regular brunch into a festive gathering. Small details like personalized place settings or themed napkin rings can also add to the experience, making guests feel special and valued.
Another way to elevate the occasion is by offering a signature cocktail that resonates with the theme. For example, a floral-infused drink could be perfect for a spring wedding, adding an artistic flair to your beverage selection. Finally, consider including interactive elements like a DIY mimosa bar, allowing guests to create their own drinks and engage in the festivities, thereby enhancing the overall experience.
- Incorporate unique celebratory dishes
- Utilize themed decorations
- Offer a signature cocktail
- Add personalized touches to settings
- Include interactive elements
- Engage guests in the celebration
- Curate a playlist that matches the mood
- Consider special lighting for ambience
Delightful Brunch Ideas for Holiday Celebrations
Celebrating holidays with brunch can be a delightful way to honor traditions while enjoying delicious food. For festive occasions like Easter, consider incorporating seasonal ingredients such as asparagus, lamb, and eggs into your menu. A frittata with spring vegetables can be a lovely nod to the season, capturing the essence of the holiday.
During the winter holidays, rich, hearty dishes often take center stage. A spiced apple cider can serve as a warming drink, while a winter-themed charcuterie board featuring cheeses, nuts, and dried fruits can serve as a beautiful centerpiece, inviting guests to indulge in a variety of flavors and textures.
For special occasions like Mother’s Day, consider creating a brunch that focuses on pampering, emphasizing decadent options like chocolate croissants or a luxurious eggs benedict. Themes for these brunches can highlight the specific holiday and bring a cohesive feel to your spread, making the event extra special for everyone involved.
- Incorporate seasonal ingredients
- Focus on festive themes
- Offer themed beverages
- Highlight traditional dishes
- Include a variety of flavors
- Decorate according to the holiday
- Engage guests in a festive atmosphere
- Consider interactive elements for fun
Creative Themed Brunch Parties for a Unique Experience
Hosting a themed brunch party can create a fun and engaging atmosphere for your guests. Begin by selecting a theme that resonates with you or your audience, such as a Hawaiian luau, a Parisian café, or a vintage tea party. This theme will guide your menu and décor choices, ensuring a cohesive experience.
Once your theme is established, curate a menu that aligns with this concept. For a Hawaiian luau, consider dishes like poke bowls, coconut rice, and tropical fruit platters. On the other hand, a Parisian café theme might feature quiches, croissants, and café au lait, creating an authentic dining experience that transports guests to another place.
Encourage guests to dress according to the theme, adding an element of excitement and engagement to the gathering. Decorate your space to reflect the theme, using colors, flowers, or items that evoke the selected atmosphere. Finally, consider incorporating activities or games that align with your theme to keep guests entertained throughout the brunch, ensuring a memorable experience for all.
- Select a resonating theme
- Curate a menu that aligns with the theme
- Encourage themed attire
- Decorate your space accordingly
- Incorporate theme-based activities
- Use themed tableware
- Consider background music that fits
- Create an engaging environment
Decadent Brunch Desserts to Satisfy Your Sweet Tooth
What Are Some Easy and Delicious Brunch Desserts?
Indulging in sweet treats during brunch elevates the experience, providing a delightful finish to the meal. Easy desserts that are simple to prepare yet satisfying include options like fruit tarts, which showcase seasonal fruits and a buttery crust, making them a visually appealing dessert that tastes as good as it looks.
Another delightful choice is a classic bread pudding, made using stale bread combined with custard and spices, baked to perfection. This dish is not only comforting but can also be served warm, drizzled with a luscious caramel sauce for an indulgent touch that guests will love.
For something lighter, consider parfaits layered with yogurt, granola, and fresh fruits. This dessert not only looks appealing but also offers a refreshing taste that’s perfect after a hearty meal. Lastly, mini cupcakes or doughnuts provide a fun, bite-sized way to satisfy a sweet craving without overwhelming guests, making them a popular choice for brunch.
- Fruit tarts with seasonal produce
- Classic bread pudding with caramel drizzle
- Yogurt parfaits with granola
- Mini cupcakes for a fun treat
- Homemade doughnuts
- Chocolate mousse for indulgence
- Brownies cut into bite-sized pieces
- Fruit sorbets for a refreshing option
Decadent Pastries That Enhance Your Brunch Experience
Decadent pastries can elevate any brunch, offering both flavor and visual appeal. Croissants are a classic choice, especially when filled with almond paste or chocolate, providing a rich and buttery experience that melts in your mouth, making them an irresistible option for guests.
Consider also adding Danish pastries, which can be filled with cream cheese, fruit, or custard, creating a delightful contrast of textures that is sure to impress. Options like cinnamon rolls, glazed with cream cheese icing, can satisfy sweet cravings while being comforting and familiar, making them perfect for a brunch setting.
For a modern twist, try making homemade pop tarts filled with fruit preserves, giving guests a nostalgic feel while enjoying a sophisticated version of this treat. Pairing these pastries with fresh coffee or tea can create a luxurious brunch experience that leaves a lasting impression on your guests.
- Buttery croissants with fillings
- Cheese and fruit-filled Danish
- Cinnamon rolls with decadent icing
- Homemade fruit-filled pop tarts
- Flaky puff pastry creations
- Chocolate eclairs for elegance
- Mini quiches for savory options
- Scones served with clotted cream
Healthy Sweet Treats That Don’t Compromise on Taste
Indulging in sweet treats doesn’t have to mean sacrificing health. Healthy dessert options can be both satisfying and nutritious. Consider incorporating natural sweeteners like honey or maple syrup into recipes to maintain sweetness while reducing refined sugars, making your desserts more wholesome.
Fruit-based desserts can be refreshing and guilt-free; think of a berry salad drizzled with a light honey-lime dressing that enhances the natural sweetness of the fruit. Another option is to create energy bites using nuts, oats, and dried fruits, providing a nutritious yet sweet treat that guests will enjoy.
For baked options, consider using whole grains in your recipes; oatmeal cookies with dark chocolate chunks can offer a comforting feel while being healthier than traditional cookies. Finally, chia seed pudding made with almond milk and topped with fresh fruits can be both creamy and decadently satisfying, serving as a healthy dessert option for your brunch.
- Natural sweeteners like honey
- Fruit-based salads with light dressings
- Energy bites with nuts and oats
- Oatmeal cookies with dark chocolate
- Chia seed pudding with fruits
- Whole grain muffins
- Frozen banana pops for a treat
- Yogurt-based desserts
Brunch on a Budget: Tips and Tricks
How to Save Money on Brunch Ingredients
Saving money on brunch ingredients doesn’t have to mean compromising on quality or taste. Start by shopping at your local farmers’ markets, where seasonal produce is often available at lower prices and higher freshness. Planning your menu around seasonal ingredients allows you to take advantage of the best deals, ensuring a budget-friendly brunch.
Consider buying in bulk for staple items such as grains, nuts, or dried fruits, which can significantly reduce costs. When grocery shopping, look for sales or discounts, especially for perishable items nearing their sell-by date; this way, you can save money while still enjoying fresh ingredients.
Another effective strategy is to incorporate pantry staples into your dishes; using ingredients like beans, rice, or lentils can create filling and delicious brunch options at a fraction of the cost. Finally, be creative with leftovers; repurposing ingredients from previous meals can prevent waste and save money, making your brunch both economical and enjoyable.
- Shop at local farmers’ markets
- Buy in bulk for staple items
- Look for sales and discounts
- Incorporate pantry staples
- Plan meals around seasonal produce
- Use leftovers creatively
- Consider meal prepping to save
- Choose versatile ingredients
Delicious and Budget-Friendly Brunch Recipes
Delicious brunch recipes can be created without breaking the bank. Start with a hearty vegetable frittata that utilizes eggs and seasonal vegetables. This dish is not only cost-effective but also versatile, allowing for different flavor profiles based on what you have on hand, making it a favorite among budget-conscious hosts.
Another budget-friendly option is a grain bowl featuring quinoa or brown rice, topped with roasted vegetables and a simple dressing. This dish is filling and can be tailored to suit various dietary preferences, ensuring that everyone at your brunch can enjoy a satisfying meal.
For sweet options, consider banana pancakes made with ripe bananas and oats. This not only reduces waste but also creates a satisfying treat that guests will love. Offering a mixed fruit salad can also be an economical way to provide a refreshing side, using whatever fruits are on sale to create a vibrant, colorful dish.
- Vegetable frittata with seasonal produce
- Grain bowls with roasted vegetables
- Banana pancakes using ripe bananas
- Mixed fruit salad with sale items
- Homemade granola with oats and nuts
- Simple muffins with pantry ingredients
- Egg and toast combinations
- Budget-friendly smoothies
Maximizing Leftovers for a Thriving Brunch
Repurposing leftovers can be a practical and budget-friendly way to create delightful brunch dishes. Start by assessing what you have on hand; roasted vegetables can easily be incorporated into a frittata or grain bowl, adding flavor and nutrition to your meal while minimizing food waste.
Leftover cooked grains, such as quinoa or rice, can serve as a base for brunch salads or bowls, topped with fresh ingredients and a zesty dressing. If you have leftover meats, consider creating breakfast burritos or wraps, utilizing tortillas or flatbreads available in your pantry, making them a convenient and satisfying option.
For sweet treats, day-old bread can be transformed into French toast or bread pudding, allowing you to create something delicious while minimizing waste. Maximize your resources by thinking creatively about how to use what you already have, making your brunch both economical and enjoyable while ensuring no food goes to waste.
- Incorporate leftover roasted vegetables
- Use cooked grains as a base
- Transform leftover meats into wraps
- Repurpose day-old bread for French toast
- Create salads with mixed leftovers
- Make smoothies with leftover fruits
- Use any remaining herbs and toppings
- Consider stir-fries with leftover proteins
Finding Affordable Brunch Outings Without Compromising Quality
Finding budget-friendly cafes and restaurants for brunch outings is possible with a bit of research. Start by exploring local eateries that offer brunch specials or deals on certain days, which can significantly reduce costs while still enjoying a delicious meal. Many places have “happy hour” style menus for brunch that feature discounted drinks and dishes, making it a great way to experience new flavors without overspending.
Consider dining at cafés that offer family-style meals, allowing you to share dishes with friends and family, making it more economical. Another option is to seek out restaurants that focus on local ingredients; these often have seasonal menus that highlight affordable, fresh produce, ensuring a delightful dining experience.
Utilizing loyalty programs or coupon apps can also help you save money on brunch outings, as many restaurants offer discounts for frequent diners. Lastly, look for community events or pop-up brunches that often feature unique menus at lower prices, providing an exciting experience without overspending, allowing you to enjoy brunch with friends and family.
- Explore local eateries with specials
- Seek family-style meal options
- Focus on restaurants with local ingredients
- Utilize loyalty programs and coupons
- Attend community events or pop-ups
- Consider brunch during off-peak hours
- Look for social media promotions
- Research menu prices beforehand
FAQs About Brunch Planning and Execution
What are some essential ingredients for brunch?
Key ingredients include fresh produce, high-quality eggs, artisan bread, and seasonal fruits. Spices and herbs, as well as cheeses and quality proteins, can also enhance your dishes, elevating the overall experience.
How can I make my brunch visually appealing?
Use colorful ingredients, unique serving dishes, and creative garnishes. Layering and stacking dishes can also enhance visual presentation, making your brunch more enticing for guests.
What are some healthy brunch options?
Nutritious options include quinoa salads, vegetable-packed omelettes, smoothie bowls, and overnight oats with fruits and nuts, ensuring that health-conscious guests have plenty of choices.
How do I plan a brunch menu effectively?
Select a theme, incorporate a mix of savory and sweet dishes, and ensure a balance of flavors and textures. Use a shopping list for efficient preparation, streamlining the cooking process.
What are popular brunch beverages?
Classic options include mimosas and Bloody Marys. Non-alcoholic choices like fresh juices and herbal teas are also great for guests, catering to a variety of preferences.
How can I save money on brunch ingredients?
Shop at local farmers’ markets, buy in bulk, and look for sales. Planning meals around seasonal items can also help reduce costs, allowing for a budget-friendly brunch.
What is the best way to use leftovers for brunch?
Repurpose leftovers by incorporating them into frittatas, grain bowls, or wraps. Day-old bread can become delicious French toast or bread pudding, minimizing waste and maximizing flavor.
How can I host a budget-friendly brunch?
Focus on simple, cost-effective recipes, use seasonal ingredients, and consider potluck-style gatherings to share costs with guests, ensuring everyone can enjoy a delightful brunch without overspending.
What are some easy brunch desserts?
Options include fruit tarts, bread pudding, yogurt parfaits, and mini cupcakes, which are simple to prepare and satisfying, making them perfect for any brunch gathering.
How can I elevate brunch for special occasions?
Incorporate unique dishes, decorations, and a signature cocktail. Engage guests with interactive elements to enhance the celebration, making the event memorable for everyone involved.
Connect with us on Facebook!
The post Top Brunch Recipes for Lazy Sundays: A Universal Guide appeared first on https://cookinggods.com
The Article Brunch Recipes for Lazy Sundays: Your Ultimate Guide Was Found On https://limitsofstrategy.com
-

Tips for a Healthy BBQ: Grilling Lean Meats
Discover the Incredible Health Advantages of Grilling Lean Meats at Your BBQ
Why Opt for Lean Meats at Your Upcoming BBQ Gathering?
Choosing to grill lean meats for your BBQ is more than just a culinary selection; it embodies a conscious dedication to a lifestyle that prioritizes health and well-being. Lean meats are defined by their lower levels of fat and calories, making them an outstanding choice for individuals who are mindful about their dietary intake. By incorporating lean meats into your BBQ menu, you can significantly lower the risks associated with heart disease and obesity, which are major health issues in the United States. Additionally, these meats are incredibly versatile and can fit seamlessly into various dietary preferences, allowing you to craft delicious meals that align with your health objectives.
The allure of grilling lean meats lies in their remarkable versatility and rich flavor potential. You can experiment with an array of marinades and spices tailored to your unique taste preferences, ensuring that your meals are always fresh and exciting. Grilling lean meats at higher temperatures can intensify their natural flavors while keeping them tender. Whether you’re hosting a backyard BBQ or enjoying a picnic in a scenic park, lean meats can greatly enhance your culinary experience while supporting your health goals.
In What Ways Do Lean Meats Contribute to Your Health and Wellness?
Lean meats serve as a nutritional powerhouse, providing vital nutrients essential for overall health. They are an excellent source of high-quality protein, which is critical for muscle development and repair, making them particularly beneficial for those with an active lifestyle. Moreover, lean meats are abundant in iron, which is necessary for the formation of red blood cells and plays a role in energy metabolism. The array of B vitamins found in lean meats is crucial for converting food into energy, establishing them as a prime choice for anyone seeking to maintain their energy levels throughout the day.
Incorporating these lean options into your meals promotes effective weight management. The protein content in lean meats fosters feelings of fullness, helping you stay satisfied longer and minimizing the likelihood of overeating. This benefit is especially significant during BBQ season, when temptations to indulge may be heightened. By prioritizing lean meats, you can enjoy flavorful dishes while making substantial strides toward a healthier lifestyle.
Which Lean Meats Are Ideal for Grilling?
When it comes to grilling, certain lean meats shine for their exceptional flavor and adaptability. Top choices include chicken breast, turkey, and lean cuts of beef such as sirloin and tenderloin. Chicken breast is favored for its mild flavor and ability to absorb marinades, making it a versatile option for any BBQ spread. Turkey, especially the breast and thighs, offers distinct flavors while remaining a healthy choice.
For beef enthusiasts, cuts like sirloin, flank, and round steaks are excellent selections. These cuts are not only low in fat but also respond beautifully to various cooking methods, yielding rich flavors without unnecessary grease. Pork tenderloin is another fantastic option that delivers great taste while maintaining its lean profile. Each of these selections can be seasoned and grilled in countless creative ways, making them perfect for any BBQ gathering.
Essential Techniques for Grilling Lean Meats to Maximize Flavor

To achieve the highest level of flavor when grilling lean meats, several key techniques can enhance taste while ensuring the meat remains juicy and tender. First and foremost, temperature control is vital. Cooking lean meats at medium to medium-high heat helps create that perfect sear while minimizing the risk of drying them out. Utilize a meat thermometer to check for the correct doneness—145°F for beef and pork, 160°F for ground meats, and 165°F for poultry.
Marinades and rubs are invaluable tools for flavor enhancement. A simple marinade made from olive oil, citrus juice, fresh herbs, and spices can infuse the meat with rich tastes. Consider adding ingredients like garlic, rosemary, or soy sauce to further elevate the flavor profile. Additionally, employing indirect grilling methods can help maintain the juiciness of your meat. Cooking the meat away from direct heat allows it to cook evenly without burning, resulting in a tender and flavorful dish that will impress your guests.
Proven Strategies for Grilling Lean Meats While Focusing on Health
What Grilling Techniques Do Professional Chefs Recommend for Lean Meats?
Culinary experts endorse specific techniques to enhance flavor and ensure safety while grilling lean meats. Here are some essential recommendations to follow:
- Utilize marinades and brines to amplify flavor and tenderness.
- Cook at lower temperatures to reduce harmful compound formation.
- Employ a meat thermometer to verify that meats reach safe cooking temperatures.
- Allow meat to rest before slicing to retain juices.
- Keep raw meats separate from other foods to avoid cross-contamination.
- Regularly clean your grill to eliminate bacterial buildup.
Implementing these techniques not only enhances the grilling process but also promotes the overall healthiness of your BBQ. For instance, marinating lean meats can introduce flavor without significantly increasing calories or fat, while using a thermometer ensures safe cooking. By adhering to these expert insights, you can elevate your grilling skills and make your BBQs both enjoyable and health-conscious.
How Can You Ensure Safety When Grilling Lean Meats?

Safety is paramount when grilling, especially with lean meats that require precise cooking. To ensure a safe grilling experience, follow several best practices. First, maintain strict separation between raw meats and other foods. Use distinct cutting boards and utensils for raw meat to prevent cross-contamination. Always wash your hands thoroughly after handling raw proteins.
Utilize a meat thermometer to verify the internal temperature of the meat. This practice not only confirms that the meat is safely cooked but also aids in achieving the desired doneness without overcooking. Remember that the recommended internal temperatures are 145°F for beef, pork, and lamb, 160°F for ground meats, and 165°F for poultry. Regularly clean your grill grates to prevent harmful bacteria buildup, and remain vigilant for flare-ups caused by fat drippings.
What Common Mistakes Should You Avoid When Grilling Lean Meats?
Grilling lean meats can present challenges, particularly for beginners. Many common errors can lead to unsatisfactory results. One of the most frequent missteps is overcooking lean meats, which can dry them out and diminish their natural flavors. To avoid this, consistently monitor cooking times and utilize a meat thermometer for accuracy.
Another miscalculation is neglecting to allow the meat to rest after grilling. Cutting into meat immediately after grilling can cause the juices to escape, resulting in a dry texture. Instead, let the meat rest for a few minutes to allow the juices to redistribute. Lastly, be cautious with marinades that contain high levels of sugar or salt, as these can lead to excessive charring or burning on the grill, detracting from the flavors you aim to achieve.
Essential Steps for Preparing Lean Meats for Grilling
What Is the Proper Way to Marinate Lean Meats?
Marinating lean meats is a superb technique to enhance their flavor and tenderness, making them more enjoyable at your BBQ. The key to an effective marinade lies in balancing flavors and selecting appropriate ingredients. A typical marinade incorporates acidic components like vinegar or citrus juice, oil for moisture, and a variety of herbs and spices for rich flavor.
To effectively marinate lean meats, simply combine your chosen ingredients in a bowl or resealable bag, then add the meat. Allow it to marinate in the refrigerator for a minimum of 30 minutes; for deeper flavor, extend this to several hours or even overnight. This process not only infuses the meat with flavor but also assists in breaking down proteins, resulting in tender meat once grilled. Always remember to discard any leftover marinade that has been in contact with raw meat to prevent foodborne illnesses.
What Are the Optimal Seasoning Options for Lean Meats?
Seasoning is vital for enhancing the flavor of lean meats while ensuring they remain healthy. Utilizing fresh herbs such as rosemary, thyme, and oregano can significantly elevate the taste of your BBQ without adding unwanted calories. These herbs provide aromatic flavors and can be incorporated into marinades or used as a rub before grilling.
Incorporating spices like paprika, cumin, or garlic powder can also add depth to your dishes. These spices complement the natural flavors of the meat and can be easily adjusted to meet diverse taste preferences. A well-thought-out combination of these herbs and spices can create a delicious and healthy coating for your lean meats, ensuring that every bite is flavorful and satisfying.
What Is the Best Way to Trim Excess Fat from Lean Meats?
Trimming excess fat from lean meats is a crucial step in reducing overall fat content and enhancing their healthfulness. Using a sharp knife, carefully cut away any visible fat from the edges and surface of the meat. Focus on thicker fat layers, as these can contribute to unwanted calories and lead to flare-ups on the grill if not removed.
While trimming, exercise caution not to eliminate all the fat, as a small amount is essential for flavor and moisture retention. For cuts like beef or pork, a slight amount of fat can help keep the meat juicy during grilling. The goal is to achieve a balance between flavor and health, ensuring that you can enjoy delicious lean meats without excessive fat.
How Long Should You Grill Lean Meats for the Best Results?
When grilling lean meats, achieving the correct doneness is critical for both flavor and food safety. Each type of meat has recommended internal temperatures that must be reached. For beef, pork, and lamb, aim for an internal temperature of 145°F; for ground meats, the target is 160°F, and for poultry, ensure it reaches 165°F.
Use a reliable meat thermometer to monitor the temperature accurately. Insert the thermometer into the thickest part of the meat, avoiding bones that could yield misleading readings. Keep in mind that lean meats tend to cook quickly, so pay close attention to avoid overcooking. Once the desired temperature is reached, allow the meat to rest for a few minutes before slicing, which enables juices to redistribute for a more succulent bite.
Key Techniques for Expertly Grilling Lean Meats
How Can You Achieve Perfectly Grilled Chicken Breast?
Grilling chicken breast requires a delicate approach, especially when the goal is to keep it tender and juicy. The most effective method is to grill over medium heat. This temperature helps mitigate the risk of drying out the meat, a common issue when cooking chicken. Preheat your grill to the correct temperature, then place the chicken breast on the grates.
To ensure it reaches the safe internal temperature of 165°F, rely on a meat thermometer for precision. Cooking times will vary based on the thickness of the chicken breast, typically ranging from 6 to 8 minutes per side. After removing it from the grill, allow the chicken to rest for a few minutes before slicing. This resting phase is crucial for retaining juices, resulting in a flavorful, moist chicken breast that impresses every time.
What Are Effective Techniques for Grilling Lean Cuts of Beef?
Grilling lean cuts of beef, such as sirloin, requires meticulous attention to detail to achieve that perfect sear while maintaining juiciness. Begin by preheating your grill to medium-high heat. Season the beef with a blend of your favorite herbs and spices, then place it on the grill. For optimal flavor and texture, aim for an internal temperature of 145°F for medium-rare.
Sear the beef for about 5-7 minutes on each side, depending on the thickness of the cut. Once again, using a meat thermometer is essential to ensure doneness without overcooking. After grilling, let the beef rest for a few minutes to allow the juices to settle. This technique not only enhances flavor but also guarantees a tender bite, making your BBQ a culinary triumph.
What Tips Can Enhance Your Turkey Grilling Experience?
Grilling turkey, particularly cuts like the breast or thighs, can yield delightful results when executed correctly. A great technique is to grill these pieces over indirect heat, which helps prevent burning while ensuring even cooking throughout. Start by preheating your grill and setting it up for indirect cooking; this typically involves activating one side and leaving the opposite side off.
Position the turkey on the cooler side of the grill and cook until it reaches an internal temperature of 165°F. To maintain moisture, consider basting it lightly with oil or marinade during the cooking process. Basting not only enhances flavor but can also help prevent dryness. After grilling, allow the turkey to rest before carving; this will seal in moisture and flavor, ensuring that each slice is juicy and satisfying.
Research-Backed Insights on Grilling Lean Meats for Healthier BBQs
How Does Grilling Lean Meats Impact Your Health?
Grilling lean meats has been shown to provide numerous health benefits, primarily due to the reduction of saturated fats in one’s diet. When grilled correctly, lean meats can significantly decrease the intake of unhealthy fats while still delivering essential nutrients like protein and iron. The grilling method itself aids in rendering excess fat, making it a healthier cooking technique compared to frying or sautéing.
Furthermore, grilling at lower temperatures can minimize the formation of harmful compounds that may develop during high-heat cooking. By adopting healthy grilling practices, you can savor flavorful meals that align with a heart-healthy diet, promoting overall wellness. This cooking method encourages the consumption of lean meats, which can facilitate weight management and contribute to a balanced, nutritious lifestyle.
What Research Supports the Health Benefits of Grilling Lean Meats?
Numerous studies underscore the advantages of including lean meats in a nutritious diet. Research indicates that diets rich in lean proteins can assist with weight management and enhance overall nutritional intake. Grilling these meats, as opposed to frying or using heavy sauces, allows for a healthier cooking method that retains essential nutrients.
For individuals focused on heart health, incorporating lean meats into a balanced diet can help lower cholesterol levels and reduce the risk of cardiovascular diseases. When grilled appropriately, lean meats can maintain their flavor and satisfaction without the added fats typically associated with other cooking methods. By making informed choices at the grill, you can reap the myriad health benefits that lean meats provide.
How Can Grilling Lean Meats Support Your Weight Loss Journey?
Grilling lean meats can be a crucial tactic for individuals aiming to lose weight and maintain a healthy lifestyle. Lean meats are low in calories while being high in protein, making them an ideal food choice for weight loss. Protein is a vital nutrient that enhances feelings of fullness, helping to keep you satisfied longer and reducing overall calorie intake.
Moreover, grilling allows for meal preparation without the addition of fats, which is often the case with frying methods that elevate calorie content. By including lean meats in your meals, you can create satisfying, nutrient-dense dishes that align with your weight loss objectives. The combination of high protein and low calorie content establishes a solid foundation for effective weight management, making grilled lean meats a wise addition to your BBQ menu.
Enhancing Lean Meats with Nutritious Accompaniments
What Vegetables Pair Perfectly with Lean Meats?
Pairing lean meats with grilled vegetables creates a balanced and nutritious BBQ plate. Vegetables not only add vibrant colors but also provide essential vitamins and minerals to your meal. Excellent choices include bell peppers, zucchini, asparagus, and mushrooms. These vegetables can be grilled alongside your meats, allowing them to absorb delightful flavors from the grill.
To prepare, simply drizzle your selected vegetables with olive oil, season with salt and pepper, and grill until tender. This technique brings out their natural sweetness and provides a satisfying crunch. Grilled vegetables beautifully complement lean meats, making your BBQ not only more colorful but also significantly healthier. Incorporating these nutrient-rich sides can enhance your meal while aligning with your health-conscious goals.
How Can You Create Healthy Salads to Accompany Lean Meats?
Healthy salads serve as a fantastic complement to lean meats, offering fiber and essential nutrients that enhance overall health. To prepare a simple yet delicious salad, start with a base of fresh greens—spinach or mixed greens are excellent options. Add vibrant vegetables like tomatoes, cucumbers, and carrots for added crunch and color.
For dressing, opt for a light vinaigrette made from olive oil and vinegar, or squeeze some fresh lemon juice over the top. This approach avoids heavy, calorie-laden dressings that can detract from the health benefits of your meal. You can also enhance the salad by incorporating nuts or seeds for added texture and nutrition. These salads not only pair well with your grilled lean meats but also promote a well-rounded, healthy BBQ experience.
What Are the Best Grain Options for a Healthy BBQ?
Incorporating whole grains into your BBQ spread can significantly boost the nutritional profile of your meal. Healthy grain options like quinoa, brown rice, or whole wheat bread provide fiber, which is essential for digestion and helps maintain a feeling of fullness. These grains can serve as a base for salads or be served alongside your grilled lean meats.
For a refreshing side, consider crafting a quinoa salad with diced vegetables and a light dressing. This addition provides a nutritious element to your BBQ while balancing the rich flavors of grilled meats. Similarly, brown rice can be flavored with herbs and spices to complement your main dish. By integrating whole grains into your BBQ, you can create satisfying meals that are both delicious and health-conscious.
Prioritizing Flavor While Enhancing Health
How Can You Effectively Utilize Herbs and Spices?
Herbs and spices are invaluable allies in amplifying the flavor of lean meats while keeping your BBQ healthy. Using fresh herbs like basil, cilantro, and parsley can impart vibrant flavors without the need for excess fats or sugars. Incorporating spices such as chili powder, cumin, and black pepper can add depth and complexity to your dishes.
When grilling, do not hesitate to experiment with various combinations. For instance, a blend of garlic powder, onion powder, and smoked paprika can create an enticing rub for chicken or beef. Using herbs and spices creatively not only keeps your meals exciting but also ensures they remain healthy and flavorful. By avoiding heavy sauces or marinades, you can celebrate the natural tastes of your lean meats.
- Basil
- Cilantro
- Thyme
- Smoked Paprika
- Oregano
- Garlic Powder
- Chili Powder
- Black Pepper
What Are Some Low-Fat Marinade Recipes?
Crafting low-fat marinades is an excellent way to infuse flavor into lean meats without adding unnecessary calories. Consider a straightforward marinade made from yogurt, which not only enhances flavor but also tenderizes the meat. Combine yogurt with lemon juice, garlic, and a mix of herbs for a tangy marinade that pairs wonderfully with chicken.
Another option is a citrus marinade using orange or lime juice, olive oil, and fresh herbs. This combination imparts a refreshing zest while keeping calories in check. For a soy-based marinade, mix low-sodium soy sauce with ginger, garlic, and a splash of vinegar for a bold flavor. These low-fat marinades can transform your grilling experience, ensuring that your lean meats remain both tasty and healthy.
How Can You Prevent Overcooking Lean Meats?
Overcooking lean meats is a common mistake that can lead to dry, unappetizing results. To prevent this, always use a reliable meat thermometer to closely monitor internal temperatures. It’s advisable to remove the meat from the grill just before it reaches the desired temperature, allowing for carryover cooking to finish the process once it is off the heat.
Be mindful of cooking times based on the thickness of the meat; thinner cuts will cook much faster than thicker ones. Another effective strategy is to let the meat rest after grilling. This resting period enables the juices to redistribute throughout the meat, resulting in a more tender and flavorful final product. By being attentive to these techniques, you can serve perfectly cooked lean meats that will impress your guests.
Proven Strategies for Grilling Lean Meats for a Healthier BBQ Experience
What Essential Grilling Tools Are Needed for Successful Cooking?
Equipping yourself with the right tools is fundamental for successful grilling, particularly when preparing lean meats. Essential grilling items include a reliable meat thermometer to ensure proper cooking temperatures, sturdy tongs for flipping and moving meat, and a grill brush for cleaning grates. These tools simplify the process and help maintain hygiene during cooking.
Investing in a quality grilling mat can also improve your experience, allowing you to grill smaller items or delicate fish without losing them through the grates. A basting brush is useful for applying marinades or sauces during cooking, adding flavor while keeping the meat moist. Lastly, consider having a spatula for flipping burgers or other patties. These tools will enhance your grilling experience and ensure that you can prepare lean meats safely and effectively.
- Meat Thermometer
- Tongs
- Grill Brush
- Grilling Mat
- Basting Brush
- Spatula
- Marinade Injector
- Grill Basket
How Can You Optimize Your Grill Setup for Lean Meats?
Optimizing your grill setup can dramatically enhance your grilling experience, particularly for lean meats. Start by ensuring that your grill is clean and free from debris left from previous cookouts. A clean grill not only enhances flavor but also minimizes the risk of flare-ups that can occur due to leftover fat.
Employing a two-zone grilling method is another effective strategy. This involves creating one side of the grill for direct heat and the other for indirect cooking. This setup allows you to sear meats quickly while gaining better control over the cooking process. It is particularly advantageous for thicker cuts, which can be initially seared to develop flavor and then moved to indirect heat to finish cooking through without drying out.
What Expert Tips Can Improve Your Grilling of Lean Meats?
Successfully grilling lean meats encompasses several expert tips that can amplify both flavor and safety. First, always preheat your grill for at least 10-15 minutes to create ideal cooking conditions. This practice helps prevent sticking and ensures a good sear. Using a meat thermometer is essential; it guarantees that your meats are cooked to safe temperatures while retaining juiciness.
Experimenting with various marinades and seasonings keeps your meals fresh and exciting. Don’t hesitate to try new combinations of herbs and spices or adjust your marinades based on seasonal ingredients. Finally, always allow meats to rest for a few minutes after grilling. This step is crucial for enabling juices to redistribute, resulting in a more succulent final product. By integrating these expert tips, your grilling sessions will be more successful and enjoyable.
Frequently Asked Questions About Grilling Lean Meats
What health benefits are associated with grilling lean meats?
Grilling lean meats can reduce saturated fat intake, support muscle growth, and supply essential nutrients like protein and iron, promoting overall health.
How do I prevent lean meats from drying out on the grill?
To prevent drying, avoid overcooking by using a meat thermometer and allowing the meat to rest before slicing to retain juices.
What are some effective marinades for lean meats?
Effective marinades include yogurt-based mixtures with herbs, citrus juices with garlic, and low-sodium soy sauce with ginger for enhanced flavor.
What grilling techniques should I apply for chicken breast?
Grill chicken breast over medium heat, checking for an internal temperature of 165°F, and allow it to rest before slicing to maintain juiciness.
How can I safely grill turkey?
Grill turkey parts using indirect heat, ensuring it reaches an internal temperature of 165°F, and baste with oil to retain moisture.
Which seasonings work best for lean beef cuts?
Lean beef cuts pair well with spices like smoked paprika, garlic powder, black pepper, and fresh herbs such as rosemary and thyme.
Can grilling lean meats aid in weight loss?
Yes, grilling lean meats provides high-quality protein with fewer calories, helping control hunger and support weight loss efforts.
What are the best vegetables to grill alongside lean meats?
Grilled vegetables like bell peppers, zucchini, asparagus, and mushrooms complement lean meats well by adding flavor and nutrients.
How can I enhance the flavor of my grilled meats without adding fat?
Using herbs, spices, and low-fat marinades can enhance flavor without adding unnecessary calories or unhealthy fats.
What grilling tools are essential for cooking lean meats?
Essential grilling tools include a meat thermometer, tongs, grill brush, basting brush, and a spatula to ensure safe and effective grilling.
Connect with us on Facebook for more tips!
The Article Grilling Lean Meats for Healthy BBQ: Tips and Tricks appeared first on https://pitmastersarsenal.com
The Article Grilling Lean Meats: Tips for a Healthy BBQ Was Found On https://limitsofstrategy.com
-

Smoke Quail: A Step-by-Step Guide to Delicate Flavor
Master the Art of Quail Cooking with Expert Preparation Techniques
Unlock Flavorful Culinary Creations by Choosing the Freshest Quail
Choosing the freshest quail is fundamental for crafting dishes that are rich and satisfying. When selecting quail, pay close attention to their physical characteristics; they should display clear eyes and firm flesh. A high-quality quail feels dense for its size, indicating that it has been well-fed and is of superior quality. To ensure optimal freshness, always purchase quail from trusted sources like a local butcher or a farmer’s market. Don’t be shy about asking about their sourcing practices to guarantee you are getting the best quality available. Be wary of any signs of dull coloration or unpleasant odors, as these can be clear indicators that the quail may not be fresh and should be avoided.
Moreover, it’s important to consider the size of the quail; younger, smaller quails typically offer a more tender texture along with a milder flavor, while larger quails may provide a more robust taste experience. Familiarize yourself with the various quail breeds available in the U.S., including Coturnix and Bobwhite, each of which has distinct flavor profiles and cooking characteristics. Understanding these differences can significantly enhance your smoking experience and elevate the final dish you present.
Enhance Your Quail’s Flavor with Expert Brining Techniques
Soaking your quail in a well-crafted brine solution can dramatically increase moisture retention and flavor, resulting in succulent meat that is bursting with taste. To create an effective brine, combine water, salt, and sugar, using about 1 cup of salt and 1/2 cup of sugar for every gallon of water. You can elevate this basic brine by incorporating additional flavoring agents like crushed garlic, fresh herbs, or spices that will infuse the quail with unique and distinctive tastes. Be sure to place the quail in a spacious container, ensuring they are completely submerged in the brine solution to maximize flavor absorption.
Allow the quail to rest in the brine for several hours; while a minimum of 4 hours is recommended, brining overnight can yield even more impressive results. This technique not only amplifies flavor but also tenderizes the meat, making it even more appealing after the smoking process. Once the brining period is complete, thoroughly rinse the quail under cold water to eliminate any excess salt and sugars, which helps to avoid an overly salty end result.
Why Patting Your Brined Quail Dry is Essential for Perfect Smoking
Once your quail has been brined, the following crucial step is to pat the birds dry, which plays a vital role in the smoking process. This preparation allows the skin to crisp beautifully during smoking, contributing to the delicate flavors we aim for. Use paper towels to gently pat the quail, ensuring you remove any residual surface moisture that could interfere with the smoking process. This practice is key; excessive moisture can lead to steaming instead of smoking, which diminishes both flavor and texture.
In addition to drying, this is also a perfect opportunity to inspect each bird for any residual feathers or impurities. A clean, well-prepared quail not only tastes better but also presents more attractively when served. Furthermore, if desired, you may lightly season the quail at this stage, ensuring that your chosen rub or seasoning adheres effectively to the dry skin for maximum flavor impact.
Selecting the Right Wood for Outstanding Smoking Results

Understanding the Best Types of Wood for Smoking Quail
The type of wood you choose for smoking quail has a profound effect on the final flavor profile of your dish. Each type of wood imparts its own distinct flavors; for quail, milder woods such as apple and cherry are particularly suitable due to their gentle sweetness, which pairs beautifully with the meat’s delicate flavor. These woods allow the natural flavors of the quail to shine through without being overwhelmed by harsh smokiness.
Avoid stronger woods like hickory or mesquite when smoking quail, as their intense flavors can overshadow the bird’s nuanced taste. If you’re feeling adventurous, consider blending a small amount of stronger wood with milder varieties, but do so with caution to ensure that the quail’s flavor remains at the forefront. For a balanced profile, fruit woods are fantastic choices because they offer versatility and enhance the overall taste while keeping the experience light and enjoyable.
Determining the Right Amount of Wood for Flavorful Smoking
The quantity of wood used during the smoking process can significantly influence the intensity of the smoke flavor in your quail. For optimal results, use small amounts of wood to preserve the delicate profile of the meat. Typically, around 2-3 chunks of wood will suffice for effective smoking, ensuring that the flavor remains subtle and enjoyable without overshadowing the natural characteristics of the quail.
It’s generally advisable to start with a lesser amount of wood, as you can always add more if you desire a stronger flavor. If, after your initial smoking attempt, you find the flavor too subtle, gradually increase the amount in future sessions. Always keep in mind that the goal is to enhance the quail’s flavor without overwhelming it; delicate meat deserves a thoughtfully curated smoke experience.
Optimal Timing for Adding Wood for Best Smoking Results

Timing is a crucial aspect when it comes to adding wood to your smoker for optimal smoking results. For the best outcomes, introduce wood at the very beginning of the smoking process. Once your smoker reaches the desired temperature, typically between 225-250°F, place your wood on the coals or in the smoker box, depending on your specific setup. This timing allows the wood to begin smoldering right away, releasing aromatic smoke that envelops the quail as it cooks.
Ensure that your wood is thoroughly dry, as wet wood can generate steam instead of smoke. Keep a close watch on your smoker’s temperature during this phase, as fluctuations can impact both the smoking duration and the flavor profile of your quail. Maintaining consistent heat is vital for achieving an even cook and ensuring optimal smoke absorption.
Setting Up Your Smoker for Successful Quail Smoking
Selecting the Right Smoker for Effective Smoking of Quail
When it comes to smoking quail, the type of smoker you choose can have a significant impact on the final outcome. Electric, charcoal, and pellet smokers each come with unique advantages for smoking quail. Electric smokers are particularly user-friendly, providing consistent temperatures that make them an excellent choice for beginners. They allow you to focus on other elements of the smoking process without the constant need to manage the fire.
On the other hand, charcoal smokers offer a traditional smoking experience, delivering a richer flavor profile due to the natural combustion of the charcoal. Although they require more attention to maintain steady temperatures, many pitmasters prefer them for the depth of flavor they can achieve. Pellet smokers combine the ease of electric smoking with the authentic flavors of traditional wood smoking, utilizing compressed wood pellets that offer versatility in flavor profiles.
When selecting your smoker, consider your experience level, the flavor profile you wish to achieve, and the amount of time you can dedicate to monitoring the smoking process. Each type can yield delicious results if you can effectively control the temperature.
Maintaining Ideal Temperature for Perfectly Smoked Quail
Maintaining the correct temperature is essential for achieving that delicate flavor when smoking quail. The optimal smoking temperature for quail is between 225-250°F. This temperature range allows the quail to cook slowly while absorbing the wood smoke, ensuring that the meat remains tender and juicy throughout the process.
Utilizing a reliable thermometer is crucial for tracking the internal temperature of the smoker. A digital probe thermometer can assist you in closely monitoring the heat, enabling you to make necessary adjustments as needed. If your smoker exhibits temperature fluctuations, consider placing a water pan inside to help stabilize the heat and maintain moisture levels.
For the best results, resist the temptation to increase the temperature to speed up the cooking process. Slow and steady cooking is vital for unlocking the full flavor potential of your quail, ultimately leading to an exquisite outcome that showcases the bird’s natural charm.
Determining the Ideal Smoking Duration for Flavor and Texture
Smoking quail typically requires about 1-2 hours at the recommended temperature range of 225-250°F. However, the exact duration can vary based on the size of the quail and the specific smoker being used. The most reliable method to determine doneness is by using a meat thermometer, aiming for an internal temperature of 165°F.
Start checking the internal temperature after approximately one hour of smoking. This step is crucial; overcooking can lead to tough, dry meat, while undercooking poses food safety risks. Keep a vigilant eye on the smoker’s temperature throughout the cooking process, as even minor fluctuations can significantly impact cooking time.
Once the quail reaches the desired internal temperature, carefully remove it from the smoker and prepare it for resting. This resting period is essential, as it allows the juices to redistribute, resulting in a juicy and flavorful quail that will undoubtedly impress your guests.
Expert Techniques for Smoking Quail to Achieve Exquisite Flavor
Key Techniques Employed by Seasoned Smokers
Experts in smoking quail often combine brining with careful wood selections to achieve the ultimate flavor. Brining is a critical step that enhances moisture retention and infuses rich flavors deep into the meat. Many professionals recommend using a brine infused with herbs and spices tailored to the desired flavor profile of the dish.
When it comes to wood selection, experts typically prefer mild fruitwoods like apple or cherry, as these impart subtle sweetness that complements quail beautifully. Additionally, they emphasize the importance of maintaining consistent temperatures throughout the smoking process, which can be monitored by regularly checking the smoker’s heat and making necessary adjustments.
A practical example of expert technique involves keeping meticulous records throughout the smoking process. Many seasoned smokers log important details such as temperature, time, wood type, and even weather conditions to refine their techniques over time. This practice aids them in replicating successful smoking sessions and serves as a valuable learning tool for future attempts.
Effective Monitoring Techniques for Best Smoking Results
Monitoring the smoking process is vital for achieving the best results when smoking quail. Experts recommend utilizing high-quality thermometers, such as meat probes, which can remain in the quail throughout the cooking process. This approach allows continuous monitoring of the internal temperature without the need to open the smoker and risk losing heat.
Moreover, regularly recording the smoker’s temperature assists in making necessary heat adjustments. Experts often maintain detailed logs of the smoking conditions, noting any variations or adjustments throughout the process. This information is invaluable for perfecting future smoking sessions.
Regularly checking on the quail is equally important. Look for visual cues; the skin should appear slightly crispy and browned, indicating that the smoke is penetrating effectively. This careful attention to detail ensures that the quail achieves the ideal flavor and texture, culminating in a dish that delights the palate.
Avoiding Common Mistakes in Quail Smoking
One prevalent mistake when smoking quail is over-smoking, which can overpower the bird’s delicate flavor. Experts advise against using excessive wood or smoking at too high a temperature, as over-smoking can lead to a bitter taste that masks the quail’s natural qualities.
Another common error is neglecting the brining process. Skipping this essential step can result in dry, flavorless meat that fails to showcase the full potential of the quail. Proper brining is critical for moisture retention and flavor enhancement, making it a vital component of preparation.
Additionally, many novice smokers underestimate the importance of closely monitoring cooking times and temperatures. Allowing the quail to smoke without regular checks can lead to overcooking or undercooking, both of which detract from the quality of the dish. Paying careful attention to these factors can help avoid common pitfalls and elevate your quail smoking techniques.
Exploring Seasoning and Rubs to Elevate Quail’s Flavor
Simple Seasoning Options to Enhance Quail’s Natural Taste
When it comes to seasoning quail, a minimalist approach often yields the best results. Basic seasonings like salt, pepper, and fresh herbs can elevate the bird’s inherent flavors without overshadowing them. Experimenting with subtle herbs such as rosemary or thyme can add aromatic depth that beautifully complements the smoky profile.
Timing is also crucial when applying your seasonings. While some prefer to season post-brining, others find that incorporating herbs and spices before the brining process allows flavors to penetrate more deeply into the meat. This technique can create a more pronounced flavor profile that remains well-balanced throughout the cooking process.
For a simple yet effective seasoning blend, consider mixing equal parts of salt and pepper, then adding a teaspoon of your chosen herbs. Rub this mixture evenly over the quail, ensuring an even distribution that enhances every bite. The objective is to elevate the quail’s natural flavors while allowing the smoking process to contribute its unique essence.
Effective Rubs for Quail to Boost Flavor
Rubs are an excellent way to infuse additional flavor into your smoked quail. Mild flavors work best to enhance the bird’s taste without overwhelming it. A rub featuring a blend of paprika, garlic powder, and a hint of brown sugar can add depth while maintaining the delicate taste of the quail.
For a balanced rub, consider utilizing the following ingredients:
- 1 tablespoon paprika
- 1 tablespoon garlic powder
- 1 tablespoon onion powder
- 1 teaspoon brown sugar
- 1 teaspoon black pepper
- 1 teaspoon salt
- 1 teaspoon dried thyme
- 1 teaspoon ground mustard
Mix these ingredients thoroughly and store them in an airtight container until you are ready to use them.
Applying rubs is an art form. Be sure to massage the rub gently into the quail’s skin, allowing the flavors to adhere and penetrate the meat. This technique is crucial for creating layers of taste that will be highlighted during the smoking process.
Proper Application of Rubs and Seasonings for Maximum Flavor
Evenly applying rubs and seasonings over the quail is essential for achieving a well-rounded flavor profile. Begin by ensuring that the quail is dry after the brining process. Take your chosen rub and generously sprinkle it over the surface of the quail, making sure to coat all sides, including inside the cavity.
Gently massage the rub into the skin, carefully working it into any crevices or folds. This step not only enhances flavor but also creates a beautiful crust as the quail cooks, contributing to the dish’s overall aesthetic appeal. It’s important to allow the quail to rest for at least 30 minutes after seasoning, permitting the flavors to meld and thoroughly infuse into the meat.
When applying rubs, consider your personal taste preferences. If you enjoy a spicier kick, feel free to add a pinch of cayenne or chili powder to the mix. Conversely, for a more aromatic experience, additional herbs like oregano or basil can be included. The objective is to create a harmonious blend that complements the quail’s natural flavors and enhances the overall smoking experience.
Advanced Techniques for Perfecting Your Quail Smoking Skills
Direct vs. Indirect Smoking: Choosing the Best Method for Quail
When it comes to smoking quail, the technique you select can greatly influence the outcome. Indirect smoking is generally preferred for quail, as it prevents the delicate meat from burning. In this method, the quail is positioned away from the direct heat source within the smoker. This approach allows for a slower, more even cooking process, which is crucial for maintaining the bird’s tenderness and ensuring even smoke penetration.
By placing the quail indirectly, you minimize the risk of charring the exterior while the interior remains undercooked. This technique is especially beneficial for smaller birds like quail, which can easily dry out if subjected to high heat for extended periods.
Utilizing this method not only enhances flavor but also creates a more enjoyable eating experience. The result is a beautifully smoked quail with a crispy exterior and a juicy interior that your guests will surely love.
Impact of Your Smoking Method on Flavor and Texture
The smoking method you choose can significantly affect the final flavor of the quail. Indirect smoking allows for a gradual infusion of smoke, resulting in a more delicate taste profile that highlights the bird’s natural qualities. This slow cooking process enables the meat to absorb the aromatic qualities of the wood, enriching the overall flavor without overwhelming it.
In contrast, direct smoking can lead to a harsher, more pronounced smoke flavor, which is less suitable for delicate meats like quail. The intense heat can also dry out the meat, detracting from its inherent qualities.
Experimenting with different smoking methods can yield varying results, so finding the right balance is essential. For quail, the indirect method is widely regarded as the best approach for achieving finely tuned flavor and texture.
Utilizing a Water Pan for Moisture Maintenance While Smoking Quail
Incorporating a water pan into your smoker setup can significantly impact the moisture levels of your smoked quail. By placing a water pan inside the smoker, you can help maintain humidity, which keeps the quail moist throughout the cooking process. This is particularly beneficial for smaller birds like quail, which can dry out easily during smoking.
Fill the water pan with water or a flavorful liquid like apple juice to enhance the aromatic experience. The steam generated from the water pan helps to regulate the smoker’s temperature while adding moisture to the air, creating a more forgiving smoking environment.
Be sure to regularly check the water level throughout the smoking process, as it will evaporate over time. Keeping the pan filled ensures that the quail remains juicy and flavorful, ultimately enhancing the overall dining experience. Using a water pan is a minor adjustment that can yield substantial improvements in the final dish.
The Significance of Resting and Serving Your Smoked Quail
Understanding the Importance of Resting Your Quail After Smoking
Resting the quail after smoking is a critical step that is often overlooked. Once the quail has reached the desired internal temperature and is removed from the smoker, allow it to rest for approximately 10 minutes. This waiting period facilitates the redistribution of juices throughout the meat, resulting in a more succulent and flavorful experience when served.
If you skip this essential step, you risk losing valuable juices that can escape as soon as the quail is cut into. A well-rested bird will retain more moisture, providing a tender bite that highlights the care taken throughout the smoking process.
During this resting time, consider preparing your side dishes or garnishing your plate. This preparation allows for a seamless transition from smoker to table, ensuring that your guests experience the best possible presentation of your smoked quail.
Techniques for Elegantly Carving Smoked Quail for Presentation
Carving smoked quail can be somewhat challenging due to its small size, but with a sharp knife and a steady hand, it can be executed elegantly. Begin by positioning the quail breast-side up. Use a sharp knife to separate the legs from the body, cutting through the joint where the leg connects to the carcass.
Once the legs are removed, proceed to the wings, making similar cuts along the joint. For the breast meat, carefully slice along the breastbone, working in a downward motion to neatly remove the flesh from either side. Aim for thin, even slices to enhance presentation and ease of eating.
Consider plating the quail artfully, perhaps by fanning the slices on a platter or arranging the legs and wings in an appealing manner. This attention to detail can elevate your dish, making it suitable for special occasions or casual gatherings alike.
Choosing the Best Accompaniments to Pair with Smoked Quail
Pairing smoked quail with the right accompaniments can significantly enhance the overall meal experience. Light side dishes such as a fresh salad or roasted vegetables are excellent choices that complement the rich, smoky flavor without overwhelming the palate. A citrus-based sauce, such as a lemon or orange glaze, can also provide a refreshing contrast to the quail’s inherent richness.
Consider the following options for a well-rounded meal:
- Mixed greens salad with vinaigrette
- Roasted seasonal vegetables
- Garlic mashed potatoes
- Wild rice pilaf
- Citrus salad with arugula
- Grilled asparagus with balsamic reduction
- Quinoa salad with fresh herbs
- Coleslaw with a light dressing
These accompaniments not only pair beautifully with smoked quail but also enhance its flavor, creating a balanced and delightful dining experience for your guests.
Proper Storage and Reheating Techniques for Smoked Quail
Safely Storing Smoked Quail to Preserve Quality
Properly storing smoked quail is essential for maintaining its quality and flavor. Once cooled, smoked quail can be kept in the refrigerator for up to 3 days. Make sure to place it in an airtight container to prevent moisture loss and flavor degradation.
If you plan to store the quail for longer than three days, consider freezing it. When properly stored in freezer-safe bags or vacuum-sealed containers, smoked quail can last for up to 3 months. Be sure to label your bags with the date to help you keep track of freshness.
When storing, avoid placing hot quail directly into the fridge, as this can raise the temperature of your refrigerator and compromise food safety. Allow the quail to cool to room temperature before refrigerating or freezing.
Best Practices for Reheating Smoked Quail to Maintain Quality
Reheating smoked quail requires a delicate touch to preserve its unique flavor and texture. The best method for reheating is in the oven at a low temperature, around 250°F. This approach allows the quail to warm evenly without drying out.
Before reheating, consider covering the quail with foil to retain moisture during the process. Heat the quail for approximately 15-20 minutes, checking frequently to ensure it does not overcook. This method helps maintain the quail’s tenderness and juiciness, allowing you to enjoy it as if it were freshly smoked.
If you find that the quail has dried out slightly during storage, consider serving it with a light sauce or broth to add moisture back into the meat, enhancing the overall experience.
Freezing Smoked Quail for Future Enjoyment Without Compromising Flavor
Freezing smoked quail is a convenient option for enjoying this delicacy at a later date. To freeze quail, place it in vacuum-sealed bags or wrap it tightly in plastic wrap followed by aluminum foil for added protection. This method helps prevent freezer burn and preserves the quail’s flavor for future enjoyment.
When you’re ready to use it, thaw the quail overnight in the refrigerator. Never refreeze thawed quail, as this can negatively impact its texture and flavor. Once thawed, reheat the quail using the methods previously discussed to restore its original qualities.
Freezing smoked quail is an excellent way to extend its shelf life while still providing you with a delicious meal option on busy days.
Microwave Reheating Techniques for Smoked Quail to Maintain Quality
Reheating smoked quail in a microwave is a quick option, but it requires careful attention to avoid overcooking. Start by placing the quail in a microwave-safe dish and covering it with a damp paper towel. This helps retain moisture and prevents the quail from drying out during the reheating process.
Set your microwave to medium power and heat the quail in short intervals, approximately 30 seconds at a time. Check the temperature frequently to ensure it warms evenly. If the quail is not adequately heated, continue microwaving in small increments until it reaches a warm internal temperature.
While the microwave can be a convenient reheating option, it may not yield the same quality result as oven reheating. Use this method as a last resort when time is of the essence, and be mindful of keeping the quail moist throughout the process.
Innovative Ways to Experiment with Flavors in Smoked Quail
Infusing Unique Flavors with Herbs and Spices in Your Brine
Experimenting with various herbs and spices in your brine can lead to unique flavor profiles that elevate your smoked quail to new heights. Consider incorporating aromatic ingredients like dill, coriander, or even a hint of cinnamon into your brine mixture. These additions can create an intriguing contrast to the natural sweetness of the quail.
When crafting your brine, remember to balance the flavors. Overdoing a potent herb can easily overpower the quail, while a subtle infusion can enhance its natural characteristics. For a basic herb brine, consider mixing the following:
- 1 cup salt
- 1/2 cup sugar
- 1 gallon water
- 1 tablespoon dill seeds
- 1 tablespoon coriander seeds
- 1 teaspoon ground cinnamon
Allow the quail to soak in this mixture for several hours or overnight, depending on the desired intensity of flavor. The result is a beautifully flavored quail that offers a delightful twist on traditional smoking techniques.
Incorporating Different Woods for Diverse Flavor Profiles
Incorporating various types of wood can create complex flavor profiles for your smoked quail. Mixing fruitwoods like apple and cherry can provide a balanced sweet and fruity taste that pairs beautifully with the quail’s delicate flavor. This combination enhances the overall experience, producing a depth of flavor that keeps each bite interesting and satisfying.
When experimenting with wood combinations, start with small amounts of each type and adjust according to your taste preferences. A good starting ratio is a 50/50 blend, but feel free to modify based on your previous experiences.
Additionally, consider the smoking time and temperature, as these factors will influence how the flavors meld together. Experimentation is key; keep detailed notes on your wood combinations, cooking times, and results to refine your technique and achieve the perfect flavor blend.
Creative Serving Ideas for Smoked Quail
Serving smoked quail in innovative ways can transform a simple dish into a gourmet experience. Here are some unique serving ideas to consider:
- Incorporate quail into a fresh salad with mixed greens and a citrus dressing for a refreshing meal.
- Serve on a charcuterie board alongside an assortment of cheeses, fruits, and artisan breads.
- Create a gourmet sandwich using artisan bread and fresh toppings like arugula and aioli.
- Present quail as a stunning centerpiece for a rustic dinner party, garnished with fresh herbs.
- Use smoked quail in tacos or wraps, adding colorful garnishes for a vibrant presentation.
- Pair with seasonal fruits such as figs or peaches for a sweet contrast to the smoky flavor.
- Offer quail as part of a tasting menu, showcasing different wood flavors with each dish.
- Create a hearty quail hash with potatoes and vegetables for a delightful brunch option.
These creative serving ideas not only enhance the dish but also provide an opportunity to impress your guests with unique flavor pairings and artistic presentations.
Exploring Marinades and Rubs for Enhanced Flavor in Smoked Quail
Experimenting with different marinades and dry rubs can further enhance the flavor of quail before smoking. Consider using citrus-based marinades, which can add brightness and acidity, perfectly balancing the richness of the smoked meat. A simple marinade made from olive oil, lemon juice, and garlic can work wonders, tenderizing the quail while infusing it with flavor.
For those seeking a spicier kick, consider crafting a marinade incorporating chili paste, lime juice, and fresh herbs. Marinate the quail for several hours or overnight to allow the flavors to penetrate deeply into the meat. For dry rubs, try combining spices such as cumin, coriander, and smoked paprika to create a bold and flavorful crust.
Ultimately, the key to successful marinades and rubs lies in balancing flavors to enhance the quail’s natural sweetness without overpowering it. Keep experimenting to discover the combinations that best suit your taste preferences.
Infusing Smoke with Aromatics for Unique Flavor Experiences
Infusing smoke with aromatic ingredients can elevate your smoked quail to new heights. Incorporate elements like citrus peels, fresh herbs, or even tea leaves in the smoker to create unique flavor profiles. For instance, adding lemon or orange peels to the wood can impart subtle citrus notes that brighten the smoky flavor.
Herbs such as rosemary or thyme can also be utilized to enhance the smoke. Place fresh sprigs directly onto the wood before smoking, allowing their oils to release and mingle with the smoke. This technique provides an added layer of flavor that perfectly complements the quail.
Experiment with different combinations to discover your favorite aromatic infusions. However, exercise caution, as some ingredients may release stronger flavors that could overpower the delicate nature of the quail. A careful balance will lead to a memorable and delicious final dish.
Addressing Common Questions About Smoking Quail
Is it possible to smoke frozen quail for convenience?
Yes, you can smoke frozen quail, but it’s advisable to thaw it in the refrigerator first to ensure even cooking results.
What internal temperature should quail reach for safe consumption?
Quail should achieve an internal temperature of 165°F for safe consumption.
Can I use a gas grill for effectively smoking quail?
Yes, you can use a gas grill to smoke quail by utilizing a smoker box or wrapping wood chips in foil.
How long should I brine quail for optimal flavor results?
Brining quail for a minimum of 4 hours is recommended, but overnight brining will yield even better outcomes.
Is it better to smoke quail with the skin on or off for moisture retention?
It is advisable to smoke quail with the skin on, as it helps retain moisture and adds flavor during the cooking process.
What sides pair excellently with smoked quail for a complete meal?
Light side dishes such as salads, roasted vegetables, and citrus-based sauces complement smoked quail beautifully.
Can I over-smoke quail and affect its flavor?
Yes, over-smoking can lead to a bitter flavor, so it’s crucial to monitor wood usage and smoking time carefully.
How do I know when my smoked quail is done cooking safely?
Use a meat thermometer to check for an internal temperature of 165°F to ensure that it is fully cooked.
Can I reheat smoked quail in a microwave for convenience?
Yes, reheating smoked quail in a microwave is possible; use medium power and cover it with a damp paper towel to retain moisture.
What types of wood are best suited for smoking quail?
Mild fruitwoods like apple and cherry are ideal for smoking quail due to their gentle sweetness that complements the meat.
Connect with us on Facebook for more tips and tricks!
The Article How to Smoke Quail for Delicate Flavor: A Guide appeared first on https://pitmastersarsenal.com
The Article Smoke Quail for Delicate Flavor: A Step-by-Step Guide Was Found On https://limitsofstrategy.com
-

Hubert Estate: Unmissable Yarra Valley Winery Experience
If you believe every wine cellar in the Yarra Valley provides a similar tasting adventure along with picturesque views, then Hubert Estate will certainly change your perspective. This remarkable destination, nestled in Coldstream, seamlessly combines a cellar door, a restaurant, an art gallery, and a distillery tasting room, creating a harmonious blend of modern architecture and traditional vineyard charm. It stands out as one of the most dynamic and visually captivating winery experiences in the entire region, inviting you to explore a world beyond the ordinary.
Whether you are enjoying a glass of exquisite Chardonnay under soaring ceilings, sampling artisan craft gin with friends, or indulging in a leisurely lunch at the acclaimed Quarters Restaurant, Hubert Estate offers an experience that goes well beyond simple sips and swirls. This destination harmonizes meticulously curated tastings with the essence of contemporary Australian dining, featuring Indigenous artwork, breathtaking panoramic vistas, and experiences designed for groups, all within a beautifully crafted environment.
Embark on an Extraordinary Wine Journey Beyond Conventional Tastings
Located just 45 minutes from Melbourne, Hubert Estate is perfectly situated on gently rolling hills of vineyards in the scenic Coldstream area of the Yarra Valley. This venue redefines the traditional concept of a cellar door, transforming it into a multifaceted destination where wine, dining, art, and atmosphere unite in perfect balance. Whether you are enjoying a daily Yarra Valley wine tour or planning a special stop along your route, Hubert Estate guarantees a unique and unforgettable experience that will linger in your memory.
Top Reasons Why International Travelers Should Prioritize Hubert Estate
If you are journeying to Australia from abroad and wish to experience an authentic taste of Victorian wine country that marries elegance with accessibility, then visiting Hubert Estate is an indispensable addition to your itinerary. This destination offers an extensive selection of cool-climate wines from the Yarra Valley, exceptional dining experiences, and tasting options tailored for wine enthusiasts at all levels. By opting for a guided tour, you can eliminate the worries of driving, managing reservations, or waiting in tasting lines, allowing you to fully immerse yourself in the experience and create lasting memories with friends and family.
Discover Why Hubert Estate Is a Must-Visit Highlight on Our Daily Tours
Renowned as one of the most comprehensive winery experiences in the Yarra Valley, Hubert Estate consistently impresses visitors, which is precisely why we feature it prominently in our tours. We include it on our daily wine tour not only for its welcoming cellar door and outstanding wines but also because it caters to a variety of preferences, ensuring there is something for everyone. Whether your interests lie in classic varietals, boutique spirits, modern Australian cuisine, or cultural experiences, this venue guarantees an all-encompassing visit that will leave a memorable impact.
Here’s a glimpse of what guests typically enjoy during our visit to Hubert Estate and why it remains a key highlight on our tour itinerary:
- Versatility: Whether your preference is wine tasting or you have an interest in beer, cider, or spirits, Hubert Estate caters to all group interests and passions.
- Ambiance: The modern, inviting, and spacious environment is perfect for both groups and individuals seeking relaxation.
- Location: Conveniently located in the heart of the valley, it is an ideal stop on our tour route.
- Extras: The art gallery beneath the cellar adds a rich cultural dimension, while the restaurant offers hearty meals that are both relaxed and unpretentious.
- Group-Friendly: Whether you are part of a private tour or joining our daily public tours, the layout is designed to accommodate groups with diverse interests and varying levels of wine knowledge seamlessly.

Explore What to Expect During Your Visit to Hubert Estate on Our Daily Wine Tours
If you are participating in one of our daily Yarra Valley wine tours, Hubert Estate undoubtedly serves as one of the standout venues we highlight, and for very valid reasons. With its inviting cellar door, modern restaurant, spirit tastings, and an underground art gallery, it provides a well-rounded experience that doesn’t overwhelm visitors. This stop integrates effortlessly into a full day of exploration within the region. Here’s what you can generally anticipate during this tour stop:
Wines & Tasting: Sample Four Signature Wines Plus Your Beverage of Choice
At roughly 11:30 am during our tour, you will arrive at Hubert Estate to sample four of their highly regarded wines at the cellar door. However, there’s an exciting alternative: if you prefer a different experience, you can choose to enjoy a crafted beer or cider instead.
For those aiming to elevate their experience, you can opt for a gin or whisky tasting on-site for a nominal additional fee, ensuring a diverse tasting journey that caters to varied palates.Indulge in Dining with Scenic Views at Quarters Restaurant
Quarters Restaurant functions as the dining venue at Hubert Estate, where the atmosphere is both casual and elegant. The seasonal menus are crafted from locally sourced produce, with dishes thoughtfully designed to pair beautifully with the estate’s exquisite wines. Typically, we gather around one or two long tables to foster a social and relaxed lunch atmosphere.
If a sit-down meal isn’t appealing to you, that’s absolutely fine. You are welcome to return to the cellar door for another glass, explore the Indigenous art gallery located just below the restaurant, or simply soak in the spectacular vineyard vistas.
This stop, as part of a full-day winery tour, strikes an ideal balance: generous hospitality, ample space to explore, and just the right touch of luxury without feeling overly formal or intimidating.
Essential Tips & Insights to Enhance Your Visit to Hubert Estate
- Consider reserving the gin or whisky tasting upgrade in advance; it promises to be an extraordinary experience that should not be missed.
- If the weather permits, be sure to request a table on the terrace at Quarters — the valley views significantly enhance the dining experience.
- Bring a light jacket for the evening — temperatures in the Yarra can drop quickly after sunset, so being prepared is essential.
- By participating in a guided tour, we take care of all the logistics, allowing you to focus on enjoyment and connection with your companions.

Explore Common Questions About Visiting Hubert Estate in the Yarra Valley
What types of wines does Hubert Estate specialize in?
Hubert Estate focuses on producing cool-climate varietals that exemplify the Yarra Valley — including refined Pinot Noir, crisp Chardonnay, and sophisticated Shiraz blends. Additionally, they provide tastings of craft beer, cider, gin, and whisky for those seeking a variety of beverage options.Is Hubert Estate suitable for groups and tours?
Absolutely. The restaurant and cellar door tastings are excellently designed for group bookings and experiences. The tour schedule we offer ensures a relaxed pace, allowing everyone to fully enjoy their time without feeling rushed or overwhelmed.Can I purchase wine at the Hubert Estate cellar door?
Certainly! Their retail area features estate wines, limited releases, and gift options, making it a fantastic spot to discover something uniquely Yarra, whether for yourself or as a thoughtful gift for someone special.Is lunch at Quarters included in the tour package?
During our daily tour itinerary, we pause for lunch at 12:30 pm at Quarters. Guests are responsible for ordering and paying for their own meals and drinks, providing flexibility while we manage transportation, timing, and the overall route for the day.The Article: Hubert Estate: A Yarra Valley Winery You Can’t Miss first appeared on https://writebuff.com
The Article Yarra Valley Winery: Discover the Unmissable Hubert Estate Was Found On https://limitsofstrategy.com
-

High-Calorie Recipes: The Ultimate Guide for Bulking
Transform Your Bulking Recipes with These Essential Ingredients
Unlock Maximum Muscle Growth by Utilizing Diverse Protein Sources
To effectively achieve your fitness goals and ensure optimal muscle growth during your bulking journey, it is essential to incorporate a rich variety of high-protein foods. These nutrient-dense foods play a crucial role in muscle repair and recovery, providing your body with the necessary building blocks to facilitate growth. By diversifying your protein sources, you are ensuring that your body receives all the essential amino acids it needs. Ideal protein sources that are highly beneficial for bulking include:
- Chicken breast
- Lean beef
- Salmon and other fatty fish
- Eggs
- Greek yoghurt
- Lentils and beans
- Quinoa
- Protein powders (including whey, casein, and plant-based)
Incorporating both animal and plant-based proteins not only accommodates various dietary preferences but also ensures a broad spectrum of essential nutrients. For instance, while chicken and beef are renowned for their high protein content, legumes such as lentils provide vital fibre and critical micronutrients. This varied protein intake is essential to combat diet fatigue and promote overall health throughout your bulking process.
Enhance Caloric Density Through the Inclusion of Healthy Fats
Incorporating healthy fats into your diet is vital for boosting your caloric intake without overwhelming your digestive system. Here are some beneficial sources of healthy fats that can effectively support your bulking goals:
- Avocado oil
- Nut butters (such as almond, peanut, and cashew)
- Seeds (including flaxseeds, chia seeds, and pumpkin seeds)
Incorporating these healthy fats into your meals not only enhances flavor but also provides essential fatty acids that are crucial for overall health. For instance, avocado oil can be drizzled over salads or used in cooking, significantly boosting caloric density. Additionally, nut butters can be blended into smoothies or enjoyed alongside fruit for a quick snack, making them versatile options for individuals focused on effective bulking strategies.
Power Your Workouts by Selecting the Right Carbohydrates
Carbohydrates serve as your primary energy source, and when bulking, it is crucial to select the most effective carbohydrate sources to effectively fuel your workouts and enhance recovery. The most beneficial carbohydrate sources for bulking recipes include:
– Whole grains: Options like brown rice, quinoa, oats, and whole-grain pasta provide sustained energy and fibre.
– Starchy vegetables: Potatoes, sweet potatoes, and corn are nutrient-dense and filling.
– Fruits: Bananas, dates, and berries offer quick energy and natural sugars.By integrating these carbohydrate sources into your daily meals, you can ensure that you meet your caloric needs while supporting your body’s energy demands during rigorous training sessions. For example, a robust bowl of quinoa topped with roasted sweet potatoes and black beans represents an excellent post-workout meal, delivering a balanced combination of protein, carbs, and healthy fats.
Incorporate Calorically Dense Foods for Effective Bulking
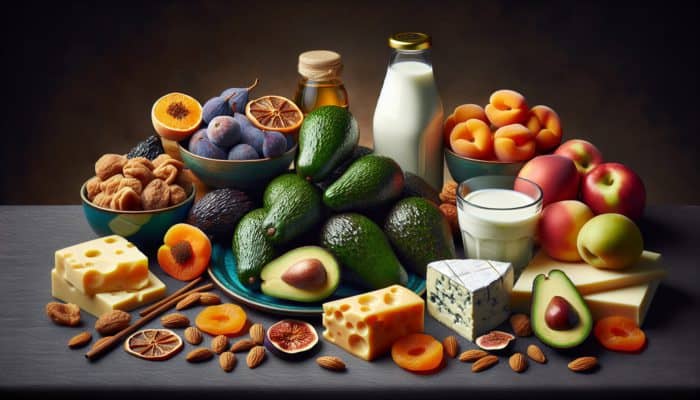
To effectively meet high caloric requirements, it is essential to incorporate calorie-rich foods into your bulking diet. Foods such as avocados, dried fruits, and full-fat dairy are particularly efficient sources. Avocados not only provide healthy fats but also enhance the creamy texture and flavor of various dishes. Dried fruits, such as apricots and figs, are packed with concentrated sugars that can significantly elevate your calorie intake without requiring large servings. Additionally, full-fat dairy products like cheese and whole milk deliver both calories and protein, making them ideal for fulfilling bulking needs.
Strategically incorporating these calorically dense foods can transform ordinary meals into hearty, high-energy dishes that effectively support your bulking goals. For instance, a satisfying full-fat Greek yoghurt parfait layered with dried fruits and granola can serve as a delightful high-calorie snack or breakfast, combining all essential macronutrients in one delicious bowl.
Expert Tips and Insights on Top High-Calorie Recipes for Bulking
Learn from Real-Life Success Stories from Experienced Bulkers
Successful bulking recipes often arise from individuals who have honed their dietary strategies over time, particularly fitness experts and athletes. For example, a well-known bodybuilder might advocate for a high-calorie ground beef and sweet potato hash, loaded with protein, carbs, and healthy fats. Customizing these recipes to accommodate various dietary needs can be straightforward. For those following a vegetarian or vegan diet, swapping ground beef for lentils or tempeh while retaining the sweet potatoes can still yield a high-calorie density while catering to plant-based diets.
In addition to traditional meals, snacks like protein bars or smoothies can also assist you in achieving your daily caloric targets. For instance, a peanut butter banana smoothie not only tastes delicious but can be customized to include protein powder or oats for added nutrition and calories. The flexibility to adapt recipes ensures that everyone can discover enjoyable, suitable high-calorie meals.
A Comprehensive Guide to Crafting High-Calorie Meals

Creating high-calorie meals can be simplified with a systematic approach. Begin by selecting a base: opt for a protein source such as chicken or beans, followed by a carbohydrate source like rice or pasta, and finish with healthy fats like olive oil or nuts.
A common mistake to avoid during bulking is relying on processed foods or excessive sugar intake to increase caloric content. Instead, focus on whole foods and nutrient-dense options. For instance, while a fast-food burger may appear calorie-rich, it often lacks the essential nutrients necessary for muscle growth and overall health.
Effective meal preparation requires careful planning. Dedicate a few hours each week to meal prepping. Cook large batches of protein, grains, and vegetables, then mix and match them throughout the week to maintain variety in your meals. This practice not only saves time but also guarantees that you consistently meet your caloric targets.
Strategic Meal Timing for Optimal Gains
The timing of your meals plays a crucial role in maximizing bulking results. Consuming high-calorie meals at strategic times can significantly improve muscle growth and recovery. Ideally, you should consume a high-calorie meal or shake within 30 minutes after your workout to supply your body with the nutrients it craves following intense exercise.
Moreover, spacing meals every 3-4 hours helps ensure a steady influx of calories and nutrients. For those who struggle with appetite, incorporating high-calorie snacks or shakes between meals can help fill caloric gaps. For example, a pre-bedtime casein protein shake can provide a steady release of protein overnight, aiding in muscle recovery.
Especially during periods of high training volume, distributing calories throughout the day becomes vital. This practice not only maintains energy levels but also helps prevent muscle catabolism, ensuring that your body sustains a positive nitrogen balance that is conducive to growth.
Steps to Calculate Your Caloric Needs for Bulking
Calculate Your Basal Metabolic Rate (BMR) for Accurate Caloric Estimates
Determining your Basal Metabolic Rate (BMR) serves as the foundation for identifying your daily caloric needs. BMR represents the number of calories your body requires at rest to maintain vital functions. Understanding your BMR enables you to tailor your caloric intake based on your activity levels and bulking objectives.
To accurately compute your BMR, consider key factors such as age, gender, height, and weight. For instance, a younger, heavier male athlete typically has a higher BMR than an older, lighter female. Knowing your BMR provides a clear basis for establishing your caloric surplus, which is essential for muscle growth during bulking phases.
Assess Your Activity Level to Determine Accurate Caloric Needs
Adjusting your caloric intake in accordance with your activity level is vital for effective bulking. Your total daily energy expenditure (TDEE) is composed of your BMR plus the calories burned through physical activity. To accurately evaluate your activity level, contemplate the intensity and frequency of your workouts.
For individuals engaged in heavy lifting or endurance training multiple times a week, a multiplier of 1.5-2.0 may apply to BMR when calculating TDEE. This adjustment ensures that your caloric intake sufficiently supports muscle growth while also meeting overall energy demands throughout the day. Recognizing your position within your activity levels can help fine-tune your diet as you progress.
Establish a Caloric Surplus for Effective Muscle Growth
Striving for a caloric surplus is crucial for facilitating muscle growth during bulking. A general guideline recommends increasing your daily caloric intake by approximately 250-500 calories above your TDEE to encourage gradual weight gain without excessive fat accumulation. This surplus supplies the necessary building blocks for muscle tissue while furnishing energy for training.
However, the ideal surplus may vary based on individual metabolic rates and fitness objectives. For example, someone with a high metabolic rate might require a larger surplus to see significant gains, while someone less active may only need a modest increase. Regularly tracking progress and adjusting caloric intake is essential for achieving the right balance that promotes muscle growth without unwanted fat gain.
Optimize Macronutrient Ratios for Successful Bulking
Balancing your intake of proteins, carbohydrates, and fats is vital for maximizing muscle growth during bulking. A typical macronutrient ratio for successful bulking might hover around 40% carbohydrates, 30% protein, and 30% fats.
This ratio guarantees that you’re not only supporting energy levels but also supplying adequate protein for muscle repair. Adjustments can be made based on individual responses and preferences. For instance, some individuals may thrive on higher carbohydrate ratios, particularly if engaging in endurance sports alongside strength training.
Effective tracking of macronutrients can be accomplished through various applications and tools, enabling a more precise approach to dietary planning. Ensuring that each meal aligns with these ratios helps maintain a steady supply of nutrients conducive to muscle growth and overall health.
Delicious High-Calorie Breakfast Ideas to Kickstart Your Day
Indulge in Protein-Packed Pancakes for a Nutritious Start
Kickstarting your day with protein-packed pancakes is an excellent way to meet your caloric needs right from the start. By utilizing protein-rich ingredients such as oats, eggs, and Greek yoghurt, these pancakes can be both delicious and nutritious. The benefits of consuming protein early in the day are substantial; it initiates muscle recovery and assists in reducing hunger later in the day.
To create a simple recipe, mix oats, protein powder, mashed bananas, and eggs, cooking them in a non-stick skillet. Top with nut butter or full-fat Greek yoghurt for added calories and flavor. This meal not only delivers a healthy dose of protein but also includes carbohydrates from the oats, ensuring you maintain sustained energy throughout the morning.
Additionally, enhancing your pancakes with toppings like fresh fruits or a drizzle of honey can elevate the nutrient profile, making this breakfast a delightful and satisfying way to begin your day.
Create Flavorful Smoothie Bowls for a High-Calorie Breakfast
Smoothie bowls offer an ideal opportunity to blend fruits, nuts, and protein into a high-calorie breakfast. These visually appealing bowls provide a refreshing meal that can be tailored to your taste preferences. Key ingredients to consider for a high-calorie smoothie bowl include:
- Bananas
- Spinach or kale for added greens
- Nut butter for healthy fats
- Greek yoghurt for protein
- Oats for additional carbohydrates
- Dried fruits like dates or figs for natural sweetness
The versatility of smoothie bowls is one of their greatest strengths. You can easily modify the thickness and flavor by varying the fruits or adding protein powders. For example, blending spinach with bananas and almond milk creates a nutrient-rich base, while topping it with granola and seeds adds texture and additional calories.
Smoothie bowls are particularly convenient for busy mornings, as they can be prepared in minutes and enjoyed on the go. This convenience makes them a popular choice among fitness enthusiasts aiming to boost their caloric intake.
Exploring Nutrient-Dense Egg-Based Dishes for Bulking
Eggs rank among the most versatile and nutrient-dense foods available, making them an exceptional choice for bulking. With their high protein content, eggs can be effortlessly incorporated into various dishes to enhance calorie intake. For instance, consider crafting a hearty scramble with cheese, avocado, and vegetables.
To further elevate the calorie content, include ingredients like full-fat cheese or sautéed mushrooms, enriching the dish’s flavor while increasing its richness. An omelette filled with spinach, cheese, and smoked salmon serves as a high-protein breakfast, perfect for those aiming to bulk up effectively.
Cooking eggs in healthy fats, such as olive oil or butter, can also amplify their calorie content. This method ensures that your meals not only taste fantastic but also align with your nutritional goals, making egg-based dishes a crucial component of your bulking strategy.
Benefits of High-Calorie Snacks for Bulking
Boost Your Energy Levels for Optimal Performance
High-calorie snacks provide an immediate energy boost for workouts, making them an essential part of any bulking diet. They help maintain elevated energy levels throughout the day, particularly during preparation for or recovery from intense training sessions. The most effective types of snacks for an energy lift include:
- Trail mix (comprised of nuts and dried fruits)
- Granola bars or protein bars
- Nut butter paired with rice cakes or fruit
- Full-fat yoghurt with honey
For example, trail mix is not only calorie-dense but also portable, making it an ideal pre-workout option. The combination of healthy fats from nuts and natural sugars from dried fruits offers a quick energy source without leaving a heavy feeling during workouts.
Incorporating high-calorie snacks at strategic times throughout the day can help prevent energy dips and support sustained performance both in and out of the gym.
Enhance Muscle Recovery with Nutrient-Rich Snacks
Snacks play a vital role in muscle recovery following workouts. Consuming high-calorie snacks that combine protein and carbohydrates can significantly promote muscle repair and growth. For instance, a post-workout smoothie made with whey protein, banana, and oats replenishes glycogen stores while providing essential amino acids for muscle recovery.
Additionally, snacks like Greek yoghurt topped with fresh berries or a peanut butter sandwich on whole-grain bread can act as convenient recovery options. These snacks not only aid muscle repair but also help restore energy levels, ensuring you’re ready for your next workout.
The timing of these snacks is equally important; consuming them within 30 minutes post-exercise is ideal for maximizing recovery benefits. This immediate nutrient intake helps alleviate muscle soreness and supports overall training progress.
The Convenience of Quick High-Calorie Snacks
High-calorie snacks are critical for busy lifestyles, offering quick, nutritious options that require minimal preparation. The convenience of having ready-to-eat snacks ensures that you consistently meet your caloric needs without resorting to unhealthy alternatives. Some quick and high-calorie snack ideas include:
- Protein shakes or ready-to-drink protein drinks
- Beef or turkey jerky
- Nut bars or protein balls
- Hard-boiled eggs
These snacks are not only easy to prepare but also portable, allowing you to maintain your diet even on the go. For example, preparing a batch of protein balls made with oats, nut butter, and protein powder can provide a quick, satisfying post-workout snack.
Incorporating these convenient high-calorie snacks into your daily routine guarantees that you’re always prepared to refuel, helping you stay on track with your bulking objectives.
Research-Backed Benefits of High-Calorie Recipes for Bulking
Focus on Nutrient-Dense Meals for Enhanced Muscle Growth
Concentrating on recipes that provide essential nutrients is crucial during bulking. Nutrient-dense meals not only support muscle growth but also contribute to overall health. Meals rich in protein, healthy fats, and carbohydrates deliver the nutrients necessary for muscle recovery and sustained energy.
For example, a meal featuring grilled salmon, quinoa, and steamed broccoli not only offers high calories but also supplies essential omega-3 fatty acids, vitamins, and minerals. By prioritizing nutrient-dense foods, you can ensure your caloric intake focuses on quality as well as quantity, promoting long-term health benefits.
Moreover, these meals can reduce the risk of nutritional deficiencies that may arise from a high-calorie but low-nutrient diet. This emphasis on nutrient density is vital for maintaining a balanced approach to bulking.
Support Long-Term Health with a Balanced Bulking Approach
Bulking with high-calorie recipes can yield long-term health benefits, provided the focus remains on wholesome, nutrient-rich foods. A well-structured bulking diet can support overall wellness by promoting a balanced intake of macronutrients and micronutrients.
However, it is equally important to acknowledge the potential health risks associated with improper bulking, such as excessive weight gain due to unhealthy foods or an unbalanced diet. This approach can lead to increased body fat, which may compromise health and performance over time.
By emphasizing healthy, high-calorie recipes, you can mitigate these risks. This balanced strategy not only supports muscle growth but also fosters sustainable dietary habits that contribute to overall health.
Enhance Performance with High-Calorie Recipes
High-calorie recipes can significantly boost athletic performance, particularly when they feature specific ingredients known for their beneficial effects. For example, incorporating complex carbohydrates like oats or whole grains provides sustained energy for longer workouts, while protein sources are essential for muscle repair.
Certain foods, such as bananas and beetroot, have been shown to enhance endurance and recovery. Including these ingredients in meals or snacks can improve training outcomes and performance. For instance, a smoothie made with bananas, spinach, and protein powder can deliver a powerful pre-workout boost.
Additionally, maintaining the right balance of macronutrients in high-calorie recipes can optimize performance and recovery, allowing athletes to train harder and longer. Focusing on these components reinforces the significance of meal quality in supporting rigorous training regimens.
High-Calorie Lunch and Dinner Recipes to Energize Your Workouts
Craft Nourishing Soups and Stews for Maximum Nutrition
Soups and stews are an excellent way to pack in calories while providing comfort and satisfaction. These dishes are easily customizable to include various ingredients, ensuring they are both nutritious and filling. The best ingredients for bulking soups and stews include:
- Beans and lentils for added protein
- Root vegetables like carrots and potatoes for carbohydrates
- Healthy oils for additional calories
- High-protein stocks, such as chicken or beef broth
A hearty lentil stew featuring carrots, potatoes, and a drizzle of olive oil can serve as a fulfilling meal that satisfies hunger while meeting caloric needs. The inclusion of beans or lentils enhances the protein content, while root vegetables provide essential carbohydrates.
Moreover, preparing large batches simplifies meal prep, as these dishes can be stored in the fridge or freezer for quick lunches or dinners throughout the week. The versatility of soups and stews makes them an invaluable component of a bulking diet.
Create Calorie-Rich Pasta and Rice Dishes for Sustained Energy
Pasta and rice dishes are ideal for bulking due to their high carbohydrate content and versatility. By making these dishes more calorie-dense, you can easily elevate their nutritional profile. To create calorie-rich pasta and rice meals, consider incorporating:
– Cream-based sauces: Alfredo or carbonara can significantly raise caloric content.
– Protein-rich toppings: Chicken, shrimp, or tofu enhance the dish.
– Vegetables: Including healthy fats and fibre-rich vegetables adds balance.For example, a creamy chicken Alfredo pasta not only provides a rich source of calories but also combines protein, fat, and carbohydrates within one dish. Adding vegetables like spinach or broccoli can further boost the nutrient density, making it a well-rounded meal for bulking.
Rice dishes can similarly be enhanced with rich sauces and protein sources. A stir-fried rice bowl featuring beef, eggs, and various vegetables can serve as a satisfying, calorie-dense meal that supports your bulking efforts.
Explore Meat and Poultry Entrees for Maximum Protein Content
Meat and poultry are outstanding sources of protein and can be seamlessly integrated into high-calorie bulking meals. Certain cooking techniques can significantly enhance the caloric density of these entrees. For example, roasting or grilling meat with healthy marinades can amplify both flavor and caloric content.
Experimenting with different cuts of meat can yield varying calorie counts. For instance, chicken thighs contain more calories than chicken breast due to their higher fat content. Similarly, marbled cuts of beef generally provide more calories compared to leaner cuts.
Preparing dishes like a slow-cooked beef stew or grilled chicken with a rich sauce can ensure you meet your caloric requirements while enjoying flavorful meals. These cooking methods not only enhance taste but also encourage higher calorie intake, making them ideal for bulking.
Effectively Track Your Progress While Bulking
Regularly Monitor Your Weight and Body Measurements
Consistently tracking your weight and body measurements is crucial for monitoring progress during a bulking phase. It’s advisable to take these measurements at least once a week, ideally at the same time each day, to maintain consistency.
In addition to weight, measuring body parts such as the chest, arms, waist, and thighs can provide a clearer picture of changes. This method enables you to adjust your diet and training regimen based on observed trends. If you find you’re gaining weight but not seeing increases in muscle size, you may need to adjust your caloric intake or training intensity.
Maintaining a log of these measurements can also help identify patterns over time, fostering accountability and encouraging adherence to your bulking objectives.
Evaluate Your Strength and Performance Gains
Monitoring changes in strength and performance during workouts is another critical aspect of tracking progress while bulking. Indicators of effective bulking include increases in the weight lifted, enhancements in endurance, and improvements in overall performance.
Regularly testing your limits —such as increasing your squat or deadlift max—provides tangible evidence of progress. Additionally, maintaining a workout log to record lifts and other performance metrics helps identify areas for improvement.
If you notice stagnation in progress, consider adjusting your diet or training program. For example, if strength gains plateau, you might need to increase your caloric surplus or modify your workout routines.
Keep a Detailed Log of Your Diet and Caloric Intake
Maintaining a thorough log of your diet and caloric intake is critical to ensure that you meet your bulking objectives. Tracking what you eat can help identify any discrepancies between your actual intake and your caloric targets.
Utilizing apps or food diaries streamlines this task, making it easier to track meals and snacks. Regularly reviewing your intake can help pinpoint ways to increase your calorie consumption, whether through larger portion sizes or by adding more calorie-dense foods.
By keeping this log, you’ll be able to adjust your diet as necessary, ensuring you stay on track with your bulking plan.
Utilize Progress Photos for Visual Monitoring
Taking regular progress photos is an effective way to visually track changes in your physique. It’s recommended to capture these photos every 2-4 weeks, taking images from multiple angles to provide a comprehensive view of your transformation.
These images can serve as motivation and help you evaluate whether your bulking strategy is effectively contributing to muscle gain. Comparing photos over time can highlight improvements that may be less noticeable in daily observation.
Moreover, these visuals can provide critical insights, prompting adjustments to your diet or training if changes are not aligning with your goals.
Monitor Your Body Fat Percentage for Healthy Bulking
Tracking your body fat percentage is essential to ensure that you’re gaining muscle rather than excessive fat during bulking. Various methods can be used to measure body fat, including skinfold calipers, bioelectrical impedance scales, and DEXA scans.
While the goal is to observe increases in muscle mass, it’s equally important to keep an eye on body fat levels. An ideal scenario involves a gradual increase in muscle with minimal fat gain. Regularly assessing body fat percentage can inform dietary adjustments; for example, if body fat levels rise too quickly, reducing caloric intake or increasing cardiovascular activity might be necessary.
Maintaining a balanced approach to bulking not only fosters muscle growth but also supports long-term health.
Proven Strategies for Maximizing High-Calorie Recipes for Bulking
Implement Effective Meal Planning and Preparation Techniques
Planning and preparing meals in advance is a reliable strategy for ensuring consistent bulking. By dedicating time each week to meal prep, you can effectively manage your caloric intake and minimize the temptation to make unhealthy food choices.
Start by crafting a weekly meal plan that focuses on your caloric goals. Prepare large batches of protein, grains, and vegetables, storing them in the fridge or freezer. This approach not only saves time but also simplifies meal assembly throughout the week.
Additionally, preparing snacks in advance can help maintain caloric targets. For example, making energy balls or portioning out nuts can ensure you have quick, high-calorie options readily available.
Balance Macronutrients for Optimal Bulking Results
Balancing your intake of proteins, fats, and carbohydrates is essential for achieving optimal bulking results. As previously stated, a macronutrient ratio of around 40% carbohydrates, 30% protein, and 30% fats is often effective for many individuals.
However, personal preferences and specific fitness goals may necessitate modifications to these ratios. Regularly evaluating your progress can help determine whether your current macronutrient distribution is effectively supporting your bulking goals.
Consider experimenting with different ratios to discover what works best for your body. For instance, endurance-trained athletes may benefit from higher carbohydrate intake, while strength-focused individuals might require a greater emphasis on protein.
Adjust Recipes to Meet Caloric and Nutritional Needs
Modifying recipes to align with your caloric and nutritional requirements is a key strategy for maintaining variety and interest in your diet. Adjustments can be as simple as adding an extra serving of protein or integrating more calorie-dense ingredients.
For example, when preparing smoothies, consider incorporating oats or nut butter to enhance calories without significantly altering the taste. Similarly, when crafting pasta dishes, adding a creamy sauce or extra cheese can improve both flavor and caloric content.
By regularly experimenting with recipes, you can keep your meals exciting while ensuring they align with your bulking goals. This adaptability is crucial for preventing diet fatigue and fostering long-term commitment to your bulking plan.
Incorporate High-Calorie Ingredients into Your Meals
Integrating high-calorie ingredients into your meals is a straightforward method for boosting energy content without drastically increasing portion sizes. Foods such as nuts, oils, and full-fat dairy are excellent additions to elevate the calorie content of your dishes.
For instance, adding a tablespoon of olive oil to salads or cooked vegetables can significantly increase the meal’s calorie content without overpowering the dish. Similarly, topping meals with nuts or seeds not only enhances flavor but also contributes healthy fats and protein.
Experimenting with these high-calorie ingredients can help you discover new flavor combinations while ensuring your meals remain both satisfying and aligned with your bulking objectives.
Frequently Asked Questions About Bulking
What are the top high-calorie foods for effective bulking?
Foods such as avocados, nuts, nut butters, whole grains, and full-fat dairy serve as excellent calorie sources for bulking. They provide the necessary energy and nutrients to support muscle growth.
How can I increase my calorie intake without feeling overly full?
Focus on calorically dense options, such as nut butters, dried fruits, and smoothies. These choices allow you to consume more calories without excessive bulk.
Is meal timing crucial for effective bulking?
Yes, meal timing can greatly enhance muscle growth. Consuming high-calorie meals post-workout and spacing meals throughout the day can optimize nutrient absorption and energy levels.
How should I modify my diet if I’m gaining too much fat while bulking?
If you’re experiencing excessive weight gain, consider decreasing your caloric surplus or increasing your cardiovascular activity. Monitoring body fat percentage can help inform these adjustments.
What are some quick snacks I can prepare for bulking?
Quick snack options include protein bars, trail mix, hard-boiled eggs, or nut butter with fruit. These choices are simple to prepare and provide essential calories.
How frequently should I weigh myself while bulking?
Weighing yourself weekly offers a consistent measure of progress. Ensure this is done at the same time each day for accuracy.
Can I effectively bulk on a vegetarian or vegan diet?
Absolutely! Incorporating protein-rich plant foods such as lentils, beans, quinoa, and tofu can help you meet your caloric and protein needs.
What role do supplements play in bulking?
Supplements like protein powder can assist you in reaching your protein targets, especially if you struggle to consume enough protein from whole foods. Always prioritize whole foods first.
How can I effectively track my progress while bulking?
Monitor weight, body measurements, strength gains, and take progress photos regularly. Keeping a food diary or utilizing an app can also help track your dietary intake.
Why is hydration crucial while bulking?
Maintaining hydration is essential for optimal performance and recovery. Proper hydration supports nutrient transport and muscle function, especially during intense training sessions.
Connect with us on Facebook!
The post Top High-Calorie Recipes for Bulking: Ultimate Guide appeared first on https://cookinggods.com
The Article High-Calorie Recipes for Bulking: Your Ultimate Guide Was Found On https://limitsofstrategy.com