Your cart is currently empty!
Category: Food & Drink
Auto Added by WPeMatico
-
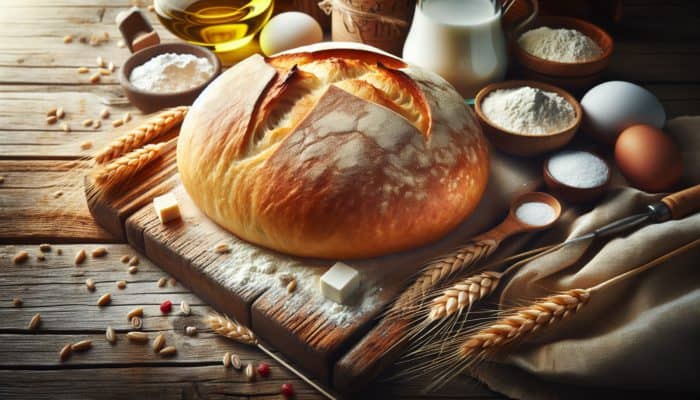
Master the Art of Kneading Dough for Soft Bread
Master the Art of Dough Kneading for Fluffy, Soft Bread Every Time
Discover the Key Ingredients That Make Soft Bread a Reality
Embarking on the journey to create the ultimate soft bread requires a thorough understanding of the essential ingredients that contribute to its structure, flavor, and overall quality. The primary components include flour, water, yeast, and salt. Each ingredient plays a pivotal role in determining the bread’s final texture and taste. The flour acts as the backbone of the dough, with its protein content—especially gluten—being crucial for developing the elasticity and chewiness of your bread. Selecting the appropriate type of flour, whether it be all-purpose, bread flour, or wholemeal, can significantly influence the final outcome. Water is vital as it hydrates the flour, dissolves the yeast, and aids in the fermentation process. Yeast, as the fermentation powerhouse, converts sugars into carbon dioxide, propelling the dough to rise. Lastly, salt enhances flavor while strengthening the gluten structure, leading to a more robust and flavorful loaf. By mastering these ingredients and understanding their interactions, you will set the foundation for successful kneading and achieve that coveted soft texture.
Determine the Optimal Kneading Time for Soft, Airy Bread
The duration required for kneading dough can vary greatly depending on several factors, including the specific type of dough and the desired texture of the final bread. As a general guideline, kneading for about 10-15 minutes is ideal for creating soft bread. This time frame is vital for effective gluten development, which is essential for achieving a soft and airy crumb. Rather than relying solely on a timer, it is important to be attentive to the dough’s characteristics throughout the kneading process. At the start, the dough will appear rough and shaggy, but as you continue kneading, it will gradually transform into a smooth and elastic form. Key indicators to monitor include a reduction in stickiness and an increase in manageability. By tuning into your visual and tactile senses—feeling for slight elasticity and smoothness—you will gain a more accurate understanding of when the dough is ready, rather than strictly adhering to a countdown. The ultimate goal is to cultivate a well-developed gluten network, ensuring that the bread rises beautifully and achieves a delightful texture after baking.
Identify the Perfect Dough Consistency for Soft Bread Success
Achieving the ideal dough consistency is paramount to the success of your bread-making endeavors. The perfect dough should be smooth and elastic, showcasing a slight tackiness that is neither overly sticky nor too dry. If the dough is excessively sticky, it can hinder your ability to handle and shape it effectively. Conversely, a dry dough may lead to a dense and crumbly loaf. The objective is to create a dough that retains its shape while remaining pliable enough to stretch without tearing. A practical method for assessing your dough’s consistency is the windowpane test: take a small piece of dough and gently stretch it between your fingers. If it can form a thin, translucent sheet without breaking, you have achieved the correct consistency. This result indicates that sufficient gluten has developed, effectively trapping the gases produced during fermentation and resulting in a beautifully soft final product.
Proven Strategies for Effective Dough Kneading Techniques

Master the Stretch-and-Fold Technique for Optimal Dough Kneading
The stretch-and-fold method is an incredibly effective technique for developing gluten while keeping the dough hydrated and airy. This method proves particularly beneficial for high-hydration doughs that can be challenging to knead using traditional methods. To master this technique, follow these detailed steps:
- Begin with a lightly floured work surface, placing your dough in the center.
- Gently stretch one side of the dough upwards and fold it over the center.
- Repeat this stretching and folding technique on each side, working your way around the dough until all four sides have been folded.
- Allow the dough to rest for 20-30 minutes before repeating the stretch-and-fold process.
- Continue this cycle for the desired number of folds (typically 3-4) during the first rise.
- Observe how the dough becomes increasingly elastic and smooth with each cycle.
- Finally, let the dough complete its bulk fermentation before shaping and baking it.
This method not only promotes effective gluten development but also incorporates air into the dough, resulting in a light and airy texture that is simply delightful.
Avoid Baking Pitfalls: Understanding the Risks of Over-Kneading Dough
Yes, over-kneading your dough can indeed lead to numerous issues, including tough and dense bread. Over-kneading occurs when excessive mechanical action breaks down gluten strands instead of allowing them to develop properly. Signs of over-kneaded dough include an overly tight texture that resists stretching and a shiny, almost leathery surface. If you notice these characteristics, it may be challenging to restore its softness. To prevent over-kneading, pay close attention to the dough throughout the kneading process, focusing on its texture rather than strictly adhering to a timer. Remember, the goal is to cultivate a well-developed gluten network that can effectively trap gases without compromising the integrity of the dough itself.
Enhance Your Kneading Technique with a Dough Scraper

A dough scraper is an essential tool for managing sticky dough and streamlining the kneading process. This simple yet effective instrument allows you to lift, fold, and turn the dough without adding excessive flour, which could lead to a denser loaf. To maximize the benefits of a dough scraper, consider the following tips:
- When the dough clings to your work surface, gently use the scraper to lift it, minimizing the need for excess flour.
- Utilize the scraper to divide the dough into manageable sections for shaping and dividing.
- The scraper can assist with folding the dough during the stretch-and-fold method, making air incorporation easier and more efficient.
- After kneading, use the scraper to transfer the dough into a bowl for rising, ensuring it retains its shape.
By incorporating a dough scraper into your kneading routine, you can significantly enhance your control over the dough, ultimately achieving better results with less effort and time.
Expert Recommendations for Perfecting Your Dough Kneading Skills
Insights from Professional Bakers on Effective Kneading Techniques
Professional bakers possess a wealth of expertise regarding kneading techniques that yield exceptional results. Many recommend employing the autolyse technique, which involves mixing flour and water and allowing the mixture to rest before adding yeast and salt. This method allows the flour to hydrate fully, thereby enhancing gluten development. Additionally, seasoned bakers suggest kneading by feel rather than strictly by time, encouraging home bakers to attune themselves to the dough’s texture and elasticity. Real-world examples from bakeries around the globe—from artisanal shops in Paris to rustic bakeries in Tuscany—underscore the importance of patience during kneading, urging bakers to take their time to achieve the perfect dough consistency. By adopting these expert techniques into your practice, you can elevate your bread-making skills, resulting in more consistent and delightful outcomes.
Understanding the Impact of Temperature on Dough Kneading
Temperature plays a crucial role in the kneading process, significantly influencing the overall behavior of the dough. Warmer environments can accelerate fermentation, potentially necessitating shorter kneading times to avoid overdevelopment of gluten. Conversely, cooler temperatures often require extended kneading periods to achieve the desired elasticity. For instance, bakers in tropical regions may need to adapt their kneading techniques due to the rapid fermentation caused by higher ambient temperatures. Additionally, the temperature of your ingredients can influence dough performance; warm water can hasten yeast activation, while cooler components can slow it down. Understanding how temperature affects your dough equips you with valuable insights for adjusting your kneading and fermentation practices to achieve the best possible outcomes.
Avoid These Common Mistakes When Kneading Dough
Kneading is a skill that requires practice, and being aware of common mistakes can greatly enhance your bread-making results. A frequent error is uneven kneading, where certain areas of the dough receive more attention than others, resulting in an inconsistent texture. To overcome this, focus on working the dough uniformly, ensuring that every part is adequately kneaded. Another common mistake is neglecting essential rest periods. Skipping rest can lead to tough bread, as the gluten won’t have sufficient time to relax. Additionally, failing to adapt kneading techniques to the dough’s hydration level may lead to unmet expectations. Recognizing these common pitfalls will empower you to refine your kneading approach, significantly improving the quality of your bread.
Determining When Your Dough Is Properly Kneaded
Recognizing when your dough has been properly kneaded is key to successful bread-making. Signs of well-kneaded dough include a smooth, elastic texture that springs back when gently pressed. One definitive test is the windowpane test, during which a small piece of dough is stretched thinly without tearing. If the dough can stretch to form a translucent sheet, it indicates adequate gluten development. Additionally, properly kneaded dough should feel slightly tacky but not sticky, facilitating easy handling. By paying close attention to these indicators during kneading, you can ensure your dough is ready for the subsequent phase of bread-making.
Essential Tools for Effective Dough Kneading
Stand Mixer vs. Hand Kneading: Which Is More Efficient?
Both stand mixers and hand kneading come with distinct advantages, and the decision largely depends on individual preference and the specific requirements of your dough. A stand mixer can save considerable time and effort, kneading dough efficiently with minimal physical strain. This method is particularly advantageous for larger batches or high-hydration doughs that necessitate significant kneading time. However, hand kneading offers a more intimate connection with the dough, providing tactile feedback that many bakers value. This hands-on method allows for better adjustments based on the dough’s behavior. Many bakers advocate for a hybrid approach: utilizing a stand mixer for the initial kneading and finishing by hand to achieve the perfect consistency. Ultimately, the best method is one that aligns with your skill level and baking goals.
Choosing the Right Bowl to Enhance Your Kneading Process
Choosing the right bowl for kneading can significantly elevate your bread-making experience. Ideally, a wide, shallow bowl is the best option, as it provides easier access to the dough and better control during kneading. Non-stick or lightly oiled surfaces are recommended to prevent sticking, which can complicate the kneading process. Bowls made from materials such as glass, stainless steel, or ceramic offer durability and ease of cleaning. Furthermore, selecting a bowl that accommodates the dough’s rise is essential; it should be large enough to allow for expansion during fermentation. By opting for the right bowl, you can optimize your kneading technique and create a more enjoyable baking experience.
Best Surfaces for Kneading Dough: What to Use?
While it is possible to knead dough on various surfaces, certain materials can enhance the process. Marble or granite countertops are particularly ideal due to their smooth surfaces and cool temperatures, which help prevent the dough from overheating during kneading. However, wooden boards can also be effective, providing a natural surface that absorbs some moisture and helps manage stickiness. It is crucial to ensure that the surface is clean and free of debris to maintain the integrity of the dough. The key is to select a stable, non-porous surface that allows for easy manipulation and control of the dough during kneading, ultimately leading to better handling and a superior final product.
The Science Behind Dough Kneading Explained
Understanding Gluten Development and Its Role in Bread Structure
Gluten development is fundamental to the structure of bread, and understanding its mechanics is crucial for successful baking. When flour combines with water, two proteins—glutenin and gliadin—begin to form gluten. Kneading aligns these proteins into long strands, creating a network that traps gas bubbles released during fermentation. This network imparts elasticity and chewiness to the bread. The more you knead, the more developed the gluten network becomes, leading to a softer, more pliable dough. When adequately developed, gluten forms the framework that supports the dough’s rise, contributing to both the structure and texture of the finished loaf. Understanding the science behind gluten enables bakers to manipulate their techniques to achieve specific outcomes, whether aiming for a soft sandwich loaf or a crusty artisan bread.
The Crucial Role of Yeast in Dough Kneading and Fermentation
Yeast is a vital component in the bread-making process, significantly impacting the dough’s behavior during kneading. As yeast ferments, it consumes sugars, producing carbon dioxide and alcohol that contribute to the dough’s rise and flavor. Proper kneading ensures even distribution of yeast throughout the dough, facilitating consistent fermentation. Additionally, as the dough is kneaded, the gluten structure develops, helping to trap the gases produced by the yeast. An even distribution of yeast results in a uniform rise, enhancing the loaf’s texture consistency throughout. Understanding the role of yeast and its interaction with kneading techniques empowers bakers to create visually appealing and deliciously flavorful loaves.
How Kneading Affects the Final Texture of Your Dough
Kneading significantly influences the final texture of the dough, affecting everything from crumb structure to overall softness. During kneading, gluten strands develop and align, forming a network that captures the gases produced during fermentation. This network is crucial for achieving a light and airy crumb in the finished bread. The degree of kneading directly relates to the dough’s strength and elasticity, determining how well it rises and how soft it becomes. Insufficient kneading can lead to dense, heavy bread, while over-kneading may result in a tough texture. Therefore, mastering the kneading technique is essential for achieving a desirable final product, whether for a crusty sourdough or a soft sandwich loaf.
Essential Tips for Perfecting Your Dough Kneading Technique
Recognizing the Signs of Properly Kneaded Dough
Identifying the signs of properly kneaded dough is crucial for successful bread-making. Key indicators include a smooth, elastic texture and the ability to pass the windowpane test. Here are some signs to observe:
- The dough feels smooth and pliable, free from sticky patches that could hinder handling.
- It springs back when poked gently, indicating good elasticity and structure.
- The surface appears slightly shiny, reflecting proper hydration and gluten development.
- It can stretch thinly without tearing, successfully passing the windowpane test.
These characteristics signify that the dough has reached the ideal state for fermentation and baking. By honing your ability to recognize these signs, you can significantly improve your bread’s texture and achieve consistently delightful results.
The Importance of Incorporating Rest Periods During Kneading
Incorporating rest periods during kneading is vital for optimal gluten development and overall texture. Allowing the dough to rest briefly facilitates gluten relaxation, reducing the effort required in subsequent kneading sessions. This relaxation phase can help prevent overworking the dough, which may lead to toughness. Typically, a 20-30 minute rest period after a series of kneading can enhance the dough’s extensibility. During this time, the gluten aligns and develops more uniformly, resulting in a softer final loaf. Integrating rest periods into your kneading routine can significantly improve the quality of your bread, making your baking experience more enjoyable and rewarding.
Exploring Advanced Kneading Techniques for Experienced Bakers
For those eager to refine their kneading skills, several advanced techniques can enhance dough development. The slap-and-fold method is a dynamic technique in which the dough is slapped onto the work surface and then folded over itself. This method effectively develops gluten while incorporating air into the dough, contributing to a lighter texture. Another technique is coil folding, where the dough is lifted and coiled back on itself during bulk fermentation. This gentle approach strengthens gluten while maintaining the dough’s airy quality. Experimenting with these advanced techniques can yield unique textures and flavors in your bread, allowing you to tailor your methods to suit various recipes.
Proven Strategies for Mastering Dough Kneading
Best Practices for Effective Dough Kneading
Implementing effective kneading practices can significantly improve your bread-making results. Firstly, maintain a consistent rhythm; knead the dough with uniform pressure, allowing it to stretch and fold evenly. Secondly, incorporate rest periods as necessary, enabling the gluten to relax and making it easier to work with the dough. Additionally, refrain from adding excessive flour during kneading; instead, utilize a dough scraper to manage stickiness while keeping the dough hydrated. Finally, remain attuned to the dough’s behavior—observe its texture, elasticity, and responsiveness to inform your kneading process. By following these actionable steps, you can ensure your kneading technique yields a soft, desirable loaf of bread.
Adapting Your Kneading Techniques for Different Dough Types
Different dough types require tailored kneading techniques, as variations in hydration and ingredients affect the approach. For instance, high-hydration doughs, such as those used for ciabatta or focaccia, may benefit from the stretch-and-fold method rather than traditional kneading, which facilitates gluten development without overworking the dough. Conversely, richer doughs containing fats or sugars may require more kneading time to develop a strong gluten network, as these components can hinder gluten formation. Understanding the specific needs of your dough will empower you to adjust your kneading method effectively, ensuring optimal results for various bread recipes.
The Benefits of Proper Kneading for Quality Bread
Proper kneading offers numerous advantages that enhance the overall quality of your bread. Firstly, it fosters a robust gluten structure, essential for trapping gases during fermentation and creating a light, airy crumb. Additionally, well-kneaded dough yields a uniform texture, ensuring even distribution of ingredients and flavors throughout the bread. A strong gluten network also contributes to the bread’s structural integrity, allowing it to rise effectively without collapsing during baking. Ultimately, mastering the kneading process is key to producing consistently delicious bread that is not only visually appealing but also delights the palate with every bite.
Determine the Ideal Kneading Duration for Soft Bread
The kneading duration for soft bread typically ranges from 10 to 15 minutes, but this can vary based on factors such as dough hydration and the type of flour used. It’s imperative to focus on the dough’s texture rather than strictly adhering to a timer; the objective is to achieve a smooth, elastic consistency that springs back when pressed. Pay attention to the dough’s behavior during kneading. If it becomes overly sticky, you may need to adjust your technique or take a brief rest to allow the gluten to relax. Ultimately, understanding your dough will help you determine the optimal kneading time to achieve the perfect soft bread.
Elevate Your Kneading Experience with the Right Tools
Utilizing the right tools can streamline the kneading process and improve your results. A dough hook attachment for a stand mixer is invaluable for those who prefer a less physical approach, allowing for efficient kneading while minimizing strain on your hands. In addition, a dough scraper is essential for managing sticky dough and keeping your work surface tidy. A high-quality bench knife can also be beneficial for cutting and shaping dough efficiently. Moreover, investing in a quality mixing bowl with a non-stick surface can facilitate easier kneading and handling. By equipping yourself with these tools, you can enhance your kneading technique and achieve more consistent results in your bread-making endeavors.
Troubleshooting Common Dough Kneading Challenges
Addressing Excessively Sticky Dough: Causes and Solutions
Excessively sticky dough can arise from several factors, most commonly excessive water content or inadequate kneading. When too much water is added, the dough can become overly hydrated, making it difficult to handle. To rectify this issue, you can either reduce the water in your recipe or knead the dough longer to adequately develop the gluten structure. If the dough remains sticky, consider using a dough scraper to manage it without adding excessive flour, which may lead to a denser final product. Adjusting your hydration levels and kneading technique will significantly improve your dough’s consistency and workability.
How to Salvage Over-Kneaded Dough
Over-kneaded dough can be salvaged, although it may require some patience. If you suspect your dough has been over-kneaded, allow it to rest for 20-30 minutes. This resting period will enable the gluten to relax, making the dough easier to shape. After resting, gently shape it without applying excessive strain, and then proceed with your recipe. While the final loaf may not achieve the same lightness as properly kneaded dough, this approach can help mitigate the effects of over-kneading, yielding a satisfactory result that you can still enjoy.
What to Do When Dough Tears During Kneading
If your dough tears during kneading, it may indicate either over-kneading or insufficient resting time. When dough tears, it can signal that the gluten has developed too tightly or that the dough hasn’t had adequate time to relax. In this case, allow the dough to rest for 10-15 minutes before continuing. This resting period will help the gluten relax, enabling gentler handling. During subsequent kneading, exercise caution and apply less force to prevent further tearing. Modifying your technique based on the dough’s response will lead to better outcomes in your future baking sessions.
Frequently Asked Questions About Dough Kneading
Which flour is best for creating soft bread?
For soft bread, utilizing bread flour or all-purpose flour with a higher protein content is ideal, as it promotes gluten development and yields a light, fluffy texture.
How can I enhance the fluffiness of my bread?
To achieve fluffier bread, ensure proper kneading to develop gluten and consider incorporating moisture-enhancing ingredients, such as milk or yogurt.
What happens if I don’t knead my dough sufficiently?
Insufficient kneading results in a weak gluten structure, leading to dense, poorly risen bread with a heavy texture and lacking the desired lightness.
Is using a food processor for kneading dough effective?
Yes, a food processor can effectively knead dough; however, be cautious of over-kneading, as this can easily result in tough dough.
How should I incorporate ingredients like nuts or seeds into my dough?
Introduce nuts or seeds during the last few minutes of kneading to ensure even distribution without compromising gluten development.
What steps should I take if my dough fails to rise?
If your dough does not rise, verify the yeast’s freshness and ensure it was kept in a warm, draft-free environment for effective fermentation.
Is using a scale for measuring ingredients necessary?
Using a scale to measure ingredients ensures accuracy, leading to more consistent results in your bread-making endeavors.
Can I freeze my dough before baking it?
Yes, dough can be frozen before baking. Ensure it is adequately wrapped to prevent freezer burn, and allow ample time to thaw and rise before baking.
What is the purpose of adding sugar to bread dough?
Sugar enhances flavor, aids in browning during baking, and serves as food for yeast, promoting fermentation for a better rise.
What methods can I use to achieve a crispy crust on my bread?
To attain a crispy crust, bake the bread in a preheated oven and consider adding steam during the initial minutes of baking.
Connect with us on Facebook for the latest updates!
The post How to Knead Dough for Soft Bread: Master the Art appeared first on https://cookinggods.com
The Article Knead Dough for Soft Bread: A Mastery Guide Was Found On https://limitsofstrategy.com
-

BBQ Forums: Your Essential Guide for Pitmaster Advice
Dive Deep into the Exciting World of BBQ Forums
Understanding BBQ Forums: A Hub for Barbecue Aficionados
BBQ forums are vibrant online communities that unite both novice and expert grillers to share invaluable knowledge, inventive cooking techniques, mouthwatering recipes, and professional advice about the art of barbecuing. These forums are indispensable resources for education and networking among BBQ enthusiasts, allowing members to participate in enriching discussions, share innovative ideas, and refine their grilling skills. By cultivating an interactive community atmosphere, BBQ forums provide a platform for enthusiasts to express their passion for grilling, whether it involves mastering various cuts of meat, exploring different smoke flavors, or keeping updated on the newest BBQ tools and gadgets that elevate their culinary experiences.
The true power of BBQ forums lies in their capacity to connect individuals from diverse backgrounds and skill levels. Participants can pose questions, seek assistance, and share their expertise, resulting in a rich knowledge exchange that benefits everyone involved. For instance, a beginner might inquire about achieving the ideal smoking temperature for brisket, while a seasoned pitmaster offers invaluable tips for creating a perfect bark. This reciprocal flow of information not only enhances individual skills but also fortifies the larger BBQ community, making these forums essential resources for pitmasters throughout the United States.
Discover the Advantages of Participating in BBQ Forums
Becoming a member of BBQ forums presents a plethora of advantages that can significantly improve your barbecue journey. Primarily, these forums provide access to an extensive array of exclusive recipes and techniques that often remain undiscovered in cookbooks or cooking shows. Members frequently share their personal recipes, practical tips, and modifications that have proven successful, allowing you to confidently broaden your culinary repertoire. Additionally, being part of a BBQ forum links you with a supportive network of fellow enthusiasts who share your passion, offering friendship and encouragement that can transform your BBQ experiences into delightful culinary explorations.
Moreover, BBQ forums serve as priceless platforms for learning from the experiences, errors, and achievements of others. Engaging in dynamic discussions allows you to gather insights that can save you time and frustration in your cooking endeavors. Whether it’s troubleshooting issues with a stubborn smoker or mastering a specific rub recipe, the collective wisdom within the forum can guide you toward success. Ultimately, being an active member of a BBQ forum can greatly enhance your confidence as you share your creations and receive constructive feedback, motivating you to experiment with new flavors and inventive techniques.
Finding the Ideal BBQ Forum to Match Your Interests
Selecting the perfect BBQ forum is crucial for optimizing your experience and maximizing the benefits of your participation. Start by evaluating the size of the community; larger forums may offer a wider array of opinions and quicker responses, while smaller forums often provide more intimate interactions. Next, consider the activity level of the forum. A forum with frequent posts and engaging discussions signals a thriving community where you can actively involve yourself. Another aspect to contemplate is the forum’s specific focus; some may cater to competitive BBQ enthusiasts, while others might prioritize backyard grilling or particular cooking methods like smoking or grilling.
Additionally, closely examine the culture and values of the forum. Do they promote inclusivity and support for beginners? Are there established guidelines that encourage respectful interactions? Evaluating these factors can assist you in finding a community that aligns with your personal BBQ interests and aspirations. Finally, take into account the resources available within the forum, such as instructional videos, recipe archives, and event listings, as these can significantly enrich your learning experience. Ultimately, choosing the right BBQ forum will lay a solid foundation for your growth as a pitmaster.
Pro Insights on the Best BBQ Forums for Aspiring Pitmasters

Identifying Key Features of a High-Quality BBQ Forum
A premium BBQ forum usually encompasses several fundamental features that contribute to its vibrancy and effectiveness. These attributes ensure that the forum transcends being merely a collection of posts; it transforms into a thriving community where knowledge flows freely and members feel valued and engaged. Active moderators are essential in maintaining the quality of discussions, ensuring that the environment remains friendly and constructive. Furthermore, a diverse user base brings a wealth of perspectives, enhancing the depth of conversations and advice shared.
In addition, comprehensive resources are a hallmark of exceptional BBQ forums. Members benefit from organized threads, searchable archives, and even multimedia content like videos and podcasts. This variety of resources enables users to explore numerous aspects of BBQ, from technique tutorials to equipment recommendations. Here are some additional features that can elevate a BBQ forum:
- Active moderation to foster respectful and informative interactions
- Diverse membership representing various BBQ styles and regional specialties
- Extensive resource sections filled with guides, recipes, and FAQs
- Regular contests and challenges to engage the community and inspire creativity
- Dedicated spaces for equipment reviews and recommendations to aid in purchasing decisions
- Opportunities for mentorship and collaboration among members
- Event listings for local BBQ competitions and meetups
- Integration with social media platforms for broader engagement
Leveraging Expert Insights for Your BBQ Mastery
The expert insights found on BBQ forums can dramatically improve your cooking techniques and elevate your BBQ skills to new heights. Engaging with seasoned pitmasters enables you to access a vast reservoir of knowledge that introduces you to new flavors, styles, and methodologies. For instance, an expert might offer guidance on creating the perfect dry rub or smoking blend, opening up a new realm of flavors in your culinary creations. Additionally, learning from the mistakes and successes of others can help you avoid common pitfalls, making your BBQ endeavors more enjoyable and rewarding.
Another significant advantage of expert insights is the opportunity for personalized feedback. When you share a specific challenge, such as a brisket that turned out tougher than you hoped, experienced members can analyze your technique and offer tailored suggestions for improvement. This level of direct, constructive feedback can accelerate your learning curve and instill confidence in your abilities. Ultimately, interacting with experts not only enhances your BBQ journey but also nurtures a sense of community, as you engage in discussions that can lead to meaningful connections and friendships.
Highlighting Notable Contributions from Experts in BBQ Forums

Real-life examples of expert contributions on BBQ forums vividly illustrate the practical value these communities provide. For instance, a respected member may post a comprehensive guide on smoking brisket, detailing each step from selecting the right cut of meat to determining the optimal temperature and wood type for smoking. Such guides can simplify the smoking process for beginners while offering advanced tips for seasoned pitmasters aiming to refine their techniques.
Moreover, these forums often showcase innovative recipes shared by members who experiment with flavors and cooking methods. A popular thread might feature a unique take on classic pulled pork that incorporates a regional BBQ sauce or a distinctive wood type for smoking. Additionally, troubleshooting discussions are common, where members describe typical issues, such as managing heat fluctuations in a smoker, and share effective solutions based on their experiences. These real-world examples underscore the vast knowledge available within BBQ forums and highlight how expert contributions can be directly applied to enhance your BBQ skills.
Must-Join BBQ Forums Across the United States
Join the Vibrant BBQ Brethren Community
BBQ Brethren is renowned as one of the largest and most active BBQ forums in the United States, cultivating a welcoming and friendly atmosphere. With thousands of members, it serves as a primary resource for both novice and experienced pitmasters alike. The forum’s structure includes specialized sections dedicated to various aspects of BBQ, such as grilling, smoking, competitions, and even a designated area for off-topic discussions that encourage community interaction.
One of the unique features of BBQ Brethren is its abundance of user-generated content, including detailed cook logs, recipe sharing, and event reports from BBQ competitions nationwide. Members engage in spirited discussions regarding BBQ techniques, equipment reviews, and lively debates about the best regional BBQ styles. The forum also hosts regular contests and challenges, promoting participation and inspiring creativity among its members. Overall, BBQ Brethren excels in its depth of knowledge and strong sense of community, making it an indispensable destination for any BBQ enthusiast.
Discover The Smoke Ring Forum
The Smoke Ring is another well-established forum that encompasses all facets of BBQ, from equipment reviews to recipe sharing and cooking techniques. With a vast array of resources, The Smoke Ring caters to a wide spectrum of BBQ enthusiasts, whether they are just starting out or are seasoned pitmasters. The forum’s user-friendly layout allows members to easily navigate through various categories, including grilling, smoking, competition BBQ, and outdoor cooking.
Unique aspects of The Smoke Ring include a dedicated section for BBQ competitions, where members can share experiences, tips, and results from the contests they have participated in. This fosters a competitive spirit and motivates members to continuously improve their skills. Additionally, the forum often emphasizes regional BBQ styles, encouraging discussions about local ingredients and techniques that make each style unique. With its diverse community and wealth of information, The Smoke Ring remains a valuable resource for anyone looking to deepen their BBQ knowledge and skills.
Distinctive Features Offered by Various BBQ Forums
Each BBQ forum presents unique features tailored to meet the diverse needs and interests of its members. Understanding these distinctions can assist you in selecting the forum that aligns best with your BBQ journey. For instance, BBQ Brethren excels in its warm community atmosphere and extensive user-generated content, including detailed cook logs and personal experiences. Members frequently share their competition stories, serving as both inspiration and education.
In contrast, The Smoke Ring stands out for its comprehensive resources and organized layout, making it easy for users to find information on specific topics. The forum’s dedicated sections for equipment reviews and competition BBQ provide focused advice that is immensely beneficial for those looking to invest in new gear or enter contests. Here’s a bullet list summarizing the unique features of each forum:
- BBQ Brethren: Friendly community, extensive user-generated content, cook logs, event reports
- The Smoke Ring: Comprehensive resources, organized categories, equipment reviews, competition-focused sections
- BBQ Brethren: Regular contests and challenges to stimulate participation
- The Smoke Ring: In-depth discussions about regional BBQ styles and locally sourced ingredients
- BBQ Brethren: Off-topic sections promoting broader community interaction
- The Smoke Ring: User-friendly layout for effortless navigation
- BBQ Brethren: Strong emphasis on mentorship opportunities among members
- The Smoke Ring: Focus on troubleshooting and problem-solving
Strategies for Active Engagement in BBQ Forums
Effective Practices for Contributing to BBQ Forum Conversations
To maximize your experience on BBQ forums, it’s vital to engage in a meaningful way. Start by posing clear and concise questions that outline your specific needs or challenges. This enables other members to provide focused and relevant advice. Moreover, when responding to others, ensure you offer detailed feedback and share your own experiences, enriching the conversation and promoting collective learning within the community.
Adhering to community guidelines is another crucial aspect of effective forum engagement. Familiarize yourself with the rules regarding posting, sharing links, and self-promotion, as violating these can lead to removal from the forum. Furthermore, taking a moment to introduce yourself in the forum’s welcome section can help you connect with other members. Sharing a bit about your BBQ journey and what you hope to learn or contribute can build rapport and establish your presence within the community. Overall, active participation—coupled with respect for the community’s norms—will enhance your engagement and the value you derive from the forum.
Making Meaningful Contributions to BBQ Forum Discussions
Contributing to BBQ forum discussions is essential for fostering a mutually beneficial community. You can add significant value by sharing your recipes, cooking tips, and personal experiences. For instance, if you’ve perfected a marinade for chicken, posting your method along with enticing photos can inspire others and ignite engaging conversations. Additionally, offering advice based on your own successes and challenges enables you to assist fellow pitmasters in avoiding common pitfalls and enhancing their skills.
Participating in community events is another excellent way to contribute. Many forums host contests, challenges, and meetups where members can showcase their skills and learn from one another. Engaging in these activities enriches not only your BBQ journey but also strengthens the community as a whole. Remember to be constructive in your feedback and express appreciation for others’ contributions, as this creates a supportive environment where all members feel valued. Ultimately, your active participation will heighten your learning and enjoyment within the BBQ community.
Fostering Strong Connections Within BBQ Forums
Building relationships within BBQ forums can greatly enhance your experience and learning opportunities. These connections can lead to mentorship opportunities where more seasoned members guide you through complex techniques or provide personalized feedback on your cooking. Engaging with others on a personal level fosters a sense of camaraderie and belonging, making the forum experience more enjoyable and fulfilling.
Additionally, recipe exchanges and collaboration on BBQ projects can emerge from these relationships. Sharing your unique recipes and learning about others’ signature dishes can help broaden your palate and cooking techniques. Real-life meetups often stem from online connections, allowing members to bond over their shared passion for BBQ in person. Building strong relationships within BBQ forums not only enriches your learning journey but also creates lasting friendships that extend beyond the digital realm.
Research-Backed Advantages of Engaging in BBQ Forums for Aspiring Pitmasters
Psychological Benefits of Participating in BBQ Forums
Engaging in BBQ forums offers numerous psychological advantages that can enhance your overall well-being. One of the most significant benefits is the sense of community that forums foster. Interacting with like-minded individuals allows members to share experiences, challenges, and successes, creating a supportive environment that can boost self-esteem. As members learn and refine their skills, they often experience a sense of accomplishment that contributes positively to their overall happiness.
Furthermore, the social interaction inherent in forum participation can reduce stress and alleviate feelings of isolation. The act of sharing your passion and learning from others promotes positive emotions and fosters a sense of belonging. This psychological connection to a community of BBQ enthusiasts creates an environment where individuals can thrive, learn from one another, and enjoy the shared journey of mastering BBQ techniques. Ultimately, the psychological benefits of participating in BBQ forums extend far beyond the grill, positively impacting overall mental health.
How BBQ Forums Facilitate Skill Development
BBQ forums significantly impact skill development by providing members access to a wealth of expert advice, varied techniques, and continuous learning opportunities. By consistently engaging with the community, members can absorb insights from seasoned pitmasters who share their expertise through tutorials, Q&A sessions, and personal anecdotes. This ongoing flow of information helps members refine their techniques and discover innovative approaches to BBQ.
Moreover, the variety of perspectives available within forums encourages experimentation and creativity. Users can learn about different regional BBQ styles, unique flavor combinations, and innovative cooking methods they may not have encountered otherwise. As members apply this knowledge in their cooking, they often experience rapid improvements in their skills, leading to heightened confidence and enjoyment in the kitchen. The collaborative nature of BBQ forums ensures that skill development is a dynamic and ongoing process, continually evolving as members share their successes and challenges.
Actionable Steps to Maximize the Benefits of BBQ Forums
To fully capitalize on the advantages of BBQ forums, members should engage consistently and actively participate in discussions. Begin by setting aside dedicated time each week to browse the forum, respond to posts, and ask questions. Being proactive in your engagement will help you stay connected and informed about the latest trends and techniques in the BBQ world. Additionally, posing specific questions related to your challenges or interests allows for targeted advice and fosters deeper discussions.
Participating in community events and challenges is another method to enhance your forum experience. These activities not only provide opportunities to showcase your skills but also allow you to connect with other members personally. Furthermore, consider sharing your own recipes and experiences to contribute to the collective knowledge of the community. By actively participating and contributing, you will enrich not only your own BBQ journey but also the experiences of fellow members, making the forum a vibrant and valuable resource for everyone.
Expanding Your Culinary Knowledge Through BBQ Forums
BBQ forums offer a vast wealth of culinary knowledge, significantly enhancing members’ understanding of BBQ techniques, flavors, and ingredients. Through engaging discussions, members can explore various cooking methods, such as smoking, grilling, or indirect cooking, and learn the nuances that differentiate each approach. Additionally, forums often feature conversations surrounding ingredient selection, where members share insights on the best wood types for smoking or the ideal cuts of meat for specific dishes.
Engaging with these resources allows members to deepen their understanding of culinary principles and expand their palates. By learning from others’ experiences and experimenting with different recipes, you can develop a more sophisticated approach to BBQ cooking. This exposure to diverse techniques and ideas ultimately fosters a more comprehensive knowledge base, empowering members to elevate their BBQ skills and create exceptional dishes. The richness of culinary knowledge available in BBQ forums serves as a catalyst for personal growth and culinary exploration.
Inspiring Success Stories from Active BBQ Forum Members
How BBQ Forums Have Helped Members Enhance Their Skills
Numerous members have witnessed significant improvements in their skills through active participation in BBQ forums. These platforms provide access to expert guidance, detailed tutorials, and community feedback that collectively elevate the learning experience. For example, a novice pitmaster may struggle to achieve the perfect smoke ring on their brisket. After sharing their challenges on a forum, they might receive tailored advice on temperature control and wood selection from experienced members, allowing them to refine their technique and achieve better results.
Success stories frequently highlight substantial breakthroughs in members’ cooking techniques and recipe development. One member might report how they transformed their backyard BBQ gatherings by incorporating feedback from forum discussions, resulting in rave reviews from friends and family. Such stories exemplify how the communal learning aspect of BBQ forums directly translates into tangible improvements in skills and outcomes, showcasing the transformative power of these online communities.
Remarkable Achievements of Forum Members
Members of BBQ forums have reached impressive milestones that underscore the significant impact of their engagement. Some have successfully won prestigious BBQ competitions after refining their techniques and recipes based on community feedback. Others have even published cookbooks showcasing unique BBQ recipes developed through discussions and experimentation within the forum. These achievements not only highlight individual success but also illustrate the collaborative spirit of BBQ forums, where shared knowledge fosters outstanding culinary accomplishments.
Moreover, many members have transformed their passion for BBQ into successful careers, leveraging the skills and insights gained from their online interactions. From launching food trucks to establishing BBQ restaurants, these success stories exemplify how active participation in BBQ forums can lead to professional growth and entrepreneurial ventures. Such notable achievements inspire others within the community, demonstrating the true power of collaboration and knowledge sharing in the world of BBQ.
Key Factors for Success in BBQ Forums: Expert Insights
Key success factors for members of BBQ forums often include active participation, a willingness to learn, and consistent application of the advice received. Engaging with the community by posting questions, offering feedback, and sharing experiences fosters connections and nurtures a collaborative environment. Members who are eager to learn from others’ experiences tend to develop more rapidly, as they absorb diverse perspectives and techniques that enhance their skills.
Furthermore, consistently applying the advice and insights gained from forum interactions is crucial for skill development. By experimenting with new techniques and recipes shared by other members, individuals can refine their cooking style and elevate their BBQ game. Here’s a bullet list summarizing the key success factors:
- Active participation in discussions and community events
- Willingness to learn from the experiences of others
- Consistent application of advice and techniques gained
- Sharing personal successes and challenges to promote community learning
- Building relationships for mentorship and support
- Engaging in contests and challenges for skill enhancement
- Seeking feedback and constructive criticism
- Embracing creativity and experimentation in cooking
Impact of BBQ Forums on Members’ Professional Paths
BBQ forums have profoundly influenced the careers of many members by providing networking opportunities, mentorship, and exposure to the BBQ industry. For instance, individuals who actively engage with the community often find mentorship relationships that guide them in refining their cooking techniques and navigating the business aspects of BBQ. This guidance can be invaluable for those considering a professional path in BBQ or culinary arts.
Moreover, networking within these forums can lead to job opportunities, collaborations, and partnerships that members may not have encountered otherwise. From catering gigs to positions at BBQ restaurants, the connections forged in online discussions often translate into real-world opportunities. As members share their journeys and aspirations, they inspire others to pursue their passions and elevate their BBQ skills to new heights, ultimately shaping the future landscape of the BBQ industry.
Future Directions and Innovations in BBQ Forums
Emerging Trends Impacting BBQ Forums
Emerging trends in BBQ forums reflect the evolving preferences and values of the BBQ community. One significant trend is the increasing focus on sustainability, with members sharing tips on sourcing local ingredients, minimizing waste, and adopting eco-friendly cooking practices. As awareness of environmental issues grows, BBQ enthusiasts are seeking ways to enjoy their passion while reducing their ecological footprint.
Another notable trend is the incorporation of new technology into BBQ practices. Members are exploring innovative gadgets, such as smart thermometers and automated smokers, which enhance the cooking experience and improve outcomes. Additionally, the rise of virtual events—such as online competitions and webinars—has made it easier for members to connect and learn from one another, regardless of geographic limitations. These trends indicate a dynamic and adaptive community that continues to evolve in response to changing interests and technological advancements.
Projected Developments in BBQ Forums for the Future
As BBQ forums continue to evolve, several trends are likely to shape their future. Personalized content that caters to individual preferences and skill levels will become increasingly prominent, allowing users to access tailored recommendations and resources. Enhanced user interaction features—such as live Q&A sessions, webinars, and video discussions—will promote richer engagement among members, fostering deeper connections and knowledge sharing.
Furthermore, a stronger emphasis on community building will likely emerge, with forums focusing on creating inclusive environments that support newcomers and encourage collaboration. These changes will not only enhance the value of forums for existing members but also attract new enthusiasts to the BBQ community. As BBQ forums evolve, they will remain essential hubs for learning, sharing, and celebrating the art of barbecue.
The Influence of Technology on the Future of BBQ Forums
Technology plays a crucial role in shaping the future of BBQ forums, enhancing user experiences and engagement. Improved user interfaces, designed for easy navigation and accessibility, will enable members to find relevant content and connect with others more seamlessly. Data analytics can further personalize the user experience, delivering tailored suggestions and resources based on individual preferences and behavior.
Moreover, advancements in virtual reality and augmented reality could revolutionize how members engage with the forum. Imagine participating in a virtual BBQ class where you can interact with expert pitmasters in a simulated environment. Such innovations will enhance learning opportunities, making BBQ forums more immersive and engaging. As technology continues to advance, it will undoubtedly influence the way members interact within these online communities, paving the way for exciting new possibilities in the BBQ world.
Common Questions About BBQ Forums Answered
What are BBQ forums?
BBQ forums are online communities where enthusiasts share recipes, techniques, and advice related to barbecuing, fostering learning and networking among BBQ lovers.
What benefits can I gain from joining a BBQ forum?
Joining a BBQ forum enhances your grilling skills, connects you with like-minded individuals, and provides access to exclusive recipes and techniques.
What characteristics define a successful BBQ forum?
Key features of successful BBQ forums include active moderation, diverse user bases, comprehensive resources, and regular community events that foster engagement.
How can I effectively engage on BBQ forums?
Effective engagement involves asking clear questions, sharing personal experiences, respecting community guidelines, and participating in discussions and events.
What types of recipes can I find on BBQ forums?
BBQ forums offer a variety of recipes, ranging from traditional smoked meats to innovative sides, sauces, and desserts, often shared by experienced members.
How do BBQ forums support skill enhancement?
BBQ forums support skill development by providing access to expert advice, diverse techniques, and opportunities for continuous learning through community interaction.
Are mentorship opportunities available in BBQ forums?
Yes, many BBQ forums foster mentorship opportunities where experienced members guide novices through techniques and provide valuable feedback.
What common BBQ-related challenges are discussed in forums?
Common challenges discussed in BBQ forums include temperature control, troubleshooting smoking issues, achieving desired flavors, and perfecting cooking techniques.
How do BBQ forums influence members’ careers?
BBQ forums influence careers by providing networking opportunities, exposure to the industry, and mentorship, helping members pursue professional paths in BBQ.
What future trends are emerging in BBQ forums?
Emerging trends in BBQ forums include a focus on sustainability, integration of new technology, and the rise of virtual events, indicating the community’s adaptability and evolution.
Connect with us on Facebook!
The Article Top BBQ Forums for Pitmaster Advice: Your Ultimate Guide appeared first on https://pitmastersarsenal.com
The Article BBQ Forums for Pitmaster Advice: The Essential Guide Was Found On https://limitsofstrategy.com
-
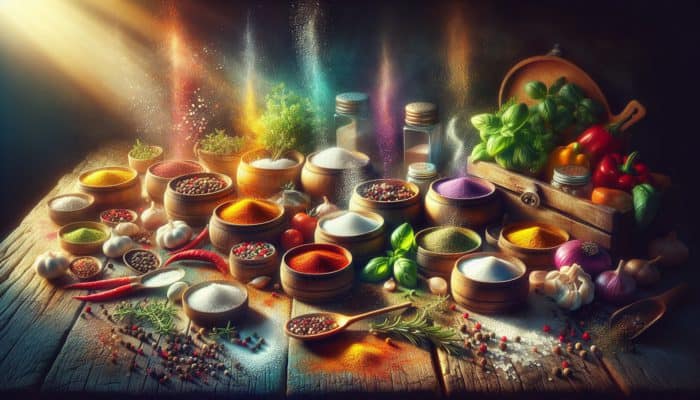
Season Food Without Overdoing It: Mastering Flavor Techniques
Discover Flavor Mastery: Essential Seasoning Techniques for Culinary Excellence
Key Seasoning Ingredients to Transform Your Dishes into Gourmet Experiences
The foundation of enhancing flavor in your culinary creations lies in a thorough understanding of key seasoning ingredients. These components are vital for transforming any ordinary meal into an extraordinary gastronomic experience. Common seasonings include salt, which serves to amplify flavors; pepper, which introduces a subtle heat; a variety of herbs that provide freshness; and numerous spices that offer complex flavor profiles. Each ingredient has unique properties that can elevate everyday dishes into captivating culinary delights, creating a flavor sensation that enchants the palate.
In addition to these fundamentals, you should consider integrating the following essential seasoning ingredients into your culinary toolkit:
- Garlic – an indispensable flavor enhancer that contributes richness and depth to various dishes.
- Onion powder – adds a touch of sweetness along with a robust flavor to your meals.
- Paprika – provides either smoky undertones or vibrant color, making it a versatile choice.
- oregano – a staple herb in Mediterranean cooking that brings aromatic qualities.
- Basil – an iconic herb that is fundamental to Italian cuisine.
- Cumin – offers warmth and an earthy undertone that enhances many recipes.
- Cilantro – a fresh herb that brightens up flavors significantly.
- Chili powder – ideal for those who enjoy an extra spicy kick in their dishes.
By mastering these ingredients, you can elevate your culinary endeavors, bringing your dishes to impressive new heights of flavor and satisfaction, ensuring every meal is a memorable experience.
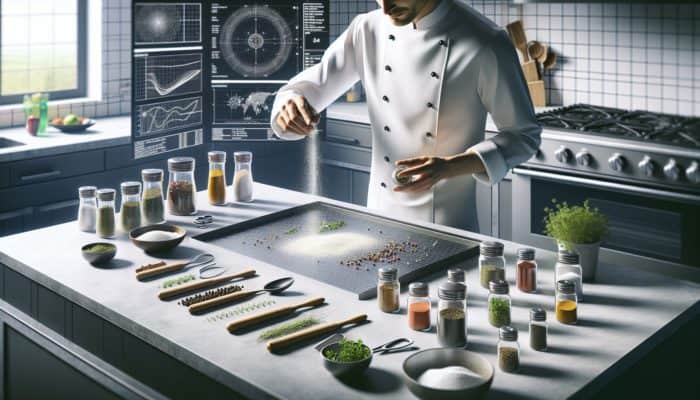
Accurately Measuring Seasonings for Perfect Flavor Balance in Your Cooking
Achieving the right balance of flavors in your culinary creations largely depends on precise measurement of your seasonings. Relying on guesswork can result in overpowering tastes or bland dishes that fail to impress your guests. The best approach is to use specific measuring tools designed for accuracy, such as measuring spoons or a digital scale. For example, measuring spoons are fantastic for small quantities, while a digital scale is indispensable for larger amounts where precision is key to flavor perfection.
Consider employing the following measurement tools and techniques to enhance your cooking skills significantly:
- Measuring spoons – perfect for small amounts of both dry and liquid seasonings, ensuring consistent flavor profiles across your dishes.
- Digital scale – provides accuracy, especially for bulk spices or herbs where precise measurements are essential.
- Measuring cups – effective for liquids and larger ingredient quantities, allowing for controlled additions.
- Pinch method – handy for quick seasoning adjustments when you’re familiar with the ingredient’s flavor strength.
By utilizing these measurement tools effectively, you can dramatically improve the consistency and quality of your culinary results, ensuring that every dish is perfectly seasoned and bursting with delightful flavors.
The Importance of Freshness in Elevating Your Seasonings
The freshness of your seasonings is crucial for achieving vibrant and lively flavors in your culinary creations. Fresh herbs and spices possess robust taste profiles that dried or processed alternatives often lack. When you use fresh ingredients, they impart greater complexity and depth to dishes, allowing for subtle flavor profiles without the risk of overpowering the palate with excessive seasoning.
To maintain the longevity and vitality of your seasonings, proper storage is essential. Keep your herbs and spices in airtight containers, away from heat and light. For example, storing dried herbs and spices in a cool, dark cupboard helps preserve their potency. When using fresh herbs, consider refrigeration and wrapping them in a damp paper towel to maintain moisture. Choosing fresh ingredients not only enhances flavor but also boosts the overall nutritional value of your meals, resulting in a healthier dining experience.
Effective Strategies for Seasoning Food Without Overwhelming Your Dishes
Expert Techniques Used by Professional Chefs to Enhance Flavor
Professional chefs have developed a variety of techniques to season dishes expertly without overwhelming them. One popular method is known as flavor layering, which involves adding seasonings at different stages of cooking to build depth and complexity. This technique allows each component to develop its unique flavor, contributing to a more nuanced overall taste that captivates the senses.
For example, a chef might start by seasoning a base of sautéed onions and garlic with salt to coax out their natural sweetness. After this, spices such as cumin or paprika may be introduced, allowing them to toast slightly and release their essential oils before adding the main ingredients. Regular tasting during the cooking process is essential to ensure a balanced flavor profile, preventing any one element from becoming overpowering. This method not only creates complexity but also aids in fine-tuning the dish, ensuring a delightful culinary experience.
Additionally, techniques like finishing with fresh herbs or a squeeze of lemon juice just before serving can brighten flavors and provide a final touch without overwhelming the dish. Chefs also emphasize the importance of understanding the natural flavors of the ingredients themselves, enabling them to make informed decisions about the precise amount of seasoning necessary to enhance the dish without overshadowing it.
Adjusting Seasoning for Different Types of Dishes for Optimal Flavor
Modifying seasonings requires a keen understanding of the foundational flavors of the dish and the intended flavor profile. Each dish possesses distinct characteristics that dictate the appropriate level of seasoning. For instance, a rich, hearty stew can withstand bolder seasoning, while a delicate fish dish necessitates a more subtle approach to maintain its integrity and flavor.
To effectively adjust seasonings, follow these actionable steps:
- Start small – begin with a pinch of salt or spice and taste continuously, allowing for gradual adjustments.
- Identify the base flavors – recognize whether the dish is sweet, sour, or savory to inform your seasoning choices effectively.
- Incorporate balance – if you detect excessive saltiness, consider adding a splash of acid like vinegar or lemon juice to brighten the flavors and create a more harmonious profile.
- Experiment with temperature – hot dishes typically require less seasoning than cold ones, as flavors tend to intensify when heated.
By considering these factors and making gradual adjustments, you can achieve a finely balanced dish that showcases the natural attributes of the food, resulting in a memorable and satisfying meal.
Balancing Flavors Using Acid and Fat for Culinary Perfection

Acidity and fat play critical roles in achieving balanced flavors in any dish, often complementing and counteracting the intensity of seasonings. Acids, such as lemon juice, vinegar, or tomato, can elevate flavors and add brightness, while fats, such as oils or butter, provide richness and help to mellow out strong spices.
For instance, in a heavily spiced curry, a splash of coconut cream can soften the sharpness of spices, delivering a luxurious mouthfeel. Conversely, a finishing drizzle of balsamic vinegar over a grilled vegetable salad can enhance the dish’s freshness and vibrancy. Understanding how to use these elements effectively allows you to fine-tune the seasoning, ensuring that each bite is delightful without being overwhelming or unbalanced.
Moreover, incorporating both fat and acid in your cooking not only enhances flavor but can also improve texture, making dishes more appealing and enjoyable. This balance is particularly crucial in cuisines that rely heavily on spices, as it allows for a harmonious blending of flavors rather than an overpowering experience.
Mastering the Art of Using Herbs and Spices Effectively
Understanding the Key Differences Between Herbs and Spices
Recognizing the distinction between herbs and spices is fundamental to effective seasoning. Herbs refer to the leafy parts of plants, typically used fresh, imparting a green and bright flavor to dishes. Examples include basil, parsley, and cilantro. In contrast, spices are derived from other parts of plants—seeds, roots, or bark—and are generally dried, offering stronger and more concentrated flavors. Common examples include cinnamon, cumin, and nutmeg.
This knowledge is crucial for their effective usage; for instance, fresh herbs should generally be added towards the end of the cooking process to preserve their vibrant flavors, while spices can be introduced earlier to allow their flavors to infuse the dish fully. Recognizing these two categories can help you enhance your meals without overpowering them, ensuring that each ingredient’s natural character shines through beautifully.
Optimal Timing for Adding Herbs and Spices During Cooking
Timing is crucial when incorporating herbs and spices, as each has an ideal moment in the cooking process to release its flavors effectively. Fresh herbs, such as basil and cilantro, are best added at the end of cooking or just before serving to maintain their delicate flavors and vibrant color. In contrast, dried herbs and spices, like oregano or cayenne pepper, benefit from early incorporation, as this allows them to release their essential oils and fully integrate into the dish.
For example, when preparing a sauce, you might start by sautéing onions and garlic, then adding dried herbs to allow them to infuse the oil. Towards the end of cooking, fresh herbs can be stirred in to brighten the dish. Additionally, spices like cinnamon or cumin can be toasted in oil before adding other ingredients, intensifying their flavor and aroma. This careful consideration of timing can significantly enhance your cooking, ensuring that the seasonings contribute meaningfully without overwhelming the dish.
Combining Herbs and Spices for Rich, Complex Flavor Profiles
Effectively blending herbs and spices can create a tapestry of complex flavors that elevate your dishes. The key lies in understanding how different ingredients complement one another. For instance, pairing rosemary with garlic can yield a robust flavor profile ideal for meats, while a combination of coriander and cumin can form a warm, earthy base for a variety of dishes.
Experimentation is vital to developing harmonious combinations. Start with classic pairings, such as basil and tomato or thyme and lemon, then venture into more adventurous territory by introducing unexpected flavors. For example, combining chili powder with cocoa powder in a mole sauce can create a rich depth of flavor that surprises and delights the palate.
When blending herbs and spices, consider their strengths. Delicate herbs should be balanced with more assertive spices to avoid overshadowing them. Additionally, tasting as you go will allow you to adjust flavors and find the perfect balance that suits your palate. This exploration of flavor combinations can lead to uniquely seasoned dishes that leave a lasting impression on your diners.
Best Practices for Storing Herbs and Spices to Maintain Freshness
Proper storage of herbs and spices is essential for maintaining their potency and flavor. Many people overlook this crucial aspect, which can lead to diminished taste and stale ingredients that fail to impress. To preserve freshness, store your herbs and spices in airtight containers away from heat, moisture, and light. Glass jars or opaque containers can shield them from light exposure, which can degrade their quality over time, ensuring they remain vibrant and flavorful.
For dried herbs and spices, a cool, dark cupboard is ideal. Fresh herbs, on the other hand, may benefit from refrigeration, where wrapping them in a damp paper towel can help retain moisture. Consider utilizing ice cube trays to freeze excess herbs in olive oil, allowing for easy flavor additions to future dishes without compromising quality.
Moreover, keeping track of expiry dates is useful; although dried herbs and spices can last for years, their flavor diminishes over time. Regularly checking your pantry ensures you’re using fresh ingredients, ultimately leading to more vibrant and delicious dishes. A well-organized storage system can significantly impact your cooking, keeping your seasonings ready to enhance your meals perfectly while preserving their unique flavors.
Avoiding Common Mistakes When Seasoning Your Dishes
Avoiding common mistakes in seasoning is vital to mastering this culinary art. One prevalent error is overusing herbs or spices, which can overwhelm the dish and mask its natural flavors. Instead, start with a small amount and gradually build up, tasting frequently to gauge how flavors develop and evolve.
Another mistake is failing to consider the timing of adding herbs and spices. Adding delicate fresh herbs too early in the cooking process can result in a loss of flavor, while neglecting to incorporate spices early can lead to an unbalanced taste. Additionally, not allowing dried spices to bloom in fat or liquid can prevent them from fully releasing their flavor potential, leading to a lackluster dish.
Finally, overlooking the freshness of your ingredients can lead to stale dishes that lack vibrancy. Regularly check your pantry and replace expired spices to ensure that your seasonings enhance rather than detract from your culinary creations. By steering clear of these common pitfalls, you can create dishes that are well-seasoned and celebrate the natural flavors of the ingredients, resulting in a truly delightful dining experience.
Techniques to Elevate Natural Flavors in Your Cooking
The Health Benefits of Using Fresh Ingredients in Your Meals
Incorporating fresh ingredients is essential for both flavor and nutritional value in your cooking. Fresh produce typically boasts more vibrant tastes and textures, allowing chefs to rely less on heavy seasoning. Ingredients such as ripe tomatoes, crisp greens, and fragrant herbs can shine through with minimal enhancement, resulting in a meal that is both delicious and nutritious. This reliance on freshness not only elevates the dish but also contributes to a healthier overall meal, promoting a balanced diet.
Moreover, fresh ingredients often have a higher nutritional content, providing essential vitamins and minerals that may diminish in processed foods. For instance, fresh herbs are packed with antioxidants, while seasonal vegetables tend to taste better and offer more nutrients that support overall health. By prioritizing freshness, cooks can create dishes that are not only delicious but also full of health benefits, enabling a wholesome dining experience that satisfies both the body and the palate.
Additionally, fresh ingredients can inspire creativity in the kitchen. The unique flavors of seasonal produce can lead to inventive recipes that showcase their qualities. This approach encourages cooks to experiment with different combinations, ultimately broadening their culinary repertoire while maintaining a focus on enhancing natural flavors rather than masking them with excessive seasoning.
Enhancing Flavors Through Various Cooking Methods
Different cooking methods can significantly enhance the natural flavors of ingredients, making them more palatable without the need for heavy seasoning. Techniques such as roasting, grilling, or sautéing can caramelize sugars and develop rich, complex flavors within fruits and vegetables. For instance, roasting carrots can intensify their sweetness, creating a dish that requires minimal additional seasoning, while grilling can add a delightful char that enhances their appeal.
Grilling not only adds a smoky flavor but also enhances the texture of meats and vegetables, creating a delightful char that elevates the overall dish. Similarly, sautéing can bring out the natural sweetness of onions and garlic, providing a flavorful base for numerous recipes. Understanding which methods to use can allow for greater flavor enhancement, reducing reliance on excessive seasoning and creating dishes that truly shine.
Moreover, cooking methods involving longer cooking times, such as braising or slow cooking, allow flavors to meld and intensify over time. This process can create deeply flavored dishes that require only a light hand with seasonings. By mastering various cooking techniques, one can enhance the inherent qualities of ingredients, leading to a more satisfying dining experience without overwhelming the palate with excessive flavors.
The Importance of Resting Meat Before Seasoning
Resting meat before seasoning is a technique that can significantly boost flavor and juiciness. When meat is cooked, juices are drawn towards the surface; resting allows these juices to redistribute throughout the meat, resulting in a more succulent and flavorful end product. Seasoning meat before it has rested can lead to uneven distribution of flavors and dry spots that detract from the overall dining experience.
By allowing meat to rest for a specified amount of time—generally about 10-15 minutes depending on the size—you give it the opportunity to return to a more even temperature, enhancing moisture retention. This procedure not only aids in better flavor absorption but also promotes a more enjoyable texture, ensuring that each bite is tender and juicy, allowing the natural flavors to shine through.
Additionally, resting provides an excellent opportunity to add finishing touches to the meat, such as fresh herbs or a light drizzle of seasoning oil, enhancing the overall dish without the risk of overpowering it with excessive flavors. This technique is particularly beneficial for larger cuts of meat, where the resting period can dramatically improve the final result, allowing for a perfectly seasoned dish that delights the senses.
Avoiding Common Pitfalls When Seasoning Your Dishes
The Negative Effects of Over-Seasoning on Food
Over-seasoning food can lead to an unpalatable experience, completely overpowering the dish’s natural flavors and ruining the intended taste profile. Excessive salt, herbs, or spices can mask the true essence of the ingredients, resulting in a dish that is one-dimensional and unenjoyable. Moreover, over-seasoning can lead to health concerns, particularly relating to high salt intake, which may contribute to various cardiovascular issues and other health complications.
Beyond health risks, over-seasoned dishes can also create a negative dining experience, where the intended flavors are lost in a sea of spices. This oversight may lead to waste if diners find the dish inedible and prefer to leave it untouched. Ultimately, mastering the right amount of seasoning is crucial for both the flavor and health of any dish, ensuring that it can be enjoyed to its fullest potential.
Recognizing the signs of over-seasoning can save a dish. If a dish tastes too salty or overpowering, it may be necessary to dilute the flavors with additional ingredients or balance them with acidity. Learning to identify these signs can improve your culinary skills and help create well-seasoned dishes that delight the palate while showcasing the natural flavors of the ingredients.
Effective Remedies for an Over-Seasoned Dish
Correcting over-seasoned dishes can be challenging, but several methods can salvage your meal and restore balance. First, diluting the dish with additional ingredients is often the most straightforward approach. For example, if a soup is too salty, adding more liquid or vegetables can help tone down the seasoning. Incorporating a starchy ingredient like rice or potatoes can also absorb excess salt while adding texture.
Consider balancing flavors with complementary ingredients. If a dish is overly spiced, adding a touch of sweetness with honey or sugar can help counteract the intensity. In many cases, a splash of acid—such as lemon juice or vinegar—can help brighten the dish and cut through the overpowering flavors, providing a more balanced profile that enhances the overall experience.
Here’s a list of effective correction methods:
- Add more base ingredients – enhance the dish without introducing additional seasoning, allowing for a more balanced flavor profile.
- Incorporate dairy – cream, yogurt, or sour cream can mellow flavors and provide a creamy texture that enhances the dish.
- Use starchy ingredients – these can absorb excess salt and balance the dish effectively, making it more palatable.
- Introduce sweetness – a small amount of sugar or honey can offset excessive spice and harmonize the flavors.
These strategies provide a roadmap for rectifying an over-seasoned dish, ensuring that meals can still be enjoyed and savored rather than discarded due to imbalance.
Preventing the Trap of Uniform Seasoning for Flavor Variety
Uniform seasoning can lead to bland and uninspired dishes, lacking the depth and complexity that a well-rounded meal requires. It is essential to vary seasoning levels to highlight different flavors and textures within each dish. For instance, while a base seasoning of salt and pepper is fundamental, adding depth through herbs, spices, and acids can transform a meal into something extraordinary and memorable.
To avoid the pitfall of uniform seasoning, focus on the dish’s components. Different ingredients can handle varying levels of seasoning; for example, delicate proteins like fish may require a light touch, while hearty vegetables can withstand bolder flavors that enhance their natural characteristics. Additionally, considering the textures and cooking methods can guide flavor variation, ensuring that each component shines through beautifully.
Tasting throughout the cooking process is crucial in preventing uniformity, allowing you to adjust flavors as needed. By embracing the nuances of each ingredient and varying your approach, you can create dishes that are dynamic and full of life, each bite offering a delightful surprise that keeps diners coming back for more.
Research-Backed Advantages of Thoughtful Seasoning Techniques
The Health Benefits of Moderate Seasoning Practices
Moderate seasoning offers numerous health benefits, particularly in reducing overall sodium intake, which is often linked to various health risks. By learning to season judiciously, individuals can enhance their meals while minimizing negative health impacts. This approach promotes better eating habits and encourages the exploration of diverse flavors, leading to a more enjoyable and varied diet that satisfies both the palate and the body.
Additionally, moderate seasoning allows for improved nutrient absorption. When salt and other spices are used in moderation, they can enhance the taste without overwhelming the dish, encouraging individuals to consume more vegetables and whole foods. This focus on balanced seasoning promotes healthier choices and a more holistic approach to eating, contributing to overall well-being.
Understanding the health impacts of seasoning can empower cooks to make informed decisions in the kitchen. By using a variety of herbs and spices, one can create flavorful dishes that support overall health, steering clear of excessive reliance on salt and processed flavor enhancers that detract from the quality of meals.
The Taste Benefits of Subtle Seasoning Techniques
Subtle seasoning allows natural flavors to shine, creating a more nuanced and enjoyable eating experience. When ingredients are seasoned thoughtfully, the individual characteristics of each component can emerge, leading to a more balanced meal that delights the senses. This approach encourages diners to appreciate the complexity of flavors rather than being overwhelmed by overpowering spices that can detract from overall enjoyment.
Using subtle seasoning can also highlight the quality of the ingredients themselves. The freshness of seasonal produce, the richness of well-sourced proteins, and the depth of homemade stocks can all be appreciated to their fullest when flavored appropriately. This appreciation of quality ingredients fosters a deeper connection with the food, turning meals into memorable experiences that resonate long after the last bite.
Moreover, subtle seasoning can cater to a range of palates, making dishes versatile and accessible. By focusing on highlighting the ingredients rather than masking them, cooks can create menus that appeal to everyone, encouraging exploration and enjoyment of diverse flavors that satisfy a variety of tastes and preferences.
Enhancing Aroma through Minimal Seasoning Techniques
Aroma plays a critical role in the overall taste experience, and minimal seasoning can beautifully enhance this aspect. When seasoning is applied gently, the natural aromas of the ingredients can take center stage, offering an irresistible invitation to the dish. Fresh herbs, spices, and citrus juices can elevate the aroma, creating a sensory experience that complements the taste and enhances the overall enjoyment of the meal.
For instance, incorporating freshly chopped herbs into a dish just before serving not only adds flavor but also releases an aromatic quality that enchants diners and draws them in. Similarly, using spices like cumin or coriander at the appropriate time can fill the kitchen with enticing scents, making the meal even more enjoyable and inviting.
Moreover, pairing foods with aromatic elements, such as sautéing garlic in olive oil or adding a splash of vinegar to brighten flavors, can enhance the overall sensory experience. By focusing on aroma alongside taste, cooks can create dishes that truly captivate the senses, ensuring a delightful eating experience that lingers in memory.
Cultivating Your Unique Seasoning Style: Tips and Techniques
Fundamentals for Creating Your Own Signature Seasoning
Creating a signature seasoning involves several key principles that allow for personal expression in the kitchen. Understanding flavor profiles is fundamental; consider the balance between sweet, salty, sour, bitter, and umami elements. Start by identifying your favorite flavors and ingredients, then experiment with combinations that resonate with your taste preferences.
Begin with a base seasoning, such as a simple blend of salt, pepper, and garlic powder. From there, build complexity by adding complementary herbs and spices that align with your culinary style. For instance, if you enjoy Mediterranean flavors, incorporating oregano, thyme, and lemon zest can create a distinctive blend that defines your cooking and sets your dishes apart.
Documenting your findings through a seasoning journal can aid in refining your signature style. Record the ratios and ingredients used in each blend, and take notes on how they perform in different dishes. This practice not only promotes consistency but also fosters creativity, enabling you to develop a unique seasoning method that is distinctly yours, resulting in dishes that reflect your personal touch and culinary philosophy.
Exploring Varied Cuisines for Flavor Inspiration
Exploring various cuisines is a fantastic way to broaden your seasoning palette and develop your unique style. Each culture has its unique blend of herbs and spices that define its dishes, and experimenting with these can inspire new ideas and flavor combinations that excite your creativity in the kitchen.
For example, try incorporating Indian spices like coriander, turmeric, and garam masala into your cooking repertoire. Alternatively, explore Mexican flavors with ingredients like cilantro, chipotle, and lime. Delving into these diverse flavor profiles encourages creativity and can lead to exciting culinary discoveries that enhance your cooking repertoire and elevate your dishes.
Additionally, learning about the traditional uses of herbs and spices in different cuisines can provide valuable insights into creating balanced dishes. Understanding how certain seasonings interact with various ingredients can guide you in crafting meals that are both authentic and innovative, allowing you to showcase your culinary flair while respecting culinary traditions and enhancing the overall dining experience.
Benefits of Keeping a Seasoning Journal to Enhance Your Cooking
Maintaining a seasoning journal can be an invaluable tool for honing your culinary skills and developing your unique flavor profile. By documenting your seasoning experiments, you can track which combinations work well and which do not, fostering a deeper understanding of flavor dynamics and enhancing your cooking abilities.
In your journal, record the ratios of spices and herbs used, as well as the dishes prepared. Note any adjustments made during the cooking process, along with the final outcomes. This detailed account can help you identify successful patterns and guide future seasoning decisions, ensuring consistency in your culinary creations while allowing for the freedom to experiment and innovate.
Moreover, keeping a seasoning journal can inspire creativity. By revisiting past entries, you may discover combinations you hadn’t considered before or find ways to innovate on familiar flavors. This process not only strengthens your understanding of seasoning but also encourages continuous exploration and growth in your cooking journey, ultimately leading to more refined and satisfying dishes.
Balancing Flavor and Heat in Your Culinary Creations
Achieving the perfect balance between flavor and heat is essential for creating versatile and enjoyable dishes. While heat can add excitement, too much can overpower a dish and mask its other flavors, leading to an unbalanced experience. To strike the right balance, it is crucial to understand the heat level of various spices and how they interact with other ingredients in your dishes.
Start by using milder spices to build a foundation, then gradually introduce hotter options as you taste. For example, using paprika or cayenne pepper can provide a gentle warmth without overwhelming the palate. Additionally, consider pairing heat with sweet or acidic elements to create a more harmonious flavor profile that captivates the senses.
Using dairy products such as yogurt or sour cream can also help balance heat, providing a cooling effect that enhances the overall experience of your dish. By mastering the art of balancing flavor and heat, you can create dishes that tantalize and excite the taste buds without overwhelming them, ensuring a delightful dining experience.
Seasoning Food for Various Dietary Needs Without Overdoing It
Low-Sodium Seasoning Alternatives for Healthier Meals
For those looking to reduce their sodium intake, low-sodium seasoning options can enhance flavor without compromising health. Herbs and spices serve as excellent substitutes, adding depth and complexity to dishes without the need for excessive salt. Options such as garlic powder, onion powder, and various dried herbs can provide a flavor boost while keeping sodium levels in check and promoting heart health.
Additionally, using acidic elements like lemon juice or vinegar can brighten dishes, creating a perception of enhanced flavor that compensates for reduced salt. Incorporating ingredients like mustard or salsa can also provide a punchy taste without relying on sodium, making them fantastic additions to your culinary toolset.
Consider these low-sodium options:
- Fresh herbs – such as basil, parsley, or cilantro, which can add vibrant flavors.
- Spices – like cumin, paprika, or turmeric, which can enhance dishes without excess salt.
- Citrus juice – lemon or lime for brightness and acidity that elevates the dish.
- Vinegar – such as balsamic or apple cider for acidity that balances flavors.
Utilizing these alternatives can ensure that meals remain flavorful while adhering to health-conscious dietary restrictions, making your dishes both delicious and nutritious.
Seasoning Strategies for Allergies and Sensitivities
When seasoning food for allergies and sensitivities, it is essential to remain mindful of potential triggers while finding suitable alternatives. Many traditional seasonings may contain allergens or irritants, so opting for allergen-free spices and herbs is crucial for creating safe and delicious meals. For instance, instead of using pre-packaged seasoning blends that may contain gluten or dairy, consider creating your combinations from safe ingredients that enhance flavor without compromising health.
Additionally, experimenting with fresh herbs, such as basil, oregano, or cilantro, can add vibrant flavors without the risk of allergens that may be present in processed seasonings. Similarly, using natural flavor enhancers like ginger or turmeric can introduce unique and delightful tastes to your dishes without compromising health or safety.
Here are a few strategies for allergen-friendly seasoning:
- Custom seasoning blends – mix safe herbs and spices to create unique flavors tailored to dietary needs.
- Focus on fresh herbs – which offer brightness, freshness, and no allergens.
- Experiment with fermentation – using options like kimchi or sauerkraut for tang and depth that enhance dishes.
- Opt for homemade sauces – avoiding processed ingredients that may contain allergens.
By prioritizing the needs of those with allergies, you can create dishes that are both safe and delicious, ensuring everyone can enjoy a satisfying meal.
Effective Seasoning Strategies for Vegan and Vegetarian Diets
Seasoning for vegan and vegetarian diets may require different approaches to ensure that meals are flavorful and satisfying without relying on animal products. Plant-based ingredients often have their unique flavor profiles that deserve to be highlighted through skillful seasoning. For example, incorporating umami-rich foods such as mushrooms, tomatoes, or nutritional yeast can add depth and richness without compromising dietary values.
Utilizing herbs and spices creatively can also enhance the overall experience of plant-based dishes. Combining spices like cumin, smoked paprika, and coriander can create a rich and complex flavor profile, while fresh herbs like basil or cilantro can brighten meals and enhance their appeal.
Consider these effective seasoning strategies for plant-based cooking:
- Use umami boosters – such as miso, nutritional yeast, or tamari, to enhance depth without animal products.
- Incorporate tangy elements – like citrus or vinegar for brightness that elevates plant-based dishes.
- Experiment with spice blends – such as garam masala or curry powder to add complexity and excitement.
- Emphasize texture – by using nuts, seeds, or legumes to add depth and interest to dishes.
By focusing on these elements, vegan and vegetarian dishes can be both satisfying and full of flavor, ensuring a delightful experience for all diners.
Proven Strategies for Achieving Perfect Seasoning Without Overdoing It
Tasting and Adjusting Seasoning Throughout the Cooking Process
The ability to taste and adjust seasoning throughout the cooking process is a hallmark of skilled chefs and home cooks alike. Tasting regularly allows you to assess the balance of flavors, making it easier to correct any imbalances before serving. This practice not only enhances the final dish but also builds your palate, helping you understand how different seasonings interact and contribute to the overall flavor profile.
To effectively taste and adjust seasoning:
- Use a spoon – take small samples to assess flavor without contamination, ensuring accurate tasting.
- Take notes – record adjustments made to help refine future dishes and improve consistency.
- Season gradually – add small amounts of seasoning, tasting after each addition to avoid overwhelming flavors.
- Involve others – having a second opinion can provide valuable feedback and enhance your cooking process.
By employing these strategies, you develop the skill to create well-balanced dishes that appeal to diverse palates, ensuring a satisfying dining experience that leaves a lasting impression.
Employing a Light Hand with Salt and Pepper for Flavor Control
Using a light hand with salt and pepper is essential for preventing overwhelming flavors in your dishes. Over-salting can quickly mask the natural taste of ingredients, while excessive pepper can lead to a harsh, unpleasant experience. Starting with a modest amount allows the inherent flavors to shine through, encouraging a more balanced meal that highlights the ingredients rather than overpowering them.
Consider this mindful approach:
- Start with a pinch – add salt and pepper gradually, tasting as you go to ensure the right balance.
- Use finishing salts – consider using flaky sea salt or herb-infused salt for a burst of flavor at the end of cooking.
- Incorporate other seasonings – use herbs and spices to build flavor alongside salt and pepper, enhancing the overall taste.
- Adjust based on cooking method – keep in mind that cooking techniques can intensify flavors, necessitating caution with seasoning.
This mindful approach to seasoning helps you create dishes that celebrate the flavors of each ingredient, leading to a more enjoyable dining experience that satisfies and delights all who partake.
The Benefits of Layering Flavors in Your Culinary Creations
Layering flavors is an effective technique that enhances the complexity and depth of dishes. By adding seasonings at various stages of cooking, each component contributes to a well-rounded final product that tantalizes the taste buds. This method allows for a harmonious melding of flavors, ensuring that no single element overpowers the others and creating a truly delightful culinary experience.
For example, when preparing a stew, one might start by sautéing onions and garlic, adding spices like thyme and bay leaves early on to infuse the oil. Next, as the dish simmers, additional seasonings and fresh herbs can be added later in the process to maintain their integrity and freshness. This strategic layering creates a multi-dimensional flavor profile that delights the palate and keeps diners engaged.
Incorporating diverse seasonings at different stages also prevents reliance on a single dominant flavor, encouraging a more balanced meal that showcases the unique characteristics of each ingredient. This approach not only enhances the overall taste but also elevates the cooking process, allowing you to explore the nuances of each component and create culinary masterpieces that impress and satisfy.
Frequently Asked Questions About Seasoning Techniques
What is the best way to season food without overdoing it?
Begin with small amounts of seasoning, taste as you cook, and adjust gradually. Utilize fresh herbs and spices, incorporating them at various stages for optimal balance and flavor.
How do I know if my dish is over-seasoned?
If the flavors are harsh or one-dimensional, it may indicate over-seasoning. Tasting frequently can help identify imbalances before serving, allowing for timely corrections.
Can I fix an over-seasoned dish?
Yes, you can dilute it with additional ingredients, balance with acidity, or introduce a touch of sweetness to counteract excessive salt or spice, restoring harmony to the dish.
What are some excellent low-sodium seasoning alternatives?
Herbs, spices, vinegar, and citrus juice are fantastic low-sodium options that can enhance flavor without the health risks associated with excessive salt intake.
How do I store fresh herbs and spices for longevity?
Store fresh herbs in the fridge wrapped in a damp towel. For dried spices, use airtight containers away from heat and light to maintain potency and flavor integrity.
What are some common mistakes when seasoning food?
Common mistakes include over-seasoning, adding herbs too early, and failing to taste as you go. Aim for balance and variety in your seasonings to enhance the dish effectively.
How can I develop my unique seasoning style?
Experiment with different herbs and spices, keep a seasoning journal to track combinations, and learn from various cuisines to create your unique flavor palette that reflects your culinary identity.
When should I add fresh herbs during cooking?
Fresh herbs are best added at the end of cooking to maintain their flavor and vibrancy, enhancing the overall dish without overwhelming it with strong flavors.
What cooking methods enhance natural flavors effectively?
Methods such as roasting, grilling, and sautéing can caramelize ingredients and intensify their natural flavors, reducing the need for additional seasoning while creating delicious meals.
How important is measuring seasonings accurately for flavor balance?
Accurate measurement is crucial for balanced flavors, preventing dishes from becoming too salty or overpowering. Use measuring tools for precision to ensure consistency in your culinary creations.
Connect with us on Facebook for more culinary tips!
The post How to Season Food Without Overdoing It: Mastering Flavor appeared first on https://cookinggods.com
The Article Mastering Flavor: Season Food Without Overdoing It Was Found On https://limitsofstrategy.com
-
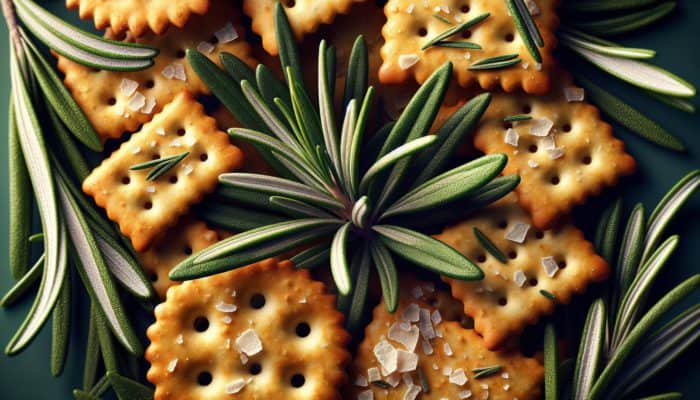
Herbs in Snacks: Exploring UK Culinary Delights
Unlock the Secrets of Using Popular Herbs to Enhance Your Snack Experience in the UK
Transform Your Savoury Snacks with the Invigorating Aroma of Rosemary
When it comes to snack enhancement, rosemary stands out as a highly aromatic herb that is treasured in British cuisine for its distinct, pine-like flavour. Its incredible versatility allows it to be seamlessly integrated into a variety of savoury snacks, particularly crisps and crackers. By infusing rosemary into these snacks, you not only elevate the overall taste profile but also introduce a sophisticated element that appeals to the tastes of discerning snack enthusiasts. The herb’s robust flavour complements the natural saltiness of crisps, delivering a balanced and mouth-watering experience that is simply irresistible.
For instance, you can create your own homemade rosemary-infused crispy potato snacks by thinly slicing potatoes, tossing them in olive oil, and generously sprinkling fresh rosemary before baking them to perfection. Additionally, rosemary can be used in cheese crackers, where its earthy notes beautifully harmonise with the richness of cheese. This addition not only enhances the flavour but also adds an air of elegance, making these snacks ideal for entertaining guests or enjoying a quiet evening at home.
In the UK, specialty shops are increasingly offering gourmet rosemary-infused crisps, reflecting the herb’s rising popularity in the snack market. Experimenting with rosemary can lead to delightful culinary adventures, inspiring home cooks to explore various combinations that elevate their overall snacking experience.
Discover Why Mint is the Perfect Herb for Elevating Sweet Treats
Mint is renowned for its refreshing aroma and cool flavour, making it a beloved herb in the UK, especially in sweet treats. This herb frequently features in desserts such as mint chocolate, after-dinner mints, and a variety of ice creams, where it plays a crucial role in amplifying sweetness while providing a refreshing counterbalance. The bright and invigorating taste of mint pairs exceptionally well with chocolate, resulting in an indulgent treat that is both rich and refreshing.
Incorporating mint into sweet dishes can be as straightforward as adding finely chopped fresh mint leaves to chocolate bark or brownies. The vibrant green flecks not only enhance visual appeal but also release a burst of flavour upon tasting, transforming an ordinary dessert into something truly extraordinary. Mint can also be infused into syrups for cocktails or drizzled over desserts, showcasing its versatility that appeals to both children and adults alike.
Furthermore, the popularity of mint in the UK is exemplified by its use in traditional sweets like peppermint creams, where the harmonious blend of sugar and peppermint essence creates an utterly delightful confection. With the growing trend of health-conscious eating, incorporating fresh mint into homemade treats offers a natural sweetness without relying heavily on added sugars, resulting in a guilt-free indulgence.
Enhance the Flavour of Cheese-Based Snacks with Thyme’s Unique Profile
Thyme captures the essence of British cuisine, often paired with rich cheese to create flavourful, satisfying snacks. The earthy, slightly minty taste of thyme complements various cheeses perfectly, making it an excellent addition to cheese straws, quiches, and cheese-based dips. These thyme-infused snacks present a delightful complexity that transforms the simple pleasure of cheese into a gourmet experience.
To craft thyme cheese straws, for instance, blend fresh thyme leaves into the pastry dough, adding a delicate herbal note that resonates beautifully with every bite. Alternatively, thyme can be incorporated into cheese dips, providing a delicious accompaniment to crackers or fresh vegetables. This combination not only delights the palate but also adds a touch of sophistication to your snack table, making it perfect for parties or family gatherings.
Exploring culinary possibilities with thyme can open doors to exciting new flavours, as it pairs remarkably well with other herbs and spices. For example, combining thyme with garlic and cream cheese creates a rich dip that is both aromatic and utterly irresistible. The use of thyme in cheese-based snacks beautifully encapsulates the charm of British culinary tradition, making it a favourite among those who appreciate nuanced flavours.
Your Comprehensive Guide to Infusing Snacks with Herbs
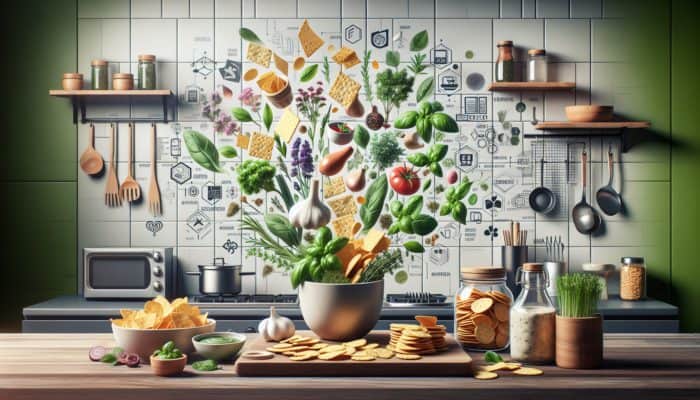
Finding the Perfect Herb Pairings for Different Snacks to Maximize Flavour
Incorporating herbs into your snacks can dramatically elevate their flavour, and selecting the right herbs for each specific type of snack is crucial. The synergy between herbs and snacks creates unique taste sensations that can transform everyday bites into culinary delights. Here’s a curated selection of ideal herb-snack pairings that can enhance your next culinary adventure:
- Basil pairs exceptionally well with tomato-based crisps and snacks.
- Dill beautifully complements fish-based snacks like smoked salmon on crackers.
- Cilantro enhances tortilla chips and salsa.
- Chives elevate creamy dips or cheese spreads impeccably.
- Oregano works wonderfully with Italian-inspired breadsticks.
- Parsley brightens up vegetable chips or fresh vegetables.
- Sage enriches savoury pastries or pies.
- Chili flakes add a kick to popcorn or spiced nuts.
Experimenting with these pairings can yield delightful results, allowing you to discover flavours that beautifully complement each other. For instance, basil’s sweet notes can enhance the tanginess of tomato-based snacks, while dill’s freshness can elevate the natural flavours of seafood. Understanding these combinations is essential for crafting snacks that not only taste amazing but also leave a lasting impression on your guests.
Mastering the Best Techniques for Drying and Storing Herbs for Snack Use
Effective drying and proper storage of herbs are essential for preserving their flavour, especially when planning to use them in snacks. Fresh herbs tend to lose potency quickly, so mastering the drying process can ensure they remain ready for use whenever culinary inspiration strikes. The drying process typically involves hanging herbs in a cool, dry place away from direct sunlight or using an oven set to a low temperature. Once dried, proper storage becomes crucial to maintaining their flavour and aroma.
Store dried herbs in airtight containers, such as glass jars or vacuum-sealed bags, and keep them in a dark, cool location to prevent degradation. Labelling the containers with the herb’s name and the drying date will help you keep track of their freshness. When stored correctly, dried herbs can last up to a year, allowing you to enjoy your favourite herbs long after the growing season has ended. This practice not only saves money but also ensures that home cooks have access to vibrant flavours all year round.
Additionally, consider freezing fresh herbs in ice cube trays filled with water or oil, creating ready-to-use herbal cubes that can be added directly to cooking or snack preparation. This method preserves the freshness of the herbs, allowing their vibrant flavours to shine through in your snacks.
Utilizing Fresh Herbs in Snacks for an Enhanced Taste Experience
Absolutely, fresh herbs can be used in snacks and are often preferred for their vibrant flavour and aroma. To fully appreciate the essence of fresh herbs, they should be added just before serving, as their delicate flavours may diminish when heated for extended periods. Fresh herbs can be incorporated into a wide range of snacks, from dips and spreads to baked goods and garnishes.
For example, adding freshly chopped mint to chocolate brownies can impart a refreshing note that perfectly offsets the dessert’s richness. Likewise, a handful of fresh basil can elevate a simple tomato bruschetta, providing an aromatic quality that is both enticing and delicious. The key is to use the right quantity to enhance the flavour without overwhelming the dish.
Moreover, fresh herbs can also be used creatively in snack presentations. Sprinkling freshly chopped chives over cream cheese on crackers or using a sprig of rosemary as a garnish for roasted nuts can enhance both the overall presentation and flavour experience. Always consider the balance of flavours when using fresh herbs, as their potency can vary significantly depending on the type and freshness.
Proven Strategies for Maximising the Use of Herbs in Snacks
What Expert Advice Do Chefs Provide on Effectively Using Herbs in Snacks?
Many chefs across the United Kingdom advocate for the effective use of herbs to elevate snack flavours. They understand that herbs have the power to transform simple ingredients into gourmet experiences, enhancing not only flavour but also presentation. Renowned chef Michel Roux Jr. emphasizes that selecting the right herb can add depth of flavour that is essential for creating memorable snacks, encouraging home cooks to experiment with various herb combinations.
For example, chef Jamie Oliver frequently incorporates fresh herbs into his recipes, highlighting the importance of basil and parsley in Italian-inspired snacks. He suggests that even a modest addition of fresh herbs can elevate a simple bruschetta or pasta dish, making it far more appealing to the palate. Chefs often recommend starting with classic herb combinations and then experimenting to find tailored flavour profiles that resonate with individual tastes.
Additionally, chefs like Tom Kerridge underscore the versatility of herbs in enhancing the texture and visual charm of snacks. They frequently advise using a blend of herbs in dips and spreads, creating a complex medley of flavours that can entice even the most selective eaters. The consensus among culinary professionals is clear: creatively utilizing herbs is an art that can significantly enhance the enjoyment derived from snacking.
How Herbs Can Enhance the Nutritional Value of Snacks for Health Benefits
Herbs serve not only as flavour enhancers but also as nutritional powerhouses that can significantly elevate the health profile of snacks. Many herbs are packed with essential vitamins, minerals, and antioxidants that contribute to a balanced diet. For instance, parsley is abundant in vitamins A, C, and K, while rosemary is well-known for its antioxidant properties.
Incorporating herbs into snacks can transform them from mere indulgences into nutritious bites. For example, adding fresh spinach or basil to a dip can enhance its vitamin content while providing a fresh burst of flavour. Similarly, using herbs like oregano, thyme, or dill can introduce an array of phytonutrients that support overall health and wellness.
Moreover, the addition of herbs can promote healthier snacking habits. By opting for snacks rich in natural herb-based flavours instead of processed flavourings, consumers can make more informed choices that align with their dietary preferences. This shift not only enhances the overall snacking experience but also encourages mindfulness in food consumption.
Best Practices for Using Herbs in Snacks Effectively
To maximize the potential of herbs in snacks, adhering to best practices is crucial. First and foremost, using high-quality, fresh herbs can significantly impact flavour. When sourcing herbs, look for vibrant, fragrant leaves that are free from wilting or browning. For dried herbs, choose reputable suppliers to ensure potency and quality.
Another best practice is to match the herb’s strength to the snack’s flavour profile. Stronger herbs like rosemary and sage can dominate milder flavours, while delicate herbs such as chives or basil should be used judiciously to avoid overpowering the dish. It’s also advisable to consider the cooking method: some herbs, such as thyme and oregano, benefit from cooking, while others, like mint and parsley, are best added fresh.
Lastly, always store herbs properly to maintain their freshness. To extend the shelf life of fresh herbs, store them upright in water or wrap them in a damp paper towel. Dried herbs should be kept in airtight containers away from light and heat to preserve their flavour. Following these best practices will lead to a more enjoyable snacking experience and showcase the true potential of herbs.
Discover the Advantages of Using Herbs in Snack Preparations
How Herbs Significantly Improve the Flavour Profiles of Snacks
Indeed, herbs can drastically enhance the flavour profiles of snacks, adding depth and complexity that makes them far more enjoyable to consume. The aromatic qualities of herbs can transform basic ingredients into taste sensations, creating a sensory experience that is both satisfying and intriguing. For instance, a simple potato crisp becomes a gourmet delight with the addition of fresh rosemary or thyme, elevating its tastiness and appeal.
Herbs offer a wide range of flavours, from the bright, zesty notes of basil to the warm, earthy tones of sage. This extensive variety allows for endless creativity in the kitchen, encouraging snack enthusiasts to explore new combinations and flavours. Furthermore, herbs can create a balance of flavours that harmonizes sweetness, saltiness, and savouriness, making for a more complex and satisfying snacking experience. For example, when paired with cheese, the herbal notes can cut through rich, creamy textures, enhancing each bite.
By incorporating a diverse array of herbs into snacks, cooks and consumers alike can experience a richer, more fulfilling snacking journey that excites the palate and elevates the overall culinary experience.
Can Herbs Naturally Extend the Shelf Life of Snacks?
Yes, certain herbs possess natural preservative properties that can help to extend the shelf life of snacks, making them not only tastier but also more sustainable. For example, herbs like rosemary and oregano contain antioxidants that can inhibit the growth of bacteria and fungi in food products. This natural preservation method is particularly advantageous for home cooks seeking to reduce waste while maintaining quality.
Incorporating herbs into the production of snack foods can enhance their longevity without the need for artificial preservatives, appealing to health-conscious consumers. For instance, adding dried rosemary to crackers can help them maintain freshness while imparting a delightful flavour. Additionally, herb-infused oils can be used to dress salads and vegetables, offering both flavour and extended shelf life.
Not only do these methods allow snacks to be enjoyed longer, but they also reflect a growing demand for cleaner, more natural food options. By incorporating herbs into snack production, we can ensure our snacks remain delicious and wholesome for an extended period.
How Herbs Foster Healthier Snacking Choices for Consumers
Integrating herbs into snacks can significantly boost their nutritional value, making them a healthier option for consumers. Many herbs are rich in vitamins, minerals, and antioxidants, contributing essential nutrients to the diet. For example, herbs like parsley and cilantro are loaded with vitamins A, C, and K, which are vital for maintaining a balanced diet.
Moreover, using fresh herbs can eliminate the need for artificial flavourings and excessive salt, producing snacks that are not only delicious but also in line with health-conscious eating trends. By flavouring snacks with herbs instead of processed seasonings, individuals can enjoy a more natural taste while also reaping the health benefits of these powerful plants.
Additionally, herbs can promote digestive health and possess anti-inflammatory properties, contributing to overall well-being. Thus, the decision to incorporate herbs into snacking habits not only enhances flavour but also supports a healthier lifestyle, making them an ideal addition to any snack repertoire.
Are Herbs Cost-Effective in Snack Production Techniques?
Utilizing herbs can indeed be a cost-effective strategy in snack production, particularly when compared to artificial flavourings and preservatives. Fresh herbs can often be sourced locally, reducing transportation costs and supporting local agriculture. In contrast, dried herbs typically have a long shelf life and can be purchased in bulk at a reasonable price.
Moreover, herbs not only add flavour but also enhance the perceived quality of snacks, making them more appealing to consumers who are willing to invest in healthier options. For instance, snacks that feature natural ingredients and herbal infusions can command a higher price point, benefiting both producers and consumers alike.
Additionally, incorporating herbs can reduce the reliance on more expensive flavouring agents, leading to cost savings in production without compromising quality. This makes herbs an attractive option for both home cooks and commercial producers seeking to create flavourful snacks that resonate with modern dietary preferences.
Do Herbs Cater to Health-Conscious Consumers in the Snack Market?
Herbs are indeed appealing to health-conscious consumers, as they embody the principles of clean eating and natural ingredients. The shift towards more wholesome, minimally processed foods has led to an increased demand for snacks enhanced with fresh herbs, which provide natural flavour without the need for artificial additives. This trend reflects a growing awareness of the importance of ingredient transparency in food choices.
Snacks that feature herbs are perceived as more nutritious and contribute to a culinary experience that is both enjoyable and beneficial. Health-conscious consumers often seek out snacks that align with their values, and those that incorporate herbs resonate strongly due to their health benefits and flavour-enhancing properties. For instance, products that highlight local, sustainable herbs are becoming increasingly popular in the UK market.
Therefore, integrating herbs into snacks satisfies taste preferences while aligning with the values of health-conscious consumers, making them a smart choice in today’s evolving food landscape.
Delicious Traditional British Snacks Enhanced with Fresh Herbs
Savour the Delight of Herb-Infused Scones: A British Classic
Herb-infused scones represent a delightful merger of traditional British baking and the aromatic qualities of fresh herbs. Although scones are typically associated with sweet toppings such as clotted cream and jam, exploring savoury options, particularly with herbs like chives or parsley, unveils a realm of culinary possibilities. These savoury scones not only serve as a staple in UK tea culture but also act as an excellent base for various toppings or fillings.
To create herb-infused scones, incorporate finely chopped herbs into the scone dough before baking. The result is a fluffy, flavour-packed scone that pairs wonderfully with cheese or smoked salmon, offering a delightful twist on a classic. These scones can be served warm as part of a festive afternoon tea spread or enjoyed as a standalone snack.
Moreover, experimenting with different herbs allows for an exciting array of flavours. For instance, blending fresh rosemary into the dough can evoke the essence of the British countryside, while adding dill can nod to coastal regions famous for their seafood. Herb-infused scones provide a versatile canvas for creativity, perfect for both casual gatherings and formal occasions.
Elevate Flavoured Crisps with a Touch of Fresh Herbs
Flavoured crisps are a quintessential British snack, and infusing them with herbs can elevate this beloved treat to new heights. Crisps flavoured with herbs such as rosemary or thyme are gaining traction in the UK, offering a unique twist on traditional potato snacks. These herb-infused crisps not only deliver a satisfying crunch but also offer a burst of aromatic, enjoyable flavour.
Making your own herb-flavoured crisps at home is a rewarding experience. Slice potatoes thinly, toss them in olive oil, and sprinkle with your chosen herbs before baking until crispy. The result is a homemade snack that allows for complete control over flavour and seasoning, showcasing the delightful nuances of the herbs used.
Commercially, many UK brands have started recognizing the appeal of herb-flavoured crisps, providing varieties that highlight local and seasonal herbs. These crisps not only satisfy cravings for a salty snack but also cater to the growing demand for gourmet snack options that are both delicious and innovative. Herb-flavoured crisps transcend mere snacking; they invite consumers to explore new flavours and elevate the humble crisp into a gourmet experience.
Explore the Art of Herb-Seasoned Pork Pies: A British Classic
Pork pies are a cherished traditional British snack, and incorporating herbs can significantly enhance their flavour. Using herbs like sage or thyme in the filling of pork pies can impart a depth of flavour that resonates with the taste of home. These herbs complement the richness of the pork, creating a savoury treat that is beloved across the UK.
To craft herb-seasoned pork pies, blend finely chopped herbs into the meat mixture before sealing it in pastry. The result is a juicy, flavourful pie that showcases the harmonious relationship between meat and herbs. This classic recipe can also be adapted to include other ingredients, such as vegetables, further enriching the snack’s nutritional profile.
The incorporation of herbs in pork pies not only enhances flavour but also aligns with the growing trend towards artisanal, locally sourced ingredients. Producers are increasingly experimenting with herb-infused variations of this traditional snack, making it a staple at food markets and festivals throughout the UK. Whether enjoyed warm or cold, herb-seasoned pork pies offer a comforting taste of British culinary heritage, making them a favourite for any occasion.
Innovative Approaches to Using Herbs in Snacks
Create Delicious Herb-Infused Popcorn for a Gourmet Snack Experience
Popcorn is a versatile snack that can be transformed into a gourmet delight with the addition of herbs. Herb-infused popcorn offers a unique twist on this classic snack, creating an exciting flavour experience that transcends the standard butter and salt. Infusing popcorn with herbs such as rosemary or dill can yield a savoury treat that is both aromatic and delicious.
To create herb-infused popcorn, pop your corn and then toss it with melted butter or oil mixed with finely chopped herbs. For example, rosemary can add a fragrant, earthy quality, while dill offers a fresh, zesty note. This method allows for endless creativity, as you can experiment with different herbs and spice blends to discover your perfect combination.
This snack is not only easy to prepare but also health-conscious, as it can be tailored to fit various dietary preferences. By controlling the seasoning, you can create a lighter version that satisfies cravings without the guilt often associated with traditional snacks. Herb-infused popcorn is perfect for movie nights or casual gatherings, providing a flavourful alternative to conventional snacks.
Crafting Exquisite Herb-Infused Dips for Enhanced Snacking
Herb-infused dips are an excellent way to incorporate the vibrant flavours of fresh herbs into your snacking repertoire. These dips can elevate a variety of snacks, from vegetable sticks to crisps, offering a refreshing and aromatic accompaniment. Combining herbs with creamy bases or beans creates delicious dips that cater to a range of tastes. Here are some ideal herb-dip combinations to inspire your culinary exploration:
- Basil mixed with cream cheese makes a smooth, rich dip.
- Cilantro blended with avocado creates a zesty guacamole.
- Parsley incorporated into hummus adds a fresh twist.
- Chives combined with sour cream offers a classic dip.
- Mint mixed with yoghurt provides a refreshing accompaniment.
- Dill blended with cream cheese creates a tangy spread.
- Thyme added to bean dip delivers an earthy flavour.
Creating these dips allows for personalisation, as you can adjust the herb quantities to suit your preferences. Moreover, they are perfect for entertaining, offering an impressive yet simple option for guests. Herb-infused dips not only provide flavour but also contribute to healthier snacking by incorporating fresh ingredients that offer nutritional benefits.
Incorporating Herbs into Snack Bars for a Unique Twist
Herbs can indeed be added to snack bars, offering a refreshing twist on traditional sweet treats. Using herbs like mint or lemon balm can introduce a unique flavour dimension that enriches the overall snacking experience. These herbs can be blended into the mixture or used as a garnish to add a delightful surprise with every bite.
For example, incorporating fresh mint into a chocolate snack bar creates a refreshing flavour reminiscent of popular mint chocolate confections. Alternatively, lemon balm lends a light, citrusy note that brightens up nut and seed-based bars. The addition of herbs not only enhances flavour but also aligns with the growing trend towards natural and health-conscious snacking.
Creating herb-infused snack bars at home allows for creativity and control over ingredients, ensuring that they are not only delicious but also nutritious. By opting for whole, natural ingredients paired with fresh herbs, you can craft bars that satisfy cravings while supporting a healthy lifestyle. This approach appeals to consumers and allows for endless experimentation with flavours and textures.
Making Herb-Infused Crackers for a Savoury Snack Delight
Herb-infused crackers provide a delightful addition to any snacking platter, offering a savoury base that pairs wonderfully with cheese, spreads, or dips. Incorporating herbs such as thyme or oregano into cracker recipes can create a flavourful treat that enhances the overall snacking experience. These crackers can be made at home, allowing for customization in flavour and texture.
To create herb-infused crackers, mix finely chopped herbs into the dough before rolling and baking. The result is a crispy, flavour-packed cracker that showcases the essence of the herbs used. Pairing these herb-infused crackers with creamy cheese or hummus creates a balanced snack that is sure to please any palate.
Additionally, herb-infused crackers can be tailored to meet various dietary preferences, making them accessible to a wide range of consumers. The use of herbs not only adds flavour but also embodies the trend towards more natural, wholesome ingredients. This approach to snacking celebrates the versatility of herbs and their ability to transform simple ingredients into something extraordinary.
Seasonal Herbs to Elevate Your UK Snacks
Spring Herbs That Infuse Freshness and Vibrancy into Your Snacks
Spring is a time of renewal and growth, and the herbs that flourish during this season truly reflect the vibrancy of the landscape. Fresh herbs such as chives and dill are perfect for adding a burst of flavour to snacks, echoing the freshness of spring. Chives, with their mild onion flavour, can be included in dips, spreads, or even cheese-based snacks, creating a delightful taste that resonates with the season.
Dill offers a refreshing, slightly tangy note that pairs beautifully with fish dishes and creamy dips. Incorporating these herbs into spring snacks evokes the essence of the season and encourages the use of seasonal produce. For example, a creamy dill dip can elevate fresh vegetables, while chive-infused crackers serve as an excellent base for spreads or cheeses.
The use of spring herbs allows for creativity in the kitchen, inspiring home cooks to experiment with flavours that celebrate the bounty of the season. These herbs not only enhance the taste of snacks but also foster a sense of connection to nature, making them a delightful addition to any spring gathering.
Summer Herbs That Refresh and Brighten Your Snacks
Summer herbs such as basil and mint bring a refreshing element to snacks, making them perfect for warm days. Basil, with its aromatic, sweet flavour, is ideal for pairing with tomato-based snacks or for creating vibrant dips. Celebrate summer with a classic bruschetta topped with fresh tomatoes and basil, offering a burst of flavour that epitomizes the season.
Mint is perfect for infusing into drinks or desserts, providing a cooling sensation that is especially appealing in the heat. Mint-infused dips or yoghurt can also be served alongside fresh fruits and vegetables, creating a refreshing snack option for summer picnics or gatherings. The versatility of these herbs allows for endless culinary possibilities, encouraging experimentation with flavours and presentations.
As summer unfolds, incorporating these herbs into snacks evokes a sense of joy and celebration, making for an enjoyable snacking experience that reflects the abundance of the season.
Autumn and Winter Herbs for Comforting and Hearty Snacks
During the colder months, herbs like rosemary and thyme shine, providing warmth and comfort to snacks. These herbs are perfect for enhancing hearty dishes, making them ideal for autumn and winter snacking. Rosemary’s earthy, aromatic qualities elevate roasted nuts or crisps, while thyme pairs excellently with creamy cheese dips, creating a comforting snack experience.
Incorporating these herbs into dishes such as winter soups or stews enhances the overall flavour, capturing the essence of the season. For example, a rosemary-infused cracker served alongside a warming soup creates a satisfying combination that evokes feelings of comfort and nostalgia.
The use of autumn and winter herbs warms the palate and aligns with the seasonal desire for hearty, nourishing snacks. These herbs can transform ordinary bites into something special, celebrating the flavours and aromas of the colder months while providing a comforting culinary experience.
Frequently Asked Questions About Effectively Using Herbs in Snacks
Which Herbs Are Best for Enhancing Snack Flavour?
Fresh herbs like basil, mint, rosemary, and thyme are excellent choices for enhancing snack flavour. They provide a variety of tastes that complement different ingredients beautifully.
Can Dried Herbs Replace Fresh Herbs in Snack Recipes?
Yes, dried herbs can be used instead of fresh herbs, but be sure to adjust the quantity since dried herbs are more concentrated in flavour.
What is the Best Way to Store Fresh Herbs to Keep Them Fresh Longer?
To maintain the freshness of fresh herbs, store them upright in a glass of water or wrap them in a damp paper towel and place them in a plastic bag in the fridge.
Which Snacks Pair Well with Herb-Infused Dips for a Delightful Experience?
Herb-infused dips pair wonderfully with vegetable sticks, crisps, crackers, and even bread, offering a variety of options for enjoyable snacking.
Can Herbs Make Snacks Healthier from a Nutritional Standpoint?
Yes, incorporating herbs can enhance the nutritional value of snacks by providing vitamins and antioxidants, making them a healthier option.
How Can I Use Herbs in Sweet Snacks for Added Flavour?
Herbs such as mint and lavender can be added to sweet snacks like cookies, brownies, or ice cream to give traditional treats a refreshing twist.
Are There Any Herbs That Should Be Used Sparingly in Snacks Due to Strong Flavours?
While most herbs are suitable for snacks, some, like strong herbs (e.g., sage), should be used judiciously to avoid overpowering other flavours.
What’s the Best Way to Dry Herbs for Proper Storage?
To dry herbs, hang them upside down in a cool, dark place or use a dehydrator, ensuring they are completely dry before storing them in airtight containers.
Can I Use Herbs in Gluten-Free Snacks for Enhanced Taste?
Absolutely! Herbs can enhance the flavour of gluten-free snacks, adding depth and interest to recipes that rely on alternative flours.
How Can I Tell if Herbs are Fresh for Optimal Snacking?
Fresh herbs should have vibrant green leaves, a strong aroma, and no signs of wilting or browning. Always choose the freshest herbs for the best flavour.
Connect with us on Facebook!
The Article: How to Use Herbs in Snacks: UK Edition appeared first on https://mcrtherapies.co.uk
The Article Herbs in Snacks: A Guide for UK Culinary Delights Was Found On https://limitsofstrategy.com
-

BBQ Heat Mappers: Essential Usage Guide for Grilling Success
Unlock the Full Potential of BBQ Heat Mapping for Perfect Grilling Every Time
Understanding BBQ Heat Mappers: Functionality and Importance
BBQ heat mappers are sophisticated instruments meticulously engineered to assess the temperature gradient across your grill’s surface. This innovative technology is essential for guaranteeing that your culinary creations are cooked evenly and reach optimal doneness. By highlighting areas of intense heat alongside cooler zones, BBQ heat mappers allow you to refine your cooking strategies and timing, ultimately leading to exquisitely grilled meats, vibrant vegetables, and more. Whether you are an enthusiastic backyard griller or a seasoned professional pitmaster, incorporating a heat mapper into your grilling routine can significantly improve your skills and elevate the quality of the meals you serve.
Integrating heat mapping technology into your barbecuing endeavors not only enhances the quality of your meals but also enriches the overall grilling experience. Picture serving perfectly seared steaks with a delectable crust, paired with juicy, succulent chicken—this is the pinnacle of grilling achieved through the strategic application of BBQ heat mappers. Their intuitive design and profound impact on cooking results have rendered them essential tools in contemporary barbecue practices.
Dive into the Different Types of BBQ Heat Mappers on the Market
Various types of BBQ heat mappers cater to a wide range of grilling styles and individual preferences. The primary categories include digital heat mappers and analog versions. Digital heat mappers generally offer precise temperature readings displayed on an easy-to-read screen, often featuring color-coded indicators to represent varying heat levels. This user-friendly design is particularly beneficial for novices, as the visual cues facilitate a quick grasp of temperature zones at a glance.
Conversely, analog heat mappers, which may include thermal stickers or basic heat-sensitive pads, are often preferred by traditionalists and grilling enthusiasts who enjoy a more hands-on methodology. These devices tend to be more cost-effective and battery-free, making them a dependable choice for those who value simplicity. Regardless of the type you opt for, the critical factor is to select a heat mapper that aligns with your grilling aspirations and comfort level.
Discover the Remarkable Advantages of Utilizing BBQ Heat Mappers
Incorporating BBQ heat mappers into your cooking routine can significantly enhance your grilling outcomes. Here are several compelling benefits:
- Provides accurate temperature readings to improve control and precision in your cooking.
- Reveals hot spots and cooler areas on your grill for optimal food placement.
- Guarantees consistent cooking across a variety of food types, improving overall quality.
- Minimizes the risk of overcooking or undercooking meals, promoting food safety.
- Enhances flavor by allowing for ideal cooking temperatures tailored to each ingredient.
- Increases overall grilling efficiency and enjoyment, making your cooking sessions more fulfilling.
- Facilitates strategic planning for multi-zone cooking, enabling simultaneous food preparation.
By leveraging these advantages, you can refine your grilling abilities and impress friends and family with perfectly cooked barbecue dishes. Consistency and accuracy are paramount in the world of grilling, and BBQ heat mappers provide the insights necessary to achieve those standards.
Mastering the Effective Use of BBQ Heat Mappers for Optimal Results

To fully harness the benefits of BBQ heat mappers, start by placing them on the grill’s surface prior to cooking. This initial step is crucial for collecting accurate data regarding the temperature distribution on your grill. Once positioned, closely observe the readings, as they will unveil the various temperature zones across your cooking surface. As you analyze the results, adjust your food placement accordingly. For instance, if you identify a hot spot, position thicker cuts of meat there for optimal searing, while more delicate items like fish can be placed in cooler areas to prevent overcooking.
This approach enhances your ability to achieve the desired doneness for each item and allows you to manage multiple food items simultaneously. For best results, allow the heat mapper to rest on the grill for several minutes to achieve stabilized readings before you begin cooking. This practice provides a clearer understanding of how heat is distributed across your grill, leading to superior cooking outcomes.
Key Considerations for Selecting the Ideal BBQ Heat Mapper
Choosing the right BBQ heat mapper is vital for maximizing your grilling effectiveness. Consider your grill type and cooking style as critical factors in your choice. Seek heat mappers that strike a balance between precision, usability, and compatibility with your specific grill setup. For example, if you use a gas grill, a digital heat mapper may offer greater effectiveness due to its quick response times and accuracy.
Additionally, evaluate features that can elevate your grilling experience. Some heat mappers come equipped with built-in timers or smartphone connectivity, allowing you to monitor temperatures remotely, which is particularly beneficial for extended cooking sessions. Understanding your unique grilling needs and how frequently you barbecue can significantly influence the type of heat mapper that will best serve you, ensuring your investment yields satisfying results time after time.
Prepare Your BBQ Heat Mapper for Unmatched Grilling Success
Essential Steps to Ready Your Grill for Heat Mapping

Before using a BBQ heat mapper, it is critical to prepare your grill properly. A clean grill is essential for achieving accurate temperature readings without interference from leftover food or grease. Follow these steps to prepare your grill:
- Thoroughly clean the grill grates to eliminate any debris or old residue that could skew readings.
- Inspect and empty the grease tray to avoid flare-ups during cooking.
- Preheat your grill to the desired cooking temperature, typically between 225°F and 450°F.
- Allow the grill to stabilize for about 10-15 minutes before placing the heat mapper.
Taking the time to prepare your grill not only affects heat readings but also improves the overall cooking process. An adequately preheated grill promotes better browning and cooking times, setting the stage for a successful grilling experience.
Correctly Positioning the Heat Mapper on Your Grill
Once your grill is ready, the next step is to accurately position the BBQ heat mapper on the grill surface. Ensure it covers the entire area you intend to map in order to collect comprehensive data on heat distribution. It is crucial that the mapper is stable and secure to prevent any shifts during cooking that could lead to inaccurate readings.
In some cases, utilizing multiple heat mappers across the grill may be advantageous to capture temperature variations in different sections, especially for larger grills or those with uneven heat distribution. This strategy will offer a more detailed understanding of your cooking surface, empowering you to make informed decisions regarding food placement and cooking techniques.
Aiming for the Ideal Temperature Range When Grilling
The perfect grilling temperature can vary significantly depending on the food being prepared. Generally, aim for a temperature range between 225°F and 450°F for most items. For instance, lower temperatures are excellent for smoking meats or slow-cooking larger cuts, while higher temperatures are optimal for searing steaks or grilling burgers. Understanding these temperature specifics is crucial for successful barbecuing.
When consulting your BBQ heat mapper, you will notice different zones marked by various colors. As you become more adept at interpreting these maps, you will learn the optimal temperatures for different foods. Utilizing this knowledge allows for better planning of your grilling, ensuring that each item is cooked flawlessly without compromising flavor or texture.
Expert Strategies for Mastering BBQ Heat Mappers
Effectively Interpreting Heat Map Data for Success
Interpreting heat map data is a vital skill when using a BBQ heat mapper. Understanding color gradients is essential; red areas indicate hot spots, while blue areas signify cooler zones. This visualization assists you in adjusting your grilling techniques effectively. For example, if a specific section of the grill appears red, it is ideal for searing meats, while blue zones can be utilized for low-and-slow cooking, such as smoking ribs or briskets.
Real-life scenarios illustrate the importance of this interpretation skill. Imagine grilling a variety of foods, such as chicken, vegetables, and sausages. By placing your heat mapper on the grill and observing the readings, you may discover that the center is significantly hotter than the edges. This insight enables you to adapt your cooking strategy by positioning chicken in the center for quicker cooking, while keeping sausages on the cooler edges to avoid overcooking.
Adjusting Cooking Zones Based on Heat Map Insights
Utilizing data from your BBQ heat mapper to create and manage different cooking zones is a sophisticated yet rewarding technique that can transform your grilling experience. Based on the heat map findings, you can ascertain where to place your food for optimal cooking outcomes. For instance, if you identify a hot spot, it’s the perfect area for thicker cuts of meat that require a good sear. Conversely, cooler regions are ideal for more delicate items such as fish or vegetables, which can easily overcook if placed in hotter zones.
Implementing this strategy not only enhances your cooking results but also allows you to grill multiple items at once, each achieving its perfect doneness. Understanding these cooking zones turns your grill into a versatile cooking appliance, enabling you to execute a variety of dishes simultaneously without sacrificing quality.
Avoiding Common Pitfalls When Using Heat Mappers
When utilizing BBQ heat mappers, steering clear of common mistakes can significantly enhance your grilling experience. Common pitfalls include misinterpreting the temperature scale, failing to allow adequate time for the grill to stabilize, and neglecting to recalibrate the mapper before use. Misreading temperatures can lead to improperly cooked food, while rushing the stabilization phase can yield inaccurate readings.
Moreover, calibrating your heat mapper is essential for ensuring accuracy. This process guarantees that the readings you receive are reliable and can be trusted for optimal cooking. By being aware of these potential pitfalls and taking proactive measures to avoid them, you can create a smoother grilling experience with superior results every time.
Enhancing Your Grilling Skills Through BBQ Heat Mapping
Achieving Cooking Consistency with Effective Heat Mapping
BBQ heat mapping plays a pivotal role in maintaining consistent cooking temperatures throughout your grill. This uniformity is crucial in minimizing the risk of overcooking or undercooking food, leading to enhanced overall results. When you are aware of where the hot spots are and adjust your food placement accordingly, you can ensure that each item is cooked evenly, resulting in a more pleasurable dining experience.
Consistency not only elevates taste but also improves the texture and juiciness of your food. For example, meats cooked at fluctuating temperatures tend to yield dry or tough results. By leveraging heat mapping technology, you create an environment where each item on your grill benefits from steady heat, resulting in juicier, more succulent dishes that your guests will rave about.
Effectively Reducing Hot Spots on Your Grill
Identifying and managing hot spots is one of the primary advantages of using a BBQ heat mapper. These devices enable you to pinpoint areas of elevated heat, which can be especially beneficial when grilling larger cuts of meat or cooking multiple items simultaneously. By recognizing where the hot spots are, you can avoid placing all your food in these areas, decreasing the likelihood of uneven cooking.
This skill proves particularly advantageous during cookouts when you’re grilling a variety of items at once. By employing your heat mapper to strategically arrange your food based on the identified temperature zones, you can ensure that everything cooks to perfection at the same time. This not only streamlines the cooking process but also allows you to impress your guests with flawlessly executed dishes.
The Impact of Heat Mapping on Food Flavor and Quality
Heat mapping can greatly affect the flavor profile of your grilled items by ensuring they are cooked at the optimal temperature. Cooking foods at incorrect temperatures can lead to charring on the outside while leaving the inside undercooked—a surefire way to compromise flavor. By utilizing your BBQ heat mapper, you can prevent such outcomes, ensuring that each ingredient is thoroughly cooked at the right temperature.
For instance, when grilling vegetables, achieving the right temperature is crucial for caramelization, which enhances their natural sweetness and flavor. Similarly, meats cooked at proper temperatures will retain their juices and inherent flavors, creating a more enjoyable dining experience. Therefore, employing heat mapping technology not only promotes food safety by ensuring accurate cooking temperatures but also enriches the overall flavor of your barbecue dishes, resulting in meals that are as delicious as they are visually appealing.
Proven Techniques for Effective BBQ Heat Mapper Usage
Optimal Frequency of Heat Mapper Usage for Best Results
For optimal results, it is advisable to utilize your BBQ heat mapper before each grilling session. This practice is especially important if you are experimenting with new food types or if the grill’s temperature settings have changed since your last use. Consistent usage of the heat mapper ensures that you remain informed about your grill’s temperature distribution, leading to more reliable and predictable cooking outcomes.
Establishing this routine not only enhances your grilling expertise but also builds confidence in your ability to manage heat distribution effectively. The more frequently you use your heat mapper, the more skilled you will become at interpreting the data it provides, resulting in a more intuitive grilling experience.
Maintenance and Calibration Best Practices for Your Heat Mapper
Regular maintenance and calibration of your BBQ heat mapper are vital for ensuring accurate readings. After each use, clean the device thoroughly to eliminate any debris or grease that may have built up during grilling. Keeping the heat mapper clean not only extends its lifespan but also ensures that it delivers precise temperature readings.
Calibration is another critical aspect to consider. Follow the manufacturer’s guidelines to ensure you are calibrating your mapper correctly. Depending on usage and environmental conditions, you may need to recalibrate periodically to maintain accuracy. By adhering to these practices, you can ensure that your heat mapper provides reliable data for years to come, enhancing both your grilling results and overall experience.
Advanced Techniques for Mastering BBQ Heat Mapping
Experienced users can elevate BBQ heat mapping by employing advanced techniques such as zone mapping. This strategy involves designating different areas of the grill to varying temperatures, allowing for the simultaneous cooking of diverse food types. For example, you can create a high-heat zone for searing meats while maintaining a low-heat zone for slow-cooking vegetables or keeping dishes warm.
To implement this technique effectively, begin by mapping your grill surface to identify hot and cool spots. Once you gather this information, adjust your burners or charcoal placement to create distinct temperature zones. This optimization will maximize your grill’s efficiency and versatility, delivering a wide variety of perfectly cooked foods at the same time.
Key Factors to Consider When Choosing the Right Heat Mapper for Your BBQ Setup
When selecting a BBQ heat mapper, compatibility with your grill type and size should be your top priority. Look for features that align with your grilling requirements, such as digital displays for effortless reading or temperature ranges suitable for the foods you frequently prepare. If you often grill large cuts of meat, a mapper with a broader temperature range may be particularly advantageous.
Moreover, consider usability. Some heat mappers come equipped with intuitive interfaces or smartphone connectivity, which can enhance your grilling experience by providing real-time data at your fingertips. Selecting the right heat mapper tailored to your specific needs will significantly improve your ability to manage heat distributions and elevate your overall grilling performance.
Troubleshooting Common Issues with Heat Mappers
Common challenges with BBQ heat mappers may include inaccurate readings, connectivity issues, or improper placement leading to erroneous data. To troubleshoot these problems effectively, consult the manufacturer’s guide for tailored advice specific to your device. Ensuring the mapper is correctly positioned on the grill surface is crucial for reliable readings, so double-check its stability before use.
If you encounter connectivity issues with a digital mapper, ensure that it has fresh batteries and is within network range if it operates wirelessly. Regular checks and proper maintenance can prevent these issues from disrupting your grilling experience, allowing you to focus on what truly matters—delivering delicious, perfectly cooked food.
Best Practices for Developing Effective BBQ Heat Mapping Strategies
Essential Tips for Beginners Using BBQ Heat Mappers
For novices, embarking on the journey with a BBQ heat mapper can be a transformative experience. Start by grilling simple foods like burgers or hot dogs to become familiar with heat map readings. As you practice, pay attention to how different foods respond to various heat zones and how to adjust your cooking methods based on these insights.
Don’t hesitate to experiment with different cooking techniques, such as modifying food placement according to the heat map results. This hands-on practice will bolster your confidence and understanding of your grill’s capabilities, ultimately leading to more successful and gratifying grilling sessions.
Long-Term Benefits of Utilizing Heat Mapping in Your Grilling Routine
The long-term advantages of using a BBQ heat mapper extend well beyond enhanced grilling abilities. Over time, you will notice substantial improvements in your grilling techniques, resulting in consistently superior cooking outcomes. As you become adept at interpreting heat maps, you will be able to tackle more complex recipes and techniques with ease.
This growth in skill will not only enrich your personal grilling experiences but also impress friends and family during gatherings. Ultimately, the knowledge gained through heat mapping will contribute to a more enjoyable and successful barbecue experience, crafting memorable meals that everyone will appreciate.
Staying Updated on the Latest BBQ Heat Mapping Technologies
As barbecue technology continues to evolve, staying informed about the latest in BBQ heat mapping tools and techniques can significantly enhance your grilling experience. Keep an eye on new products entering the market, along with advancements in features that could further improve your ability to manage heat distribution effectively.
Engaging with barbecue communities or following industry leaders online can provide valuable insights into the latest trends and tools, helping you remain informed and competitive in your grilling endeavors. Embracing new technology will only serve to elevate your skills and outcomes as a grill master.
Seamless Integration of Heat Mapping into Your BBQ Routine
Incorporating BBQ heat mapping into your grilling routine can be a game changer. Make it a habit to utilize your heat mapper for every cookout, as this practice will enhance your ability to anticipate and control heat distribution effectively. Regular use will help you become more attuned to your grill’s behavior, leading to more precise cooking.
As you seamlessly integrate heat mapping into your routine, you may begin developing your unique techniques based on your grilling style. Whether it involves adjusting cooking times or strategizing your food placement, consistent practice will lead to more successful barbecue sessions and ultimately better meals.
Common Errors to Avoid When Using BBQ Heat Mappers
To maximize your experience with BBQ heat mappers, be vigilant about common mistakes. Misinterpreting the heat map or neglecting to recalibrate your mapper can result in inaccurate readings and disappointing outcomes. Always take the necessary time to ensure your heat mapper is correctly positioned and cleaned for optimal performance.
Furthermore, patience is crucial when using heat mappers. Avoid rushing through the stabilization process, as this can lead to misread temperatures. By being diligent and attentive to these details, you can ensure accurate heat readings that yield superior cooking outcomes every time.
Frequently Asked Questions (FAQs) About BBQ Heat Mapping
What is the Optimal Temperature for Grilling Meat?
The optimal temperature for grilling meat typically ranges between 225°F and 450°F, depending on the type of meat and the desired cooking method. Higher temperatures are ideal for searing, while lower temperatures are better suited for slow cooking.
How Long Should I Preheat My Grill Before Using a Heat Mapper?
Allow your grill to preheat for approximately 10-15 minutes before placing the heat mapper on the surface. This timeframe grants the grill time to stabilize and provides accurate temperature readings.
Can I Use a BBQ Heat Mapper on Any Type of Grill?
Yes, you can use a BBQ heat mapper on most grill types, including gas, charcoal, and electric grills. Just ensure that the heat mapper is compatible with your grill’s surface and temperature range.
How Frequently Should I Clean My BBQ Heat Mapper?
It is recommended to clean your BBQ heat mapper after each use. This practice prevents grease buildup and residue that can affect its accuracy over time.
Is Heat Mapping Suitable for Beginners?
Absolutely, heat mapping is ideal for beginners. It offers valuable insights into temperature distribution, helping new grillers learn how to effectively manage their cooking zones.
What Should I Do If My Heat Mapper Displays Inaccurate Readings?
If your heat mapper shows inaccurate readings, first check its placement on the grill to ensure it is stable. Calibrate it according to the manufacturer’s instructions, and clean it if necessary.
Can I Utilize Multiple Heat Mappers Simultaneously?
Yes, using multiple heat mappers at once can provide a more comprehensive view of temperature distribution, particularly on larger grills.
How Does Heat Mapping Enhance the Flavor of Grilled Foods?
Heat mapping ensures that food is cooked at the optimal temperature, which helps prevent charring or undercooking. This leads to a more flavorful and juicy outcome.
Are There Advanced Techniques for Using BBQ Heat Mappers?
Yes, advanced techniques include zone mapping, where different areas of the grill are set to various temperatures to cook multiple foods simultaneously, improving efficiency and versatility.
What is the Expected Lifespan of a BBQ Heat Mapper?
The lifespan of a BBQ heat mapper can vary based on usage and maintenance, but with proper care, many devices can last for several years, providing accurate readings throughout their lifespan.
Connect with us on Facebook!
The Article How to Use BBQ Heat Mappers: A Guide appeared first on https://pitmastersarsenal.com
The Article BBQ Heat Mappers: Your Essential Guide for Usage Was Found On https://limitsofstrategy.com
-

Tequila Tours: Discover Global Flavors in San Miguel de Allende
Discover the Exciting World of Tequila Tours in San Miguel de Allende
Why Tequila Tours Stand Out as Unique Experiences
Tequila tours present an extraordinary adventure that captures the hearts of both veteran aficionados and intrigued newcomers. These immersive excursions seamlessly blend cultural heritage, historical significance, and the intricate art of distillation, allowing guests to engage deeply with the captivating story of Mexico’s most iconic spirit. What differentiates tequila tours from standard tasting events are several distinctive features that elevate the overall experience and deepen the knowledge acquired.
- Cultural Heritage: Tequila transcends being a mere beverage; it embodies the profound traditions and cultural fabric of Mexico.
- Interactive Learning: Many tours promote direct interaction with master distillers, offering genuine insights into the tequila-making process.
- Exclusive Tastings: Participants often enjoy rare and unique tequilas that are not typically available in commercial markets, enriching the tasting experience.
- Scenic Locations: Numerous tours are set in breathtaking environments, allowing guests to admire the stunning beauty of sprawling agave fields.
- Historical Insights: Tours frequently include visits to historic distilleries, enhancing the experience with fascinating details about tequila’s origins.
- Community Engagement: Local communities actively participate in these tours, promoting sustainable tourism and fostering cultural exchange.
- Food Pairing: Several tours integrate food pairings that elevate the tasting experience by introducing traditional culinary delights.
- Personalized Experiences: Smaller group sizes promote personalized interactions, ensuring an intimate and engaging atmosphere.
Understanding these unique attributes of tequila tours can significantly enrich your experience and deepen your appreciation for this quintessential spirit that embodies the heart of Mexico.
A Comprehensive Look at the Art of Tequila Production
The process of transforming the blue agave plant into tequila is a captivating blend of artistry and science, merging time-honored traditions with contemporary innovations. At the core of this process lies the blue agave plant, which predominantly flourishes in the Jalisco region of Mexico. The adventure begins with the meticulous harvesting of mature agave plants, which take nearly a decade to reach maturity. This pivotal phase involves extracting the heart of the agave, known as the “piña,” which is then carefully cooked to convert its starches into fermentable sugars, establishing the foundation for tequila production.
The cooking phase entails steaming the piñas, which can take place in traditional stone ovens or modern autoclaves. Each method imparts distinct flavor profiles to the final tequila product. After cooking, the piñas are crushed to release the sweet agave juice, which undergoes fermentation with yeast for several days, resulting in alcohol production. This stage is crucial, as it sets the groundwork for the unique flavors that distinguish various tequilas.
The distillation phase, typically conducted twice, further refines the spirit, filtering out impurities and concentrating the alcohol content. This purified liquid is then aged in oak barrels, where it develops its unique character and flavor profile. Grasping these intricate processes not only enhances your appreciation for tequila but also sheds light on the exceptional craftsmanship that goes into every bottle produced.
Tips for Crafting an Unforgettable Tequila Tour Experience
Planning a tequila tour necessitates thoughtful considerations to maximize both enjoyment and educational opportunities. First and foremost, conducting thorough research on various tour options is vital, given that they can differ significantly in duration and focus. Some tours may be brief, lasting just a few hours, while others could extend for an entire day, encompassing visits to multiple distilleries and numerous tasting sessions that delve into the complexities of tequila.
When scheduling your tour, consider the time of year you plan to visit. Peak seasons typically offer increased tour availability but may attract larger crowds, while off-peak periods can provide more intimate experiences. Whether you prefer a leisurely pace or a packed schedule, understanding the available options will facilitate your selection of a tour that aligns with your interests and desired experience.
Additionally, preparing a list of questions or topics you wish to explore with the tour guides can enrich your educational experience. This approach not only allows you to engage meaningfully with the knowledgeable staff but also enhances your overall understanding of tequila. Lastly, ensure you have a dependable mode of transportation, particularly if you plan to visit various distilleries or indulge in the tastings offered during the tour.
Dive into the Vibrant Tequila Culture of San Miguel de Allende

The lively culture of San Miguel de Allende is intricately connected to the history and artistry of tequila production. This charming town, celebrated for its colonial architecture and vibrant artistic community, serves as the perfect backdrop for exploring the cultural significance of tequila. Here, visitors discover that tequila is not just a drink; it symbolizes a critical aspect of local traditions and celebrations, deeply woven into the social fabric of the community.
Throughout the year, San Miguel de Allende hosts a variety of festivals and events dedicated to tequila, including the highly anticipated annual Tequila and Mezcal Festival. During these events, attendees can sample a wide range of tequilas, engage in workshops, and enjoy live music, all while celebrating the town’s rich cultural heritage. Additionally, local artisans often draw inspiration from tequila, incorporating it into their crafts, whether through paintings, pottery, or culinary creations that highlight the spirit’s versatility.
Moreover, the community’s commitment to sustainable practices and agricultural preservation enhances the appreciation for tequila as a cultural artifact. By participating in a tequila tour, visitors gain insight into how the local community upholds these traditions, fostering a deeper connection to the spirit that transcends mere tasting experiences and encapsulates the essence of Mexican culture.
Insights from Experts on the Value of Tequila Tours in San Miguel de Allende
What Insights Do Industry Experts Provide About Tequila Tours?
Experts in tequila production and cultural tourism often emphasize the substantial educational value that tequila tours provide. They highlight how these tours offer valuable insights into the production process and the rich history surrounding tequila, transforming them into invaluable learning experiences for all participants. For instance, knowledgeable guides frequently share captivating narratives detailing the origins of tequila and its evolution over centuries, enriching the educational component of the tour.
Another focal point for experts is the sensory experience of tasting various tequilas. By guiding participants through the subtle spectrum of flavor profiles—from earthy and herbal to fruity and floral—tasting sessions become enlightening journeys. Experts recommend that understanding these flavor nuances enhances appreciation and fosters a more informed tasting experience that resonates with both novices and seasoned drinkers alike.
Real-world examples of expert opinions often underscore the importance of visiting family-owned distilleries, which tend to offer more authentic experiences. These smaller operations embody traditional methods and philosophies that genuinely reflect the true spirit of tequila, enriching the overall tour experience and allowing visitors to connect with the genuine essence of this iconic beverage.
How to Choose the Ideal Tequila Tour to Match Your Interests?

Selecting the perfect tequila tour requires careful consideration of several key factors to ensure a fulfilling experience. First, assess the duration of the tour. While shorter tours may provide a brief overview of tequila production, longer tours generally allow for a more comprehensive exploration, including visits to multiple distilleries and extended tasting sessions that delve deeper into various tequila varieties.
Another critical consideration is the size of the tour group. Smaller tours often facilitate more personalized interactions with guides, enabling tailored questions and deeper learning. Opt for tours that merge educational components with tasting experiences, as this combination ensures a thorough understanding of tequila and its nuances, enhancing the overall enjoyment of the tour.
Researching the specific focus of the tour is equally crucial. Some tours may specialize in organic or artisanal tequilas, while others might concentrate on historical production methods. Ensure that the tour aligns with your personal interests, whether you are eager to explore the science of distillation or the cultural significance of tequila, to create a more engaging and fulfilling experience.
Lastly, examining reviews and testimonials from past participants can provide valuable insights into the experiences of others, helping you gauge the quality and authenticity of the tour. A well-chosen tequila tour not only deepens your understanding but also enriches your overall travel experience, creating lasting memories connected to this iconic spirit.
Improving Your Tequila Tasting Skills for an Enhanced Experience
To genuinely appreciate tequila, it is vital to approach the tasting process with a discerning palate and an open mind. Start by familiarizing yourself with the various types of tequila—blanco, reposado, añejo, and extra añejo—as each type presents unique flavor profiles shaped by their aging processes and production methods. Understanding these distinctions significantly enhances your tasting experience.
During the tasting, initiate with a visual assessment, closely observing the color and clarity of the spirit. Gently swirl the tequila to release its aromas, then inhale deeply, allowing the array of scents to inform your expectations. Tasting tequila involves more than just flavor; it encompasses a holistic sensory experience, including aroma and mouthfeel, which all contribute to the overall enjoyment of this cherished spirit.
When tasting, take small sips, allowing the spirit to coat your palate. Concentrate on the initial taste, mid-palate sensations, and the finish. Recognizing these nuances enhances your appreciation and provides an opportunity to articulate what you enjoy about each variety. Consider pairing tequila with traditional Mexican dishes, as this can elevate your tasting experience significantly. Dishes such as ceviche or mole can beautifully complement the flavors of the tequila, creating a harmonious balance. By employing these techniques during your tequila tasting, you gain a richer understanding and enjoyment of this cherished spirit.
Key Benefits of Participating in Tequila Tours in San Miguel de Allende
The Educational Value of Engaging in Tequila Tours
One of the foremost benefits of participating in tequila tours is the profound educational value they provide. Visitors gain a comprehensive understanding of tequila’s history and production processes, uncovering how this spirit intricately connects to Mexican culture. These tours often commence with discussions about the significance of the agave plant, emphasizing its importance to local communities and economies, and setting the foundation for a comprehensive learning experience.
Tour participants can anticipate learning about the various stages of tequila production, including harvesting, cooking, fermenting, and distilling. Educational components may involve guided tastings, where participants discern the differences in flavor profiles among various types of tequila. This hands-on learning experience fosters a deeper appreciation for the craftsmanship involved in tequila creation, cultivating a sense of respect for the art of distillation.
Many tours also incorporate discussions surrounding the regulations related to tequila production, including the designation of origin and the significance of certification. Understanding these elements enriches the overall experience and provides context for the product being tasted. Ultimately, the educational aspect of tequila tours enhances participants’ knowledge while promoting responsible consumption and appreciation for this storied spirit that reflects Mexico’s cultural heritage.
Cultural Immersion Through Engaging Tequila Experiences
Tequila tours present a unique opportunity for cultural immersion, allowing participants to engage directly with the customs and traditions surrounding this iconic spirit. Given tequila’s deep-rooted significance in Mexican culture, these tours provide insights into local rituals, festivals, and the role tequila plays in significant celebrations such as weddings and holidays, enriching the overall experience with cultural depth.
Many tours spotlight community involvement in tequila production, showcasing family-owned distilleries where practices have been lovingly passed down through generations. This connection fosters a greater understanding of how tequila transcends mere consumption to become a cultural symbol that embodies Mexico’s heritage and identity. Engaging with local traditions enhances your appreciation for the spirit and the craftsmanship that goes into its creation.
Moreover, culinary experiences frequently accompany tequila tours, showcasing traditional dishes that pair beautifully with the spirit. Understanding these culinary connections enhances the cultural experience, allowing participants to appreciate the synergy between food and tequila. Through these immersive experiences, visitors develop a profound respect for tequila’s craftsmanship and cultural significance, deepening their connection to the region.
Socializing and Networking Opportunities During Tequila Tours
Tequila tours offer exceptional social and networking opportunities for participants. As these experiences typically attract individuals with a shared passion for tequila, they create a friendly atmosphere that encourages interaction and camaraderie. Many attendees find themselves exchanging stories and tasting notes, forging connections with fellow enthusiasts and creating lasting memories that extend beyond the tasting experience.
The group setting often facilitates shared experiences that lead to meaningful friendships. Engaging discussions about preferences, production methods, and personal stories can amplify the enjoyment of the tour and create unforgettable moments. Additionally, interacting with knowledgeable guides offers valuable insights into the industry, providing networking opportunities for those interested in careers in spirits or tourism, further enriching the overall experience.
Furthermore, many tours provide opportunities to meet local producers, gaining insights into their philosophies and practices. This direct interaction enriches the experience while fostering a sense of community among participants, connecting them to the broader realm of tequila appreciation and culture that thrives in San Miguel de Allende.
Preparing for Your Tequila Tours in San Miguel de Allende
What Essentials Should You Pack for an Enjoyable Tequila Tour?
Packing thoughtfully for a tequila tour is essential to guarantee comfort and enjoyment throughout the journey. Start by considering the climate in San Miguel de Allende, which can be warm and sunny during the day yet cooler in the evenings. Lightweight clothing that can be layered is ideal, and comfortable walking shoes are crucial for exploring distilleries and their surroundings, ensuring you can fully enjoy the experience without discomfort.
Hydration is vital, especially during alcohol tastings, so bring a reusable water bottle to stay hydrated throughout the tour. Having snacks on hand is also advisable, particularly if your tour does not include food pairings. Light snacks can help sustain your energy levels while keeping you focused on the tastings and discussions that enhance the experience.
Another useful item to consider is a notebook, allowing you to jot down tasting notes, favorite brands, or intriguing facts shared by your guides. This not only enhances your experience but also provides valuable reference material for future tequila explorations. By packing wisely, you can fully immerse yourself in the experience without unnecessary distractions, guaranteeing a memorable adventure.
Upholding Proper Etiquette During Your Tequila Tour
Participating in a tequila tour involves adhering to certain etiquette guidelines that enhance the experience for everyone involved. Respect is paramount, both for the guides and fellow participants. Arriving punctually, being courteous, and actively listening during discussions positively impacts the dynamics of the tour, fostering an enjoyable atmosphere for all.
When tasting tequila, it’s customary to take small sips and savor the flavors rather than consuming quickly. Engaging in conversations about the different tequilas being sampled illustrates appreciation for the craft and encourages a more enriching experience. Additionally, asking questions respectfully is encouraged, as guides are typically enthusiastic about sharing their knowledge and insights into the world of tequila.
It’s important to practice responsible drinking during the tour. Be mindful of your limits and ensure you stay hydrated throughout the experience. If you prefer not to drink, many tours accommodate non-drinkers, allowing them to enjoy the educational aspects without consuming alcohol. Following these etiquette guidelines ensures a respectful and enjoyable experience for all participants, enhancing the overall enjoyment of the tour.
Crucial Safety Tips for a Memorable Tequila Tour
Safety is paramount when participating in tequila tours, especially due to the nature of alcohol consumption. First and foremost, be conscious of your limits and pace yourself throughout the tastings. Having a plan for transportation is wise, particularly if you intend to visit multiple distilleries or consume significant amounts of alcohol during the tour.
Consider arranging for a designated driver or utilizing a rideshare service to ensure a safe return after the tour concludes. Staying hydrated is another critical safety aspect; drinking ample water before, during, and after tastings can help mitigate the effects of alcohol consumption and enhance your overall experience.
Additionally, be aware of the tour’s pace and take breaks as needed. Many tours allow for a leisurely exploration, providing participants time to rest and absorb the information shared. Being attentive to your surroundings and maintaining communication with your group can further enhance safety during the tour. By following these safety tips, you can ensure a fun and responsible tequila tour experience that you will cherish for years to come.
Effective Strategies for Engaging in Tequila Tours in San Miguel de Allende
How to Select the Best Tequila Tour Company for Your Adventure
Choosing the right tequila tour company is essential for a fulfilling experience. Begin by conducting thorough research on different companies, focusing on their reputations and customer reviews. Look for companies that specialize in tequila tours and have a proven track record of delivering quality experiences, ensuring that your adventure will be memorable and insightful.
Reading reviews from past participants can provide valuable insights into the strengths and weaknesses of the tour company. Pay attention to feedback regarding the expertise of the guides, the quality of the distilleries visited, and the overall organization of the tour. A reliable company will feature experienced guides who can offer educational insights and respond to inquiries effectively, enhancing the overall experience.
Additionally, consider the tour company’s commitment to sustainable and ethical practices. Companies that collaborate with local producers and prioritize community engagement not only enhance your experience but also contribute positively to the local economy. Making an informed choice based on these criteria ensures that your tequila tour is both enjoyable and responsible, aligning your experience with your values.
Strategizing Your Booking and Scheduling for Optimal Enjoyment
When it comes to booking your tequila tour, timing can significantly influence your overall experience. It’s advisable to reserve your spot well in advance, especially during peak tourist seasons when availability may be limited. This not only secures your place but also allows ample time for planning additional activities around your tour, creating a seamless travel itinerary.
Consider the time of year you plan to visit, as certain seasons may offer unique events or festivals related to tequila. For instance, booking during the Tequila and Mezcal Festival can enrich your experience with additional tastings and cultural activities that celebrate the spirit and its significance.
Effectively managing your schedule is also crucial. Ensure that the timing of the tour aligns well with other activities in your itinerary. Leaving sufficient time between activities allows for a more relaxed experience, enabling you to fully absorb the journey and appreciate the beauty of San Miguel de Allende. By strategically booking and scheduling your tequila tour, you can optimize your experience and create lasting memories.
Maximizing Your Investment in Tequila Tours
Understanding the costs associated with tequila tours and how to maximize your investment is essential for a rewarding experience. Prices can vary significantly based on the tour’s length, included amenities, and the distilleries visited. Consider what aspects are most critical to you—whether it’s the number of tastings, educational components, or unique experiences—and select a tour that aligns with those priorities.
Look for tours that offer comprehensive experiences, such as guided tastings, food pairings, and opportunities to meet distillers. These additional elements can provide substantial value, making your investment worthwhile by ensuring a rich and fulfilling experience.
Furthermore, consider purchasing tequila directly from the distilleries you visit during the tour, as many offer exclusive bottles that may not be available elsewhere. This not only enhances your personal collection but also supports local producers and fosters a deeper connection to the tequila you enjoy. By being strategic in your choices, you can ensure that your tequila tour investment yields lasting enjoyment and cherished memories.
Diving Into Diverse Tequila Varieties and Production Techniques
Tequila tours present an exceptional opportunity to explore the diverse varieties of tequila and the intricate production processes that define them. Understanding the distinctions between blanco, reposado, añejo, and extra añejo tequilas is fundamental for any enthusiast. Each type is categorized based on its aging process, with blanco being unaged, reposado aged for a minimum of two months, añejo for at least a year, and extra añejo aged for over three years.
During your tour, you’ll often learn about the various production methods employed, ranging from traditional techniques to modern innovations, and how these practices influence the flavor profiles of the tequilas. For example, the choice of barrels used for aging—whether new or previously used—can impart distinct flavors and characteristics to the spirit, enhancing the tasting experience.
Tours may also delve into the significance of the agave plant itself, discussing different varieties and their impact on taste. By participating in these tastings and discussions, visitors can gain a deeper appreciation for tequila’s complexity and the heritage that informs its production. This insight cultivates a greater respect for tequila as a testament to craftsmanship and tradition that is celebrated globally.
Discover the Varied Types of Tequila Tours Available in San Miguel de Allende
Traditional Tequila Tours: A Deep Historical Exploration
Traditional tequila tours emphasize the rich history and time-honored methods of tequila production. These tours typically include visits to historic distilleries where age-old techniques are meticulously preserved. By focusing on traditional practices, participants gain valuable insights into the authentic craftsmanship behind this iconic spirit that has been cherished for generations.
During a traditional tour, visitors can expect guided tastings of classic tequilas, often accompanied by stories from master distillers about their family legacies and the art of tequila-making. These narratives provide a deeper understanding of how tequila has transformed over the years while retaining its cultural significance and connection to the land it comes from. The experience frequently includes observing the detailed process of harvesting and processing agave, offering a glimpse into the labor-intensive craftsmanship that characterizes tequila production.
Moreover, many traditional tours highlight the importance of terroir, exploring how the local environment influences the flavor profiles of different tequilas. This focus on history and authenticity makes traditional tequila tours particularly appealing for those seeking a deeper connection to the roots of tequila production and its cultural heritage.
Modern Tequila Tours: Where Innovation Meets Tradition
Modern tequila tours showcase innovative techniques and the evolution of tequila production, often spotlighting cutting-edge distilleries that embrace contemporary practices. These tours highlight the creativity and experimentation taking place within the tequila industry, offering visitors a glimpse into the future of this beloved spirit that continues to evolve.
Participants can anticipate tasting unique and innovative tequila varieties that may incorporate unconventional aging methods or experimental flavors. Many modern distilleries prioritize sustainability and organic practices, presenting a stark contrast to traditional methods. This shift not only appeals to modern consumers but also reflects a growing trend toward environmentally conscious production that respects the land and its resources.
Modern tours may also include sensory experiences, such as guided tastings that focus on flavor development and the application of technology in the distillation process. By exploring advancements in tequila production, these tours cater to enthusiasts eager to discover the next generation of tequila craftsmanship that pushes boundaries and redefines expectations.
Specialty Tequila Tours: Customized Experiences for Unique Interests
Specialty tequila tours cater to specific interests and preferences, providing unique experiences that extend beyond standard tastings. These tours may focus on niche areas such as cooking with tequila, exploring food pairings, or even crafting cocktails that highlight the versatility of tequila as an ingredient in culinary arts.
For instance, a cooking-themed tequila tour might offer hands-on cooking classes where participants learn to incorporate tequila into traditional recipes, enhancing the cooking experience and deepening appreciation for the spirit’s versatility. Pairing tours could emphasize harmonizing the flavors of tequila with local cuisine, creating a delightful culinary journey that enhances the overall tasting experience.
Additionally, specialty tours may delve into cocktail mixology, teaching participants how to craft signature tequila cocktails that showcase the spirit’s potential in modern gastronomy. Such experiences attract both foodies and cocktail aficionados, providing avenues for exploring tequila’s role in culinary innovation. By focusing on specific interests, specialty tequila tours deliver memorable experiences that resonate with diverse audiences, enriching their understanding of this iconic beverage.
How Tequila Tours Enrich Your Travel Experience in San Miguel de Allende
Integrating Tequila Tours into Your Travel Itinerary for Maximum Enjoyment
Incorporating tequila tours into your travel itinerary can notably enhance your overall experience, offering a unique perspective on local culture. When planning your schedule, consider the timing of the tour in relation to other activities. For example, a morning tequila tour may perfectly complement an afternoon spent exploring art galleries or historical sites in San Miguel de Allende, creating a well-rounded day of cultural exploration.
Take advantage of the picturesque agave fields and stunning landscapes surrounding the distilleries. Many tours provide opportunities for photography and exploration, allowing you to capture the beauty of the region while creating lasting memories. Additionally, some tours may include stops at local markets or restaurants, further enriching your travel experience and providing a deeper connection to the local culture.
By thoughtfully integrating tequila tours into your itinerary, you can craft a well-rounded travel experience that highlights the connection between culture, history, and gastronomy. This holistic approach can lead to unforgettable moments and a deeper appreciation for the destination, making your journey truly memorable.
Tequila Tours as Social Activities for Engaging Connections
Tequila tours serve as vibrant social activities that foster interaction and camaraderie among participants. As individuals come together with a shared passion for tequila, they often forge connections that can lead to lasting friendships. The collective experience of tasting and learning cultivates an atmosphere conducive to conversation and collaboration, enhancing the enjoyment of the shared journey.
Many tours feature group activities, such as tastings or team-based challenges, which promote teamwork and enhance social engagement. This dynamic encourages participants to share their experiences, preferences, and insights, enriching the overall journey and fostering a sense of belonging among participants. Additionally, the communal aspect of a tequila tour can create a sense of community, especially for solo travelers seeking connection and interaction with others.
Furthermore, tequila tours frequently provide opportunities to meet industry professionals, including distillers and experts. Engaging with these individuals can expand your network and provide valuable insights into the tequila industry, fostering connections that extend beyond the tour itself. By embracing the social nature of tequila tours, participants can enrich their travel experience and cultivate meaningful relationships that enhance their understanding and appreciation of this iconic beverage.
Exploring the Relationship Between Tequila and Local Cuisine
The connection between tequila and local cuisine is a central theme of many tequila tours, enhancing the overall tasting experience. Numerous tours include food pairings that emphasize the flavors of tequila alongside traditional Mexican dishes. This culinary connection allows participants to explore the versatility of tequila as an ingredient and its role in enhancing flavors, creating a harmonious dining experience.
As you embark on your tequila tour, you may have the chance to taste classic dishes such as tacos, ceviche, or mole, expertly paired with specific tequila varieties to highlight the complementary nature of flavors. Understanding how these culinary elements interact deepens appreciation for both the food and the spirit, creating a holistic experience that celebrates the culinary heritage of Mexico.
Furthermore, some tours may feature cooking demonstrations or workshops showcasing how to incorporate tequila into diverse recipes. Exploring local cuisine enriches the cultural experience, providing insights into the culinary traditions of the region. By celebrating the harmonious relationship between tequila and food, participants gain a comprehensive understanding of how this spirit plays a significant role in Mexican culture and gastronomy, enhancing their overall appreciation for both.
Tequila Tours as a Means of Cultural Immersion
Tequila tours provide a unique avenue for cultural immersion, enabling participants to engage with the traditions and practices surrounding this iconic spirit. Through guided experiences, visitors gain insights into tequila’s cultural significance in San Miguel de Allende, where it plays a vital role in local celebrations and customs, enriching the overall experience with cultural depth.
During the tour, participants often visit historic distilleries that embody the heritage of tequila production. Engaging with master distillers provides valuable context, as they share narratives about the craftsmanship and cultural stories tied to their families’ legacies. This connection fosters a deeper understanding of how tequila is interwoven with the community’s identity and traditions.
Tours may also include visits to local landmarks or cultural sites, enhancing the immersive experience. This holistic approach not only educates participants about tequila’s production but also enriches their understanding of the broader cultural landscape of San Miguel de Allende. By connecting with local traditions and communities, tequila tours create lasting memories and foster a deeper appreciation for the cultural significance of this cherished spirit, leaving an indelible mark on your travel experience.
The Educational Aspects of Engaging in Tequila Tours
Tequila tours provide exceptional educational experiences, offering participants in-depth knowledge about the production process and history of this iconic spirit. Through guided tastings and expert insights, visitors learn about the intricate steps involved in creating tequila, from agave cultivation to distillation and aging, enhancing their overall understanding and appreciation for the craft.
Many tours emphasize the importance of terroir, exploring how environmental factors influence the flavor profiles of different tequilas. This educational component fosters a deeper appreciation for the craftsmanship involved in tequila production, allowing participants to discern subtleties in flavor and aroma that make each tequila unique.
Additionally, tours often include discussions about the regulations surrounding tequila production, such as the certification process and the significance of Denomination of Origin. Understanding these elements enhances participants’ knowledge and encourages responsible consumption practices. By engaging in these educational experiences, participants develop a profound respect for tequila as a cultural artifact and a symbol of craftsmanship that reflects the rich heritage of Mexico.
Reflecting on Your Enriching Tequila Tour Experience
How to Reflect on Your Memorable Tequila Tour Experience
Taking the time to reflect on your tequila tour experience is crucial for maximizing its impact. Consider keeping notes on the various tequilas tasted, the stories shared by guides, and any personal insights gained during the journey. Writing a review not only helps consolidate your memories but also provides valuable feedback to the tour company and future participants, assisting others in making informed decisions.
Engaging with other participants in the tour can further enrich your reflection process. Discussing your favorites, the tour highlights, and any newfound knowledge can deepen your appreciation for the experience and foster connections with fellow enthusiasts. Sharing stories on social media or through travel blogs can inspire others to explore tequila tours and foster a greater understanding of this cultural treasure that embodies the spirit of Mexico.
Ultimately, the memories created during a tequila tour can last a lifetime, enriching your comprehension of tequila and its significance in Mexican culture. Reflecting on these experiences can lead to a deeper connection with the spirit and the traditions surrounding it, making your journey even more meaningful and profound.
Planning Your Next Tequila Tour Adventure
As you contemplate your next tequila tour, consider the aspects you enjoyed most during your previous experience. Whether it was the educational components, the scenic locations, or the social interactions, identifying your preferences can guide your research for future tours, ensuring that your next adventure is tailored to your interests.
Begin by exploring different regions known for tequila production beyond San Miguel de Allende. Each area offers unique characteristics and experiences, allowing for a diverse exploration of tequila and its cultural context. Researching other distilleries and tour companies can broaden your understanding of what’s available and the various experiences offered.
Additionally, keep an eye out for events or festivals that may coincide with your travel plans. Participating in a tequila festival can provide an immersive experience that showcases a wide variety of tequilas and cultural activities related to this beloved spirit. By planning ahead and considering your preferences, you can ensure that your next tequila tour is equally enriching and enjoyable, full of discoveries and lasting memories.
The Lasting Impact of Your Tequila Tour Experience
Tequila tours can leave a lasting impression on participants, enhancing their understanding of this iconic spirit and its cultural significance. Many visitors come away with newfound knowledge about the history, production processes, and craftsmanship that define tequila, fostering a deeper respect for the spirit and its role in Mexican culture and traditions.
Moreover, the connections formed during tequila tours can create lasting friendships and networks within the tequila enthusiast community. Engaging with fellow participants and industry professionals fosters a sense of belonging and shared passion, enriching the overall experience and creating bonds that extend beyond the tour itself.
In addition to the knowledge gained, the memories created during a tequila tour often resonate long after the experience concludes. Whether through the flavors tasted, the stories shared, or the cultural insights gained, tequila tours enrich participants’ lives and foster a lasting appreciation for this cherished spirit. Embracing the journey of tequila exploration can lead to a lifelong passion for the craftsmanship and culture surrounding this iconic beverage that continues to captivate enthusiasts worldwide.
Frequently Asked Questions About Engaging Tequila Tours
What is the best time to visit San Miguel de Allende for tequila tours?
The ideal time to visit is during the dry season from November to April, which offers pleasant weather and opportunities to participate in local festivals celebrating tequila and its cultural significance.
Are tequila tours suitable for beginners?
Absolutely! Tequila tours are designed to accommodate all experience levels. Guides provide educational insights, making it easy for beginners to learn and enjoy the experience without feeling overwhelmed.
What is the average duration of tequila tours?
Tours can vary from a few hours to a full day, depending on the itinerary and the number of distilleries visited, providing ample time for exploration and tasting.
Can I book private tequila tours for a more personalized experience?
Yes, many tour companies offer private tours that can be customized based on your interests and preferences, ensuring a more tailored and intimate experience.
What attire is recommended for a tequila tour?
Dress comfortably and appropriately for the weather. Comfortable shoes are essential for walking around distilleries and outdoor areas, allowing you to enjoy the tour fully.
Is food included in tequila tours, or should I plan accordingly?
Some tours include food pairings or meals, while others focus solely on tastings. It’s best to check with the tour provider for specifics on inclusions and plan accordingly.
How do I determine which tequila tour to take?
Consider factors such as tour length, group size, focus areas, and reviews from previous participants to find a tour that aligns with your interests and preferences.
Can I purchase tequila during the tour for personal enjoyment?
Yes, many distilleries offer exclusive bottles for sale that may not be available in stores, allowing you to bring home unique souvenirs that commemorate your experience.
What is the age requirement for participating in tequila tours?
Participants must typically be 18 years old to taste alcohol. It’s advisable to check with the specific tour company for their policies on age restrictions.
Are reservations necessary for tequila tours?
Yes, reservations are generally recommended, particularly during peak tourist seasons, to secure your spot and ensure availability for a memorable experience.
The Article: Tequila Tours in San Miguel de Allende: A Global Adventure appeared first on https://fallinginlovewithsanmiguel.com/
The Article Tequila Tours: Explore San Miguel de Allende’s Global Flavors Was Found On https://limitsofstrategy.com
-

Offset Smoker Mastery for Winning Competitions
Achieve Mastery in Offset Smoker Competitions for Barbecue Success
Understanding the Unique Mechanics of an Offset Smoker
An offset smoker is a specialized barbecue tool that operates using indirect heat generated from a firebox positioned alongside the cooking chamber. This innovative design is particularly esteemed by barbecue aficionados, especially in competitive environments, due to its exceptional capability to produce richly flavored and tender smoked meats. The cooking technique employed here focuses on slow and low heat, which is critical for achieving the juicy, mouthwatering results that judges seek in contests. By understanding the mechanics behind this equipment, you’ll be better equipped to create dishes that stand out.
The construction of an offset smoker facilitates a distinctive airflow pattern that circulates smoke and heat around the food, enhancing flavor infusion while allowing for precise temperature control. This makes offset smokers the equipment of choice for serious competitors. Mastering the intricate workings of this apparatus is essential for elevating your barbecue skills and ensuring your success in competitions, as it allows you to harness the full potential of these remarkable tools.
Diverse Types of Barbecue Competitions to Explore
In the vibrant landscape of barbecue competitions across the United States, participants can encounter a wide array of events, ranging from intimate local contests to prestigious national championships like the American Royal and the Memphis in May World Championship Barbecue Cooking Contest. Each competition features its own unique set of rules, judging criteria, and categories such as ribs, brisket, and chicken, creating a diverse and challenging environment that tests the skills of all competitors.
Local competitions are often an excellent entry point for aspiring barbecue pitmasters. These events typically offer a more relaxed atmosphere, allowing participants to refine their techniques without the intense scrutiny characteristic of national competitions. As competitors advance to larger contests, the stakes increase alongside the required skill level. Developing a comprehensive understanding of the intricacies of each competition type can significantly enhance your preparation and strategic approach, ultimately leading to greater success.
The Strategic Advantage of Choosing an Offset Smoker for Competitions
Opting for an offset smoker for your competitive barbecuing endeavors extends beyond simple equipment selection; it’s about embracing the unique advantages it delivers. The capability to create complex flavor profiles, influenced by the choice of wood and various smoking techniques, distinguishes offset smokers from other cooking devices. This depth of flavor often becomes a pivotal aspect that judges focus on when evaluating entries, making it essential to harness the advantages of this equipment.
Moreover, offset smokers necessitate a profound understanding of fire management and cooking techniques. This demand for skill and patience attracts dedicated competitors who appreciate cooking as an art form. The journey toward mastering an offset smoker can result in distinctive flavor profiles, improved textures, and ultimately, enhanced scores in competitions, positioning you for success.
Strategies for Effective Preparation for Offset Smoker Competitions

Preparation stands as the cornerstone of success in offset smoker competitions. The selection of high-quality meats is crucial; the meat should be fresh, well-marbled, and specifically suited for the category you are entering. Mastering temperature control and honing specific recipes will also play a significant role in achieving consistency. Competitors must familiarize themselves with the competition’s rules and manage their time effectively, as every minute counts on the day of the contest.
To excel in competitions, it is advisable to establish a dedicated practice schedule leading up to the event. Achieving consistency in your cooking techniques fosters confidence and enhances performance when it matters most. Gaining a thorough understanding of the competition setup, including the timing and judging criteria, can provide you with a substantial competitive advantage, enabling you to execute your strategies with precision.
Acquire In-Depth Knowledge to Dominate Offset Smoker Competitions
Advanced Techniques Used by Elite Competitors to Succeed
Top-tier competitors throughout the United States employ a variety of sophisticated techniques to effectively master their offset smokers. Temperature control is paramount; many experts utilize multiple thermometers to consistently monitor both the cooking temperature inside the chamber and the internal temperature of the meat. The selection of wood is equally crucial, as the type and quality of wood can dramatically impact the flavor profile of the meat.
Here are some essential techniques that experts commonly implement:
- Using a water pan to maintain humidity and effectively regulate temperature.
- Experimenting with diverse wood types to discover the ideal flavor pairing for specific meats.
- Utilizing a two-zone cooking method to balance high and low heat areas within the smoker.
- Practicing consistently to develop muscle memory for managing the smoker with precision.
- Monitoring airflow and making necessary adjustments to intake and exhaust dampers for optimal performance.
- Creating a detailed cooking timeline to ensure that each step is executed on schedule.
- Maintaining a consistent fire by mastering fuel and airflow management techniques.
- Applying wraps such as butcher paper or foil at various cooking stages to control bark and moisture levels effectively.
Mastering these techniques requires not only practice but also a willingness to learn from both successes and challenges. Many seasoned pitmasters assert that frequent participation in competitions offers an exceptional platform for refining these essential skills.
Strategies to Elevate Your Barbecue Skills to New Heights

Enhancing your skills with an offset smoker is a continuous journey that requires dedication and a passion for learning. First and foremost, consistent practice is essential. The more you cook, the more attuned you become to your smoker’s unique characteristics and the subtleties of temperature management. Engaging in workshops or classes led by experienced pitmasters can also provide invaluable insights and expose you to diverse techniques.
Consider implementing these actionable steps to elevate your skills:
- Start a cooking journal to document your methods, temperatures, and results for reflective learning.
- Join a local barbecue club to share experiences and gain knowledge from fellow enthusiasts.
- Attend barbecue festivals and competitions to observe and network with top competitors.
- Experiment with new recipes and variations to expand your culinary repertoire and creativity.
- Watch instructional videos or online tutorials focused specifically on offset smoking techniques.
- Seek constructive feedback from judges and fellow competitors to identify areas for improvement.
- Practice cooking under varying environmental conditions to effectively adapt your techniques.
- Stay informed about the latest trends and innovations within the barbecue community to keep your approach fresh.
The journey to mastering the offset smoker is rich with learning opportunities, with each competition serving as a valuable stepping stone for further development and growth in your barbecue endeavors.
Avoiding Common Pitfalls in Competitions: Mistakes to Watch Out For
Beginners often encounter several common pitfalls when participating in offset smoker competitions. Over-smoking the meat is a frequent error that can lead to bitter flavors, which judges may penalize. Additionally, failing to maintain consistent temperatures can result in uneven cooking, adversely affecting the final product’s quality.
To avoid these common mistakes, it is vital to be aware of the following frequent errors:
- Neglecting to adequately preheat the smoker before beginning to cook, which can affect cooking times.
- Overlooking the importance of balanced airflow, which can lead to temperature fluctuations.
- Using low-quality or improperly stored wood that does not burn cleanly, impacting flavor.
- Failing to closely monitor meat temperature, increasing the risk of overcooking and dryness.
- Neglecting to season the meat properly before cooking, which can diminish flavor profiles.
- Rushing the cooking process instead of allowing it to develop naturally, which can compromise quality.
- Not adjusting the smoker’s dampers and vents to effectively control temperature and smoke levels.
- Forgetting to allow the meat to rest after cooking, which can significantly diminish juiciness.
By recognizing and addressing these errors, you can significantly enhance your performance in competitions, ensuring that your barbecue creations shine.
Thorough Preparation Strategies for Competition Success
Preparing for an offset smoker competition demands careful planning and execution. Start by selecting high-quality meats that will impress judges, ensuring they are well-suited for the categories you are entering. Practicing your cooking techniques in advance is also crucial; refining your recipes and timing can make a significant difference in your results. Mental preparation is equally important; remaining calm and focused can enhance your decision-making during the competition.
To ensure comprehensive preparation for a competition, consider these actionable steps:
- Develop a detailed checklist of all necessary equipment and ingredients to avoid forgetting essentials.
- Conduct a thorough practice run to simulate competition conditions and refine your timing.
- Plan your cooking schedule to effectively manage time on competition day, ensuring all entries are completed on time.
- Understand the competition rules and judging criteria thoroughly to align your strategies.
- Gather feedback from prior competitions to identify areas for improvement and opportunities for growth.
- Mentally prepare by visualizing success and cultivating a positive mindset for confidence.
- Ensure your equipment is in top shape and familiarize yourself with its operation to avoid issues.
- Network with other competitors to exchange tips and strategies that can enhance your approach.
The more thorough your preparation, the more confidently you can approach the competition, increasing your chances of success.
Essential Gear for Triumph in Barbecue Competitions
Must-Have Items for a Successful Competition Day
When gearing up for a barbecue competition, having the right tools and ingredients is crucial for success. Competitors should ensure that all necessary items are packed and ready before arriving at the venue. A well-prepared checklist is invaluable, ensuring that nothing critical is overlooked amidst the excitement and chaos of the event.
Key items that every competitor should bring include:
- Premium-quality meats suited to the specific competition categories for optimal results.
- Your favorite rubs and sauces, with precise measurements for consistency across entries.
- Essential tools such as knives, cutting boards, and tongs for effective preparation and serving.
- A well-maintained offset smoker, equipped with fuel and wood for effective cooking.
- Thermometers for monitoring both smoker and meat temperatures to ensure perfect doneness.
- Cleaning supplies to maintain a tidy cooking environment and uphold hygiene standards.
- Containers for storing and transporting cooked meats safely and efficiently.
- Personal items, including protective clothing and sunscreen to stay comfortable and safe.
Arriving with all necessary supplies can significantly enhance your focus and overall performance during the competition, allowing you to concentrate on cooking your best barbecue.
Setting Up Your Smoker for Optimal Competition Performance
Properly setting up your offset smoker is a vital step that can significantly influence your cooking outcomes during the competition. Begin by positioning the smoker in a location that allows for adequate airflow, away from obstructions or other heat sources that could interfere with cooking. Preheating the smoker to the desired cooking temperature before adding meat is also essential for achieving even cooking results.
Essential setup steps include:
1. Position the smoker with ample space around it for safety and ease of access.
2. Ensure all vents and dampers function properly before lighting the fire to maintain control.
3. Gradually preheat the smoker, allowing it to stabilize at your target temperature for consistency.
4. Build a consistent fire in the firebox using quality fuel and wood for reliable heat.
5. Monitor temperature and airflow as you add meat to maintain consistency in cooking.
6. Keep necessary tools and supplies within reach for quick access during cooking to save time.
7. Regularly check your fire and adjust as needed to prevent temperature drops or spikes that could affect cooking outcomes.A well-set smoker is fundamental to achieving the consistent results required for competitive success, making this setup process critical.
Efficient Time and Resource Management Strategies for Competitions
Effective time management and resource allocation are critical components for success in barbecue competitions. Planning your cooking schedule is essential to ensure all entries are completed within the designated time, allowing you to deliver a well-prepared presentation. It is equally vital to monitor your fuel and wood supplies carefully to avoid running out during the cooking process, which could jeopardize your results.
To manage your time and resources effectively, consider these strategies:
- Create a detailed timeline that outlines each cooking step, including preparation and resting times for all meats.
- Utilize efficient cooking methods, such as wrapping meats, to reduce overall cooking time without sacrificing quality.
- Conduct pre-competition runs to determine the precise timing for each meat category to refine your approach.
- Keep a close eye on fuel levels and have backups ready to avoid interruptions during the cooking process.
- Communicate with your team to delegate tasks and keep everyone on track and organized.
- Stay organized by designating an area for supplies to minimize searching time and streamline your workflow.
- Be flexible and ready to adapt your plan based on real-time observations of cooking conditions.
- Practice multitasking efficiently to maximize your cooking time and ensure all tasks are completed on schedule.
By mastering time and resource management, you can focus on honing your barbecue skills and delivering outstanding results that impress judges and audiences alike.
Expert Practices for Choosing Wood and Fuel in Competitions
Selecting the Best Wood Types for Competition Smoking
Choosing the right wood type for your offset smoker is crucial for imparting unique flavors to your meats. Different wood varieties contribute distinct aroma and taste profiles, which significantly impact the final product. Many competitors prefer popular options like oak, hickory, and fruitwoods such as apple and cherry, each offering its unique flavor characteristics.
The pros and cons of each wood type include:
- Oak: Provides a robust, smoky flavor and burns consistently, making it ideal for long cooks without overpowering the meat.
- Hickory: Delivers a bold, rich flavor that pairs exceptionally with red meats, though it can be overpowering if used excessively, so moderation is key.
- Apple: Offers a mild, fruity smoke that enhances poultry and pork, adding a touch of sweetness that judges often appreciate.
- Cherry: Adds a sweet, fruity flavor and imparts a beautiful color to meats, particularly effective for ribs and pork.
- Mesquite: Known for its intense flavor, best used sparingly or for shorter cooking durations to avoid bitterness.
- Pecan: Provides a rich, nutty flavor that is versatile for various meats and enhances their overall taste.
- Alder: Often used for fish, imparting a light, sweet smoke flavor that complements seafood beautifully.
- Maple: Offers mild sweetness, making it ideal for pork and poultry, enhancing their natural flavors.
Selecting the right wood type based on the meat you are cooking is essential for achieving a well-balanced flavor profile that can impress competition judges.
Maintaining Fuel Consistency During Extended Cooking Sessions
Effectively managing fuel during long cooking sessions is vital for sustaining a consistent temperature in your offset smoker. Utilizing high-quality charcoal and well-seasoned wood ensures a steady burn and reliable heat levels throughout the cooking process, which is crucial for producing tender and flavorful barbecue.
To maintain a steady fire, follow these best practices:
- Utilize hardwood lump charcoal as a base for a long, stable burn that can withstand extended cooking times.
- Prepare and season your wood well in advance to ensure it burns cleanly and produces optimal smoke.
- Learn how to build a fire that maintains consistent temperatures by layering fuel appropriately for effective combustion.
- Monitor the firebox closely and add wood in manageable quantities to avoid large temperature swings.
- Use a charcoal basket or similar setup to promote airflow and maintain temperature control throughout the cooking process.
- Rotate your wood to ensure even burning and prevent hot spots that could lead to uneven cooking results.
- Experiment with different fire management techniques to discover what works best for your specific setup and cooking style.
- Consider using a temperature controller for precise management during long cooks to alleviate the burden of constant monitoring.
Mastering fuel management will help you maintain a consistent temperature throughout your competition, ultimately leading to better-cooked meats that impress judges.
Best Practices for Storing Wood for Optimal Quality
Proper wood storage is essential for maintaining the quality of your smoking wood. Keeping wood dry and protected from the elements ensures that it burns cleanly, imparting the best flavors to your meats during competitions. Proper storage techniques can prevent moisture buildup and enhance your wood’s performance.
Here are some best practices for wood storage:
- Store wood in a well-ventilated area to prevent moisture buildup that can compromise burning quality.
- Keep wood elevated using pallets or racks to avoid contact with the ground and protect it from dampness.
- Cover wood piles with a tarp or shed to protect them from rain and snow that may affect their seasoning.
- Organize wood by type and size for easy access during competitions, ensuring you can quickly select the right wood for your needs.
- Allow wood to season for at least six months for optimal burning and smoke production, enhancing flavor infusion.
- Regularly check for signs of mold or rot and discard any compromised pieces to maintain quality.
- Maintain a consistent supply of various wood types to experiment with different flavor profiles and enhance your culinary offerings.
- Label your wood storage to easily track seasoning and types, facilitating efficient selection during competitions.
By adhering to these storage practices, you can ensure that your wood remains in peak condition for use during competitions, thereby maximizing the flavor and quality of your barbecue.
Effective Cooking Techniques for Achieving Competition Success
Creating the Ideal Smoke Ring in Your Barbecue
Achieving the perfect smoke ring is a hallmark of high-quality barbecue and often serves as a critical judging criterion in competitions. A smoke ring is a pink layer of cured meat just below the surface, formed during the smoking process and indicating a well-executed cook. Several factors contribute to its formation, including proper temperature, the appropriate wood smoke, and meticulous meat preparation.
Key factors in achieving a desirable smoke ring include:
- Starting with high-quality, fresh meat that is well-prepared to enhance the chances of a successful smoke ring.
- Utilizing a reliable smoker that maintains consistent temperatures throughout the cooking process for even cooking.
- Applying a dry rub containing salt, which helps in drawing moisture out of the meat and stimulating the formation of a smoke ring.
- Ensuring sufficient exposure to smoke early in the cooking process to encourage the development of the smoke ring.
- Maintaining lower cooking temperatures initially to promote smoke absorption and enhance the ring’s visibility.
- Using wood that produces clean smoke, free from chemicals or additives that could affect flavor.
- Minimizing handling of the meat during the cooking process to retain moisture and encourage the formation of the smoke ring.
- Allowing the meat to rest after cooking to enhance overall presentation and flavor retention.
Focusing on these elements can significantly enhance your chances of achieving that coveted smoke ring, elevating your barbecue to a competitive level.
Best Practices for Preparing Meat for Competition
Meat preparation is a crucial step in achieving competition-level barbecue. Properly trimming, seasoning, and marinating can elevate the flavor and texture of your meats, ensuring they meet the high standards of competition judges. Each cut of meat requires specific techniques to bring out its best qualities, which is vital for standing out in a competitive environment.
Here are some best practices for meat preparation:
- Trim excess fat and silver skin to prevent chewiness and promote even cooking, ensuring a tender final product.
- Apply seasoning generously, allowing the rub to penetrate the meat for maximum flavor infusion and impact.
- Consider brining or marinating meats to improve moisture retention and flavor depth, enhancing overall quality.
- Let the meat rest at room temperature before cooking to promote even cooking and reduce temperature shock.
- Experiment with injection marinades for added depth of flavor and moisture retention, creating a more succulent product.
- Use a binder, such as mustard or olive oil, to help the rub adhere to the meat and enhance flavor absorption.
- Cut meats into uniform sizes for consistent cooking times, ensuring even doneness across all pieces.
- Let seasoned meat sit for a few hours or overnight for the best flavor infusion and development.
These preparation methods can dramatically affect the final result, helping you achieve the quality sought in competitions that impress judges and elevate your barbecue reputation.
Maintaining Effective Temperature Control During Cooking
Temperature control is crucial for producing consistent results in offset smoker competitions. Keeping a steady temperature ensures that your meat cooks evenly and correctly, resulting in tender and flavorful barbecue that meets competition standards. Here are some essential strategies for effective temperature management:
- Invest in high-quality thermometers to accurately monitor both smoker and meat temperatures for reliable results.
- Position thermometers appropriately to avoid misleading readings caused by hot or cold spots within the smoker.
- Regularly check and adjust air dampers to regulate airflow and maintain desired temperatures throughout the cooking process.
- Familiarize yourself with your smoker’s quirks; every unit operates slightly differently, and knowing these can improve performance.
- Use a water pan to stabilize temperature and add humidity to the cooking environment, enhancing cooking outcomes.
- Learn to manage your fuel and firebox effectively to prevent temperature spikes or drops that could affect cooking results.
- Conduct regular checks during cooking to make small adjustments as necessary to maintain optimal conditions.
- Practice maintaining temperature control under various weather conditions to refine your skills and adaptability.
Mastering temperature control will lead to more consistent results and is vital for success in competition scenarios, ultimately leading to higher scores from judges.
Research-Backed Benefits of Mastering the Offset Smoker for Competitions
Key Advantages of Utilizing an Offset Smoker
Utilizing an offset smoker in competitions offers numerous benefits that can enhance both your cooking experience and outcomes. Primarily, offset smokers provide precise temperature control and flavor management, which are crucial elements that can determine the success of a competition entry. Their design allows for the cooking of larger quantities of meat, enabling the possibility of entering multiple categories in a single competition while maintaining quality.
Benefits of offset smokers include:
- The ability to cook at low temperatures for extended periods, resulting in tender and flavorful outcomes that impress judges.
- Versatile cooking options that permit the preparation of various meats simultaneously, optimizing your competition strategy.
- Enhanced flavor profiles due to the unique smoke characteristics from different wood types, allowing for experimentation.
- Potential for large cooking capacity, ideal for competitions with multiple entries that require careful planning.
- Higher quality results, as they encourage skilled techniques and meticulous attention to detail in every aspect of cooking.
- The ability to achieve a distinct barbecue aesthetic that visually impresses judges and enhances presentation.
- Longer burn times with consistent temperatures, reducing the need for frequent adjustments during the cooking process.
- Encouragement of skill development as pitmasters learn to manage fire and temperature effectively, fostering growth.
Overall, these advantages contribute to a more fulfilling competition experience and better outcomes, making the offset smoker an invaluable asset for serious barbecue competitors.
Impact of Mastery in Offset Smoking on Competition Outcomes
Competitors who become proficient with the offset smoker often observe a direct impact on their competition results. With a thorough understanding of their equipment and cooking techniques, skilled practitioners can produce consistent cooking results and superior flavor profiles that exceed judges’ expectations. This mastery translates into higher scores from judges, who typically reward excellence in both taste and presentation.
Metrics that improve with mastery include:
- Consistency in meat texture and doneness, which is critical for judging and overall quality.
- Flavor complexity that enhances the overall sensory experience of the barbecue, leaving a lasting impression.
- Visual appeal, featuring well-defined smoke rings and attractive presentation that captivates judges.
- Ability to replicate successful outcomes across competitions, fostering confidence and reducing anxiety.
- Confidence in managing the smoker and adapting to changing conditions, allowing for flexibility in cooking.
- Timeliness in each step of the cooking process, ensuring all meats are ready on schedule for presentation.
- Increased positive feedback from judges, leading to repeated successes and recognition in the barbecue community.
- Opportunities for recognition and networking within the barbecue community, fostering connections with fellow enthusiasts.
The pursuit of mastery in offset smoking can significantly affect competition success, distinguishing seasoned competitors from novices and creating a pathway for continuous improvement.
Long-Term Benefits of Mastering Barbecue Skills
Mastering an offset smoker yields numerous long-term benefits that extend beyond individual competitions. As competitors hone their skills, they often experience increased confidence, which leads to improved performance in future events. Additionally, consistent success helps build a solid reputation within the barbecue community, creating further opportunities for growth and collaboration.
Long-term benefits include:
- Heightened confidence in cooking techniques and equipment management, leading to improved outcomes.
- Better performance in upcoming competitions, resulting in more frequent accolades and recognition.
- A deeper understanding of barbecue culture and community, enriching personal experiences and connections.
- Networking opportunities with other skilled competitors and industry experts, fostering knowledge exchange.
- Enhanced culinary creativity, resulting in unique recipes and flavor combinations that set you apart.
- Opportunities to give back to the community through mentorship or teaching, fostering the next generation of pitmasters.
- Recognition as a skilled pitmaster can lead to professional opportunities in the culinary world and beyond.
- A strong sense of accomplishment and personal growth through the mastery journey, making it a rewarding experience.
The journey of mastering the offset smoker transcends merely winning competitions; it’s about developing lasting skills and relationships within a passionate community of barbecue enthusiasts.
Conducting Post-Competition Analysis for Continuous Improvement
Effective Performance Assessment After Competitions
After a competition, evaluating your performance is essential for growth and improvement. Reviewing your results, including feedback from judges, can provide valuable insights into what worked well and what areas need refinement. Concentrating on key aspects of your performance will help you make strategic adjustments for future competitions, enhancing your chances of success.
Key areas to focus on include:
- Analyzing feedback provided by judges, noting specific comments on flavor, texture, and presentation to identify strengths and weaknesses.
- Reflecting on your preparation process and identifying any missed opportunities or mistakes that could be addressed.
- Assessing your time management during the event to find areas for improvement and efficiency.
- Reviewing cooking techniques and temperature control to pinpoint inconsistencies that may have affected results.
- Considering the overall presentation of your entries and how it might be enhanced for future competitions.
- Soliciting feedback from peers or mentors who observed your competition activities for additional perspectives.
- Documenting your findings in a cooking journal for future reference, creating a valuable resource for learning.
- Setting specific goals based on the evaluation to track progress in subsequent competitions and foster continuous improvement.
A thorough evaluation will equip you with the knowledge necessary for continuous improvement, allowing you to refine your skills and strategies for future success.
Strategies for Learning from Mistakes in Competitions
Learning from mistakes is integral to personal and competitive growth in barbecue. Analyzing what went wrong is vital for developing strategies to avoid similar pitfalls in the future. The process of transforming failures into learning opportunities will strengthen your skills and performance, leading to greater success down the line.
Effective methods for learning from mistakes include:
- Documenting each mistake in a journal, detailing what went wrong and why to facilitate learning and improvement.
- Seeking constructive criticism from judges and mentors to gain different perspectives on your performance.
- Conducting a post-event debrief with your team to discuss challenges and solutions for future competitions.
- Attempting to replicate the mistake during practice to understand its causes and develop effective solutions.
- Being open to change and ready to adapt your techniques based on your findings and experiences.
- Setting specific improvement goals based on the lessons learned to track progress over time.
- Sharing experiences with fellow competitors to learn from their successes and failures, fostering community learning.
- Participating in additional workshops to reinforce skills and techniques, enhancing your overall competence.
This proactive approach to learning will help you transform each competition into a stepping stone for future success, ensuring continuous growth and improvement.
Preparation Strategies for Upcoming Competitions
Preparation for future competitions requires an ongoing commitment to refining your techniques and expanding your culinary knowledge. Staying updated on the latest trends in the barbecue scene can also provide an edge over competitors, allowing you to adapt and innovate effectively.
To effectively prepare for future competitions, consider these actionable steps:
- Continuously practice and refine your recipes, incorporating feedback from previous competitions into your cooking.
- Experiment with new techniques, flavors, or cooking methods to keep your approach fresh and engaging.
- Attend industry events, workshops, or seminars to stay informed on the latest innovations and trends in barbecue.
- Network with other competitors to exchange ideas and learn from their experiences, creating opportunities for collaboration.
- Regularly assess and update your equipment to ensure peak performance and reliability during competitions.
- Set aside time for creative experimentation to discover unique flavor profiles that can set you apart from competitors.
- Maintain a cooking log that tracks successes, failures, and areas for improvement to facilitate informed learning.
- Commit to a growth mindset, viewing challenges as opportunities for learning and growth, fostering resilience.
This proactive preparation will help you remain competitive and elevate your skills in every competition, enhancing your overall barbecue journey.
Frequently Asked Questions About Competition Barbecue
What is the best wood for smoking brisket in a competition?
Hickory is often regarded as the best wood for smoking brisket due to its strong flavor, which complements the rich, fatty cut of meat. Oak and cherry are also popular choices, providing a balance of smoke and sweetness that enhances the overall experience.
How long should I rest my meat after cooking?
Resting meat for at least 30 minutes to an hour after cooking allows juices to redistribute, enhancing flavor and tenderness dramatically. Larger cuts may benefit from longer resting periods to achieve optimal results.
Can I use an offset smoker for other types of cooking?
Yes, an offset smoker is versatile and can be employed for various cooking methods, including grilling, roasting, and even baking, depending on how you manage the heat and smoke effectively.
Should I wrap my meat during the competition cook?
Wrapping meat during cooking, often referred to as the “Texas Crutch,” can help retain moisture and speed up the cooking process, making it a common practice in competitions to ensure quality.
How do I know when my meat is done?
Utilizing a reliable meat thermometer is the most effective way to determine doneness. Different meats have specific internal temperature targets, such as 195°F for brisket and 165°F for chicken, ensuring that your barbecue meets competition standards.
What should I do if it rains on competition day?
Prepare for wet conditions by using a waterproof cover for your smoker and ensuring that your cooking area is sheltered. Adjust your cooking techniques to maintain consistent temperatures in damp weather to prevent adverse effects on your barbecue.
How can I improve my presentation for judges?
Focus on cleanliness, color contrast, and creativity in presentation. Use garnishes, arrange meats attractively, and ensure your entries are visually appealing to catch the judges’ attention and enhance your scores.
What is the optimal cooking temperature for competition ribs?
The optimal cooking temperature for competition ribs is typically around 225°F to 275°F. This range allows for slow cooking that develops tenderness while preserving flavor, contributing to a well-executed competition entry.
How can I prevent my meat from drying out during long cooks?
Maintaining moisture can be achieved by using a water pan in your smoker, wrapping meat during cooking, and ensuring that you do not overcook by closely monitoring internal temperatures for best results.
What common rub ingredients should I use for competition barbecue?
A well-balanced rub typically includes a mix of salt, sugar, paprika, garlic powder, onion powder, and black pepper. Customize your blend to enhance the flavors of specific meats used in competition, ensuring a standout profile.
Connect with us on Facebook!
The Article Mastering the Offset Smoker for Competitions: Winning Tips appeared first on https://pitmastersarsenal.com
The Article Offset Smoker Mastery: Tips for Competition Success Was Found On https://limitsofstrategy.com
-

Best Global Dishes for a Summer Picnic Party
Vibrant and Flavorful Salad Recipes to Enhance Your Summer Picnic Experience
Discover Unique Green Salad Combinations for a Memorable Meal
To create an unforgettable summer picnic, incorporating salads is essential, as they introduce both freshness and vibrancy into your dining experience. When exploring various green salad variations, consider the diverse flavors and textures that various ingredients can contribute. From crisp greens to zesty dressings, these salads can be customized to suit any palate. A classic green salad may include a delightful mix of baby spinach, arugula, and romaine, all harmoniously dressed with a refreshing lemon vinaigrette. However, the possibilities are endless; imagine a Mediterranean salad bursting with mixed greens, olives, crumbly feta cheese, and a generous drizzle of aromatic olive oil. Alternatively, savor a vibrant Asian-inspired salad that features crunchy bok choy, shredded carrots, and a rich sesame dressing designed to entice your taste buds.
- Baby spinach
- Romaine lettuce
- Arugula
- Mixed greens
- Cherry tomatoes
- Feta cheese
- Olives
- Shredded carrots
Another delightful option to consider is the iconic Caesar salad, crafted from crisp romaine lettuce, crunchy croutons, parmesan cheese, and a creamy dressing that brings all elements together seamlessly. To add an indulgent twist, think about incorporating roasted nuts or seeds for that extra crunch. The variety of salad options allows picnickers to mix and match according to their personal preferences. Moreover, adding seasonal vegetables can elevate your picnic into a jubilant celebration of summer flavors, creating a feast for the senses!
Irresistible Pasta Salad Recipes to Delight Your Guests
Pasta salads have become a quintessential choice for summer picnics due to their convenience and delightful flavor profile. You can whip up a pasta salad with ease, ensuring that you have a dish that is both satisfying and versatile. Traditional variations, like the beloved Italian pasta salad, typically utilize rotini or fusilli pasta, tossed with juicy cherry tomatoes, creamy mozzarella balls, and a tangy Italian dressing that ties all the flavors together beautifully. Alternatively, a pesto pasta salad is perfect for those who crave a herby twist; simply mix penne pasta with either homemade or store-bought pesto, cherry tomatoes, and succulent grilled chicken for a refreshing meal that’s sure to impress.
- Fusilli
- Rotini
- Penne
- Bow-tie pasta
- Italian dressing
- Pesto
- Grilled vegetables
- Cheese cubes
Additionally, unleash your culinary creativity by incorporating seasonal vegetables such as zucchini or capsicum, or even legumes for a protein boost. The charm of pasta salads lies in their adaptability; whether you prefer a creamy dressing or a light vinaigrette, you can craft a dish that appeals to all. Remember, the secret to a fantastic pasta salad is allowing it to chill before serving, which allows the flavors to meld beautifully. This not only makes it a delicious addition to your picnic basket but also a dish that suits large gatherings, ensuring an enjoyable experience for every guest.
Refreshing Fruit Salad Ideas to Brighten Your Picnic Table
No summer picnic is complete without a revitalizing fruit salad that cleanses the palate and provides a sweet contrast to savory dishes. A well-prepared fruit salad can achieve a delightful balance of flavors and textures, emphasizing the importance of using seasonal fruits at their peak ripeness. Imagine a vibrant medley of juicy watermelon, tangy berries, and sweet mango, creating a combination that will surely entice everyone to come back for more. Adding fresh mint leaves can elevate this dish, providing a cool hint that beautifully complements the sweetness of the fruits.
- Watermelon
- Strawberries
- Mango
- Kiwi
- Pineapple
- Blueberries
- Mint leaves
- Honey
To further enhance your fruit salad, consider drizzling a touch of honey or lime juice to introduce a hint of acidity that balances the sweetness perfectly. Feel free to experiment with various fruit combinations based on what is currently in season or locally available. Not only does a fruit salad serve as a delightful treat, but it also offers a burst of hydration, making it a practical choice for warm summer afternoons. Cut your fruits into bite-sized pieces and mix them in a large bowl, ensuring they are vibrant and visually appealing. Serving them in individual cups can also add a fun element to your picnic, allowing guests to easily grab their portions and enjoy them on the go!
Crucial Tips for Selecting the Best Dishes for Your Summer Picnic Party

Smart Strategies for Choosing Dishes That Will Impress Your Guests
Selecting the perfect dishes for your summer picnic requires an understanding of your guests’ preferences, which can greatly enhance the overall experience. Popular selections typically include a delightful mix of fresh salads, hearty sandwiches, and light finger foods, creating a balanced spread that caters to various tastes. For instance, a classic potato salad or coleslaw can beautifully complement grilled meats, while a vibrant quinoa salad offers a nutritious option. To elevate your picnic, incorporating crowd-pleasers like a charcuterie board can captivate guests who appreciate a touch of indulgence.
Real-life examples indicate that dishes like Mediterranean wraps and fresh fruit platters have become perennial favorites at international picnics because they can be prepared ahead of time and served chilled. Additionally, incorporating local flavors and seasonal ingredients not only enhances the appeal of the dishes but also promotes sustainability. It’s essential to consider how well the dishes will hold up outdoors; opt for items that can endure warm temperatures without losing quality. By thoughtfully selecting dishes that are both delicious and practical for outdoor settings, you guarantee an enjoyable experience for all your picnic-goers.
How to Ensure Food Safety During Your Picnic
Maintaining food safety is paramount during picnics, particularly in the hot summer months when the risk of spoilage increases significantly. Keeping food at safe temperatures is critical to prevent foodborne illnesses. To ensure your dishes remain safe to consume, begin by utilizing insulated containers for hot foods and coolers stocked with ice packs for cold items. Aim to keep perishable foods, such as creamy salads or deli meats, at or below 4°C (40°F) to inhibit bacterial growth. Additionally, avoid leaving food exposed to sunlight for extended periods; instead, create a shaded area for your picnic spread.
It’s also wise to include a food thermometer in your picnic kit to check temperatures if you’re serving hot dishes. If uncertain, adjust the serving time to ensure food is consumed while still fresh. Furthermore, always wash your hands before preparing food or eating; carrying hand sanitizer can simplify this process. By implementing these proactive measures, you can enjoy your picnic without concerns about food safety, allowing everyone to focus on the fun and flavors that summer has to offer.
What Benefits Do Picnic Dishes Provide?

Picnic dishes offer unique advantages that can significantly enhance your outdoor experience. One key benefit is their portability; many picnic dishes are designed to be easily transported and consumed without the need for elaborate serving utensils. This convenience allows guests to enjoy their meals comfortably while engaging in outdoor activities. Additionally, picnic dishes frequently feature fresh and seasonal ingredients, promoting a healthier eating experience that aligns perfectly with the joys of summer.
Another advantage is the social aspect of sharing food. Picnics encourage communal dining, where friends and family can sample a variety of dishes, fostering a sense of connection and camaraderie. Moreover, the simplicity of preparing picnic food allows you to spend less time in the kitchen and more time basking in the sunshine. Embracing these benefits while planning your menu can lead to a more memorable and enjoyable picnic experience, transforming it into a cherished occasion.
Flavorful Sandwiches and Wraps for Your Outdoor Feast
Classic Sandwich Creations That Will Leave a Lasting Impression
Classic sandwiches have long been a beloved staple at picnics, providing comfort and familiarity that guests adore. These simple yet satisfying creations can easily be customized to cater to diverse tastes and dietary preferences. A traditional ham and cheese sandwich made with crusty bread, crisp lettuce, and a smear of mustard is always well-received. Alternatively, consider preparing a turkey and avocado sandwich that combines lean protein with creamy goodness, served on wholesome wholegrain bread for a nutritious twist.
For those who prefer vegetarian options, a classic caprese sandwich featuring fresh mozzarella, juicy tomatoes, and fragrant basil, drizzled with balsamic glaze, can be a delightful addition. The versatility of sandwiches allows you to experiment with various flavor profiles, from spicy jalapeño spreads to sweet apple chutneys, enriching the overall experience. Additionally, wrapping sandwiches tightly in parchment paper or foil keeps them fresh and makes them easy to grab and enjoy while mingling with friends during your picnic.
Innovative Wrap Ideas for a Contemporary Take on Tradition
Wraps provide an innovative and modern twist on the classic picnic sandwich, offering versatility and ease of consumption. They are typically easier to manage and can be filled with a delightful array of tasty ingredients. For a refreshing option, consider a Mediterranean wrap filled with creamy hummus, roasted vegetables, and fresh spinach. This choice not only caters to vegetarian guests but also bursts with flavor, making it an excellent addition to your picnic spread. Another fantastic idea is the Thai chicken wrap, featuring grilled chicken, crunchy vegetables, and rich peanut sauce, all snugly wrapped in a tortilla.
For those seeking a lighter option, a simple wrap with turkey, avocado, and spinach offers a great balance of protein and healthy fats. The beauty of wraps lies in their practicality; they can be prepared ahead of time, easily packed, and enjoyed on the go. Moreover, you can explore various types of wraps—try whole wheat, spinach, or even gluten-free tortillas to accommodate dietary restrictions. By providing a selection of creative wraps, you can elevate your picnic menu and offer something unique for your guests to relish.
What Features Define an Excellent Picnic Sandwich?
An excellent picnic sandwich should exemplify a harmonious blend of flavor, texture, and practicality. First and foremost, it should be easy to eat without the need for elaborate utensils—think finger food! Choosing the right bread is essential; opt for sturdy varieties like ciabatta or sourdough that can withstand moist ingredients without becoming soggy. Fillings should be well-balanced; a combination of proteins, vegetables, and spreads can create a satisfying bite. For example, a roast beef sandwich with crunchy pickles and creamy horseradish sauce can be a flavor powerhouse, while a simple cucumber and cream cheese sandwich provides a refreshing touch.
Additionally, consider how well the sandwich will travel. Wrap the sandwiches tightly and store them in containers to prevent squishing during transit. If you’re including ingredients that may wilt or become soggy, consider packing them separately and assembling them just before serving. This attention to detail ensures that your sandwiches remain fresh and enjoyable, allowing everyone to savor each bite while relaxing outdoors.
Tempting Finger Foods to Enhance Your Picnic Experience
Delicious and Fun Bite-Sized Appetizers That Everyone Will Love
Bite-sized appetizers provide an enjoyable and easy way to kick off your picnic meal, offering a variety of flavors without overwhelming your guests. These small bites are perfect for social settings, enabling people to mingle while indulging in a selection of delicious treats. For instance, skewers of marinated chicken or vegetables not only look visually appealing but are also easy to eat. You might also consider preparing mini quiches or stuffed mushrooms, which can be served warm or at room temperature, making them ideal picnic fare.
Another delightful option is to create a platter of assorted cheeses, crackers, and cured meats. This not only adds an elegant touch to your picnic but also allows guests to customize their bites according to personal preference. Include items like olives, nuts, and dried fruits to round out the selection, offering a delightful mix of textures and tastes. The key to successful bite-sized appetizers is variety; aim for a range of flavors and ingredients that will keep everyone intrigued and satisfied throughout the picnic.
How to Make Finger Foods Picnic-Friendly
Making finger foods suitable for a picnic involves carefully considering their portability and ease of consumption. Begin by selecting items that can be easily picked up and eaten without the need for plates or cutlery. For instance, mini sliders or wraps cut into bite-sized pieces make perfect finger foods that guests can enjoy while mingling. When preparing these foods, consider using sturdy ingredients that won’t easily break apart, such as puff pastry or phyllo dough for pastries, ensuring they maintain their integrity during transport.
Additionally, presentation is important; using bite-sized portions not only simplifies eating but also invites guests to sample a variety of flavors. Preparing individual servings in small cups or jars can add a fun twist and help control portion sizes. Don’t forget about dips; offering a selection of dips alongside your finger foods can enhance the experience and encourage interaction among guests. By making these considerations, you can ensure your finger foods remain enjoyable and practical for any picnic setting.
What Are the Best Finger Foods to Bring to a Picnic?
The best finger foods for a picnic are those that are easy to eat, portable, and delicious. Think about items like savory pastries, such as sausage rolls or spinach and feta triangles, which can be enjoyed warm or at room temperature. Another great option is vegetable skewers, which can be crafted with a variety of seasonal produce, providing a healthy and colorful addition to your spread. Cheese balls rolled in herbs or nuts can be served on toothpicks for quick and easy enjoyment, while mini tacos or empanadas can offer a fun twist on traditional finger foods.
Don’t forget about sweet options; mini cupcakes, brownie bites, or fruit skewers can add a delightful end to your meal. The key is to provide a variety of flavors and textures so guests can nibble to their heart’s content. Balancing savory and sweet options ensures there’s something for everyone, making your picnic a resounding success. Remember to package these finger foods in a way that keeps them fresh and intact during transport, allowing everyone to enjoy the deliciousness without a hitch!
How to Store Finger Foods for an Enjoyable Picnic?
Proper storage is crucial to keep your finger foods fresh and safe for consumption at your picnic. Start by ensuring all items are completely cooled before packing them away; this helps prevent condensation that can lead to sogginess. Use airtight containers to store your finger foods, ensuring they are well-protected from being squished or damaged during transport. For items that are prone to wilting, such as salads or delicate pastries, consider separating them with parchment paper or using divided containers to maintain their presentation.
Additionally, packing ice packs alongside your finger foods can help keep them cool, especially if you’re including items that require refrigeration. If you’re bringing dips or spreads, store them in smaller containers and keep them chilled until serving. Upon arrival at your picnic destination, set your food out in a shaded area to maintain freshness. This thoughtful approach to storage will ensure that your finger foods remain enjoyable and safe to eat, allowing everyone to relish the flavors you’ve prepared fully.
Research-Backed Benefits of Choosing the Right Dishes for Your Summer Picnic Party
Nutritional Advantages of Picnic Foods
The nutritional benefits of common picnic dishes are often overlooked, yet they play a significant role in planning a balanced summer meal. Many picnic foods are naturally rich in vitamins, minerals, and wholesome ingredients, especially when you opt for fresh fruits and vegetables. For instance, salads made with leafy greens provide essential nutrients like iron and calcium, while incorporating colorful vegetables enhances the dish’s antioxidant content. Wholegrain breads and wraps offer excellent sources of fiber, aiding digestion and promoting overall health.
Moreover, including lean proteins in your picnic dishes, such as grilled chicken or chickpeas, can sustain energy levels throughout the day. Understanding the nutritional content of the foods you choose allows for better meal planning, ensuring everyone enjoys a satisfying and healthful picnic. By focusing on wholesome, nutrient-dense foods, you can create an enjoyable outdoor dining experience while promoting healthier eating habits among family and friends.
Social Benefits of Hosting Picnics
Hosting a picnic offers numerous social advantages that foster connections among friends and family. Picnics create a relaxed atmosphere where guests can unwind and enjoy each other’s company, making it easier to engage in conversations and create lasting memories. The act of sharing food brings people together, encouraging interactions that can lead to deeper relationships. Moreover, picnics often allow for collaborative preparation, where everyone can contribute their favorite dishes, promoting a sense of belonging and camaraderie.
Additionally, picnics provide a break from daily routines, allowing participants to enjoy nature and fresh air while indulging in delicious food. Sharing a meal outdoors can stimulate positive feelings, reinforcing social bonds and enhancing overall well-being. By embracing the social benefits of picnics, you can create a joyful atmosphere that celebrates connections, making every outing a meaningful experience.
Enhancing the Picnic Experience with Thoughtful Food Selections
The right food choices can significantly enhance the overall picnic experience, transforming a casual outing into a memorable event. Thoughtfully curated menus that consider guests’ preferences and dietary needs can elevate the enjoyment factor. Incorporating a variety of dishes, from refreshing salads to hearty wraps, can cater to diverse tastes and keep everyone satisfied. Moreover, using seasonal and locally sourced ingredients not only supports sustainability but also adds a unique touch to your picnic fare, making it distinct and flavorful.
Consider creating themed picnics, such as Mediterranean or Mexican-inspired spreads, which can add an element of fun and excitement. Pairing food with appropriate beverages—like refreshing infused waters or chilled wines—can also enhance the dining experience. Carefully chosen food options can create a cohesive theme, inviting guests to explore and enjoy new flavors together. By prioritizing thoughtful food choices, you can ensure your picnic becomes a cherished memory for all involved.
Quick and Easy-to-Prepare Picnic Dishes
Simple yet delicious recipes are perfect for a summer picnic, allowing you to save time without sacrificing flavor. Dishes like pasta salads or grain bowls can be prepared in advance and served cold, making them ideal for outdoor dining. For instance, a quinoa salad with roasted vegetables and a lemon vinaigrette not only offers a burst of flavor but also packs well for transport. Alternatively, consider making mini sandwiches with various fillings, which can cater to different tastes while being incredibly easy to assemble.
Another great option is to prepare skewers or kebabs, which can be made with marinated chicken, vegetables, or even fruit for dessert. These can be grilled or baked beforehand and enjoyed cold at the picnic. By focusing on easy-to-prepare dishes, you can reduce stress and maximize enjoyment, allowing you to fully engage with your friends and family during your outdoor gathering. Remember, the simpler the preparation, the more time you’ll have to relax and soak in the beautiful summer atmosphere!
Ensuring Food Safety During Summer Picnics
Maintaining food safety during hot summer picnics is essential to ensure that your dishes remain fresh and safe to eat. Start by planning your menu carefully; choose foods that are less prone to spoilage, like hard cheeses, dry-cured meats, or pickled vegetables. Use insulated coolers with ice packs to keep perishable items at appropriate temperatures, ideally below 4°C (40°F). For hot foods, consider pre-cooking and keeping them warm in thermoses or insulated containers until serving, ensuring they remain at safe temperatures.
It’s also advisable to set up a routine for monitoring food temperatures during your picnic. Use a food thermometer to ensure dishes stay within safe ranges; if they start to rise above 4°C, it’s time to consume them or return them to the cooler. Washing hands thoroughly before handling food and providing hand sanitizer for guests can further enhance safety. By taking these essential precautions, you can ensure that your summer picnic is not only enjoyable but also safe for everyone involved.
Refreshing Beverage Selections for Your Summer Picnic
Cool and Invigorating Drink Options to Keep You Hydrated
Staying hydrated during a summer picnic is just as crucial as the food you serve, making cold drink options essential. Consider a variety of refreshing beverages that cater to everyone’s tastes. Iced herbal teas can be a delightful choice, offering a caffeine-free option that can be infused with fruits or herbs for added flavor. Lemonade is another classic option; it can be easily prepared in large batches and served in dispensers for convenience. For those who prefer fizzy drinks, sparkling water mixed with a splash of fruit juice can be both revitalizing and aesthetically pleasing.
You might also want to explore smoothies or fruit punches loaded with fresh fruits, as these not only keep everyone refreshed but also add a delightful burst of flavor. When preparing drinks for your picnic, focus on light and refreshing options that complement your food, creating a cohesive dining experience. Remember to bring plenty of ice or insulated drink containers to keep everything chilled, ensuring your beverages remain enjoyable throughout the day.
Best Non-Alcoholic Beverages for a Family-Friendly Picnic
Non-alcoholic beverage options are key for family-friendly picnics, providing hydration and refreshment for guests of all ages. Consider crafting a vibrant batch of infused water, combining fruits like strawberries, cucumber, and mint for a visually appealing drink that is as tasty as it is refreshing. Sparkling lemonade is another excellent option; you can make it with fresh lemons and add a touch of sweetness to cater to different palates.
Additionally, cold brew coffee or iced tea can be delightful for those seeking a caffeine boost, providing an energizing lift during the gathering. Finally, consider offering a variety of sodas or juices to ensure there is something for everyone. By incorporating these non-alcoholic beverages into your picnic spread, you create a welcoming atmosphere that encourages everyone to stay hydrated and enjoy their time outdoors.
Homemade Lemonade and Iced Tea Recipes for a Personal Touch
Crafting homemade lemonade and iced tea can add a personal touch to your picnic drinks. For fresh lemonade, start with the following ingredients: freshly squeezed lemon juice, cold water, and sugar to taste. Mix the lemon juice with cold water, adding sugar gradually until you reach your desired sweetness. To elevate it, consider adding fresh mint leaves or slices of fruit, such as strawberries or oranges.
- Freshly squeezed lemon juice
- Cold water
- Sugar (or honey)
- Mint leaves (optional)
- Fruit slices (optional)
For iced tea, brew your favorite tea and allow it to cool. Once cooled, mix in simple syrup for sweetness, or keep it unsweetened for a refreshing option. Lemon slices and fresh herbs can enhance the flavor. Let it chill in the fridge before serving, ensuring it’s a perfect refresher for your guests.
- Tea bags (black, green, or herbal)
- Water for brewing
- Sugar or honey (optional)
- Lemon slices (optional)
- Fresh herbs (optional)
Both beverages are simple to prepare and can be made in advance, ensuring a deliciously fresh taste that’s sure to delight everyone at your picnic!
Creative Infused Water Ideas for Optimal Hydration
Infused water recipes are perfect for staying hydrated while adding a burst of flavor to your picnic beverages. Start with a base of cold water and experiment with various fruits, herbs, and even vegetables to create unique combinations. For a refreshing option, try infusing water with slices of cucumber and fresh mint leaves. This combination provides a crisp and revitalizing taste that’s perfect for hot summer days.
Another lovely infusion idea is combining citrus fruits such as oranges, lemons, and limes for a zesty drink. You can also enhance the flavor with basil or thyme for an aromatic twist. Pairing strawberries with rosemary can create a delightful and elegant infusion, while watermelon chunks mixed with mint leaves offer a sweet and refreshing option. The beauty of infused water lies in its versatility, allowing you to mix and match according to your preferences and seasonal availability.
- Cucumber and mint
- Strawberries and basil
- Oranges and lemons
- Watermelon and mint
- Grapefruit and rosemary
To prepare, add your chosen ingredients to a pitcher of water and let it chill for a few hours to allow the flavors to meld. This not only keeps everyone hydrated but also encourages guests to enjoy a refreshing drink throughout the picnic.
Irresistible Sweet Treats and Desserts for Your Picnic
Portable Dessert Ideas That Everyone Will Adore
Portable desserts are a must for picnics, ensuring everyone can enjoy a sweet treat outdoors without the hassle of heavy serving dishes. Items like cookie bars or brownies can be made in advance and sliced into manageable portions, making them easy to transport and serve. Consider preparing mini cupcakes adorned with colorful frosting; these bite-sized delights are not only adorable but also perfect for sharing.
Another fantastic portable dessert is fruit skewers, which add a fresh touch while providing visual appeal. You can alternate between various fruits, creating a rainbow of colors that is both enticing and refreshing. Additionally, try making no-bake cheesecakes in mason jars; these are easy to transport and provide individual servings that guests can enjoy without any fuss. From cookie dough bites to chocolate truffles, the options for portable desserts are endless, ensuring a delightful end to your picnic meal.
Best Summer Desserts for a Picnic
When it comes to summer desserts, the best options are those that are light, refreshing, and easy to enjoy outdoors. Summertime calls for fruity treats; consider making a berry tart with a crisp, buttery crust filled with fresh summer berries and a light custard. Alternatively, sorbets or gelato served in small cups can be a cooling treat on hot days. These options are not only delicious but also add a delightful sweetness that complements your picnic fare.
Another fantastic choice is lemon bars; their bright zing makes them perfect for summer picnics. Light and airy meringue pies can also be a wonderful addition, providing a delightful sweetness without being overly rich. The key to summer desserts is to keep them light and refreshing, allowing everyone to indulge without feeling weighed down. By choosing desserts that embody the spirit of summer, you can elevate your picnic experience and create lasting memories for all.
Quick and Easy No-Bake Dessert Recipes
No-bake dessert recipes are a practical choice for summer picnics, as they require minimal preparation and no cooking. One popular option is no-bake cheesecake; combine cream cheese, sugar, and vanilla, then pour it over a graham cracker crust. Top it with fresh fruits or a berry compote for a delightful finish. Another easy recipe is chocolate mousse, which can be whipped together in minutes and chilled until ready to serve.
- Cream cheese
- Graham cracker crumbs
- Sugar
- Heavy cream
- Chocolate (for mousse)
- Fruits for topping
For a fruit-based no-bake option, consider making parfaits with layers of yogurt, granola, and your choice of fruits. They are easy to assemble in jars, making them a fun and portable treat for your picnic. These no-bake options not only save time but also provide a deliciously satisfying sweet end to your outdoor feast. By incorporating these easy-to-make recipes into your picnic plans, you can focus more on enjoying the day with friends and family.
Healthy Dessert Options Perfect for Picnics
Healthy dessert ideas can add a guilt-free element to your picnic offerings, allowing everyone to indulge without compromising their health goals. Consider making energy balls, which are packed with nutritious ingredients like oats, nut butter, and dried fruits. These bite-sized treats are naturally sweet and offer a satisfying crunch, making them an excellent choice for a snack. Another option is to prepare fruit salads featuring a variety of seasonal fruits, drizzled with a bit of honey or lime juice to enhance their natural sweetness.
Yogurt parfaits are another healthy dessert choice; layer Greek yogurt with fresh fruits and a sprinkle of granola for added texture. This not only provides protein but also keeps the dessert light and refreshing. Consider making banana or oatmeal cookies that are low in sugar and high in fiber; these are perfect for satisfying cravings while remaining nutritious. By including healthy dessert options, you can cater to a variety of dietary preferences while keeping your picnic delicious and wholesome.
Traditional Australian Desserts to Celebrate Your Picnic
Incorporating traditional Aussie desserts into your picnic spread can bring a taste of home to your outdoor gatherings. Think about making lamingtons, which are sponge cakes coated in chocolate and rolled in desiccated coconut; these delightful treats are not only delicious but also portable. Another classic is the ANZAC biscuit; these oaty cookies are sturdy and can stay fresh for days, making them perfect for picnics. The rich flavors of these desserts evoke fond memories and create a sense of nostalgia.
Pavlova is another iconic dessert that can be adapted for picnics; prepare mini pavlovas topped with whipped cream and fresh fruits for a light, airy treat. These desserts not only provide a sweet finish to your meal but also serve as conversation starters, allowing guests to reminisce about their own experiences with traditional Aussie treats. Including these desserts not only celebrates local flavors but also adds a personal touch to your picnic, making it a truly special occasion.
Proven Strategies for Selecting the Best Dishes for Your Summer Picnic Party
Effective Techniques for Planning Your Picnic Menu
Effective menu planning is the foundation of a successful picnic, ensuring a diverse range of dishes that cater to all tastes and dietary needs. Start by considering the number of guests and their preferences; this will help you gauge the quantity and types of food to prepare. Aim for a balance of flavors and textures, including salads, mains, finger foods, and desserts. Incorporate seasonal ingredients to enhance freshness and taste while supporting local producers.
As you create your menu, think about how well each dish will hold up during transport and while sitting out in the sun. For instance, opt for salads with sturdy greens like kale or cabbage rather than delicate lettuces that may wilt. Preparing dishes that can be served cold or at room temperature means less stress when serving time arrives. A well-planned menu will give you the confidence to enjoy the picnic alongside your guests, knowing that everything has been thoughtfully prepared.
How to Cater to a Variety of Dietary Needs
Accommodating different dietary needs at your picnic is essential to ensure everyone can indulge without worry. Start by collecting information about your guests’ preferences and restrictions, such as vegetarian, vegan, gluten-free, or allergy concerns. By being mindful of these needs, you can curate a menu that offers a wide variety of options, such as salads featuring grains and legumes, or sandwiches made with gluten-free bread.
Consider including a range of dishes that are naturally gluten-free or vegan, such as fruit salads, vegetable platters, or quinoa bowls. Labeling dishes can help guests easily identify what they can enjoy, ensuring no one feels left out. By embracing diversity in your menu, you create an inclusive atmosphere where everyone can enjoy the picnic experience together, celebrating the joy of sharing food in the great outdoors.
Best Practices for Preparing Food for Your Picnic
Proper food preparation is key to a successful picnic, ensuring both safety and enjoyment. Start by washing all fruits and vegetables thoroughly to eliminate any pesticides or dirt. Prepare food the day before to allow flavors to develop and ensure you have ample time to pack everything. Opt for foods that are easy to assemble and serve; for example, assembling sandwiches or wraps just before leaving can help maintain freshness.
When packing, use separate containers for different dishes to prevent cross-contamination and to keep flavors distinct. Remember to include utensils, napkins, and serving tools to make dining easy. Finally, double-check your cooler situation to ensure it’s adequately packed with ice or ice packs to keep perishables at safe temperatures. By following these best practices, you can create a picnic food experience that is not only delicious but also safe and stress-free.
Frequently Asked Questions About Picnic Planning
What are the best dishes for a summer picnic?
The best dishes for a summer picnic include fresh salads, savory sandwiches, finger foods, and light desserts. Popular options like pasta salads and fruit platters cater to diverse tastes while keeping the menu refreshing and enjoyable.
How can I keep food safe during a picnic?
To keep food safe during a picnic, store perishable items in insulated containers with ice packs, avoid leaving food in direct sunlight, and use a food thermometer to monitor temperatures.
What drinks are suitable for a summer picnic?
Suitable drinks for a summer picnic include homemade lemonade, iced tea, infused water, and a variety of non-alcoholic beverages. These options keep everyone refreshed while complementing the food.
How do I prepare desserts for a picnic?
To prepare desserts for a picnic, opt for portable options like cookie bars, fruit skewers, or mini cupcakes. No-bake recipes are also ideal, allowing for easy transport without compromising taste.
What are some healthy picnic food options?
Healthy picnic food options include fresh salads, vegetable platters with hummus, quinoa bowls, and fruit salads. These dishes are nutritious and provide a variety of flavors and textures.
Can I cater to dietary restrictions at my picnic?
Yes, you can cater to dietary restrictions by including a variety of dishes, such as gluten-free options, vegetarian salads, and vegan finger foods. Clearly label dishes to help guests easily identify what they can enjoy.
How can I make finger foods picnic-friendly?
To make finger foods picnic-friendly, choose bite-sized items that are easy to eat, pack them in portable containers, and consider using sturdy ingredients to prevent mess during transport.
What are some creative sandwich ideas for picnics?
Creative sandwich ideas for picnics include Mediterranean wraps with hummus and roasted veggies, Thai chicken sandwiches with peanut sauce, or classic caprese sandwiches with fresh mozzarella and basil.
How should I store salads for a picnic?
To store salads for a picnic, use airtight containers to keep them fresh and prevent wilting. If the salad contains dressing, consider packing it separately and adding it just before serving.
What are the benefits of having a picnic?
The benefits of having a picnic include fostering social connections, enjoying fresh air and nature, and creating shared experiences with friends and family while indulging in delicious food.
Connect with us on Facebook!
The post Best Dishes for a Summer Picnic Party: A Global Feast appeared first on https://cookinggods.com
The Article Summer Picnic Party: Global Best Dishes to Enjoy Was Found On https://limitsofstrategy.com
-
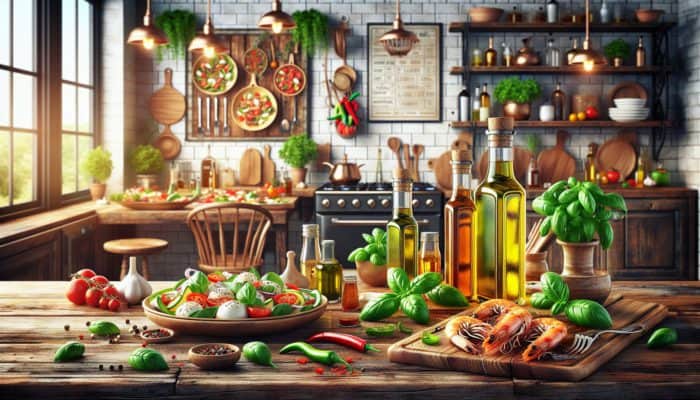
Infused Oils: The Ultimate Guide for Gourmet Dishes
Master the Art of Creating Flavorful Infused Oils for Culinary Masterpieces
Understanding Infused Oils: Definition and Production Techniques
Infused oils represent a remarkable culinary trend that takes ordinary cooking oils and transforms them into vibrant, flavor-rich elixirs. This transformation occurs through a gentle process of steeping herbs, spices, or other aromatic ingredients in a quality base oil. The result is an oil that not only significantly enhances the overall taste of gourmet dishes but also encourages both professional chefs and enthusiastic home cooks to explore their culinary creativity. The adaptability of infused oils is impressive; they can be utilized in marinades, dressings, or as exquisite finishing touches that elevate a dish to a gourmet standard. Picture a drizzle of basil-infused olive oil gracing a fresh Caprese salad or a splash of chili-infused grapeseed oil enhancing grilled prawns—this is all about amplifying the culinary experience.
Selecting the Best Oils for Flavorful Infusions
The selection of oil is pivotal since it greatly influences the ultimate flavor and application of your infused creations. Each type of oil possesses its own unique flavor profile and smoke point, making them appropriate for various culinary purposes. Below is a detailed list of popular oils that are commonly used for infusion:
- Olive Oil: With its rich and robust flavor, it’s perfect for Mediterranean-inspired dishes.
- Grapeseed Oil: This light and neutral oil is ideal for delicate infusions.
- Avocado Oil: Boasting a high smoke point, it’s excellent for frying and finishing dishes.
- Sunflower Oil: Mild in flavor, it’s versatile across numerous cuisines.
- Coconut Oil: Adds a tropical flair, making it suitable for sweet dishes and baking.
- Sesame Oil: Renowned for its nutty flavor, perfect for Asian culinary creations.
- Walnut Oil: Earthy and rich, ideal for enhancing salad dressings.
- Hazelnut Oil: With a deep, nutty essence, it’s fantastic for desserts.
Choosing the right oil for your infusion is crucial, as it can either enhance or overshadow the other flavors present in your culinary creation. For example, the bold taste of olive oil pairs wonderfully with strong herbs like rosemary, while the lighter taste of grapeseed oil complements more subtle flavors, such as lemon zest.
Exploring the Advantages of Infused Oils in Cooking
The charm of infused oils lies in their remarkable capacity to elevate the flavor profiles of various dishes, adding a gourmet touch that can transform the most ordinary meals into extraordinary culinary experiences. Their versatility allows for a wide array of applications, from sautéing vegetables to drizzling over finished dishes, enhancing both presentation and taste. Furthermore, infused oils introduce complex layers of flavor that can either complement or contrast with the primary ingredients, making every bite more dynamic and exciting.
Moreover, infused oils may retain some of the nutritional benefits associated with their infused ingredients. For instance, oil infused with garlic not only provides flavor but may also deliver health benefits linked to garlic, such as its antioxidant properties. The convenience and creative potential they offer make infused oils an essential component of any gourmet cook’s toolkit, enabling experimentation with a variety of ingredients to cater to different culinary traditions and personal preferences.
Step-by-Step Guide to Infusing Oils at Home

Infusing oils can be accomplished through two primary methods: heat infusion and cold infusion. Each technique imparts distinct qualities to your oil, influencing the final flavor profile.
Heat infusion is a quicker technique that involves gently warming the oil along with your selected herbs or spices. This method encourages rapid flavor extraction, making it ideal for those short on time. However, it’s crucial to monitor the temperature closely to avoid burning the ingredients, as this could lead to unwanted bitter notes in your oil.
In contrast, cold infusion is a slower but more delicate approach that preserves the subtle flavors of fresh herbs. This technique involves simply combining your chosen ingredients with the oil and allowing them to steep at room temperature for an extended period, often several weeks. While this method requires patience, the resulting oil typically showcases the bright and nuanced flavors of the ingredients used.
Both methods hold their rightful place in the culinary world, and your choice will depend on the desired intensity of flavor and the types of ingredients you are using.
Proven Techniques for Crafting Exquisite Infused Oils
Choosing Premium Ingredients for Flavorful Infusions
Choosing high-quality ingredients is critical for successful oil infusions. Fresh herbs, dried spices, and other flavorings should be carefully selected to ensure the best results. When possible, opt for organic produce to avoid pesticides and chemicals that may compromise the flavor and quality of your infused oils.
For example, if you’re crafting a rosemary-infused olive oil, select vibrant, aromatic sprigs of rosemary. Dried spices, such as chili flakes, can introduce heat and complexity, while citrus peels can impart a refreshing zing to your infusions. The freshness and quality of your ingredients directly impact the final flavor of the oil, making thoughtful selection crucial.
A practical approach is to source your ingredients seasonally. Many gourmet chefs advocate for using local produce, as it tends to be fresher and more flavorful. Additionally, experimenting with various combinations can lead to delightful surprises—imagine a blend of thyme and lemon zest creating a bright yet earthy oil that beautifully enhances seafood dishes.
Identifying the Optimal Method for Infusing Oils
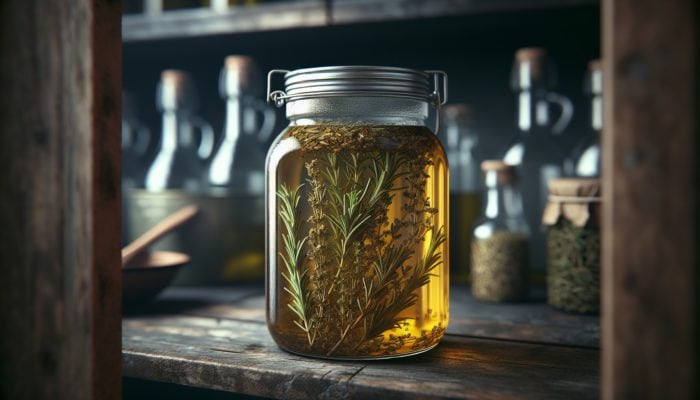
When it comes to infusing oils, the optimal method largely depends on the specific ingredients you’re using and the depth of flavor you wish to achieve. There are three primary methods: cold infusion, hot infusion, and quick infusion.
Cold Infusion: This method entails combining oil with your chosen ingredients and allowing it to steep over time. To execute this successfully, follow these steps:
- Choose your herbs or spices and prepare them accordingly (for example, bruising fresh herbs).
- Combine the oil and ingredients in a clean, sterilised jar.
- Seal the jar tightly and store it in a cool, dark environment.
- Allow the mixture to steep for 1-4 weeks, shaking occasionally to encourage flavor release.
Hot Infusion: This quicker method utilizes gentle heat to extract flavors. Here’s how to proceed:
- Warm the oil gently in a saucepan over low heat.
- Add your prepared herbs or spices to the warm oil.
- Maintain a low temperature (around 60-80°C/140-176°F) for 30-60 minutes, ensuring the oil does not reach a high heat that could burn the ingredients.
- Strain the oil and allow it to cool before transferring it to a storage container.
Quick Infusion: For those pressed for time, this method employs a microwave or stovetop for faster results, although it may compromise some flavor depth. Simply heat the oil with your ingredients for short bursts, ensuring you do not cook them.
Ultimately, the method you select should align with your culinary style and the flavor profiles you wish to create.
Determining the Ideal Infusion Time for Maximum Flavor
The duration of infusion can vary significantly based on the chosen method and the ingredients used. Generally, cold infusions require a longer time, often ranging from one to four weeks. This extended period allows the flavors to meld beautifully while preserving the freshness of the herbs. A wise practice is to taste the oil periodically to gauge its flavor development.
In contrast, hot infusions can be completed much more quickly, with oils often ready in as little as 30 minutes to a couple of hours, depending on the desired flavor intensity. Delicate ingredients like basil may require less time, while heartier herbs like rosemary can endure longer infusions without losing their character.
Understanding the optimal infusion times for various oils and ingredients is essential, as it can significantly affect the final product. A well-timed infusion can elevate your oil, making it a cornerstone of your gourmet dishes.
Comprehensive Guide to Preparing Infused Oils at Home
Ensuring Equipment Cleanliness and Sterilisation
Proper sanitation is paramount when preparing infused oils to prevent contamination and spoilage. All equipment, including jars, utensils, and measuring cups, should be thoroughly cleaned and sterilised before use. Start by washing everything in hot, soapy water, followed by a thorough rinse.
To effectively sterilise jars, you can either submerge them in a boiling water bath for 10 minutes or run them through a dishwasher cycle on the hot setting. Ensure that the jars are completely dry before adding your ingredients. Using fresh, clean equipment not only improves the quality of your infused oils but also extends their shelf life, allowing you to enjoy your culinary creations for a longer period.
Once sterilised, consider how you’ll measure your ingredients for infusion. Accurate measurements are vital for achieving a balanced flavor, enhancing the overall quality of your infused oils. Investing in a reliable kitchen scale or measuring spoons can provide precision, especially when experimenting with new flavor combinations.
Precise Measurement Techniques for Infusion Ingredients
Accurate measurements are essential for balancing flavors in infused oils. Using too much of an ingredient can overpower the oil, while too little might not impart sufficient flavor. Start by determining the optimal ratio of oil to herbs or spices that suits your infusion.
Typically, a good starting point is to use 1 cup of oil for every 1-2 tablespoons of fresh herbs or 1-2 teaspoons of dried spices. This ratio can be adjusted based on personal preference and the potency of the ingredients. Remember, when using stronger flavoring agents like garlic or chilies, less is often more to prevent overwhelming the oil.
When measuring dried herbs, it’s beneficial to crush or chop them slightly to increase their surface area, allowing for better flavor extraction. Fresh herbs should be washed and dried thoroughly before use, as excess moisture can lead to spoilage. Taking the time to measure and prepare your ingredients properly ensures that your infused oils deliver the exquisite flavors you seek.
Essential Steps for Infusing Oils Successfully
Infusing oils is a delightful process that involves preparing your ingredients, combining them with oil, and allowing them to steep. Here’s a detailed step-by-step guide to creating your own infused oils:
- Select Your Ingredients: Choose high-quality herbs, spices, or flavoring agents based on the flavor profile you desire.
- Prepare the Ingredients: Wash fresh herbs and dry them thoroughly. Chop or bruise them to release their essential oils for maximum flavor.
- Choose Your Oil: Decide on the type of oil you want to use, considering its flavor and smoke point.
- Combine and Heat (if applicable): If using the hot infusion method, gently warm the oil before adding the ingredients. For cold infusion, simply combine them in a sterilised jar.
- Seal and Store: After combining, seal the jar tightly and place it in a cool, dark area to allow for infusion.
- Monitor and Taste: Check the infusion periodically to assess flavor development. Adjust the infusion time as necessary.
- Strain and Store: When the desired flavor is achieved, strain the oil through a fine mesh sieve or cheesecloth to remove any solids, and transfer it to a clean, sterilised bottle.
Following these steps will yield infused oils that are not only flavorful but also tailored to your culinary preferences. The process encourages exploration and experimentation, allowing you to discover unique combinations that enhance your cooking.
Optimal Storage Techniques for Longevity of Infused Oils
Proper storage is essential for prolonging the shelf life of infused oils. Start by selecting dark glass bottles that shield the oil from light, which can degrade its quality over time. Light exposure can lead to rancidity and flavor loss, so it’s crucial to store your oils in a dark environment.
Once bottled, keep your infused oils in a cool, dark place, such as a pantry or cupboard. Avoid placing them near the stove or any heat source to maintain their quality. Additionally, label each bottle with the type of oil, infusion date, and specific ingredients used to track freshness effectively.
Regularly inspect your infused oils for any signs of spoilage, such as off odors or unusual cloudiness. When stored properly, most infused oils can last for several months, but it’s advisable to use them within six months for optimal flavor.
Best Practices for Storing and Preserving Infused Oils
Selecting Optimal Containers for Infused Oils
When storing infused oils, the choice of container is crucial for preserving their quality. Opt for glass bottles with tight-fitting lids to prevent air exposure, which can lead to oxidation. Dark glass containers are ideal, as they protect the oil from light, essential for maintaining flavor and freshness.
Consider the size of your containers as well. Smaller bottles are often preferable, as they limit the volume exposed to air each time you open them, thus extending the oil’s shelf life. Always ensure that any container used is thoroughly cleaned and sterilised to prevent contamination.
For those who enjoy experimenting with various infusions, having a selection of small, dark glass bottles on hand can facilitate easy storage and organization. Clearly label each container with the type of oil and infusion date to help manage and rotate your stock effectively.
Strategies for Extending the Shelf Life of Infused Oils
Extending the shelf life of infused oils requires a combination of proper storage practices and, if desired, the use of natural preservatives. To maximise freshness, always store your oils in a cool, dark location, away from direct sunlight and heat. Refrigeration can also be an option for longer shelf life, particularly for oils infused with fresh ingredients, although it may cause them to solidify.
Another method for prolonging freshness is the addition of natural preservatives, such as vitamin E oil, which can help slow down oxidation. Adding a few drops of vitamin E per bottle can provide an extra layer of protection without affecting the flavor profile.
Regularly inspect your infused oils for signs of spoilage, such as off smells or cloudiness, and always use clean utensils when handling the oil to prevent introducing contaminants. A proactive approach to storage and preservation can help ensure your infused oils remain delicious and safe for use over time.
Identifying Signs of Spoilage in Infused Oils
Being aware of the signs of spoilage in infused oils is crucial for maintaining food safety and quality. Spoiled oils may develop off odors, unusual flavors, or visible mold, indicating that they are no longer suitable for consumption.
Regularly check your stored oils for these signs. A rancid smell, often described as fishy or stale, indicates that the oil has gone bad. Furthermore, if you notice any cloudiness or sediment that wasn’t present during the initial infusion, it could signal spoilage.
If your infused oil exhibits any of these signs, it’s best to err on the side of caution and discard it. Proper storage practices can help minimize the risk of spoilage, but vigilant monitoring is equally important to ensure the oils you use are fresh and safe.
Best Practices for Labeling Your Infused Oils
Clear and accurate labeling is essential for managing your infused oils effectively. Each bottle should include key information, such as the type of oil used, the infusion date, and any specific ingredients included. This practice not only aids in tracking freshness but also allows for easy identification when preparing meals.
Consider using waterproof labels or a permanent marker to ensure that the information remains legible over time. Additionally, labeling with expiry dates—typically six months from the infusion date—can further assist in maintaining the quality of your oils.
Furthermore, if you experiment with various infusion combinations, keeping a small notebook detailing each infusion can enhance your culinary exploration. Documenting your successes and failures can lead to valuable insights for future infusions, helping you refine your techniques and flavor profiles.
Freezing Infused Oils for Extended Preservation
Freezing infused oils is an excellent method for long-term storage, allowing you to maintain their flavors and benefits for several months. This technique is particularly beneficial if you’ve prepared a large batch of infused oil that you won’t use immediately.
To freeze infused oils effectively, pour them into ice cube trays, enabling easy portion control and thawing. Once frozen, transfer the cubes into a resealable freezer bag, making sure to remove as much air as possible to prevent freezer burn. When stored correctly, frozen infused oils can last for up to six months without losing their flavor integrity.
When you’re ready to use your frozen infused oils, simply pop out a cube and let it thaw at room temperature or add it directly to a hot pan. This method not only extends the shelf life of your infused oils but also provides convenient, ready-to-use flavor enhancers for your culinary creations.
Research-Backed Benefits of Crafting Infused Oils for Gourmet Dishes
Nutritional Benefits of Infused Oils
Infused oils can be a delightful way to incorporate additional nutrients into your cooking, as they often retain the nutritional benefits of the ingredients used. For instance, garlic-infused oil can carry the health benefits associated with garlic, such as its antibiotic properties and potential cardiovascular advantages, thanks to the presence of the allicin compound.
Similarly, oils infused with herbs like oregano or basil may offer antioxidant properties, which can help combat oxidative stress in the body. The choice of ingredients significantly affects not only the flavor of the oil but also its nutritional profile, making it wise to consider the health benefits of each component during the infusion process.
Being mindful of the nutritional aspects of your infused oils allows you to subtly enhance your overall diet while still enjoying the gourmet flavors they bring to your dishes. Furthermore, using high-quality oils like extra virgin olive oil can contribute healthy fats, adding to the potential health benefits of your culinary creations.
The Impact of Infused Oils on Flavor Enhancement
Infused oils possess the remarkable ability to significantly enhance the flavor of dishes, introducing layers of taste that can either complement or contrast with the primary ingredients. The subtle nuances brought by infused oils can transform simple recipes into gourmet experiences.
For example, a drizzle of chili-infused grapeseed oil over grilled fish can provide a delightful kick, while basil-infused olive oil can elevate the freshness of a summer salad. The right infusion can also balance out the richness in a dish, making it more appealing and satisfying.
In essence, the impact of infused oils on flavor goes beyond merely adding a new layer; they can redefine how we experience food. As chefs and home cooks alike experiment with different combinations, the potential for culinary creativity appears boundless, encouraging deeper exploration of flavors and textures.
Health Considerations When Using Infused Oils
While infused oils can enhance flavor and offer some nutritional benefits, it’s important to approach their use with an awareness of health considerations. The calorie content in oils, even healthy options, can accumulate quickly, so moderation is essential.
Additionally, be cautious of potential allergens. For example, nut oils like hemp oil or walnut oil are delicious but may pose risks for individuals with nut allergies. It’s crucial to inform guests of the ingredients used if serving dishes made with infused oils.
Lastly, due to the infusion process, oils can sometimes develop a rancid taste if not stored properly. Always check for signs of spoilage and use clean utensils to avoid contaminating your oils. A balanced approach will ensure you can enjoy the culinary benefits of infused oils while being mindful of health and safety.
Effective Techniques for Crafting Infused Oils at Home
Creating your own infused oils at home is a rewarding venture that can greatly enhance your cooking. The process is straightforward and allows for a high degree of creativity. Start by selecting high-quality oils and fresh or dried flavorings that appeal to your palate.
Begin with the method that suits your lifestyle—whether it’s the quicker hot infusion or the more patient cold infusion. Gather your ingredients, measure them accurately, and combine them with your chosen oil. Allow the oil to steep, monitoring its flavor regularly to achieve your desired profile.
With a bit of experimentation, you’ll soon discover unique combinations that can elevate your meals. Infused oils can be utilized in a myriad of ways, from salad dressings to marinades, and their potential is limited only by your imagination and willingness to explore new flavor territories.
Innovative Uses of Infused Oils in Gourmet Cooking
Enhancing Appetizers and Starters with Infused Oils
Infused oils can add a gourmet touch to a multitude of appetizers and starters, enhancing both flavor and presentation. Drizzling a fragrant rosemary-infused olive oil over bruschetta intensifies the herbaceous notes of the dish while also elevating its visual appeal with a glossy finish.
Salad dressings greatly benefit from the complexity that infused oils bring. A vinaigrette made with lemon-infused olive oil can brighten the flavors of mixed greens, while a garlic-infused version adds warmth and depth to the mix. Use infused oils as dips for artisan breads, showcasing unique flavors like chili or truffle oil that can captivate your guests’ palates.
Moreover, incorporating infused oils into dips, such as hummus or tzatziki, can provide an unexpected twist that sets your appetizer apart. The key lies in maintaining balance within the flavors, ensuring that your infused oils enhance rather than overpower the other components of the dish.
Elevating Main Courses with Infused Oils
Main courses can be significantly enhanced through the thoughtful addition of infused oils. For example, consider grilling meats with a brush of smoked paprika-infused oil; the subtle smokiness will enhance the grilled flavor without overwhelming the dish’s core taste.
Vegetarians can also reap the benefits of infused oils; a drizzle of herb-infused oil over roasted vegetables can transform the dish, accentuating the natural sweetness of the produce. Pasta dishes gain sophistication through the use of infused oils as well—imagine a garlic or basil-infused oil tossed with freshly cooked spaghetti, finished with grated cheese and a sprinkle of fresh herbs.
Using infused oils as finishing touches can create a dramatic impact. A splash of lemon-infused oil over seafood or a drizzle of chili oil on a stir-fry can provide that elusive ‘wow’ factor while harmonising the flavors of the dish.
Incorporating Infused Oils into Desserts and Baking
Infused oils can also find a place in the sweet realm, adding unique flavors that surprise and delight the palate. For instance, a citrus-infused oil can be drizzled over vanilla ice cream, creating a refreshing contrast that elevates the dessert to gourmet status.
Baking can also benefit from the richness of infused oils. Incorporating hazelnut oil into cake batters adds a nutty depth that pairs beautifully with chocolate, while olive oil can yield moist, flavorful cakes. Consider using rosemary-infused oil in shortbread cookies for an intriguing herbal note that contrasts beautifully with sweetness.
When using infused oils in desserts, it’s essential to strike the right balance. The objective is to enhance sweetness without overpowering it, ensuring your dish remains harmonious. The versatility of infused oils in both sweet and savory applications truly exemplifies their potential in gourmet cooking.
Frequently Asked Questions About Infused Oils
What is infused oil and how is it utilized?
Infused oil is a culinary oil that has been flavored by steeping herbs, spices, or other ingredients to enhance its taste and aroma, adding depth and character to a variety of dishes.
How long can I safely store infused oils?
Infused oils can typically last for several months when stored properly in dark glass containers in cool, dark places. However, it’s recommended to use them within six months for optimal flavor and quality.
Can I use fresh herbs for making infused oils?
Yes, fresh herbs can be utilized for infusion, but they should be thoroughly dried before use to minimize spoilage risks. Alternatively, cold infusion can be applied to fresh herbs, allowing for better flavor retention without the heating process.
Which oils are best for creating infused oils?
Common oils for infusion include olive oil, grapeseed oil, avocado oil, and coconut oil. Each oil offers unique flavors and properties suitable for various culinary applications.
Is it safe to infuse oils at home?
Yes, it is safe to infuse oils at home, provided you adhere to proper sanitisation practices and storage guidelines to avoid contamination and spoilage.
How do I know if my infused oil has gone bad?
Signs of spoilage include off odors, unusual cloudiness, or visible mold. Regularly check your oils and discard any that exhibit these signs to maintain safety and quality.
Can I use infused oils for cooking purposes?
Absolutely! Infused oils can be used for sautéing, drizzling, or as a finishing touch on dishes, enhancing flavors and adding a gourmet touch.
What is the difference between hot and cold infusion methods?
Hot infusion involves gently warming oil with herbs or spices for quicker flavor extraction. In contrast, cold infusion allows ingredients to steep over time, resulting in a more delicate and nuanced flavor profile.
How do I store infused oils to maintain their quality?
Infused oils should be stored in dark glass containers in cool, dark places to protect against light and heat, which can degrade their quality and flavor.
Can I freeze infused oils for long-term storage?
Yes, freezing infused oils is an excellent way to prolong their shelf life. Use ice cube trays for portioning, and ensure they are stored in airtight containers to prevent freezer burn and maintain quality.
Join our community and stay updated on Facebook!
The post How to Make Infused Oils for Gourmet Dishes: A Universal Guide appeared first on https://cookinggods.com
The Article Infused Oils for Gourmet Dishes: A Complete Guide Was Found On https://limitsofstrategy.com
-
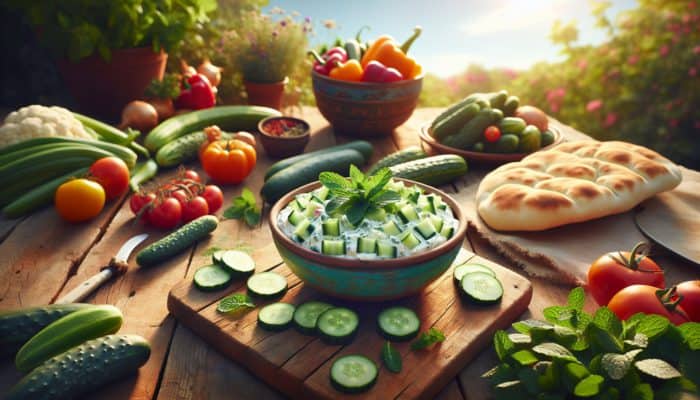
Herbal Dips: Best UK Party Recipes to Impress Guests
Delight in Timeless British Herbal Dips Ideal for Every Celebration
Craft a Refreshing Mint and Cucumber Dip That Will Wow Your Guests
This invigorating dip serves as a delightful addition, especially during the warmer months when gatherings thrive. The perfect harmony of cool cucumber and aromatic mint creates a vibrant dip that enhances any social event. It pairs beautifully with pitta bread or a colorful array of fresh vegetables, making it an ideal choice for summer parties and picnics. For this refreshing dip, gather the following ingredients:
- Fresh mint leaves
- Cucumber
- Greek yoghurt
- Lemon juice
- Garlic
- Salt and pepper
To create this delightful dip, finely chop the fresh mint and cucumber, and then combine them in a bowl with creamy Greek yoghurt. Add a splash of zesty lemon juice for a lively kick and incorporate minced garlic for an extra layer of flavor. Season generously with salt and pepper to taste. The secret to a successful mint and cucumber dip lies in using fresh ingredients, which significantly enhance its flavor profile. Serve this dip chilled to fully enjoy its refreshing qualities, making it a sure hit at any summer gathering or outdoor event.
Indulge in a Luxurious Creamy Chive and Onion Dip for Any Gathering
This creamy dip is a versatile delight that pairs seamlessly with a wide array of snacks, ranging from crisps to crackers. It beautifully combines the mild onion flavor of chives with the rich, creamy texture of sour cream or crème fraîche, resulting in a dip that is both luxurious and flavorful. If you are hosting a large gathering, scaling up this recipe is effortless, allowing you to cater to all your guests.
Begin with a base of rich sour cream, then finely chop a generous handful of fresh chives to mix in. For an even deeper flavor, consider adding a small amount of finely diced onion, which enhances the overall taste profile. It is crucial to allow the dip to rest for at least an hour before serving; this resting period allows the flavors to meld beautifully, creating a more cohesive taste. Present this dip in a large bowl, garnished with additional chopped chives for a touch of elegance. For larger parties, you can prepare this dip in substantial batches, as it stores well in the fridge for several days, making it a practical and indulgent choice for entertaining.
Enhance Your Party Spread with a Sophisticated Tarragon and Lemon Dip
Bright and zesty, this dip is particularly delightful when paired with seafood, making it an elegant addition to any party spread. The combination of fragrant tarragon and zesty lemon creates a sophisticated flavor that can elevate even the simplest of dishes. To serve this dip at a party, consider offering it alongside a selection of seafood, such as succulent prawns, smoked salmon, or grilled fish, which perfectly complement its vibrant taste.
To create your tarragon and lemon dip, start with Greek yoghurt as your creamy base, and then fold in finely chopped fresh tarragon along with a generous squeeze of fresh lemon juice. To enhance the brightness, incorporate freshly grated lemon zest, which provides an added citrus punch. Serve this dip in a decorative bowl, garnished with tarragon leaves or lemon slices to enhance its visual appeal. This dip is not only delicious but also refreshingly vibrant, making it a fantastic choice for summer parties where seafood is a highlight.
Uncover the Bold and Flavorful Experience of a Robust Parsley and Garlic Dip
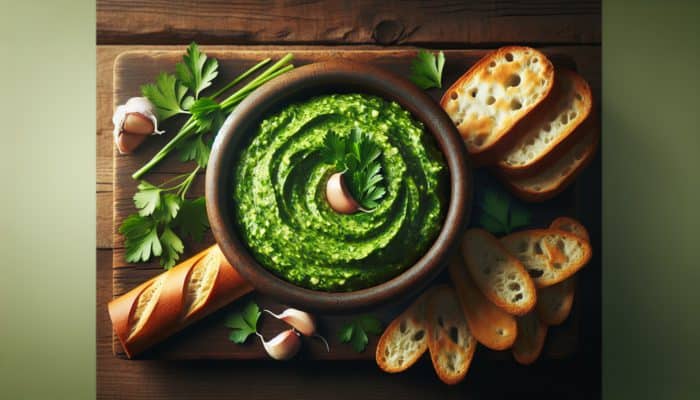
Rich in flavor and aroma, this bold dip is perfect for pairing with artisan bread and crisp crackers, offering a taste experience that delights the palate. The combination of fresh parsley and pungent garlic creates a dip that is not only delicious but also visually appealing, thanks to the vibrant green color of the parsley.
To prepare this dip in advance for a party, start by finely chopping a generous bunch of fresh parsley along with a couple of cloves of garlic. Mix these into a base of cream cheese or opt for Greek yoghurt for a lighter option. To ensure the dip remains fresh, store it in an airtight container in the fridge. This dip can be prepared a day ahead, allowing the flavors to intensify significantly. When serving, consider presenting it with an assortment of artisan breads and crisp crackers, showcasing the dip’s versatility and making it a standout option at your gathering.
Relish a Light and Zesty Dill and Yogurt Dip for Fresh Vegetable Platters
This light and tangy dip is perfect for fresh vegetables, providing a refreshing and healthy option for all your party guests. The incorporation of fragrant dill and creamy yoghurt not only creates a delightful flavor but also adds a nutritious element to your spread, making it a guilt-free choice.
When selecting the best vegetables to serve with this dip at a gathering, consider offering a selection such as:
- Carrot sticks
- Celery sticks
- Cucumber slices
- Bell pepper strips
- Radishes
- Cherry tomatoes
To make this dip, simply mix Greek yoghurt with finely chopped fresh dill and a generous squeeze of lemon juice. Season with salt and pepper to taste for added flavor. This dip pairs excellently with a colorful platter of crudités, making it an appealing and healthy option for any gathering. Guests will appreciate the refreshing nature of this dip, especially alongside crisp, fresh vegetables, enhancing their overall snacking experience.
Gain Expert Insights on Crafting Delicious Herbal Dips for Unforgettable Parties
Tips for Selecting the Best Herbs to Maximize Flavor and Appeal
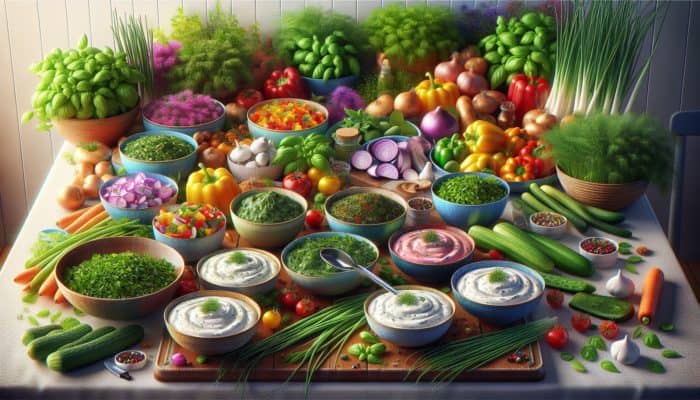
Selecting the right herbs for your dip can genuinely elevate its flavor and impact at any gathering. In the UK, popular herb combinations include chives and sour cream for a classic onion flavor, or the refreshing duo of mint and cucumber for a delightful summer option. Experimenting with these herbs can yield delightful results that will impress your guests and keep them returning for more.
For instance, mixing fragrant basil with creamy cheese creates an aromatic dip that pairs beautifully with freshly baked bread. Additionally, consider using herbs that are in season, as they tend to have a more robust flavor profile. When planning your dips, think about the overall theme of your party; robust herbs like rosemary can complement hearty snacks, while lighter herbs such as dill are perfect for fresh vegetables and lighter fare.
An important tip is to always taste as you go. The right balance of herbs can make all the difference; begin with a small amount and gradually add until the flavor is just right. This practical approach ensures that your dip stands out on the party table, leaving a lasting impression on your guests and encouraging delightful conversations.
Achieving Flavor Harmony in Your Dips for an Unforgettable Taste Experience
Achieving the perfect balance of herbs and other ingredients is crucial for creating a memorable dip experience. Start with a solid base, such as creamy Greek yoghurt or rich sour cream, which provides a delightful texture without overpowering the other flavors present in the dip.
When adding herbs, consider their intensity; delicate herbs like chives require less quantity than robust herbs like rosemary. An actionable step is to finely chop the herbs before incorporating them into the base, as this releases their essential oils and enhances their flavor. Incorporate a splash of acidity, such as refreshing lemon juice or vinegar, to brighten the dip and balance the creaminess, creating a well-rounded taste.
Taste frequently throughout the process, adjusting as needed. A pinch of salt can also enhance the flavors, bringing out the best in your selected ingredients. This careful consideration of balance will ensure your dips are not only delicious but also well-received by your guests, leaving them eager for more.
Creative Presentation Ideas for Dips That Will Impress Your Guests
Elevating your party with beautifully presented dips can significantly enhance the overall experience for your guests. First, consider the serving dish — opt for vibrant or textured bowls that complement the color of the dip. For instance, a bright green herb dip looks stunning in a white bowl, which allows it to stand out beautifully on the table.
Garnishing your dips adds an extra touch of finesse and flair. For example, a sprinkle of fresh herbs, a drizzle of high-quality olive oil, or even edible flowers can transform a simple dip into a visually appealing centerpiece. Group your dips together on a large platter, and surround them with an assortment of appealing snacks such as colorful crudités, artisan breads, and crisp crackers, creating an inviting display that will entice your guests.
Another clever idea is to create a “dip bar” at your party, where guests can mix and match their dips and snacks at their leisure. This interactive element not only adds to the fun but also allows guests to personalize their experience, making your gathering memorable and unique.
Strategic Pairing of Dips with Snacks for an Unforgettable Experience
The right snack pairings can significantly enhance the experience of enjoying herbal dips. Popular snack pairings in the UK include savoury biscuits, which offer a delightful crunch alongside creamy dips. Consider options like cheese crackers or oat biscuits, which have a mild flavor that won’t overpower the dips, creating a harmonious balance.
Fresh vegetables, or crudités, are another excellent choice. They provide a healthy crunch and can complement the flavors of the dip perfectly. Some popular UK vegetables to consider include:
- Carrot sticks
- Cucumber slices
- Celery sticks
- Cherry tomatoes
When it comes to bread, consider artisan options like sourdough or ciabatta, which can be sliced and toasted for added texture and flavor. A variety of crackers can also create an exciting tasting experience, providing guests with the opportunity to explore different combinations. The key is to mix and match textures and flavors, ensuring there’s something for everyone to enjoy and savour at your gathering.
Understanding the Health Benefits of Herbal Dips: Discover Their Nutritional Value
Examining the Nutritional Benefits of Popular UK Herbs
Herbs do more than just enhance the flavor of your dips; they also pack a nutritious punch that benefits your health. Common UK herbs like parsley, dill, and basil are rich in vitamins and minerals. For instance, parsley is an excellent source of vitamin K, which is essential for maintaining bone health, while dill contains antioxidants that can support immune function and overall wellness.
Integrating a variety of herbs into your dips not only enhances flavor but also boosts their nutritional value, making them a more wholesome option for your guests. Basil is known for its anti-inflammatory properties, while chives provide vitamins A and C, contributing to overall health. Keeping a diverse array of herbs in your dips can make them not just tasty but also beneficial for health-conscious guests, encouraging them to indulge without guilt.
When creating dips, consider the nutritional benefits of each herb you use. This approach not only appeals to health-minded individuals but also shows that you value the well-being of your guests, making your gathering more thoughtful and enjoyable. Highlighting the health aspects can spark engaging conversations around the table, enhancing the experience for everyone.
How Herbal Dips Can Support Digestive Health: A Thoughtful Addition to Your Spread
Certain herbs can significantly aid digestion, making them a smart and thoughtful choice for party dips. Herbs such as mint, dill, and ginger have been traditionally used to promote digestive health and comfort. For instance, mint is renowned for its ability to soothe the stomach, while dill can help relieve bloating and discomfort, making your dips not only delicious but also functional.
Incorporating these digestive-friendly herbs into your dips can provide added benefits for your guests. For a digestive aid, consider creating a mint and yoghurt dip, or a dill-infused cream cheese spread. These not only taste great but also serve a purpose, promoting a comfortable eating experience during the festivities and ensuring that guests feel their best while enjoying your culinary offerings.
To further enhance the digestive qualities of your dips, consider adding probiotic-rich ingredients like Greek yoghurt. Combining herbs that support digestion with these ingredients can lead to a winning combination that guests will appreciate, especially at larger gatherings where rich foods are served and enjoyed.
Maximizing Antioxidant Properties in Your Dips for Enhanced Health Benefits
Many herbs commonly used in UK dips are rich in antioxidants, which are essential for combating oxidative stress in the body and promoting overall health. Herbs like parsley, basil, and rosemary are particularly high in these beneficial compounds. By including these herbs in your party dips, you can offer guests a tasty snack that also supports their health and well-being.
For example, parsley is not only flavorful but is also packed with antioxidants that help protect cells from damage caused by free radicals. Similarly, basil contains flavonoids that may provide anti-inflammatory benefits, contributing to better health. When crafting your dips, consider mixing various herbs to maximize their antioxidant benefits, creating a delicious and health-conscious snack.
Highlighting the health aspects of your dips can also be a conversation starter at your gathering. Guests often appreciate knowing that they’re indulging in snacks that are not only delicious but also beneficial, adding an extra layer of enjoyment to the experience and making your event memorable.
Seasonal Herbal Dips to Celebrate UK Occasions
Spring-Inspired Dips to Embrace Fresh Seasonal Herbs
Spring is a wonderful time to celebrate fresh, seasonal herbs in your dips. As the weather warms up, herbs like chives, mint, and parsley flourish, offering vibrant flavors that complement the season perfectly. A chive and sour cream dip, for example, pairs beautifully with the crisp vegetables that are abundant during springtime, creating a delightful snack that reflects the freshness of the season.
To make the most of spring herbs, consider creating a refreshing mint and cucumber dip, which is perfect for outdoor gatherings. Alternatively, a light parsley and lemon dip can brighten up any party spread, infusing the occasion with the essence of spring. The key is to utilize these fresh herbs when they are at their peak, bringing the vibrant flavors of the season to your table and delighting your guests.
Seasonal ingredients not only taste better but also provide an opportunity to connect with nature. By incorporating spring herbs into your dips, you offer guests a taste of the season that is both delightful and memorable, enhancing their overall experience and enjoyment.
Summer Dips to Celebrate Bold and Vibrant Flavors
Summer is synonymous with vibrant flavors and fresh herbs that can transform any gathering into a celebration of taste and color. Dips made with summer herbs like basil, dill, and mint can create an exciting culinary experience, ensuring your dips stand out during sunny soirées and outdoor events.
Consider a basil and olive oil dip, which pairs beautifully with ripe, juicy tomatoes and crusty bread. Alternatively, a refreshing dill and yogurt dip complements the plethora of summer vegetables available, providing a light and tasty option. Using seasonal ingredients not only enhances flavor but also allows you to showcase the beauty of summer produce, making your dips truly memorable.
To highlight these summer dips, present them in colorful bowls surrounded by fresh fruits and vegetables. The combination of taste and presentation will create an inviting atmosphere, encouraging guests to indulge in the flavors of summer, bringing joy and satisfaction to your gathering.
Cozy Autumn and Winter Dips for Comforting Gatherings
As the seasons change and temperatures drop, hearty, comforting dips become the star of the show. Autumn and winter dips often feature robust herbs like rosemary and thyme, which offer warmth and comfort, perfect for chilly gatherings and festive celebrations.
For an autumn-inspired dip, consider a creamy rosemary and garlic dip, which pairs well with roasted vegetables and crusty bread. In winter, a thyme-infused cream cheese dip served with warm, freshly baked bread can evoke the comforting feeling of the season. Using seasonal herbs not only enhances taste but also connects your dips with the essence of the season, creating a warm and inviting atmosphere for your guests.
Embrace the warmth of autumn and winter by creating a cozy atmosphere at your gatherings. Incorporating these hearty dips will invite your guests to indulge in the flavors of the colder months, creating memorable moments around the table that will be cherished long after the party is over.
Year-Round Dips to Delight for Any Occasion
Discovering versatile dips that can be enjoyed throughout the year is a fantastic way to keep your gatherings fresh and exciting. By using a mix of seasonal and evergreen herbs, you can create dips that resonate with guests no matter the time of year, ensuring that your offerings remain relevant and enticing.
For instance, a classic hummus made with tahini and garlic can be elevated with fresh herbs like parsley or coriander, creating a dip that is both familiar and exciting. Similarly, a simple yogurt dip can be jazzed up with whatever fresh herbs are available, ensuring that your offerings are always delicious and in line with the season’s bounty.
Year-round dips also allow for creativity. Experimenting with different herbs depending on the season can spark inspiration and lead to new flavor combinations that surprise and delight your guests. Keeping an eye on what’s fresh and available in your local markets will ensure that your dips are always bursting with robust flavor and appeal, keeping every gathering unique and enjoyable.
Mastering the Art of Pairing Herbal Dips with UK Snacks for Maximum Enjoyment
Delicious Savoury Biscuits That Elevate Your Dips
Pairing herbal dips with savoury biscuits can add a delightful crunch to your party spread, enhancing the overall experience. In the UK, many types of biscuits complement the richness of dips beautifully. For example, cheese-flavored crackers pair wonderfully with creamy dips, enhancing the overall flavor experience and making each bite more enjoyable.
Consider using options such as:
- Cheese crackers
- Oat biscuits
- Thins or crisps
- Seeded crackers
The key is to select biscuits that have a mild flavor, allowing the dip to shine while adding texture to the overall experience. Offering a variety of biscuits ensures that your guests have options to choose from, making the pairing experience enjoyable and interactive as they explore different combinations.
Present your biscuits alongside the dips on a large platter, creating a visually appealing buffet for your guests. This variety will encourage them to explore the different combinations and find their favorites, enhancing the festive atmosphere of your gathering.
Fresh and Colourful Crudités for a Nutritious Option
Fresh vegetables, or crudités, are a healthy and tasty accompaniment to herbal dips. Not only do they provide a colorful display, but they also offer a satisfying crunch that pairs perfectly with creamy dips, creating a balanced and enjoyable snack experience. Incorporating a range of vegetables ensures that there’s something for everyone at your party, catering to diverse tastes and preferences.
Some popular UK vegetables to consider include:
- Carrot sticks
- Cucumber slices
- Celery sticks
- Bell pepper strips
- Radishes
- Cherry tomatoes
When preparing your crudités, aim for a variety of colors and textures to create an inviting platter. The freshness of the vegetables contrasts beautifully with the richness of the dips, making for a balanced and enjoyable snacking experience. Consider serving your dips in small bowls alongside the crudités to encourage guests to mix and match, creating their own perfect combinations.
Artisan Breads and Crackers to Enhance the Flavor Experience
Different types of breads and crackers can significantly enhance the flavor of your dips. When choosing the right pairing, consider the texture and flavor profile of both the dip and the bread. For instance, crusty artisan breads like sourdough or ciabatta serve as excellent vehicles for creamy dips, providing a delightful contrast that enhances the overall tasting experience.
To choose the right bread or cracker for your herbal dip, think about:
– The dip’s richness: For heavier dips, opt for denser breads or thicker crackers that can support the weight of the dip.
– The dip’s flavor: Pair more robust dips with hearty breads, while lighter dips can be accompanied by delicate crackers for an ideal balance.Offering a range of breads and crackers allows your guests to experiment with different combinations, ensuring there’s something to suit every palate. Present these options alongside your dips on a beautifully arranged platter, creating an inviting and interactive dining experience that encourages exploration and enjoyment.
Effective Strategies for Crafting Herbal Dips for Memorable Parties
Strategic Planning for Your Dip Menu to Delight Guests
Strategically planning your dip menu can set the stage for a successful party experience. Start by considering the theme of your gathering and the preferences of your guests. Offering a variety of dips ensures there’s something for everyone, catering to different tastes from creamy options to lighter, healthier choices that please the palate.
Begin your planning by selecting a mix of classic dips, such as a chive and onion dip, along with more adventurous options like a tarragon and lemon dip. Think about the textures and flavors you’re presenting; for instance, pairing a creamy dip with crunchy vegetables and savoury biscuits creates a well-rounded experience that delights the senses.
Additionally, consider dietary preferences and restrictions. Including vegan options or gluten-free snacks ensures that all guests feel welcome and catered to. Having a diverse dip menu not only enhances the visual appeal but also promotes an inclusive atmosphere, encouraging everyone to indulge and enjoy the culinary offerings.
Calculating Quantity and Preparation to Ensure Success at Your Event
Determining how much dip to prepare for your party is crucial to avoid running out or wasting food. A good rule of thumb is to plan for approximately 2 ounces of dip per person, ensuring that there is enough for everyone to enjoy. This amount can vary depending on whether it’s served as an appetizer or as part of a larger meal spread.
Prepare your dips in advance to save time on the day of the event. Many dips, such as parsley and garlic or mint and cucumber, can be made a day ahead, allowing the flavors to meld beautifully and enhancing their overall taste. Store them in airtight containers in the fridge to maintain freshness and quality.
On the day of the party, simply set them out on a table with your selected snacks, creating a beautiful display. This thoughtful preparation not only ensures that your dips are ready to go but also helps mitigate any last-minute stress, allowing you to enjoy the event alongside your guests.
Ensuring Proper Storage and Freshness of Your Dips for Optimal Quality
Keeping your dips fresh is crucial for a great party experience. To maintain the quality of your herbal dips, ensure they are stored properly. After preparation, place them in airtight containers and store them in the refrigerator until serving, preserving their flavors and textures.
Depending on the ingredients, most dips can last for 3-5 days in the fridge. For dips made with dairy or fresh herbs, it’s especially important to check for freshness before serving. If a dip appears discolored or has an off smell, it’s best to err on the side of caution and discard it, ensuring that your guests enjoy only the best.
Real-world examples of how UK party hosts maintain freshness include using ice bowls to keep dips cool during outdoor events. This not only preserves the dips but also adds an appealing presentation element to your spread. By prioritising freshness, you can ensure your guests enjoy delicious, safe-to-eat dips that elevate your party experience.
Can You Create Vegan-Friendly Herbal Dips? Absolutely! Here’s How!
Exploring Dairy-Free Alternatives for Inclusive and Delicious Dips
Switching to dairy-free ingredients can make your dips suitable for vegan guests while still retaining a creamy texture and delicious flavor. Some excellent dairy-free bases for herbal dips in the UK include coconut yoghurt, cashew cream, or silken tofu. Each of these options can create a deliciously smooth and satisfying dip that everyone can enjoy.
For example, using cashew cream as a base allows for a rich, creamy texture that can be enhanced with fresh herbs like basil or dill. Alternatively, coconut yoghurt brings a slight sweetness that pairs beautifully with mint or cucumber, creating refreshing combinations that delight the palate.
When creating vegan dips, it’s important to consider both texture and flavor. Experiment with different dairy-free bases to find the combination that best suits the herbs you’re using. This approach ensures that all guests, regardless of dietary preference, can enjoy your dips and feel included in the culinary experience.
Vegan-Friendly Herbs That Make Delicious Dips Everyone Will Adore
Certain herbs are particularly popular in vegan cooking, and incorporating them into your dips can elevate their flavors while keeping them plant-based. Herbs like basil, parsley, and cilantro are not only vibrant but also versatile, lending themselves well to a variety of flavors and culinary applications.
To incorporate these herbs into your vegan herbal dips, consider creating a creamy basil and avocado dip, which is both flavorful and packed with nutrients. A parsley and garlic dip made with olive oil can be a robust option for guests who enjoy bold tastes and rich flavors while remaining entirely plant-based.
Being mindful of vegan-friendly herbs while planning your dips ensures that you account for different dietary needs, making your event inclusive and enjoyable for everyone, allowing all guests to partake in the culinary delights you offer.
Delightful Vegan Dipping Options for All Guests to Savor
Pairing your vegan herbal dips with plant-based snacks can create a delightful spread for your guests, ensuring everyone has something to enjoy. Some popular vegan snacks in the UK that pair well with herbal dips include:
- Vegetable sticks
- Rice cakes
- Seeded crackers
- Pita chips
These options not only provide a crunchy texture but also allow the flavors of the dips to shine through. Offering a variety of dipping options ensures that all guests can enjoy the full experience of your dips, while also accommodating a range of dietary preferences and needs.
Consider presenting these snacks alongside your dips on a colorful platter to create an inviting display. This approach encourages guests to mix and match, discovering their favorite combinations throughout the event and enhancing their overall experience.
Nutrition-Focused Considerations for Crafting Vegan Dips That Satisfy
When preparing vegan herbal dips, it’s essential to ensure they are nutritionally balanced and satisfying. Focus on incorporating a variety of vitamins and minerals that can be found in plant-based ingredients. For instance, nuts and seeds provide healthy fats and protein, while fresh herbs offer essential vitamins and antioxidants.
To create a well-rounded vegan dip, consider including ingredients like avocado, which is rich in healthy fats and adds a creamy texture. Additionally, incorporating legumes such as chickpeas can boost protein content, making your dips satisfying and nutritious while appealing to health-conscious guests.
By prioritising nutritional balance, you not only cater to vegan guests but also offer wholesome options that align with health-conscious trends. Creating dips that are both flavorful and nutritious will enhance your guests’ experience, encouraging them to savour every bite and appreciate the thoughtfulness behind your culinary creations.
Discover the Best UK Herbs for Crafting Memorable Party Dips
Versatile Basil: Adding a Touch of Sweetness to Your Dips
This versatile herb adds a sweet, slightly peppery flavor to a variety of dips, making it a popular choice in the UK. Fresh basil pairs beautifully with creamy ingredients, creating a delightful contrast that enhances the overall taste and experience of your dips.
Some creative ways to use basil in party dips include blending it into a classic pesto or mixing it into a creamy dip with cashews for a dairy-free option. The aromatic qualities of basil can elevate even the simplest dips, making them more appealing and inviting to guests.
Incorporating basil into your party dips not only offers a burst of flavor but also provides a vibrant green color that enhances the visual appeal of your spread. Guests will be drawn to the enticing aroma of basil, creating a memorable tasting experience that lingers in their minds long after the event.
Fresh Parsley: Infusing Your Dips with a Bright, Grassy Note
Known for its fresh, grassy taste, parsley is a staple in many UK dips. This herb not only enhances flavor but also adds a vibrant green hue to your dips, making them visually appealing and inviting. Highlighting parsley’s flavor in your dips can be as simple as using it as a main ingredient in a creamy dip.
For instance, a parsley and garlic dip served with artisan bread can be a showstopper at any gathering. Another option is to mix parsley into a refreshing yogurt dip, which pairs wonderfully with a variety of snacks. The versatility of parsley ensures it can be utilized in both bold and subtle flavors, catering to a wide range of preferences and tastes.
Incorporating parsley into your party dips demonstrates a commitment to freshness and flavor, inviting your guests to savour every bite. Its widespread appeal makes it a fantastic choice for gatherings, ensuring everyone can find something to enjoy and appreciate.
Distinctive Dill: Offering a Unique Flavor Experience in Your Dips
Dill brings a unique, slightly tangy flavor to dips, making it perfect for seafood pairings and adding a fresh twist. Its distinct taste is particularly popular in the UK, especially when combined with creamy bases like yogurt or cream cheese, creating rich, flavorful dips that are sure to impress.
For example, a dill and lemon dip complements smoked salmon beautifully and can be served alongside crusty bread or crisp vegetables, creating a delightful culinary experience. The freshness of dill not only enhances the flavor of the dip but also provides a lovely aromatic experience for guests, making it a memorable addition to any spread.
Using dill in your party dips adds a touch of sophistication while maintaining a homey feel. Its ability to pair well with various ingredients makes it a versatile option for any gathering, ensuring that your dips stand out and leave a lasting impression on your guests.
Frequently Asked Questions About Creating Herbal Dips
What are some popular herbal dips for parties that everyone will enjoy?
Popular herbal dips for parties include mint and cucumber dip, chive and onion dip, and dill and yogurt dip. Each offers a unique flavor profile that pairs well with various snacks, ensuring delightful experiences for your guests.
How can I make my herbal dips healthier without sacrificing flavor?
To make your herbal dips healthier, consider using Greek yoghurt or dairy-free alternatives as a base. Incorporate lots of fresh herbs and serve with healthy snacks like fresh vegetables or wholegrain crackers, promoting a wholesome and enjoyable experience.
What herbs are best for summer dips to enjoy the season’s flavors?
Best herbs for summer dips include mint, basil, and dill. These herbs provide refreshing flavors that pair perfectly with light summer snacks and enhance the overall enjoyment of your gathering.
How do I store leftover dips to keep them fresh?
Store leftover dips in airtight containers in the fridge. Most dips can last for 3-5 days, but always check for freshness before consuming to ensure a delightful experience.
Can I make herbal dips vegan-friendly for all dietary needs?
Yes, you can make herbal dips vegan by using dairy-free alternatives like coconut yoghurt or cashew cream. Fresh herbs enhance flavor while keeping the dip plant-based and suitable for all guests.
What snacks pair well with herbal dips for a delightful experience?
Snacks that pair well with herbal dips include savoury biscuits, fresh vegetable sticks, and crusty artisan breads. These options provide great texture and flavor contrasts, enhancing the overall experience for your guests.
How can I make dips ahead of time for convenience?
You can make dips ahead of time by preparing them a day in advance and storing them in the fridge. This allows the flavors to meld beautifully before serving, ensuring a delightful taste experience for your guests.
What is the best way to present dips at a party to impress guests?
Present dips in colorful bowls on platters, surrounded by an array of snacks. Garnishing with fresh herbs or decorative garnishes adds an appealing touch that enhances the visual experience for your guests.
Are there any herbs to avoid in dips to maintain balanced flavors?
While most herbs are suitable for dips, it’s best to avoid overly strong herbs like sage or thyme in large quantities, as they can overpower other flavors and detract from the overall experience.
How do I balance flavors in my dips for a harmonious taste?
To balance flavors in your dips, start with a solid base and gradually add herbs and seasonings. Taste as you go to ensure the right balance of richness and acidity, creating a harmonious and delightful dip experience.
Connect with us on Facebook!
The Article: Herbal Dips for Parties: UK’s Best Recipes appeared first on https://mcrtherapies.co.uk
The Article Herbal Dips: Top Party Recipes from the UK Was Found On https://limitsofstrategy.com