Your cart is currently empty!
Category: Cleaning Tips
-

Grout Cleaning Solutions: Expert Tips for Best Results
Master Grout Cleaning Techniques: Proven Strategies for Outstanding Results showcases advanced methods of grout cleaning, detailing how expert techniques significantly outshine ordinary consumer-grade practices.
This comprehensive article delves into several crucial elements:
- Recognising the Advantages of Professional-Grade vs. Retail Cleaning Solutions – This discussion elucidates how professional cleaning products consistently outperform standard retail options found in stores.
- Investigating Eco-Friendly Cleaning Approaches – The article explores natural cleaning methods that facilitate effective grout upkeep while minimising environmental impact.
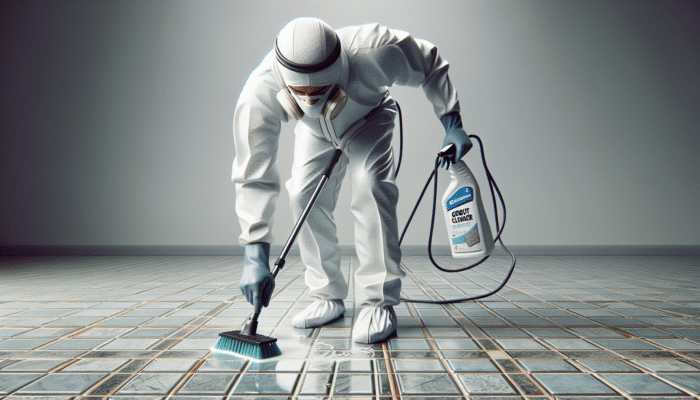
- Prioritising Safety Measures – Guidelines for using protective equipment, including gloves, goggles, and masks, are included to prevent exposure to harmful substances.
- Selecting the Most Suitable Cleaning Method for Your Specific Needs – Insights are provided on how to determine the most effective cleaning strategy based on the state of your grout and particular cleaning demands.
- Implementing Sustainable Protection Tactics – The importance of investing in high-quality sealants and protective solutions to prolong the lifespan of grout and tiled surfaces is highlighted.
Critical Considerations for Choosing an Effective Grout Cleaning Product
Selecting the appropriate grout cleaner is essential for preserving the pristine condition of your tiled surfaces. The effectiveness of your grout cleaning efforts hinges not only on the techniques you apply but is also greatly influenced by your choice of cleaning products. By gaining insight into the unique qualities of various cleaning solutions, you can customise your strategy to meet the specific requirements of your grout and tiles. This article aims to explore the vital factors necessary for selecting effective grout cleaning solutions, equipping you with the knowledge to make informed decisions that lead to exceptional results.
Assessing the Pros and Cons of Chemical vs. Natural Grout Cleaning Solutions
When comparing chemical grout cleaners to natural alternatives, it’s crucial to evaluate the strengths and weaknesses of each option. Chemical cleaners often feature strong formulations specifically created to dissolve stubborn stains and grime, frequently containing potent ingredients such as bleach or hydrochloric acid. While highly effective against significant discolouration, these substances can pose health risks and potentially harm surrounding surfaces. For instance, the fumes generated can be overwhelming in enclosed spaces, making it essential to ensure proper ventilation and use of protective gear to safeguard your health.
On the other hand, natural cleaners typically utilise components such as vinegar, baking soda, and essential oils, providing a more environmentally friendly choice. Their lower toxicity makes them safer for both users and the planet. Although these natural solutions may require more physical effort and time to achieve optimal results, they excel in routine maintenance, effectively preventing the buildup of grime without resorting to harsh chemicals.
Ultimately, the best cleaning solution hinges on your unique cleaning needs and the current state of your grout. For regular upkeep, natural cleaners might suffice, while more demanding cleaning tasks may necessitate the robust efficacy of chemical cleaners. In many instances, employing a combination of both approaches could yield superior results, ensuring comprehensive cleanliness while protecting your health and the integrity of nearby surfaces.
Grasping the Importance of pH Levels in Selecting Grout Cleaning Products
Understanding the role of pH levels is essential when choosing suitable grout cleaning solutions. Grout can greatly differ in composition, with cementitious and epoxy grout being the two primary types. Cementitious grout, known for its porous nature and susceptibility to staining, typically responds best to cleaners that maintain a neutral pH level. Acidic cleaners can inflict damage on cement-based grout, leading to erosion and unsightly discolouration over time.
Conversely, epoxy grout is more robust and can tolerate stronger cleaners, including those with lower pH levels. This grout type is particularly well-suited for high-traffic areas or regions exposed to moisture. When selecting a cleaning agent, it’s imperative to consider the specific pH level of the product and how well it corresponds with the type of grout being cleaned.
Using an incompatible cleaner could result in significant damage, necessitating costly repairs or replacements. Therefore, it is advisable to conduct a small patch test in a discreet area to assess the cleaner’s effectiveness and safety before proceeding with a larger application.
Distinguishing Between Professional-Grade and Retail Grout Cleaning Products
The differences between professional-grade grout cleaning products and those available in retail stores can be quite pronounced. Professional-grade solutions are specifically formulated for intensive use, designed to tackle even the toughest stains and restore grout to its original state. These products are generally more concentrated and possess superior cleaning capabilities, making them ideal for commercial applications or large-scale cleaning jobs.
While retail products are more accessible, they may lack the strength necessary for severe staining or heavy soiling. Typically designed for everyday consumers, these products might not provide the same level of effectiveness as their professional-grade counterparts. Additionally, retail options often come with simpler, more straightforward instructions, appealing to individuals who may lack extensive cleaning experience.
When evaluating your options, it’s crucial to assess the scale of your project. Retail cleaners may be sufficient for maintaining smaller areas, but investing in professional-grade solutions can lead to superior outcomes and save time when addressing larger jobs or significantly stained grout. Ultimately, understanding your cleaning requirements and the capabilities of each product will assist you in making the most effective choice for your grout cleaning solutions.
Optimising Application Techniques and Tools for Maximum Grout Cleaning Efficiency
The techniques and methods employed during the cleaning process can significantly enhance the effectiveness of grout cleaning solutions. The choice of application method can impact not only the efficiency of the cleaning process but also the final results. Common techniques include spray, scrub, or steam, each offering distinct advantages.
Utilising a spray applicator ensures even distribution of cleaning agents across grout lines, providing comprehensive coverage. This approach is particularly effective when paired with a stiff-bristled brush for scrubbing. Combining manual scrubbing with chemical application can yield remarkable outcomes even against stubborn stains.
Steam cleaning is a powerful method that utilises heat and steam to penetrate deep into grout lines, effectively loosening dirt and grime without the need for harsh chemicals. This technique is both efficient and eco-friendly, primarily relying on heat and pressure to thoroughly cleanse surfaces.
Choosing the right tools, such as brushes with varying bristle stiffness and steam cleaners, can enhance the results achieved. When selecting your method and equipment, consider the specific condition of your grout and the nature of the stains you are tackling. A structured approach can streamline the cleaning process, maximising both efficiency and effectiveness.
Thorough Preparation Steps for Your Workspace Before Grout Cleaning
Meticulously preparing your workspace is crucial for a successful grout cleaning project. Proper preparation ensures not only that the cleaning process is efficient but also minimises the risk of damaging surrounding surfaces. This section will outline the essential steps necessary to set up your environment for effective grout cleaning solutions tailored for professionals.
Protecting Surrounding Surfaces During the Grout Cleaning Process
Taking appropriate measures to safeguard surrounding surfaces can prevent costly damage during grout cleaning. Fixtures and furnishings can be particularly vulnerable to aggressive cleaning agents, which may lead to discolouration, etching, or other forms of damage. Start by removing any items from the immediate area to avoid unintended spills or splashes. Common items to remove include furniture, rugs, and decorative pieces that may obstruct your cleaning efforts.
Utilising protective coverings, such as plastic sheeting or painter’s tape, around the edges of tiles and fixtures can shield these surfaces from potential harm. In regions where grout lines are particularly close to sensitive materials, applying painter’s tape can create a barrier that prevents unwanted contact with cleaning solutions. Another effective strategy is to establish a designated area for storing your cleaning tools and chemicals, ensuring that everything remains easily accessible without hindering your cleaning process. This organisation promotes a smoother workflow and reduces the likelihood of accidental spills from moving equipment.
Maintaining a clean and organised workspace can significantly enhance the effectiveness of your cleaning efforts, ultimately leading to impressive results without incurring costly damage to your surroundings.
Ensuring Adequate Ventilation and Using Appropriate Safety Gear
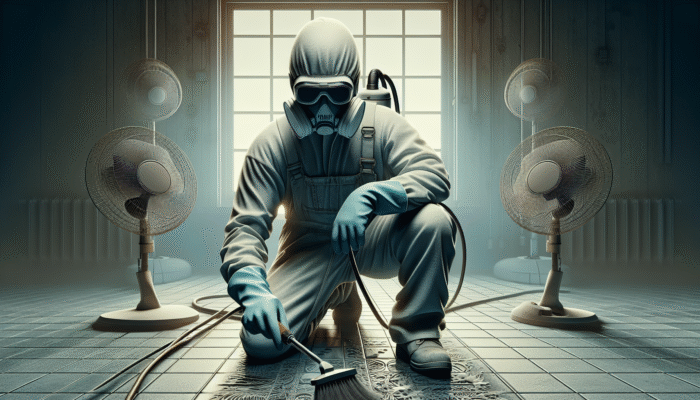
Ensuring proper ventilation and wearing suitable safety gear are vital components of grout cleaning preparation. Many grout cleaning products, particularly chemical cleaners, can emit strong fumes that pose health risks if inhaled. To create a safe working environment, open windows and doors to promote airflow, and consider using fans to circulate air throughout the area.
Additionally, wearing appropriate protective equipment, such as gloves, goggles, and face masks, is essential to safeguard yourself from potential exposure to harmful substances. Gloves protect your hands from irritation and shield against harsh chemicals, while goggles defend your eyes from splashes. A well-fitted face mask can help reduce the inhalation of fumes, ensuring your respiratory health remains protected during the cleaning process.
When selecting safety gear, ensure it is suitable for your specific products, as some chemicals may require specialized protection. Investing in quality safety equipment is a minor expense for peace of mind and health protection while undertaking grout cleaning tasks.
In summary, prioritising ventilation and safety measures not only contributes to a safer working environment but also enhances the overall efficiency of the cleaning process.
Strategically Planning Your Workspace Layout for Maximum Efficiency
Effectively planning the layout of your workspace can significantly boost efficiency and simplify the grout cleaning process. Creating a logical workflow can help you avoid unnecessary backtracking and ensure a seamless cleaning experience.
Consider segmenting your area into manageable sections, focusing on one section at a time. This method not only organises your workspace but also allows for a more concentrated cleaning effort. Begin from the furthest point in the room and work towards the exit, preventing accidental footprints on freshly cleaned grout.
Utilising a checklist can further streamline your approach. Enumerate the tasks for each area, from applying the cleaning solution to scrubbing and rinsing, enabling you to track your progress effectively. An organised plan can help maintain motivation and ensure comprehensive coverage of all grout lines, leaving no stone unturned.
Ultimately, efficient layout planning promotes a smoother, more productive cleaning session, yielding exceptional results in your grout cleaning solutions designed for professionals.
Proven Grout Cleaning Techniques for Exceptional Outcomes
The success of your grout cleaning efforts often hinges on the techniques employed. Understanding various cleaning methods empowers you to effectively tackle even the most stubborn stains and restore your grout lines to their original brilliance. This section delves into the most effective grout cleaning strategies, highlighting their unique advantages and ideal applications.
Leveraging Steam Cleaning Techniques for Superior Grout Restoration
Steam cleaning has emerged as a highly effective technique for grout cleaning, particularly due to its ability to harness the cleansing power of heat and moisture. This method involves utilising a steam cleaner that penetrates deep into grout lines, loosening dirt, grime, and even mould.
One of the most significant benefits of steam cleaning is its eco-friendliness. By relying primarily on water, steam cleaning eliminates the need for harsh chemicals, making it a safe choice for households with children or pets. The high temperatures achieved during steam cleaning can effectively kill bacteria and allergens, contributing to a healthier home environment.
To achieve optimal results, it is essential to work methodically, allowing the steam to penetrate the grout for several seconds before scrubbing. Following up with a stiff-bristled brush can help lift any remaining debris, ensuring thorough cleaning.
Regular cleaning using this method can prevent the accumulation of dirt and stains over time. This proactive approach not only preserves the appearance of your surfaces but also extends the longevity of your grout, making steam cleaning an invaluable technique in your grout cleaning arsenal.
Utilising Scrubbing and Brushing Techniques for Effective Stain Removal
For persistent stains, employing various scrubbing and brushing techniques can be crucial for achieving optimal results. Different types of brushes can significantly influence the effectiveness of your cleaning efforts. A stiff-bristled brush is ideal for aggressive scrubbing, while softer brushes are better suited for more delicate surfaces.
When scrubbing, it’s essential to employ the proper technique. Begin by applying your chosen grout cleaning solution to the grout lines. Allow it to sit for a few minutes to penetrate and break down dirt. Then, using circular motions with your brush, scrub the grout lines thoroughly, applying sufficient pressure to lift stains without damaging the surrounding tiles.
In cases of severe staining, combining scrubbing techniques may be necessary. Start with a stiff brush to tackle the bulk of the grime, then switch to a softer brush for finishing touches. This approach ensures a comprehensive cleaning process without risking damage to your surfaces.
Establishing a regular brushing routine is invaluable for maintaining the grout between professional cleanings. Paying attention to the grout helps prevent dirt and stains from accumulating, preserving its appearance and integrity over time.
Employing High-Pressure Cleaning Systems for Professional Grout Restoration
High-pressure cleaning systems can be transformative for professionals seeking outstanding cleaning results. These powerful machines use pressure to blast away dirt and grime from grout lines, delivering outcomes that traditional cleaning methods may struggle to achieve.
The effectiveness of high-pressure cleaning systems lies in their capacity to dislodge deeply embedded dirt particles from porous grout surfaces. This method is particularly beneficial for outdoor patios or driveways, where environmental factors can lead to significant buildup.
When using high-pressure systems, it is crucial to adjust the pressure settings based on the type of grout and tiles in your area. Excessive pressure can damage fragile tiles or erode softer grout, leading to costly repairs. Therefore, conducting a test in an inconspicuous area is advisable to determine the safest pressure level for your specific surfaces.
Moreover, high-pressure systems can often be combined with cleaning solutions to enhance their effectiveness. Applying a suitable detergent before pressure cleaning can help break down stubborn stains, while the power of water pressure ensures thorough rinsing and debris removal. This approach can yield significant benefits when utilising a high-pressure cleaning system, particularly for professionals seeking efficient and effective grout cleaning solutions.
Making Use of Chemical Grout Cleaners for Tackling Stubborn Stains
Chemical grout cleaners are a staple in the toolkit of grout cleaning solutions for professionals, especially for addressing tough stains that resist other cleaning methods. Formulated with powerful active ingredients, these cleaners can effectively dissolve grime, mildew, and discolouration, restoring your grout to its original condition.
When selecting a chemical grout cleaner, it’s vital to consider the specific stains and the type of grout being cleaned. For example, alkaline-based cleaners excel at removing grease and oil-based stains, while acid-based cleaners effectively address mineral deposits and hard water stains.
Proper application of chemical cleaners is crucial for achieving desired results. Start by thoroughly reading the manufacturer’s instructions, ensuring you understand the recommended dilution ratios and application techniques. Generously applying the cleaner to the grout lines and allowing it to sit for the recommended duration can enhance its effectiveness, enabling the chemicals to penetrate deeply and break down tough stains.
As with any chemical product, safety precautions must be adhered to. Wearing appropriate protective gear and ensuring proper ventilation will help mitigate any risks associated with chemical exposure. After cleaning, it is essential to rinse the area thoroughly with clean water to remove any residual chemicals, preventing potential damage to tiles and grout over time.
When used correctly, chemical grout cleaners can deliver impressive results, making them a valuable addition to the professional cleaning toolkit.
Strategic Approaches for Conquering Stubborn Grout Stains
Addressing stubborn stains can pose a significant challenge during grout cleaning, particularly in high-traffic areas or spaces prone to moisture. Successfully tackling these tough stains necessitates knowledge, specialized products, and proactive measures. This section explores techniques for identifying stain types, utilizing specialized stain removers, and implementing preventive measures to maintain grout in optimal condition.
Accurately Identifying Stain Types for Successful Grout Cleaning
Identifying the type of stain in your grout is essential for determining the most effective cleaning approach. Common stains can originate from various sources, including food, grease, mould, and mineral deposits. Each stain type possesses unique characteristics and may require a tailored cleaning solution.
For instance, oily stains from cooking or food can often appear greasy and dark, while mineral deposits from hard water may present as white or chalky residue. Mould and mildew stains typically manifest as dark spots, often accompanied by a musty odour.
To accurately identify stains, consider conducting a simple test. Apply a small amount of water to the stained area. If the stain lightens or disappears, it may be a surface stain that can be cleaned with a standard grout cleaner. If the stain remains unaffected, it may indicate a deeper issue requiring more intensive treatment.
By accurately identifying stain types, you can choose the most appropriate cleaning method or product, ensuring a more targeted and effective grout cleaning process that maximises results.
Utilising Specialized Stain Removers for Tackling Persistent Stains
For particularly stubborn stains, specialized stain removers can provide the additional cleaning power needed to restore your grout. These products are designed to target specific types of stains, such as mould, mildew, or mineral deposits, offering enhanced effectiveness compared to generic cleaners.
When selecting a specialized stain remover, consider the nature of the stain and the type of grout you are working with. Many products come with clear instructions and recommendations for use, ensuring you achieve optimal results.
Apply the stain remover according to the manufacturer’s guidelines, allowing it to sit for the recommended time to penetrate and break down the stain. Following up with scrubbing can help lift the stain completely, leaving your grout refreshed and clean.
In some cases, multiple applications may be necessary, particularly for deeply embedded stains that resist initial treatment. Investing in quality specialized stain removers can effectively tackle even the most persistent grout stains, ensuring your tiled areas remain immaculate.
Implementing Preventive Measures to Avert Future Grout Stains
Preventive measures can significantly reduce the likelihood of future grout stains, saving you time and effort in the long run. Regular maintenance and proactive cleaning habits are key components of effective grout care.
Establishing a routine cleaning schedule can help minimise the build-up of dirt and stains. Regularly sweeping or vacuuming tiled areas can prevent dirt from settling into grout lines, while promptly addressing spills can mitigate the risk of staining.
Applying a grout sealant can also offer added protection against staining. Sealants create a barrier that repels moisture and dirt, making it more challenging for stains to penetrate the grout surface. As recommended by the manufacturer, reapplying sealant periodically can help maintain its effectiveness.
Educating household members about preventing spills and promptly addressing messes can further enhance your prevention efforts. By fostering a culture of cleanliness and care, you can significantly prolong the life of your grout and maintain its appearance.
Exploring Eco-Friendly Stain Removal Techniques for Sustainable Solutions
For those seeking environmentally friendly options, baking soda serves as a gentle solution that can effectively remove various stains. While many recommend using vinegar and lemon juice, these strong acids can degrade the grout’s surface, causing permanent damage. Therefore, it is advisable to avoid using these products.
Strategies for Maintaining Spotless Grout
A consistent maintenance routine is vital for preserving your grout’s appearance and prolonging its lifespan. Regular care not only enhances the look of your grout but also prevents the accumulation of dirt and stains that can lead to expensive remedial cleaning. This section delves into practical tips for maintaining clean grout, including establishing regular cleaning schedules, utilising quick fixes for minor issues, and incorporating deep cleaning techniques.
Creating Regular Cleaning Schedules for Optimal Grout Maintenance
Establishing a regular cleaning schedule can be instrumental in keeping your grout clean. A consistent routine allows you to effectively avoid dirt and stains, preventing them from escalating into larger issues over time.
Consider incorporating a weekly or bi-weekly cleaning session focused on high-traffic areas, such as kitchens and bathrooms, where grime and stains tend to accumulate. During these sessions, utilise gentle cleaners and a soft brush to maintain the grout’s appearance without compromising its integrity.
In addition to regular cleaning, make it a habit to promptly address spills and stains. The longer a stain remains, the harder it can be to remove. Keeping cleaning supplies readily accessible can facilitate quick action, allowing you to maintain your grout’s cleanliness with minimal effort.
By committing to a consistent cleaning schedule, you can significantly enhance the longevity of your grout, preserving its appearance and function while reducing the need for extensive cleaning later on.
Applying Sealants and Protective Coatings for Enhanced Grout Durability
Applying sealants and protective coatings is an effective strategy for maintaining clean grout and enhancing its durability. Grout sealants act as a barrier, preventing moisture and dirt from penetrating the grout’s porous surface. This strong barrier is particularly beneficial in areas prone to spills and water exposure, such as bathrooms and kitchens.
When selecting a sealant, consider its compatibility with the grout used. Many sealants are available in spray or liquid forms, and applying them requires careful attention to the manufacturer’s instructions. A thin, even coat can provide optimal protection without compromising the grout’s appearance.
Routine maintenance of sealants is also essential; depending on the installation and traffic conditions, resealing may be needed every six months to a year. By keeping your grout sealed, you can significantly reduce the likelihood of staining and prolong its lifespan.
In addition to sealants, protective coatings can enhance the aesthetic appeal of your grout, providing an extra layer of shine and resistance to dirt. Investing in quality protective products can yield long-term benefits for your grout and tiled surfaces.
Implementing Quick Fixes for Minor Grout Issues
Addressing minor grout problems promptly can prevent them from escalating into more significant issues. Common concerns may include small stains, discolouration, or minor cracking. Fortunately, many quick fixes can restore your grout’s appearance with minimal effort.
For minor stains, applying a paste of baking soda directly to the affected area can help lift discolouration when left to sit for a few minutes. Gently scrubbing with a soft brush can assist in restoring the grout’s original colour.
In instances of slight cracking, using a grout repair compound can be effective. These compounds are designed to fill minor cracks, restoring integrity and preventing moisture from penetrating the grout.
Consider using a commercial grout restorer that coats the surface and enhances its appearance for discoloured grout lines. Regular attention to these minor issues can avert extensive cleaning or repairs in the future, ensuring your grout remains in prime condition.
Incorporating Deep Cleaning Techniques for Effective Grout Restoration
In addition to routine maintenance, periodically incorporating deep cleaning techniques can help preserve grout and combat stubborn stains. Deep cleaning is particularly crucial in high-traffic areas or spaces prone to moisture, as these factors can contribute to grime buildup over time.
One effective deep cleaning method involves combining steam cleaning with chemical grout cleaners. Steam cleaning can loosen dirt and grime, while a chemical cleaner targets any remaining stains.
Consider renting or investing in a professional-grade grout cleaning machine for areas with significant buildup. These machines often feature more powerful capabilities than conventional methods and deliver impressive results.
Scheduling deep cleaning sessions every six months to a year, based on usage and exposure levels, can dramatically improve the appearance of your grout while extending its lifespan. By committing to these techniques, you can ensure that your grout remains clean and vibrant, contributing to the overall beauty of your tiled areas.
Essential Tools and Equipment for Achieving Professional Grout Cleaning Results
The right tools and equipment are crucial for effective grout cleaning solutions for professionals. Investing in high-quality tools can enhance efficiency and ensure that the cleaning process yields remarkable results. This section will examine the essential grout cleaning tools, the importance of investing in quality equipment, and tips for maintaining and storing your tools.
Key Tools Required for Efficient Grout Cleaning
To achieve effective grout cleaning, a variety of essential tools are required. Investing in high-quality equipment can streamline your cleaning process and improve overall results. Key tools include stiff-bristled brushes, scrubbing pads, spray bottles, and steam cleaners.
Stiff-bristled brushes are indispensable for tackling tough stains, while softer brushes are better suited for cleaning delicate surfaces without causing damage. Scrubbing pads can also be effective when combined with cleaning solutions, adding extra abrasiveness to eliminate stubborn dirt.
Spray bottles facilitate precise application of cleaners, ensuring even coverage across grout lines. For larger areas, investing in a steam cleaner can significantly enhance cleaning efficiency, harnessing the power of heat to eliminate dirt and bacteria.
Don’t overlook the necessity of safety equipment, such as gloves and goggles, to protect yourself during the cleaning process. Having the right tools is a surefire way to maximise your cleaning efforts and achieve outstanding results.
The Importance of Investing in Quality Equipment
Investing in quality equipment is essential for long-term success in grout cleaning. High-quality tools can withstand frequent use, delivering consistent results while preventing unnecessary wear and tear. Opting for professional-grade products may require a higher initial investment, but the return on investment can be substantial, as they typically perform better and last longer.
When selecting equipment, consider the specific needs of your cleaning tasks. For example, a robust steam cleaner with adjustable pressure settings can offer versatility across various surfaces and conditions. Similarly, durable brushes and scrubbing pads can endure challenging cleaning tasks without losing effectiveness.
Before purchasing, read reviews and consult peer recommendations to ensure you select equipment that aligns with your specific requirements. By choosing quality tools, you’ll be better equipped to tackle the challenges of grout cleaning and achieve remarkable results.
Maintaining and Properly Storing Your Grout Cleaning Equipment
Proper maintenance and storage of your grout cleaning tools can extend their lifespan and ensure they remain in optimal condition. After each use, thoroughly clean your brushes and pads to remove residual cleaning products and dirt. Rinsing them with warm water and allowing them to dry completely can prevent the growth of mould or bacteria.
Store your equipment in a dry, accessible location to prevent damage and ensure you can easily find everything when needed. Consider using storage bins or containers to keep your tools organised and protected from dust or debris.
Additionally, periodically inspect your equipment for signs of wear and tear. Promptly replacing worn brushes or pads can enhance your cleaning efforts and provide better results. By incorporating a maintenance routine for your tools, you can maximise their effectiveness and ensure they continue to serve you well in your grout cleaning endeavours.
Advancing Your Expertise Through Training and Certifications in Grout Cleaning
As a professional in the grout cleaning industry, pursuing training and certifications can substantially elevate your skills and credibility within the sector. Building expertise not only enhances your service offerings but also demonstrates a commitment to quality to your clients. This section will explore the benefits of professional grout cleaning courses and the importance of certifications in establishing industry standards.
Participating in Professional Grout Cleaning Courses
Engaging in professional grout cleaning courses can equip you with the knowledge and skills necessary to excel in the field. These courses cover cleaning techniques, product knowledge, safety practices, and customer service.
Attending hands-on training sessions enables you to practice various cleaning methods under the guidance of experienced instructors, providing invaluable experience. Additionally, many courses offer insights into industry trends and innovations, ensuring you remain current with the latest advancements in grout cleaning technologies.
By investing in professional development, you position yourself as a credible expert in the field. Clients are more likely to trust your services when they see you have undergone specialised training, leading to increased business opportunities and client loyalty.
The Benefits of Certifications and Adhering to Industry Standards
Obtaining certifications can further bolster your credibility within the grout cleaning industry. Various organisations offer certifications that demonstrate your expertise and adherence to established industry standards. Recognised certifications can set you apart from competitors, indicating to potential clients that you are committed to providing high-quality services.
Certifications typically require candidates to pass exams and demonstrate practical skills, ensuring that only qualified professionals receive recognition. These programs also instil a sense of accountability, encouraging certified professionals to maintain high standards in their work.
Staying informed about industry standards and best practices is essential for delivering exceptional results. Adhering to these guidelines not only protects clients’ interests but also enhances your reputation in the market.
Prioritising Continuing Education and Networking Opportunities
Continuing education is vital in the ever-evolving world of grout cleaning. Participating in workshops, webinars, and industry conferences can expose you to new techniques, products, and changes within the field.
Networking opportunities at these events allow you to connect with professionals, share experiences, and learn from others. Building relationships within the industry can lead to valuable partnerships and collaborations that can enhance your business.
By committing to lifelong learning and professional development, you can stay ahead in the grout cleaning industry, ensuring you deliver exceptional service and maintain a competitive edge.
Frequently Asked Questions About Grout Cleaning
What is the most effective grout cleaner for stubborn stains?
The most effective grout cleaner for stubborn stains often depends on the type of stain. For tough grease stains, consider using alkaline-based cleaners, while mineral deposits respond well to acidic solutions.
How often should I clean my grout to maintain its appearance?
Grout should be cleaned every 1-3 months, depending on usage and exposure to moisture. Regular cleaning can prevent the accumulation of dirt and stains.
Are natural grout cleaners effective in maintaining cleanliness?
Yes, natural grout cleaners can be effective, especially for routine maintenance. Ingredients like baking soda can tackle minor stains without harsh chemicals.
How can I determine if my grout requires sealing?
If water is absorbed into the grout rather than beading on the surface, it’s a sign that sealing is necessary. Regular inspection can help determine the right time for its application.
Can bleach be used on all types of grout?
Bleach can be effective on certain grout types but may damage coloured or porous grout. Always test in a small area before widespread use.
What distinguishes grout from caulk in tiling applications?
Grout is used between tiles to fill gaps, while caulk is a flexible material that seals joints and edges, providing waterproofing and preventing mould growth.
What measures can be taken to prevent mould in grout lines?
To prevent mould, ensure proper ventilation in high-moisture areas, clean regularly, and consider applying a grout sealant to inhibit moisture retention.
Is it worthwhile to hire professionals to clean grout?
Professional grout cleaning can be worth the investment, especially for heavily stained or neglected grout. Professionals use advanced equipment and techniques for optimal results.
How long does it typically take to clean grout?
The time required to clean grout varies depending on the area size and level of staining. It can generally take a couple of hours to a full day.
Can vinegar be safely used on coloured grout?
Vinegar is not recommended for coloured grout, as its acidity can cause fading or discolouration. To ensure safety, opt for pH-neutral cleaners for coloured grout.
The Article Grout Cleaning Solutions for Pros: Expert Techniques was first found on https://london-stone.co.uk
The Article Grout Cleaning Solutions: Expert Techniques for Professionals appeared first on https://fabritec.org
The Article Grout Cleaning Solutions: Pro Techniques for Effective Results Was Found On https://limitsofstrategy.com
-

Tile Cleaning Tips for a Spotless Victorian Home
Uncover the Timeless Elegance and Craftsmanship of Authentic Victorian Tiles
Diving Into the Historical Importance of Victorian Tiles
Victorian tiles serve as a breathtaking testament to the artistry and innovation of the 19th century, a period celebrated for its remarkable advancements in art and architecture. These exquisite tiles, primarily made from natural clay, reflect the era’s love for intricate patterns and vibrant hues. Flourishing during the Victorian era (1837-1901), these tiles were more than just decorative pieces; they played a vital role in both private residences and public venues throughout the United Kingdom. From the opulent entryways of grand estates to the crowded halls of train stations, these tiles became enduring symbols of Victorian artistry, embodying the rich cultural tapestry of the time.
The tile-making techniques that emerged during this transformative era were groundbreaking, producing tiles that were not only visually stunning but also exceptionally durable. The onset of the Industrial Revolution introduced innovative mass production methods, making these beautiful tiles accessible to a wider audience and allowing them to be integrated into various architectural styles. Craftsmen adopted advanced techniques like encaustic printing, which facilitated the creation of complex patterns and elaborate designs that encapsulate the unique features of Victorian tiles. Today, these tiles are coveted for their historical value and enduring beauty, standing as a tribute to the artistic accomplishments of that time and continuing to inspire contemporary design.
Recognizing the historical significance of Victorian tile cleaning is essential for homeowners dedicated to preserving the beauty and integrity of these elegant artifacts. With proper maintenance, these tiles can retain their charm for generations, allowing the captivating essence of the Victorian era to flourish in modern interiors, creating a seamless connection between the past and present while enhancing the aesthetic appeal of any space.
Examining the Varied Styles and Characteristics of Victorian Tiles
Victorian tiles are available in a broad spectrum of styles, each offering distinct designs and functional applications that enhance various spaces. Among the most cherished are encaustic tiles, renowned for their elaborate patterns achieved through the meticulous combination of different colored clays. This method ensures that the design remains intact, even as the tile ages, rendering these tiles particularly valued for their artistic charm. Commonly utilized in hallways and conservatories, they serve as striking focal points that captivate visitors and evoke admiration.
Another significant category consists of geometric tiles, characterized by their precise shapes and orderly patterns. These tiles were frequently incorporated in Victorian residences to create a sense of balance and organization within living spaces. Their bold, straightforward designs make them an ideal choice for homeowners looking to evoke a traditional Victorian aesthetic. Additionally, mosaic tiles, formed by assembling small pieces into intricate designs, found widespread application in public monuments, celebrated for their ability to showcase elaborate artwork on both floors and walls, highlighting the craftsmanship of the era.
Every type of Victorian tile possesses its unique appeal and can greatly influence the ambiance of a space. Understanding these different varieties is crucial for anyone engaged in Victorian tile cleaning, as the required cleaning methods may vary based on the specific tile type. For example, encaustic tiles necessitate special care to prevent damage to their surfaces, while geometric tiles can tolerate more aggressive cleaning agents, ensuring that each tile remains a stunning enhancement to your home.
Mastering the Identification of Authentic Victorian Tiles
Establishing the authenticity of Victorian tiles is vital for both collectors and homeowners. Genuine Victorian tiles often display a level of craftsmanship that is challenging to replicate. When evaluating the tiles, pay careful attention to the material; authentic Victorian tiles are typically made of clay and exhibit a certain weight and texture that plastic or modern replicas fail to convey. The colors should be rich and vibrant, showcasing variations that indicate the use of natural pigments, further validating their authenticity.
Examine the craftsmanship with a discerning eye. Authentic tiles often reveal minor imperfections, which are indicative of handcrafted products. Look for signs of age-related wear, such as crazing, which manifests as tiny cracks in the surface glaze. These characteristics not only add unique charm to the tiles but can also enhance their market value, transforming them into not just decorative elements, but also valuable historical treasures.
Enlisting expert appraisal can further aid in verifying authenticity. Professionals specializing in historic ceramics can offer invaluable insights and help differentiate genuine items from replicas. This expertise is especially important when considering Victorian tile cleaning, as the cleaning methods utilized can differ significantly depending on the tile’s authenticity. Proper care of authentic Victorian tiles not only maintains their aesthetic allure but also preserves their value over time, ensuring that these historical gems are cherished for generations.
Crucial Cleaning Techniques for Revitalizing Victorian Tiles

Carefully Evaluating the Condition of Your Victorian Tiles
Before embarking on the Victorian tile cleaning process, it is crucial to conduct a comprehensive assessment of the tiles’ condition. Begin by scrutinizing each tile for visible signs of damage, such as cracks, chips, or discoloration. Identifying these defects will guide you in determining the most suitable cleaning methods and highlighting any necessary repairs, ensuring that your cleaning efforts yield optimal results.
It is equally important to inspect the grout lines closely, as they can accumulate dirt and grime that may not be immediately apparent. If the grout appears stained or deteriorating, it may indicate a deeper issue requiring professional attention. Additionally, take note of any areas where the tiles may be loose or uneven, as these conditions could impede the cleaning process and potentially lead to further damage, making it essential to resolve these issues before proceeding with cleaning.
Documenting the condition of your tiles serves as a valuable reference point for future cleaning endeavors. Keeping a visual record will enable you to monitor changes over time, ensuring that any emerging problems are promptly addressed. This proactive strategy not only preserves the allure of your Victorian tiles but also bolsters their longevity, making your Victorian tile cleaning efforts more effective in the long run, ultimately safeguarding the historical integrity of your home.
Assembling the Right Tools and Cleaning Solutions for Tile Care
Equipping yourself with the proper tools and cleaning agents is essential for successful Victorian tile cleaning. Begin with a soft-bristled brush or a vacuum cleaner designed for hard surfaces to eliminate loose dirt and debris. For cleaning agents, opt for pH-neutral solutions specifically formulated for tiles; these will effectively dissolve grime without compromising the tile’s surface, maintaining their beauty and integrity.
Moreover, you may need a bucket, mop, and clean rags or sponges for wiping down the tiles. For stubborn stains, consider using a mixture of vinegar and water, but always conduct a test on a small, inconspicuous area before full application. Steer clear of harsh chemicals that can erode the glaze or discolor the tiles, as this can result in irreversible damage, ensuring that your cleaning efforts are both safe and effective.
If repairs are necessary, gather materials such as tile adhesive, grout, and sealant to address any cracks or chips before beginning the cleaning process. Having these supplies readily available ensures that your Victorian tile cleaning undertaking is efficient and comprehensive, allowing you to restore your tiles to their former glory while preserving their historical charm.
Prioritizing Safety During Your Cleaning Routine

Ensuring safety is paramount when undertaking Victorian tile cleaning. Start by wearing protective gloves to safeguard your hands from cleaning agents, especially when using any acidic solutions. Eye protection is highly recommended, particularly if you are working with stronger chemicals or if there is a possibility of debris flying up during scrubbing, thereby protecting your well-being throughout the cleaning process.
Make sure that the cleaning area is well-ventilated, as certain cleaning solutions can emit fumes that may be harmful when inhaled. Open windows and doors, and consider employing fans to enhance air circulation. If you are handling heavy equipment or lifting tiles, use proper lifting techniques to avoid strain or injury, ensuring a safe and efficient cleaning experience.
Before you begin, carefully read the labels on all cleaning products for specific safety instructions and recommendations. Adhering to these safety precautions not only protects your health but also ensures that your Victorian tile cleaning efforts are both successful and safe, ultimately fostering an environment conducive to effective cleaning.
Proven Strategies for Maintaining the Visual Appeal of Victorian Tiles
Fundamental Cleaning Practices for Daily Upkeep
Ongoing maintenance is critical for preserving the aesthetic charm of Victorian tiles. Basic cleaning practices should be followed consistently to keep your tiles looking their finest. Commence with a simple sweeping or vacuuming routine to eliminate dirt and debris; this helps prevent scratches during more intensive cleaning. Following this, damp mop the tiles using a pH-neutral cleaner diluted in warm water, ensuring that your cleaning routine is gentle yet effective.
For deeper stains, employing a soft-bristle brush can prove beneficial. Gently scrub the stained areas while being careful not to apply excessive pressure, as this may damage the tile surface. Rinse the mop frequently to avoid redistributing dirt back onto the tiles, ensuring that your cleaning efforts yield the best results.
Once cleaning is complete, it is crucial to dry the tiles thoroughly. Leaving moisture can lead to mildew growth and further staining, particularly in areas with high humidity. For added shine, consider buffing the tiles with a soft, dry cloth after cleaning. This basic routine can significantly enhance the longevity and appearance of your Victorian tile cleaning efforts, ensuring that your tiles remain a breathtaking feature in your home for years to come.
Executing a Detailed Deep Cleaning for Persistent Stains
When regular maintenance proves inadequate and your tiles show signs of stubborn stains or built-up grime, a deep cleaning may become necessary. Initiate the process by evaluating the tiles to pinpoint which areas require more intensive treatment. For heavy soiling, a more potent cleaning solution may be needed. Use a mixture of warm water and a gentle tile cleaner, or, for particularly tough stains, a diluted solution of vinegar may suffice, ensuring that your cleaning approach is both thorough and effective.
Apply the cleaner to the stained areas and allow it to sit for several minutes to penetrate the grime. Afterward, utilize a soft-bristle brush to gently scrub the tiles, paying special attention to the grout lines where dirt commonly accumulates. For particularly stubborn stains, sprinkling baking soda on the brush can create an abrasive action without scratching the tile surface, ensuring that your cleaning efforts are both safe and effective.
After scrubbing, rinse the tiles thoroughly with clean water to eliminate any remaining cleaning agents, as leftover solutions can create a dull film on the tiles. Ensure the tiles are dried completely to prevent water spots or mildew. Deep cleaning is a vital component of Victorian tile cleaning, ensuring that the tiles maintain a pristine appearance and prolonging their lifespan, allowing their beauty to shine brightly.
Restoring the Original Brilliance of Your Victorian Tiles
Restoring the original luster of Victorian tiles can be achieved through several effective techniques. Over time, tiles may lose their shine due to dirt accumulation or improper cleaning methods. To rejuvenate their shine, start by ensuring that the tiles are clean and free of any debris. This foundational step is crucial for achieving optimal results during the restoration process.
For a natural shine restoration, consider using a mixture of vinegar and water applied sparingly. Avoid soaking the tiles; instead, use a damp cloth to wipe down the surface, followed by buffing with a dry cloth to enhance the shine. For tiles that require a more vigorous approach, a commercial tile polishing product may prove beneficial, ensuring that your tiles regain their former glory.
Once polished, apply a sealant specifically designed for Victorian tiles. This not only enhances the shine but also provides a safeguard against future staining and damage. A well-sealed tile is easier to clean and maintain, making your Victorian tile cleaning efforts far more effective. Achieving that beautiful sheen can transform the overall aesthetic of your space, highlighting the elegance of Victorian design and ensuring that your tiles remain a cherished feature of your home.
Implementing Protective Strategies Against Potential Damage
Preventing damage to Victorian tiles is crucial for maintaining their beauty over time. Begin by establishing a consistent cleaning routine to remove dirt and debris that could cause scratches or stains. Moreover, consider placing rugs in high-traffic areas to protect the tiles from wear and tear, thereby preserving their integrity.
When moving furniture or heavy objects, always lift rather than drag to avoid chipping or cracking the tiles. For any spills, promptly clean them up to prevent staining; acidic substances can be particularly harmful to the tile surface, making immediate action essential in maintaining your tiles’ appearance.
Applying a quality sealant can provide an extra layer of protection against stains and moisture. Be diligent about reapplying the sealant as recommended, which may be every few years depending on foot traffic and exposure to moisture. By taking these precautions, you can ensure that your Victorian tile cleaning efforts are fruitful, preserving the elegance and integrity of your tiles for future generations to admire.
Effectively Addressing and Repairing Damaged Victorian Tiles
Over time, even the most meticulously maintained Victorian tiles can develop chips, cracks, or other forms of damage. Addressing these issues promptly is essential for preserving both the aesthetic and structural integrity of your tiles. Begin by assessing the extent of the damage; minor chips can often be repaired using a suitable tile adhesive that matches the tile’s color, ensuring a seamless appearance.
For larger cracks, it may be necessary to remove the damaged tile and replace it with a new one. When doing so, ensure that the replacement tile matches in color, texture, and thickness. This careful consideration will create a seamless appearance once the repair is completed, maintaining the overall beauty of your tile layout.
Grouting is another essential aspect of the repair process, particularly for tiles that have been replaced. Use grout that complements your existing grout lines, ensuring that it is applied evenly for a clean finish. After completing the repairs, consider resealing the tiles to protect them against future damage. Engaging in these repair methods is a critical component of effective Victorian tile cleaning, ensuring that your cherished historic tiles remain as beautiful as ever and preserving their unique charm for years to come.
Confronting Common Challenges Associated with Victorian Tiles
Resolving Cracks and Chips in Your Victorian Tiles with Confidence
Cracks and chips are common issues that can arise in Victorian tiles, often due to age, improper installation, or impact. Addressing these problems swiftly is essential to prevent further damage from occurring. For minor chips, an epoxy filler can be used to fill in the damaged areas. Color-matching the filler to your tile is crucial for achieving a seamless repair that blends with the original surface, ensuring that the aesthetics of your tiles remain intact.
In cases of larger cracks, consider removing the entire tile and replacing it with a new one that closely matches the original in color and design. This process may require consulting with a professional if you are unsure about the replacement procedure, ensuring that the repair is executed with care and precision. Once replaced, re-grout the edges to secure the new tile and uphold the integrity of the floor, reinforcing its durability.
If the damage is extensive, consulting a professional specializing in tile restoration can be beneficial. They can assess the situation and provide tailored solutions based on your specific tiles and their condition. Promptly addressing cracks and chips will safeguard the long-term beauty and functionality of your Victorian tiles, enhancing the efficacy of your Victorian tile cleaning efforts and ensuring a lasting investment in your home.
Effectively Removing Stubborn Stains from Your Tiles
Stubborn stains can significantly diminish the beauty of Victorian tiles, but with the right techniques, they can be effectively eliminated. Start by identifying the type of stain; common culprits include oil, rust, and mineral deposits. For oil stains, create a paste using baking soda and water, which, when applied to the stain and allowed to set for a few hours, can efficiently absorb the oil, restoring the tile’s pristine appearance.
For rust stains, a mixture made from lemon juice and baking soda can work wonders. Apply this paste to the affected area, allowing it to sit before gently scrubbing with a soft brush. Always rinse the area thoroughly to eliminate any residue from the cleaning solutions, as leaving them may lead to further discolouration, ensuring your tiles look their best.
For mineral deposits, particularly in areas with hard water, a vinegar solution can be highly effective. Spray the solution onto the stained area, let it sit for a few minutes, then scrub gently before rinsing. Regular maintenance and immediate attention to stains will greatly ease the Victorian tile cleaning process, keeping your tiles vibrant and well-loved, ultimately preserving their charm.
Implementing Preventative Measures Against Future Damage
Preventing future damage to Victorian tiles is crucial for ensuring their longevity and aesthetic appeal. Start by establishing a routine cleaning regimen to remove dust and debris that can scratch the surface. Employ soft brushes or vacuums equipped with brush attachments to prevent any potential harm to the tiles, ensuring that your cleaning efforts are both safe and effective.
Consider applying a high-quality sealant to your tiles, particularly if they are located in high-humidity areas or frequently exposed to water. Regularly reapplying the sealant can protect against staining and minimize the risk of moisture-related damage, preserving your tiles’ beauty for years to come.
Establishing a policy of immediate clean-up for spills can also assist in preventing permanent stains. Educate family members or users of the space to promptly clean up any spills to avoid lasting damage. By taking these proactive measures, you can enhance the effectiveness of your Victorian tile cleaning efforts and ensure that your tiles remain a lasting feature within your home, cherished by future generations.
Effectively Addressing Uneven Surfaces in Victorian Tiles
Uneven surfaces in Victorian tiles can present a challenging issue, often resulting from settling or improper installation. Effectively addressing this problem is essential not only for the aesthetic appeal of your tiles but also for ensuring safety in the areas they cover. If only a few tiles are affected, consider removing them and reinstalling them on a properly leveled surface, ensuring they adhere to the original design.
In situations where numerous tiles are uneven, it may be prudent to consult a professional. They can offer solutions such as resurfacing or re-leveling the entire area, ensuring that all tiles sit flush and evenly, thereby enhancing both the aesthetic quality and safety of your flooring.
Additionally, implementing measures such as proper underlayment during installation can help prevent future unevenness. This proactive approach ensures that your Victorian tiles maintain their charm and integrity over the long term, enhancing the efficacy of your Victorian tile cleaning efforts and making your investment worthwhile.
The Benefits of Engaging Professional Tile Cleaning Services
Identifying When to Seek Professional Support
Certain situations warrant the expertise of professional tile cleaning services, especially when dealing with large tile areas or significant damage. If your Victorian tiles have suffered years of neglect or exhibit stubborn stains that DIY methods cannot remove, it may be time to seek professional assistance to ensure that your tiles receive the thorough care they deserve.
Moreover, if structural issues such as cracking or unevenness arise that could require reinstallation or advanced repair techniques, professionals with experience in historic tiles become invaluable. Their specialized knowledge guarantees that your precious tiles are treated with the care and expertise they require, preserving their historical integrity.
Furthermore, for large-scale cleaning projects, such as restoring a historic building or a commercial space, hiring professionals can save time and ensure high-quality results. Engaging experts secures the long-term preservation of your tiles, making this investment worthwhile for any homeowner dedicated to maintaining the beauty of their Victorian tiles and enhancing the overall value of their property.
Choosing the Right Professional Cleaning Service for Your Tiles
Selecting the appropriate professional cleaning service for your Victorian tiles is crucial for achieving optimal results. Begin by researching local companies that specialize in tile cleaning and restoration, particularly those with extensive experience in dealing with Victorian tiles specifically. This ensures that your tiles are in capable hands, receiving the expertise they require.
Read reviews and testimonials from previous clients to gauge the quality of service provided. A reputable company should be willing to provide references and details about their cleaning methods, ensuring they align with your expectations for maintaining your tiles’ historical integrity, thus enhancing your confidence in their services.
Inquire about potential cleaners’ expertise in handling different types of Victorian tiles and their strategies for repairs and restoration. Having an open dialogue about their methods and materials will empower you to make an informed choice, ensuring that your Victorian tile cleaning is entrusted to capable professionals who prioritize the preservation of your tiles.
Understanding the Financial Aspects of Hiring Professional Services
Gaining insight into the factors that influence the cost of professional Victorian tile cleaning can assist you in budgeting effectively and making informed decisions. Costs can vary significantly based on multiple factors, including the size of the area being cleaned, the condition of the tiles, and the extent of the services required, which can impact your overall investment.
For example, a straightforward cleaning service will generally be more affordable than one that includes repairs or restoration work. Additionally, geographical location can affect pricing, as services offered in urban areas may command a premium compared to those in rural settings, further influencing your budget considerations.
When requesting quotes, be sure to ask for a comprehensive breakdown of the costs involved. This will enable you to compare services effectively and ensure you receive value for your investment. By understanding these cost considerations, you can navigate your options proficiently, ensuring that your Victorian tile cleaning remains within your budget while achieving the desired outcomes for your beautiful home.
Strategic Approaches for Maintaining Your Victorian Tiles
Establishing Effective Regular Maintenance Routines
To keep Victorian tiles in impeccable condition, establishing a routine for regular maintenance is essential. Start with daily sweeping or vacuuming to remove dirt and grit that can scratch the tile surface, preserving their beauty. For weekly upkeep, mop the tiles with a pH-neutral cleaner diluted in warm water, ensuring that excess moisture does not linger on the tiles, which can lead to damage.
Every few months, conduct a thorough cleaning by attending to the grout lines and ensuring all corners and edges are properly addressed. This may involve using a soft-bristle brush or a toothbrush to eliminate hidden grime, ensuring that every surface is well cared for. Rinsing thoroughly after cleaning is vital to prevent a build-up of residue, which can dull the tile’s appearance and detract from their charm.
Regularly inspect for any signs of damage or wear, such as cracks or loose tiles, and address these issues immediately. Maintaining this routine not only preserves the aesthetic appeal of your Victorian tiles but also extends their lifespan, rendering your Victorian tile cleaning efforts more effective over time, ultimately protecting your investment in these beautiful historical features.
Seasonal Care Strategies for Protecting Your Victorian Tiles
Adapting your Victorian tile care to seasonal changes is pivotal for maintaining their beauty and structural integrity. During the winter months, be particularly mindful of the potential for salt and grit that can be tracked indoors. Regularly clean these residues to prevent scratches and staining on the tiles, ensuring they remain in pristine condition.
In spring, consider implementing a more thorough deep cleaning to eradicate any grime accumulated during the colder months. This is also an opportune time to assess the condition of the grout and caulking, reapplying sealants as necessary to safeguard against moisture and staining, further enhancing their longevity and appearance.
Summer may bring increased foot traffic, necessitating a more frequent cleaning routine to maintain the tiles’ appearance. During autumn, with fallen leaves and debris, ensure that your cleaning regimen is adapted to address any organic matter that may stain the tiles. By tailoring your care to seasonal conditions, you ensure the ongoing beauty of your Victorian tiles and facilitate your Victorian tile cleaning efforts, allowing them to shine throughout the year.
Strategies for Long-Term Preservation of Your Victorian Tiles
Long-term preservation of Victorian tiles necessitates a commitment to proactive measures and consistent care. Start with a comprehensive cleaning and restoration of the tiles, ensuring they are in optimal condition before applying any protective measures. Following this, apply a high-quality sealant to protect against moisture, stains, and wear, which is essential for maintaining their visual appeal.
Regularly assess the condition of both the tiles and grout, promptly addressing any signs of damage. This might include re-grouting or repairing tiles to prevent minor issues from escalating into larger problems, ensuring the longevity of your tiles’ aesthetic and structural integrity.
Incorporate gentle cleaning practices into your routine to maintain the shine and surface integrity of the tiles. Avoid using harsh chemicals and abrasive tools that could inflict damage, preserving their beauty. By implementing these long-term preservation strategies, you ensure that your Victorian tile cleaning efforts contribute to the enduring beauty and historical significance of your tiles, making them a cherished feature of your home.
Effectively Confronting Common Tile Issues with Confidence
Common tile problems such as stains, cracks, and chips can emerge over time, but understanding how to address these issues is key to maintaining your Victorian tiles. Stains can often be treated with specific cleaning solutions tailored to their nature, whether they are oil, rust, or mineral deposits, ensuring effective removal and restoration of your tiles’ beauty.
Cracks and chips should be repaired as soon as they are noticed to prevent further damage from occurring. Small chips can be filled with epoxy, while larger issues may necessitate tile replacement. Regular inspections will help catch these problems early, allowing for timely interventions that preserve the integrity of your tiles.
Most importantly, maintaining a regular cleaning routine will significantly reduce the likelihood of many common issues. By remaining vigilant and addressing problems promptly, you can ensure that your Victorian tiles remain a cherished feature of your home, making your Victorian tile cleaning efforts both rewarding and effective, enhancing the overall value of your property.
Utilising Professional Restoration Techniques for Optimal Outcomes
When it comes to restoring Victorian tiles, professional services can provide expertise and techniques that are essential for achieving optimal results. Professionals often utilise methods such as steam cleaning, which penetrates the tile surface deeply without the use of harsh chemicals, effectively removing dirt and restoring shine while preserving the tiles’ integrity.
In cases of significant damage, professionals may employ advanced techniques such as re-glazing or recreating missing sections of tiles. They can also offer specialized sealants that ensure long-lasting protection against future staining and wear, safeguarding your investment in these historical artefacts.
If you are contemplating restoring your Victorian tiles, consulting a professional is advisable to explore the best options available. Their expertise guarantees that your tiles receive the utmost care and that any restoration methods employed are suitable for the age and type of your tiles, enhancing your Victorian tile cleaning efforts and ensuring their beauty is preserved.
Frequently Asked Questions About Victorian Tiles
What are Victorian tiles?
Victorian tiles are decorative tiles that originated during the Victorian era (1837-1901). Renowned for their intricate designs and exceptional durability, they were commonly used in both residential and public buildings throughout the United Kingdom, making them a significant aspect of architectural history.
How can I confirm whether my tiles are authentic Victorian tiles?
Genuine Victorian tiles typically exhibit craftsmanship, uneven edges, natural color variations, and signs of age such as crazing. If uncertain, consulting an expert in historic ceramics for a proper evaluation is advisable, ensuring that you have accurate information about your tiles’ provenance.
What effective cleaning techniques can I employ for Victorian tiles?
Basic cleaning involves sweeping and mopping with a pH-neutral cleaner. For deeper stains, consider utilizing a mixture of vinegar and baking soda. Always rinse thoroughly to prevent residue build-up that may dull the tiles, ensuring they remain vibrant and beautiful over time.
How often should I clean my Victorian tiles?
Regular maintenance should encompass daily sweeping and weekly mopping. A more thorough clean should be performed every few months, particularly in areas subject to heavy foot traffic, ensuring that your tiles remain in optimal condition throughout the year.
Is sealing Victorian tiles really necessary?
Yes, sealing Victorian tiles is imperative for protecting them from stains and moisture. A high-quality sealant should be reapplied every few years to ensure effective protection and to maintain their aesthetic appeal, preserving their beauty for generations.
Can I undertake repairs on cracked or chipped tiles myself?
Minor chips can be adequately filled with epoxy. However, for larger cracks or extensive damage, it is advisable to consult a professional to ensure proper replacement and color matching, preserving the integrity of your tiles.
What steps should I take if my tiles are uneven?
If only a few tiles are uneven, consider removing and reinstalling them. For larger areas, consult a professional who can assess and appropriately level the surface, ensuring your tiles remain safe and visually appealing.
How can I prevent future damage to my Victorian tiles?
Implementing a regular cleaning routine, avoiding dragging heavy objects, and promptly cleaning spills can help prevent enduring stains. Applying a sealant can also provide protection against moisture and stains, ensuring your tiles remain beautiful and well-maintained.
When is it advisable to hire a professional cleaning service?
Consider hiring professionals if your tiles require deep cleaning, extensive damage repair, or restoration. Their expertise ensures that your Victorian tiles receive the best possible care, preserving their historical significance and beauty.
What factors influence the cost of professional tile cleaning services?
Costs can fluctuate based on the size of the area, the condition of the tiles, the services required, and geographical location. Always request detailed quotes to effectively compare services, ensuring that you get the best value for your investment.
The post Victorian Tile Cleaning: A Comprehensive Guide appeared first on https://tilecleaningsurrey.co.uk
The Article Victorian Tile Cleaning Tips for a Pristine Home appeared first on https://fabritec.org
The Article Victorian Tile Cleaning Tips for a Spotless Home Was Found On https://limitsofstrategy.com
-

Marble Cleaning Techniques for a Shiny Finish
Master the Art of Marble Cleaning: Proven Techniques and Expert Tips for Stunning Results
Marble is a material that signifies elegance and sophistication within the context of UK architecture and interior design. To maintain its breathtaking beauty, marble requires meticulous care and dedicated maintenance. This comprehensive guide reveals expert techniques for effectively cleaning and preserving marble surfaces, ensuring they remain immaculate and resilient throughout the years. From the selection of appropriate cleaning agents to the implementation of protective strategies, this resource delivers essential knowledge for both homeowners and industry professionals. Whether dealing with stubborn stains, etching issues, or routine upkeep, adopting these best practices will help you uphold the luxurious aesthetic of marble in any setting.
In-Depth Exploration of Marble Varieties Available in the UK
Dive into the Most Sought-After Marble Varieties in the UK
The architectural landscape of the UK is enriched by an impressive variety of marble types, each with unique characteristics and diverse applications. Among the most cherished varieties is Carrara marble, renowned for its exceptional quality and stunning veining that ranges from brilliant white to soft blue-grey. This exquisite marble, sourced from the picturesque region of Tuscany, often adorns prestigious buildings and sculptures, symbolizing timeless beauty. Another highly sought-after type is Statuario marble, also imported from Italy, celebrated for its dramatic veining contrasts, making it a preferred choice for intricate sculptures and opulent interiors. Additionally, distinctive green marbles from regions in Wales and Scotland contribute to the rich selection of marble available for residential and public spaces throughout the UK, reflecting the versatility and artistic charm of this natural stone.
Local quarries, particularly those in the West Midlands and Wales, play a crucial role in supplying the diverse array of marble available in the UK market. These quarries not only support restoration efforts but also enable homeowners to incorporate authentic British marble into their projects, celebrating local craftsmanship and heritage. Understanding the various types of marble empowers homeowners and builders to make informed choices that align with their design aspirations and practical requirements, thereby enhancing both aesthetic appeal and functionality.
Identifying Key Characteristics of Marble for Informed Choices
Marble is well-known for its remarkable properties, including porosity and durability. The porosity level of marble can vary significantly among different types, impacting their susceptibility to staining and water damage. For instance, more porous varieties may necessitate regular sealing to preserve both their structural integrity and visual appeal. In contrast, durability refers to the stone’s ability to withstand wear and tear, making it an ideal option for high-traffic areas like hallways and kitchens, where strength is essential.
The visual allure of marble is equally significant, as its lustrous finish and unique veining patterns can dramatically transform the ambiance of any interior space. Grasping these characteristics is vital for homeowners; for example, one might opt for a denser marble type for kitchen countertops to ensure resilience against scratches and stains, while a more delicate variety may be ideal for decorative elements. This knowledge empowers individuals to select the most appropriate marble for specific applications, maximizing both aesthetic appeal and functional efficiency.
Proven Tips for Sourcing Premium Marble in the UK
Finding high-quality marble in the UK involves exploring various sources, ranging from local quarries to specialized suppliers. Numerous reputable suppliers in London offer an impressive assortment of imported marbles alongside local varieties, catering to a wide range of tastes and budgets. Notably, the York area and its surroundings host several quarries recognized for their exceptional stone, showcasing unique colors and textures that can be challenging to find elsewhere.
Before finalizing a purchase, it is advisable to visit showrooms or suppliers to examine samples, as this allows for a more accurate visualization of how different marbles will complement your space. Engaging with knowledgeable staff can provide invaluable insights regarding the maintenance and optimal applications of each type of marble. By sourcing locally, you not only support the British industry but also gain access to materials that are particularly well-suited to the local climate and architectural styles, enhancing the overall aesthetic of your environment.
Innovative Ways to Incorporate Marble in UK Architecture

The application of marble in UK architecture boasts a rich and diverse history, encompassing numerous styles, from grand historical edifices to modern residential designs. Iconic public structures such as the British Museum and St. Paul’s Cathedral prominently feature marble in their flooring and decorative elements, exemplifying their lasting elegance and sophistication. The traditional use of marble for staircases and facades significantly enhances the grandeur of these landmarks, establishing them as major attractions in their respective locales.
In private residences, marble is often utilized for kitchen countertops, bathroom vanities, and flooring. Its luxurious appearance infuses a touch of refinement into any home, while its inherent durability renders it a practical choice for areas subjected to heavy use. The versatility of marble allows architects and designers to seamlessly integrate it into various design styles, from classic to contemporary, ensuring its continued popularity within UK interiors. Thoughtful consideration of marble’s application underscores its enduring appeal and the skilled craftsmanship associated with its installation and maintenance.
Must-Have Supplies for Effective Marble Cleaning and Maintenance
Choosing the Right Cleaning Agents for Marble Surfaces
Selecting appropriate cleaning agents is vital for preserving the stunning appearance of marble surfaces throughout the UK. Harsh chemicals can severely damage the stone, resulting in dullness or etching over time. Instead, it is advisable to choose pH-balanced cleaners specifically designed for use on marble. A variety of brands available in UK retail outlets provide products that efficiently remove dirt and grime while safeguarding the stone’s integrity. Particularly, a simple combination of stone-safe cleaner with warm water can serve as an effective solution for routine upkeep.
It is crucial to avoid using vinegar or any acidic cleaners under any circumstances, as they can cause irreversible damage to marble surfaces. For more intensive cleaning tasks, consider utilizing a specially formulated marble cleaner that targets stains while remaining gentle on the stone. Taking time to read product labels and conducting thorough research on available options will ensure that you select the safest and most effective cleaners for your marble surfaces, thereby preserving their beauty and longevity.
Essential Tools for Comprehensive Marble Maintenance
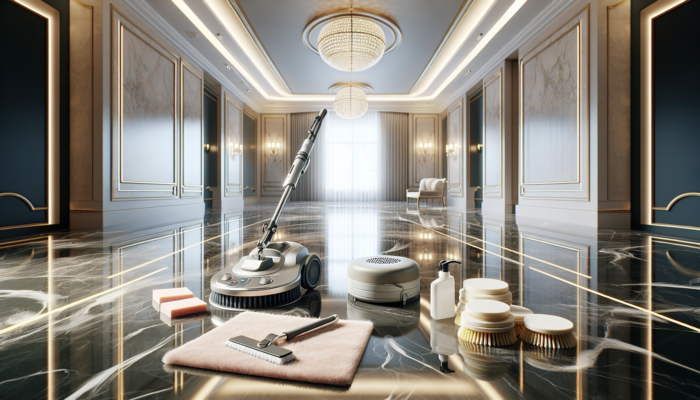
Utilizing the right tools is essential for effective marble cleaning and maintenance. A soft microfiber cloth is indispensable for routine dusting and wiping down surfaces without risking scratches to the stone. Additionally, non-abrasive cleaning pads can efficiently tackle more stubborn stains without damaging the finish. For expansive areas, a mop specifically designed for delicate materials can assist in maintaining floors in pristine condition.
When addressing tough stains or undertaking deep cleaning, having a soft-bristle brush handy can help reach into crevices without causing harm. Some homeowners may also find it beneficial to invest in a marble polishing or buffing machine, as it can restore the shine of marble surfaces and eliminate minor scratches. Understanding the necessary tools for marble maintenance empowers homeowners to care for their surfaces effectively, ensuring their beauty is preserved for years to come.
The Importance of Protective Gear During Marble Cleaning
Engaging in marble cleaning, particularly during deep cleaning or restoration tasks, necessitates the use of protective gear. Although marble is a natural stone, dust and residues from cleaning products can pose potential health risks. Wearing gloves protects your skin from irritants found in cleaning solutions, while a mask can prevent the inhalation of dust particles. Furthermore, eye protection is highly advisable, especially when utilizing more potent cleaning agents or during polishing procedures.
For individuals with allergies or sensitivities, protective gear is not just a precaution; it is a necessity. Ensuring safety while cleaning marble surfaces is essential, allowing you to focus on achieving a brilliant shine without compromising your health. This commitment to safety reflects the broader responsibility of caring for your marble surfaces while prioritizing your overall well-being, ensuring a secure cleaning environment.
Step-by-Step Guide to Efficient Marble Cleaning
Thorough Preparation of the Marble Surface Before Cleaning
Preparing the marble surface properly before commencing the cleaning process is vital for achieving optimal results. Begin by clearing the area of any loose items, including furniture and decorative accents. A thorough dusting with a soft cloth or a vacuum equipped with a brush attachment will eliminate any debris that could scratch the surface during cleaning. Pay special attention to corners and crevices, as dirt often accumulates in these frequently overlooked areas.
Once the surface is clear, it is essential to inspect for any pre-existing damage, such as cracks or etch marks, which may require special attention before cleaning. If the surface has experienced heavy use, performing a preliminary rinse with clean water can help loosen dirt and grime, facilitating a more effective cleaning process. Proper preparation sets the stage for a successful cleaning experience, ultimately preserving the beauty of your marble surfaces.
Best Practices for Effectively Cleaning Marble Surfaces
When it comes to marble cleaning techniques, employing the correct methods can significantly influence the outcome. Start by using a gentle, pH-balanced cleaner mixed with water, applying it with a soft cloth in a circular motion. This technique helps lift dirt without causing any harm to the stone. A microfiber mop is an excellent tool for marble floors, ensuring that you do not oversaturate the marble, as excess moisture can seep into the stone and lead to staining.
For more stubborn stains, consider creating a paste from baking soda and water. Apply this paste directly onto the stain, covering it with plastic wrap to allow it to sit for several hours or overnight. Afterward, gently wipe it away to reveal a refreshed surface. Professional marble cleaning services often utilize similar techniques, highlighting the importance of adopting best practices for marble care within the home environment.
Drying and Polishing for a Stunning Finish
Upon completing the cleaning process, the drying phase is just as critical as the cleaning itself. Use a clean, dry microfiber towel to wipe down the surface, ensuring that all moisture is thoroughly removed. Preventing water spots is essential, as marble surfaces are sensitive to prolonged exposure to moisture. Allowing the surface to air dry in a well-ventilated area can also help achieve a flawless finish.
Polishing is the final touch for attaining that highly sought-after high-gloss finish. Utilize a marble-specific polishing compound, apply it with a soft cloth, and buff in small sections. This technique enhances the stone’s natural shine, revitalizing its overall appearance. Polishing not only elevates aesthetic appeal but also adds a protective layer against stains and scratches, making it an indispensable part of your marble care routine.
Selecting Optimal Products for Marble Care and Maintenance
Choosing the right cleaning and polishing products is crucial for preserving the integrity of your marble in the UK. When selecting cleaners, look specifically for those labeled for use on marble, as they are formulated to be both safe and effective. It is always wise to read reviews or seek professional recommendations to invest in quality products that deliver results without harming your marble surfaces.
Moreover, select products that are compatible with the specific type of marble you are maintaining for polishing. Certain polishes, such as honed or polished marble, are designed for particular finishes. Understanding these distinctions helps ensure you achieve the desired results without risking damage to your surfaces. Making informed choices regarding cleaning and polishing products will significantly influence the longevity and visual appeal of your marble surfaces.
Practical Tips for Ongoing Maintenance of Marble Surfaces
To effectively maintain UK marble, promptly wipe spills, utilize coasters, and clean with a gentle cloth. Furthermore, sealing every 6–12 months is crucial to prevent stains and preserve the beauty of marble surfaces.
Addressing Common Marble Challenges Encountered in the UK
Effective Approaches for Stain Removal from Marble Surfaces
Stains on marble surfaces can pose significant challenges, particularly from common sources such as tea and wine. To effectively eliminate these stains, it is essential to first identify the type of stain, as different approaches are required for organic versus inorganic stains. For example, a mixture of hydrogen peroxide and baking soda is effective for organic stains, while a poultice may be necessary for more stubborn or deeply ingrained marks.
Creating a poultice involves combining a stone-safe cleaning agent with an appropriate absorbent material, such as talc or flour, to form a paste. Apply this paste to the stained area and cover it with plastic wrap, allowing it to sit undisturbed for 24 hours before removing and gently rinsing it. The poultice method effectively draws out the stain from the marble, restoring its pristine condition. Timely attention to spills can significantly reduce the likelihood of staining over time, helping maintain the beauty of your marble surfaces.
Effectively Repairing Etch Marks on Marble Surfaces
Etch marks can be disheartening for marble owners, often resulting from acidic substances coming into contact with the surface. To repair etch marks, begin by assessing the depth of the damage. Light etching may be polished away with a compound specifically designed for marble, while more severe etches may necessitate professional restoration services for proper resolution.
For minor etch marks, apply marble polishing powder to the affected area and buff it in a circular motion with a soft cloth. This technique can help smooth out the surface and diminish the visibility of the etch. In more severe cases of etching, professional honing may be required to restore the marble’s finish. Preventing etch marks involves promptly cleaning any spills and utilizing coasters and placemats to protect the surface from acidic foods and beverages, thereby safeguarding the integrity of your marble.
Repairing Cracks and Chips in Marble Surfaces for Longevity
Cracks and chips in marble can detract from its beauty and structural integrity; however, they can be effectively repaired using suitable methods. For hairline cracks, a specialized marble adhesive can bond the edges together. Carefully apply the adhesive, ensuring it fills the crack, and allow it to cure according to the manufacturer’s instructions.
For larger chips, epoxy fillers can restore the surface effectively. Choose a filler that closely matches the color of your marble for a seamless repair. Once cured, gently sand the area with fine-grit sandpaper to smooth out any uneven surfaces, followed by polishing to restore the shine. Regular inspections and prompt repairs can prevent further damage, ensuring that your marble remains a stunning feature within your home.
Preventive Care Strategies for Marble Surfaces in the UK
Routine Maintenance Recommendations for Marble Surfaces
Maintaining the beauty of UK marble surfaces requires a proactive approach. Regular dusting with a soft cloth and gentle cleaning with pH-balanced solutions can keep dirt and grime at bay. It is crucial to avoid abrasive cleaners and tools, as these can scratch and dull the surface over time.
Establishing a consistent cleaning routine can be particularly beneficial; weekly cleaning complemented by a more thorough monthly deep clean will keep your marble looking its best. Additionally, educating family members or household staff on proper marble care can foster consistency in upkeep, ensuring that your marble surfaces remain visually stunning for years to come.
The Importance of Sealing Marble Surfaces for Longevity
Sealing is essential for protecting UK marble from stains and moisture penetration. Depending on the marble’s porosity, a professional-grade sealer should be applied every 6 to 12 months, using a sprayer or applicator pad to guarantee even coverage. After applying the sealer, it is crucial to follow the manufacturer’s instructions regarding drying time and to regularly inspect for signs of wear on your seal, even before they become apparent. A simple water test can indicate whether your marble needs resealing; if water beads on the surface, it is sealed; if it absorbs instead, it is time to refresh. Committing to sealing your marble surfaces ensures their long-lasting beauty and durability, protecting your investment.
Preventing Common Damages to Marble Surfaces
Preventing damage to marble surfaces necessitates a combination of awareness and proactive measures. Avoid placing hot items directly on marble, as the heat can lead to discoloration or cracks. Similarly, refrain from using acidic cleaners or household chemicals that could etch or stain the stone.
Utilizing placemats, coasters, and cutting boards can significantly mitigate risks associated with daily use. Encourage household members to be mindful of spills and accidents, emphasizing the importance of immediate clean-up to prevent staining. By adopting these practices, you can substantially reduce the likelihood of damage, allowing you to enjoy your marble surfaces for many years.
Effective Cleaning Techniques for Upholding Marble Surfaces
Maintain UK marble by promptly wiping spills, employing coasters to protect surfaces, and sealing every 6 to 12 months for optimal protection.
Seeking Expert Care and Professional Restoration Services for Marble
While regular maintenance plays a crucial role in preserving the beauty of UK marble, there are instances when professional care becomes essential. If your marble surfaces exhibit significant staining, etching, or scratching, seeking the expertise of professional services is advisable. Professional cleaners have access to advanced equipment and techniques that can effectively restore the original beauty of your marble.
Choosing the right service provider is paramount; look for companies with a proven track record in marble care and restoration. They should offer a range of services, from deep cleaning to polishing and repair, ensuring your marble surfaces receive the attention they deserve. Regular professional maintenance can complement your efforts, ensuring that your marble remains clean and safeguarded against future damage.
Professional Marble Cleaning Services Available Across the UK
Recognizing the Right Time to Engage Professional Services
Certain indicators suggest it may be time to enlist professional marble cleaning services in the UK. If your marble surfaces display signs of heavy staining, persistent etching, or notable wear, seeking expert assistance is prudent. Professionals can restore your marble to its original splendor using specialized equipment and techniques often unavailable to the average homeowner.
Another compelling reason to consider professional services arises if your marble has not been sealed appropriately. Sealing is vital for preventing moisture and stains; if you notice that water is being absorbed instead of beading on the surface, a professional can evaluate and effectively reapply the sealant, safeguarding your investment.
How to Choose the Right Marble Cleaning Service Provider
Selecting the appropriate marble cleaning service is crucial for achieving satisfactory outcomes. Begin by researching local companies that have a solid reputation and positive client testimonials. Seek out providers specializing in marble care and restoration, as this indicates a deep understanding of the material’s unique characteristics and maintenance requirements.
Understanding Costs and the Value of Professional Cleaning Services
Gaining insight into the costs associated with professional marble cleaning services in the UK is integral to effectively planning your budget. Prices may vary based on the extent of cleaning required, the size of the area, and the specific services requested. Generally, expect to pay more for intensive restoration services than for basic cleaning.
However, investing in professional marble care can be viewed as a long-term strategy. The value it provides in prolonging the lifespan of your marble and preserving its aesthetic appeal far outweighs the initial costs. Additionally, a well-maintained marble surface can significantly enhance your property’s overall value, making it a worthwhile investment for homeowners.
Benefits of Utilizing Professional Marble Cleaning Services
There are numerous advantages to enlisting professional marble cleaning services in the UK. Firstly, professionals bring expertise and experience, ensuring that delicate marble surfaces receive the necessary care. They have access to the latest products and techniques specifically designed for marble, which can lead to superior results compared to DIY methods.
Furthermore, professional cleaning can uncover underlying issues, such as chips or cracks that need to be addressed. Regular professional maintenance not only enhances the appearance of your marble but also extends its longevity, making your investment worthwhile. By prioritizing professional marble cleaning, you ensure that your surfaces remain stunning and resilient for many years to come.
Frequently Asked Questions About Marble Care and Maintenance
How frequently should I clean my marble surfaces for optimal upkeep?
It is recommended that marble surfaces be cleaned weekly using a soft cloth and a pH-neutral cleaner to preserve their beauty and prevent staining.
Is vinegar a suitable cleaning agent for marble?
No, vinegar is acidic and can damage marble surfaces, leading to etching. Always opt for pH-balanced cleaners formulated explicitly for marble care.
What is the best method for removing stains from marble surfaces?
A poultice made from baking soda and water can be effective for most stains. Apply it to the stain, cover it with plastic wrap, and let it sit before thoroughly rinsing.
Is sealing marble surfaces a necessary step in maintenance?
Yes, sealing marble surfaces is essential for protecting against stains and moisture. Depending on usage and the type of marble, it is advisable to seal every six months to a year.
What tools do I need for effective marble cleaning?
Essential tools include soft cloths, gentle cleaning pads, a microfiber mop, and marble-specific cleaning solutions to ensure safe and effective maintenance.
How do I repair chips that occur in marble surfaces?
To repair chips, use a marble adhesive or epoxy filler that matches the marble’s color. Carefully apply the product and sand the area once it has cured.
Can a steam cleaner be used on marble surfaces?
Yes, but ensure it is specifically designed for delicate surfaces. Steam cleaning can effectively lift dirt without the need for harsh chemicals that could damage the marble.
What precautions should I take to protect my marble surfaces from damage?
Avoid placing hot items directly on marble and using abrasive cleaners or acidic substances that could harm or etch it over time.
When should I consider hiring professional marble cleaning services?
Consider engaging professionals when stains, etching, or wear become significant, or if your marble has not been sealed properly, requiring expert assessment and care.
The post Expert Techniques and Tips for Immaculate Marble Cleaning appeared first on https://tilecleaningsurrey.co.uk
The Article Marble Cleaning Techniques: Expert Tips for a Gleaming Surface appeared first on https://fabritec.org
The Article Marble Cleaning Techniques for a Gleaming Surface Was Found On https://limitsofstrategy.com
-
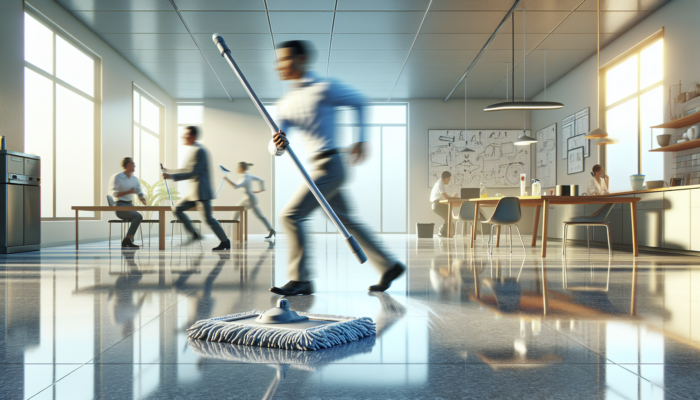
Spray Mops for Stone Floors: Your Essential Buying Guide
Elevate Your Cleaning Routine with Specialized Spray Mops Designed for Stone Flooring
Embracing a spray mop for stone floors can transform your cleaning practices by introducing a range of benefits that enhance overall efficiency. These advanced cleaning tools ingeniously combine the functions of spraying and mopping, significantly simplifying the maintenance of your stone surfaces. This comprehensive guide will explore the myriad advantages of using a spray mop specifically engineered for stone floors, illustrating how they can improve your cleaning effectiveness while prolonging the life of your cherished flooring.
Effortless Cleaning Solutions Tailored for Fast-Paced Lifestyles
Keeping stone floors spotless can often feel like a formidable task, especially when relying on traditional mops and buckets. Nevertheless, utilizing a spray mop specifically crafted for stone surfaces can revolutionize your cleaning experience. The innovative design of these mops allows you to apply your chosen cleaning solution directly onto the floor while simultaneously mopping, drastically reducing both time and physical effort typically associated with cleaning. Envision effortlessly removing dirt and grime without the hassle of dragging a heavy bucket or frequently rinsing your mop.
The convenience of spray mops proves invaluable in bustling households or commercial environments like cafés and restaurants, where cleanliness is of utmost importance. Their user-friendly design enables effortless operation by anyone, from busy parents managing household tasks to staff in commercial settings adhering to strict hygiene protocols. This ease of use encourages more regular cleaning sessions, ultimately fostering a healthier living environment for everyone involved.
Embrace Eco-Friendly Cleaning Practices with Minimal Chemical Usage
In today’s climate of heightened environmental awareness, spray mops for stone floors present a sustainable approach to cleaning. Conventional mopping often necessitates the use of significant amounts of cleaning chemicals, which can be detrimental to both the environment and the integrity of your stone flooring. In contrast, spray mops utilize only a small quantity of cleaning solution, promoting eco-friendly cleaning practices that are both effective and responsible.
By reducing chemical usage, you contribute to environmental conservation while also enhancing the lifespan of your stone floors. Certain types of stone, such as limestone and marble, are particularly susceptible to harsh chemicals, making it vital to adopt a gentler cleaning method. The capability to use less cleaning solution while still achieving a thorough clean signifies a significant advancement towards a more responsible and conscientious cleaning routine.
Enhance Cleaning Versatility with Spray Mops Suitable for Various Stone Types
A standout feature of spray mops for stone floors is their remarkable versatility. These mops are designed to accommodate a diverse array of stone types, including granite, slate, and travertine. This adaptability makes them a smart investment for homeowners who have multiple types of flooring throughout their living spaces.
Equipped with the right cleaning solution, you can smoothly transition between different stone surfaces without fear of causing damage. For instance, a spray mop fitted with a soft microfiber head can gently clean the delicate surface of polished marble while effectively addressing the rough texture of unsealed slate. This exceptional versatility ensures you can maintain both the aesthetic appeal and structural integrity of your stone floors without needing a plethora of cleaning tools, thereby simplifying your cleaning arsenal.
Prioritize Safety When Using Spray Mops on Stone Floors

A frequently overlooked benefit of using a spray mop for stone floors is the enhanced safety it provides. Wet stone floors can quickly become extremely slippery, increasing the likelihood of accidents. Spray mops offer precise moisture application, effectively minimizing the risk of excess water on the floor during the cleaning process.
By carefully regulating the amount of cleaning solution dispensed, these mops help create a safer environment, particularly in homes where children or elderly family members are present. The chances of slips and falls are significantly reduced, making spray mops an excellent choice for households that prioritize safety alongside cleanliness. Incorporating such tools into your cleaning routine can provide peace of mind while effectively caring for your stone floors.
Enhance Cleaning Efficiency with Innovative Spray Mop Technology
Efficiency is a crucial aspect of any cleaning endeavor, and spray mops for stone floors excel at delivering outstanding results. The direct application of cleaning solutions ensures even coverage, effectively eliminating dirt and grime from every corner of your flooring. Unlike traditional mopping methods, which may leave streaks or miss certain areas, spray mops guarantee a consistently thorough clean.
Moreover, targeting specific spots with a concentrated spray allows for a more detailed cleaning experience. This focused approach is especially useful in high-traffic zones, where dirt tends to accumulate more noticeably. By ensuring that every square inch of your flooring receives adequate attention, you can achieve a visually appealing level of cleanliness that enhances the long-term durability of your stone floors.
Key Considerations for Choosing the Perfect Spray Mop for Your Stone Floors
Selecting the ideal spray mop for stone floors is essential for achieving superior cleaning results while safeguarding your valuable flooring. With a myriad of options available on the market, understanding the key features to consider can streamline your decision-making process. This section will examine the critical factors to evaluate when selecting a mop that aligns with your unique cleaning requirements.
Opt for an Appropriate Mop Head Design for Your Cleaning Needs
The design of the mop head is a vital consideration when choosing a spray mop for stone floors. Selecting mop heads made from microfiber or soft pads is essential to prevent scratching delicate stone surfaces. Microfiber is renowned for its exceptional cleaning capabilities, effectively capturing dirt and dust without causing harm to your flooring.
When assessing mop heads, look for flexible designs that can easily access corners and crevices, ensuring a complete clean. The ability to wash and reuse mop heads is another significant advantage, as it not only reduces waste but also lowers ongoing costs associated with disposable pads. Investing in a high-quality mop head enhances your cleaning experience while prolonging the life of your mop.
Customize Your Cleaning Experience with Adjustable Spray Settings
A key feature to consider in a spray mop for stone floors is the availability of adjustable spray settings. Different stone types require varying levels of moisture and cleaning solutions, so having the capability to customize the spray intensity can greatly influence cleaning effectiveness.
For instance, granite floors can withstand a more vigorous cleaning approach, while softer stones like limestone may necessitate a gentler application. Adjustable settings empower homeowners to tailor their cleaning experience based on the unique needs of their flooring, thereby preserving the stone’s integrity.
This flexibility is especially beneficial for homes with mixed flooring, allowing you to adapt your cleaning methods without needing multiple tools. Such customization is not only convenient; it is crucial for maintaining the beauty and durability of your stone surfaces.
Prioritize Durability and Quality Construction
Durability is a key quality to prioritize when selecting a spray mop for stone floors. Given the demands of regular cleaning, it is essential to choose a mop with robust construction to ensure it can withstand frequent use. Look for mops made from high-quality materials that can endure the challenges of cleaning stone floors.
Also, consider the handle’s design; an ergonomic handle enhances comfort, making the cleaning experience more pleasant. A reliable and well-constructed mop will not only last longer but also facilitate better cleaning outcomes, enabling you to apply the necessary pressure without concerns about the mop failing.
Ensure Compatibility with Stone-Safe Cleaning Solutions
To protect the integrity of your stone floors, the spray mop for stone floors you select must be compatible with pH-neutral cleaners. Many stone surfaces, particularly those with sealants, can be easily damaged by harsh chemicals, leading to unsightly stains or surface etching.
Before purchasing a spray mop, confirm that it is designed to work seamlessly with pH-neutral, stone-safe cleaning solutions. This compatibility will safeguard your floors and ensure effective cleaning. Most brands recommend specific cleaning solutions, so adhere to these guidelines to maintain your mop’s performance and the beauty of your stone surfaces.
Selecting the Most Suitable Cleaning Solutions for Your Spray Mop on Stone Floors
Choosing the right cleaning solution is crucial when utilizing a spray mop for stone floors. Using the incorrect type of cleaner can lead to damage, making it essential to understand which products will effectively clean without compromising the integrity of your floors. This section will review the available options, empowering you to select the best cleaning products.
Utilizing pH-Neutral Cleaners for Optimal Stone Care
Employing pH-neutral cleaners is critical for preserving the beauty of your stone floors. These cleaners are specifically formulated to be gentle on stone surfaces while effectively removing dirt and grime. The balanced pH helps prevent damage to the stone’s surface and any sealants applied.
When using a spray mop for stone floors, dilute the pH-neutral cleaner according to the manufacturer’s instructions for optimal results. Regular use of these cleaners can help maintain the stone’s natural sheen, ensuring it looks pristine over time. Additionally, pH-neutral products contribute to a healthier indoor environment, as these cleaners are often free from harsh chemicals and toxins.
Exploring Natural Alternatives for Eco-Friendly Cleaning Solutions
Natural alternatives can be an appealing choice for those who prefer eco-friendly cleaning methods while using a spray mop for stone floors. A simple mixture of vinegar and water can serve as an effective cleaning solution. However, it is essential to use this sparingly, as vinegar’s acidic nature can etch certain types of stone, particularly softer varieties like limestone and marble.
When utilizing natural solutions, always test them on a small, inconspicuous area first to evaluate their impact on your specific stone. This precaution helps ensure you don’t inadvertently damage your flooring. While natural cleaners can offer a sustainable cleaning option, always prioritize the longevity of your stone surfaces by using them judiciously.
Avoiding Harsh Chemicals for Effective Stone Floor Care
When cleaning stone floors with a spray mop, it is crucial to avoid harsh chemicals. Substances like bleach and ammonia can strip away protective sealants and damage the stone, resulting in costly repairs or replacements. It is essential to read labels carefully and steer clear of products not explicitly designed for stone.
Instead, focus on cleaners that are gentle yet effective for stone surfaces. Many manufacturers now offer a range of stone-specific cleaning products that successfully remove dirt without jeopardizing the stone’s integrity. Investing in these specialized solutions will ensure your floors remain beautiful and well-maintained for years to come.
Mastering Effective Techniques for Cleaning Stone Floors
Implementing effective cleaning techniques is essential for maximizing the benefits of a spray mop for stone floors. Understanding best practices will not only enhance your cleaning outcomes but also extend the life of your flooring. This section will cover key techniques to elevate your stone floor cleaning regimen.
Incorporating Regular Sweeping for Comprehensive Preparation
Removing loose debris and dirt before mopping is crucial. This step prevents scratches from dirt being ground into the stone during the mopping process. A high-quality broom or vacuum specifically designed for hard floors is ideal, ensuring you effectively capture all dirt and particles.
In high-traffic areas, more frequent sweeping may be necessary to maintain cleanliness and protect the stone’s surface. Establish a cleaning routine that includes regular sweeping, ideally before mopping, to adequately prepare the floor. This proactive approach enhances the effectiveness of your spray mop and preserves the beauty of your stone flooring over time.
Employing the Correct Mopping Technique for Uniform Results
The technique used while mopping is just as vital as the tools and solutions you employ. When using a spray mop for stone floors, adopt a back-and-forth motion instead of a circular one. This method ensures even distribution of the cleaning solution while preventing excessive wear on both the mop head and the flooring itself.
Utilizing a systematic approach will also assist you in covering all areas of the floor, ensuring thorough cleaning. Start from one corner of the room and work outward, applying the cleaning solution as necessary. This technique optimizes cleaning results and simplifies tracking areas that have already been cleaned.
Implementing Proper Drying Techniques for Stone Floors
After mopping, it’s crucial to allow the floor to dry completely. If moisture is allowed to linger, stone surfaces can become susceptible to water spots and mildew. Proper drying can be facilitated by ensuring good ventilation within the room, which helps expedite the process.
You may also consider using a dry mop or towel with your spray mop to absorb any excess moisture on stone floors. This additional step not only helps protect the stone but also enhances the overall cleanliness and appearance of the flooring. By prioritizing drying, you can significantly reduce the likelihood of long-term damage to your stone floors.
Essential Maintenance Tips for Your Spray Mop
Regular maintenance is vital for optimizing the performance of your spray mop for stone floors. Keeping your mop in excellent condition will enhance its effectiveness and improve your cleaning routine. This section will provide important maintenance tips that can prolong the life of your mop and boost its overall performance.
Frequently Cleaning the Mop Head for Hygiene and Efficiency
Over time, mop heads can accumulate dirt, grime, and bacteria, making regular cleaning essential. Depending on the material, many mop heads are machine washable, allowing for easy maintenance. Routine washing eliminates build-up and ensures that your cleaning remains hygienic and efficient.
Make it a habit to wash the mop head after every few uses to maintain its effectiveness. Additionally, inspect the mop head for any signs of wear or damage. A well-maintained mop head will clean more efficiently and help preserve the quality of your stone floors, ensuring they remain beautiful for many years to come.
Conducting Routine Checks on the Spray Mechanism for Optimal Performance
The spray mechanism is a crucial component of your spray mop for stone floors, and ensuring its proper functionality is vital for optimal cleaning. Periodically check for clogs or malfunctions that could hinder the spray function. A clogged sprayer can lead to uneven cleaning and unsatisfactory results.
If you notice any issues, refer to the manufacturer’s instructions for troubleshooting or cleaning the spray nozzle. Keeping this component in good condition will enhance your cleaning efficiency and prolong the life of your mop, ensuring it performs at its best every time you use it.
Employing Proper Storage Techniques for Longevity of Your Mop
Proper storage of your spray mop for stone floors is critical to prevent mould growth and ensure its longevity. Store the mop in a dry, well-ventilated area to avoid dampness that can lead to unpleasant odours and bacterial growth.
Consider hanging the mop or storing it upright to prevent damage to the mop head. Avoid leaving the mop in areas with high humidity, such as bathrooms, where it can easily become a breeding ground for mould. By caring for your mop’s storage conditions, you can extend its lifespan and ensure effective cleaning whenever needed.
Replacing Worn Parts for Continuous Optimal Functionality
Like any cleaning tool, regularly inspecting your spray mop for stone floors for worn parts is essential. Pay close attention to components such as the mop head and spray nozzles, which are critical for performance. If you notice any wear or damage, replace these parts promptly to maintain optimal cleaning efficiency and results.
Many manufacturers offer replacement parts, making it easy to keep your mop in top condition. A well-maintained mop will clean more effectively and help protect your stone floors from potential damage, ensuring that your investment pays off over time.
Using the Correct Cleaning Solution for Maximum Effectiveness
Always use the recommended cleaning solutions to maximize the effectiveness of your spray mop for stone floors. Using inappropriate cleaners can damage your floors and void any warranties. Stick to pH-neutral and stone-safe products to ensure the longevity of your flooring and the effectiveness of your cleaning tool.
By adhering to these maintenance tips, you can enjoy a more efficient cleaning experience while protecting the beauty and integrity of your stone floors for years to come.
Avoiding Common Pitfalls in Stone Floor Cleaning
While a spray mop for stone floors can greatly streamline your cleaning routine, certain common errors can undermine your efforts. Understanding these pitfalls will help ensure optimal results while safeguarding your flooring. This section will highlight the key mistakes to avoid, allowing you to refine your cleaning strategy effectively.
Preventing Over-Wetting of Stone Surfaces
Overwetting the surface is a significant mistake to avoid when utilizing a spray mop for stone floors. Excess moisture can penetrate the porous nature of certain stones, leading to potential damage, mould growth, and discoloration. When mopping, be mindful of the amount of cleaning solution dispensed; it’s essential to err on the side of caution to prevent oversaturation.
An adjustable spray setting can assist in controlling moisture levels, ensuring the floor remains damp but not drenched. It’s also vital to allow adequate drying time after cleaning to minimize the risk of further damage. By being conscious of moisture levels, you can maintain the beauty and integrity of your stone floors over time, ensuring they remain a stunning feature of your home.
Avoiding Abrasive Pads for Safe Cleaning
Utilizing abrasive pads or brushes on stone floors is a common misstep that can cause irreversible damage. Scratching the surface can detract from the stone’s natural beauty and may lead to costly repairs. Always opt for soft or microfiber pads specifically designed for delicate surfaces when using your spray mop for stone floors.
Many modern spray mops come equipped with mop heads that are gentle on stone, allowing you to clean effectively without risk. Always double-check the manufacturer’s recommendations for compatible mop heads to ensure you choose the safest option for your flooring and preserve its integrity.
Following Manufacturer Guidelines for Optimal Results
Every spray mop for stone floors comes with specific manufacturer guidelines outlining best practices for use and maintenance. Ignoring these recommendations can result in subpar cleaning outcomes or damage to your flooring. Take the time to read the user manual, paying close attention to details regarding compatible cleaning solutions, maintenance tips, and replacement parts.
By following the manufacturer’s guidelines, you can maximize the performance of your spray mop while preserving the quality of your stone floors. This diligence not only enhances your cleaning efforts but also ensures the longevity of both your mop and your flooring investment.
Enhancing the Visual Appeal of Your Stone Floors
Maintaining the pristine appearance of your stone floors goes beyond basic cleaning; it requires a commitment to proper care and maintenance. Using a spray mop can significantly enhance their look, but there are additional measures you can take to ensure that your flooring remains stunning for years to come. This section will discuss essential practices to amplify the natural beauty of your stone surfaces.
Regular Sealing to Safeguard and Enhance Visual Appeal
Regularly sealing your stone floors is one of the most effective methods to protect and enhance their appearance. A high-quality sealant creates a barrier against stains, dirt, and moisture, helping to maintain the stone’s natural sheen. Different stone types may require different sealing products, so selecting the appropriate sealant for your specific flooring is crucial.
Depending on the type of stone and the volume of foot traffic, sealants should typically be reapplied every few years. When applying sealant, ensure the floors are clean and dry to achieve optimal results. Regular sealing not only protects your stone but also amplifies its visual appeal, ensuring it remains a focal point in your home for years.
Choosing Suitable Cleaning Products for Stone Maintenance
The cleaning products you choose for your stone floors can significantly impact their appearance. Using unsuitable cleaning solutions can lead to discoloration or damage to the stone’s surface. When using your spray mop for stone floors, stick to pH-neutral and stone-safe cleaning options to preserve their beauty and integrity.
Additionally, consider using products specifically formulated for your type of stone. This tailored approach will ensure that you’re cleaning effectively while protecting the longevity of your flooring. By being discerning about your cleaning products, you can maintain the vibrancy and allure of your stone surfaces over time, enhancing the overall aesthetic of your home.
Establishing Regular Maintenance Routines for Longevity
Creating a regular maintenance routine for your stone floors is key to keeping them looking their best. In addition to routine cleaning with your spray mop, incorporate periodic deep cleaning and inspections to assess the condition of your flooring.
Consider implementing a regimen that includes sweeping, mopping, and sealing at scheduled intervals. This consistent approach will prevent dirt build-up and prolong the life of your stone. By dedicating time to regular maintenance, you can ensure that your stone floors continue to exude elegance and charm, reflecting the care you invest in them.
Engaging Professional Cleaning Services for Superior Care
For those looking to further elevate the appearance of their stone floors, enlisting professional cleaning services may be an excellent option. Professionals possess the expertise and tools necessary to effectively restore and maintain the beauty of stone surfaces.
Whether through deep cleaning, polishing, or resealing, professional services can provide care that may be challenging to achieve with DIY methods. If your stone floors have lost their luster or show signs of significant wear, consider contacting experts to rejuvenate their appearance. This investment can yield remarkable results, leaving your floors looking as good as new and enhancing your home’s overall aesthetic appeal.
Frequently Asked Questions About Spray Mops for Stone Floors
What exactly are spray mops?
Spray mops are innovative cleaning devices that seamlessly integrate a mop with a spraying mechanism. They enable users to dispense cleaning solution directly onto the floor while mopping, offering convenience and efficiency for various floor types, including stone, making them a favored choice among homeowners.
Can I use a spray mop on all types of stone floors?
While spray mops are versatile, it is essential to utilize the appropriate cleaning solution and mop head suitable for your specific stone type. Always consult the manufacturer’s recommendations regarding compatibility to ensure optimal cleaning results and prevent damage.
How frequently should I clean my stone floors using a spray mop?
Stone floors should ideally be cleaned with a spray mop regularly, ideally on a weekly basis. High-traffic areas may require more frequent cleaning to maintain their appearance and hygiene, ensuring they remain inviting and pristine.
What cleaning solutions are safe for stone floors?
pH-neutral cleaners are safe and effective for stone floors, as they won’t damage the surface or any protective sealant applied. Avoid harsh chemicals such as bleach or ammonia, which can cause irreversible damage and diminish the beauty of your stone surfaces.
How can I prevent my stone floors from scratching?
Regularly sweeping or vacuuming to remove debris before mopping can help prevent scratches. Additionally, utilizing a soft microfiber mop head reduces the risk of damaging the stone surface, ensuring your floors remain beautiful and well-maintained.
How often should I seal my stone floors?
Generally, stone floors should be sealed every one to three years, depending on the type of stone and the foot traffic they experience. Regular sealing enhances protection against stains and moisture, prolonging the life of your flooring.
Is it possible to create my own cleaning solution for stone floors?
You can create a natural cleaning solution using vinegar and water, but it should be used sparingly to prevent etching. Always test a small, inconspicuous area first to ensure safety and compatibility with your specific stone type.
What should I do if my spray mop is not spraying properly?
Check for clogs in the spray nozzle and ensure that the cleaning solution is diluted correctly according to the manufacturer’s instructions. If problems persist, consult the manufacturer’s guidelines for troubleshooting specific issues and restoring proper function.
Is it safe to use a steam mop on stone floors?
Steam mops can potentially harm certain types of stone, as the high heat may damage the surface or any sealant applied. For the safety and protection of your investment in stone flooring, it is advisable to stick to pH-neutral cleaning methods.
How can I enhance the shine of my stone floors?
Regular cleaning with appropriate products and periodic professional polishing can notably enhance the shine of your stone floors. Additionally, proper sealing will help maintain their luster, ensuring they remain inviting and beautiful over time.
The article Spray Mops for Stone Floors: A Comprehensive Guide was first found on https://london-stone.co.uk
The Article Spray Mops for Stone Floors: Your Essential Guide appeared first on https://fabritec.org
The Article Spray Mops for Stone Floors: The Ultimate Buying Guide Was Found On https://limitsofstrategy.com
-

Ultimate Spring Cleaning Guide: Top Clearance Tips for the UK
Transform Your Home with Effective Spring Cleaning and Decluttering Strategies in the UK
Beginning your spring cleaning and decluttering journey in the UK may seem overwhelming at first, but by adopting an organized strategy, this annual task can become a rejuvenating and fulfilling experience. Spring cleaning transcends simple tidying; it’s an essential opportunity to refresh your living space, uplift your mental well-being, and establish a more orderly environment. This yearly ritual can reinvigorate your surroundings, transforming your home into a sanctuary of positive energy that significantly enhances your overall quality of life.
Exploring the Importance of Spring Cleaning: Elevating Home Aesthetics and Mental Wellness
The importance of spring cleaning and decluttering in the UK goes far beyond mere visual appeal. Research shows that maintaining a decluttered space is closely associated with lower levels of stress and enhanced focus. A well-organized home transforms into your personal oasis, offering a serene backdrop for relaxation amidst the daily grind. Numerous studies affirm that a tidy environment boosts productivity, enabling you to engage efficiently with your tasks and responsibilities.
Additionally, spring cleaning presents a valuable opportunity to evaluate the emotional significance of your belongings. This reflective process not only aids in physical decluttering but also alleviates mental burdens. Making decisions about what to retain or discard can be liberating, fostering a profound sense of achievement. Furthermore, a thorough cleaning regimen can significantly minimize allergens and pathogens, creating a healthier living environment for you and your loved ones.
The advantages of spring cleaning and decluttering in the UK extend beyond individual homes, promoting broader community wellness. When residences are tidy and organized, inhabitants take pride in their environments, encouraging their neighbors to join in, ultimately leading to enhanced aesthetics and health throughout entire neighborhoods.
Crafting a Detailed Spring Cleaning Plan for Optimal Efficiency
Creating a comprehensive cleaning plan is crucial for maximizing the success of your spring cleaning and decluttering efforts in the UK. Begin by meticulously evaluating each room in your home. Assemble a detailed checklist of areas that require attention, prioritizing tasks based on urgency and importance. This systematic approach clarifies your objectives and enables you to monitor your progress effectively.
It’s advantageous to break the cleaning process into smaller, manageable segments. Instead of attempting to clean your entire home in one day, allocate specific days to concentrate on individual rooms or tasks. For example, you might dedicate one day solely to the kitchen and another to the bedrooms. This strategy helps reduce feelings of overwhelm and facilitates thorough cleaning.
Ensure your plan includes a comprehensive list of supplies, encompassing cleaning agents, waste receptacles, and organizational tools for items you wish to retain but currently lack organization. Assembling all necessary materials in advance will enhance your efficiency and allow for a more concentrated cleaning session.
An organized spring cleaning and decluttering strategy in the UK not only amplifies your productivity but also transforms the cleaning process into an enjoyable endeavor. By establishing realistic goals and timelines, you can ensure that your cleaning journey is both successful and gratifying.
Mastering Time Management for Successful Spring Cleaning Scheduling
Effective time management is essential for executing spring cleaning and decluttering in the UK successfully. By creating a well-structured schedule, you can allocate specific time slots for each task, ensuring that you remain focused and maintain momentum throughout your cleaning journey.
Start by determining how much time you can realistically dedicate to cleaning each day or week, factoring in other work or family obligations. Once you have a clear understanding of your available time, you can design a timeline that aligns seamlessly with your lifestyle.
Utilizing digital calendars or specialized cleaning apps can be particularly advantageous. These tools can remind you of your tasks while helping you visualize your progress. For example, checking off completed tasks can provide a sense of accomplishment, motivating you to continue.
Incorporating breaks into your cleaning schedule is equally important. Working continuously without rest can lead to burnout, diminishing the effectiveness of your efforts. Short breaks can refresh your focus, enabling you to tackle your tasks with renewed vigor.
By managing your time efficiently, you can transform spring cleaning and decluttering in the UK from a daunting chore into a rewarding project, leaving you with a revitalized and organized home.
Comprehensive Room-by-Room Spring Cleaning and Decluttering Blueprint for UK Homes

Adopting a systematic room-by-room approach can provide clarity and direction as you undertake spring cleaning and decluttering in the UK. Each area of your home presents unique cleaning requirements, and addressing them individually can make the overall process more efficient and manageable.
Kitchen: Thoroughly Cleaning and Optimizing Your Culinary Space
The kitchen is often termed the heart of the home, making it a crucial area for comprehensive cleaning during spring cleaning and decluttering in the UK. Start by completely clearing countertops, cabinets, and drawers. This initial step allows you to assess all your kitchen items, leading to informed decisions about what to keep, donate, or discard.
Once all items are removed, dedicate time to deep cleaning surfaces. Utilize a vinegar and baking soda solution as a natural and effective cleaning agent. Focus especially on high-contact areas like cabinet knobs and light switches, which can harbor germs and bacteria. Remember to clean appliances thoroughly; maintaining a hygienic kitchen necessitates a clean oven, microwave, and refrigerator.
After completing your cleaning, systematically organize your items. Group similar items together and consider using transparent storage bins for improved accessibility. Labeling these bins can also be helpful, ensuring that every item has its designated place. This heightened level of organization not only improves functionality but also enhances the visual appeal of your kitchen.
Lastly, conduct a pantry clean-out by checking expiration dates and discarding any expired items. An organized pantry significantly contributes to efficient meal preparation and grocery shopping, transforming your kitchen into a delightful workspace.
Bedroom: Crafting a Tranquil and Tidy Sleep Sanctuary
Your bedroom should serve as a peaceful retreat that promotes relaxation and restful sleep. During your spring cleaning and decluttering in the UK, aim to cultivate a serene environment by decluttering and deep cleaning your space. Start by stripping all bedding, including pillows and duvet covers, and washing them according to their care instructions.
Next, declutter your nightstands and dressers. Remove unnecessary items and consider donating clothing and accessories that you no longer wear. A useful guideline is to assess whether each item brings you joy or serves a purpose; if it does not, it might be time to let it go.
Dust all surfaces and vacuum or mop the floors, paying special attention to often-overlooked areas like behind the bed and beneath the wardrobe. After cleaning, make your bed with fresh linens to instantly evoke a sense of calm and order.
Incorporating storage solutions can further enhance your bedroom’s organization. Under-bed storage boxes or stylish baskets can keep items hidden yet easily accessible, helping to maintain a clutter-free environment and ensuring your bedroom remains a tranquil haven.
Living Room: Refreshing Your Main Gathering Space

The living room serves as the central hub for family interactions and social gatherings, making it essential to keep this area inviting and tidy. Begin by removing items from surfaces like coffee tables, shelves, and entertainment units. This step provides the opportunity to clean every corner and crevice.
Dust all surfaces, including light fixtures and decorative objects. For upholstery, consider using a fabric cleaner or hiring a professional service to refresh sofas and chairs. Don’t forget to inspect beneath cushions and in the crevices of seating areas, as these spots can accumulate dust and crumbs.
After cleaning, reconsider the room’s layout. Rearranging furniture can breathe new life into your living space, creating a more welcoming atmosphere. Adding decorative elements, such as fresh cushions or a new throw blanket, can further elevate the overall aesthetic.
Finally, decluttering is vital. Remove any items that do not belong in the living room and consider donating books, magazines, or decorations that no longer align with your style. An organized living room is not only visually appealing but also fosters a warm and inviting environment for family and friends.
Bathroom: Ensuring Hygiene and Decluttering for Health
The bathroom requires regular sanitation, making it a top priority during spring cleaning and decluttering in the UK. Start by emptying cabinets and drawers of toiletries and cleaning supplies, allowing you to assess your inventory and dispose of expired products.
Clean all surfaces, including the sink, toilet, shower, and tub. Utilize disinfectant cleaners in high-contact areas to ensure a hygienic environment. Don’t overlook scrubbing grout and tiles, as these areas can harbor mildew and bacteria over time.
After cleaning, reorganize your toiletries. Use drawer dividers or small baskets to group similar items together. This organization not only enhances your bathroom’s appearance but also allows you to quickly find what you need.
Lastly, adopt eco-friendly practices by selecting sustainable cleaning products and replacing disposable items with reusable alternatives, such as washable cotton pads and bamboo toothbrushes. This shift benefits your home and positively impacts the environment.
Embracing Eco-Friendly Practices for Spring Cleaning and Decluttering in the UK
With growing awareness about environmental sustainability, many individuals in the UK are seeking eco-conscious methods for their spring cleaning and decluttering. These green approaches not only enhance your home but also contribute to a healthier planet.
Selecting Eco-Friendly Cleaning Products
Choosing sustainable cleaning products is a significant step toward making your spring cleaning and decluttering in the UK more environmentally friendly. Many conventional cleaning agents contain harsh chemicals that can adversely affect your health and the environment. Instead, opt for biodegradable or plant-based products that effectively clean without causing harm.
Homemade cleaning solutions can also be practical and eco-friendly. Ingredients like vinegar, baking soda, and lemon can tackle various cleaning tasks while being gentle on the environment. For instance, a mixture of vinegar and water can serve as an excellent all-purpose cleaner, while baking soda can effectively scrub surfaces.
When purchasing cleaning supplies, look for certifications such as the EcoLabel or similar eco-friendly endorsements. These labels indicate that the product meets specific environmental standards, ensuring that your cleaning efforts are both effective and responsible.
By choosing sustainable cleaning products, you contribute not only to a cleaner home but also to the larger movement toward environmental sustainability during your spring cleaning and decluttering in the UK.
Minimizing Waste: Eco-Conscious Decluttering Techniques
Decluttering during spring cleaning and decluttering in the UK presents an excellent opportunity to minimize waste. Begin by closely evaluating each item in your home. For items you no longer use or need, consider alternatives to simply throwing them away.
Donation is one of the most effective ways to ensure unwanted items find new homes rather than ending up in a landfill. Charitable organizations and local groups gladly accept gently used clothing, toys, and household goods, giving them a second life.
If items cannot be donated, explore recycling options. Many local councils offer recycling services for specific materials, such as electronics, batteries, and textiles. Educate yourself on what can be recycled and ensure that these items are disposed of responsibly.
Another approach is repurposing. Before discarding an item, think creatively about how it could serve a different purpose. For example, glass jars can be transformed into storage containers or decorative pieces. This practice not only reduces waste but also encourages creativity and resourcefulness during spring cleaning and decluttering in the UK.
Creative Repurposing Ideas for a Greener Home
Repurposing is a fantastic way to contribute to an eco-friendly lifestyle during spring cleaning and decluttering in the UK. Instead of discarding old items, consider how they might be transformed into something both functional and decorative. This approach not only reduces waste but also adds unique touches to your home.
For instance, old furniture can be revitalized with a fresh coat of paint or new upholstery. A wooden pallet can be transformed into a charming garden bench or coffee table, enhancing the character of your space. Similarly, glass bottles can be turned into stylish vases or candle holders, adding a creative flair to your home decor.
Textiles also offer numerous opportunities for repurposing. Old t-shirts can be converted into cleaning rags or quilts, while outdated curtains can be transformed into cushion covers. This not only extends the life of the fabric but also reduces the need to purchase new items.
Engaging in creative repurposing during your spring cleaning and decluttering in the UK not only benefits the environment but also allows you to personalize your home with unique, handmade items. It transforms the cleaning process into an enjoyable and engaging activity.
Utilizing Effective Decluttering Techniques for Spring Cleaning and Clearance in the UK
Decluttering is a crucial component of spring cleaning and decluttering in the UK, and employing effective strategies can significantly ease this process. Various methodologies exist, each offering a unique approach to help you streamline your belongings.
The KonMari Method: Joy-Centric Decluttering Approach
One of the most renowned decluttering techniques is the KonMari Method, developed by Marie Kondo. The core principle of this approach is simple: keep only those items that spark joy. By focusing on the emotional significance of your possessions, you can create a more meaningful and organized space.
To initiate the KonMari Method, categorize your belongings—clothing, books, papers, miscellaneous items, and sentimental items—and tackle them one category at a time. Start with clothing, as this category is typically easier to evaluate. Gather all your clothing in one location and assess each piece, determining whether it brings you joy. If it does not, express gratitude for its service and let it go.
After completing all categories, you’ll be left with only those items that truly resonate with you. This process declutters your space while cultivating a deeper appreciation for the belongings you choose to keep.
Implementing the KonMari Method during spring cleaning and decluttering in the UK can lead to a more joyful and organized home environment, ultimately transforming your relationship with your possessions.
Minimalism: Embracing a Simplified Lifestyle Through Decluttering
Minimalism has gained popularity as a lifestyle choice in recent years, emphasizing simplicity and intentionality. Adopting a minimalist approach during spring cleaning and decluttering in the UK can result in a more streamlined and peaceful living space.
Begin by assessing your possessions and questioning whether each item serves a purpose or brings you joy. If it doesn’t, consider parting with it. Minimalism advocates for quality over quantity, encouraging fewer but more meaningful possessions that enhance your overall happiness.
Applying the minimalist philosophy to your home can promote more mindful purchasing habits. By concentrating on what you genuinely need, you can avoid accumulating unnecessary items in the future, making your home easier to maintain.
By embracing minimalism during your spring cleaning and decluttering in the UK, you can simplify your life and create a space that reflects your values and priorities, contributing to a more intentional lifestyle.
Monetizing Unwanted Items: Effective Selling Techniques and Platforms
Decluttering during spring cleaning and decluttering in the UK doesn’t have to be a one-sided process; it can also present an opportunity to earn extra cash. Selling unwanted items can be an effective way to declutter while recouping some of your investment.
Start by identifying items that are in good condition and possess resale value. Online platforms such as eBay, Facebook Marketplace, and Depop provide excellent avenues for selling. Take high-quality photos and compose clear, honest descriptions to attract potential buyers.
Consider organizing a garage or car boot sale where you can sell multiple items simultaneously. This can be a fun community event and a great way to clear out unwanted items quickly.
When pricing your items, research similar listings to ensure your prices are competitive. Be open to negotiation, as potential buyers may be seeking bargains.
By incorporating selling into your spring cleaning and decluttering strategy in the UK, you not only declutter but also gain financial benefits, making the process even more rewarding.
Spring Cleaning and Decluttering in the UK: Capitalizing on Seasonal Sales and Clearances
Spring is not only a time for cleaning and decluttering but also a prime season for taking advantage of shopping sales and clearance events across the UK. Leveraging these opportunities can help refresh your home while staying within budget.
Timing Your Spring Clearance Shopping for Maximum Savings
The spring season ushers in numerous sales events, making it an ideal time for savvy shoppers. Key spring cleaning and decluttering periods in the UK include the Easter weekend, during which many retailers offer discounts on home goods, furniture, and decor.
Moreover, many brands and retailers unveil their spring collections during this period, leading to clearance on winter stock. This creates a perfect opportunity to stock up on essentials and rejuvenate your home without overspending.
Stay alert for local advertisements and online promotions to catch the best deals. Signing up for newsletters from your favorite retailers can also ensure you remain informed about upcoming sales and exclusive offers.
By strategically timing your purchases, you can enhance your home while benefiting from spring’s seasonal sales.
Top Retailers for Exceptional Spring Clearance Bargains
Several retailers in the UK are renowned for their spring clearance sales. Stores like John Lewis, Argos, and IKEA often feature extensive selections of home goods and furniture on sale during this season. These retailers frequently provide discounts on popular items, making it an ideal time to invest in quality pieces for your home.
Additionally, online retailers such as Amazon and Wayfair often present seasonal sales, allowing for convenient shopping from the comfort of your home. Many of these platforms also offer user reviews, which can facilitate informed purchasing decisions.
Local boutiques and smaller shops may also host spring sales, providing an opportunity to support local businesses while discovering unique items for your home.
By exploring various retailers during your spring cleaning and decluttering in the UK, you can uncover many affordable options to refresh your space.
Strategies for Securing the Best Deals During Clearance Events
To maximize your savings during spring cleaning and decluttering in the UK, consider implementing a few savvy shopping strategies. First, create a list of items you need or wish to replace. This ensures you remain focused and avoid impulsive purchases that could disrupt your budget.
Set a financial limit for your shopping excursion and adhere to it. It’s easy to get carried away during clearance events, so having a set budget can help you make more intentional decisions.
Utilize comparison shopping apps to secure the best prices. Many tools allow you to scan barcodes and compare prices across various retailers, ensuring you find the best deal.
Finally, don’t hesitate to inquire about discounts on clearance items. Many retailers are open to negotiating prices, especially if an item has been on the shelf for an extended period.
By employing these strategies, you can fully capitalize on the spring clearance season, ensuring your spring cleaning and decluttering in the UK is both practical and economical.
Spring Cleaning and Decluttering in the UK: Implementing Effective Storage Solutions
As you embark on spring cleaning and decluttering in the UK, implementing effective storage solutions can play a vital role in maintaining a clutter-free home. With the right strategies, you can optimize your space and ensure everything has its designated location.
Creative Storage Solutions for Small Spaces
Space can be at a premium in numerous UK homes, necessitating innovative storage solutions. When considering spring cleaning and decluttering in the UK, focus on utilizing often-overlooked vertical space. Wall-mounted shelves can accommodate books, decor, or storage baskets, freeing up valuable floor space.
Multi-functional furniture is another excellent investment for smaller homes. Ottomans with storage capabilities or beds with built-in drawers can provide additional space for storing items out of sight while remaining easily accessible.
Utilizing under-bed storage is also a brilliant way to maximize space. Clear storage bins can hold seasonal clothing, shoes, or extra bedding, keeping them organized and out of the way.
By embracing creative storage solutions, you can make the most of your space and ensure your home remains tidy and organized after your spring cleaning and decluttering in the UK.
Selecting the Right Storage Units to Meet Your Specific Needs
Choosing appropriate storage units is critical for maintaining order in your home. When addressing spring cleaning and decluttering in the UK, consider your specific requirements and the items you wish to store.
Begin by evaluating the types of items you have. For example, if you’re storing clothing, opt for breathable fabric bins or plastic containers with lids to protect items from dust. Sturdy shelving or filing cabinets can help keep books and documents organized.
Assess the size and layout of your space to determine which type of storage unit will work best. Selecting units that complement your home’s aesthetic while also serving a practical purpose is essential.
Lastly, ensure that your chosen storage solutions are easily accessible. You want to be able to retrieve items without hassle, so consider how frequently you’ll need to access the stored items when making your selections.
By choosing the right storage units during spring cleaning and decluttering in the UK, you can create a more organized and easy-to-maintain home.
Organizing Your Storage for a Clutter-Free Environment
Once you’ve established your storage solutions, the next step is to organize them effectively to maintain a clutter-free environment. During spring cleaning and decluttering in the UK, focus on creating a system that makes it easy to find and access your belongings.
Start by categorizing items based on their function. For example, keep seasonal clothing together and store frequently used items in easily reachable locations. Labeling storage bins and shelves can also streamline the process, ensuring everyone knows where things belong.
Consider implementing a ‘one in, one out’ policy to prevent future clutter. When introducing a new item into your home, commit to removing an existing one. This habit can help you maintain your organized storage solutions over time.
Regularly reassess your storage needs, especially during your annual spring cleaning and decluttering in the UK. As your family grows or your lifestyle evolves, your storage requirements may shift, necessitating adjustments to your organizational system.
By following these strategies for organizing your storage, you can create a home that remains clutter-free and welcoming, allowing you to enjoy the benefits of your hard work.
Spring Cleaning and Decluttering in the UK: Strategies for Long-Term Maintenance and Planning
Once the dust has settled from your spring cleaning and decluttering in the UK, it’s essential to implement maintenance strategies to ensure your home remains organized throughout the year. Long-term planning can help you sustain the benefits of your hard work, creating a more enjoyable living environment.
Establishing a Consistent Cleaning Routine for Year-Round Organization
Creating and adhering to a regular cleaning routine is vital for maintaining the cleanliness and organization of your home. After your spring cleaning and decluttering in the UK, consider implementing a weekly or monthly cleaning schedule that incorporates essential tasks.
For example, designate specific days for different areas of your home. You might choose to clean bathrooms on Mondays, dust and vacuum on Wednesdays, and focus on kitchen maintenance over the weekend. This consistency can help prevent the return of clutter and dirt, ensuring your home remains a sanctuary.
In addition to your regular cleaning schedule, consider deep cleaning tasks that may only need to be completed seasonally. This could include washing curtains, cleaning carpets, or organizing storage areas. Scheduling these tasks can ensure they don’t fall by the wayside.
By establishing a consistent cleaning routine, you can sustain the results of your spring cleaning and decluttering in the UK, creating a welcoming home environment throughout the year.
Proactive Strategies to Minimize Future Clutter Accumulation
To maintain the advantages of your spring cleaning and decluttering in the UK, it’s crucial to implement proactive measures that can help reduce future clutter. Start by evaluating your shopping habits. Before making a purchase, consider whether the item is necessary and aligns with your values and lifestyle.
Engaging in regular decluttering sessions can also be beneficial. Set aside time every few months to reassess your belongings and remove items that no longer serve a purpose. This proactive approach can help prevent clutter from accumulating over time.
Another effective strategy is establishing a designated ‘donation box’ in your home. If you find an item you no longer need or use, place it in the box. Once full, take it to a local charity or organization, keeping your home clutter-free.
By implementing these proactive measures, you can enjoy a more organized and harmonious living space, making your home a true reflection of your lifestyle.
Preparing for Next Year’s Spring Cleaning: Lessons Learned from Your Experience
As you conclude your spring cleaning and decluttering in the UK, take the opportunity to reflect on the process and the lessons learned. Consider what strategies worked well and what could be improved for next year’s cleaning project.
Maintaining a journal or planner can be beneficial for documenting your experiences. Recording your successes and challenges can offer valuable insights for future cleaning endeavors. For instance, you may discover that certain cleaning products were particularly effective or that specific organizational methods proved more valuable than others.
Involving family members in the planning process can also be advantageous. Gathering input from all household members can lead to a more collaborative approach to maintaining cleanliness and organization in your home.
By preparing for next year’s spring cleaning and decluttering in the UK, you can refine your strategy and ensure that the process remains efficient and effective, transforming it into an anticipated annual ritual rather than an obligatory chore.
Spring Cleaning and Decluttering in the UK: Psychological Benefits for Enhanced Well-Being
The physical act of spring cleaning and decluttering in the UK extends beyond mere organization; it also offers numerous psychological benefits that can significantly enhance your overall well-being.
The Mental Health Advantages of a Clean and Organized Space
A clean and organized home can profoundly impact mental health. Research indicates that living in a cluttered environment can lead to heightened levels of stress and anxiety. In contrast, maintaining a tidy space fosters a sense of calm and control, contributing to overall emotional well-being.
During spring cleaning and decluttering in the UK, the act of decluttering can also serve as a form of mindfulness. This process allows you to focus on the present moment, diverting your attention from external stressors.
Moreover, the sense of accomplishment derived from organizing your home can enhance your self-esteem and confidence. Each completed task reinforces the notion that you can create a positive environment, leading to increased motivation in other areas of your life.
By recognizing the mental health benefits of a clean and organized home, you can approach your spring cleaning and decluttering in the UK as a beneficial practice for both your physical environment and mental state.
Enhancing Focus and Productivity Through Decluttering
Decluttering your space during spring cleaning and decluttering in the UK can significantly improve focus and productivity. When surrounded by clutter, concentrating on tasks can become challenging due to various distractions. Conversely, a clean and organized environment promotes clarity and enhances your ability to focus on what truly matters.
You can establish boundaries that support productivity by creating designated areas for work and relaxation. For example, a clutter-free home office can boost efficiency and creativity, while an organized living space can promote relaxation and downtime.
Additionally, the decluttering process can stimulate mental clarity. As you sort through your belongings, you may uncover insights about your preferences and priorities, leading to a more intentional approach to spending your time and energy.
By embracing the focus and productivity benefits of decluttering, you can transform your spring cleaning and decluttering in the UK into a powerful tool for enhancing your daily life.
Creating a Calming Environment Through Effective Spring Cleaning
As you engage in spring cleaning and decluttering in the UK, consider how the process can create a calming environment. A clean home can serve as a sanctuary from the chaos of the outside world, promoting relaxation and tranquility.
Incorporate elements that enhance the soothing qualities of your environment. For instance, consider adding plants to improve air quality and create a sense of nature indoors. Soft lighting and calming colors can establish a peaceful atmosphere, making your home a refuge.
During the cleaning process, assess your decor and belongings. Choose to keep only those pieces that resonate with you and contribute to a sense of calm. This mindful approach can create a more harmonious environment, allowing your home to provide comfort and relaxation.
By creating a calming atmosphere during your spring cleaning and decluttering in the UK, you can enhance your overall well-being and make your home a true haven.
Spring Cleaning and Decluttering in the UK: Encouraging Family and Community Involvement
Involving family members and your community in your spring cleaning and decluttering in the UK can transform the process into a more enjoyable and meaningful experience. By collaborating, you can foster a sense of camaraderie and shared responsibility while achieving a cleaner environment.
Engaging Family Members in Spring Cleaning: Effective Tips and Strategies
Getting your family involved in spring cleaning and decluttering in the UK can simplify the task and add an element of fun. Start by assigning age-appropriate responsibilities to each family member. For younger children, simple chores, like picking up toys or sorting laundry, can instill a sense of responsibility.
Consider turning cleaning into a game by setting a timer and challenging family members to see who can complete their tasks the fastest. This approach can generate excitement and motivation, making the process feel less like a chore.
Additionally, offering incentives can encourage participation. You might reward your family with a fun outing or a special treat after completing the cleaning tasks, fostering teamwork and creating positive associations with cleaning and organization.
By involving your family in your spring cleaning and decluttering in the UK, you can cultivate a more harmonious household while achieving a clean and organized home.
Participating in Community Clean-Up Initiatives: Joining Local Efforts
Engaging in community clean-up initiatives is an excellent way to contribute to the local environment while participating in spring cleaning and decluttering in the UK. Many communities organize events where residents unite to clean up parks, streets, and public areas, fostering a sense of unity and pride.
Joining these initiatives benefits your community and provides a fantastic opportunity to connect with neighbors. Collaborating towards a common goal can strengthen community bonds and promote a shared sense of responsibility for the environment.
Research local organizations or community groups that host clean-up events and consider participating as a family. Your involvement can inspire others to take action, creating a ripple effect of positive change in your neighborhood.
By engaging in community clean-up efforts, you can contribute to the well-being of your surroundings while enhancing your experience of spring cleaning and decluttering in the UK.
Teaching Children the Value of Cleaning and Organization
Instilling the importance of cleaning and organizing in children during spring cleaning and decluttering in the UK can foster lifelong habits that benefit them and their future households. Begin by involving them in the process from a young age, making it a family affair.
Explain the advantages of a clean, organized space in terms they can grasp. For younger children, highlight how a tidy room makes it easier to locate their toys or how a clean kitchen is crucial for preparing healthy meals.
Encourage children to take ownership of their spaces. Assign them specific tasks, such as maintaining the tidiness of their rooms or organizing their toys. Acknowledging their efforts and celebrating their accomplishments can motivate them to uphold these habits.
By teaching children the significance of cleaning and organizing, you equip them with essential life skills that will serve them well as they mature, making your spring cleaning and decluttering in the UK a valuable learning experience.
Frequently Asked Questions
What is the best time to start spring cleaning in the UK?
The ideal time to initiate spring cleaning in the UK is typically March or April when temperatures rise, making it perfect to open windows and refresh your home.
How often should I deep clean my home?
It’s advisable to conduct a deep clean of your home at least once per season, but a thorough spring cleaning can lay the groundwork for regular maintenance throughout the year.
Are there natural products I can use for cleaning?
Absolutely! Natural ingredients like vinegar, baking soda, and essential oils serve as effective and eco-friendly alternatives to harsh chemical cleaners.
What should I do with items I no longer need?
Items you no longer need can be donated, sold, or recycled. Explore local charities or online platforms for selling unwanted belongings.
How can I involve my children in spring cleaning?
Engage your children by assigning them age-appropriate tasks, making it fun, and rewarding their contributions to instill a sense of responsibility.
What is the KonMari Method?
The KonMari Method, devised by Marie Kondo, encourages keeping only items that spark joy, fostering a more meaningful and organized living space.
How can I maintain a clutter-free home after spring cleaning?
To maintain a clutter-free home, establish a regular cleaning routine, apply a ‘one in, one out’ policy, and routinely evaluate your belongings.
What eco-friendly cleaning tips can I follow?
To reduce your environmental impact, use natural cleaning products, minimize waste by donating or recycling items, and creatively repurpose old belongings.
What psychological benefits does cleaning offer?
Cleaning can alleviate stress and anxiety, enhance focus and productivity, and create a calming atmosphere, positively influencing your mental health.
How can I find community clean-up events?
Look for announcements about upcoming clean-up initiatives in your area on local community boards, social media platforms, or organizations.
Join us on Facebook!
The Article: Spring Cleaning in the UK: Your Ultimate Clearance Guide Was First Found @ https://birminghamhouseclearance.com
The Article Spring Cleaning Guide: The Ultimate Clearance Tips for the UK Was Found On https://limitsofstrategy.com
-

Power-Washing Myths
The Mysterious World of Power-Washing Myths
Power-Washing Myths. In a world where cleanliness is often equated with divinity, power-washing has become the superhero of cleaning techniques. The sight of a high-power-water jet removing dirt and grime from surfaces is undeniably satisfying, but amidst this gratification is a web of myths and misconceptions that can lead you astray.
This article aims to dispel the power-washing myths buckle up, as we embark on a journey that separates fact from fiction and equips you with the knowledge you need to make informed decisions about your power-washing efforts.
The Power of Knowledge about Power-Washing Myths
Before we start debunking these Power-Washing Myths, let’s make it clear why it’s imperative to do so. Power-washing isn’t just a mundane chore, it’s an investment in the longevity and aesthetics of your property. Believing Power-Washing Myths can lead to costly mistakes and unnecessary hassles, and we’re here to save you from that fate.
But why the urgency?
Demand for power-washers has skyrocketed in recent years, and home and business owners have realized the value of a clean exterior. In this age of instant gratification, misinformation can spread like wildfire. To make sure you don’t fall for these power-washing myths, we’re here with a sense of urgency.
Top 5 Power-Washing Myths
Our journey through the world of power-washing myths begins with the five most common misconceptions:
Myth #1: High power means better cleaning
-
Debunking Power-Washing Myths #1
This myth suggests that the higher the pressure, the better the cleaning results. Many people believe that maximum power will remove all stains and dirt, but the reality is not so simple.
- The truth about power-settingsPower-washing is not a one-size-fits-all solution. Excessive power can damage delicate surfaces and even push water into places it shouldn’t be. In the next section, we’ll go into more detail about how to set the right power for each job.
Myth #2: All Surfaces Are Good
-
Debunking Power-Washing Myths #2
Some people believe that power washing can be used on any surface without consequences. After all, it’s just water, right? Wrong.
- Surface-specific guidelines The truth is that every surface requires a different method. What works for your concrete driveway may not be right for your delicate wood deck. We’ll explain these surface-specific guidelines in more detail shortly.
Myth #3: Home power-washing is foolproof
-
Debunking Power-Washing Myths #3
DIYers may think that power-washing is an easy task that can be done on a sunny weekend, but it’s not all sunshine and rainbows.
- When to call in a professional We explain when professional power-washing is not just a luxury, but a necessity. Knowing when to call in an expert can save you from making costly mistakes.
Myth No. 4: Power-washing solves all stains
-
Debunking Power-Washing Myths #4
This myth suggests that power-washing is a magic wand that can remove all stains and surface imperfections. Unfortunately, it’s not so miraculous.
- Alternative stain removal techniques At HouseWash, PA, we present alternative methods and products for tough stains that can’t be removed by power washing alone.
Myth #5: Power-washing is environmentally friendly
-
Debunking Power-Washing Myths #5
Some claim that power-washing is an environmentally friendly cleaning method. After all, it’s just water, right? Not so fast.
- Environmentally friendly power-washing practices We highlight the environmental impact of power-washing and give tips on how to minimize your environmental footprint when cleaning.
Next stop: The science of power-washing
Now that we’ve debunked these power-washing myths, it’s time to explore the science behind power-washing. Understanding how it works will help you use this cleaning technique effectively and responsibly. In the next section, we’ll explore the intricate mechanisms that make power-washing such a powerful tool.
Watch for our next section, ” The Science of Power-Washing,” a journey you won’t want to miss as we reveal the secrets behind the water jet.
The 5 biggest power-washing myths
Separating Fact from fiction: Your Guide to debunking power-washing myths
Welcome back to our journey through the world of power-washing myths. In our last post, we uncovered the top five power-washing myths that have shrouded this cleaning technique in mystery. Now, let’s dig deeper into each myth and explore the truths lurking beneath the surface.
Myth #1: High power means better cleaning
Debunking Power-Washing Myths #1
Contrary to popular belief, the world of high-power-cleaners is not a place where “Might Makes Right”. Here’s why:
- Fact: Excessive power can wreak havoc on surfaces, stripping paint, damaging wood and even denting softer materials. The key is to find the right balance between power and efficiency.
- The truth about power settings: Optimal power depends on the job. Delicate surfaces, such as wood siding, require less pressure, while concrete driveways can withstand more force. Always consult your power-washer’s manual.
Myth #2: All Surfaces Are Good
Debunking Power-Washing Myths #2
Not all surfaces can withstand the relentless power of the power-washer. Here’s the explanation:
- Some surfaces are not suitable for this cleaning method, and ignoring this fact can lead to costly damage.
- Surface-specific guidelines: Before you turn on the power-washer, know what surfaces you’re dealing with. Consult experts or the manufacturer’s guidelines to determine if power-washing is safe and effective for your particular job.
Myth #3: Home power-washing is foolproof
Debunking Power-Washing Myths #3
If you think power-washing is a do-it-yourself project, think again:
- Power-washing may look simple, but it’s far from safe: mishandling the equipment or improper techniques can lead to property damage or injury.
- When to call in a professional: It’s important to know your limits, so if you’re unsure of your ability to power-wash safely and effectively, use professional services that have the experience and equipment to do the job right.
Myth #4: Power-washing solves all stains
Debunking Power-Washing Myths #4
Don’t fall into the trap of believing that power-washing is a magic wand that removes stains:
- Reality: While power washing can remove many stains and dirt, it is not a universal solution. Stubborn stains, such as oil or rust, often require additional treatment.
- Alternative stain removal techniques: Learn about specific techniques and products for each stain. From chemical cleaners to scrubbing, there are several methods for removing stubborn stains. We will explain these alternatives in more detail shortly.
Myth No. 5: Power-washing is environmentally friendly
Debunking Power-Washing Myths #5
Is power-washing as environmentally friendly as some people claim? Let’s find out:
- The fact: power-washing uses water and the wastewater may contain pollutants and, depending on the detergents used, is not always environmentally friendly.
- Green practices in high power-washing: We look at how to minimize the environmental impact of high power-washing, from the choice of environmentally friendly cleaning products to their proper disposal.
Dismantling the truth
Now that we’ve dispelled power-washing myths, you can make informed decisions. Power-washing is a powerful tool, but like any tool, it requires understanding and responsibility.
In our next section, we’ll delve into the science behind power-washing. Understanding how it works will help you use this cleaning technique effectively and responsibly. Join us in the next section, “The Science of Power-Washing,” where we’ll uncover the secrets behind spraying and the physics that make it possible. It’s a journey that promises to demystify the magic of power-washing, so stay tuned!
The science of power-washing
Unlocking the secrets of the water jet: The science of power-washing
Welcome to the third part of our journey into the world of power-washing. In the previous sections, we’ve dispelled common misconceptions and explored the practical aspects of this cleaning technique. Now it’s time to dive into the heart of power-washing: the science that makes it possible.
The power of water and power-washing
At its core, power-washing uses the powerful combination of water and pressure, and understanding the science behind these elements is key to mastering this cleaning technique.
- The cleaning power of water: Water is an excellent solvent capable of dissolving a variety of substances and, under pressure, can remove dirt, grime, and even paint from surfaces.
- The role of pressure: power-boosts the cleaning power of water, propelling the water jet and ensuring thorough cleaning. However, as we have already mentioned, too much power can also be harmful.
The mechanics of a power-washer
To get a good understanding of the science of power-washing, let’s look at the components of a typical power-washer:
- Water inlet: The power-washer is connected to a water source, usually a hose, which supplies the pressurized water for cleaning.
- High-power pump: This pump pressurizes the water, often to a power of over 1000 PSI (pounds per square inch). The power of the pump drives the cleaning process.
- Nozzle: The nozzle is the heart of the power-washer, as it directs the high-power jet to the surface to be cleaned. There are different types of nozzles, each suitable for specific tasks.
- Detergent injector: Some power washers have a detergent injector that allows cleaning solutions to be applied to the surface along with the pressurized water.
The physics of cleaning
Understanding the physics of power-washing is critical to getting the best results and protecting your property.
- Impact and abrasion: The jet of pressurized water hits the surface and dislodges dirt and contaminants. It’s a bit like high-speed sanding but without the abrasives.
- Hydrokinetic: This term describes the way the water jet carries away the dislodged dirt and contaminants. Think of it as a powerful river washing away the dirt.
- The right angle: The optimum angle of attack is crucial. If the nozzle is held too close or too far away from the surface, it can lead to ineffective cleaning or damage.
Safety aspects
As we delve deeper into the science, it is important to emphasize safety:
- Eye and hearing protection: The high-power-jetting can throw dirt backward, so always wear safety glasses and, in some cases, hearing protection.
- Proper clothing: Do not underestimate the force of the water and wear clothing that covers your skin to avoid injury.
- Stability: Make sure you have a secure foothold to avoid accidents, especially when working on elevated surfaces.
Next stop: Equipment and safety
Now that you know the science behind spraying, you’re better prepared to use your power washer effectively. But knowledge alone isn’t enough; you also need the right equipment and safety measures.
In our next section, Choosing the Right Power-Washer and Safety Precautions, we’ll look at the equipment options and key safety practices that will ensure your power-washing job is effective and safe. Join us on the road to becoming a power-washing pro!
Equipment and Safety
Choosing the Right Power-Washer and Safety: The Basics of Effective Power-Washing
Welcome back to our exploration of power-washing. In previous sections, we’ve debunked the myths, explored the science, and discussed the mechanics of this cleaning technique. Now it’s time to focus on the equipment you need and crucial safety measures.
Choosing the right power-washer
Choosing the right power-washer is the cornerstone of a successful power-washing project, and here’s what you need to know:
Types of power-washers
There are primarily two types of power-washers: electric and gas-powered, each of which has its advantages and special features.
- Electric power-washers: are usually smaller, lighter, and quieter, and are ideal for small jobs such as cleaning vehicles and decks.
- Gas power washers: These units have more power and are suitable for larger, tougher jobs, and offer more mobility since they are not plugged into an electrical outlet.
Consider PSI and GPM
When choosing a power-washer, look at two important specifications:
- PSI (pounds per square inch): measures the power of the water the machine delivers. A higher PSI is suitable for tougher cleaning jobs, while a lower PSI is safer for delicate surfaces.
- GPM (gallons per minute): GPM indicates water flow rate; a higher GPM covers a larger area more quickly but may consume more water.
Nozzle Selection
As discussed in the previous sections, nozzles play an important role in directing the spray pattern. Different nozzles produce different spray patterns, so have a selection on hand for different tasks.
Safety Precautions
Safety should always come first when power-washing, and here are some important precautions to keep in mind:
Protective equipment
- Eye protection: Wear safety glasses to protect your eyes from flying debris.
- Hearing protection: If the power-washer is particularly noisy, wear hearing protection to prevent hearing damage.
- Proper clothing: Wear long sleeves, long pants, and closed-toe shoes to protect your skin from the power-washer.
Stability and balance
- Stability: Make sure you have good footing, especially when working on uneven or elevated surfaces. Slippery conditions can lead to accidents.
- Ladder safety: If you must use a ladder, make sure it is securely fastened and on a level surface. Do not overstretch; reposition the ladder if necessary.
Correct handling
- Nozzle control: Always aim the nozzle so that it is not pointed at you or at other people, as accidental spraying can cause injury.
- Distance: Keep a safe distance from the surface to be cleaned; start at a greater distance and gradually move closer if necessary.
Electrical Safety
- Extension cords: When using an electric power-washer, use extension cords suitable for outdoor use and make sure they are adequate for the power of the power-washer.
- Grounding: Make sure the power washer is properly grounded to prevent electric shock.
Next stop: Do-it-yourself vs. professional services
Now that you know the proper equipment and key safety precautions, you need to decide whether you want to tackle power-washing as a do-it-yourself project or turn to professional services.
In the next section, Home Washing and Hiring a Professional, we’ll discuss the pros and cons of both approaches to help you make an informed decision based on your specific needs. Join us on our journey to becoming home-washing experts
DIY power-washing vs. hiring a professional power-washer
The decision: to do it yourself or not to do it yourself
Welcome back to our journey through the world of power-washing. In the previous sections, we’ve dispelled myths, explored the science, discussed equipment, and highlighted safety. Now it’s time to make a decision: take power-washing into your own hands or call in the pros? Let’s dive into the pros and cons of both approaches.
Self-washing on your own
Advantages of power-washing
- Cost-effectiveness: If you do the power-washing yourself, you’ll save money on labor.
- Convenience: You can complete smaller projects at your own pace, with no scheduling issues.
- Instant access: You have instant access to your power-washer whenever you need it.
Disadvantages of do-it-yourself power-washing
- Learning curve: Effective use of a power-washer requires a learning curve, and improper use can cause damage.
- Time-consuming: Large projects can be time-consuming, especially if you are inexperienced.
- Risk of damage: Do-it-yourselfers are more likely to make mistakes that can lead to surface damage or injury.
Hire professional cleaners
Advantages of hiring professionals
- Expertise: Professionals have the knowledge and experience to effectively deal with different surfaces and stains.
- Time savings: Professionals work efficiently and complete projects faster than do-it-yourselfers.
- Safety: They place great importance on safety and reduce the risk of accidents or damage.
Disadvantages of hiring professionals
- Cost: Professional services come at a cost, which can be higher for larger projects.
- Scheduling: You may have to wait to schedule an appointment, especially during peak season.
- Less control: You have less control over deadlines and the cleaning process.
The right choice
When should you do it yourself?
- Smaller projects: DIY is suitable for smaller jobs, such as cleaning a patio, deck, or car.
- Experience: If you have experience with power-washing and are confident in your skills.
- Budget constraints: When budget is an important consideration.
When should you hire a professional?
- Large projects: For extensive projects such as cleaning entire homes or commercial properties.
- Inexperience: When you are unsure about power-washing or dealing with difficult stains.
- Time Sensitivity: when time is of the essence and the job must be done quickly.
Frequently Asked Questions about Professional Power-Washing and Do-It-Yourself Power-Washing
Q1: How do I determine the right approach for my project?
A1: Consider the scale, complexity, and your experience. Smaller, simpler tasks are often suitable for do-it-yourselfers, while larger or more complicated projects may benefit from professional expertise.
Q2: Can I rent professional cleaning equipment for DIY jobs?
A2: Yes, you can rent high-quality power washers, but you must know how to use them safely and effectively to avoid damage or injury.
Q3: Do professionals use environmentally friendly methods and products?
A3: Many professional cleaning services offer environmentally friendly options, so ask about the methods and products they use.
Q4: What is the difference in cost between professional and do-it-yourself power-washing?
A4: Costs vary greatly depending on the size and location of the project. Do-it-yourself is usually cheaper up front, but professional services can offer better results in the long run.
Next stop: Case studies
Now that you’ve thought about whether you’d prefer to handle power-washing yourself or hire a professional, it’s time for our next section: case studies. We’ll look at success stories and real-world experiences to give you a better understanding of what to expect from your power-washing projects.
Join us as we explore these case studies and continue our journey towards mastering the art of power-washing
Power-washing myths Case studies from the field
Unleashing the power of power-washing: Real-life success stories
Welcome back to our journey through the world of power-washing. We’ve covered a lot in the previous sections, from debunking myths to exploring the science, the equipment, the safety measures, and the decision-making process between DIY and professional services. Now it’s time to dive into the real world and discover how power-washing has transformed properties and solved real challenges.
Case Study #1: Revitalizing the driveway
The problem: A homeowner, let’s call her Sarah, had a driveway that had seen better days. Years of tire marks, oil stains, and dirt had left it looking worn and neglected.
The solution: Sarah decided to tackle the project herself with a rented power-washer. She chose a mid-range model with a gas engine and carefully followed safety guidelines. With the right nozzle and detergent, she washed the driveway in a weekend.
The result: The result was remarkable: the driveway was no longer dirty and stained, but looked almost new. Sarah was delighted with the result, and her neighbors couldn’t believe the difference. With this DIY project, she saved money and improved her home’s curb appeal.
Idea clave: For small projects such as driveways, do-it-yourself power-washing can offer impressive results, as long as best practices and safety precautions are followed.
Case Study #2: The Storefront
The problem: A local business owner, Mr. Anderson, faced a major challenge: the exterior of his storefront had been covered in dirt and grime for years, scaring away potential customers.
The solution: Mr. Anderson recognized the need for professional intervention and hired a reputable cleaning service, which examined the building’s surface and used a combination of low-power-cleaning and environmentally friendly cleaning agents to thoroughly clean the facade.
The result: the transformation was simply stunning. The once dull facade now shone in the sunlight, attracting new customers and revitalizing Mr. Anderson’s business. The investment in professional high-power washing was well worth it, and the clean facade continued to make a positive impression on passersby.
Conclusion: For large commercial projects where appearance is important, professional power-washing is the right choice, as it not only improves aesthetics but can also boost business.
Case Study #3: The Wood Deck Dilemma
The problem: John, owner of a beautiful wooden deck, faced a problem: over time, his deck had become covered with algae, mold mildew, and stains from outdoor gatherings.
The solution: John opted for a do-it-yourself approach, as he had experience with a power washer, chose a mid-range electric power washer, used a low PSI level to protect the wood, used an environmentally friendly deck cleaner and carefully followed the manufacturer’s instructions.
The result: the transformation was amazing. John’s wood decking regained its natural beauty and the wood grain was once again visible. He was able to save money by taking on this project himself and enjoyed his new outdoor space.
The bottom line is that for wood surfaces such as decks, do-it-yourself power-washing can be a cost-effective way to renew their appearance – you just need to use the right equipment and apply the right techniques.
Learning from real-life success stories
These case studies demonstrate how well power-washing works in practice: whether a homeowner is sprucing up their driveway, a business owner is beautifying their facade, or a DIYer is restoring a wooden deck, power-washing has proven its effectiveness time and time again.
To conclude these stories, we move on to our next section, Conclusion and Next Steps, where we summarize our journey and suggest concrete steps you can take to take your power-washing knowledge to the next level. Join us for the final leg of this adventure!
Conclusion and recap of power-washing myths
Mastering the Art of Power-Washing: Your Journey to Clean Success
Over the course of seven articles, we’ve debunked myths, explored the science, discussed equipment and safety measures, made the decision between DIY and professional services, and even shared real-life success stories.
Reviewing our journey through Power-Washing Myths
Let’s take a moment to recap the valuable insights you’ve gained:
1. Introduction: The mysterious world of power-washing myths
- We have shown the importance of separating power-washing myths from fact and highlighted the urgency of doing research.
2. Top 5 power-washing myths
- We debunked common power-washing myths such as power-washing being suitable for all surfaces and the idea that power-washing is foolproof for DIYers.
3. The science of power-washing
- We look at the physical basics of power-washing and explain how water, power, and mechanics work together to achieve a clean surface.
4. Equipment and safety
- We examine choosing the right cleaning machine and key safety precautions for successful and safe cleaning.
5. DIY power-washing vs. hiring a professional power-washer
- We analyze the pros and cons of DIY or hiring professional services and help you make the right decision for your projects.
6. Real-life case studies
- We’ve uncovered the transformative power of power-washing through real-life success stories ranging from redesigning driveways to revitalizing storefronts.
7. Conclusion and summary of power-washing myths (it’s here!)
- We wrap up our journey with a summary of what we’ve learned and a final conclusion.
Conclusion: Your Path to Cleaning Success
Power-washing is an art, a science, and a skill that can revitalize surfaces, improve property aesthetics, and even boost business. With the knowledge, safety expertise, and insights gained from real-world case studies, you’ll be well-equipped to tackle your power-washing projects with confidence.
Remember, whether you tackle a task yourself or opt for the services of a professional, the key is to understand your needs and the surfaces you are dealing with and follow best practices.
We hope this journey has helped you make informed decisions and inspired you to take advantage of the full potential of power-washing.
Thank you for joining us in exploring Power-Washing Myths
We thank you for joining us on this interesting journey through power-washing myths and hope you have enjoyed exploring the world of power-washing myths as much as we have enjoyed guiding you through it.
If you are ever faced with a power-washing project or are simply looking for more information on this cleaning technique, you know where to turn.
Stay tuned for more informative and engaging content on a variety of topics, and until then, I wish you that your power-washing efforts always lead to clean success!
Call House Wash PA at 484-881-2713 today!
The post Power-Washing Myths first appeared on The Marketing Tutor.
The Article Power-Washing Myths First Appeared ON
: https://ad4sc.com -
-
Soft Washing VS Power Washing
Soft Washing VS Power Washing
The Art of Soft Washing: gentle and effective household cleaning
Knowing when to choose between Soft Washing VS Power Washing is of great importance in maintaining the exterior of your home is important not only for its aesthetics but also for its overall longevity. Over time, dirt, grime, and algae can build up on the surfaces of your home, so regular cleaning is a necessity. There are two popular methods for cleaning your home’s exterior: soft cleaning and high-pressure cleaning. In this article, you’ll learn more about the art of soft washing, its advantages, and why it’s often the best choice for home cleaning.
What is soft washing?
Soft washing is a cleaning technique that uses low-pressure water combined with special cleaning solutions to safely and effectively clean various surfaces in your home. Unlike high-pressure cleaning, which uses high-pressure water to remove dirt, soft washing is a gentler method. It is especially suitable for delicate surfaces such as roofs, siding, and decks.
Advantages of soft washing
Damage prevention: Soft washing minimizes the risk of damage to the exterior surfaces of your home. Pressure washers can cause unwanted damage, such as paint chipping, dented siding, or peeling shingles. Gentle cleaning, on the other hand, uses a low-pressure jet that is gentle enough not to cause damage but effectively removes dirt, algae, and other contaminants.
Long-lasting results: The cleaning solutions used in soft washing not only remove visible dirt but also treat the causes of stains and discoloration. They penetrate deep into surfaces and remove mildew and algae at the source. This ensures a thorough clean that lasts longer and keeps your home looking fresh and cared for.
Eco-friendly approach: Soft washing is an environmentally friendly option compared to power washing. The special cleaning solutions used in soft washing are biodegradable and safe for plants, pets, and the environment. In addition, the use of low-pressure water means less water is wasted, making it a sustainable solution for household cleaning.
Versatile cleaning: Soft washing can effectively clean a wide variety of surfaces. Whether you need to clean the roof, facade, patio, or even delicate surfaces such as windows and solar panels, the soft wash can be adapted to the materials in question. It ensures thorough cleaning without leaving damage or streaks.
Soft washing process
Soft washing involves a systematic process to ensure thorough cleaning. The following are the main steps usually followed in a soft washing process:
Inspection – A professional soft wash service begins by assessing the condition of your home’s exterior surfaces. This identifies problem areas, such as stains, mildew, or discoloration, and determines the appropriate cleaning solution for each surface.
Pretreatment: Before applying the cleaning solution, loose dirt is gently removed with a brush or low-pressure water. This step prepares the surfaces for optimal cleaning and allows the cleaning solution to penetrate deeply.
Application of the cleaning solution: The cleaning solution, specially formulated for gentle cleaning, is applied to the surfaces with a low-pressure sprayer. The solution should be left on for a certain amount of time, usually the time recommended by the manufacturer, to ensure thorough cleaning and removal of contaminants.
Rinsing: Once the cleaning solution has had time to work, the surfaces are rinsed with a low-pressure water sprayer. Rinsing removes remaining contaminants and cleaning solution residue, leaving a clean, fresh exterior.
Aftercare: In some cases, an after-treatment step may be performed to provide additional protection or aesthetic enhancement to the surfaces. This step helps maintain the cleanliness and longevity of the cleaned surfaces.
In conclusion
Soft washing is a gentle, effective, and environmentally friendly method for cleaning the exterior surfaces of your home. Using low-pressure water and special cleaning solutions, soft washing provides thorough cleaning without damaging delicate surfaces.
The advantages of the soft wash process include damage prevention, longevity of results, environmental friendliness, and versatility in cleaning a wide variety of surfaces. With a systematic soft washing process, professionals provide a thorough cleaning and rejuvenate the appearance of your home’s exterior. Consider soft washing as a safe and effective way to maintain the cleanliness and longevity of your home while preserving its aesthetics.
Power Washing: A Dynamic Solution for Deep Cleaning Your Home
A clean and well-maintained exterior of your home is crucial to its overall appearance and longevity. Over time, dirt, mold, mildew, and other contaminants can build up on surfaces and cause your home to look dull and unattractive. When it comes to thoroughly cleaning the exterior surfaces of your home, power washing is a dynamic and effective solution. In this article, you’ll learn more about the world of power washing, its benefits, and why it’s a popular choice for homeowners looking to deep clean their homes.
What is power washing?
Power washing is a cleaning method that uses high-pressure water to remove stubborn dirt, mold, mildew, and other contaminants from surfaces. It involves the use of a powerful machine that pressurizes water and produces a powerful jet that effectively loosens and washes away accumulated dirt. Power washing is suitable for a wide variety of surfaces, such as driveways, walkways, fences, patios, and concrete walls.
Advantages of Power Washing
Deep cleaning: power washing is extremely effective for deep cleaning of exterior surfaces. High-pressure water jetting has the power to remove tough stains, mildew, and years of grime that are difficult to remove with other cleaning methods. It can rejuvenate the look of your home by restoring surfaces to their original condition.
Time-saving: Power Washing is a fast and effective cleaning solution. The powerful water jet allows for faster cleaning than traditional cleaning methods. With high-pressure cleaning, you can clean larger areas in less time, making it the ideal choice for homeowners who value efficiency and convenience.
Versatility: Power Washing is a versatile cleaning method that is suitable for a variety of surfaces. Whether you need to clean your driveway, patio, deck, or even the exterior walls of your home, power washing can handle any job. It can remove oil stains, dirt, algae, and even graffiti, making it a complete solution for a wide range of cleaning needs.
Preparation for painting or staining: If you plan to paint or stain the exterior of your home, power washing is a great way to prepare surfaces. By removing dirt, flaking paint, and other contaminants, power washing provides a clean, smooth surface that ensures better paint or stain adhesion and improves the overall appearance.
Cost-effective maintenance: Regular power washing can help prolong the life of your home’s exterior surfaces. By removing dirt, mold, and mildew that can deteriorate over time, power washing helps maintain the integrity of materials such as wood, concrete, and vinyl. This can save you money on costly repairs or premature replacements.
The Power Washing process
Power washing involves several steps to ensure effective and safe cleaning. Below is an overview of the power washing process:
Inspection: Before you begin power washing, you should inspect the surfaces to be cleaned. This will allow you to identify any problem areas, such as delicate surfaces, loose paint, or areas requiring special attention.
Preparation: Clear the area of any items that may be damaged or interfere with the cleaning process. This includes patio furniture, potted plants, and outdoor decorations. Cover delicate plants or areas that should not get wet with plastic sheeting or tarps to protect them during the cleaning process.
Equipment and safety precautions: Wear protective clothing such as goggles, gloves, and non-skid footwear. Familiarize yourself with the pressure washer controls and adjust the pressure according to the surface to be cleaned. Higher pressure is suitable for concrete or brick, while lower pressure is recommended for more delicate surfaces such as wood or vinyl siding.
Pretreatment: For stubborn stains or heavily soiled surfaces, pretreatment of the surface with a suitable detergent or cleaning solution may improve the high-pressure cleaning result. Allow the solution to act for a few minutes to loosen the dirt before proceeding with high-pressure cleaning.
Power Washing technique: Keep the jet hose of the pressure washer slightly inclined, about 12 to 18 centimeters from the surface to avoid damage. Guide the hand power washer with even, overlapping up and down movements. Be careful near windows, electrical outlets, and other sensitive areas to avoid water damage or accidents.
Aftercare and maintenance: After washing, check cleaned surfaces to ensure that dirt and stains have been removed. If necessary, clean remaining stains or problem areas. Consider applying a sealer or protective coating to prolong the cleanliness and longevity of surfaces.
Power Washing is a dynamic and effective solution for deep cleaning your home’s exterior surfaces. High-pressure water jetting effectively removes dirt, grime, mildew, mold, and other contaminants and rejuvenates the appearance of your home. It offers time savings, versatility, and cost-effective maintenance, making it a popular choice among homeowners. By following the power washing process and taking the necessary safety precautions, you can restore the beauty of your home’s exterior and ensure its longevity. Consider power washing as a comprehensive cleaning method that will keep your home looking fresh, vibrant, and well-maintained.
Call House Wash PA at 484-881-2713 today!
The post Soft Washing VS Power Washing first appeared on The Marketing Tutor.
The post Soft Washing VS Power Washing appeared first on https://gqcentral.co.uk
The Article Soft Washing VS Power Washing First Appeared ON
: https://ad4sc.com -

Unleash the Power: Essential Home Washing for a Sparkling Sanctuary
Essential Home Washing for a Sparkling Sanctuary
Essential Home Washing for a Sparkling Sanctuary. Imagine: You enter your humble home after a long day, hoping to relax in an oasis of calm. But what is it? Dirty windows, a grimy patio, and a dusty exterior? Don’t worry, the solution is obvious: a thorough house cleaning! Buckle up and get ready for a cleaning adventure that will transform your home into a shining sanctuary. Look forward to the thrill of a thorough cleaning of your home.
Before we get into the details of this cleaning undertaking, let’s take a moment to consider the magnitude of this transformative act. Think of your home as a mighty fortress that defends you from the outside world. But like any warrior, it needs regular care to maintain its splendor. This is where deep cleaning comes in, armed with its trusty allies: Water, detergent, and, of course, a lot of power!
The first thing to do is to fight the best-known enemies of cleanliness: dirt and grime. These sly adversaries lurk in every corner and undermine the beauty of your beloved home. But fear not, because when it comes to pressure washing your home, there’s a secret weapon: an invigorating high-pressure water jet. With a pressure washer, you can unleash a flood of H2O on those stubborn stains and watch them recede. It’s like summoning a water deity to defeat the demons of dirt.
Let us now turn our gaze to the windows, the eyes of the soul of your sanctuary. The view from your spotless windows can lift your spirits and transport you to a world of serenity. But unfortunately, stains and streaks can mar this visual delight. Never fear, dear readers, we have the perfect solution. With an effective home washing routine, you can say goodbye to those unsightly stains. Let the sunlight dance through the crystal clear windows and let the world admire the beauty of your interior.
Ah, the patio: a magical realm where you sip your morning coffee or hold happy gatherings. But over time, this precious space becomes a battleground for dirt and grime. Never fear, pressure washing is here to save the day again. With a powerful pressure washer, you can restore your patio to its former glory. The most stubborn stains will disappear, revealing a rejuvenated outdoor paradise that will beckon you to your next outing.
Speaking of outdoor adventures, let’s not forget the exterior of your castle, which is a testament to its greatness. Mother Nature, in her whimsical way, unleashes a barrage of elements on your noble abode. Fear not, brave homeowner, as pressure washing homes is the key to restoring your exterior to its full glory. Say goodbye to moss, mold, and other unwanted guests that mar the facade of your home. Unleash the power of the pressure washer and watch it drive away these uninvited intruders, leaving behind a majestic exterior that stands proud and tall.
Now that we’re approaching the grand finale of our pressure-washing symphony, let’s address one crucial point: safety. With great power comes great responsibility, and pressure washing is no exception. As you embark on this cleaning odyssey, remember to equip yourself with the necessary protective gear, handle the pressure washer with care and familiarize yourself with its powerful features. Safety first, my friend, to ensure a triumphant and accident-free conquest of the dirt.
In summary, pressure washing is the invigorating solution you’re looking for to restore your home to its former glory. With water, detergent, and a pressure washer, you can defeat the forces of dirt and grime that are trying to pollute your sanctuary. Use the power at your disposal and embark on a cleaning adventure like no other.
But pressure washing is not just a task, it’s an experience, a dance between you and your home. When you operate the pressure washer, you’ll feel the surge of energy coursing through your veins. Let the superhero in you rise up as you spray a powerful stream of water on surfaces in need of renovation. Imagine yourself as the guardian of cleanliness, fighting the forces of decay and leaving a trail of shine in your wake.
And don’t forget the satisfaction you’ll feel when you see the before-and-after picture. Witness the magic unfold before your eyes as dull, worn surfaces are brought back to life. Enjoy the feeling of accomplishment that comes with witnessing the rejuvenation of your sanctuary. Each pass of the pressure washer becomes an artistic brushstroke that paints a picture of cleanliness and serenity.
But the true beauty of pressure washing lies not only in its transformative power but also in the connection it creates between you and your home. When you invest time and effort into cleaning your living space, you develop a deeper appreciation for the place you call your own. Every splash of water becomes a gesture of love and care, strengthening the bond between you and your home.
When you embark on the adventure of pressure washing, explore every nook and cranny, leaving no surface untouched. Take on the challenge of reaching high places, negotiating hard-to-reach corners, and surprise yourself with your own determination. And while the water washes away the dirt, it should also cleanse your spirit and give you a sense of renewal and refreshment that transcends the physical realm.
But, dear reader, housecleaning is not limited to your castle. Extend its reach and give the gift of cleanliness to the environment around you. Share your power with sidewalks, driveways, and fences that yearn for a fresh start. Transform your neighborhood into a shining testament of unity and pride, and inspire a contagious enthusiasm for pressure washing in your neighbors.
So, my brave homeowner, get in on the thrill of pressure washing. Dive into the art of cleaning armed with water, detergent and the power of a pressure washer. Unleash your inner superhero, banish dirt and grime, and watch your home transform into a paradise of shine. It’s time to embark on a journey of transformation, one jet at a time. Embrace the power and make your home shine like never before.
Call House Wash PA at 484-881-2713 today!
The post Unleash the Power: Essential Home Washing for a Sparkling Sanctuary first appeared on The Marketing Tutor.
The post Unleash the Power: Essential Home Washing for a Sparkling Sanctuary appeared first on https://gqcentral.co.uk
The Article Unleash the Power: Essential Home Washing for a Sparkling Sanctuary First Appeared ON
: https://ad4sc.com -

How Should One Get Ready To Clean Their Air Conditioning Ducts?
Air ducts are an important component of the architecture of our homes and places of business. They play an important part in maintaining our body temperature, as well as in supplying us with clean air and enhancing the quality of the air around us. It is essential to ensure that our air ducts are properly maintained and cleaned on a regular basis if we want to guarantee that they function correctly and effectively. We will talk about the significance of air duct cleaning, the steps needed to get ready for it, and the advantages of performing routine maintenance. Therefore, if you are looking for information on how to clean your air ducts, you have arrived at the appropriate location.
How Should One Get Ready To Clean Their Air Conditioning Ducts?
The Importance of Maintaining Clean Air Ducts
It is impossible to overstate the significance of having your air ducts cleaned on a regular basis when it comes to the health and well-being of your family, your home, and your air ducts themselves. A dirty air duct system can lead to various issues, including a decline in the air quality inside the building and increased utility costs. It is essential to have a solid understanding of the steps that must be taken before beginning the process of cleaning air ducts to ensure that the cleaning produces the desired results and to avoid any potential complications.
 When getting ready to clean air ducts, one of the most important aspects of preparation is learning what tools are required and how they will be applied during the cleaning process. While some tools are more general in nature, others have been developed specifically for the purpose of removing dirt and debris from the many different kinds of air ducts. In addition, it is essential to have a solid understanding of the functionality of each tool and the most effective methods for cleaning the various components of an air duct system. If you do this, you will prevent any problems that may arise during the actual cleaning process, and as a result, you will obtain the best possible results.
Aside from avoiding potential problems during the cleaning process itself, proper preparation can also lead to other benefits such as better indoor air quality and lowered energy bills over time. Regular air duct cleaning can help improve overall health in your home by reducing the risks for serious illnesses such as asthma and allergies. This is accomplished by removing contaminants from the system, such as dust, pet dander, mold spores, etc. And last but not least – clean Air Ducts mean happy HVAC systems!
Preparing For Ac Duct Cleaning
Your home’s air conditioning system is one of the most important pieces of equipment that you have. It is the one that is in charge of keeping you cool in the summer and warm in the winter, and it is important to keep it clean so that it can perform at its best. However, many people choose to DIY their ac duct cleaning because AC units are often inaccessible. During the cleaning process, dust mites and other allergens have a good chance of accumulating within the ducts, which is a proposition that can be fraught with potential danger.
It is important to take a step back and identify all the possible dust and debris trapped inside your AC unit to avoid making a mess like this. This will allow you to avoid the mess. This encompasses everything from individual feathers to particles of dirt. After you have a general idea of what needs to be cleaned, it is time to start looking for air vents or air filtration units in the area. These devices allow air to flow freely throughout the unit while removing visible contaminants, simplifying the task.
It is possible that you will require vacuuming equipment of a professional grade if you do not have access to an air conditioning unit or air vents. If you want to keep everyone in your home safe while you work with this equipment, you must take the appropriate safety precautions. And finally, make sure that you have regular tests done on the quality of the air inside your home so that you are aware of any potential issues as soon as they arise. If you follow the advice in this article, you will be able to keep your air conditioning unit in good health and ensure that it operates at its maximum capacity.
Benefits Of Regular Maintenance
There are a lot of reasons why you should perform routine maintenance on your air conditioning system. You can avoid potential problems that might result in the failure of your air conditioning system if you regularly clean and inspect it and give it the attention it deserves. In this section, we will outline the specific benefits of regular ac duct maintenance and provide tips on taking care of your AC system safely and effectively.
The prevention of failure of the system is one of the most significant advantages of performing routine maintenance on the air conditioning ducts. Regular cleaning and inspection of your air conditioning systems will allow you to spot any potential issues as soon as they arise and take corrective action before they lead to more serious complications. This will save you both time and money, reducing the need for repairs and preventing lost productivity.
The quality of the air is also improved when a/c ducts are maintained on a regular basis. Regularly removing debris from your air conditioning systems will prevent the buildup of allergens and other particles that can lead to other respiratory issues. In addition, by ensuring that your air filters are regularly cleaned, you can lessen the amount of dust that is present in the air, which is beneficial for everyone living in your house.
In conclusion, performing routine maintenance on air conditioning ducts results in cost savings in the long run due to avoiding minor repairs that would otherwise be necessary. You can save money in the long run by performing routine maintenance on your air conditioning systems to prevent costly breakdowns or replacements in the future.
How to Decrease the Presence of Allergens Through Air Duct Cleaning
The cleaning of air ducts is an essential procedure that should be performed on a routine basis in all homes. It will help to keep your home clean and free of allergens, and it will also help to reduce the amount of money you spend on your monthly energy bills. In order to properly clean air ducts, it is necessary first to clear the area of any obstructions, such as furniture or other items, then disconnect any electrical components, and then clean the ductwork until there is no visible dust left. In addition, a thorough cleaning procedure ought to be carried out to reduce allergens even more.
The following will provide an overview of the processes involved in cleaning air ducts and some useful advice for minimizing allergen exposure during the process. Make it a point to read the whole article if you want more information on this significant subject!
First and foremost, become familiar with the steps involved in the process of cleaning air ducts.
To begin, it is important to gain an understanding of what the process of cleaning air ducts entails and what steps must be taken in order to achieve the best possible results. This includes moving any furniture or other items that are blocking access, disconnecting any electrical components that may be present, and cleaning the ductwork thoroughly to remove any visible dust that may be present. If one is available, a vacuum cleaner should be used to thoroughly clean all of the surfaces inside and outside the ducts. This should include the vents and ceiling fans. Finally, when cleaning air ducts, make sure to comply with all of the local regulations and safety standards so that you can continue working without risking your health.
The second step is to remove any obstacles, such as furniture or other items.
The next step is to take away any pieces of furniture or other obstacles that are obstructing the flow of air. This can include pieces of furniture that are placed near vents or fans, bulky electronics or appliances that are placed near heating registers or windowsills, and so on and so forth. Before beginning the work of the deep cleaners, make sure that all obstructions have been removed; otherwise, you run the risk of the air quality throughout your home deteriorating, as well as an increase in the severity of allergy symptoms.
Step Three: If it is necessary, disconnect any and all electrical components.
Suppose any electrical components are located close to areas where dirt will likely accumulate (elevators, for example). In that case, you should make sure to disconnect them before beginning your deep cleaning work so that you do not cause damage to them when you remove the dirt in the future. In addition, if there are wires that run through the walls or ceilings (for example, those that power light fixtures), make sure to mark their locations in advance so that the wires can be easily reconnected after the renovation is complete without the need to search for them in a cluttered manner.
Step Four: Using a Vacuum Cleaner, Thoroughly Clean Any Visible Dust in the Ductwork
It is important to remove debris not only from within the walls of a duct, where it can collect over time but also from the exterior surface of the duct, where it can also collect.
To summarise:
Air ducts are an essential component of any building, be it a private residence or a commercial establishment, and it is imperative that they be cleaned and maintained on a regular basis. A successful duct cleaning process requires appropriate planning, the utilization of appropriate tools, and the application of appropriate procedures. In addition, performing routine maintenance can improve the quality of the air we breathe, lower monthly energy bills, and prevent potential issues in the future. Cleaning your air ducts can help reduce allergens in your home, keeping your family protected from potential dangers, and it can be done by following the steps outlined in this blog post.
Find the best ac duct cleaning services in West Hills, Reseda
The Article How Should One Get Ready To Clean Their Air Conditioning Ducts? First Appeared ON
: https://ad4sc.com -

Why Cleaning Your House Regularly Is Important
With our hectic schedules and fast-paced lives, it can be difficult to prioritize everything on our to-do list. From frequent health check-ups to spending more time with family and friends, it’s safe to say that when our work life and other duties keep us on our toes, many vital things in our lives take a back seat. This is unfortunately also true when it comes to cleaning our houses.
While many homeowners attribute their disregard for household cleaning and tasks to a lack of time, others dismiss the necessity of a clean home entirely. The reality is that home cleaning is more than simply keeping your house appearing neat and tidy; there are various advantages to having a clean home that every household member should be aware of! So, let’s get started and consider why cleaning your house should be a top priority for you and your family.
Preventing Illness and Controlling Allergies
Nothing is more essential than our own and our loved ones’ health. While we cannot entirely protect ourselves from every illness or disease that exists, we may take particular preventive actions to lower our chances of being ill. Maintaining a clean and healthy living environment is one such measure. This is due to the fact that if we don’t clean, we don’t sterilize our houses, which raises the danger of illness or disease for all house members. Furthermore, dust is a common cause of colds, coughs, asthma attacks, breathing and respiratory issues, and different allergies. These may be lessened, if not totally avoided, by decreasing dust collection in our homes. As a result, cleaning our homes regularly and thoroughly is critical for maintaining excellent health and hygiene at home.
Reducing Stress
It’s difficult not to feel stressed and disappointed when you enter a dirty and cluttered residence. On the other hand, coming home to a clean and tidy house helps to set your mind at ease because it’s one less thing to worry about. When we neglect home cleaning for extended periods of time, the collection of jobs and cleaning responsibilities accumulates in the back of our brains, increasing our tension. In reality, the sight of a dirty, messy house can cause anxiety in many people. As a result, homeowners with hectic schedules choose to employ a maid to handle domestic tasks and cleaning.
Improving Sleep Quality
It’s usually simpler to go to sleep when we don’t have any undone duties tugging at us. When our houses are neat, we can look around before going to bed without noticing any outstanding responsibilities. This helps us to unwind and relax, resulting in greater quality sleep. When our houses are dusty and untidy, though, it might be difficult to relax and go asleep. So, by keeping our homes clean, we improve not just the aesthetic but also the quality of our sleep.
Increasing Productivity
It is much simpler to focus and be productive when we are surrounded by a clean and ordered environment. This is due to the fact that a clean house equals a clear mind. We can focus on the work at hand when we are not continuously distracted by dirty dishes in the sink or clothing piled up on the floor. Furthermore, by not continually hunting for missing items in a congested environment, we save time and energy that we may then apply to other essential duties.
Boosting Self-Esteem
We care for ourselves when we take care of our houses. A clean and tidy home may increase our self-esteem and make us feel better about ourselves. Living in a messy, chaotic environment may make us feel unorganized and unproductive, lowering our self-esteem. On the other side, taking pleasure in our houses and keeping them tidy may provide us with a feeling of accomplishment and make us feel better about ourselves. Plus, it’s always good to be able to show off our clean and well-maintained houses when we have company around.
Saving Money
Keeping our houses tidy might also save us money over time. When we overlook cleaning and upkeep, tiny problems might grow into larger and more expensive ones. For example, if we do not clean our carpets on a regular basis, they might get soiled and damaged, necessitating costly repairs. Furthermore, if we do not clean and maintain our appliances on a regular basis, they might break down and require costly repairs. We may avoid these problems and save money in the long run by taking care of our houses and keeping them clean.
Selling Your Home
If you intend to sell your house, keep in mind that first impressions are critical. When potential buyers go into a messy, untidy property, it may be a huge turn-off and reduce their prospects of making an offer significantly. When buyers go into a clean and well-maintained property, on the other hand, it might make a favorable impression and enhance their chances of making an offer. So, if you intend to sell your property, maintain it neat and tidy to maximize your chances of a successful sale.
Conclusion
Cleaning our homes is vital not only for the aesthetics of our living space but also for our health, emotional well-being, and even our money. So, the next time you’re tempted to put off household cleaning and tasks, consider the numerous advantages of a clean home and make it a priority. Your house, health, and happiness will all thank you. Cleaning can be time-consuming and labor-intensive, but the advantages are well worth it. We improve not just the beauty of our living space but also our entire well-being by keeping our houses clean and neat. So, let us make cleaning a priority and get the numerous benefits that it provides!
How Professional Cleaners Can Help
Many of us struggle to find the time and energy to clean our houses as frequently as we would like. Perhaps you work long hours, have children who require your time and attention or have physical restrictions that prohibit you from performing the task yourself. Hiring expert house cleaners allow you to get the numerous benefits of a clean home regardless of your schedule or health. Many professional house cleaning services also employ green cleaning products that are healthier for your health and the environment, making them an even better all-around option. Before you engage a house cleaning service, inquire about discounts for signing up for more regular cleaning services.
Brought to You By:
KCS Kitchener Cleaning Services
135 Hardcastle Drive, Cambridge ON N1S 0A6
(647) 760-6357The post Why Cleaning Your House Regularly is Important appeared first on https://soonrs.com
The post Why Cleaning Your House Regularly Is Important appeared first on https://gqcentral.co.uk