Category: Floor Maintenance

Auto Added by WPeMatico

  • Travertine Floor Sealing Guide Every Homeowner Needs

    Travertine Floor Sealing Guide Every Homeowner Needs

    Unlock the Aesthetic and Practical Benefits of Luxurious Travertine Flooring

    Understanding Travertine: Unique Properties of This Exquisite Natural Stone

    Elegant travertine stone with layered structure and natural pockmarks, in creamy beige to deep gold colors.

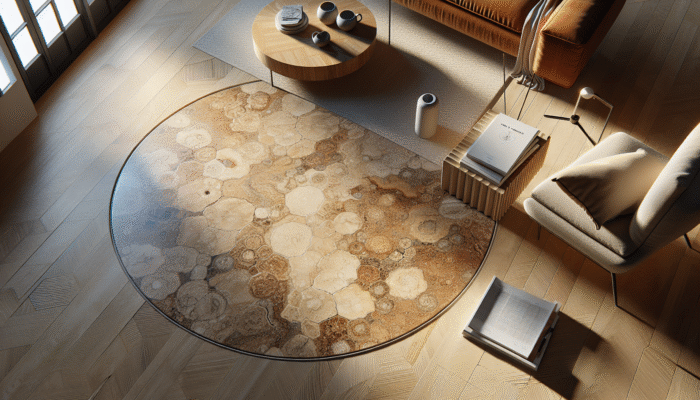
    <a href="https://tilecleaningsurrey.co.uk/tile-care/discover-the-secrets-of-how-professionals-clean-travertine/">Travertine</a> is a remarkable type of limestone that emerges through natural processes involving mineral-rich hot spring waters, primarily composed of calcium carbonate. This stunning stone is celebrated for its distinct layered textures and the charming, naturally occurring pockmarks that enhance its visual complexity. The sophisticated allure of travertine deeply resonates with homeowners and businesses, providing an elegant ambience that is highly sought after throughout the UK. Available in a vast range of colors, from soft creamy beiges to luxurious deep golds, travertine serves as a versatile choice for various interior design aesthetics. Beyond its breathtaking appearance, the impressive durability of travertine makes it an ideal option for high-traffic areas, ensuring that it maintains both beauty and warmth over the years.

    Primarily extracted from natural hot springs located in regions like Italy and Turkey, travertine possesses a unique porous structure that can make it prone to staining if not properly maintained. This reality underscores the vital importance of <a href="https://tilecleaningsurrey.co.uk/tile-care/effective-travertine-tile-cleaning-simple-guide-a-uk-homeowners-essential-tips/">travertine floor sealing</a>, which is essential for preserving its exquisite appearance and structural soundness. By understanding the unique attributes of travertine, homeowners can truly appreciate the necessity of protecting this beautiful material, ensuring it remains an attractive and functional part of their living spaces for many years to come.

    Unveiling the Numerous Advantages of Choosing Travertine Flooring

    Choosing travertine flooring for both residential and commercial environments offers a multitude of benefits that go beyond mere visual appeal. One of the most compelling advantages is its timeless elegance; travertine infuses a sense of sophistication that can enhance the atmosphere of any space. Whether installed in a contemporary apartment in London, a charming countryside cottage, or a sleek modern office, travertine introduces a refined touch that elevates the overall ambiance of the environment.

    Additionally, the exceptional durability of travertine flooring constitutes another significant benefit. Unlike alternative flooring solutions that may warp or crack over time, travertine is engineered to withstand considerable wear and tear, making it an ideal choice for bustling households or high-traffic business venues. Furthermore, its natural thermal characteristics provide excellent insulation, contributing to comfortable indoor climates regardless of external weather, thereby improving overall energy efficiency and comfort within the space.

    Besides its strength, travertine flooring offers remarkable versatility, seamlessly complementing an extensive range of interior design styles, from sleek modern looks to classic traditional themes. Its ability to harmonize with various decorative elements has made it a favored option among architects and interior designers throughout the UK, who appreciate both its adaptability and enduring elegance.

    Identifying Ideal Spaces for Travertine Installation in UK Homes

    Across the UK, travertine is widely embraced by homeowners captivated by its unique qualities for numerous areas within their residences. Living rooms, for instance, greatly benefit from the natural beauty of travertine, which fosters a warm and inviting atmosphere, perfect for family gatherings or entertaining friends. The inherent aesthetic charm of the stone is enhanced by its durability, making it a favored choice for high-traffic zones where resilience is critical.

    Kitchens also represent an excellent application for travertine flooring due to its robust characteristics, providing a solid foundation for the dynamic activities of culinary enthusiasts. Its natural resistance to heat, along with its ability to handle spills and stains, makes it an incredibly practical option for those who love to cook. Moreover, the natural cooling properties of travertine create a pleasant surface to walk on, especially during the warmer summer months, enhancing the overall comfort of the kitchen experience.

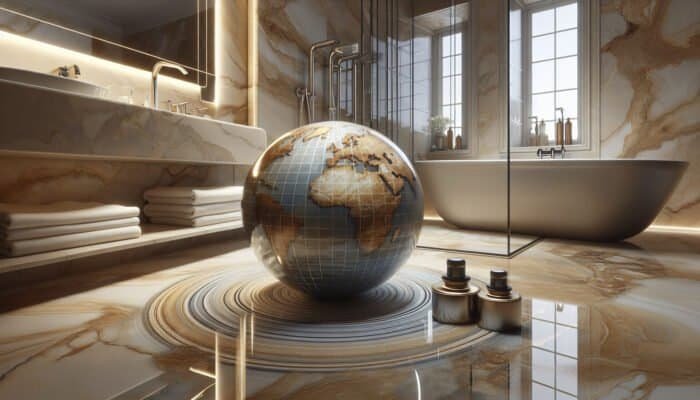
    Bathrooms frequently feature travertine flooring as well, where its elegant presence can transform an ordinary space into a luxurious retreat. When adequately sealed, the stone’s moisture resistance ensures it maintains its pristine condition while contributing to a tranquil and stylish atmosphere. This remarkable versatility has solidified travertine as a top choice for homeowners looking to enhance both the aesthetic and functional aspects of their living spaces.

    Understanding the Critical Importance of Sealing Travertine for Longevity

    Polished travertine tiles with sealant applied, enhancing veining and color in a luxurious bathroom.

    Protecting Travertine from Stains and Discoloration

    The sealing of travertine is crucial for safeguarding against unsightly stains that can emerge from everyday activities. The porous nature of travertine enables liquids, such as red wine, coffee, and oil, to penetrate its surface, potentially leading to irreversible discoloration if not quickly addressed. A high-quality sealant acts as a protective barrier that prevents these substances from seeping into the stone, simplifying the cleaning process and preserving its beauty for years to come.

    In many UK households, where travertine is commonly installed in spill-prone areas, the necessity for sealing cannot be emphasized enough. Homeowners can feel confident knowing that their stunning floors are protected against the challenges posed by daily living. For instance, in a busy kitchen, the likelihood of accidental spills is heightened, making sealing an indispensable step in maintaining the stone’s immaculate appearance and ensuring its durability.

    Moreover, sealing can substantially minimize the need for frequent deep cleaning to maintain travertine floors. By preventing stains from becoming embedded, homeowners can focus on routine maintenance tasks rather than dealing with the aftermath of stubborn blemishes. This not only saves valuable time but also helps protect the investment made in exquisite travertine flooring.

    Extending the Lifespan and Durability of Travertine Flooring

    While the durability of travertine flooring is widely acknowledged, proper sealing further enhances that durability. A suitable sealant adds an extra layer of protection against scratches, chips, and general wear and tear. In areas with heavy foot traffic, where the volume of use is considerable, this added protection becomes essential for maintaining the floor’s appearance and structural integrity over time.

    Sealing also plays a vital role in prolonging the lifespan of travertine floors by reducing damage caused by moisture infiltration. In regions of the UK that experience heavy rainfall, such as the Lake District or various parts of Wales, moisture can cause significant damage to unsealed stone surfaces. In such scenarios, sealing serves as a protective barrier against water damage and mold growth, ensuring that the floor remains in optimal condition.

    In addition, a well-sealed travertine floor can maintain its natural beauty for decades, preserving its original charm and elegance. With the right sealant, homeowners can expect their travertine floors to withstand the rigors of daily life while consistently appearing beautiful and inviting.

    Maintaining the Visual Splendor of Travertine Flooring

    A sealed travertine floor maintaining vibrant colors and patterns, resisting dullness from dirt and wear.

    The aesthetic appeal of travertine flooring is undeniably one of its most captivating features; however, this beauty can fade over time without proper maintenance. Sealing plays a critical role in enhancing and preserving the stone’s natural colors and textures, ensuring that a travertine floor remains visually stunning for years. When effectively sealed, travertine retains its vibrant hues and unique patterns, preventing the dullness that can occur from dirt accumulation and wear over time.

    An unsealed travertine floor can quickly become a breeding ground for grime, leading to a lackluster appearance that detracts from its charm. By investing in travertine floor sealing, homeowners can protect the stone’s beauty while simplifying their cleaning efforts. A sealed floor resists dirt accumulation, facilitating easy maintenance that preserves its aesthetic integrity while enhancing the overall ambiance of the home.

    Additionally, sealed travertine surfaces display a subtle sheen that amplifies their elegance without appearing overly glossy. This natural luster can elevate the overall atmosphere of a room, imparting a more sophisticated and luxurious feel. Homeowners eager to impress guests or create a welcoming environment will find that sealing their travertine is an essential step in showcasing its intrinsic beauty and charm.

    Preventing Moisture Damage to Travertine Floors

    Moisture represents one of the most significant threats to the integrity of travertine flooring. When water penetrates the porous surface, it can lead to a host of problems, including cracks, warping, and the growth of mold and mildew. Such issues not only compromise the aesthetic appeal of travertine but can also jeopardize its structural integrity over time, necessitating costly repairs or replacements.

    Sealing travertine serves as a proactive measure against moisture damage, providing a robust barrier that prevents water from seeping into the stone. Given the damp conditions often encountered in the UK, sealing becomes increasingly crucial for protecting travertine flooring. Properly sealed floors are less likely to suffer from adverse effects associated with humidity and moisture, ensuring durability and longevity for many years to come.

    Furthermore, the benefits of moisture protection extend to the overall health of the home. The growth of mold and mildew can lead to respiratory issues and other health concerns, particularly in confined spaces such as bathrooms or basements. By sealing travertine, homeowners not only protect their investment in beautiful flooring but also promote a healthier indoor environment for their families.

    Simplifying the Cleaning and Maintenance of Travertine Floors

    The practical advantages of sealing travertine are considerable, particularly regarding maintenance. A sealed surface is significantly easier to clean than an unsealed one, as dirt and grime cannot penetrate the stone. This benefit is especially valuable for busy households in the UK, where time for extensive cleaning is often limited.

    With a sealed travertine floor, regular cleaning routines become more efficient. Homeowners can quickly sweep or mop the surface without the fear of scratching or damaging the stone. Liquid spills can be wiped up effortlessly, minimizing the risk of stains and allowing for swift cleanups after everyday accidents or mishaps.

    Moreover, a sealed travertine floor can elevate hygiene levels within the home. Since dirt does not infiltrate the surface, it is less likely to harbor bacteria and allergens, contributing to a healthier living environment. This quality is especially significant in family homes or among individuals with allergies, making travertine floor sealing a wise investment for overall cleanliness and comfort.

    Essential Steps to Prepare Travertine for Effective Sealing

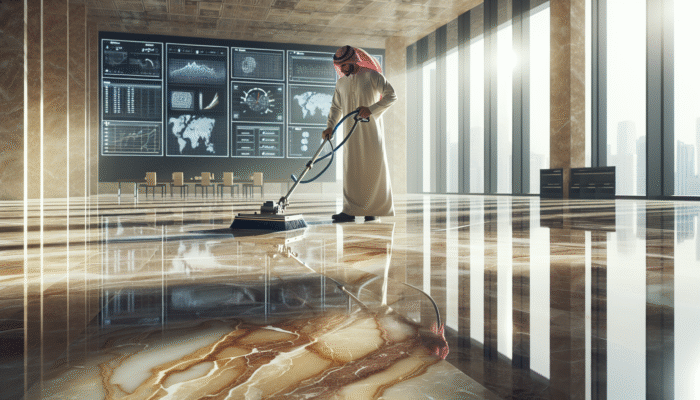
    Performing a Comprehensive Cleaning of the Travertine Surface

    Before undertaking the sealing process, it is crucial to conduct a thorough cleaning of the travertine surface. This initial step ensures that all dirt, dust, and debris are effectively removed, allowing the sealant to adhere correctly. A well-prepared surface is vital; any remnants left behind can compromise the overall effectiveness of the sealant and lead to less than satisfactory results.

    Homeowners should begin by sweeping or vacuuming the travertine floor to eliminate loose dirt and particles. Following this, a suitable stone cleaner should be employed to deeply cleanse the surface, effectively removing ingrained grime and stains. It is essential to select a cleaner specifically formulated for use on natural stone to avoid damaging the travertine during the cleaning process.

    After cleaning, rinsing the surface with clean water is necessary to eliminate any cleaner residue before allowing the travertine to dry thoroughly. This preparation phase is critical for ensuring optimal adhesion for the sealant, setting the stage for a successful sealing process that protects and preserves the beauty of the travertine for years to come.

    Addressing Existing Flaws Before Sealing

    Prior to applying sealant, it is crucial to address any existing damages in the travertine. Cracks, chips, or holes can interfere with the sealing process, leading to uneven coverage and potentially compromising the floor’s integrity. Properly repairing these imperfections not only enhances the travertine’s appearance but also ensures that the sealant provides maximum protection and lasts longer.

    For minor cracks or holes, homeowners can utilize a suitable travertine repair kit, typically containing a resin filler specifically designed for natural stone. Following the manufacturer’s instructions for applying the filler will help achieve a smooth and uniform surface, primed for sealing.

    Additionally, it is advisable to assess the surrounding areas for any loose tiles or pieces of travertine that may require reaffixing. This meticulous attention to detail guarantees a consistent and effective sealing process, allowing homeowners to enjoy the full benefits of their travertine flooring without the concern of hidden imperfections undermining its beauty.

    Choosing the Right Timing for Sealing Travertine Floors

    The timing of the sealing process is crucial for achieving optimal results. Homeowners should ideally select a dry and mild day for sealing, as humidity and extreme temperatures can negatively affect the curing process of the sealant. In the UK, autumn or spring typically provide ideal weather conditions, as these seasons often offer more stable temperatures and lower humidity levels.

    Before commencing the sealing process, it is essential to check the weather forecast to ensure that no rain or significant temperature fluctuations are expected. Applying sealant under less-than-ideal conditions can result in unsatisfactory outcomes, such as incomplete curing or a surface that does not adhere correctly, diminishing the effectiveness of the sealing process.

    Planning ahead and allowing sufficient time for the sealing procedure to be completed without haste is also vital. Rushing through the application can lead to uneven coverage or missed spots, detracting from the overall finish. Taking these factors into account will help ensure a successful sealing experience that enhances both the durability and appearance of the travertine flooring.

    Utilizing Primer for Improved Adhesion of Sealant

    To achieve the best possible results during sealant application, using a primer specifically designed for travertine can significantly enhance adhesion. The primer acts as a bonding agent, ensuring that the sealant adheres properly to the stone surface and provides a more durable finish capable of withstanding daily wear.

    Before applying the primer, it is essential to ensure that the travertine is clean and dry to promote effective adhesion. Using a brush or roller, apply the primer evenly across the surface, paying special attention to seams or joints where moisture may penetrate. Allow the primer to cure according to the manufacturer’s instructions before proceeding with the sealant application.

    This additional step helps create a robust, protective barrier that ultimately extends the lifespan of the travertine and ensures it continues to look beautiful over time. Homeowners who invest the time in applying primer will discover that their sealed travertine floors possess an enhanced level of protection and aesthetic appeal that is well worth the effort.

    Protecting Surrounding Areas During the Sealing Process

    Before starting the sealing process, it is crucial to safeguard the surrounding areas of the home. Sealant can easily splatter or spill onto adjacent surfaces, potentially causing damage or creating unsightly messes that can be challenging to clean. Taking the time to mask off or cover nearby areas ensures a smooth sealing process with minimal unintended consequences.

    Utilizing painter’s tape to cover baseboards, edges, or any adjacent areas to the travertine can provide an effective barrier against sealant. Additionally, employing drop cloths or old sheets to shield furniture and fixtures will protect them from any accidental spills, ensuring they remain unscathed during the sealing process.

    By prioritizing this preparation step, homeowners can focus entirely on the sealing process itself, confident that their home is protected against potential messes. This attention to detail is instrumental in achieving a professional-looking finish that enhances the overall appeal of the travertine flooring.

    Exploring Various Sealant Options for Optimal Travertine Protection

    A Comprehensive Overview of Penetrating Sealants for Superior Protection

    When considering travertine floor sealing, penetrating sealants are often the preferred choice among homeowners due to their effectiveness. These sealants work by soaking into the porous surface of the travertine, providing deep protection against stains and moisture. Unlike topical sealants that create a barrier on the surface, penetrating sealants allow the stone to maintain its natural texture and appearance while offering robust protection.

    One of the primary advantages of penetrating sealants is their longevity. Once properly applied, they can last for several years, thus reducing the frequency of reapplications. This is particularly advantageous in busy households where maintenance time is often limited. Moreover, penetrating sealants do not alter the color of the travertine, preserving the stone’s inherent beauty while providing the necessary protection it demands against environmental factors.

    In the UK, where unpredictable weather conditions are commonplace, penetrating sealants are especially effective in safeguarding travertine flooring against moisture damage. By preventing water from infiltrating the stone, these sealants help mitigate the risk of mold and mildew growth, ensuring that the floors remain in optimal condition for an extended period.

    Understanding Topical Sealants for Enhanced Surface Protection

    Topical sealants present another viable option for protecting travertine flooring, functioning by forming a protective layer on the surface of the stone. This layer not only enhances the stone’s shine but can also impart a polished appearance, making it an attractive choice for homeowners aiming to elevate the aesthetic of their space.

    While topical sealants can offer excellent protection against stains and moisture, they typically necessitate more frequent reapplication than penetrating sealants. This is largely because the protective layer can wear down over time, particularly in high-traffic areas. For homeowners in the UK, where foot traffic may be considerable, understanding the maintenance requirements of topical sealants is crucial for ensuring long-lasting protection of their travertine floors.

    It’s important to note that, while topical sealants can enhance the shine and appearance of travertine, they might alter the stone’s natural look. Therefore, homeowners should carefully weigh their desire for a glossy finish against the need to maintain the stone’s original character and texture.

    The Advantages of Using Enhancing Sealants for Visual Appeal

    Enhancing sealants are specifically formulated to boost the visual allure of travertine flooring while providing additional protection. These sealants not only guard against stains and moisture but also enrich the colors and patterns of the stone, revealing its natural beauty. For those desiring a vibrant, polished look for their travertine floors, enhancing sealants offer an excellent solution.

    In the context of UK homes, enhancing sealants can dramatically transform a dull travertine surface into a stunning focal point. The application process remains similar to that of traditional sealants, but the results can be striking, with the stone appearing more vibrant and alive, thus enhancing the overall aesthetic of the space.

    However, homeowners should be aware that enhancing sealants generally require more frequent maintenance, as their surface layer may wear off faster than penetrating sealants. This consideration is particularly important for busy households where foot traffic is high, making regular upkeep a vital part of preserving the beauty of travertine floors for the long term.

    Effective Techniques for Applying Travertine Sealants

    Utilizing a Brush for Precision in Sealant Application

    One of the most effective methods for applying sealant to travertine flooring is by using a brush. This technique enables homeowners to achieve an even distribution of sealant across the surface, ensuring that every crevice and pore is adequately covered. For smaller areas or intricate designs, brushing is often the best approach due to the precision and control it offers.

    When brushing on sealant, it’s essential to use a high-quality, natural-bristle brush that can effectively work the sealant into the stone. Begin at one corner of the room and methodically work across the surface, applying a thin, even layer. This approach helps prevent pooling or excess sealant, which can lead to an uneven finish and detract from the overall appearance of the flooring.

    Another advantage of brushing on sealant is the ability to closely monitor the application. Homeowners can easily adjust their technique based on the stone’s texture and any areas that may require additional attention. This level of control is particularly beneficial for those unfamiliar with the sealing process, as it allows for corrections along the way and ultimately leads to a more professional finish that enhances the beauty of the travertine.

    Rolling on Sealant for Effective Coverage in Larger Areas

    For homeowners with expansive areas to cover, rolling on sealant can be a time-saving and efficient technique. Using a foam roller allows for quick and uniform application of sealant across large travertine surfaces, minimizing the time and effort required for the task while ensuring comprehensive coverage.

    Before rolling on sealant, it is crucial to ensure that the surface is clean, dry, and free from debris to prevent any imperfections in the finish. Start at one end of the room and work across in sections, applying a consistent amount of sealant as you proceed. This method facilitates swift application while still ensuring full coverage, which is essential for long-lasting protection.

    One key benefit of rolling on sealant is the ability to cover large areas in a fraction of the time it would take to brush. However, homeowners should remain attentive during the application process, checking for spots that may require additional sealing or uneven coverage. By maintaining a careful eye, this technique can yield impressive results while significantly reducing the time spent on the project.

    Utilizing Spray Application for Complex Designs and Hard-to-Reach Areas

    For those with intricate designs or hard-to-reach areas, spraying on sealant can provide an effective solution. This method involves using a sprayer to apply a fine mist of sealant, ensuring even coverage without the risk of over-saturation. For homeowners aiming for a consistent finish, spraying can be an advantageous technique that simplifies the sealing process.

    Before beginning, ensure that the area is well-ventilated, as sealant fumes can be potent. It’s also essential to wear appropriate protective gear, including a mask and gloves, to safeguard against inhalation and skin contact. Prepare the sprayer according to the manufacturer’s instructions and test the spray pattern on a small, inconspicuous area before proceeding to ensure proper functionality.

    When spraying, maintain a consistent distance from the travertine surface to ensure even application. Work in sections, overlapping each pass slightly to avoid missed spots while maintaining a uniform layer. This method can be particularly beneficial for homeowners with larger projects or those seeking to achieve a flawless finish that enhances the overall appearance of the flooring.

    Comprehending the Drying and Curing Process for Sealants

    Understanding Drying Times for Optimal Results

    Once the sealant has been applied to the travertine flooring, understanding the drying times is crucial for achieving optimal results. Different sealants may have varying drying times, making it essential to adhere to the manufacturer’s recommendations for the specific product being utilized. Generally, most sealants require a few hours to dry sufficiently before foot traffic can safely resume.

    During this drying period, it is vital to refrain from walking on the newly sealed surface to prevent any imprinting or smudging that could mar the finish. Homeowners should also keep pets and children away from the area to allow the sealant to set properly without disturbances.

    In the context of UK weather, humidity can significantly influence drying times. In more humid conditions, such as during summer months, drying may take longer than anticipated. Homeowners should factor in weather forecasts and plan their sealing projects accordingly to ensure optimal conditions for drying and curing.

    The Significance of Curing Following Sealant Application

    Curing is a critical phase that follows the drying of the sealant, allowing the product to fully bond with the travertine surface. This process can take several days, during which the sealant hardens and provides the necessary protection against moisture and stains. It is essential to refrain from heavy foot traffic during this period to ensure that the sealant cures completely and effectively.

    While the surface may feel dry to the touch after a few hours, it is important to remember that full curing could take up to a week or more, depending on the specific sealant used and environmental conditions. To achieve the best results, homeowners should ensure that the temperature remains stable and that the area is well-ventilated to facilitate curing and enhance the performance of the sealant.

    Monitoring the curing process closely can assist homeowners in identifying any issues that may arise. If the sealant appears to be taking longer to cure than expected, checking humidity levels or consulting the manufacturer for guidance may prove beneficial in ensuring successful results.

    Conducting a Water Test to Ensure Sealant Effectiveness

    Once the recommended drying and curing times have elapsed, homeowners can perform a simple water test to confirm the effectiveness of the sealant. This test involves placing a few drops of water on the sealed travertine surface. If the water beads up instead of soaking in, it indicates that the sealant is functioning properly and providing the necessary protection.

    Should the water absorb into the travertine, it may signal the need for additional sealing or that the initial application was insufficient. In such cases, homeowners should consider reapplying the sealant according to the manufacturer’s instructions to ensure optimal protection for their travertine flooring and preserve its beauty over time.

    Conducting this straightforward test is an effective way to confirm the success of the sealing process, providing homeowners with peace of mind that their stunning travertine floors are adequately protected against moisture, stains, and everyday wear.

    Common Questions About Travertine Flooring

    What materials make up travertine flooring?

    Travertine flooring is a natural stone product derived from limestone, recognized for its unique texture and impressive durability. It is highly regarded for its elegant appearance and is commonly utilized in both residential and commercial settings, adding a touch of sophistication to diverse environments.

    How often should I seal my travertine floors?

    Typically, it is advisable to seal travertine floors every one to three years, depending on foot traffic levels and exposure to liquids. Regular inspections will help determine the appropriate sealing schedule, ensuring that the flooring remains protected and visually appealing.

    Can I use regular cleaners on travertine surfaces?

    No, standard cleaners may damage travertine. It is crucial to use cleaning products specifically designed for natural stone to preserve its beauty and integrity while ensuring that the stone remains in excellent condition.

    Which sealants are best suited for travertine flooring?

    The ideal types of sealants for travertine include penetrating sealants for deep protection and topical sealants for enhanced surface shine. Selecting the right sealant depends on the homeowner’s desired appearance and maintenance preferences.

    What is the recommended method for cleaning travertine floors?

    To clean travertine floors effectively, begin by sweeping or vacuuming to eliminate dirt, then use a pH-neutral stone cleaner with a soft mop or cloth. Avoid abrasive tools that could scratch the surface, ensuring the integrity of the travertine remains intact.

    Is sealing travertine necessary?

    Yes, sealing travertine is vital to protect it from stains, moisture damage, and wear, ensuring its longevity and maintaining its natural beauty. Proper sealing allows homeowners to enjoy their exquisite flooring without the concern of damage.

    Can I apply sealant on my own?

    Yes, many homeowners choose to apply sealant independently; however, it is essential to follow the manufacturer’s instructions closely to achieve the best results. Proper preparation and application techniques are crucial for ensuring a successful sealing process.

    What should I do if my travertine is already stained?

    If your travertine is stained, it may be necessary to use a specialized stone cleaner or a poultice to treat the stain before sealing. Consulting a professional is advisable for severe stains that require expert attention and restoration.

    How long does the sealing process take?

    The sealing process generally requires a few hours for application and several days for complete curing. Homeowners should plan accordingly and avoid heavy foot traffic during this period to ensure the sealant sets properly.

    Is it possible to change the color of my travertine with sealant?

    Enhancing sealants can enrich the natural colors of travertine, but they may not significantly alter its color. For more notable color changes, consider professional treatment or dyeing options to achieve the desired effect.

    The post Travertine Floor Sealing: A Comprehensive Guide appeared first on https://tilecleaningsurrey.co.uk

    The Article Travertine Floor Sealing: Your Essential Guide appeared first on https://fabritec.org

    The Article Travertine Floor Sealing: A Must-Have Guide for Homeowners Was Found On https://limitsofstrategy.com

  • Degreasers for Stone Floors: Key Maintenance Strategies

    Discover a Wide Range of Stone Flooring Options for Your Home

    Transform Your Living Space with Stunning Natural Stone Choices

    Envision the luxurious experience of walking on an exquisite natural stone floor within your home, featuring striking limestone or the rich, elegant tones of slate. These remarkable materials significantly enhance your home’s aesthetic appeal. Many homeowners across the UK prefer a diverse selection of natural stone types, including granite, marble, limestone, and slate, all renowned for their remarkable durability and timeless sophistication. Each stone type possesses unique qualities and demands specific maintenance. For instance, granite is known for its exceptional resilience, offering outstanding resistance to scratches and stains. In contrast, marble is admired for its refined appearance but requires careful handling due to its tendency to etch and stain.

    Limestone, being a softer stone, is more prone to scratches and requires sealing to protect against spills and dirt buildup. Recognizing these differences is crucial when selecting the right degreasers for stone floor maintenance. The cleaning products you choose should be compatible with the specific stone type you have installed. Opting for the right degreaser can significantly extend the lifespan and beauty of your stone floors, preserving their stunning appearance for years to come.

    Understanding the Role of Porosity in Stone Floor Care

    The porosity of stone is a vital aspect that greatly affects its maintenance. Different stones exhibit varying degrees of porosity, which influences their ability to absorb moisture and cleaning agents. For example, porous stones like limestone and sandstone easily absorb degreasers and cleaning solutions, potentially leading to damage if inappropriate products are used. On the other hand, denser stones like granite have lower absorption rates, allowing them to withstand harsher cleaning agents without deteriorating.

    Comprehending porosity is essential when selecting the most suitable degreasers for stone floor maintenance. It’s important to assess the absorption characteristics and pH levels of the degreaser to ensure it is safe for your stone. Performing a small test in a discreet area before full application can help avert unintended damage. Furthermore, the porosity of your stone also dictates the frequency of cleaning and sealant application, making this understanding imperative for maintaining the beauty and structural soundness of your floors.

    Recognizing Common Challenges with Stone Flooring

    While stone floors are undeniably beautiful and durable, they can face several challenges. Staining is arguably the most prevalent issue, often arising from spills of liquids such as oil, wine, or other substances. In UK households, these stains can become embedded in porous stones, making them difficult to remove without the right cleaning agents. Additionally, etching—caused by acidic substances dulling the stone’s surface—can detract from the overall visual appeal of your floors, specifically in marble and limestone.

    Another common issue is scratching, which can occur due to heavy foot traffic or furniture movement. Being aware of these challenges enables homeowners to take preventative measures. Utilizing the appropriate degreasers for stone floor maintenance is crucial, as these products can effectively tackle stains and etching while safeguarding the stone’s integrity. Regular care, including routine cleaning and resealing, can help avert these problems, ensuring your stone floors remain in excellent condition.

    How Stone Floor Finishes Affect Maintenance Requirements

    The finish applied to your stone floor has a significant impact on its visual appeal and maintenance needs. Finishes can range from honed and polished to tumbled. A honed finish offers a matte appearance and is generally more slip-resistant, making it a favored option for kitchens and bathrooms. However, honed surfaces may demand more frequent maintenance as they tend to attract dirt and grease more than polished finishes.

    In contrast, polished stone floors provide a high-gloss finish that showcases the stone’s natural beauty but may be more susceptible to scratches and etching. Tumbled finishes present a rustic look with a textured surface that can effectively conceal dirt and wear, yet they may necessitate more intensive cleaning efforts to uphold their aesthetic. Choosing the right degreasers for stone floor maintenance is critical, as different finishes may respond uniquely to various cleaning products. Understanding your floor’s finish will guide you in selecting the best solutions and methods for optimal care.

    The Vital Role of Sealing in Stone Floor Maintenance

    Sealing your stone floor is an essential maintenance step that protects the surface from stains, dirt, and general wear and tear. In the UK, a wide array of sealants is available, including penetrating sealers that infiltrate the stone and surface sealers that create a protective layer. Choosing the right sealant depends on the stone type and its porosity. For instance, porous stones typically benefit from penetrating sealers, which offer deeper protection, while denser stones may be better suited to surface sealers.

    Regular sealing can significantly prolong the life of your stone floors, making them more resistant to damage from spills and foot traffic. When utilizing degreasers for stone floor maintenance, ensure that the products are compatible with your sealant to avoid compromising the protective barrier. As a general guideline, resealing is recommended every 1-2 years, depending on foot traffic and the specific stone type, to maintain the pristine appearance and beauty of your floors over time.

    Making Smart Choices When Selecting the Right Degreaser

    Recognizing the Importance of pH Levels for Safe Stone Care

    Choosing a degreaser with the appropriate pH level is crucial for safeguarding your stone surfaces. Most natural stones thrive within a neutral pH range of 7-8. Using a degreaser with an excessively low (acidic) or high (alkaline) pH can damage the stone surface, leading to etching or dulling. For example, acidic cleaners can severely harm polished marble and limestone, potentially resulting in costly repairs or replacements.

    Before making a purchase, always verify the pH level of the degreaser. Ideally, choose a product specifically designed for stone care that clearly states its pH level on the label. This attention to detail ensures the use of safe degreasers for stone floor maintenance, effectively eliminating grease and grime while preserving the beauty of your stone. Consulting with stone care professionals can also provide valuable insights into the best degreasers for your particular flooring type.

    Assessing Chemical Composition for Effective Cleaning Results

    Understanding the chemical composition of degreasers is essential for ensuring the optimal maintenance of stone floors. Many conventional degreasers contain harsh chemicals that can harm stone surfaces, leading to discoloration or deterioration of the finish. Products containing solvents, acids, or caustic substances should be avoided, particularly on delicate stones like marble and limestone.

    Instead, opt for degreasers specifically formulated for stone care. These products typically include biodegradable surfactants and mild cleaning agents that effectively remove grease while preserving the integrity of the stone. By utilizing safe, stone-friendly degreasers for stone floor maintenance, you can extend your flooring’s lifespan while achieving a thorough clean. Carefully reviewing labels and product testimonials can assist you in selecting the safest and most effective cleaning solutions for your home.

    Choosing Eco-Conscious Cleaning Products for Stone Care

    In today’s environmentally conscious society, the demand for eco-friendly degreasers for stone floor maintenance has surged. Many traditional cleaning products contain harsh chemicals that can be detrimental to both the environment and personal health. Fortunately, numerous biodegradable and eco-friendly alternatives are available in the UK, often utilizing natural ingredients that are safer for both you and the planet.

    When searching for eco-friendly degreasers, look for certifications indicating environmental safety, such as the EU Ecolabel or similar UK-specific certifications. By opting for eco-friendly degreasers for stone floor maintenance, you not only contribute to environmental protection but also foster a healthier indoor atmosphere for your family. Green cleaning products can be just as effective as their chemical-laden counterparts, reinforcing the case for making environmentally responsible cleaning choices.

    Effective Techniques for Applying Degreasers

    Utilizing effective application techniques is essential for achieving outstanding results when using degreasers on stone floors. The right method can enhance cleaning efficiency while minimizing potential damage to the stone. Begin by ensuring the floor is free from loose debris or dirt, which can scratch the surface during scrubbing.

    When applying your chosen degreasers for stone floor maintenance, follow the manufacturer’s instructions regarding dilution and application. Using a mop or a soft-bristle brush can help evenly distribute the product across the surface. Allowing the degreaser to dwell on the surface for the recommended time is also crucial for effectively breaking down grease. Afterward, rinse thoroughly with water to eliminate any residue, as leftover cleaning agents can lead to buildup over time, jeopardizing the finish of your beautiful stone floors.

    Best Practices for Maintaining Your Stone Floors

    Ensuring Correct Dilution and Mixing of Degreasers

    Achieving optimal results without damaging your stone floors relies on careful dilution and mixing of degreasers. Each product typically comes with specific dilution ratios recommended by the manufacturer, which must be adhered to for effective cleaning. Using a concentrated solution on sensitive surfaces can lead to etching or discoloration, so always measure accurately.

    When mixing, utilize a clean container to avoid contamination that could affect the degreaser’s effectiveness. A bucket or spray bottle is usually sufficient, but ensure it is properly labeled to prevent any mix-ups. Once mixed, apply the degreaser gradually to the stone floor, ensuring even coverage. You might want to allow the solution to sit for a few minutes before scrubbing particularly stubborn stains. Remember, using the proper dilution ensures you’re utilizing degreasers for stone floor maintenance safely and effectively.

    Selecting the Right Tools for Applying Degreasers

    Choosing the appropriate tools for applying degreasers can significantly influence the results of your cleaning efforts. The most commonly used tools in the UK include mops, soft-bristle brushes, and microfiber cloths. Mops are ideal for covering large areas, ensuring even distribution of the degreaser, while soft-bristle brushes can assist in lifting stubborn dirt without scratching the stone surface.

    Microfiber cloths are perfect for detailing and ensuring no residue is left behind after cleaning. When utilizing degreasers for stone floor maintenance, it’s important to avoid abrasive tools like steel wool or stiff brushes, as these can damage the stone finish. Selecting the correct application tools promotes effective cleaning and helps preserve the integrity and beauty of your stone floors for years to come.

    Determining the Frequency of Degreaser Application

    Establishing a schedule for applying degreasers is essential for maintaining the condition of your stone floors. High-traffic areas, such as hallways and kitchens, require frequent cleaning to prevent grease buildup. Typically, a monthly degreasing routine is advisable for these spaces to keep them looking pristine.

    Conversely, less frequently used areas may only require cleaning every two months or quarterly, depending on their exposure to dirt and spills. Observing the condition of your floors can guide adjustments to this cleaning schedule. Consistent use of degreasers for stone floor maintenance helps protect the stone, ensuring it remains beautiful and resilient for years. Regular inspections can highlight potential issues before they escalate, allowing for a proactive approach to stone care.

    Safety Measures When Using Degreasers

    Wearing Protective Gear During Cleaning Activities

    Safety should always be a priority when handling degreasers. Wearing appropriate protective gear, including gloves and goggles, is essential to prevent skin irritations and eye damage from chemical exposure. Many degreasers contain potent ingredients that can pose risks if they come into direct contact with your skin or eyes.

    In addition to gloves and goggles, consider wearing a mask to avoid inhaling fumes in poorly ventilated spaces. By prioritizing safety with the proper protective equipment, you can effectively use degreasers for stone floor maintenance without compromising your health. Establishing a safety protocol not only protects you but also promotes responsible cleaning practices within your household.

    Ensuring Proper Ventilation During Cleaning

    Proper ventilation is crucial when using degreasers to ensure a safe working environment. Many cleaning products release vapors that can be harmful when inhaled, especially in confined spaces. Always ensure that windows are open and any fans are turned on to promote airflow during the cleaning process.

    If the degreaser emits a strong chemical odor, additional ventilation measures should be implemented. This may include using an air purifier or working in smaller sections to limit exposure. By maintaining adequate ventilation, you can safely use degreasers for stone floor maintenance while promoting a healthier environment for yourself and your family. Prioritizing ventilation not only protects your health but also contributes to improved indoor air quality.

    Proper Storage and Disposal of Degreasers

    Following UK guidelines for the safe storage and disposal of degreasers is vital for ensuring safety and environmental protection. Store cleaning products in a cool, dry location, away from direct sunlight and out of reach of children and pets. Ensure all containers are tightly sealed to prevent leaks or accidental spills.

    Regarding disposal, consult local regulations concerning hazardous waste. Many degreasers cannot be poured down drains or discarded in regular rubbish bins. Instead, you may need to take them to a designated disposal facility. By adhering to these guidelines, you protect your home and contribute to environmental sustainability while using degreasers for stone floor maintenance safely.

    Preparing for Emergency Situations Involving Degreasers

    It’s crucial to be ready for potential accidents when using degreasers. Knowing emergency procedures can significantly mitigate risks. In the event of a chemical spill, act quickly by isolating the area and ventilating the space to reduce fume exposure.

    Always keep the degreaser’s material safety data sheet (MSDS) readily available, as it contains specific instructions on handling spills. If skin or eye contact occurs, follow first aid procedures immediately by rinsing the affected area thoroughly with water. By being informed about these emergency procedures, you can effectively manage potential hazards while using degreasers for stone floor maintenance, ensuring the safety of your household.

    First Aid Protocols for Chemical Exposure from Degreasers

    Having a clear understanding of first aid measures for exposure to degreasing chemicals is crucial for any homeowner. If skin contact occurs, rinse the affected area with plenty of water for at least 15 minutes, removing any contaminated clothing. If irritation continues, seek medical attention.

    In the case of eye contact, do not rub the eyes; gently flush them with water for at least 15 minutes, keeping the eyelids open to facilitate thorough rinsing. If ingested, do not induce vomiting; instead, seek medical assistance immediately. Familiarizing yourself with these first aid measures can help mitigate risks while using degreasers for stone floor maintenance, providing peace of mind as you care for your home.

    A Comprehensive Approach to Cleaning Stone Floors

    Preparing for the Stone Cleaning Process

    Proper preparation of your stone floor before applying a degreaser is crucial for effective cleaning. Begin by removing loose debris, dirt, and dust to prevent scratching the surface during the cleaning process. Sweep or vacuum the area thoroughly, paying special attention to corners and beneath furniture to ensure a comprehensive clean.

    If the floor is particularly dirty, consider mopping with plain water to loosen any embedded grime. This initial step enhances the efficacy of the degreasers for stone floor maintenance, allowing the product to penetrate better and dissolve grease effectively. Proper preparation not only aids in achieving a thorough clean but also protects the integrity of your stone flooring, ensuring it remains beautiful and well-maintained for years to come.

    Applying Degreasers Effectively for Optimal Cleanliness

    When applying degreasers, the technique is just as important as the product itself. After preparing the floor, evenly distribute the degreaser across the stone surface. For larger areas, a mop is typically the best tool, while a soft-bristle brush can assist in scrubbing specific areas where grease has accumulated.

    Make sure to follow the manufacturer’s instructions regarding dwell time, allowing the degreaser to work on the grime effectively. Avoid over-saturation of the floor, as excess moisture can seep into porous stones, leading to potential damage. After scrubbing the surface, rinse thoroughly with clean, warm water to remove any residue. By mastering the application technique, you can ensure the successful use of degreasers for stone floor maintenance, keeping your floors looking immaculate.

    Post-Cleaning Care for Outstanding Results

    Proper post-cleaning care is crucial after degreasing to prevent residue buildup that can dull the appearance of your stone floors. Begin by rinsing the area thoroughly to ensure that all cleaning agents are completely washed away. This step is vital, as leftover degreaser can leave a film on the surface, attracting dirt and compromising the finish.

    Once rinsed, dry the floor with a soft, absorbent cloth or mop to remove any remaining moisture. This helps prevent water spots and streaks. Allow the surface to air dry completely before walking on it if possible. This attention to detail in post-cleaning care will ensure your stone floors remain vibrant and beautiful, showcasing the effectiveness of the degreasers you’ve utilized for stone floor maintenance.

    Establishing a Consistent Maintenance Routine

    Implementing Daily Cleaning Habits for Stone Floors

    Establishing a daily cleaning routine for your stone floors helps prevent grease buildup and maintains their aesthetic appeal. Simple tasks such as sweeping or vacuuming help eliminate loose dirt and debris that can scratch the surface over time. Additionally, consider using a damp mop with a mild stone cleaner to wipe down high-traffic areas daily, ensuring that any spills are promptly addressed.

    Regular upkeep not only preserves the appearance of your floors but also minimizes the need for intensive cleaning sessions later on. By incorporating these daily practices into your routine, you’ll protect your investment and enjoy the enduring beauty of your stone flooring. Integrating appropriate degreasers for stone floor maintenance as part of your daily cleaning ensures their integrity, allowing you to fully appreciate your living space.

    Weekly Maintenance Practices to Enhance the Longevity of Stone Floors

    A weekly maintenance routine can significantly extend the life of your stone floors. Allocate time each week for more in-depth cleaning tasks, such as applying a gentle stone-safe degreaser to remove built-up dirt and grease. This routine not only helps maintain the floor’s appearance but also prevents potential staining or damage.

    Moreover, consider inspecting the sealant on your floors during these weekly cleanings. If you notice any wear or discoloration, it may be time to reapply the sealant. Consistent maintenance keeps your stone floors looking pristine and enhances their durability. Regular use of degreasers for stone floor maintenance within your weekly routine provides a robust defense against everyday wear and tear, allowing your stone floors to shine brilliantly.

    Planning Seasonal Deep Cleaning Sessions for Comprehensive Care

    Scheduling seasonal deep cleaning sessions is essential for maintaining the overall appearance and durability of your stone floors. These sessions allow you to address accumulated grime, stains, and dirt that your daily and weekly routines may not adequately tackle. During a deep clean, utilize a high-quality degreaser, following the proper application techniques specific to your stone type.

    Consider planning these sessions with the change of each season, as environmental factors can impact your floors differently throughout the year. Additionally, this is an excellent opportunity to inspect for signs of wear or damage, allowing you to address any issues before they escalate. Employing degreasers for stone floor maintenance during these deep cleaning sessions will ensure your floors maintain excellent condition, showcasing their natural beauty season after season.

    Scheduling Annual Professional Inspections for Optimal Stone Care

    Arranging annual professional inspections for your stone floors is a wise investment in their longevity. Professionals can identify potential issues that may not be visible to the untrained eye, such as cracks, wear in sealants, or damage caused by improper cleaning. They can also provide expert advice on the best practices for maintaining your specific type of stone.

    During these inspections, professionals might recommend specialized cleaning or resealing if necessary. This proactive approach ensures your stone floors are continually protected and well-maintained. By incorporating annual inspections into your routine, you can enhance the effectiveness of your regular cleaning with degreasers for stone floor maintenance, ensuring your stone flooring remains a captivating and enduring feature of your home.

    Troubleshooting Common Issues with Stone Floors

    Effective Strategies for Removing Grease Stains

    Removing persistent grease stains from stone floors can be challenging, but with the right techniques, it is manageable. Start by applying a degreaser specifically formulated for stone directly onto the stain, allowing it to penetrate for several minutes. For deeper stains, gently scrubbing with a soft brush can help lift the grease without damaging the stone.

    Always follow up by rinsing the area thoroughly with warm water. If the stain persists, you may need to repeat the process or consider using a poultice—a paste made from a degreaser and absorbent material—to effectively draw out the stain. By employing these methods, you can successfully tackle grease stains while safeguarding your stone floors with appropriate degreasers for stone floor maintenance.

    Addressing Etching and Scratches on Stone Floors

    Etching and scratches are common issues that can arise during degreasing if not handled with care. Acidic cleaners can cause etching on sensitive stones, while abrasive scrubbing can lead to scratches. To address etching, gently polish the affected area with a stone polishing powder specifically designed for your type of stone.

    If the damage is more significant, you may want to consider using a stone refinishing kit or consulting with a professional for scratches. Regular maintenance and the use of appropriate degreasers for stone floor maintenance can help prevent these issues from occurring. Exercising caution during cleaning will also help preserve your stone’s appearance, ensuring it looks stunning and well-cared for.

    Preventing Residue Buildup on Your Stone Floors

    Residue buildup from degreasers can dull the finish of your stone floors over time. To prevent this accumulation, always rinse thoroughly after applying any cleaning agent. Pay special attention to corners and edges where residue can easily collect.

    If you notice a film developing, a simple remedy is to mop the area with a mixture of warm water and a few drops of pH-neutral soap. This gentle approach can help lift any stubborn residues without harming the stone. By avoiding buildup and regularly using degreasers for stone floor maintenance, you can ensure your stone floors continue to shine beautifully.

    Frequently Asked Questions About Stone Floor Care

    What are degreasers, and why are they crucial for maintaining stone floors?

    Degreasers are specialized cleaning products designed to break down and eliminate grease and grime. They are essential for maintaining stone floors as they help prevent staining and keep the stone looking beautiful and hygienic.

    How often should I apply degreasers to my stone floors?

    The frequency of degreaser application varies based on foot traffic and usage. Generally, monthly cleaning is advisable for high-traffic areas, while less frequented spaces may require cleaning every few months.

    Are there degreasers formulated specifically for different stone types?

    It is critical to select degreasers that are formulated for specific types of stone, as some may contain ingredients that could harm sensitive surfaces like marble or limestone.

    Can I create my degreaser for stone floors?

    While homemade degreasers can be effective, it’s important to ensure that the ingredients are safe for your specific stone type. For instance, using vinegar can damage sensitive stones.

    What should I do if I accidentally damage my stone floor during cleaning?

    If damage occurs, assess the extent of the issue. For minor scratches, polishing products can often restore the finish. Consulting a professional may be necessary to evaluate the situation for more severe damage.

    Is it necessary to seal my stone floors after degreasing?

    Sealing your stone floors post-cleaning helps protect against future stains and damage. To maintain their integrity, regular resealing, typically every 1-2 years, is recommended.

    How can I tell if my stone floor needs cleaning or maintenance?

    Visible dirt or grease buildup, a dull appearance, or evident stains are signs that your stone floor requires cleaning. Regular inspections can help identify these issues early on.

    Are eco-friendly degreasers effective for stone floor maintenance?

    Indeed, many eco-friendly degreasers are designed to be effective on stone floors while being safe for the environment. Look for products specifically formulated for stone care.

    What tools are best for applying degreasers on stone floors?

    Soft-bristle brushes, mops, and microfiber cloths are ideal for applying degreasers, as they effectively clean without scratching the stone surface.

    What measures can I take to prevent future staining on my stone floors?

    Preventing future staining involves regular cleaning, using protective sealants, and promptly addressing spills. Employing the right degreasers for stone floor maintenance will also help keep your surfaces pristine.

    The Article Degreasers for Stone Floor Maintenance: Essential Tips first found on https://london-stone.co.uk

    The Article Degreasers for Stone Floor Maintenance: Key Tips to Know appeared first on https://fabritec.org

    The Article Degreasers for Stone Floors: Essential Maintenance Tips Was Found On https://limitsofstrategy.com

  • Travertine Floor Care: Essential Tips for Maintenance

    Travertine Floor Care: Essential Tips for Maintenance

    Discover the Captivating Charm and Distinctive Attributes of Travertine Stone

    Examine the Remarkable Characteristics of Travertine

    Close-up of travertine flooring with warm, earthy tones and intricate textures in a modern living room.

    Travertine is an exceptionally stunning natural stone that has gained popularity for its unique aesthetic qualities and impressive durability. This remarkable material is created through the slow accumulation of mineral deposits over countless years within mineral-rich springs, leading to a beautifully textured surface that can transform the atmosphere of any space. With its warm and inviting color palette, travertine seamlessly integrates into a variety of interior design styles, from charming rustic themes to sleek modern looks. When employed as flooring, travertine radiates an organic warmth, establishing a welcoming ambiance in homes across the United Kingdom. Its distinctive features have made it a favored choice among discerning homeowners aiming to enhance their living environments.

    The creation of travertine occurs via the gradual deposition of calcium carbonate in hot springs or limestone caves, resulting in a stone that showcases unique pitting and veining. These natural imperfections not only elevate its visual appeal but also guarantee that each tile is truly unique, allowing homeowners to express their individuality. Additionally, the outstanding durability of travertine renders it an ideal selection for high-traffic areas such as kitchens, hallways, and living rooms. This attribute offers a pragmatic flooring solution capable of enduring daily wear and tear while retaining its breathtaking appearance over time.

    Discover the Various Finishing Options Available for Travertine

    Travertine comes in a variety of types, each offering distinct finishes that can significantly impact the overall look of your flooring. The most common finishes include honed, polished, and tumbled, each possessing unique characteristics and applications tailored to different design preferences and functional requirements.

    Honed travertine features a matte finish that provides a smooth and natural appearance while maintaining the stone’s inherent beauty. This finish is perfect for homeowners wishing to create a subtle yet sophisticated elegance within their interiors. Furthermore, honed surfaces are generally less slippery than polished alternatives, making them a practical choice for families with children or elderly individuals who may need safer flooring options.

    Conversely, polished travertine boasts a glossy, reflective surface that enhances the stone’s natural colors, imparting a sense of luxury and refinement. This variety is particularly suitable for spaces where an element of glamour is desired, such as dining rooms or formal sitting areas. However, homeowners should be aware that polished surfaces may necessitate more rigorous maintenance to prevent scratches and etching from spills or abrasive materials.

    Tumbled travertine showcases a weathered appearance, featuring softened edges and a textured surface that enriches any setting. This finish is ideal for outdoor uses or rustic interiors, offering an authentic and inviting aesthetic. Additionally, tumbled travertine is slip-resistant, making it appropriate for wet areas such as bathrooms and patios, ensuring safety without compromising style.

    Unveil the Many Benefits of Installing Travertine Flooring

    Choosing travertine flooring brings an array of advantages that make it a highly desirable option for homeowners in the UK. One of the most notable benefits is its exceptional durability. Travertine is recognized for its capacity to withstand heavy foot traffic, making it an ideal choice for bustling households. Its strength and resilience mean that, with appropriate care and maintenance, it can endure for decades, representing a smart long-term investment for your home.

    Beyond its practical qualities, the aesthetic charm of travertine contributes an air of sophistication to any environment. The stone’s intricate textures and rich color variations can complement a wide range of décor styles, from traditional to contemporary. Moreover, travertine functions as a natural insulator, helping to maintain comfortable temperatures within your home. This feature is especially appealing for residents in the UK, where significant temperature fluctuations are common throughout the year.

    Another significant characteristic of travertine is its heat resistance. This stone remains cool underfoot, making it an excellent flooring choice for areas exposed to high temperatures, such as conservatories or sunrooms. Furthermore, the porous nature of travertine allows it to absorb excess moisture, helping to reduce the risk of slips and falls in damp conditions. These attributes render travertine not only visually appealing but also a practical flooring solution suitable for a variety of environments.

    Crucial Daily Maintenance Strategies for Your Travertine Floors

    A person cleaning a travertine floor with specialized tools in a sunlit room, highlighting the stone's veining.

    Utilizing Effective Sweeping and Dusting Techniques for Maintenance

    Regular sweeping or dusting is essential for preserving the pristine condition of your travertine floors. Over time, dirt, dust, and debris can accumulate on the surface, potentially leading to scratches and dullness if left unaddressed. By establishing a consistent cleaning routine, you can effectively maintain the beauty of your flooring. Ideally, aim to sweep or dust your travertine floors daily, particularly in high-traffic areas where dirt is more likely to collect.

    To minimize the risk of scratching the delicate surface of travertine, utilize a soft-bristled broom or a microfiber dust mop. These cleaning tools are gentle yet effective, capturing fine particles that could become problematic if allowed to settle on the stone. In areas prone to dirt accumulation, such as entryways or kitchens, consider placing a doormat to help lessen the amount of debris tracked onto your exquisite floors.

    It is also crucial to note that certain cleaning tools should be completely avoided. Steel wool or abrasive scrubbers can inflict irreversible damage to the delicate surface of travertine. Always choose gentle cleaning methods to ensure your travertine retains its natural beauty for many years to come.

    Mastering Appropriate Mopping Techniques for Your Travertine Floors

    When mopping your travertine floors, employing the correct techniques is vital for preserving their integrity. A damp mop is your best friend; however, it is crucial to ensure that it is not overly wet. Excess moisture can seep into the stone, potentially causing damage over time. A pH-neutral cleaner specifically designed for travertine is ideal, as acidic or harsh chemicals can etch the surface and diminish its shine.

    Start by filling a bucket with warm water and adding the recommended amount of pH-neutral cleaner. Dip the mop into the solution, ensuring it is damp rather than soaking wet. Begin mopping from one corner of the room and work your way toward the exit. This strategy prevents you from stepping on freshly cleaned areas and inadvertently spreading dirt onto the floor.

    After mopping, it’s essential to rinse the mop frequently to avoid redepositing dirt onto the floors. Once you finish cleaning, allow the travertine to air dry naturally. If desired, you can buff the surface with a soft cloth to enhance the shine. This straightforward daily maintenance routine will help keep your travertine floors in excellent condition, showcasing their natural beauty.

    Promptly Addressing Spills on Your Travertine Floors

    Spills are an unavoidable aspect of life in any household, but taking immediate action regarding travertine flooring is crucial. Acidic substances such as wine, coffee, or citrus juice can cause permanent staining or etching if not cleaned right away. Therefore, having a clear plan for addressing spills can save your floors from unsightly damage and expensive repairs.

    When a spill occurs, grab a clean, dry cloth or paper towel and gently blot the affected area. Avoid rubbing, as this can spread the stain further and exacerbate the issue. If the spill involves a liquid, such as wine or juice, continue blotting until the area is thoroughly dry. For sticky or greasy residues, you may need to utilize a pH-neutral cleaner and a soft cloth for effective removal.

    After addressing the immediate spill, keep an eye on the affected area over the following days. If you notice any lingering discoloration, it may be necessary to employ a more thorough cleaning method or consult a professional for advice. By taking swift action, you can protect your travertine floors and maintain their stunning appearance for years to come.

    A Comprehensive Guide to Deep Cleaning Your Travertine Floors

    Selecting the Optimal Cleaner for Travertine Maintenance

    Choosing the right cleaning product is essential when deep cleaning your travertine floors. Not all cleaners are suitable for this elegant stone; harsh chemicals, such as bleach or vinegar, can cause significant damage, stripping away protective layers and dulling the finish. Instead, opt for a travertine-specific cleaner that is free from harmful ingredients and specifically formulated to care for natural stone.

    These specialized cleaners effectively remove dirt, grime, and stains without harming the stone. Many reputable brands offer products tailored explicitly for natural stone care, ensuring your flooring receives the gentle yet effective treatment it requires. Before making a purchase, check for pH-neutral options, as these will help maintain the integrity of the stone while providing a thorough clean.

    Additionally, consider conducting a spot test in a discreet area before applying the cleaner extensively. This precaution will help confirm that the cleaner does not discolor or damage your travertine. Once you find a suitable product, you will be well-equipped to keep your floors looking fabulous and well-maintained.

    Implementing Effective Scrubbing and Rinsing Techniques for Deep Cleaning

    A successful deep cleaning routine for travertine involves careful scrubbing and rinsing. Once you have selected an appropriate cleaner, prepare your tools: a soft-bristled brush and a bucket of clean water should suffice. Begin by applying the cleaner to a small section of the floor, allowing it to sit for a few minutes to penetrate the dirt and stains effectively.

    Next, gently scrub the area in circular motions using the soft-bristled brush. Avoid using abrasive brushes, as they can scratch the surface of the travertine. Concentrate on any dirty spots or stains, but do not over-scrub. After thoroughly cleaning the section, rinse the area with clean water to remove any remaining cleaner and dirt. This step is crucial, as residue on the surface can dull the stone over time.

    Once you have rinsed the area, dry it with a soft cloth to prevent water spots or streaks from forming. This thorough scrubbing and rinsing method will keep your travertine looking fresh and vibrant, ready to impress all who enter your home.

    Proper Drying and Buffing Techniques for Your Travertine Floors

    After completing your deep cleaning, allowing your travertine to dry completely is essential for preserving its beauty. Use soft cloths or towels to absorb any residual moisture. Once the floor is dry, take the time to gently buff the surface. Buffing enhances the stone’s natural shine and helps eliminate any remaining streaks after cleaning.

    Utilize a clean, dry microfiber cloth for this task, as it will not scratch the surface of your travertine. In a circular motion, buff the entire floor, paying special attention to corners and edges where moisture may linger. This process will restore the travertine, giving it a polished, well-maintained appearance that impresses visitors.

    Incorporating this drying and buffing routine into your overall maintenance strategy is vital. Regular buffing can help keep your travertine floors looking their best while extending the stone’s lifespan. By committing to this process, you can ensure your travertine remains a stunning feature in your home for years to come.

    The Critical Importance of Sealing Your Travertine Floors

    Determining the Best Timing for Sealing Your Travertine

    Sealing your travertine floors is a crucial step in preserving their beauty and longevity. Over time, even the most meticulously maintained floors can become susceptible to stains and moisture infiltration. The frequency of sealing will largely depend on factors such as the type of finish, levels of foot traffic, and the specific environment of your home.

    As a general guideline, sealing travertine should occur every one to three years. High-traffic areas like hallways and kitchens may require more frequent sealing than less-used spaces. Observing your floors can help you determine the proper sealing schedule; if you notice that spills are no longer beading on the surface or that the stone feels increasingly porous, it may be time to reseal.

    Before sealing, it is essential to ensure that the surface is clean. Make sure that your travertine is thoroughly cleaned and dried before application. These steps guarantee that the sealant adheres properly and provides the most effective protection against stains and moisture.

    A Step-by-Step Guide to Sealing Your Travertine Floors

    Once you decide to seal your travertine floors, it is essential to follow the correct process to achieve optimal results. First, select a high-quality penetrating sealer specifically designed for natural stone. This sealer will penetrate the stone, providing a protective barrier against moisture and stains.

    Begin the sealing process by applying the product according to the manufacturer’s instructions. Typically, you will need a manufacturer’s tool, such as a soft cloth or roller, to spread the sealant evenly across the surface. Work in small sections to ensure complete coverage, allowing the sealer to absorb into the stone for the recommended time before wiping away any excess.

    After sealing, allow the floor to dry completely. Please exercise caution and avoid walking on the surface until the sealant has fully cured, as this can interfere with its effectiveness. Adhering to these steps will ensure your travertine floors are well protected, enabling you to enjoy their beauty without worry.

    Maintaining the Longevity of Your Travertine Floor Seal

    Ensuring the integrity of your travertine floor seal is vital for guaranteeing long-lasting protection. Regular inspections of the sealant’s condition should be integral to your maintenance routine. Look for signs of wear or areas where the seal appears to be thinning, as these can indicate that it’s time for reapplication.

    A simple water test is one effective method to assess its sealing integrity. Sprinkle a few drops of water on the surface; if the water beads up, the seal is still effective. However, if the water soaks into the stone, it may be time to reseal. This proactive approach can prevent damage and help maintain the pristine condition of your travertine flooring.

    When reapplying sealant, ensure the floor is clean and dry, similar to the initial sealing process. Following the application guidelines provided by the sealant manufacturer will yield the best results. By committing to this maintenance practice, you’ll enhance the durability and beauty of your travertine for years to come.

    Effectively Managing Stains and Etches on Your Travertine Floors

    Recognizing the Different Types of Stains Affecting Travertine

    Understanding the various types of stains that can impact your travertine flooring is crucial for effective cleaning and restoration. Stains can generally be classified into three categories: oil-based, organic, and inorganic. Each type of stain necessitates a specific approach for removal, making accurate identification essential for successful treatment.

    Oil-based stains typically arise from cooking oils, grease, or cosmetics, often appearing as dark discolorations on the surface. Organic stains originate from natural substances, such as food, beverages, or plant materials, leading to browning or rust-like marks. Lastly, inorganic stains stem from substances like rust or cement, manifesting as discolored patches that can be particularly stubborn and challenging to remove.

    By accurately identifying the source of a stain, you can select the most effective cleaning method. For example, oil-based stains may require a poultice made from baking soda or flour mixed with water to draw out the stain. Meanwhile, organic stains might respond well to a diluted pH-neutral cleaner. Being informed about the nature of the stains on your travertine will empower you to take appropriate action quickly and effectively.

    Effective Techniques for Removing Stains from Travertine

    Successfully eliminating stains from travertine necessitates a tailored approach based on the type of stain identified. Creating a poultice is one of the most effective techniques for oil-based stains. Mix a cup of baking soda or flour with a small amount of water to form a paste. Apply the paste to the stained area and cover it with plastic wrap, allowing it to work overnight. The poultice will absorb the stain, aiding in restoring the surface to its original condition.

    A gentle pH-neutral cleaner and a soft cloth can often yield positive results for organic stains. Dab the stained area with the cloth soaked in the cleaning solution, allowing it to sit for a few minutes before rinsing thoroughly with clean water. Avoid scrubbing too hard, as this can further damage the stone and worsen the stain’s appearance.

    Inorganic stains, such as rust, may require a more specialized approach. A rust remover specifically designed for natural stone can be effective, but it is crucial to test it in a small, inconspicuous area first. Following the manufacturer’s instructions closely will ensure optimal results. By employing these methods, you can effectively manage stains on your travertine flooring and preserve its beauty and integrity.

    Repairing Etches on Your Travertine Surfaces

    Etching is a common problem with travertine flooring, often caused by contact with acidic substances like vinegar or citrus. These reactions can lead to dull or discolored spots on the surface, detracting from the stone’s natural beauty. Fortunately, there are techniques available to restore the appearance of your floors to their former glory.

    One effective method of repairing etches involves honing or polishing the affected area. Use a honing powder or diamond polishing pad designed for natural stone to gently buff the etched spot. This process helps to remove the damaged surface and restore the stone’s original color, progressing stone by stone to avoid further harm to the travertine.

    If the etching is particularly deep or extensive, you may wish to consider professional restoration services. Stone care specialists possess advanced tools and techniques that can return your travertine floors to their original splendor. By addressing etches promptly, you can maintain the beauty and integrity of your travertine flooring, ensuring it remains a stunning feature in your home.

    Proactive Measures to Prevent Future Stains and Etches on Travertine Floors

    Preventing future stains and etches on your travertine floors requires a proactive approach that pays dividends in the long run. Applying sealants is one of the most effective methods to create a protective barrier against spills and stains. As previously discussed, ensure your travertine is regularly sealed to maintain its resilience and beauty.

    Another straightforward yet effective strategy is to use protective mats in high-traffic areas or near entry points to catch dirt and moisture before it reaches the stone. Additionally, placing coasters under beverages and avoiding direct contact between acidic substances and the floor can help prevent etching and staining.

    Educating family members and guests about the importance of care around travertine can also foster a culture of preservation. By implementing these preventive measures, you can ensure your travertine flooring remains a stunning feature in your home for years, maintaining its elegance and functionality.

    Seeking Professional Restoration Services for Travertine Flooring

    In situations where travertine flooring has endured deep stains or extensive etching, enlisting the help of professional restoration services may be the most effective option. Experienced professionals possess the tools and expertise necessary to clean, polish, and restore travertine to its original brilliance, ensuring that your flooring remains beautiful.

    When selecting a restoration service, look for companies that specialize in natural stone care. Ask for references or reviews from previous clients to gauge the quality of their work. A reputable restoration service will evaluate your floor’s condition and recommend appropriate restoration steps, including deep cleaning, honing, and resealing.

    Investing in professional restoration not only helps maintain the value of your home but also ensures that your travertine flooring remains a timeless and elegant element of your living space. By addressing issues promptly and seeking expert advice when necessary, you can enjoy the beauty and durability of your travertine for a lifetime.

    Safeguarding Your Travertine Flooring from Potential Damage

    Utilizing Rugs and Mats to Protect Your Floors

    Incorporating rugs and mats in strategic locations is an exceptionally effective way to protect your travertine floors from damage. Rugs can help prevent scratches and wear caused by foot traffic while absorbing moisture from shoes, which can otherwise lead to staining or etching over time.

    When selecting rugs, choose those with rubber backing to prevent slipping and sliding, which can pose a safety risk. Position rugs at entryways, kitchens, and high-traffic areas to catch dirt and moisture before it reaches the stone. Additionally, consider using floor protectors under furniture to prevent scratches and dents that could mar the surface of your beautiful travertine flooring.

    Regular cleaning and maintenance of your rugs is also crucial to avoid dirt accumulation, which could be transferred to your travertine floors. By using rugs and mats thoughtfully and consistently, you can significantly prolong the life and beauty of your travertine flooring, ensuring it remains a stunning feature in your home for years to come.

    Conducting Routine Maintenance Inspections on Travertine Flooring

    Conducting routine maintenance checks is a wise approach to identify and address potential issues before they escalate into major problems. Regularly inspect your travertine floors for signs of wear, such as discoloration, scratches, or areas that appear less shiny than others.

    If you notice any irregularities, take immediate action. For example, if you identify a scratch, consider using a polishing compound designed for natural stone to restore the surface. Similarly, if you observe signs of staining, address it before it becomes more entrenched and difficult to remove.

    By staying vigilant with regular maintenance checks, you can ensure the ongoing beauty and integrity of your travertine flooring. These proactive measures will save you time, effort, and money in the long run, allowing you to enjoy your beautiful flooring without concern for its condition.

    Common Questions and Answers About Travertine Care

    What is the most effective method for cleaning my travertine floors?

    To effectively clean travertine floors, regularly sweep or dust, followed by using a damp mop with a pH-neutral cleaner specifically designed for natural stone. Avoid excessive water and harsh chemicals to maintain the integrity and beauty of the stone.

    How often should I seal my travertine floors?

    Travertine floors should generally be sealed every one to three years, depending on foot traffic and usage. Regular surface checks can help determine when resealing is necessary to maintain optimal protection.

    Can I use vinegar to clean travertine floors?

    No, vinegar is acidic and can etch the surface of travertine, causing irreversible damage. Always use a pH-neutral cleaner designed for natural stone to ensure safe and effective cleaning.

    What should I do immediately if I spill something on my travertine floor?

    Blot the spill immediately with a clean cloth to prevent staining. Follow up with a damp cloth and a pH-neutral cleaner for acidic spills to neutralize any potential damage.

    Are there specific products available to clean travertine?

    Yes, a variety of travertine-specific cleaning products are available on the market. Look for pH-neutral cleaners designed for natural stone to avoid damaging the surface of your beautiful flooring.

    How can I effectively remove stains from my travertine flooring?

    Identify the stain type first, then use techniques such as poultices for oil-based stains or gentle cleaners for organic stains to effectively remove discolorations and restore the stone’s appearance.

    Is it possible to polish my travertine floors myself?

    Yes, you can polish minor etches and scratches using honing powders or diamond polishing pads, but for extensive damage, seeking professional help may be necessary to achieve the best results.

    Is travertine a suitable choice for bathrooms?

    Yes, travertine is well-suited for bathrooms due to its moisture resistance, but ensure proper sealing and ventilation to prevent moisture damage and maintain the stone’s integrity.

    How can I prevent slips on my travertine flooring?

    Using rugs and mats, along with ensuring proper sealing, can help prevent slips. Additionally, selecting a tumbled finish for better traction in wet areas is advisable for enhanced safety.

    When should I consider seeking professional restoration for my travertine?

    If your travertine floors exhibit deep stains, extensive etching, or appear dull despite regular cleaning efforts, professional restoration services can effectively restore their beauty and shine.

    The Article Travertine Floor Care Tips: A Comprehensive Guide first found on https://london-stone.co.uk

    The Article Travertine Floor Care: Essential Tips for Maintenance appeared first on https://fabritec.org

    The Article Travertine Floor Care Tips for Effective Maintenance Was Found On https://limitsofstrategy.com

  • Travertine Floor Care: Essential Maintenance Tips

    Travertine Floor Care: Essential Maintenance Tips

    Uncover the Distinctive Beauty and Features of Travertine Flooring

    Diving Deep into the Exceptional Attributes of Travertine Stone

    Travertine Floor Care: Close-up of travertine flooring with warm, earthy tones and intricate textures in a modern living room.

    Travertine Floor Care: Renowned for its stunning beauty, travertine is a remarkable natural stone that captivates homeowners with its exceptional aesthetic appeal and impressive resilience. This extraordinary material forms through a gradual accumulation of mineral deposits over millennia, primarily in mineral-rich springs, resulting in unique surfaces that showcase intricate textures and captivating patterns. With its warm and earthy color palettes, travertine serves as an adaptable choice for a multitude of interior design styles, seamlessly fitting into everything from rustic country homes to sleek modern settings. When applied as flooring, travertine infuses organic warmth into spaces, creating an inviting atmosphere in residences across the United Kingdom. Its distinctive characteristics make it a favored option among discerning homeowners who aspire to enhance their living environments.

    The formation of travertine involves a meticulous process of gradual calcium carbonate deposition within hot springs or limestone caves, resulting in stone that exhibits unique pitting and veining. These natural imperfections not only augment its visual charm but also ensure that each tile possesses its own individuality, allowing homeowners to showcase their personal style. The remarkable durability of travertine renders it an exceptional option for high-traffic areas such as kitchens, hallways, and living rooms, providing a flooring solution that withstands the daily rigors of life while maintaining its stunning beauty.

    Examining the Diverse Finishes Available for Travertine Stone

    Travertine is available in various types, each offering distinct finishes that can dramatically influence the overall appearance of your flooring. The most sought-after finishes include honed, polished, and tumbled, each with unique characteristics and applications that cater to a wide range of design preferences and functional needs.

    Honed travertine is known for its matte finish, providing a smooth, natural appearance while preserving the stone’s inherent beauty. This finish is ideal for homeowners aiming for a subtle, understated elegance in their interiors. Additionally, honed surfaces tend to be less slippery compared to polished options, making them a practical choice for families with children or older adults who may require safer flooring alternatives.

    Conversely, polished travertine features a glossy, reflective surface that enhances the stone’s vibrant colors, creating a lavish atmosphere. This finish is particularly suited for spaces where an element of glamour is desired, such as dining rooms or formal living areas. However, homeowners should be aware that polished surfaces typically require more diligent maintenance to prevent scratches and etching caused by spills or abrasive materials.

    Tumbled travertine presents a weathered appearance, showcasing softened edges and a textured surface that enriches any setting with character. This finish is ideal for outdoor applications or rustic interiors, providing a charming and authentic aesthetic. Furthermore, tumbled travertine is slip-resistant, making it suitable for wet areas like bathrooms and patios.

    Understanding the Advantages of Travertine Flooring

    Selecting travertine flooring offers numerous benefits, solidifying its status as a highly sought-after choice among homeowners in the UK. One of the most prominent advantages is its outstanding durability. Travertine is celebrated for its ability to endure heavy foot traffic, making it an ideal selection for bustling households. Its strength and resilience mean that, with proper care, it can last for decades, representing a wise long-term investment in your home.

    Alongside its practicality, the natural beauty of travertine injects a sophisticated flair into any space. The stone’s diverse textures and rich color variations can complement a wide array of décor styles, from traditional to contemporary. Moreover, travertine functions as a natural insulator, helping to maintain comfortable temperatures within your home. This feature is especially advantageous for residents in the UK, where significant temperature fluctuations can occur throughout the year.

    Another significant benefit of travertine is its heat resistance. This stone remains cool to the touch, making it an excellent flooring option for areas exposed to high temperatures, such as conservatories or sunrooms. Additionally, the porous nature of travertine allows it to absorb excess moisture, thereby reducing the risk of slips and falls in damp conditions. These qualities render travertine not just visually appealing but also a practical flooring solution for a variety of environments.

    Essential Daily Maintenance Strategies for Travertine Floors

    A person cleaning a travertine floor with specialized tools in a sunlit room, highlighting the stone's veining.

    Establishing Effective Sweeping and Dusting Routines

    To maintain the impeccable condition of your travertine floors, establishing a routine of regular sweeping or dusting is of utmost importance. Over time, dirt, dust, and debris can accumulate on the surface, leading to scratches and dullness if not promptly addressed. By implementing a consistent cleaning routine, you can effectively preserve the beauty of your flooring. Ideally, aim to sweep or dust your travertine floors daily, particularly in high-traffic zones where dirt accumulates rapidly.

    Utilizing a soft-bristled broom or a microfiber dust mop is highly recommended to prevent scratching the delicate surface of travertine. These cleaning tools are gentle yet effective, capturing fine particles that could be harmful if allowed to settle on the stone. In areas particularly prone to dirt accumulation, such as entryways or kitchens, consider placing a doormat to significantly reduce the amount of debris tracked onto your exquisite floors.

    It is also crucial to remember to avoid certain cleaning tools entirely. Steel wool or abrasive scrubbers can inflict irreversible damage to the delicate surface of travertine. Always opt for gentle cleaning techniques to ensure that your travertine retains its natural beauty for many years to come.

    Mastering the Techniques for Mopping Your Travertine Floors

    When it comes to mopping your travertine floors, employing the correct techniques is vital for maintaining their integrity. A damp mop is your best ally, but it’s important to ensure that it is not excessively wet. Too much moisture can seep into the stone, potentially causing damage over time. A pH-neutral cleaner specifically formulated for travertine is ideal, as acidic or harsh chemicals can etch the surface and diminish its shine.

    Begin by filling a bucket with warm water and mixing in the recommended amount of pH-neutral cleaner. Dip the mop into the solution, ensuring it is damp, not soaking wet. Start mopping from one corner of the room and work your way towards the exit. This method prevents you from stepping on freshly cleaned areas and inadvertently spreading dirt back onto the floor.

    After mopping, it’s essential to rinse the mop frequently to avoid redepositing dirt onto the floors. Once you finish cleaning, allow the travertine to air dry naturally. If necessary, you can buff the surface with a soft cloth to enhance the shine. This straightforward daily maintenance routine will ensure your travertine floors remain in exceptional condition, showcasing their natural allure.

    Responding Quickly to Spills on Travertine Flooring

    Spills are an inevitable aspect of life in any household, but when it comes to travertine flooring, prompt action is critical. Acidic substances, such as wine, coffee, or citrus juice, can lead to permanent staining or etching if not cleaned immediately. Therefore, having a clear plan for managing spills can save your floors from unsightly damage and costly repairs.

    As soon as a spill occurs, grab a clean, dry cloth or paper towel and gently blot the area. Avoid rubbing, as this can spread the stain further and exacerbate the issue. If the spill involves a liquid such as wine or juice, continue blotting until the area is thoroughly dry. For sticky or greasy residues, use a pH-neutral cleaner and a soft cloth for effective removal.

    After addressing the immediate spill, monitor the affected area over the next few days. If you notice any lingering discolouration, it may be necessary to employ a more thorough cleaning method or consult a professional for guidance. By taking swift action, you can protect your travertine floors and maintain their stunning appearance for years to come.

    Comprehensive Guide to Deep Cleaning Travertine Floors

    Selecting the Best Cleaner for Your Travertine

    When it’s time for a deep clean of your travertine floors, choosing the right cleaning product is crucial. Not all cleaners are suitable for this elegant stone; harsh chemicals like bleach or vinegar can inflict significant damage, stripping away protective layers and dulling the finish. Instead, opt for a travertine-specific cleaner that is free from harmful ingredients and formulated to care for natural stone.

    These specialized cleaners are designed to effectively eliminate dirt, grime, and stains without harming the stone itself. Many reputable brands offer products specifically tailored for natural stone care, ensuring that your flooring receives the gentle yet effective treatment it requires. Before making a purchase, check for pH-neutral options, as these will help maintain the stone’s integrity while providing a thorough clean.

    Additionally, consider conducting a spot test in an inconspicuous area before applying the cleaner extensively. This precaution will help confirm that the cleaner does not discolour or damage your travertine. Once you find a suitable product, you will be well-equipped to keep your floors looking fabulous and well-maintained.

    Implementing Effective Scrubbing and Rinsing Techniques

    A successful deep cleaning routine for travertine involves careful scrubbing and rinsing. Once you have selected an appropriate cleaner, prepare your tools: a soft-bristled brush and a bucket of clean water should suffice. Begin by applying the cleaner to a small section of the floor, allowing it to sit for a few minutes to penetrate the dirt and stains effectively.

    Next, use the soft-bristled brush to gently scrub the area in circular motions. Be cautious when using abrasive brushes, as they can scratch the travertine surface. Concentrate on any particularly dirty spots or stains, but exercise caution not to over-scrub. After thoroughly cleaning the section, rinse the area with clean water to eliminate any remaining cleaner and dirt. This step is crucial, as residue left on the surface can dull the stone over time.

    Once you have rinsed the area, dry it with a soft cloth to prevent water spots or streaks from forming. This thorough scrubbing and rinsing method will keep your travertine looking fresh and vibrant, ready to impress anyone who enters your home.

    Drying and Buffing Your Travertine Floors for Enhanced Shine

    After completing your deep cleaning, allowing your travertine to dry completely is vital for preserving its beauty. Use soft cloths or towels to absorb any residual moisture. Once the floor is dry, take the time to gently buff the surface. Buffing not only enhances the stone’s natural shine but also helps to eliminate any streaks left behind after cleaning.

    Utilize a clean, dry microfiber cloth for this task, as it will not scratch the surface of your travertine. In a circular motion, buff the entire floor, paying special attention to corners and edges where moisture may linger. This process will restore the luster of the travertine, giving it a polished and well-maintained appearance that is sure to impress visitors.

    Integrating this drying and buffing routine into your overall maintenance strategy is essential. Regular buffing can help keep your travertine floors looking their best while also extending the stone’s lifespan. By committing to this process, you can ensure your travertine remains a stunning feature in your home for years to come.

    The Crucial Importance of Sealing Travertine Floors

    Determining the Right Time to Seal Your Travertine Flooring

    Sealing your travertine floors is a critical step in preserving their beauty and extending their lifespan. Over time, even the most carefully maintained floors can become susceptible to stains and moisture infiltration. The frequency of sealing largely depends on factors such as the finish type, foot traffic levels, and the specific environment of your home.

    Typically, sealing travertine should occur every one to three years. High-traffic areas, such as hallways and kitchens, may require more frequent sealing compared to less-used spaces. Observing your floors will help you determine the right sealing schedule; if you notice that spills are no longer beading on the surface or that the stone feels more porous, it may be time to reseal.

    Before sealing, it’s crucial to ensure that the surface is clean. Make sure that your travertine is thoroughly cleaned and dried prior to application. Taking these steps will guarantee that the sealant adheres properly and provides the highest level of protection against stains and moisture.

    Step-by-Step Guide to Properly Sealing Travertine

    Once you’ve determined that it’s time to seal your travertine floors, it’s essential to follow the correct procedure to achieve optimal results. First, select a high-quality penetrating sealer specifically designed for natural stone. This type of sealer will penetrate the stone, providing a protective barrier against moisture and stains.

    Start the sealing process by applying the product according to the manufacturer’s instructions. Typically, you will need to use a clean applicator, such as a soft cloth or roller, to spread the sealant evenly across the surface. Work in small sections to ensure complete coverage, allowing the sealer to absorb into the stone for the recommended time before wiping away any excess.

    After sealing, allow the floor to dry completely. Please exercise caution and avoid walking on the surface until the sealant has fully cured, as this can interfere with its effectiveness. By following these steps, you will ensure that your travertine floors are well-protected, enabling you to enjoy their beauty without concern.

    Maintaining the Efficacy of the Sealing on Your Travertine Floors

    Maintaining the integrity of your travertine floor’s seal is crucial for ensuring long-lasting protection. Regular inspections of the sealant’s condition should be an integral component of your maintenance routine. Look for signs of wear or areas where the seal appears to be thinning, as these can indicate that it’s time for reapplication.

    One effective method for testing the seal is to conduct a simple water test. Just sprinkle a few drops of water on the surface; if the water beads up, the seal is still effective. Conversely, if the water soaks into the stone, it’s time to reseal. This proactive approach can prevent future damage and maintain the pristine condition of your travertine flooring.

    When reapplying sealant, ensure the floor is clean and dry, following the same procedure as the initial sealing process. Adhering to the application guidelines provided by the sealant manufacturer will yield the best results. By committing to this maintenance practice, you’ll enhance the durability and beauty of your travertine floors for years to come.

    Effectively Addressing Stains and Etches on Travertine Floors

    Identifying Different Types of Stains Affecting Your Travertine

    Understanding the various types of stains that can affect your travertine flooring is crucial for effective cleaning and restoration. Stains can typically be classified into three categories: oil-based, organic, and inorganic. Each type of stain necessitates a specific approach for removal, making identification essential for successful treatment.

    Oil-based stains generally originate from cooking oils, grease, or cosmetics and may present as dark discolourations on the surface. Organic stains stem from natural substances, such as food, drinks, or leaves, resulting in browning or rust-like marks. Lastly, inorganic stains arise from substances like rust or cement, appearing as discoloured patches that can be particularly stubborn and challenging to remove.

    By accurately identifying the source of a stain, you can select the most effective cleaning method. For instance, oil-based stains may require a poultice made from baking soda or flour mixed with water to draw out the stain. Meanwhile, organic stains might respond well to a diluted pH-neutral cleaner. Being informed about the nature of the stains on your travertine will empower you to take prompt and effective action.

    Employing Strategies for Successful Stain Removal

    Effectively removing stains from travertine requires a tailored approach based on the type of stain identified. For oil-based stains, creating a poultice is one of the most effective techniques. Mix a small amount of baking soda or flour with water to form a paste. Apply the paste to the stained area and cover it with plastic wrap to allow it to work overnight. The poultice will absorb the stain from the stone, helping to restore the surface to its original glory.

    For organic stains, using a gentle pH-neutral cleaner and a soft cloth can often yield positive results. Dab the stained area with the cloth soaked in the cleaning solution, allowing it to sit for a few minutes before rinsing thoroughly with clean water. Avoid scrubbing too hard, as this can further damage the stone and worsen the stain’s appearance.

    Inorganic stains, such as rust, may necessitate a more specialised approach. A rust remover specifically designed for natural stone can be effective, but it’s crucial to test it in a small, inconspicuous area first. Following the manufacturer’s instructions closely will ensure the best results. By employing these methods, you can effectively address stains on your travertine flooring and preserve its beauty and integrity.

    Repairing Etches on Travertine Surfaces for Restoration

    Etching is a common issue with travertine flooring, often caused by contact with acidic substances, such as vinegar or citrus. These reactions can result in dull or discoloured spots on the surface, detracting from the stone’s natural beauty. Fortunately, there are techniques to repair etches and restore the appearance of your floors to their former glory.

    One effective method of repairing etches involves honing or polishing the affected area. Use a honing powder or a diamond polishing pad specifically designed for natural stone to buff the etched spot gently. This process helps to grind away the damaged surface and restore the stone’s original finish. It’s essential to proceed slowly and methodically to avoid causing further damage to the travertine.

    If the etching is particularly deep or extensive, you may wish to consider professional restoration services. Stone care specialists have access to advanced tools and techniques that can return your travertine floors to their original splendour. By promptly addressing etches, you can maintain the beauty and integrity of your travertine flooring, ensuring it remains a stunning feature in your home.

    Taking Preventative Measures Against Future Stains and Etches on Travertine Flooring

    Preventing future stains and etches on your travertine floors is a proactive strategy that pays dividends in the long run. Using sealants is one of the most effective methods to create a protective barrier against spills and stains. Ensure that your travertine is sealed regularly, as previously discussed, to maintain its resilience and beauty.

    Another simple yet effective strategy is to use protective mats in high-traffic areas or near entry points to catch dirt and moisture before it reaches the stone. Additionally, placing coasters under beverages and avoiding direct contact between acidic substances and the floor can help prevent etching and staining.

    Educating family members and guests about the importance of care around travertine can also foster a culture of preservation. By implementing these preventative measures, you can ensure your travertine flooring remains a stunning feature in your home for years to come, maintaining its elegance and functionality.

    Engaging Professional Restoration Services for Travertine Floors

    In situations where travertine flooring has suffered from deep stains or extensive etching, enlisting the help of professional restoration services may be the best course of action. Experienced professionals possess the tools and expertise necessary to clean, polish, and restore travertine to its original splendour, ensuring that your flooring remains a beautiful aspect of your home.

    When selecting a restoration service, look for companies that specialise in natural stone care. Seek references or reviews from previous clients to gauge the quality of their work. A reputable restoration service will assess the condition of your floors and recommend appropriate steps for restoration, including deep cleaning, honing, and resealing.

    Investing in professional restoration not only helps maintain the value of your home but also ensures that your travertine flooring remains a timeless and elegant element of your living space. By addressing issues promptly and seeking expert advice when necessary, you can enjoy the beauty and durability of your travertine for years to come.

    Effective Strategies for Protecting Your Travertine Flooring

    Utilising Rugs and Mats for Optimal Protection

    Incorporating rugs and mats in strategic locations can be an extremely effective way to shield your travertine floors from damage. Rugs help prevent scratches and wear from foot traffic while also absorbing moisture from shoes, which can otherwise lead to staining or etching over time.

    When selecting rugs, opt for those with rubber backing to prevent slipping and sliding, which can pose safety hazards. Place rugs at entryways, kitchens, and high-traffic areas to effectively catch dirt and moisture before it reaches the stone. Additionally, consider using floor protectors under furniture to prevent scratches and dents that could mar the surface of your beautiful travertine flooring.

    Regularly cleaning and maintaining your rugs is also crucial to avoid dirt accumulation, which could be transferred to your travertine floors. By using rugs and mats thoughtfully and consistently, you can significantly prolong the life and beauty of your travertine flooring, ensuring it remains a stunning feature in your home for years to come.

    Conducting Routine Maintenance Checks for Longevity

    Conducting routine maintenance checks is a prudent way to identify and address potential issues before they escalate into major problems. Inspect your travertine floors regularly for signs of wear, such as discolouration, scratches, or areas that appear less shiny than others.

    If you notice any irregularities, take immediate action. For instance, if you identify a scratch, consider using a polishing compound designed for natural stone to restore the surface. Similarly, if you observe signs of staining, take steps to address it before it becomes more entrenched and difficult to remove.

    By staying vigilant with regular maintenance checks, you can ensure the ongoing beauty and integrity of your travertine flooring. These proactive measures will save you time, effort, and money in the long run, allowing you to enjoy your beautiful flooring without concern for its condition.

    Frequently Asked Questions About Travertine Maintenance

    What is the most effective method for cleaning my travertine floors?

    To clean travertine floors effectively, regularly sweep or dust, then use a damp mop with a pH-neutral cleaner specifically formulated for natural stone. Avoid excessive water and harsh chemicals to preserve the integrity and beauty of the stone.

    How often should I seal my travertine floors?

    Travertine floors should typically be sealed every one to three years, depending on the frequency of foot traffic and usage. Regular checks of the surface can help determine when resealing is necessary to maintain optimal protection.

    Can I use vinegar to clean travertine floors?

    No, vinegar is acidic and can etch the surface of travertine, causing irreversible damage. Always use a pH-neutral cleaner specifically designed for natural stone to ensure safe and effective cleaning.

    What immediate actions should I take if I spill something on my travertine floor?

    Blot the spill immediately with a clean cloth to prevent staining. For acidic spills, follow up with a damp cloth and a pH-neutral cleaner to neutralise any potential damage.

    Are there specific products available for cleaning travertine?

    Yes, a variety of travertine-specific cleaning products are available on the market. Look for pH-neutral cleaners specifically designed for natural stone to prevent damage to the surface of your beautiful flooring.

    How can I effectively remove stains from my travertine flooring?

    Identify the stain type first, then use appropriate techniques such as poultices for oil-based stains or gentle cleaners for organic stains to remove discolourations and restore the stone effectively.

    Is it possible to polish my travertine floors myself?

    Yes, you can polish minor scratches and etches using honing powders or diamond polishing pads, but for extensive damage, seeking professional help may be necessary to achieve the best results.

    Is travertine a suitable choice for bathrooms?

    Absolutely, travertine is well-suited for bathrooms due to its moisture resistance, but ensure proper sealing and ventilation to prevent moisture damage and maintain the stone’s integrity.

    How can I prevent slips on my travertine floors?

    Using rugs, mats, and ensuring proper sealing can help prevent slips and falls. Additionally, choosing a tumbled finish for better traction in wet areas is advisable for enhanced safety.

    When should I consider hiring a professional to restore my travertine?

    If your travertine floors exhibit deep stains, extensive etching, or appear dull despite regular cleaning efforts, professional restoration services can effectively restore their beauty and shine.

    The Article Travertine Floor Care Tips: A Comprehensive Guide was first found on https://london-stone.co.uk

    The Article Travertine Floor Care: Essential Tips for Maintenance appeared first on https://fabritec.org

    The Article Essential Tips for Travertine Floor Care and Maintenance Was Found On https://limitsofstrategy.com

  • Sealing Stone Floors for Maximum Protection: Key Tips

    Sealing Stone Floors for Maximum Protection: Key Tips

    This article, Essential Tips for Sealing Stone Floors to Ensure Maximum Protection, delves into the vital significance of sealing <a href="https://limitsofstrategy.com/spray-mops-for-stone-floors-the-ultimate-buying-guide/">stone floors</a> to enhance their durability and maintain their captivating aesthetic appeal. The following key aspects are explored in detail:

    • Crucial Pre-Cleaning Steps to Prepare Stone Floors for Effective Sealing: Before applying any sealant, it is paramount to thoroughly clean the stone surface to guarantee optimal adhesion and effectiveness of the sealant.
    • Selecting the Ideal Sealant Specifically for Your Type of Stone: Different types of stone necessitate distinct sealants. For instance, polished marble may require topical finishes, while more porous stones need penetrating sealers to provide sufficient protection.
    • Mastering Application Techniques to Ensure Comprehensive Coverage: Implementing the right application methods is essential for preventing staining and achieving uniform coverage across the stone surface.
    • Establishing Regular Maintenance Routines Post-Sealing for Longevity: Consistent care, such as utilizing pH-neutral cleaners and steering clear of harsh chemicals, greatly extends the lifespan of the sealant.
    • Recognizing When to Reapply Sealants for Ongoing Protection: Indicators such as water absorption or diminished water beading suggest that a new layer of sealant is required.
    • Boosting Both Protection and Aesthetic Value of Stone Floors: A properly sealed floor not only enhances the beauty of the stone but also simplifies cleaning and guards against stains and damage.

    This content provides actionable advice for homeowners eager to preserve the quality and charm of their stone flooring.

    Strategies for Extending the Lifespan and Aesthetic Appeal of Stone Floors Through Effective Sealing

    Sealing stone floors is an essential measure in protecting these exquisite surfaces while enhancing their durability and visual appeal. Although natural stone is celebrated for its resilience, it remains susceptible to damage from stains and everyday wear. By adopting a comprehensive sealing strategy, homeowners can enjoy numerous benefits that significantly enhance their investment in stone flooring. This proactive approach not only safeguards the stone but also ensures that its beauty is preserved for years to come, making it a savvy choice for any homeowner intent on maintaining the integrity and allure of their floors.

    Proactively Preventing Stains and Safeguarding the Integrity of Your Stone Floors

    A pristine stone floor with sealant repelling wine, oil, and cleaning solution, preventing stains.

    Stains pose a significant risk to the beauty of stone floors. Once a stain penetrates the surface, it can be incredibly difficult to remove, often necessitating professional cleaning solutions or services. By implementing a thorough sealing process, homeowners establish a strong defense against these unwelcome blemishes. The sealant acts as a protective barrier, effectively preventing liquids such as wine, oil, or cleaning agents from seeping into the stone. This protection helps to maintain the surface in pristine condition, significantly reducing the likelihood of permanent discoloration and ensuring that the stone continues to exhibit its natural elegance and charm.

    Consider the bustling kitchen environment, where spills frequently occur. A properly sealed stone floor can endure minor accidents, allowing for swift clean-ups while preserving the stone’s inherent beauty. For example, if tomato sauce or olive oil is accidentally spilled, immediate staining may happen if the situation is not promptly addressed; however, with a reliable sealant in place, the impact of such incidents is greatly mitigated, allowing for quick recovery and preservation of the floor’s pristine appearance.

    Moreover, reputable brands in the UK offer sealants specifically formulated for various stone types, ensuring that the protection is tailored to the material, whether it be limestone, granite, or slate. The outcome is a flawless appearance that maintains the stone’s original charm while significantly extending its lifespan.

    Enhancing the Durability of Stone Floors for Long-Lasting Performance

    Durability is a crucial factor when investing in stone flooring. Unsealed stone is vulnerable to daily challenges, including foot traffic, spills, and environmental conditions. Sealing stone floors significantly improves their durability. A high-quality seal adds an extra layer of protection against wear and tear, ensuring that the stone remains safeguarded for many years.

    Many homeowners overlook the reality that sealed floors exhibit superior resistance to moisture compared to their unsealed counterparts. This quality is particularly advantageous in the humid climate commonly found in the UK. Sealing minimizes moisture absorption, which can otherwise lead to cracks or mold growth over time, thereby ensuring that the integrity of the stone remains intact and unblemished.

    Furthermore, a well-sealed floor simplifies maintenance requirements. It necessitates less frequent deep cleaning and can usually be maintained using simple pH-neutral cleaning solutions. This ease of upkeep is especially beneficial for busy households or commercial environments where high foot traffic is the norm. Ultimately, investing in sealants not only protects the stone but also reduces long-term maintenance costs, making it a wise investment for homeowners.

    Elevating the Visual Appeal of Stone Surfaces Through Effective Sealing

    The allure of stone floors primarily stems from their aesthetic charm. However, unsealed stone can appear dull or lackluster over time due to the buildup of dirt and general wear. Sealing stone floors revitalizes the surface, allowing its natural beauty to shine through. A well-applied sealant can enhance the stone’s color and texture, resulting in a vibrant and stunning appearance.

    Numerous sealants available on the market are specifically designed to amplify the stone’s inherent patterns. A color-enhancing sealer can highlight the warm tones in a sandstone floor, transforming it into an inviting centerpiece in any room. The visual transformation can be striking, significantly uplifting the atmosphere in living rooms, kitchens, or hallways, thereby enhancing the overall aesthetic of the home.

    Additionally, the glossy finish provided by topical sealants can create a sophisticated ambiance, making stone floors a stunning focal point within home décor. This enhancement elevates the property’s overall aesthetic and substantially increases its market value, as prospective buyers often seek well-maintained and visually appealing surfaces. Therefore, sealing not only provides necessary protection but also enhances the aesthetic standards of stone flooring, establishing it as a valuable investment.

    Exploring the Various Sealants Available for Stone Floors

    A variety of sealant bottles on a stone floor, showing different textures and uses.

    When it comes to sealing stone floors for protection, the selection of sealant is crucial in determining the effectiveness of the protection provided. A diverse assortment of sealants is available, catering to various needs and preferences, making it essential to understand their characteristics for informed decision-making.

    Understanding the Advantages of Penetrating Sealants for Stone Floors

    Penetrating sealants, as the name suggests, absorb into the stone, providing profound protection without altering the material’s appearance. This type of sealant is particularly suitable for natural stones such as granite and marble, benefiting from enhanced resistance to stains and moisture without the risk of an unsightly glossy finish that can detract from the stone’s natural beauty.

    A defining feature of penetrating sealants is their ability to allow the stone to breathe. This characteristic is vital in the UK’s variable climate, where humidity and temperature fluctuations can compromise stone integrity. Sealants that penetrate deeply into the substrate create a barrier against moisture from within, effectively preventing damage while preserving the stone’s natural finish and texture.

    Moreover, penetrating sealants are known for their longevity, requiring less frequent reapplication compared to topical alternatives. This makes them a practical choice for homeowners seeking both aesthetic enhancement and durability in their stone flooring. The reduced maintenance requirements, coupled with adequate protection, present a compelling case for selecting this type of sealant for optimal performance.

    Examining the Benefits of Topical Sealants for Stone Floors

    Topical sealants provide an alternative approach to sealing stone floors for protection. Unlike penetrating sealants, these products create a protective layer on the stone’s surface, delivering a robust barrier against stains, spills, and wear resulting from foot traffic. One of the primary benefits of topical sealants is the high-gloss finish they impart, which can dramatically enhance the visual appeal of a floor.

    While ideally suited for high-usage areas such as kitchens and bathrooms, topical sealants may be prone to scratching and may require more frequent maintenance. Proper application techniques are essential to achieving an even coat, as uneven application can result in unsightly streaks or patches that detract from the overall appearance. Therefore, meticulous attention to detail during application is crucial for achieving the best results.

    When selecting a topical sealant, homeowners should consider its compatibility with their specific stone type. Certain stones, such as polished marble, respond favorably to topical finishes, providing the luxurious aesthetic that many homeowners desire. However, softer stones may require a more cautious approach to prevent long-term damage, ensuring that the sealant enhances rather than detracts from the stone’s natural beauty.

    In summary, topical sealants represent an excellent option for those looking to enhance the visual appeal of their stone floors while ensuring substantial protection against everyday wear and tear.

    Maximizing Stone Floor Aesthetics with Specialized Enhancing Sealants

    A luxurious slate floor with enhanced, vibrant earthy tones and rich textures, pulsating with character and warmth.

    Enhancing sealants represent a unique category that provides protection while enriching the stone’s color and texture. These sealants are specifically designed to amplify the natural beauty of stone flooring, making them ideal for homeowners eager to showcase the stunning patterns and colors inherent in natural stone.

    These sealants intensify the hues of the stone while providing a protective barrier against stains and moisture. For instance, an enhancing sealant can elevate a slate floor’s rich, earthy tones, making the surface pulsate with character and warmth.

    Implementing enhancing sealants has a significant visual impact in the UK, where stone floors are popular in both traditional and contemporary homes. Their application can transform a dull, uninspiring floor into a striking centerpiece in any room, drawing attention and admiration from guests and residents alike.

    Furthermore, these sealants are relatively easy to apply, making them a favorite among DIY enthusiasts and professionals. However, homeowners should be aware that enhancing sealants may require more frequent reapplication than others, particularly in high-traffic areas, so planning ahead is essential for maintaining their effectiveness.

    By opting for an enhancing sealant, homeowners can enjoy remarkable visual benefits alongside the protective qualities necessary to maintain stone flooring in optimal condition, ensuring it remains a beautiful feature of their home.

    Utilizing Impregnating Sealants for Optimal Protection of Stone Floors

    Impregnating sealants offer an effective solution for sealing stone floors for protection while preserving the natural appearance and breathability of the stone surface. These sealants penetrate deeply into the stone, creating a solid barrier against moisture, oil, and other potential stains.

    One significant advantage of impregnating sealants is their ability to allow vapor to escape. This feature is crucial in preventing damage caused by moisture entrapment, which can lead to mold or mildew growth—an especially prevalent risk in the damp climate of the UK. The breathability of these sealants makes them suitable for various stone types, including porous materials like limestone and sandstone, ensuring comprehensive protection.

    Furthermore, impregnating sealants do not alter the stone’s visual appearance. This allows stone owners to protect their flooring while preserving the natural textures and colors that initially attracted them to the material. Maintaining the natural beauty of the stone enhances its appeal and value within the property.

    When applied correctly, impregnating sealants can provide long-lasting protection, typically requiring reapplication every few years. The performance of these sealants is heavily influenced by the quality of the product and the conditions under which it is applied, so meticulous preparation and application are essential for optimal results.

    In summary, impregnating sealants offer a harmonious balance between protection and aesthetics, making them an excellent selection for maintaining the integrity of stone floors across various settings.

    Maximizing Color with Color-Enhancing Sealants for Stone Floors

    Color-enhancing sealants are specifically formulated to protect and intensify the natural colors of stone flooring. These sealants present an appealing option for homeowners eager to showcase their stone’s vibrant hues and intricate patterns. They not only seal the surface against stains and moisture but also amplify the stone’s inherent beauty, making it appear more inviting.

    This type of sealant is particularly popular for stones such as travertine, slate, and certain types of granite, which can often appear muted over time. A well-applied color-enhancing sealant can rejuvenate these surfaces, allowing the natural variation and depth to shine effortlessly, thereby creating a visually stunning environment.

    Homeowners should note that color-enhancing sealants may impart a subtle sheen that adds elegance to any room. In areas such as hallways or living spaces, where aesthetics are paramount, the visual impact of these sealants can be transformative, contributing to a sophisticated overall design.

    However, selecting a product that is compatible with the specific type of stone being sealed is essential. Some stones may react differently to various sealants, so it is advisable to conduct a small test in an inconspicuous area before completing the application to ensure optimal results.

    Overall, color-enhancing sealants provide a dual benefit of protection and aesthetic enhancement, making them a popular choice for homeowners who wish to preserve the beauty of their stone floors while ensuring long-lasting durability.

    Essential Preparation Steps for Sealing Stone Floors Effectively

    Preparing stone floors for sealing is a crucial step that ensures optimal results. Proper preparation facilitates the effective application of the sealant while significantly enhancing its longevity and performance.

    Thoroughly Cleaning the Surface Before Sealing

    The first step before applying any sealant is to meticulously clean the stone floor. This process involves removing dirt, grime, and any previous cleaning products that may hinder the sealant’s adherence. It is advisable to use a sealant-neutral cleaner, as harsh chemicals can damage the stone or leave residues that interfere with the sealing process.

    An effective cleaning routine may include sweeping or vacuuming to eliminate loose dust and debris, followed by mopping with a suitable cleaner. This is particularly important for natural stones, as their porous surfaces can trap dirt and other contaminants. If the floor has been neglected or shows signs of heavy staining, a more intensive cleaning method, such as steam cleaning, may be necessary to restore the stone to its original condition.

    Once the floor has been cleaned, allowing it to dry completely is crucial. Any moisture remaining on the surface can complicate the sealant application, potentially leading to blistering or uneven coverage. Ensuring the surface is pristine and dry sets the stage for successful sealing, making this step essential for achieving the desired results.

    Repairing Any Damage Before Sealing Stone Floors

    Tackling any damage to the stone floor before sealing is vital to ensure comprehensive coverage. Cracks, chips, or scratches can detract from the overall aesthetic and compromise the sealant’s effectiveness. Taking the time to repair these imperfections ensures an even application, which is crucial for achieving comprehensive protection of the stone.

    For minor chips and scratches, homeowners can utilize a repair kit specifically designed for their type of stone. These kits typically include epoxy or resin that can fill imperfections and help restore the surface to its original condition. It is essential to adhere closely to the manufacturer’s instructions to achieve the best results.

    For larger cracks, professional assistance may be necessary to ensure a proper and lasting repair. Neglecting to address damages before sealing can lead to further deterioration over time and undermine the purpose of applying a sealant in the first place.

    Once repairs are complete and the surface has fully cured, the floor will be primed for sealing, providing a smooth and uniform base for the application.

    Testing Sealant Compatibility with Different Stone Types

    Not all sealants are suitable for every type of stone, making it essential to test sealant compatibility before full application. Each stone possesses unique properties, and using an inappropriate sealant can lead to adverse effects such as discoloration or damage.

    To conduct a compatibility test, select a small, inconspicuous area of the floor and apply a small amount of the chosen sealant. Observe how the stone reacts over 24 hours, noting any changes in color or texture. If the stone appears altered or if the sealant does not adhere properly, it may indicate that a different product is necessary for optimal results.

    This test is particularly crucial for porous stones, which absorb sealants differently than denser materials. This knowledge allows homeowners to make informed decisions regarding which sealant to use for their specific flooring, ultimately ensuring the best possible outcome.

    Ensuring Complete Dryness of the Stone Surface Before Sealing

    A successful seal application relies heavily on the moisture content of the stone before application. The stone floor must be entirely dry before sealing to prevent moisture-related issues, such as bubbling or improper sealant adhesion.

    Drying times can vary depending on the climate and the cleaning method employed. In humid conditions prevalent in some areas of the UK, it may take longer for the stone to dry thoroughly. Homeowners should allow adequate drying time, which can range from several hours to a full day, depending on the conditions.

    Additionally, using fans or dehumidifiers can help accelerate the drying process. Once the floor is confirmed to be dry, it will be in prime condition for applying the sealant, ensuring maximum protection and longevity for the stone.

    Effective Application Techniques for Sealing Stone Floors

    Applying sealants is pivotal in protecting stone floors, and utilizing the proper techniques guarantees optimal product performance. Different methods can be employed depending on the sealant type, area size, and stone surface.

    Utilizing the Brushing Method for Precise Sealant Application

    One of the most traditional yet effective methods for applying sealant is brushing. A high-quality brush allows for precision control, ensuring the sealant is evenly distributed across the stone surface. This method is particularly advantageous for textured stones, where a brush can reach the grooves and crevices, ensuring comprehensive coverage and protection.

    When brushing, homeowners should work in small sections, applying the sealant in overlapping strokes to avoid missed spots. This systematic approach guarantees an even application and facilitates a thorough inspection of the area before advancing to the subsequent section.

    Moreover, using a brush enables the user to adjust the amount of sealant applied, which can be particularly beneficial for porous stones that require more product for adequate coverage. It is crucial to select a brush designed explicitly for sealants, as this will significantly influence the quality of the application and the overall finish of the floor.

    Efficiency of the Spraying Method for Large Area Coverage

    For larger areas, the spraying method can serve as an efficient means of applying sealant. This technique ensures even distribution and can significantly reduce application time. However, it necessitates more equipment and some practice to master, as achieving the correct spray pattern is essential for effective sealing.

    When spraying sealant, it is advisable to utilize a professional-grade sprayer designed for the specific type of sealant. Homeowners should also use drop cloths or masking tape to safeguard nearby surfaces from overspray, protecting other areas from potential damage.

    Working in controlled sections, the sprayer should maintain a consistent distance from the surface to achieve an even coat. After spraying, it is essential to back-brush the area to ensure the sealant penetrates properly and to eliminate any potential pooling, which can lead to uneven coverage.

    The spraying method proves particularly beneficial for outdoor stone surfaces, where extensive areas require protection against environmental factors. When executed correctly, it can yield professional-looking results with minimal effort and time.

    Applying the Rolling Method for Quick and Efficient Coverage of Stone Floors

    For those who prefer a more straightforward approach, the rolling method presents an excellent alternative for applying sealant. A roller can provide a smooth and efficient application, especially for flat, even stone surfaces. Rollers tend to facilitate a quick method of covering larger areas without the risk of drips or unevenness commonly associated with brushed applications.

    When using a roller, selecting the appropriate nap length for the specific type of stone is crucial. A shorter nap is ideal for smoother surfaces, while a longer nap may be necessary for textured stones to ensure adequate sealant penetration and coverage.

    As with other methods, working in small sections is advisable. This practice allows for better control over the application and ensures that the sealant cures evenly across the surface. Additionally, the rolling method can be combined with brushing for those tricky areas or edges that require more precision, ensuring comprehensive coverage and protection.

    In summary, selecting the appropriate application technique is vital for achieving the best protection for stone floors. Homeowners should choose the method that best aligns with their skill level and the specific conditions of their flooring to ensure a successful application.

    Ongoing Maintenance for Sealed Stone Floors to Ensure Longevity

    Maintaining sealed stone floors is essential to ensure their longevity and sustained aesthetic appeal. Proper care can significantly extend the life of the sealant and the stone itself, making routine maintenance a worthwhile investment for any homeowner.

    Implementing Regular Cleaning Routines for Stone Floors

    Regular cleaning is paramount to maintaining the integrity of sealed stone floors. It is crucial to use a pH-neutral cleaner, as harsh chemicals can degrade the sealant and potentially damage the stone over time. A straightforward routine that includes sweeping or vacuuming followed by damp mopping can effectively remove dirt and debris without compromising the seal.

    Establishing a cleaning schedule that corresponds to the level of foot traffic within the home is essential. For high-traffic areas, such as kitchens and hallways, more frequent cleaning may be necessary to prevent dirt accumulation and preserve the beauty of the stone. Regular attention to these areas will help ensure that the floors remain attractive and functional.

    In addition to regular cleaning, periodic deep cleaning may be required, particularly if the floor has not been consistently maintained. However, homeowners should always follow the manufacturer’s cleaning guidelines to ensure compatibility with the sealant and maintain the floor’s protective qualities.

    By cultivating a regular cleaning routine, homeowners can keep their stone floors pristine and ensure the protective sealant remains effective, thereby prolonging the life and beauty of the flooring.

    Avoiding Damage from Harsh Chemicals During Stone Floor Cleaning

    When maintaining sealed stone floors, it’s crucial to avoid harsh chemicals that can cause irreversible damage. Many conventional cleaning products contain acids or abrasive agents that can deteriorate the sealant, reducing its effectiveness and potentially harming the stone surface itself.

    Instead, homeowners should opt for milder, stone-safe cleaners specifically formulated for natural stone surfaces. These products will not only clean effectively but also help maintain the integrity of the sealant, ensuring it continues to offer protection against stains and moisture over time.

    Careful label reading is essential to avoid unwanted reactions that could compromise the floor’s appearance or longevity. By choosing appropriate cleaning solutions, homeowners can protect their investment and enjoy beautiful, well-maintained stone flooring for years to come.

    Understanding Resealing Frequency for Stone Floors’ Longevity

    The frequency of resealing is critical to maintaining sealed stone floors. Depending on the type of sealant used and the level of foot traffic, homeowners should plan to reseal their floors every one to three years to ensure continued protection.

    Due to daily wear and tear, high-traffic areas may require more frequent applications, while less-used spaces might endure longer without needing resealing. Recognizing the signs that a sealant requires replenishing—such as water no longer beading on the surface—can guide homeowners in determining when to reapply.

    For optimal results, scheduling a reseal when the least-used flooring can prevent disruption and allow the sealant to cure properly. This proactive approach ensures ongoing protection and contributes to the homeowner’s overall value and aesthetic appeal.

    Effective Strategies for Managing Spills on Sealed Floors

    Even with a sealant in place, swift action is essential when managing spills on stone floors. While the sealant provides a level of protection, allowing spills to sit for extended periods can still lead to staining or damage.

    Homeowners should prepare a cleaning strategy for everyday spills, such as oil or acidic substances. It is crucial to blot rather than rub to prevent pushing the liquid deeper into the stone, which could exacerbate the issue and lead to more significant damage.

    Utilizing a pH-neutral cleaner, homeowners can effectively tackle spills without risking damage to the sealant or stone. By acting promptly and implementing a spill response plan, homeowners can maintain the integrity and appearance of their sealed stone floors over the long term, ensuring they remain a beautiful feature in the home.

    Addressing Common Issues with Sealed Stone Floors

    Despite the numerous benefits of sealing, various common issues can arise with sealed stone floors. Understanding these challenges can empower homeowners to maintain their floors effectively and address any problems as they occur.

    Identifying Signs of Sealant Wear and Tear on Stone Floors

    Over time, even the most durable sealants can experience wear and tear. Factors such as foot traffic, exposure to moisture, and cleaning methods can all contribute to the degradation of the sealant. Homeowners should remain vigilant for signs of wear, such as dullness or a lack of water beading on the surface, which indicate that the sealant is no longer performing effectively.

    Regular maintenance, including cleaning and appropriate resealing, can help extend the lifespan of the sealant. If signs of wear become evident, it may be time for a complete reapplication to ensure the stone remains protected from stains and moisture, preserving its beauty and functionality.

    Investing in high-quality sealants can also reduce the frequency of reapplication. Professional-grade options often enhance durability, making them a wise choice for homeowners seeking lasting protection for their stone floors.

    Effectively Managing Stains and Spills on Sealed Stone Surfaces

    While sealed stone floors exhibit greater resistance to stains, they are not entirely immune; quick action is essential to prevent spills from penetrating the stone. Homeowners should familiarize themselves with various types of spills and have a cleaning strategy prepared for each situation.

    Daily kitchen spills, such as oil or red wine, can be particularly problematic. Immediate blotting and cleaning with an appropriate solution can prevent lasting damage. Developing a proactive cleaning routine, especially in areas prone to spills, can significantly mitigate the risk of stains and maintain the floor’s pristine appearance.

    When stains do occur, professional cleaning services can often restore the stone to its original condition. However, prevention through prompt action remains the most effective strategy for maintaining the beauty and integrity of sealed stone floors.

    Mitigating Etching and Scratches on Stone Floors

    Etching and scratches can occur even on sealed surfaces, particularly in high-traffic areas. Acidic substances like vinegar or citrus juices can cause etching, dulling the surface and impacting the stone’s aesthetic appeal.

    Consistent and careful cleaning can help reduce the risk of etching. Homeowners should also avoid using abrasive cleaning tools that may scratch the surface, preserving the stone’s integrity and preventing further damage.

    For existing scratches, severity is key. Minor scratches can often be buffed out with a polishing compound, while deeper scratches may require professional assistance. Promptly addressing etching and scratches can help maintain the beauty of sealed stone floors and ensure their longevity.

    Choosing the Right Sealant for Your Stone Flooring Needs

    Selecting the proper sealant for stone floors is a critical decision that directly affects the flooring’s overall protection and aesthetic appeal. Homeowners must consider various factors to select the most suitable product for their needs.

    Evaluating Stone Type to Select the Optimal Sealant

    Different types of stone, such as limestone, granite, and slate, each possess unique properties that dictate the appropriate sealant for use. For instance, limestone is more porous and typically benefits from penetrating sealants that provide deep protection without altering its natural finish. Conversely, granite may be compatible with both penetrating and topical sealants, depending on the desired aesthetic and level of protection required.

    When selecting a sealant, it is essential to investigate the specific requirements of the stone being treated. Consulting with a professional can offer invaluable insight into the best options available, ensuring that the chosen sealant aligns with the stone’s unique characteristics and intended use.

    Selecting the proper sealant tailored to the specific stone type will yield the best results in terms of appearance, longevity, and protection, ultimately enhancing the overall value of the flooring.

    Understanding Indoor vs. Outdoor Sealant Requirements for Stone Floors

    The intended use of the stone flooring—whether indoors or outdoors—significantly influences the sealant choice. Outdoor stone floors face different challenges, such as exposure to weather elements, UV rays, and increased wear from foot traffic over time.

    For outdoor applications, homeowners should choose sealants formulated explicitly for external use. These products typically offer enhanced durability and resistance to environmental factors, ensuring the stone remains protected against the elements and retains its beauty.

    Conversely, sealants designed for indoor use may focus more on aesthetics and ease of maintenance. Indoor sealants might provide a glossy finish that accentuates the beauty of the stone, while outdoor sealants prioritize longevity and protection against harsh conditions.

    Understanding the specific requirements of indoor versus outdoor applications can help homeowners make informed decisions that guarantee the best outcomes for their stone flooring, ensuring it remains a stunning feature of their home.

    Answering Frequently Asked Questions About Stone Sealing

    What is the best method to clean sealed stone floors effectively?

    The optimal method for cleaning sealed stone floors is to use a pH-neutral cleaner with a soft mop or cloth. Avoid harsh chemicals that could potentially damage the sealant or the stone surface.

    How frequently should I reseal my stone floors for optimal protection?

    Resealing should generally occur every one to three years, depending on the type of sealant applied and the area’s traffic levels.

    Is it safe to use vinegar to clean sealed stone floors?

    No, vinegar is acidic and can harm the stone and the sealant. Instead, choose a pH-neutral cleaner specifically designed for stone surfaces to maintain their integrity.

    What types of sealants are available for stone floors?

    Several sealants exist, including penetrating, topical, enhancing, impregnating, and color-enhancing sealants, each suited to different needs and preferences of homeowners.

    How can I determine if my sealant requires reapplication?

    Dullness, the absence of water beading, or visible stains on the stone surface are signs that your sealant may need reapplication to maintain its protective qualities.

    Is sealing necessary for all types of stone floors?

    While sealing is highly recommended for most stone floors to protect against stains and moisture, specific denser stones may require less frequent sealing to maintain their integrity.

    Can I apply sealant myself for my stone floors?

    Yes, many homeowners opt for DIY applications; however, it is crucial to follow the instructions closely and ensure the stone is adequately prepared before sealing.

    What should I do if my sealed stone floor becomes stained?

    Promptly blot the stain and clean it with a suitable pH-neutral cleaner. If the stain persists, seek professional assistance for specialized cleaning services to restore the floor.

    Are there environmentally friendly sealants available for stone floors?

    Several eco-friendly sealants are on the market that provide adequate protection without harmful chemicals, catering to environmentally conscious homeowners who wish to protect their floors sustainably.

    How can I enhance the color of my stone floor?

    A color-enhancing sealant can intensify the colors and patterns of your stone floor, giving it a more vibrant and polished appearance that enhances its overall beauty.

    The Article Sealing Stone Floors for Protection: Essential Tips first appeared on https://london-stone.co.uk

    The Article Sealing Stone Floors: Key Tips for Effective Protection appeared first on https://fabritec.org

    The Article Sealing Stone Floors: Essential Tips for Optimal Protection Was Found On https://limitsofstrategy.com