Your cart is currently empty!
Category: Home Maintenance
-
LED Lights Not Working? Key Fixes for Homeowners
Uncovering the Causes of LED Light Failures for Better Performance
There are a multitude of factors that can contribute to LED lights experiencing malfunctions, ranging from a defective driver (power supply) to loose wiring connections, incompatible dimmer switches, or inherent issues with the LED module itself.
In Australia, it is essential to hire a licensed electrician to inspect any mains-voltage connections, ensuring both safety and adherence to local regulations, which ultimately safeguards your home and financial investment.Identifying Common Issues with LED Lighting and Proactive Solutions
While LEDs are celebrated for their exceptional energy efficiency and reliability, they can occasionally fail to perform as intended. Often, the underlying issue is not the LED itself but rather complications with associated components or errors that occurred during installation.
In the upcoming sections, we will explore the frequent problems encountered with LED lighting and provide actionable solutions to address them. Additionally, we will highlight when it becomes necessary to reach out to your local electrician in Melbourne’s outer eastern suburbs for expert assistance.
1. Assess the Power Supply and Driver for Potential Malfunctions
Numerous LED lights rely on a driver (or transformer) that converts mains voltage (230–240 V) into the appropriate low voltage required for LED modules to operate effectively. If this driver malfunctions, the LED may fail to illuminate entirely or may flicker unpredictably.
Steps for Diagnosing Power Supply Issues:
- Verify that the switch or automatic circuit breaker is in the ‘on’ position.
- If the LED is visible, inspect for indications of driver burnout or any physical damage.
- Consider whether any recent changes have been made to your lighting setup, such as the addition of dimmers or increasing the length of strip lighting beyond the driver’s capacity.
- In Australia, ensure all components comply with lighting product standards such as AS/NZS 62560, especially for mains voltage LED lamps, and have a licensed electrician handle any direct mains wiring.
When to Consult a Professional Electrician:
If you determine that the driver is faulty or that the wiring has been altered, it is crucial to engage a licensed electrician to rectify the problem. Connecting LED modules directly to mains power without the necessary driver or safety precautions is against regulations and poses significant risks.2. Investigate for Loose or Poor Electrical Connections
A frequent reason for LED lights not functioning correctly is compromised connections. This issue can stem from loose terminal blocks, damaged wire ends, or degraded connections found within walls or junction boxes, all of which can impede the flow of electricity and cause malfunctions.
- Always turn off the power at the switchboard before conducting any inspections.
- Check terminal blocks to ensure they are tight and look for visible signs of overheating, such as brown marks or melted plastic.
- Examine any connectors located in strip lights, downlights, or under-cabinet lighting systems.
- Ensure that ceiling roses or junction boxes have not been altered without maintaining proper connections.
Why Proper Connections Matter:
Loose connections can increase electrical resistance, generate excessive heat, and lead to premature LED failure, which may create a fire hazard. According to the wiring rules (AS/NZS 3000:2018), all electrical terminations must remain secure to ensure safety and compliance.
3. Verify Compatibility of Your Dimmer or Control System with LEDs
If your LED lights flicker, buzz, or fail to light up when connected to a dimmer circuit, it is likely that the dimmer is incompatible with LED loads. Many older dimmers were designed for incandescent or halogen bulbs and are unable to accommodate the lower wattage draw of LEDs.
Recommended Actions for Dimmer Issues:
- Consider replacing the dimmer with one specifically designed for LED lighting.
- If using smart lighting systems, ensure that the driver and control device are compatible with each other.
- For strip lighting applications, confirm that the controller or remote can manage the appropriate voltage and current specifications.
Pro Tip: If the light completely turns off when the dimmer is set to full brightness, this strongly indicates that the dimmer is not suitable for that specific LED load.

4. Assess Over-Length LED Strip Runs or Heat Issues
Although LED strip lights provide a flexible lighting solution, they come with specific limitations. Over-length runs can lead to voltage drops, causing the modules at the far end to malfunction, or the adhesive backing may peel away in hot or humid conditions.
Verification Checklist:
- Confirm that strip runs adhere to the maximum length specifications set by the manufacturer.
- In outdoor or moisture-prone environments, utilize appropriately rated IP-rated strips and drivers for enhanced safety.
- Ensure that heat is not trapped behind the strips; recessed or enclosed channels need to allow for sufficient cooling.
- Inspect the adhesive mounts for cleanliness; if the strips have detached, connections may have been compromised.
Importance of Compliance in Australia: Lighting product regulations require that fixtures and strips are properly certified and installed by qualified professionals when integrated into mains circuits, ensuring compliance and safety standards are maintained.
5. Investigate Potential Failures in Your LED Modules or Chips
In rare instances, the LED modules themselves may fail, particularly if they have been exposed to overheating, over-current situations, or poor installation practices.
If one section of modules is dark while others are functioning correctly, and you have eliminated issues with the power supply and connections, it may be necessary to replace the affected modules.Key Considerations for Module Replacement:
- If the system is still under warranty, ensure that replacement modules or strips are installed according to the original specifications.
- When replacing, verify that the new modules match the original specifications for voltage, color temperature, and current requirements.
- If the replacement requires any modifications to wiring or switching drivers, a licensed electrician should perform the work to ensure compliance and safety.

6. Utilize Smart Products to Mitigate Future LED Lighting Challenges
Implementing proactive maintenance can significantly reduce the probability of LED failures and prolong their operational lifespan. Here are some best practices to consider:
- Always choose LED strips and fixtures that carry the RCM (Regulatory Compliance Mark) and comply with Australian standards.
For additional details, refer to resources from the Australian Lighting Council. - Ensure that your electrician confirms that drivers and dimmers are rated for LED loads to prevent compatibility issues.
- Maintain proper cooling and ventilation behind downlights or strips to avoid overheating.
- Avoid connecting different batches of LED strips in series, as voltage mismatches can lead to failures.
- Schedule an electrical inspection every 3 to 5 years, particularly for integrated lighting circuits, to ensure ongoing safety and compliance.
When Is It Essential to Reach Out to a Licensed Electrician?
If you encounter any of the following problems, immediately stop using the circuit and reach out to a qualified electrician:
- Warm or hot light fittings or driver units
- Discolored or charred wiring insulation or terminal blocks
- Lights that become completely dark following a DIY repair
- Multiple lights on a circuit failing rapidly in succession
In Victoria and across Australia, all mains-voltage lighting installations, wiring modifications, or fault diagnostics must be conducted by a licensed electrician, following the standards outlined by AS/NZS 3000:2018 and state licensing mandates. Engaging in DIY work may invalidate product warranties, insurance coverage, and could violate legal regulations.
Essential Strategies for Maintaining Your LED Lighting System
<a href="https://writebuff.com/led-lighting-installation-tips-for-lower-power-bills/">LED lighting</a> offers unmatched efficiency, longevity, and design flexibility, but these advantages can only be fully realized when systems are properly installed and maintained.
When your LED lights are malfunctioning or flickering, the root cause typically relates to the driver, wiring connections, dimmer compatibility, or load issues, rather than the LED unit itself.For homeowners in Melbourne’s outer eastern suburbs, the most effective approach is to consult a licensed electrician who is well-versed in local regulations and lighting standards. While addressing the light itself may be straightforward, ensuring its ongoing reliability and safety is where the true value lies.
The Article: Fix LED Lights Not Working: Essential Tips for Homeowners first appeared on https://writebuff.com
The Article LED Lights Not Working? Essential Tips for Homeowners Was Found On https://limitsofstrategy.com
-

Grout Sealing Methods for Lasting Protection and Durability
Last Updated on October 2, 2025 by David
Discover Effective Grout Sealing Techniques for Lasting Protection
-
- Grout is highly porous, making it prone to absorbing moisture, dirt, and bacteria. Implementing proper sealing techniques is crucial for ensuring long-term durability and hygiene in tiled environments.
- Penetrating sealers are highly recommended for residences in Surrey, offering deep protection while remaining invisible on the grout surface.
- Surface sealers enhance the aesthetic appeal of tiled spaces but require more frequent reapplication, making them ideal for low-traffic or decorative areas.
- Water-based sealers are excellent for indoor use due to their safety and ease of application, while solvent-based sealers offer superior durability but require adequate ventilation during application to ensure safety.
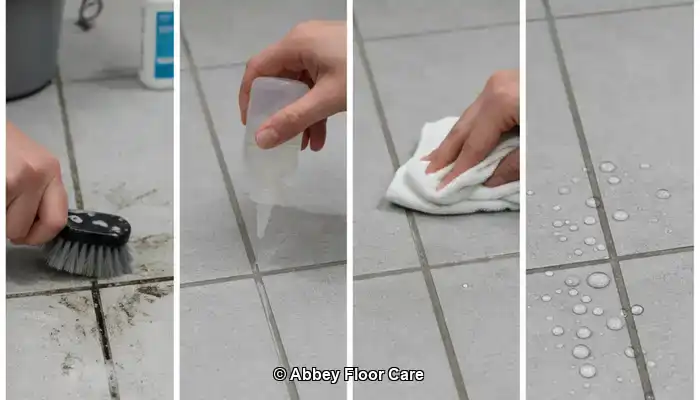
- Application technique matters: Employing a brush-on method guarantees precise coverage, whereas spray-on techniques may speed up the process but could compromise accuracy.
- Multiple coats enhance performance, especially in high-traffic or moisture-prone areas that necessitate additional protection for longevity.
- Regular maintenance is crucial: Reseal your grout every 12 to 18 months and utilize pH-neutral cleaners to uphold the integrity of the sealant.
- Old grout can be effectively sealed after a thorough cleaning and repair process, improving both its protective qualities and visual appearance.
- Epoxy grout requires no sealing, though surrounding tiles can still benefit from a protective sealant to enhance durability.
- Indicators of sealant wear include water absorption, staining, and a chalky texture—these signs suggest it’s time to reseal.
Understanding the Importance of Grout Sealing

Grout maintenance is often underestimated, yet it plays an essential role in improving the appearance and lifespan of spaces such as kitchens, bathrooms, hallways, and conservatories. Acting as the adhesive between tiles, grout secures them in place while simultaneously preventing moisture infiltration. Despite its crucial role, grout’s porous nature makes it vulnerable, as it can easily absorb water, dirt, oils, and cleaning agents. This absorption can lead to stains, discoloration, and even structural degradation over time, making proper sealing a necessity for maintaining both aesthetics and functionality.
Top Choices: Essential Products for Daily Grout Upkeep
 Fila Pro Floor Cleaner
 LTP Floorshine
 Vileda H2PrO Spin Mop System
In Surrey, where tiled surfaces are prevalent in both contemporary and traditional homes, sealing grout stands out as one of the most effective methods to safeguard your investment. Without a suitable sealant, grout can quickly accumulate dirt and grime, particularly in high-traffic zones or areas prone to moisture and spills. Imagine a bustling kitchen where cooking oils may splatter or a bathroom where steam and soap residue settle into the grout lines—unsealed grout in such settings can swiftly transition from clean and pristine to dull and dirty.
Furthermore, unsealed grout can become a breeding ground for bacteria and mould, which poses significant concerns in areas like showers and splashbacks where moisture is prevalent. Once mould establishes itself, it becomes not only unsightly but also difficult to remove without harsh chemicals that can damage adjacent tiles. By sealing the grout, you create a protective barrier that repels moisture and contaminants, making it easier to maintain a clean and hygienic living environment.
Another compelling reason for sealing grout is to enhance its longevity. Exposed grout—subject to foot traffic, cleaning agents, and environmental factors—will deteriorate much more rapidly. This deterioration can result in cracks, loose tiles, and costly repairs. A high-quality grout sealer can significantly prolong the lifespan of your tiled surfaces by reinforcing the grout’s structure and preventing premature wear.
Moreover, sealing grout isn’t just reserved for newly installed tiles; older grout can—and should—be sealed after a thorough cleaning. In fact, the resealing process is a vital aspect of ongoing maintenance. Many homeowners in Surrey opt to reseal their grout every 12 to 18 months, depending on usage and the type of sealer applied. This routine upkeep ensures that grout remains protected and continues to perform effectively.
For those concerned about how sealants might affect the appearance of tiles, modern products are designed to be invisible once dried. They do not alter the colour or texture of your grout and are safe for use on various tile materials, including ceramic, porcelain, and natural stone. Some sealers even provide the added benefit of enhancing the grout’s colour slightly, giving it a refreshed appearance without the need for regrouting.
In essence, sealing grout is not merely a luxury—it’s a necessity. It acts as a barrier against moisture, stains, bacteria, and wear, all while preserving the visual appeal of your tiled surfaces. Whether you are renovating a bathroom or maintaining a frequently used kitchen floor, investing in a high-quality grout sealer is one of the wisest decisions you can make for your home. In Surrey, where homeowners appreciate both aesthetics and functionality, grout sealing is a fundamental aspect of long-term property maintenance.
Exploring Different Types of Grout Sealers Available

Understanding the Distinction: Penetrating Sealers vs Surface Sealers
When it comes to protecting grout over time, one of the primary decisions homeowners face is whether to opt for penetrating sealers or surface sealers. Pentrating sealers are engineered to deeply infiltrate the grout, establishing a protective barrier beneath the surface. These sealers bond with the internal structure of the grout, making them exceptionally effective at repelling moisture, oils, and stains without changing the appearance of the grout or surrounding tiles. They are particularly beneficial in areas that frequently encounter water exposure, such as bathrooms, kitchens, and splashbacks.
In contrast, surface sealers sit atop the grout, creating a visible layer. These sealers can enhance the colour of the grout and provide a slight sheen, which some homeowners find appealing for decorative finishes. However, because they rest on the surface, they are more susceptible to wear and may necessitate more frequent reapplication. Surface sealers are ideally suited for low-traffic areas or spaces where aesthetic enhancement takes precedence. For instance, a decorative tiled feature wall or a guest bathroom may benefit from a surface sealer that adds gloss and depth to the grout lines.
Assessing Water-Based and Solvent-Based Sealers: Key Considerations for Homeowners
Another critical distinction lies between water-based sealers and solvent-based sealers. Water-based sealers are increasingly popular among homeowners in Surrey due to their low VOC emissions, making them safer for indoor applications and environmentally friendly. They are easy to apply, dry quickly, and are suitable for most residential uses. Water-based sealers are particularly ideal for families with children or pets, as they emit fewer fumes and are generally gentler on surrounding surfaces.
Conversely, solvent-based sealers offer deeper penetration and more durable protection. They are often preferred in commercial settings or outdoor areas where durability is paramount. While they provide excellent resistance to stains and moisture, they require proper ventilation during application and may not be suitable for enclosed spaces. Homeowners opting for solvent-based sealers should take precautions to protect adjacent surfaces and ensure adequate airflow throughout the application process.
Selecting the Perfect Sealer for Your Surrey Home
For most homes in Surrey, a water-based penetrating sealer offers the ideal balance of safety, effectiveness, and ease of maintenance. It provides invisible protection that does not alter the grout or tile appearance and is suitable for both indoor and outdoor applications. This type of sealer aligns well with the various tiled surfaces found in Surrey residences, such as ceramic kitchen floors, porcelain bathroom tiles, and natural stone splashbacks.
However, the best choice ultimately depends on the specific needs of the area being treated. High-traffic zones, like hallways and kitchens, greatly benefit from penetrating sealers that provide deep, lasting protection. Decorative spaces or surfaces where visual enhancement is desired may be better suited to a surface sealer that adds gloss and colour depth. For outdoor patios or commercial environments, solvent-based alternatives may be worth considering due to their durability.
It is also essential to match the sealer with the type of grout—cement-based grout, which is highly porous, benefits significantly from sealing. In contrast, epoxy grout, which is non-porous and moisture-resistant, typically does not need sealing; however, surrounding tiles may still benefit from a protective coating.
Choosing the right grout sealer involves more than just performance; it requires aligning with your lifestyle, tile material, and long-term maintenance objectives. In the next section, we will delve into how different application methods can impact the efficiency of your chosen sealer and ensure lasting protection.
Enhancing Grout Protection Through Optimal Application Techniques
Evaluating Brush-On vs Spray-On Techniques for Efficient Grout Sealing
When applying grout sealer, the chosen method can significantly influence the effectiveness and durability of the protective barrier established. The two most common techniques are brush-on and spray-on applications, each with distinct advantages depending on the type of grout, tile arrangement, and required precision.
The brush-on application is regarded as the most reliable method for sealing grout. This technique allows for targeted coverage, ensuring that the sealer penetrates deeply into the grout lines without saturating the surrounding tiles. This precision is particularly vital in homes with natural stone or textured tiles, where excess sealer can leave a hazy residue or alter the tile’s appearance. By using a small brush or applicator bottle with a roller tip, homeowners can control the amount of product applied, minimizing waste. Although this process might be more time-consuming, the accuracy it offers makes it especially suitable for high-value surfaces or intricate tile designs.
Conversely, spray-on sealers provide speed and convenience. They are particularly effective for large areas with uniform tile layouts, such as open-plan kitchens or tiled hallways. Utilizing a fine mist applicator, the sealer can be evenly distributed across the surface, quickly reaching the grout lines. However, spray-on methods may lack precision, particularly around decorative tiles or uneven surfaces. Overspray is a common concern; if not wiped away promptly, it can lead to streaks or dull patches on glossy tiles.
For homeowners in Surrey who value both efficiency and quality, a hybrid approach may yield the best results. Begin with a spray-on application to cover the main area, then follow up with a brush to touch up corners, edges, and any missed grout lines. This strategy ensures comprehensive coverage while maintaining control over the final appearance.
Regardless of the method chosen, it is crucial to work in manageable sections and avoid rushing. Proper application is key to achieving a long-lasting seal that protects against moisture, staining, and wear.
Determining the Number of Coats Required for Optimal Sealing
The number of coats needed for effective grout sealing varies based on the type of sealer used, the grout’s porosity, and the space’s conditions. Most manufacturers recommend applying at least two coats for optimal protection; however, in specific cases, additional coats may be necessary.
The initial coat acts as a primer, soaking into the grout and initiating the protective process. It is essential to allow this coat to absorb and dry completely before applying the second layer. The second coat reinforces the barrier, ensuring the grout is fully sealed and resistant to moisture and contaminants.
In high-traffic areas, such as kitchens and entryways, or in rooms that regularly encounter water, like bathrooms, a third coat may be beneficial. This is especially true for older grout that has been previously sealed and may demonstrate uneven absorption. Applying multiple coats guarantees that any worn or porous sections receive adequate protection.
Timing between coats is equally crucial. Rushing through the process can lead to poor adhesion and diminished effectiveness. Most water-based sealers recommend a wait time of 30 to 60 minutes between coats, while solvent-based products may require longer intervals. Always refer to the manufacturer’s guidelines and conduct a small area test first to assess the absorption rate.
For homeowners in Surrey seeking long-lasting results, dedicating time to properly apply multiple coats can save both money and effort in the long run. This practice reduces the need for frequent resealing and helps maintain the appearance and integrity of tiled surfaces.
Avoiding Common Mistakes During Grout Sealing
Even with quality products and good intentions, grout sealing can go awry if common mistakes are made. One prevalent error is applying sealer to dirty or damp grout. Sealing over grime or moisture traps contaminants beneath the surface, leading to staining, discoloration, and reduced effectiveness. Always ensure the grout is thoroughly cleaned and allowed to dry completely—ideally for 24 hours—before sealing.
Another frequent mistake is using the incorrect type of sealer for the grout or tile material. For instance, applying a surface sealer to highly porous grout may result in uneven coverage and inadequate protection. Similarly, using a solvent-based sealer in poorly ventilated areas can introduce strong fumes and potential health risks. Matching the sealer to the specific needs of the space is crucial for effective results.
Overapplication is another concern. Applying too much sealer at once can lead to pooling, sticky residue, or a cloudy finish on tiles. It is better to apply thin, even coats and gradually build up protection. Wipe away any excess immediately to prevent hazing on the tile surface.
Lastly, neglecting to test a small area before applying the most recent treatment can lead to unintended results. Certain sealers may slightly darken grout or alter the sheen of nearby tiles. Testing is essential to ensure compatibility and allows for adjustments in technique if necessary.
By avoiding these common pitfalls, you can ensure that your grout sealing project delivers the protection and finish you expect. In the following section, we will explore how to maintain sealed grout over time and recognize when it’s time to reseal.
Key Maintenance Strategies After Sealing Grout
How Frequently Should You Reseal Grout for Best Outcomes?
Once grout has been sealed, it can be tempting to assume that the job is done for the foreseeable future—but like most protective treatments, grout sealant possesses a limited lifespan. Over time, exposure to foot traffic, cleaning agents, moisture, and general wear will gradually degrade the sealant, leaving grout susceptible to staining and deterioration. To maintain optimal protection, grout should be resealed every 12 to 18 months. This timeframe can vary based on the location and usage of the tiled surface.
In high-traffic areas such as kitchen floors, entryways, and family bathrooms, grout experiences constant wear. These spaces often necessitate resealing closer to the 12-month mark. For example, kitchens are subject to cooking oils, food spills, and frequent mopping—all of which can accelerate the degradation of the sealant. Bathrooms contend with humidity, soap residue, and water splashes, which also hasten wear and tear. Conversely, low-traffic areas, such as guest bathrooms or decorative tiled walls, may sustain their sealant effectiveness for up to 18 months or longer.
The type of sealer utilized also influences how often resealing is required. Penetrating sealers typically last longer than surface sealers, especially when applied correctly in multiple coats, providing more durable and long-lasting protection. Water-based sealers may require more frequent reapplication compared to solvent-based counterparts, although they are easier to use and safer for indoor environments.
Homeowners in Surrey who prioritize long-term property care often incorporate grout resealing into their annual maintenance schedule. This proactive approach not only prevents costly repairs but also keeps tiled surfaces looking fresh and clean. It provides an opportunity to inspect grout for any signs of damage, such as cracking or discoloration, which may indicate deeper issues.
Professional resealing services can offer additional peace of mind, particularly for larger areas or natural stone installations. Experts can evaluate the condition of the existing sealant, perform a deep clean, and apply the appropriate product tailored to your specific grout and tile type. Whether you choose to tackle resealing yourself or hire a specialist, consistency is vital for preserving the integrity and appearance of your grout over time.
Recommended Cleaning Products That Preserve Sealant Integrity
Maintaining sealed grout involves more than just timing; it also requires using the right cleaning products. Harsh or acidic cleaners can prematurely degrade sealant, leaving grout exposed and vulnerable. To extend the life of your grout sealer, it is essential to use pH-neutral cleaning solutions specifically designed for sealed surfaces.
pH-neutral cleaners are both gentle and effective. They remove everyday dirt, grease, and grime without compromising the protective barrier established by the sealant. These products are safe for use on ceramic, porcelain, and natural stone tiles, making them ideal for cleaning multiple surfaces in kitchens, bathrooms, and hallways. Many reputable brands offer tile and grout cleaners labelled as “sealant-safe” or “pH-neutral,” simplifying the selection process for homeowners.
Conversely, common household cleaners such as bleach, vinegar, and ammonia-based products can be highly corrosive. While they may seem effective for cleaning, they often strip away layers of sealant, leaving grout porous and susceptible to staining. Acidic cleaners are particularly damaging to natural stone tiles and cement-based grout, which are sensitive to pH changes. Over time, the repeated use of these products can lead to discoloration, etching, and even structural weakening of the grout.
For homeowners in Surrey who prioritize eco-friendly cleaning, several non-toxic, biodegradable options provide sealant-safe performance. These products are perfect for families with children or pets, contributing to a healthier indoor environment. Microfibre mops and soft-bristle brushes can also assist in maintaining grout cleanliness without the need for abrasive scrubbing.
Additionally, it is crucial to follow proper cleaning techniques. Avoid soaking the grout with excessive water, as this can seep into the joints and weaken the sealant. Instead, use damp mops or cloths and ensure the area is dried thoroughly after cleaning. Promptly spot-clean spills to prevent staining, and avoid using steam cleaners unless the grout and sealant are rated for high-temperature exposure.
By selecting the right cleaning products and methods, you can significantly prolong the lifespan of your grout sealant and maintain the beauty of your tiled surfaces. This simple step in your maintenance routine yields long-term durability and visual appeal.
Identifying Signs That Your Grout Needs Resealing
Even with regular maintenance, grout sealant will inevitably wear down. Recognizing the signs that your grout requires resealing can empower you to take action before damage occurs. One of the most reliable indicators is how water behaves on the surface. If water fails to bead up and instead seeps into the grout, the sealant has likely worn off, indicating that the protective barrier is no longer effective.
Staining is another obvious sign. If your grout begins to darken or show spots after spills or cleaning, it is absorbing moisture and contaminants—conditions that sealed grout should effectively resist. Discoloration may develop gradually, especially in areas that see frequent use or cleaning. In kitchens, be vigilant for oil or food stains; in bathrooms, watch for soap scum or mildew marks.
Changes in texture can also indicate sealant breakdown. Grout that feels chalky, rough, or powdery may be losing its structural integrity. This can lead to crumbling or cracking, which not only affects appearance but also compromises the stability of the tiles. In some cases, grout may begin to flake or pull away from the edges of the tiles, signaling a deeper level of deterioration.
Visual indicators are important, but timing is also critical. If it has been over 18 months since your last sealing—or if you cannot recall when it was last done—it is wise to inspect your grout closely. A simple water test can be conducted: apply a few drops of water to the grout and observe the outcome. If the water is absorbed rather than repelled, it is time to reseal.
For homeowners in Surrey who are committed to long-term property care, catching these signs early can prevent costly repairs and maintain the aesthetic quality of tiled surfaces. Resealing not only restores protection but also refreshes the appearance of grout, ensuring that floors and walls look cleaner and newer.
Whether you’re caring for a newly renovated kitchen or maintaining a vintage bathroom, staying vigilant to these signs ensures your grout remains sealed, strong, and visually appealing. In the next section, we will address common questions regarding grout sealing to assist you in making informed decisions for your home.
Final Insights and Strategies for Long-Term Grout Protection
Grout sealing may seem like a minor detail in the broader context of home maintenance, yet its impact is significant. From preserving the aesthetic appeal of your tiled surfaces to protecting against moisture, stains, and structural damage, the proper sealing method can greatly influence longevity. For homeowners in Surrey who value both style and durability, understanding the nuances of grout sealing is essential for maintaining a clean, healthy, and enduring home environment.
Throughout this guide, we have explored the reasons why grout needs sealing, the types of sealers available, the most effective application techniques, and how to maintain sealed grout over time. We have also addressed common questions regarding sealing old grout, the functionality of epoxy grout, and the typical lifespan of sealers. Each of these components contributes to a holistic approach to grout care—one that transcends surface-level cleaning and prioritizes long-term protection.
The Significance of Selecting the Right Sealer for Your Needs
The most effective sealing strategy starts with selecting the appropriate product. Water-based penetrating sealers generally offer the best solution for Surrey homes, providing deep protection without altering the appearance of your tiles. Application should be methodical and precise, with careful attention given to cleaning, drying, and layering the sealer appropriately. Equally important is maintenance: using pH-neutral cleaners, avoiding harsh chemicals, and adhering to a regular resealing schedule will keep your grout looking fresh and performing optimally.
Should You Seek Professional Assistance for Grout Sealing?
It is worth considering professional assistance. While many homeowners are comfortable with DIY sealing, complex tile layouts, natural stone surfaces, or older grout may benefit from expert care. Tile and stone specialists can evaluate your surfaces, recommend the most suitable products, and ensure flawless application. This is especially valuable in high-use areas or heritage properties where preservation is crucial.
For those managing multiple tiled spaces—such as kitchens, bathrooms, hallways, and patios—establishing a grout care calendar can help keep track of resealing and cleaning routines. Documenting the dates when sealers were applied and which products were used simplifies future maintenance.
Ultimately, grout sealing is about more than just protection—it is about peace of mind. Knowing that your tiled surfaces are safeguarded against wear and tear allows you to enjoy your home without the stress of premature damage or expensive repairs. Whether you are renovating a space or simply maintaining what you already have, investing in proper grout care is a wise decision that pays dividends in both appearance and longevity.
If you are ready to take the next step in protecting your grout, consider reaching out to a trusted tile care professional in Surrey. They can provide tailored advice, recommend high-quality products, and ensure your grout is sealed to perfection. Your floors, walls, and splashbacks will thank you—and so will your future self.
Frequently Asked Questions Regarding Grout Sealing
Can You Effectively Seal Old Grout?
Absolutely—old grout can be sealed, and in many cases, it should be. Over time, grout becomes increasingly vulnerable to staining, moisture absorption, and wear. If it has never been adequately sealed or the existing sealant has worn off, resealing is a wise method to restore protection and enhance appearance. However, sealing old grout requires careful preparation to ensure the new sealant adheres effectively and performs as intended.
The first step is cleaning. Old grout often contains trapped dirt, grease, soap residue, and even mildew, particularly in kitchens and bathrooms. These contaminants must be removed before sealing, or they will be trapped beneath the sealant, causing discoloration and reducing effectiveness. A thorough deep-cleaning is necessary—and in many instances, professional cleaning is recommended. Tile care specialists utilize targeted products and tools to lift stubborn grime without damaging the grout or surrounding tiles.
Once the grout is clean, it must be allowed to dry thoroughly. Moisture trapped in the grout can hinder the sealant’s ability to bond and cure effectively. Depending on the room’s humidity and ventilation, drying may take 24 to 48 hours. During this period, it is advisable to avoid using the area and keep it dry by not exposing it to water.
After cleaning and drying, inspect the grout for damage. Cracks, missing sections, or crumbling areas should be repaired before sealing. Applying sealant over compromised grout will not resolve underlying issues and may lead to further deterioration. Grout repair products are available for DIY fixes, but for extensive damage, professional regrouting may be necessary.
Once the grout is clean, dry, and intact, sealing can proceed. Choose a sealant that is suitable for the type of grout and tile material. Penetrating sealers are typically the best choice for older grout, as they penetrate the surface and reinforce it from within. Carefully apply the sealer, following the manufacturer’s instructions, and allow it to cure completely before using the area.
For homeowners in Surrey with older tiled surfaces—especially in period properties or high-use areas—sealing old grout is a cost-effective way to extend the life of your flooring and improve hygiene. It is a practical step that enhances both function and aesthetics, and when executed correctly, it can make old grout look almost new again.
Is Sealing Necessary for Epoxy Grout?
Epoxy grout is a unique material that differs significantly from traditional cement-based grout. Composed of a combination of epoxy resins and filler powder, it is non-porous, highly resistant to moisture, and exceptionally durable. Due to these properties, epoxy grout does not require sealing in the same manner as cement-based grout.
Its non-porous nature means that liquids, oils, and stains are far less likely to penetrate the surface. This makes epoxy grout ideal for areas with high moisture exposure, such as showers, wet rooms, and commercial kitchens. Additionally, it is resistant to cracking and shrinkage, which enhances its long-term performance.
However, while the grout itself does not require sealing, the surrounding materials may still benefit from sealant. Many tiled surfaces—especially those made from natural stones like marble, slate, or travertine—are porous and can benefit from the application of sealant. In these cases, sealing the tiles instead of the grout will help protect the entire surface from staining and moisture damage.
Moreover, some homeowners choose to seal epoxy grout for aesthetic reasons. While it is not necessary for protection, a surface sealer can enhance colour uniformity or add a subtle sheen. This is entirely optional and should only be done with products specifically formulated for use with epoxy grout.
It is also important to note that epoxy grout can be more challenging to work with during installation. It sets quickly and requires precise handling, which is why many homeowners in Surrey prefer professional installation when using epoxy grout. Once installed, however, it provides excellent performance with minimal maintenance required.
In summary, sealing epoxy grout is not required for protection, but surrounding tiles may still benefit from sealant. If you are unsure whether your tiled surface needs sealing, consult a tile care expert who can evaluate the materials and recommend the most effective approach for your home.
What Is the Average Longevity of Grout Sealer?
The longevity of grout sealer depends on several factors, including the type of sealer employed, the location of the grout, and the level of surface maintenance. On average, most grout sealers last between one and three years. However, this timeframe can significantly vary based on usage and environmental conditions.
Penetrating sealers generally have a longer lifespan than surface sealers. Because they soak into the grout and bond with its internal structure, they provide deeper and more resilient protection. These sealers are best for high-traffic areas and rooms exposed to moisture, such as kitchens and bathrooms. When applied correctly, a high-quality penetrating sealer can remain effective for up to three years.
Surface sealers, which create a protective layer atop the grout, typically have a shorter lifespan. They are more susceptible to wear from foot traffic, cleaning, and abrasion. In busy households or commercial settings, surface sealers may need to be reapplied annually to maintain their effectiveness.
The location of the grout also influences its longevity. Grout in low-traffic areas or decorative installations may retain its sealant longer than grout in frequently used spaces. For instance, a tiled wall in a guest bathroom may not require resealing as often as a kitchen floor or shower enclosure.
Maintenance habits are another key factor. Using pH-neutral cleaners and avoiding harsh chemicals helps preserve the sealant. Regular cleaning with sealant-safe products prevents buildup and reduces the risk of sealant degradation. Promptly spot-cleaning spills and avoiding excessive water exposure can also contribute to a longer sealant life.
To determine whether your grout sealer remains effective, perform a simple water test. Apply a few drops of water to the grout and observe the outcome. If the water beads up and remains on the surface, the sealant is intact. If it soaks in or leaves a dark spot, it is time to reapply the sealant.
For homeowners in Surrey who prioritize long-term property care, scheduling grout resealing every 12 to 18 months is a reliable strategy for maintaining protection against stains and damage. Keeping track of application dates and monitoring grout condition ensures that your tiled surfaces remain clean, durable, and visually appealing.
The Article Which Grout Sealing Method Offers the Best Long-Term Protection? first found on https://www.abbeyfloorcare.co.uk
The Article Grout Sealing Methods: Discover the Best Long-Term Protection appeared first on https://fabritec.org
The Article Grout Sealing Methods for Optimal Long-Term Protection Was Found On https://limitsofstrategy.com
-
-

Grout Sealing Methods for Long-Lasting Protection
Last Updated on October 2, 2025 by David
Enhance the Lifespan of Your Grout with Proven Sealing Strategies
-
- The porous nature of grout significantly increases its susceptibility to moisture, dirt, and bacterial growth. Implementing effective sealing techniques is essential for maintaining long-term resilience and integrity.
- Choose penetrating sealers for homes in Surrey, as they provide deep protection while keeping the surface finish invisible and natural.
- Surface sealers enhance aesthetic appeal but necessitate more frequent applications, making them ideal for decorative or low-traffic areas.
- Water-based sealers are safer and simpler for indoor use, while solvent-based sealers offer longer-lasting protection but require adequate ventilation during application.
- The application method is crucial: brush-on techniques ensure precision, while spray-on methods provide speed but may compromise accuracy.
- Applying multiple coats enhances sealing performance, particularly in high-traffic or moisture-prone areas where additional protection is vital.
- Regular maintenance is essential: reseal every 12 to 18 months and use pH-neutral cleaners to prevent degrading the sealant.
- Older grout can be revitalized through thorough cleaning and resealing, restoring its appearance and protective qualities.
- Epoxy grout does not require sealing; however, surrounding tiles can still benefit from protective sealants.
- Indicators of sealant wear include water absorption, staining, and a chalky texture, signaling the need for resealing.
The Importance of Grout Sealing for Durable and Beautiful Tiled Surfaces

The maintenance of grout is often neglected, yet it is vital to the overall aesthetic and durability of tiled surfaces found in kitchens, bathrooms, hallways, and conservatories. Grout acts as the adhesive that binds tiles together and prevents moisture from seeping underneath. However, due to its porous nature, grout is highly susceptible to absorbing water, dirt, oils, and even cleaning agents. Over time, this absorption can lead to severe issues such as staining, discoloration, and structural deterioration, which can compromise the integrity of your tiled surfaces.
Expert Recommendations for Routine Grout Maintenance Products
 Fila Pro Floor Cleaner
 LTP Floorshine
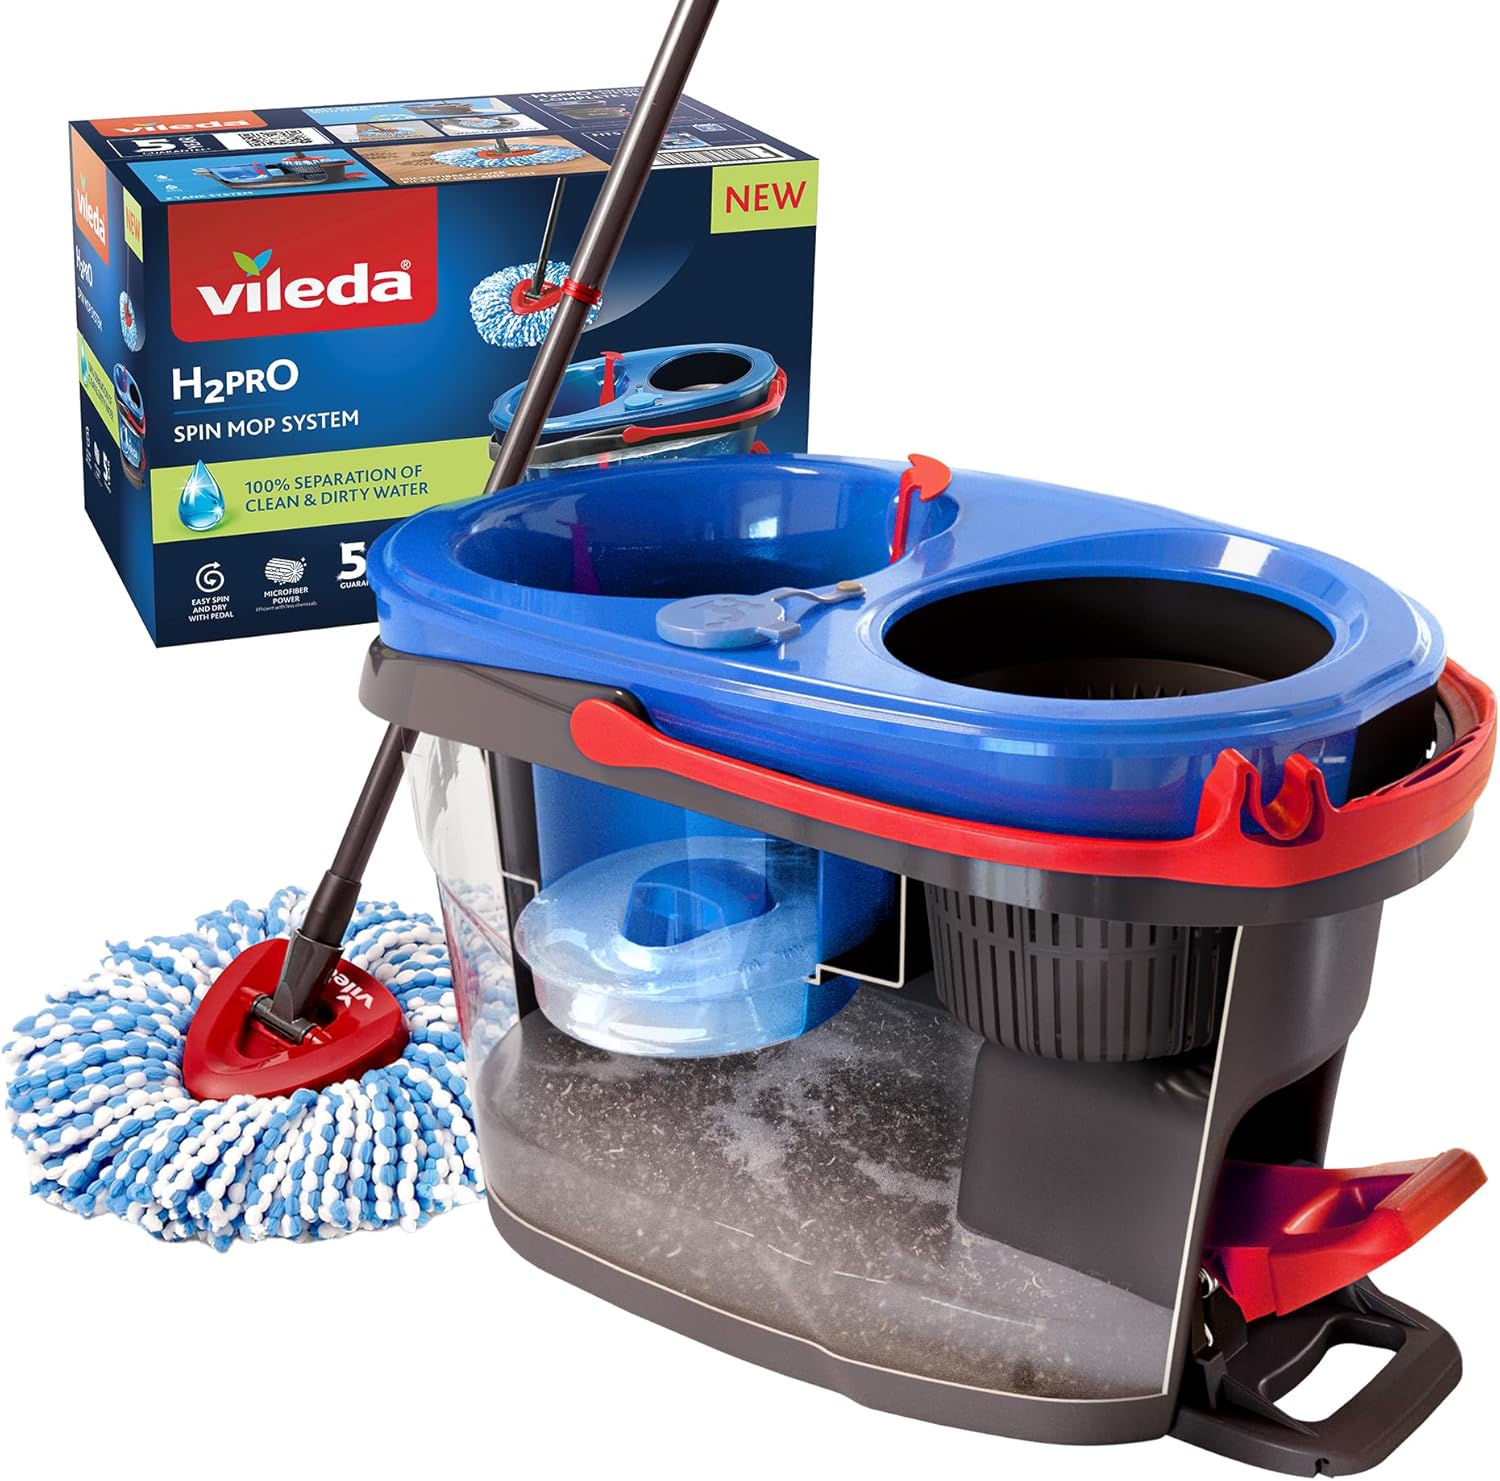 Vileda H2PrO Spin Mop System
In the diverse range of homes across Surrey, where tiled surfaces are essential for both contemporary and classic designs, effectively sealing your grout is one of the most beneficial strategies for protecting your investment. Without an appropriate seal, grout can quickly become a repository for dirt and grime, particularly in high-traffic areas or spaces with elevated moisture levels. For instance, kitchens face splashes of cooking oils while bathrooms are subjected to steam and soap residue buildup in the grout lines. The transition from pristine to grimy grout can occur rapidly without proper sealing.
Moreover, unsealed grout poses significant hygiene risks as it can harbor bacteria and mold. This concern is especially pressing in moisture-rich environments such as showers and kitchen splashbacks, where persistent water presence creates an ideal breeding ground for microbes. Once mold develops, it becomes not only visually unpleasant but also challenging to eliminate without resorting to harsh chemicals that could potentially damage the surrounding tiles. Sealing grout helps establish a protective barrier that repels moisture and contaminants, making cleaning simpler and maintaining a hygienic environment.
Additionally, effective sealing is crucial for extending the lifespan of your tiles. Grout that remains unprotected is subject to the wear and tear of foot traffic, cleaning agents, and environmental elements, which leads to accelerated degradation. This deterioration can manifest as cracks, loose tiles, and the need for costly repairs. A high-quality grout sealer can significantly enhance the longevity of your tiled surfaces by fortifying the grout structure and preventing premature wear.
It is important to recognize that sealing grout is not limited to newly installed tiles; older grout can and should be sealed following a thorough cleaning process. Resealing becomes an essential aspect of ongoing maintenance. Many homeowners in Surrey choose to reseal their grout every 12 to 18 months based on usage and the type of sealer applied. This routine maintenance ensures that grout remains protected and continues to perform its critical functions effectively.
For those concerned about the visual impact of sealers on their tiles, modern products are designed to be invisible upon drying. They do not alter the color or texture of your grout and are safe for use on various tile materials, including ceramic, porcelain, and natural stone. Some sealers may even enhance the grout’s color slightly, providing a refreshed appearance without the need for regrouting.
In conclusion, sealing grout is not merely a luxury; it is a necessity. It provides protection against moisture, stains, bacteria, and wear while preserving the visual appeal of your tiled surfaces. Whether you are updating a bathroom or maintaining a high-traffic kitchen floor, investing in a quality grout sealer is one of the most intelligent decisions you can make for your home. In Surrey, where homeowners appreciate both aesthetics and functionality, grout sealing is a fundamental aspect of long-term property maintenance.
Explore the Various Types of Grout Sealers Available for Optimal Protection

Analyzing the Benefits of Penetrating Sealers Versus Surface Sealers
When selecting the appropriate grout protection, one of the first considerations is whether to choose penetrating sealers or surface sealers. Penetrating sealers are formulated to deeply penetrate the grout, creating a protective barrier beneath the surface. These sealers bond to the grout’s internal structure, making them highly effective at repelling moisture, oils, and stains without altering the visual appearance of the grout or surrounding tiles. They are particularly beneficial in areas that frequently encounter water, such as bathrooms, kitchens, and splashback areas.
Conversely, surface sealers are applied to the top of the grout, forming a visible layer. These sealers can enhance the color and add a slight sheen to the grout, which some homeowners appreciate for decorative finishes. However, because they sit on the surface, they are more prone to wear and require more frequent reapplications. Surface sealers are best suited for low-traffic areas or where aesthetic enhancement is prioritized, such as a tiled feature wall or a guest bathroom that could benefit from a surface sealer to enhance gloss and depth in the grout lines.
Comparing Water-Based Sealers with Solvent-Based Sealers
Another vital distinction lies between water-based and solvent-based sealers. Water-based sealers are gaining popularity among homeowners in Surrey due to their low VOC content, making them safer for indoor applications and more environmentally friendly. They are easy to apply, dry quickly, and are suitable for most residential uses. These sealers are particularly ideal for households with children or pets, as they emit fewer fumes and are generally gentler on surrounding surfaces.
On the other hand, solvent-based sealers provide superior penetration and longer-lasting protection. They are often utilized in commercial settings or outdoor areas where durability is crucial. While they offer exceptional resistance to staining and moisture, they require increased ventilation during application and may not be suitable for confined spaces. Homeowners considering solvent-based sealers should take care to protect adjacent surfaces and ensure adequate airflow during application.
Selecting the Ideal Grout Sealer for Your Surrey Residence
For most homes in Surrey, a water-based penetrating sealer represents the optimal balance between safety, effectiveness, and ease of maintenance. It creates an invisible barrier that does not alter the appearance of grout or tiles and is suitable for both indoor and outdoor applications. This type of sealer aligns perfectly with the common tiled surfaces in Surrey homes, such as ceramic kitchen floors, porcelain bathroom tiles, and natural stone splashbacks.
Nevertheless, the best choice ultimately hinges on the specific needs of your space. High-traffic areas like hallways and kitchens benefit from penetrating sealers that provide robust, long-lasting protection. Decorative areas or surfaces where visual enhancement is desired may be better suited for a surface sealer that adds gloss and depth. For outdoor patios or commercial spaces, solvent-based options could be worth considering due to their enhanced durability.
It is also essential to select the sealer according to the type of grout—cement-based grout, known for its high porosity, significantly benefits from sealing. In contrast, epoxy grout is non-porous and moisture-resistant, usually not requiring sealing; however, the tiles surrounding it may still need a protective coating.
Choosing the right grout sealer involves considering performance aspects alongside your lifestyle, tile materials, and long-term maintenance goals. In the subsequent section, we will explore how application techniques can augment the effectiveness of your chosen sealer and ensure it provides enduring protection.
Application Techniques That Optimize Grout Protection Efficiency

Evaluating Brush-On Versus Spray-On Methods for Grout Sealing
The method chosen for applying grout sealer can greatly impact the effectiveness and longevity of the protection offered. Among the most common techniques are brush-on and spray-on applications, each with unique advantages depending on the grout type, tile arrangement, and required precision.
Brush-on application is widely regarded as the most reliable method for sealing grout. It allows for precise coverage, ensuring the sealer penetrates deeply into the grout lines without oversaturating the surrounding tiles. This precision is particularly crucial for homes featuring natural stone or textured tiles, where excess sealer could create a hazy residue or alter the tile’s appearance. By utilizing a small brush or applicator bottle with a roller tip, homeowners can control the amount of product applied, minimizing waste. Although this method may take longer, its accuracy makes it ideal for high-value surfaces or intricate tile layouts.
In contrast, spray-on sealers offer speed and convenience. They are particularly beneficial for large areas with uniform tile layouts, such as open-plan kitchens or tiled hallways. Using a fine mist applicator ensures even distribution of the sealer across the surface, quickly covering grout lines. However, spray-on methods may lack precision, especially around decorative tiles or uneven surfaces. Overspray can result in issues if not promptly wiped off, potentially leading to streaks or dull patches on glossy tiles.
For homeowners in Surrey who prioritize both efficiency and quality, a hybrid approach may provide the most effective solution. Start with a spray-on application to cover the majority of the area, then follow up with a brush to touch up corners, edges, and any missed grout lines. This technique guarantees comprehensive coverage while maintaining control over the final appearance.
Regardless of the application method chosen, it is essential to work in manageable sections and avoid rushing through the process. Proper application is critical to achieving a long-lasting seal that effectively protects against moisture, staining, and wear.
Determining the Optimal Number of Coats for Effective Grout Sealing
The number of coats required for successful grout sealing varies depending on the sealer type, grout porosity, and specific environmental conditions. Most manufacturers recommend applying at least two coats for optimal protection, although certain situations may necessitate additional applications.
The first coat acts as a primer, penetrating the grout and starting the protective process. It is essential to allow this initial coat to absorb fully and dry before applying a second one. The second coat reinforces the barrier, ensuring the grout is thoroughly sealed and resistant to moisture and contaminants.
In high-traffic areas, such as kitchens and entryways, or in rooms frequently exposed to water, like bathrooms, a third coat may be beneficial. This is especially true for older grout that has been previously sealed and may exhibit uneven absorption. Applying multiple coats guarantees that any worn or porous sections receive adequate protection.
Timing between coats is also crucial. Rushing through the process can lead to poor adhesion and reduced effectiveness. Most water-based sealers require a drying period of 30 to 60 minutes between coats, whereas solvent-based products might require longer intervals. Always refer to the manufacturer’s guidelines and conduct a small area test to assess absorption rates.
For homeowners in Surrey seeking lasting results, investing the necessary time to apply multiple coats correctly can save both money and effort in the long run. This practice minimizes the need for frequent resealing and helps maintain the appearance and structural integrity of tiled surfaces.
Common Mistakes to Avoid During Grout Sealing
Despite utilizing high-quality products and having good intentions, mistakes can occur during the grout sealing process. One prevalent error is applying sealant to dirty or damp grout. Sealing over dirt or moisture traps contaminants beneath the surface, leading to staining, discoloration, and reduced efficacy. Always ensure that the grout is thoroughly cleaned and entirely dry—ideally for 24 hours—before sealing.
Another frequent oversight involves using the wrong type of sealant for the specific grout or tile material. For instance, applying a surface sealer to highly porous grout may lead to uneven coverage and inadequate protection. Similarly, using a solvent-based sealer in a poorly ventilated area can produce strong fumes and pose potential health risks. It is crucial to match the sealant to the precise needs of the space.
Overapplication can also create challenges. Applying too much sealant at once can cause pooling, sticky residues, or a cloudy finish on tiles. It is advisable to apply thin, even coats and gradually build up protection. Any excess should be wiped off immediately to avoid hazing on the tile surface.
Finally, neglecting to test a small area before applying the latest treatment can lead to unexpected results. Certain sealants may slightly darken grout or alter the sheen of adjacent tiles. Testing ensures compatibility and allows for adjustments in technique if necessary.
By steering clear of these common pitfalls, you can ensure that your grout sealing project achieves the protection and finish you desire. In the next section, we will discuss effective methods for maintaining sealed grout and identifying when resealing is necessary.
Proactive Maintenance After Grout Sealing
How Frequently Should You Reseal Grout for Maximum Protection?
Once grout has been sealed, it’s easy to assume the job is complete; however, like most protective treatments, grout sealant has a limited lifespan. Over time, exposure to foot traffic, cleaning agents, moisture, and general wear will gradually degrade the sealant, rendering the grout susceptible to staining and deterioration. For optimal protection, it is advisable to reseal grout every 12 to 18 months. This timeline may vary based on the location and usage of the tiled surface.
In high-traffic areas such as kitchen floors, entryways, and family bathrooms, grout experiences constant wear. These spaces often require resealing closer to the 12-month mark. For example, kitchens are exposed to cooking oils, food spills, and frequent cleaning—all of which can accelerate sealant degradation. Similarly, bathrooms contend with humidity, soap residue, and water splashes, all of which speed up wear and tear. Conversely, low-traffic areas such as guest bathrooms or decorative tiled walls may maintain their sealant effectiveness for up to 18 months or longer.
The type of sealant used also influences how often resealing is necessary. Penetrating sealers typically offer a longer lifespan than surface sealers, particularly when applied correctly in multiple coats, providing more robust protection. Water-based sealers may require more frequent reapplication than solvent-based options, although they are easier to work with and safer for indoor environments.
Homeowners in Surrey who prioritize long-term property care often schedule grout resealing as part of their annual maintenance routine. This proactive approach helps prevent costly repairs and ensures that tiled surfaces remain visually appealing and clean. It also presents an excellent opportunity to inspect the grout for any signs of damage, such as cracking or discoloration, which may indicate deeper issues.
For larger spaces or natural stone installations, professional resealing services can provide added assurance. Experts can assess the condition of the existing sealant, perform a deep clean, and apply the most suitable product for your specific grout and tile type. Whether you choose to reseal yourself or enlist a specialist, consistency is crucial for maintaining grout’s integrity and appearance over time.
Choosing Cleaning Products That Safeguard Your Sealant
Maintaining sealed grout involves not only proper timing but also selecting the right cleaning products. Harsh or acidic cleaners can prematurely degrade sealants, leaving grout exposed and vulnerable. To maximize the lifespan of your grout sealer, it’s essential to use pH-neutral cleaning solutions specifically formulated for sealed surfaces.
pH-neutral cleaners are effective yet gentle. They can remove everyday dirt, grease, and grime without compromising the protective barrier established by the sealant. These products are safe on ceramic, porcelain, and natural stone tiles, making them ideal for multi-surface cleaning in kitchens, bathrooms, and hallways. Many reputable brands offer tile and grout cleaners labeled as “sealant-safe” or “pH-neutral,” simplifying the selection process for homeowners.
Conversely, common household cleaners like bleach, vinegar, and ammonia-based products can be highly corrosive. While they may seem effective, they often strip away sealant layers, leaving grout porous and prone to staining. Acidic cleaners can particularly damage natural stone tiles and cement-based grout, which are sensitive to pH fluctuations. Repeated use of such products can lead to discoloration, etching, and even structural weakening of the grout.
For environmentally conscious homeowners in Surrey, several non-toxic, biodegradable options offer effective sealant-safe performance. These products are excellent for families with children or pets, contributing to a healthier indoor environment. Employing microfiber mops and soft-bristle brushes can also help maintain grout cleanliness without the risk of abrasive scrubbing.
It is essential to adhere to proper cleaning techniques. Avoid soaking the grout with excessive water, which can seep into the joints and compromise the sealant. Instead, use damp mops or cloths and ensure the area is dried thoroughly after cleaning. Promptly spot-clean spills to prevent staining and avoid using steam cleaners unless the grout and sealant are rated for high-temperature exposure.
By selecting the right cleaning products and methods, you can significantly extend the lifespan of your grout sealant and maintain the visual appeal of your tiled surfaces. This simple yet effective step in your maintenance routine yields long-term durability and satisfaction.
Identifying When Your Grout Requires Resealing
Despite regular maintenance, grout sealants will eventually wear down. Recognizing the signs that your grout needs resealing can help you take timely action before damage occurs. One of the most reliable indicators is how water interacts with the surface. If water fails to bead up and instead penetrates the grout, the sealant has likely worn off, indicating that the protective barrier is no longer effective.
Staining is another clear sign that resealing is necessary. If your grout begins to darken or develop spots after spills or cleaning, it is absorbing moisture and contaminants—something sealed grout should resist. Discoloration may become noticeable gradually, particularly in areas subjected to frequent use or cleaning. In kitchens, watch for oil or food stains; in bathrooms, be alert for soap scum or mildew marks.
Texture changes can also signal sealant deterioration. Grout that feels chalky, rough, or powdery may be losing its structural integrity. This condition could lead to crumbling or cracking, affecting visual appeal and compromising the stability of the tiles. In some cases, grout may begin to flake or pull away from the edges of the tiles, indicating deeper degradation.
While visual cues are important, timing is equally critical. If it has been over 18 months since your last sealing—or if you cannot recall when it was last done—it is advisable to inspect your grout carefully. A simple water test can be conducted by applying a few drops of water to the grout and observing the results. If the water is absorbed rather than repelled, it’s time to reseal.
For homeowners in Surrey who prioritize long-term property care, recognizing these signs early can prevent costly repairs and help preserve the aesthetic of tiled surfaces. Resealing not only restores protection but also refreshes the look of grout, ensuring that floors and walls appear cleaner and newer.
Whether maintaining a newly renovated kitchen or caring for a historic bathroom, staying vigilant for these signs guarantees that your grout remains sealed, strong, and beautiful. In the next section, we will address common questions regarding grout sealing to assist you in making informed decisions for your home.
Implementing Best Practices for Long-Lasting Grout Protection
While sealing grout may seem like a minor detail within the broader context of home maintenance, its impact is anything but insignificant. From protecting the aesthetic appeal of your tiled surfaces to defending against moisture, stains, and structural damage, the right sealing method can profoundly influence the longevity of your spaces. For homeowners in Surrey who value both style and durability, understanding the intricacies of grout sealing is essential for maintaining a clean, healthy, and long-lasting home.
Throughout this guide, we have explored the necessity of grout sealing, the various types of available sealers, the most effective application methods, and strategies for maintaining sealed grout over time. We have also answered common inquiries regarding sealing older grout, the role of epoxy grout, and the typical lifespan of sealers. Each of these components contributes to a holistic approach to grout care—one that goes beyond simple surface cleaning and focuses on enduring protection.
The Importance of Selecting the Right Sealer
The most effective sealing strategy begins with choosing the appropriate product. Penetrating water-based sealers are frequently the ideal choice for Surrey homes, providing deep protection without altering the appearance of your tiles. The application should be methodical and precise, with careful attention to cleaning, drying, and layering the sealer correctly. Regular maintenance is equally vital: using pH-neutral cleaners, avoiding harsh chemicals, and adhering to a regular resealing schedule will keep your grout looking pristine and functioning optimally.
Is Professional Help Necessary for Grout Sealing?
It is also worth considering professional assistance. While many homeowners feel comfortable with DIY sealing, complex tile layouts, natural stone surfaces, or older grout may greatly benefit from expert care. Tile and stone specialists can evaluate your surfaces, recommend the most suitable products, and ensure flawless application. This is especially valuable in high-usage areas or historic properties where preservation is a priority.
For those managing multiple tiled spaces—such as kitchens, bathrooms, hallways, and patios—establishing a grout care calendar can help maintain an organized resealing and cleaning regimen. Documenting when sealers were applied and which products were used simplifies future maintenance tasks.
Ultimately, grout sealing extends beyond mere protection—it provides peace of mind. Knowing that your tiled surfaces are safeguarded from wear and tear allows you to enjoy your home without anxiety about premature damage or high repair costs. Whether you are renovating a space or simply maintaining what you currently possess, investing in proper grout care is a wise decision that yields benefits in both appearance and longevity.
If you are ready to take the next step in protecting your grout, consider reaching out to a trusted tile care professional in Surrey. They can offer tailored advice, suggest high-quality products, and ensure that your grout is sealed to perfection. Your floors, walls, and splashbacks will appreciate it—and so will your future self.
Frequently Asked Questions About Grout Sealing
Can Old Grout Be Sealed Effectively?
Absolutely—old grout can be sealed, and in many instances, it should be. Over time, grout becomes increasingly vulnerable to staining, moisture absorption, and wear. If it was never properly sealed or if the existing sealant has deteriorated, resealing is a smart approach to restoring protection and improving appearance. However, sealing old grout requires careful preparation to ensure that the new sealant adheres effectively and performs as intended.
The first critical step is cleaning. Old grout often traps embedded dirt, grease, soap residue, and even mildew, especially in kitchens and bathrooms. These contaminants must be eradicated before sealing; otherwise, they will be trapped beneath the sealant, leading to discoloration and compromised effectiveness. A thorough deep cleaning is essential—and in many cases, professional cleaning is advisable. Tile care specialists use targeted products and tools to lift stubborn grime without damaging the grout or surrounding tiles.
Once the grout is clean, it must be allowed to dry completely. Moisture trapped in the grout can hinder the sealant’s ability to bond and cure correctly. Depending on the room’s humidity and ventilation, this drying process may take 24 to 48 hours. During this time, it is crucial to avoid using the area and keep it dry by not exposing it to water.
After cleaning and drying, inspect the grout for any signs of damage. Cracks, missing sections, or crumbling areas should be repaired before sealing. Applying sealant over compromised grout will not address underlying issues and may lead to further deterioration. Grout repair products are available for DIY fixes, but for extensive damage, professional regrouting may be necessary.
Once the grout is clean, dry, and intact, sealing can proceed. Choose a sealant that is appropriate for the type of grout and tile material. Penetrating sealers are typically best suited for older grout as they penetrate the surface and reinforce it from within. Apply the sealer carefully, following the manufacturer’s instructions, and allow it to cure thoroughly before using the area.
For homeowners in Surrey with older tiled surfaces—especially in period properties or high-use areas—sealing old grout is a cost-effective way to prolong the lifespan of your flooring and improve hygiene. It is a practical step that enhances both functionality and aesthetics, and when executed correctly, it can make old grout appear nearly new again.
Is Sealing Epoxy Grout Necessary for Optimal Protection?
Epoxy grout is unique and differs significantly from traditional cement-based grout. Composed of a blend of epoxy resins and filler powder, it is non-porous, highly resistant to moisture, and exceptionally durable. Due to these characteristics, epoxy grout does not require sealing in the same manner as cement-based grout.
The non-porous nature of epoxy grout means that liquids, oils, and stains are much less likely to penetrate the surface, making it an ideal choice for areas exposed to high moisture, such as showers, wet rooms, and commercial kitchens. Furthermore, it is resistant to cracking and shrinkage, enhancing its long-term performance.
However, while the grout itself does not necessitate sealing, the surrounding materials may still benefit from it. Many tiled surfaces—especially those made from natural stones such as marble, slate, or travertine—are porous and would benefit from sealant application. In such cases, sealing the tiles instead of the grout helps protect the entire surface from staining and moisture damage.
Moreover, some homeowners opt to seal epoxy grout for aesthetic reasons. Although protective sealing is not essential, a surface sealer can enhance color uniformity or add a subtle sheen. This is purely optional and should be carried out with products specifically designed for use with epoxy grout.
It is also noteworthy that epoxy grout can be more challenging to work with during installation. It sets quickly and requires careful handling, which is why many homeowners in Surrey prefer professional installation when using epoxy grout. Once installed, however, it delivers excellent performance with minimal maintenance required.
In conclusion, sealing epoxy grout is not vital for protection; nonetheless, surrounding tiles may still benefit from a sealant. If you are uncertain whether your tiled surface requires sealing, consult a tile care expert who can evaluate the materials and recommend the best approach for your home.
What Is the Typical Lifespan of Grout Sealer?
The longevity of grout sealer is influenced by several factors, including the type of sealer used, the location of the grout, and the level of surface maintenance. Generally, most grout sealers last between one to three years; however, this range can vary significantly based on usage and environmental conditions.
Penetrating sealers tend to have a longer lifespan compared to surface sealers. As they soak into the grout and bond with its internal structure, they provide deeper and more resilient protection. These sealers are well-suited for high-traffic areas and rooms exposed to moisture, such as kitchens and bathrooms. When applied correctly, a quality penetrating sealer can remain effective for up to three years.
Surface sealers, which create a protective layer on top of the grout, generally exhibit a shorter lifespan. They are more prone to wear from foot traffic, cleaning, and abrasion. In busy households or commercial settings, surface sealers may require reapplication annually to maintain their effectiveness.
The location of the grout also plays a significant role. Grout situated in low-traffic areas or decorative installations may retain its sealant longer than grout in frequently used spaces. For instance, a tiled wall in a guest bathroom may not need resealing as often as a kitchen floor or shower enclosure.
Maintenance habits are another critical factor influencing sealant longevity. Using pH-neutral cleaners and avoiding harsh chemicals helps preserve the sealant’s integrity. Regular cleaning with sealant-safe products prevents buildup and minimizes the risk of sealant degradation. Promptly spot-cleaning spills and avoiding excessive water exposure also contribute to a longer sealant lifespan.
To determine whether your grout sealer remains effective, perform a simple water test. Apply a few drops of water to the grout and observe the outcome. If the water beads up and stays on the surface, the sealant is intact. If it soaks in or leaves a dark spot, it’s time to reapply the sealant.
For homeowners in Surrey who prioritize long-term property care, scheduling grout resealing every 12 to 18 months is a dependable strategy to maintain protection against stains and damage. Keeping track of application dates and monitoring the condition of grout ensures that your tiled surfaces remain clean, durable, and visually appealing.
The Article Which Grout Sealing Method Offers the Best Long-Term Protection? first found on https://www.abbeyfloorcare.co.uk
The Article Grout Sealing Methods for Optimal Long-Term Protection appeared first on https://fabritec.org
The Article Grout Sealing for Lasting Protection: Best Methods Revealed Was Found On https://limitsofstrategy.com
-
-

Grout Sealing Methods for Lasting Protection
Last Updated on October 2, 2025 by David
Uncover the Best Grout Sealing Techniques for Long-lasting Protection and Durability
-
- Grout is highly porous and can easily absorb moisture, dirt, and bacteria, making the sealing process crucial for ensuring its long-lasting durability and function.
- Penetrating sealers are highly recommended for most homes in Surrey due to their deep protective qualities and invisible finish that does not alter the tile appearance.
- Surface sealers enhance aesthetics but necessitate more frequent reapplication; they are best suited for low-traffic or decorative areas where appearance is prioritized.
- Water-based sealers are safer and simpler to apply indoors, while solvent-based sealers offer prolonged protection but require adequate ventilation during application.
- Application technique is crucial—brush-on methods allow for precision and targeted application, while spray-on methods are quicker but may lack the same level of accuracy.
- Multiple coats enhance performance, particularly in high-traffic or moisture-prone areas, ensuring maximum protection and durability.
- Consistent maintenance is essential: reseal every 12–18 months and utilize pH-neutral cleaners to prevent degradation of the sealant and maintain grout integrity.
- Old grout can be sealed after thorough cleaning and repair, effectively restoring both protection and appearance to previously neglected areas.
- Epoxy grout doesn’t require sealing, but surrounding tiles may still benefit from a protective sealant for added safety against stains.
- Signs of sealant wear include water absorption, staining, and a chalky texture—indicators that it’s time to reseal for continued effectiveness.
Understanding the Essential Role of Grout Sealing in Tile Maintenance

Grout is frequently overlooked in the realm of tile maintenance; however, it serves a pivotal role in both the aesthetics and longevity of tiled surfaces. Found in various spaces such as kitchens, bathrooms, hallways, and conservatories, grout acts as a filler between tiles, ensuring they remain secure while preventing moisture from penetrating beneath them. Despite its significance, grout is inherently vulnerable to environmental factors. Its porous nature means it readily absorbs water, dirt, oils, and cleaning chemicals, which over time can lead to staining, discoloration, and even structural damage if not properly sealed.
Top Expert Picks: Best Products for Daily Grout Maintenance and Cleaning
 Fila Pro Floor Cleaner
 LTP Floorshine
 Vileda H2PrO Spin Mop System
In numerous homes across Surrey, where tiled surfaces are prevalent in both modern and traditional interiors, sealing grout stands out as one of the most effective strategies for safeguarding your investment. Without a suitable sealant, grout can become a magnet for dirt and grime, particularly in high-traffic areas or spaces subject to moisture and spills. Consider a bustling kitchen, where cooking oils may splatter, or a bathroom where steam and soap residue settle into the grout lines—unsealed grout in these environments can rapidly transition from looking crisp and clean to dull and dirty.
Beyond mere aesthetics, unsealed grout can also serve as a breeding ground for bacteria and mould. This is especially concerning in places such as showers and splashbacks, where constant moisture creates an ideal environment for microbial growth. Once mould takes hold, it becomes not just unsightly but also challenging to eliminate without harsh chemicals that may damage the surrounding tiles. By sealing grout, you establish a protective barrier that repels moisture and contaminants, thereby facilitating easier cleaning and maintaining a hygienic living space.
Another critical rationale for sealing grout is the longevity of your tiled surfaces. Grout exposed to the elements—whether from foot traffic, cleaning agents, or environmental factors—will deteriorate more quickly. This can lead to cracks, loosened tiles, and potentially costly repairs. A quality grout sealer enhances the lifespan of your tiled surfaces by reinforcing the structure of the grout and preventing premature wear and tear, which ultimately saves money in the long run.
It’s also important to highlight that sealing grout is not solely for newly installed tiles. Older grout can—and should—be sealed following a thorough cleaning process. In fact, resealing is an integral aspect of ongoing maintenance. Many homeowners in Surrey choose to reseal every 12 to 18 months, depending on the usage and type of sealer applied. This consistent care ensures that grout remains adequately protected and continues to fulfil its critical function effectively.
For those who are apprehensive about the impact of sealants on the appearance of their tiles, modern products are engineered to be invisible once they dry. They do not alter the colour or texture of the grout, and they are safe for use on a broad spectrum of tile materials, including ceramic, porcelain, and natural stone. Some sealers even slightly enhance the colour of the grout, providing it with a refreshed appearance without the necessity of regrouting, which can be time-consuming and costly.
In essence, sealing grout is not merely a luxury—it is a fundamental requirement. It safeguards against moisture, stains, bacteria, and wear, all the while preserving the visual appeal of your tiled surfaces. Whether you are renovating a bathroom or maintaining a heavily used kitchen floor, investing in a high-quality grout sealer is one of the most astute decisions you can make for your home. In Surrey, where homeowners appreciate both style and substance, grout sealing is an essential part of long-term property maintenance.
Understanding the Various Types of Grout Sealers to Meet Your Unique Needs

Exploring the Advantages of Penetrating Sealers Versus Surface Sealers
When it comes to effectively protecting grout over time, the initial decision homeowners encounter is whether to opt for penetrating sealers or surface sealers. Penetrating sealers are crafted to infiltrate the grout, forming a protective barrier beneath the surface. These sealers bond with the grout’s internal structure, making them exceptionally effective at repelling moisture, oils, and stains without altering the appearance of the grout or the surrounding tiles. They are particularly beneficial in areas that frequently encounter water exposure, such as bathrooms, kitchens, and splashbacks, as they provide lasting protection against damage.
Conversely, surface sealers rest atop the grout and form a visible layer. These sealers can enhance the colour and add a slight sheen to the grout, which some homeowners may find aesthetically appealing for decorative finishes. However, because they remain on the surface, they are more susceptible to wear and may require more frequent reapplication. Surface sealers are best suited for low-traffic areas or spaces where aesthetic enhancement is paramount, such as a tiled feature wall or a guest bathroom that may benefit from a surface sealer that adds gloss and depth to the grout lines.
Assessing the Differences Between Water-Based Sealers and Solvent-Based Sealers
Another significant distinction lies between water-based sealers and solvent-based sealers. Water-based sealers are becoming increasingly popular among homeowners in Surrey due to their low VOC content, making them safer for indoor use and more environmentally friendly. They are easy to apply, dry rapidly, and are suitable for most residential applications. These sealers are ideal for families with children or pets, as they emit fewer fumes and are generally less harsh on surrounding surfaces.
On the other hand, solvent-based sealers provide deeper penetration and longer-lasting protection. They are often employed in commercial environments or outdoor spaces where durability is paramount. While they offer excellent resistance to staining and moisture, they necessitate more ventilation during application and may not be appropriate for enclosed areas. Homeowners who select solvent-based sealers should take care to shield nearby surfaces and ensure proper airflow during use to avoid health risks associated with fumes.
Identifying the Ideal Sealing Solution for Homes in Surrey
For the majority of residences in Surrey, a water-based penetrating sealer presents the most advantageous balance of safety, efficacy, and ease of maintenance. It offers invisible protection that does not alter the appearance of the grout or tiles and is suitable for both indoor and outdoor applications. This type of sealer is particularly well-suited to the types of tiled surfaces typically found in Surrey homes, such as ceramic kitchen floors, porcelain bathroom tiles, and natural stone splashbacks.
However, the optimal choice ultimately hinges on the specific needs of the space. High-traffic zones, such as hallways and kitchens, benefit from penetrating sealers that provide deep, long-lasting protection. Decorative areas or surfaces where visual enhancement is desired may favour a surface sealer that adds gloss and depth of colour. For outdoor patios or commercial environments, solvent-based options may be worth considering due to their durability and resistance to the elements.
Moreover, it is essential to match the sealer to the type of grout—cement-based grout, which is highly porous, benefits significantly from sealing. Conversely, epoxy grout, which is non-porous and moisture-resistant, typically does not require sealing, although surrounding tiles may still benefit from a protective coat to ensure comprehensive protection.
Selecting the appropriate grout sealer is not solely about performance; it also involves aligning with your lifestyle, tile material, and long-term maintenance objectives. In the following section, we will delve into how application methods can influence the effectiveness of your chosen sealer and ensure enduring protection of your grout.
Application Techniques to Maximize Grout Protection and Effectiveness

Evaluating Brush-On Versus Spray-On Techniques for Optimal Grout Sealing
The method you select for applying grout sealer can greatly influence the effectiveness and longevity of the protection. Two of the most prevalent techniques are brush-on and spray-on applications, each offering its own benefits depending on the type of grout, tile configuration, and desired level of precision.
Brush-on application is widely regarded as the most dependable method for sealing grout. It allows for targeted coverage, ensuring that the sealer penetrates deeply into the grout lines without oversaturating the surrounding tiles. This is particularly crucial in homes with natural stone or textured tiles, where excess sealer can leave a hazy residue or alter the tile’s appearance. By utilizing a small brush or an applicator bottle with a roller tip, homeowners can control the amount of product applied and prevent wastage. Although it is a slower process, the precision offered makes it ideal for high-value surfaces or intricate tile patterns that require careful attention.
Conversely, spray-on sealers grant speed and convenience. They are particularly useful for expansive areas with uniform tile layouts, such as open-concept kitchens or tiled hallways. With a fine mist applicator, the sealer can be evenly distributed across the surface, quickly reaching grout lines. However, spray-on methods may lack accuracy, especially around decorative tiles or uneven surfaces. Overspray is a common issue, and if not wiped off promptly, it can result in streaks or dull patches on glossy tiles, which can detract from the overall appearance.
For homeowners in Surrey who value both efficiency and quality, a hybrid approach may yield the best results. Begin with a spray-on application to cover the majority of the area, then follow up with a brush to touch up corners, edges, and any missed grout lines. This ensures comprehensive coverage while maintaining control over the final appearance of the sealed grout.
Regardless of the method chosen, it is crucial to work in manageable sections and avoid rushing the application process. Proper application is vital to achieving a long-lasting seal that protects against moisture, staining, and wear, ensuring the longevity of your grout and tiled surfaces.
Determining the Optimal Number of Coats for Effective Grout Sealing
The number of coats necessary for effective grout sealing depends on the type of sealer employed, the porosity of the grout, and the environmental conditions of the space. Most manufacturers suggest applying at least two coats for optimal protection, although in some instances, additional coats may be warranted based on specific needs.
The first coat serves as a primer, soaking into the grout and initiating the protective process. It is crucial to allow this coat to absorb fully and dry completely before applying the second one. The second coat reinforces the barrier, ensuring that the grout is thoroughly sealed and resistant to moisture, contaminants, and stains that can affect its appearance and durability.
In high-traffic areas, such as kitchens and entryways, or in rooms with frequent water exposure, like bathrooms, a third coat may be advantageous. This is particularly true for older grout that has been sealed previously and may exhibit uneven absorption. Applying multiple coats guarantees that any worn or porous sections receive adequate protection and helps maintain the integrity of the grout over time.
Timing between coats is equally critical. Rushing the process can lead to poor adhesion and diminished effectiveness. Most water-based sealers necessitate a waiting period of 30 to 60 minutes between coats, while solvent-based products might require longer intervals. Always refer to the manufacturer’s guidelines and conduct a small area test first to ascertain the absorption rate and compatibility of the sealer with your grout.
For homeowners in Surrey seeking long-term outcomes, investing time to apply multiple coats correctly can save money and effort in the long run. This practice reduces the necessity for frequent resealing and aids in maintaining the appearance and integrity of tiled surfaces, ensuring they remain beautiful and functional.
Avoiding Common Mistakes in Grout Sealing for Successful Results
Even with the finest products and intentions, grout sealing can go awry due to common mistakes. One prevalent error involves applying sealer to dirty or damp grout. Sealing over grime or moisture traps contaminants beneath the surface, leading to staining, discoloration, and diminished effectiveness. Always ensure to deep-clean the grout and allow it to dry completely—ideally for 24 hours—prior to sealing to achieve the best results.
Another frequent mistake is using an inappropriate type of sealer for the grout or tile material. For instance, applying a surface sealer to highly porous grout may result in uneven coverage and inadequate protection. Similarly, using a solvent-based sealer in an inadequately ventilated area can create strong fumes and potential health hazards. Matching the sealer to the specific needs of the space and materials is paramount for effective results.
Overapplication is another issue to consider. Applying too much sealer at once can lead to pooling, sticky residue, or a cloudy finish on tiles. It is advisable to apply thin, even coats and gradually build up protection. Wipe off any excess immediately to prevent haziness on the tile surface, ensuring a clean and polished appearance.
Finally, neglecting to test a small area prior to applying the latest treatment can lead to unexpected outcomes. Certain sealers may slightly darken grout or alter the sheen of adjacent tiles. Testing ensures compatibility and allows for adjustments to your technique if necessary, enhancing the overall success of your grout sealing project.
By avoiding these common pitfalls, you can guarantee that your grout sealing project delivers the protection and finish you anticipate. In the subsequent section, we will explore how to maintain sealed grout over time and recognize when it’s time to reseal for continued effectiveness.
Key Maintenance Strategies Following Grout Sealing for Enhanced Longevity
How Often Should You Reseal Grout to Ensure Optimal Integrity?
Once grout has been sealed, it’s easy to assume that the task is complete for the foreseeable future—but like most protective treatments, grout sealant has a limited lifespan. Over time, exposure to foot traffic, cleaning agents, moisture, and general wear will gradually degrade the sealant, leaving grout susceptible to staining and deterioration. To maintain optimal protection, grout should be resealed every 12 to 18 months. This timeframe can vary based on the location and usage of the tiled surface, emphasizing the need for awareness in maintenance practices.
In high-traffic areas such as kitchen floors, entryways, and family bathrooms, grout is subjected to constant wear. These spaces often necessitate resealing closer to the 12-month mark. Kitchens, for example, are exposed to cooking oils, food spills, and frequent mopping—all of which can erode the sealant more swiftly. Bathrooms face humidity, soap residue, and water splashes, which also accelerate wear and tear. In contrast, low-traffic areas, such as guest bathrooms or decorative tiled walls, may retain their sealant effectiveness for up to 18 months or longer, depending on usage.
The type of sealer employed also impacts how often resealing is necessary. Penetrating sealers generally last longer than surface sealers, particularly when applied correctly in multiple coats, providing more durable and long-lasting protection. Water-based sealers may require more frequent reapplication than solvent-based ones; however, they are simpler to use and safer for indoor environments, making them a preferred choice for many homeowners.
Homeowners in Surrey who prioritize long-term property care often schedule grout resealing as an integral part of their annual maintenance routine. This proactive strategy helps prevent costly repairs and keeps tiled surfaces looking fresh and clean. It also presents an opportunity to inspect grout for any signs of damage, such as cracking or discoloration, which may indicate deeper issues that require attention.
Professional resealing services provide added peace of mind, particularly for larger areas or natural stone installations. Experts can evaluate the condition of the existing sealant, perform a thorough clean, and apply the most suitable product for your specific grout and tile type. Whether you opt to reseal yourself or enlist a specialist, consistency remains key to preserving the integrity and appearance of your grout over time, ensuring it remains functional and visually appealing.
Choosing Safe Cleaning Products That Won’t Compromise Sealant Integrity
Maintaining sealed grout is not solely about frequency; it also involves using appropriate cleaning products. Harsh or acidic cleaners can prematurely degrade sealant, leaving grout exposed and vulnerable. To prolong the life of your grout sealer, it is essential to utilize pH-neutral cleaning solutions specifically formulated for sealed surfaces, which are both gentle and effective.
pH-neutral cleaners effectively eliminate everyday dirt, grease, and grime without compromising the protective barrier created by the sealant. These products are safe for use on ceramic, porcelain, and natural stone tiles, making them ideal for multi-surface cleaning in kitchens, bathrooms, and hallways. Many reputable brands offer tile and grout cleaners labelled as “sealant-safe” or “pH-neutral,” simplifying selection for homeowners who want to maintain their grout without risking damage.
In contrast, common household cleaners such as bleach, vinegar, and ammonia-based products can be highly corrosive. While they may seem effective, they often strip away sealant layers, leaving grout porous and prone to staining. Acidic cleaners are particularly harmful to natural stone tiles and cement-based grout, which are sensitive to pH fluctuations. Over time, repeated use of these products can lead to discoloration, etching, and even structural weakening of the grout, necessitating more frequent repairs and maintenance.
For environmentally conscious homeowners in Surrey, several non-toxic, biodegradable options deliver sealant-safe performance. These products are ideal for families with children or pets, contributing to a healthier indoor environment. Microfibre mops and soft-bristle brushes can also help maintain grout cleanliness without abrasive scrubbing, ensuring that the grout remains in good condition without causing damage.
Additionally, it is crucial to follow proper cleaning techniques. Avoid saturating the grout with excessive water, which can seep into the joints and weaken the sealant. Instead, use damp mops or cloths and dry the area thoroughly after cleaning. Promptly spot-clean spills to prevent staining, and steer clear of using steam cleaners unless the grout and sealant are rated for high-temperature exposure, which can compromise their effectiveness.
By selecting the right cleaning products and methods, you can significantly extend the lifespan of your grout sealant and preserve the beauty of your tiled surfaces. This straightforward step in your maintenance routine yields long-term durability and visual appeal, ensuring that your home remains inviting and well-maintained.
Identifying Signs That Your Grout Needs Resealing to Prevent Damage
Even with regular maintenance, grout sealant will ultimately wear down over time. Being aware of the indications that your grout necessitates resealing can help you take action before any damage occurs. One of the most reliable indicators is the behavior of water on the surface. If water no longer beads up and instead soaks into the grout, the sealant has likely deteriorated. This is a clear indication that the protective barrier is ineffective, and immediate action is required to restore it.
Staining serves as another telltale sign that resealing is necessary. If your grout begins to darken or display spots following spills or cleaning, it’s absorbing moisture and contaminants—something sealed grout should resist. Discoloration may manifest gradually, especially in areas subjected to frequent use or cleaning. In kitchens, watch for oil or food stains; in bathrooms, observe for soap scum or mildew marks that can detract from the overall cleanliness.
Texture changes can also signal the breakdown of sealant. Grout that feels chalky, rough, or powdery may be losing its structural integrity. This can lead to crumbling or cracking, which not only affects appearance but also compromises the stability of the tiles. In some instances, grout may begin to flake or pull away from the tile edges, indicating a more profound level of deterioration that requires immediate attention.
While visual cues are essential, timing is equally critical. If it has been more than 18 months since your last sealing—or if the timing is uncertain—it’s worthwhile to inspect your grout closely. A simple water test can be useful: apply a few drops of water to the grout and observe the results. If the water is absorbed rather than repelled, it is time to reseal to ensure continued protection.
For homeowners in Surrey who value long-term property care, recognizing these signs early can avert costly repairs and maintain the aesthetic appeal of tiled surfaces. Resealing not only restores protection but also revitalizes the appearance of grout, making floors and walls appear cleaner and more modern, enhancing the overall value of your home.
Whether you are overseeing the maintenance of a newly renovated kitchen or caring for a heritage bathroom, remaining alert to these signs ensures your grout remains sealed, robust, and visually pleasing. In the following section, we will address common questions regarding grout sealing to help you make informed decisions for your home.
Comprehensive Recommendations and Best Practices for Ensuring Long-Term Grout Protection
Grout sealing may seem like a minor detail in the broader context of home maintenance, yet its ramifications are anything but negligible. From preserving the visual appeal of your tiled surfaces to guarding against moisture, stains, and structural damage, the correct sealing method can significantly impact your space over time. For homeowners in Surrey who appreciate both style and durability, grasping the intricacies of grout sealing is essential for maintaining a clean, healthy, and enduring home environment.
Throughout this guide, we have examined the rationale behind grout sealing, the various types of sealers available, optimal application techniques, and how to maintain sealed grout effectively over the years. We have also addressed prevalent questions about sealing old grout, the role of epoxy grout, and the typical lifespan of sealers. Each of these components contributes to a holistic approach to grout care—one that transcends surface-level cleaning and prioritizes long-term protection for your tiled surfaces.
The Significance of Selecting the Right Type of Sealer for Maximum Effectiveness
The most effective sealing strategy begins with selecting the right product. PENETRATING WATER-BASED SEALERS often represent the best option for Surrey homes, offering profound protection without altering the appearance of your tiles. The application should be methodical and precise, with careful attention given to cleaning, drying, and layering the sealer properly to ensure its effectiveness. Ongoing maintenance is equally crucial: employing pH-neutral cleaners, avoiding harsh chemicals, and adhering to a regular resealing schedule will keep your grout looking fresh and functioning optimally over time.
Should You Consider Hiring Professionals for Grout Sealing to Ensure Quality Results?
It may also be beneficial to consider professional support. While many homeowners are comfortable with DIY sealing, complex tile layouts, natural stone surfaces, or older grout may benefit from expert attention. Tile and stone specialists can evaluate your surfaces, suggest the most appropriate products, and ensure flawless application. This is particularly valuable in high-usage areas or heritage properties where preservation is paramount to maintaining their original beauty.
For those managing multiple tiled spaces—such as kitchens, bathrooms, hallways, and patios—creating a grout care calendar can assist in staying on top of resealing and cleaning routines. Documenting when sealers were applied and which products were utilized simplifies future maintenance efforts and helps ensure that your home remains in peak condition.
Ultimately, grout sealing is about more than mere protection—it embodies peace of mind. Knowing that your tiled surfaces are shielded against wear and tear allows you to enjoy your home without the anxiety of premature damage or expensive repairs. Whether you are renovating a space or simply maintaining existing features, investing in proper grout care is a wise decision that pays dividends in both aesthetics and longevity, enhancing the overall value of your property.
If you are prepared to take the next step in protecting your grout, consider contacting a reputable tile care professional in Surrey. They can provide tailored advice, recommend high-quality products, and ensure your grout is sealed to perfection. Your floors, walls, and splashbacks will express gratitude—and so will your future self.
Frequently Asked Questions About Grout Sealing: Answers to Common Queries
Can Old Grout Be Sealed Effectively?
Indeed—old grout can be sealed, and in many instances, it should be. Over time, grout becomes increasingly susceptible to staining, moisture absorption, and wear. If it has never been properly sealed or if the existing sealant has worn off, resealing is a prudent method to restore protection and enhance appearance. Nevertheless, sealing old grout requires meticulous preparation to ensure the new sealant adheres effectively and performs as intended for long-lasting results.
The foremost step is to clean thoroughly. Old grout often retains embedded dirt, grease, soap residue, and even mildew, particularly in kitchens and bathrooms. These contaminants need to be eradicated before sealing; otherwise, they will be trapped beneath the sealant, resulting in discoloration and reduced efficacy. A comprehensive deep-cleaning is vital—and in many cases, professional cleaning is advisable to ensure the best results. Tile care specialists employ targeted products and techniques to remove stubborn grime without harming the grout or surrounding tiles, ensuring a clean and suitable surface for sealing.
Once the grout is clean, it must be allowed to dry completely. Moisture trapped in the grout can hinder the sealant’s ability to bond and cure effectively. Depending on the humidity and ventilation of the room, drying may take between 24 to 48 hours. During this period, it is advisable to refrain from using the area and to keep it dry by avoiding exposure to water, ensuring that the sealing process is successful.
After cleaning and drying, inspect the grout for any damage. Cracks, missing sections, or crumbling areas should be repaired prior to sealing. Applying sealant over compromised grout will not resolve underlying issues and may lead to further deterioration. Grout repair products are available for DIY fixes, but for extensive damage, professional regrouting may be necessary to ensure the longevity of the tiled surface.
Once the grout is clean, dry, and intact, sealing can proceed. Choose a sealer that is appropriate for the type of grout and tile material. PENETRATING SEALERS are typically the best option for older grout, as they penetrate the surface and reinforce it from within, providing necessary protection. Carefully apply the sealer, following the manufacturer’s guidelines, and allow it to cure fully before using the area to achieve optimal results.
For homeowners in Surrey with older tiled surfaces—especially in period properties or high-use areas—sealing old grout represents a cost-effective method to prolong the lifespan of your flooring while enhancing hygiene. It is a practical measure that improves both functionality and aesthetics, and when executed correctly, it can rejuvenate old grout to appear nearly new, contributing to a more appealing living environment.
Is Sealing Necessary for Epoxy Grout or Not?
Epoxy grout is a unique material that differs significantly from traditional cement-based grout. Composed of a combination of epoxy resins and filler powder, it is non-porous, highly resistant to moisture, and exceptionally durable. Due to these properties, epoxy grout does not require sealing in the same manner as cement-based grout, making it a low-maintenance option for many homeowners.
Its non-porous nature means that liquids, oils, and stains are far less likely to penetrate the surface, making epoxy grout ideal for areas with high moisture exposure, such as showers, washrooms, and commercial kitchens where cleanliness is paramount. It is also resistant to cracking and shrinkage, which enhances its long-term performance without the need for additional protection.
However, while the grout itself does not necessitate sealing, the surrounding materials may still require it. Many tiled surfaces—especially those composed of natural stones like marble, slate, or travertine—are porous and benefit from the application of sealant. In these instances, sealing the tiles rather than the grout helps safeguard the entire surface from staining and moisture damage, maintaining the beauty of your tiled areas.
Additionally, some homeowners opt to seal epoxy grout for aesthetic reasons. While sealing is not necessary for protection, a surface sealer can enhance colour uniformity or add a subtle sheen, contributing to a polished look. This is entirely optional and should be carried out with products specifically formulated for use with epoxy grout, ensuring compatibility and effectiveness.
It is also worth mentioning that epoxy grout can be more challenging to work with during installation. It sets quickly and requires precise handling, which is why many homeowners in Surrey choose professional installation for epoxy grout. However, once installed, it delivers excellent performance with minimal maintenance, making it a popular choice for many residential and commercial applications.
In summary, sealing epoxy grout is not required for protection; however, surrounding tiles may still benefit from sealant. If you are uncertain whether your tiled surface requires sealing, consult a tile care expert who can evaluate the materials and recommend the most suitable approach for your home, ensuring optimal performance and longevity.
What Is the Typical Lifespan of Grout Sealer?
The lifespan of grout sealer is influenced by several factors, including the type of sealer used, the location of the grout, and the level of surface maintenance. On average, most grout sealers last between one and three years, but this range can vary considerably based on usage and environmental conditions.
PENETRATING SEALERS tend to last longer than surface sealers. Because they seep into the grout and bond with its internal structure, they provide deeper, more resilient protection. These sealers are ideal for high-traffic areas and spaces subjected to moisture, such as kitchens and bathrooms. When applied correctly, a high-quality penetrating sealer can remain effective for as long as three years, making it a worthwhile investment for long-term care.
Surface sealers, which create a protective layer on top of the grout, generally have a shorter lifespan. They are more susceptible to wear from foot traffic, cleaning, and abrasion. In busy households or commercial environments, surface sealers may need to be reapplied annually to maintain their effectiveness, which can increase maintenance efforts over time.
The location of the grout also plays a significant role. Grout in low-traffic areas or decorative installations may retain its sealant longer than grout in heavily used spaces. For example, a tiled wall in a guest bathroom may not require resealing as frequently as a kitchen floor or shower enclosure, emphasizing the importance of context in maintenance planning.
Maintenance practices are another key consideration. Using pH-neutral cleaners and avoiding harsh chemicals helps preserve the sealant. Regular cleaning with sealant-safe products prevents buildup and minimizes the risk of sealant degradation. Prompt spot-cleaning of spills and avoiding excessive water exposure also contribute to prolonged sealant life, enhancing overall effectiveness.
To ascertain whether your grout sealer remains effective, perform a simple water test. Apply a few drops of water to the grout and observe the results. If the water beads up and stays on the surface, the sealant is intact. If it absorbs or leaves a dark spot, it is time to reapply the sealant to ensure protection against stains and moisture.
For homeowners in Surrey who prioritize long-term property care, scheduling grout resealing every 12 to 18 months is a reliable method for maintaining protection against stains and damage. Keeping track of application dates and monitoring grout condition ensures that your tiled surfaces remain clean, durable, and visually appealing, enhancing the overall quality of your home environment.
The Article Which Grout Sealing Method Offers the Best Long-Term Protection? first found on https://www.abbeyfloorcare.co.uk
The Article Grout Sealing Methods: Best for Long-Term Protection appeared first on https://fabritec.org
The Article Grout Sealing Methods for Effective Long-Term Protection Was Found On https://limitsofstrategy.com
-
-
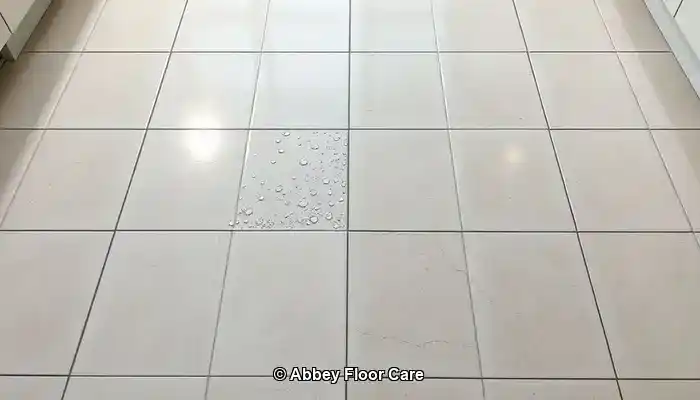
Grout Sealing Methods for Long-Lasting Protection Techniques
Last Updated on October 2, 2025 by David
Essential Factors to Determine the Most Effective Grout Sealing Method for Long-Lasting Protection
-
- Grout is highly porous and adept at absorbing moisture, dirt, and bacteria, which makes the grout sealing process critical for ensuring durability and hygiene in your tiled areas.
- Opt for penetrating sealers, which are strongly recommended for most homes in Surrey as they provide deep, lasting protection while maintaining an invisible finish.
- Surface sealers can enhance the aesthetic appeal of your tiles but require more frequent reapplications; they are best suited for areas with lower foot traffic or purely decorative functions.
- Water-based sealers are safer and easier to apply indoors, while solvent-based sealers offer prolonged protection but call for good ventilation during application.
- Selecting the appropriate application technique is crucial—brush-on methods provide accuracy, while spray-on techniques are quicker but may sacrifice precision.
- Applying multiple coats enhances performance, which is especially important in high-traffic areas or spaces exposed to moisture.
- Regular maintenance is essential: reseal every 12–18 months and use pH-neutral cleaners to prevent degradation of the sealant.
- Older grout can be effectively sealed after thorough cleaning and repairs, enhancing both its protection and visual appearance.
- Epoxy grout generally does not require sealing; however, the surrounding tiles may still benefit from a sealant application.
- Signs of sealant wear include water absorption, staining, and a chalky texture, indicating that resealing is necessary.
Understanding the Importance of Grout Sealing for Your Home’s Longevity

grout often goes underestimated in the context of tile maintenance, yet it plays a crucial role in the overall aesthetics and durability of tiled surfaces. Found in areas such as kitchens, bathrooms, hallways, and conservatories, grout serves as the vital filler between tiles, ensuring they remain securely in place while preventing moisture from seeping underneath. Despite its significance, grout is inherently susceptible due to its porous nature; it readily absorbs water, dirt, oils, and cleaning agents. Over time, this absorption can result in unsightly stains, discoloration, and potential structural damage, underscoring the necessity of sealing to preserve both appearance and function.
Expert Recommendations: Best Products for Daily Grout Care and Maintenance
 Fila Pro Floor Cleaner
 LTP Floorshine
 Vileda H2PrO Spin Mop System
In residences throughout Surrey, where tiled surfaces are prevalent in both contemporary and classic designs, effective grout sealing stands out as one of the most efficient methods to protect your investment. Without a reliable sealant, grout can easily accumulate dirt, particularly in high-traffic areas or locations that are prone to moisture and spills. Consider a busy kitchen where cooking oils splatter, or a bathroom where steam and soap residue accumulate in the grout lines. Unsealed grout in these environments can swiftly transition from clean to dirty.
Moreover, unsealed grout can become a breeding ground for bacteria and mould. This scenario is particularly alarming in areas such as showers and backsplashes, where persistent moisture creates ideal conditions for microbial growth. Once mould takes hold, it not only detracts from the visual appeal but can also be difficult to eliminate without using harsh cleaning products that may harm the surrounding tiles. Sealing grout effectively creates a protective barrier that repels moisture and contaminants, simplifying the cleaning process while promoting a hygienic environment.
Another compelling reason to seal grout is to enhance its longevity. Unsealed grout is vulnerable to various damaging factors—foot traffic, cleaning agents, and environmental conditions—which can lead to accelerated deterioration. Cracks may develop, tiles can become loose, and repair costs can rise significantly. A quality grout sealer extends the lifespan of your tiled surfaces by strengthening the structure of the grout and preventing premature wear.
It is important to note that sealing grout is not limited to newly installed tiles. Older grout can and should be sealed after thorough cleaning. In fact, routine resealing is a crucial part of ongoing maintenance. Many homeowners in Surrey choose to reseal their grout every 12 to 18 months, depending on usage and the type of sealer applied. This regular maintenance ensures that grout remains adequately protected and continues to perform its intended function effectively.
For those concerned about how sealants might impact the appearance of tiles, modern products are specifically formulated to be invisible once dried. They do not alter the color or texture of your grout and can be safely applied to various tile materials, including ceramic, porcelain, and natural stone. Some sealers even enhance the color of the grout slightly, providing a refreshed look without the need for regrouting.
In essence, sealing grout is not merely a luxury; it is a necessity. It helps protect against moisture, stains, bacteria, and wear, all while maintaining the visual appeal of your tiled surfaces. Whether you are renovating a bathroom or upkeeping a high-traffic kitchen floor, investing in a premium grout sealer is one of the wisest decisions you can make for your home. In Surrey, where homeowners value both style and functionality, grout sealing is an essential aspect of long-term property maintenance.
Exploring the Diverse Range of Grout Sealers Available in the Market

Understanding the Differences Between Penetrating Sealers and Surface Sealers
When it comes to safeguarding grout for the long haul, homeowners face a critical decision regarding the choice between penetrating sealers and surface sealers. Pentrating sealers are formulated to penetrate the grout, establishing a protective barrier beneath the surface. These sealers bond with the grout’s internal structure, making them exceptionally effective at repelling moisture, oils, and stains without altering the appearance of the grout or surrounding tiles. They are particularly beneficial in areas exposed to frequent water, such as bathrooms, kitchens, and splashbacks.
Conversely, surface sealers rest atop the grout, creating a visible layer. These sealers can enhance the color of the grout and impart a subtle shine, which some homeowners find visually appealing for decorative finishes. However, because they reside on the surface, they are more susceptible to wear and may require more frequent reapplications. Surface sealers are best suited for low-traffic areas or where aesthetic enhancement is the primary concern. For instance, a tiled feature wall or a guest bathroom may benefit from a surface sealer that adds gloss and vibrancy to the grout lines.
Comparing Water-Based and Solvent-Based Sealers for Optimal Performance
Another important distinction lies between water-based sealers and solvent-based sealers. Water-based sealers are increasingly favored by homeowners in Surrey due to their low VOC content, which makes them safer for indoor use and more environmentally friendly. They are easy to apply, dry quickly, and are suitable for most residential applications. These sealers are particularly ideal for families with children or pets, as they produce fewer fumes and are typically gentler on surrounding surfaces.
In contrast, solvent-based sealers offer deeper penetration and longer-lasting protection. They are commonly utilized in commercial settings or outdoor areas where durability is paramount. While they provide excellent resistance to staining and moisture, they require enhanced ventilation during application and may not be appropriate for enclosed spaces. Homeowners contemplating solvent-based sealers should take care to protect adjacent surfaces and ensure proper airflow during use.
Determining the Best Type of Grout Sealer for Homes in Surrey
For the majority of homes in Surrey, a water-based penetrating sealer strikes the ideal balance between safety, effectiveness, and ease of maintenance. It provides invisible protection that does not alter the grout or tiles’ appearance and is suitable for both indoor and outdoor use. This type of sealer is especially well-suited for the common tiled surfaces found in Surrey homes, such as ceramic kitchen floors, porcelain bathroom tiles, and natural stone splashbacks.
Nevertheless, the best choice ultimately depends on the specific needs of each area. High-traffic zones, such as hallways and kitchens, benefit from penetrating sealers that provide deep, enduring protection. Decorative spaces or surfaces where visual enhancement is desired may thrive with a surface sealer that adds gloss and color depth. For outdoor patios or commercial settings, solvent-based options may be worth considering due to their exceptional durability.
It is also vital to match the sealer with the type of grout—cement-based grout, known for its high porosity, significantly benefits from sealing. Epoxy grout, which is non-porous and moisture-resistant, generally does not require sealing, although surrounding tiles may still benefit from a protective coat.
Choosing the appropriate grout sealer is not solely about performance; it also involves aligning with your lifestyle, tile materials, and long-term maintenance objectives. In the following section, we will explore how application methods can influence the effectiveness of your selected sealer and ensure long-lasting protection.
Effective Techniques for Applying Grout Sealers to Maximize Protection

Evaluating Brush-On and Spray-On Techniques for Superior Results
When it comes to applying grout sealer, the method selected can greatly influence the effectiveness and longevity of the protective barrier. Two of the most prevalent techniques are brush-on and spray-on applications, each offering distinct advantages based on the type of grout, tile arrangement, and required level of precision.
Brush-on application is widely regarded as the most dependable method for sealing grout. It allows for targeted coverage, ensuring that the sealer penetrates deeply into the grout lines without oversaturating the adjacent tiles. This precision is especially important in homes with natural stone or textured tiles, where excess sealer can create a hazy residue or alter the tile’s appearance. By utilizing a small brush or applicator bottle with a roller tip, homeowners can effectively control the amount of product applied and minimize waste. While this method may require more time, its accuracy makes it particularly suitable for high-value surfaces or intricate tile patterns.
Conversely, spray-on sealers offer speed and convenience. They are particularly effective for larger areas with uniform tile layouts, such as open-plan kitchens or tiled hallways. With a fine mist applicator, the sealer can be evenly distributed across the surface, quickly reaching grout lines. However, spray-on techniques may lack precision, especially around decorative tiles or uneven surfaces. Overspray can be a common issue, and if not promptly wiped off, it may leave streaks or dull patches on glossy tiles.
For homeowners in Surrey who desire both efficiency and quality, a hybrid approach may be the best solution. Start with a spray-on application to cover most of the area, then follow up with a brush to touch up corners, edges, and any missed grout lines. This strategy ensures comprehensive coverage while maintaining control over the final appearance.
Regardless of the chosen method, it is crucial to work in manageable sections and avoid rushing the process. Proper application is essential for achieving a lasting seal that protects against moisture, staining, and wear.
Determining the Optimal Number of Coats for Maximum Grout Protection
The number of coats needed for effective grout sealing can vary based on the type of sealer used, the porosity of the grout, and the specific conditions of the area. Most manufacturers recommend applying at least two coats for optimal protection; however, additional coats may be beneficial in certain situations.
The first coat serves as a primer, penetrating the grout and initiating the protective process. It is crucial to allow this coat to absorb fully and dry before applying the second one. The second coat reinforces the barrier, ensuring that the grout is sufficiently sealed and resistant to moisture and contaminants.
In high-traffic areas, like kitchens and entryways, or in rooms with frequent water exposure, such as bathrooms, a third coat may be advantageous. This is especially relevant for older grout that has been sealed previously and may exhibit uneven absorption. Applying multiple coats ensures that any worn or porous sections receive adequate protection.
Timing between coats is equally vital. Rushing the process can compromise adhesion and overall effectiveness. Most water-based sealers require a waiting period of 30 to 60 minutes between coats, while solvent-based products may necessitate longer intervals. Always consult the manufacturer’s instructions and perform a small test area first to gauge the absorption rate.
For homeowners in Surrey seeking long-lasting results, dedicating time to properly apply multiple coats can save both money and effort in the long run. This practice reduces the need for frequent resealing and helps maintain the appearance and integrity of tiled surfaces.
Avoiding Common Mistakes in Grout Sealing for Best Results
Even with the best products and intentions, grout sealing can go awry if certain common mistakes are made. A prevalent error is sealing over dirty or damp grout. Applying sealer over dirt or moisture traps contaminants beneath the surface, leading to staining, discoloration, and reduced effectiveness. Always ensure the grout is thoroughly deep-cleaned and completely dried—preferably for 24 hours—before sealing.
Another frequent mistake involves using an incorrect type of sealer for the grout or tile material. For instance, using a surface sealer on highly porous grout may result in uneven coverage and insufficient protection. Similarly, applying a solvent-based sealer in a poorly ventilated area can produce strong fumes and pose potential health hazards. It is essential to match the sealer to the specific requirements of the space.
Overapplication is yet another issue. Applying too much sealer at once can lead to pooling, sticky residue, or a cloudy finish on tiles. It is recommended to apply thin, even coats and gradually build up protection. Wipe off any excess immediately to avoid hazing on the tile surface.
Lastly, neglecting to test a small area before applying the latest treatment can lead to unexpected results. Some sealers may slightly darken grout or alter the sheen of adjacent tiles. Testing ensures compatibility and allows you to adjust your technique if necessary.
By avoiding these common pitfalls, you can ensure that your grout sealing project delivers the protection and finish you expect. In the next section, we will delve into how to maintain sealed grout over time and recognize when it’s time to reseal.
Crucial Grout Maintenance Tips Following Sealing
Understanding the Frequency of Resealing Grout for Optimal Protection
Once grout has been sealed, it’s easy to assume that the job is complete for the foreseeable future—but like most protective treatments, grout sealant has a limited lifespan. Over time, exposure to foot traffic, cleaning products, moisture, and general wear will gradually degrade the sealant, leaving the grout vulnerable to staining and deterioration. To ensure maximum protection, grout should be resealed every 12 to 18 months. This timeframe may vary based on the location and usage of the tiled surface.
In high-traffic areas such as kitchen floors, entryways, and family bathrooms, grout experiences constant wear. These spaces often require resealing closer to the 12-month mark. For instance, kitchens are subject to cooking oils, food spills, and frequent mopping—all of which can wear down the sealant more rapidly. Bathrooms contend with humidity, soap residue, and water splashes, which also accelerate wear and tear. Conversely, low-traffic areas, such as guest bathrooms or decorative tiled walls, may retain their sealant effectiveness for up to 18 months or longer.
The type of sealer applied also influences how often resealing is necessary. Pentrating sealers commonly last longer than surface sealers, especially when applied correctly in multiple coats, yielding more durable, long-lasting protection. Water-based sealers may require more frequent reapplication compared to solvent-based options, although they are easier to use and safer for indoor environments.
Homeowners in Surrey who prioritize long-term property maintenance often include grout resealing in their annual upkeep routine. This proactive strategy helps prevent expensive repairs and keeps tiled surfaces looking fresh and clean. It also provides an opportunity to inspect grout for any signs of damage, such as cracking or discoloration, which may indicate underlying issues.
Professional resealing services can offer additional peace of mind, particularly for large areas or natural stone installations. Experts can assess the condition of the existing sealant, perform a thorough deep clean, and apply the appropriate product tailored to your specific grout and tile types. Whether you choose to reseal independently or engage a specialist, consistency is key to preserving the integrity and appearance of your grout over time.
Selecting Cleaning Products That Protect Your Sealant
Maintaining sealed grout isn’t solely about timing; it also involves utilizing the correct cleaning products. Harsh or acidic cleaners can quickly break down sealant, leaving grout exposed and vulnerable. To extend the lifespan of your grout sealer, it’s vital to use pH-neutral cleaning solutions specifically designed for sealed surfaces.
pH-neutral cleaners are both gentle and effective. They remove everyday dirt, grease, and grime without jeopardizing the protective barrier established by the sealant. These products are safe for use on ceramic, porcelain, and natural stone tiles, making them ideal for multi-surface cleaning in kitchens, bathrooms, and hallways. Numerous reputable brands offer tile and grout cleaners labeled as “sealant-safe” or “pH-neutral,” simplifying the product selection process for homeowners.
In contrast, common household cleaners like bleach, vinegar, and ammonia-based products can be highly corrosive. While they may seem effective at cleaning, they often strip away sealant layers, leaving grout porous and susceptible to staining. Acidic cleaners can be particularly harmful to natural stone tiles and cement-based grout, both of which are sensitive to pH fluctuations. Over time, repeated use of these products can result in discoloration, etching, and even structural weakening of the grout.
For environmentally conscious homeowners in Surrey, several non-toxic, biodegradable options offer sealant-safe performance. These products are perfect for families with children or pets, contributing to a healthier indoor environment. Microfiber mops and soft-bristle brushes can also help maintain grout cleanliness without requiring abrasive scrubbing.
It’s crucial to follow proper cleaning techniques. Avoid saturating the grout with excessive water, as this can seep into the joints and weaken the sealant. Instead, use damp mops or cloths, and ensure the area is thoroughly dried after cleaning. Promptly addressing spills prevents staining, and avoid using steam cleaners unless the grout and sealant are rated for high-temperature exposure.
By selecting appropriate cleaning products and methods, you can significantly extend the lifespan of your grout sealant and preserve the beauty of your tiled surfaces. This simple step in your maintenance routine can yield long-term durability and visual appeal.
Recognizing When Your Grout Needs Resealing
Even with consistent maintenance, grout sealant will inevitably wear down over time. Identifying the signs that indicate your grout requires resealing can prompt timely action before damage occurs. One of the most reliable indicators is the behavior of water on the surface. If water no longer beads up and instead soaks into the grout, the sealant has likely worn off. This serves as a clear signal that the protective barrier is no longer effective.
Staining is another unmistakable sign. If your grout begins to darken or develop spots after spills or cleaning, it is absorbing moisture and contaminants—something that sealed grout should resist. Discoloration may manifest gradually, particularly in areas subjected to frequent use or cleaning. In kitchens, keep an eye out for oil or food stains; in bathrooms, watch for soap scum or mildew marks.
Changes in texture can also signal sealant deterioration. Grout that feels chalky, rough, or powdery may be losing its structural integrity. This can lead to crumbling or cracking, which not only impacts appearance but also compromises the stability of the tiles. In some instances, grout may begin to flake or separate from the tile edges, indicating deeper levels of deterioration.
Visual cues are significant, but timing is equally essential. If it has been over 18 months since your last sealing—or if you cannot recall when it was last done—it is prudent to inspect your grout closely. A simple water test can be performed: apply a few drops of water to the grout and observe the outcome. If the water is absorbed rather than repelled, it is time to reseal.
For homeowners in Surrey committed to long-term property care, promptly addressing these signs can avert costly repairs and maintain the aesthetic appeal of tiled surfaces. Resealing not only restores protection but also rejuvenates the appearance of grout, making floors and walls look cleaner and more contemporary.
Whether you are maintaining a newly renovated kitchen or caring for a vintage bathroom, remaining vigilant to these signs ensures your grout remains sealed, durable, and visually appealing. In the next section, we will address common questions regarding grout sealing to empower you to make informed decisions for your home.
Best Practices for Ensuring Grout Protection Over Time
Grout sealing may seem like a minor detail within the broader context of home maintenance, but its implications are far from trivial. From preserving the visual allure of your tiled surfaces to safeguarding against moisture, stains, and structural damage, the proper sealing method can yield significant benefits over time. For homeowners in Surrey who value both aesthetics and durability, understanding the nuances of grout sealing is essential for maintaining a clean, healthy, and enduring home environment.
Throughout this guide, we have explored why grout requires sealing, the different types of sealers available, optimal application techniques, and how to maintain sealed grout for years to come. We have also addressed common inquiries about sealing old grout, the role of epoxy grout, and the typical lifespan of sealers. Each of these components contributes to a comprehensive approach to grout care—one that transcends surface-level cleaning and focuses on long-term protection.
The Importance of Choosing the Right Sealer for Maximum Efficiency
The most effective sealing strategy starts with selecting the appropriate product. Pentrating, water-based sealers are often the best choice for Surrey homes, providing deep protection without altering the appearance of your tiles. Application should be systematic and precise, with attention to cleaning, drying, and layering the sealer correctly. Maintenance is equally important: using pH-neutral cleaners, avoiding harsh chemicals, and adhering to a regular resealing schedule will keep your grout looking pristine and functioning optimally.
Considering Professional Grout Sealing Services for Best Results
It is also worth considering professional assistance. While many homeowners are comfortable undertaking DIY sealing, intricate tile layouts, natural stone surfaces, or older grout may benefit from expert care. Tile and stone specialists can assess your surfaces, recommend the most suitable products, and ensure flawless application. This is particularly valuable in high-use areas or heritage properties where preservation is crucial.
For those managing multiple tiled spaces—such as kitchens, bathrooms, hallways, and patios—creating a grout care calendar can help you stay organized regarding resealing and cleaning routines. Documenting when sealers were applied and which products were used simplifies future maintenance efforts.
Ultimately, grout sealing signifies more than just a protective measure—it represents peace of mind. Knowing that your tiled surfaces are shielded against wear and tear allows you to fully enjoy your home without the anxiety of premature damage or expensive repairs. Whether you are renovating a space or simply maintaining your existing one, investing in proper grout care is a wise decision that yields dividends in both visual appeal and longevity.
If you are ready to take the next step in protecting your grout, consider reaching out to a trusted tile care professional in Surrey. They can provide tailored advice, recommend premium products, and ensure your grout is sealed to perfection. Your floors, walls, and splashbacks will express gratitude—and your future self will benefit as well.
Frequently Asked Questions About Grout Sealing Clarified
Can You Effectively Seal Old Grout?
Absolutely—old grout can be sealed, and in many cases, it should be. Over time, grout becomes increasingly vulnerable to staining, moisture absorption, and wear. If it has never been adequately sealed or if the existing sealant has deteriorated, resealing is a smart way to restore protection and enhance appearance. However, sealing old grout requires careful preparation to ensure the new sealant adheres effectively and performs as intended.
The first step is cleaning. Old grout often retains embedded dirt, grease, soap residue, and even mildew, particularly in kitchens and bathrooms. These contaminants must be thoroughly eliminated before sealing; otherwise, they will be trapped beneath the sealant, leading to discoloration and reduced effectiveness. A thorough deep clean is essential—and in many cases, professional cleaning is advisable. Tile care specialists utilize targeted products and tools to eliminate stubborn grime without damaging the grout or surrounding tiles.
Once the grout has been cleaned, it must be allowed to dry completely. Moisture trapped within the grout can interfere with the sealant’s ability to bond and cure effectively. Depending on the room’s humidity and ventilation, drying may take 24 to 48 hours. During this period, it is crucial to avoid using the area and keep it dry by preventing exposure to water.
After cleaning and drying, inspect the grout for any damage. Cracks, missing sections, or crumbling areas should be repaired before sealing. Applying sealant over compromised grout will not resolve underlying issues and may lead to further deterioration. Grout repair products are available for DIY fixes, but for extensive damage, professional regrouting may be necessary.
Once the grout is clean, dry, and intact, sealing can proceed. Choose a sealer suitable for the type of grout and tile material. Pentrating sealers are generally best suited for older grout, as they penetrate the surface and reinforce it from within. Carefully apply the sealer, adhering to the manufacturer’s instructions, and allow it to cure fully before resuming use of the area.
For homeowners in Surrey with older tiled surfaces—especially in period properties or high-traffic areas—sealing old grout is a cost-effective method to extend the life of your flooring and enhance hygiene. It is a practical step that improves both function and aesthetics, and when executed correctly, it can make old grout appear nearly new again.
Is Sealing Epoxy Grout Necessary for Ongoing Protection?
Epoxy grout is a unique material that significantly differs from traditional cement-based grout. Composed of a combination of epoxy resins and filler powder, it is non-porous, highly resistant to moisture, and exceptionally durable. Due to these characteristics, epoxy grout does not require sealing in the same manner as cement-based grout.
Its non-porous nature means that liquids, oils, and stains are far less likely to penetrate the surface. This makes epoxy grout ideal for areas with high moisture exposure, such as showers, wet rooms, and commercial kitchens. It is also resistant to cracking and shrinkage, further enhancing its long-term performance.
However, while the grout itself does not necessitate sealing, the surrounding materials might. Many tiled surfaces—especially those made from natural stones like marble, slate, or travertine—are porous and benefit from sealant application. In these instances, sealing the tiles rather than the grout helps protect the entire surface from staining and moisture damage.
Additionally, some homeowners choose to seal epoxy grout for aesthetic purposes. While sealing is not required for protection, a surface sealer can enhance color consistency or add a subtle sheen. This is purely optional and should be conducted with products specifically formulated for use with epoxy grout.
It’s also worth noting that epoxy grout can be more challenging to handle during installation. It sets quickly and requires precise application, which is why many homeowners in Surrey opt for professional installation when using epoxy grout. Once installed, however, it provides excellent performance with minimal maintenance.
In summary, sealing epoxy grout is not necessary for protection, but surrounding tiles may still benefit from sealant. If you are uncertain whether your tiled surface requires sealing, consult a tile care expert who can evaluate the materials and recommend the best approach for your home.
What Is the Typical Lifespan of Grout Sealer Products?
The lifespan of grout sealer is influenced by several factors, including the type of sealer used, the grout’s location, and the level of surface maintenance. On average, most grout sealers maintain effectiveness for one to three years. However, this range can vary significantly based on usage and environmental conditions.
Pentrating sealers generally outlast surface sealers. Because they soak into the grout and bond with its internal structure, they provide deeper, more resilient protection. These sealers are ideal for high-traffic areas and rooms exposed to moisture, such as kitchens and bathrooms. When correctly applied, a high-quality penetrating sealer can remain effective for up to three years.
Surface sealers, which create a protective layer atop the grout, typically have a shorter lifespan. They are more vulnerable to wear from foot traffic, cleaning, and abrasion. In busy households or commercial environments, surface sealers may necessitate annual reapplication to sustain their effectiveness.
The location of the grout also influences longevity. Grout in low-traffic areas or decorative installations may retain its sealant longer than grout in frequently used spaces. For instance, a tiled wall in a guest bathroom may not require resealing as often as a kitchen floor or shower enclosure.
Maintenance habits play a critical role as well. Using pH-neutral cleaners and avoiding harsh chemicals helps prolong the sealant’s life. Regular cleaning with sealant-safe products prevents buildup and diminishes the risk of sealant degradation. Promptly addressing spills and avoiding excessive water exposure also contribute to extending sealant longevity.
To ascertain whether your grout sealer remains effective, conduct a simple water test. Apply a few drops of water to the grout and observe the outcome. If the water beads up and stays on the surface, the sealant is still intact. If it absorbs or creates a dark spot, it’s time to reapply the sealant.
For homeowners in Surrey who value long-term property care, scheduling grout resealing every 12 to 18 months is a reliable method for maintaining protection against stains and damage. Keeping track of application dates and monitoring the condition of your grout ensures that your tiled surfaces remain clean, durable, and visually appealing.
The Article Which Grout Sealing Method Offers the Best Long-Term Protection? first found on https://www.abbeyfloorcare.co.uk
The Article Grout Sealing Methods for Optimal Long-Term Protection appeared first on https://fabritec.org
The Article Grout Sealing Methods for Lasting Protection Was Found On https://limitsofstrategy.com
-
-

Grout Sealing Methods for Durable Protection Solutions
Last Updated on October 2, 2025 by David
Uncover the Most Reliable Grout Sealing Methods for Long-Term Defense Against Damage
-
- The Porosity of Grout creates a susceptibility to moisture, dirt, and bacteria, underscoring the necessity of effective sealing to enhance the grout’s lifespan and overall durability.
- Opt for Penetrating Sealers, particularly in residential properties across Surrey, as they provide deep-rooted protection while remaining nearly invisible on the surface.
- <a href="https://limitsofstrategy.com/stripping-sealers-without-damaging-porcelain-tile/">Surface Sealers</a> can enhance the aesthetic appeal but necessitate more frequent applications, making them ideal for decorative spaces or areas with low foot traffic.
- Water-Based Sealers are safer for indoor environments and easier to apply, while solvent-based sealers deliver superior durability but require adequate ventilation during application.
- Application Techniques Are Crucial: Brush-on methods allow for precision application, while spray-on techniques provide speed but may compromise accuracy.
- Multiple Coats Enhance Effectiveness, particularly in areas with high foot traffic or moisture exposure.
- Routine Maintenance is Essential: Reseal every 12–18 months and utilize pH-neutral cleaners to preserve the integrity of the sealant.
- Older Grout Can Be Restored through thorough cleaning and necessary repairs, rejuvenating its protective properties and visual appeal.
- Epoxy Grout Generally Does Not Require Sealing, although the surrounding tiles may still benefit from sealant application.
- Indicators of Sealant Wear include water absorption, discoloration, and a chalky texture—signs that it’s time to consider resealing the grout.
The Importance of Grout Sealing for Your Home’s Protection and Longevity
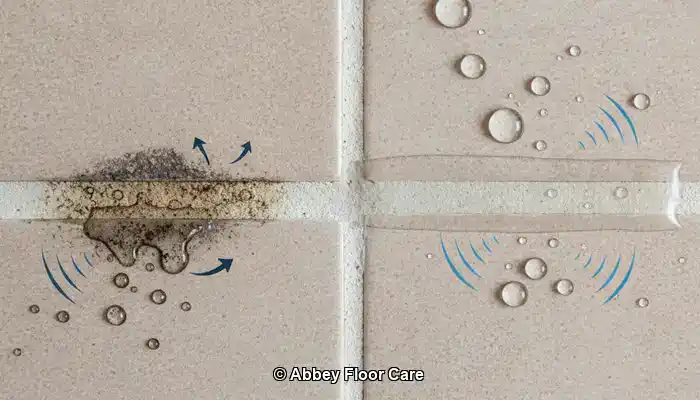
Grout is a vital component of tile maintenance, yet it often goes overlooked. Its significance extends beyond aesthetics; grout serves as the essential filler between tiles, ensuring they remain securely aligned while effectively blocking moisture from penetrating beneath the surfaces. Despite its critical function, grout is inherently vulnerable due to its porous structure, which allows it to absorb water, dirt, oils, and even cleaning agents. Over time, this absorption leads to unsightly staining, discoloration, and ultimately, structural damage to the tiled surfaces. Thus, understanding its importance is essential for maintaining the integrity of your flooring and walls.
Professional Tips for Daily Grout Care and Recommended Cleaning Products
 Fila Pro Floor Cleaner
 LTP Floorshine
 Vileda H2PrO Spin Mop System
In numerous homes throughout Surrey, where tiled surfaces are prevalent in both modern and traditional designs, sealing grout stands out as one of the most effective measures to protect your investment. Without an appropriate sealant, grout can easily accumulate dirt, particularly in high-traffic zones or areas exposed to moisture and spills. For instance, consider a bustling kitchen where cooking oils may splatter or a bathroom constantly subjected to steam and soap residue—unsealed grout in these environments can rapidly degrade from pristine to stained and dull.
Moreover, unsealed grout can become a breeding ground for bacteria and mould. This is especially concerning in wet areas like showers and splashbacks, where continuous moisture creates an ideal environment for microbial growth. Once mould takes hold, it can be unsightly and challenging to remove without resorting to aggressive chemicals that might damage adjacent tiles. Sealing grout creates a barrier that repels moisture and contaminants, making cleaning easier and maintaining a hygienic atmosphere.
Additionally, sealing grout is essential for prolonging its lifespan. Grout exposed to various elements—whether from foot traffic, cleaning agents, or environmental factors—will deteriorate more rapidly. This can result in cracks, loose tiles, and potentially expensive repairs. A high-quality grout sealer works to extend the life of your tiled surfaces by reinforcing the grout’s structure and preventing premature wear and tear.
It’s crucial to understand that sealing grout is not limited to newly installed tiles. Older grout can—and should—be sealed after thorough cleaning. In fact, resealing is a vital aspect of ongoing maintenance. Many homeowners in Surrey choose to reseal every 12 to 18 months, depending on the level of use and the specific type of sealer employed. This routine maintenance guarantees that grout remains protected and continues to serve its purpose effectively.
For those concerned about how sealants may affect tile appearance, modern products are formulated to be invisible once dried. They do not alter the colour or texture of your grout and are safe for a wide array of tile materials, including ceramic, porcelain, and natural stone. Some sealers may even enhance the grout’s colour slightly, offering a refreshed look without the necessity for regrouting.
In summary, sealing grout is not merely an optional task—it is a necessity. It guards against moisture, stains, bacteria, and wear while preserving the visual appeal of your tiled surfaces. Whether you’re renovating your bathroom or maintaining a heavily trafficked kitchen floor, investing in a high-quality grout sealer is one of the most advantageous decisions you can make for your home. In Surrey, where homeowners prioritize both style and durability, grout sealing is a crucial component of long-term property maintenance.
Evaluating Different Grout Sealers: Finding the Perfect Fit for Your Home

Understanding the Differences Between Penetrating Sealers and Surface Sealers
When it comes to safeguarding grout over time, the first choice homeowners must make is whether to opt for penetrating sealers or surface sealers. Penetrating sealers are crafted to absorb into the grout, establishing a protective barrier beneath the surface. These sealers bond with the grout’s internal structure, making them exceptionally effective at repelling moisture, oils, and stains without changing the appearance of the grout or surrounding tiles. They are particularly advantageous in areas exposed to regular water, such as bathrooms, kitchens, and splashbacks.
Conversely, surface sealers create a protective film on top of the grout, leading to a visible finish. These sealers can enhance the color of the grout and impart a slight sheen, which some homeowners appreciate for decorative finishes. However, because they remain on the surface, they are more prone to wear and may require more frequent reapplications. Surface sealers are best suited for low-traffic areas or spaces where aesthetic enhancement is prioritized, such as a tiled feature wall or a guest bathroom that could benefit from a surface sealer that adds gloss and depth to the grout lines.
Water-Based Sealers vs. Solvent-Based Sealers: Evaluating the Best Option
Another significant distinction is between water-based and solvent-based sealers. Water-based sealers have gained traction among homeowners in Surrey due to their low VOC content, making them safer for indoor use and more environmentally friendly. They are straightforward to apply, dry quickly, and are appropriate for most residential settings. These sealers are ideal for families with children or pets, as they emit fewer fumes and are typically gentler on surrounding surfaces.
In contrast, solvent-based sealers provide deeper penetration and longer-lasting protection. They are often utilized in commercial environments or outdoor areas where durability is vital. While they offer excellent resistance to staining and moisture, they necessitate better ventilation during application and may not be suitable for enclosed spaces. Homeowners who choose solvent-based sealers should take care to protect nearby surfaces and ensure adequate airflow during use.
Selecting the Ideal Sealer for Homes in Surrey
For the majority of homes in Surrey, a water-based penetrating sealer strikes the perfect balance of safety, effectiveness, and ease of maintenance. It provides invisible protection that does not alter the grout or tile appearance and is suitable for both indoor and outdoor applications. This type of sealer aligns exceptionally well with the kinds of tiled surfaces commonly found in Surrey homes, such as ceramic kitchen floors, porcelain bathroom tiles, and natural stone splashbacks.
However, the best choice ultimately depends on the specific requirements of the space. High-traffic areas, like hallways and kitchens, gain the most from penetrating sealers that provide deep, lasting protection. In contrast, decorative areas or surfaces where visual enhancement is desired may be better suited to a surface sealer that adds gloss and richness to the color. For outdoor patios or commercial settings, solvent-based options could be worth exploring due to their superior durability.
It’s also essential to match the sealer with the type of grout—cement-based grout, which is highly porous, benefits greatly from sealing. Conversely, epoxy grout, which is non-porous and moisture-resistant, typically does not require sealing; however, adjacent tiles may still gain from a protective coating.
Choosing the appropriate grout sealer involves not only performance considerations but also alignment with your lifestyle, tile materials, and long-term maintenance objectives. In the following section, we will delve into how various application techniques can influence the efficacy of your selected sealer and ensure enduring protection.
Enhancing Grout Protection: Effective Application Techniques

Choosing Between Brush-On and Spray-On Application Techniques
The method chosen for applying grout sealer can significantly influence the effectiveness and durability of the protective layer. The two most prevalent techniques are brush-on and spray-on applications, each offering unique benefits based on the grout type, tile arrangement, and required precision.
Brush-on application is widely regarded as the most dependable method for sealing grout. It allows for targeted coverage, ensuring that the sealer penetrates deeply into the grout lines without oversaturating the surrounding tiles. This precision is especially critical in homes with natural stone or textured tiles, where excess sealer can create a hazy residue or alter the tile’s appearance. By utilizing a small brush or an applicator bottle with a roller tip, homeowners can control the amount of product applied and minimize waste. Although this method may be slower, it offers the accuracy that is ideal for high-value surfaces or intricate tile designs.
Conversely, spray-on sealers provide speed and convenience. They are particularly beneficial for extensive areas with uniform tile layouts, such as open-plan kitchens or tiled hallways. Employing a fine mist applicator, the sealer can be evenly distributed across the surface, rapidly reaching the grout lines. However, spray-on methods may lack accuracy, particularly around decorative tiles or uneven surfaces. Overspray can occur, and if not promptly wiped off, it can cause streaks or dull patches on glossy tiles.
For homeowners in Surrey looking for a balance between efficiency and quality, a hybrid approach might be the optimal solution. Start with a spray-on application to cover the majority of the area and follow up with a brush to tackle corners, edges, and any missed grout lines. This strategy guarantees comprehensive coverage while maintaining control over the final appearance.
Regardless of the chosen technique, working in manageable sections and avoiding haste is crucial. Proper application is vital for achieving a durable seal that protects against moisture, staining, and wear.
Determining the Number of Coats Required for Effective Sealing
The number of coats necessary for effective grout sealing depends on the specific type of sealer utilized, the grout’s porosity, and the conditions of the area. Generally, manufacturers advocate for applying at least two coats for optimal protection, but in certain cases, additional coats may be warranted.
The first coat acts as a primer, penetrating the grout and initiating the protective process. It is essential to allow this coat to absorb and dry completely before applying the second one. The second coat reinforces the barrier, ensuring that the grout is thoroughly sealed and resistant to moisture and contaminants.
In high-traffic areas, such as kitchens and entryways, or in rooms frequently exposed to water, like bathrooms, a third coat may be beneficial. This is particularly relevant for older grout that has been previously sealed and may exhibit uneven absorption. Applying multiple coats ensures that any worn or porous sections receive sufficient protection.
Timing between coats is critical. Rushing the process can result in poor adhesion and reduced effectiveness. Most water-based sealers require a waiting period of 30 to 60 minutes between coats, while solvent-based products may necessitate longer intervals. Always adhere to the manufacturer’s instructions and conduct a small area test to evaluate the absorption rate.
For Surrey homeowners seeking durable results, investing the time to apply multiple coats correctly can ultimately save both money and effort in the future. This practice reduces the need for frequent resealing and helps maintain the appearance and structural integrity of tiled surfaces.
Avoiding Common Mistakes in Grout Sealing
Even with the best intentions and products, grout sealing can go awry if specific common mistakes are made. A prevalent error is applying sealer to dirty or damp grout. Sealing over grime or moisture traps contaminants beneath the surface, leading to staining, discoloration, and compromised effectiveness. Always ensure the grout is thoroughly cleaned and completely dry—ideally for 24 hours—before sealing.
Another frequent oversight involves selecting the inappropriate type of sealer for the grout or tile material. For instance, using a surface sealer on highly porous grout may result in uneven coverage and inadequate protection. Similarly, applying a solvent-based sealer in a poorly ventilated area can produce strong fumes and potential health risks. It is crucial to align the sealer with the specific needs of the space.
Overapplication is another issue that can occur. Applying too much sealer at once can lead to pooling, sticky residue, or a cloudy finish on tiles. It is preferable to apply thin, even coats and gradually build up protection. Any excess should be wiped off immediately to prevent hazing on the tile surface.
Finally, neglecting to test a small area prior to applying the latest treatment can lead to unexpected results. Some sealers may slightly darken grout or alter the sheen of adjacent tiles. Testing ensures compatibility and allows necessary adjustments to be made.
By steering clear of these common pitfalls, you can ensure your grout sealing project yields the desired protection and finish. In the upcoming section, we will explore how to maintain sealed grout over time and recognize when it’s necessary to reseal.
Fundamental Maintenance Practices for Sealed Grout
How Frequently Should You Reseal Your Grout?
Once grout has been sealed, it may be tempting to think the task is complete indefinitely; however, like most protective treatments, grout sealant has a limited lifespan. Over time, exposure to foot traffic, cleaning agents, moisture, and general wear will gradually degrade the sealant, leaving the grout vulnerable to staining and deterioration. To maintain optimal protection, grout should be resealed every 12 to 18 months. This timeframe may vary based on the location and usage of the tiled surface.
In high-traffic areas such as kitchen floors, entryways, and family bathrooms, grout experiences continuous wear. These spaces often necessitate resealing closer to the 12-month mark. Kitchens, for example, are subjected to cooking oils, food spills, and frequent mopping—all of which can erode the sealant more quickly. Similarly, bathrooms contend with humidity, soap residue, and water splashes, which also accelerate wear. Conversely, low-traffic areas, such as guest bathrooms or decorative tiled walls, may maintain their sealant effectiveness for up to 18 months or even longer.
The type of sealer used also influences resealing frequency. Penetrating sealers typically last longer than surface sealers, particularly when applied correctly in multiple coats, providing more durable and long-lasting protection. Water-based sealers may require more frequent reapplications than solvent-based options; however, they are generally easier to use and safer for indoor environments.
Homeowners in Surrey who emphasize long-term property care often integrate grout resealing into their annual maintenance routines. This proactive approach helps avert costly repairs and keeps tiled surfaces looking pristine and clean. Additionally, it provides an opportunity to inspect grout for any signs of damage, such as cracking or discoloration, which may indicate underlying issues.
Engaging professional resealing services can offer added assurance, especially for larger areas or natural stone installations. Experts can assess the condition of the existing sealant, perform a thorough deep clean, and apply the appropriate product for your specific grout and tile type. Whether you decide to reseal yourself or hire a specialist, consistency remains crucial to preserving the integrity and appearance of your grout over time.
Choosing Cleaning Products That Protect Your Sealant
Maintaining sealed grout involves not only timing but also the use of appropriate cleaning products. Harsh or acidic cleaners can prematurely degrade sealants, leaving the grout exposed and vulnerable. To prolong the lifespan of your grout sealer, it is vital to utilize pH-neutral cleaning solutions specifically designed for sealed surfaces.
pH-neutral cleaners are effective yet gentle, efficiently removing everyday dirt, grease, and grime without compromising the protective barrier established by the sealant. These products are safe for use on ceramic, porcelain, and natural stone tiles, making them ideal for multi-surface cleaning in kitchens, bathrooms, and hallways. Many reputable brands offer tile and grout cleaners labeled as “sealant-safe” or “pH-neutral,” simplifying the selection process for homeowners.
Conversely, common household cleaners such as bleach, vinegar, and ammonia-based products can be highly corrosive. Although they may appear effective for cleaning, they often strip away sealant layers, leaving grout porous and susceptible to staining. Acidic cleaners are particularly harmful to natural stone tiles and cement-based grout, which are sensitive to pH fluctuations. Over time, repeated use of these products can lead to discoloration, etching, and even structural weakening of the grout.
For homeowners in Surrey who prioritize eco-friendly cleaning, numerous non-toxic, biodegradable options offer sealant-safe performance. These products are especially suitable for families with children or pets, contributing to a healthier indoor environment. Microfiber mops and soft-bristle brushes can also assist in maintaining grout cleanliness without the need for abrasive scrubbing.
Additionally, adhering to proper cleaning techniques is crucial. Avoid soaking the grout with excessive water, as this can seep into the joints and weaken the sealant. Instead, utilize damp mops or cloths and ensure the area is dried thoroughly after cleaning. Promptly spot-clean spills to prevent staining, and refrain from using steam cleaners unless the grout and sealant are rated for high-temperature exposure.
By selecting the right cleaning products and methods, you can significantly extend the lifespan of your grout sealant and maintain the beauty of your tiled surfaces. This straightforward yet effective aspect of your maintenance routine pays dividends in terms of long-term durability and visual appeal.
Recognizing When Your Grout Requires Resealing
Even with consistent maintenance, grout sealant will ultimately wear down. Being aware of the signs indicating your grout needs resealing can help you take action before damage occurs. One of the most reliable indicators is the behavior of water on the surface. If water ceases to bead up and instead soaks into the grout, it is likely that the sealant has worn off, signaling that the protective barrier is no longer functioning effectively.
Staining serves as another telltale sign. If your grout begins to darken or display spots after spills or cleaning, it is absorbing moisture and contaminants—something sealed grout is designed to resist. Discoloration may develop gradually, particularly in areas exposed to regular use or cleaning. In kitchens, keep an eye out for oil or food stains; in bathrooms, be vigilant for soap scum or mildew marks.
Changes in texture can also indicate sealant breakdown. Grout that feels chalky, rough, or powdery may be losing its structural integrity. This deterioration can lead to crumbling or cracking, affecting not only the appearance but also the stability of the tiles. In some cases, grout may begin to flake or detach from the tile edges, signaling a deeper level of damage.
While visual cues are essential, timing is equally critical. If it has been over 18 months since your last sealing—or if you cannot recall when it was performed—it is worthwhile to closely inspect your grout. A simple water test can be effective: apply a few drops of water to the grout and observe the results. If the water is absorbed rather than repelled, it is time to reseal.
For homeowners in Surrey who value long-term property care, recognizing these signs early can help mitigate costly repairs and maintain the aesthetic appeal of tiled surfaces. Resealing not only restores protection but also revitalizes the appearance of grout, ensuring that floors and walls look cleaner and more inviting.
Whether you are maintaining a newly renovated kitchen or caring for a heritage bathroom, staying vigilant to these signs ensures your grout remains sealed, robust, and visually appealing. In the next section, we will address frequently asked questions about grout sealing to help you make informed decisions for your home.
Common Questions Regarding Grout Sealing
Is It Possible to Seal Old Grout?
Absolutely—old grout can indeed be sealed, and in many cases, it should be. Over time, grout becomes increasingly vulnerable to staining, moisture absorption, and wear. If it was never adequately sealed or if the existing sealant has deteriorated, resealing is an intelligent approach to restoring protection and enhancing appearance. However, sealing old grout requires careful preparation to ensure that the new sealant adheres effectively and performs as intended.
The first and most crucial step involves thorough cleaning. Old grout often contains embedded dirt, grease, soap residue, and even mildew, particularly in kitchens and bathrooms. These contaminants must be eliminated before sealing; otherwise, they will be trapped beneath the sealant, leading to discoloration and diminished effectiveness. A comprehensive deep-cleaning is essential—and in many instances, professional cleaning is advisable. Tile care specialists utilize targeted products and tools to remove stubborn grime without harming the grout or surrounding tiles.
After cleaning, it is vital to allow the grout to dry completely. Moisture trapped within the grout can hinder the sealant’s ability to bond and cure properly. Depending on the room’s humidity and ventilation, this drying process may take anywhere from 24 to 48 hours. During this time, it is advisable to refrain from using the area and keep it dry by avoiding water exposure.
Following the cleaning and drying process, inspect the grout for any damage. Cracks, missing sections, or crumbling areas should be repaired before sealing. Applying sealant over compromised grout will not address underlying issues and may lead to further deterioration. Grout repair products are available for DIY fixes, but extensive damage may necessitate professional regrouting.
Once the grout is clean, dry, and intact, sealing can proceed. Select a sealer that is suitable for the type of grout and tile material. Penetrating sealers are typically the best choice for older grout, as they penetrate the surface and reinforce it from within. Carefully apply the sealer according to the manufacturer’s instructions, and allow it to cure fully before using the area.
For homeowners in Surrey with older tiled surfaces—especially in period properties or high-use areas—sealing old grout represents a cost-effective strategy to prolong the life of your flooring and enhance hygiene. It is a practical measure that improves both functionality and aesthetics, and when executed correctly, it can make aged grout appear nearly new once again.
Is Sealing Necessary for Epoxy Grout?
Epoxy grout is a unique material that significantly differs from conventional cement-based grout. Comprising a blend of epoxy resins and filler powder, it is non-porous, highly resistant to moisture, and exceptionally durable. Due to these characteristics, epoxy grout does not require sealing in the same manner as cement-based grout.
Its non-porous nature means that liquids, oils, and stains are significantly less likely to penetrate the surface. This makes epoxy grout particularly suitable for areas exposed to high moisture, such as showers, wet rooms, and commercial kitchens. It also exhibits resistance to cracking and shrinkage, enhancing its long-term performance.
However, while the grout itself does not require sealing, the surrounding materials may still benefit from it. Many tiled surfaces—especially those made of porous natural stones like marble, slate, or travertine—should be sealed to protect against staining and moisture damage. In such cases, applying sealant to the tiles rather than the grout helps safeguard the entire surface.
Additionally, some homeowners choose to seal epoxy grout for aesthetic reasons. Although sealing is not necessary for protection, a surface sealer can enhance color uniformity or impart a subtle sheen. This step is purely optional and should be performed using products specifically formulated for use with epoxy grout.
It is also important to note that epoxy grout can be more challenging to work with during installation due to its quick-setting nature and the need for precise handling. Many homeowners in Surrey prefer professional installation for epoxy grout. Nevertheless, once installed, it delivers excellent performance with minimal ongoing maintenance.
In summary, sealing epoxy grout is not required for protective purposes, but surrounding tiles may still benefit from a sealant application. If you are unsure whether your tiled surface requires sealing, consult a tile care expert who can assess the materials and recommend the best approach for your home.
What is the Typical Lifespan of Grout Sealer?
The longevity of grout sealer is influenced by several factors, including the type of sealer used, the grout’s location, and the level of surface maintenance. On average, most grout sealers last between one and three years. However, this range can vary significantly depending on usage and environmental conditions.
Penetrating sealers tend to have a longer lifespan than surface sealers. Because they absorb into the grout and bond with its internal structure, they provide deeper, more resilient protection. These sealers are particularly suitable for high-traffic areas and rooms exposed to moisture, such as kitchens and bathrooms. When applied correctly, a high-quality penetrating sealer can remain effective for up to three years.
Surface sealers, which create a protective layer on top of the grout, generally have a shorter lifespan. They are more susceptible to wear from foot traffic, cleaning, and abrasion. In busy households or commercial settings, surface sealers may need to be reapplied annually to maintain their effectiveness.
The location of the grout also plays a role in its longevity. Grout in low-traffic areas or decorative installations may retain its sealant longer than grout in frequently used spaces. For instance, a tiled wall in a guest bathroom may not require resealing as often as a kitchen floor or shower enclosure.
Maintenance habits significantly influence sealer lifespan. Utilizing pH-neutral cleaners and avoiding harsh chemicals contribute to preserving the sealant. Regular cleaning with sealant-safe products prevents buildup and reduces the risk of sealant degradation. Promptly spot-cleaning spills and avoiding excessive water exposure also extend the life of the sealant.
To determine whether your grout sealer is still effective, conduct a simple water test. Apply a few drops of water to the grout and observe the results. If the water beads up and remains on the surface, the sealant is intact. Conversely, if the water soaks in or leaves a dark spot, it is time to reapply the sealant.
For homeowners in Surrey who prioritize long-term property care, scheduling grout resealing every 12 to 18 months is a reliable method to maintain protection against stains and damage. Keeping track of application dates and monitoring grout condition ensures that your tiled surfaces remain clean, durable, and visually appealing.
The Article Which Grout Sealing Method Offers the Best Long-Term Protection? first found on https://www.abbeyfloorcare.co.uk
The Article Grout Sealing Methods for Optimal Long-Term Protection appeared first on https://fabritec.org
The Article Grout Sealing Methods for Lasting Protection Solutions Was Found On https://limitsofstrategy.com
-
-

Grout Sealing Methods for Durable and Long-Lasting Protection
Last Updated on October 2, 2025 by David
Essential Techniques for Choosing the Optimal Grout Sealing Method for Longevity
-
- Grout has a naturally porous structure that enables it to absorb moisture, dirt, and bacteria. This porous nature makes sealing indispensable to ensure the long-lasting durability and preservation of your tiled surfaces.
- Penetrating sealers are highly recommended for most residences in Surrey, as they offer deep, effective protection while remaining virtually invisible on the surface.
- Surface sealers enhance the aesthetic look of your tiles but necessitate more frequent reapplication, making them better suited for low-traffic or decorative areas.
- Water-based sealers are safer and easier to use indoors, whereas solvent-based sealers provide longer-lasting protection but require adequate ventilation during application.
- Application technique is crucial: brush-on methods allow for precise application, while spray-on techniques are quicker but may lack the same level of accuracy.
- Multiple coats enhance performance, especially in areas with high traffic or moisture exposure.
- Regular maintenance is essential: aim to reseal your grout every 12 to 18 months and utilize pH-neutral cleaners to prevent damage to the sealant.
- Old grout can be revitalized through proper cleaning and sealing, improving both its protective capabilities and visual appeal.
- Epoxy grout does not require sealing, yet the surrounding tiles can still benefit from an additional protective sealant.
- Indicators of sealant deterioration include water absorption, staining, and a chalky texture, all of which suggest that resealing is necessary.
The Crucial Importance of Grout Sealing for Your Tiled Surfaces

The importance of grout in maintaining tile surfaces is frequently underestimated, yet it plays a vital role in both the visual appeal and the durability of tiled areas. Grout serves as the binding agent that keeps tiles securely in place while preventing the infiltration of moisture beneath. However, due to its porous nature, grout is particularly susceptible to absorbing water, dirt, oils, and even cleaning chemicals. This absorption can lead to staining, discoloration, and structural damage over time.
Professional Advice: Recommended Products for Daily Grout Maintenance and Care
 Fila Pro Floor Cleaner
 LTP Floorshine
 Vileda H2PrO Spin Mop System
In homes throughout Surrey, where tiled surfaces are prevalent in both contemporary and traditional designs, sealing grout is one of the most effective methods to protect your investment. Without a proper sealant, grout can quickly become a haven for dirt, especially in high-traffic areas or locations prone to moisture and spills. Imagine a busy kitchen where cooking oils splatter or a bathroom where steam and soap residues settle into the grout lines; unsealed grout in such settings can swiftly transition from clean to unsightly and unkempt.
Moreover, unsealed grout can harbor bacteria and mold, which is particularly concerning in areas like showers and splashbacks, where constant moisture fosters growth. Once mold establishes itself, it not only becomes unsightly but also difficult to eliminate without the use of harsh chemicals that could potentially damage adjacent tiles. Sealing grout creates a protective barrier that repels moisture and contaminants, simplifying cleaning and maintaining a hygienic living environment.
Additionally, sealing grout prolongs its lifespan. Grout exposed to various elements—whether from foot traffic, cleaning agents, or environmental factors—degrades more quickly. This degradation can lead to cracks, loose tiles, and increased repair expenses. A high-quality grout sealer can significantly extend the life of your tiled surfaces by reinforcing the grout’s structure and preventing premature wear.
It’s essential to understand that sealing grout is not just a task for newly installed tiles. Older grout can and should be sealed after thorough cleaning. Resealing is a crucial aspect of ongoing maintenance. Many homeowners in Surrey choose to reseal every 12 to 18 months, depending on usage frequency and the type of sealant applied. This routine maintenance ensures that grout remains protected and continues to perform effectively.
If you are concerned about how sealants might affect the appearance of your tiles, modern products are engineered to remain invisible once dried. They will not alter the color or texture of your grout and are safe for use on various tile materials, including ceramic, porcelain, and natural stone. In some instances, sealers may even slightly enhance the grout’s color, providing a refreshed look without necessitating regrouting.
In essence, sealing grout is not merely an option; it is a necessity. It helps protect against moisture, stains, bacteria, and wear while preserving the visual charm of your tiled surfaces. Whether you are updating a bathroom or maintaining a kitchen floor, investing in a high-quality grout sealer is one of the smartest decisions you can make for your home. In Surrey, where homeowners appreciate both aesthetics and functionality, grout sealing is integral to long-term property maintenance.
Exploring the Various Types of Grout Sealers Available

Comparing the Characteristics of Penetrating Sealers and Surface Sealers
When selecting the best protection for grout, homeowners must decide between penetrating sealers and surface sealers. Penetrating sealers are designed to infiltrate the grout, creating a protective layer within the material itself. These sealers bond with the grout’s internal structure, making them highly effective at repelling moisture, oils, and stains without changing the grout’s appearance or that of the surrounding tiles. They are particularly advantageous in areas that frequently encounter water exposure, such as bathrooms, kitchens, and splash zones.
Conversely, surface sealers rest on top of the grout, forming a visible film. These sealers can enhance the grout’s color and impart a slight sheen, which may appeal to homeowners seeking decorative finishes. However, because they remain on the surface, they are more susceptible to wear and require more frequent reapplication. Surface sealers are best utilized in low-traffic areas or where aesthetic enhancement is prioritized. For example, a tiled feature wall or a guest bathroom may benefit from a surface sealer that adds gloss and vibrancy to the grout lines.
Understanding the Differences Between Water-Based and Solvent-Based Sealers
Another important distinction lies between water-based sealers and solvent-based sealers. Water-based sealers are becoming increasingly popular among homeowners in Surrey due to their low volatile organic compound (VOC) content, making them safer for indoor use and more eco-friendly. They are easy to apply, dry quickly, and are suitable for most residential applications. These sealers are especially ideal for households with children or pets, as they emit fewer fumes and are generally milder on surrounding surfaces.
In contrast, solvent-based sealers penetrate deeper and offer longer-lasting protection. These are typically used in commercial settings or outdoor areas where durability is crucial. While they provide excellent resistance to stains and moisture, they require good ventilation during application and may not be suitable for enclosed spaces. Homeowners opting for solvent-based sealers should take care to protect adjacent surfaces and ensure adequate airflow during the application process.
Choosing the Right Type of Sealer for Homes in Surrey
For most homes in Surrey, a water-based penetrating sealer offers the best blend of safety, effectiveness, and ease of upkeep. It provides invisible protection that does not alter the grout or tile appearance and is appropriate for both indoor and outdoor applications. This type of sealer is particularly well-suited for the common tiled surfaces found in Surrey residences, such as ceramic kitchen floors, porcelain bathroom tiles, and natural stone splashbacks.
However, the final choice should align with the specific demands of the area. High-traffic zones, such as hallways and kitchens, benefit from penetrating sealers that deliver deep, enduring protection. Decorative areas or surfaces where visual enhancement is desired may be better served by a surface sealer that enhances gloss and vibrancy. For outdoor patios or commercial spaces, solvent-based options might be worth considering due to their increased durability.
It’s also essential to match the sealer with the type of grout—cement-based grout, which is highly porous, greatly benefits from sealing. In contrast, epoxy grout, which is non-porous and moisture-resistant, typically does not require sealing, although the surrounding tiles could benefit from a protective layer.
When selecting a grout sealer, it is vital to consider your lifestyle, tile material, and long-term maintenance objectives. In the next section, we will discuss how application methods can influence the effectiveness of your chosen sealer and ensure lasting protection.
Application Techniques That Enhance Grout Protection

Exploring Brush-On Versus Spray-On Application Methods
The method chosen for applying grout sealer can greatly affect the efficiency and durability of the protective layer. Two popular techniques are brush-on and spray-on applications, each providing unique benefits depending on the grout type, tile arrangement, and precision required.
The brush-on application method is widely considered the most reliable way to seal grout. It allows for targeted coverage, ensuring that the sealer penetrates deeply into the grout lines without oversaturating adjacent tiles. This is particularly important in homes with natural stone or textured tiles, where excess sealer can create a cloudy residue or alter the tile’s appearance. By using a small brush or an applicator bottle with a roller tip, homeowners can control the amount of product used and minimize waste. Though this process is time-consuming, the accuracy it offers makes it ideal for high-value surfaces or intricate tile designs.
In contrast, spray-on sealers provide speed and convenience. They are well-suited for larger areas with uniform tile arrangements, such as open-plan kitchens or tiled hallways. Using a fine mist applicator allows for even distribution of the sealer across the surface, quickly reaching the grout lines. However, spray-on methods can sometimes lack precision, particularly around decorative tiles or uneven surfaces. Overspray is a common concern, and if not wiped away immediately, it can leave streaks or dull patches on glossy tiles.
For homeowners in Surrey who value both efficiency and quality, a combination approach may yield optimal results. Start with a spray-on application to cover the majority of the area, then follow up with a brush to touch up corners, edges, and any missed grout lines. This strategy ensures comprehensive coverage while maintaining control over the final appearance.
Regardless of the chosen method, it’s essential to work in manageable sections and take your time. Proper application is crucial for achieving a long-lasting seal that effectively safeguards against moisture, staining, and wear.
Determining the Optimal Number of Coats for Maximum Protection
The number of coats needed for effective grout sealing depends on the type of sealer used, the grout’s porosity, and the conditions of the environment. Most manufacturers recommend applying at least two coats for optimal protection, although in certain situations, additional coats may be necessary.
The initial coat serves as a primer, penetrating the grout and initiating the protective process. Allow this first layer to fully absorb and dry before proceeding with the second coat. The second coat fortifies the barrier, ensuring that the grout is thoroughly sealed and resistant to moisture and contaminants.
In high-traffic areas, such as kitchens and entryways, or in spaces with frequent water exposure, like bathrooms, a third coat may be beneficial. This is particularly true for older grout that has been previously sealed and may show uneven absorption. Applying multiple coats ensures that any worn or porous sections receive adequate protection.
Timing between coats is also crucial. Rushing the process can lead to poor adhesion and reduced effectiveness. Most water-based sealers require a drying interval of 30 to 60 minutes between coats, while solvent-based products may have longer waiting times. Always refer to the manufacturer’s instructions and test a small area first to evaluate absorption rates.
For homeowners in Surrey aiming for lasting results, investing time in the proper application of multiple coats can save both money and effort in the long run. This approach minimizes the frequency of resealing required and helps maintain the appearance and integrity of tiled surfaces.
Avoiding Common Mistakes in Grout Sealing
Even with quality products and good intentions, grout sealing can go awry if common pitfalls are encountered. One frequent mistake is applying sealer to dirty or damp grout. Sealing over grime or moisture traps contaminants beneath the surface, leading to staining, discoloration, and diminished effectiveness. Always ensure that the grout is thoroughly cleaned and allowed to dry completely—ideally for 24 hours—before sealing.
Another common error involves using an inappropriate type of sealer for the grout or tile material. For instance, applying a surface sealer to very porous grout may result in uneven coverage and inadequate protection. Similarly, using a solvent-based sealer in a poorly ventilated area can generate strong fumes and pose health risks. It is essential to select a sealer that meets the specific needs of the environment.
Overapplication is another common mistake. Applying excessive sealer at once can lead to pooling, sticky residue, or a cloudy finish on tiles. It is best to apply thin, even layers and gradually build up protection. Wiping away any excess immediately can prevent hazing on the tile surface.
Finally, neglecting to test a small area before applying a new treatment can lead to unexpected results. Certain sealers may slightly darken grout or alter the sheen of adjacent tiles. Conducting a test ensures compatibility and allows for adjustments in technique if necessary.
By avoiding these common errors, you can ensure that your grout sealing project achieves the protection and finish you desire. In the following section, we will explore how to maintain sealed grout over time and identify when it is necessary to reseal.
Essential Maintenance Strategies After Grout Sealing
How Frequently Should Grout Be Resealed?
Once grout has been sealed, it is easy to assume that the task is complete for the foreseeable future. However, similar to most protective treatments, grout sealant has a limited lifespan. Over time, exposure to foot traffic, cleaning agents, moisture, and regular wear will gradually degrade the sealant, leaving grout susceptible to staining and deterioration. To maintain optimal protection, grout should be resealed every 12 to 18 months. This timeframe may vary based on the location and usage of the tiled surface.
In high-traffic areas such as kitchen floors, entryways, and family bathrooms, grout experiences constant wear. These spaces often necessitate resealing closer to the 12-month mark. For instance, kitchens are subject to cooking oils, food spills, and frequent mopping—all of which can erode the sealant more rapidly. Bathrooms endure humidity, soap residue, and splashes, which also hasten wear and tear. Conversely, low-traffic areas, such as guest bathrooms or decorative tiled walls, may retain their sealant effectiveness for up to 18 months or even longer.
The type of sealer applied also influences how often resealing is required. Penetrating sealers typically last longer than surface sealers, especially when applied correctly in multiple coats, providing more durable and long-lasting protection. Water-based sealers may necessitate more frequent reapplications compared to solvent-based options, although they are easier to apply and safer for indoor use.
Homeowners in Surrey who prioritize long-term property maintenance often schedule grout resealing as part of their annual upkeep. This proactive approach prevents costly repairs and ensures that tiled surfaces maintain their fresh and clean appearance. It also provides an opportunity to inspect grout for any signs of damage, such as cracking or discoloration, which may indicate deeper issues.
Professional resealing services can offer additional peace of mind, especially for larger areas or natural stone installations. Experts can assess the condition of the existing sealant, perform a thorough cleaning, and apply the appropriate product tailored to your specific grout and tile type. Whether you choose to reseal independently or hire a specialist, consistency is crucial for maintaining the integrity and appearance of your grout over time.
Selecting Cleaning Products That Preserve Sealant Integrity
Maintaining sealed grout involves more than just timing; it also requires choosing the right cleaning products. Harsh or acidic cleaners can quickly degrade the sealant, leaving the grout exposed and vulnerable. To prolong the life of your grout sealer, it is essential to use pH-neutral cleaning solutions specifically formulated for sealed surfaces.
pH-neutral cleaners are both gentle and effective. They eliminate everyday dirt, grease, and grime without compromising the protective barrier established by the sealant. These products are safe for use on ceramic, porcelain, and natural stone tiles, making them perfect for multi-surface cleaning in kitchens, bathrooms, and hallways. Several reputable brands offer tile and grout cleaners labeled as “sealant-safe” or “pH-neutral,” simplifying product selection for homeowners.
In contrast, common household cleaners like bleach, vinegar, and ammonia-based products can be highly corrosive. While they may seem effective for cleaning, they often strip away sealant layers, rendering grout porous and prone to staining. Acidic cleaners can be particularly damaging to natural stone tiles and cement-based grout, which are sensitive to changes in pH. Over time, the repeated use of these products can lead to discoloration, etching, and even structural weakening of the grout.
For homeowners in Surrey who prefer eco-friendly cleaning methods, several non-toxic, biodegradable options provide sealant-safe performance. These products are excellent for families with children or pets, contributing to a healthier indoor environment. Utilizing microfiber mops and soft-bristle brushes can also help maintain grout cleanliness without abrasive scrubbing.
It is crucial to follow appropriate cleaning techniques. Avoid soaking the grout with excess water, as it can seep into the joints and weaken the sealant. Instead, use damp mops or cloths and dry the area thoroughly after cleaning. Promptly spot-clean spills to prevent staining, and refrain from using steam cleaners unless the grout and sealant are rated for high-temperature exposure.
By selecting the right cleaning products and techniques, you can significantly extend the life of your grout sealant and maintain the beauty of your tiled surfaces. This simple maintenance step yields long-term durability and visual appeal.
Recognizing When Your Grout Needs Resealing
Even with diligent maintenance, grout sealant will inevitably wear down. Identifying the signs that your grout requires resealing can help you take proactive measures before damage occurs. One of the most reliable indicators is how water interacts with the grout surface. If water fails to bead up and instead seeps into the grout, it likely means the sealant has worn off, indicating that the protective barrier is no longer effective.
Staining serves as another clear sign. If your grout darkens or develops spots following spills or cleaning, it is absorbing moisture and contaminants—something that sealed grout is designed to resist. Discoloration may develop gradually, particularly in frequently used areas. In kitchens, watch for oil or food stains; in bathrooms, observe for soap scum or mildew marks.
Texture changes can also signify sealant breakdown. Grout that feels chalky, rough, or powdery may be losing its structural integrity. This can lead to crumbling or cracking, negatively impacting both appearance and tile stability. In some cases, grout may start to flake or pull away from the edges of tiles, indicating deeper deterioration.
Visual clues are important, but timing is equally critical. If it has been over 18 months since your last sealing—or if you cannot recall the last time it was done—it is wise to inspect your grout closely. A simple water test can be performed: apply a few drops of water to the grout and observe the results. If the water is absorbed rather than repelled, it is time to reseal.
For homeowners in Surrey who value long-term property maintenance, catching these signs early can prevent costly repairs and maintain the aesthetic appeal of tiled surfaces. Resealing not only restores protection but also refreshes the grout’s appearance, making floors and walls appear cleaner and more inviting.
Whether you are caring for a newly renovated kitchen or an older bathroom, remaining vigilant for these indicators ensures your grout remains sealed, robust, and visually appealing. In the upcoming section, we will address common questions related to grout sealing to assist you in making informed decisions for your home.
Best Practices and Key Recommendations for Achieving Durable Grout Protection
Grout sealing might seem like a minor detail in the broader context of home maintenance, but its impact is significant. From preserving the aesthetic quality of your tiled surfaces to protecting against moisture, stains, and structural damage, the right sealing method can provide considerable benefits over time. For homeowners in Surrey who appreciate both style and durability, understanding the nuances of grout sealing is essential for maintaining a clean, healthy, and enduring home environment.
Throughout this guide, we have explored the necessity of grout sealing, the various types of sealers available, the most effective application techniques, and how to maintain sealed grout for years to come. We have also addressed common questions regarding sealing old grout, the role of epoxy grout, and the typical lifespan of sealers. Each of these components contributes to a comprehensive approach to grout care—one that goes beyond surface cleaning to emphasize long-term protection.
The Importance of Selecting the Right Type of Sealer
The most effective sealing strategy begins with choosing the appropriate product. Penetrating water-based sealers are often the best choice for homes in Surrey, providing deep protection without altering the appearance of your tiles. The application process should be systematic and precise, with careful attention to cleaning, drying, and layering the sealer appropriately. Maintenance is equally important: using pH-neutral cleaners, avoiding harsh chemicals, and following a regular resealing schedule will keep your grout looking pristine and functioning optimally.
Should You Consider Professional Assistance for Grout Sealing?
It is also wise to contemplate professional assistance. While many homeowners feel comfortable with DIY sealing, intricate tile layouts, natural stone surfaces, or older grout may benefit from expert care. Tile and stone specialists can assess your surfaces, recommend the best products, and ensure flawless application. This is particularly valuable in high-traffic areas or historic properties where preservation is critical.
For those managing multiple tiled spaces—such as kitchens, bathrooms, hallways, and patios—establishing a grout care calendar can help maintain consistency in resealing and cleaning routines. Documenting when sealers were applied and which products were used simplifies future maintenance efforts.
Ultimately, grout sealing is about more than just protection—it provides peace of mind. Knowing that your tiled surfaces are safeguarded against wear and tear enables you to enjoy your home without worrying about premature damage or costly repairs. Whether you are renovating a space or simply maintaining existing features, investing in proper grout care is a smart choice that pays off in both appearance and longevity.
If you are ready to take the next step in protecting your grout, consider reaching out to a trusted tile care professional in Surrey. They can offer tailored advice, recommend high-quality products, and ensure your grout is sealed to perfection. Your floors, walls, and splashbacks will appreciate it—and so will your future self.
Common Questions About Grout Sealing
Can Old Grout Be Sealed?
Absolutely—old grout can and should be sealed. Over time, grout becomes increasingly prone to staining, moisture absorption, and wear. If it has never been adequately sealed or if the existing sealant has degraded, resealing is an effective way to restore protection and enhance appearance. However, sealing old grout requires thorough preparation to ensure the new sealant adheres effectively and performs as intended.
The first and foremost step is cleaning. Old grout often harbors embedded dirt, grease, soap residue, and even mildew, particularly in kitchens and bathrooms. These contaminants must be removed before sealing; otherwise, they will be trapped beneath the sealant, leading to discoloration and reduced efficacy. A thorough deep cleaning is crucial—and in many cases, professional cleaning is advisable. Tile care specialists utilize targeted products and tools to remove stubborn grime without harming the grout or adjacent tiles.
After cleaning, it is essential to allow the grout to dry completely. Any moisture trapped within the grout can interfere with the sealant’s bonding and curing process. Depending on the humidity and ventilation of the space, drying may take 24 to 48 hours. During this time, refrain from using the area and keep it dry by avoiding water exposure.
Once the grout is clean, dry, and intact, sealing can proceed. Choose a sealer suitable for the type of grout and tile material. Penetrating sealers are typically the best choice for older grout, as they penetrate the surface and reinforce it from within. Apply the sealer carefully, following the manufacturer’s instructions, and allow it to cure fully before using the area.
For homeowners in Surrey with older tiled surfaces—especially in period properties or high-use areas—sealing old grout is a cost-effective way to extend the life of your flooring and enhance hygiene. It is a practical step that improves both functionality and aesthetics, and when done correctly, it can rejuvenate old grout to look almost new again.
Is Sealing Necessary for Epoxy Grout?
Epoxy grout is a unique material that differs significantly from traditional cement-based grout. Comprising a blend of epoxy resins and filler powder, it is non-porous, highly resistant to moisture, and extremely durable. Because of these properties, epoxy grout does not require sealing in the same manner that cement-based grout does.
Its non-porous nature means that liquids, oils, and stains are far less likely to penetrate the surface. This makes epoxy grout ideal for areas exposed to high moisture, such as showers, wet rooms, and commercial kitchens. It also resists cracking and shrinkage, further enhancing its long-term performance.
However, while the grout itself does not need sealing, surrounding materials may still benefit from it. Many tiled surfaces—especially those made from natural stones like marble, slate, or travertine—are porous and can benefit from the application of sealant. In these cases, sealing the tiles instead of the grout helps protect the entire surface from staining and moisture damage.
Additionally, some homeowners opt to seal epoxy grout for aesthetic reasons. Although it is not necessary for protection, a surface sealer can enhance color uniformity or add a subtle sheen. This is entirely optional and should be performed with products specifically designed for use with epoxy grout.
It is also worth noting that epoxy grout can be more challenging to handle during installation. It sets rapidly and requires precise handling, which is why many homeowners in Surrey prefer professional installation when choosing epoxy grout. Once installed, however, it offers excellent performance with minimal maintenance.
In summary, sealing epoxy grout is not necessary for protective reasons, but surrounding tiles may still benefit from a sealant. If you are unsure whether your tiled surface needs sealing, consult a tile care professional who can assess the materials and recommend the best approach for your home.
What is the Typical Lifespan of Grout Sealer?
The longevity of grout sealer depends on several factors, including the type of sealer used, the location of the grout, and the level of surface maintenance. On average, most grout sealers last between one and three years. However, this range can vary significantly based on usage and environmental conditions.
Penetrating sealers typically have a longer lifespan than surface sealers. Because they penetrate the grout and bond with its internal structure, they provide deeper, more resilient protection. These sealers are ideal for high-traffic areas and rooms exposed to moisture, such as kitchens and bathrooms. When applied correctly, a high-quality penetrating sealer can remain effective for up to three years.
Surface sealers, which form a protective layer on top of the grout, generally have a shorter lifespan. They are more vulnerable to wear from foot traffic, cleaning, and abrasion. In busy households or commercial settings, surface sealers may require reapplication annually to maintain their effectiveness.
The grout’s location also significantly influences longevity. Grout in low-traffic areas or decorative installations may retain its sealant longer than grout in frequently used spaces. For example, a tiled wall in a guest bathroom may not need resealing as often as a kitchen floor or shower enclosure.
Maintenance habits also play a crucial role. Using pH-neutral cleaners and avoiding harsh chemicals helps prolong the sealant’s life. Regularly cleaning with sealant-safe products prevents buildup and reduces the risk of sealant degradation. Promptly spot-cleaning spills and avoiding excessive water exposure also contribute to extending sealant lifespan.
To determine whether your grout sealer is still effective, perform a simple water test. Apply a few drops of water to the grout and observe what happens. If the water beads up and stays on the surface, the sealant is intact. If it absorbs or leaves a dark spot, it is time to reapply the sealant.
For homeowners in Surrey who prioritize long-term property maintenance, scheduling grout resealing every 12 to 18 months is a reliable strategy for maintaining protection against stains and damage. Keeping track of application dates and monitoring grout conditions ensures that your tiled surfaces remain clean, durable, and visually appealing.
The Article Which Grout Sealing Method Offers the Best Long-Term Protection? first found on https://www.abbeyfloorcare.co.uk
The Article Grout Sealing Methods: Best for Long-Term Protection appeared first on https://fabritec.org
The Article Grout Sealing Methods for Lasting Protection and Durability Was Found On https://limitsofstrategy.com
-
-

Terracotta Care Tips for Lasting Cleanliness and Durability
Last Updated on September 29, 2025 by David
Essential Techniques for Keeping Your Terracotta Floors Spotless
-
- Understanding the Porous Nature of Terracotta highlights its tendency to quickly absorb dirt and stains, especially in humid environments like Surrey.
- Significance of Proper Sealing is crucial to prevent dirt and moisture from seeping into the tile’s surface, ensuring it remains beautiful and intact.
- Consistent Maintenance is Key—daily sweeping and weekly mopping with pH-neutral cleaning solutions are essential for maintaining the aesthetic appeal of your tiles.
- Steer Clear of Harsh Chemicals and Steam Mops, as they can damage the protective sealant and negatively impact the tile’s surface.
- <a href="https://www.abbeyfloorcare.co.uk/home-garden/can-you-recommend-the-safest-products-for-cleaning-sandstone/">Opt for Eco-Friendly Cleaning Solutions</a>, especially in households with pets or children, to ensure safety and health.
- Consider Professional Restoration Services for deep cleaning and resealing, which provide lasting protection for your tiles.
- Utilise Rugs and Mats Wisely in high-traffic areas to reduce the transfer of dirt onto your tiles.
- Effectively Manage Moisture—ensuring proper ventilation and promptly addressing spills can help prevent stains and the growth of mould.
Understanding Factors Behind Quick Dirt Accumulation on Terracotta Floors
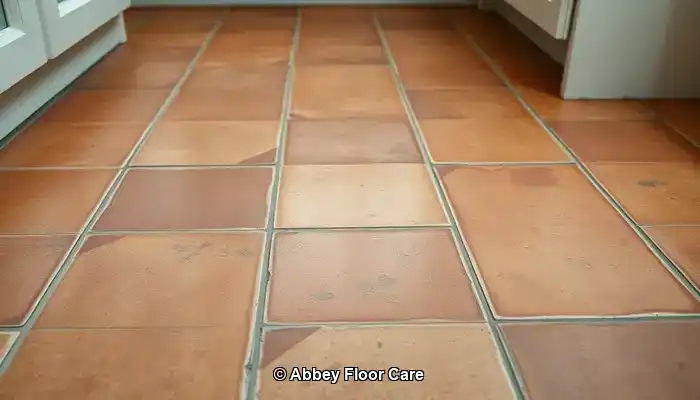
Terracotta tiles not only provide visual allure but also serve as an excellent flooring option, particularly in traditional or rustic homes throughout Surrey. Their warm, organic hues and natural textures markedly enhance the character of any living space. However, despite their aesthetic benefits, terracotta tiles are notably susceptible to rapid dirt accumulation. Understanding the various factors that contribute to this issue is the first critical step towards effective cleaning and maintenance.
Expert Tip: Recommended Cleaning Products for Daily Care of Terracotta
 Fila Pro Floor Cleaner
 LTP Floorshine
 Vileda H2PrO Spin Mop System
Comprehending the Porosity of Terracotta: A Major Challenge
Terracotta is crafted from natural clay and is fired at lower temperatures compared to other types of tiles. This specific manufacturing process results in a highly porous surface that can readily absorb moisture, oils, and dirt—functioning similarly to a sponge. In practical terms, this porosity enables grime to settle deeply within the tile, complicating the removal process with standard cleaning techniques.
Unsealed terracotta tiles are particularly susceptible to stains and marks. Without a protective seal, even minor spills or muddy footprints can leave permanent blemishes. As time progresses, this can lead to a dull and stained appearance, often necessitating professional intervention to restore the tile’s original beauty and vibrancy.
How Does Surrey’s Weather Affect the Cleanliness of Terracotta?
The climate in Surrey significantly influences how quickly terracotta flooring can become dirty. The region is known for frequent rainfall and damp conditions, resulting in more moisture being tracked indoors, particularly in entryways and conservatories.
Homes located near wooded areas or gardens face even greater challenges. Soil, pollen, and organic debris can easily migrate onto terracotta surfaces, especially if shoes are not removed at the door. This increases the likelihood of dirt accumulation on your beautiful terracotta tiles, making proper care even more critical.
Daily Habits That Contribute to Excess Dirt Accumulation
In addition to environmental factors, daily habits can exacerbate the problem of dirt build-up on terracotta floors. Utilizing inappropriate cleaning agents, such as acidic solutions or bleach, can strip essential protective coatings and damage the tile surface. While steam mops are popular, they often force moisture into the tile, worsening the issue.
High-traffic areas like kitchens and hallways naturally endure more wear and tear. Without a consistent routine of sweeping and mopping, dirt can quickly accumulate and embed itself within the tile’s texture, making it increasingly difficult to clean effectively.
Proactive Steps to Maintain Pristine Terracotta Floors
Maintaining cleanliness in terracotta floors is not solely about responding to existing dirt; it’s fundamentally about preventing it from settling in from the start. In homes throughout Surrey, where damp weather and garden-related traffic are prevalent, taking proactive measures is vital for preserving the inherent beauty of terracotta tiles.
Sealing Your Terracotta Tiles: The First Line of Defense
The most effective strategy to prevent terracotta from becoming dirty quickly is through proper sealing. A high-quality, breathable sealant creates a protective barrier that repels moisture, oils, and dirt. For properties in Surrey, where humidity levels can vary, sealing is essential to prevent water absorption that could lead to staining and mould growth.
Experts typically recommend resealing terracotta every 12 to 18 months, depending on foot traffic and moisture exposure. In high-usage areas like kitchens, hallways, and conservatories, more frequent resealing may be warranted. Always opt for a sealant specifically designed for porous stone and avoid glossy finishes that can trap dirt.
Strategic Placement: The Effect of Rugs and Mats
Thoughtfully using rugs and mats can significantly reduce the amount of dirt that reaches your terracotta tiles. Heavy-duty doormats at entrances help capture mud and moisture before they spread throughout your home. In high-traffic areas, such as hallways or underneath dining tables, area rugs act as protective barriers that absorb impacts and limit wear and tear on the tiles.
For spaces that connect directly to the outdoors, consider utilizing washable runners that are easy to clean. These not only help preserve the tiles but also add warmth and aesthetic value to your living environment.
Efficient Moisture Management in Surrey Homes
Considering Surrey’s reputation for rainfall and humidity, managing moisture is crucial to combat the rapid accumulation of dirt on terracotta. Implementing dehumidifiers in enclosed spaces and ensuring proper ventilation throughout your home can greatly assist in regulating moisture levels. Additionally, it’s important to promptly wipe up spills and avoid leaving wet items, like shoes or towels, on the flooring.
If your terracotta flooring is installed in a conservatory or garden room, consider using blinds or UV filters to reduce condensation and protect against sun damage. These minor adjustments can substantially enhance the longevity and appearance of your tiles over time.
By combining effective sealing, thoughtful design choices, and moisture management, homeowners in Surrey can significantly slow the rate at which terracotta floors become dirty. The following sections will explore the best cleaning practices to maintain that fresh, natural appearance every day.
Proven Cleaning Techniques for Terracotta Tiles

Even with proper sealing and proactive measures in place, terracotta floors require regular care to uphold their natural beauty. The key to successful maintenance lies in using the appropriate techniques and products that effectively clean without damaging the porous surface of the tile.
Establishing a Consistent Daily and Weekly Cleaning Schedule
In homes across Surrey, where outdoor elements frequently infiltrate, daily sweeping or vacuuming is essential. Employ a soft-bristle broom or a vacuum with a hard floor setting to remove dust, grit, and organic debris before it can settle into the tile.
For your weekly cleaning regimen, mop with warm water and a pH-neutral cleaner specifically formulated for natural stone surfaces. Avoid soaking the floor; damp mopping is recommended. Excess water can penetrate the tile and potentially lead to staining or mould growth, especially in older or inadequately sealed installations.
Choosing the Right Cleaning Products for Terracotta
Select products that are both gentle and effective. Look for labels indicating “stone-safe,” “non-acidic,” or “pH-neutral.” In Surrey, where eco-friendly living is increasingly prioritized, many homeowners prefer biodegradable cleaners that are safe for use around pets and children.
Avoid multi-surface cleaners containing bleach, ammonia, or citrus extracts, as these can strip protective sealants and etch the terracotta, rendering it more vulnerable to future staining.
For stubborn stains, utilize a soft cloth and a diluted solution of stone cleaner. Never scrub with abrasive pads or wire brushes, as these can scratch the surface and complicate future cleaning efforts.
What to Avoid: The Risks of Harsh Chemicals and Steam Cleaning?
While steam mops may seem convenient, they are unsuitable for terracotta. The high temperatures and moisture can penetrate the tile and damage the sealant, leading to long-term issues. Furthermore, acidic cleaners such as vinegar or lemon juice—even when diluted—can erode the tile’s surface and cause discolouration.
It’s advisable to adhere to gentler methods and always test new products on a small, inconspicuous area before applying them to the entire floor.
Assessing Professional Care Versus DIY Terracotta Maintenance
When it comes to caring for terracotta floors, many homeowners in Surrey initially favor DIY methods. While regular sweeping and mopping can be beneficial, there comes a time when professional assistance becomes not just advantageous but necessary.
When to Consult a Tile Specialist in Surrey?
If your terracotta tiles exhibit signs of deep staining, uneven colour, or surface wear, it may be time to seek expert help. Professional tile care specialists in Surrey employ advanced equipment and stone-safe products that penetrate deeper than standard household cleaners. They can assess whether your sealant has degraded and recommend an appropriate resealing schedule tailored to your home’s unique circumstances.
Restoration services typically include deep cleaning, stain removal, and reapplication of breathable sealants that protect without altering the tile’s natural appearance. For older homes or heritage properties, specialists can even replicate the original finish to preserve authenticity.
Cost Versus Durability: Is Professional Care a Worthwhile Investment?
While DIY cleaning may seem more cost-effective, it often leads to short-lived results. Without proper sealing and thorough cleaning, dirt can continue to accumulate—requiring more frequent maintenance and risking irreversible damage.
Conversely, professional care extends the lifespan of your terracotta flooring. A single restoration session can rejuvenate colour, eliminate embedded grime, and protect the surface for months or even years. In high-traffic areas like kitchens or hallways, this investment proves invaluable in reducing maintenance efforts while enhancing visual appeal.
Homeowners in Surrey who prioritize long-term property maintenance and curb appeal often find that expert services provide peace of mind and superior results. Additionally, many local providers offer eco-friendly options and tailored maintenance plans to suit individual lifestyles.
Eco-Friendly and Safe Cleaning Solutions for Terracotta
The earthy charm of terracotta deserves care that aligns with its natural characteristics. For homeowners in Surrey looking to maintain clean floors without compromising health or environmental standards, eco-friendly cleaning is the ideal solution. Thankfully, modern products and techniques allow for the protection of your tiles and your household without resorting to harsh chemicals.
Choosing Non-Toxic Sealants and Cleaners
Conventional sealants often contain solvents that emit volatile organic compounds (VOCs), which can linger in the air and adversely impact indoor air quality. Eco-friendly alternatives now use water-based formulations that are low in VOCs and safe for both children and pets.
When selecting a cleaner, look for labels that indicate “biodegradable,” “plant-based,” or “stone-safe.” These products are designed to lift dirt without harming the porous surface of terracotta. Brands specializing in natural stone care often offer concentrated solutions that can be diluted for regular use, minimizing waste and packaging.
Safe Choices for Households with Pets and Children
In active homes throughout Surrey, safety is just as crucial as cleanliness. Avoid using bleach, ammonia, and acidic cleaners like vinegar, which can damage the tile and pose risks to pets and young children. Instead, opt for gentle formulations derived from coconut oil, citrus enzymes, or mineral-based ingredients.
If you prefer DIY cleaning methods, a simple mixture of warm water and a few drops of castile soap can be surprisingly effective for light cleaning tasks. Just ensure to test any homemade solution on a small area first to confirm it does not affect the sealant or finish.
Fostering Sustainable Cleaning Practices
Eco-friendly care extends beyond product selection; it encompasses the habits we adopt as well. Use reusable microfiber cloths and mops instead of disposable pads. Regular sweeping can help reduce the need for frequent wet cleaning. Additionally, when resealing, choose products with recyclable packaging and minimal environmental impact.
Many floor care professionals in Surrey now offer green cleaning packages, employing certified non-toxic products and sustainable methods. If you’re unsure where to start, scheduling a consultation with a local expert can help you establish a routine that is both effective and environmentally conscious.
Keep Your Terracotta Floors Radiant and Inviting
Terracotta flooring adds warmth, character, and timeless charm to homes across Surrey. However, its porous nature necessitates careful attention to maintain its cleanliness and vibrancy. By understanding the reasons behind rapid dirt accumulation, properly sealing the tiles, and implementing smart cleaning practices, you can significantly reduce grime build-up and extend the lifespan of your tiles.
Whether managing a busy household or restoring a historic property, consistency is crucial. Daily sweeping, using pH-neutral cleaners, and seasonal resealing are vital to maintaining an inviting atmosphere. When stains or signs of wear emerge, do not hesitate to contact a local specialist for professional restoration services.
Utilizing eco-friendly products and safe cleaning routines ensures that your floors remain beautiful without compromising your health or the environment. With the right approach, terracotta can continue to be a stunning feature in your home for many years to come.
Are you ready to safeguard your floors the smart way? <a href=”https://www.abbeyfloorcare.co.uk/home-garden/porcelain-tile-repair-near-me-east-calder/”>Contact us today</a> for expert terracotta maintenance tailored to the unique conditions of Surrey. Let’s collaborate to keep your home looking its best—naturally.
Frequently Asked Questions About Terracotta Maintenance
Terracotta floors are a classic choice, but they come with specific care requirements. Below, we address the most commonly asked questions from homeowners in Surrey eager to keep their tiles clean, protected, and visually appealing.
How Often Should I Reseal My Terracotta Tiles?
In most residences within Surrey, terracotta should be resealed every 12 to 18 months. However, this frequency can vary depending on foot traffic, moisture exposure, and whether the tiles are indoors or outdoors. Areas like kitchens, hallways, and conservatories may need more frequent resealing. If your tiles start to absorb water or appear dull, it’s time to consider resealing.
Can I Use Vinegar or Bleach for Cleaning Terracotta?
Absolutely not—vinegar, bleach, and other acidic or harsh cleaning agents can severely damage terracotta. These substances break down sealants and etch the tile’s surface, leading to permanent discolouration. Always opt for pH-neutral, stone-safe cleaners specifically designed for porous flooring.
What’s the Best Mop for Cleaning Terracotta Floors?
A microfiber mop is highly recommended. It effectively traps dust and dirt without scratching the surface and uses minimal water, which is crucial for porous tiles like terracotta. Avoid sponge mops or steam mops, as they can oversaturate the tile and weaken the sealant over time.
Is It Safe to Use DIY Cleaning Solutions on Terracotta?
Yes, but exercise caution. A mild mixture of warm water and castile soap can be effective for light cleaning tasks. Always test any homemade solution on a small, hidden area before widespread application. Avoid anything acidic or abrasive, and refrain from using homemade cleaners on unsealed tiles.
What Should I Do If My Tiles Have Already Stained?
If stains are present, professional restoration services offer the best solution. Tile care specialists in Surrey can deep clean, remove embedded grime, and reseal the surface to restore the tile’s original colour and texture. DIY methods may exacerbate the damage if inappropriate products are used.
The Article Tired of Dirty Terracotta? How to Keep It Clean Longer first found on https://www.abbeyfloorcare.co.uk
The Article Keep Terracotta Clean Longer: Tips for Pristine Care appeared first on https://fabritec.org
The Article Terracotta Care Tips for Longer Lasting Cleanliness Was Found On https://limitsofstrategy.com
-
-

Grout Sealing Methods for Long-Lasting Durability
Last Updated on October 2, 2025 by David
Essential Guidelines for Selecting the Best Grout Sealing Techniques for Ultimate Longevity
-
- Grout is extremely porous and susceptible to absorbing moisture, dirt, and bacteria, making it essential to seal it for enduring durability and hygiene.
- Penetrating sealers are highly recommended for most homes in Surrey due to their capacity to provide deep, long-lasting defense while maintaining an invisible finish.
- Surface sealers improve the aesthetic appeal but necessitate more frequent reapplications and are best suited for low-traffic or decorative areas.
- Water-based sealers are safer and simpler to apply indoors, while solvent-based sealers deliver more robust protection but require adequate ventilation during application.
- Application technique is vital: brush-on techniques offer precision, while spray-on methods are quicker but may lack accuracy.
- Multiple coats greatly enhance performance, particularly in areas exposed to high traffic or moisture.
- Regular maintenance is crucial: reseal every 12–18 months and utilize pH-neutral cleaners to uphold the integrity of the sealant.
- Old grout can be rejuvenated by sealing after thorough cleaning and repair, restoring its protective qualities and visual charm.
- Epoxy grout generally doesn’t require sealing, yet the surrounding tiles may still benefit from a protective sealant.
- Signs of sealant wear include water absorption, unsightly stains, and a chalky texture—clear indicators that it’s time to reseal.
Understanding the Importance of Grout Sealing for Your Home’s Longevity

Although often overlooked in tile maintenance, grout plays a critical role that significantly affects both the aesthetics and durability of tiled surfaces. Whether situated in your kitchen, bathroom, hallway, or conservatory, grout serves as the critical filler between tiles, ensuring they are securely positioned while preventing moisture infiltration beneath the surface. However, grout is inherently vulnerable due to its porous nature, which allows it to easily absorb water, dirt, oils, and even cleaning agents. Over time, this absorption can lead to staining, discoloration, and ultimately, structural degradation of the tiled surface.
Expert Strategies for Daily Grout Maintenance and Cleaning
 Fila Pro Floor Cleaner
 LTP Floorshine
 Vileda H2PrO Spin Mop System
In homes throughout Surrey, where tiled surfaces are prevalent in both contemporary and traditional designs, sealing grout stands out as one of the most effective strategies for protecting your investment. Without an appropriate sealant, grout can quickly become a magnet for dirt, particularly in high-traffic areas or places exposed to moisture and spills. Imagine a bustling kitchen where cooking oils might splatter or a bathroom where steam and soap residue accumulate in the grout lines. In such settings, unsealed grout can swiftly transition from pristine to unsightly.
Beyond aesthetics, unsealed grout can foster a breeding ground for bacteria and mould. This is especially concerning in areas like showers and splashbacks, where ongoing moisture creates an ideal environment for microbial growth. Once mould establishes itself, it not only becomes unsightly but also challenging to remove without harsh chemicals that may damage the surrounding tiles. Sealing grout creates a protective barrier that repels moisture and contaminants, simplifying cleaning and promoting a sanitary environment.
Another vital reason for sealing is to enhance longevity. Grout that remains exposed to various elements—whether foot traffic, cleaning agents, or environmental factors—will deteriorate more quickly. Over time, cracks can form, tiles may loosen, and repairs can become costly. A high-quality grout sealer significantly extends the lifespan of your tiled surfaces by reinforcing the grout’s structure and preventing premature wear.
It’s also crucial to recognize that sealing grout is not exclusive to new installations. Older grout can—and should—be sealed after thorough cleaning. In fact, resealing is a vital part of ongoing maintenance. Many homeowners in Surrey choose to reseal every 12 to 18 months based on usage patterns and the type of sealant applied. This routine care ensures that grout remains protected and continues to function effectively.
For those concerned about the visual impact of sealants on tile appearance, modern products are designed to be invisible once dry. They do not alter the color or texture of your grout and are safe for use on a wide array of tile materials, from ceramic and porcelain to natural stone. Some sealers even enhance the color of the grout slightly, providing a refreshed look without the need for regrouting.
Ultimately, sealing grout is not merely an option—it is a necessity. It protects against moisture, stains, bacteria, and wear while preserving the visual appeal of your tiled surfaces. Whether you are renovating a bathroom or maintaining a heavily used kitchen floor, investing in a high-quality grout sealer is one of the smartest decisions you can make for your home. In Surrey, where homeowners appreciate both style and substance, grout sealing is an essential aspect of long-term property maintenance.
Exploring the Varieties of Grout Sealers Available for Optimal Protection

Assessing the Advantages of Penetrating Sealers Versus Surface Sealers
When it comes to ensuring long-lasting protection for grout, homeowners face the critical decision of selecting between penetrating sealers and surface sealers. Penetrating sealers are designed to seep deeply into the grout, establishing a protective barrier beneath the surface. These sealers bond with the internal structure of the grout, making them exceptionally effective at repelling moisture, oils, and stains without altering the appearance of the grout or the surrounding tiles. They are particularly advantageous in areas that experience frequent water contact, such as bathrooms, kitchens, and splashbacks.
Conversely, surface sealers create a layer on top of the grout, forming a visible barrier. These sealers can enhance the color of the grout and impart a slight sheen, which some homeowners find attractive for decorative finishes. However, due to their surface nature, they are more prone to wear and may necessitate more frequent reapplications. Surface sealers are best suited for low-traffic areas or situations where aesthetic enhancement is a priority. For instance, a tiled feature wall or a guest bathroom might benefit from a surface sealer that adds gloss and depth to the grout lines.
Choosing Between Water-Based and Solvent-Based Sealers for Maximum Effectiveness
Another important distinction lies between water-based and solvent-based sealers. Water-based sealers are becoming increasingly popular among homeowners in Surrey due to their low levels of volatile organic compounds (VOCs), making them safer for indoor use and more environmentally friendly. They are straightforward to apply, dry quickly, and are suitable for most residential applications. These sealers are particularly ideal for families with children or pets, as they emit fewer fumes and are generally gentler on surrounding surfaces.
In contrast, solvent-based sealers provide deeper penetration and more durable protection. They are frequently used in commercial settings or outdoor spaces where longevity is paramount. Although they offer excellent resistance to staining and moisture, they require greater ventilation during application and may not be suitable for enclosed areas. Homeowners opting for solvent-based sealers should take precautions to protect adjacent surfaces and ensure proper airflow during use.
Selecting the Ideal Sealer Type for Homes in Surrey
For the majority of residences in Surrey, a water-based penetrating sealer strikes the ideal balance of safety, effectiveness, and ease of maintenance. It provides invisible protection that doesn’t affect the appearance of the grout or tiles and is suitable for both indoor and outdoor applications. This type of sealer is particularly well-suited for the types of tiled surfaces commonly found in Surrey homes, including ceramic kitchen floors, porcelain bathroom tiles, and natural stone splashbacks.
However, the best choice ultimately depends on the specific requirements of the space. High-traffic areas, such as hallways and kitchens, benefit from penetrating sealers that offer deep, long-lasting protection. Decorative areas or surfaces that require visual enhancement may find a surface sealer advantageous, adding gloss and depth of color. For outdoor patios or commercial locations, solvent-based options might be worth considering due to their durability.
It’s also critical to match the sealer to the type of grout—cement-based grout is highly porous and greatly benefits from sealing. In contrast, epoxy grout, which is non-porous and moisture-resistant, typically doesn’t need sealing; however, surrounding tiles may still benefit from a protective coat.
Selecting the right grout sealer is not solely about performance—it’s about aligning with your lifestyle, tile material, and long-term maintenance goals. In the following section, we will explore how application methods can affect the effectiveness of your chosen sealer and ensure enduring protection.
Maximizing Grout Protection Through Strategic Application Techniques

Evaluating Brush-On Versus Spray-On Application Techniques for Optimal Results
When it comes to applying grout sealer, the method chosen can significantly influence the effectiveness and longevity of the protection. Two of the most common techniques are brush-on and spray-on applications, each offering distinct advantages based on the type of grout, tile configuration, and the level of accuracy required.
The brush-on application method is widely regarded as the most reliable technique for sealing grout. It allows for precise coverage, ensuring that the sealer penetrates deeply into the grout lines without oversaturating the surrounding tiles. This precision is especially critical in homes featuring natural stone or textured tiles, where excess sealer can leave behind a hazy residue or alter the tile’s appearance. Using a small brush or a specially designed applicator bottle with a roller tip, homeowners can control the amount of product applied and minimize waste. Although this method is slower, the accuracy it provides makes it ideal for high-value surfaces or intricate tile patterns.
In contrast, spray-on sealers offer speed and convenience. They are particularly useful for large areas with uniform tile layouts, such as open-plan kitchens or tiled hallways. With a fine mist applicator, the sealer can be evenly distributed across the surface, rapidly reaching grout lines. However, spray-on methods can lack accuracy, especially around decorative tiles or uneven surfaces. Overspray is a common issue, and if not wiped off immediately, it can leave streaks or dull patches on glossy tiles.
For homeowners in Surrey who prioritize both efficiency and quality, a hybrid approach may yield the best results. Start with a spray-on application to cover most of the area, then follow up with a brush to touch up corners, edges, and any unsealed grout lines. This ensures comprehensive coverage while maintaining control over the final appearance.
Regardless of the chosen method, it is critical to work in manageable sections and avoid rushing through the process. Proper application is vital to achieving a long-lasting seal that protects against moisture, stains, and wear.
Determining the Optimal Number of Coats for Effective Grout Sealing
The number of coats required for effective grout sealing varies based on the type of sealer used, the porosity of the grout, and the specific conditions of the space. Most manufacturers recommend a minimum of two coats for optimal protection, though additional layers may be necessary in certain situations.
The first coat acts as a primer, penetrating into the grout and initiating the protective process. It is crucial to allow this coat to fully absorb and dry before applying the second one. The second coat strengthens the barrier, ensuring that the grout is thoroughly sealed and resistant to moisture and contaminants.
In high-traffic areas, such as kitchens and entryways, or in rooms with frequent water exposure, such as bathrooms, a third coat can be advantageous. This is particularly important for older grout that has been previously sealed and may exhibit uneven absorption. Applying multiple coats ensures that any worn or porous sections are adequately protected.
Timing between coats is equally important. Rushing the process can lead to poor adhesion and diminished effectiveness. Most water-based sealers require 30 to 60 minutes between coats, while solvent-based products may necessitate longer intervals. Always consult the manufacturer’s guidelines and conduct a small area test to assess the absorption rate.
For homeowners in Surrey seeking sustainable results, dedicating the time to apply multiple coats correctly can save both money and effort in the long run. It reduces the need for frequent resealing and helps maintain the appearance and integrity of tiled surfaces.
Avoiding Common Mistakes During Grout Sealing Projects
Even with the best products and intentions, mistakes during grout sealing can lead to unsatisfactory outcomes. One of the most common errors is applying sealant to dirty or damp grout. Sealing over grime or moisture traps contaminants beneath the surface, resulting in staining, discoloration, and diminished effectiveness. Thoroughly deep-clean the grout and allow it to dry completely—preferably for 24 hours—before sealing.
Another frequent mistake is using an inappropriate type of sealer for the grout or tile material. For instance, applying a surface sealer to highly porous grout may result in uneven coverage and inadequate protection. Similarly, using a solvent-based sealer in an inadequately ventilated area can produce strong fumes and potential health hazards. Ensuring the sealer matches the specific needs of the space is essential.
Overapplication presents yet another challenge. Applying excessive sealer at once can lead to pooling, sticky residue, or a cloudy finish on tiles. It is advisable to apply thin, even coats and gradually build up protection. Promptly wipe off any excess to prevent hazing on the tile surface.
Finally, neglecting to test a small area before applying the latest treatment can yield unexpected results. Some sealers may slightly darken grout or alter the sheen of adjacent tiles. Testing ensures compatibility and allows for adjustments to your technique if necessary.
Avoiding these common pitfalls will help ensure that your grout sealing project delivers the protection and finish you desire. In the next section, we will discuss how to maintain sealed grout over time and recognize when it is time to reseal.
Crucial Maintenance Strategies Following Grout Sealing
How Often Should You Reseal Your Grout for Optimal Protection?
Once grout has been sealed, it can be tempting to assume the job is done for the foreseeable future. However, similar to most protective treatments, grout sealant has a limited lifespan. Over time, exposure to foot traffic, cleaning agents, moisture, and general wear will gradually degrade the sealant, leaving grout vulnerable to staining and deterioration. To maintain optimal protection, grout should ideally be resealed every 12 to 18 months. This timeframe can vary depending on the location and usage of the tiled surface.
In high-traffic areas such as kitchen floors, entryways, and family bathrooms, grout experiences constant stress. These spaces often require resealing closer to the 12-month mark. Kitchens, for instance, are exposed to cooking oils, food spills, and frequent mopping—all of which can erode the sealant more quickly. Bathrooms encounter humidity, soap residue, and water splashes, which also accelerate wear and tear. Conversely, low-traffic areas, such as guest bathrooms or decorative tiled walls, may retain their sealant effectiveness for up to 18 months or longer.
The type of sealer used also influences how frequently resealing becomes necessary. Penetrating sealers typically last longer than surface sealers, especially when applied correctly with multiple coats, providing more durable and long-lasting protection. Water-based sealers may require more frequent reapplication than solvent-based alternatives, although they are easier to use and safer for indoor environments.
Homeowners in Surrey who value long-term property care often incorporate grout resealing into their annual maintenance routine. This proactive approach not only prevents costly repairs but also keeps tiled surfaces looking fresh and clean. It’s also an excellent opportunity to inspect grout for any signs of damage, such as cracking or discoloration, which may indicate deeper issues.
Professional resealing services can provide added reassurance, particularly for large areas or natural stone installations. Experts can evaluate the condition of the existing sealant, perform a deep clean, and apply the appropriate product tailored to your specific grout and tile type. Whether you choose to reseal yourself or engage a specialist, consistency is paramount in preserving the integrity and appearance of your grout over time.
Recommended Cleaning Products for Protecting Your Grout Sealant
Maintaining sealed grout is not just about timing; it also involves using the correct cleaning products. Harsh or acidic cleaners can prematurely degrade sealant, exposing grout to potential damage. To extend the life of your grout sealer, it is vital to use pH-neutral cleaning solutions specifically formulated for sealed surfaces.
pH-neutral cleaners are effective yet gentle. They efficiently eliminate everyday dirt, grease, and grime without compromising the protective barrier established by the sealant. These products are safe for use on ceramic, porcelain, and natural stone tiles, making them ideal for multi-surface cleaning in kitchens, bathrooms, and hallways. Many reputable brands offer tile and grout cleaners labeled as “sealant-safe” or “pH-neutral,” simplifying the selection process for homeowners.
Conversely, common household cleaners, including bleach, vinegar, and ammonia-based products, can be highly corrosive. While they may seem effective, they often strip away sealant layers, leaving grout porous and susceptible to staining. Acidic cleaners are particularly harmful to natural stone tiles and cement-based grout, which are sensitive to pH fluctuations. Over time, repeated use of these products can cause discoloration, etching, and even structural weakening of the grout.
For environmentally conscious homeowners in Surrey, several non-toxic, biodegradable cleaning options provide sealant-safe performance. These products are ideal for families with children or pets, contributing to a healthier indoor environment. Microfiber mops and soft-bristle brushes can also aid in maintaining grout cleanliness without the need for abrasive scrubbing.
It is equally essential to follow proper cleaning techniques. Avoid soaking the grout with excessive water, which can seep into the joints and weaken the sealant. Instead, use damp mops or cloths and ensure the area is thoroughly dried after cleaning. Promptly spot-clean spills to prevent staining, and refrain from using steam cleaners unless the grout and sealant are rated for high-temperature exposure.
By selecting the right cleaning products and methods, you can significantly prolong the lifespan of your grout sealant and maintain the beauty of your tiled surfaces. This simple maintenance step yields long-term durability and visual appeal.
Recognizing the Signs That Your Grout Requires Resealing
Even with diligent maintenance, grout sealant will eventually wear down. Being alert to the signs that your grout requires resealing can enable you to act before damage occurs. One of the most reliable indicators is how water interacts with the surface. If water fails to bead up and instead soaks into the grout, it is likely that the sealant has worn off. This is a clear signal that the protective barrier is no longer effective.
Staining serves as another clear sign. If your grout begins to darken or exhibit spots following spills or cleaning, it is absorbing moisture and contaminants—something that sealed grout should resist. Discoloration may develop gradually, especially in frequently used or cleaned areas. In kitchens, keep an eye out for oil or food stains; in bathrooms, watch for soap scum or mildew marks.
Texture changes can also indicate sealant breakdown. Grout that feels chalky, rough, or powdery may be losing its structural integrity. This deterioration can lead to crumbling or cracking, which affects both appearance and the stability of the tiles. In some instances, grout may start to flake or pull away from the edges of the tiles, signaling a deeper level of deterioration.
While visual cues are essential, timing is equally critical. If it has been over 18 months since your last sealing—or if you cannot recall when it was last done—it is worthwhile to inspect your grout closely. A simple water test can assist: apply a few drops of water to the grout and observe the outcome. If the water is absorbed rather than repelled, it is time to reseal.
For homeowners in Surrey who prioritize long-term property care, timely recognition of these signs can avert costly repairs and maintain the aesthetic quality of tiled surfaces. Resealing not only restores protection but also rejuvenates the appearance of grout, making floors and walls appear cleaner and newer.
Whether you are caring for a newly renovated kitchen or a heritage bathroom, staying vigilant to these signs ensures that your grout remains sealed, strong, and visually appealing. In the next section, we will address common questions related to grout sealing to empower you to make informed decisions for your home.
Best Practices and Key Takeaways for Ensuring Long-Lasting Grout Protection
Although grout sealing may seem like a minor detail in the broader context of home maintenance, its impact is anything but trivial. From preserving the aesthetic quality of your tiled surfaces to safeguarding against moisture, stains, and structural damage, the proper sealing method can significantly influence outcomes over time. For homeowners in Surrey who appreciate both style and durability, understanding the nuances of grout sealing is essential for maintaining a clean, healthy, and long-lasting home environment.
Throughout this guide, we have explored the reasons grout requires sealing, the various types of sealers available, the best application techniques, and how to maintain sealed grout for years to come. We have also addressed common queries about sealing old grout, the role of epoxy grout, and the typical longevity of sealers. Each of these elements contributes to a comprehensive approach to grout care—one that extends beyond mere surface cleaning and focuses on long-term protection.
The Vital Importance of Selecting the Right Type of Sealer for Your Needs
The most effective sealing strategy begins with choosing the appropriate product. Penetrating water-based sealers are often the best option for homes in Surrey, providing deep protection without altering the appearance of your tiles. Application should be methodical and precise, with particular attention given to cleaning, drying, and layering the sealer correctly. Maintenance is equally critical: utilizing pH-neutral cleaners, avoiding harsh chemicals, and adhering to a regular resealing schedule will keep your grout looking fresh and functioning optimally.
Is Professional Assistance Necessary for Grout Sealing Projects?
It may also be beneficial to consider professional support. While many homeowners feel confident undertaking DIY sealing, complex tile layouts, natural stone surfaces, or older grout may benefit from expert care. Tile and stone specialists can evaluate your surfaces, recommend the most appropriate products, and ensure flawless application. This is particularly valuable in high-usage areas or heritage properties where preservation is a priority.
For those managing multiple tiled spaces—such as kitchens, bathrooms, hallways, and patios—developing a grout care calendar can aid in staying organized with resealing and cleaning routines. Documenting when sealers were applied and which products were used simplifies future maintenance efforts.
Ultimately, grout sealing transcends mere protection—it embodies peace of mind. Knowing that your tiled surfaces are secured against wear and tear enables you to relish your home without the anxiety of premature damage or expensive repairs. Whether you are refurbishing a space or simply maintaining existing surfaces, investing in proper grout care is a smart choice that yields dividends in both appearance and longevity.
If you are ready to take the next step in safeguarding your grout, consider reaching out to a trusted tile care professional in Surrey. They can provide tailored advice, recommend high-quality products, and ensure your grout is sealed with precision. Your floors, walls, and splashbacks will thank you—and your future self will too.
Frequently Asked Questions About Grout Sealing
Can You Effectively Seal Old Grout?
Absolutely—old grout can be sealed, and in many instances, it should be. Over time, grout becomes increasingly susceptible to staining, moisture absorption, and wear. If it was never properly sealed or the existing sealant has deteriorated, resealing is a wise way to restore protection and enhance appearance. However, sealing old grout necessitates careful preparation to guarantee that the new sealant adheres effectively and performs as intended.
The first and most essential step is thorough cleaning. Old grout frequently harbors embedded dirt, grease, soap residue, and even mildew, especially in kitchens and bathrooms. These contaminants must be eradicated before sealing, or they will become trapped beneath the sealant, leading to discoloration and diminished effectiveness. A comprehensive deep cleaning is imperative; in many cases, professional cleaning is advisable. Tile care specialists utilize targeted products and tools to lift stubborn grime without damaging the grout or the surrounding tiles.
Once the grout is clean, it must be thoroughly dried. Moisture trapped in the grout can interfere with the sealant’s ability to bond and cure properly. Depending on the room’s humidity and ventilation, this drying process may take 24 to 48 hours. During this period, avoid using the area and keep it dry by refraining from exposing it to water.
After cleaning and drying, inspect the grout for damage. Cracks, missing sections, or crumbling areas should be repaired prior to sealing. Applying sealant over compromised grout will not resolve underlying issues and may lead to further deterioration. Grout repair products are available for DIY fixes, but for extensive damage, professional regrouting may be necessary.
Once the grout is clean, dried, and intact, sealing can proceed. Select a sealer that is suitable for the specific type of grout and tile material. Penetrating sealers are typically best suited for older grout, as they penetrate the surface and reinforce it from within. Apply the sealer carefully, following the manufacturer’s guidelines, and allow it to cure fully before using the area.
For homeowners in Surrey with older tiled surfaces—especially in period properties or high-traffic areas—sealing old grout represents a cost-effective method for extending the life of your flooring and improving hygiene. It is a practical step that enhances both functionality and aesthetics, and when executed correctly, it can make old grout look nearly new again.
Is Sealing Epoxy Grout Necessary?
Epoxy grout is a unique material that differs significantly from traditional cement-based grout. Composed of a combination of epoxy resins and filler powder, it is non-porous, highly resistant to moisture, and exceptionally durable. Due to these characteristics, epoxy grout does not require sealing in the same manner as cement-based grout.
Its non-porous nature means that liquids, oils, and stains are far less likely to penetrate the surface. This makes epoxy grout ideal for areas with high moisture exposure, such as showers, wet rooms, and commercial kitchens. It is also resistant to cracking and shrinkage, which enhances its long-term performance.
However, while the grout itself does not need sealing, the surrounding materials may still benefit from it. Many tiled surfaces—especially those composed of natural stones like marble, slate, or travertine—are porous and can benefit from the application of sealant. In these scenarios, sealing the tiles rather than the grout helps protect the entire surface from staining and moisture damage.
Additionally, some homeowners opt to seal epoxy grout for aesthetic purposes. While it is unnecessary for protection, a surface sealer can enhance color uniformity or impart a subtle sheen. This is purely optional and should be undertaken with products specifically formulated for use with epoxy grout.
It is also worth noting that epoxy grout can be more challenging to work with during installation. It sets quickly and requires precise handling, which is why many homeowners in Surrey choose professional installation when using epoxy grout. Once installed, however, it offers excellent performance with minimal maintenance.
In summary, sealing epoxy grout is not required for protective reasons, but surrounding tiles may still benefit from sealant. If you are uncertain whether your tiled surface requires sealing, consult a tile care expert who can assess the materials and suggest the best approach for your home.
What Is the Typical Lifespan of Grout Sealer?
The longevity of grout sealer is influenced by several factors, including the type of sealer used, the location of the grout, and the level of surface maintenance. On average, most grout sealers last between one and three years. However, this range can vary significantly depending on usage and environmental conditions.
Penetrating sealers tend to outlast surface sealers. Because they penetrate the grout and bond with its internal structure, they offer deeper, more resilient protection. These sealers are ideal for high-traffic areas and rooms exposed to moisture, such as kitchens and bathrooms. When applied correctly, a high-quality penetrating sealer can remain effective for up to three years.
Surface sealers, which form a protective layer on top of the grout, generally have a shorter lifespan. They are more prone to wear from foot traffic, cleaning, and abrasion. In busy households or commercial settings, surface sealers may need to be reapplied annually to maintain their effectiveness.
The location of the grout also plays a role in its longevity. Grout in low-traffic areas or decorative installations may retain its sealant longer than that in frequently used spaces. For instance, a tiled wall in a guest bathroom may not require resealing as often as a kitchen floor or shower enclosure.
Maintenance practices are another critical variable. Utilizing pH-neutral cleaners and avoiding harsh chemicals helps preserve the sealant. Regular cleaning with sealant-safe products prevents buildup and diminishes the risk of sealant degradation. Promptly spot-cleaning spills and steering clear of excessive water exposure also contribute to longer sealant life.
To ascertain whether your grout sealer remains effective, conduct a simple water test. Apply a few drops of water to the grout and observe the results. If the water beads up and stays on the surface, the sealant is intact. However, if it soaks in or creates a dark spot, it’s time to reapply the sealant.
For homeowners in Surrey who value long-term property care, scheduling grout resealing every 12 to 18 months is a dependable approach to maintaining protection against stains and damage. Keeping track of application dates and monitoring grout condition ensures that your tiled surfaces remain clean, durable, and aesthetically pleasing.
The Article Which Grout Sealing Method Offers the Best Long-Term Protection? first found on https://www.abbeyfloorcare.co.uk
The Article Grout Sealing Methods for Optimal Long-Term Protection appeared first on https://fabritec.org
The Article Grout Sealing Methods for Lasting Protection and Durability Was Found On https://limitsofstrategy.com
-
-

Marble Restoration Specialists: Do You Need Them in East Renfrewshire?
Last Updated on August 28, 2025 by David
This comprehensive article serves as an invaluable guide for homeowners in East Renfrewshire who are considering the significant decision of hiring a specialist company for marble restoration. It brings to light the potential hazards associated with DIY methods and the limitations of generic cleaning services, especially when managing delicate surfaces like marble. This guide delves into various crucial topics:
- The Necessity of Specialized Care for Marble Surfaces: Given its porous nature and vulnerability to acidic or abrasive substances, marble mandates expert handling.
- Preventing Common Restoration Errors: This includes avoiding improper grinding, polishing, or sealing methods that could irreparably damage the stone.
- Advantages of Engaging a Professional: Benefits include customized restoration plans, access to top-tier equipment, and techniques that ensure enduring protection.
- Critical Considerations for Choosing a Restoration Company: Essential elements such as experience, transparency, local reputation, and effective communication regarding methods and expected outcomes.
Comprehensive Guide to Effective Marble Restoration Techniques
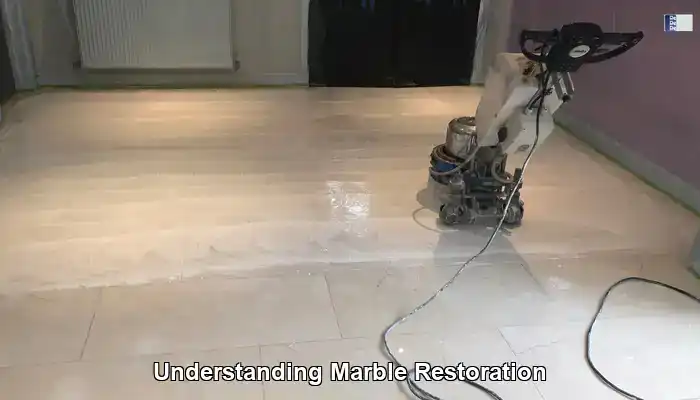
Marble surfaces symbolize luxury and elegance, enhancing the visual appeal of homes, offices, and public spaces. However, maintaining their radiant appearance can be quite challenging as they endure regular wear and tear over time. This brings forth a pivotal question: <a href=”https://www.abbeyfloorcare.co.uk/home-garden/professional-sandstone-floor-restoration-near-me/”>Is hiring a specialist company for marble restoration necessary?</a>? Gaining insights into the complexities of marble restoration will underscore the advantages of seeking professional assistance.
Expert Recommendations: Best Products for Daily Marble Maintenance and Care
 Fila Pro Floor Cleaner
 HG Natural Stone Cleaner 38
 Vileda H2PrO Spin Mop System
Exploring the Steps Involved in Marble Restoration
Marble restoration is a meticulous process dedicated to repairing, honing, and polishing marble surfaces to bring back their original beauty and luster. Over time, even with careful maintenance, these surfaces may lose their shine due to scratches, etching, and stains. The restoration process employs a series of precise techniques aimed at eliminating these imperfections while simultaneously safeguarding the marble from future damage.
Expert restoration companies make use of advanced tools and techniques, including diamond grinding and specialized polishing pads that far exceed any standard household cleaning solution. During the restoration phase, technicians carefully evaluate the marble surface and determine the necessary treatment level, customizing their approach based on the unique requirements of the marble. This tailored methodology results in a finish that not only looks stunning but also prolongs the marble’s lifespan, thereby preserving its value over time.
In the UK, where marble is a favored choice for flooring and countertops, understanding this process can empower homeowners to make more informed decisions regarding renovations or restorations. This knowledge equips homeowners to make choices that will significantly enhance both the aesthetic appeal and durability of their marble surfaces.
The Significance of Engaging a Professional Restoration Service
Hiring professional restoration services is crucial for maintaining the integrity and allure of marble surfaces. Many homeowners might feel inclined to attempt restoration independently, yet this can inadvertently lead to damage, such as etching or uneven polishing. Leveraging professional restoration ensures that the appropriate techniques are employed, thus safeguarding the marble’s finish and extending its lifespan.
A significant advantage of hiring a specialist is their extensive knowledge of various types of marble and their unique characteristics. For instance, the restoration methods suitable for Carrara marble may differ markedly from those necessary for Calacatta marble. Professionals can accurately assess the marble’s requirements, applying the correct methods and products that are both effective and safe for the surface.
Moreover, utilizing professional restoration services can enhance the value of your property. A well-restored marble surface improves the overall aesthetic appeal, which can serve as a major selling point should you decide to market your property. By investing in expert services, you are not merely restoring a surface; you are protecting a valuable asset.
Comparative Analysis: DIY Restoration vs. Professional Services
While DIY methods may initially appear budget-friendly, they frequently fail to yield the anticipated results. Homeowners might resort to using harsh chemicals or improper tools that can exacerbate damage to marble surfaces. For example, using acidic cleaners can result in etching, a common problem that detracts from the marble’s appearance.
In contrast, professional services come equipped with the necessary tools and expertise to effectively address various types of damage. They understand the appropriate cleaning agents and techniques capable of restoring marble without causing harm. Additionally, specialists are trained to identify underlying issues that may not be immediately visible, ensuring a comprehensive restoration process.
Investing in professional services can ultimately result in cost savings over the long run. The expenses associated with repeated DIY attempts, coupled with the potential need for more extensive repairs, can far exceed the initial investment in expert restoration. Thus, when deliberating whether to hire a specialist, it is essential to carefully weigh the risks and benefits associated with both options.
Recognizing When Your Marble Requires Restoration

Identifying when your marble surfaces necessitate professional intervention is essential for preserving their beauty. Overlooking minor issues can lead to significant damage that may be costly to repair. So, how can you ascertain if your marble requires restoration?
Key Indicators of Damage to Monitor
Marble surfaces can manifest various signs of damage over time. Common indicators include etching, which appears as dull, discolored patches on the surface; stains that can seep into the marble if not addressed promptly; and cracks that compromise the material’s integrity. Furthermore, a general lack of shine and dullness can serve as strong indicators that your marble requires professional care.
Etching is often a result of exposure to acidic substances, such as fruit juices or certain cleaning products. This type of damage may be subtle yet noticeable, especially when light reflects off the surface. Stains tend to be more apparent and can arise from spills or ingrained dirt. If left untreated, these stains may become permanent, necessitating comprehensive restoration efforts.
Regularly inspecting your marble surfaces for these signs can aid in the early identification of potential issues. If you observe a combination of these problems, it may be time to consult a specialist who can evaluate the damage and recommend suitable restoration services.
When to Seek Professional Assistance for Restoration?
Determining the appropriate time to pursue professional help is vital for maintaining the integrity of your marble surfaces. If you encounter significant damage or extensive staining, it’s prudent to engage expert assistance. Attempting to rectify these issues independently can lead to further complications, including irreversible damage.
Moreover, if you find yourself unsure about the best method for restoring your marble, consulting a specialist is advisable. They can offer a thorough evaluation and outline the necessary steps for effective restoration. This is particularly important in scenarios where damage is not immediately visible, such as subsurface cracks that could worsen over time.
In some cases, homeowners may attempt DIY restoration methods only to realize they are out of their depth. If you have tried various cleaning solutions or techniques unsuccessfully, do not hesitate to contact a professional. They possess the expertise required to navigate the complexities of marble restoration efficiently.
Implementing Preventative Measures for Marble Care
Preventive care can significantly minimize the need for extensive restoration work. Regular cleaning is crucial; utilizing pH-neutral cleaners specifically designed for marble helps maintain its shine without inflicting damage. Steering clear of harsh chemicals and abrasive materials during cleaning will also prevent unnecessary wear.
Another effective preventive approach is routine sealing. Applying a high-quality sealant every few years establishes a protective barrier that helps repel stains and moisture, ensuring lasting protection. This practice not only enhances the marble’s appearance but also prolongs its lifespan. A well-sealed surface is less likely to absorb spills, facilitating easier maintenance.
Establishing a consistent maintenance schedule, which includes periodic inspections and professional cleaning services, can further assist in identifying potential issues before they escalate. By adopting these proactive measures, you can maintain your marble’s pristine condition for years to come, thereby reducing the necessity for more intensive restoration in the future.
Essential Considerations for Choosing a Specialist Company for Marble Restoration in the UK
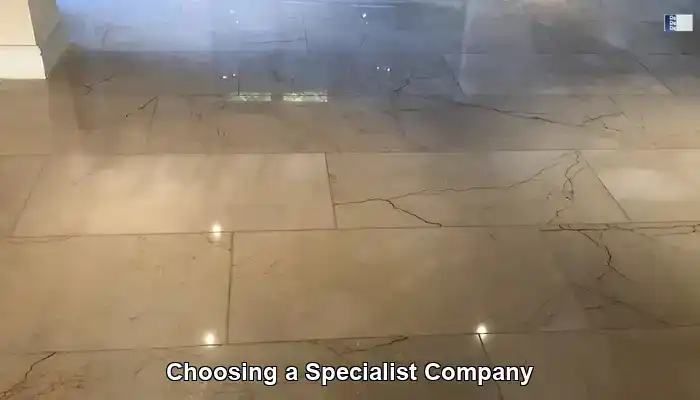
Choosing the right specialist company for marble restoration in the UK necessitates a careful assessment of several critical factors. The quality of service, reputation, and expertise of the company can profoundly influence the outcome of your restoration project.
Evaluating the Credentials and Certifications of Restoration Companies
When searching for a marble restoration company, it is vital to examine their credentials and certifications. Seek out companies that have received training from reputable institutions and hold certifications that reflect their expertise in marble care. This not only guarantees quality service but also showcases a commitment to industry standards.
In the UK, several professional associations focus on stone care and restoration. Membership in these organizations often requires adherence to specific guidelines and best practices, which can further validate the company’s credibility. For instance, companies associated with the Stone Federation Great Britain are recognized for their dedication to excellence in stone care.
Additionally, inquire about any specialized training that technicians have completed. This knowledge can greatly influence the restoration process, ensuring that the methods employed are suitable and effective for the specific type of marble in question.
Assessing Experience and Reviewing Portfolios
Experience is a crucial factor when selecting a marble restoration company. Businesses with a long-standing presence in the industry are typically better equipped to handle various types of damage and possess extensive knowledge regarding different varieties of marble and finishes.
Reviewing a company’s portfolio can offer valuable insight into its capabilities and the quality of its work. A diverse portfolio showcasing a range of completed projects demonstrates versatility and expertise. Look for before-and-after images that illustrate the transformations achieved through their services.
Moreover, consider reaching out to the company for references from previous clients. Learning about other customers’ experiences can provide crucial information regarding service quality and satisfaction levels. A reputable company should be willing to supply references upon request.
The Importance of Customer Reviews and Testimonials in Your Decision-Making Journey
Customer reviews and testimonials are vital resources when selecting a marble restoration company. Online platforms such as Trustpilot or Google Reviews can provide insights into past clients’ experiences. Positive reviews often emphasize aspects such as professionalism, quality of work, and exceptional customer service.
When reviewing feedback, pay attention to specific details related to the restoration process and the outcomes achieved. Look for comments that mention the technicians’ expertise and the efficacy of their methods. Negative reviews can also offer insight, helping you steer clear of companies that may not meet your expectations.
In addition to online reviews, consider seeking recommendations from friends, family, or professionals in the interior design or real estate sectors. Personal recommendations often carry significant weight and can connect you with reputable restoration specialists.
Understanding Cost and Value for Money in Restoration Services
Gaining a clear perspective on the cost of marble restoration services is essential for effective budgeting. However, it is important to view cost not merely in terms of price but also in relation to the value provided. Different companies may have varying pricing structures, influenced by aspects such as the area size, the extent of damage, and the techniques utilized.
When comparing costs, ensure that you consider the services included in the quote. A lower price may signal a lack of thoroughness or the use of inferior materials. Conversely, a slightly higher cost might reflect a comprehensive service that encompasses assessment, cleaning, polishing, and sealing.
It can be advantageous to obtain multiple quotes from various companies. This practice allows you to compare not only prices but also the specific services provided. Look for companies that offer a detailed breakdown of their pricing, which can aid in evaluating the overall value for money.
Ultimately, investing in marble restoration should be perceived as an investment in your property. The long-term benefits of professional restoration, including enhanced aesthetics and increased property value, can far outweigh the initial costs involved.
Understanding the Costs Associated with Marble Restoration in the UK
Gaining insight into the costs connected with marble restoration in the UK can empower homeowners to make informed decisions regarding their budget and restoration needs. Several factors can influence the pricing of restoration services, making it essential to evaluate these elements thoroughly.
Key Factors Influencing Restoration Costs
Numerous factors contribute to the overall cost of marble restoration. Firstly, the size of the area being restored is a significant factor; larger spaces necessitate more time and materials, thereby increasing the overall cost. Additionally, the degree of damage can greatly affect pricing—serious damage requiring extensive repairs will naturally incur higher expenses compared to minor cleaning and polishing.
The type of marble also plays a role in determining costs. Certain varieties may pose more challenges during restoration due to their characteristics, necessitating more specialized techniques or materials. For example, softer marbles can be more difficult to polish without risking additional scratching, leading to increased costs.
The specific services required for restoration will also influence the overall price. Comprehensive services, including cleaning, grinding, polishing, and sealing, will typically cost more than basic cleaning. It’s crucial to discuss your specific requirements with potential restoration specialists to obtain an accurate quote tailored to your needs.
Strategies for Effectively Budgeting for Restoration Projects
Budgeting for marble restoration demands careful planning and consideration. Begin by assessing the condition of your marble and identifying the areas that require attention. Once you have a clear understanding of the necessary services, request quotes from multiple restoration companies to obtain a precise estimate.
Establishing a contingency fund for unexpected costs that may arise during the restoration process is also wise. Occasionally, underlying issues may become apparent, necessitating additional work. Having a budget that accounts for these possibilities can help alleviate financial strain.
Consider categorizing your budget based on different aspects of restoration. For example, allocate funds for cleaning, repairs, polishing, and sealing. By dividing expenses, you can monitor spending more effectively and ensure that all necessary aspects of restoration are adequately addressed.
Evaluating Cost vs. Value in Restoration Investments
When considering the cost of marble restoration, it is essential to weigh the expense against the potential value gained. A well-restored marble surface not only enhances your property’s visual appeal but can also significantly elevate its market value. Properties featuring high-quality finishes tend to attract more buyers and can command a higher selling price.
In addition to increased property value, professional restoration can extend the life of your marble surfaces, reducing the need for frequent replacements or repairs. This long-term cost-saving aspect should not be overlooked when contemplating the initial investment in professional services.
Ultimately, the decision to invest in marble restoration should be approached as a strategic move. By prioritizing quality restoration, you ensure that your marble surfaces remain stunning and functional for many years, making it a wise financial decision in the long run.
A Detailed Overview of the Marble Restoration Process
Understanding the marble restoration process can clarify what to expect when engaging a specialist company. Each phase is critical for ensuring that the marble is beautifully restored and protected for the future.
What Occurs During the Initial Assessment Phase?
The marble restoration process commences with an initial evaluation conducted by a trained specialist. This assessment is crucial as it enables the technician to gauge the condition of the marble and identify specific areas that require attention. They will inspect for signs of damage, such as scratches, stains, and etching, as well as any structural issues, including cracks.
During this phase, the technician may also note the marble’s finish and the specific type of marble involved. Understanding these details is vital for determining the most effective restoration techniques to apply. An accurate diagnosis can significantly impact the restoration’s success, ensuring that appropriate methods and products are utilized.
The initial assessment is often complemented by a discussion with the homeowner regarding their expectations and any concerns they may have. This interaction is critical for aligning the restoration process with the homeowner’s vision, thereby ensuring satisfaction with the final result.
How Are Marble Surfaces Cleaned and Repaired?
Once the assessment is complete, the next step focuses on cleaning and repairing the marble surfaces. Thorough cleaning is essential to eliminate dirt, grime, and any residues left by previous cleaning products. This process often employs specialized cleaning agents that are safe for marble, ensuring that the integrity of the surface is preserved.
After cleaning, any necessary repairs will be addressed. This may include filling in cracks or chips using materials that match the color and texture of the marble. Effective repair work is essential; if cracks are overlooked, they can expand over time, leading to further damage.
In some cases, technicians may also utilize honing techniques to correct surface irregularities and imperfections. This procedure not only enhances the overall appearance but also prepares the surface for polishing, ensuring a smooth finish.
What Are the Polishing and Sealing Procedures?
After the marble has been cleaned and repaired, the polishing phase begins. This step is crucial for restoring the marble’s original shine and beauty. Technicians utilize a series of progressively finer polishing pads to achieve a high-gloss finish that enhances the marble’s color and patterns.
Polishing not only enhances aesthetics but also provides a level of protection for the surface. Following polishing, a high-quality sealant is generally applied. Sealing the marble creates a barrier against stains and moisture, making it easier to maintain the surface over time. This step can significantly prolong the lifespan of the marble, reducing the likelihood of damage.
Selecting the right sealant is crucial; numerous options are available, ranging from penetrating sealers to topical sealers. The choice often depends on the type of marble and the level of protection required. A professional technician will recommend the most appropriate option based on their assessment.
What About Grouting and Filling Gaps?
In cases where marble surfaces are installed as tiles, grouting and filling become integral components of the restoration process. Grout is utilized to fill the spaces between tiles, creating a seamless appearance while also preventing moisture from penetrating beneath the surface.
Technicians apply grout with precision, ensuring that it matches the color and texture of the marble. Proper grouting not only enhances the aesthetic appeal but also contributes to the durability of the marble installation. A well-grouted surface assists in preventing issues such as mold and mildew, which can arise from moisture retention.
Moreover, filling gaps with suitable materials is vital for creating a smooth surface. Filling compounds should be selected based on the specific type of marble and the nature of the damage being addressed. This attention to detail ensures that the final restoration appears cohesive and flawless.
What Happens During the Final Inspection and Maintenance Guidance?
Upon completion of the restoration process, a final inspection is conducted to ensure that the work meets quality standards. Technicians will evaluate the overall appearance and functionality of the marble surfaces, confirming that all aspects of the restoration have been executed correctly.
After this inspection, specialists often provide homeowners with maintenance advice to ensure the longevity of the restored marble. This may include recommendations on cleaning products, sealing schedules, and optimal daily care practices. Proper maintenance is critical for preserving the results of the restoration effort.
By adhering to the maintenance guidelines provided, homeowners can maximize the lifespan and beauty of their marble surfaces. This proactive approach not only enhances the aesthetic appeal of the space but also protects the investment made in professional restoration.
Essential Strategies for Maintaining Restored Marble Surfaces
After investing in professional marble restoration, it’s crucial to maintain the newly restored surfaces to ensure their longevity and visual appeal. Proper care can prevent further damage and keep marble looking its best for many years to come.
Recommended Daily Care Practices for Marble Surfaces
Daily care for marble surfaces encompasses straightforward yet effective practices that contribute to their upkeep. Utilizing pH-neutral cleaners formulated specifically for marble is essential, as these products help preserve the surface without causing harm. Avoid abrasive scrubbers or harsh chemicals, as these can scratch or dull the finish.
For routine cleaning, employ a soft cloth or mop to promptly wipe away dust and spills. This practice prevents harmful substances from settling into the marble, thereby reducing the risk of staining. In the event of spills, they should be blotted immediately rather than wiped, as wiping can spread the stain further.
Alongside daily cleaning, conducting regular inspections of the marble can help identify potential issues early. Look for signs of wear or damage, such as dull spots or new stains, and address these promptly to avert costly repairs in the future.
Implementing a Regular Maintenance Schedule for Your Marble
Establishing a routine maintenance schedule is vital for extending the life of your marble surfaces. This schedule should encompass periodic professional cleaning and sealing, which helps refresh the marble’s appearance and provides protection against stains.
Sealing should generally occur every 1-3 years, depending on usage and the specific type of marble. A professional can assist in determining the appropriate sealing frequency based on the marble’s condition and the surrounding environment.
Additionally, consider scheduling professional inspections to evaluate the condition of your marble. These inspections can help identify potential issues that may require attention before they worsen, thereby ensuring the continued beauty and integrity of your surfaces.
Recognizing When Further Restoration Is Necessary
Monitoring the condition of your marble surfaces will help you ascertain when professional restoration may be required again. If you notice new damage, such as staining or dull spots, it’s advisable to consult a specialist. Addressing these issues early can prevent the need for extensive restoration work in the future.
Scheduling further restoration is also important if you plan to alter the layout or use of the space. For example, if you are renovating a kitchen or bathroom, the increased activity may necessitate professional intervention to restore the marble’s appearance.
Regular assessments and timely interventions can help maintain the marble’s beauty and value. By remaining proactive, you ensure that your investment in marble continues to yield aesthetic and functional benefits.
Effective Strategies for Managing Stains and Spills
Promptly addressing stains and spills is crucial for maintaining the appearance of your marble surfaces. If a spill occurs, it is essential to act quickly—blot the area with a soft cloth rather than rubbing, which can spread the stain further.
For stubborn stains, using an appropriate stain remover specifically designed for marble is advisable. Numerous products are available tailored to different types of stains, such as wine or oil. Always test any product on a small, inconspicuous area first to check for adverse reactions.
In addition to commercial stain removers, some homeowners opt to create homemade poultices, using ingredients like baking soda and water to draw out the stain. While this method can be effective, it requires patience and care to avoid damaging the marble.
Proper care and timely interventions can significantly impact the preservation of your marble surfaces, ensuring they remain a stunning focal point in your home or business.
Common Questions About Marble Restoration Answered
What is Included in the Marble Restoration Process?
Marble restoration involves a comprehensive approach that includes cleaning, repairing, polishing, and sealing marble surfaces to restore their original appearance and safeguard them from future damage.
How Frequently Should I Have My Marble Professionally Restored?
Typically, marble should be professionally restored every 1 to 3 years, depending on usage and wear. Regular maintenance can help extend this timeframe.
Is DIY Marble Restoration a Feasible Option?
While DIY restoration is possible, it often presents risks such as causing further damage. Professional services ensure that proper techniques and tools are utilized for optimal results.
What Indicators Suggest That My Marble Requires Restoration?
Signs that restoration is needed include dullness, etching, cracks, and deep stains. If any of these issues are present, professional restoration may be necessary.
What is the Average Cost of Marble Restoration in the UK?
Costs vary based on the area size, extent of damage, and required services. On average, restoration can range from £15 to £30 per square meter.
Is Investing in Professional Restoration Justifiable?
Yes, professional restoration enhances the beauty and value of marble surfaces, making it a worthwhile investment for homeowners.
How Long Does the Restoration Process Usually Take?
The duration of the restoration process depends on the level of damage and area size, but it typically takes 1-3 days for most projects.
Which Cleaning Products Are Recommended for Marble Surfaces?
Utilize pH-neutral cleaners specifically formulated for marble to avoid damaging the surface. Steer clear of harsh chemicals and acidic products that can cause harm.
What Preventative Measures Can I Take to Safeguard My Marble?
Regular cleaning, sealing every 1-3 years, and promptly addressing spills can help prevent future damage and maintain the marble’s appearance.
What Steps Should I Take If I Notice a Stain on My Marble?
Act swiftly by blotting the area with a soft cloth and employing a suitable stain remover for the specific type of stain. Always test any product on a small area first to ensure safety.
The Article Do I Need a Specialist Company for Marble Restoration in East Renfrewshire first found on https://www.abbeyfloorcare.co.uk
The Article Specialist Company for Marble Restoration in East Renfrewshire: Is It Necessary? appeared first on https://fabritec.org
The Article Marble Restoration Specialists in East Renfrewshire: Is It Needed? Was Found On https://limitsofstrategy.com