Enhance Your House Clearance Process by Choosing the Right Packing Tape
Discover the Various Types of Packing Tape for Optimal Organization
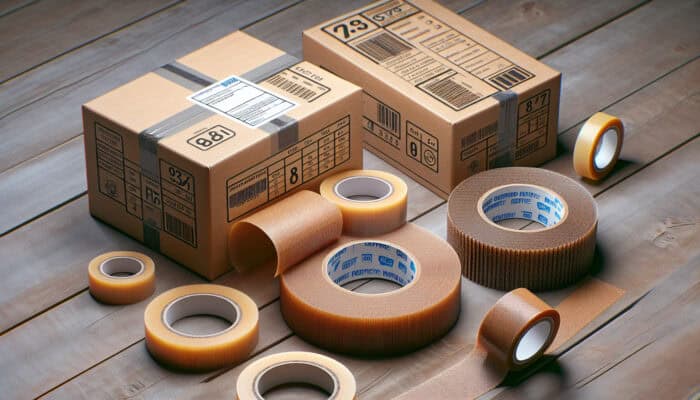
Packing tape is an indispensable tool for anyone engaged in a house clearance, available in various types to suit diverse packing needs. The most commonly used options include clear tape, brown tape, and reinforced tape. Clear tape is celebrated for its adaptability, making it perfect for general packing tasks, as it provides visibility of box contents. This feature proves particularly useful for labelling, allowing you to identify items quickly without needing to open the boxes. Conversely, brown tape, made from kraft paper, is preferred for its robust nature and professional appearance, making it an excellent choice for items that require a more refined look. Reinforced tape, designed specifically for heavy-duty applications, incorporates embedded fibres for enhanced durability, making it ideal for safely transporting heavy or fragile items.
Choosing the right type of tape can profoundly affect your house clearance experience. For lighter items, either clear or brown tape typically suffices. However, when handling heavier or more delicate possessions, such as glassware, it is essential to opt for reinforced tape to prevent potential damage during transit.
The Importance of High-Quality Packing Tape in Your Moving Process
Utilizing high-quality packing tape is crucial for safeguarding your belongings throughout a house clearance. When boxes are securely sealed with sturdy tape, the risk of damage is significantly reduced. Low-quality tape can easily fail, leading to boxes bursting open or items shifting, which may result in breakage or loss. By investing in robust packing tape, you not only ensure the protection of your items but also gain peace of mind during the moving process.
Furthermore, premium tape adheres more effectively to various surfaces, ensuring that boxes remain securely sealed despite the challenges of moving and transportation. This characteristic is vital when items are stacked or exposed to vibrations during transit. The right tape can withstand these stresses, making it an essential component of any successful house clearance.
Guidelines for Selecting the Most Appropriate Packing Tape
Choosing the correct packing tape requires a thoughtful evaluation of the items you plan to pack. The weight and fragility of your belongings significantly influence the type of tape you should select. For lightweight and non-fragile items, standard clear or brown tape will typically suffice. However, for heavier or fragile items, it becomes imperative to seek out tape that offers superior strength and adhesive qualities.
When selecting tape, pay attention to the tensile strength rating, which indicates its capacity to hold weight without breaking. Additionally, the tape’s width is crucial; wider options usually provide a stronger seal compared to narrower alternatives. The type of dispenser used for applying the tape is another factor to consider; a handheld dispenser can facilitate smoother application and ensure even coverage.
Ultimately, a comprehensive assessment of your packing needs will guide you in selecting the most suitable packing tape. If you are uncertain, always choose a stronger tape to guarantee the safety of your items.
Best Practices for Efficient Packing Tape Application
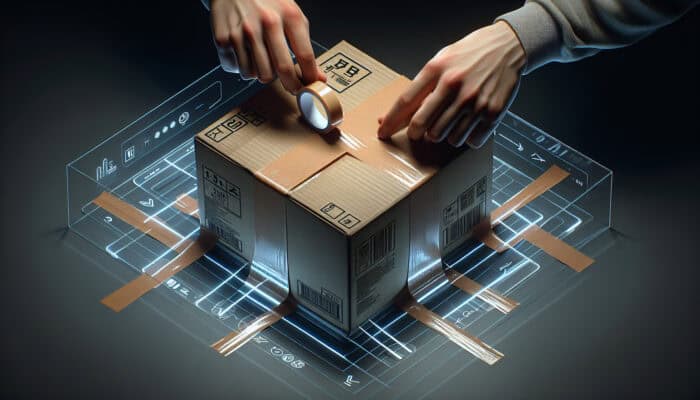
Applying packing tape effectively is fundamental to ensuring that boxes remain securely sealed during transportation. Following best practices can significantly enhance the efficiency of your packing process. First and foremost, ensure that you apply the tape evenly across the seams of the boxes to eliminate weak points. This entails laying the tape flat and free of creases to optimize adhesion. It is advisable to apply two to three strips of tape over the seams for added security, especially on larger boxes.
Moreover, when sealing boxes, ensure that all openings, including the top and bottom flaps, are completely covered. It is often beneficial to begin from the center of the seam and work outward, ensuring that the tape adheres smoothly without any bubbles or gaps. When packing heavier items, do not hesitate to use extra tape; it is always preferable to use slightly more than risk compromising the safety of your belongings.
- Apply tape evenly and firmly across all seams.
- Utilize two to three strips for larger or heavier boxes.
- Start from the center of the seam and work outward.
- Ensure no gaps or bubbles are present under the tape.
- For fragile items, consider double-taping seams for added security.
- Label boxes clearly after taping to avoid confusion.
- Store tape in a cool, dry place to maintain its adhesive quality.
Evaluating the Environmental Impact of Packing Tape Choices
In a time when environmental awareness is paramount, the impact of packing materials, including packing tape, plays a significant role during house clearance. Traditional packing tape is often composed of plastic, contributing to landfill waste. This highlights the necessity of considering eco-friendly alternatives, such as biodegradable or recyclable tapes. These environmentally conscious options not only serve the same functions as traditional packing tape but also provide peace of mind, knowing you are reducing your ecological footprint.
When selecting packing tape, prioritize products that are labeled as recyclable or made from sustainable materials. Some brands even offer refillable dispensers to further minimize waste. By choosing these alternatives, you not only participate in a more sustainable moving process but also educate others on the importance of making eco-conscious decisions during their own clearances.
Opting for eco-friendly tape not only benefits the environment but can also enhance your reputation as a responsible individual or organization, especially important for those involved in large-scale clearances.
Professional Insights on Packing Tape Essentials for Successful House Clearance
The Crucial Role of Packing Tape in Your House Clearance

Packing tape is a fundamental component of any house clearance operation. Its primary purpose is to securely seal boxes, preventing items from falling out during transportation or storage. This level of security is particularly crucial when moving fragile or valuable possessions. A well-sealed box guarantees that your items remain protected from damage, dirt, and moisture, thereby ensuring their condition is preserved.
Moreover, packing tape simplifies the organization process. With clearly labelled and securely sealed boxes, identifying and locating contents becomes effortless, saving time and reducing stress on a bustling moving day. The efficiency of packing tape extends beyond merely sealing; it is a foundational tool that plays a significant role in the overall success of a house clearance.
Additionally, the ease of use that quality packing tape offers can greatly streamline the packing process. Whether you are an experienced mover or managing your first house clearance, the right tape can make the task significantly more efficient and manageable.
How Professionals Can Assist in Selecting the Right Packing Tape
Experts in the moving industry provide invaluable guidance when it comes to choosing the appropriate packing tape for various house clearance scenarios. For instance, professional movers often assess the unique requirements of each clearance project, considering factors such as the type and quantity of items to be packed, the distance of the move, and any potential hazards during transport.
In practical applications, experts frequently recommend reinforced tape for heavy or fragile items, as it delivers additional protection against the various challenges of moving. They may also suggest clear tape for lightweight items that do not require as much support but need easy visibility for identification. Through their experience, these professionals can offer tailored advice, ensuring you select the most suitable tape for your specific circumstances.
Moreover, expert consultations can guide you on best practices for tape application, including tips on layering and ensuring a secure seal. This level of expertise can be particularly beneficial for those who may lack confidence in their packing abilities.
Best Practices for Effectively Using Packing Tape
Utilizing packing tape effectively is essential to ensure that your items remain well-protected during a house clearance. Following best practices not only secures your boxed belongings but also enhances the overall efficiency of the moving process. One key practice is to apply the tape with sufficient pressure, ensuring that it adheres fully to the box. This helps prevent the tape from peeling away during transit.
Another critical practice involves securely sealing the bottom of boxes before filling them with items. This measure ensures that the weight of the contents does not cause the box to split open. Additionally, apply tape uniformly to avoid weak points that could lead to box failures.
- Apply tape with firm pressure for optimal adhesion.
- Always tape the bottom of boxes securely before packing.
- Use enough tape to cover all seams and openings adequately.
- Opt for wider tape for larger boxes to enhance strength.
- Label boxes clearly after sealing to eliminate confusion.
- Keep tape dispensers within easy reach for quick access during packing.
- Check the expiry date on tapes to ensure effectiveness.
Choosing the Ideal Packing Tape for Your House Clearance
Selecting the appropriate type of packing tape can significantly influence the success of your house clearance. As previously mentioned, clear tape is suitable for general packing and allows for visibility, but may lack the necessary strength for heavier items. Brown tape is an excellent option for those seeking a sturdy choice that offers a classic appearance, making it ideal for packaging fragile or valuable items professionally.
Reinforced tape stands out as the best choice for particularly heavy or fragile items, combining exceptional strength with durability. This type of tape features embedded plastic fibres, making it less prone to tearing or breaking under pressure. Additionally, specialty tapes designed for specific weather conditions may be advantageous for long-distance moves, where temperature fluctuations could affect the integrity of standard packing tape.
Ultimately, understanding the specific needs of your items will guide you in selecting the most suitable tape, ensuring that your house clearance proceeds smoothly and efficiently.
Proper Storage Techniques for Packing Tape
Properly storing packing tape is crucial for maintaining its quality and ensuring it remains usable for future house clearance projects. Store tape in a cool, dry environment, away from direct sunlight, as excessive heat can compromise the adhesive properties, rendering it less effective when needed. Keep the tape in its original packaging or a dedicated storage box to prevent it from becoming tangled or damaged.
If you have multiple rolls, consider using a tape dispenser that allows for easy access and protection against dust and moisture. This not only keeps the tape in optimal condition but also expedites the packing process, as you will not have to deal with tangled rolls.
Regularly check your tape supplies, especially before a planned clearance, to ensure you have an adequate quantity of the types you require. Proper storage can significantly extend the life of packing tape and enhance your packing experience.
Understanding Packing Tape and Box Sizes for UK House Clearance
How to Effectively Match Tape to Different Box Sizes
Correctly matching tape to box sizes is essential for a successful house clearance. The amount of tape required varies according to box dimensions; smaller boxes generally need less tape than larger ones. A good rule of thumb is to ensure that all seams are securely covered, regardless of the box size.
For small boxes, a few strips of tape may suffice. However, for larger boxes, you will want to use multiple strips to ensure that the contents remain secure. This not only prevents boxes from bursting open but also adds an additional layer of protection against potential damage during transit. Evaluating the size and weight of the items being packed will help determine the appropriate amount of tape needed for each box.
By ensuring that you have enough tape for each box size, you can streamline your packing process, reducing delays and frustrations on moving day.
Estimating the Right Amount of Packing Tape for Various Box Sizes
The quantity of tape required for different box sizes can vary based on their intended use and contents. For example, small boxes typically require around three strips of tape along the seams, while medium boxes may need approximately five strips to ensure security. Large boxes, particularly those containing heavier items, often require six or more strips to prevent any potential openings during transport.
When estimating the amount of tape needed, consider the dimensions and weight of the box. A heavier box may necessitate additional tape to ensure that it does not split during handling. Moreover, if your packing involves fragile items, using extra tape for reinforcement is highly advisable.
By taking these factors into account, you can ensure that you have sufficient packing tape on hand for all your boxes, thereby enhancing the efficiency of your house clearance process.
Common Box Sizes to Consider for UK House Clearance
Understanding the common box sizes utilized during house clearance in the UK is essential for effectively planning your packing strategy. Typically, boxes are categorized into three main sizes: small, medium, and large. Small boxes, often used for books and small appliances, generally measure around 30 cm x 30 cm x 30 cm. Medium boxes, ideal for clothing and kitchen items, typically measure 45 cm x 45 cm x 60 cm. Large boxes, suitable for larger items such as bedding or bulky toys, can measure up to 60 cm x 60 cm x 100 cm.
Familiarizing yourself with these sizes facilitates better preparation concerning packing materials and the amount of packing tape required. Knowing the sizes of the boxes you will be using helps you determine how much tape to stock up on, ensuring that all boxes are sealed securely for the move.
Understanding these standard sizes also aids in budgeting for packing materials, as different sizes may necessitate varying amounts of tape for secure sealing.
Protecting Fragile Items with Packing Tape During House Clearance
Implementing Effective Strategies for Safeguarding Fragile Items
When it comes to house clearance, protecting fragile items is paramount, and packing tape plays a vital role in this process. Fragile possessions, such as glassware or ceramics, require additional layers of protection to ensure they arrive safely at their new destination. Using reinforced packing tape can be especially beneficial in these situations, providing a secure seal that can withstand the bumps and jolts of moving.
One effective strategy is to use packing tape to reinforce boxes containing fragile items. This may involve applying extra strips of tape along the seams and edges to prevent boxes from splitting open during transit. Additionally, consider wrapping fragile items in bubble wrap or packing paper before placing them in boxes, and then using tape to secure the wrapping in place.
By taking these precautions, you can significantly minimize the risk of breakage and ensure that your delicate belongings arrive intact. The proper use of packing tape in this context is not merely about sealing boxes; it is about enhancing the overall safety of your items during the moving process.
Techniques to Secure Fragile Items Effectively
Securing fragile items during a house clearance necessitates careful packing and the application of the right techniques to protect them effectively. One approach is to double-tape seams, which adds an extra layer of security to prevent boxes from opening unexpectedly. This method is especially useful for boxes filled with delicate items, as it reinforces the structure and reduces the risk of breakage.
Another effective technique involves using additional tape to create internal supports within the boxes. This could include taping small, rigid pieces of cardboard around delicate items to provide extra cushioning against movement. Moreover, consider using tape to secure items in place within their boxes, which can help prevent them from shifting during transit.
- Double-tape seams for enhanced security.
- Create internal supports with cardboard and tape.
- Utilize bubble wrap or packing paper to cushion fragile items.
- Secure items in place within the box using extra tape.
- Label boxes containing fragile items clearly to prevent mishandling.
- Consider using foam inserts for high-value items to protect them from damage.
- Fill any empty spaces in boxes to prevent movement of contents.
The Role of Packing Tape in Ensuring the Safety of Fragile Items
Packing tape is essential for protecting fragile items during a house clearance, serving as the primary means of securing boxes that contain delicate possessions. By reinforcing boxes with quality packing tape, you create a barrier that helps contain and protect fragile items from external impacts and vibrations that may occur during transport. This is critical, as even minor shocks can lead to breakage if items are not properly secured.
Furthermore, packing tape can immobilize delicate items within their boxes, ensuring they do not shift during transit. This added stability is vital for preventing damage and maintaining the integrity of the items being moved. The combination of careful packing techniques and strong packing tape significantly enhances the safety of fragile items, reducing the risk of damage during the moving process.
Ultimately, effectively using packing tape can be the difference between a successful move and one filled with unfortunate incidents.
Strategic Approaches to Packing Tape Essentials During House Clearance
Reliable Strategies for Effective Use of Packing Tape
When utilizing packing tape efficiently, certain strategies have become established best practices. First and foremost, using high-quality tape is crucial; selecting tape specifically designed for moving ensures it will withstand the stresses of transport. This includes choosing tape with strong adhesive properties and suitable tensile strength for the items being packed.
Another reliable strategy is to apply the tape correctly. This involves ensuring that tape is applied evenly without bubbles or gaps that could compromise the seal. Furthermore, using the right amount of tape is vital; it is always better to use extra tape than to risk a box coming undone during transport. This proactive approach to packing will safeguard your belongings and enhance the overall moving experience.
By adopting these trustworthy strategies, you not only protect your items but also reduce the stress associated with house clearance. Ensuring that your boxes are securely packed provides peace of mind, allowing you to focus on other important aspects of the move.
Implementing Trusted Strategies for Packing Tape Effectively
Implementing trusted strategies for using packing tape involves a combination of thoughtful planning and proper execution. Begin by assessing your packing needs, considering the types and quantities of items you will be moving. This evaluation will guide you in selecting the appropriate packing tape and determining the quantity required.
Once you have your materials, create a packing plan that outlines the order in which you will pack items. This plan should incorporate best practices for using packing tape, such as starting with smaller items and gradually transitioning to larger ones. Additionally, ensure that all necessary packing materials, including tape dispensers and scissors, are readily available to streamline the process.
Training yourself or your team on effective tape application techniques can also improve efficiency. This includes mastering proper sealing methods, understanding how to reinforce seams, and knowing when double-taping is necessary for added security. By following a structured approach, you will find that your packing process becomes more manageable and less stressful.
The Benefits of Trusted Strategies for Packing Tape Implementation
Implementing trusted strategies for using packing tape during house clearance offers numerous advantages. Firstly, these practices enhance the security of your belongings, significantly reducing the risk of damage during transport. When boxes are properly secured, items are less likely to shift or break, leading to a more seamless moving experience.
Furthermore, adopting these strategies can save time and effort. Efficient packing techniques minimize the need for redoing tasks or dealing with damaged items, which can be both time-consuming and frustrating. Additionally, using high-quality tape and following best practices conveys a level of professionalism that reflects positively on your overall moving efforts.
Ultimately, the benefits of trusted strategies extend beyond just securing items; they contribute to a more organized and less stressful house clearance process.
Addressing Environmental Considerations with Packing Tape in UK House Clearance
Exploring Eco-Friendly Packing Tape Options
As consumer demand for environmentally friendly products rises, eco-friendly packing tape options have emerged as viable alternatives for house clearance. Biodegradable tapes, made from natural materials, break down more easily in landfills, significantly reducing environmental impact. Similarly, recyclable tapes produced from recycled materials contribute to a circular economy, minimizing waste.
Some brands have even developed compostable packing tape, which offers the same durability as traditional options but decomposes in composting environments. Opting for these eco-friendly choices not only helps protect the planet but also aligns with a growing commitment to sustainability among consumers.
In the UK, where awareness of environmental issues is steadily increasing, using eco-friendly packing tape can enhance your reputation as a responsible individual or business. As more individuals strive to reduce their ecological footprint, adopting sustainable practices during house clearance can help you stand out from the crowd.
Advantages of Utilizing Eco-Friendly Packing Tape
The advantages of utilizing eco-friendly packing tape are multifaceted. Firstly, these products significantly reduce waste, promoting a more sustainable approach to moving and packing. By choosing biodegradable or recyclable options, you engage in responsible consumption that aligns with environmental objectives.
Additionally, eco-friendly packing tape typically features high-quality materials that perform well without sacrificing strength or reliability. This means you can effectively secure your items while also making an environmentally responsible choice. Furthermore, many consumers are drawn to brands that prioritize sustainability, enhancing your credibility as a conscientious mover.
Moreover, using eco-friendly tape can provide a sense of satisfaction, knowing that you are positively contributing to the environment during your house clearance. This alignment between personal values and practical actions creates a more harmonious moving experience.
Responsible Disposal Methods for Packing Tape
Responsible disposal of packing tape is critical for reducing environmental impact. The first step is to determine whether the tape is recyclable or biodegradable, as disposal methods may vary based on the material. Many packing tapes cannot be recycled due to their plastic components, so it is essential to understand the specific product you are using.
For recyclable options, ensure that they are clean and free from debris before placing them in recycling bins. For biodegradable tapes, composting is an ideal method; however, ensure they are placed in appropriate composting facilities that can effectively process them.
- Check the type of tape before disposing of it.
- Recyclable tape should be clean before recycling.
- Consider composting biodegradable tapes.
- Avoid combining tape with non-recyclable materials during disposal.
- Educate others about responsible disposal methods.
- Participate in local recycling initiatives to promote sustainability.
- Store tape separately from general waste to encourage proper disposal.
- Research local regulations regarding the disposal of packing tape.
Final Recommendations for Utilizing Packing Tape During House Clearance
Essential Tips for Effective Packing Tape Use
Utilizing packing tape effectively is integral to a successful house clearance. One of the key tips is to use an adequate amount of tape; underestimating your needs can lead to unsecured boxes, posing risks during transport. Additionally, applying tape evenly promotes a strong seal that can withstand the rigors of moving.
Selecting the right type of tape for your specific needs is equally critical. Whether you opt for clear, brown, or reinforced tape, ensure that it aligns with the weight and fragility of your items. Finally, remember to label boxes clearly after sealing, as this will simplify the unpacking process and help you keep track of your belongings.
Key Takeaways When Using Packing Tape
The key takeaways from effectively using packing tape during house clearance include recognizing the importance of quality tape and the necessity for proper application. A strong seal is paramount for protecting your belongings, and selecting the right tape for your unique needs can make all the difference. Additionally, eco-friendly options are available to reduce environmental impact and promote sustainability.
Being aware of best practices, such as double-taping seams for fragile items and using adequate quantities of tape, can significantly enhance the security of your packed items. In summary, approach packing with a well-thought-out plan and utilize packing tape wisely to ensure a smooth and successful house clearance.
Ensuring a Successful House Clearance with Efficient Packing Tape Use
To guarantee a successful house clearance with packing tape, begin by carefully planning your packing strategy. Assess the items you need to clear and select the appropriate tape based on their weight and fragility. Always maintain a sufficient stock of high-quality tape to prevent interruptions during the packing process.
Implement best practices for applying tape, such as ensuring even application and adequate sealing, to enhance the safety of your items during transit. Finally, consider the environmental impact of your choices; opting for eco-friendly tape can positively contribute to your overall house clearance experience.
Frequently Asked Questions About Packing Tape
Which Type of Packing Tape is Best for Fragile Items?
Utilizing reinforced packing tape is ideal for fragile items, as it provides superior strength and durability, ensuring that boxes remain securely sealed during transport.
Is Packing Tape Recyclable?
Most packing tape is not recyclable due to its plastic composition. Always check local recycling guidelines for specific instructions.
How Do I Select the Right Packing Tape?
Evaluate the weight and fragility of your items, then choose a tape with adequate tensile strength and adhesive properties suitable for your specific packing requirements.
What Are Some Eco-Friendly Packing Tape Options?
Eco-friendly options include biodegradable and recyclable packing tapes, which help minimize environmental impact during house clearance.
How Much Packing Tape Do I Need for a Large Box?
For a large box, you may require six or more strips of packing tape, depending on the weight and nature of the items inside.
What Are the Advantages of Using High-Quality Packing Tape?
High-quality packing tape ensures better adhesion, stronger seals, and greater durability, thus reducing the risk of damage to your belongings during transport.
What Is the Best Way to Store Packing Tape?
Store packing tape in a cool, dry place, away from direct sunlight, to maintain its adhesive qualities and prevent damage.
Can I Use Clear Tape for Heavy Items?
While clear tape can suffice for lightweight items, it is advisable to use reinforced tape for heavy items to ensure secure sealing.
What Is the Recommended Method for Labelling Boxes After Sealing?
Use a marker to write clear labels directly on boxes after sealing, ensuring that contents can be quickly identified without opening them.
How Can I Dispose of Packing Tape Responsibly?
Check if your tape is recyclable; if not, dispose of it according to local waste management guidelines. Consider composting biodegradable options if available.
Connect with us on Facebook!
The Article: Packing Tape Essentials for House Clearance: UK Guide Was First Found At https://birminghamhouseclearance.com
The Article Packing Tape Essentials: Your UK Guide for House Clearance Was Found On https://limitsofstrategy.com