Key Ingredients for an Unforgettable Brunch Gathering
Selecting the Best Fresh Fruits and Vegetables to Enhance Your Brunch

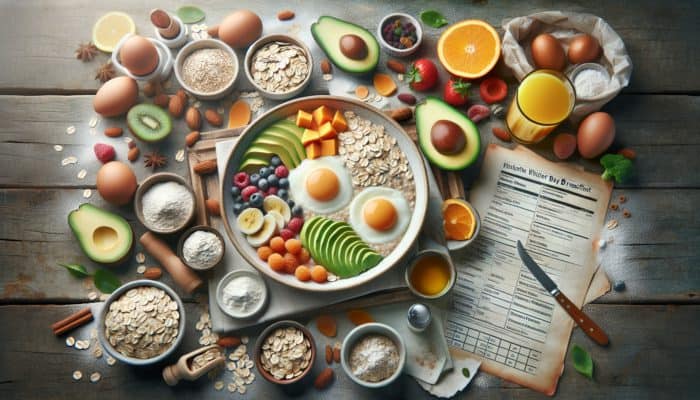
When it comes to crafting a brunch that is visually stunning and scrumptious, selecting the freshest fruits and vegetables plays a pivotal role. The quality of your produce can significantly influence the overall taste and visual appeal of your brunch offerings. By opting for seasonal ingredients, you ensure that the items you choose are at their peak flavor and nutritional value. A visit to local farmers’ markets can be beneficial for sourcing organic, freshly picked produce. Picture a rainbow of seasonal fruits, including strawberries in spring, stone fruits in summer, pumpkins in fall, and citrus fruits in winter. These vibrant selections can be used in fruit salads, refreshing smoothie bowls, or as delightful toppings that enhance not only taste but also the visual presentation of your meals.
In addition to fruits, it is essential to incorporate a diverse range of vegetables into your brunch menu. Include leafy greens such as spinach and kale for a nutritious lift in savory dishes, while colorful options like bell peppers and cherry tomatoes can add visual interest. Aim for a harmonious mix of textures and flavors by blending crunchy, sweet, and creamy elements for a well-rounded brunch experience. Fresh herbs like basil, mint, or coriander can elevate your dishes with aromatic layers of flavor. Ultimately, the vibrancy and allure of your brunch largely depend on the quality and variety of the produce you select.
What Protein Sources Will Optimize Your Brunch Menu?
Exploring a variety of protein options can cater to different dietary preferences and elevate the appeal of your brunch menu. Traditional brunches often feature eggs in various styles—scrambled, poached, or sunny-side-up. However, understanding your guests’ dietary needs is crucial. For those who prefer plant-based alternatives, options like tofu scramble or chickpea-flour omelettes can provide satisfying and flavorful choices.
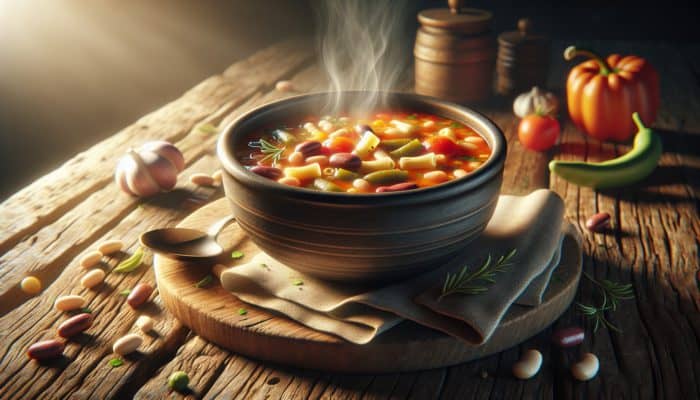
Don’t overlook other excellent protein sources such as smoked salmon, which can elevate a simple bagel brunch into a gourmet experience. Incorporating a selection of charcuterie can create a stunning spread featuring a variety of cured meats and cheeses that cater to different taste preferences. For a heartier option, consider integrating legumes into your menu, which can provide a substantial protein boost. Dishes like black bean breakfast burritos or lentil salads can appeal to both vegetarians and meat lovers, ensuring that every guest finds something delightful to savor.
Additionally, think about incorporating nuts and seeds into your dishes. A sprinkle of chia seeds on a smoothie bowl or crushed walnuts in pancake batter can enhance both flavor and nutritional value. The aim is to provide variety so that every guest feels included while enriching your brunch offerings with depth and diversity.
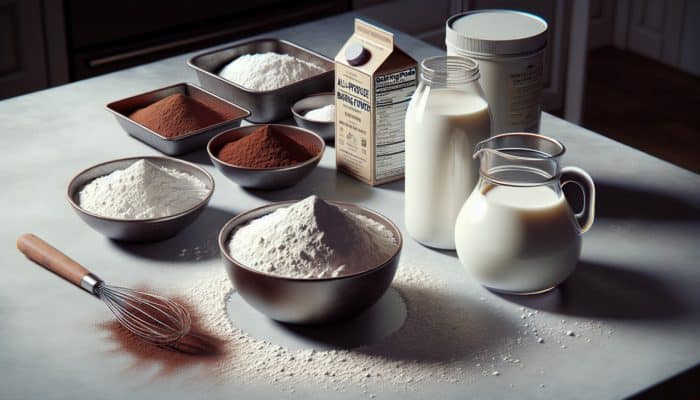
How to Incorporate Dairy and Non-Dairy Options in Your Brunch?
Understanding how to effectively include dairy products and appropriate alternatives is essential for accommodating lactose-intolerant guests and vegans at your brunch. Consider versatile dairy options like Greek yoghurt, which serves as a creamy base for parfaits and smoothies, adding richness and a healthy protein boost. Conversely, if you are catering to non-dairy diets, alternatives like coconut or almond yoghurt can mimic that creamy texture while often offering added health benefits.
Cheese varieties are also a must-have at many brunches. From a simple cheese platter featuring brie and aged cheddar to a rich quiche packed with assorted cheeses, dairy adds complexity to your dishes. However, ensure that you also provide vegan cheese options made from nuts or soy, ensuring inclusivity for all your guests.
Additionally, you can explore non-dairy milk alternatives, which serve as excellent substitutes for dairy milk in recipes and beverages. Almond, oat, and soy milk can enhance pancake batter or be enjoyed as a creamy addition to coffee or smoothies. These alternatives cater not just to those with dietary restrictions but also add an innovative twist to classic recipes. By thoughtfully blending both dairy and non-dairy choices, you create a brunch that is delicious and accommodating.
What Beverage Selections Should You Include at Brunch?

Offering a diverse selection of beverages, ranging from freshly squeezed juices and coffee to alcoholic options, can cater to various tastes and significantly enhance the overall brunch experience. Start with fresh juices—consider zesty combinations like a green juice made with kale, cucumber, and apple or a rejuvenating watermelon cooler. These delightful drinks not only taste great but also serve as vibrant accompaniments to your brunch dishes.
Coffee is a brunch staple around the globe. Whether it’s a robust espresso or a creamy cappuccino, consider establishing a coffee bar with various options, including decaf and alternative milks. For guests preferring a more relaxed approach, offering a selection of teas can add an elegant touch to your beverage offerings.
For adult guests, think about incorporating light alcoholic beverages. Mimosas, made from sparkling wine and fresh orange juice, are a cherished brunch classic. Meanwhile, a Bloody Mary provides a savory option to help ease any lingering effects from the night before. Additionally, consider creating a signature cocktail that reflects your brunch theme, using seasonal fruits or herbs for a unique twist.
Don’t forget about hydration—sparkling water infused with slices of lemon or cucumber can serve as a refreshing palate cleanser. By ensuring you provide a wide range of beverages, you cultivate an inviting atmosphere that encourages guests to relax and connect.
What Types of Bread and Pastries Should You Feature?
Incorporating a variety of freshly baked breads and pastries can greatly enhance your brunch menu, ensuring a satisfying and diverse offering. Consider featuring different types of bread, from artisanal sourdough and crusty baguettes to fluffy brioche. Each variety brings its unique flavor and texture, beautifully complementing your brunch dishes.
Pastries offer another layer of delight, with options such as flaky croissants, sweet danishes, and comforting muffins. These can be enjoyed on their own or creatively incorporated into your dishes—imagine croissant French toast or muffins served with a dollop of fresh cream and berries.
For guests with dietary restrictions, consider including gluten-free options made with almond or coconut flour. These can be just as delicious, ensuring that everyone feels included. Offering a selection of whole grain options can also be appealing, providing added fiber and essential nutrients.
To enhance the experience further, offer a variety of spreads such as homemade jams, honey, and butters. A DIY toast bar can encourage guests to get creative and personalize their brunch experience. By providing a diverse array of breads and pastries, you create a comforting, inclusive environment that invites indulgence and enjoyment.
How to Create Outstanding Lazy Sunday Brunch Recipes?
Brunch Menu Inspirations from Real-World Success Stories
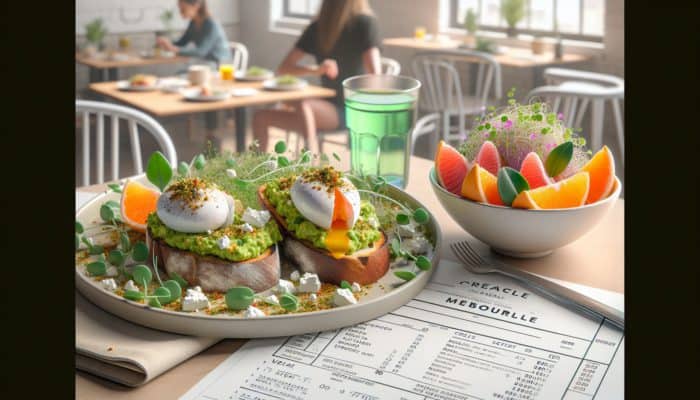
Gaining inspiration from successful brunch menus that have delighted guests can spark your culinary creativity. For example, a renowned café in Melbourne has cultivated a dedicated following thanks to its innovative brunch dishes, such as avocado toast topped with poached eggs and dukkah, accompanied by a zesty citrus salad. The standout ingredients that contribute to this menu’s success include:
- Sourdough bread
- Fresh avocado
- Free-range eggs
- Dukkah (a nut and spice mix)
- Citrus fruits
- Feta cheese
- Microgreens
Similarly, a popular brunch spot in Toronto serves an enticing menu featuring breakfast poutine—crispy potato wedges smothered in cheese curds, gravy, and a fried egg. This dish highlights locally sourced ingredients, showcasing Canada’s rich culinary culture while offering a comforting twist on a classic.
Another notable example comes from a trendy eatery in Tokyo, where the brunch menu merges Western and Japanese flavors. Dishes like matcha pancakes served with sweet red bean paste and whipped cream have gained immense popularity. The standout ingredients include:
- Matcha powder
- Fluffy pancakes
- Sweet red bean paste
- Whipped cream
- Seasonal fruits
These examples illustrate how menus can be creatively curated to reflect local influences while ensuring a rich brunch experience. By incorporating these successful elements into your own brunch, you are likely to delight and impress your guests.
What Steps Should You Follow for Streamlined Brunch Preparation?
Creating a memorable brunch necessitates meticulous planning and organization to ensure a smooth experience. To facilitate your preparations, start by crafting a detailed menu that outlines your chosen dishes along with their ingredients. This will aid in shopping and confirm that you have everything you need for your brunch.
Begin your preparations the night before. Chop vegetables, prepare your doughs, and set the table to avoid any last-minute rushes. Marinating proteins or soaking beans overnight can save valuable time on the day of the brunch. Create a timeline that specifies when to start each dish, taking into account cooking times and potential overlaps.
On the day of your brunch, prioritize effective time management. Start with dishes that require longer cooking times, such as casseroles or baked goods. While these items are in the oven, prepare quicker dishes like smoothies or salads. Don’t hesitate to ask friends or family for help; they can assist with setting the table, pouring drinks, and entertaining guests while you prepare.
Lastly, consider adopting a buffet-style serving approach. This allows guests to help themselves, fostering a relaxed and engaging atmosphere. By following these strategies, you can transform brunch preparation from a stressful task into an enjoyable gathering, ensuring you spend quality time with your guests.
What Are the Latest Trends in Brunch Cuisine?
Current trends in brunch cuisine reflect an increasing desire for creativity, health-conscious choices, and global influences. A significant trend is the rise in plant-based brunch offerings, as more individuals embrace vegan or vegetarian lifestyles. Dishes like chia pudding, avocado toast, and tofu scrambles have become staples, appealing to both health-conscious diners and those seeking unique flavor profiles.
Another trend is the incorporation of international flavors. Brunch menus are increasingly showcasing global influences, from shakshuka—an Israeli egg dish in a spicy tomato sauce—to Korean-inspired breakfast bowls featuring kimchi and rice. This fusion approach not only broadens culinary horizons but also invites guests to explore exciting new tastes and textures.
Presentation styles are also evolving, with a focus on visual appeal. Instagrammable brunches often highlight vibrant colors, artistic plating, and thoughtful garnishes. This trend underscores the importance of flavor alongside the aesthetic presentation of dishes. Consider adding edible flowers, microgreens, or creative drizzles to your plates for that extra wow factor.
Moreover, innovative cooking techniques, such as sous vide or fermentation, are gaining popularity in home brunch preparations. These methods can enhance flavors and textures, allowing home cooks to experiment with their dishes. By staying informed about these trends, you can ensure your brunch offerings remain relevant and exciting for your guests.
How Can You Create a Relaxing Brunch Atmosphere?
Crafting the Ideal Ambiance for Your Brunch Gathering
Creating a soothing atmosphere is crucial for enhancing the overall brunch experience. The right ambiance can transform a meal into a cherished gathering. Start by curating a music playlist that reflects a relaxed yet vibrant vibe, featuring acoustic tunes or soft jazz to establish a welcoming tone.
Lighting plays a vital role as well. Natural light is ideal, so if you’re hosting during the day, open the curtains and let the sunshine in. For indoor settings, consider using candles or soft string lights to create an inviting environment. Subtle lighting fosters relaxation and enhances conversations among guests, making everyone feel more at ease.
Decorations also contribute significantly to setting the mood. Simple touches such as fresh flowers, elegant table runners, and thoughtfully arranged tableware can elevate the presentation of your brunch. Using seasonal decorations adds a personal touch that aligns with your theme, creating a cohesive look that captivates your guests.
To enrich the experience further, create designated areas for various activities. For example, a coffee station, a fresh juice bar, and a dessert table can encourage guests to mingle and interact, enhancing the overall atmosphere of enjoyment and engagement.
- Soft music playlist
- Natural lighting or candles
- Seasonal floral arrangements
- Artfully arranged table settings
By focusing on these elements, you can create a serene, inviting ambiance that encourages guests to relax and enjoy their time together, making your brunch a memorable occasion.
What Time Management Techniques Are Effective for Brunch Preparation?
Effective time management is essential to prevent last-minute chaos and ensure that everyone, including yourself, enjoys the meal. Start by creating a detailed brunch timeline. Document when each dish needs to be prepared, accounting for both cooking and prep times. Prioritize your menu based on which items take longer to cook, allowing you to manage the flow of dishes more efficiently and guarantee everything is ready on time.
Having a to-do list is beneficial to remind you which dishes require attention. This will help prevent overcooking or burning, especially for items like baked goods that demand precision. Familiarize yourself with your kitchen appliances, such as slow cookers and food processors, to expedite the process and simplify your preparations.
Consider preparing dishes that can be made in advance. Items like overnight oats, frittatas, or casseroles can be prepared ahead of time and merely heated before serving. This not only saves time on the day but also enhances flavors as they meld overnight, making your brunch even more enjoyable.
Lastly, enlist the help of friends or family. Assign tasks—such as setting the table, pouring drinks, or prepping ingredients—to lighten the load and allow you to focus on creating a delightful meal. By implementing these time management strategies, you’ll find yourself more relaxed and able to enjoy brunch alongside your guests.
What Activities Can Enhance Guest Interaction During Brunch?
Incorporating engaging activities can keep your guests entertained and elevate the enjoyment of your brunch. One popular idea is to set up a DIY mimosa or Bloody Mary bar, allowing guests to craft drinks tailored to their individual tastes. Provide a range of mixers, garnishes, and unique flavorings that foster creativity and conversation, making the beverage experience just as memorable as the food.
Consider integrating casual games or activities that promote interaction. A trivia game centered around food or brunch themes can spark lively discussions and laughter, creating an energetic atmosphere that keeps spirits high. Alternatively, setting up a photo booth with fun props can add a playful element, encouraging guests to capture memories of the day while sharing in the joy of the gathering.
For a more relaxed option, provide a space for board games or puzzles, allowing guests to unwind and enjoy each other’s company without feeling rushed. This approach can also facilitate deeper conversations and connections among attendees, fostering a sense of community and shared enjoyment.
Lastly, consider incorporating a theme for your brunch, such as a cultural cuisine or a seasonal celebration. This can inspire unique activities, such as a cooking demonstration or a cultural exchange, expanding everyone’s culinary horizons and enhancing the overall experience. By including these engaging activities, you create a more dynamic and enjoyable brunch gathering for all.
What Unique Dishes Can You Prepare for Brunch?
Creative Egg Dishes to Transform Your Brunch
Exploring innovative methods to prepare eggs can add a distinctive twist to your brunch menu. One exciting technique is poaching eggs, which can create stunning dishes like eggs Benedict, served on toasted English muffins and finished with a rich hollandaise sauce. This method keeps the yolks runny, providing a delightful contrast to the buttery sauce, and will certainly impress your guests with each delicious bite.
Baking eggs in individual ramekins presents another creative approach. Layering vegetables, cheese, and eggs, then baking until set, not only offers an impressive presentation but also allows for endless flavor combinations based on your preferences and available ingredients.
Consider incorporating global influences into your egg dishes. Shakshuka, a North African and Middle Eastern specialty, features poached eggs nestled in a spicy tomato sauce, often served with crusty bread—making it a satisfying brunch option. Alternatively, a <a href=”https://cookinggods.com/spanish-tapas-recipes-for-unforgettable-parties/”>Spanish tortilla</a>, made with potatoes and eggs, is a hearty dish that can be enjoyed warm or at room temperature, perfect for serving a crowd and impressing your guests.
Lastly, don’t forget about frittatas. These versatile dishes can be filled with seasonal vegetables, meats, or cheeses and served hot or cold. With their vibrant colors and enticing flavors, they are sure to impress your guests and add a touch of creativity to your brunch offerings. By experimenting with these innovative egg dishes, you can elevate your brunch and delight everyone attending.
What Sweet and Savory Pancake Recipes Should You Try?
Exploring recipes that blend sweet and savory flavors in pancakes can provide a delightful contrast for your guests. Start by crafting a base pancake recipe that is fluffy and adaptable. Beyond traditional buttermilk, consider integrating ingredients like ricotta or whole wheat flour for added texture and nutritional benefits, creating a wholesome foundation for your pancake creations.
A popular sweet-and-savory combination is the bacon-and-maple-syrup pancake. The salty richness of crispy bacon pairs beautifully with the sweetness of maple syrup, creating a satisfying balance that will delight your taste buds. For a global twist, consider incorporating Asian flavors by making kimchi pancakes, served with a soy dipping sauce for added depth and flavor.
Another creative approach is to make pancakes filled with seasonal fruits, such as apples or bananas, drizzled with a warm caramel sauce. This combination provides a luscious contrast to the fluffy pancake base and can be elevated with a sprinkle of sea salt for complexity and a gourmet touch.
For a more adventurous option, consider savory pancakes stuffed with spinach and feta or zucchini and herbs. These can be served alongside a dollop of Greek yoghurt or a tangy dipping sauce, offering a refreshing contrast to the richness of the pancakes. By exploring these sweet and savory pancake recipes, you can create a brunch spread that excites the palate and showcases your culinary creativity.
What Unique Beverage Pairings Should You Consider for Brunch?
Selecting the right beverages to accompany your brunch dishes can significantly enhance the overall dining experience. When considering pairings, ensure they harmonize with the flavors of your food while adding an exciting twist. For instance, pairing a citrusy salad with a refreshing rosemary lemonade can elevate the dish’s brightness and complexity, creating a delightful balance of flavors.
Coffee is a brunch cornerstone, and exploring different brewing methods can add variety to your offerings. Cold brew coffee, known for its smooth and less acidic profile, pairs beautifully with rich, buttery pastries, enhancing the overall flavor experience. Alternatively, a spiced chai latte can provide a flavor explosion when served alongside a sweet pancake stack.
For those seeking something stronger, consider crafting cocktails that reflect the essence of your dishes. A light gin and tonic with a splash of cucumber can be a refreshing pairing for smoked salmon or a savory frittata. For a bolder cocktail, try mixing tequila with fresh grapefruit juice and a hint of jalapeño for a spicy kick that complements hearty breakfast burritos.
Non-alcoholic options also deserve attention. Infusing sparkling water with seasonal fruits and herbs can create delightful mocktails that beautifully complement your brunch spread. By offering unique beverage pairings that enhance your dishes, you’ll create a well-rounded brunch experience that tantalizes the senses and leaves a lasting impression on your guests.
What Are the Benefits of Establishing a Weekly Brunch Tradition?
How Does Brunch Strengthen Social Connections?
Establishing a regular brunch routine can greatly enhance relationships with friends and family by providing a dedicated time for connection. Gathering around a meal fosters a sense of community, allowing for meaningful conversations and shared experiences. In our fast-paced lives, having a set time each week to sit down and enjoy food together nurtures deeper relationships and emotional bonds that can last a lifetime.
Brunch acts as a catalyst for reconnecting with loved ones. Whether it’s an opportunity to celebrate, exchange updates, or simply enjoy each other’s company, these gatherings become cherished rituals that participants look forward to. Regular interactions can enhance feelings of belonging and support within social circles, contributing to a positive mental health outlook and an overall sense of well-being.
Moreover, brunch provides a chance to introduce new friends and acquaintances into your social circle, expanding your network and forging new connections. The collaborative nature of cooking and sharing a meal can foster interactions that deepen friendships and enrich lives. Ultimately, the social benefits of a weekly brunch are immense, cultivating an engaging environment conducive to growth and connection.
Can Brunch Boost Mental Health Through Shared Meals?
Taking the time to enjoy a leisurely brunch can significantly alleviate stress and enhance overall well-being. Slowing down, stepping away from daily hustle, and spending quality moments with loved ones provides a much-needed mental break. Engaging in relaxed conversations while savoring delicious food elevates mood and fosters a sense of happiness and fulfillment that nourishes the soul.
Additionally, the ritualistic nature of a weekly brunch can introduce structure into people’s lives. Establishing this routine encourages individuals to carve out time for self-care and socialization, promoting a healthier work-life balance. This dedicated time away from responsibilities allows for reflection and mindfulness, which are vital for maintaining mental health and emotional resilience.
Furthermore, the shared experience of cooking and enjoying a meal can generate feelings of accomplishment and satisfaction. Collaborating on dishes or taking turns hosting fosters a sense of teamwork and community, reinforcing connections and making individuals feel valued. By prioritizing time for brunch, you ultimately cultivate a healthier mindset, contributing to emotional well-being and resilience in the face of life’s challenges.
What Nutritional Benefits Can You Gain from a Thoughtful Brunch?
A well-rounded brunch can deliver numerous nutritional advantages, starting the day with a healthy meal that fuels both body and mind. Emphasizing nutrient-dense ingredients such as whole grains, fresh produce, and lean proteins ensures that guests receive essential vitamins and minerals that support overall health. Incorporating diverse food groups allows for a more comprehensive nutrient profile, promoting optimal health and vitality.
Moreover, brunch offers an opportunity to showcase seasonal ingredients, often at their peak in flavor and nutrition. Highlighting fresh fruits and vegetables not only enhances the taste of your dishes but also supports a diet rich in antioxidants, fiber, and vital nutrients. This focus on wholesome ingredients can help maintain energy levels and support optimal bodily functions throughout the day.
Additionally, brunch can encourage healthier eating habits by presenting a variety of options. Guests can experiment with new foods and flavors, inspiring them to try items they may not have previously considered. This exposure can lead to a greater appreciation for nutritious foods and inspire healthier choices throughout the week. Ultimately, a well-planned brunch can be a crucial step toward achieving a balanced diet and improved overall health and well-being.
How Does Brunch Enhance Weekend Planning?
Establishing a weekly brunch can serve as an effective method for organizing weekend activities, enhancing both productivity and relaxation. By scheduling a specific time for brunch, individuals can better manage their weekend routines, allowing space for both leisure and responsibilities. This structure encourages people to reflect on how they want to spend their time, whether engaging in outdoor activities, enjoying family outings, or catching up on hobbies and interests.
Moreover, brunch serves as a launching pad for the weekend. By gathering with friends or family, individuals can collaboratively discuss plans, brainstorm ideas, and organize group activities. The communal atmosphere of brunch fosters collaboration and teamwork, making it easier to coordinate outings and ensure everyone is aligned for a fun-filled weekend ahead.
Additionally, the leisurely nature of brunch facilitates reflection on the past week and planning for the upcoming one. Discussing goals, challenges, and achievements over a delicious meal can revitalize motivation and set a positive tone for the days ahead. This planning not only boosts productivity but also promotes a sense of accomplishment and satisfaction as individuals navigate their weekends with intention.
How Can Brunch Help You Explore Cultural Diversity?
Brunching can expose participants to diverse cuisines and cultures, broadening culinary horizons and enriching social experiences. By exploring a range of dishes from around the globe, attendees can deepen their understanding of various food traditions and practices. This cultural exploration can enrich gatherings with stories, flavors, and experiences from different regions, fostering curiosity and appreciation for diversity in food and culture.
Host an international-themed brunch featuring dishes representing specific cultures, such as Mexican chilaquiles, French quiche, or Japanese okonomiyaki. This approach invites guests to engage with new flavors while providing opportunities to discuss the cultural significance of the dishes. Sharing personal food experiences can create stronger bonds among friends and family, promoting cultural understanding and appreciation for global diversity.
Moreover, hosting international brunches encourages experimentation and creativity in the kitchen. Trying new recipes and cooking methods can inspire home cooks to expand their culinary skill set while adding excitement to the dining experience. Ultimately, brunching evolves into not just a meal, but a journey of exploration, learning, and connection that celebrates the rich tapestry of global cultures and traditions.
What Strategies Can Help You Create Memorable Lazy Sunday Brunch Recipes?
How to Curate Your Brunch Menu Thoughtfully?
Planning a successful brunch menu requires careful consideration of various factors to ensure a delightful and satisfying meal. Begin by selecting a theme—whether it’s based on seasonal ingredients, international cuisine, or a specific culinary tradition. A cohesive theme aids in curating dishes that complement each other, providing a seamless dining experience that guests will remember.
Balancing variety and simplicity is crucial. Aim to include a range of dishes with different flavors and textures, while avoiding an overly complicated menu. A mix of sweet and savory items, along with vegetarian and non-vegetarian options, caters to diverse preferences. Consider including one or two crowd-pleasers, such as pancakes or a breakfast casserole, to serve as the meal’s focal point and draw guests in.
When planning your menu, take into account preparation times and cooking methods. Dishes that can be prepared in advance or require minimal last-minute efforts are ideal for brunch, allowing you to spend more quality time with your guests. Incorporate a variety of dishes that can be served at various temperatures, ensuring everything remains enjoyable regardless of when it is served.
Finally, seek feedback from your guests about their preferences or dietary restrictions before finalizing your menu. This ensures that everyone feels included and cared for, creating a more enjoyable atmosphere. By applying these strategies, you can create a brunch menu that is both delicious and unforgettable, leaving a lasting impression on your guests.
What Cooking Techniques Should You Master for Brunch Success?
Mastering essential cooking techniques can elevate your brunch dishes, transforming simple ingredients into extraordinary meals. One fundamental skill is mastering the art of cooking eggs—whether it’s perfecting your scramble, poaching, or frying. Each method offers distinct textures and flavors, and learning the nuances of these techniques will empower you to create impressive egg dishes that cater to various tastes and preferences.
Another vital technique is baking. Familiarize yourself with different baking processes, whether for pastries, breads, or casseroles. Understanding temperature control, timing, and ingredient ratios will lead to consistently delightful baked goods. Techniques like folding, creaming, and kneading are essential for producing tender and fluffy results that enhance the quality of your dishes.
Furthermore, honing your knife skills will significantly improve your cooking experience. Efficiently chopping vegetables, julienning herbs, or dicing fruits can save time and enhance the visual appeal of your dishes. A well-prepared plate not only tastes great but also looks inviting and appetizing, adding to the overall brunch experience.
Lastly, consider learning about various cooking methods, such as grilling, roasting, or sautéing. These techniques can infuse depth and flavor into your dishes while allowing for creative expression. By mastering these essential cooking techniques, you’ll gain the confidence to experiment and elevate your brunch offerings, impressing your guests with every bite.
What Presentation Tips Will Captivate Your Guests?
Presentation is a crucial aspect of creating an impressive brunch experience. The way dishes are plated can greatly enhance visual appeal, enticing guests and elevating their dining experience. Start by using vibrant colors and contrasting textures to create eye-catching plates. Incorporate fresh herbs, edible flowers, or garnishes to add elegance and sophistication to your meals, ensuring they are truly Instagrammable.
Utilize various serving platters and bowls, mixing and matching different materials and shapes to create visual interest. Layering food, such as stacking pancakes or creating tiered displays for pastries, can add dimension and make your spread more dynamic and appealing to guests. Don’t hesitate to explore modern serving techniques, such as mason jars for parfaits or rustic wooden boards for charcuterie, which provide charm while maintaining aesthetic appeal.
Additionally, consider using small serving dishes for sauces, dips, or spreads, allowing guests to personalize their plates. This interactive element adds an engaging touch and encourages creativity among diners, making the brunch experience even more enjoyable.
Finally, always maintain a balanced table layout. Avoid overcrowding plates, allowing each dish to shine individually. By employing these presentation tips, you can create a visually stunning brunch that captivates your guests and transforms your meal into a celebratory experience full of flavor and joy.
What Time-Saving Shortcuts Should Busy Cooks Implement?
Learning quick and easy hacks can streamline your brunch preparation, enabling you to focus on enjoying the occasion rather than feeling overwhelmed in the kitchen. Start with preparation strategies—chopping vegetables and herbs the night before can save considerable time on the day of your brunch. Pre-measuring and combining dry ingredients for your pancake or waffle batter can expedite cooking and reduce stress on the day.
Consider utilizing kitchen gadgets to simplify tasks, such as a food processor for quickly chopping or blending ingredients. If you often prepare smoothies, an immersion blender can save time on clean-up when making smaller batches, enhancing your efficiency in the kitchen.
For baked goods, consider using pre-made mixes when appropriate. Many quality pancake or muffin mixes are available that only require adding wet ingredients. These can save time without compromising flavor or quality, allowing you to spend more time with your guests. Creating a buffet-style meal can also alleviate the pressure of plating individual dishes and foster a more relaxed atmosphere. Set up stations for drinks, food, and condiments that encourage guests to mingle and serve themselves. By employing these time-saving shortcuts, you can ensure a more enjoyable brunch experience for both you and your guests, making the occasion truly special.
What Common Questions Do People Have About Brunch?
What are the best dishes to serve at a brunch?
Consider offering a blend of sweet and savory options, such as pancakes, frittatas, avocado toast, and pastries. Including fresh fruits and a variety of beverages can also enhance the experience, ensuring something for everyone to enjoy.
How can I accommodate dietary restrictions at brunch?
Be proactive in asking about your guests’ dietary needs beforehand. Provide vegan, gluten-free, and dairy-free options to ensure everyone can enjoy brunch without sacrificing taste or satisfaction, making your gathering inclusive and enjoyable for all.
What beverages are popular for brunch?
Classic beverages include mimosas, Bloody Marys, coffee, tea, and fresh juices. Offering a mix of alcoholic and non-alcoholic options can cater to all preferences, ensuring every guest finds a drink they love.
How do I create the right ambiance for brunch?
Foster a relaxed atmosphere with soft music, natural lighting, and tasteful decorations. Fresh flowers and elegant table settings can enhance the dining experience, making your guests feel valued and welcomed.
What are some time-saving tips for preparing brunch?
Prepare as much as possible the day before, including chopping ingredients and setting the table. Consider using kitchen gadgets to speed up cooking, allowing you to focus on spending quality time with your guests instead of stressing in the kitchen.
How can I make my brunch visually appealing?
Emphasize vibrant colors and contrasting textures in your dishes. Incorporate garnishes, fresh herbs, and decorative serving platters to elevate presentation and craft an inviting atmosphere your guests will appreciate.
What are some unique brunch dish ideas?
Explore options like shakshuka, breakfast burritos, or matcha pancakes. Fusion dishes that blend global flavors can also provide a unique twist, making your brunch memorable and exciting for your guests.
How can I encourage social interaction at brunch?
Consider setting up interactive stations, such as a DIY mimosa bar or a coffee station. Incorporating games or themed activities can also promote engagement among guests, making the brunch a lively and enjoyable experience.
What is the ideal number of dishes to serve at a brunch?
Aim for a selection of 5-7 dishes, including mains, sides, and desserts. This allows for a diverse offering without overwhelming guests, ensuring that everyone has plenty to enjoy.
How often should I host a brunch?
Hosting a weekly brunch can create a beloved ritual that strengthens connections with friends and family. However, hosting monthly or seasonal brunches can also be enjoyable and less demanding, allowing you to maintain the joy of gathering.
Connect with us on Facebook!
The post Top Lazy Sunday Brunch Recipes: Global Favorites appeared first on https://cookinggods.com
The Article Lazy Sunday Brunch Recipes: Global Favorites You’ll Love Was Found On https://limitsofstrategy.com