Essential Strategies for Mastering Wilderness Fire Safety
What Are the Primary Causes of Wilderness Fires?
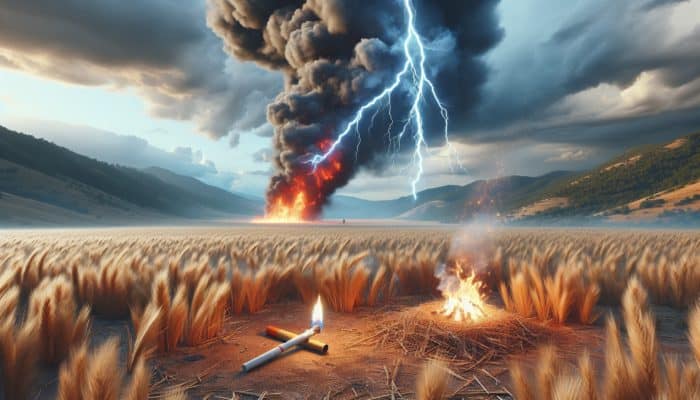
Wilderness fire safety is greatly enhanced by understanding the various sources that lead to fire outbreaks. Fires in these areas generally stem from two major categories: natural causes and human activities. Among natural causes, lightning strikes are notorious for sparking fires in dry vegetation, especially in remote, arid regions. When the weather conditions are favorable, these flames can quickly spread, resulting in extensive destruction. Meanwhile, human-induced factors represent a significant portion of wilderness fires, with reckless behaviors like improper disposal of cigarettes, inadequate management of campfires, and deliberate arson contributing to fire incidents. Recognizing these causes is crucial for preventing and managing wilderness fires effectively.
By identifying the core causes of wildfires, individuals can adopt improved practices that significantly lower the risk of fire outbreaks. For instance, hikers and campers should remain vigilant about weather conditions that can increase fire risks, such as prolonged dry spells or strong winds. Furthermore, understanding and following local regulations regarding fire usage is essential to prevent unintended ignitions. As communities increasingly face the peril of wildfires, fostering awareness and education around these causes becomes a critical component of comprehensive fire safety strategies.
The Critical Role of Fire Safety Education for Outdoor Enthusiasts
Educating individuals about fire safety is crucial for minimizing the risks associated with accidental fires in wilderness settings. Awareness equips outdoor enthusiasts to make informed choices about their activities, promoting both personal safety and environmental sustainability. Key educational resources include:
- Workshops hosted by local fire departments
- Online courses centered around wilderness survival and fire safety
- Guidelines disseminated by national parks and forest services
- Community-based interactive fire safety programs
Engaging in educational initiatives helps individuals grasp the consequences of their actions in natural environments. Knowledge about proper campfire management, recognizing the importance of fire bans, and understanding the correct use of fire safety equipment can drastically lower the chances of fire ignition. Moreover, active community participation through education fosters a culture of safety, wherein individuals feel empowered to take responsibility for their actions in the wilderness.
Essential Fire Safety Equipment for Outdoor Adventures
Equipping oneself with the appropriate fire safety tools is vital for anyone exploring wilderness areas. Key equipment includes fire extinguishers, water buckets, and fire blankets. A portable fire extinguisher specifically designed for wildland fires should be an integral component of any camping kit, as it provides a quick means to control small blazes before they escalate into larger fires. Having accessible and reliable water buckets is also essential; a dependable water source can significantly aid in timely fire suppression efforts.
In addition to these critical tools, a fire blanket proves invaluable for addressing minor fires or emergencies involving clothing. Ensuring that all fire safety equipment is easily reachable and in good working order can greatly enhance preparedness in the event of a fire. Regularly checking the functionality and expiration dates of fire extinguishers can prevent critical failures when they are most needed. Ultimately, being equipped with the right tools, coupled with the necessary knowledge, creates a safer wilderness experience for everyone involved.
Insights from Experts on Wilderness Fire Safety Practices

What Are the Latest Innovations in Fire Safety Techniques?
The realm of fire safety is in a constant state of evolution, with new techniques and technologies being developed to enhance preparedness and response strategies. Current trends emphasize proactive measures while integrating advanced technology into fire management practices. For example, advancements in fire behavior modeling allow for more precise predictions of fire spread based on environmental factors, enabling responders to allocate resources more effectively and mitigate potential damage.
Additionally, the introduction of drones has transformed fire monitoring strategies. Drones equipped with thermal imaging capabilities can accurately assess fire locations and track their growth without putting human lives at risk. This technology provides real-time data that is invaluable during fire emergencies. Understanding and utilizing these advancements can significantly strengthen an individual’s or group’s preparedness and response strategies in the face of wildfires.
How Can You Effectively Train for Wilderness Fire Emergencies?
Training for wilderness fire emergencies is essential for ensuring safety and an effective response in case of a fire outbreak. Comprehensive training encompasses several crucial components, including mastering the use of fire safety equipment, conducting evacuation drills, and understanding the unique risks associated with different environments.
To start, individuals should familiarize themselves with the operation of fire extinguishers and other safety tools. Training sessions should incorporate hands-on practice to ensure confidence and proficiency in effectively using these instruments. Furthermore, regularly conducting evacuation drills establishes a clear plan of action, allowing group members to comprehend their roles and responsibilities during an emergency.
Moreover, staying informed about local fire conditions and regulations is vital. Attending workshops or seminars organized by local fire departments can provide valuable insights into best practices. Participation in community drills fosters teamwork and creates a cohesive response team capable of acting decisively during fire emergencies.
Expert Recommendations for Selecting Reliable Fire Safety Gear

When it comes to wilderness fire safety equipment, experts consistently recommend investing in high-quality, reliable tools. This includes durable fire extinguishers rated for wildland use, as well as protective clothing made from fire-resistant materials. Choosing gear that adheres to industry standards not only enhances personal safety but also instills confidence in one’s ability to manage fire situations effectively.
Experts also suggest considering the size and weight of safety equipment, particularly during backpacking or remote camping trips. Lightweight options that do not compromise quality are preferable. Regular maintenance of gear ensures it remains in optimal condition; for instance, checking the pressure gauge on fire extinguishers or inspecting fire blankets for wear can prevent failures when they matter most.
Finally, seeking advice from experienced outdoor professionals or local fire authorities can guide gear selection, ensuring that individuals are well-prepared for specific wilderness environments. By prioritizing safety gear and making informed decisions, adventurers can significantly reduce their fire risks while enjoying the great outdoors.
Proactive Strategies for Wilderness Fire Safety
How Can You Minimize the Risk of Wilderness Fires?
Preventing wilderness fires requires a proactive approach that combines awareness with responsible behavior. Key strategies include proper disposal of cigarette butts, meticulous management of campfires, and avoiding open flames during dry conditions. Cigarettes must always be thoroughly extinguished and disposed of in designated receptacles to avert accidental ignitions.
When it comes to campfires, individuals should strictly adhere to guidelines, such as utilizing established fire pits and ensuring that fires are never left unattended. It is essential to confirm that campfires are completely doused with water and stirred until cool before departing. Furthermore, during dry weather or periods of heightened fire risk, it is imperative to avoid using open flames altogether, as conditions may not be conducive to combustion.
Educating fellow outdoor enthusiasts about these preventive measures significantly contributes to risk reduction. When everyone takes responsibility for their actions, the collective effort enhances safety in wilderness areas. Ultimately, adopting these straightforward yet effective practices can help preserve natural landscapes and protect wildlife from devastating fires.
Best Practices for Safe Campfire Management
Effective campfire management is a critical aspect of wilderness fire safety, ensuring that campfires do not escalate into uncontrollable wildfires. To maintain a safe campfire, it should always be contained within designated fire pits. This practice minimizes the risk of the fire spreading to nearby vegetation, particularly in dry areas.
Never leave a campfire unattended, as even a slight gust of wind can dramatically alter the fire’s behavior. Always keep firefighting tools within reach—this includes a bucket of water, dirt, or sand to suppress the flames if necessary. Moreover, when extinguishing a fire, pour water over the flames, stir the ashes, and continue adding water until everything is cool to the touch. This thorough approach ensures that no embers remain that could reignite.
Understanding local regulations regarding campfires is equally crucial. Many national parks and wilderness areas enforce strict rules governing fire use, especially during high-risk periods. By adhering to these regulations, campers not only protect themselves but also contribute to the safety of the entire wilderness community.
The Significance of Fire Bans and Restrictions in Fire Safety
Fire bans and restrictions serve as essential tools for preventing wilderness fires, particularly during high-risk periods. These measures are often implemented in response to extreme weather conditions that elevate wildfire risks. Adhering to these rules is vital for ensuring safety, not just for individual campers but also for the broader ecosystem.
During fire bans, individuals must refrain from using campfires, fireworks, and other heat sources capable of igniting dry vegetation. This collective action is crucial in minimizing the risk of accidental fires spreading quickly through sensitive areas. Outdoor enthusiasts should stay informed about local fire conditions through park announcements or community updates.
Moreover, understanding the rationale behind fire bans promotes a culture of respect for nature among outdoor enthusiasts. When individuals recognize that these restrictions are implemented to protect the environment and wildlife, they are more likely to comply, resulting in a safer wilderness experience for all.
Effective Strategies for Responding to Wilderness Fires
What Actions Should You Take If You Encounter a Wilderness Fire?
Encountering a wilderness fire can be a frightening experience, but maintaining composure is critical. First, evaluate the situation: assess the fire’s size, direction, and proximity. If the fire appears manageable and you feel confident in your firefighting skills, you may attempt to extinguish it using your fire safety equipment. However, if the fire is substantial or spreading quickly, evacuating is the safest option.
If you decide to combat the fire, utilize the PASS technique: Pull the pin, Aim at the fire’s base, Squeeze the handle, and Sweep side to side. This method allows for effective control of small blazes. Nonetheless, always maintain a safe distance and stay alert to the fire’s behavior. If conditions worsen, prioritize your safety and evacuate the area immediately.
In any scenario, being aware of your evacuation routes and having a plan in place is critical for a swift exit. Familiarity with the terrain and potential safe zones, such as roads or clearings, can guide your escape during an emergency. A well-thought-out response plan can reduce panic and ensure a smoother process during stressful situations.
Strategies for Effective Evacuation and Identifying Safety Zones
Establishing effective evacuation strategies is vital for safety during wilderness fire emergencies. Knowing the location of evacuation routes and identifying safety zones in advance can be life-saving during an emergency. An evacuation route should be planned using the most direct path away from the fire, taking into account terrain and potential hazards.
It is advisable to create a map of your planned route, including landmarks, access roads, and designated safe zones. Safe zones are areas devoid of vegetation that can provide refuge from flames and smoke. These zones may include bodies of water, open fields, or designated areas established by park services.
Furthermore, ensuring that everyone in your group understands the evacuation plan is crucial. Conducting practice runs and discussing various scenarios prepares individuals to respond effectively. This preparation nurtures confidence and helps mitigate panic during an actual emergency. Remember, having a well-prepared evacuation strategy can substantially increase the likelihood of a safe, efficient response to a wilderness fire.
Proper Techniques for Using Fire Extinguishers Effectively
Correctly using a fire extinguisher is essential for controlling small fires before they escalate into major emergencies. The right technique involves several key steps. First, ensure you are at a safe distance from the fire, ideally 6 to 8 feet away. Next, remember the PASS acronym: Pull the pin, Aim at the base of the fire, Squeeze the handle, and Sweep side to side.
Aiming at the base of the fire is crucial, as this is where the fuel source is located. Sweeping the extinguisher back and forth helps distribute the suppressing agent evenly across the flames. Maintaining a clear exit behind you while engaging with the fire ensures that you have a safe escape route should conditions change.
Regular training on fire extinguisher usage is beneficial for all outdoor enthusiasts. Familiarity with this equipment can lead to more effective responses in emergencies. Additionally, knowing when to use an extinguisher and when to evacuate is vital; never attempt to combat a fire that exceeds your control.
Fire Safety Considerations for Diverse Wilderness Environments
Fire Safety Strategies for Dense Forests: What You Need to Know
Dense forests present unique challenges for fire safety due to abundant fuel sources, including dry leaves, fallen branches, and thick underbrush. These elements can facilitate rapid fire spread, making it imperative to take special precautions. Ensuring campfires are contained within designated fire pits can help mitigate risks, as can maintaining a safe distance from surrounding vegetation.
Regularly monitoring fire conditions in these areas is crucial. During periods of heightened fire risk, it may be advisable to forgo campfires altogether. Opting for alternative cooking methods, such as portable stoves that do not produce open flames, can further reduce risks. Additionally, contacting park services or local authorities to verify any current fire bans is vital.
Moreover, practicing responsible waste disposal, including thoroughly extinguishing cigarettes and ensuring all trash is removed, helps minimize fire risks in these environments. Staying informed and cautious while navigating dense forests is essential for maintaining both personal safety and environmental integrity.
What Precautions Should You Consider in Dry Areas?
Dry areas are particularly vulnerable to wildfires due to limited moisture and abundant dry vegetation. When exploring these environments, specific precautions should be taken to prevent fire outbreaks. First, avoid using open flames, including campfires and fireworks, during dry spells.
Utilizing fire-resistant materials for camping gear and equipment enhances safety. This includes selecting tents and backpacks made from materials designed to resist ignition. Furthermore, remaining informed about local fire risk levels and strictly adhering to fire bans is critical during these periods.
Educating fellow campers about fire safety practices in dry areas can significantly enhance collective safety. Encouraging group members to stay vigilant and proactive can considerably reduce the likelihood of accidental fires. By prioritizing caution and awareness, individuals can help protect the wilderness and ensure a safer experience for everyone involved.
Fire Safety Considerations When Camping Near Water Bodies
Even when camping near water bodies, fire risks can still pose significant dangers due to dry vegetation and fluctuating weather. When setting up camp near lakes, rivers, or oceans, it is crucial to maintain a safe distance from flammable materials. Campfires should always be established well away from the water’s edge, where vegetation is less dense and more manageable.
Additionally, while water bodies may seem like a natural resource for fire suppression, they should not be relied upon solely for extinguishing fires. Always have a dedicated firefighting strategy that includes tools like sand- or dirt-filled buckets, which can be more effective at quickly suppressing flames.
It’s also vital to remain vigilant regarding weather changes, particularly winds that can carry embers and ignite nearby materials. Properly extinguishing campfires before leaving the area is non-negotiable. By taking these precautions, individuals can enjoy their time near water while significantly reducing fire risks.
Fire Safety Strategies for High-Altitude Regions
High-altitude regions exhibit unique fire dynamics due to rapid changes in wind conditions and the presence of dry, oxygen-rich air. These factors can lead to the swift spread of wildfires, necessitating specific fire safety precautions. Campers should use designated fire rings to better contain fires and reduce the likelihood of them spreading.
Keeping fires small and manageable is another essential practice. A smaller fire can be monitored more effectively and extinguished quickly if necessary. Additionally, it’s wise to avoid large fires that generate excessive heat and sparks, which can ignite the surrounding environment.
Staying aware of local weather patterns and fire advisories is crucial for anyone venturing into high-altitude areas. Fire bans are often enacted during particularly dry or windy conditions, and compliance with these regulations is essential for safety. By implementing these strategies, individuals can effectively mitigate wildfire risks in these vulnerable environments.
Fire Safety in Grassland Areas: Key Considerations
Grasslands, characterized by their low vegetation and expansive open spaces, are especially susceptible to fast-moving fires. The dry grasses can ignite quickly, leading to rapid fire spread. When camping in these areas, it is essential to be well-prepared with water and firefighting tools readily accessible. Always keep a perimeter around your campsite clear of flammable materials, as this serves as a buffer against potential fire spread.
In addition to monitoring fire conditions, familiarizing yourself with local fire risk levels is wise. During high-risk periods, it may be necessary to avoid campfires altogether. Utilizing alternative cooking methods, such as portable gas stoves, can help minimize risk while still allowing for meal preparation.
Education and open communication with fellow campers about fire safety can foster a culture of collective responsibility. Everyone should understand the seriousness of fire risks in these environments and commit to proactive measures to mitigate them. By prioritizing safety and preparedness, individuals can significantly decrease the chances of wildfires in grasslands.
Long-Term Approaches to Wilderness Fire Management
Creating Firebreaks and Buffer Zones for Enhanced Safety
Implementing firebreaks and buffer zones is a fundamental strategy in the long-term management of wilderness fire risks. Firebreaks are cleared areas that help contain fires by removing flammable materials, thereby preventing the spread of flames into populated or sensitive areas. Thoughtfully placing firebreaks can be invaluable in protecting communities and ecological zones from wildfires.
In addition to firebreaks, establishing buffer zones around high-risk areas can further enhance safety. These zones may consist of managed landscapes where vegetation is routinely thinned or removed to reduce potential fuel sources. Engaging in sustainable land management practices can also help maintain these areas effectively.
Moreover, community involvement is crucial in planning and maintaining firebreaks. Volunteer programs that engage residents can foster a sense of ownership and responsibility toward fire safety. By implementing these fire management strategies, communities can significantly diminish the risks posed by wildfires.
Encouraging Community Engagement in Fire Safety Initiatives
Community involvement plays a pivotal role in effective fire management strategies. Engaging residents in fire safety initiatives enhances awareness and cultivates a culture of responsibility toward wilderness preservation. Programs that educate and involve the community can take various forms, such as:
- Neighborhood fire safety workshops
- Community clean-up events to remove flammable debris
- Volunteer firefighting training sessions
- Collaborative fire prevention campaigns
By fostering participation in these initiatives, communities equip individuals with the knowledge and tools necessary to prevent wildfires. Moreover, establishing a communication network enables real-time updates on fire risks and regulations.
Encouraging residents to engage in fire drills and educational seminars can further bolster collective preparedness. A united community effort can significantly enhance overall safety, ensuring that everyone plays a part in protecting their environment and themselves from fire hazards.
Implementing Sustainable Practices for Effective Fire Prevention
Sustainable fire prevention practices are vital for safeguarding wilderness areas from devastating blazes. Techniques such as controlled burns, where small, manageable fires are intentionally ignited and monitored, help reduce the fuel load in forests and grasslands. These practices maintain ecological balance while significantly lowering the risk of larger, uncontrolled wildfires.
Additionally, vegetation management plays a crucial role in preventing catastrophic fires. This process includes regularly thinning dense areas, removing dead or dying trees, and maintaining defensible space around homes and communities. These actions contribute to healthier ecosystems and reduce fire risks.
Community education about the significance of these sustainable practices enhances overall awareness and involvement. Workshops that inform residents about vegetation management and controlled burns empower them to take proactive steps in protecting their environment. By incorporating sustainable fire prevention practices into long-term management strategies, communities can effectively mitigate fire risks while preserving their natural landscapes.
The Role of Technology in Enhancing Wilderness Fire Safety
How Can Technology Improve Fire Safety Efforts?
Technology increasingly plays an essential role in enhancing wilderness fire safety through innovative solutions. Fire detection systems are being integrated into remote areas, enabling real-time monitoring and immediate alerts when fires occur. These systems utilize sensors to detect heat and smoke, providing early warnings to local authorities and facilitating prompt responses.
Moreover, the use of drones has transformed fire management practices. Equipped with thermal imaging cameras, drones can quickly survey vast areas, identify hotspots, and assess fire behavior without endangering human lives. This technology aids effective resource allocation and planning during fire emergencies.
Additionally, mobile applications designed for fire safety can provide users with real-time information regarding fire conditions, alerts about active fires, and guidance on evacuation routes. By leveraging technology, communities and individuals can significantly enhance their fire preparedness and response capabilities.
The Importance of Fire Detection Apps in Safety Management
Fire detection apps have emerged as essential tools for outdoor enthusiasts, delivering crucial information to help maintain safety in wilderness areas. These apps alert users to nearby fires, offering real-time updates on fire conditions and potential hazards. Users can set location-based notifications to stay informed about fires that may impact their planned activities or travel routes.
Many of these apps also feature interactive maps that display fire locations, evacuation paths, and safe zones. This information is invaluable for those navigating unfamiliar territories, particularly in emergencies. Some applications even include educational resources about fire safety protocols, enhancing users’ knowledge and preparedness.
Furthermore, the ability to report fires directly through these apps fosters community involvement and swift responses. By leveraging technology, individuals can effectively enhance their own and others’ safety while enjoying the great outdoors.
The Advantages of Satellite Monitoring for Fire Prevention
Satellite monitoring is becoming an integral component of fire prevention efforts, providing continuous surveillance of extensive wilderness areas. Satellites equipped with advanced sensors can detect thermal anomalies and changes in vegetation moisture, offering early warnings of potential wildfire outbreaks. This data is crucial for land management agencies in assessing fire risks and planning preventative measures.
Moreover, satellite imagery enables comprehensive analysis and mapping of fire-prone regions, helping authorities identify areas that require fuel reduction or other fire management strategies. By utilizing this technology, agencies can allocate resources more effectively and proactively respond to emerging threats.
Additionally, satellite monitoring systems can provide communities with real-time updates on shifting fire conditions, enabling residents to stay informed. This capability enhances public safety and fosters better preparedness for potential fire emergencies. By embracing satellite technology, communities can significantly improve their fire management strategies, ultimately leading to safer wilderness experiences.
Psychological Considerations in Wilderness Fire Safety
How Does the Fear of Fire Affect Emergency Responses?
The fear of fire can significantly influence safety during wilderness emergencies, often leading to panic and poor decision-making. Understanding and managing this fear is crucial for effective responses during fire outbreaks. When individuals panic, they may neglect to follow safety protocols or make hasty decisions that jeopardize their safety and that of others.
Training and education can help mitigate fear by equipping individuals with knowledge and skills. Familiarizing oneself with fire safety practices, evacuation routes, and firefighting techniques fosters confidence and can counteract fear during emergencies. Additionally, practicing calm communication within groups can help maintain order during stressful situations.
Ultimately, addressing the psychological aspects of fire safety, including fear management, is essential for enhancing overall preparedness. When individuals remain calm and focused, they are better equipped to respond effectively to fire emergencies, reducing the risk to themselves and their companions.
Mental Preparedness for Fire Emergencies: Techniques to Implement
Mental preparation is a crucial component of fire safety that empowers individuals to act effectively during emergencies. Staying calm, knowing your plan, and being ready to act are all essential elements of mental preparedness. Familiarity with fire safety protocols and evacuation routes helps instill confidence, allowing individuals to respond quickly and decisively when faced with a fire threat.
Visualization techniques can also be beneficial. Mentally rehearsing the steps to take in case of a fire can prepare individuals for real situations. Practicing these scenarios can help alleviate anxiety and bolster confidence, leading to a more organized response during emergencies.
Moreover, discussing potential fire scenarios with friends or family reinforces collective preparedness. Open conversations about safety plans and responsibilities build camaraderie and enhance group dynamics, ultimately contributing to better outcomes during fire emergencies.
The Importance of Managing Stress in Fire Safety Situations
Effective stress management techniques can play a pivotal role in maintaining clear thinking during fire emergencies. Techniques such as deep breathing exercises, mindfulness practices, and focusing on immediate tasks can help individuals remain calm and rational when faced with the chaos of a fire outbreak.
Regularly practicing stress management techniques enhances resilience and improves overall preparedness for emergencies. Incorporating stress-reduction activities into daily routines, such as yoga or meditation, can bolster mental strength and adaptability in the face of unexpected challenges.
Staying connected with support networks is also vital during emergencies. Relying on friends or family for emotional support can help alleviate stress and foster a sense of community during crises. By prioritizing stress management, individuals can enhance their ability to respond effectively and safely during wilderness fire emergencies.
- Practice deep breathing techniques to stay grounded.
- Engage in regular physical activity to reduce stress levels.
- Maintain a positive outlook and practice visualization techniques.
- Discuss and review emergency plans with your group regularly.
The Significance of Group Dynamics in Fire Safety Responses
Understanding group dynamics is crucial for enhancing safety during wilderness fire emergencies. Effective teamwork and communication can significantly influence how a group responds to a fire threat. Establishing clear roles and responsibilities within the group can lead to a more organized response, reducing confusion and panic during critical moments.
Training together as a group can foster camaraderie and improve collective preparedness. Regularly practicing evacuation drills and discussing potential fire scenarios enhances cohesion, ensuring that everyone knows their tasks in an emergency. Encouraging open communication allows group members to voice their concerns, fostering a more collaborative environment.
Additionally, recognizing individual strengths within the group can enhance overall response capabilities. Assigning responsibilities based on each member’s skills and experience can optimize the group’s effectiveness during a fire emergency. By prioritizing group dynamics and teamwork, individuals can significantly improve their collective fire safety strategies.
Legal and Ethical Considerations in Wilderness Fire Safety
What Are Your Legal Responsibilities Regarding Fire Safety?
Individuals have legal obligations to prevent fires and report outbreaks, especially when recreating in wilderness areas. Various laws and regulations govern fire safety, typically established by local authorities or land management agencies. Understanding these obligations is crucial for ensuring compliance and overall safety.
For example, many jurisdictions impose strict penalties for igniting fires in prohibited areas or during fire bans. Familiarizing oneself with these regulations is essential for outdoor enthusiasts, as ignorance of the law does not exempt individuals from liability. Reporting any observed fire hazards or violations to local authorities is also a legal duty that contributes to community safety.
Moreover, participating in community fire safety initiatives fosters a sense of accountability among residents. Engaging in local workshops or educational programs can enhance understanding of legal obligations and promote responsible behaviors that protect the wilderness.
Practicing Ethical Approaches in Fire Management
Ethical practices in fire management encompass adherence to fire bans, refraining from starting unnecessary fires, and prioritizing environmental protection. Following regulations and guidelines set forth by local authorities reflects a commitment to responsible wilderness stewardship. These actions contribute to overall fire safety while safeguarding natural habitats and ecosystems.
Furthermore, educating fellow outdoor enthusiasts about the importance of ethical practices fosters a culture of respect for nature. Sharing knowledge about the consequences of reckless behaviors can help motivate others to comply with fire safety protocols. By collectively prioritizing ethical practices, individuals can significantly reduce wildfire risk and preserve the wilderness for future generations.
Additionally, engaging in community fire safety initiatives promotes collaborative efforts toward responsible land use. Encouraging responsible behaviors among peers can have a lasting impact on overall fire safety in the wilderness.
The Consequences of Ignoring Fire Safety Regulations
Neglecting fire safety can lead to severe consequences, including legal repercussions, environmental destruction, and personal harm. Wildfires can devastate ecosystems, resulting in the loss of wildlife habitats and negatively impacting air quality. The emotional toll on communities affected by fires can be profound, as families may be displaced or lose their homes.
Legal consequences for failing to adhere to fire safety regulations can be significant. Individuals may face fines or criminal charges, depending on the severity of their negligence. Understanding these consequences encourages responsible behaviors and emphasizes the importance of adhering to fire safety protocols.
Furthermore, fostering a culture of awareness and accountability can lead to more sustainable wilderness practices. Encouraging open discussion about the importance of fire safety can motivate individuals to take proactive measures to protect themselves and their environment from potential fire hazards.
Common Questions About Wilderness Fire Safety
What Are the Primary Causes of Wilderness Fires?
Wilderness fires can originate from natural events such as lightning strikes or from human actions, including campfires, discarded cigarettes, or even arson. Understanding these causes is essential for effective prevention.
How Can I Educate Myself About Fire Safety?
Education can be pursued through local fire department workshops, online courses, and resources provided by national parks or forest services, enhancing both awareness and safety.
What Basic Equipment Should I Carry for Fire Safety?
Basic fire safety equipment includes portable fire extinguishers, water buckets, and fire blankets to control small fires and prevent them from escalating.
What Are the Latest Techniques in Fire Safety?
Recent advancements include fire behavior modeling and drone technology, which provide real-time data for improved fire management and response strategies.
How Should I Train for Fire Emergencies?
Training should involve practicing the use of fire safety equipment, conducting evacuation drills, and learning about local fire risks and regulations.
What Gear Is Recommended for Fire Safety?
Experts suggest high-quality fire extinguishers, protective clothing, and reliable firefighting tools that meet industry standards for effectiveness and safety.
How Can I Prevent Wilderness Fires?
Prevent fires by properly disposing of cigarettes, carefully managing campfires, and avoiding open flames during dry conditions.
What Should I Do If I Encounter a Wilderness Fire?
Stay calm, assess the situation, and decide whether to fight the fire or evacuate. Prioritize your safety and be aware of your escape routes.
What Are Effective Evacuation Strategies?
Plan your evacuation routes, identify safe zones, and ensure everyone in your group understands the plan for responding effectively during emergencies.
How Does Technology Aid Fire Safety?
Technologies such as fire detection systems and drones enhance fire safety by providing early warnings and enabling effective fire management strategies.
Discover more at X!
The post Wilderness Fire Safety: Essential Tips and Techniques appeared first on Survival Bite.
The Article Wilderness Fire Safety Tips and Techniques You Need to Know Was Found On https://limitsofstrategy.com